Metropolitan Wargamers D-Day Plus 70 Event – June 6th-8th 2014

MWGDDay

This June is the 70th Anniversary of the Allied D-Day landings at Normandy, and New York City’s oldest and largest wargaming club Metropolitan Wargamers is celebrating with a full weekend of events.

IMG_2161

La Fiere Causeway at Metropolitan Wargamers in Brooklyn, NY

Whether you’re new to the hobby or an experienced gamer, there will be plenty of WWII action the entire weekend. On the evening of Friday June 6th we’ll begin with Flames of War airborne landing scenarios. Saturday June 7th kicks off at noon with a FOW beach landing scenario on one of the club’s famed sand tables. Sunday wraps up the weekend with a couple FOW breakthrough battles and a large Memoir ’44 board game. Other WWII-themed games will run throughout the weekend.

IMG_2816

Utah Beach on one of the sand tables at Metropolitan Wargamers

We’ll have FOW scenarios set up for the weekend with plenty of miniatures and stunning terrain on the club’s tables, so all you need to bring is your passion for wargaming and history. Our FOW miniatures games are fun and a feast for the eyes, and you can get a sense of what’s in store for the weekend by viewing some of our past scenarios at the club here.

Admission for the full weekend of gaming is just $10 and a great opportunity to visit a very unique community of gamers in the heart of Brooklyn’s Park Slope neighborhood.

For more information and to RSVP for the D-Day Plus 70 weekend, check the Metropolitan Wargamers website or join our Yahoo group.

Flames of War: Dust Up Mission With “Blood, Guts and Glory”

tank3

Although actually made up of a number of battles and assaults during World War II, the post-D-Day breakout actions by the Allies in late 1944 in Northern France has become commonly known as the Lorraine Campaign to military historians. Frustrated by poor weather conditions and weak supply lines, the General George Patton’s 3rd Army push into Germany eventually led to the wintery and more famed German counteroffensive with the  Battle of the Bulge in the winter of 1944-1945.

bggbook

Flames of War offers a book outlining the Lorraine Campaign with Blood, Guts and Glory. US lists in the book focus on the powerful tank and armored rifle companies which made up the steely backbone of Patton’s daunting force. For the Germans, the cobbled-together 106 Panzerkorps Felderherrnhalle and 111 Panzer brigade are outlined with forces full of some of the best Late War armor and equipment albeit under somewhat challenging motivation and experience ratings.

A couple of weeks ago at Metropolitan Wargamers in Brooklyn, NY, two of us had a go at a fictional battle set during the Lorraine Campaign. We play against each other a fair amount, and both of us were looking to switch things up commanding some very different forces. The tabletop terrain was also different with a more open battlefield lined with fields, woods, gentle hills and two farms. All of this was quite a departure from the games we have most played set in the days and months after the Normandy Invasion in June of 1944.

dustup

My opponent’s Panzerkompanie was  full of armor – Stugs, Panthers and Panzer IVs – and  supplemented by an Aufklärungs platoon and a couple Wirbelwinds to chase away any US aircraft. For my US force, I wanted to try out some underused rifle platoons which were supported by 105mm M7 Priests, some Shermans and a P-47 Thunderbolt buzzing overhead. We also chose a different game framework, opting for a somewhat complicated Dust Up scenario from the official Flames of War missions list.

pzco

us4th

IMG_3397

Our Dust Up scenario with my US forces in the foreground and Germans in the distance

Well, as the game played out, I quickly discovered I had brought infantry to a tank fight. With one of my infantry platoons camped out in the woods near two objectives, my hope was to stave off the German armor advance with repeated bombardments from my Priests and diving runs from the P-47.

IMG_3398US M7 Priest platoon taking up position

IMG_3399US rifles deploy in the woods to guard a nearby objective

Things went well for me in the early stages as Panthers stalled moving through the woods. A Wirbelwind and two Panthers were subsequently destroyed from 105mm volleys , but my P-47 failed to get any traction in stopping a group of Stugs creeping along the table edge. Even so, a couple turns in I was feeling fairly confident my artillery fire would whittle away the rolling German advance.

IMG_3401A German Panther and Wirbelwind are destroyed by incoming US 105mm fire

IMG_3400Panthers make through the woods but one bogs in the terrain

IMG_3402The P-47 Thunderbolt attempts a run at a Stug platoon

IMG_3403More fire from the Priests take out another Panther

My plan fell apart as the first German Panzer IV reserves came on the table at the corner behind my Priest battery and made quick work of the nearly-armorless US mobile artillery. I swung my surviving Priest and supporting Sherman around and engaged the Germans at close range with direct fire, but succeeded in only cracking open one German tank. In another turn, the Priests were wiped from the board and only my infantry platoon remained to defend my end of the table. The P-47 appeared again to control the center of the battlefield, but missed on its run. The US center and flank were crumbling by the time turn four approached.

IMG_3405Panzer IV reinforcements surprise the Priests from the rear

IMG_3406The Thunderbolt tries to stall the German armor in the middle of the field

My reserve Shermans came on the table near a farm and quickly engaged with the Panthers which swung to meet the US armor advance. Shots from my heavier 76mm guns lit up a Panther and bailed another’s crew. The German tanks returned fire, destroying all but one 76mm Sherman as more Panzer IVs showed up with the Aufklärungs platoon close behind.

IMG_3407Reserve American 75 and 76mm Shermans roll on the board

IMG_3409The last of the Priests burn as more Panzer IVs appear

In the fifth turn, my final supporting infantry platoon arrived in their halftracks, dismounted and made a desperate run for an objective in the open field. The infantry on my side of the table also broke from the woods in a last-ditch assault on a mass of German tanks creeping toward an objective but were repulsed. With German armor swarming an objective, the game went to the Axis.

IMG_3410A reinforcing column of US rifles follows-up the Sherman advance

IMG_3413A lone Sherman survives as the US rifle company dismounts and heads for an objective

IMG_3414US riflemen break from the woods in a desperate assault on German tanks at an objective

IMG_3415With tanks aflame in the fields, the Germans take an objective

Clearly, my US plan from the outset was a stretch. Had I taken the more historic approach of Patton in the Lorraine Campaign of 1944, a fully-armored US force may very well have stood a fair chance against all the German tanks shuttling here and there on the tabletop. Balancing history and what-ifs is what makes playing Flames of war so engaging over and over again, but next time I’ll be careful not to second-guess the command decisions made in Northern France some 70 years ago.

Flames of War: Fielding the FOW M10 Tank Destroyer Platoon

m10

The Blitzkreig of German armored forces is one of the more enduring tactics introduced in World War II. Swarmed masses of German tanks and mechanized forces in the early war period rolled through Poland, France, Belgium and the Netherlands in Western Europe and punched into the Soviet Union with Operation Barbarossa in 1941. With early Panzer and later Panther and Tiger tanks ruling the battlefields of Europe, Allied forces struggled for solutions to crack the German tide of iron.

m10normandy

A US M10 tank destroyer comes ashore in Normandy after D-Day in 1944

By mid-war, the Americans had a solution with the M10 tank destroyer. Introduced first into the battlefields of North Africa in 1943, the M10 GMC (“gun motor carriage”) carried a big 3-inch/76mm gun and on a Sherman hull. After success in Africa against earlier model German tanks, M10s became part of the post-D-Day Allied breakthrough campaign. While effective against Panzer III and IV tanks, more heavily-armored Panther and Tiger tanks still proved problematic. Luckily, the M10 was supplemented by the British-modified Sherman 76mm Firefly and the later US-built M18 Hellcat which was quicker on the field. The combination of these three tank destroyers, along with the stalwart work of Allied infantry and deadly air support, turned the tide in Europe.

fowm10set

One of my earliest 15mm WWII purchases years ago, and somewhat at random, was the now-discontinued M10 Tank Destroyer Platoon set from Flames of War. I think at the time, I just liked the look of the models and I was looking to fill-out my new US forces with more variety. To get to a full platoon of four M10s, a fellow club member at Metropolitan Wargamers in Brooklyn, NY recently gave my two more M10s to which I’ve added an additional M20 scout car.

IMG_3389New M10 tank destroyer and M20 scout car

IMG_3388New M10 tank destroyer

IMG_3387New M20 scout car

IMG_3390US tank destroyer platoon with new models (left) and older models (right)

With my existing and new section sections, I now can field a full tank destroyer platoon using a variety of Allied Late War European lists. Anti-tank tactics in the game provide multiple opportunities for the M10 platoon to be used in combination with infantry and other Allied armor on the game table. With optional deployment as a recon platoon using the M20 scout cars, the M10s can create ambushes to wreak havoc on German tanks. Admittedly, using this full platoon will take some practice but I’m certain they’ll be causing headaches for my German opponents in the very near future.

Micro Armour: Getting Started

GHQlogo

After years of wargaming World War II with Flames of War, I’ve been looking for a change of pace for the period. I’ve recently caught up on the vast majority of my modelling projects, including fairly extensive American, British and German Late War forces as well as a bunch of terrain. I’ve also been interested in playing larger battles, something that becomes a bit unwieldy with FOW. In looking for a way to expand my WWII gaming experience, I’ve been weighing factors of scale, cost, storage and time. After a lot of thought, I’m going small and getting started with WWII in micro scale.

The standard in micro scale gaming is GHQ. Founded in the late 1960s and based just outside Minneapolis, Minnesota, GHQ manufactures an extensive line of pewter miniatures for WWII, Modern, Napoleonic, American Civil War and various naval eras. In the early 1990s, GHQ also began offering N and HO scale vehicles targeting model railroading enthusiasts. Along with their gaming models, the company has developed a number of rulesets and terrain-building supplies appropriate for various eras of combat at the micro scale level. For over 40 years GHQ’s models have been held in high regard by wargamers as well as the US military which uses the company’s products for training and planning excercises.

WWIIscales

World War II miniatures scale comparisons (from www.historicalwargames.net)

The 1/285th (6mm) scale of GHQ’s WWII models offers a number of differences and potential advantages to larger scales, such as 1/100th (15mm) FOW miniatures and 1/56 (28mm) models from the expanding Bolt Action game line from Warlord Games.

  • Scale: In 6mm micro scale, an entire infantry platoon can be represented with approximately 3-5 figures mounted to a small square or round base. An inch on the table approximates 100 yards on the battlefield. This allows for larger multi-company or battalion level games compared to smaller single company and platoon skirmish games at a 15mm or 28mm scales.
  • Cost: Wargaming at any scale is an investment, but micro scale allows for the depiction of large battles for a fraction of the cost of larger scales. The starter sets from GHQ provide around twenty tanks for $40, making individual armour models just a couple bucks each compared to the 15mm scale where tanks can run easily to triple that cost. Fielding an entire 6mm infantry and armor company might run just $10-20 while that same company at 15mm could run hundreds of dollars. And, since each micro scale tank represents a platoon and a platoon in FOW may run to maybe six tank models (or more), the game scales cheap and fast into grand scale engagements.
  • Storage: As the website says, I live in Brooklyn, NY, so storage is always an issue for my board games, cards games, miniatures, terrain and hobby supplies. I keep a lot of my miniatures at my local club, Metropolitan Wargamers, but I like having stuff around the apartment for when the gaming mood hits. At the micro scale level, dozens of tanks, infantry and vehicles can be carried in a shoulder bag or kept in a drawer. Compared to my FOW collection which sprawls over multiple bags and boxes, micro scale makes for some quick and easy game deployment just about anywhere.
  • Time: Painting micro scale takes a fraction of time compared to larger scales. A quick spray of white primer followed by a thinned color basecoat, a couple dots of detail, a wash and maybe a tiny decal is all that’s needed to get forces on the table and ready to game.

IMG_3211GHQ’s US Shermans vs. German Panzer IVs box set

IMG_3210GHQ’s US Armoured Infantry Command 1944 box set

To get started at the micro scale, I ordered two sets from GHQ. The Shermans vs. Panzer IVs Battle Box comes with ten tanks per side, a storage case and a set of rules — everything needed to get a game started. To this, I added the US Armoured Infantry Command 1944 set with additional tanks, half-tracks, jeeps, armoured cars and a bunch of infantry. To get some Germans into action, I think I’ll be going for the German Kampfgruppe 1944 for a nice mix of infantry, transport, Marders and even some horse and wagon teams.

IMG_3214Assembly of my first GHQ micro armour sets

In well under less than an hour’s initial work, my first sets of micro armour glued up fast with some careful organization of parts and assembly with superglue and tweezers. Already I’m loving getting so many models ready for paint and then on to the table in no time at all. The saying is “go big or go home” but my new micro armour project looks like its already going to be a massive amount of fun in a very small package.

Flames of War: Fielding the FOW Hawker Typhoon

Typhoon

The story of the British Hawker Typhoon in WWII is one best told in two acts. Its early use beginning  in 1941 met with very mixed service results against superior planes in the German Luftwaffe  and production of the plane was nearly scrapped by the Royal Air Force. However, with a bit of re-purposing, the Typhoon’s speed was soon coupled with increasingly-heavy bomb payloads to become an effective fighter bomber against ground targets.

In 1943, the Typhoon really came into its own when armed with wing-mounted rockets and fuel tanks providing greater flight range. While of questionable effectiveness against tough-armored German tanks, a run from a squadron of  Typhoons with rockets firing struck fear into German forces and devastated supply lines and production facilities in Western Europe. The Typhoon’s role in D-Day, Operation Goodwood, Operation Varsity and other engagements was both disruptive and deadly in support of ground campaigns all the way to the war’s end.

fowtyphoon

Flames of War offers a model of the Typhoon as well as a short online guide to painting their model. With my British ground forces fairly well built out with artillery, tanks, infantry and support weapons, adding some air support seemed to be the next natural step as well as another interesting modelling project.

IMG_3206

I picked up my model online at a slight discount online and went straight to work. I painted the plane in a RAF grey and green camouflage pattern with yellow details to the nose and leading wing edges. Next, I added black and white “invasion stripes” which had been used on Typhoons since earlier in the war, although my plane was going to be flying over late war Normandy. The decals included with the kit finished off the plane with “V” markings, subtly allowing me to add my own initial to my completed plane. Finally, a little watery rusty brown wash brushed along the seams in the fuselage added a weathered look of many previously-flown missions.

IMG_3207

With my existing American P-47 Thunderbolt, having the Typhoon in my miniature Allied arsenal is sure to add more depth and choice to my Late War Western Europe gaming. With the Typhoon hitting the table in the near future, my hope is its presence above the battlefield will rain rocket-fueled terror and distraction on my German opponents just as they did over Europe some 70 years ago.

Flames of War: Lingevres 1944 Scenario

lingevres1944

By D-Day +8 on June 14, 1944, the British 50th Infantry Division had pressed about 5 miles inland from Gold Beach to the outskirts of Lingevres. Dug in at the town were elements from the Panzer Lehr Division with several Panther tanks ready to force back the looming British attack. With 6-pdr anti-tank guns in tow, the British pushed into town mid-morning following a bombardment by 25-pound artillery and runs from supporting Typhoons above. A ferocious battle commenced between the 4th/7th Royal Dragoon Guards and the German Panthers. When the smoke cleared, several Panthers sat burning as victims of Sherman Firefly and anti-tank gun fire. At day’s end, the British controlled Lingevres.

lingevresAT

British 6-pdr anti-tank gun deployed outside Lingevres, June 14, 1944

The WWPD website has a Lingevres scenario available which two of us adapted for play this past weekend at Metropolitan Wargamers in Brooklyn, NY. Using the scenario as a guideline, we laid out the tabletop battlefield with cornfields stretching outside the town occupying two-thirds of the table. With our 1750-point forces on each side, the Germans began with two platoons of infantry and a heavy machine gun platoon inside two buildings and the church at the center of Lingevres. The British then deployed with their artillery battery, two rifle companies and a recon patrol. All other forces were held off table, with German delayed reserves set to arrive in turn three and British reserves eligible to arrive immediately at the beginning of the game.

Victory conditions as presented were simple — the British needed to take three buildings in the town and the Germans needed to drive the British from the field. How the game played was not simple and once again revealed my need to sink more work into creating accurate, playable scenarios for FOW.

IMG_3163Germans dug in at Lingevres in the town’s buildings while British artillery and infantry deployed from the cornfields in the distance

IMG_3164

Initial movement of British forces into Lingevres with recon carriers moving left and infantry moving into the woods near the church

The first two turns of the game saw the British marching from their edge of the table toward Lingevres. At the town, a German machine gun platoon sat waiting in a building at the crossroads while two other infantry platoons took up position in the church and shops across the road. By turn three, British artillery had opened fire on the machine gunners and pinned them. The first British tank platoon also rumbled onto the table, as did the German Panthers which made way for the center of town.

IMG_3165

Panther reserves roll into the center of Lingevres

IMG_3173

British infantry in the woods take fire and are pinned as armored reserves move from the rear

The first British infantry platoon made way through the woods at the center of the table but were pinned and cut down over two consecutive turns of fire from nearby Germans. The British recon patrol, edging its way through the bocaged fields near the church, was chased away with the appearance of the Panthers.

IMG_3167A British Sherman takes up position to spot for the artillery battery

IMG_3166

British infantry move from the farmhouse across the field

IMG_3169

Panthers destroy a Firefly and the Sherman spotter tank at the edge of town

IMG_3170

British infantry fall back after taking fire from the German half-tracks

On the main road to town, the British ran their Sherman spotter tank and lead Firefly toward the nearby farmhouse. On the other side of the farmhouse, a British infantry platoon moved into position using the building and nearby bocage as cover as they made way for the open field. The heavy British push around the farm was stymied with the arrival of German halftracks which fired machine guns into the field. By turn five, the Sherman spotter tank and spearheading Firefly also lay in flames after some quick shots from the German Panthers.

IMG_3168

British machine gun carriers and tank reserves roll on

IMG_3171

Armored reserves move to support infantry

IMG_3172 British infantry reserves move in near their artillery battery

By turns six and seven the inital British assualt had been repulsed at a safe distance from town. All German infantry platoons remained safely bunkered up in the town’s buildings, and the spotter for the German’s reserve 12cm mortar platoon was now camped out in the church’s bell tower. The three Panthers prowled back and forth at the center of town, and the incoming fire from the British artillery in the distance was the only real agitation to the occupying Germans. The Britsh rolled on their final reserves of machine gun carriers, Sherman/Firefly tanks and a fresh infantry platoon.

Even with all reserves on the table, the British attack was stumped. With one rifle platoon destroyed and a second whittled down, the British had just one intact infantry platoon on the field. One tank platoon struggled through the fields to one side of town, while the second sat idling on the road to town. Clear lines of fire around the church and town center presented open killing zones for the Germans in the town’s buidings and the three Panthers. All the Germans needed to do was sit in place and mow down the coming British.

I love playing wargames for historical scenarios, but our game this past weekend at Lingevres presented some serious limitations to the FOW rules as written. Playing an even match of 1750-point forces per side ultimately did not allow for a satisfying game for either player. What works for a head’s up FOW tournament game or randomly-rolled mission simply does not play well in recreating historic engagements.

In our Lingevres game, the British simply didn’t have enough units to create a critical mass to advance into town under what was sure to be withering fire from the Germans. We decided we liked the scenario, but perhaps the British needed a 50% increase in points, perhaps with additional rifle and tank platoons and a Typhoon providing air support.

With a three-day D-Day weekend being planned at our club this June, we’ve got multiple historic airborne, beach and inland fights to sketch out in the coming months. There’s going to be a lot of playtesting and tweaking to get our historic games to play well. With wargaming, striking the balance between a game that provides both historic accuracy and the potential for different outcomes is the real challenge that lies beyond just the roll fo the dice.

Flames of War: “Desperate Measures” Tanks On The Steppe

t34

Late in 2013, Flames of War re-launched their Late War Eastern European Front books and models with the release of Desperate Measures. The slim guide to the German and Soviet forces of 1945 is packed with lots of fun and flexibility in fielding tons of armor and mechanized troops slugging it out in the final months of World War II.

My usual FOW gaming opponent at Metropolitan Wargamers in Brooklyn, NY has made a sizable investment in Soviet models and Eastern Front terrain. His rural church model in particular looks fantastic on the table with real gold leaf applied to the classic onion dome. Playing from the Desperate Measures book for the first time this past week allowed me to field a bunch of German armor which has mostly sat idle for a year or two as I’ve focused on playing Allied forces in Western Europe.

dmlogo

My German list was a Confident-Trained Panzer Kampfgruppe with a Panther G HQ, two Jagdpanthers, two Panzer IVs and a Confident/Veteran Schwere Panzer platoon of three Tiger I Es. The Soviets rolled out a Confident-Trained Tankavoy Batalon with a T-34/84 obr 1944 HQ tank, a platoon of seven T-34/84 obr 1944 tanks, a ten-tank T-34 obr 1942 platoon and two four-gun platoons of the heavy SU-100 tank killers. At 1500-points on a side, there was a ton of Soviet hardware sitting on the tabletop against a small, but diverse German force.

FFAMission

This was my first time playing these lists, so we went with a straight-forward Free-For-All from the basic FOW missions list. The table presented a mix of woods and buildings for cover, and roads and a railway cutting across the table. We placed out objectives, deployed our lines of tanks and the Soviets rolled for the first turn.

IMG_3092Following deployment, Soviet tanks roll forward on turn one

IMG_3094T-34s reach the railway and center with SU-100s in support

IMG_3093Panzer IV’s lie idling in the woods with Panther command tanks nearby

IMG_3096Tigers defend the objective at the middle of the table

With the Soviets beginning the game as having moved, they weren’t able to take any valid shots. The T-34s pressed to the edge of the railroad tracks on their left and the central forested area at the middle of the table. On either flank, the SU-100s sat parked and looked to take advantage of their ability to re-roll misses by firing from stationary positions. I perched my Jagdpanthers in a wood at my left flank and aimed at one platoon of SU-100s in the distance. The Tigers sat at the middle of the table, looking to attack from behind two huts and defend an objective. My Panthers and Panzer IVs took up position on my right, hoping to stall the massed T-34 assault over the railway.

IMG_3097T-34/84 obr 1944 tanks take up position around the central woods

IMG_3099The T-34 obr 1942 platoon is lit up by  fire from the Panzer IVs and Panthers

IMG_3098A Panther explodes with returned fire from the surviving T-34s

IMG_3102With one Panzer IV crew bailed out, the T-34s press the attack

IMG_3104Surviving T-34s burn after closing on the Panzer IVs

The game quickly divided into three main fronts. The Panzer IVs and Panthers dueled over the railroad with the T-34 obr 1942s. In three successive turns, the advancing Russian tanks were hit twice and then fled the field with a failed morale test. Along the way, the Germans lost a Panther from the command HQ and a Panzer IV, cutting German tank force in half on that end of the table.

IMG_3103T-34/84 obr 1944 tanks roll to the center and engage the Tigers

IMG_3105Tigers burn on the field

At the table’s center, the T-34/84 obr 1944 tanks moved into position around the central forest and fields. The Tigers moved in and out of cover, taking deadly shots. By the third turn, two of the Tigers had been bailed by combined fire from the T-34/84 obr 1944s and the SU-100s on either side. Struggling to remount their tanks, two Tigers were destroyed and the remaining tank fled the field.

IMG_3101Jagdpanthers blaze away at SU-100s in the distance

Beyond the church at the German left, the two Jagdpanthers destroyed the SU-100 guns in front of them in two turns. With the flank open and the rest of the table locked in mobile tank duels, the Jagdpanthers fired their engines at the double to occupy the objective beyond the burning SU-100s. With the Germans below half-strength following the destruction of the final Panzer IV, the game came down to one company morale check which the Germans passed to win.

We were both pretty pleased with how evenly matched the game had been on the Eastern Front. The sheer number of tanks kept the Soviets in the game even as the Germans rolled devastating hits in almost every turn. The SU-100s at the railroad, on the other hand, managed to miss most of the game until their combined fire with the T-34/84 obr 1944 platoon ran the Tigers off the table.

I’ve spent the past couple years gaming back and forth across Western Europe from D-Day onward, so a new front and some new forces was a great change of pace. Leafing through the rest of Desperate Measures, I can see there’s plenty of opportunity to run around more tanks and maybe even some poor, unlucky troops on the Eastern Front again soon.

Flames of War: Aalst 1944 Scenario

aalst

The ultimately unsuccessful week-long Operation Market Garden commenced on September 17, 1944 with an Allied push toward Germany. The ground “Market” portion of the campaign saw the British Guards Armoured Division taking point on the push into the Low Countries.

On the second day of the operation, a column of the Guards Armoured had rolled to the southern outskirts of Aalst, a Belgian town occupied by German forces since 1940. Led by Col. Joe Vandeleur, the division’s tanks encountered the remnants of German troops and guns which were dug in but heavily-damaged by the previous day’s Allied air bombings and artillery barrages. For the Germans, Aalst was a line in the sand protecting the Allied advance northeast to Antwerp and  the Netherlands beyond. For the Allies, keeping the long column of armour moving was key to reinforcing the Allied airborne troops already engaged with German forces along several bridges.

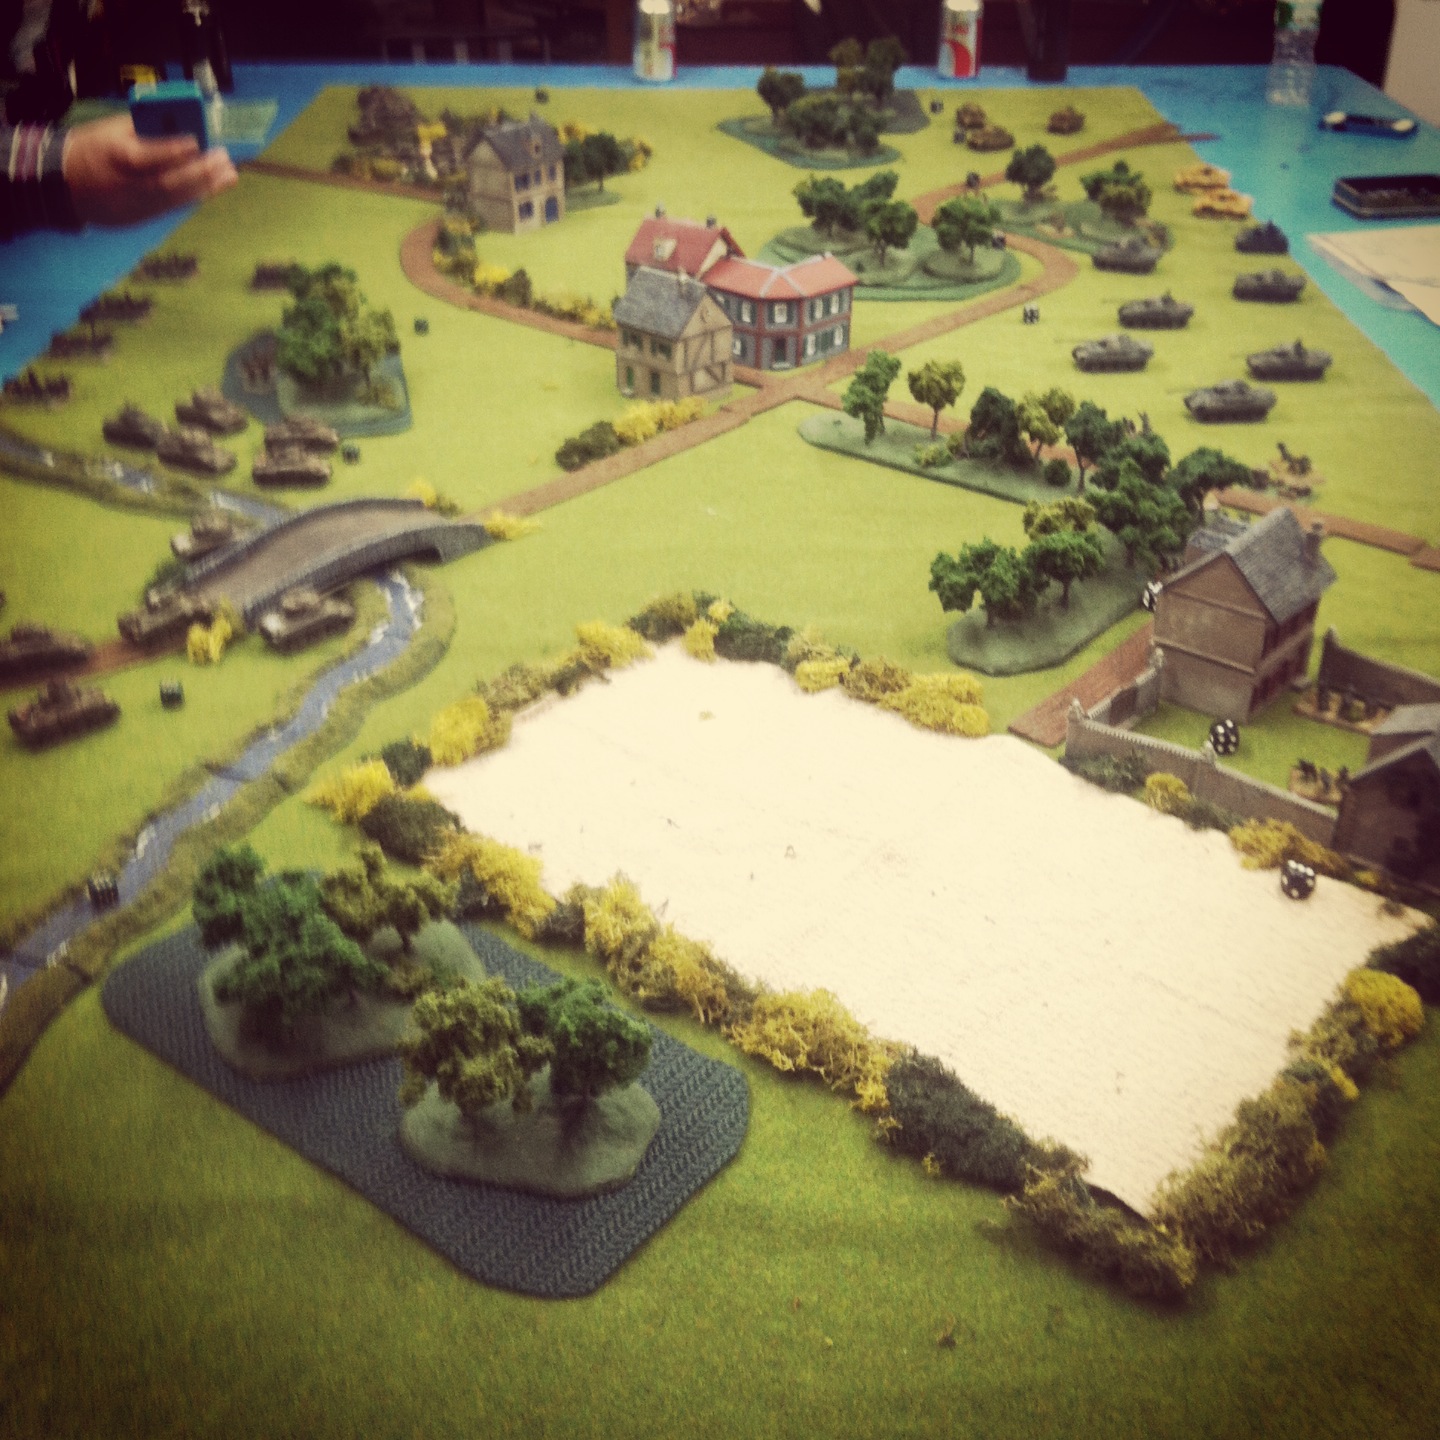
This past weekend at Metropolitan Wargamers in Brooklyn, NY we ran the Aalst scenario for Flames of War with 2000-point forces on either side of the table. We pulled our British and German lists from the Market Garden and Bridge By Bridge books. As a jumping off point for the game’s outline, we referenced an Aaalst scenario originally designed for Battlefront. We planned a 10-turn game with points scored for destroyed platoons and an immediate end to the game when the British rolled a platoon off the German-defended north end of the table.

IMG_3026

German set-up at Aalst

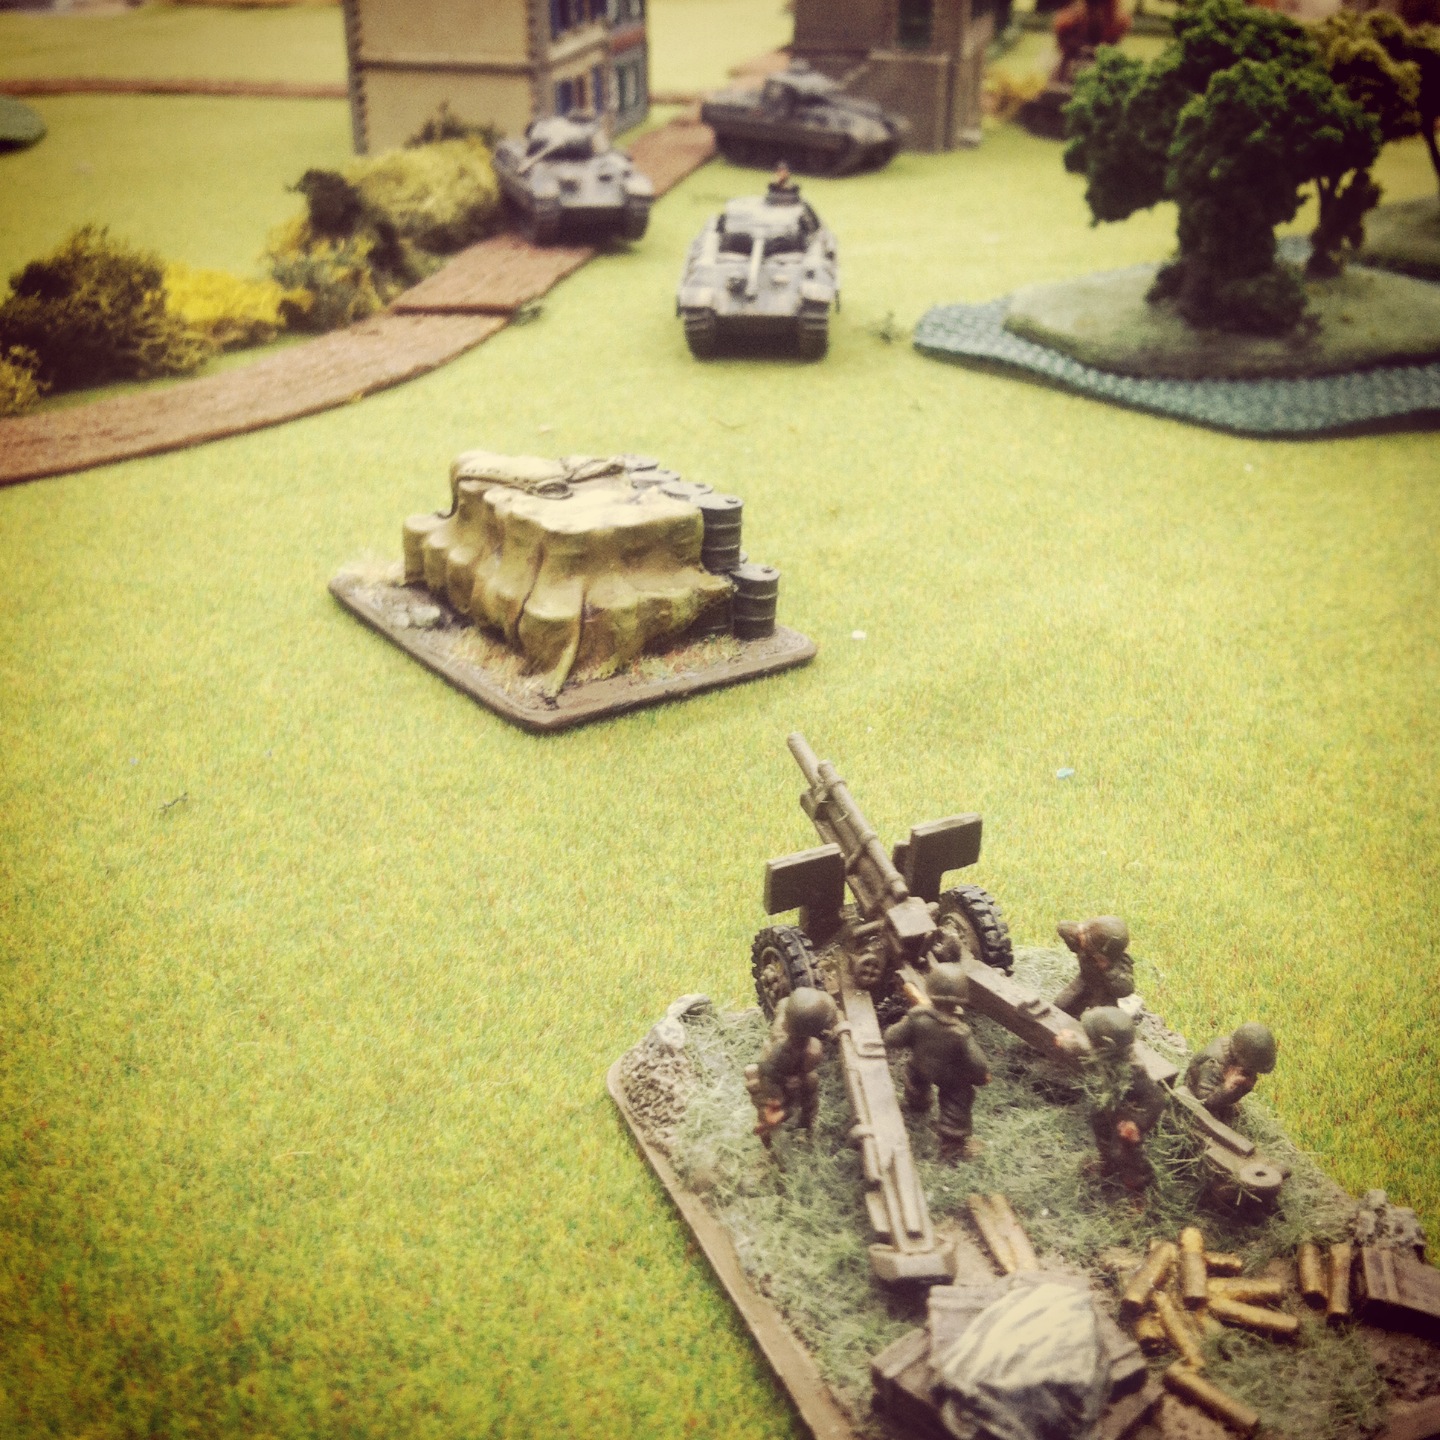
As per the actual situation at Aalst in 1944, the Germans began setting up with half their force heavily dug in just north of the town’s center. Deadly 8.8 cm Flak guns were positioned on roads to their right and left flanks, and 7.5 cm PaK 40 anti-tank guns stood closer to town. Infantry and heavy machine gun platoons hunkered down in the fields just outside of town, and a single Jagdpanther idled nearby. Expecting both ground and possible air forces, the German guns were well-prepared for the arriving British.

IMG_3027

German 88’s dug in at the northeast and northwest ends of town

IMG_3016

British set-up at Aalst

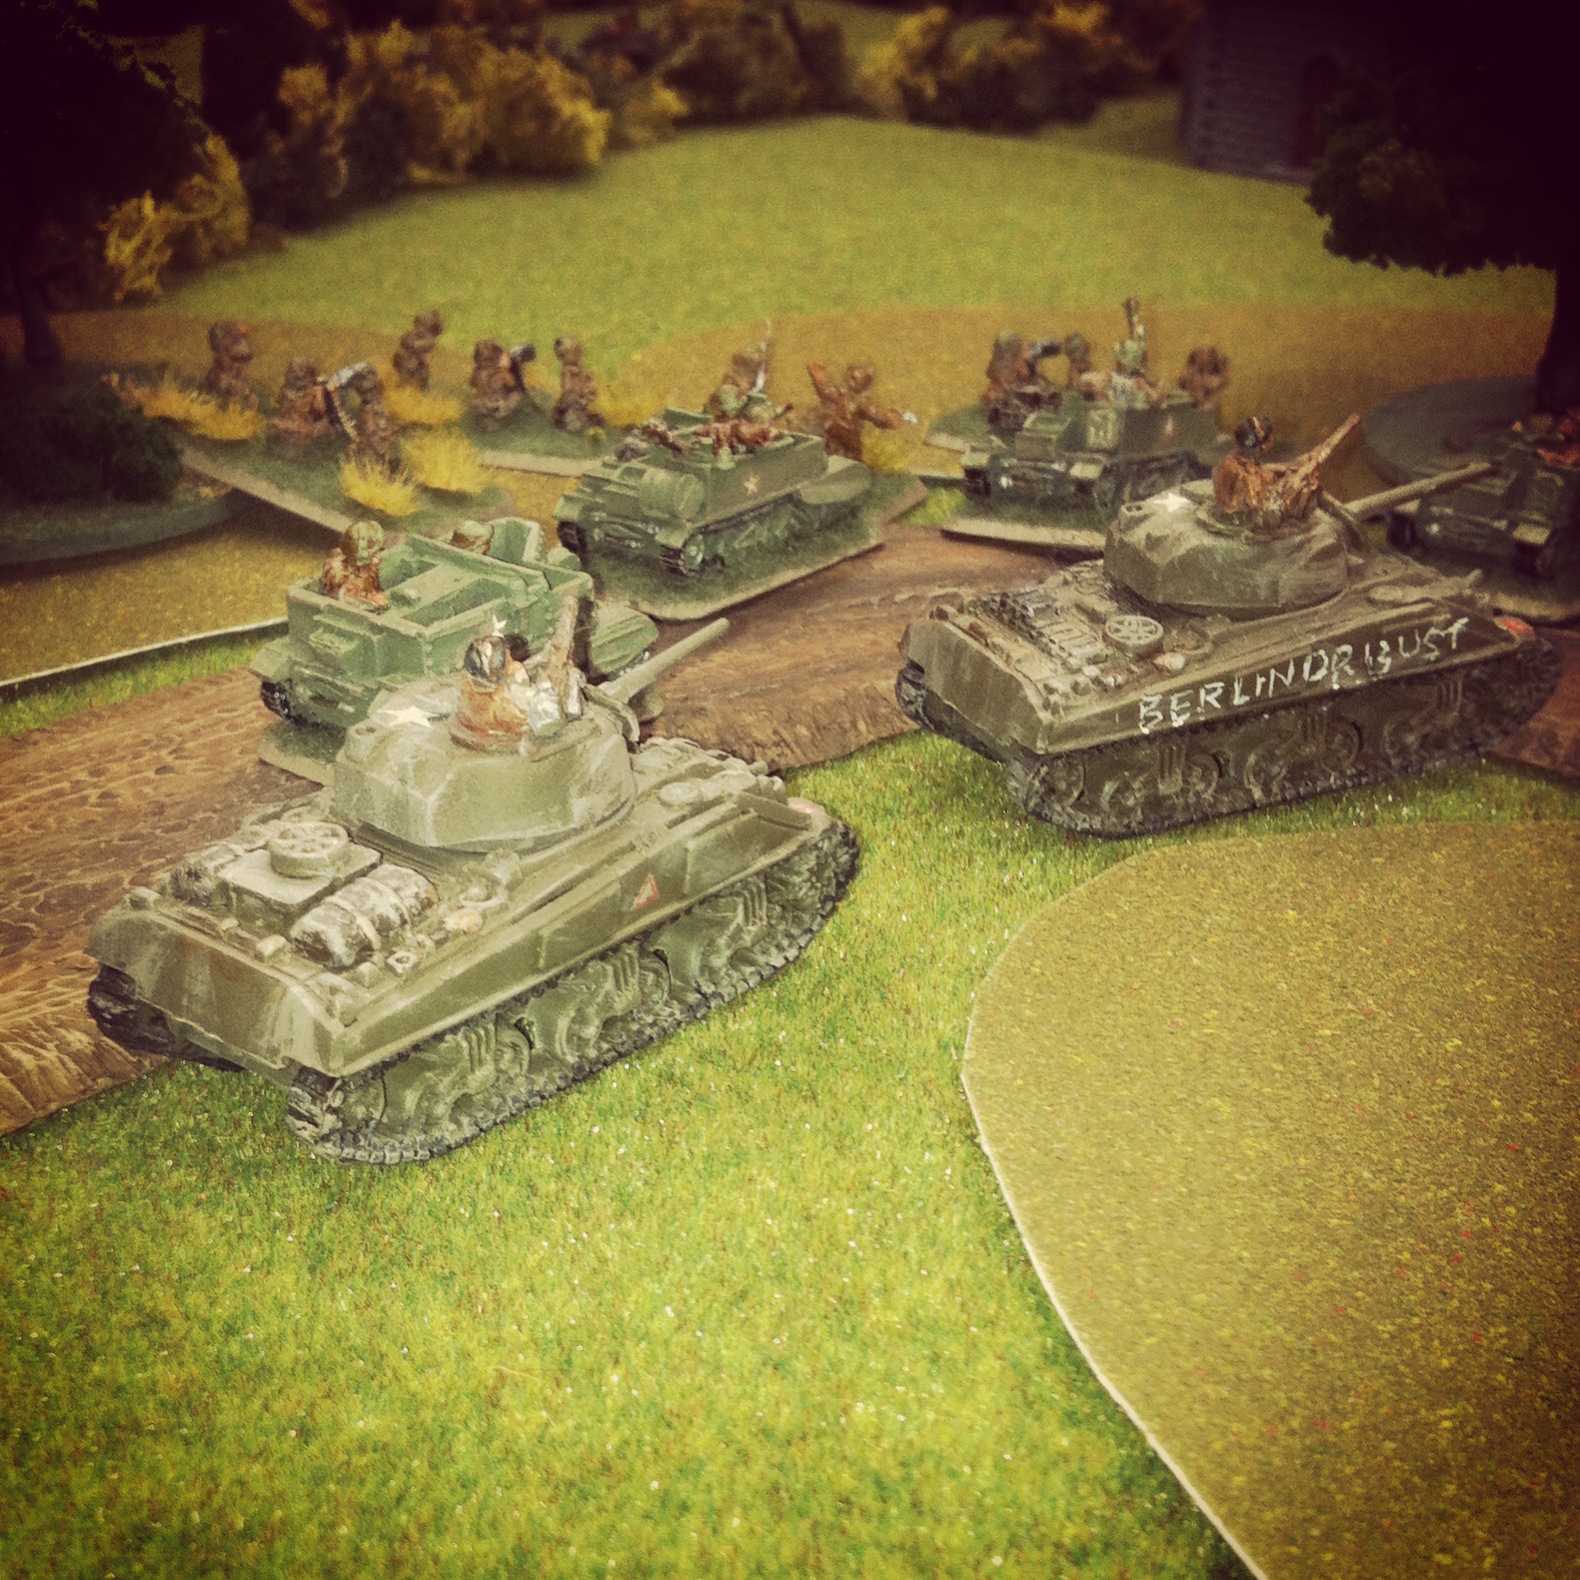
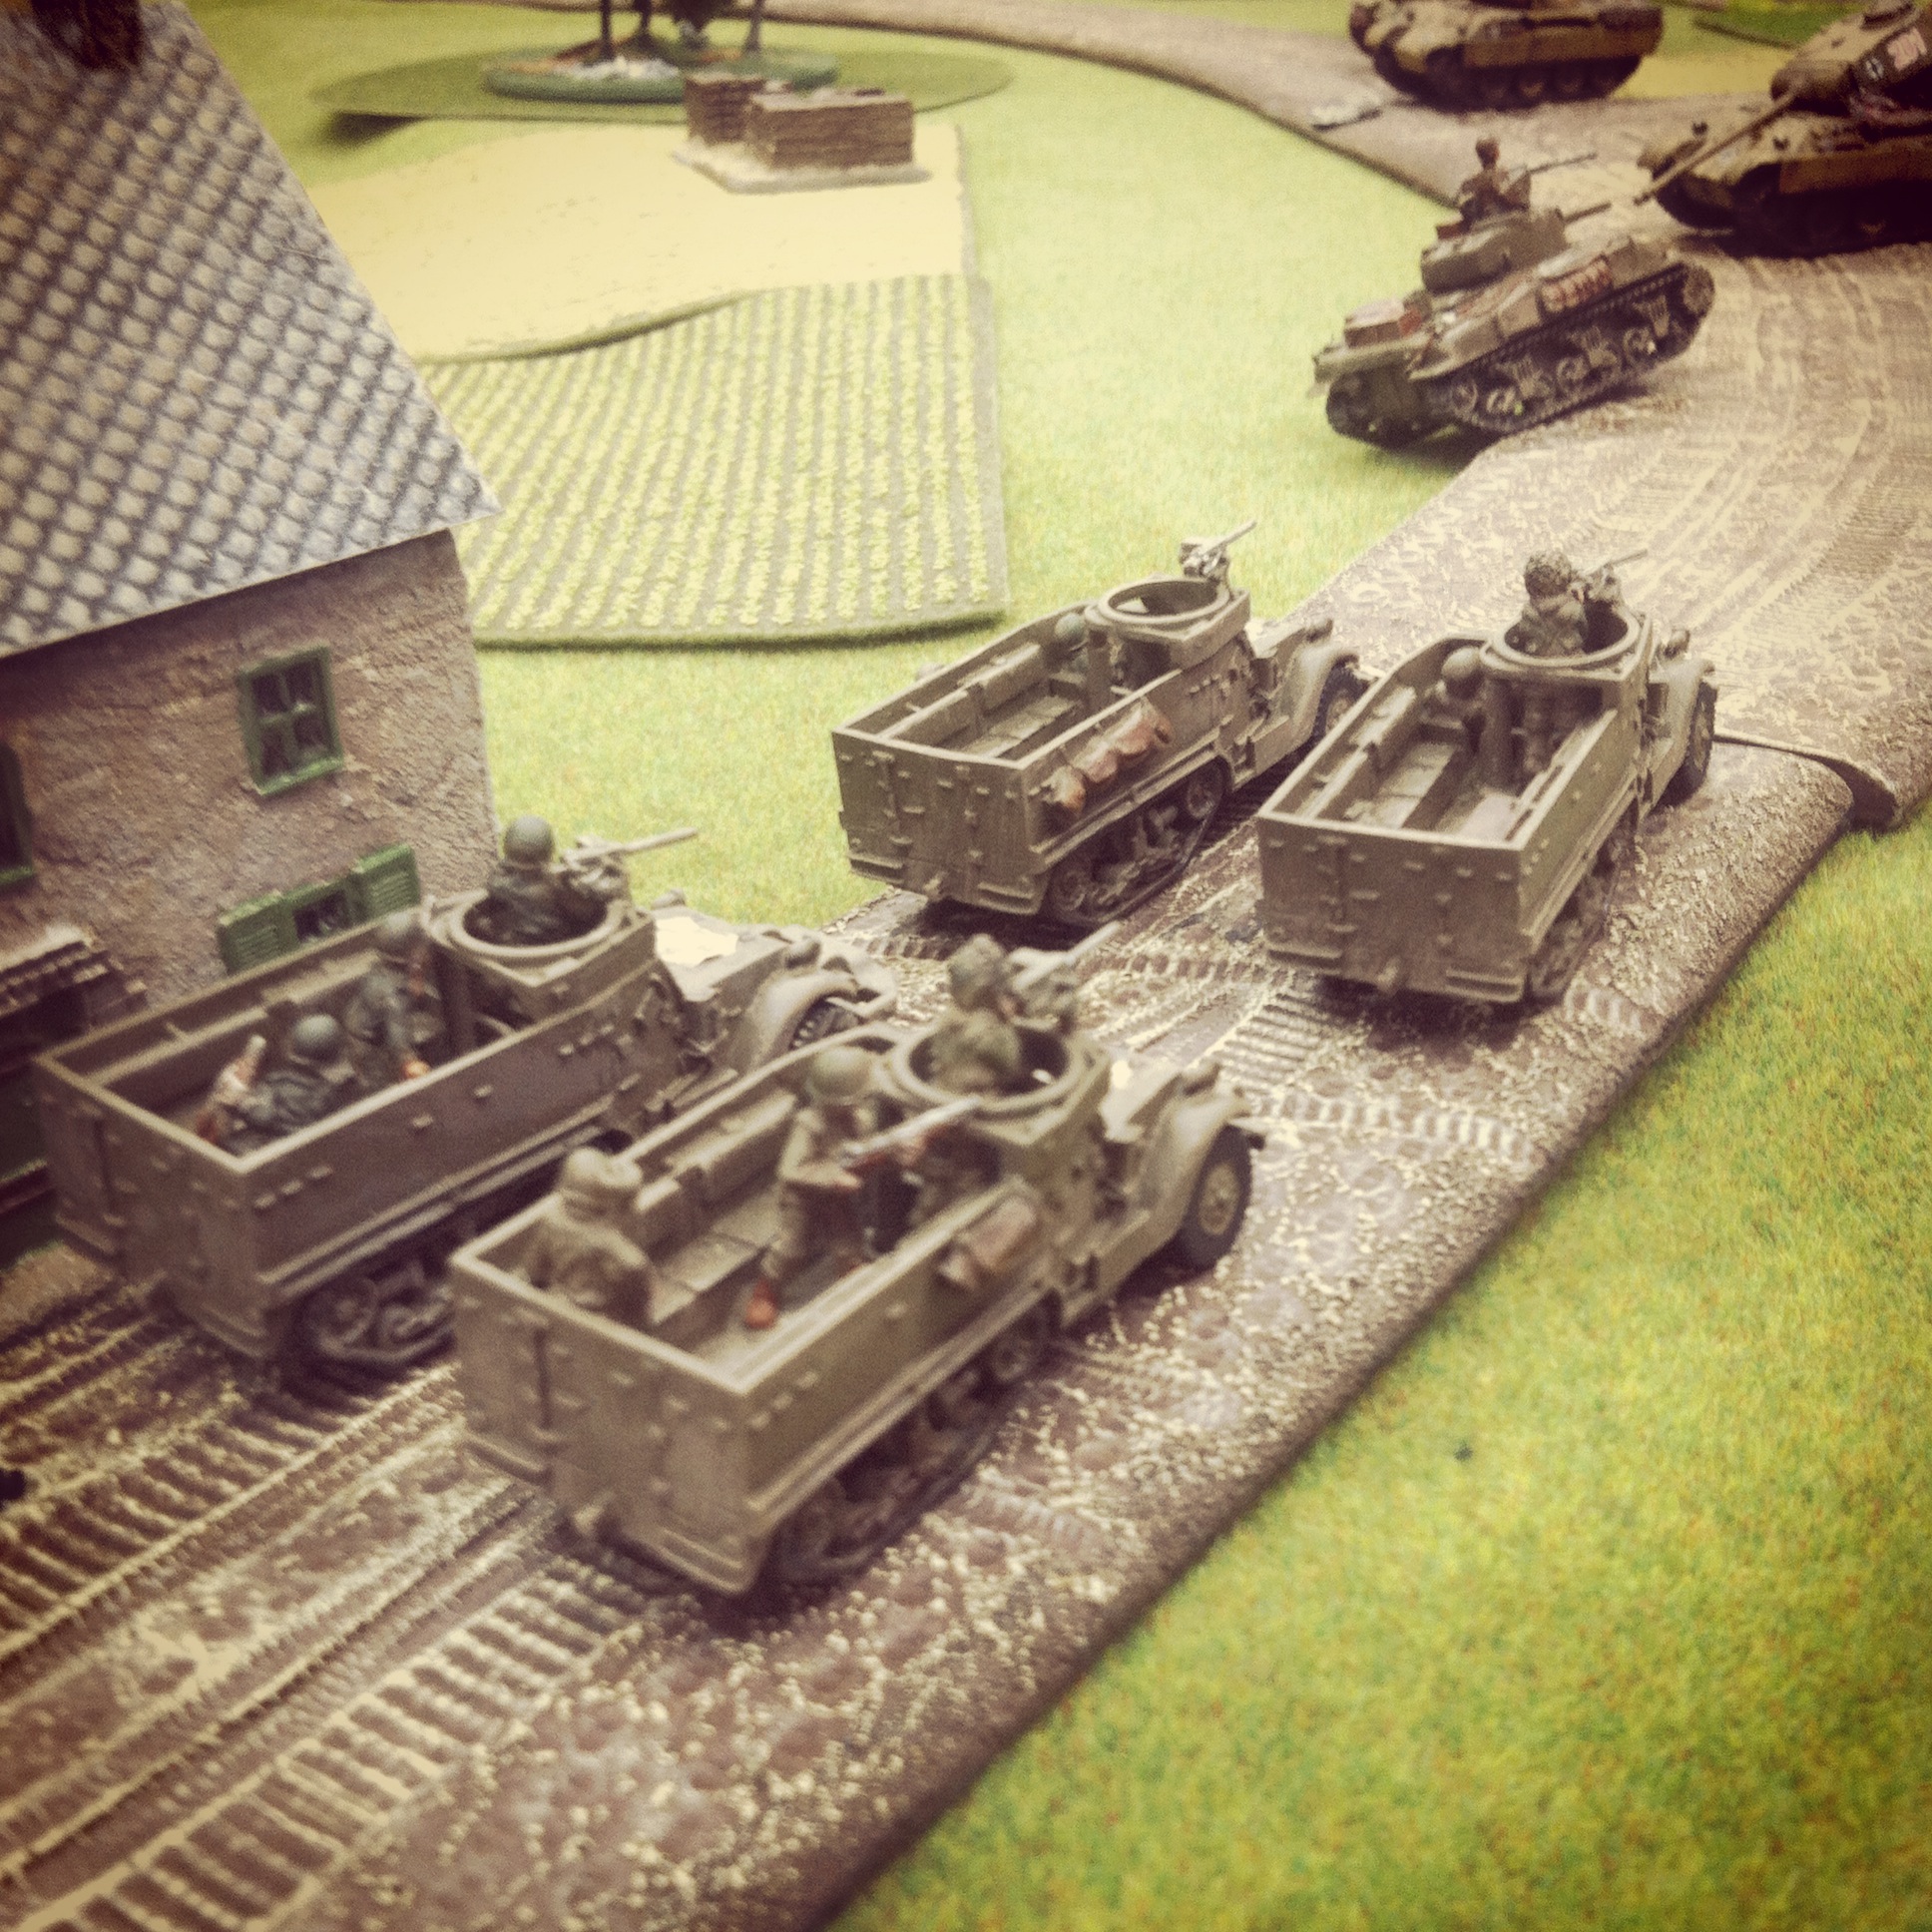
The British laid out their 8-gun 25 pdr battery at the rear of the table and rolled on two platoons from the Guards with Joe Vandeleur attached. Spotters for the artillery were deployed in Shermans to the right and left hoping to provide eyes across the entire table for. Towed 6 pdr anti-tank guns, infantry, machine gunners and additional tanks lay in reserve off-table to follow the initial wave of armour. The plan was to use Vandeleur’s special rules to rush tanks to the center of the table, saturate the Germans with artillery fire and pave the way from additional supporting platoons.

IMG_3029

 Vandeleur leads the Guards into position behind the town

IMG_3028

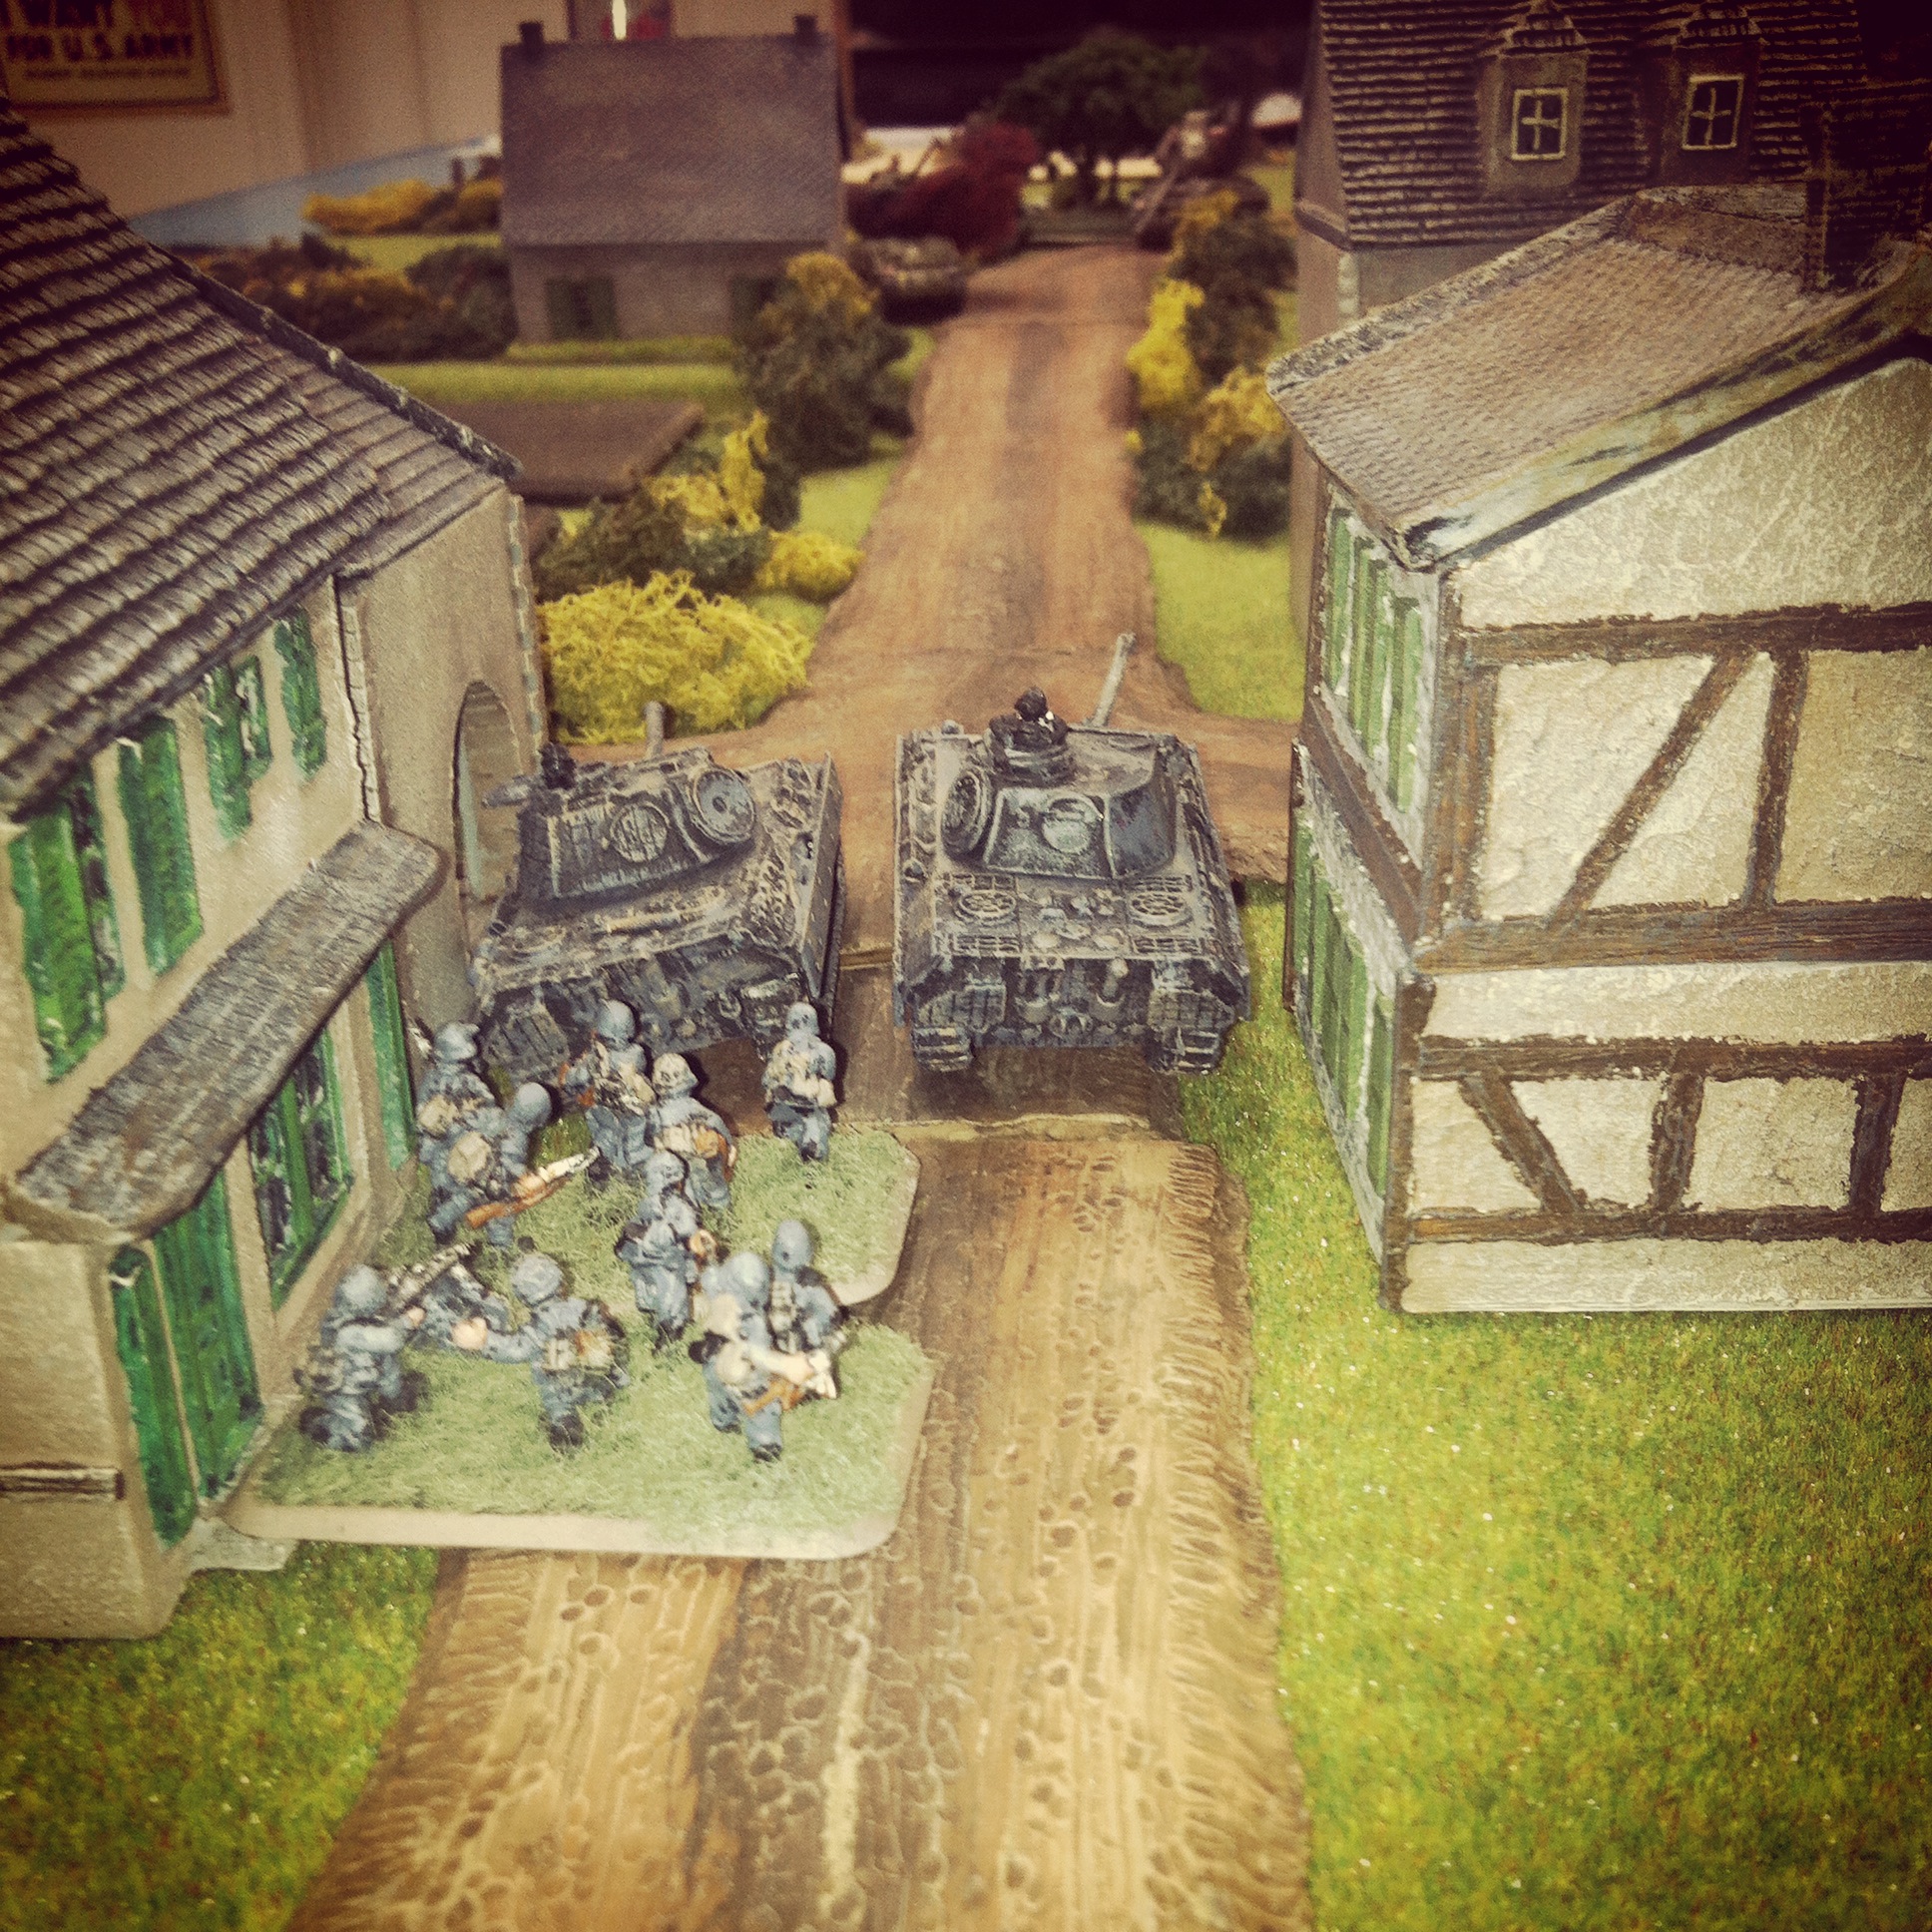
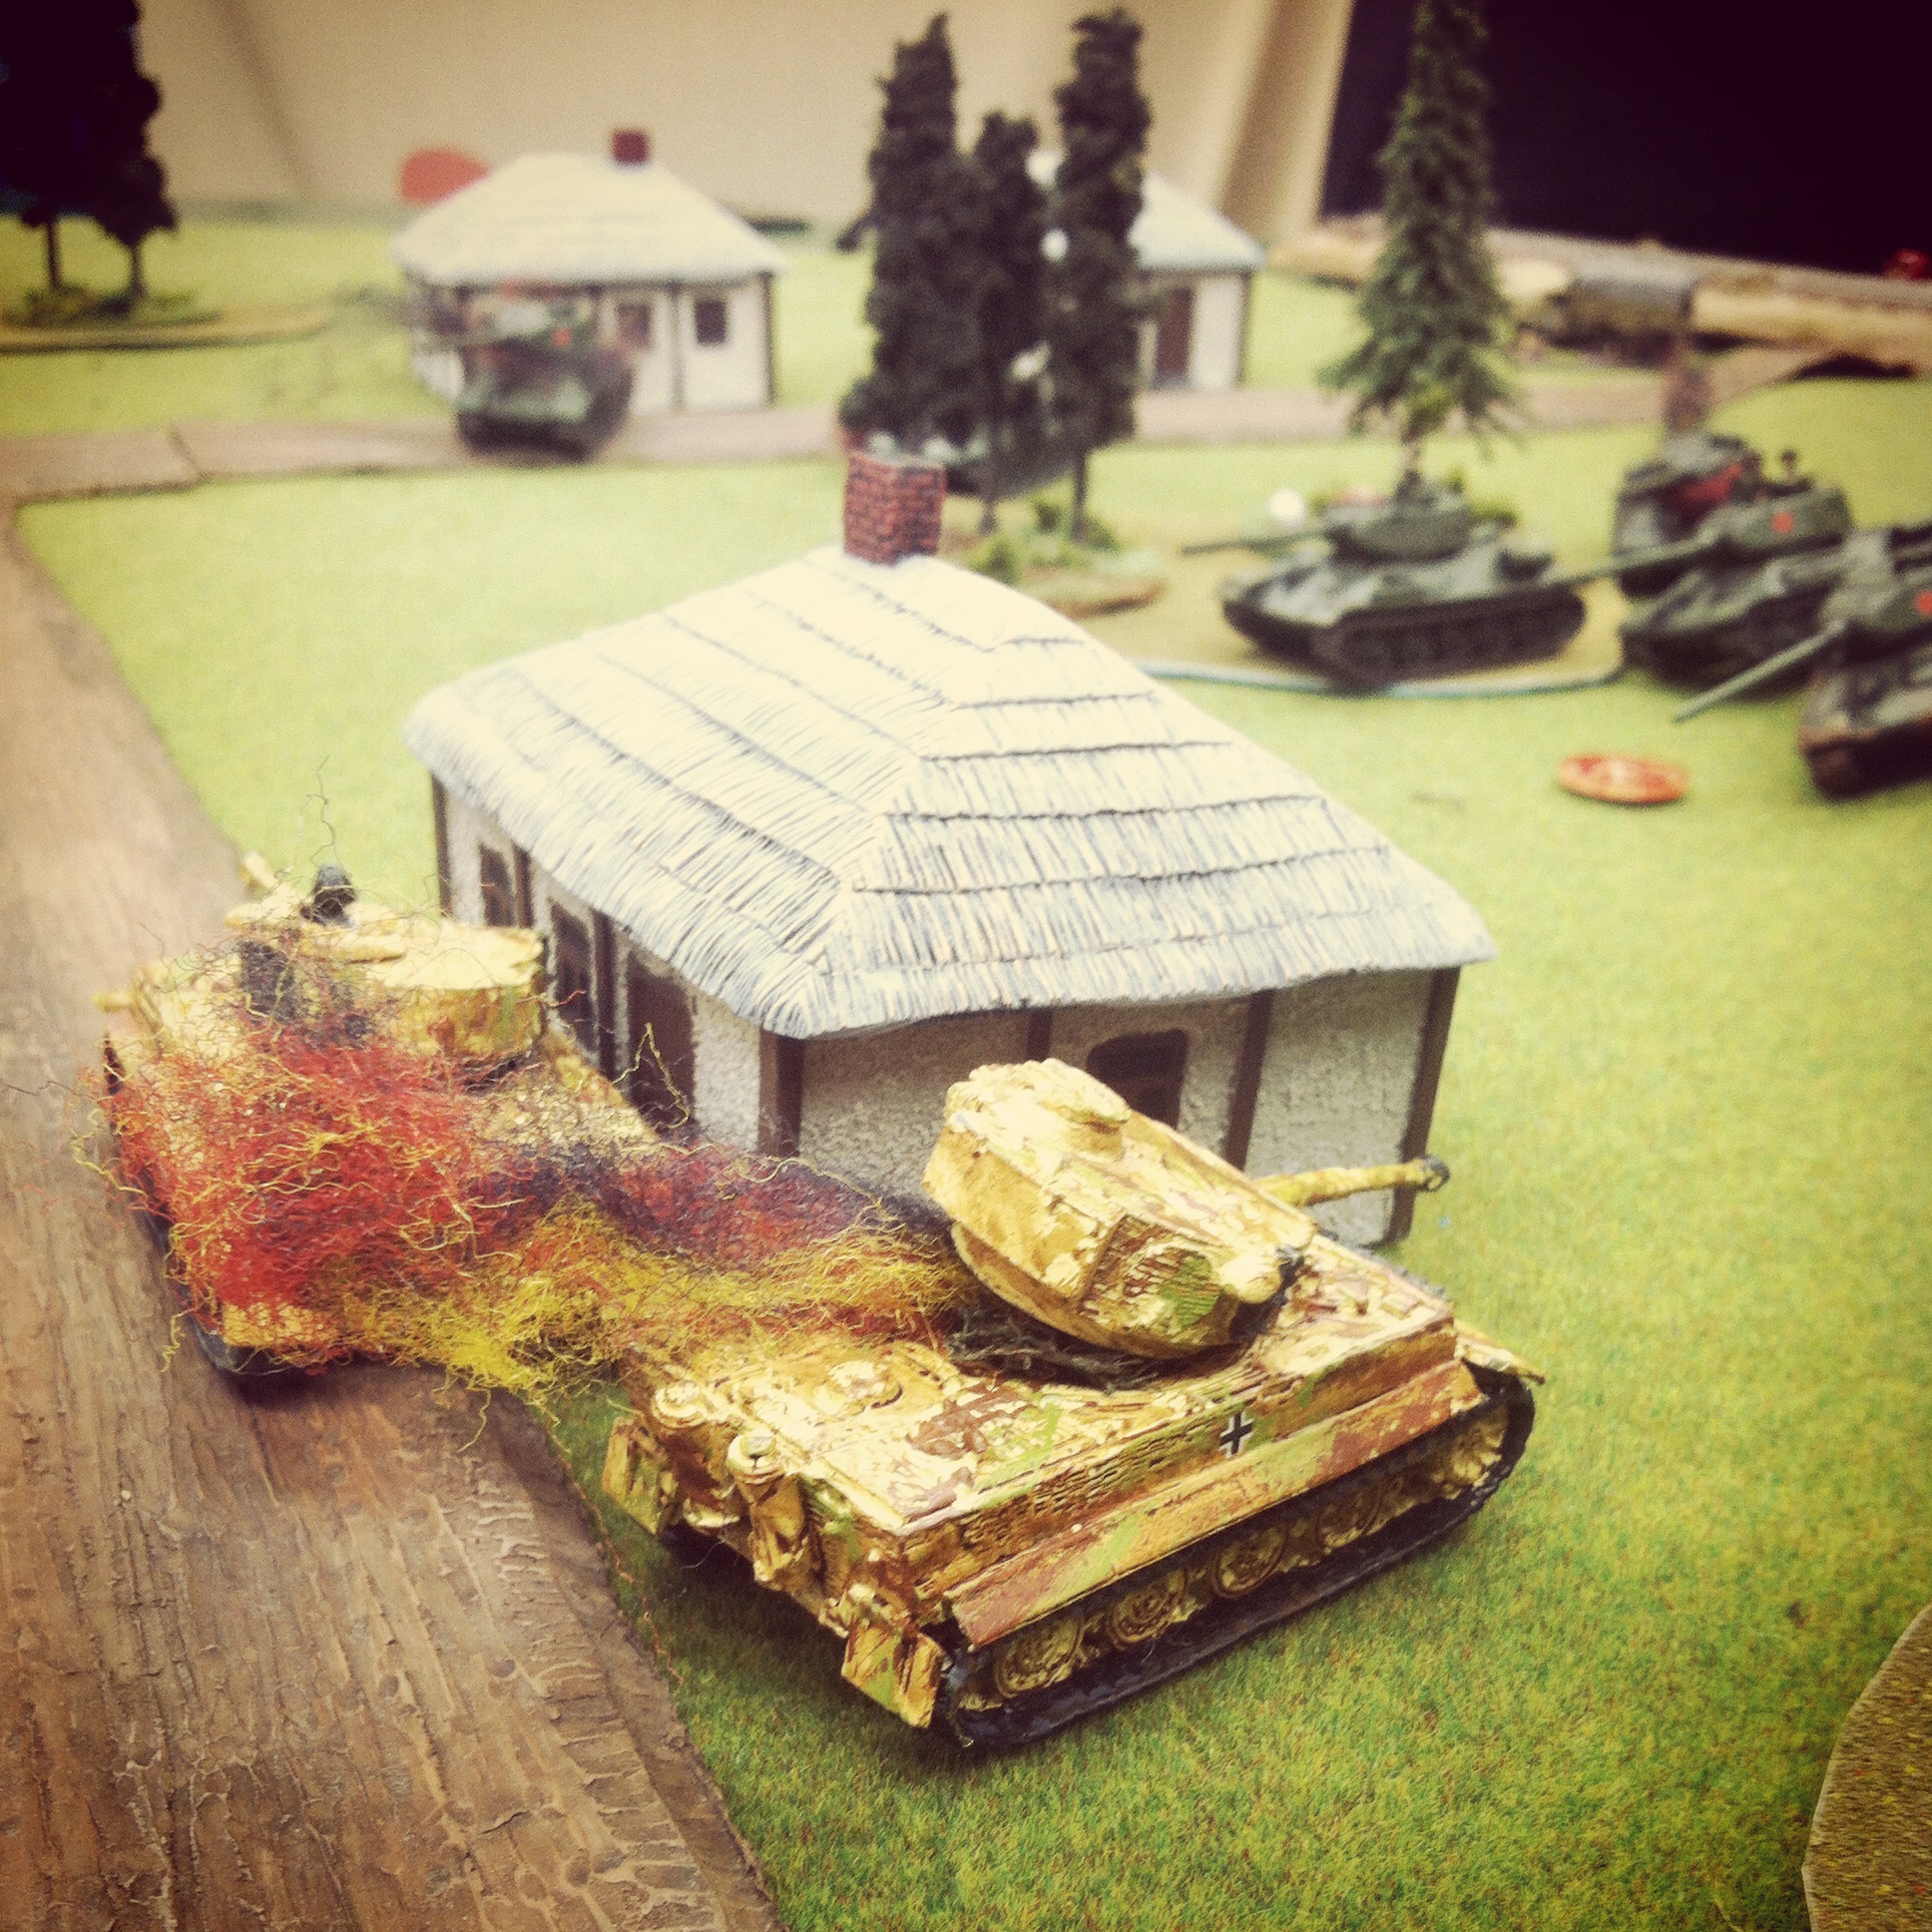
German infantry and Pagdpanther make for the church at the center of Aalst

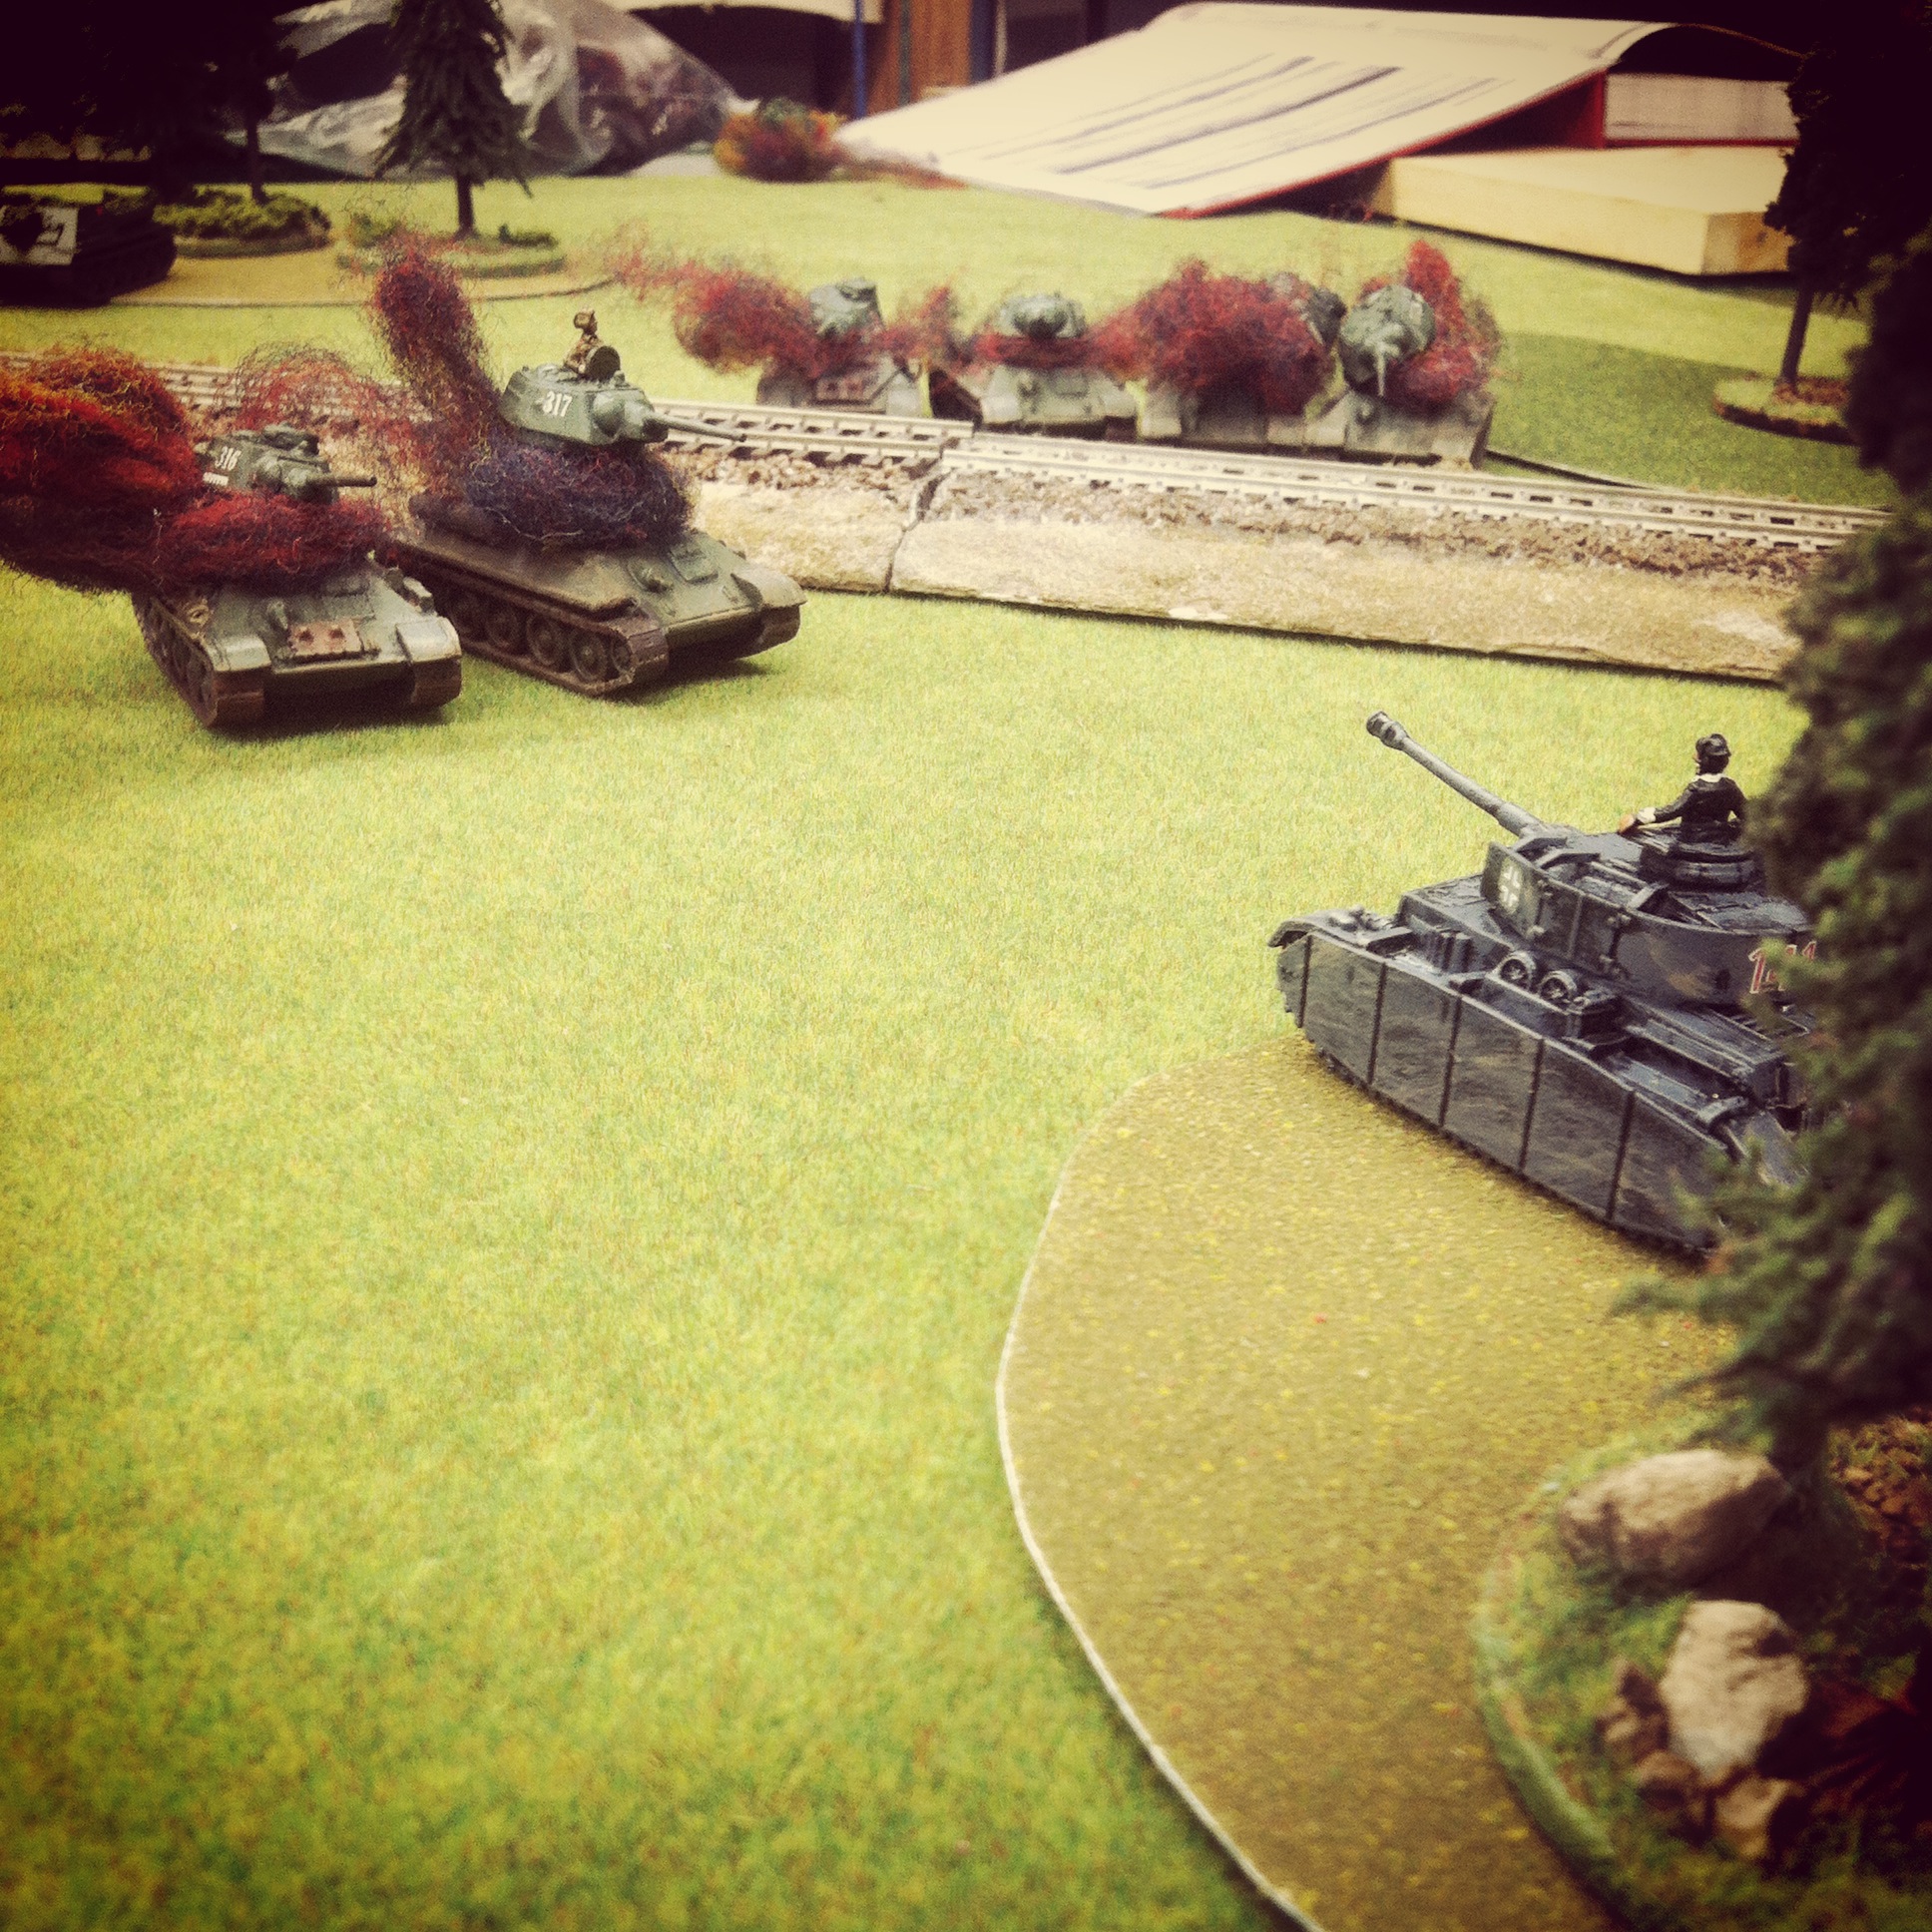
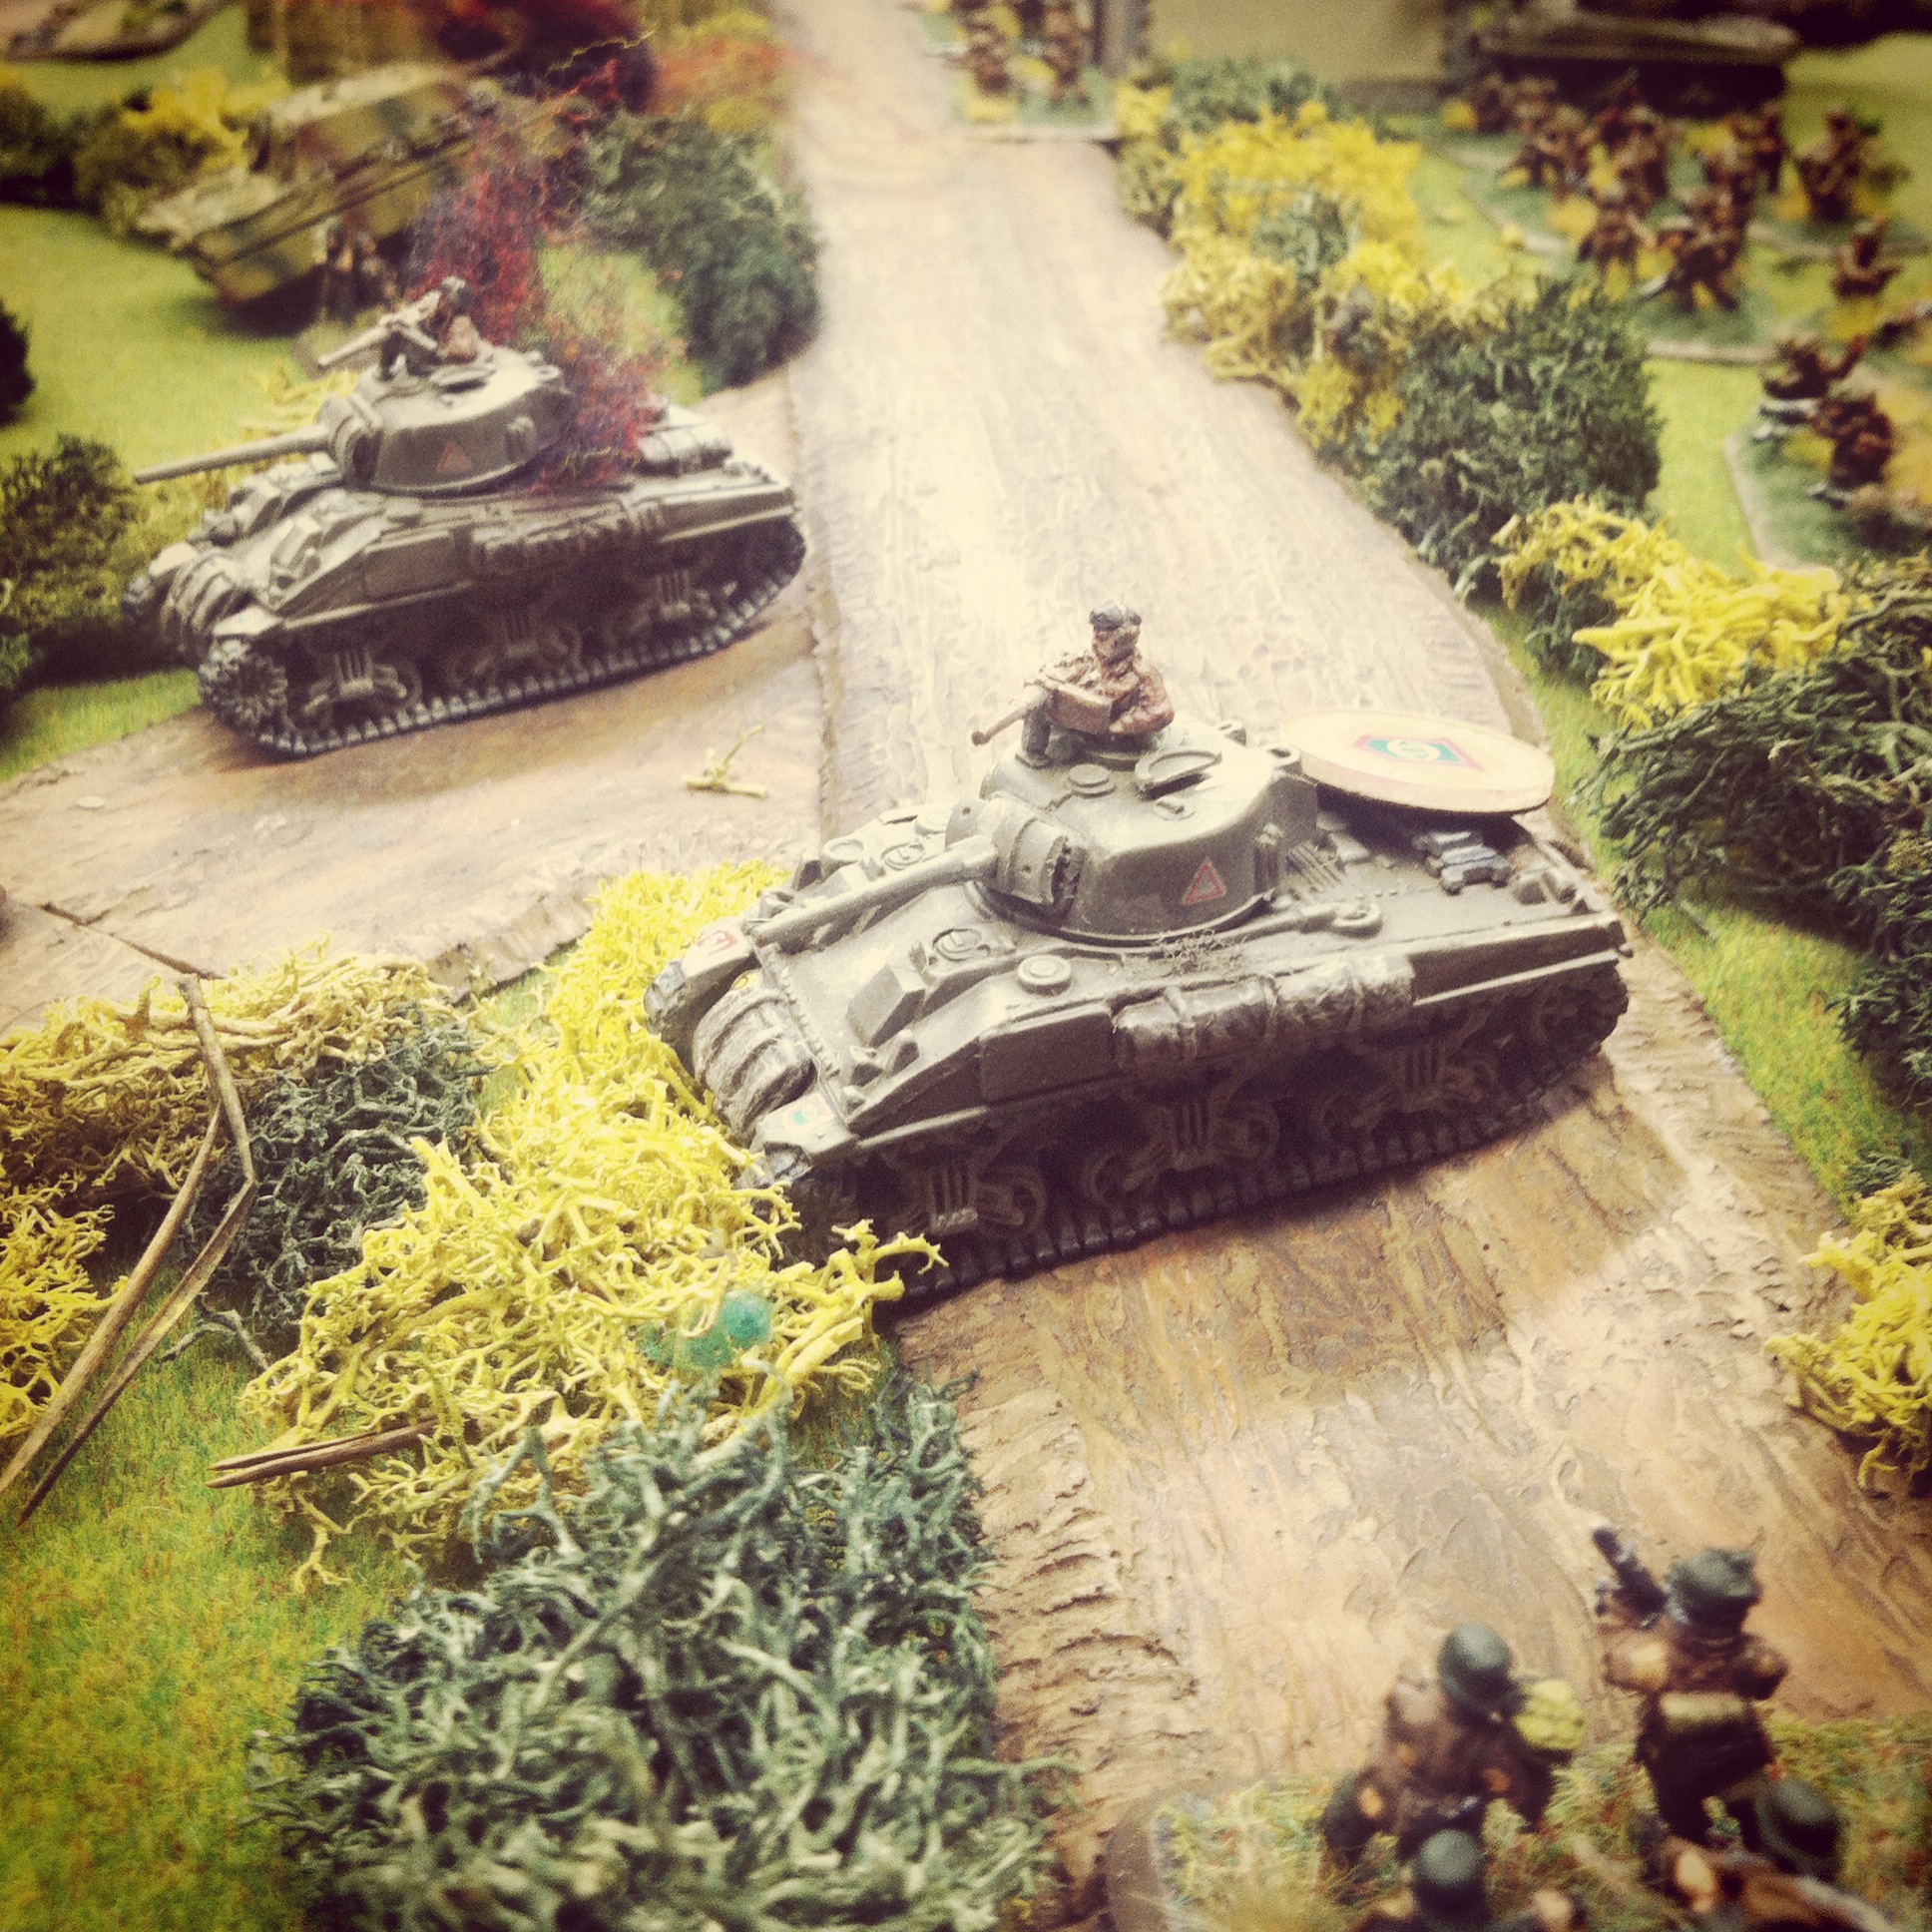
In the first two turns, the Guards quickly rolled up to take position behind the town to the south with their Vickers machine gun platoon riding on the tanks. The British artillery spotter hopped from his Sherman tank and ran for back door of a building. The Germans made way to the north of town with infantry looking to occupy the church at Aalst with a lone Jagdpanther in support.

IMG_3031

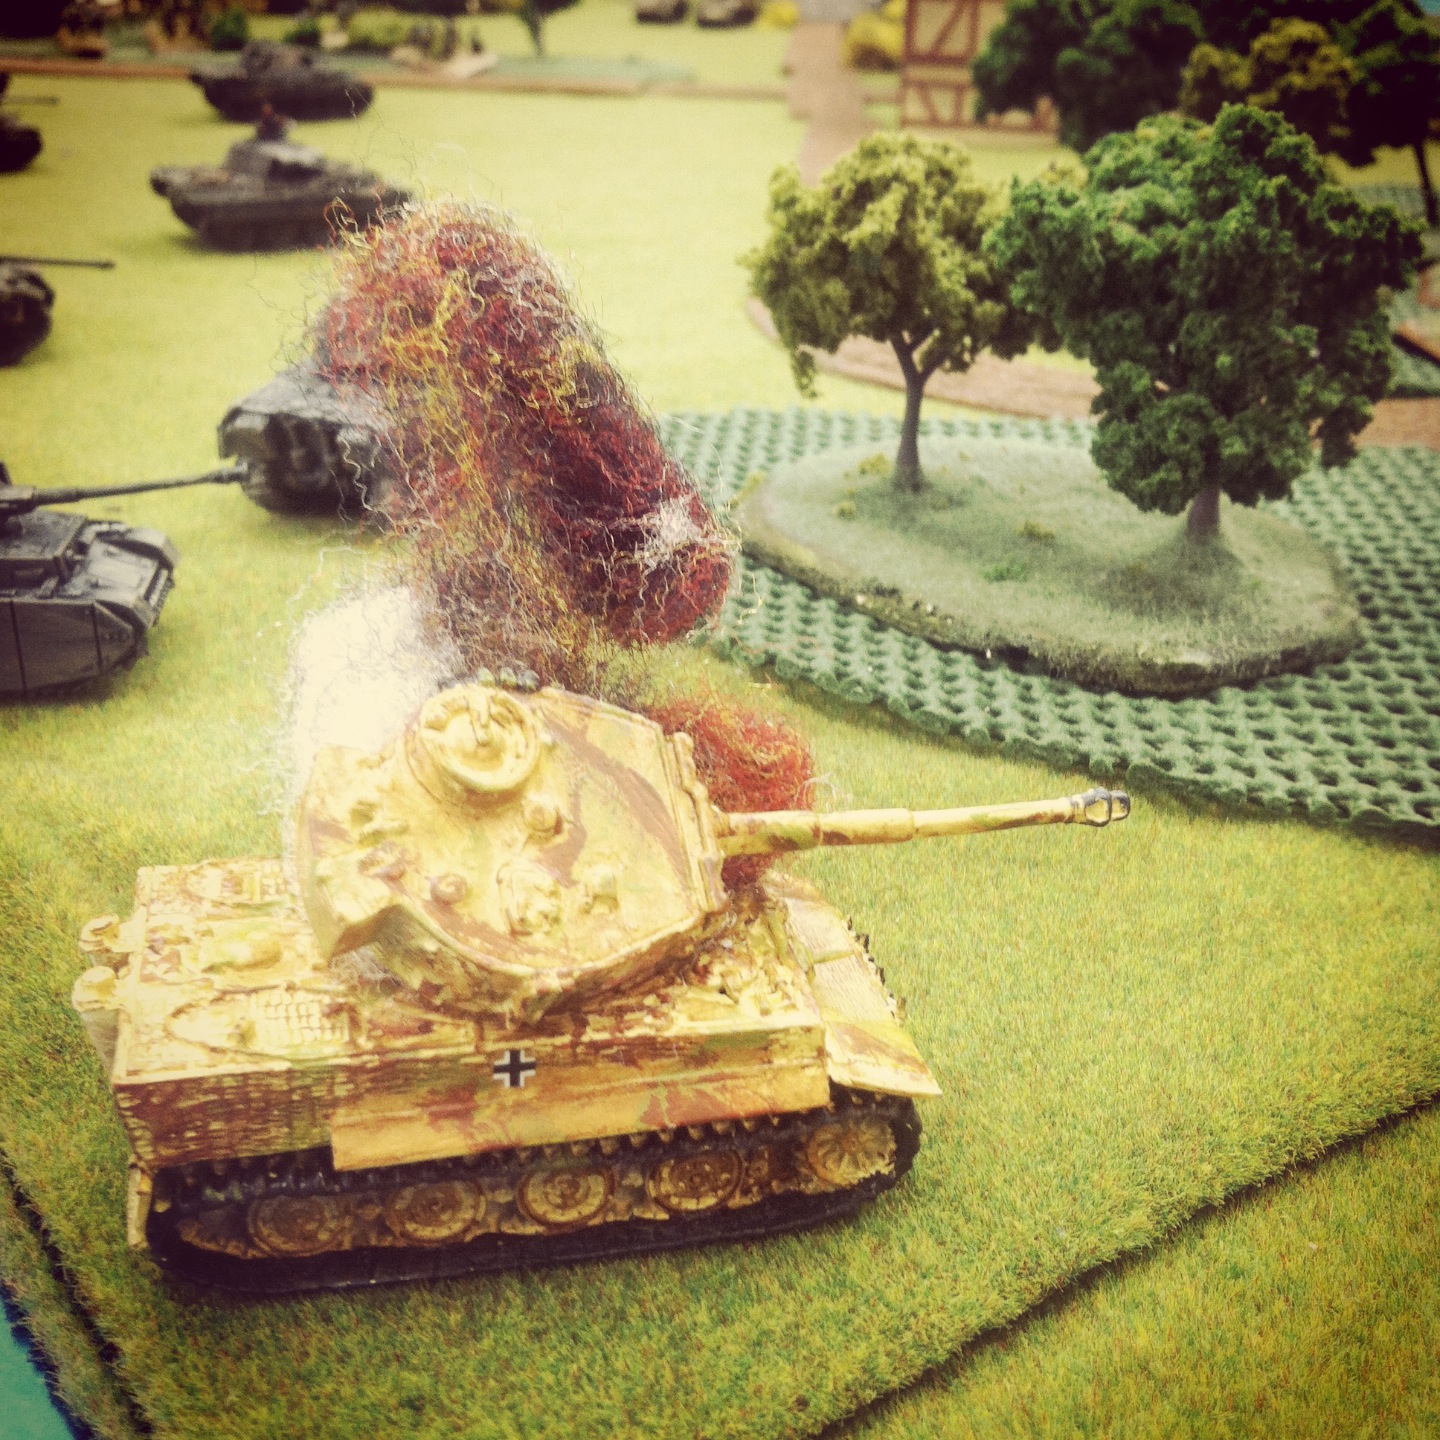
A Firefly lays waste to the approaching Jagdpanther with its first shot

IMG_3032

The Guards take heavy fire and two Shermans and a Firefly sit in flames

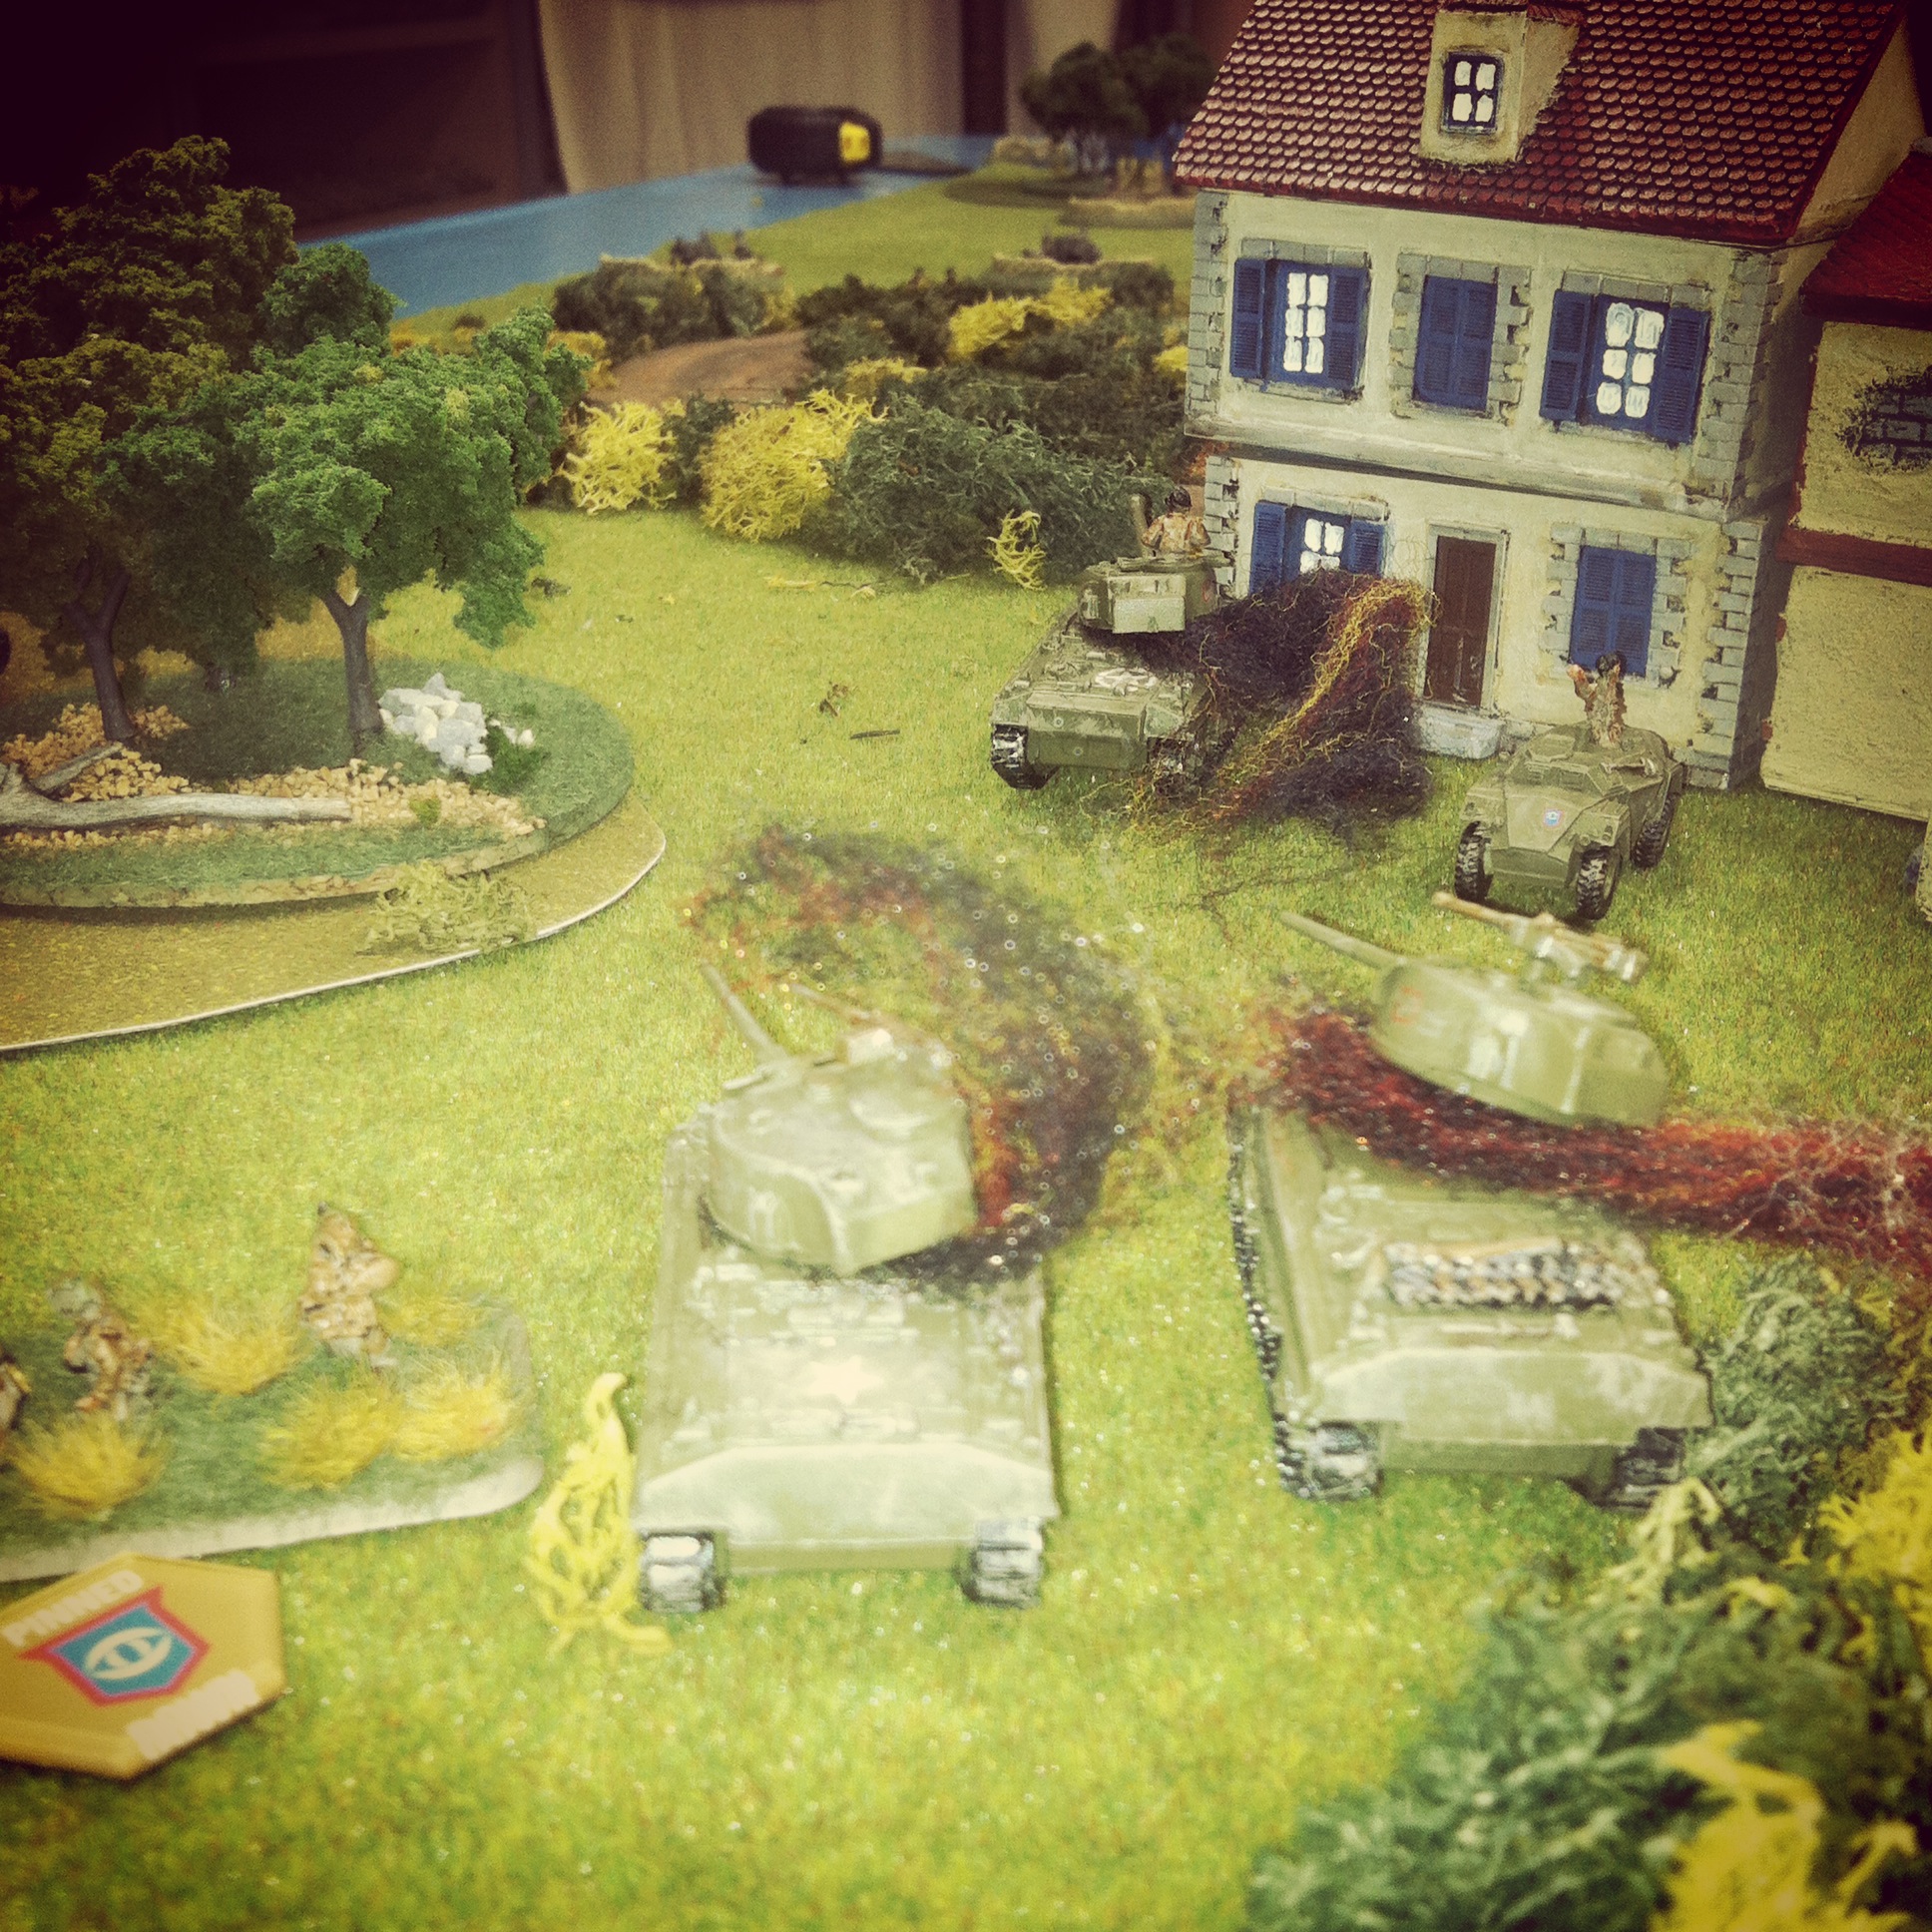
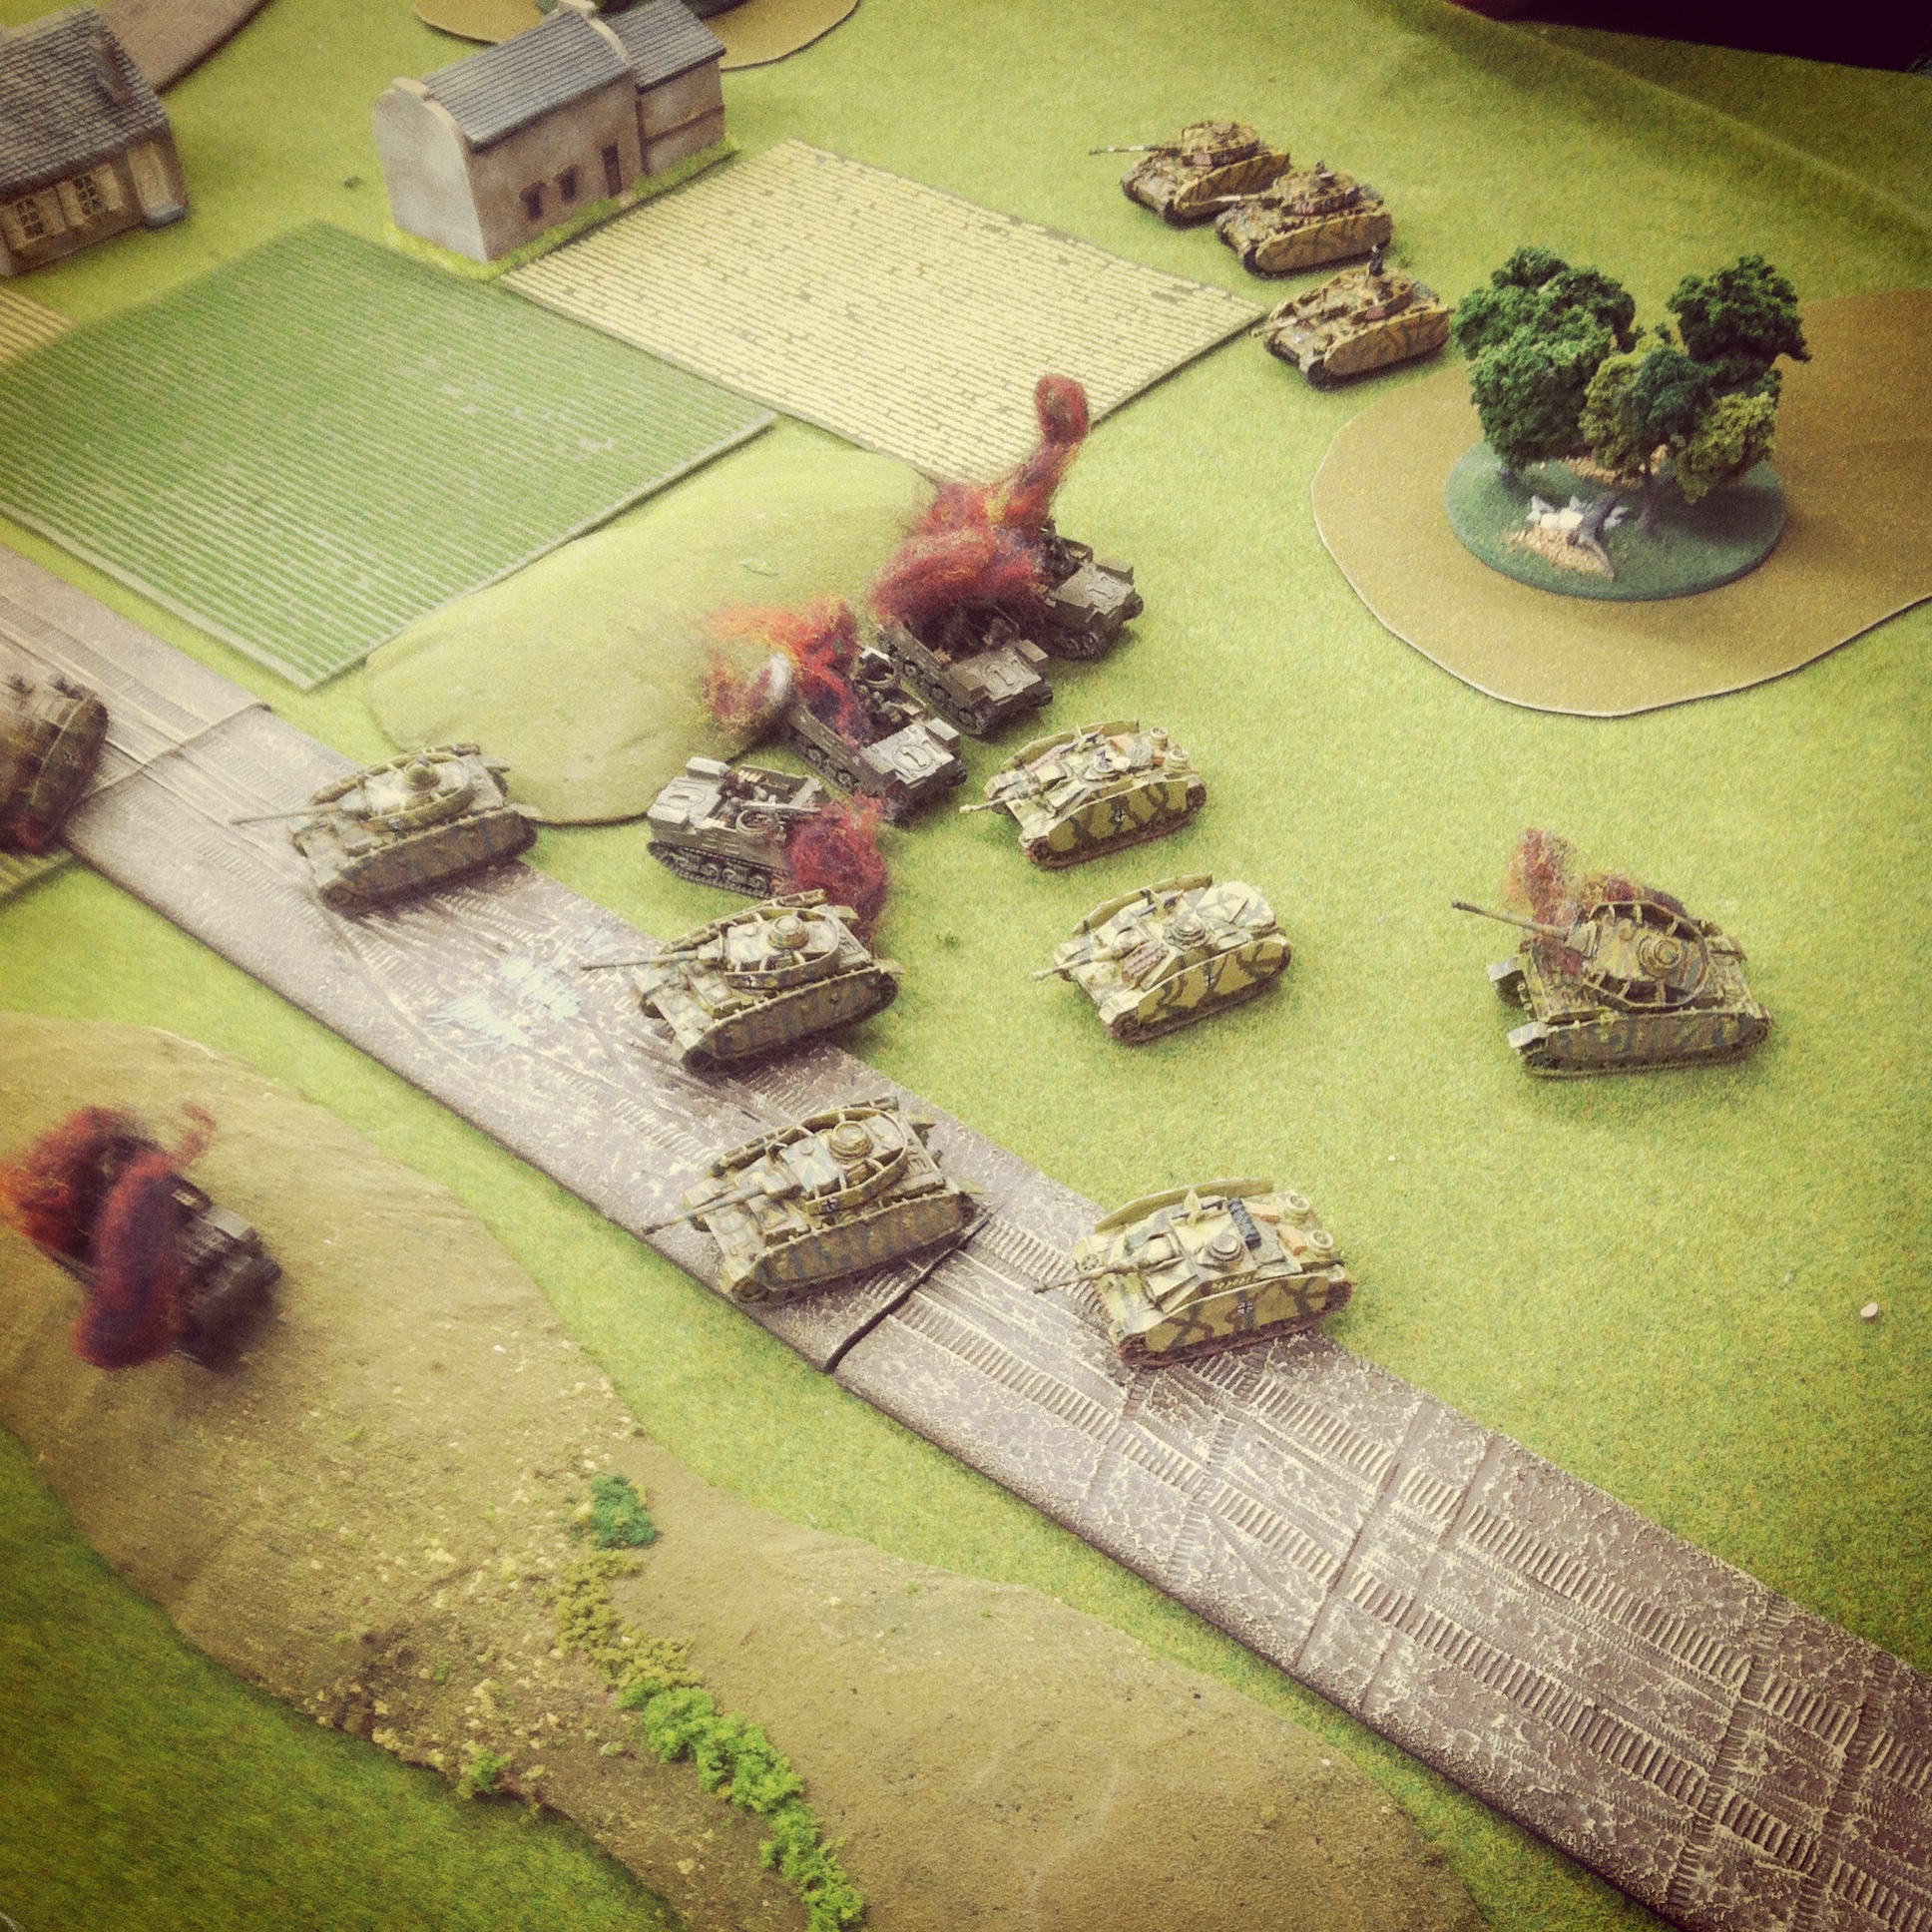
Fire opened up in the next two turns with a well-positioned Firefly scoring a kill on the nearing Jagdpanther. Returning fire, German 88s destroyed the Firefly and PaK 40s bailed and subsequently wrecked two other Shermans. Machine gunners made their saves, jumped off their tanks and made way for cover in a nearby building at the town’s intersection. Meanwhile, British artillery lobbed a volley over the town hoping to slow down the German infantry and machine guns looking to take hold of the town’s buildings. The barrage resulted in a destroyed PaK 40 just to the north of the church, but the German infantry pressed on to take up positions in the church.

IMG_3034

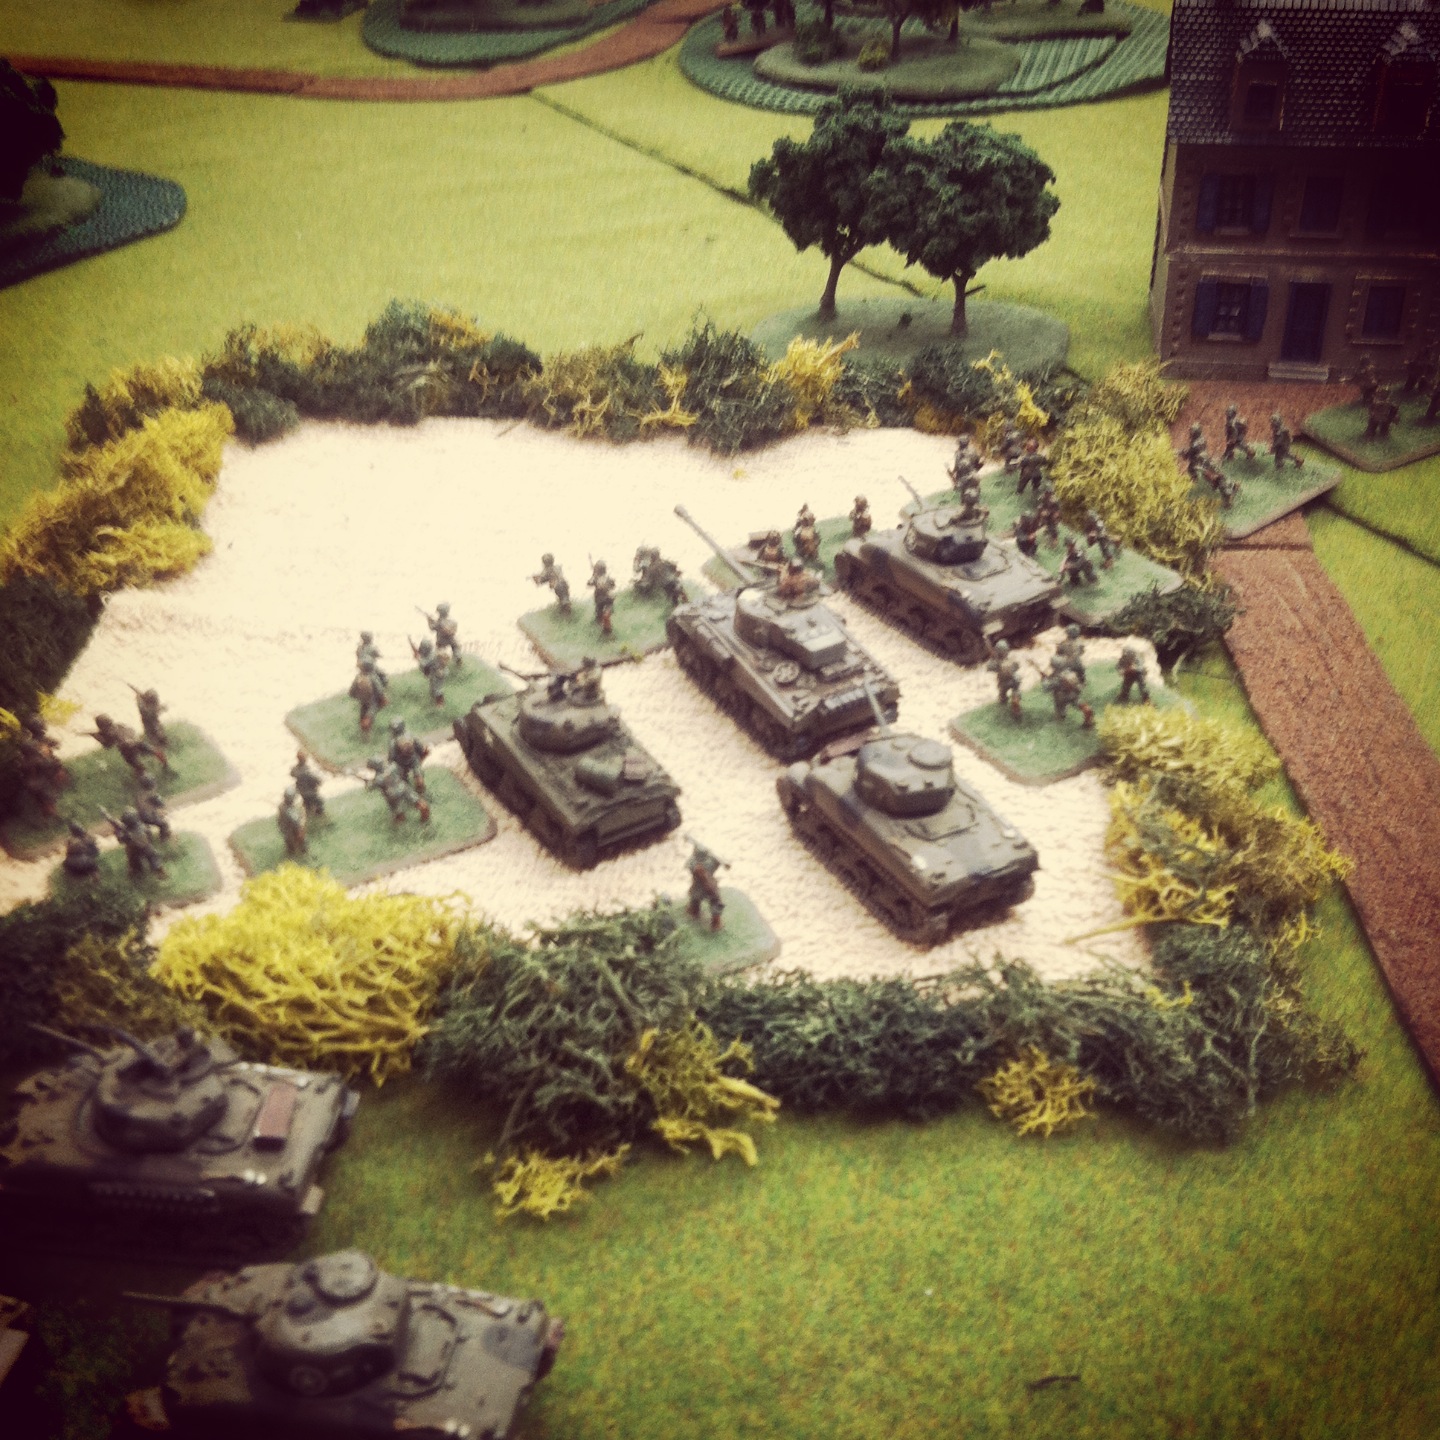
British infantry move to assault the church as reserve armor rolls to the town center

With British infantry reserves moved at the double to the town and then moved in a subsequent turn to assault the church. At the same time, a reinforcing Guards tank platoon raced to the town center. Shots from the Shermans failed to destroy nearby PaK 40s but fire from the Vickers guns in a nearby building pinned the Germans in the church ahead of the assault. Despite all the British fire lighting up the center of town, the assault failed and the British infantry fell back to the other side of the street.

IMG_3033

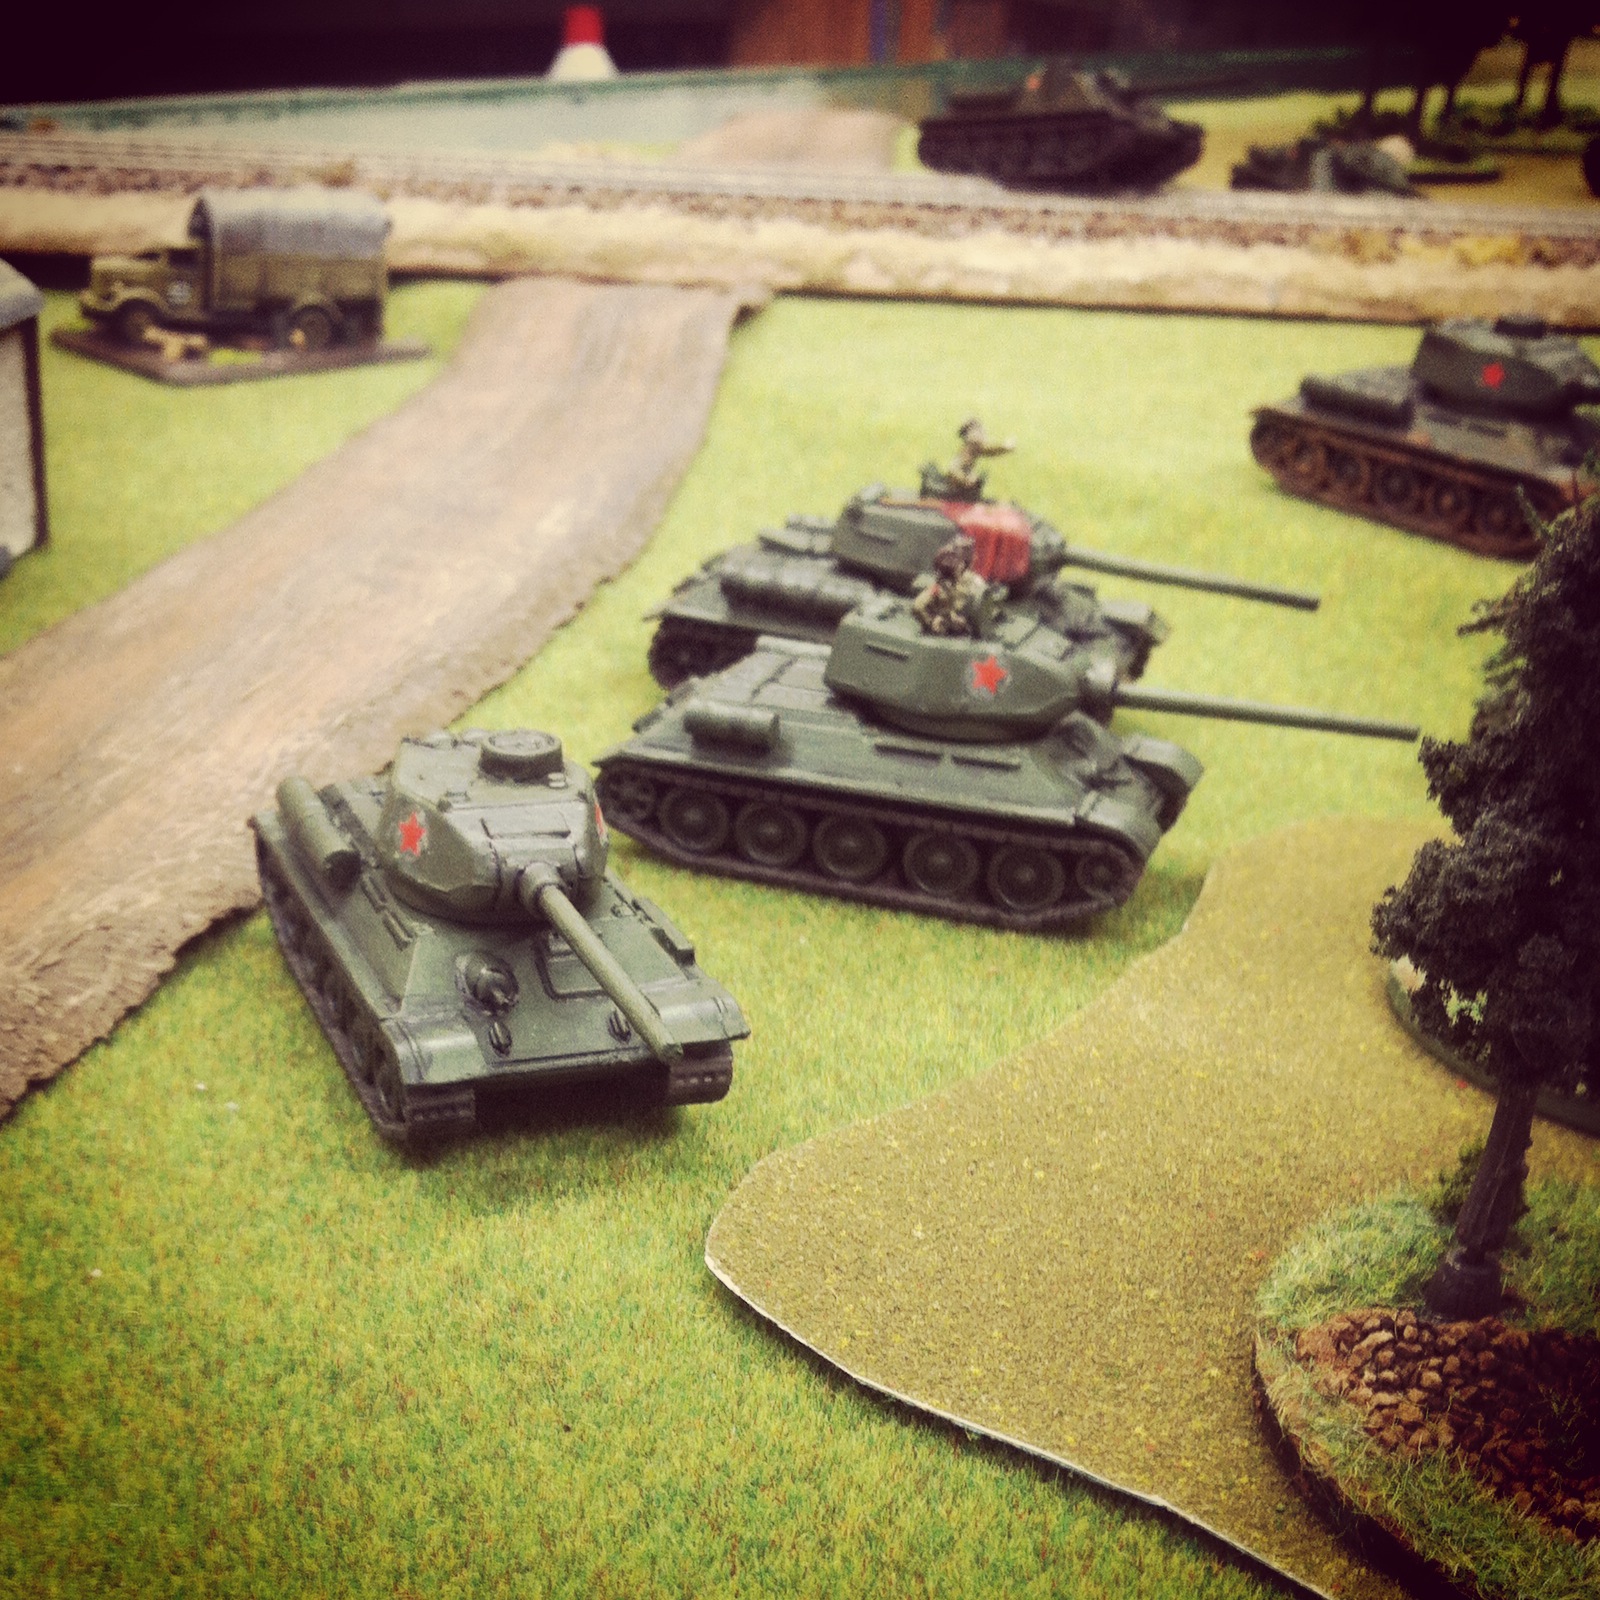
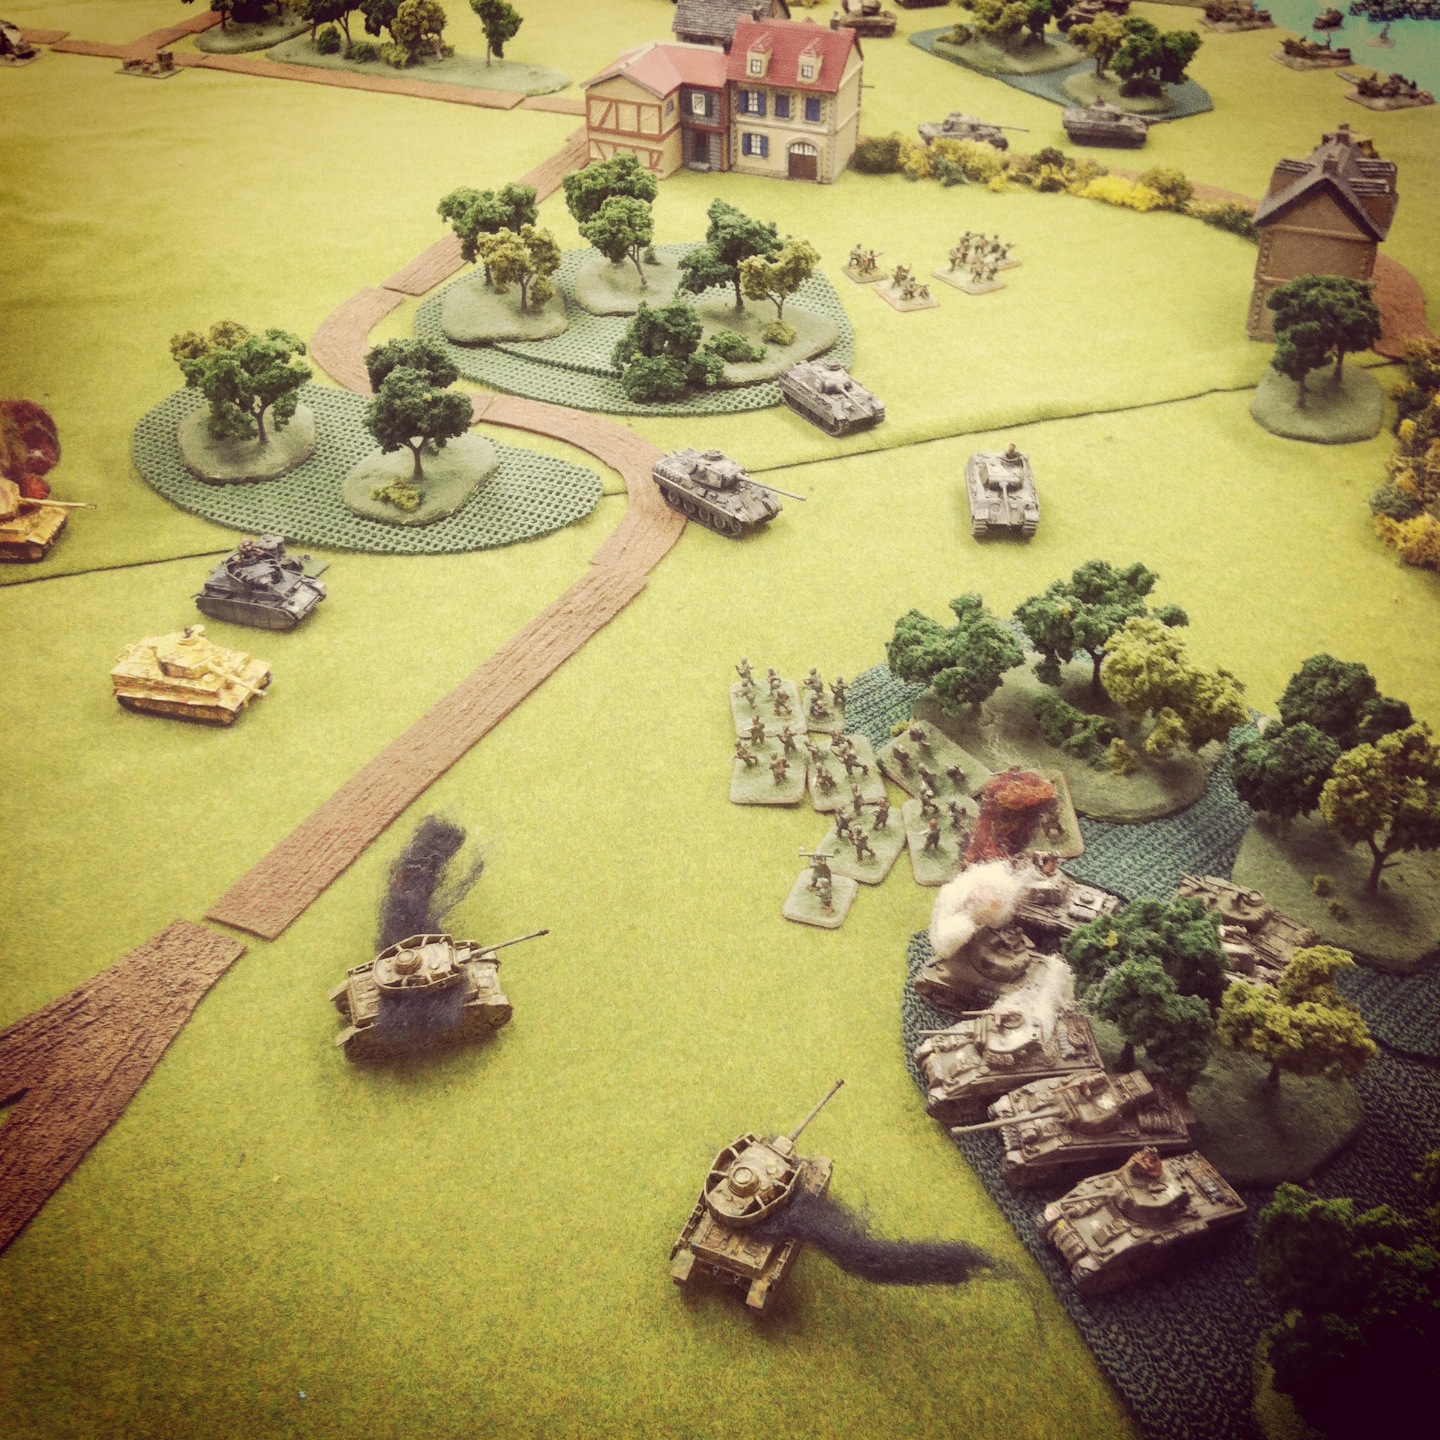
German armored reserves arrive

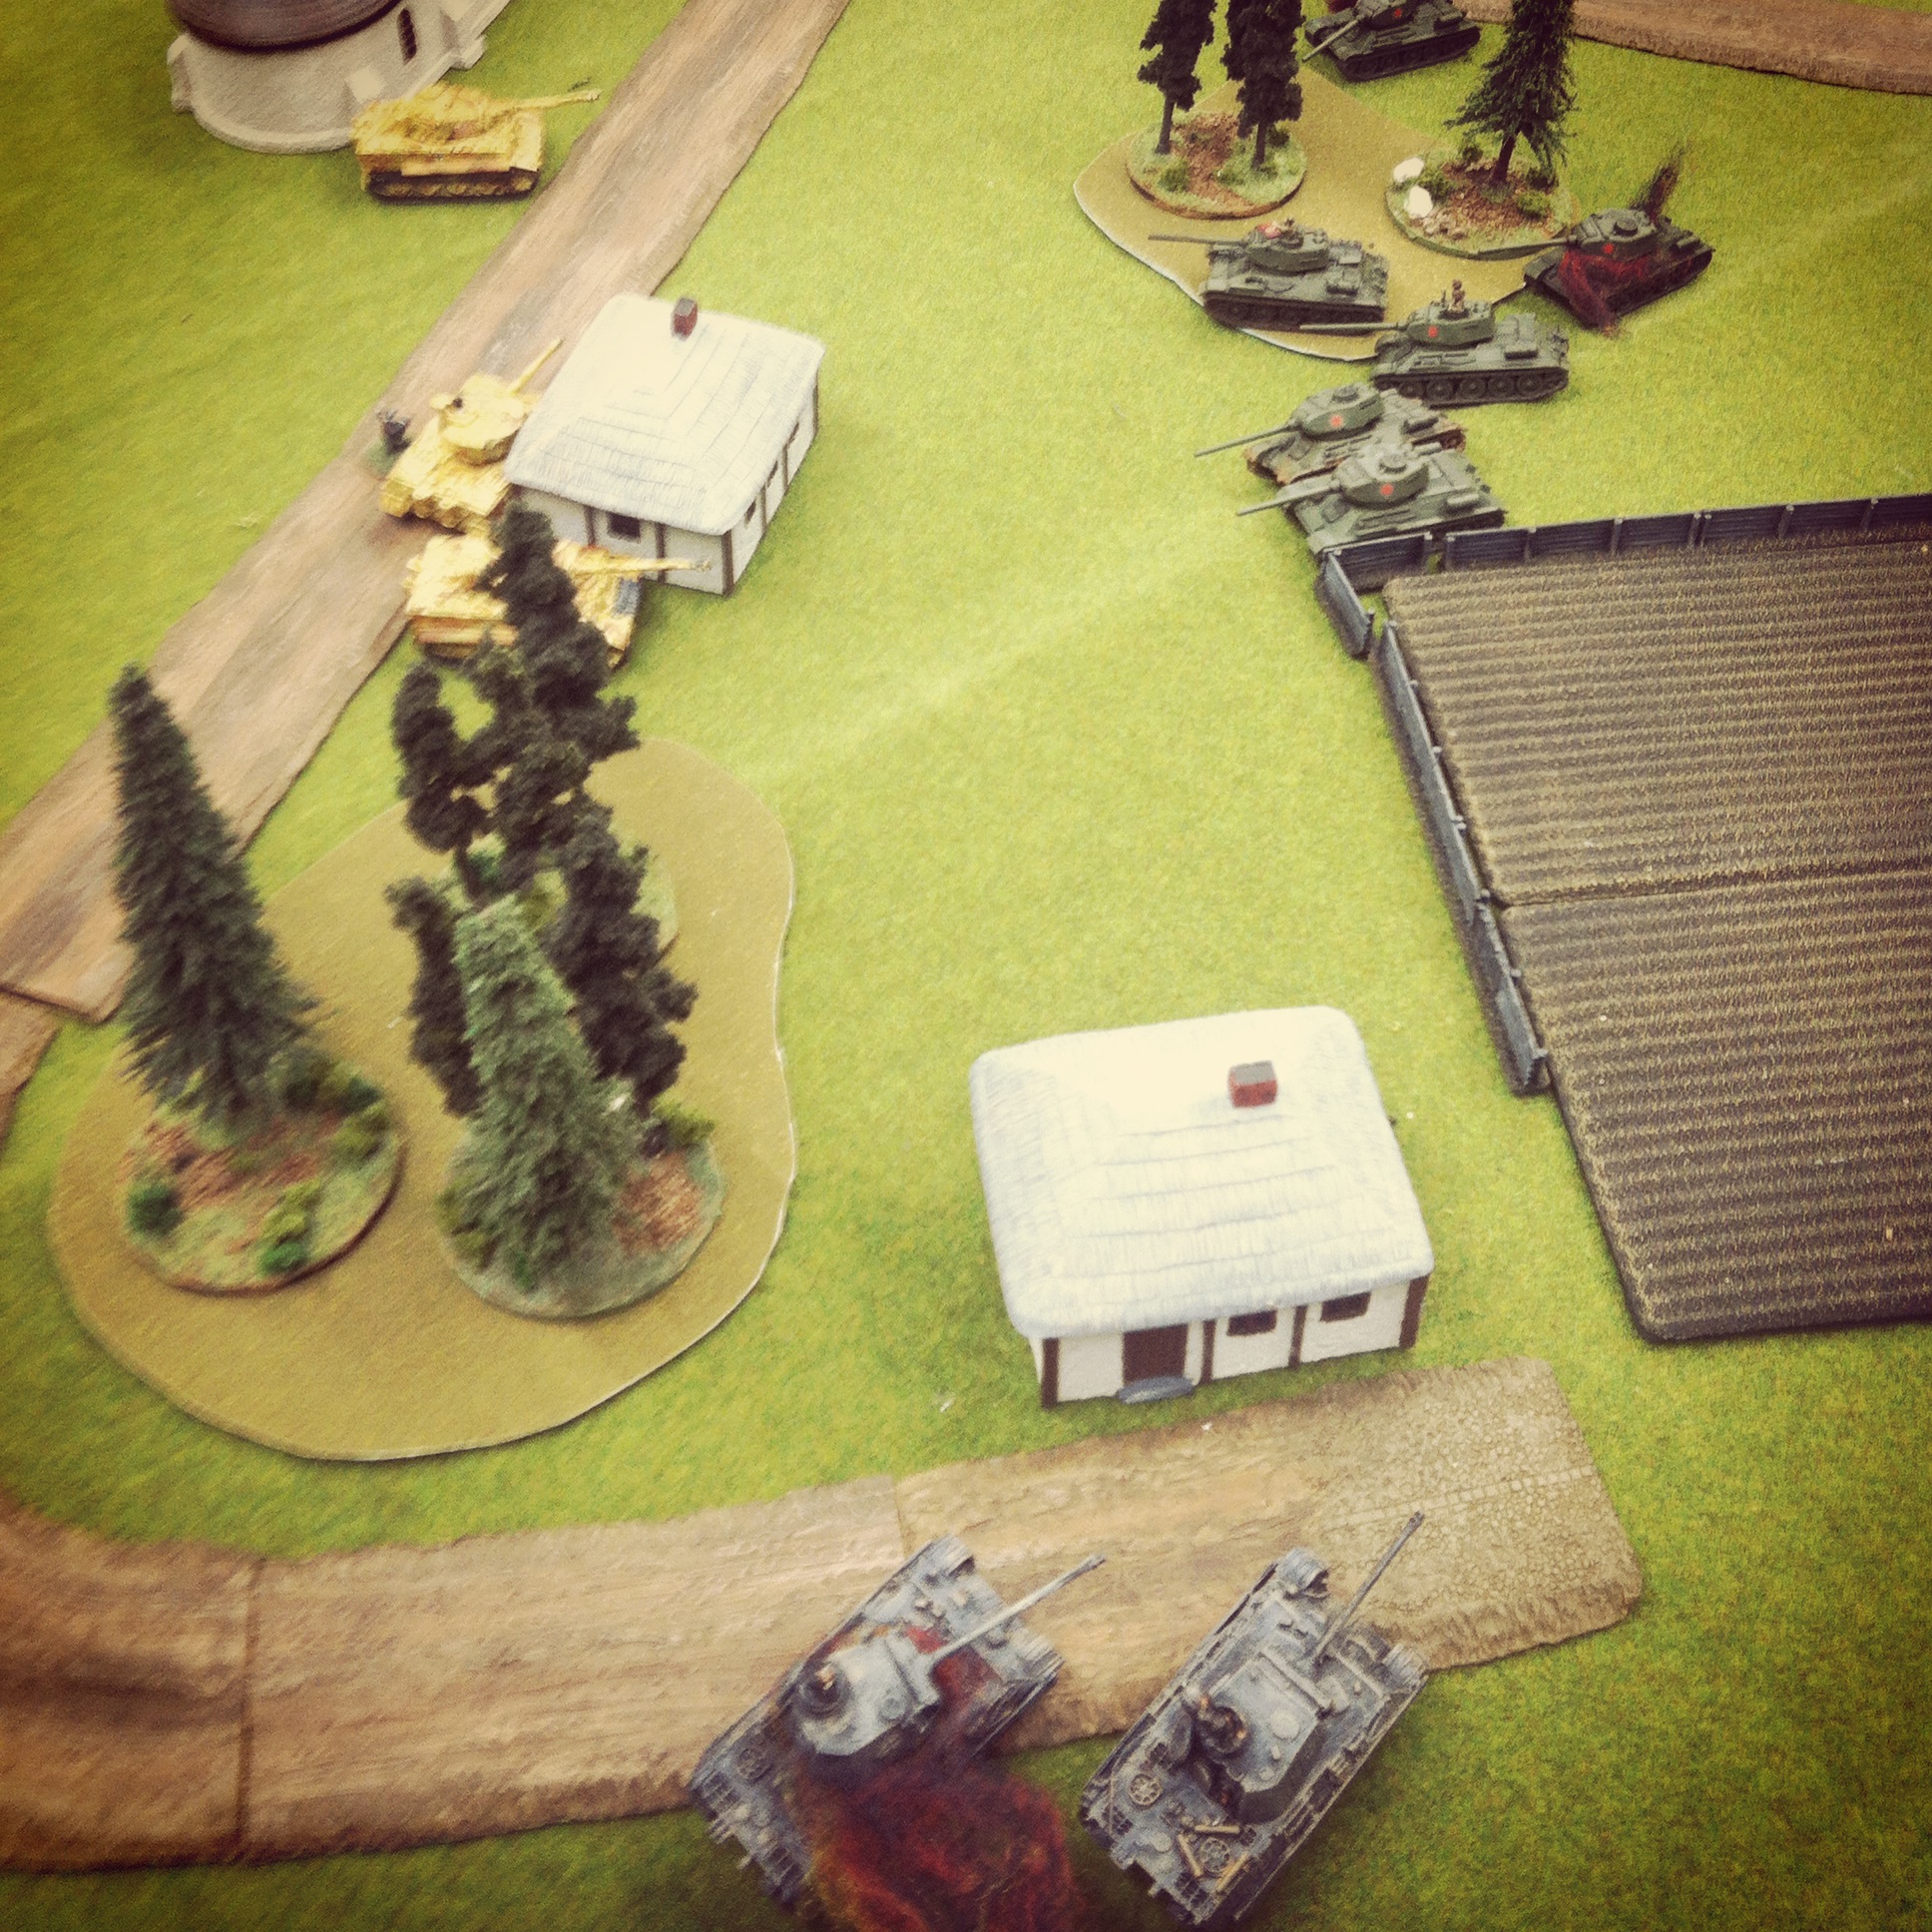
With the British stalled at the crossroads in Aalst, German reserves moved onto the table. A Stug platoon, Wirbelwinds and a fresh Jagdpanther began closing in from the northwest of town, drawing fire from the British battery looking to slow their advance. Volleys from the 25-pound guns blew up an 88 and a PaK 40, but the mass of German hardware kept rolling forward.

IMG_3035

British command tanks move to engage the Germans

IMG_3036

A swarm of German armor and troops push forward under British artillery fire

IMG_3037

A Panzerfaust lights up a British command tank

Hoping for a hard push of combined arms on the German right, British command tanks followed by two platoons of infantry pressed forward from a nearby woods. The British tankies proved to be tough, surviving a turn of fire from nearby Stugs and an attempted infantry assault with  Panzerfaust-wielding infantry as British guns continued to range in and rain shells on the Germans to no effect.

IMG_3038

The lone surviving command British tank awaits its fate from the German onslought

Back at the center of town, the last tank platoon took fire from the 88s, PaK 40s and a Panzerfaust in the church steeple and was destroyed. The one lone command tank on the western outskirts of town was surrounded and destroyed by combined tank and artillery fire. With only the remnants two rifle platoons and the Vickers left spread through the town, the game was lost for the British. As the sun set in the west, Aalst remained in Axis hands.

In our discussion after, the British artillery had only been effective only about 50% of the time and only eliminated a few units throughout the game. Too many British tanks burned too quickly against overwhelming crossfire from German guns, and reinforcing British infantry could never make headway beyond Aalst’s crossroads. More British tank platoons with Fireflies might have gone a long way toward at least pushing through the town.

Fortunately for the people of Aalst, the engagement during Market Garden resulted in the liberation of the town by the British. Pictures from the victory show a very different outcome from our game with smiling faces all around. The very nature of wargaming sometimes just makes things go a different way, and this past weekend the dice rolled against the tide of history with a victory for the Germans at Aaalst.

2014: Opening New Fronts

wraondsnyIn the middle of 2013 I somewhat unexpectedly re-launched Brooklyn Wargaming with a new design and a renewed posting vigor. Since then, I’ve had more than 10,000 visits from readers all over the world. Together with these folks I’m sure to never know, we share a continued passion for gaming I am committed to infusing in every one of my postsings here.

My World War II Flames of War posts are clearly the favorites for visitors to the site. My FOW After Action Reports continue to garner a lot of daily views, and people in particular seem to love the Barkmann’s Corner scenario I played in July at Metropolitan Wargamers in Brooklyn, NY. More AARs and building-out my various national forces in my FOW Modelling posts will be a big part of 2014.

As for other stuff on the site, my few posts on Warfare In The Age of Reason are quickly shooting to the top of popularity. I really enjoy writing up my plays a variety of board and card games through my New Game Weekend posts, and taking a look backward at Retro Gaming The 70s & 80s often result in emails from people like me who have fond memories of hours spent at play in the past.

Looking to 2014, here’s where my focus will continue and grow on Brooklyn Wargaming and the tabletop each week.

World War II

For years, I’ve played a lot of FOW with a big focus on Western Europe. To start the year, I’ll be playing a beach landing or two as a way to prep for the 70th anniversary of D-Day this summer, and I’ve also got a handful of other historic scenarios I’ve been working-up over the past few months.

a3ee242c52

Over Thanksgiving, my brother (another lifelong gamer like myself) handed me a copy of Antony Breevor’s Stalingrad and told me it was the best military history book he’d ever read. The highly-readable account of the vicious siege of Stalingrad has gotten my hooked on the idea of expanding my WWII gaming into the Eastern Front in the new year.

Desperate-Measures

As a first step toward this front of the war, I picked up the new FOW Desperate Measures book. While this intelligence briefing is centered on the closing months of the war battled among German and Soviet forces, there’s also a newly-released updated edition of the FOW Red Bear book which gives a broader look at the Allied forces on the Eastern Front. These resources coupled with my historical reading on Stalingrad have whet my appetite for fielding some large masses of Russian forces on the table. A couple other guys at the club in Brooklyn have already started putting together some of Stalin’s finest and I’m very much looking forward to the Eastern Front opening up my WWII gaming with some scenarios this year.

716532

I spent a chunk of the past year reading Rick Atkinson’s Guns At Last Light, the third book in his World War II Liberation Trilogy. The book’s focus on the D-Day landings through the campaigns in Western Europe to the fall of the Third Reich squares with the majority of my FOW gaming from the past year. Working my way back through Atkinson’s books, I’m just starting in on The Day Of Battle for Christmas. As with my new swing in interest toward the Soviets and Eastern Front, I’m looking to Atkinson’s second WWII book to fill in my knowledge on the southern European campaigns in Sicily and Italy. Whether I get some Italian troops on the table by year’s end remains to be seen, but I’m really looking to 2014 as another big year of WWII gaming and learning.

Seven Years War

I grew up in Western New York State and then lived for a period of time in Western Pennsylvania, so the French and Indian War has always lingered as an interest but has never found its way into my gaming.

lastmohicanpen

James Fenimore Cooper’s The Last of the Mohicans and other books in his Leatherstocking Tales series have also been favorites since boyhood. These colorful stories are set within the wilderness backdrop of the colonial wars of the Americas fuel much of my love for the French and Indian War period, and my visits to historic sites like Fort Niagara and Fort Necessity have added physical understanding to the frontier conflicts of the period.

ageofreasonrules

Toward the end of 2013, a fellow club member introduced me to the Warfare In the Age Of Reason rules and the Seven Years War. While my experience gaming battles from the period have thus far had a European focus, my long-time interest in what most consider the world’s first global-scale war holds tremendous interest for me. To this end, I hope to make wargaming the Americas front with the FIW a project for the coming year. Modelling 15mm miniatures of colonists, French, British and Native Americans, along with requisite early American frontier terrain, is sure to be making an appearance here in the coming months.

World War I

While I’m on the subject of world wars, I can’t help but acknowledge the calendar and the 100th anniversary of the beginnings of World War I this coming July.keegan_first_l

My only real exposure to the war so far has been with John Keegan’s excellent The First World War. I’ve read a half-dozen of Keegan’s books, and his 1999 overview of the Great War gave me a solid introduction to a war that’s often overlooked by most Americans like myself. Clearly this is a major period in modern warfare I could stand to learn more about.

9780385351225_p0_v1_s260x420

To get myself back into the period, I’m planning on reading Max Hasting’s Catastrophe 1914: Europe Goes To War which made many top nonfiction lists at the end of 2013. I’ve only gamed WWI once with a 28mm French-German trench warfare scenario at a convention back in 2011, but there are a number of club members with miniatures from the period I may prod into using in some games this year. There are also rumors afoot that the makers of FOW are expanding into WWI just in time for this year’s anniversary, but for now I think some time with a few good books should be enough tribute from me in 2014.

And…

I can’t really tell with complete certainty where this coming year in gaming will take me. Like with most battle plans, a grand strategy can be laid out but actual events often unfold very differently in the fog of war. I can say there will be more miniatures, more scenarios and more completely fresh games to come here on Brooklyn Wargaming by New Year’s Day 2015. For now, here’s to old fronts not forgotten from 2013 and new fronts to come in 2014.

Flames of War: Metropolitan Wargamers Tanksgiving 2013

Tanksgiving PicAbout ten of us at Metropolitan Wargamers in beautiful Park Slope, Brooklyn kicked off the holiday season this past weekend with a day of WWII armored action in conjunction with our first Flames of War Tanksgiving event. The official rules for the event called for 1500-point companies facing off in multiple games throughout the day. Given we had so many new players interested in playing their first games of Flames of War, a few of the more experienced players decided to play host with our own forces brought along for the day over two tables.

FFAMissionThe bigger of the two tables featured Allied forces facing off against Germans in a Late War Western Europe scenario. The Flames of War website offers a group of basic missions of increasingly-complex scenarios, each easily playable in about three hours. Given we were dealing with an entry-level game, we went with a beginner-friendly Free-For-All mission with two 1500-point companies on each side.

IMG_2442Allied defenders (left) and German attackers (right) deployed

Since this was a tank-focused game, we went easy on terrain with just a smattering of wooded areas, buildings and fields spread over the table. The Allied forces defended, beginning on the side of the table defined primarily by a small river crossing bridge on the Allied right and a field and nearby farmhouse on the Allied left.  On the attacking German side of the table, a walled farm complex surrounded by a tree-lined road sat to the German left and a group of wooded areas to their right. A small town was situated squarely at a crossroad at the center of the field.

IMG_2446Guards Armoured and 101st Airborne started in the farm field

The British Guards Armoured Company began near the farm at their left, deploying its Sherman and Firefly tanks along with one platoon from the US 101st Airborne. Near the bridge, the US 4th Armored Company set its 75mm and 76mm tanks and finally deployed its 105mm artillery platoon at the center of the table edge hidden behind a copse of trees. The Germans deployed Panzer IVs, two Tiger tanks and a Grenadier platoon near a forest at their right. A large group of Panthers started near the center behind the small town with a supporting dismounted Panzergrenadier platoon on their left and a two-tank Panther command platoon at their extreme left.

IMG_2444US 75mm and 76mm Shermans tanks at the bridge near the German objective

With the German player starting things off, their main thrust of Panthers moved toward the center of the table while their Panzer IVs and Tigers made a move looking to shutdown to the advance of the Guards Armoured and US airborne troops. The Panzergrenadiers made their way for the walled farm and the treeline at the neighboring road, and the commanding Panthers looped around the farm toward the river and the American right flank.

IMG_2448A Tiger sits burning after being hit by a Firefly

On the Allied first turn, the 101st Airborne made a beeline for the neighboring forest across from the field while tanks rolled into the gap between the forest and the field. A lucky opening shot from a British Firefly took out a German Tiger, providing one of the only bright spots for the Allies during the entire afternoon. The spotter for the US howitzers ran for the cover of the town’s buildings while the mass of American tanks on the right split to hold off the center German advance as well as the German command section’s coming end-run at the river.

IMG_2453The Armoured Guards take ferocious fire from the German tanks

In the second and third turns, the German players began running the table to their victory. A concentration of fire into the town destroyed the US artillery spotter, effectively shutting down any good chance of Allied artillery support. The Tigers began laying waste to the line of advancing Shermans in the field and rolling in the open. A failed assault on the German tanks by the 101st Airborne out of the woods stalled under a hail of machine gun before it began, but the Guards Armoured managed to route the Panzer IVs off the board and whittle-down the Grenadiers making their way between the town and farm house nearby.

IMG_2460Panzer IVs and Shermans aflame as the 101st Airborne sprints across the field

By the fourth turn, German infantry making their way through the open both for the bridge and objective near the American artillery were mowed down under heavy machine gun fire from the US Shermans. Finding a gap amid the tank fight around them, the 101st made a dash to the next forested area while German tanks poured more fire into the British armor at the rear. At the bridge, American 76mm guns managed to destroy one command tank and bail the crew from the other. Unfortunately, the remnants of the American armor were outgunned and entangled in the burning shells of their comrade’s tanks. With nothing left to stop the advance, German tanks rolled to the center and seized their objective.

IMG_2458Nothing left to stop the German advance to victory

While things raged away on the European table, an Early War showdown between 1500-point British and Italian forces in Africa dustily clamored away one table over. You couldn’t get a more different game with less advanced equipment and differently skilled troops battling in a desert environment laced with prepared defensive positions. Since most of my gaming has focused on Late War Europe, the earlier war stuff fascinates me and I’m definitely going to make some time to try my hand at this other period soon.

IMG_2440Early War Italian and British desert action at Tanksgiving in Brooklyn

As it turned out, the Italians took the game on the Africa table, making our first Tanksgiving event a 2-0 victory for the Axis powers. I learned a mass of German armor is really hard nut to crack unless you’ve got some effective artillery and enough infantry to assault and push to an objective. Every game under my belt gives me ideas for the next. Win or lose, I think a few hours of playing may have hooked a couple new players on Flames of War. For that, we’ll all be thankful as we deploy our platoons for another game very soon.