Flames of War: 70th Anniversary Battle Of The Bulge Mission

Bulge82nd

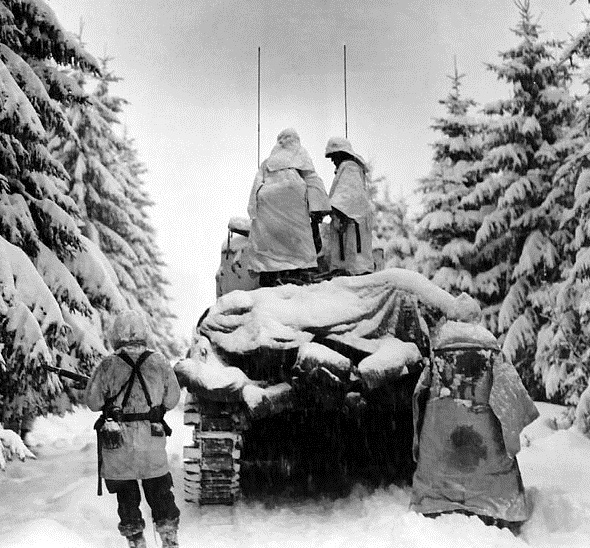
This past week marked the 70th anniversary of the Battle of the Bulge fought between Allied and German forces in the snowy, wooded Ardennes region of Western Europe. The six-week German offensive through a frigid December 1944 and January 1945 surprised Allied forces and proved to be costly for all involved. At its conclusion, commanders on both sides counted nearly 100,000 casualties and much of the German ground and air reserves had been smashed as a result of their ill-fated gambit against the Allies.

BulgeMission

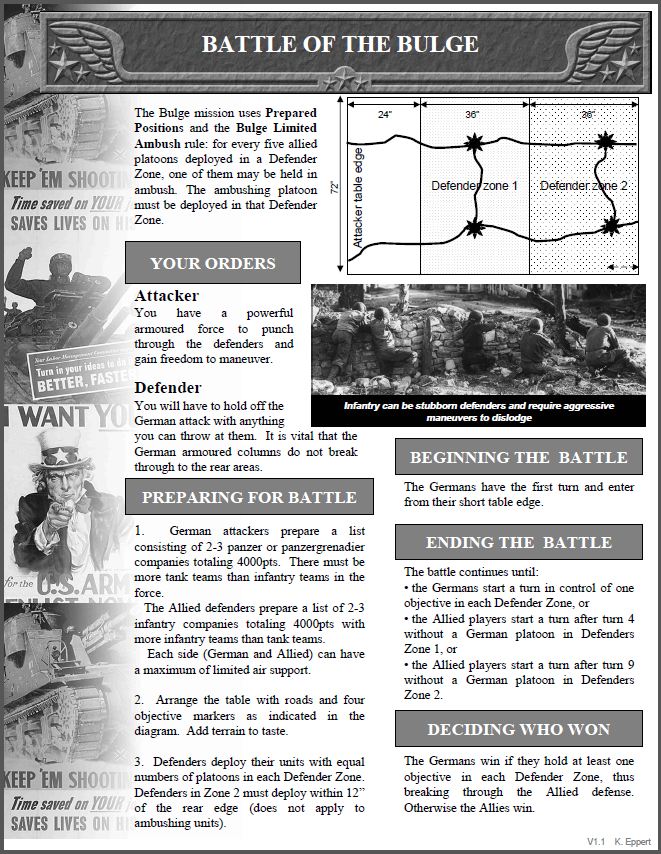
The Battle of the Bulge Mission rules from Flames of War

To mark the occasion, several of us met at Metropolitan Wargamers in Brooklyn, NY to run through the big Battle of the Bulge Mission available free online for Flames of War. The simple scenario plays out on a huge 6′ x 8′ tabletop with 4000-point forces on either side drawn from the Nuts! and Devil’s Charge books as well as the Panzers To The Meuse PDF. We set our table using a large off-white canvas with roads crisscrossing the forested field dotted with a few small structures.

101stabbulge

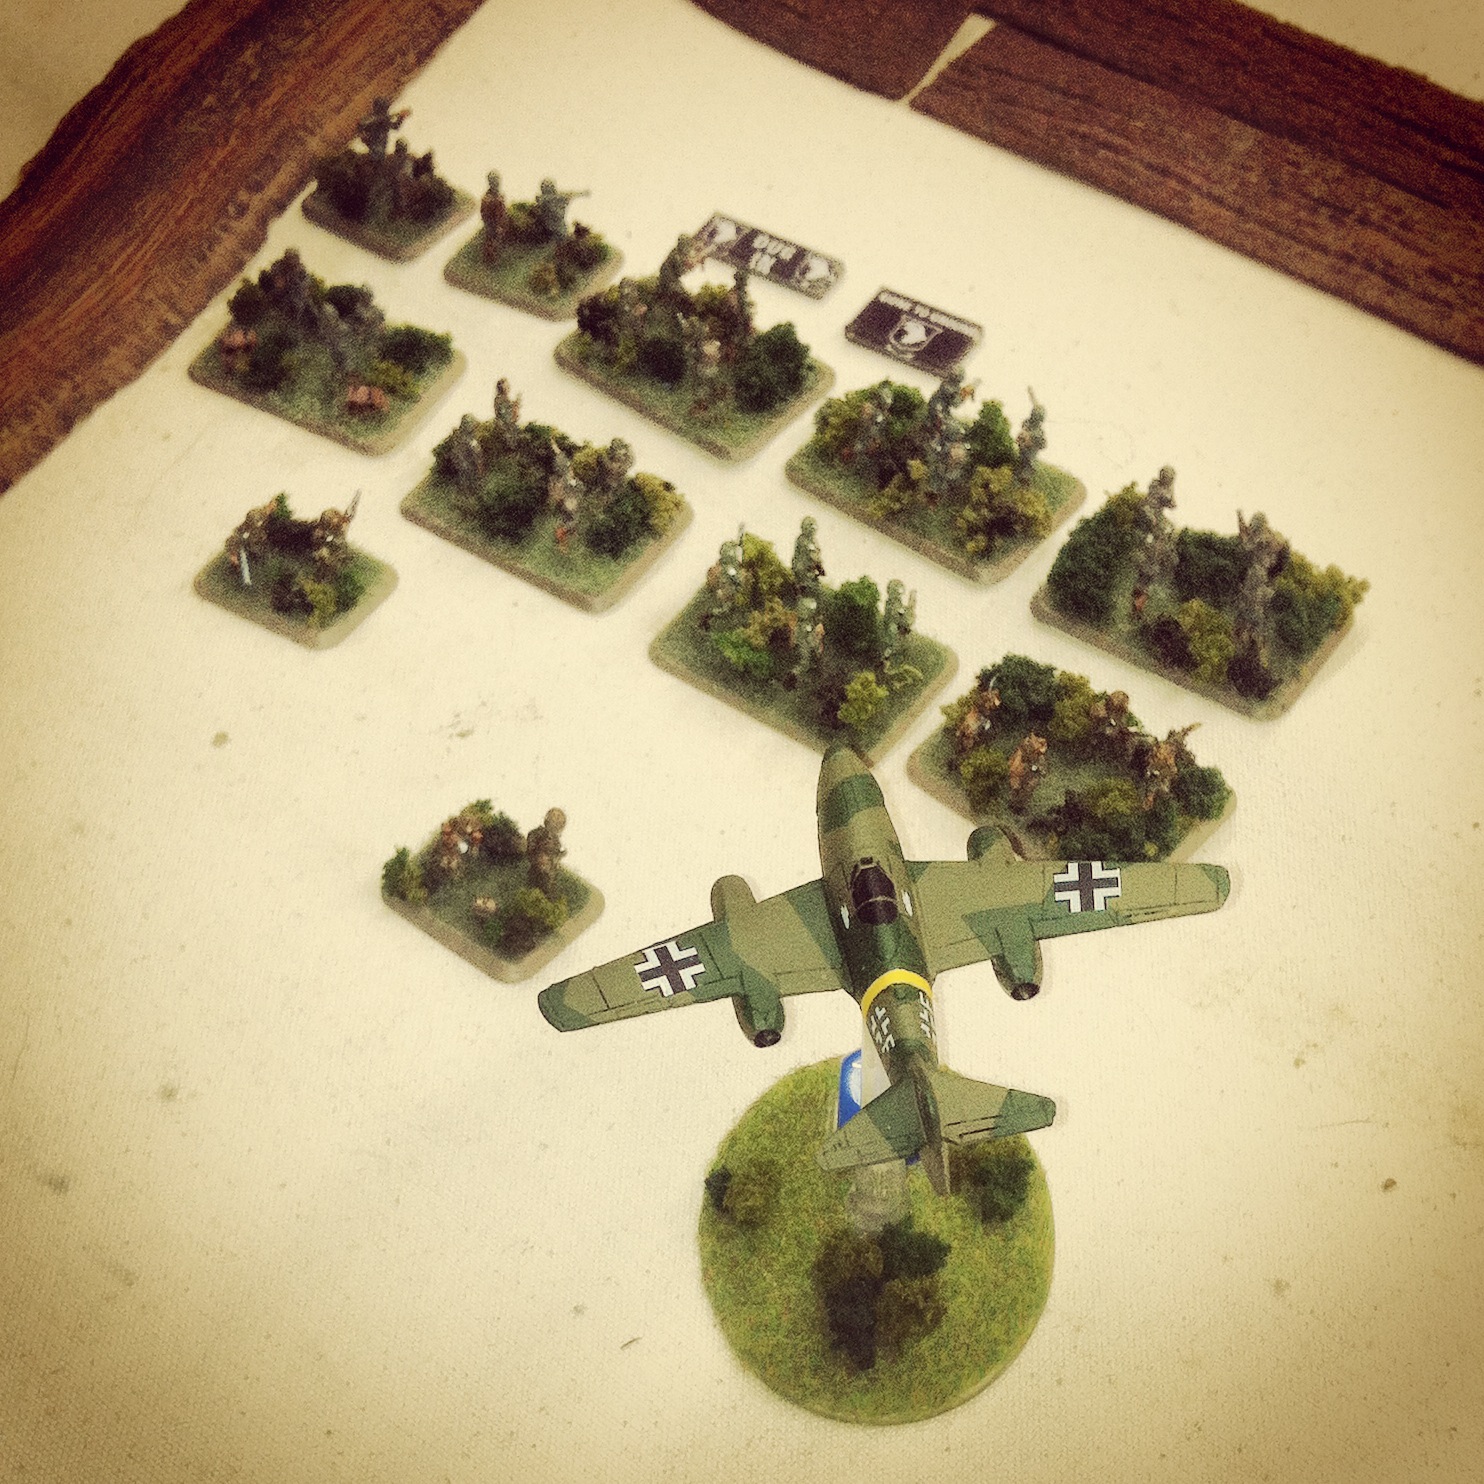
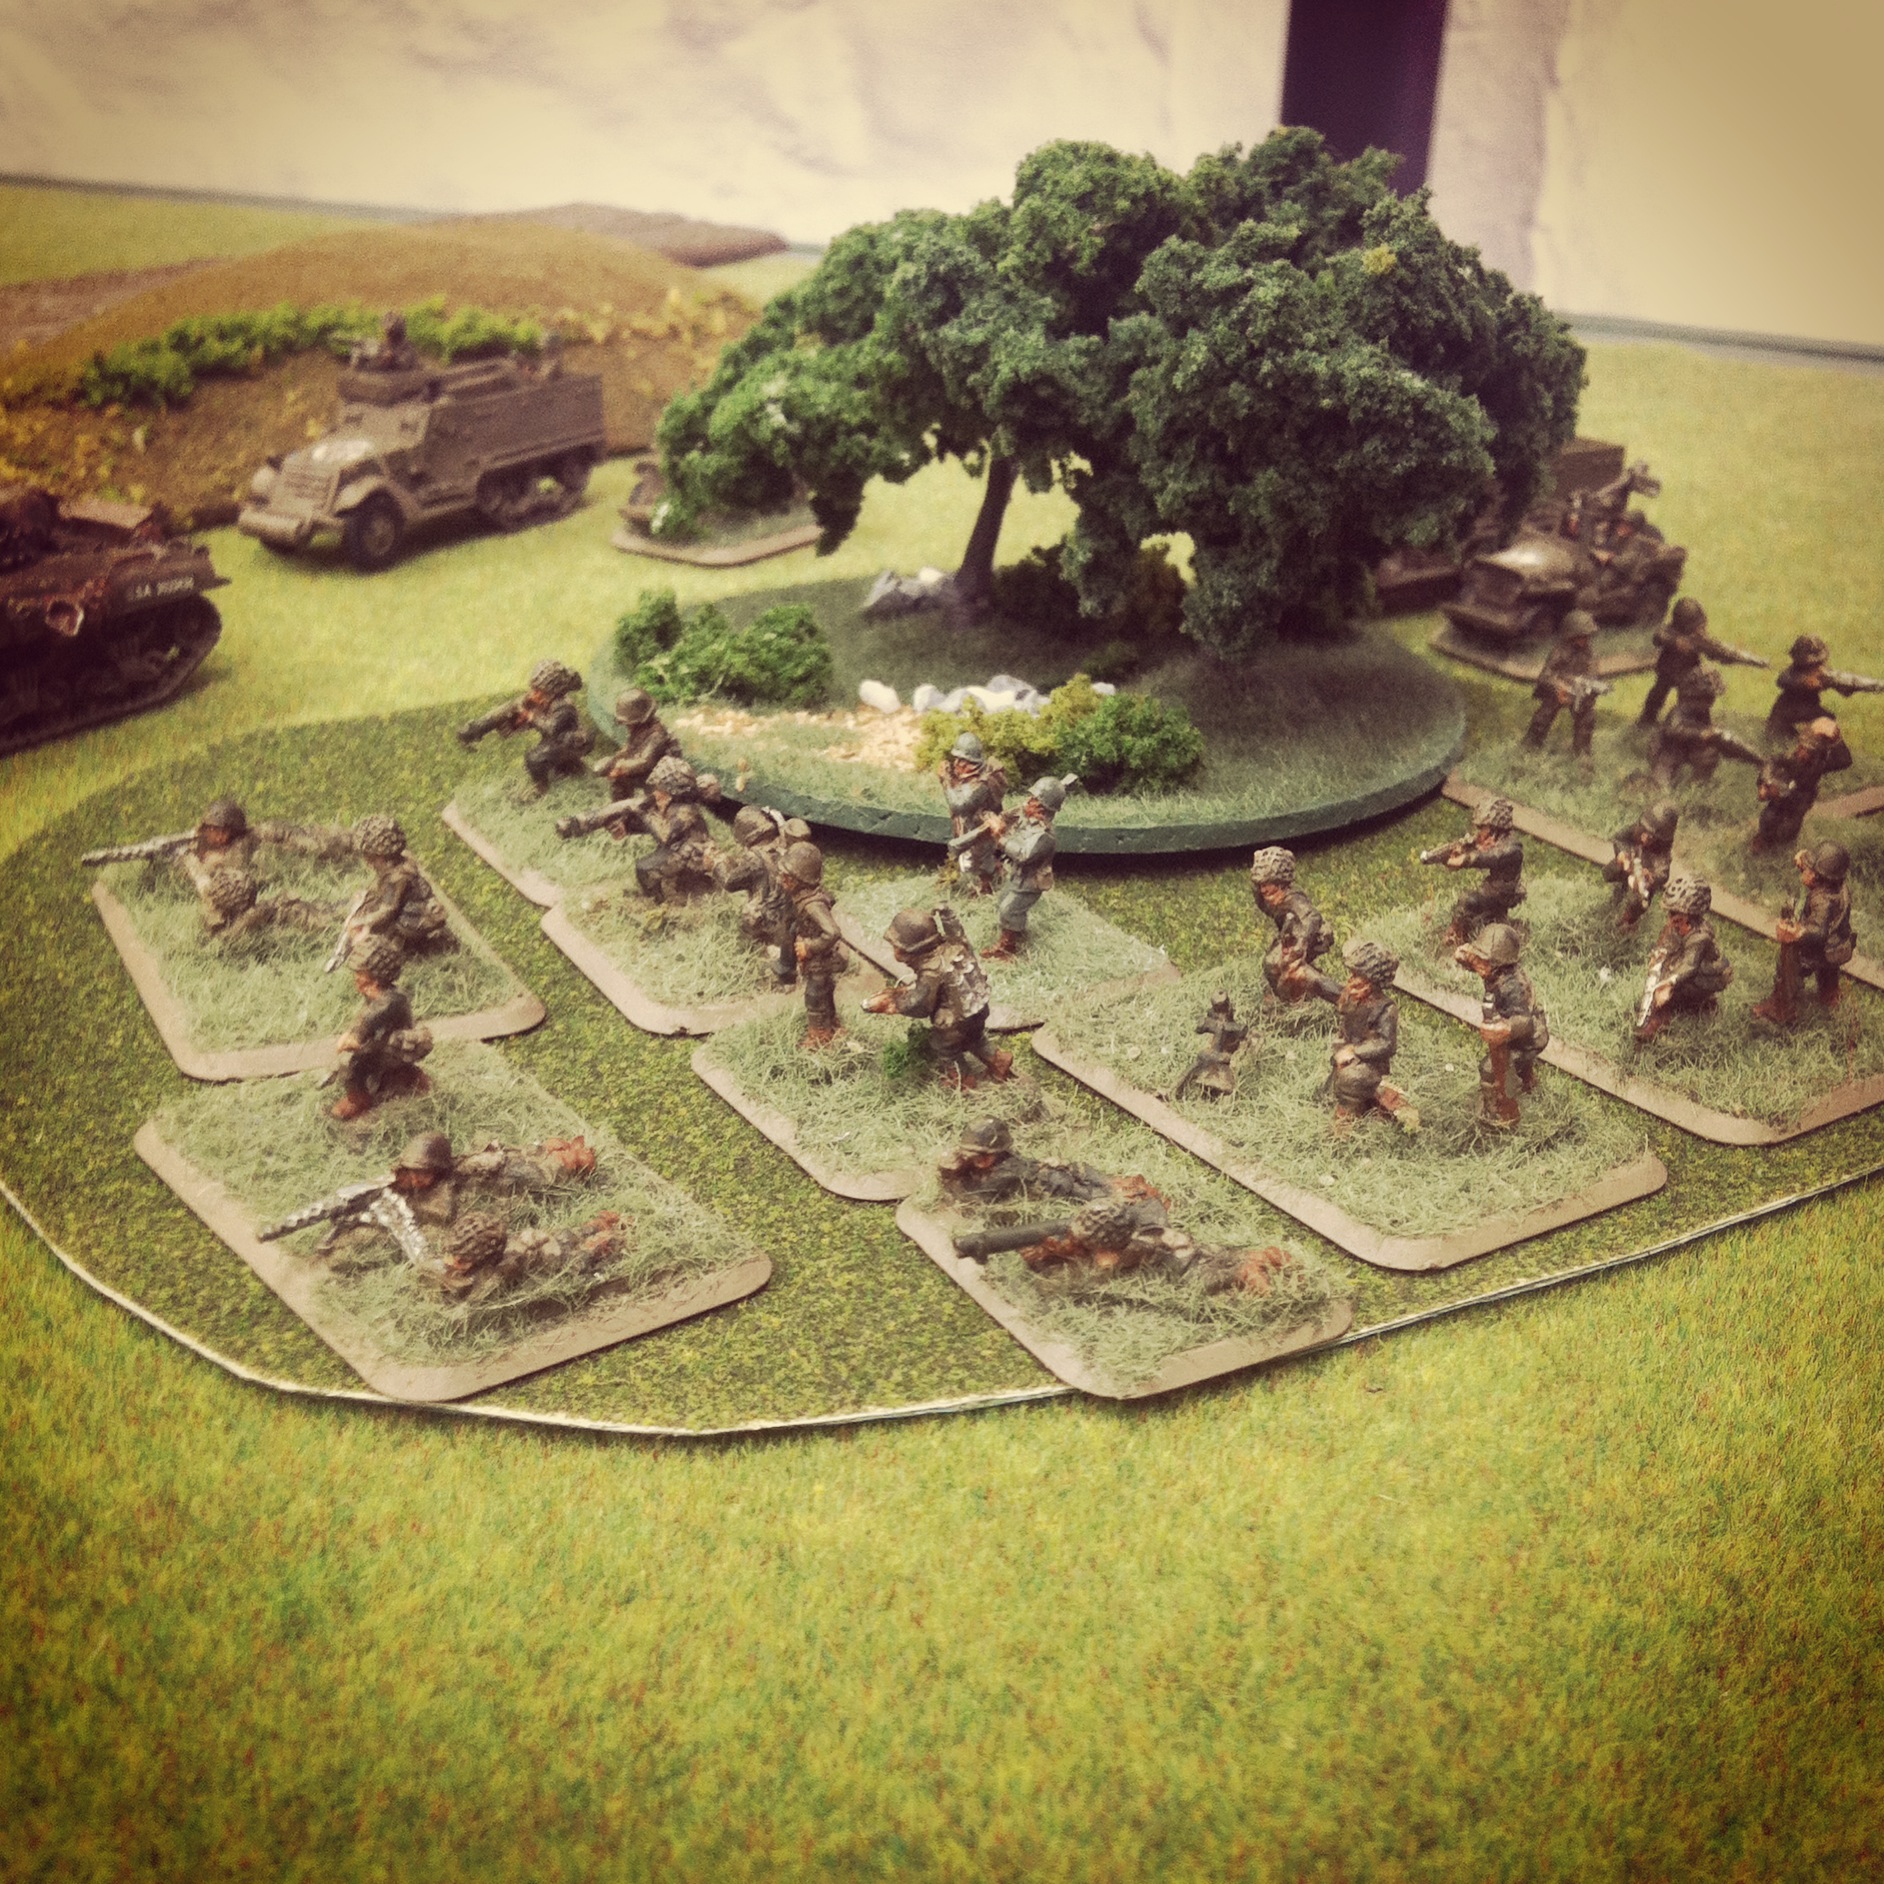
101st Airborne US Parachute Rifle Company from Nuts!

gliderrc

US Glider Rifle Company from Nuts!

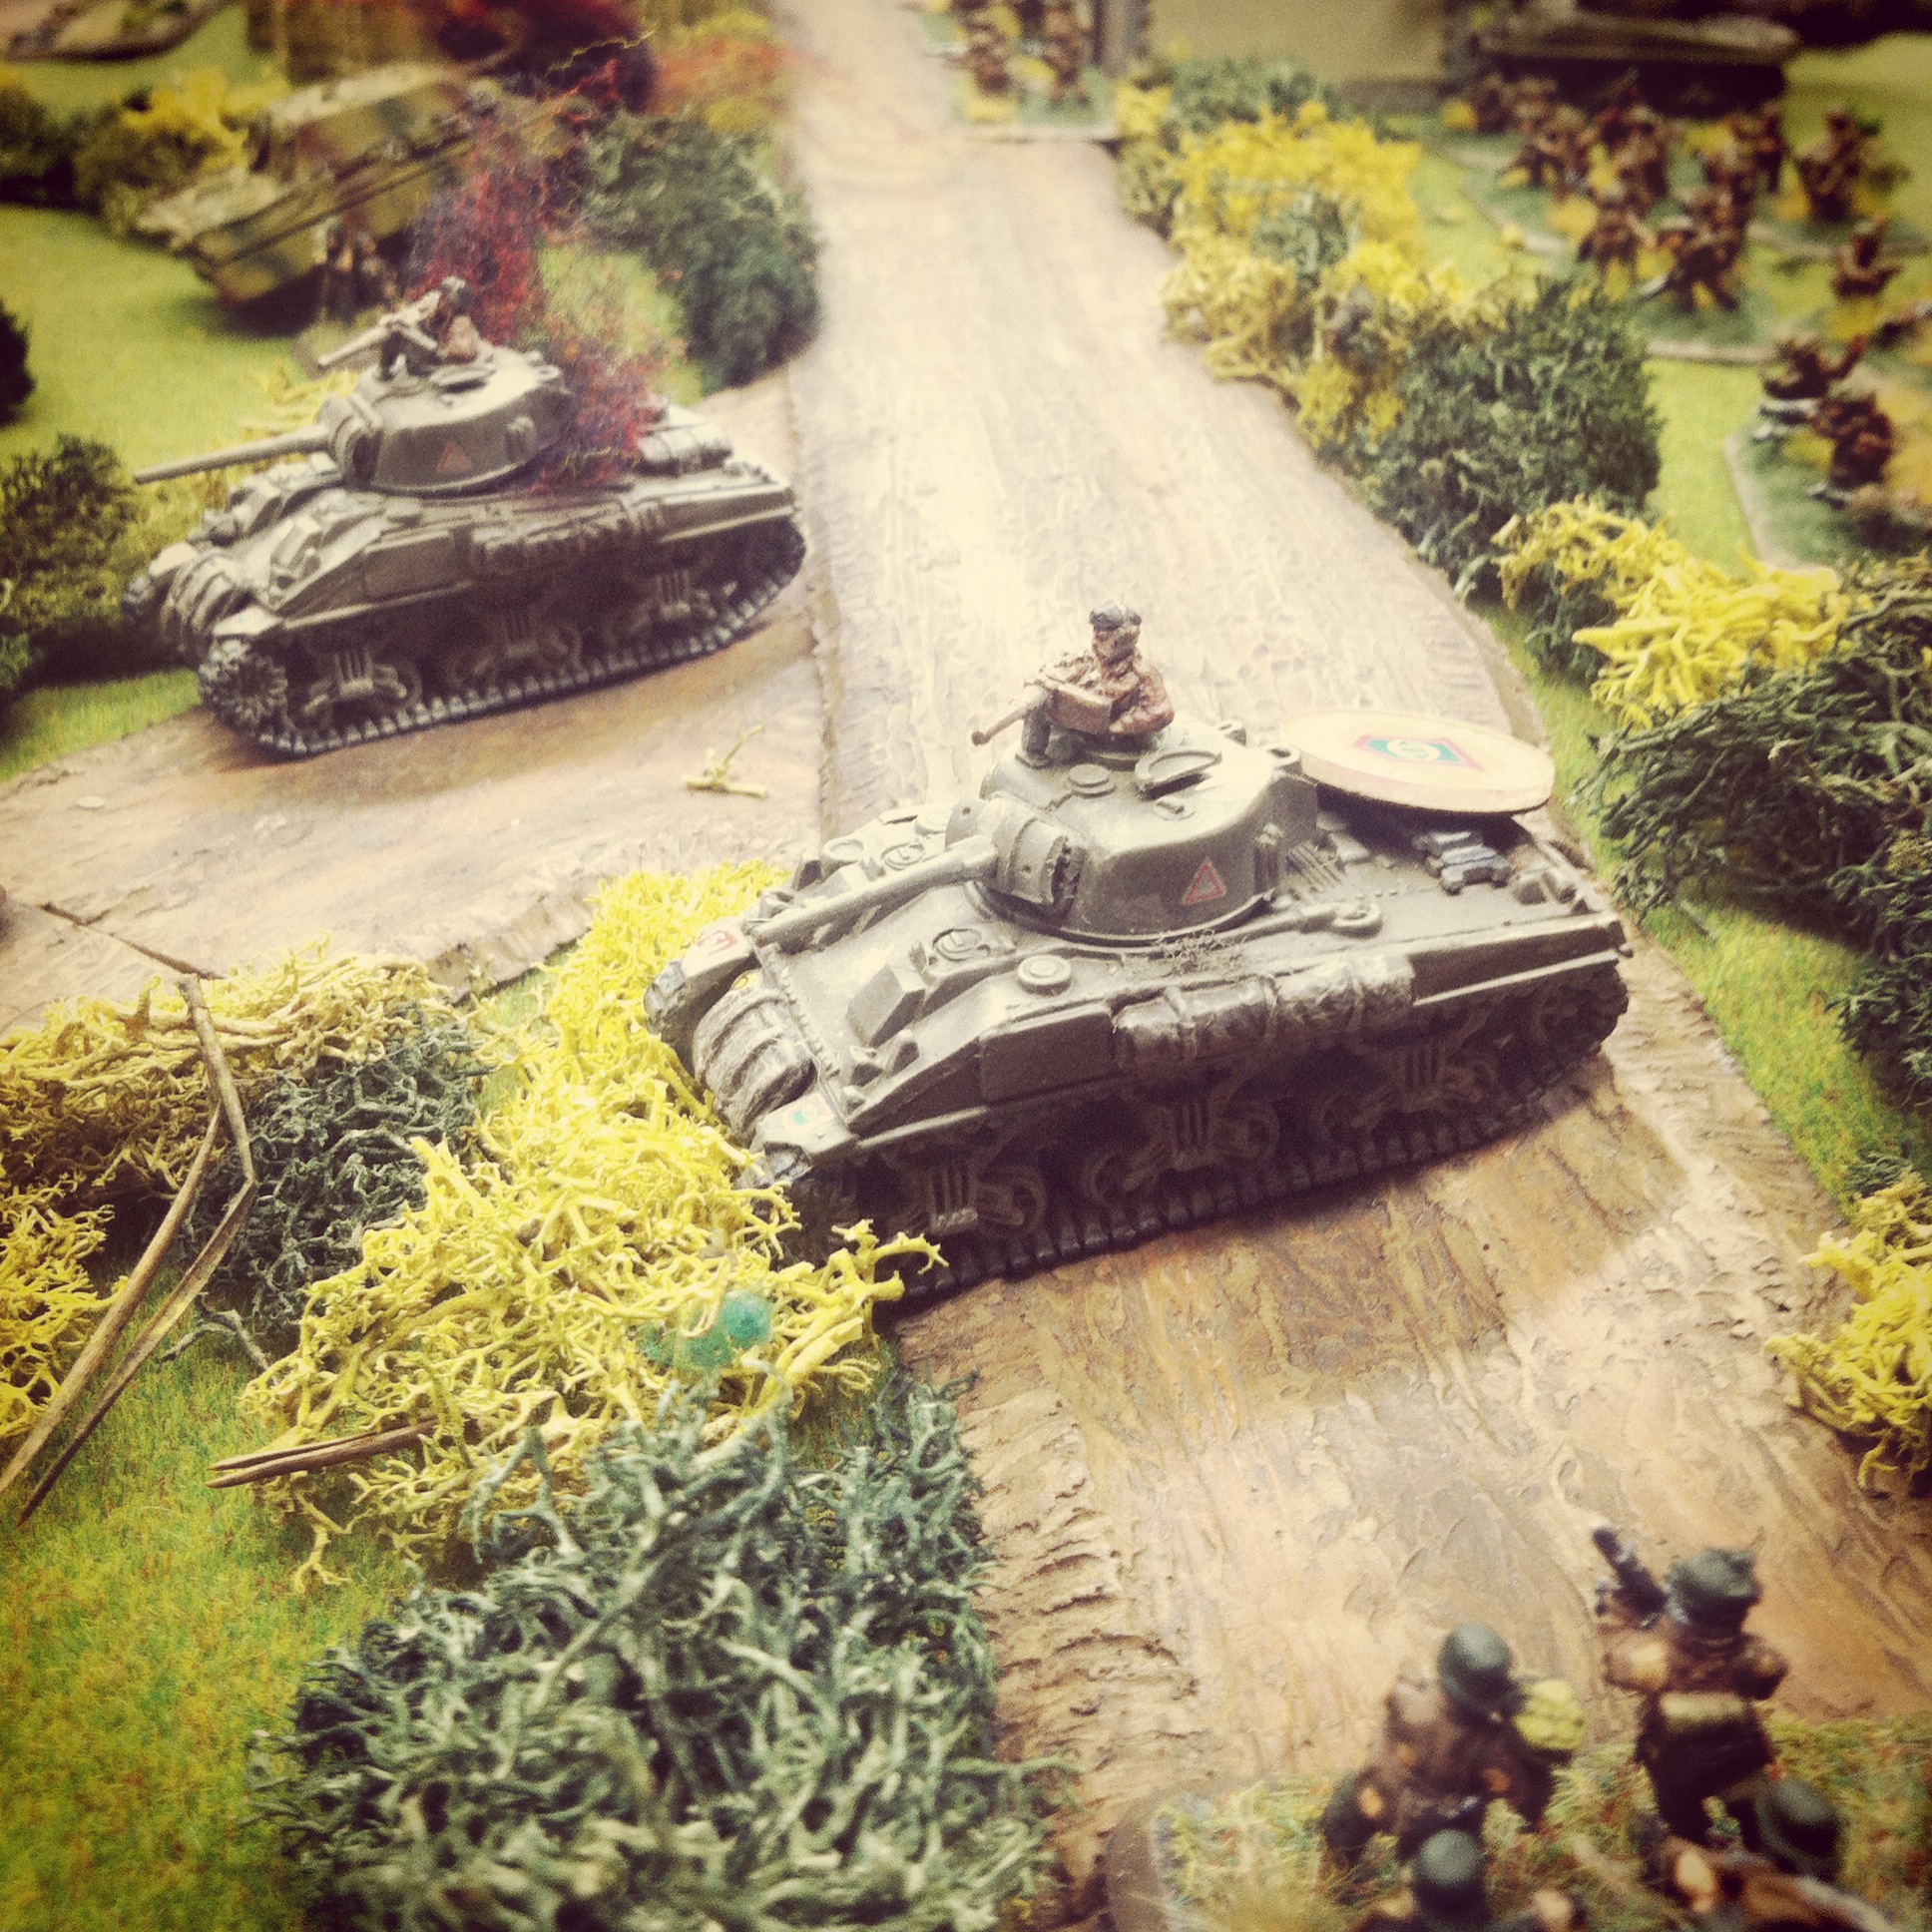
On the Allied defending side, I ran my US 101st Airborne Division “Easy Company” list made famous by the book and TV series Band of Brothers. Several special character Warrior figures were included in my list and I also added a hefty group of five M4A3 76mm Shermans and an 81mm mortar platoon. My partner fielded a US Glider Rifle Company, also with 81mm mortars and a 57mm anti-tank platoon. In support, his list was rounded out with M7 Priests, M18 Hellcats and a tank platoon with a Jumbo, two Easy Eights and two more M4A3 76mm Shermans.

 PLJustinBulge
Lehr Panzerkompanie from Panzers To The Meuse

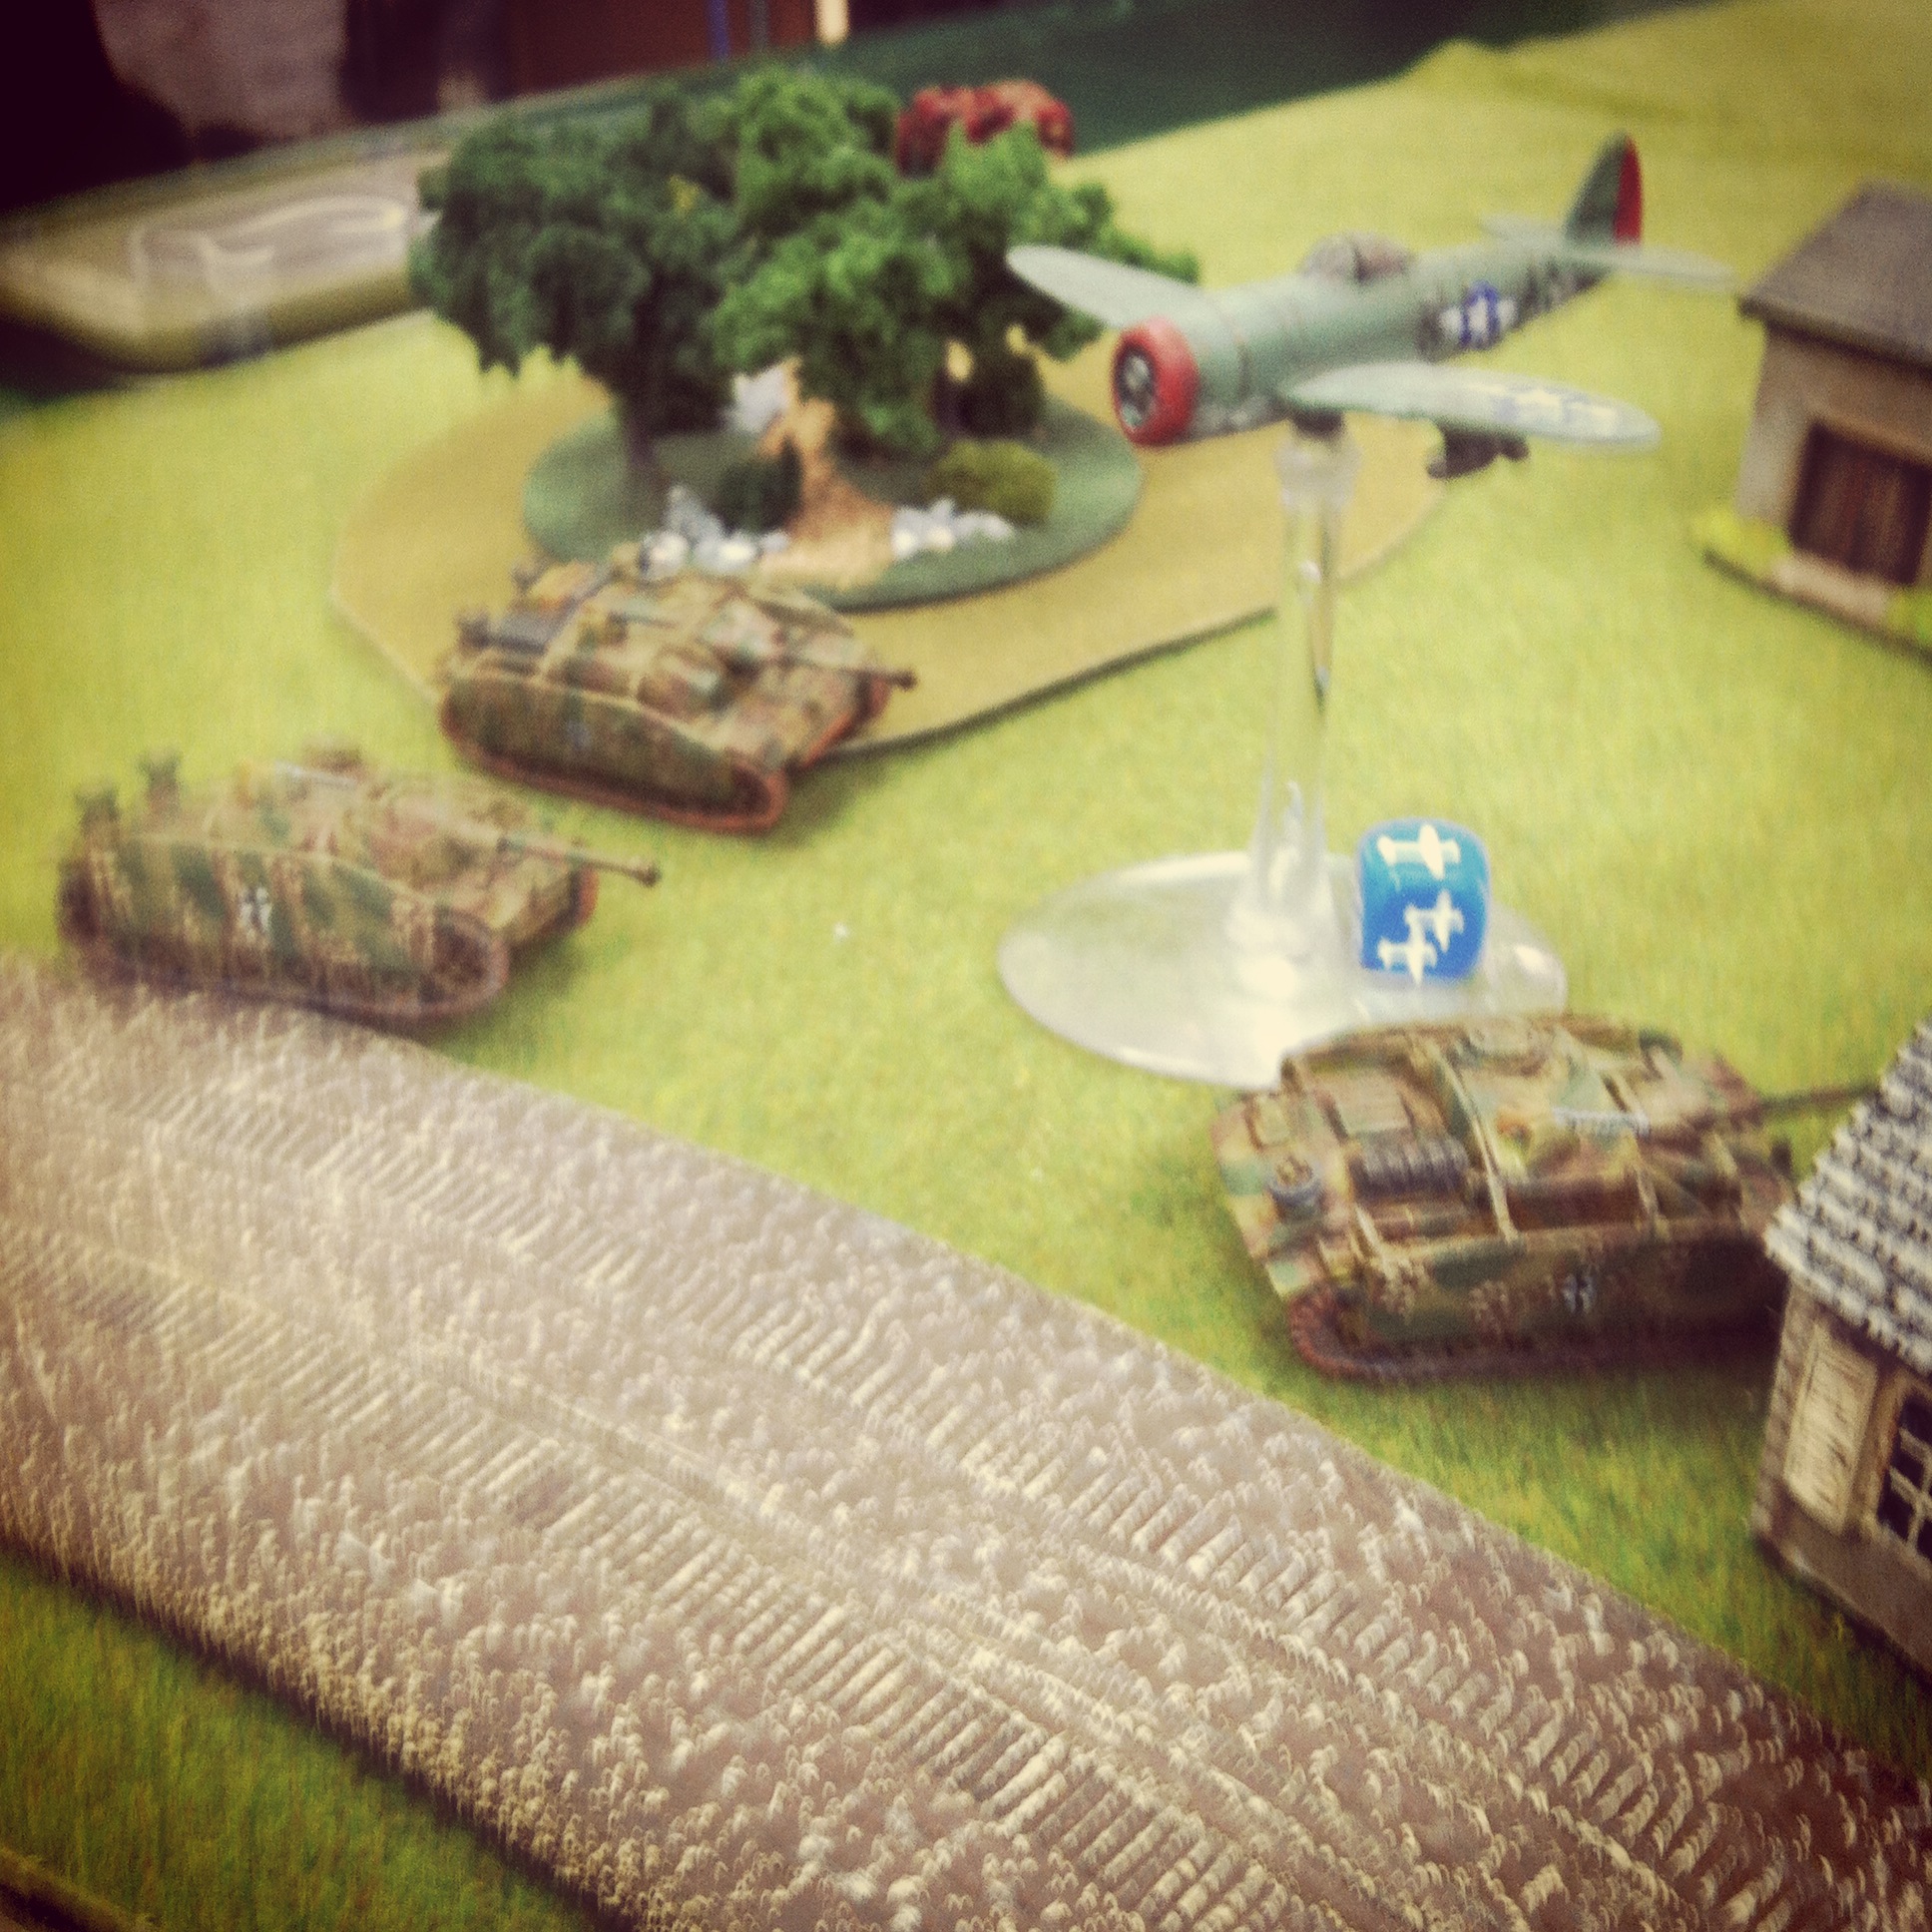
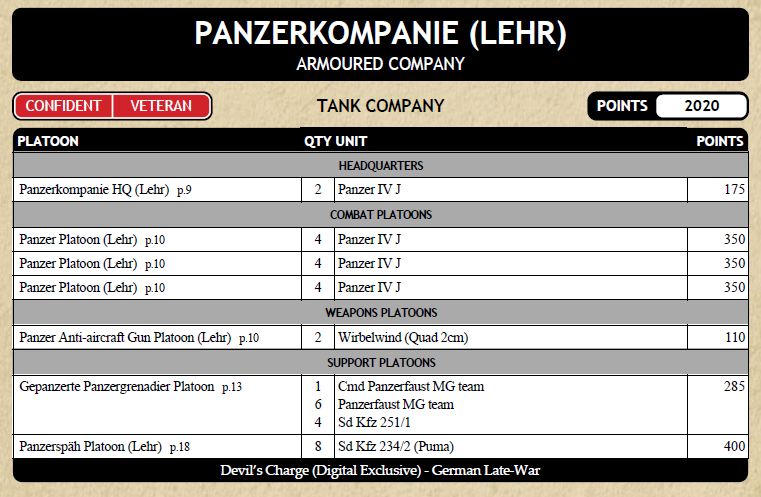
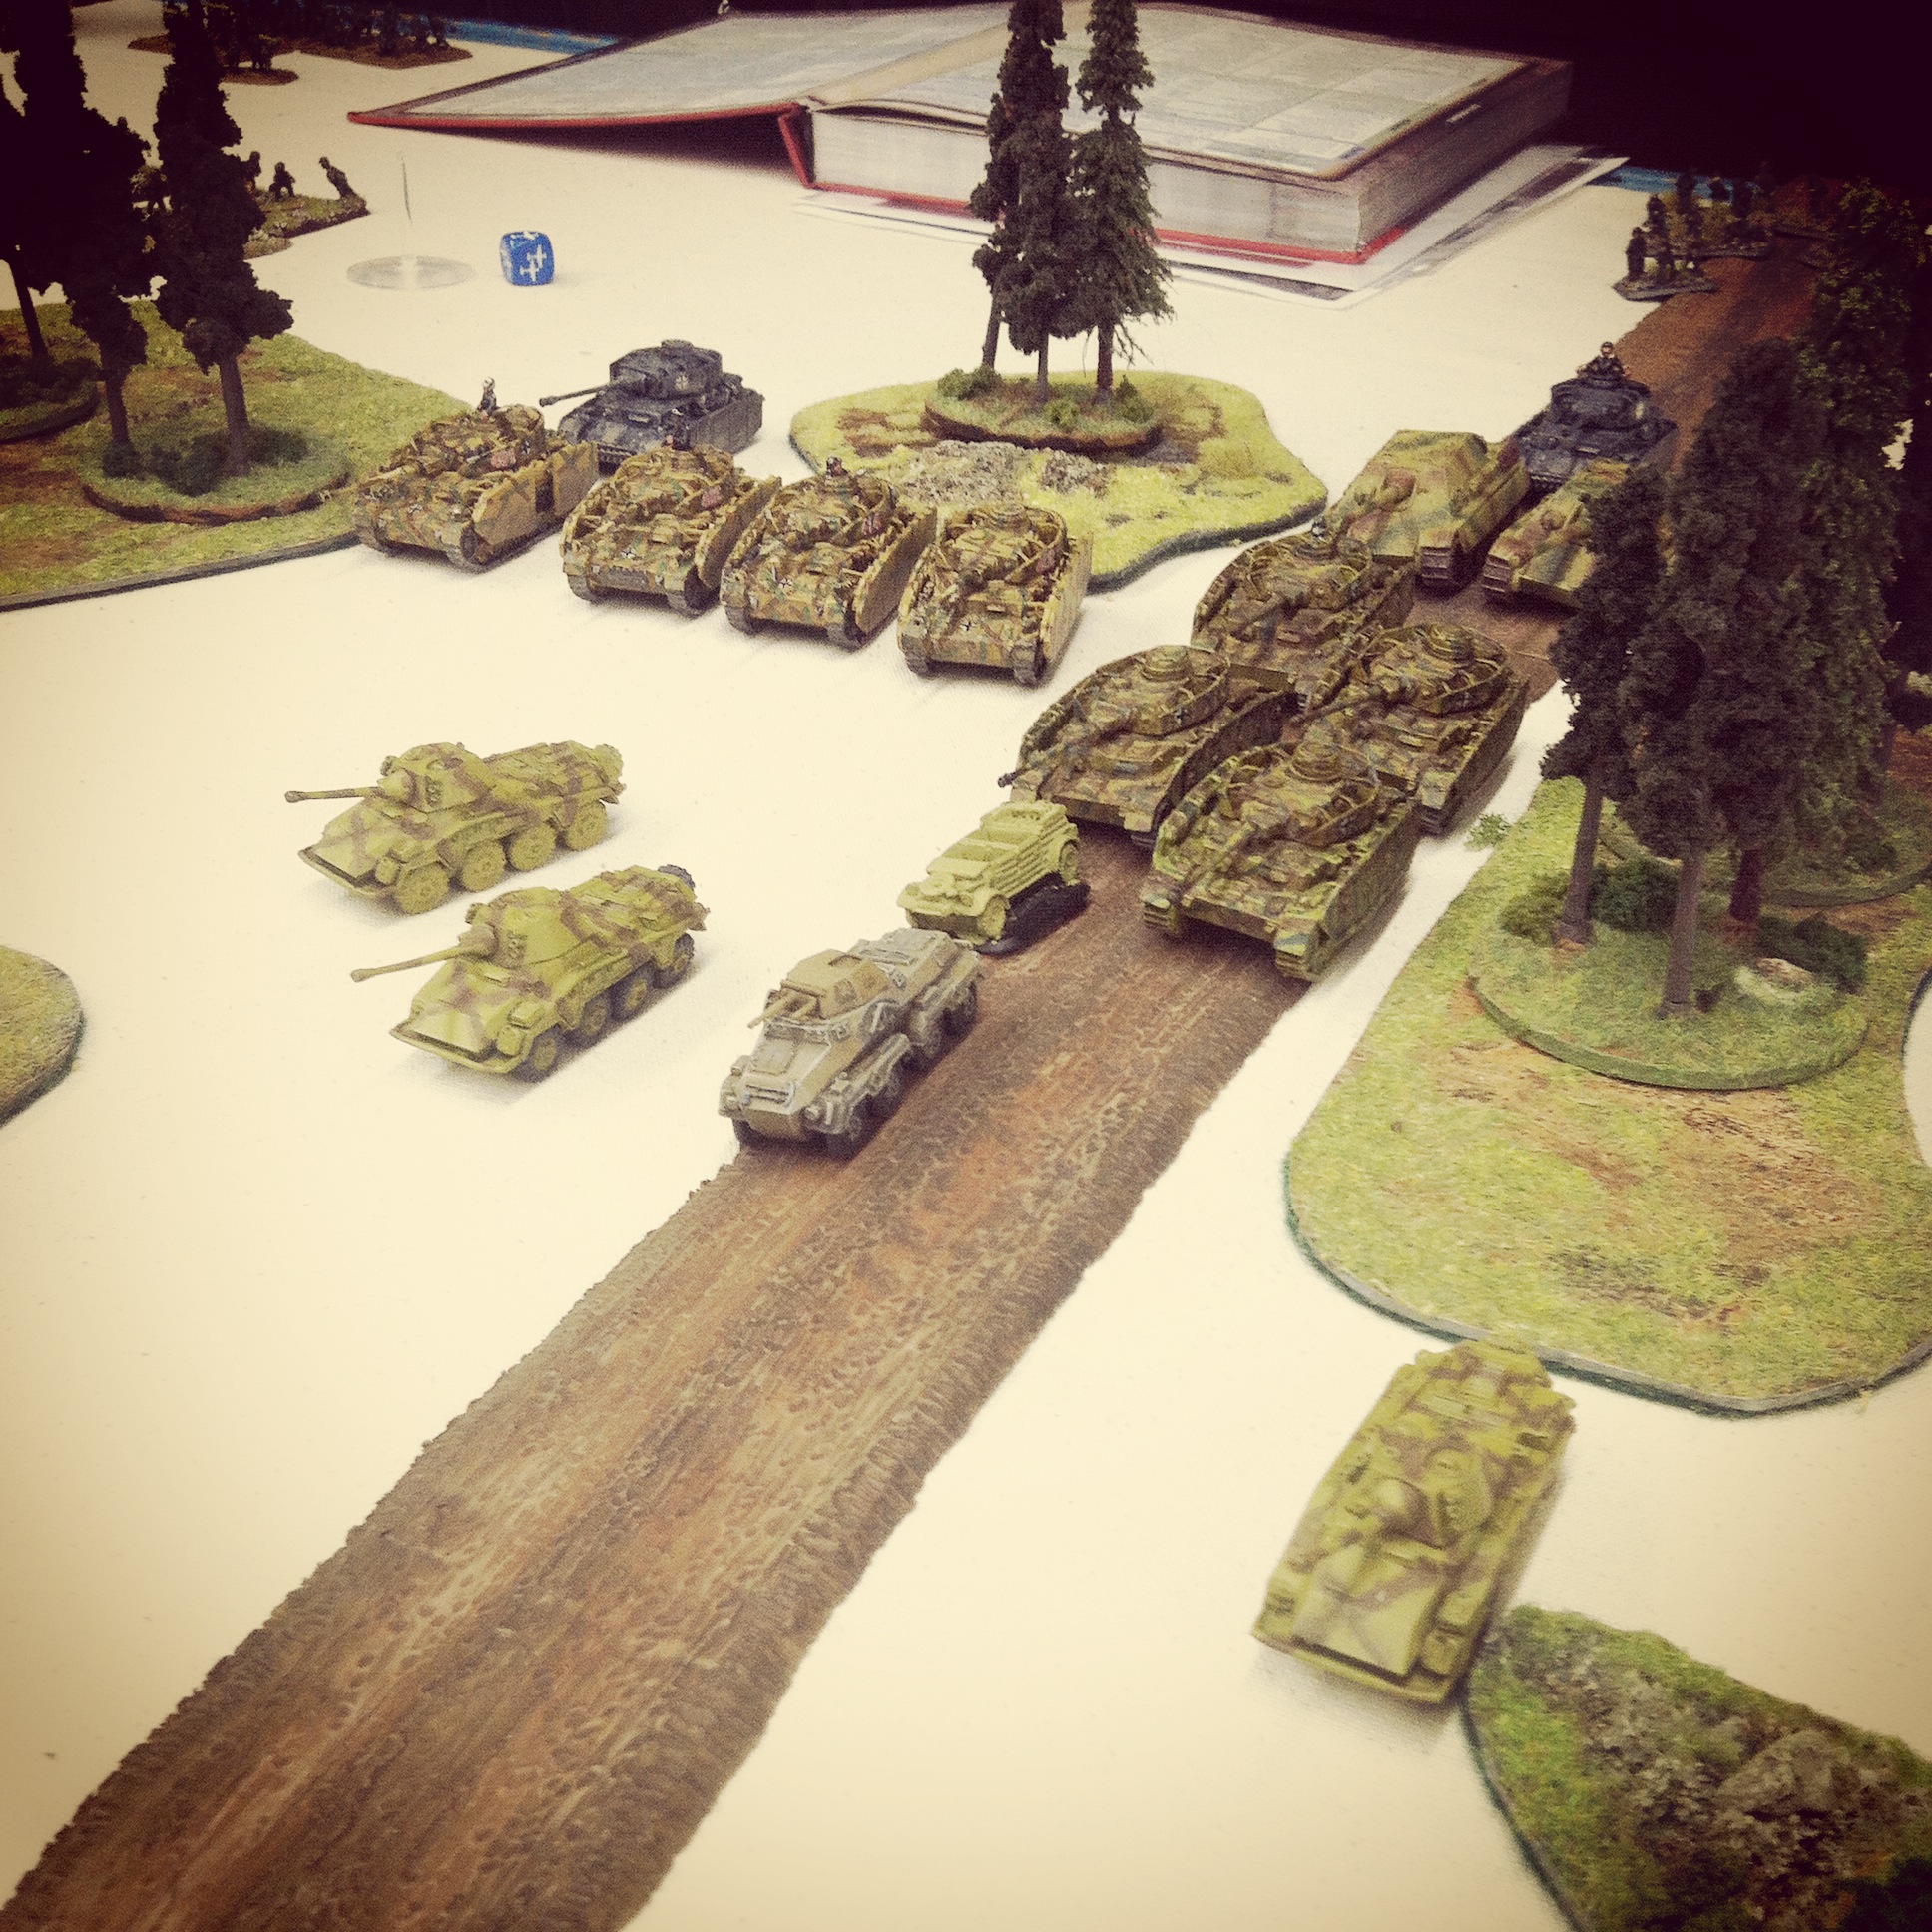
For the armored attacking Germans, both players pulled Lehr Panzerkompanie lists from the Panzers To The Meuse PDF from FOW. Across the lists, a swarm of Panzer IV platoons were accompanied by Panther G and Jagdpanther tanks, Puma armored cars, rocket launchers, Wirbelwinds and two Panzergrenadier platoons. To supplement their massive armored ground forces, the German players also opted for limited air support from a ME 262 A2a Sturmvogel jet plane.

IMG_4830

Initial Battle of the Bulge set up as German players plot their offensive

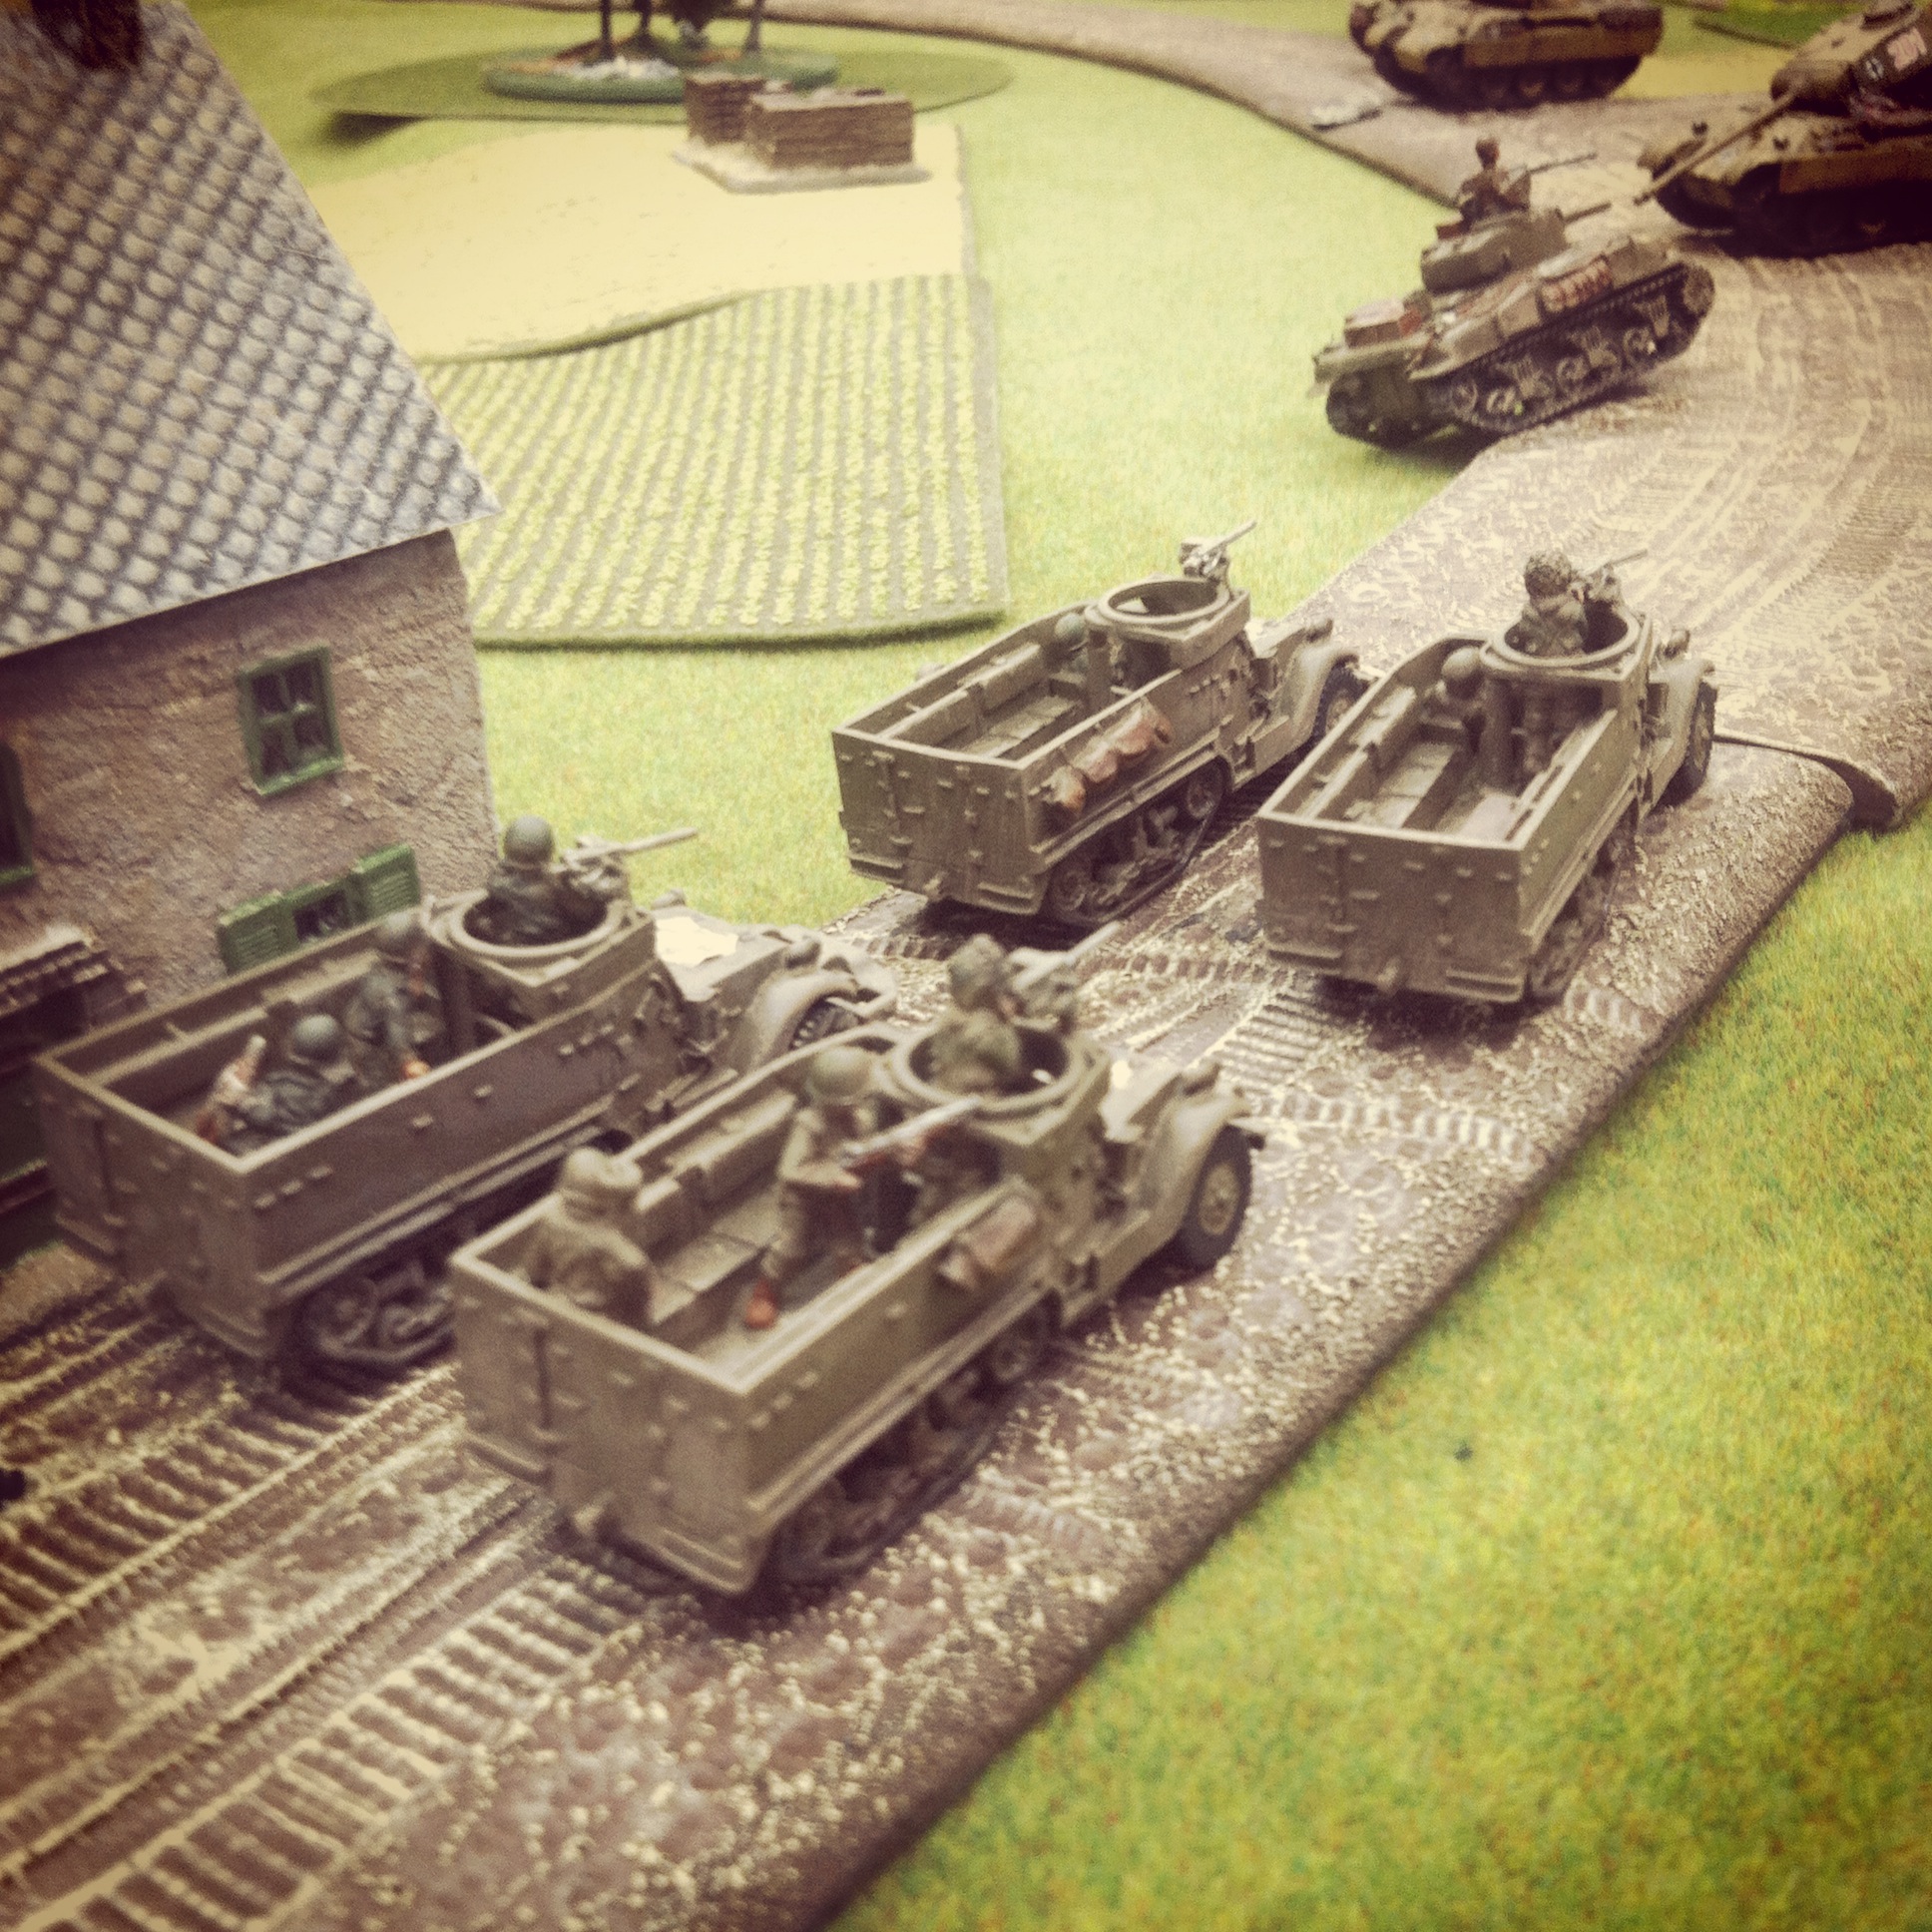
Per the scenario, the largely infantry US forces were deployed with the exception of our 76mm tank platoon and anti-tank guns which we held in reserve. The US anti tank platoon deployed at the center of the board with their M20 Greyhound scout cars, ready to spring support with the soft but deadly Hellcats to either flank.

IMG_4831

Panzer Lehr forces deploy and move toward the American right

IMG_4832

The German armored assault pushes to the American left

IMG_4833

German ME 262 jet attempts to dig the 101st Airborne out of their positions

The German forces moved quickly onto the board with reconnaissance moves from the Pumas stretching across the table. A mass of Panzer IVs and the Jagdpanthers rolled to the US right. On the American left, Panthers moved to cover in a small wood while the two platoons of mounted Panzergrenadiers pushed down the road toward a US rifle team dug into another woods looking to attack with an armored assault. At the rear, the first run of the Sturmvogel took after the US Airborne in position protecting an objective to no effect.

IMG_4834

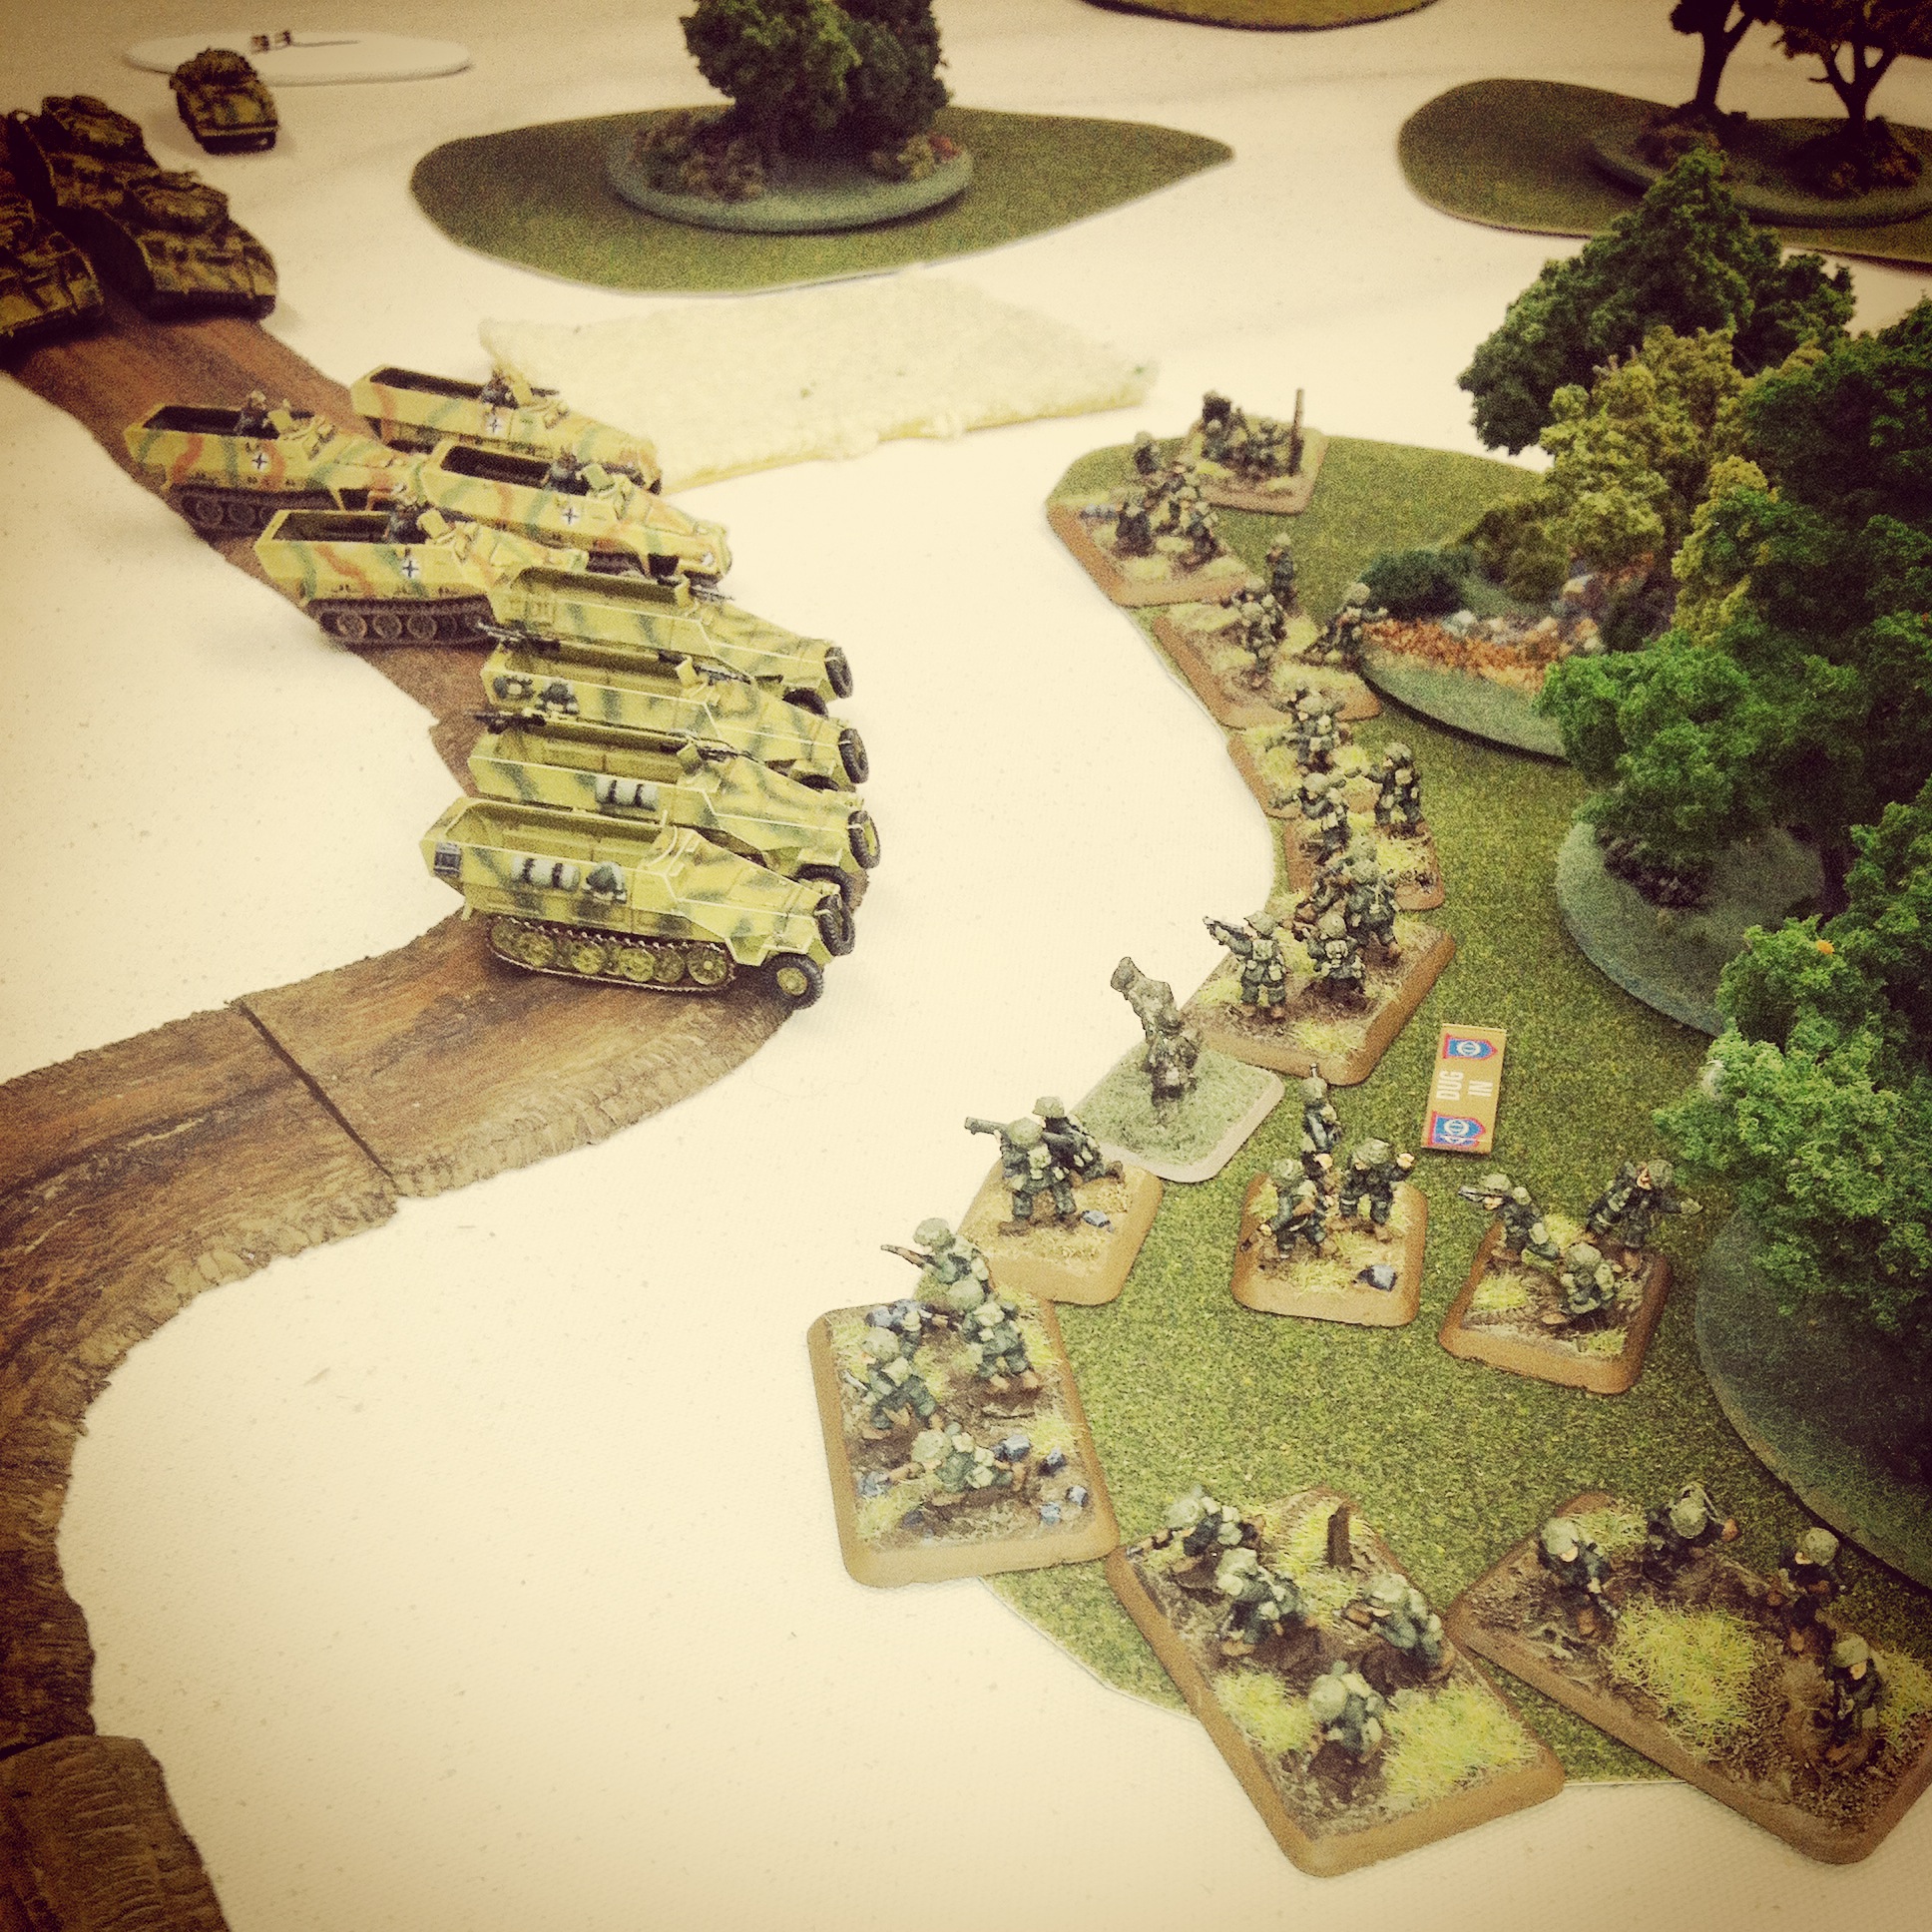
The German armored assault on the US rifles in the woods

The German armored assault commenced but was bounced back over the first couple turns with the Americans taking only a few losses from the protection of the trees. Panzer IVs moved in to support from behind the German halftracks and took fire from the Jumbo, Easy Eights and 76mm Shermans sitting in a treeline across the road. The Americans sprang their first ambush, placing anti-tank guns nearby the Panthers. While shots from the US AT platoon were unable to crack the heavy panther armor, their position would go on to strongly limit the maneuverability of the Panthers for the whole game.

IMG_4835

US 76mm tank platoon springs an ambush on the right

IMG_4836

US tanks receive heavy fire from the Panzer Lehr

IMG_4837

US Hellcats move to stop the German armor advance

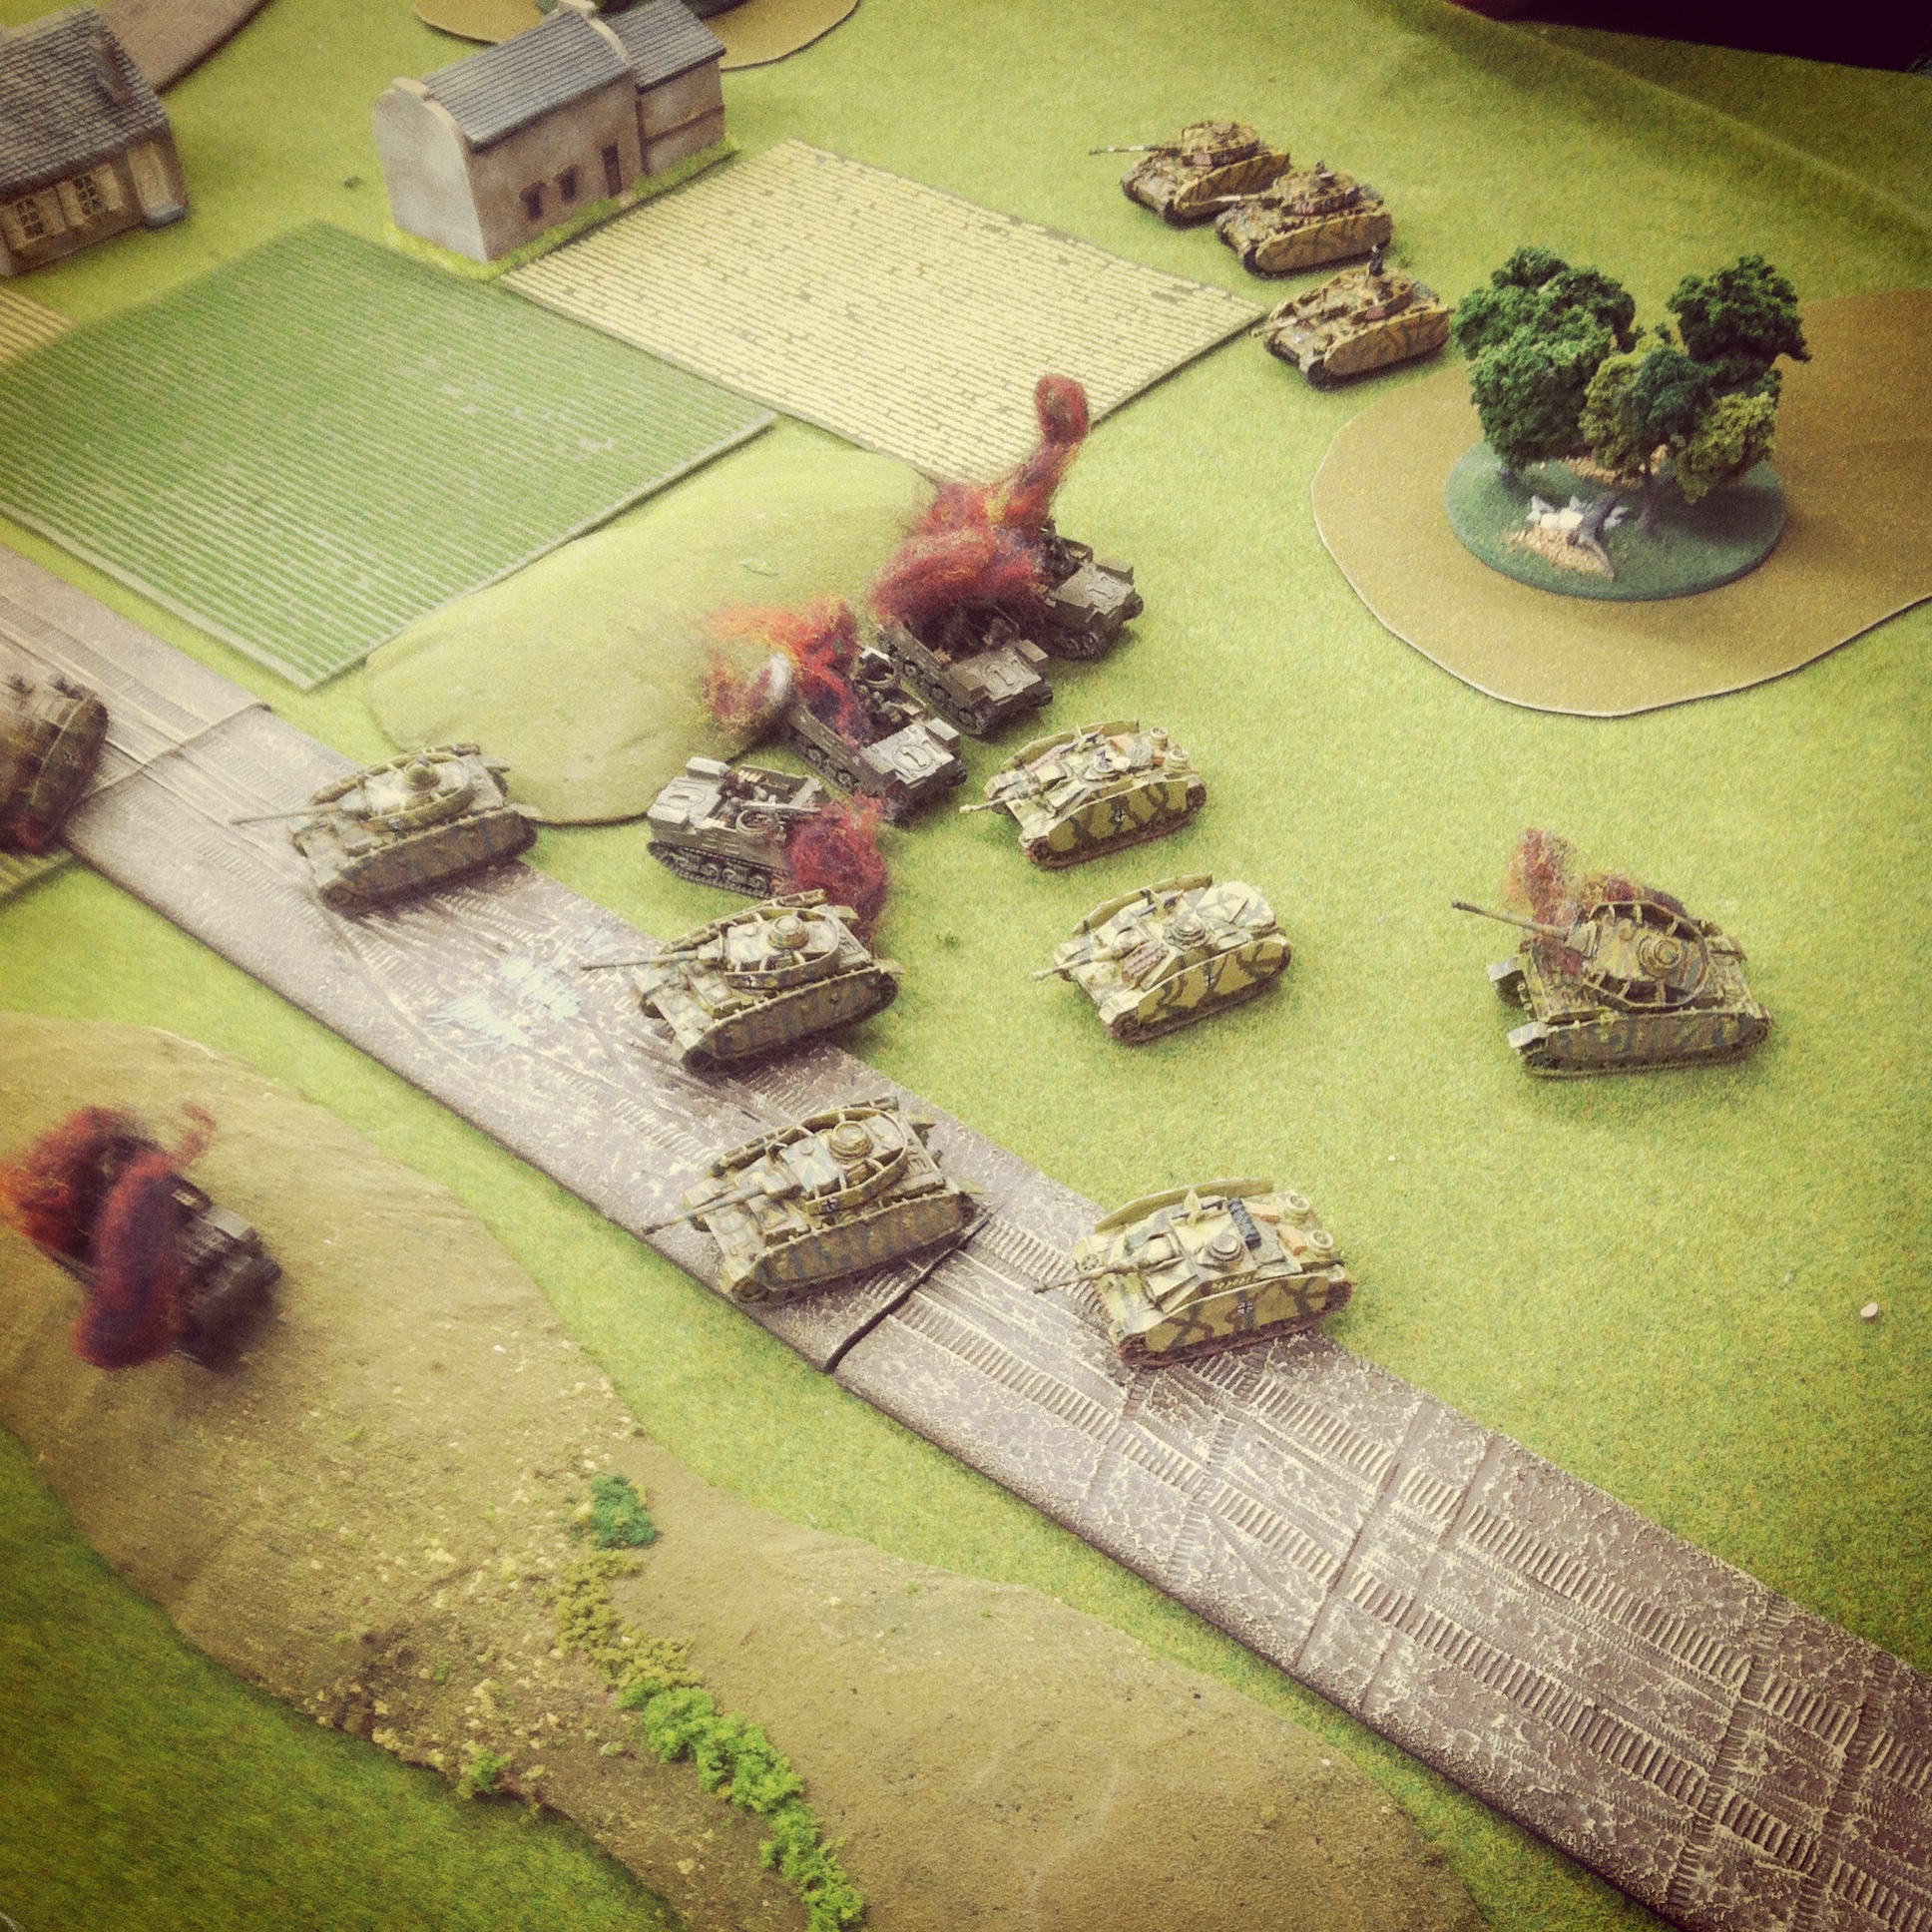
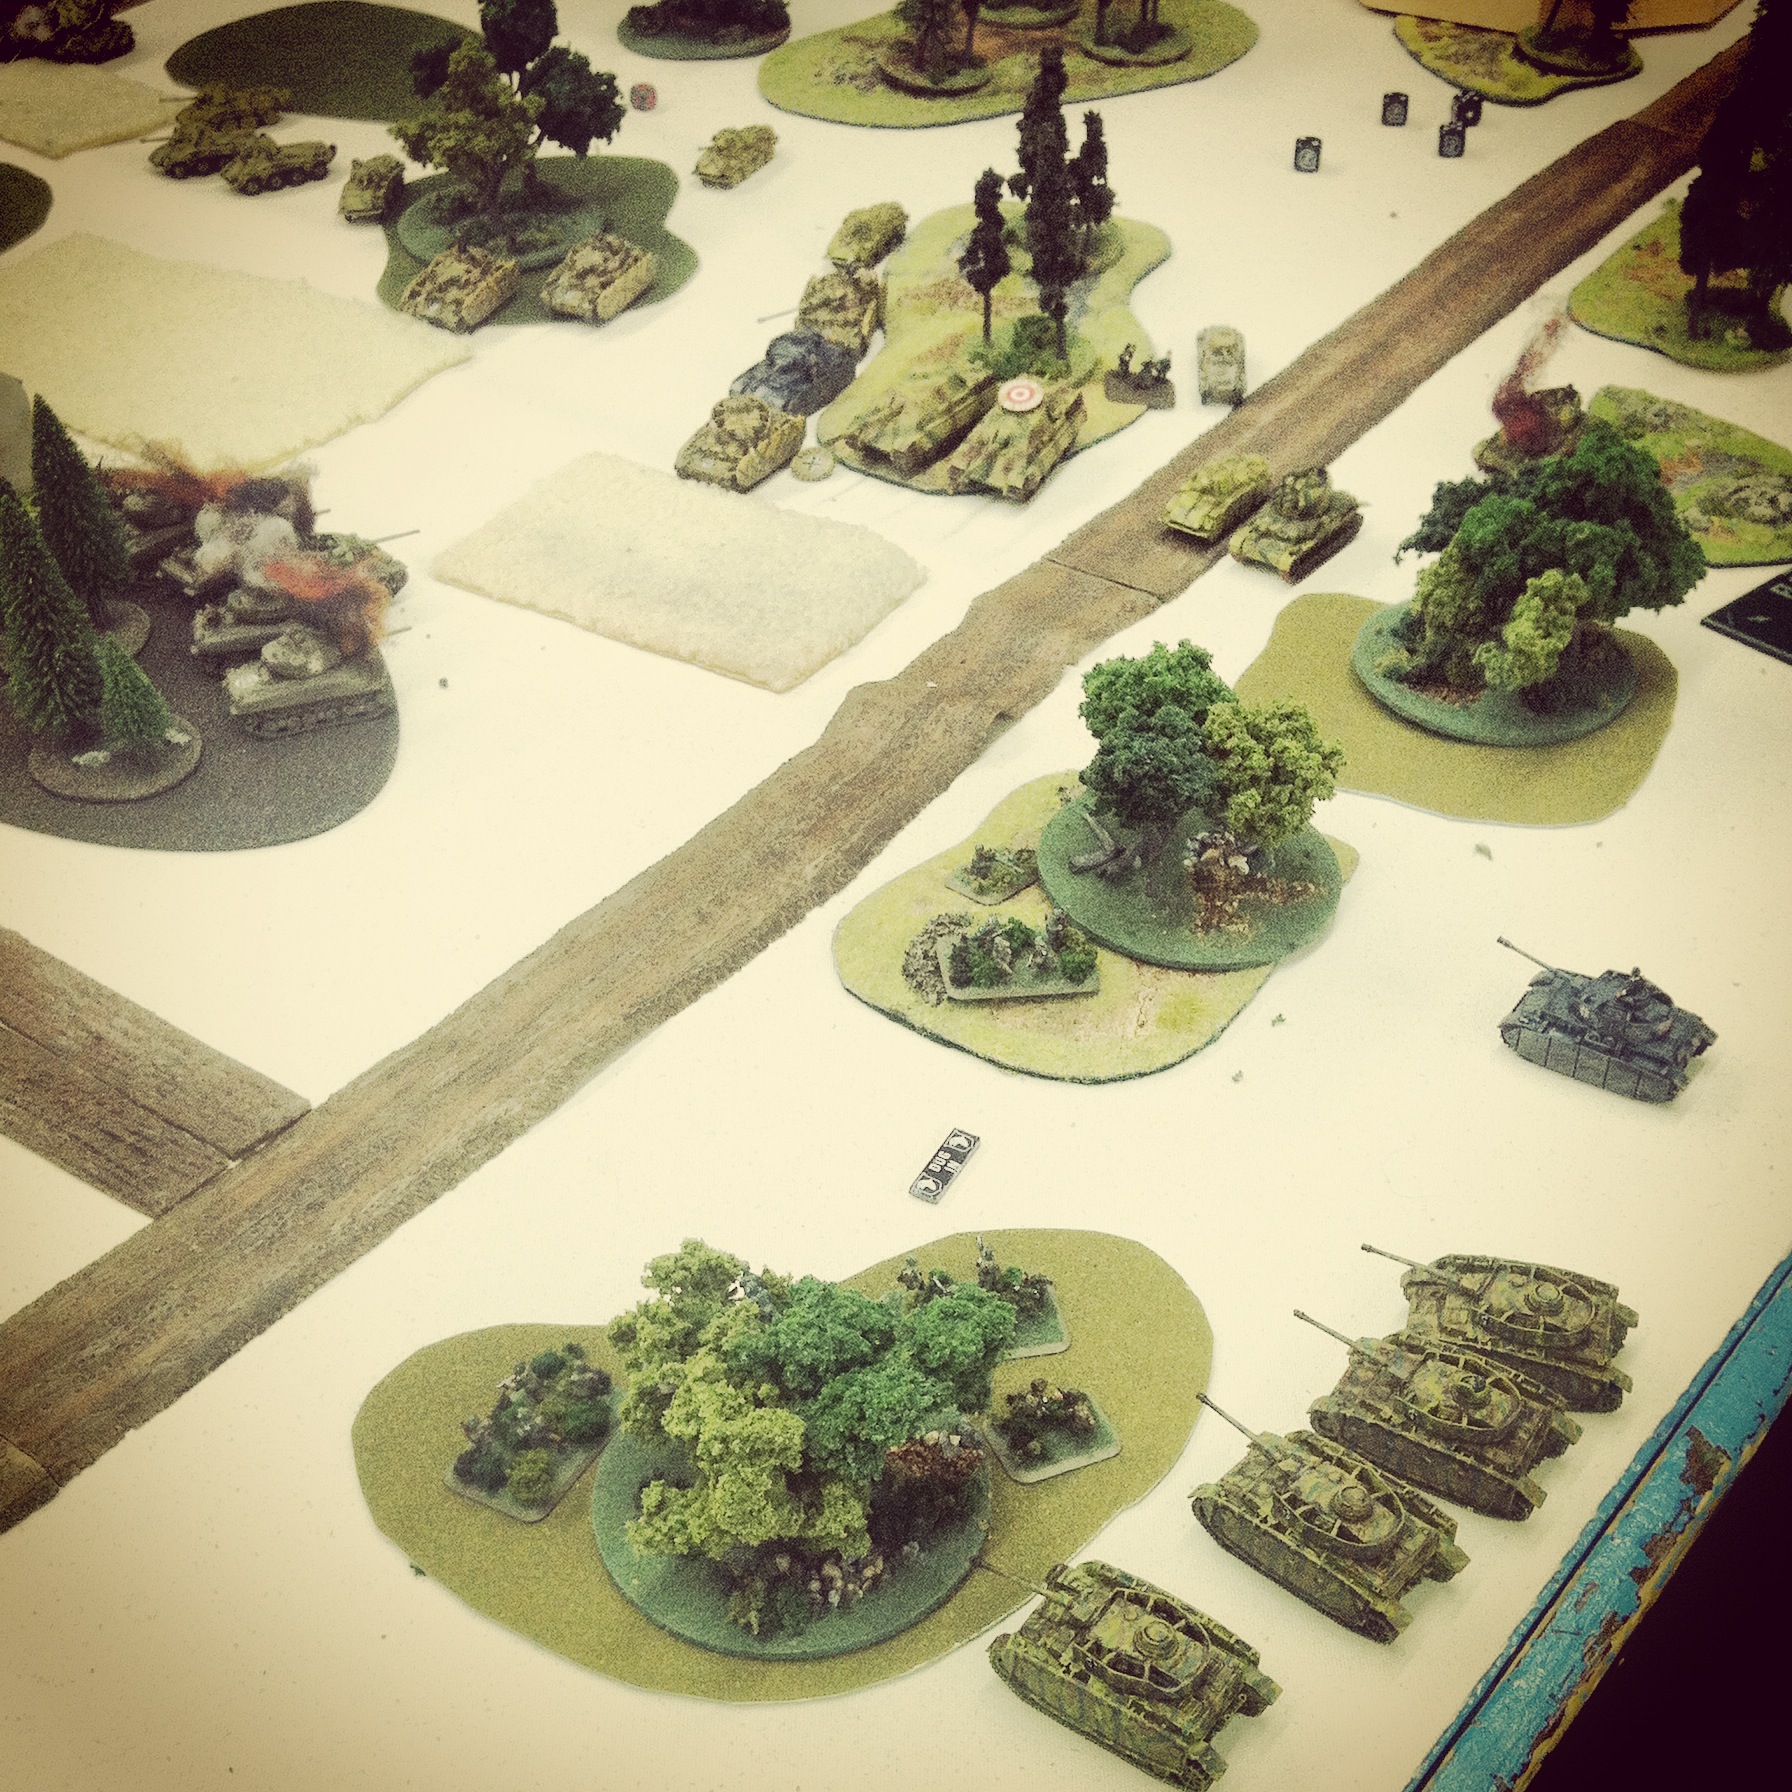
Over on the German right, the Panzer IV and Jagdpanther force divided around a wooded area and was engaged by the platoon of five 76mm Shermans exposing themselves in ambush. Over the next several turns, armor fire was exchanged as the German tanks sought cover in and around the woods. Three 76mm Shermans were quickly destroyed and the position was quickly reinforced with the US Hellcats deploying from behind a nearby barn. One Jagdpanther quickly bogged and sat stalled over repeated attempts to unbog for the majority of the remainder of the game.

IMG_4838

Panzer IVs are devastated by US armor fire from the woods at the left

Back on the US left flank, the German armored assault was pushed back with most of two platoons destroyed in a crossfire from American rifle infantry in one woods and tank fire from another. the combined fire from the US armor likewise laid waste to the approaching Panzer IVs and Pumas. At mid-game, the American left was holding but the US right was in trouble.

IMG_4839

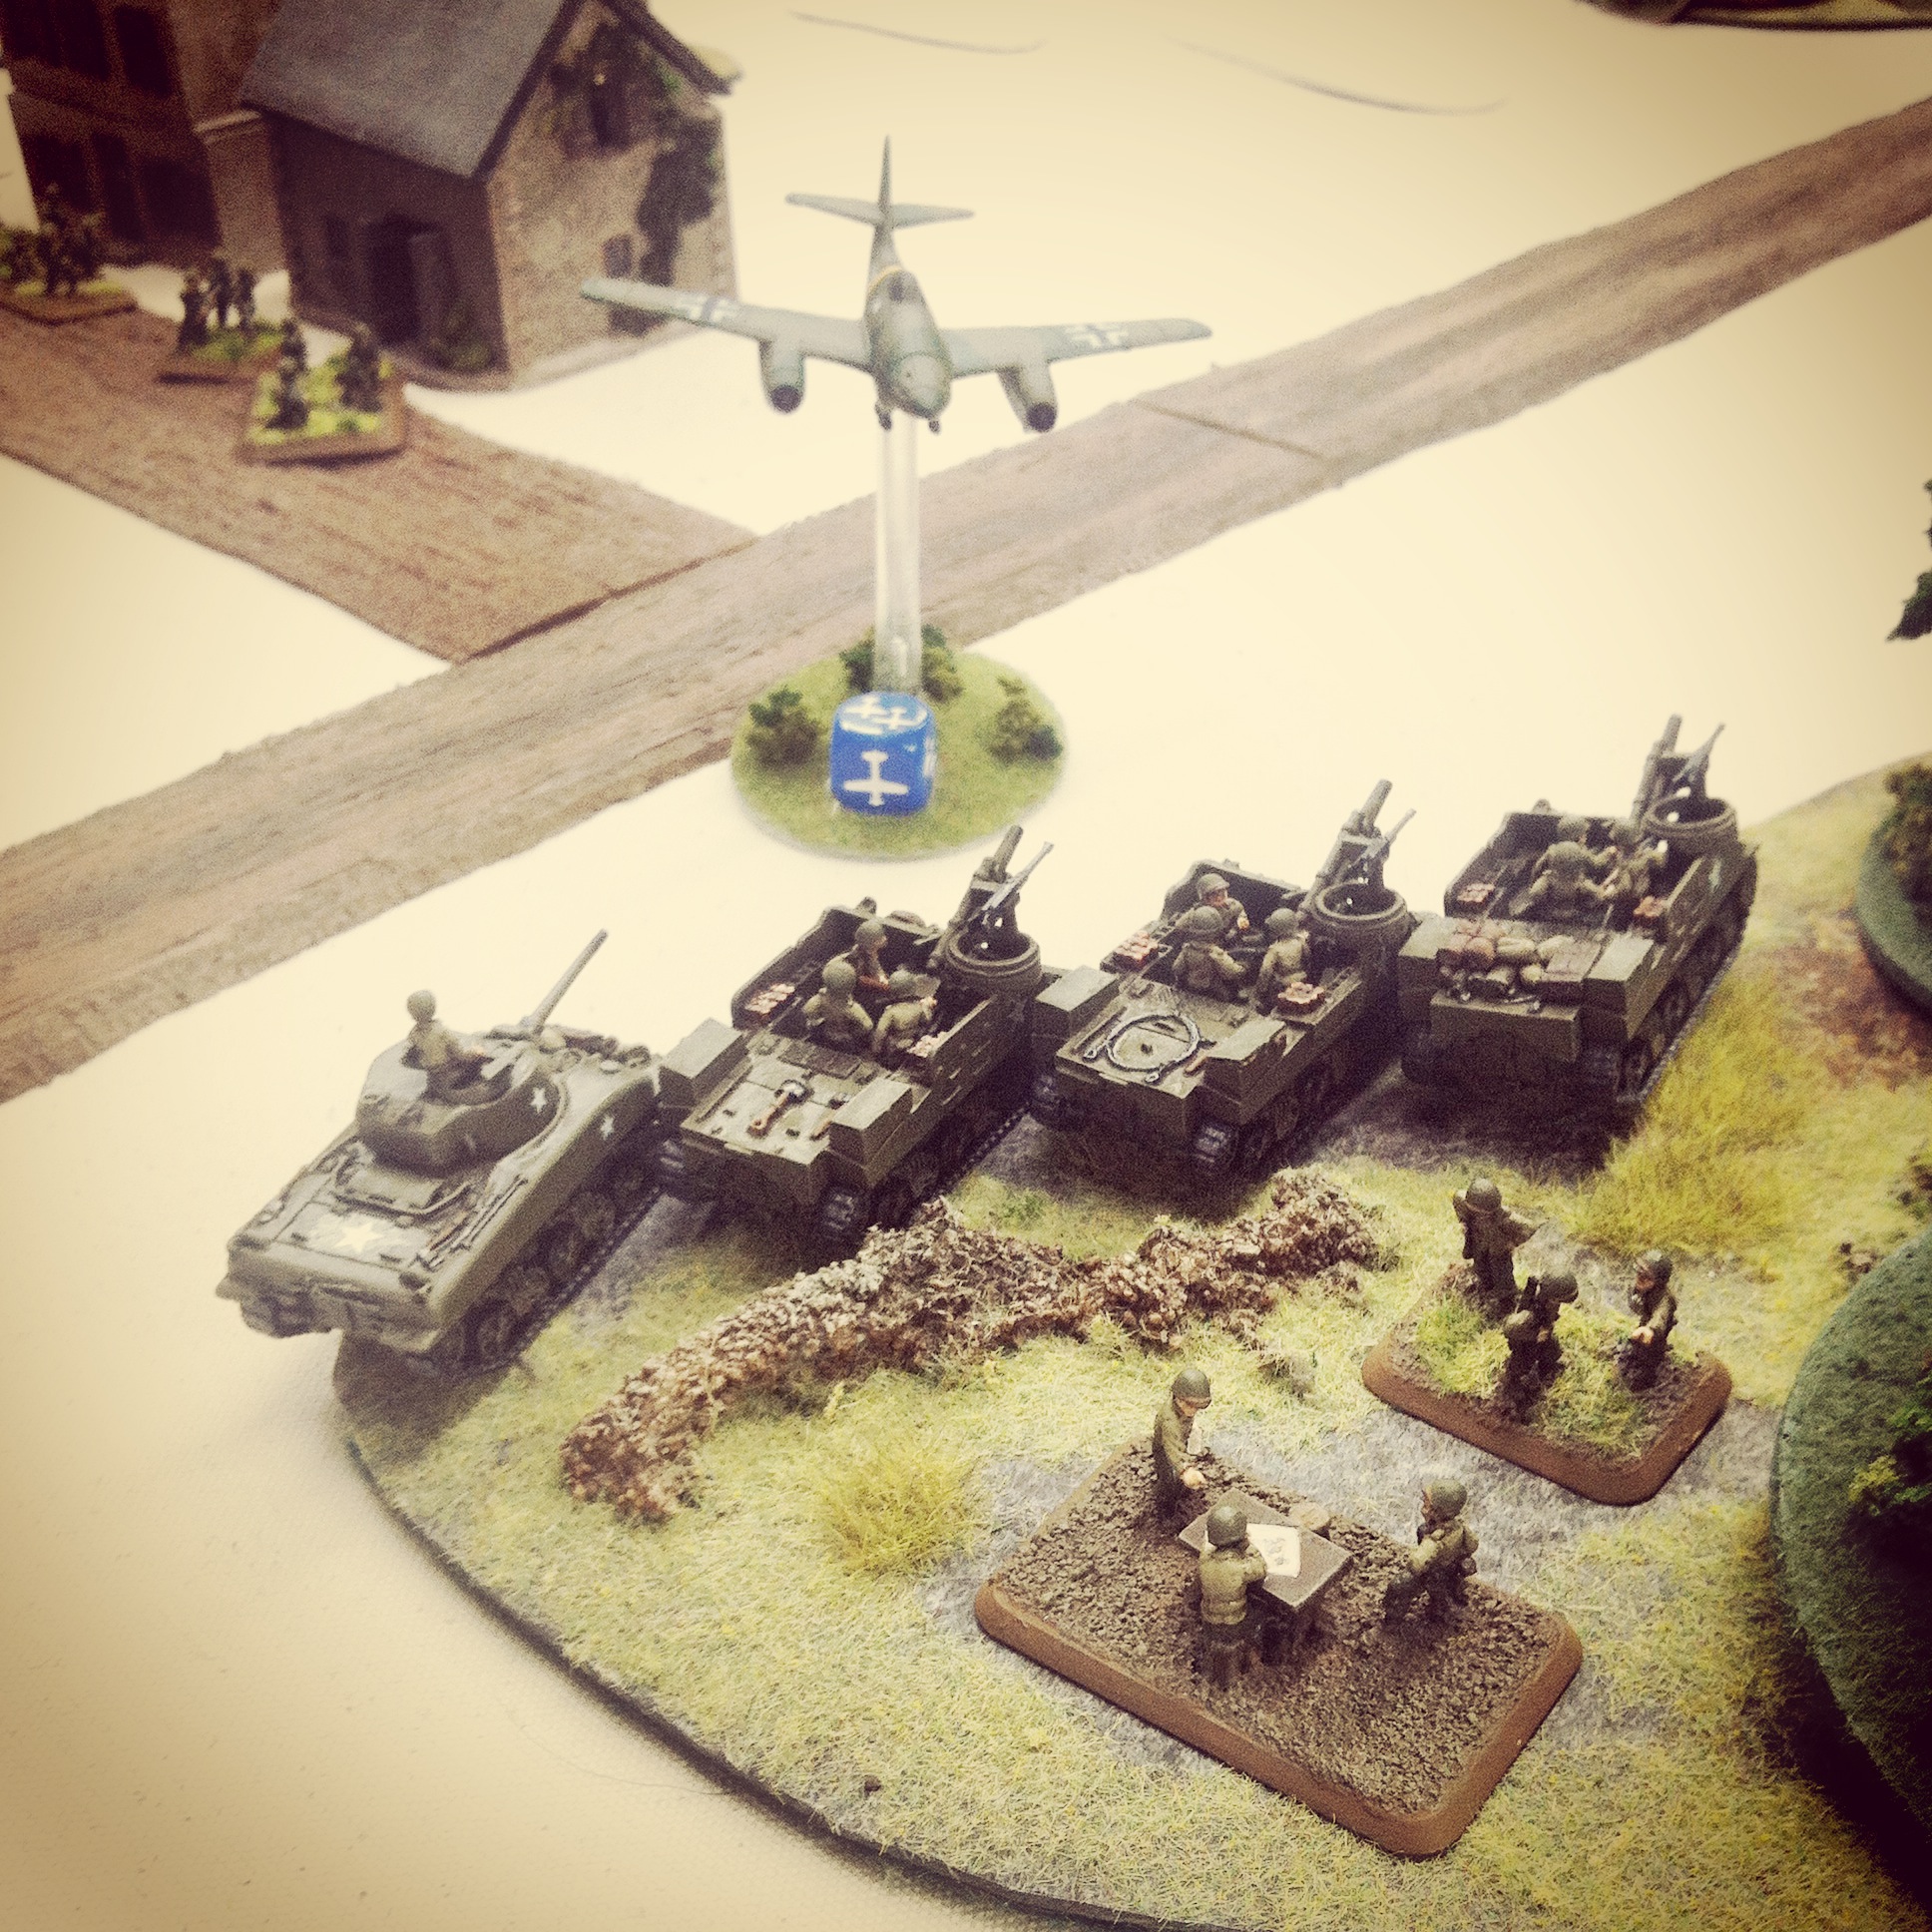
The ME 262 Sturmvogel takes a run at the US Priests

Supporting fire from both sides proved relatively ineffective throughout the game. The German ME 62 failed to score a hit on multiple runs over the table both to infantry and the rear American Priest platoon. The Priests themselves served to only stall the German armor advance with poor results from multiple bombardments. German rocket fire from their rear also showed little for its repeated efforts once spotting teams were in position on both flanks.

IMG_4840German Panthers are thwarted by smoke rounds at the US left

IMG_4841
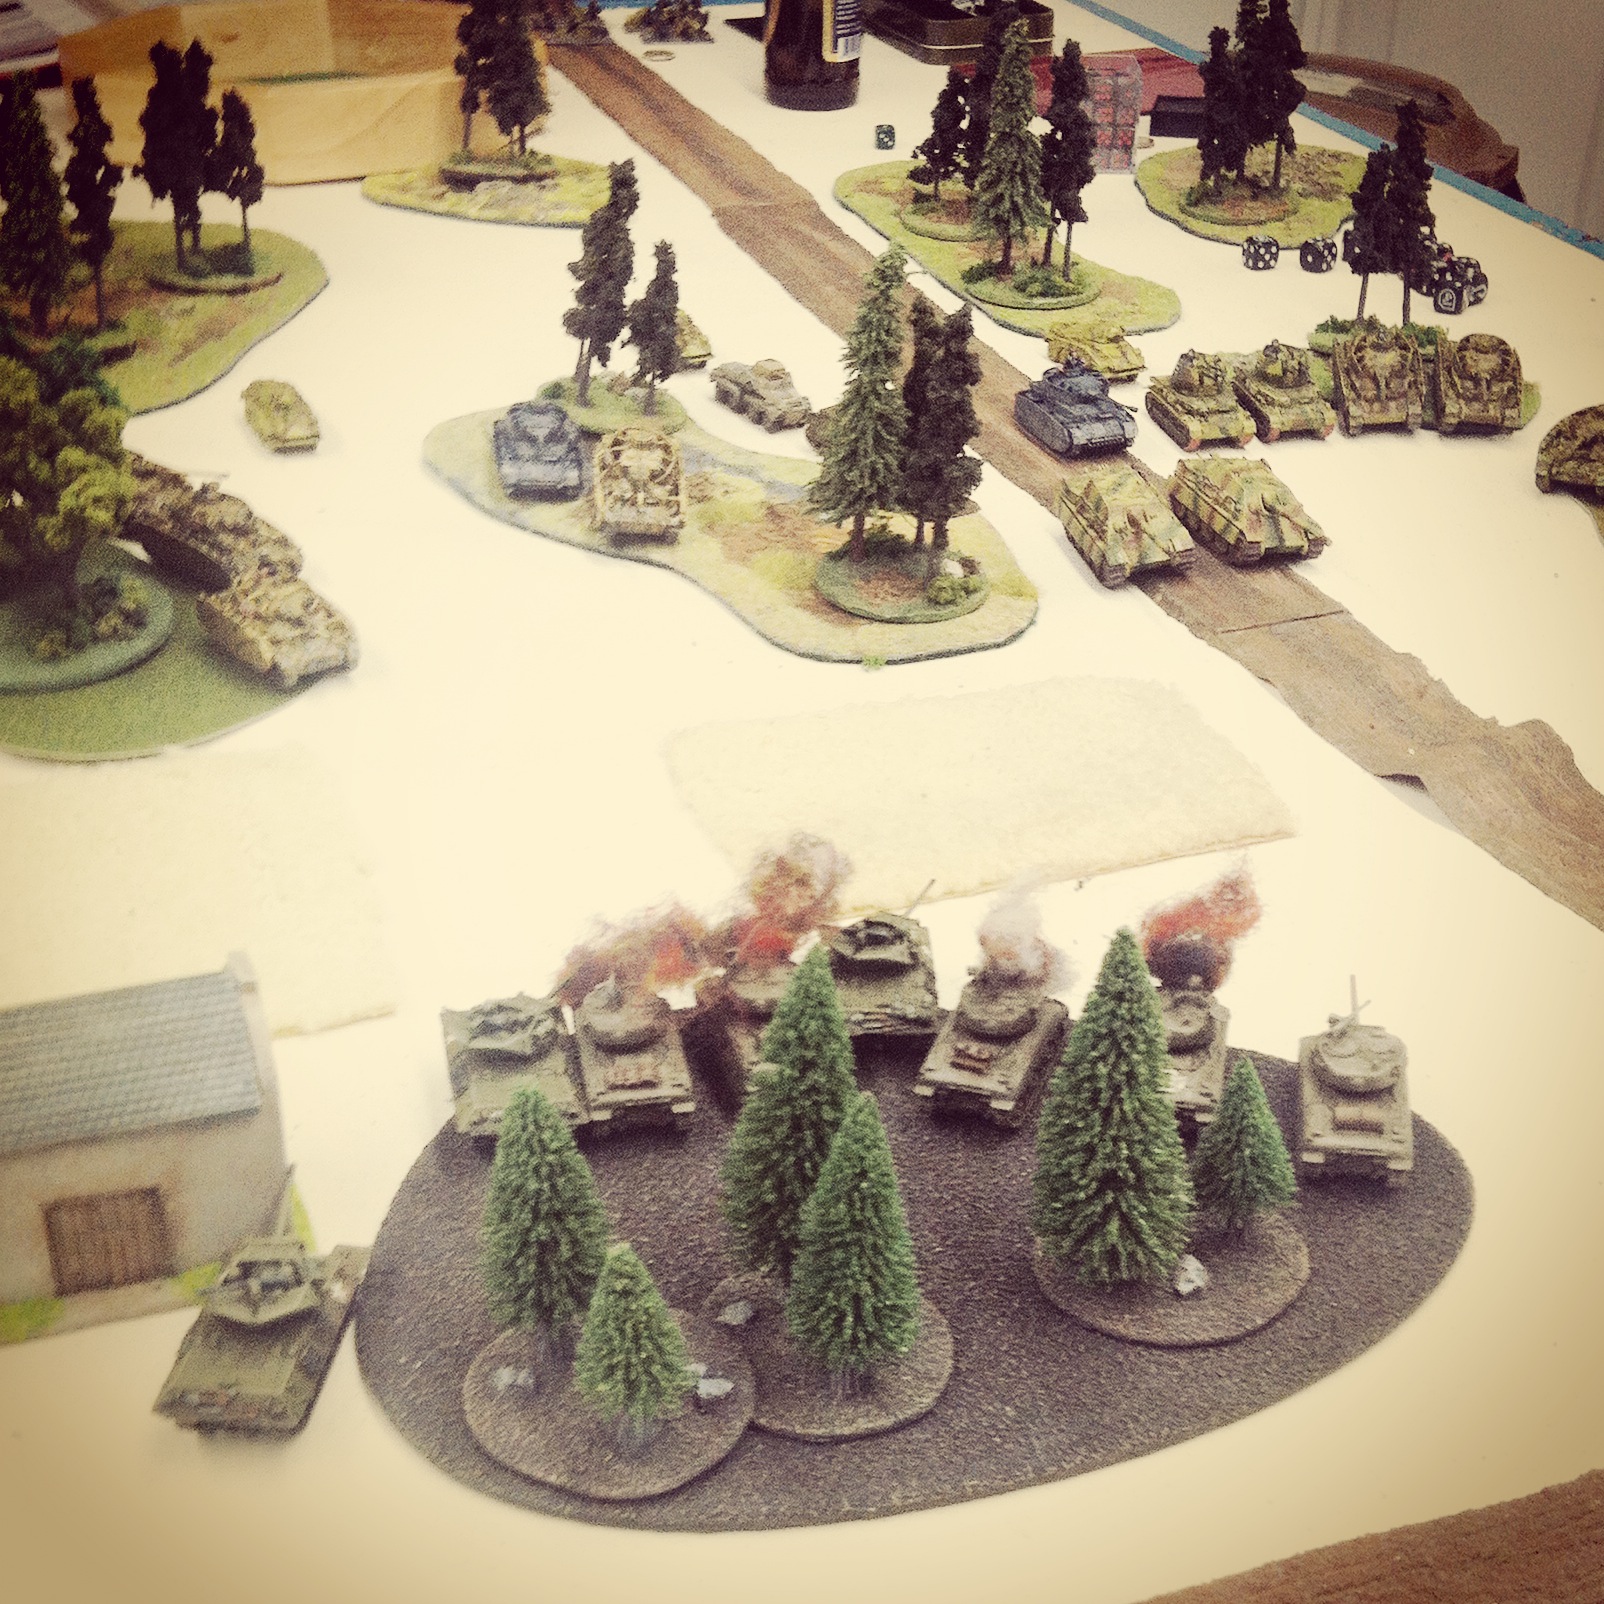
German armor pushes for the crossroads objective

By the sixth and seventh turns, the game continued to progress steadily on two fronts. At the US left, Panther tanks moved into position after their allied Panzer IVs sat burning all around them. Smoke rounds from two US mortar platoons effectively kept the Panthers out of most of the fight as they crept forward and back in the woods. Finally, a couple of side armor shots from the American anti-tank 57mm guns took a couple of the Panthers out and effectively ended the German threat on one side of the field.

IMG_4843

101st Airborne troops rush forward to contest the crossroads objective

IMG_4842

Panzer Lehr forces attempt to push out the 101st Airborne

IMG_4844

German armor continues to roll to a second objective crossroads at the rear

Things were fairing much better for the Germans all along at the other end of the field. Over several late game turns, the German armor pushed forward, leaving all the US Hellcats in flame and the final surviving 76mm Sherman fleeing the field. The veteran 101st Airborne troops continued to snarl the German advance, remaining static and dug in under wooded cover. With the Americans handily holding their left, two US platoons ran to the right to shore up the defense of two objectives. Just as one platoon of US paratroopers broke, a round of fire from the Priests took out one of the Jagdpanthers. With German armor at one objective and pushing hard at a second, a lot of American troops were poised to go down contesting two crossroads with plenty of mortar support ready to shift their attention across the table.

The written scenario doesn’t call for a turn limit, but after having played for nearly eight hours we called the game at the ninth turn. This was one of the longer and larger FOW battles we had played at the club in Brooklyn in this year. In a year of 70th anniversaries, wrapping up with an exhausting and dynamic Battle of the Bulge game seemed the best way to play some tribute in miniature to the largest battle fought in US history.

Flames of War: Dust Up Mission With “Blood, Guts and Glory”

tank3

Although actually made up of a number of battles and assaults during World War II, the post-D-Day breakout actions by the Allies in late 1944 in Northern France has become commonly known as the Lorraine Campaign to military historians. Frustrated by poor weather conditions and weak supply lines, the General George Patton’s 3rd Army push into Germany eventually led to the wintery and more famed German counteroffensive with the  Battle of the Bulge in the winter of 1944-1945.

bggbook

Flames of War offers a book outlining the Lorraine Campaign with Blood, Guts and Glory. US lists in the book focus on the powerful tank and armored rifle companies which made up the steely backbone of Patton’s daunting force. For the Germans, the cobbled-together 106 Panzerkorps Felderherrnhalle and 111 Panzer brigade are outlined with forces full of some of the best Late War armor and equipment albeit under somewhat challenging motivation and experience ratings.

A couple of weeks ago at Metropolitan Wargamers in Brooklyn, NY, two of us had a go at a fictional battle set during the Lorraine Campaign. We play against each other a fair amount, and both of us were looking to switch things up commanding some very different forces. The tabletop terrain was also different with a more open battlefield lined with fields, woods, gentle hills and two farms. All of this was quite a departure from the games we have most played set in the days and months after the Normandy Invasion in June of 1944.

dustup

My opponent’s Panzerkompanie was  full of armor – Stugs, Panthers and Panzer IVs – and  supplemented by an Aufklärungs platoon and a couple Wirbelwinds to chase away any US aircraft. For my US force, I wanted to try out some underused rifle platoons which were supported by 105mm M7 Priests, some Shermans and a P-47 Thunderbolt buzzing overhead. We also chose a different game framework, opting for a somewhat complicated Dust Up scenario from the official Flames of War missions list.

pzco

us4th

IMG_3397

Our Dust Up scenario with my US forces in the foreground and Germans in the distance

Well, as the game played out, I quickly discovered I had brought infantry to a tank fight. With one of my infantry platoons camped out in the woods near two objectives, my hope was to stave off the German armor advance with repeated bombardments from my Priests and diving runs from the P-47.

IMG_3398US M7 Priest platoon taking up position

IMG_3399US rifles deploy in the woods to guard a nearby objective

Things went well for me in the early stages as Panthers stalled moving through the woods. A Wirbelwind and two Panthers were subsequently destroyed from 105mm volleys , but my P-47 failed to get any traction in stopping a group of Stugs creeping along the table edge. Even so, a couple turns in I was feeling fairly confident my artillery fire would whittle away the rolling German advance.

IMG_3401A German Panther and Wirbelwind are destroyed by incoming US 105mm fire

IMG_3400Panthers make through the woods but one bogs in the terrain

IMG_3402The P-47 Thunderbolt attempts a run at a Stug platoon

IMG_3403More fire from the Priests take out another Panther

My plan fell apart as the first German Panzer IV reserves came on the table at the corner behind my Priest battery and made quick work of the nearly-armorless US mobile artillery. I swung my surviving Priest and supporting Sherman around and engaged the Germans at close range with direct fire, but succeeded in only cracking open one German tank. In another turn, the Priests were wiped from the board and only my infantry platoon remained to defend my end of the table. The P-47 appeared again to control the center of the battlefield, but missed on its run. The US center and flank were crumbling by the time turn four approached.

IMG_3405Panzer IV reinforcements surprise the Priests from the rear

IMG_3406The Thunderbolt tries to stall the German armor in the middle of the field

My reserve Shermans came on the table near a farm and quickly engaged with the Panthers which swung to meet the US armor advance. Shots from my heavier 76mm guns lit up a Panther and bailed another’s crew. The German tanks returned fire, destroying all but one 76mm Sherman as more Panzer IVs showed up with the Aufklärungs platoon close behind.

IMG_3407Reserve American 75 and 76mm Shermans roll on the board

IMG_3409The last of the Priests burn as more Panzer IVs appear

In the fifth turn, my final supporting infantry platoon arrived in their halftracks, dismounted and made a desperate run for an objective in the open field. The infantry on my side of the table also broke from the woods in a last-ditch assault on a mass of German tanks creeping toward an objective but were repulsed. With German armor swarming an objective, the game went to the Axis.

IMG_3410A reinforcing column of US rifles follows-up the Sherman advance

IMG_3413A lone Sherman survives as the US rifle company dismounts and heads for an objective

IMG_3414US riflemen break from the woods in a desperate assault on German tanks at an objective

IMG_3415With tanks aflame in the fields, the Germans take an objective

Clearly, my US plan from the outset was a stretch. Had I taken the more historic approach of Patton in the Lorraine Campaign of 1944, a fully-armored US force may very well have stood a fair chance against all the German tanks shuttling here and there on the tabletop. Balancing history and what-ifs is what makes playing Flames of war so engaging over and over again, but next time I’ll be careful not to second-guess the command decisions made in Northern France some 70 years ago.

Flames of War: Aalst 1944 Scenario

aalst

The ultimately unsuccessful week-long Operation Market Garden commenced on September 17, 1944 with an Allied push toward Germany. The ground “Market” portion of the campaign saw the British Guards Armoured Division taking point on the push into the Low Countries.

On the second day of the operation, a column of the Guards Armoured had rolled to the southern outskirts of Aalst, a Belgian town occupied by German forces since 1940. Led by Col. Joe Vandeleur, the division’s tanks encountered the remnants of German troops and guns which were dug in but heavily-damaged by the previous day’s Allied air bombings and artillery barrages. For the Germans, Aalst was a line in the sand protecting the Allied advance northeast to Antwerp and  the Netherlands beyond. For the Allies, keeping the long column of armour moving was key to reinforcing the Allied airborne troops already engaged with German forces along several bridges.

This past weekend at Metropolitan Wargamers in Brooklyn, NY we ran the Aalst scenario for Flames of War with 2000-point forces on either side of the table. We pulled our British and German lists from the Market Garden and Bridge By Bridge books. As a jumping off point for the game’s outline, we referenced an Aaalst scenario originally designed for Battlefront. We planned a 10-turn game with points scored for destroyed platoons and an immediate end to the game when the British rolled a platoon off the German-defended north end of the table.

IMG_3026

German set-up at Aalst

As per the actual situation at Aalst in 1944, the Germans began setting up with half their force heavily dug in just north of the town’s center. Deadly 8.8 cm Flak guns were positioned on roads to their right and left flanks, and 7.5 cm PaK 40 anti-tank guns stood closer to town. Infantry and heavy machine gun platoons hunkered down in the fields just outside of town, and a single Jagdpanther idled nearby. Expecting both ground and possible air forces, the German guns were well-prepared for the arriving British.

IMG_3027

German 88’s dug in at the northeast and northwest ends of town

IMG_3016

British set-up at Aalst

The British laid out their 8-gun 25 pdr battery at the rear of the table and rolled on two platoons from the Guards with Joe Vandeleur attached. Spotters for the artillery were deployed in Shermans to the right and left hoping to provide eyes across the entire table for. Towed 6 pdr anti-tank guns, infantry, machine gunners and additional tanks lay in reserve off-table to follow the initial wave of armour. The plan was to use Vandeleur’s special rules to rush tanks to the center of the table, saturate the Germans with artillery fire and pave the way from additional supporting platoons.

IMG_3029

 Vandeleur leads the Guards into position behind the town

IMG_3028

German infantry and Pagdpanther make for the church at the center of Aalst

In the first two turns, the Guards quickly rolled up to take position behind the town to the south with their Vickers machine gun platoon riding on the tanks. The British artillery spotter hopped from his Sherman tank and ran for back door of a building. The Germans made way to the north of town with infantry looking to occupy the church at Aalst with a lone Jagdpanther in support.

IMG_3031

A Firefly lays waste to the approaching Jagdpanther with its first shot

IMG_3032

The Guards take heavy fire and two Shermans and a Firefly sit in flames

Fire opened up in the next two turns with a well-positioned Firefly scoring a kill on the nearing Jagdpanther. Returning fire, German 88s destroyed the Firefly and PaK 40s bailed and subsequently wrecked two other Shermans. Machine gunners made their saves, jumped off their tanks and made way for cover in a nearby building at the town’s intersection. Meanwhile, British artillery lobbed a volley over the town hoping to slow down the German infantry and machine guns looking to take hold of the town’s buildings. The barrage resulted in a destroyed PaK 40 just to the north of the church, but the German infantry pressed on to take up positions in the church.

IMG_3034

British infantry move to assault the church as reserve armor rolls to the town center

With British infantry reserves moved at the double to the town and then moved in a subsequent turn to assault the church. At the same time, a reinforcing Guards tank platoon raced to the town center. Shots from the Shermans failed to destroy nearby PaK 40s but fire from the Vickers guns in a nearby building pinned the Germans in the church ahead of the assault. Despite all the British fire lighting up the center of town, the assault failed and the British infantry fell back to the other side of the street.

IMG_3033

German armored reserves arrive

With the British stalled at the crossroads in Aalst, German reserves moved onto the table. A Stug platoon, Wirbelwinds and a fresh Jagdpanther began closing in from the northwest of town, drawing fire from the British battery looking to slow their advance. Volleys from the 25-pound guns blew up an 88 and a PaK 40, but the mass of German hardware kept rolling forward.

IMG_3035

British command tanks move to engage the Germans

IMG_3036

A swarm of German armor and troops push forward under British artillery fire

IMG_3037

A Panzerfaust lights up a British command tank

Hoping for a hard push of combined arms on the German right, British command tanks followed by two platoons of infantry pressed forward from a nearby woods. The British tankies proved to be tough, surviving a turn of fire from nearby Stugs and an attempted infantry assault with  Panzerfaust-wielding infantry as British guns continued to range in and rain shells on the Germans to no effect.

IMG_3038

The lone surviving command British tank awaits its fate from the German onslought

Back at the center of town, the last tank platoon took fire from the 88s, PaK 40s and a Panzerfaust in the church steeple and was destroyed. The one lone command tank on the western outskirts of town was surrounded and destroyed by combined tank and artillery fire. With only the remnants two rifle platoons and the Vickers left spread through the town, the game was lost for the British. As the sun set in the west, Aalst remained in Axis hands.

In our discussion after, the British artillery had only been effective only about 50% of the time and only eliminated a few units throughout the game. Too many British tanks burned too quickly against overwhelming crossfire from German guns, and reinforcing British infantry could never make headway beyond Aalst’s crossroads. More British tank platoons with Fireflies might have gone a long way toward at least pushing through the town.

Fortunately for the people of Aalst, the engagement during Market Garden resulted in the liberation of the town by the British. Pictures from the victory show a very different outcome from our game with smiling faces all around. The very nature of wargaming sometimes just makes things go a different way, and this past weekend the dice rolled against the tide of history with a victory for the Germans at Aaalst.