World War I: The Battle of Vimy Ridge 1917 with Price of Glory

VimyRidgepic

The Battle of Vimy Ridge, France over four days in early April 1917 was not just a victory for the Allies during World War I. The battle also served as a shining example of Canadian national pride as the overwhelming Canadian-led force was able to stand on its own for the first time without British leadership on the field against Germany. The decisive capture of the German lines at the ridge would hold this section of the Western Front for the Allies until the end of the war.

pogcover“Price of Glory” by Iron Ivan Games

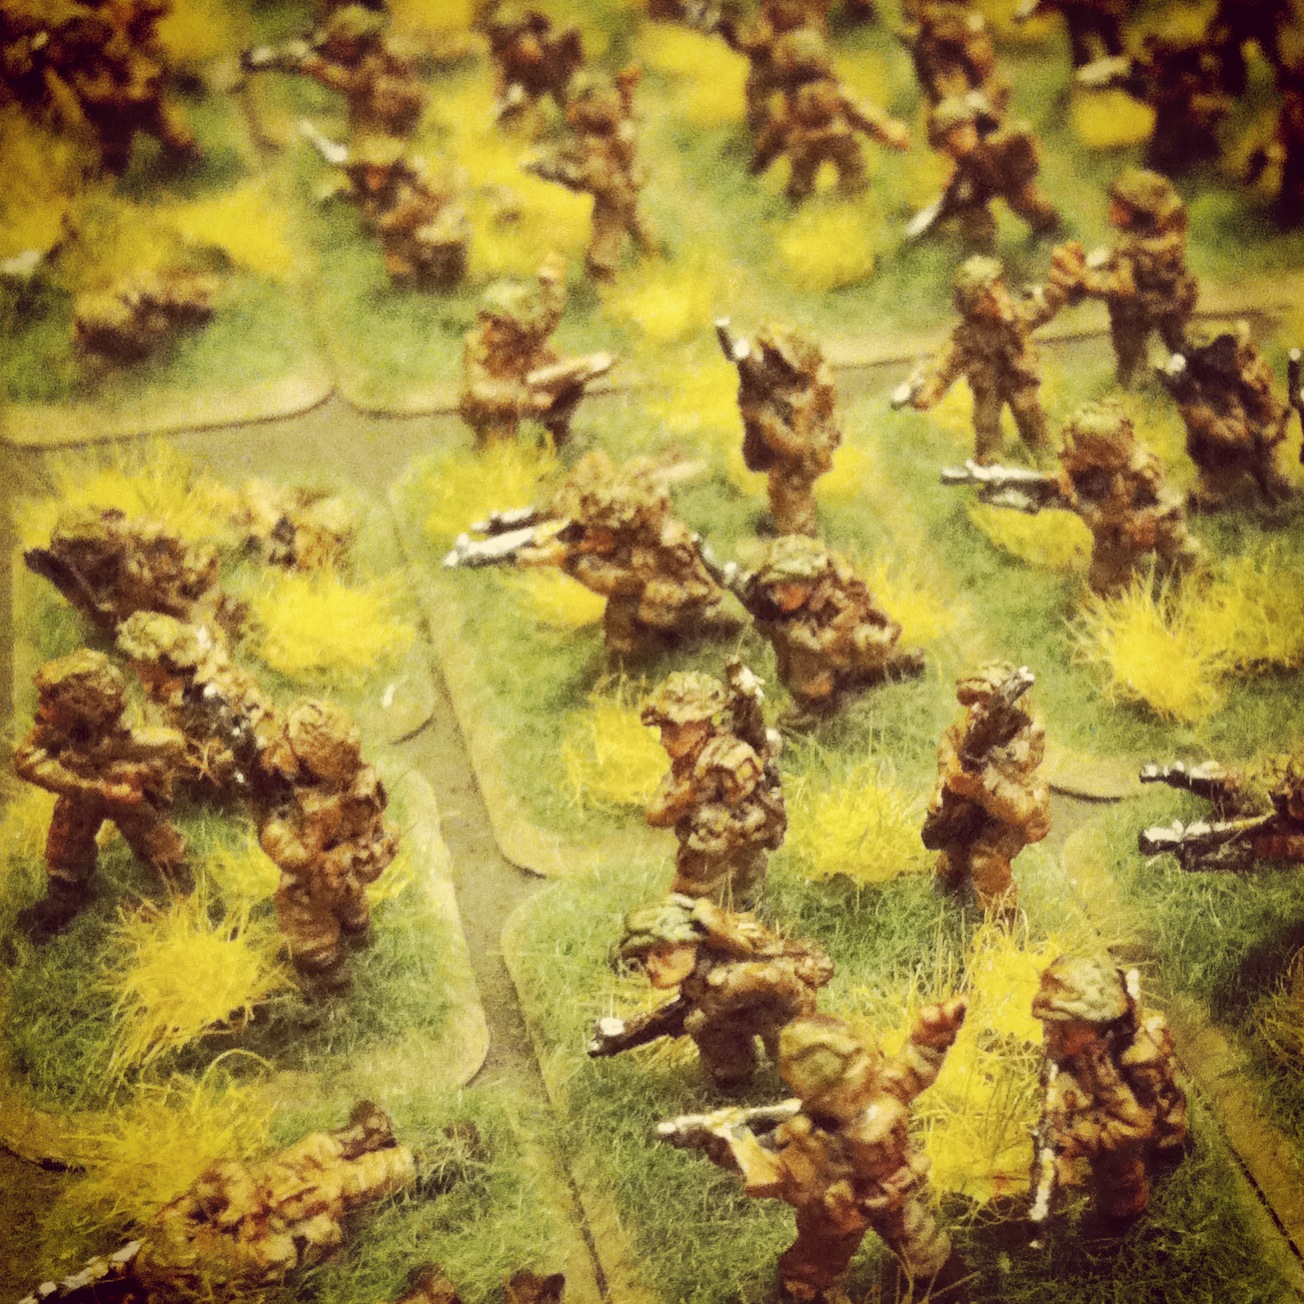
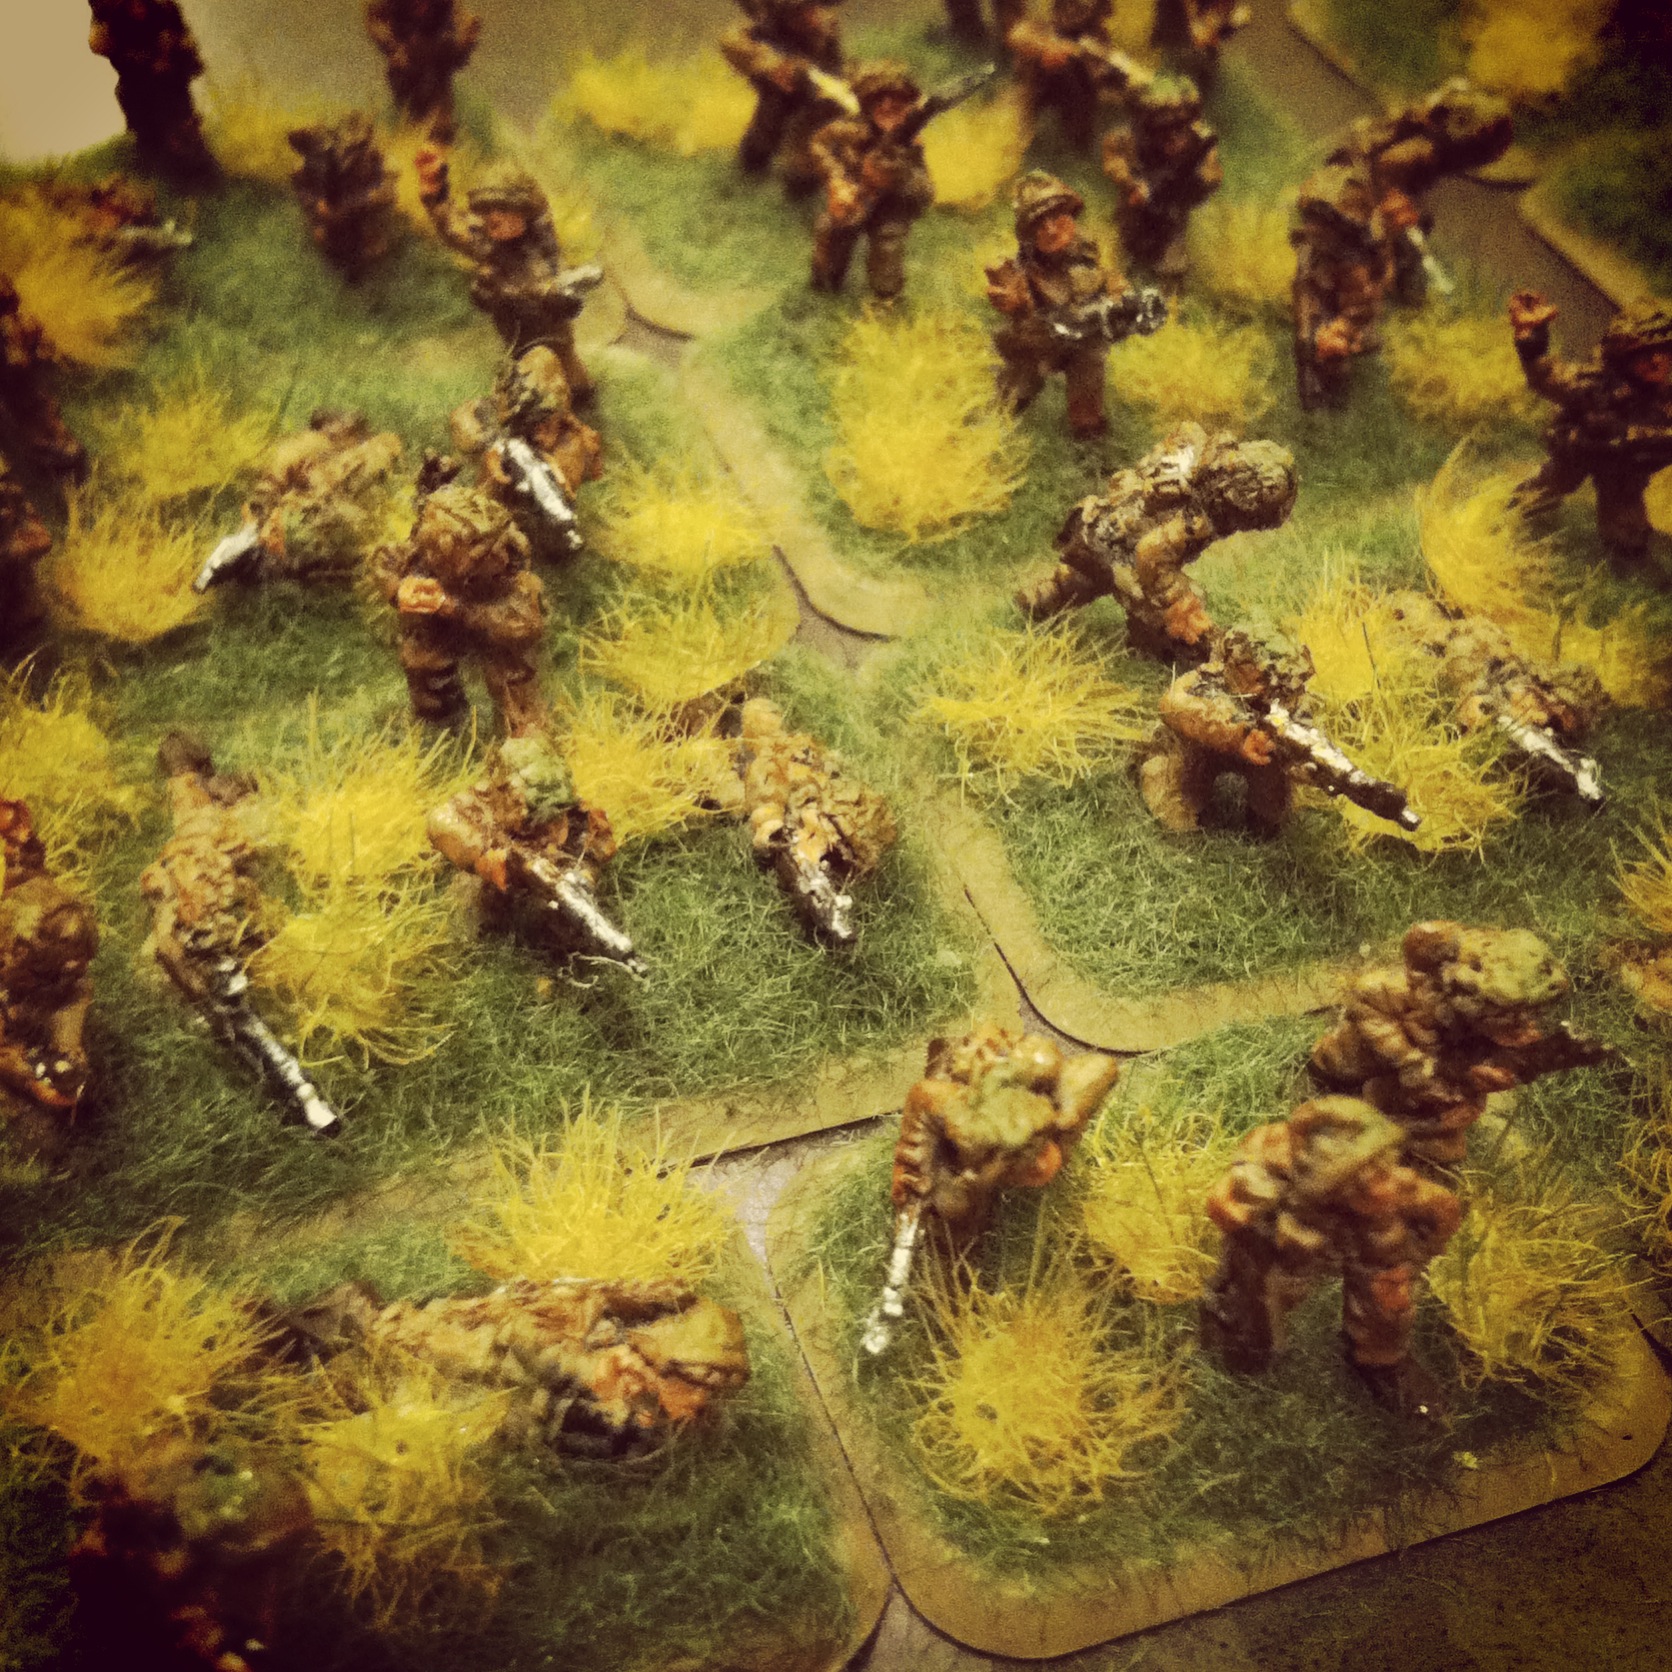
This past weekend at Metropolitan Wargamers we finally got some WWI gaming in with a quick scenario modelled on the Canadian exploits at Vimy Ridge with the Price of Glory rules from Iron Ivan Games. We unpacked over six feet of beautifully modelled trench works that had laid too long in storage and set up a gorgeous collection of 28mm WWI German and Canadian troops from Great War Miniatures. The three of us new to the rules divided the Canadians among ourselves with four rifle and machine gun squads, a grenade-armed bombing party and a Vickers machine gun to our right. Facing us across the cratered and barb-wired field was two lines of German trenches initially defended by two teams of Germans and a MG 08 on their right flank. The level of Canadian victory would be measured by the capture of the German front line, rear set of trenches or the treeline beyond in a ten-turn game.

IMG_4620

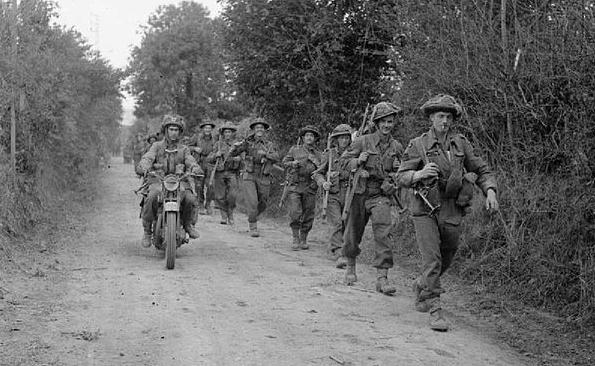
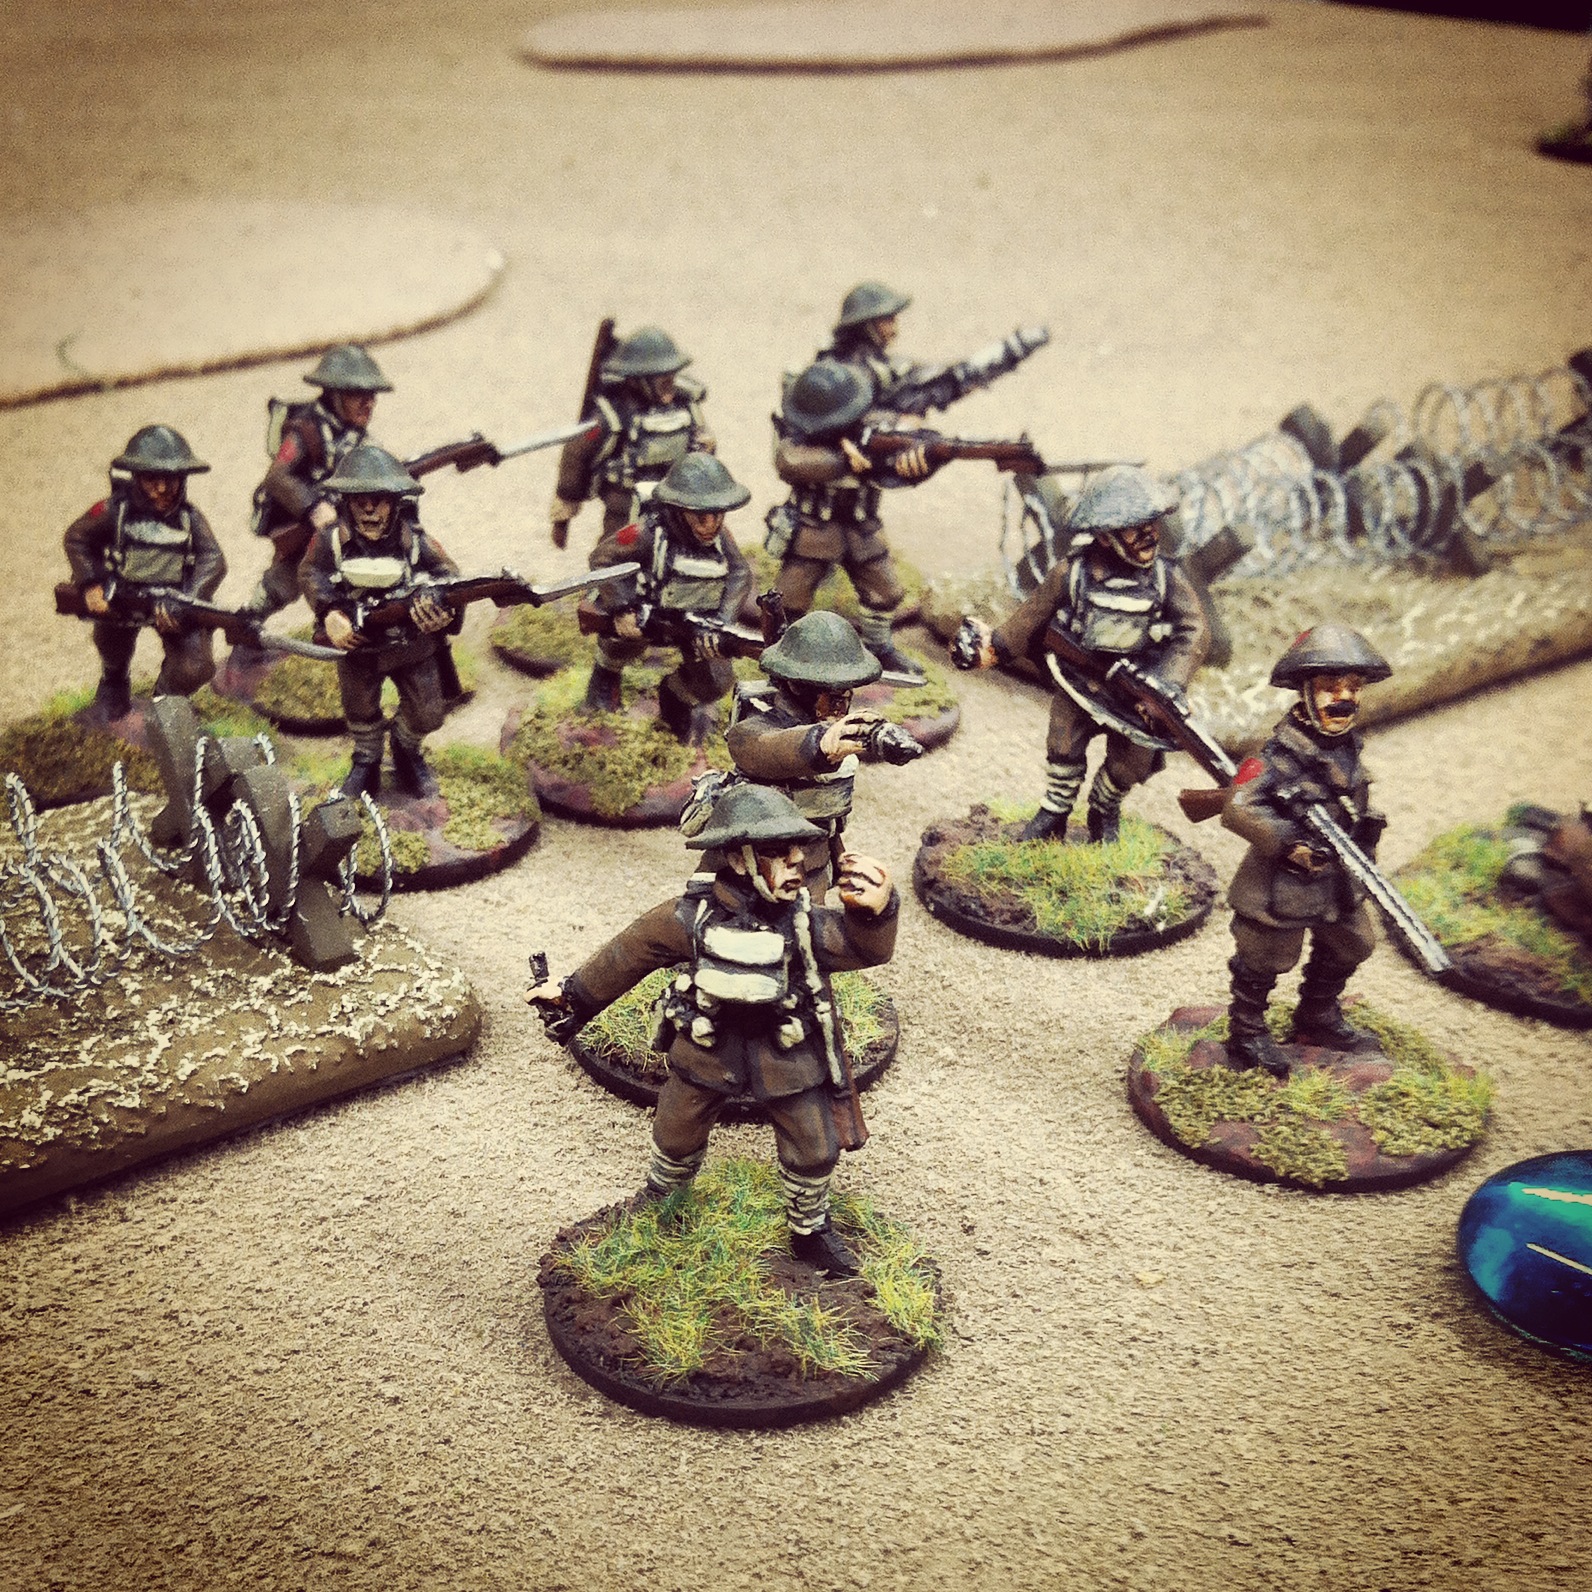
Canadian troops advance on the German lines at Vimy Ridge

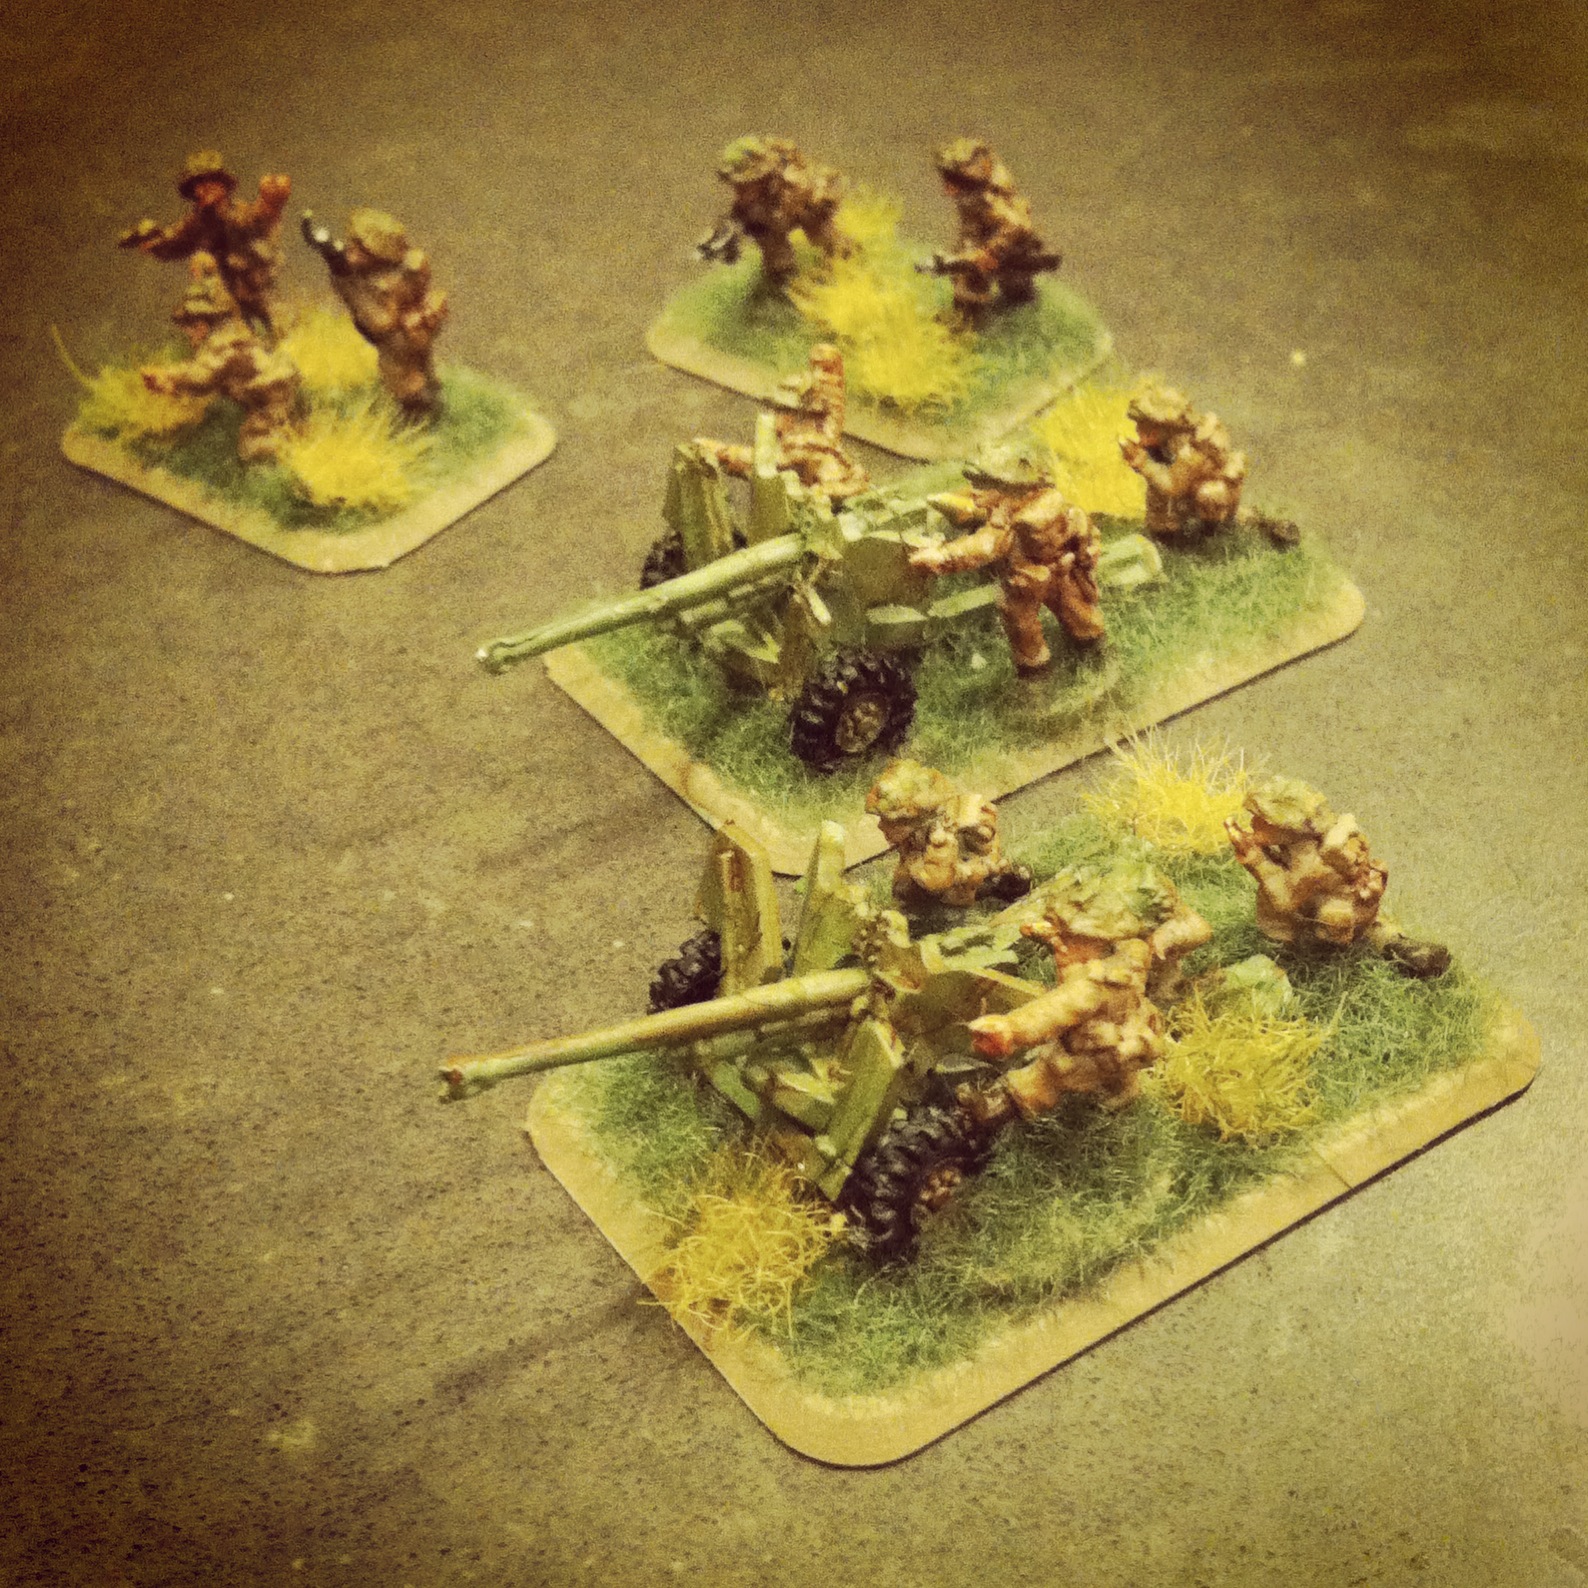
The Canadians initially plotted four artillery targets along the front and rear trench lines. After the starting German deployment, we rolled off for the artillery bombardment which we had luckily ranged-in directly on the German rifles and machine gun on the front line. Unfortunately the dice were not with the Canadians, and all four artillery shots missed. From there, the Price of Glory rules progressed simple enough with a D10 roll-off for initiative which the Canadians won and began their advance. Teams alternate on each side of the table taking move, fire or melee actions with short movement of 3″ allowing for a full rate of fire, 6″ at fire at half-rate and a 9″ sprint allowing for now firing.

IMG_4621

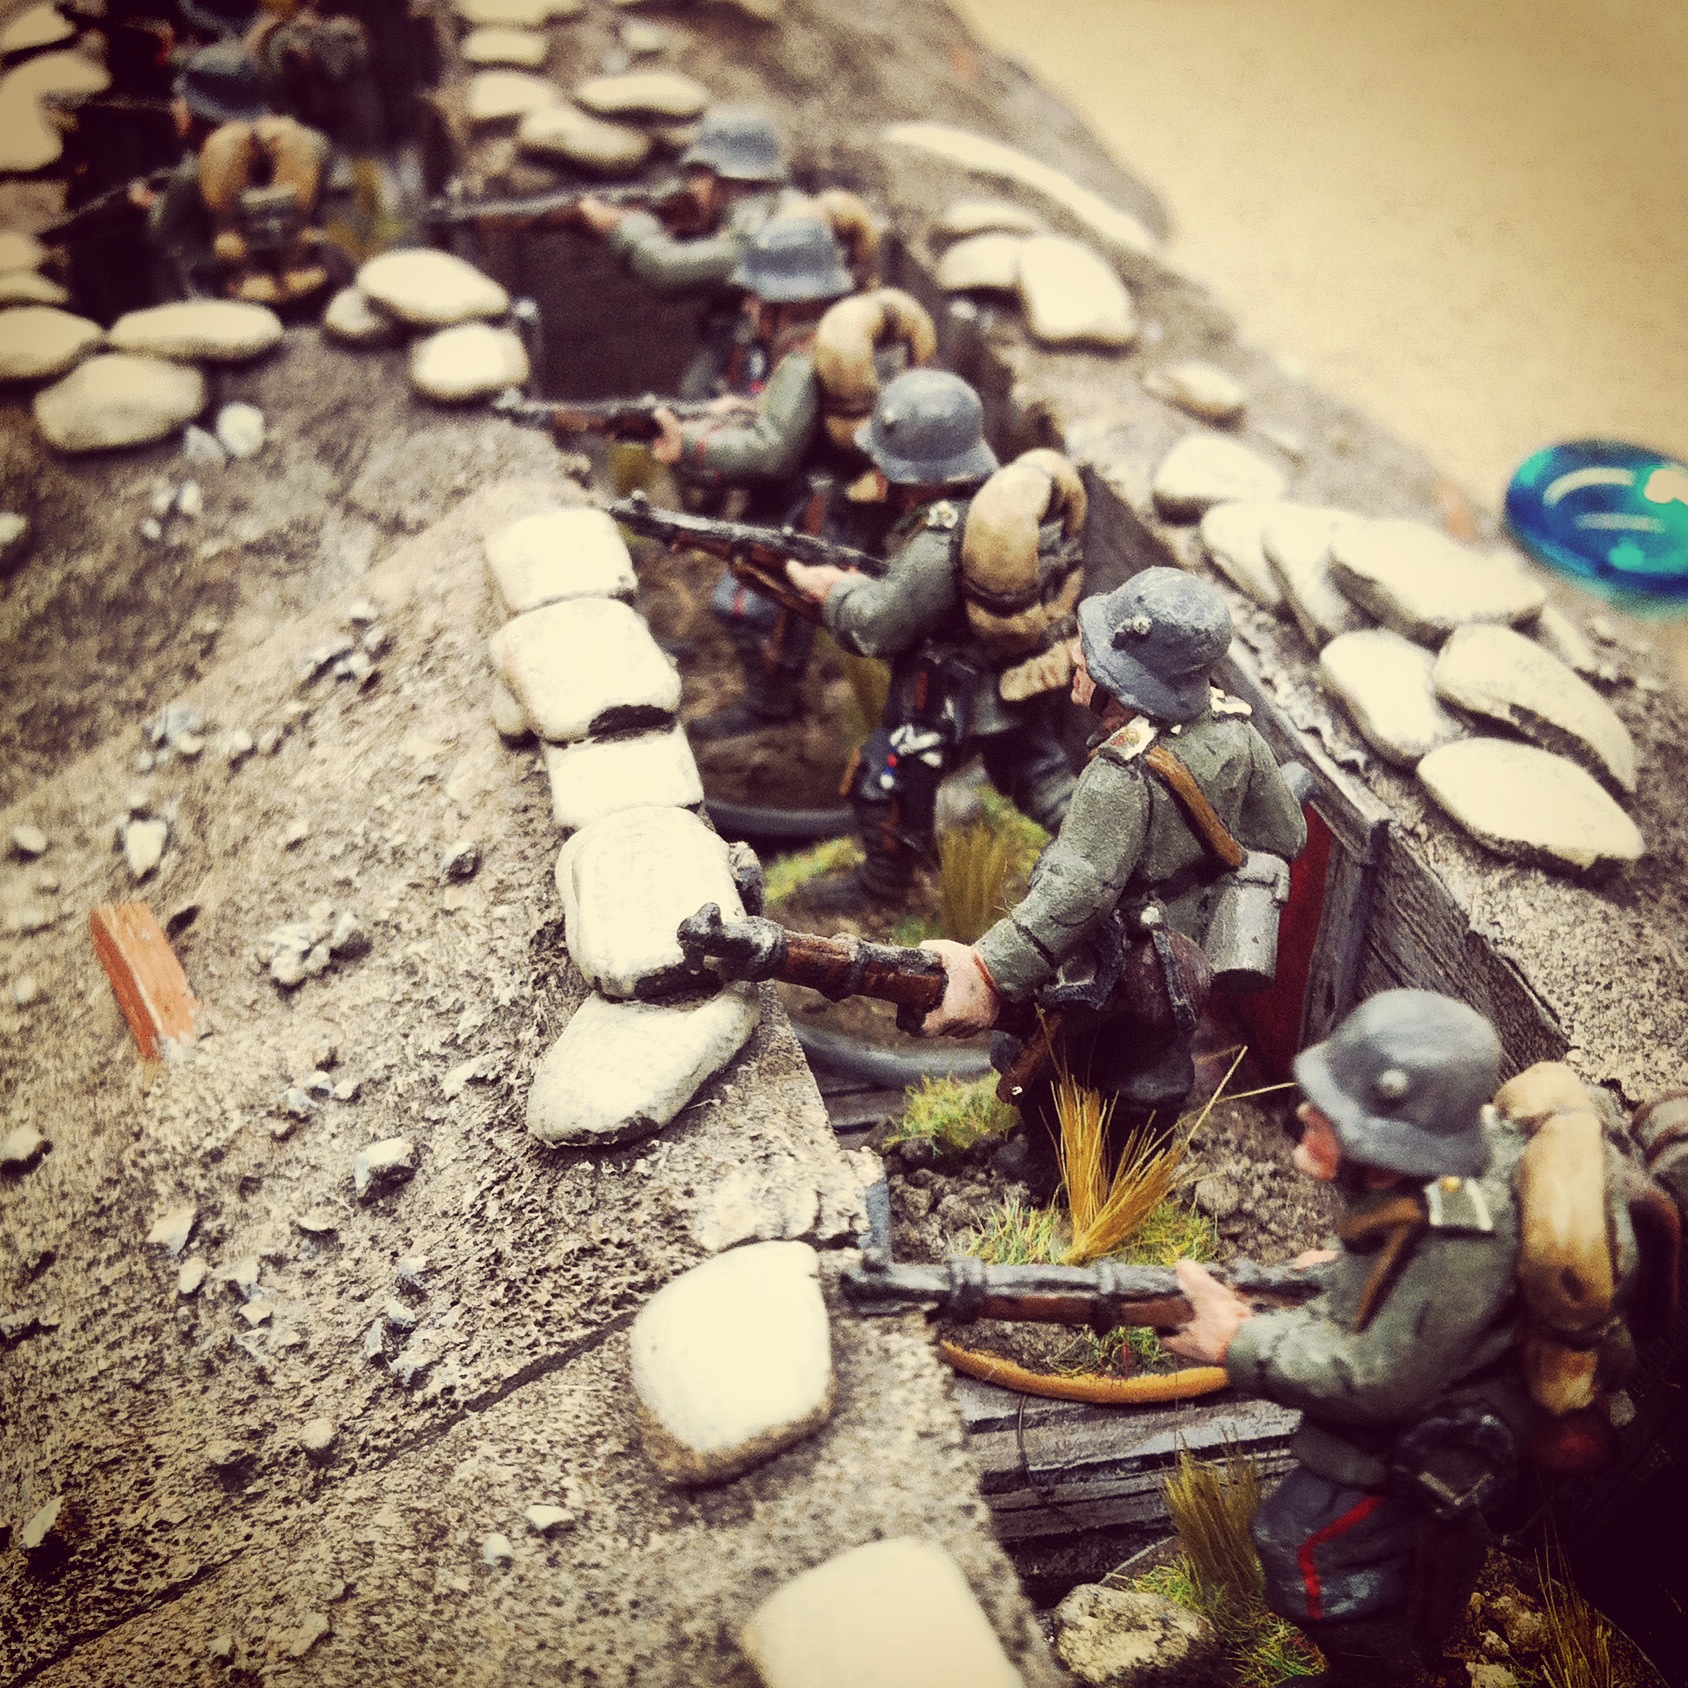
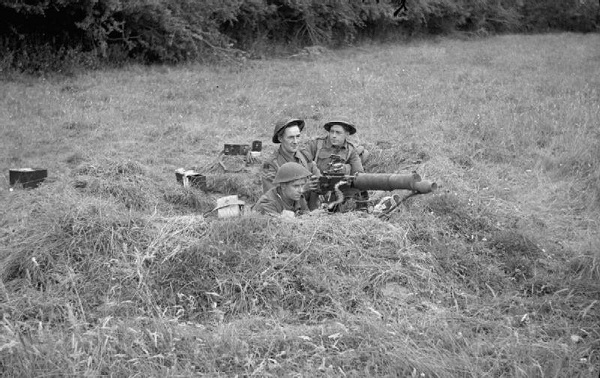
Germans hold the front line in the trenches

As the first few turns elapsed, the Canadians at the right slowly advanced from crater to crater as they took heavy fire from the German rifles and machine gun. Defending from the trenches, the Germans were a hard target with only a “1” result counting as a hit on the fistfuls of D10s being thrown. In the rules, a team taking fire must also roll a D10 morale check or become suppressed. Morale rating is based on the command strength of the squad, with squads on both sides initially beginning with two officers each at a “7” and “8” rating. A morale check equal to or less than the command rating for the squad passes and may take an action on their turn. A squad losing their morale check must use their next activation to rally.

IMG_4622

Canadians advance through a gap in the wire

By mid-game, one Canadian squad had met their doom in the open wasteland in front of the German line and a second was torn in half as they limped to the trench line at the German left. At the center, a full Canadian squad made their way through a center gap followed by the bomb team. On the German right, the machine gun was eliminated and a final squad of fresh Canadians made way for the trenches. The Canadians continued to win initiative roll-offs which were modified at -1 on each side for lost squads or squads failing morale checks.

IMG_4623

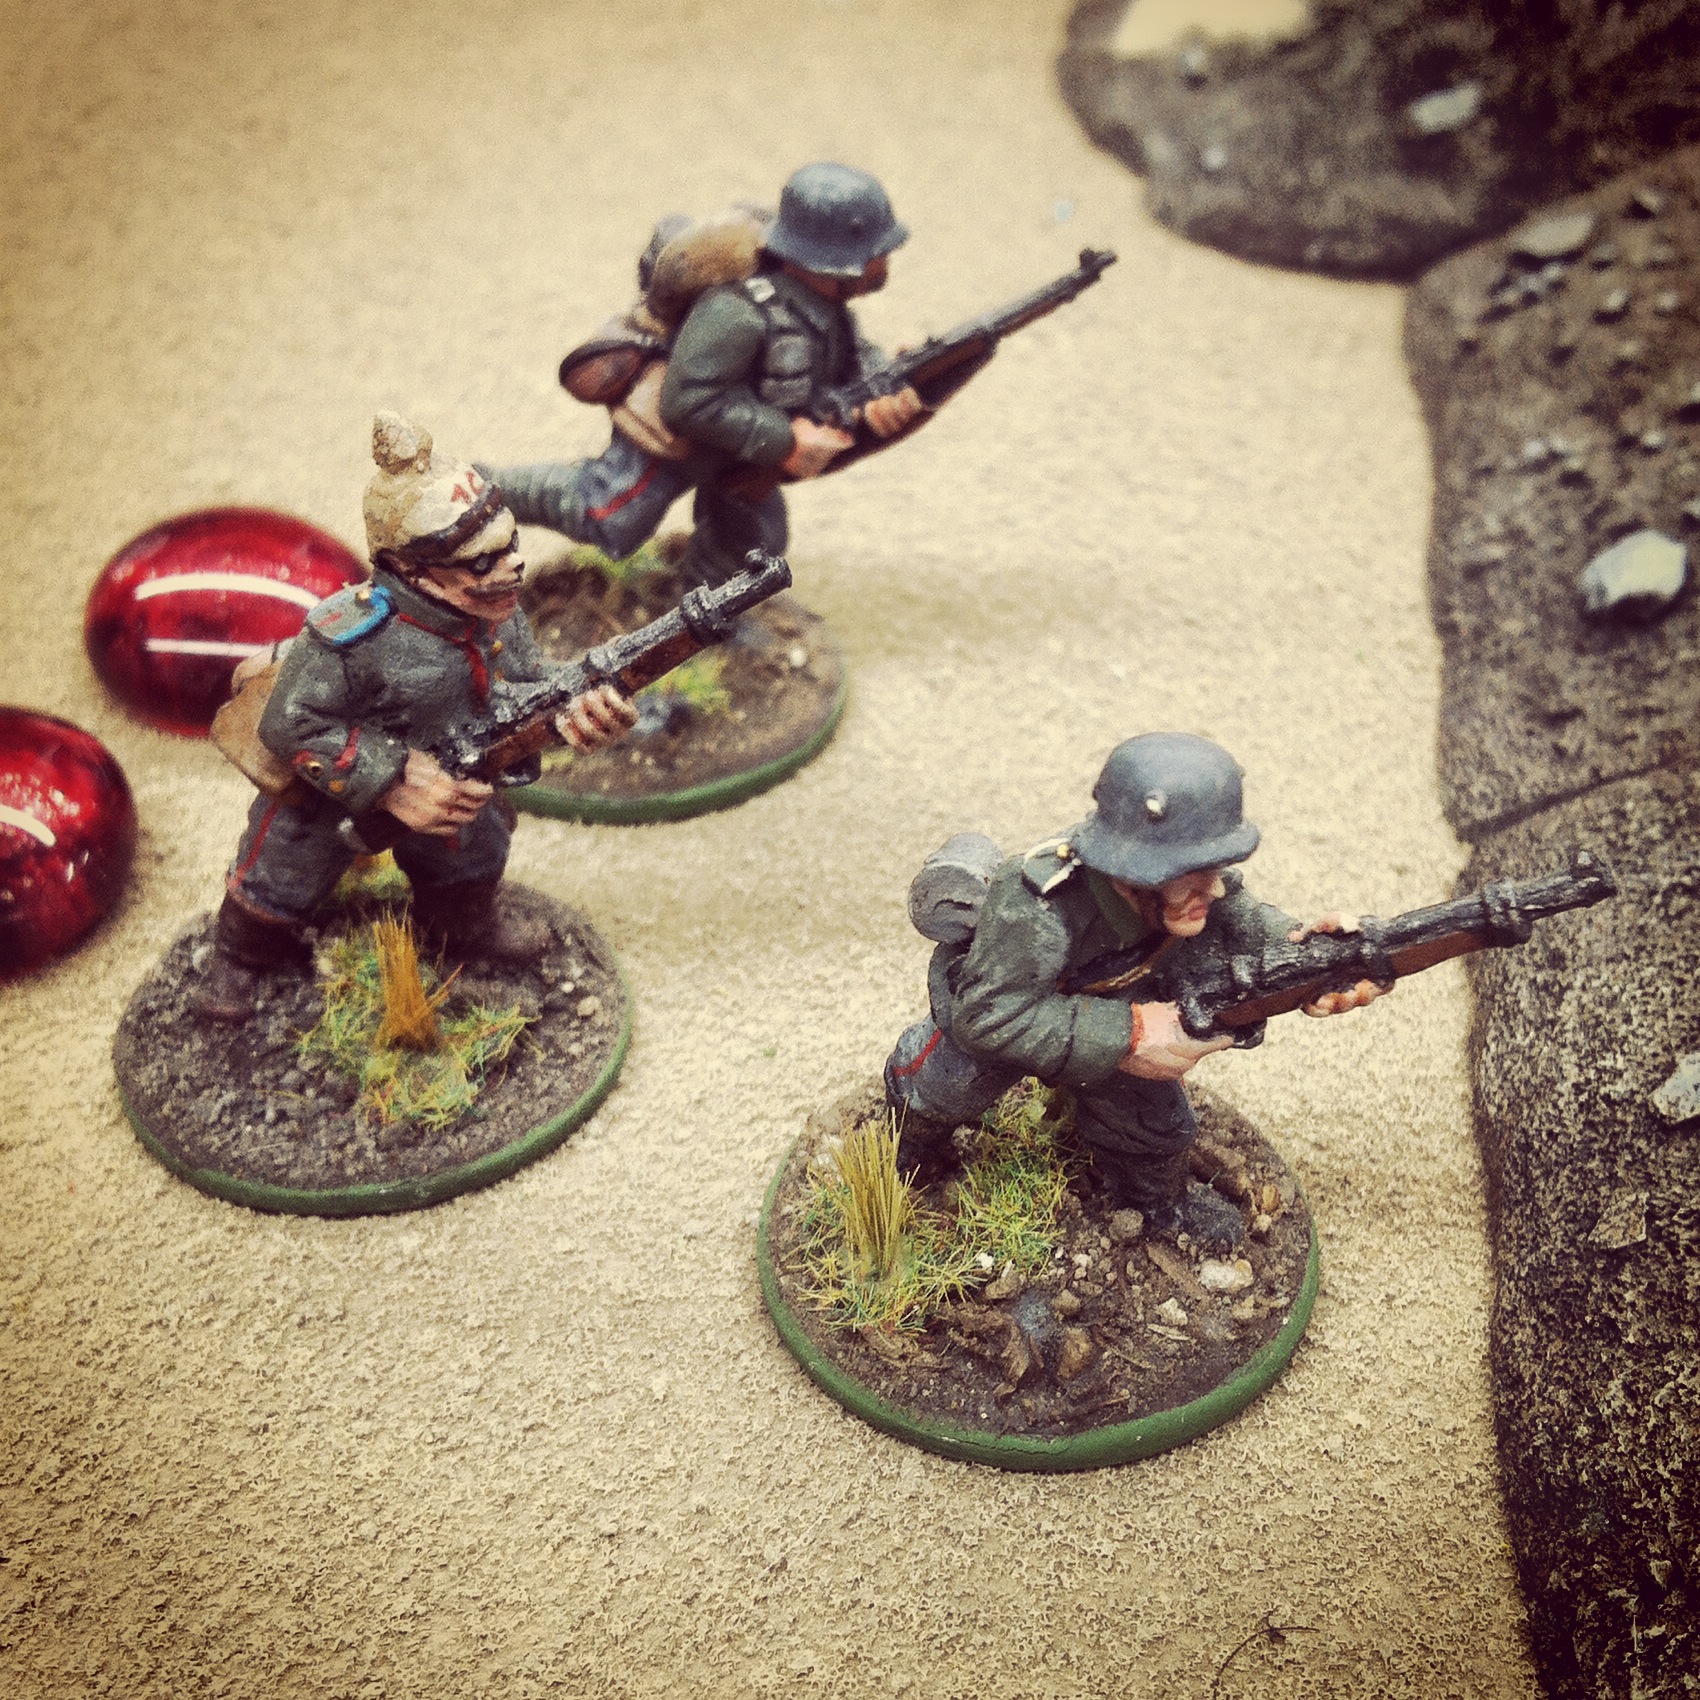
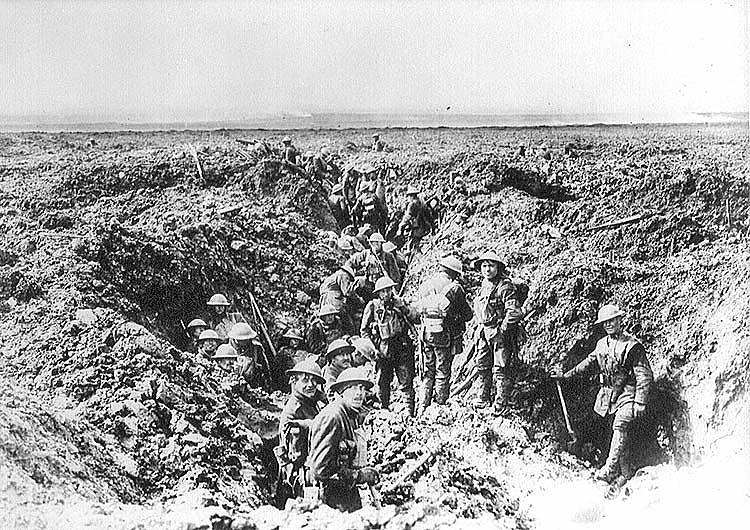
Germans flee the front line to defend from the next line of trenches

As the remnants of one surviving squad of Germans fled the first line of defense after losing two morale checks against the encroaching Canadians, two reserve units of Germans emerged from the woods to the rear and ran to defend the secondary line of trenches. From there, the final turns of the game became a shoot-out between the two trenches with the Canadian bomb crew and a German rifle squad being nearly eliminated in the firefight. At the final turn, the Canadians had scored a minor yet costly victory by securing the first line of the German trenches for the Allies.

IMG_4625

The Canadian bombing party occupies the first line of trenches

IMG_4626

Germans hold the second line at Vimy Ridge

IMG_4624

Canadians hold the first line for victory

I hadn’t played a WWI game in a couple of years, and the figures and terrain at the club hadn’t hit the table in quite some time either. The Price of Glory rules ran fast, and we were all generally of the opinion it captured the combined fire and morale effects found during the conflict. We also agreed another larger game with a bit more complexity and perhaps some artillery, armor and cavalry would be in order. With many worldwide commemorations this year of the Great War’s 100th anniversary (including an excellent site from the Imperial War Museum), is was good to make time for our own journey back to the Western Front.

Flames of War: Lingevres 1944 Scenario

lingevres1944

By D-Day +8 on June 14, 1944, the British 50th Infantry Division had pressed about 5 miles inland from Gold Beach to the outskirts of Lingevres. Dug in at the town were elements from the Panzer Lehr Division with several Panther tanks ready to force back the looming British attack. With 6-pdr anti-tank guns in tow, the British pushed into town mid-morning following a bombardment by 25-pound artillery and runs from supporting Typhoons above. A ferocious battle commenced between the 4th/7th Royal Dragoon Guards and the German Panthers. When the smoke cleared, several Panthers sat burning as victims of Sherman Firefly and anti-tank gun fire. At day’s end, the British controlled Lingevres.

lingevresAT

British 6-pdr anti-tank gun deployed outside Lingevres, June 14, 1944

The WWPD website has a Lingevres scenario available which two of us adapted for play this past weekend at Metropolitan Wargamers in Brooklyn, NY. Using the scenario as a guideline, we laid out the tabletop battlefield with cornfields stretching outside the town occupying two-thirds of the table. With our 1750-point forces on each side, the Germans began with two platoons of infantry and a heavy machine gun platoon inside two buildings and the church at the center of Lingevres. The British then deployed with their artillery battery, two rifle companies and a recon patrol. All other forces were held off table, with German delayed reserves set to arrive in turn three and British reserves eligible to arrive immediately at the beginning of the game.

Victory conditions as presented were simple — the British needed to take three buildings in the town and the Germans needed to drive the British from the field. How the game played was not simple and once again revealed my need to sink more work into creating accurate, playable scenarios for FOW.

IMG_3163
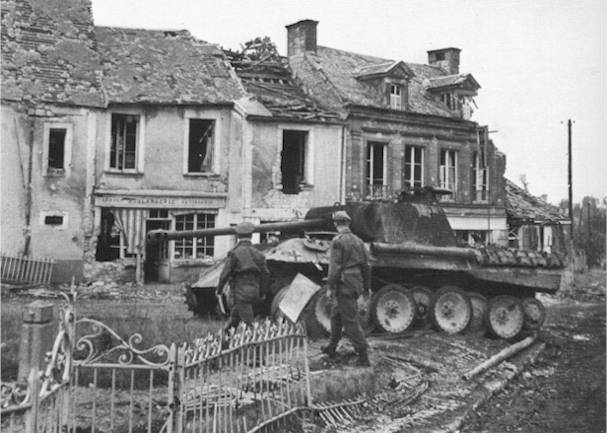
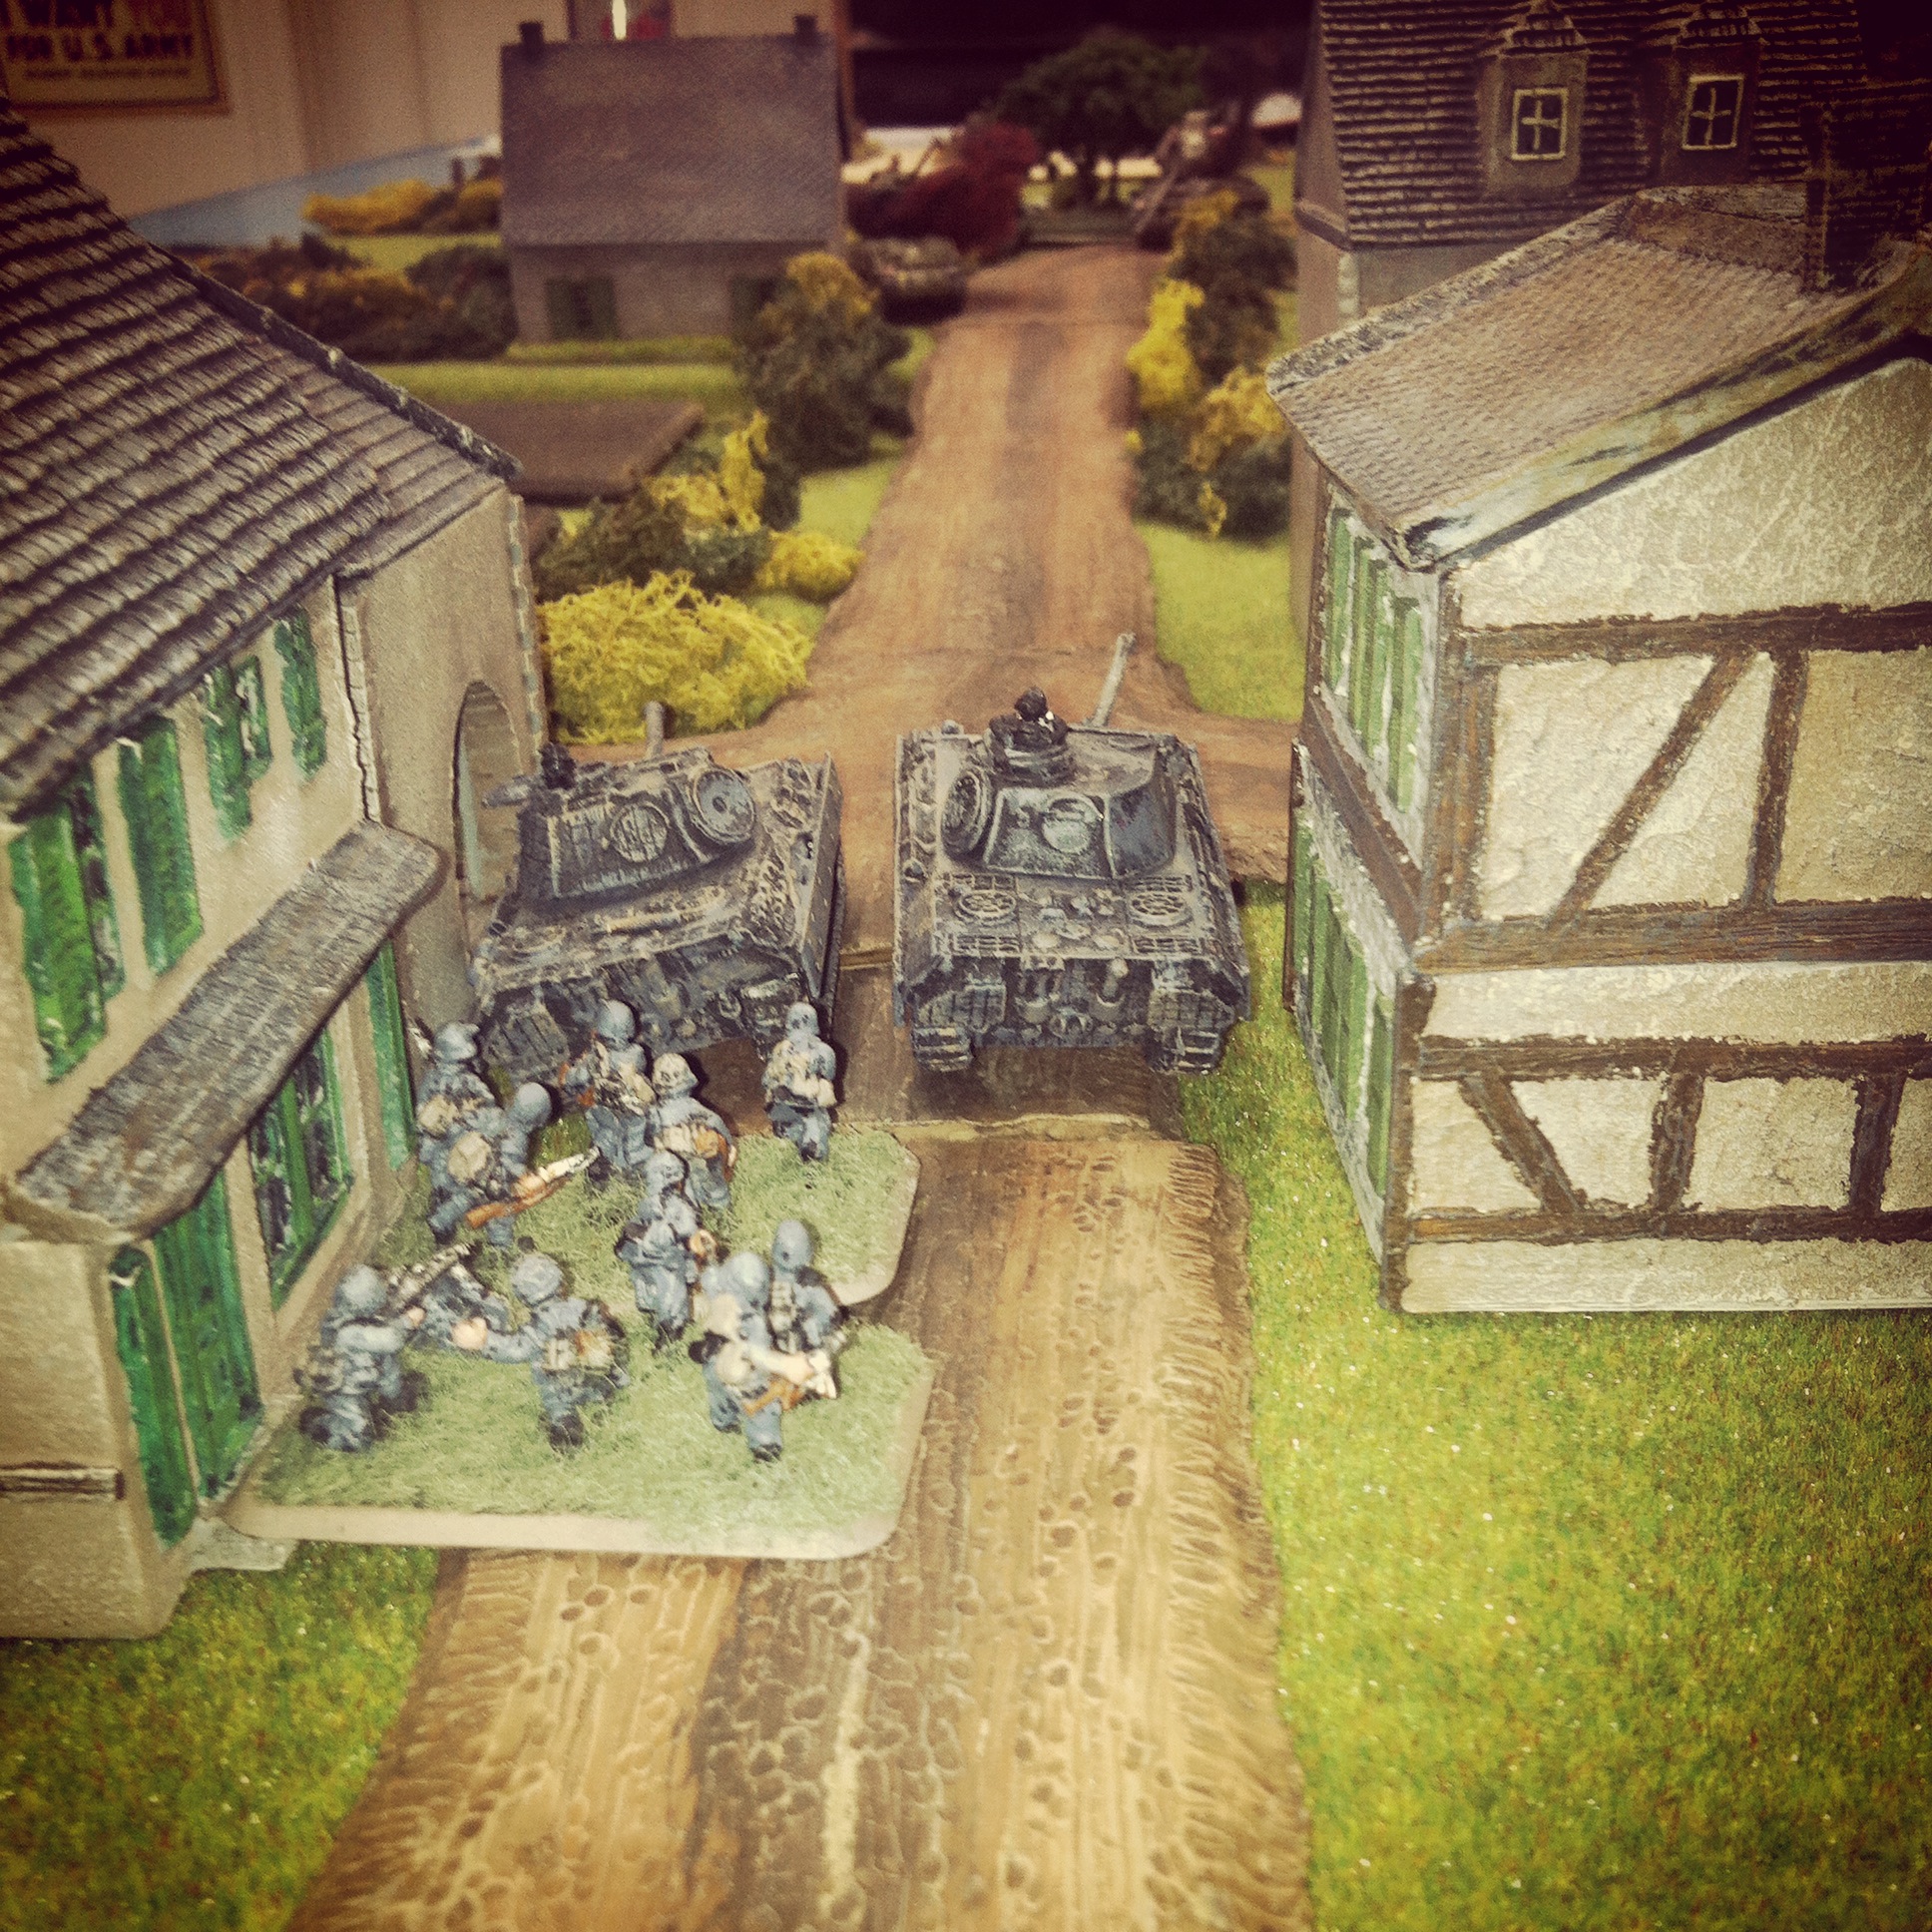
Germans dug in at Lingevres in the town’s buildings while British artillery and infantry deployed from the cornfields in the distance

IMG_3164

Initial movement of British forces into Lingevres with recon carriers moving left and infantry moving into the woods near the church

The first two turns of the game saw the British marching from their edge of the table toward Lingevres. At the town, a German machine gun platoon sat waiting in a building at the crossroads while two other infantry platoons took up position in the church and shops across the road. By turn three, British artillery had opened fire on the machine gunners and pinned them. The first British tank platoon also rumbled onto the table, as did the German Panthers which made way for the center of town.

IMG_3165

Panther reserves roll into the center of Lingevres

IMG_3173

British infantry in the woods take fire and are pinned as armored reserves move from the rear

The first British infantry platoon made way through the woods at the center of the table but were pinned and cut down over two consecutive turns of fire from nearby Germans. The British recon patrol, edging its way through the bocaged fields near the church, was chased away with the appearance of the Panthers.

IMG_3167A British Sherman takes up position to spot for the artillery battery

IMG_3166

British infantry move from the farmhouse across the field

IMG_3169

Panthers destroy a Firefly and the Sherman spotter tank at the edge of town

IMG_3170

British infantry fall back after taking fire from the German half-tracks

On the main road to town, the British ran their Sherman spotter tank and lead Firefly toward the nearby farmhouse. On the other side of the farmhouse, a British infantry platoon moved into position using the building and nearby bocage as cover as they made way for the open field. The heavy British push around the farm was stymied with the arrival of German halftracks which fired machine guns into the field. By turn five, the Sherman spotter tank and spearheading Firefly also lay in flames after some quick shots from the German Panthers.

IMG_3168

British machine gun carriers and tank reserves roll on

IMG_3171

Armored reserves move to support infantry

IMG_3172 British infantry reserves move in near their artillery battery

By turns six and seven the inital British assualt had been repulsed at a safe distance from town. All German infantry platoons remained safely bunkered up in the town’s buildings, and the spotter for the German’s reserve 12cm mortar platoon was now camped out in the church’s bell tower. The three Panthers prowled back and forth at the center of town, and the incoming fire from the British artillery in the distance was the only real agitation to the occupying Germans. The Britsh rolled on their final reserves of machine gun carriers, Sherman/Firefly tanks and a fresh infantry platoon.

Even with all reserves on the table, the British attack was stumped. With one rifle platoon destroyed and a second whittled down, the British had just one intact infantry platoon on the field. One tank platoon struggled through the fields to one side of town, while the second sat idling on the road to town. Clear lines of fire around the church and town center presented open killing zones for the Germans in the town’s buidings and the three Panthers. All the Germans needed to do was sit in place and mow down the coming British.

I love playing wargames for historical scenarios, but our game this past weekend at Lingevres presented some serious limitations to the FOW rules as written. Playing an even match of 1750-point forces per side ultimately did not allow for a satisfying game for either player. What works for a head’s up FOW tournament game or randomly-rolled mission simply does not play well in recreating historic engagements.

In our Lingevres game, the British simply didn’t have enough units to create a critical mass to advance into town under what was sure to be withering fire from the Germans. We decided we liked the scenario, but perhaps the British needed a 50% increase in points, perhaps with additional rifle and tank platoons and a Typhoon providing air support.

With a three-day D-Day weekend being planned at our club this June, we’ve got multiple historic airborne, beach and inland fights to sketch out in the coming months. There’s going to be a lot of playtesting and tweaking to get our historic games to play well. With wargaming, striking the balance between a game that provides both historic accuracy and the potential for different outcomes is the real challenge that lies beyond just the roll fo the dice.

Flames of War: Aalst 1944 Scenario

aalst

The ultimately unsuccessful week-long Operation Market Garden commenced on September 17, 1944 with an Allied push toward Germany. The ground “Market” portion of the campaign saw the British Guards Armoured Division taking point on the push into the Low Countries.

On the second day of the operation, a column of the Guards Armoured had rolled to the southern outskirts of Aalst, a Belgian town occupied by German forces since 1940. Led by Col. Joe Vandeleur, the division’s tanks encountered the remnants of German troops and guns which were dug in but heavily-damaged by the previous day’s Allied air bombings and artillery barrages. For the Germans, Aalst was a line in the sand protecting the Allied advance northeast to Antwerp and  the Netherlands beyond. For the Allies, keeping the long column of armour moving was key to reinforcing the Allied airborne troops already engaged with German forces along several bridges.

This past weekend at Metropolitan Wargamers in Brooklyn, NY we ran the Aalst scenario for Flames of War with 2000-point forces on either side of the table. We pulled our British and German lists from the Market Garden and Bridge By Bridge books. As a jumping off point for the game’s outline, we referenced an Aaalst scenario originally designed for Battlefront. We planned a 10-turn game with points scored for destroyed platoons and an immediate end to the game when the British rolled a platoon off the German-defended north end of the table.

IMG_3026

German set-up at Aalst

As per the actual situation at Aalst in 1944, the Germans began setting up with half their force heavily dug in just north of the town’s center. Deadly 8.8 cm Flak guns were positioned on roads to their right and left flanks, and 7.5 cm PaK 40 anti-tank guns stood closer to town. Infantry and heavy machine gun platoons hunkered down in the fields just outside of town, and a single Jagdpanther idled nearby. Expecting both ground and possible air forces, the German guns were well-prepared for the arriving British.

IMG_3027

German 88’s dug in at the northeast and northwest ends of town

IMG_3016

British set-up at Aalst

The British laid out their 8-gun 25 pdr battery at the rear of the table and rolled on two platoons from the Guards with Joe Vandeleur attached. Spotters for the artillery were deployed in Shermans to the right and left hoping to provide eyes across the entire table for. Towed 6 pdr anti-tank guns, infantry, machine gunners and additional tanks lay in reserve off-table to follow the initial wave of armour. The plan was to use Vandeleur’s special rules to rush tanks to the center of the table, saturate the Germans with artillery fire and pave the way from additional supporting platoons.

IMG_3029

 Vandeleur leads the Guards into position behind the town

IMG_3028

German infantry and Pagdpanther make for the church at the center of Aalst

In the first two turns, the Guards quickly rolled up to take position behind the town to the south with their Vickers machine gun platoon riding on the tanks. The British artillery spotter hopped from his Sherman tank and ran for back door of a building. The Germans made way to the north of town with infantry looking to occupy the church at Aalst with a lone Jagdpanther in support.

IMG_3031

A Firefly lays waste to the approaching Jagdpanther with its first shot

IMG_3032

The Guards take heavy fire and two Shermans and a Firefly sit in flames

Fire opened up in the next two turns with a well-positioned Firefly scoring a kill on the nearing Jagdpanther. Returning fire, German 88s destroyed the Firefly and PaK 40s bailed and subsequently wrecked two other Shermans. Machine gunners made their saves, jumped off their tanks and made way for cover in a nearby building at the town’s intersection. Meanwhile, British artillery lobbed a volley over the town hoping to slow down the German infantry and machine guns looking to take hold of the town’s buildings. The barrage resulted in a destroyed PaK 40 just to the north of the church, but the German infantry pressed on to take up positions in the church.

IMG_3034

British infantry move to assault the church as reserve armor rolls to the town center

With British infantry reserves moved at the double to the town and then moved in a subsequent turn to assault the church. At the same time, a reinforcing Guards tank platoon raced to the town center. Shots from the Shermans failed to destroy nearby PaK 40s but fire from the Vickers guns in a nearby building pinned the Germans in the church ahead of the assault. Despite all the British fire lighting up the center of town, the assault failed and the British infantry fell back to the other side of the street.

IMG_3033

German armored reserves arrive

With the British stalled at the crossroads in Aalst, German reserves moved onto the table. A Stug platoon, Wirbelwinds and a fresh Jagdpanther began closing in from the northwest of town, drawing fire from the British battery looking to slow their advance. Volleys from the 25-pound guns blew up an 88 and a PaK 40, but the mass of German hardware kept rolling forward.

IMG_3035

British command tanks move to engage the Germans

IMG_3036

A swarm of German armor and troops push forward under British artillery fire

IMG_3037

A Panzerfaust lights up a British command tank

Hoping for a hard push of combined arms on the German right, British command tanks followed by two platoons of infantry pressed forward from a nearby woods. The British tankies proved to be tough, surviving a turn of fire from nearby Stugs and an attempted infantry assault with  Panzerfaust-wielding infantry as British guns continued to range in and rain shells on the Germans to no effect.

IMG_3038

The lone surviving command British tank awaits its fate from the German onslought

Back at the center of town, the last tank platoon took fire from the 88s, PaK 40s and a Panzerfaust in the church steeple and was destroyed. The one lone command tank on the western outskirts of town was surrounded and destroyed by combined tank and artillery fire. With only the remnants two rifle platoons and the Vickers left spread through the town, the game was lost for the British. As the sun set in the west, Aalst remained in Axis hands.

In our discussion after, the British artillery had only been effective only about 50% of the time and only eliminated a few units throughout the game. Too many British tanks burned too quickly against overwhelming crossfire from German guns, and reinforcing British infantry could never make headway beyond Aalst’s crossroads. More British tank platoons with Fireflies might have gone a long way toward at least pushing through the town.

Fortunately for the people of Aalst, the engagement during Market Garden resulted in the liberation of the town by the British. Pictures from the victory show a very different outcome from our game with smiling faces all around. The very nature of wargaming sometimes just makes things go a different way, and this past weekend the dice rolled against the tide of history with a victory for the Germans at Aaalst.

Flames of War: Fielding the FOW British Rifle Company, Machine Gun Platoon and 6-Pdr Anti-Tank Platoon

BritSoldiers

At long last, my months-long build of my British forces for Flames of War was wrapped up this week (at least for now). Starting with the Guards Armoured Division this past summer, my British collection now contains a fair amount of armor, artillery, transport and now, infantry platoons. With most of my WWII gaming focused on the late war period from D-Day onward in Western Europe, having a solid British base to supplement my Americans provides me with a lot of playability for my Allies in any number of scenarios and campaigns.

fowbritinf

With nearly 3.8 million soldiers serving for the British army in WWII, the “PBI” (Poor Bloody Infantry”) led the war for the Allies from its earliest days right up until the bitter end in Western Europe and the Pacific. The FOW British Rifle Company box provides gamers the basic backbone for fielding a core group of British infantry. The FOW rifle company comes armed with the standard kit of WWII British infantry, including the Bren light machine gun, Sten submachine gun, 2-inch mortar and PIAT anti-tank weapon. The set also includes a few snipers and a hero figure of Stanley Hollis, whose heroic actions on D-Day earned him the only Victoria Cross awarded on that historic day.

For inspiration during my hours of painting, I looked to a lot of photos of Commonwealth forces from the period and have included some below.

britinfBritish infantry with their Bren light machine gun

BritStenBritish soldiers loading Sten submachine gun magazines

Brit2inchBritish 2-inch mortar crew

BritPiatA British soldier with his PIAT

I keep my painting simple with a brownish-drab uniform, brown boots and a bit of green lightly brushed on the helmet netting. The FOW models offer a nice variety of weapons and poses, plus little details like trench shovels tucked on the backs of many of the figures. I’m usually pretty spare with my basing of basic green flock over a light brown base. That said, I’ve recently discovered easy-to-apply grass tufts from Walthers, a model railroading hobby supplier, and so I added a bunch of those to really make the bases come a bit more alive.

I’ve included a few photos below of my completed British three-platoon infantry company:

IMG_2990

IMG_2988

IMG_2991

IMG_2989

To supplement the standard infantry company and its weapons, I added in the FOW Machine Gun Platoon with the Vickers machine gun. With wide use by the British from WWI to the late 1960s, the hearty Vickers machine gun lays down a hail of fire in support of the swift advancing actions of their infantry countrymen.

britvickersBritish infantry dug in with their Vickers machine gun

IMG_2987Completed British machine gun platoon

Aside from man-packed weapons, many infantry units were accompanied by heavier weapons for when faced by enemy armor. The Ordnance Quick-Firing 6-pounder or 6-pdr was the go-to British anti-tank gun throughout the battlefields of WWII. Hand-hauled short distances or commonly pulled along with the ubiquitous Universal Carrier, the 6-pdr proved most effective in stopping German tanks in the early desert war of Africa. Thicker armor on Panther and Tiger tanks eventually stymied the use of the 6-pdr in frontal face-offs with German crews, but later development of heftier armor-piercing shot by 1944 brought their effectiveness back into play in the last campaigns of the war in Normandy and beyond.

brit6pdrBritish crew with their 6-pdr anti-tank gun in Europe

Again, I needed some of these guys in the mix, so the FOW 6-pdr Platoon was another must-have in my force. I love this little set, especially the officer with his foot planted boldly on a gun’s wheel as he gestures to a distant target. Along with my existing British armor and Royal Artillery Battery, having some anti-tank guns in my force will hopefully provide enough firepower against my heavily-armored German opponents.

IMG_2984Completed 6-pdr anti-tank platoon

Any time I complete a big build, I’m inevitably left with the question of “what next?” First of all, most of my British will begin hitting the game table this coming weekend at Metropolitan Wargamers in Brooklyn, NY in a scenario at Aalst from September 18th, 1944 during Operation Market Garden. I’ll be posting an after-action report for the game early next week, and I’m certain I’ll have plenty more to write up on my fresh British boys in the months to come.