Battleground: Bocage HQ Near Le Mesnil-Rouxelin 1944 Scenario

leMesnilRouxelinJune1944

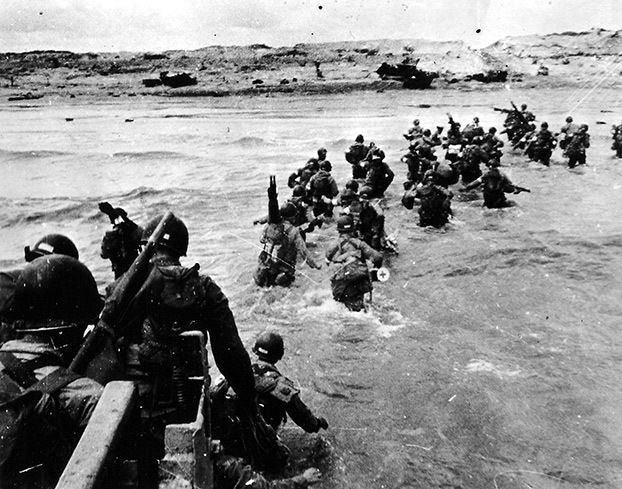
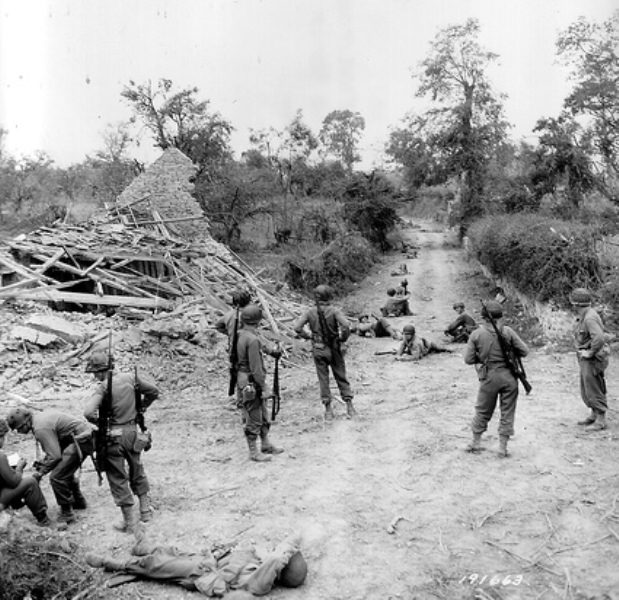
On June 6, 1944, General Dietrich Kraiss and the 7000 some soldiers of his 352nd Infantry Division were at Omaha Beach to meet the Allied invasion. Fighting valiantly against the overwhelming tide of American and British forces, Kraiss and 352nd were stretched thin at the beaches and continued the defense inland for weeks as they fought the Allied advance toward their objective of St. Lo.

LeMesnilStLoMap
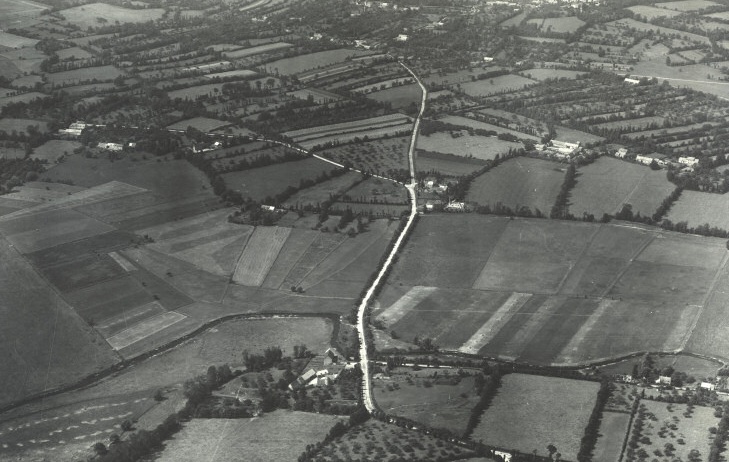
Map of the area around Le Mesnil-Rouxelin and the US 175th Infantry Regiment June 14-18, 1944 advance

St. Lo was an important crossroads objective which had endured German occupation since 1940. On the morning of June 6, 1944, the city was hit with vicious American artillery bombardments. As the Allies advanced inland after the coastal landings toward St. Lo, the German 352nd and 353rd Infantry Divisions and 3rd Parachute Division formed a line to slow them down. By late July, St. Lo was liberated by the Allies and the 352nd was destroyed. By early August, Kraiss was dead, and the German presence in Northern France was near its end.

SCHeroesofOmaha
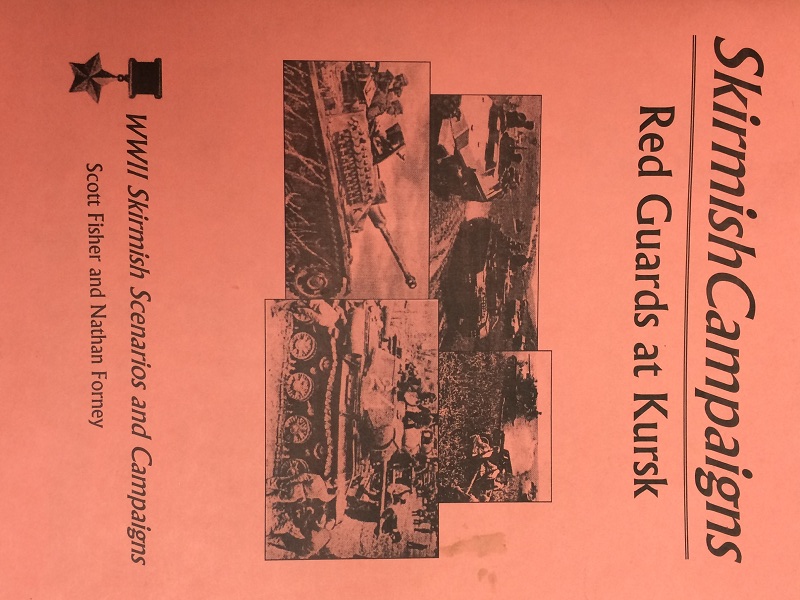
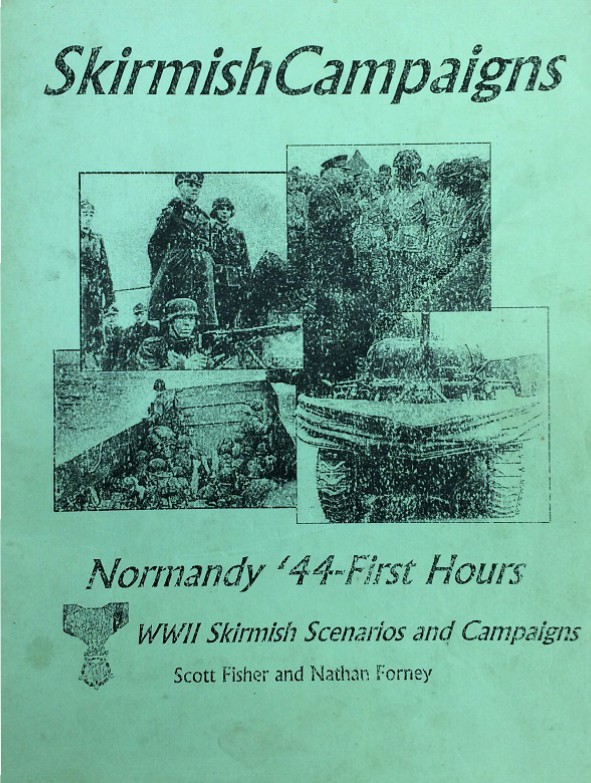
Skirmish Campaigns “Heroes of Omaha and Panzer Lehr” scenario book

The Heroes of Omaha and Panzer Lehr book from Skirmish Campaigns outlines the eleven engagements during this key period from D-Day to the German counterattack through the Allied breakthrough. This past weekend at Metropolitan Wargamers in Brooklyn, NY we ran through the battle near Le Mesnil-Rouxelin just north of St. Lo on June 17, 1944. With elements of the US 175th Infantry Regiment closing in, General Kraiss and his headquarters quickly assembled an ad hoc force to delay the American advance. In the game, three US rifle squads (each armed with a BAR team) and a lone M4 Sherman must advance and seize the German HQ while being held at bay by several small German teams armed with rifles, Panzerfausts, a mortar and a MG-42. the Americans have to hustle, and they have eight turns to capture the German HQ before Kraiss and his staff can make their escape to fight another day.

IMG_6808
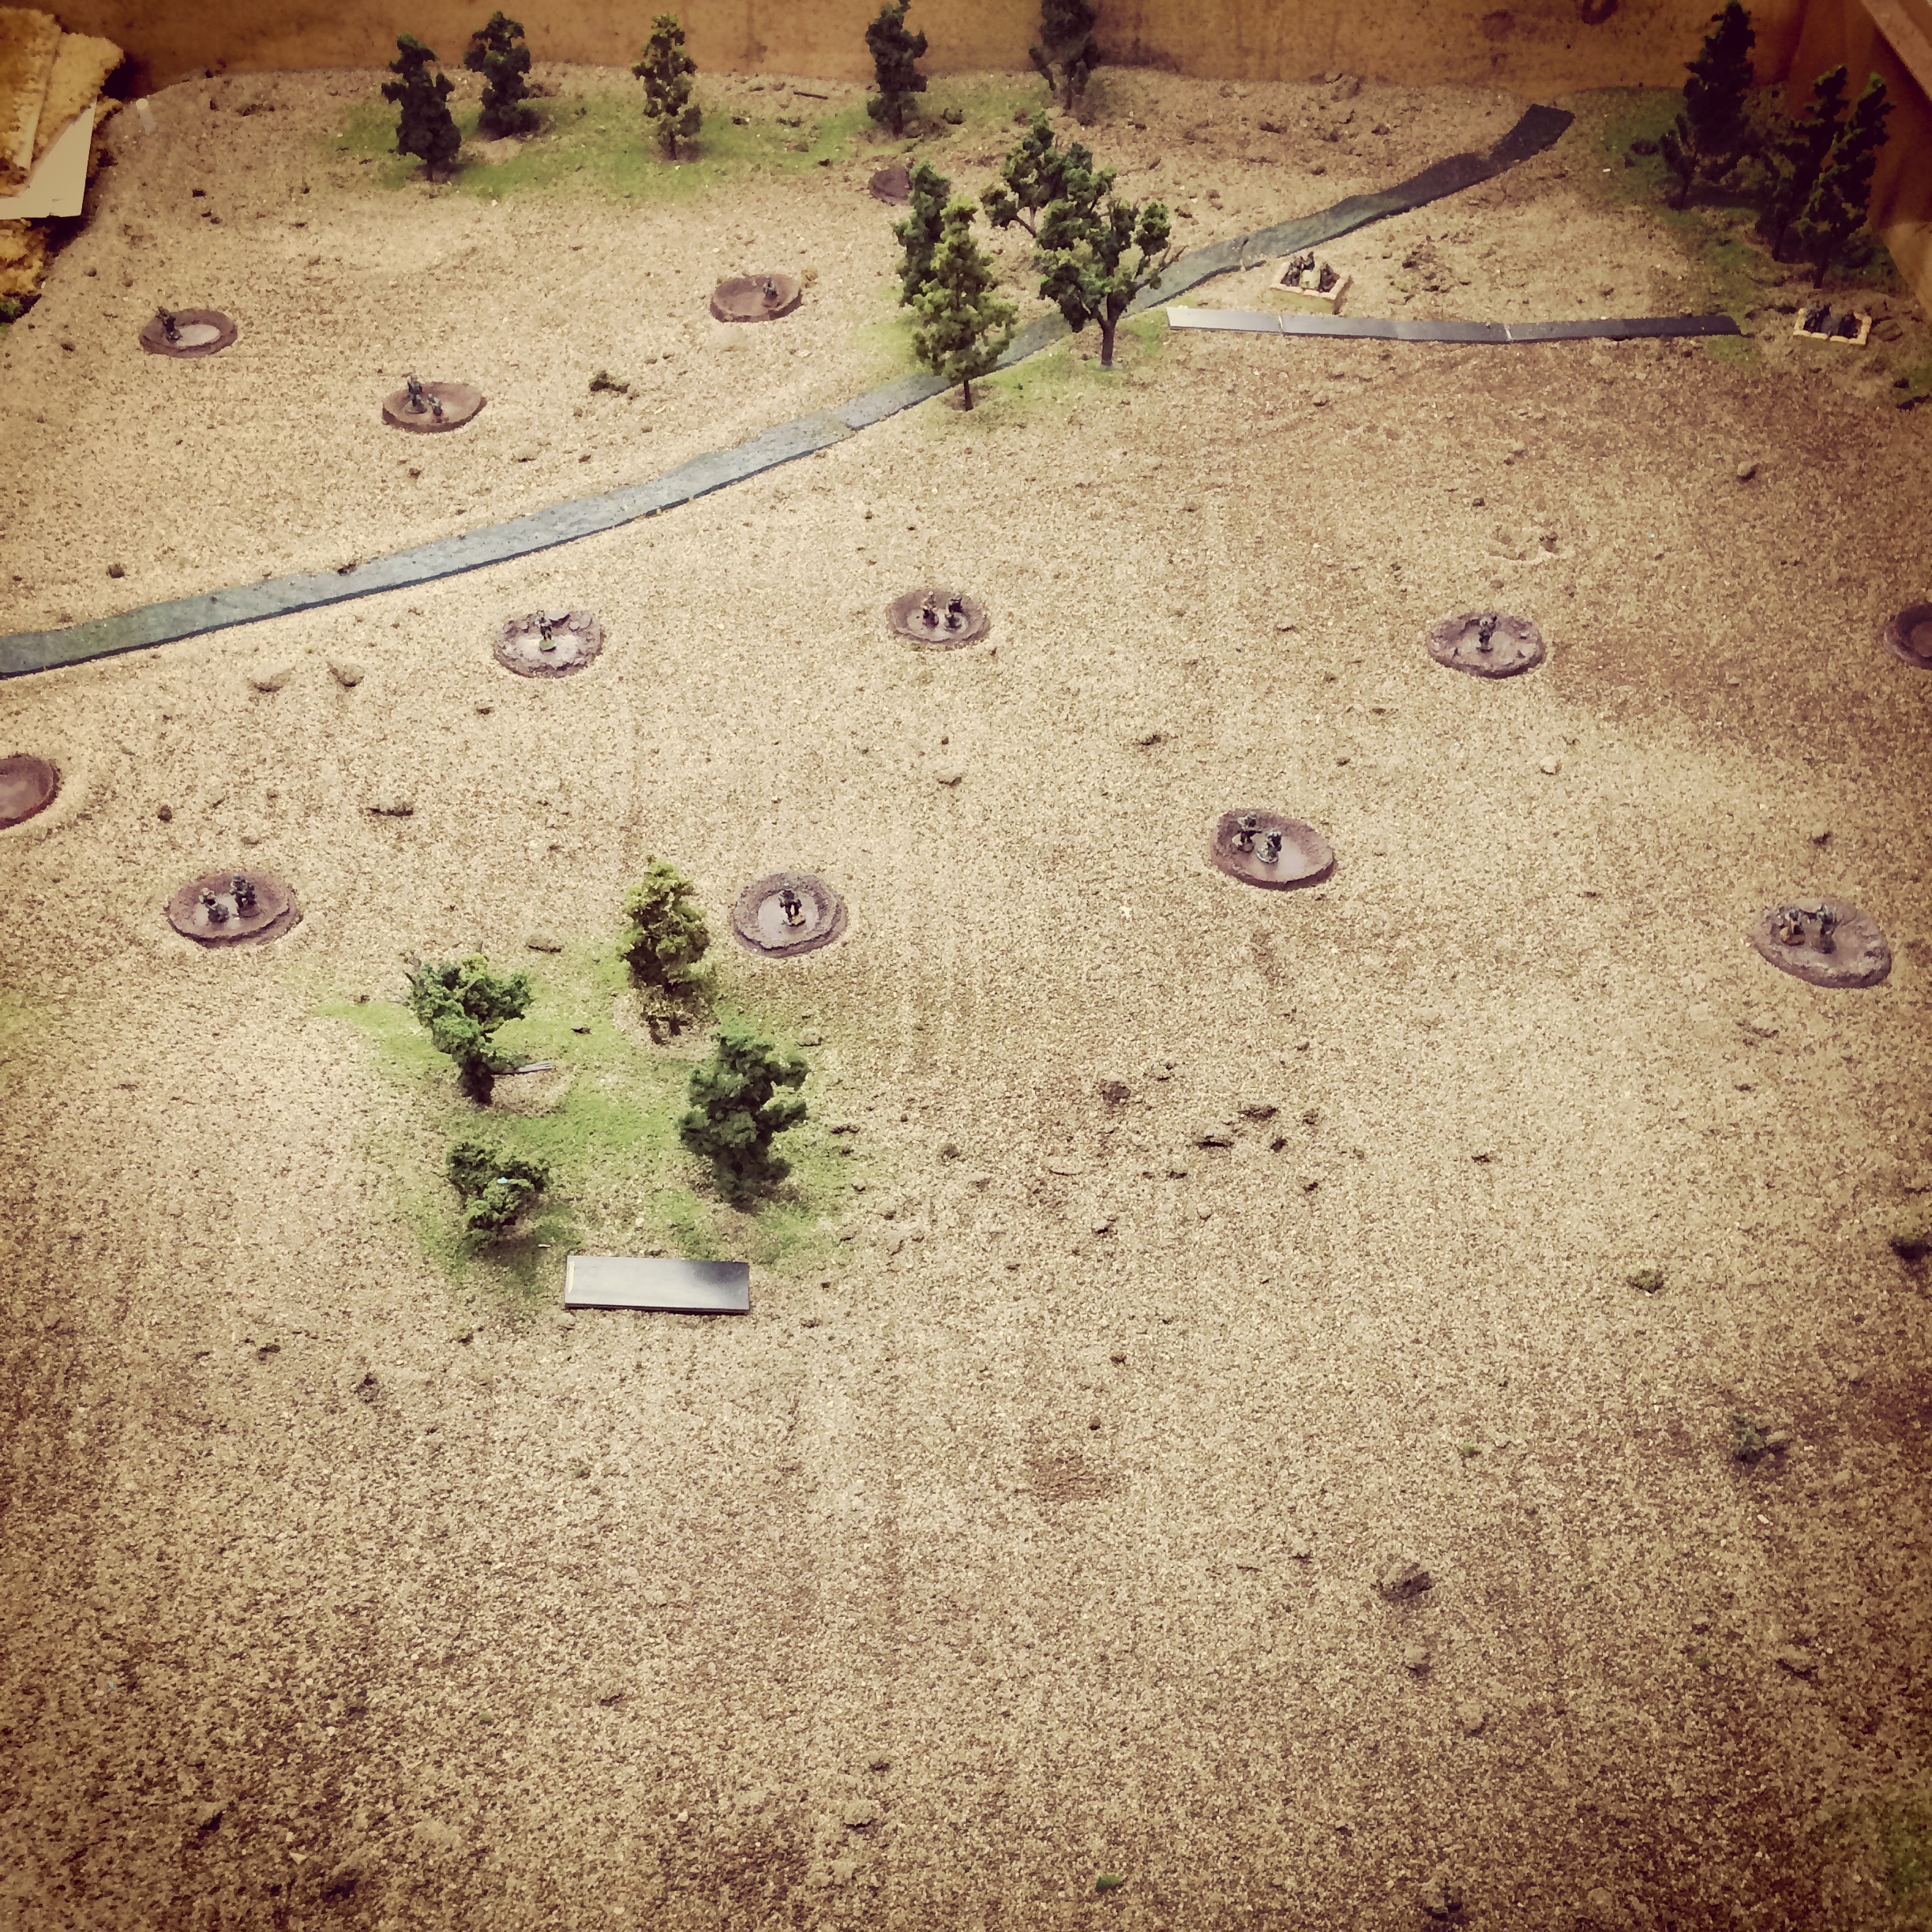
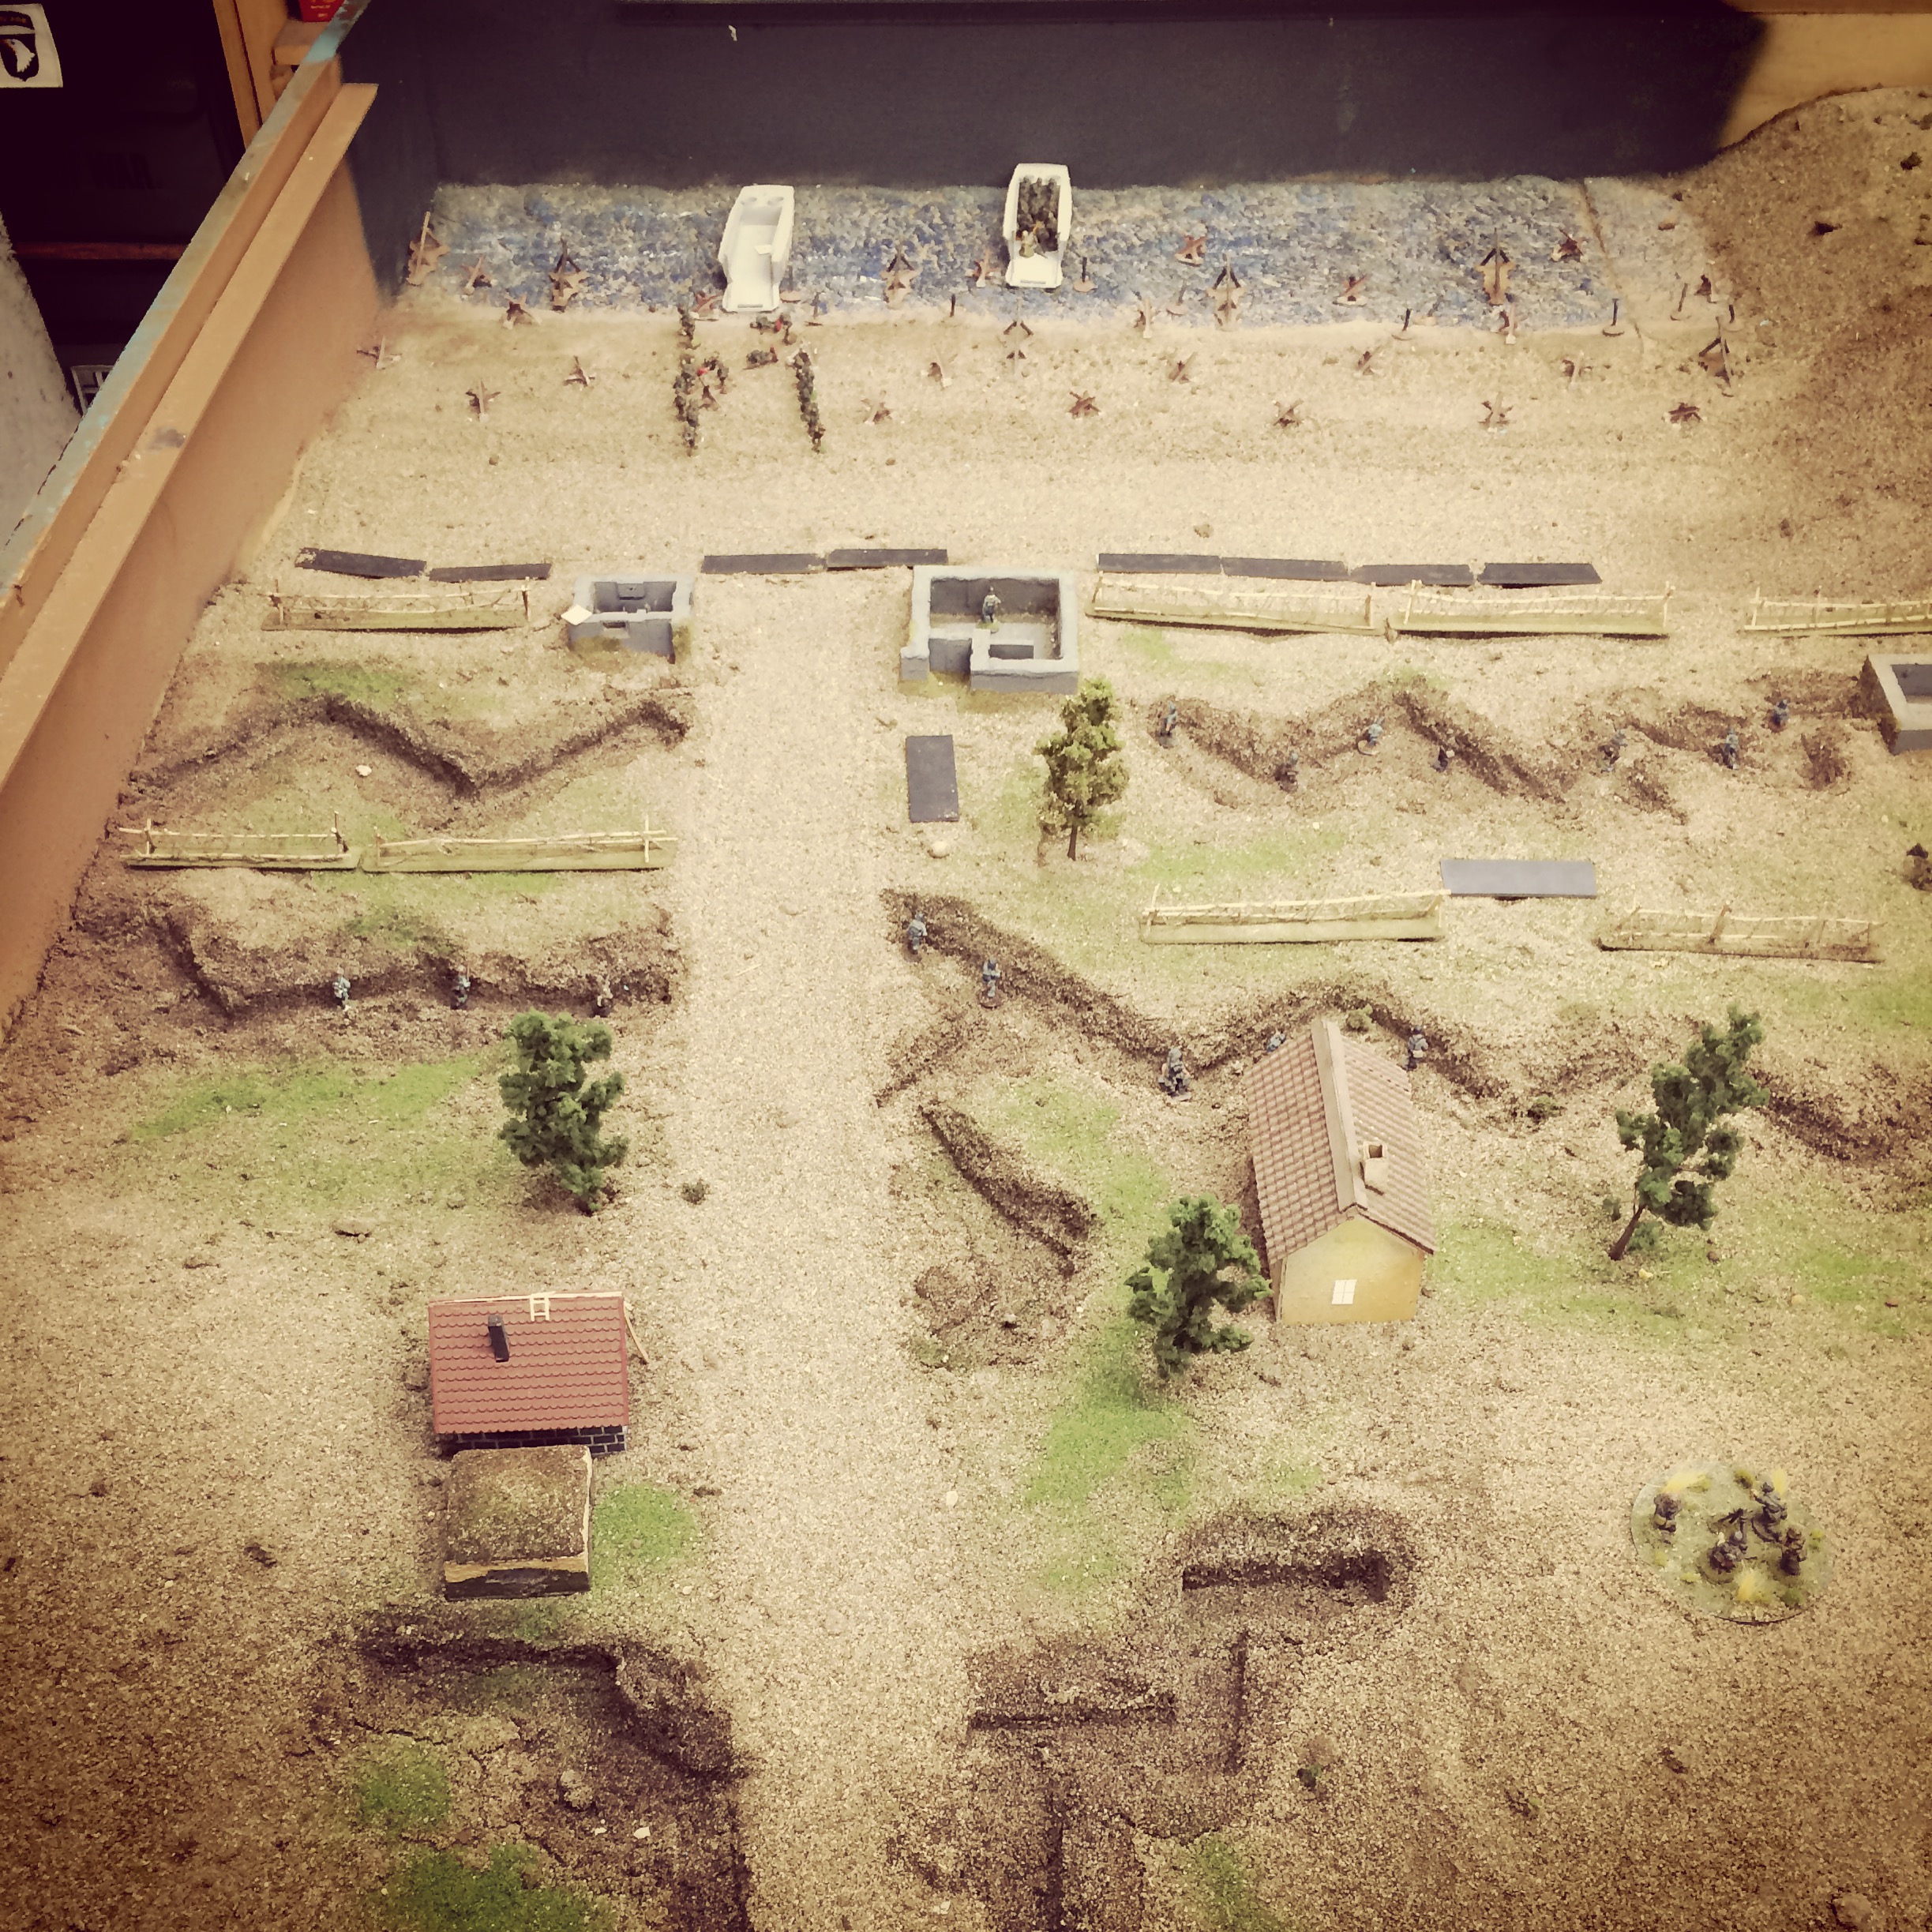
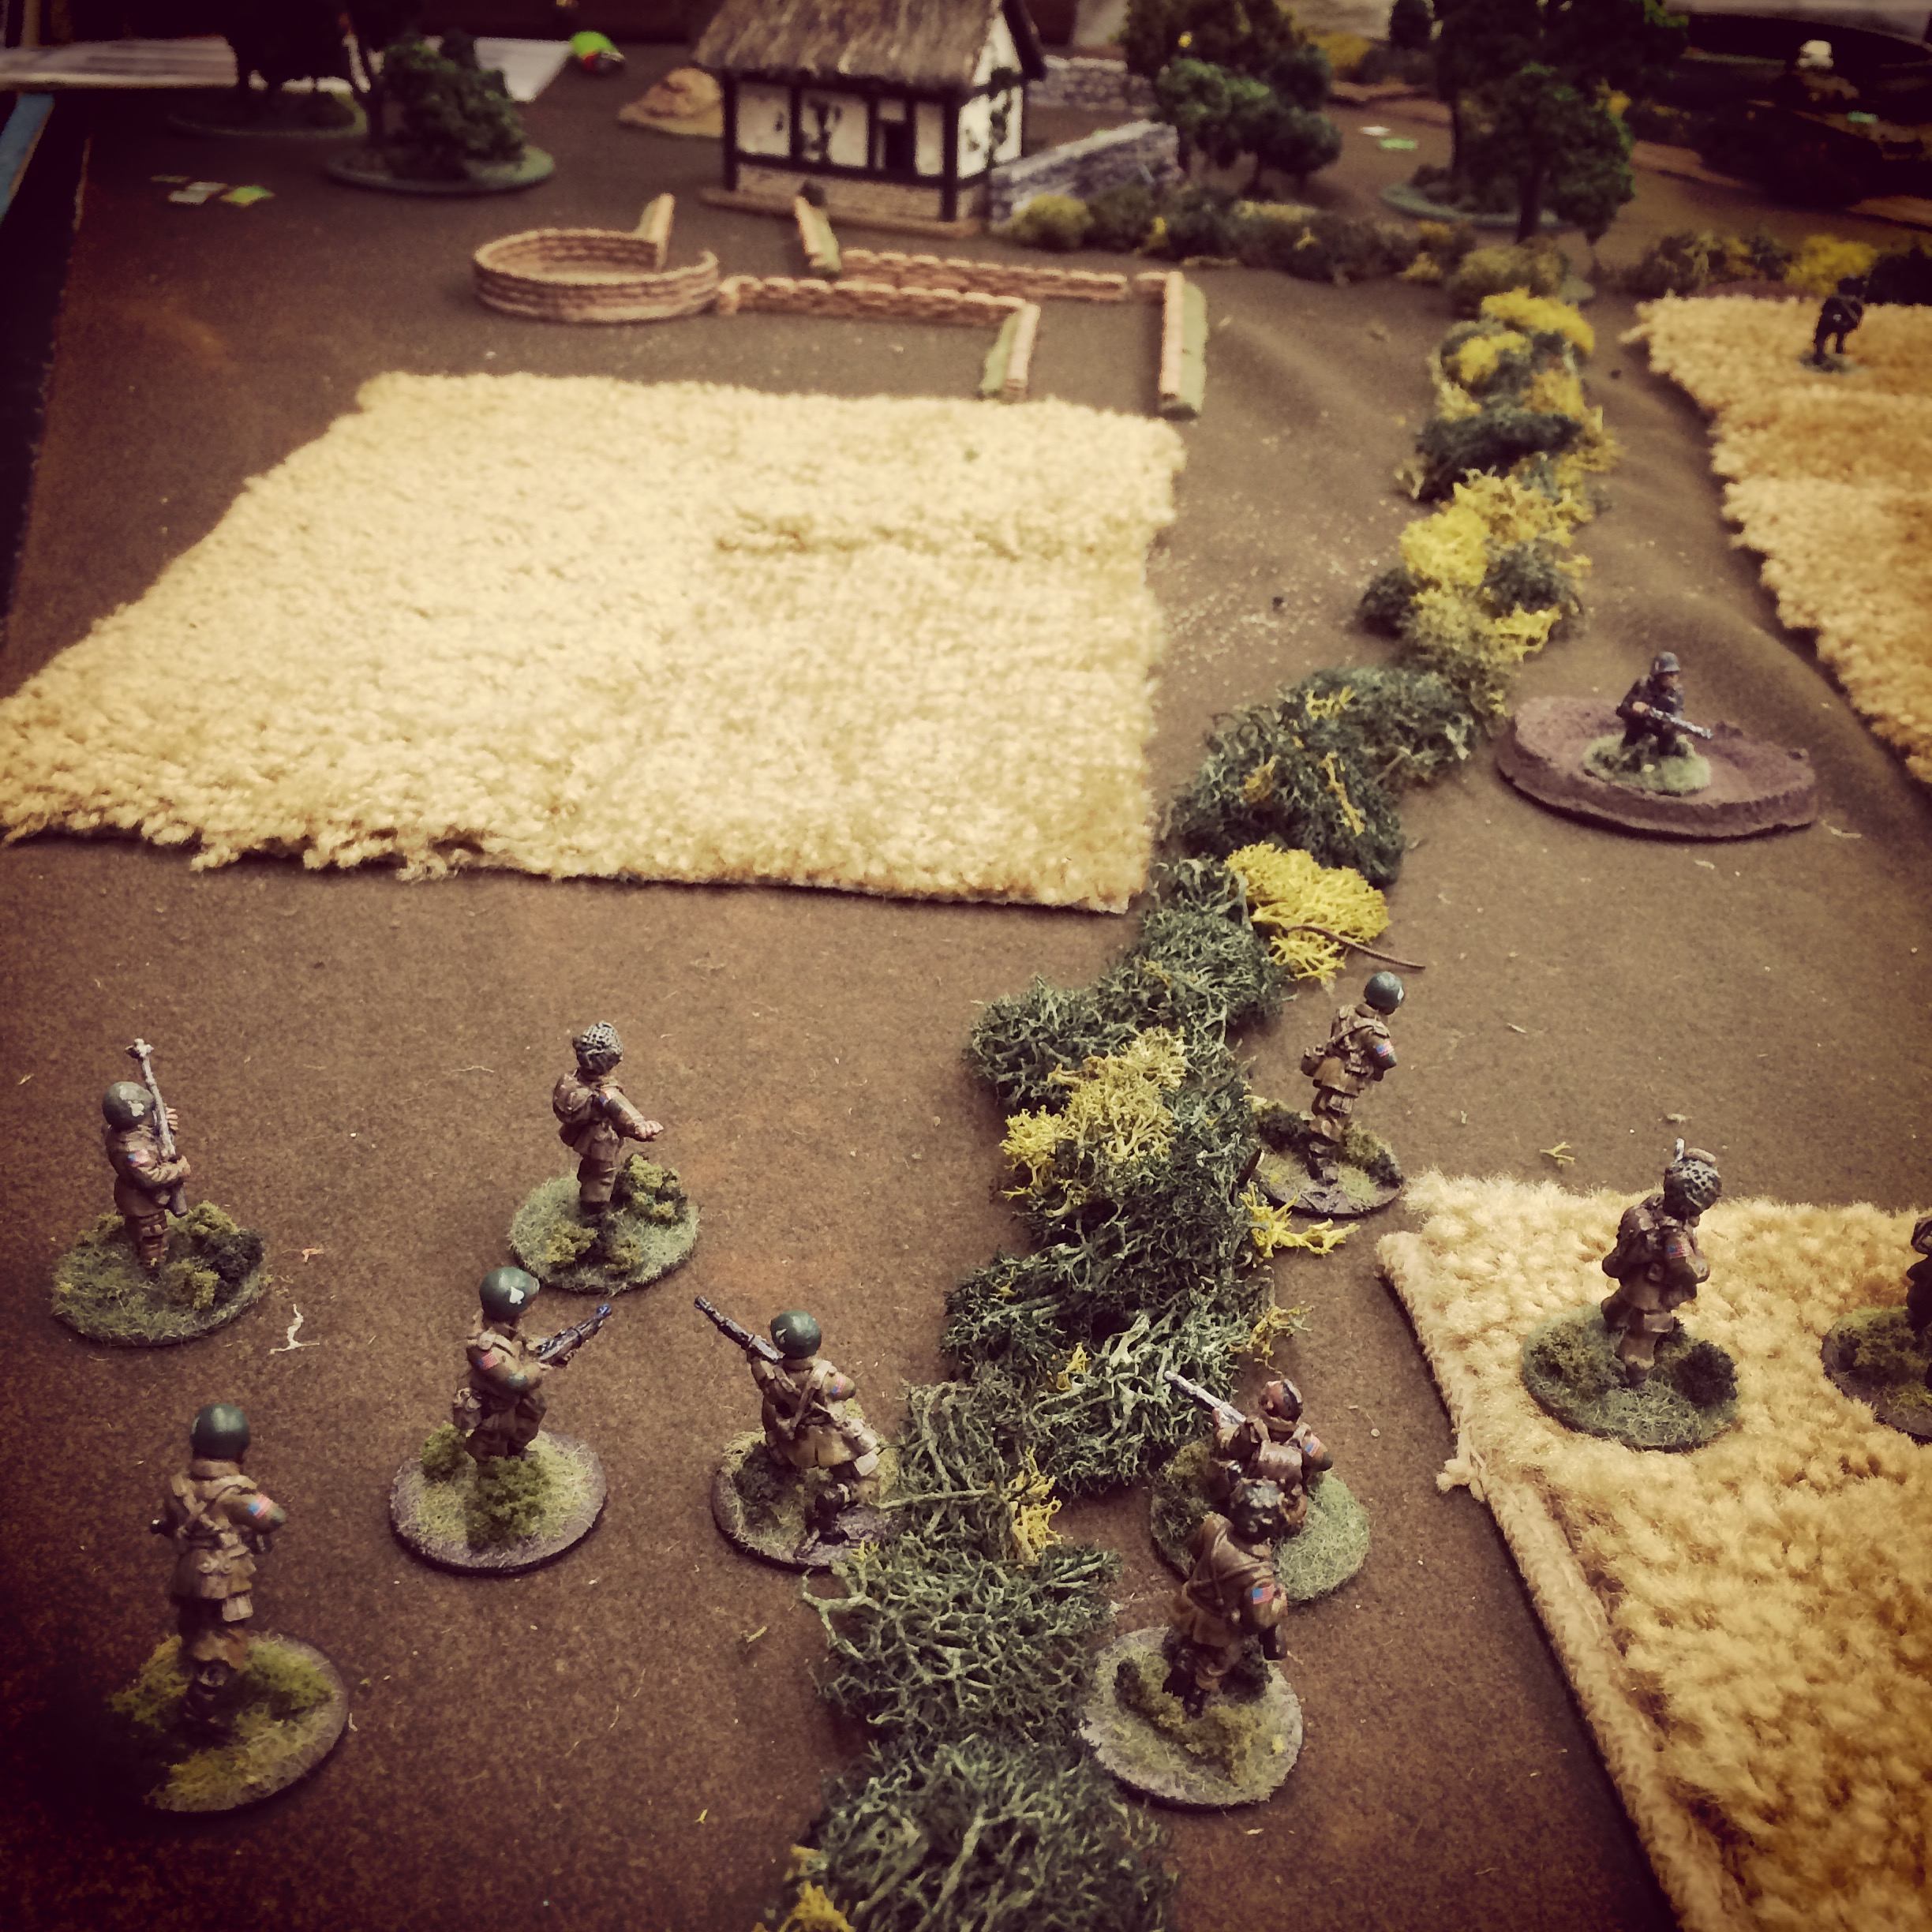
Game set up near Le Mesnil-Rouxelin with the German HQ in the distance

With my US Airborne 28mm models standing in for the American infantry, they spent the first few turns moving in from the north and navigating the bocage hedgerows. Two squads and the US HQ moved to the east of the main road, the Sherman ran straight through the middle and one squad edged toward a French farmhouse mid-field. The German machine gun set up at the road edge in the bocage, looking to cover the advance by road or in the thick fields. Other German riflemen spread out along the hedges, looking to create a defense using their thin units and cover to the best advantage.

IMG_6804

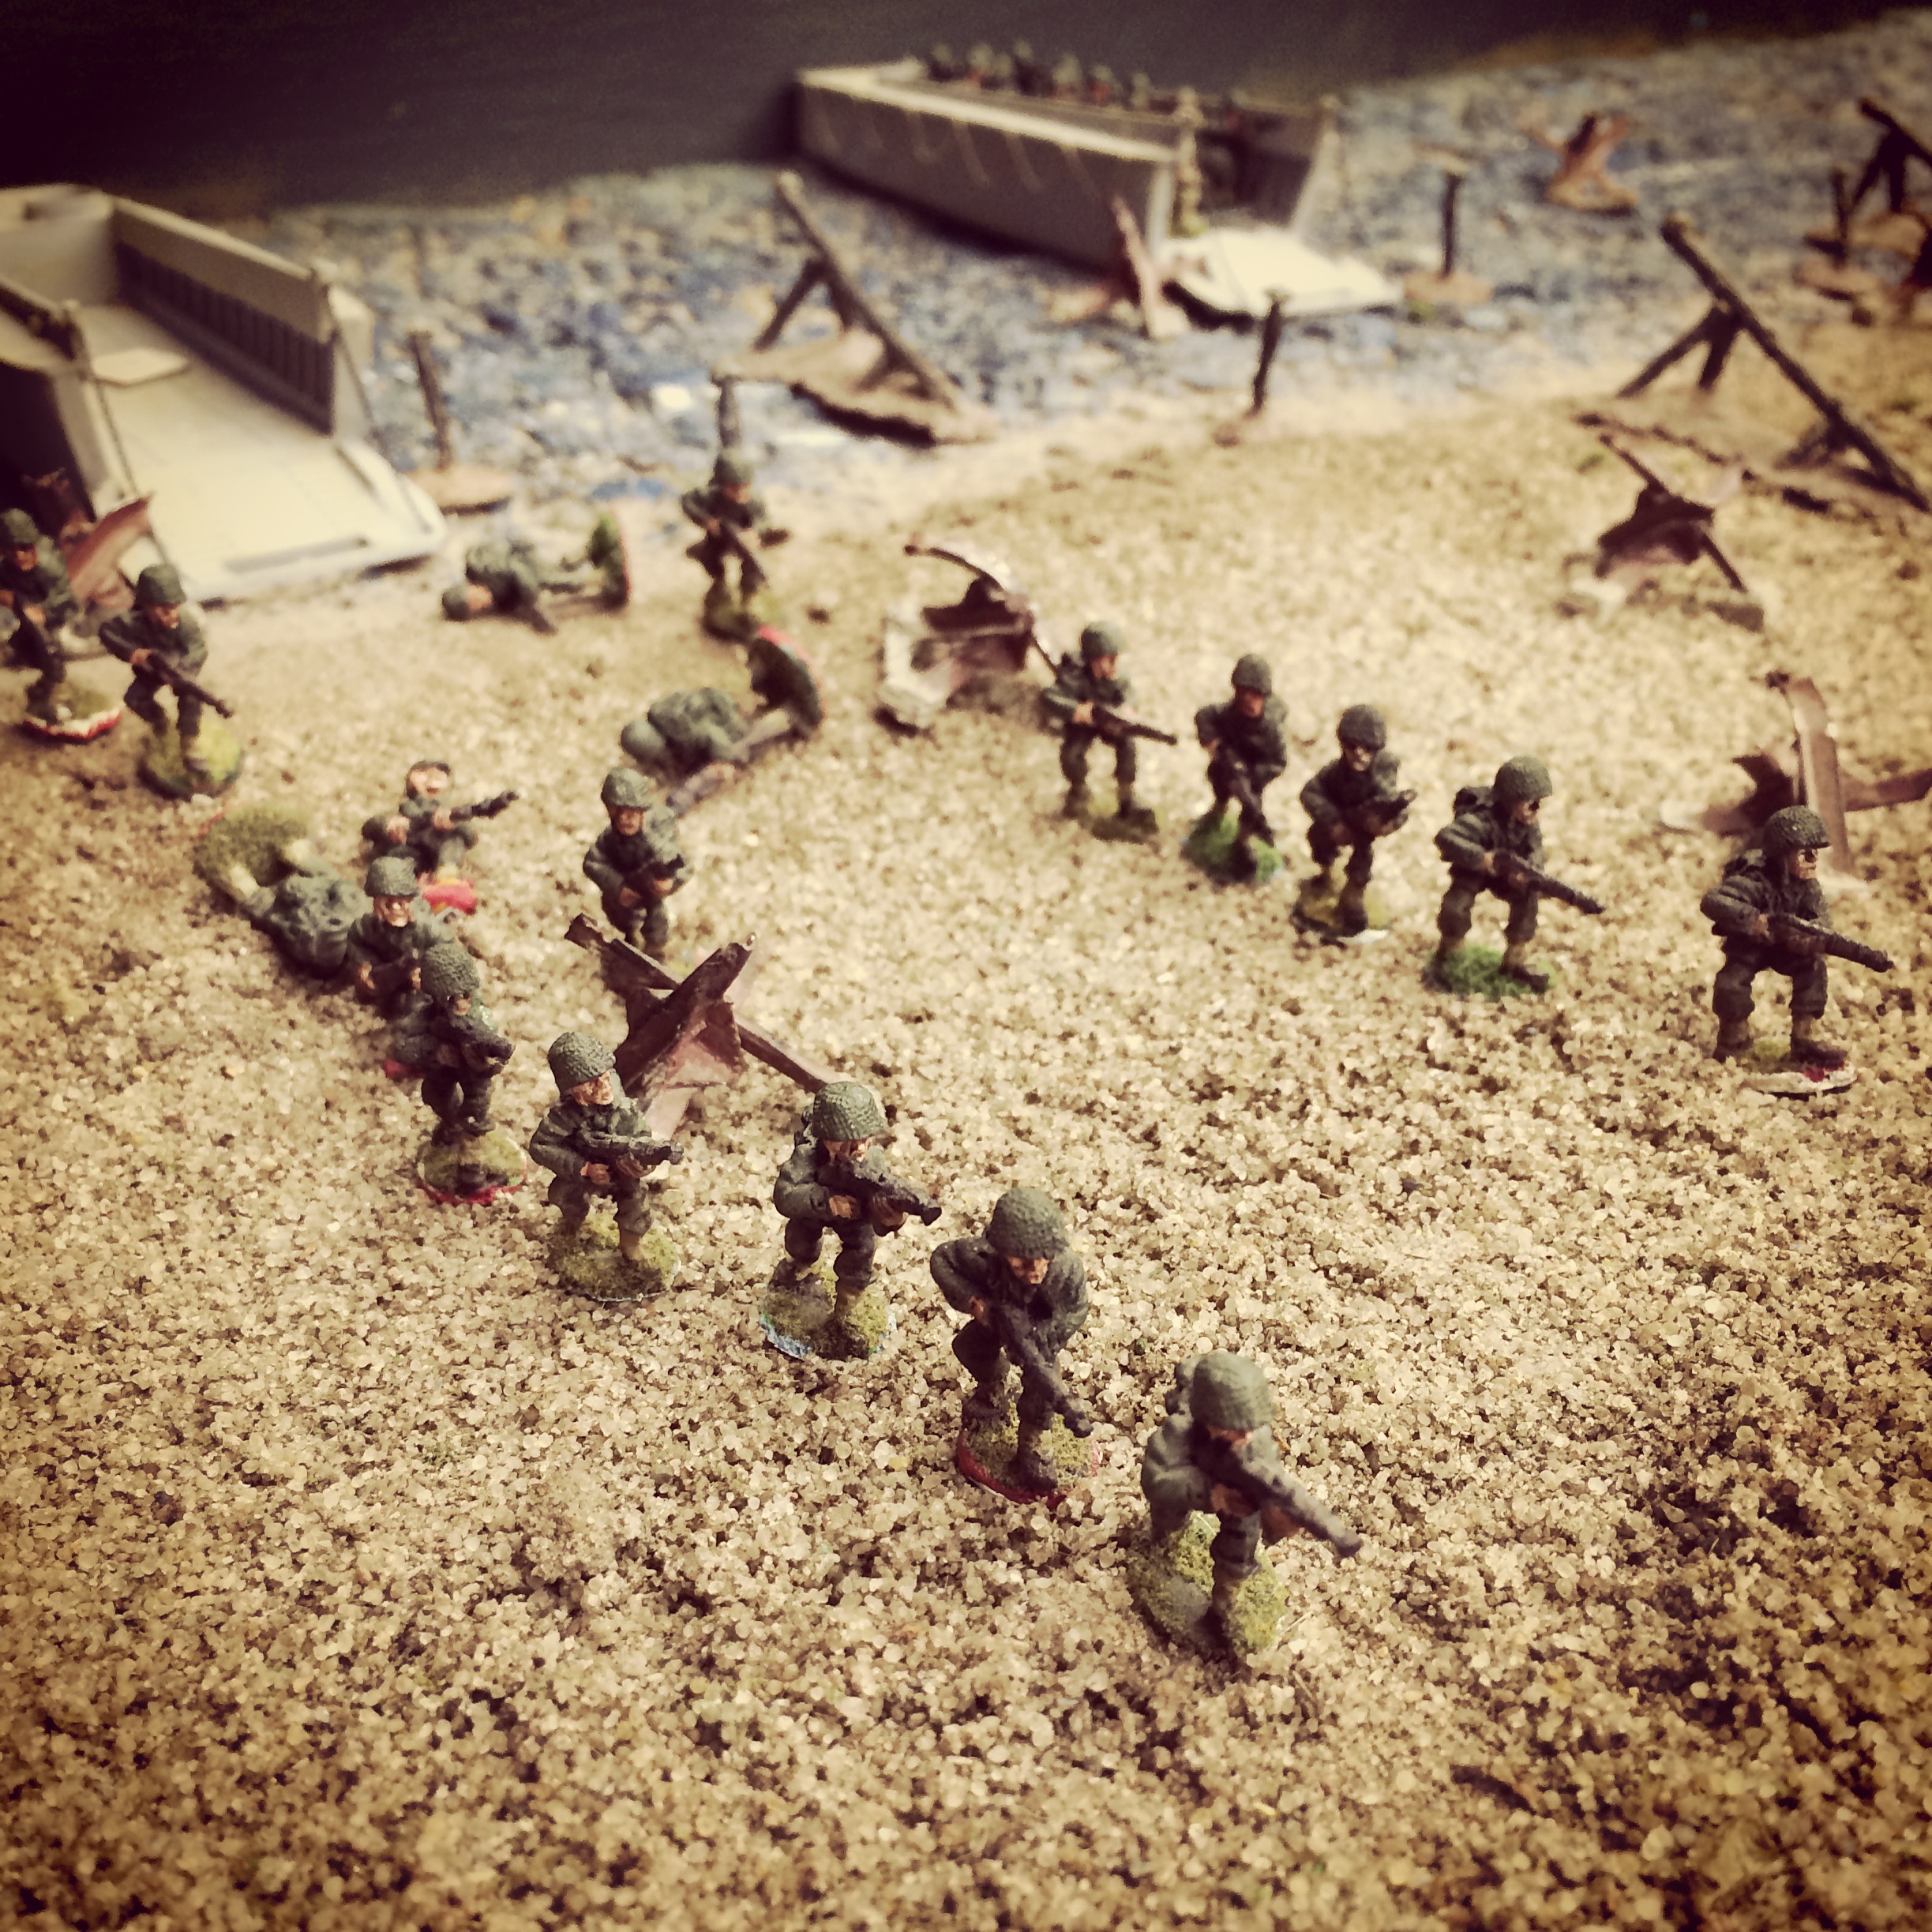
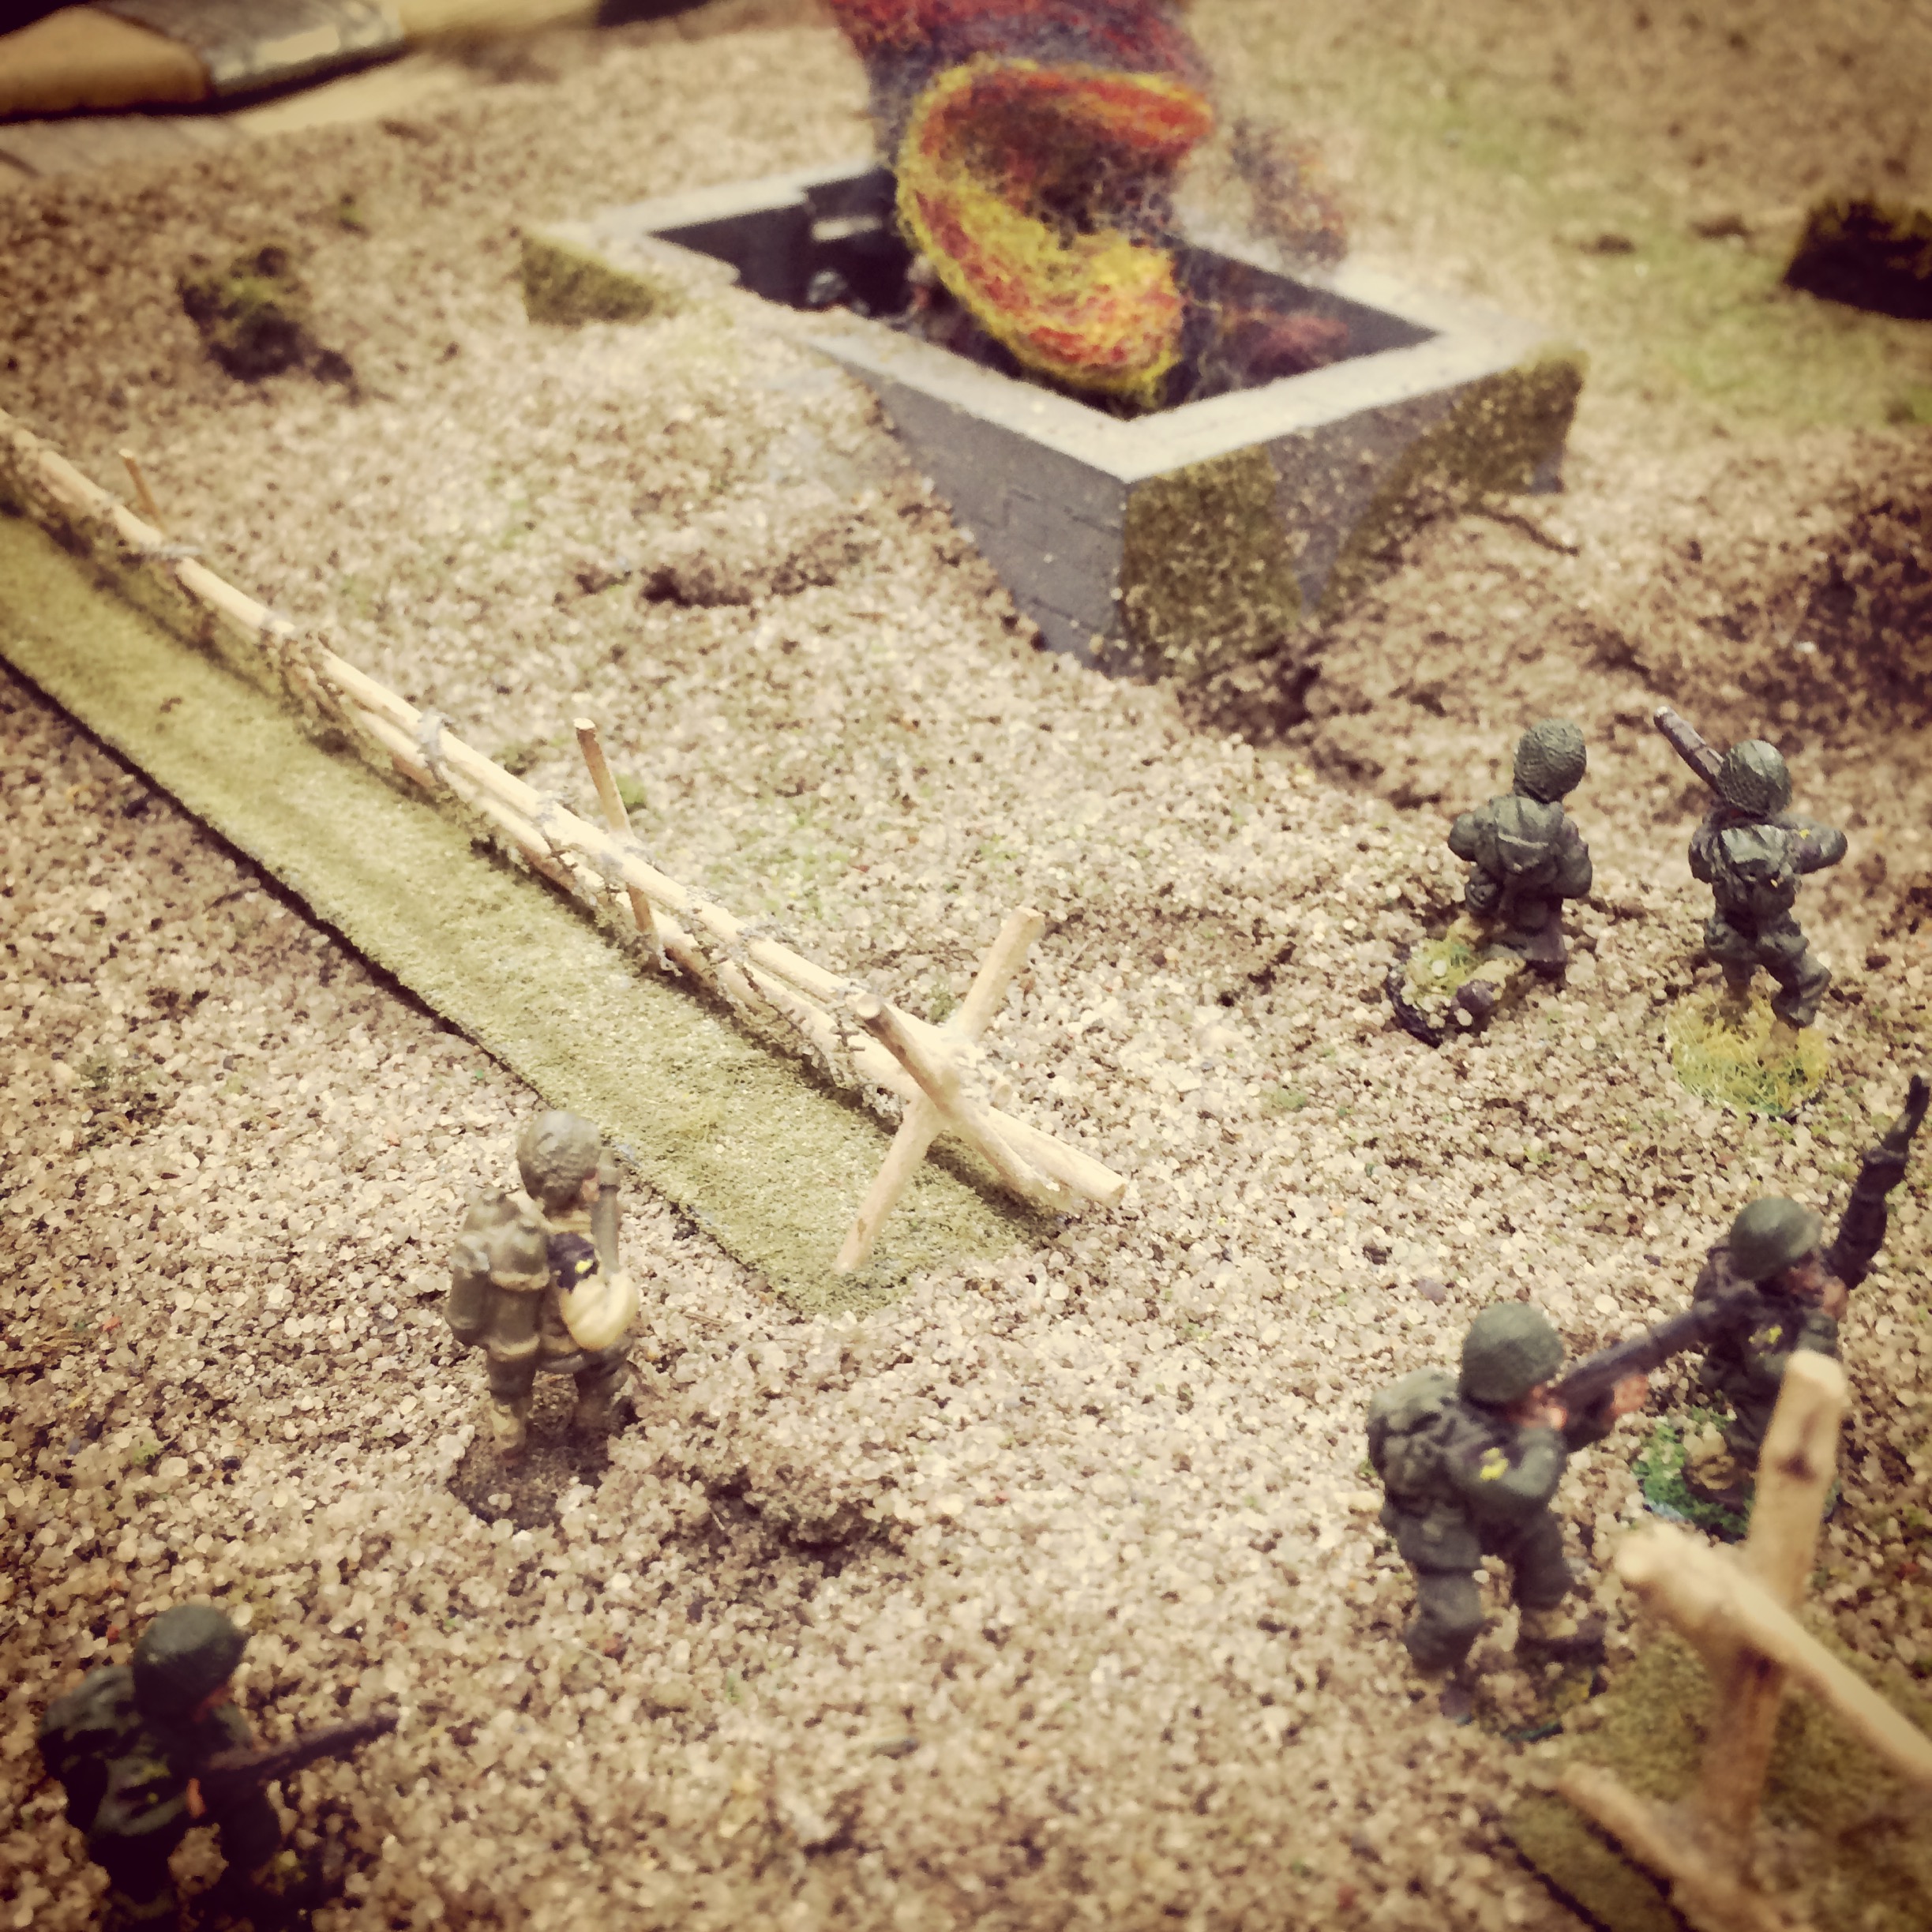
US soldiers push through the fields and bocage

IMG_6805

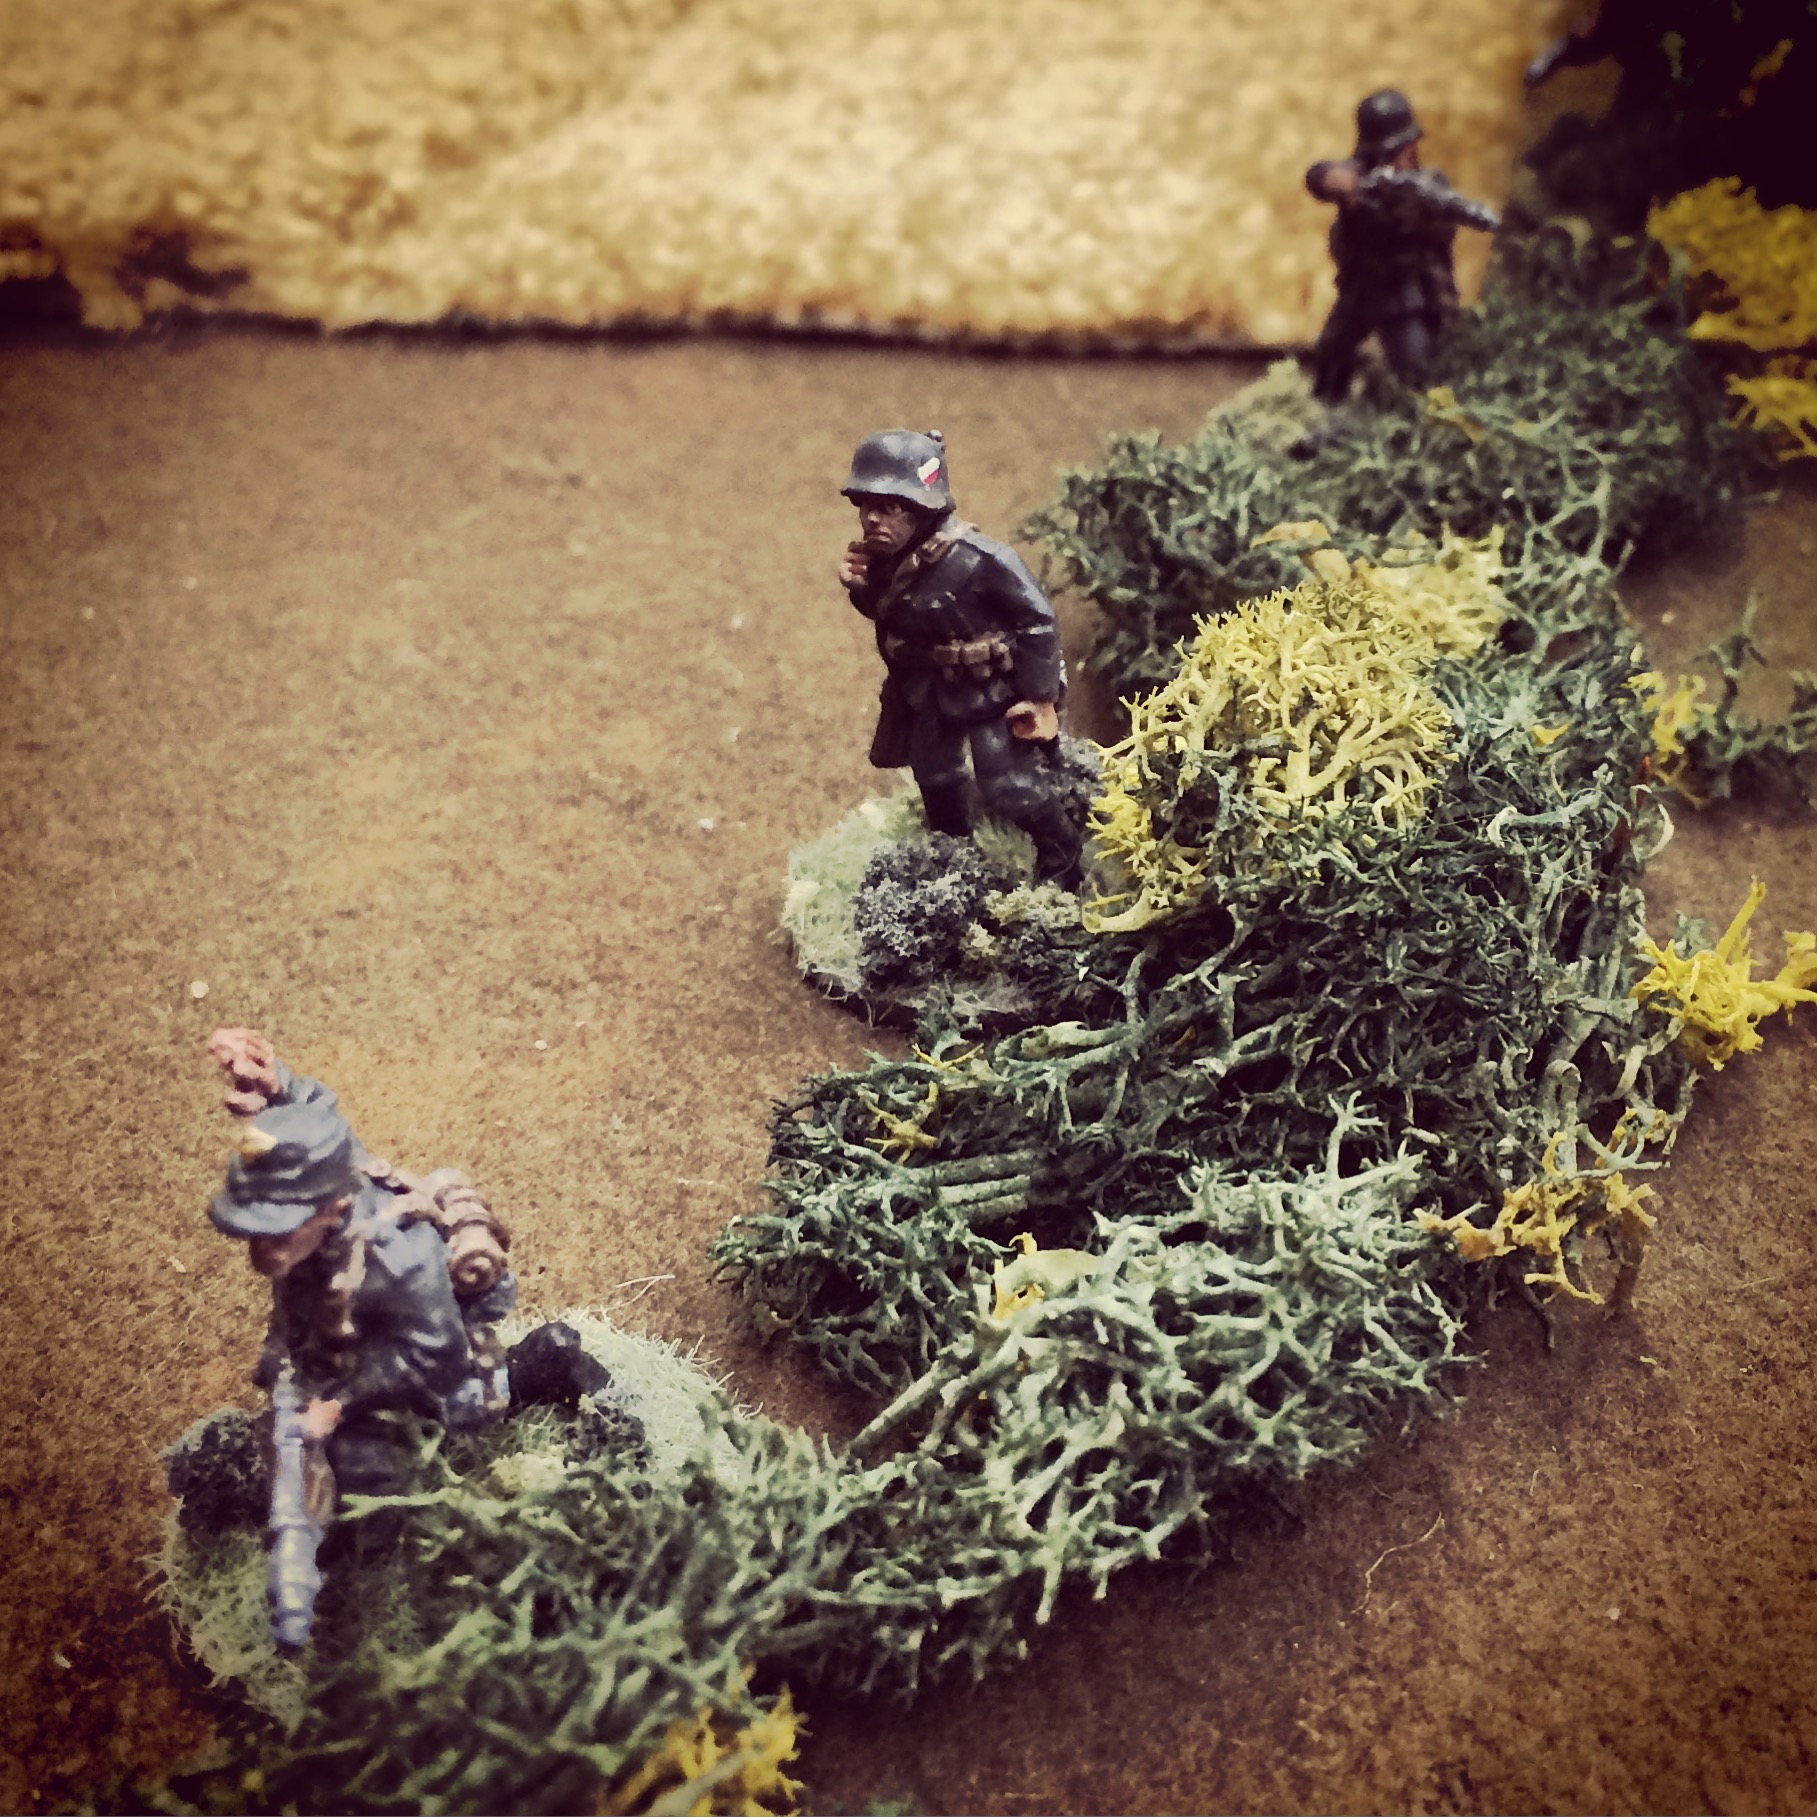
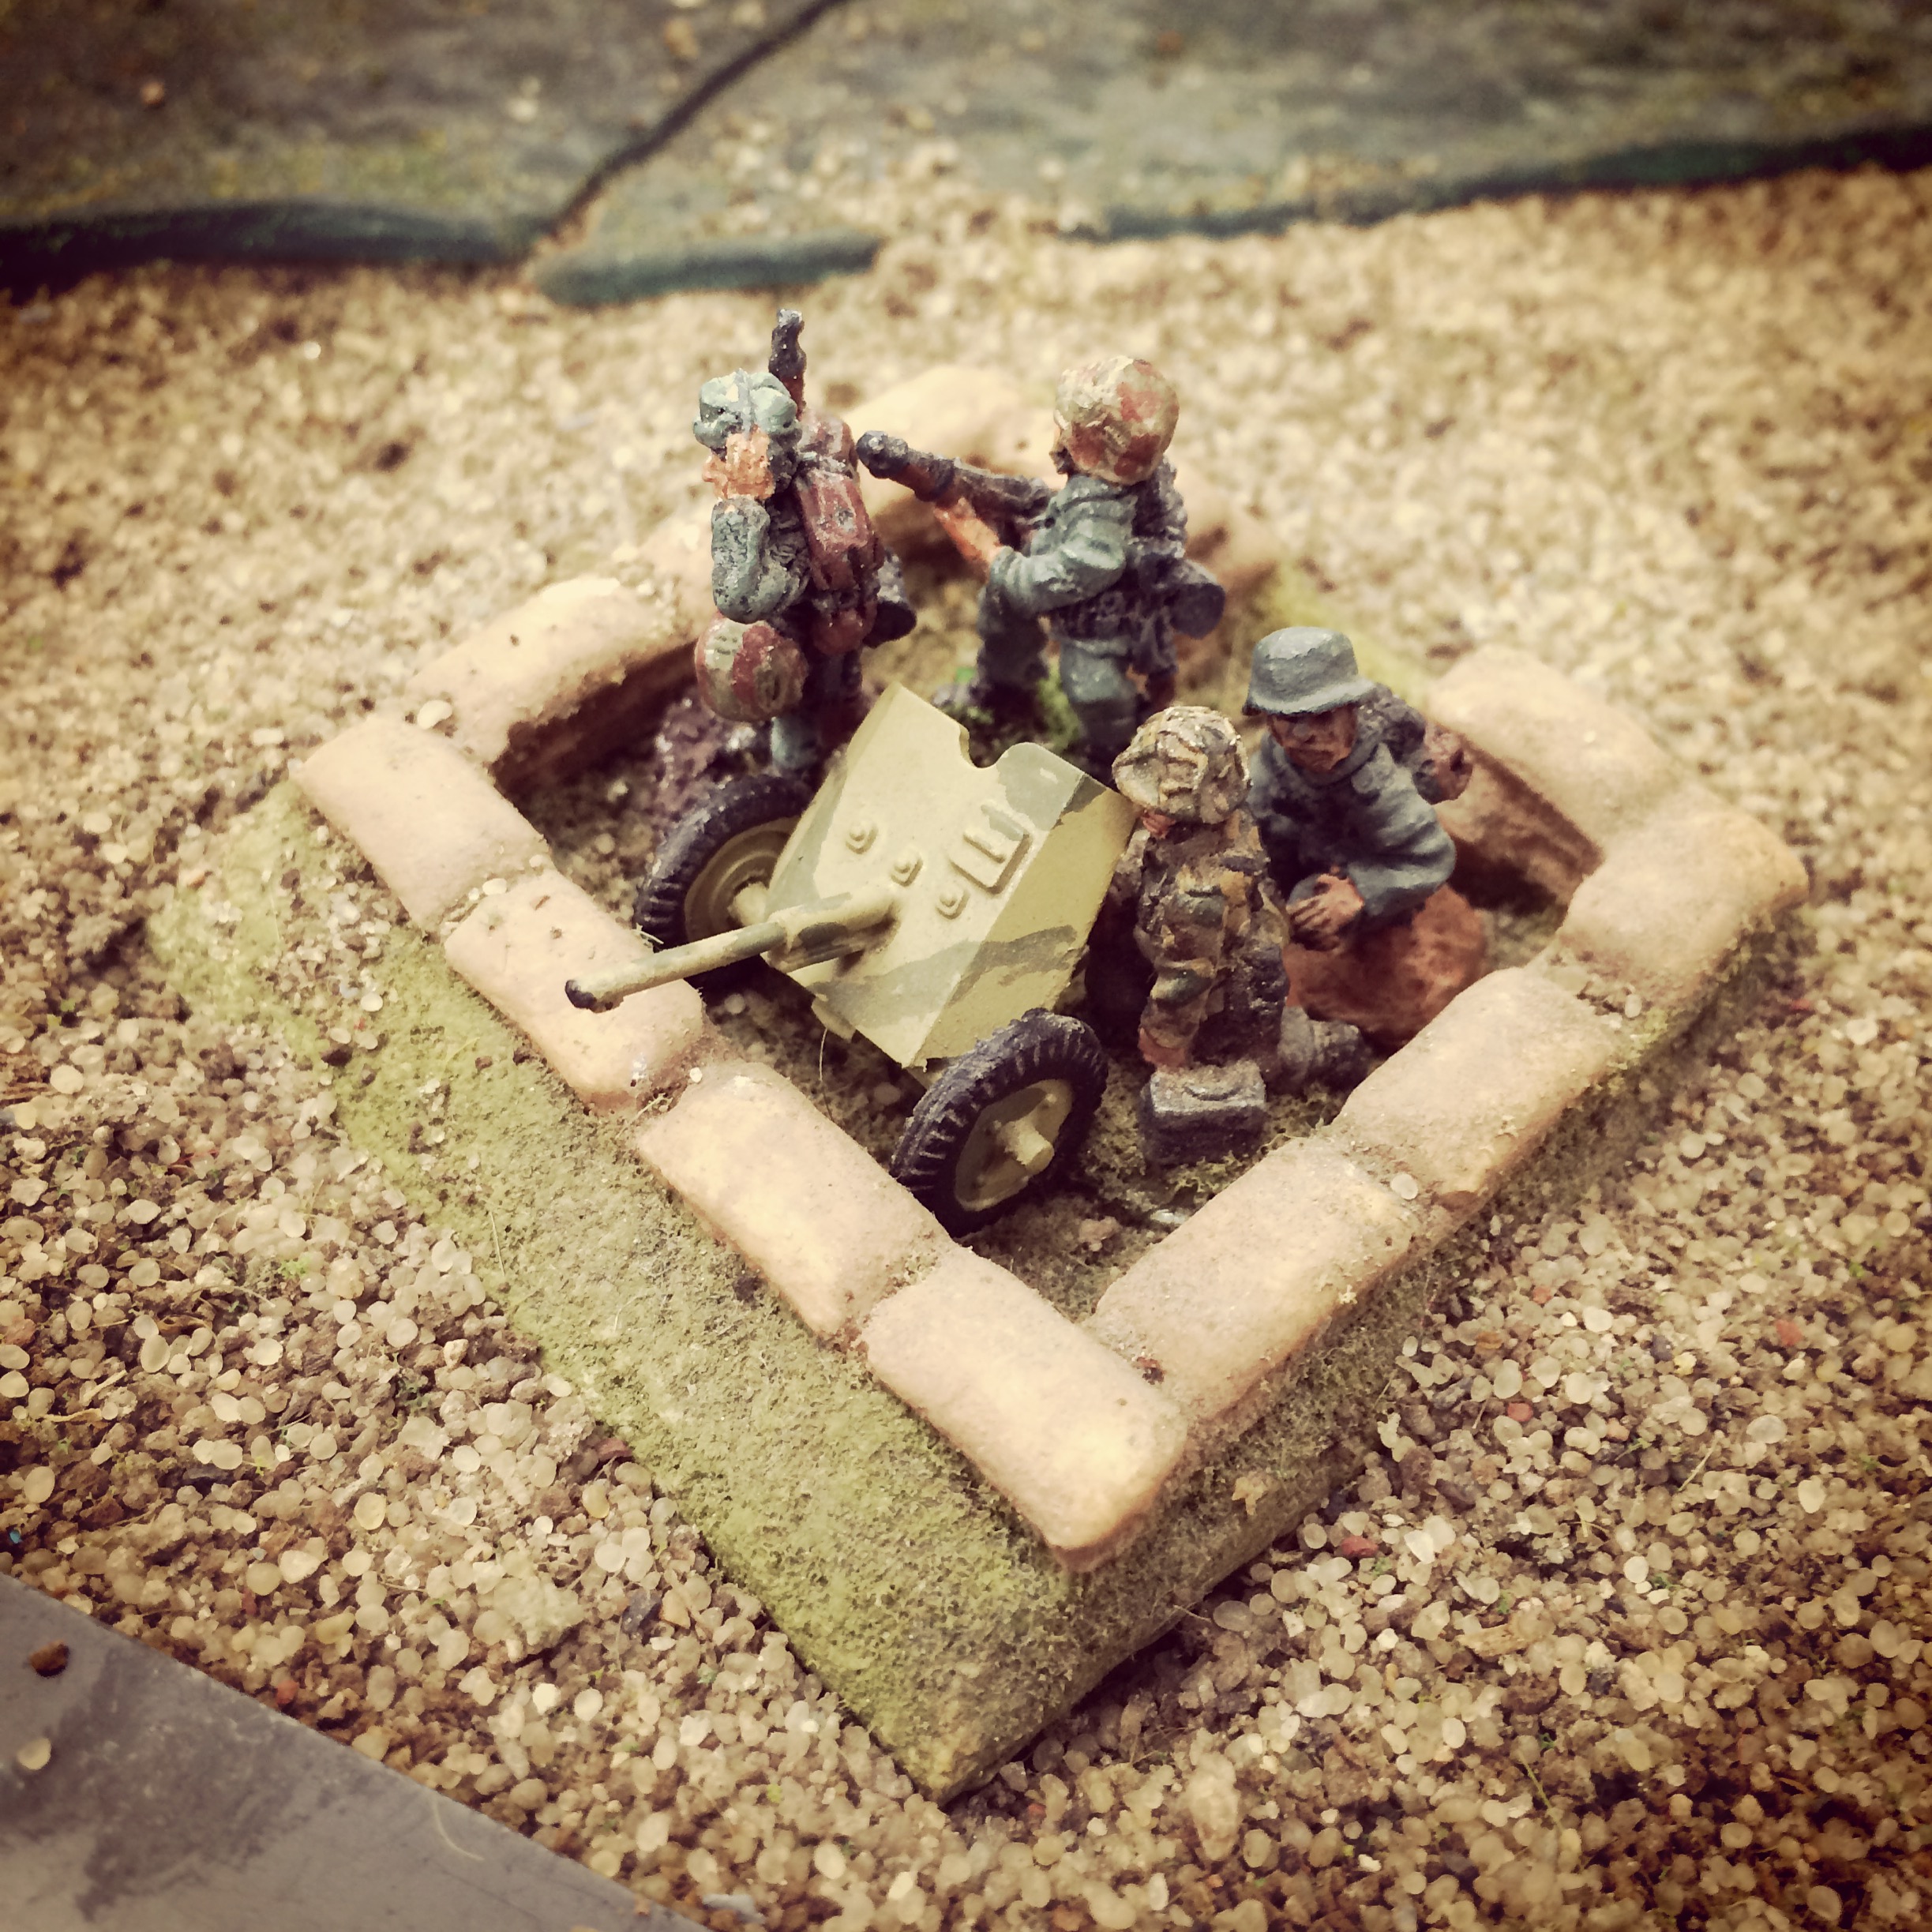
German soldiers edge into position along the bocage

IMG_6806
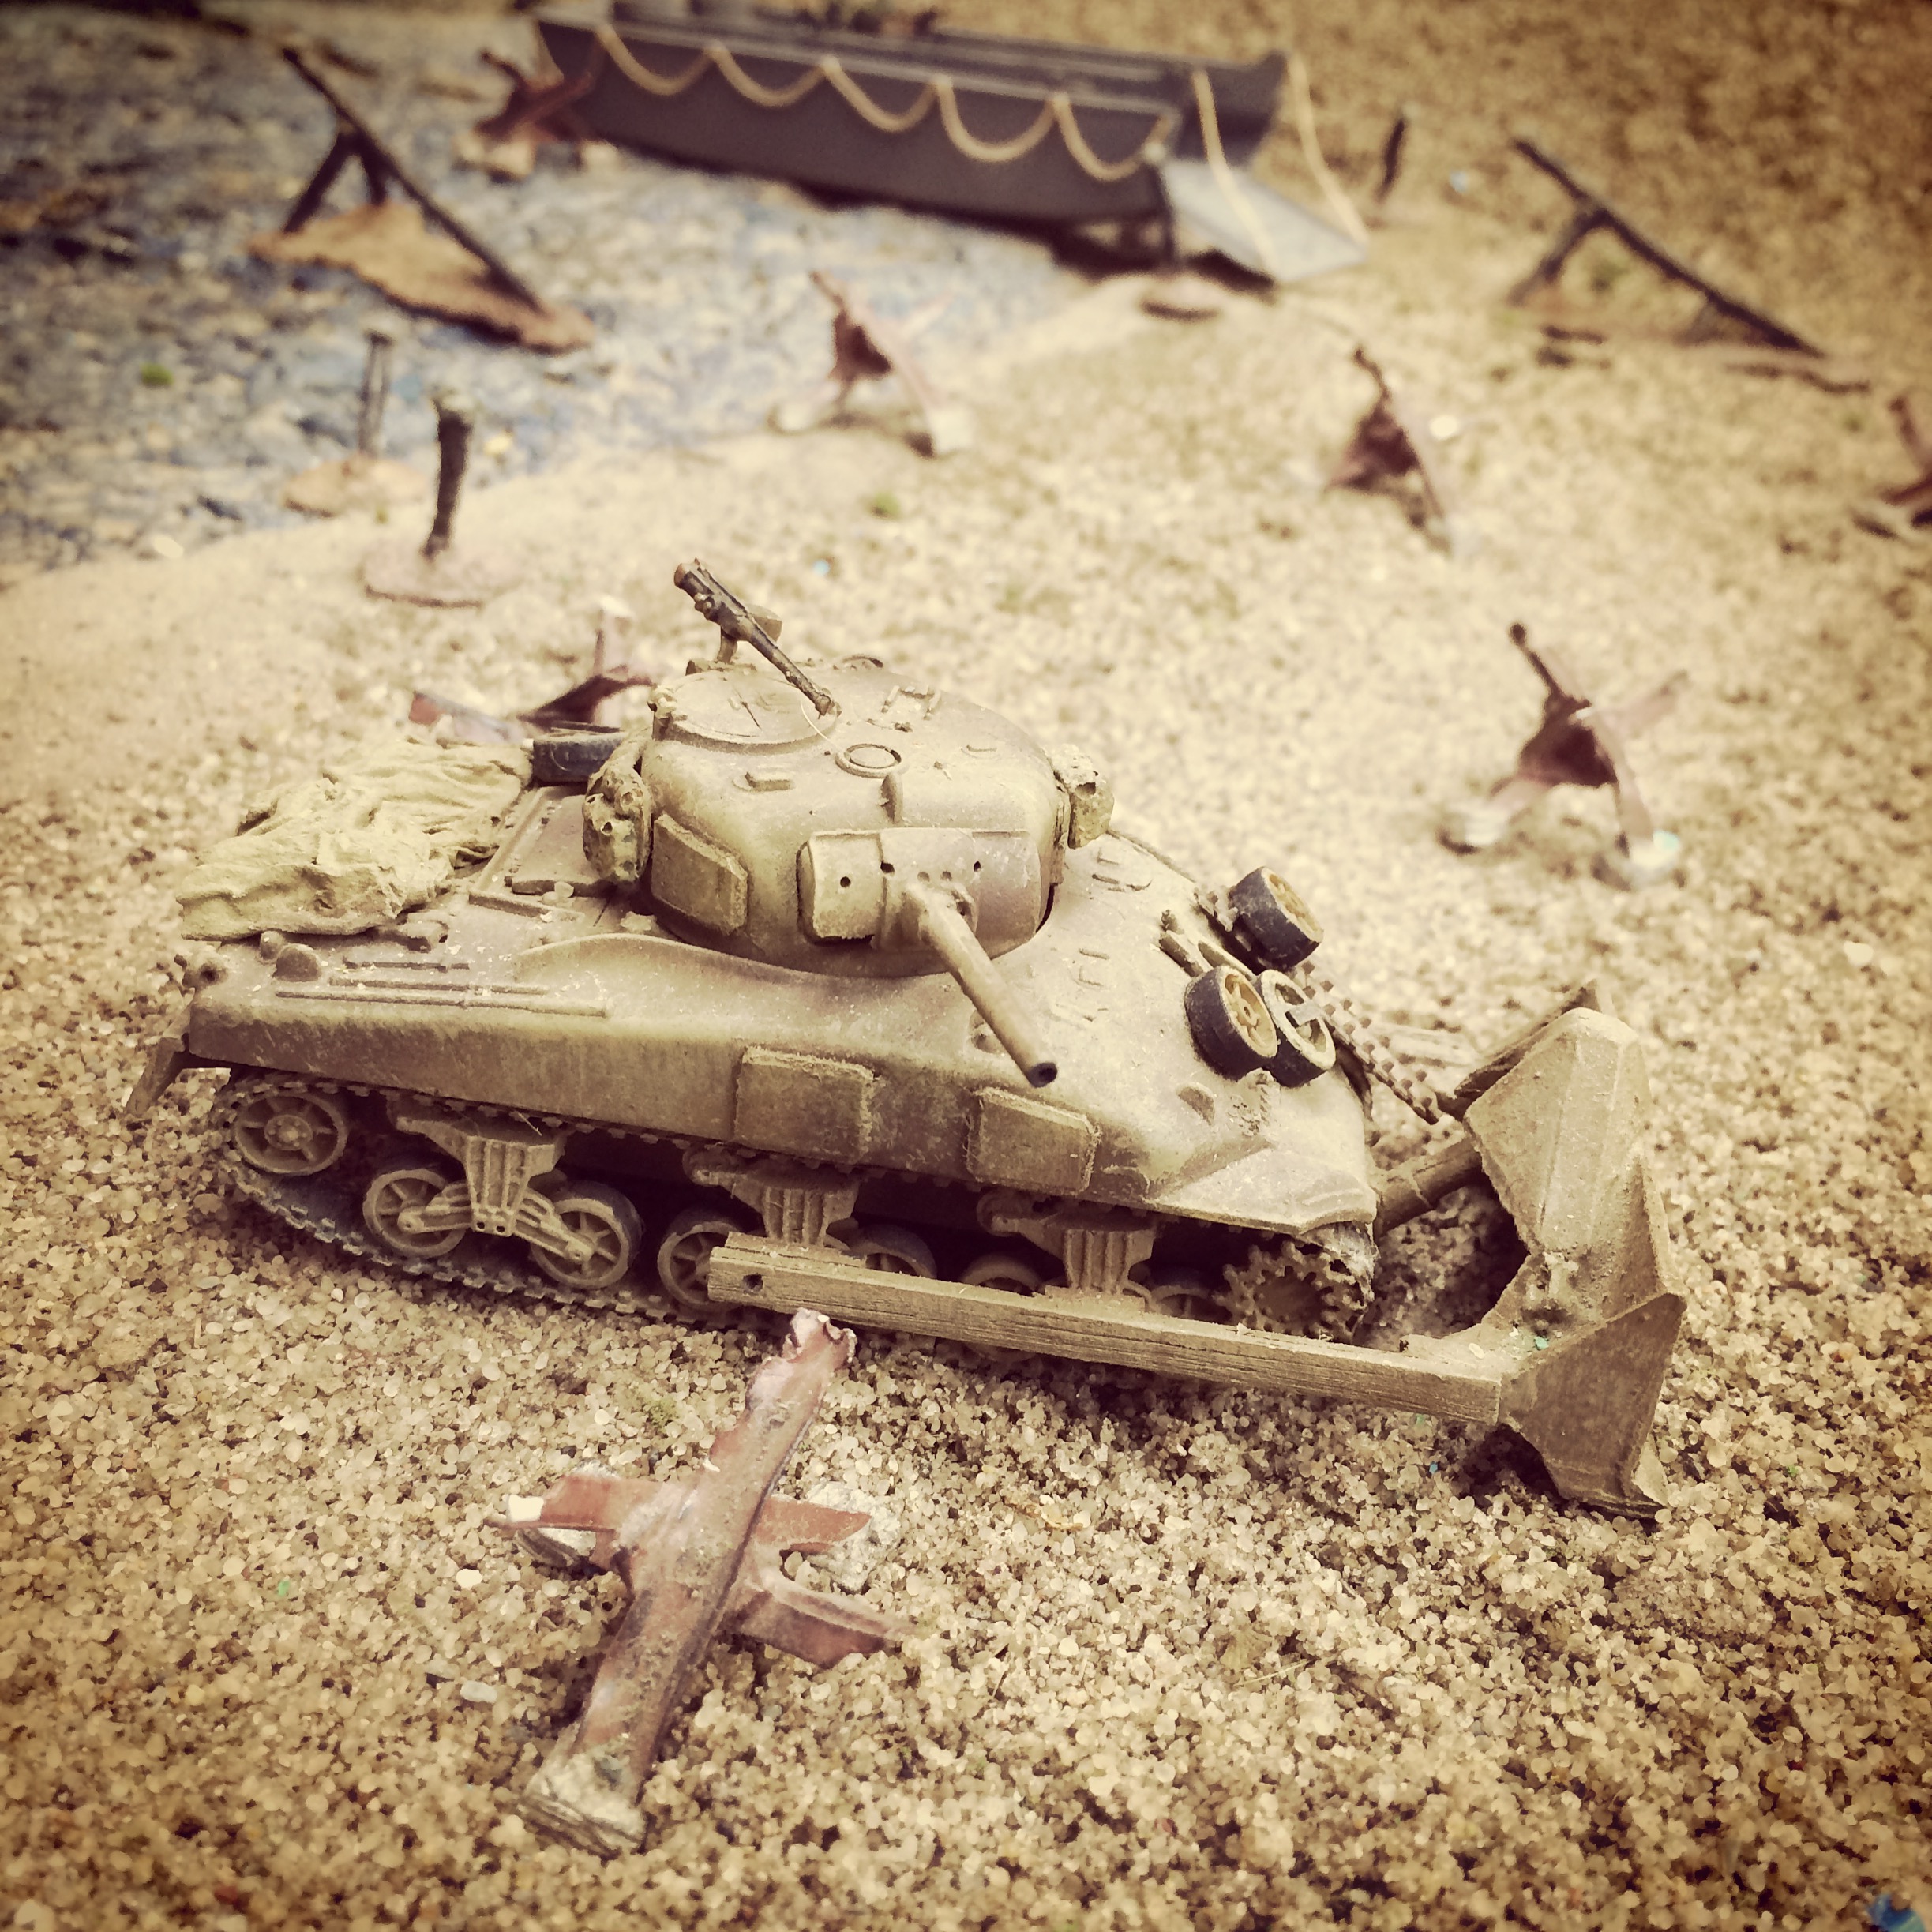
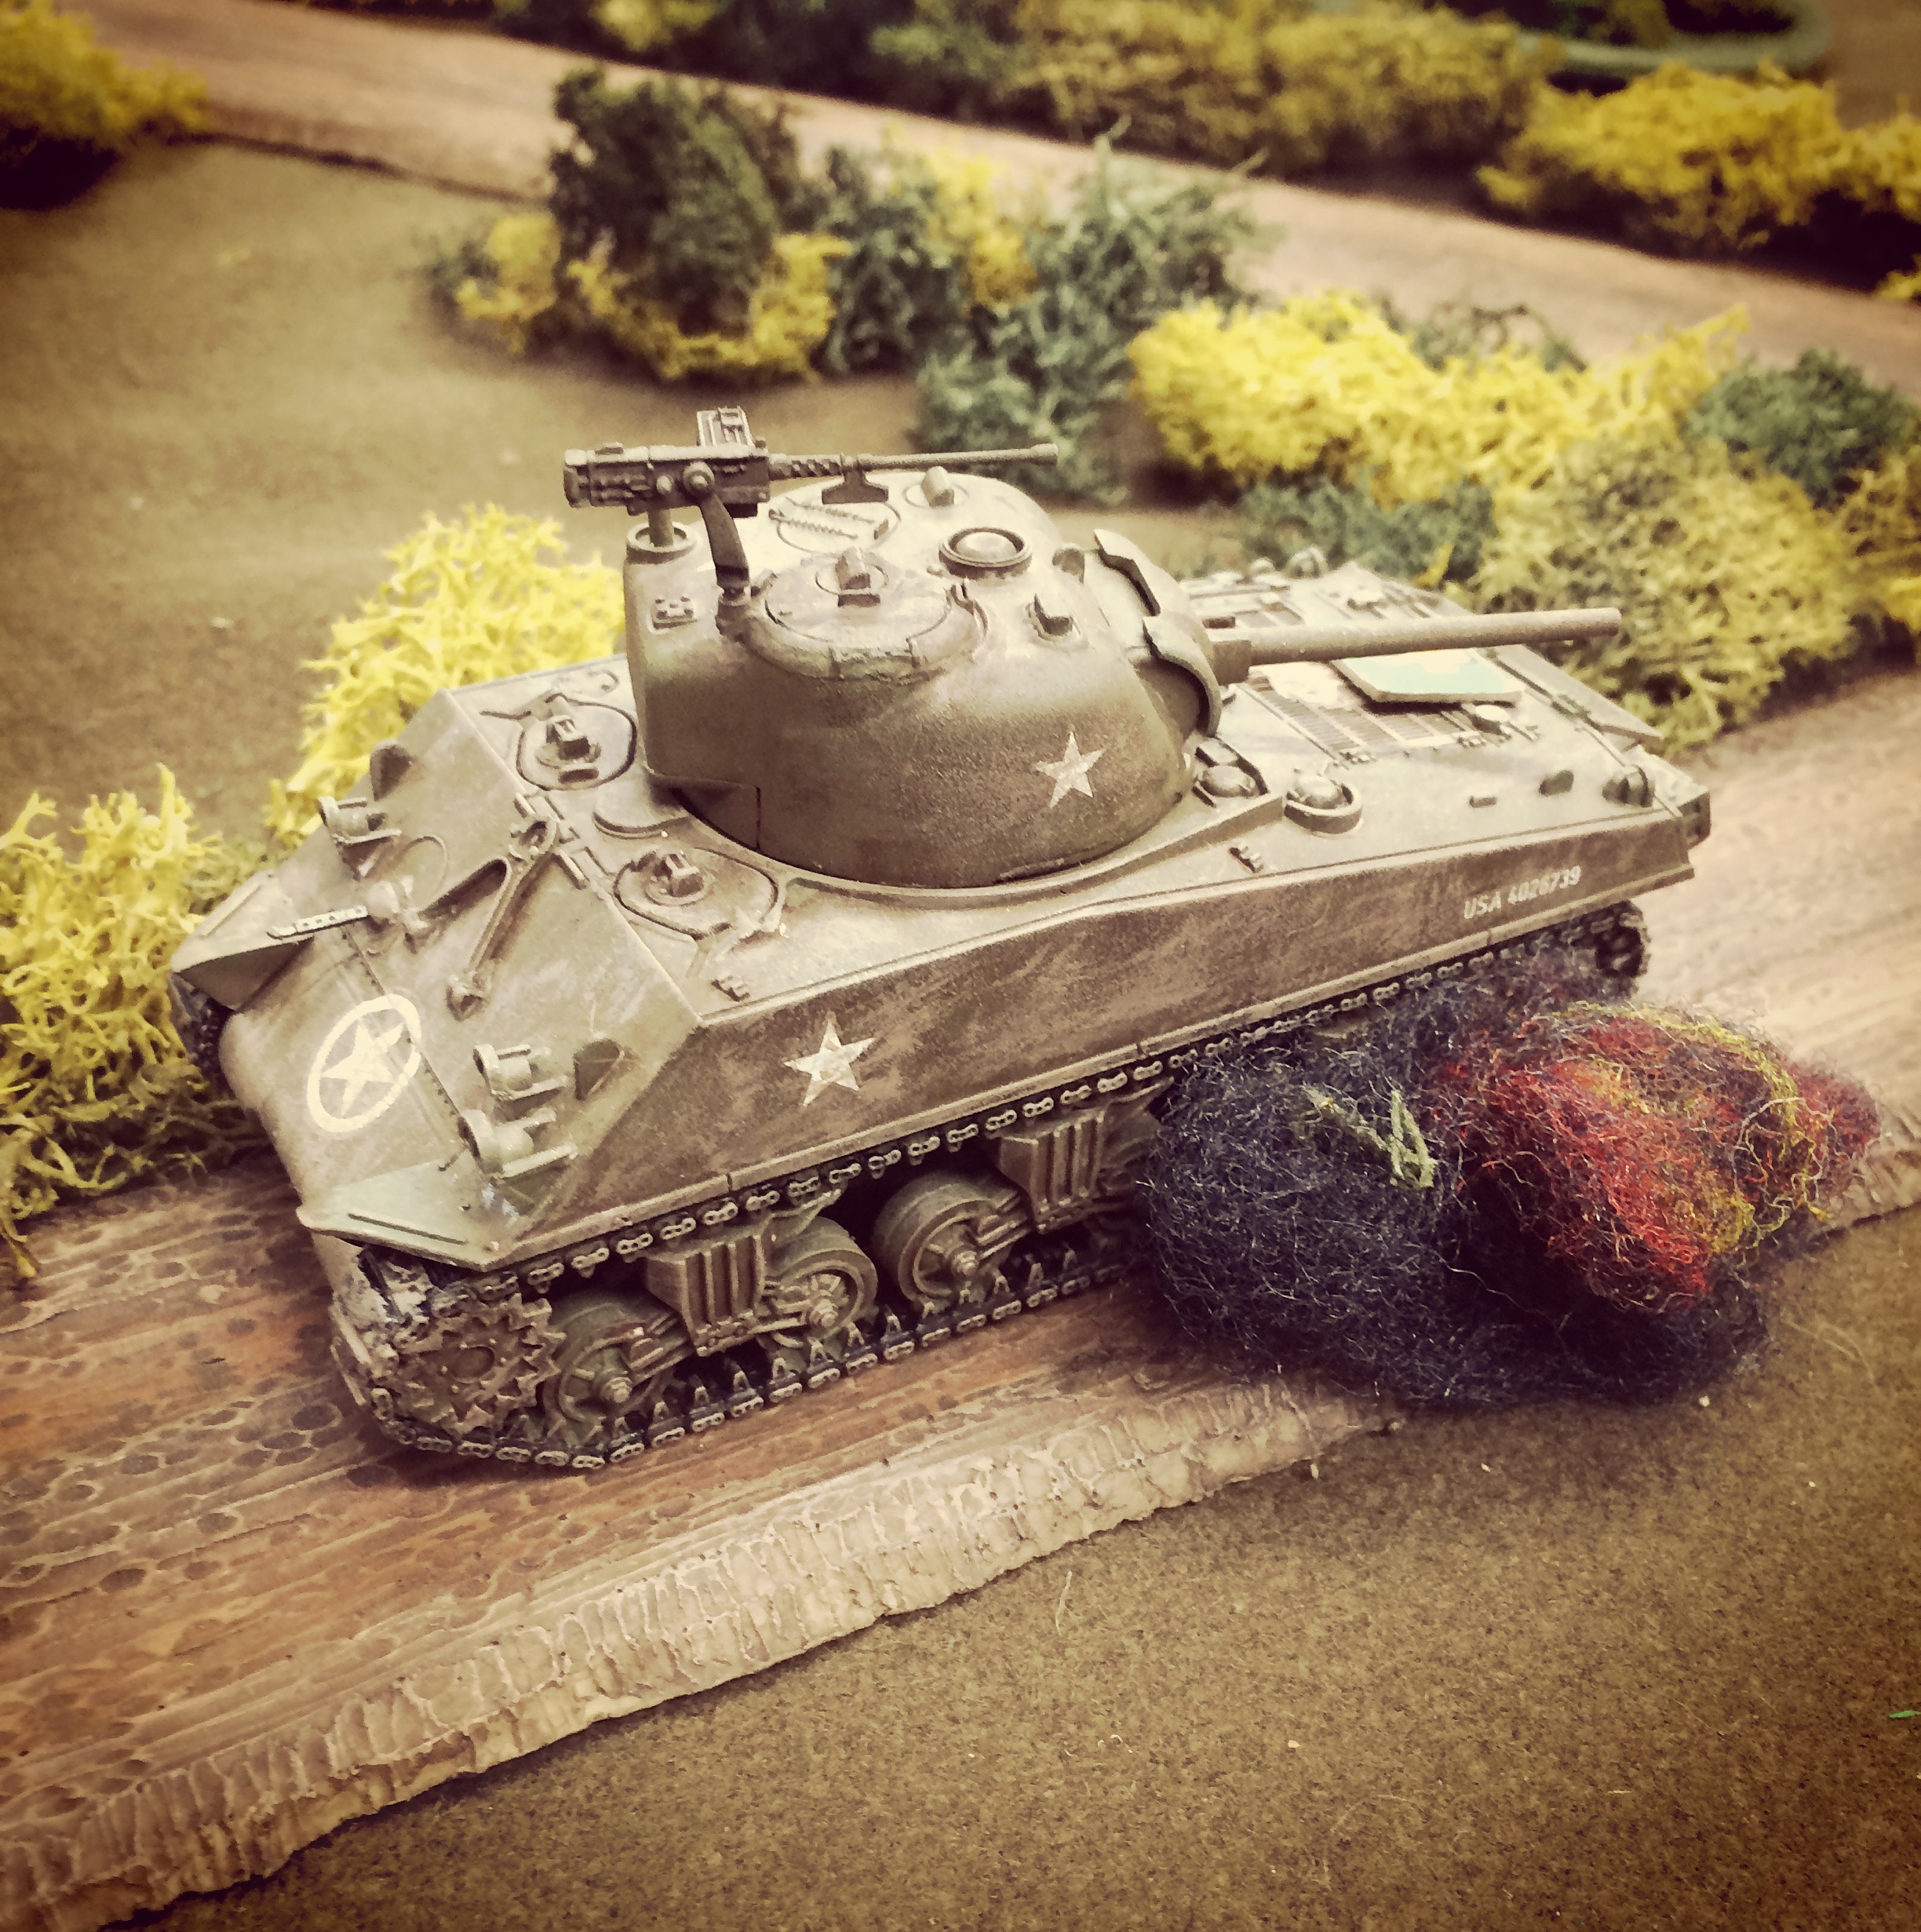
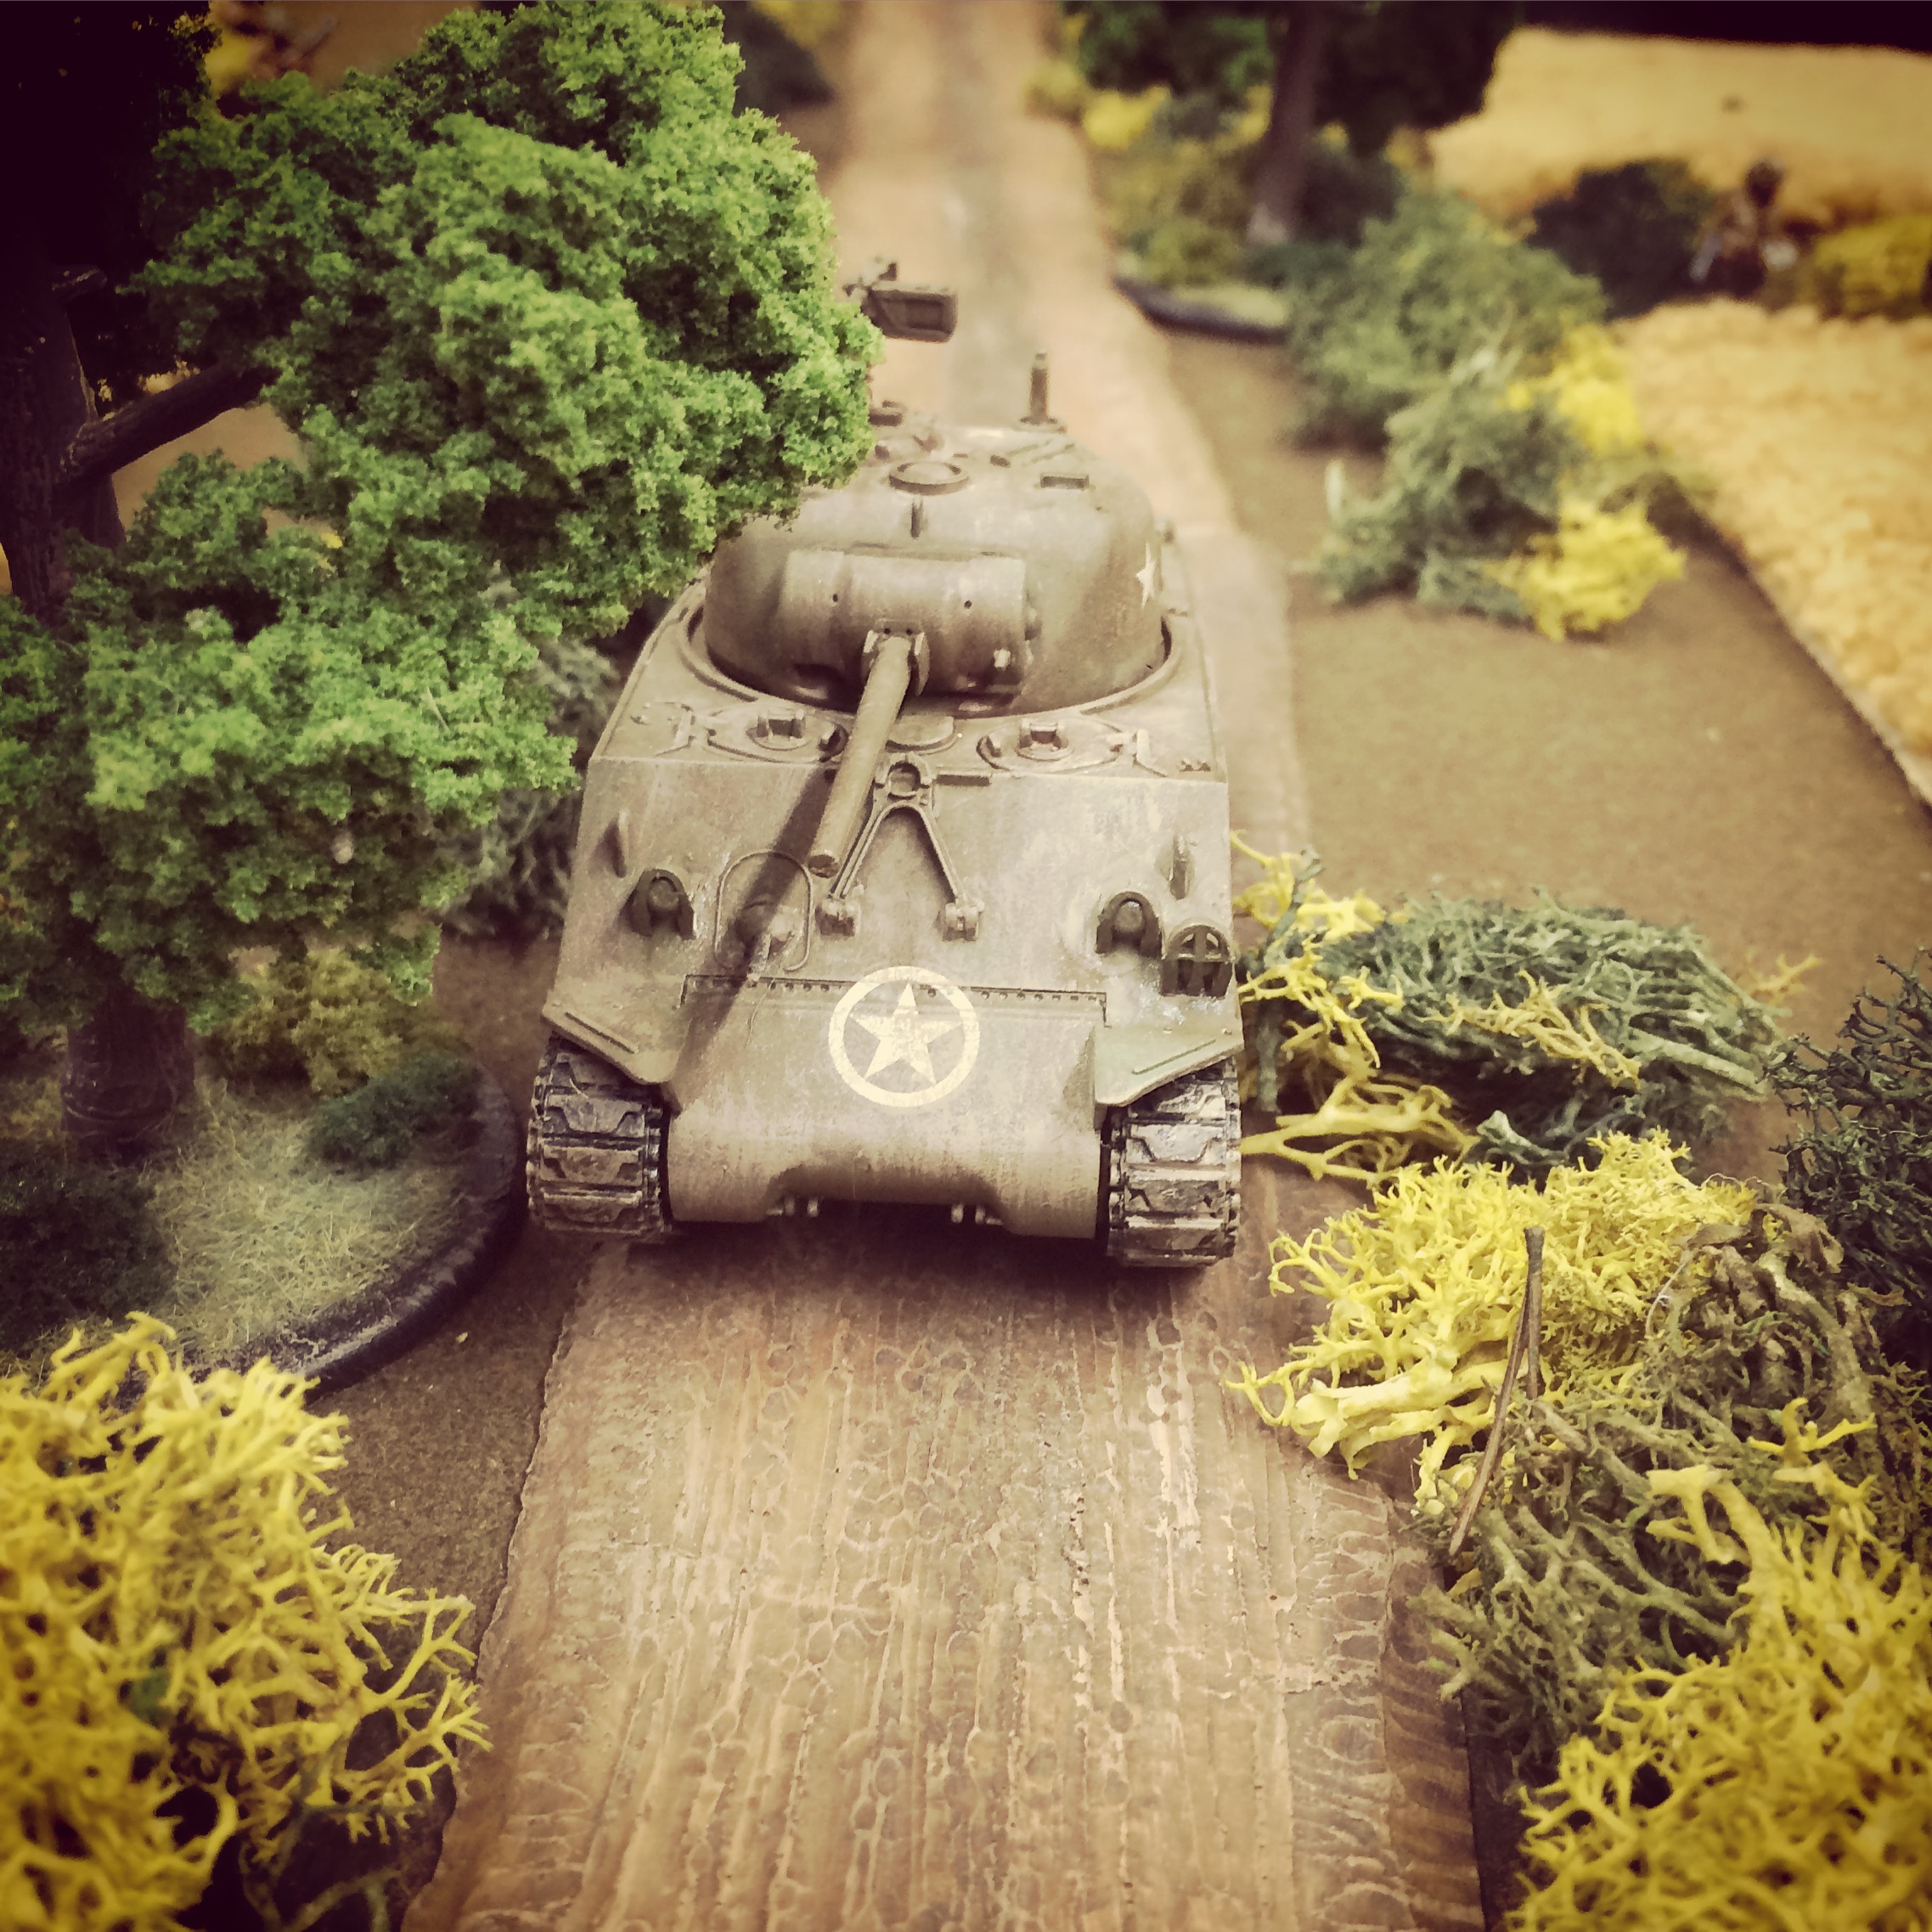
The Sherman rolls straight along the road toward the objective

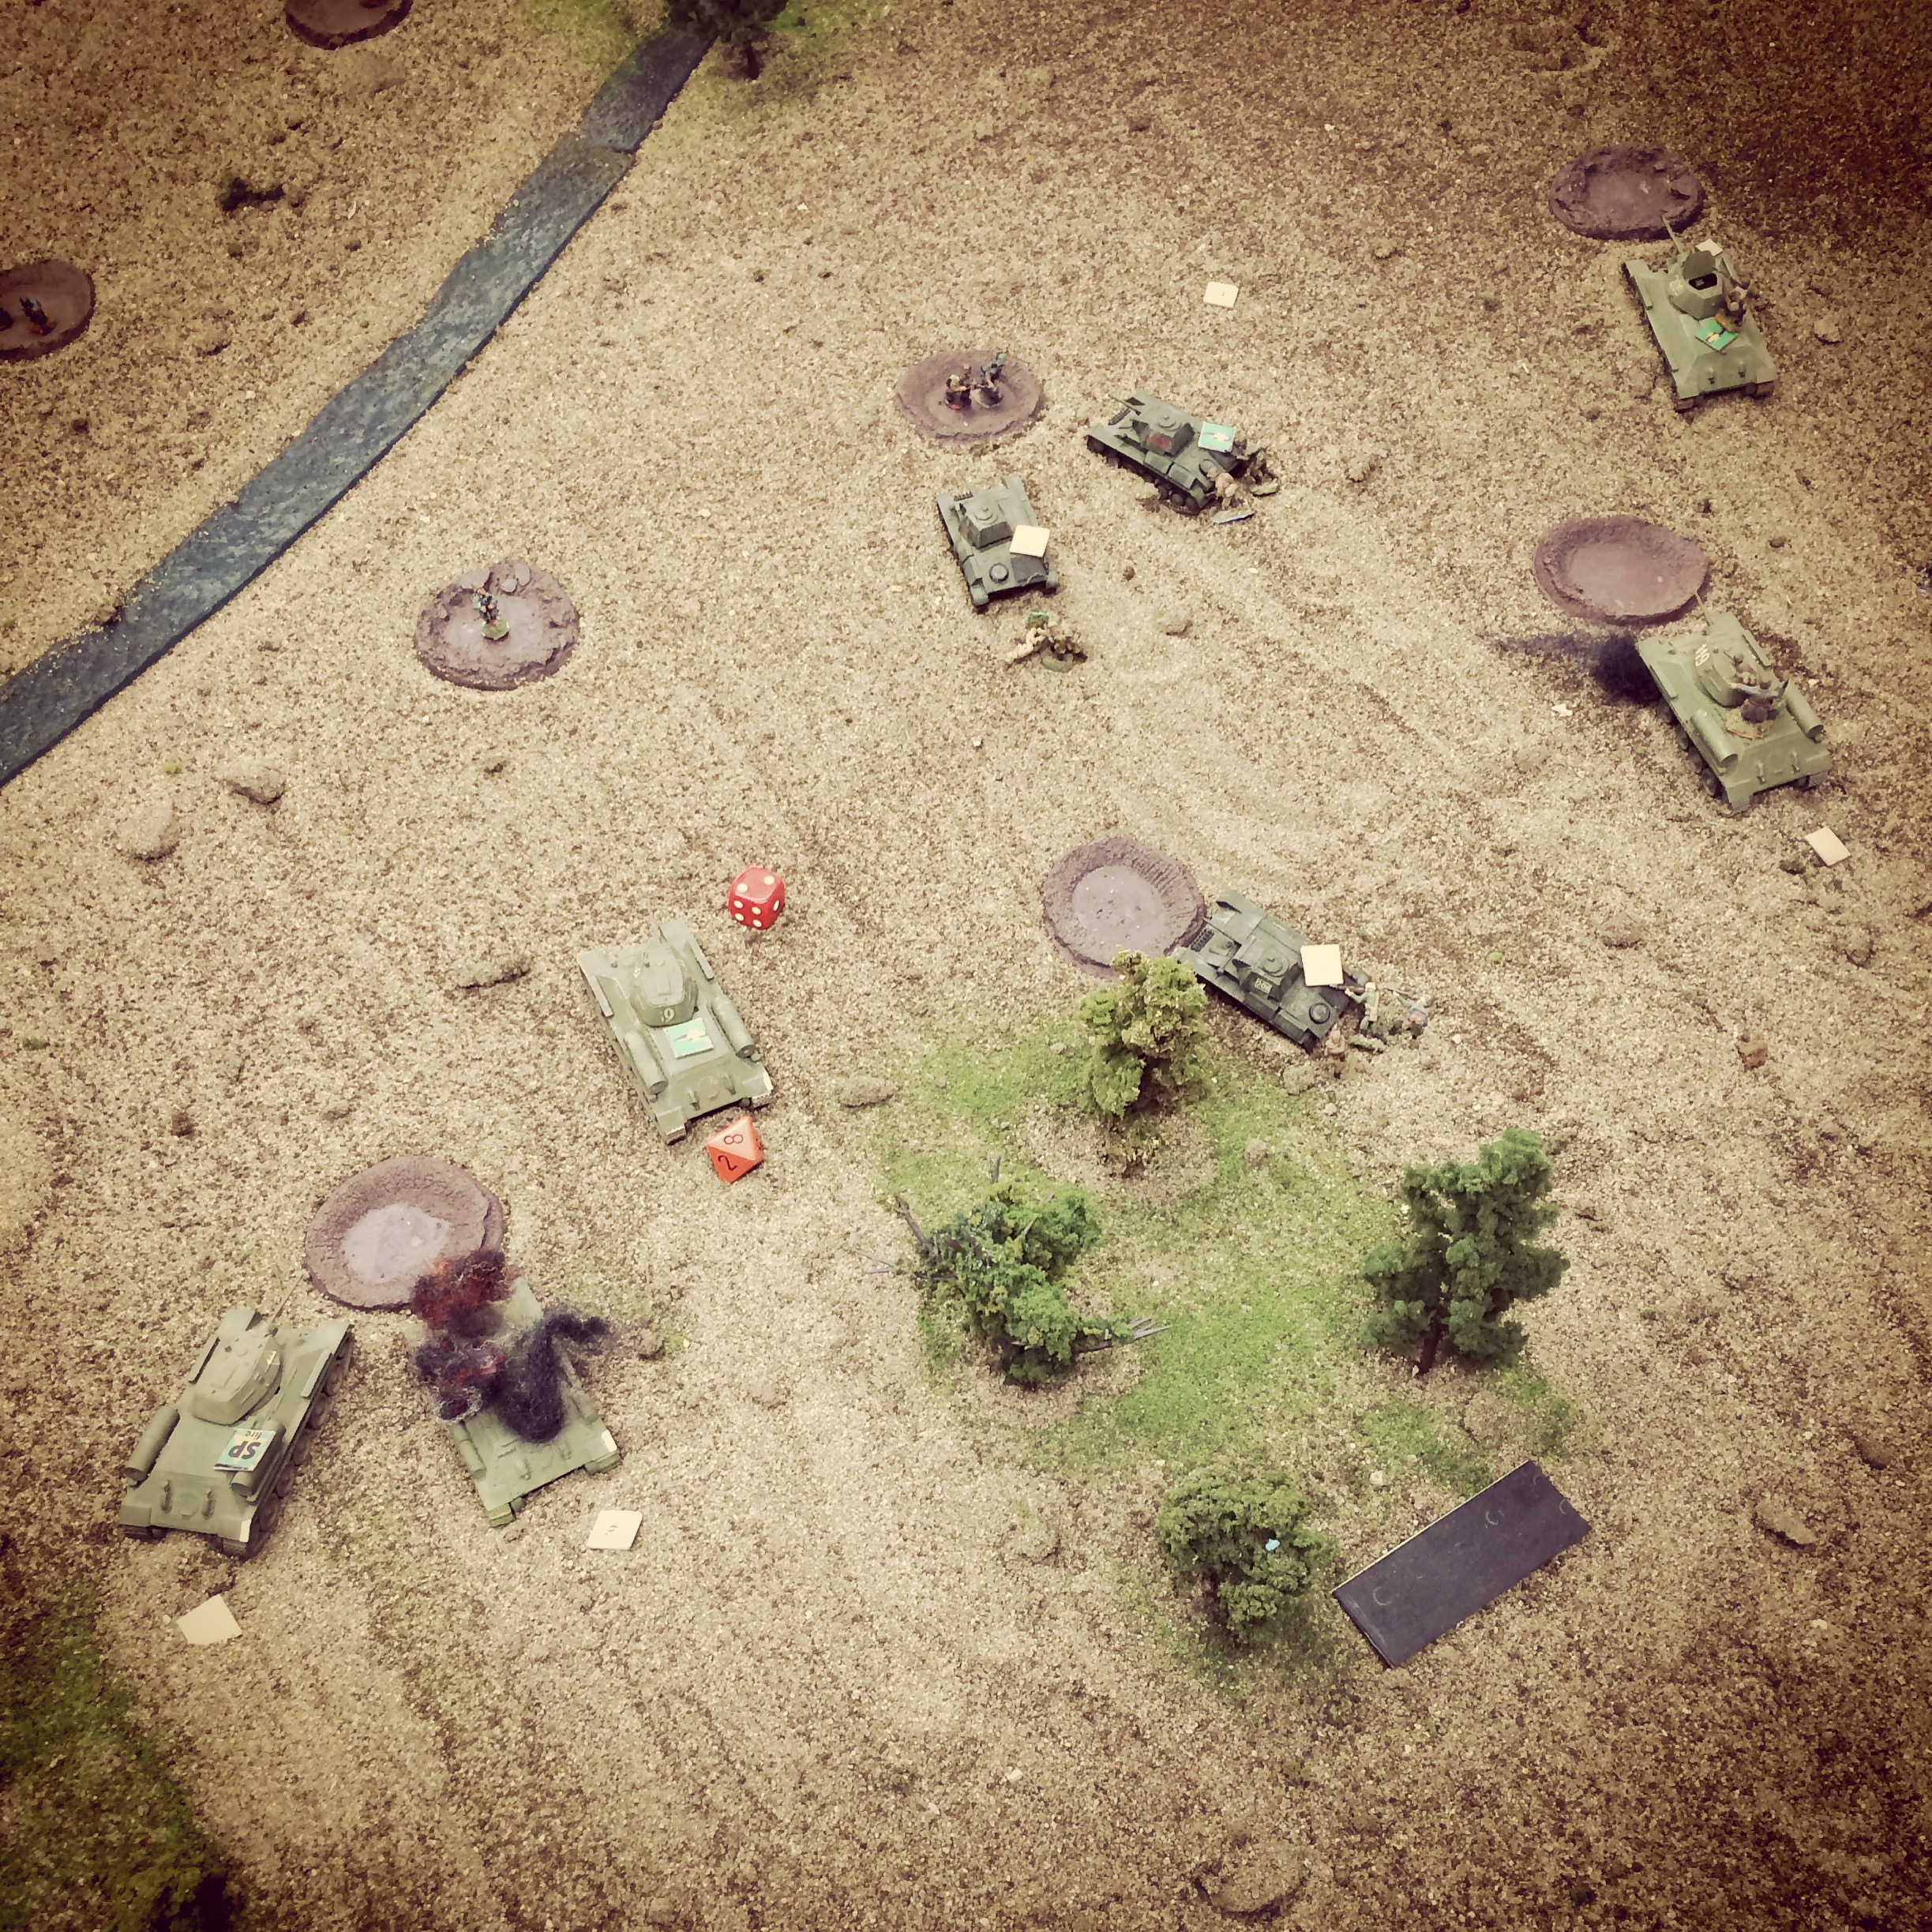
By turn four, the firing began. Germans along the bocage made an attempt to shoot the Sherman at close range with a panzerfaust but the shot miraculously missed. The Sherman answered with a burst of machine gun and high explosive shots, forcing the Germans to fall back from the hedge and into the field. The Sherman rolled forward and a second squad of Germans emerged from the bocage and rushed the tank, placing three grenades along its left side. With the charges set to blow, the tank moved forward and rotated its turret to light up the exposed Germans with another round of machine gun fire, destroying the entire unit. Just as the smoke cleared, the grenades blew up along the side of the tank, immobilizing it for the game with its weapons still functional and crew left unharmed. Back in the field at the center, the German rifles and MG-42 took up new positions and the two US rifle squads and HQ continued to creep forward in prone positions.

IMG_6807
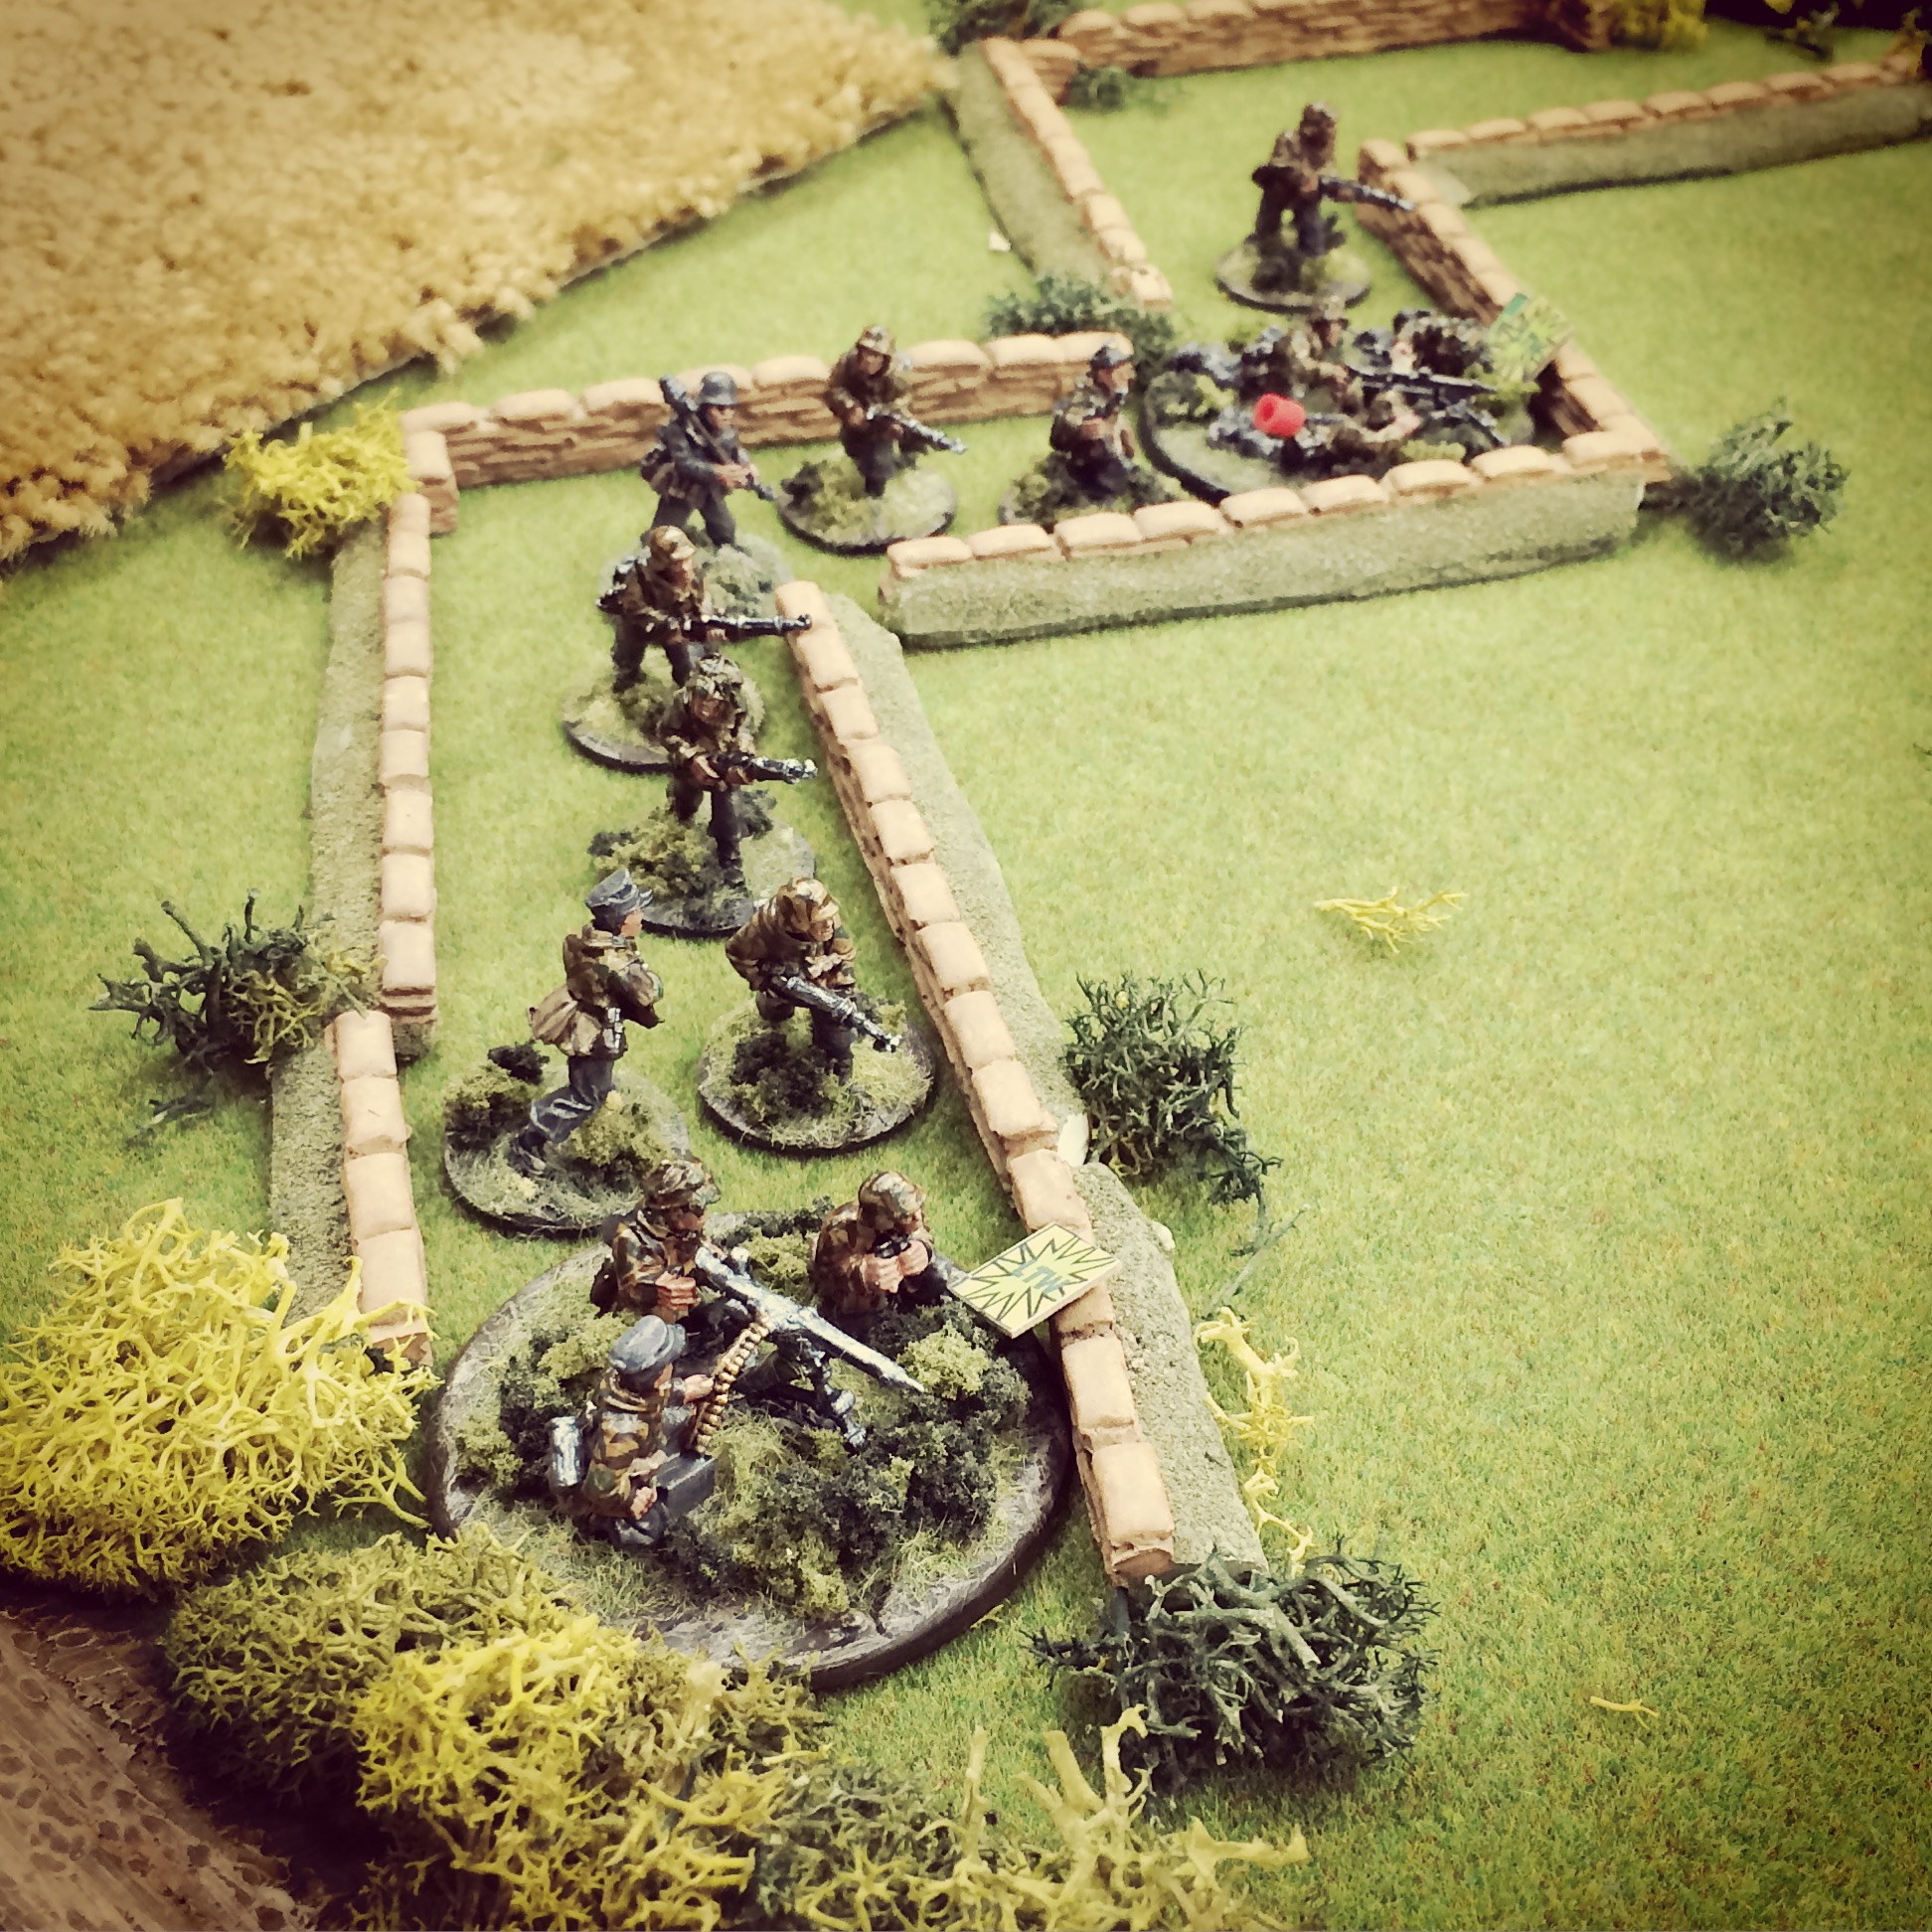
Germans await the Sherman’s advance from their bocage positions

IMG_6809Germans disperse under machine gun fire from the Sherman

IMG_6810
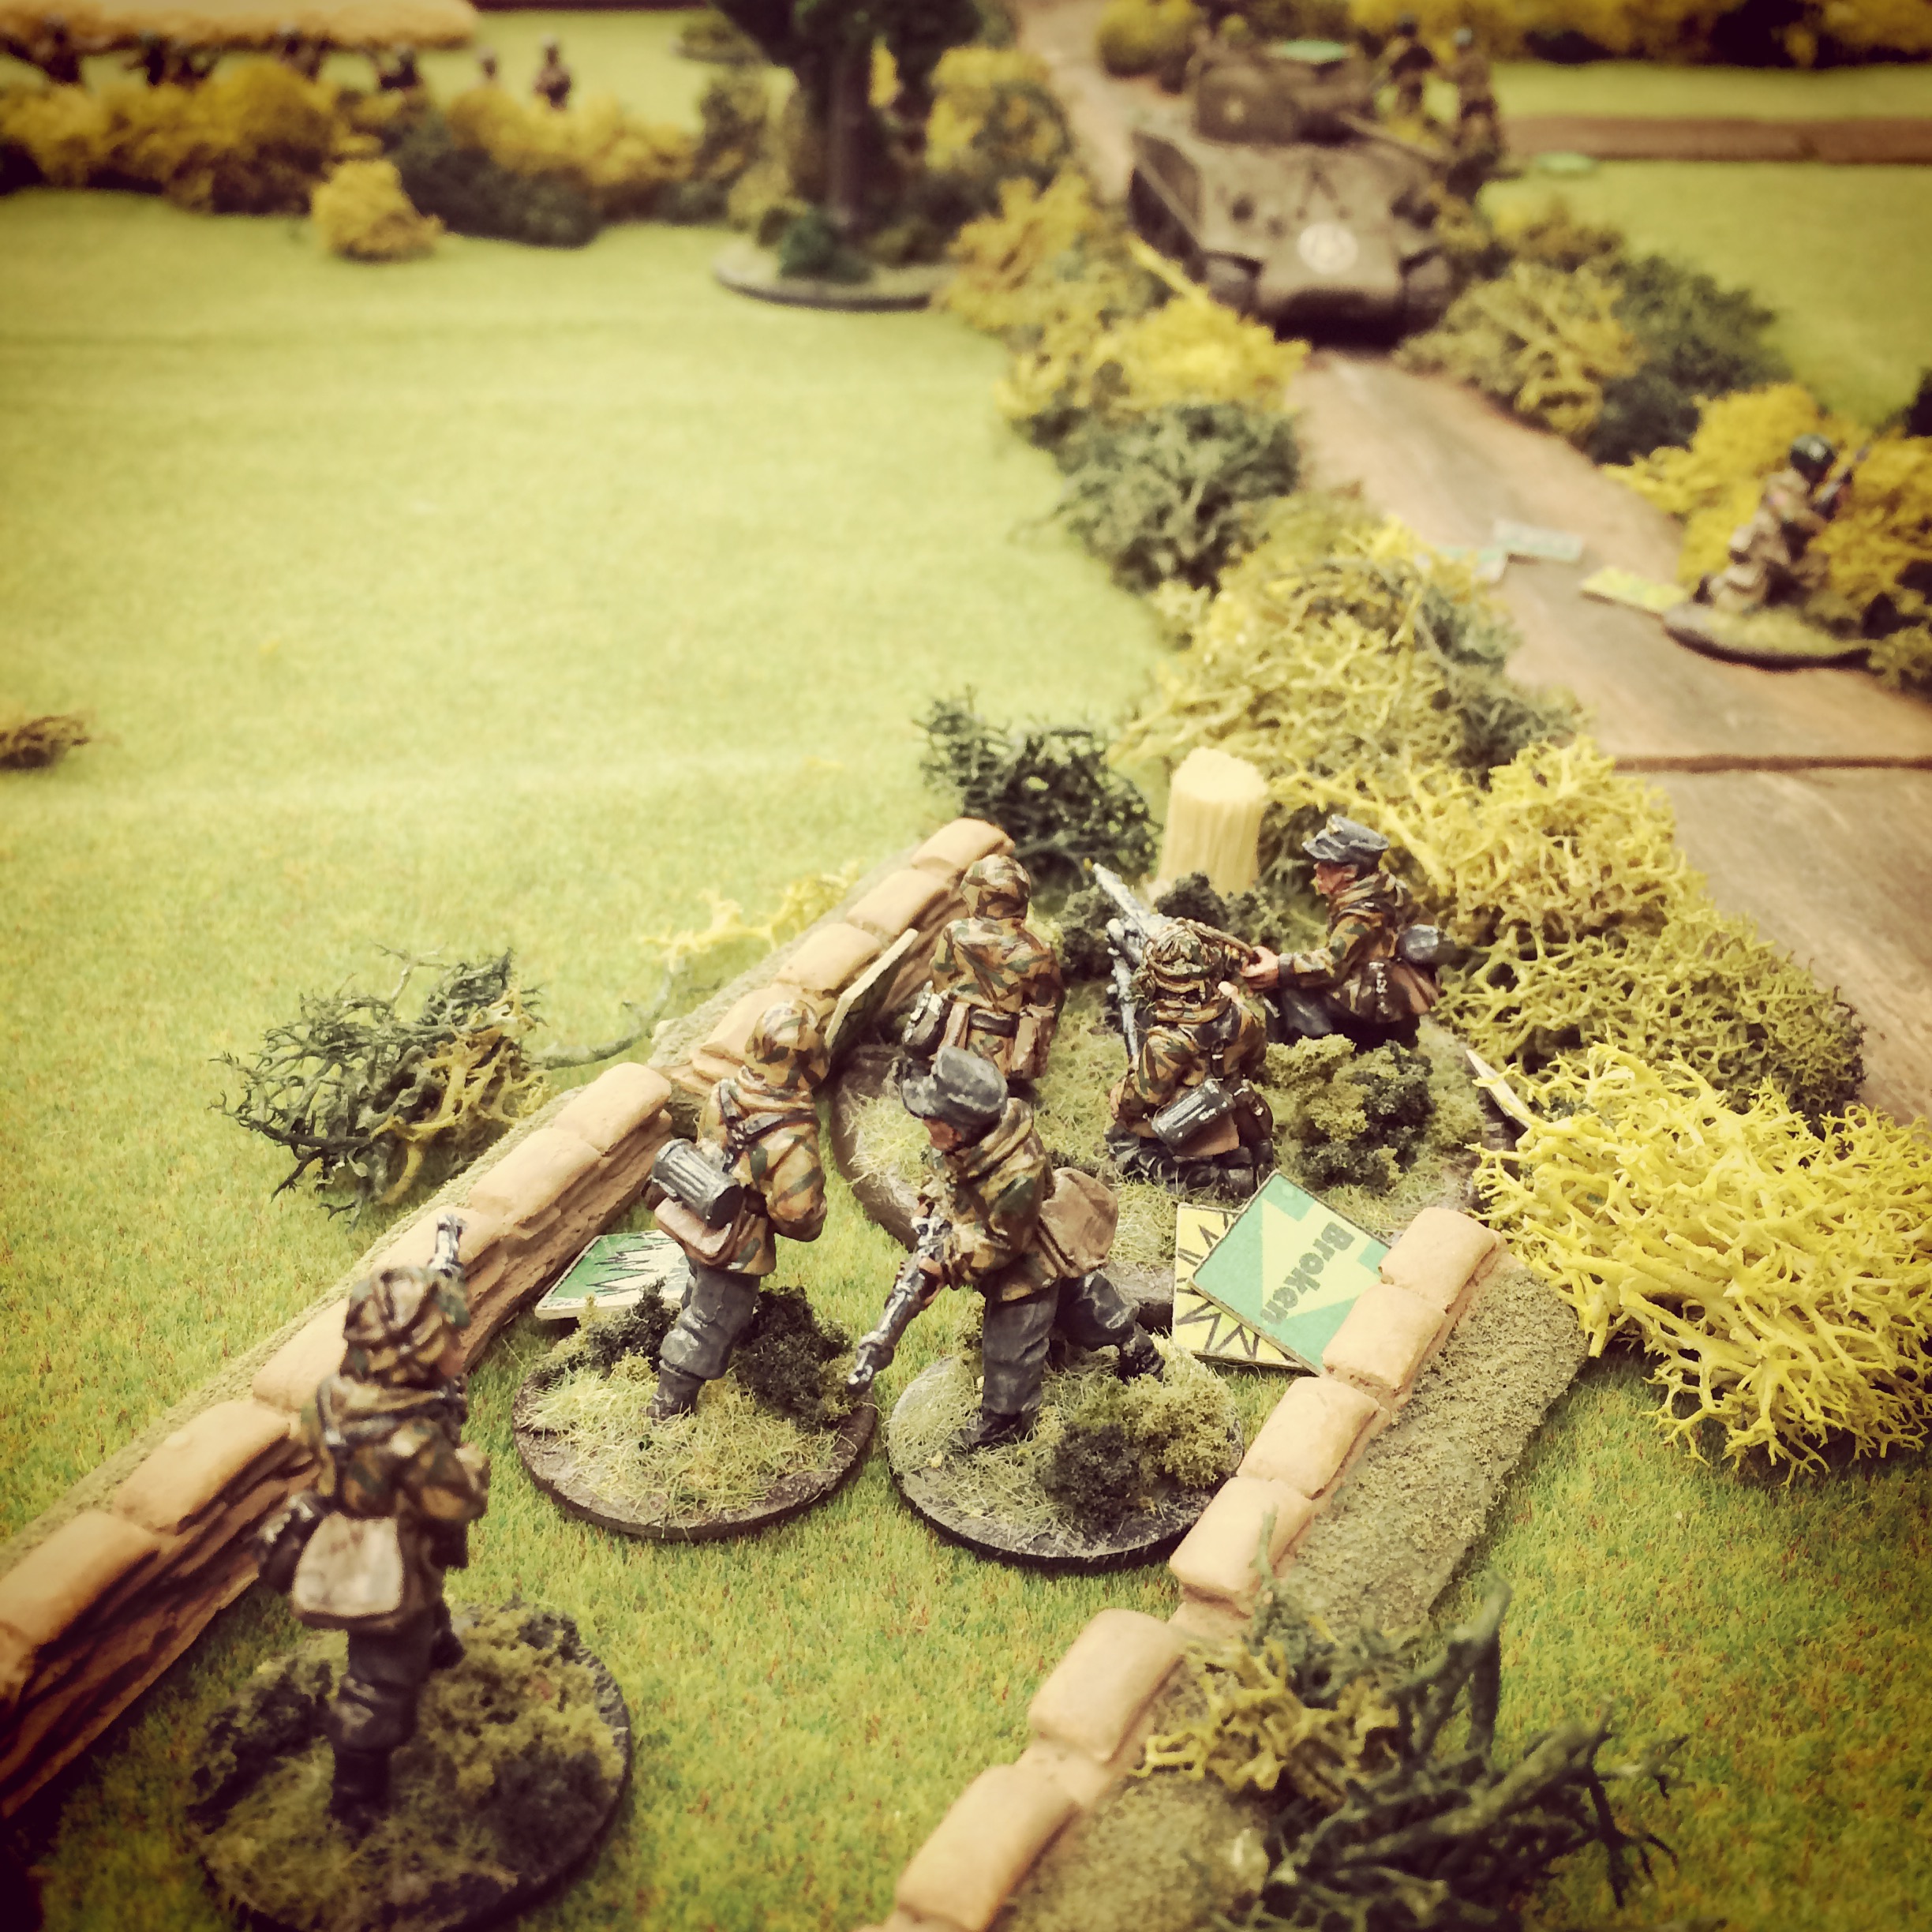
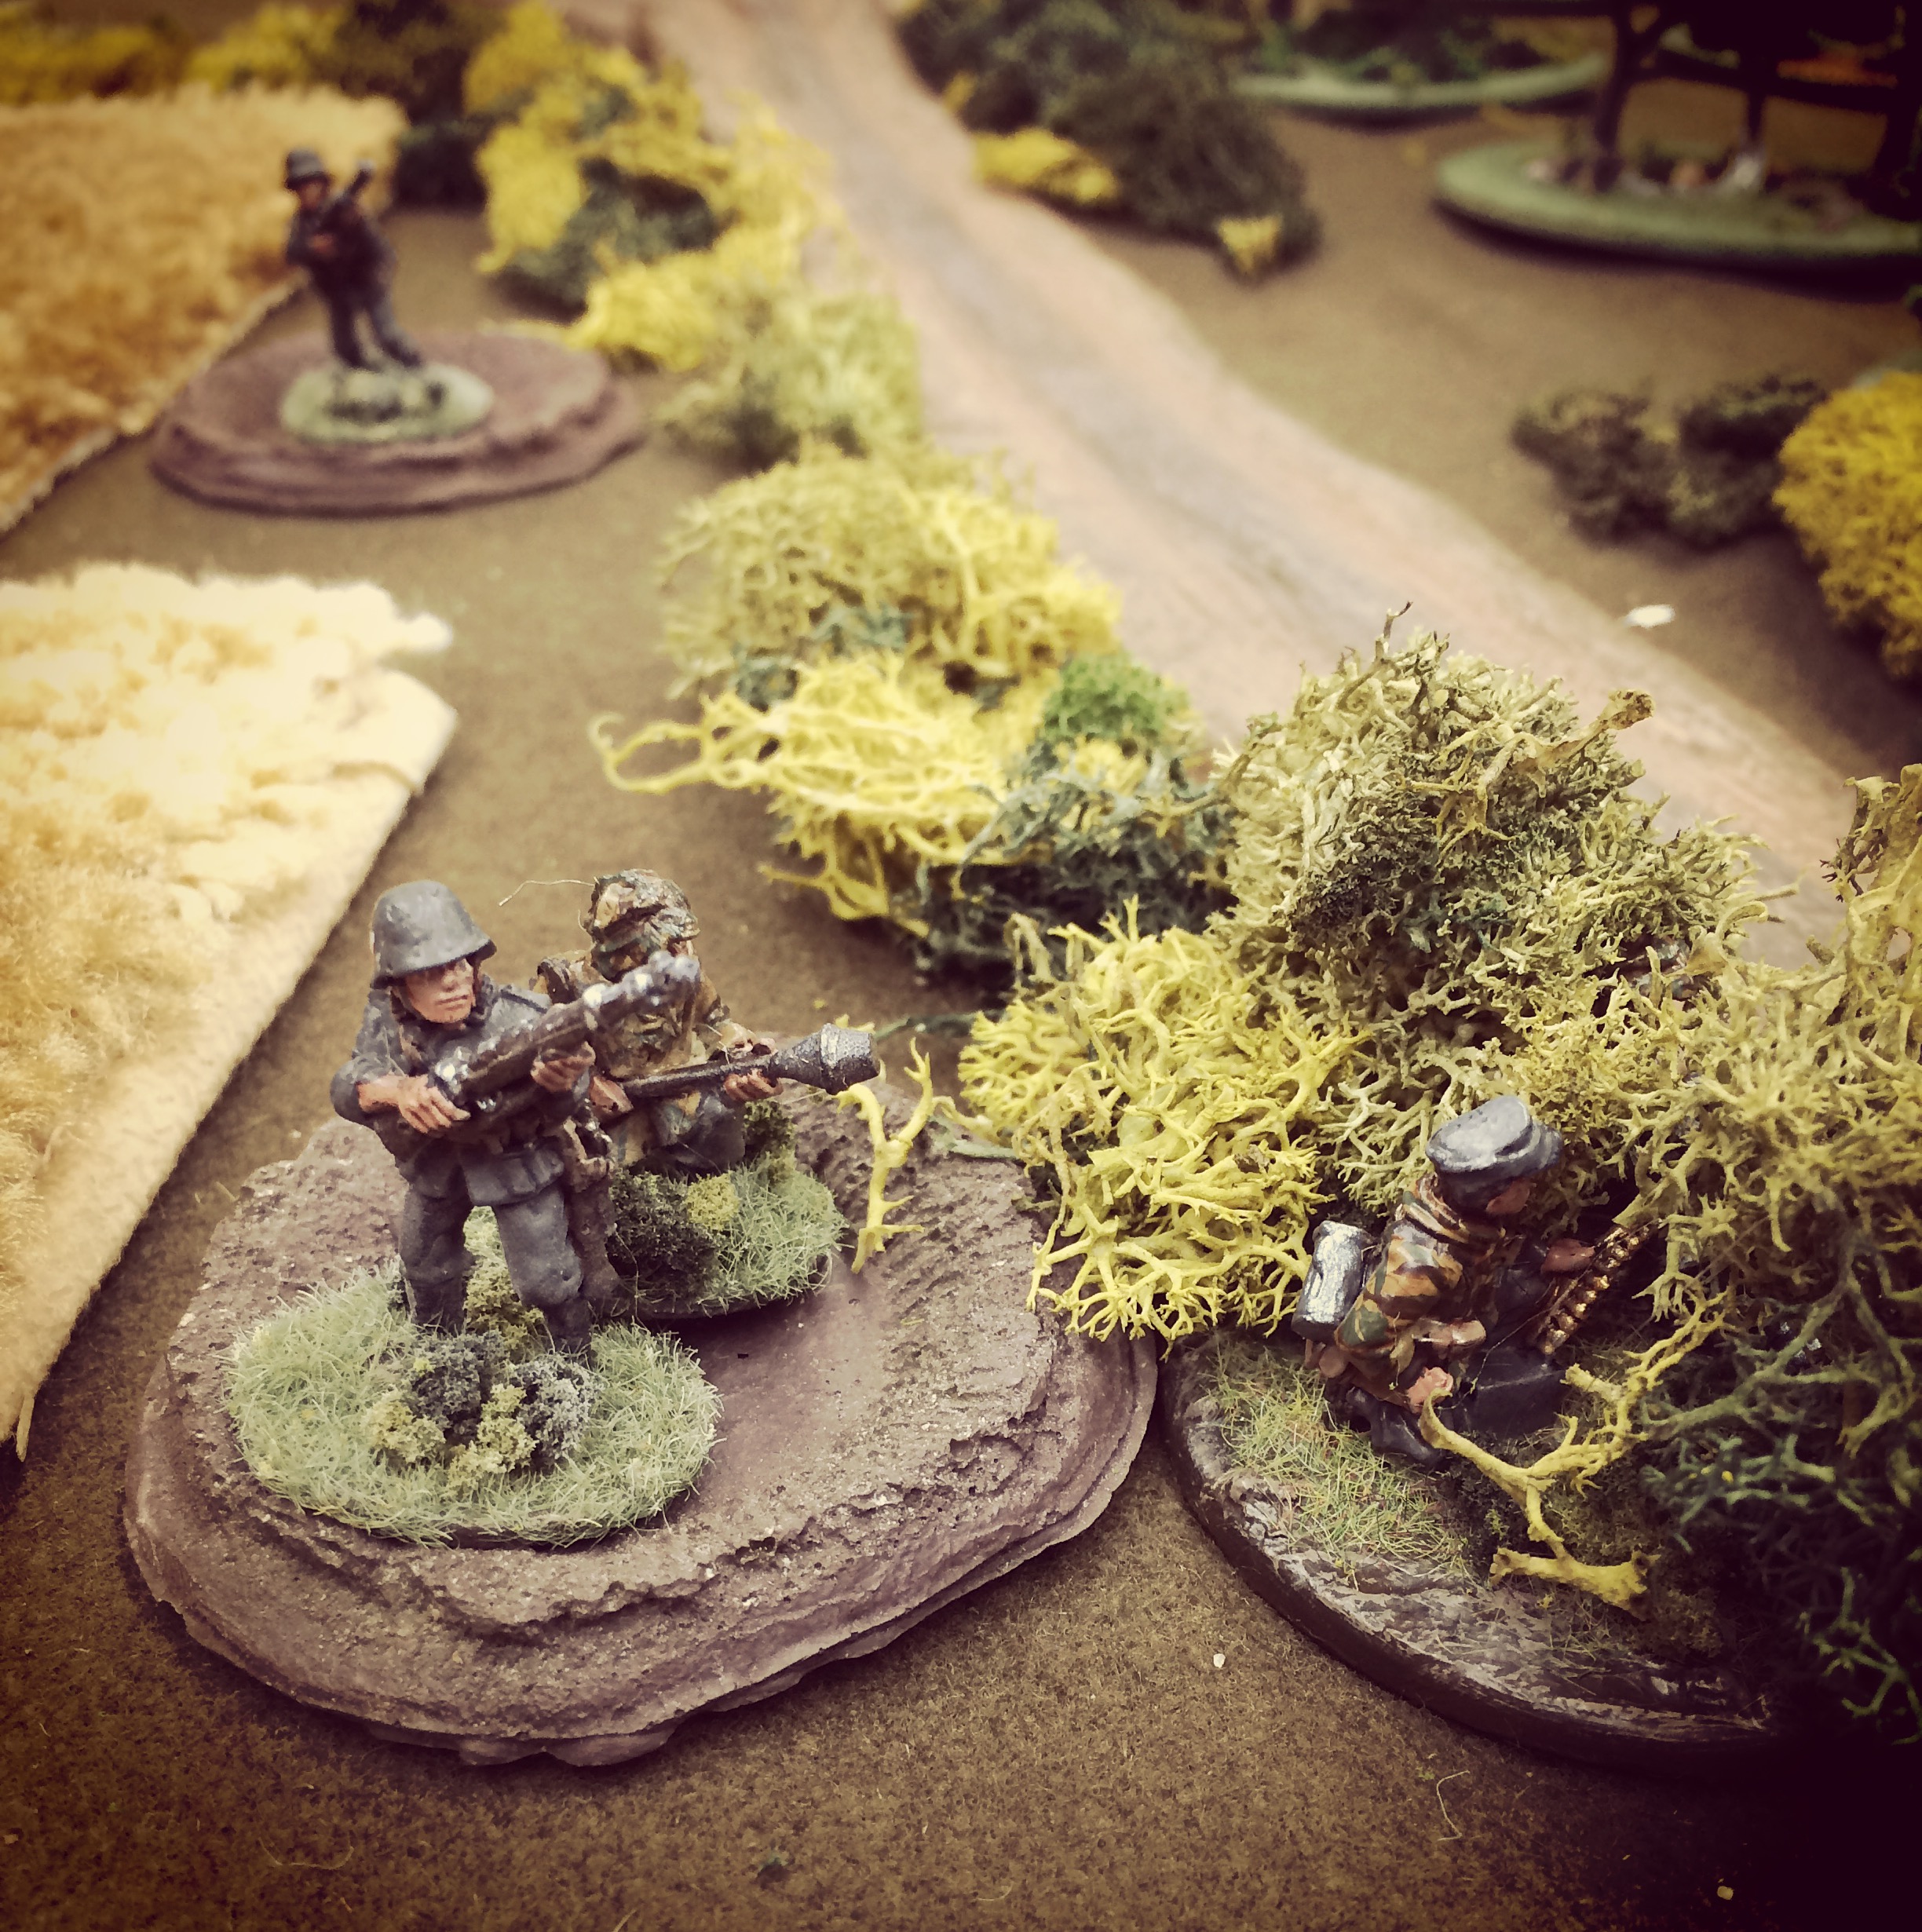
Germans bravely close assault the Sherman from the hedgerow

IMG_6813The Sherman is immobilized but still keeps fighting

With game time running short, the Americans in the field stood to fire on the Germans. Two German riflemen fell and the MG-42 crew took heavy fire, knocking it out for a round as the remaining crew scrambled back into position. At the left of the field, a US squad opened up at the Germans stretched along the hedgerow. Leaping the bocage and rushing forward, the Germans vanished in a hail of bullets, opening the route forward to the German HQ ahead. At the same time, Germans fell back along the right side of the field and the Americans ran forward. On the far US right, the third fire team ran forward, using their broken tank as cover as they made an end run toward the German command team in their farmhouse HQ.

IMG_6811
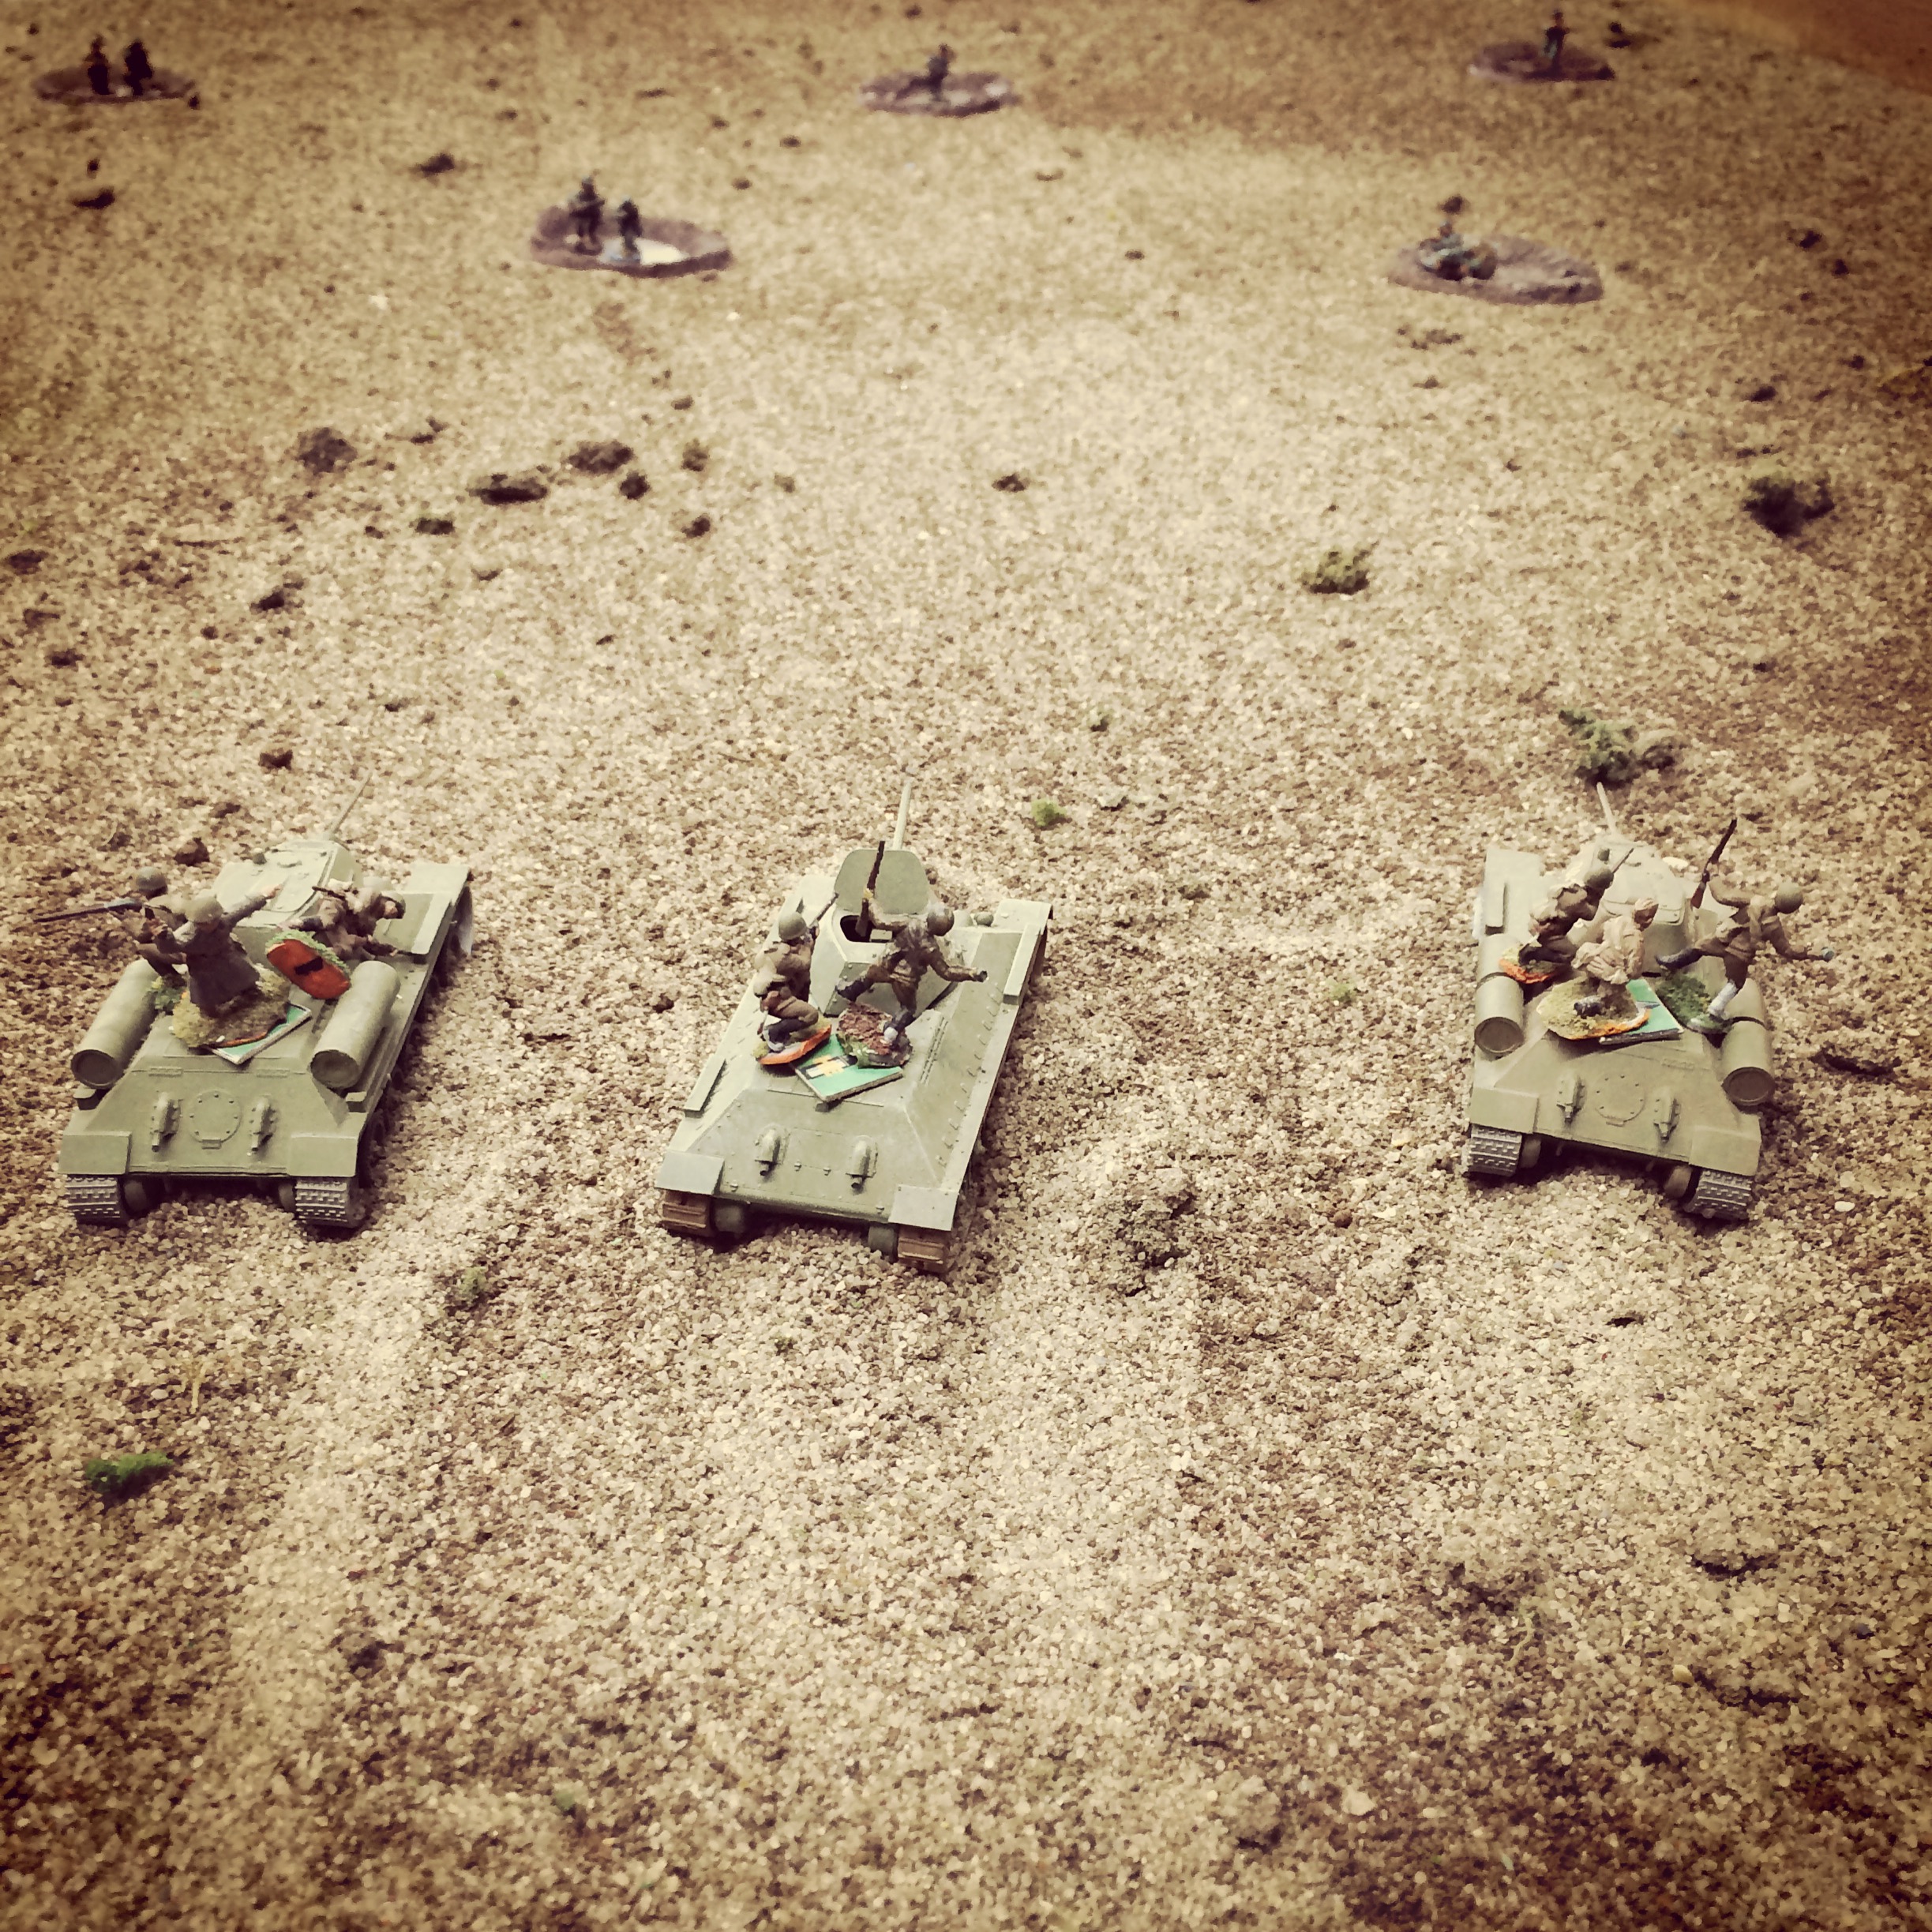
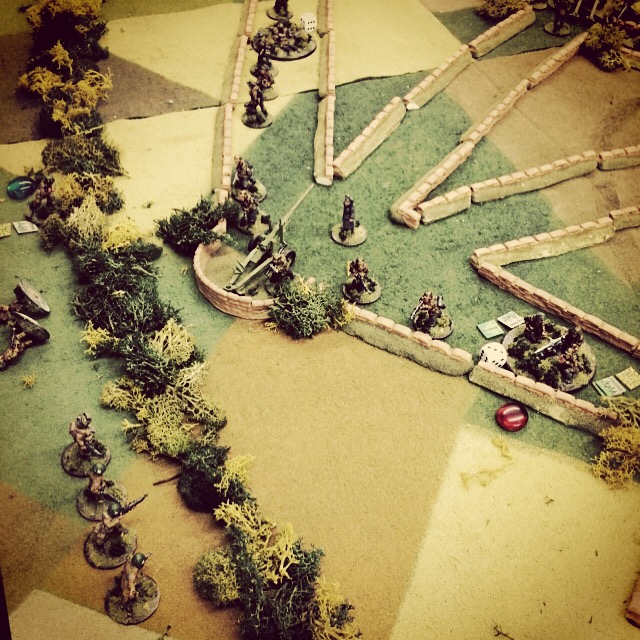
Two US squads and the platoon HQ advance at prone through the field

IMG_6814

US riflemen and BAR gunner fire into the German MG-42 as another American squad rushes forward in the distance

IMG_6815With the German HQ in sight, the US soldiers push hard to their objective

By the sixth turn, Kraiss and his command staff were on the move, making a run south from the safety of the farm where they had sat in cover for the whole game. With the final German defense in the field breaking, Americans broke through toward the farmhouse straight ahead and to both sides. Four remaining German rifles behind a wall and in a small copse of trees at the farm exchanged fire with the Americans, holding off dozens of GIs as Kraiss continued his run for safety.

IMG_6816
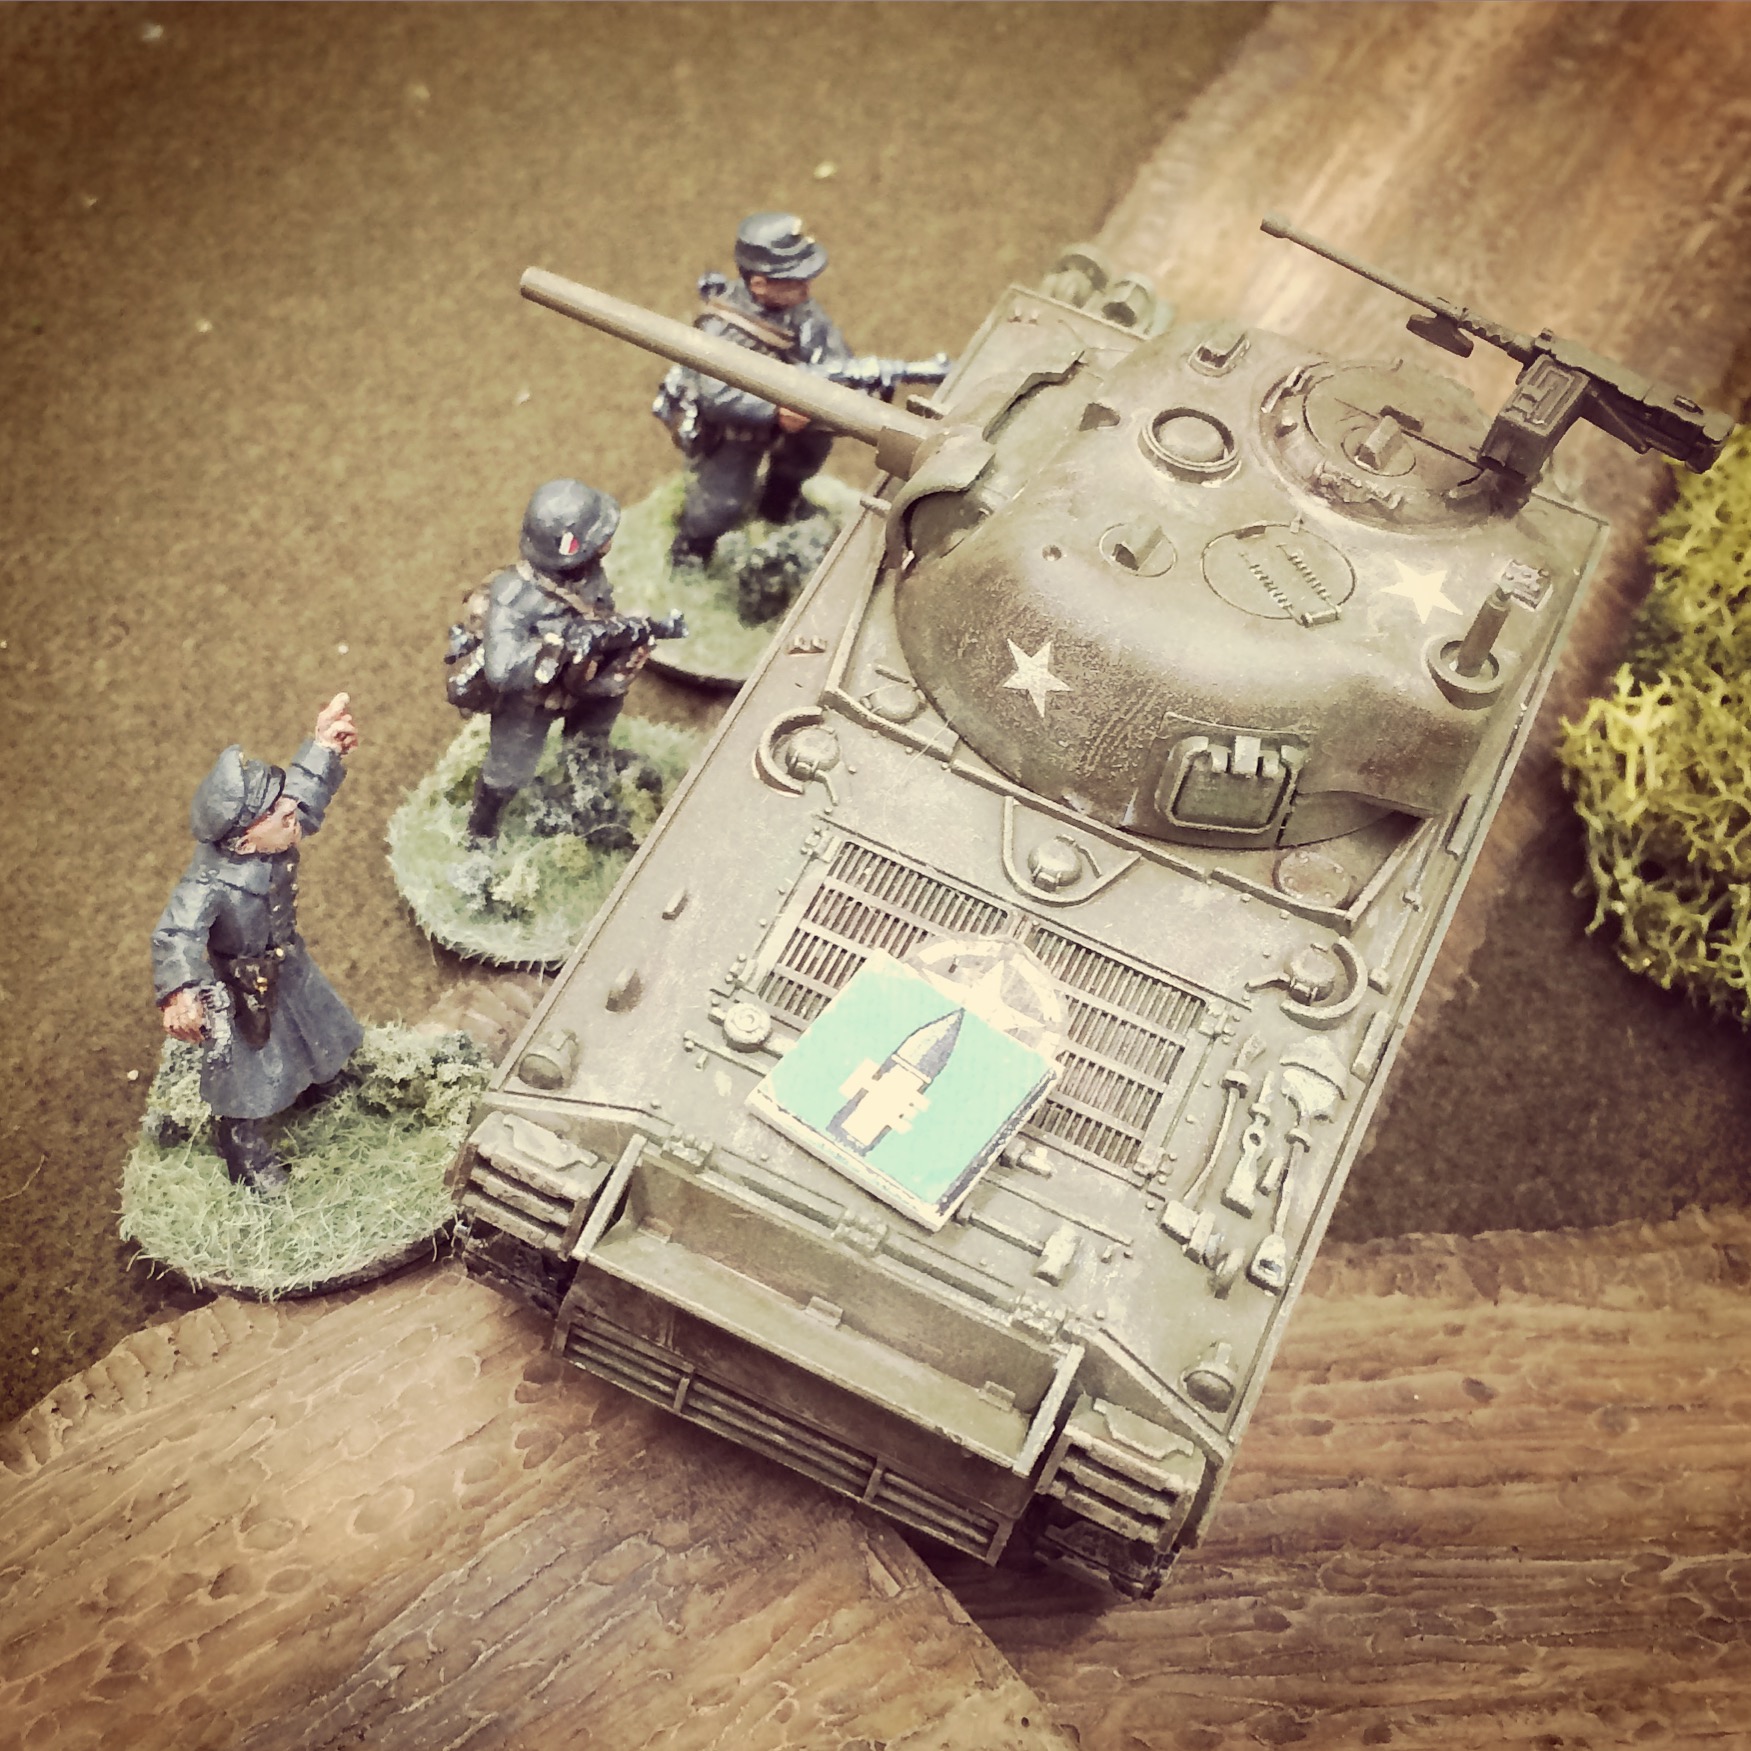
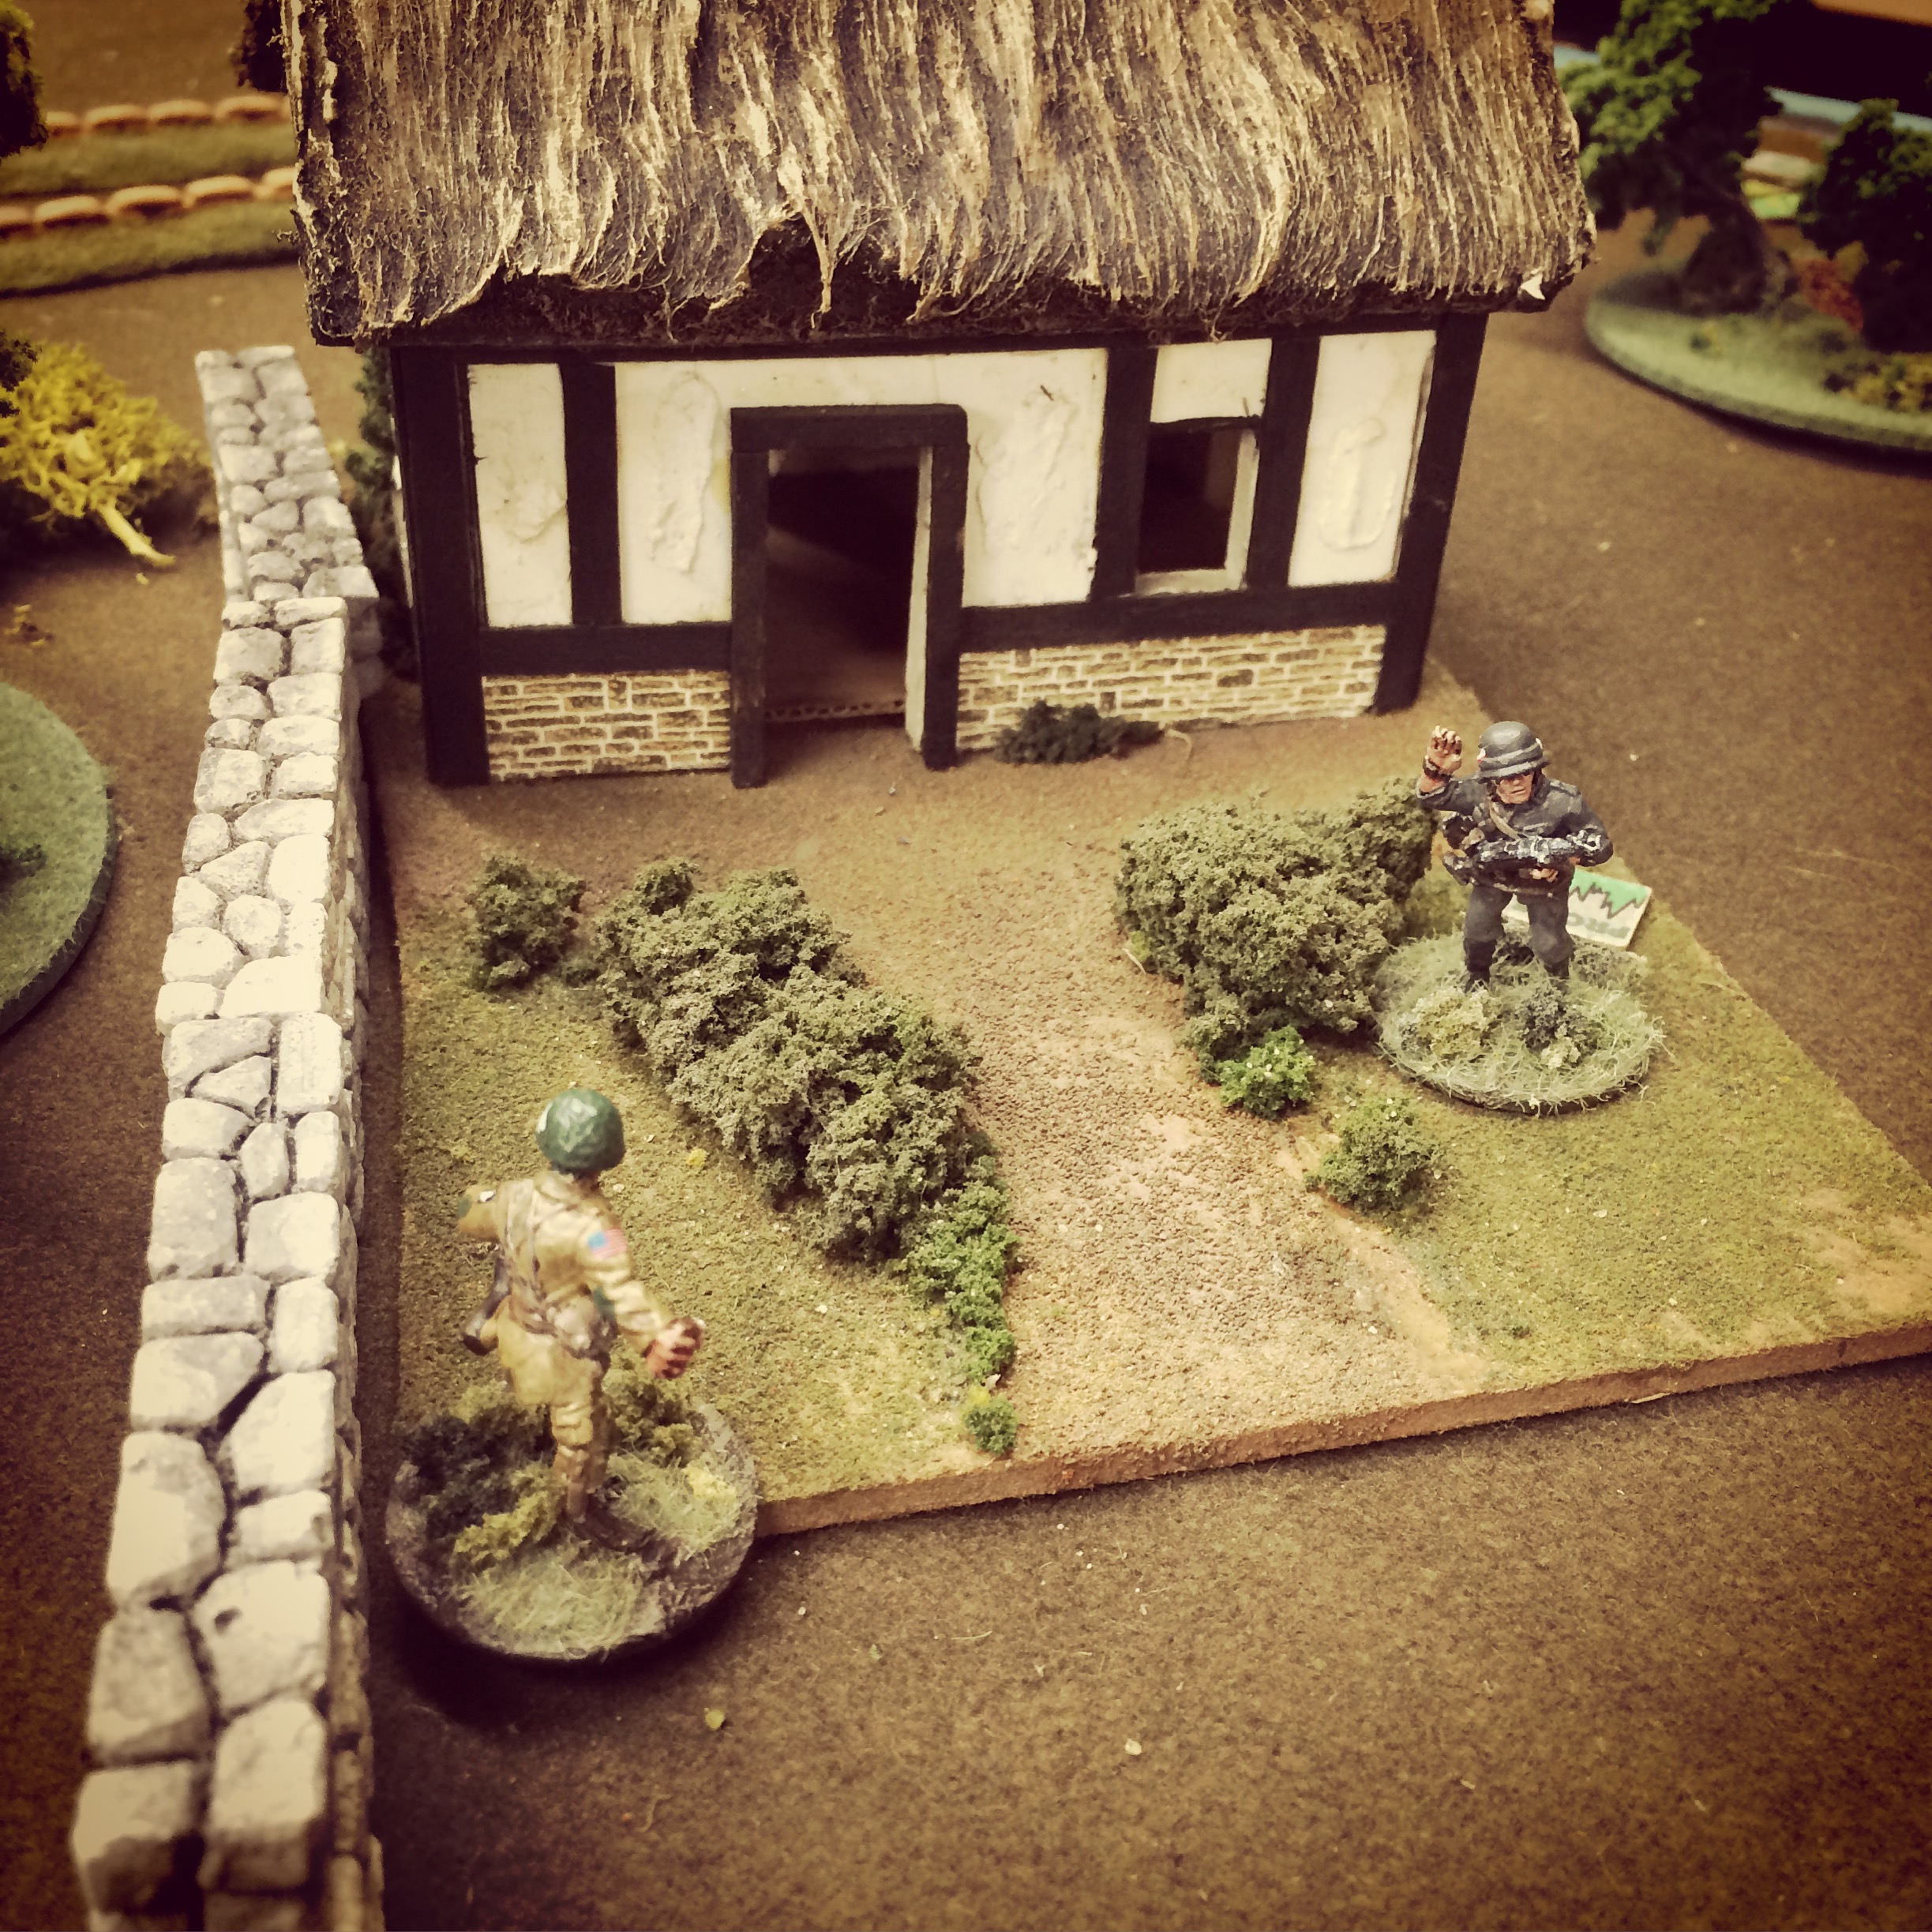
American and German soldiers come face-to-face at the German HQ

With the final turn eighth turn’s arrival, the Americans finally reached the edge of the farm. After quick series of shots, another German fell but no Americans were able to seize the HQ in time as Kraiss and a couple straggling men slipped off to the south further toward St. Lo..

Our battle at the German HQ near Le Mesnil-Rouxelin presented a pretty good feel for the fighting that occurred in mid-June 1944. With a wave of Allied forces closing in toward their objective of St. Lo, General Kraiss and the other German commanders struggled to stall the advance. With the four-year German control of Northern France at stake, German forces cobbled together a fierce retreating defense. Beginning with the tide of men landing on the beaches and from the air on D-Day, the war had turned inevitably for the Allies.

Battleground: Advance to La Fiere 1944 Scenario

LaFiereAerialAllied airborne troops were the first units on the ground in the pre-dawn hours of June 6th, 1944 invasion of Normandy. As the vanguard ahead of the massive beach landings to come on D-Day, the inland goals of the paratroopers was to secure key inland areas and deny German reinforcements a path to the coast. Members of the 505th Parachute Infantry Regiment of the 82nd Airborne Division were tasked with seizing a bridge over the Merderet River at La Fiere and just west of Sainte-Mère-Église.

LaFiereMapMap of the action around La Fiere, June 6-9 1944

There to meet the arriving Americans were elements of the German 1057th Infantry Regiment of the 91st Infantry Division. For three days, German resistance amid the open fields, bocage hedgerows and scattered stone Normandy buildings held out against the elite US airborne troops. By July 9th, however, the Germans withdrew and the way was cleared as Allied troops began to arrive inland from the beaches.

IMG_6037Skirmish Campaigns  “Normandy ’44 – First Hours” scenario book

I’ve previously run a 15mm Flames of War scenario at La Fiere, so I was excited to scale up the battle to 28mm at Metropolitan Wargamers in Brooklyn, NY this past weekend. Our game at La Fiere once again came from the classic Normandy ’44 – First Hours scenario book from Skirmish Campaigns, and we used Battleground rules. The Skirmish Campaigns series offers narratives, orders of battle and terrain layout maps that are brief and to the point, focusing on getting into the game as quickly as possible. For our game at La Fiere, we modified the order of battle and added in my newly-painted Rubicon Models Sherman tank for the US and a German anti-tank unit I’ve also recently completed. The rest of our forces came from my collection of 28mm German and US troops painted over the past year.

IMG_6699Table set up and initial German deployment at La Fiere

At the 28mm scale, we increased the tabletop set-up to a 4′ x 4′ board accommodating two main bocage-lined east-west roads, fields and a large stone house. With an American objective to seize the house, the Germans set-up with an infantry team and light machine gun in a line of trenches stretching through the main field. The German command set-up in the top floor of the house with a tripod-mounted MG 42 and anti-tank unit armed with a Panzershreck and Panzerfausts ready to deploy from the rear of the building. Two small anti-personnel mine fields were also set — one to the east of the house and one protecting the northern end of the German prepared positions.

IMG_6701Entrenched German troops and machine guns shift to meet the arriving Americans

With a game time limit of ten turns, the game began with the US being given the initiative as the Germans lay quietly in wait. The Americans took the first two turns to move on from the far edge of the table to the east and their deployment quickly revealed their plan. To their right, a M1 mortar crew set up behind a tree with their spotter creeping to the edge of the bocage to sight German targets across the field. Next, a .30-calibre machine gun team  set up at the hedgerow, followed by the HQ and a parachute rifle squad all stretched along the thick hedge. Across the road at the American left, one additional rifle squad moved in along the road with their Sherman rolling in support.

IMG_6700US paratroopers advance at the bocage hedgerows supported by a Sherman

Clearly the US plan was to lock down the German forces in their prepared positions with combined mortar, machine gun and infantry fire as the infantry would push through the open field toward the house objective. All the while, the balance of the Americans would creep toward the house using their tank for cover and intimidation. The mortar team confirmed the plan by launching two smoke rounds into the wide field at the end of the second turn, providing drifting cover for the next two turns.

IMG_6706German machine gunners take heavy fire from the American rifles

With the tank’s position revealed at the road, my Germans quickly moved their anti-tank squad around the house through turn three and lay in wait behind the bocage. The Germans also redeployed their tripod-mounted MG 42 to the far right of the trench to stave off the American advance in the field. The German advantage lay solely in their defensive positions, and all they had to do was survive. The Americans were going to have to abandon cover early in the game, but they superior numbers, elite troops and better weapons. Plus, the airborne had a tank.

IMG_6703The Sherman rolls down the road

There were few targets for the Germans soldiers to shoot at through turn four, and they had difficulty spotting through the smoke and distance across the field. The American machine gunners managed to lay down steady fire each turn, forcing some Germans into prone positions, wounding others but not scoring any kills. The American plan shows signs of unraveling early on as the mortar began failing to repeatedly to sight and range in effectively on any German targets in the trenches.

IMG_6705Confident US soldiers make for the open as their tank protects their left

The only other alternative for the Americans was to simply start pushing across the field in the open. With the heavy German machine guns at their center and right jamming and the crew taking fire, the US airborne began a slow advance by turns five and six. Infantry fire from the US included three dice from each Thompson submachine gun and two dice for every M1 rifle. As the paratroopers closed in, grenades were also thrown and knocked the German tripod MG 42 out of commission. All the Germans could answer with were single dice from their rifles and three dice for submachine gun shots from the officers, all in fewer numbers than the larger US squads.

IMG_6702German anti-tank weapons move to meet the advancing American airborne and supporting tank

Across the road, the second American rifle squad crept along on either side of the bocage with the tank rattling along beside them. As the first troops closed near the house, the first minefield was exposed but no Americans were injured as they continued on at a slower pace. Their delay allowed the German anti-tank crew to move into position, firing a few rifle and submachine gun shots along the way at the airborne tip-toeing around the mines. With the tank finally in sight, the Sherman opened up with opportunity fire from its hull, turret and top-mounted .50-calibre machine guns. Under a hail of bullets, the anti-tank crew went prone and took light wounds, disallowing their planned shot at the tank for the turn. By the sixth turn, the assistant gunner was able to crawl to the injured Panzershreck and deliver a crippling shot to the tank’s front track. Rolling for morale after the hit, the American crew rolled a ’20’ — the worst possible outcome — and fled their tank and the field.

IMG_6704German troops hold fast against continued fire from the Americans

With the tank out of the battle, the airborne infantry were left alone to do the job. At the seventh turn, the first US troops to close on the building were mowed down under heavy fire from the German HQ inside the building. The German survivors in the field trenches held out against three waves of US advances. In the open and with no heavy support, the Americans were eaten up in the field despite their superior training and weapons. Against the odds, the German forces had thrown back the US airborne’s advance on La Fiere.

Playing a 28mm battle with the Battleground skirmish rules gives an incredible amount of detailed feel to the game. Wounds, suppression, weapon jams, moving, loading, spotting, morale checks, cover and troop quality all intertwine to effect each figure individually as they contribute to the overall mission of their force. Under battle conditions, unlikely things — like mortars being completely useless or a tank crew fleeing the field– can and did happen. In our game, a well-laid plan by a superior American force was thwarted by Germans who just kept hanging on as the dice went their way.

Battleground: Iron Wedge 1943 Scenario

KurskT34sOur latest Battleground scenario at Metropolitan Wargamers in Brooklyn, NY took us back to one of our club’s sand tables and the area northwest of Ulianovo during Operation Kutuzov in July 1943. The Soviet 11th Guards Army and 1st and 5th Tank Corps led the counteroffensive action against a thin but dug in German force, resulting in some of the heaviest losses to both sides during Operation Citadel and the Battle of Kursk.

IMG_6214

Using 20mm miniatures and the scenario from the Red Guards At Kursk book from the Skirmish Campaigns series, the game sets up a 12 turn limit with the Soviet objective of pushing tanks through the German defenders. The German side is tasked with holding off the largely armored Soviet force of T-34s and T-70s with infantry and two Pak 38 anti-tank guns.

IMG_6239Battlefield layout with German infantry and anti-tank guns in dug in positions

The bleak, open table was set up with Germans in foxholes spread over half the field. The two anti-tank gun positions sat at the left rear of the German position with a mine field laid to channel the Soviets toward the river at the other side of the battlefield. Sparse wooded areas and small hill to the Soviet left formed the areas of safer ground for the Red Army’s tanks.

IMG_6233The first T-34s take position at the top of the hill

IMG_6234The second T-34s and tank riders move to the middle

The Soviets quickly ate up two of the game’s turns moving their first T-34 platoon forward toward the hilltop. By turns three and four, the second T-34 platoon entered at the right and the T-70s moved to the center with both groups of tanks carrying tank-riding infantry.

IMG_6231The center German Pak-38 position

IMG_6236T-34s race to engage German foxholes at close range in the center

With the German anti-tank guns at too long range to effective hit the Soviet tanks, the Red Army’s armor rolled aggressively to engage the German infantry at close range. Tank riders took some initial hits but the tanks pushed in to fire HE rounds into the German foxholes, quickly causing several casualties. German infantry answered back with several soldiers effectively setting off close assaults with satchel charges being placed and several tank riding Soviets being killed.

IMG_6235Close engagements between T-34s and German infantry in foxholes

IMG_6232The second Pak-38 on the German left

By mid-game, one T-34 at the Soviet left had been left in flames and a second at the center had a track blown out and was permanently immobilized. The Pak-38s continued to fire rounds at long range with one more T-34 crew bailed out in a delay while they fixed their tank for a number of turns. In the meantime, the German foxholes were emptied as surviving Soviet tanks and infantry poured fire into the positions.

IMG_6237T-34s are destroyed and immobilized as they push forward

IMG_6240T-70s provide cover in the center as surviving T-34s move to the river

As the T-34s closed into the German side of the field, one of the anti-tank positions was completely destroyed while another had their crew eliminated. With the Germans scrambling to man their surviving gun, the three functioning T-34s raced to the river at the German right while the light T-70s cleared out resistance in the remaining center German defenses. With only a few crossing checks at the river, the Soviets were assured a victory as they continued to rattle to the German edge of the field and on to a victory by alluding the last German defenders.

With only a sparse historic defense, the Germans performed remarkably well in our replay of the scenario. The German infantry had a tall order holding off the rumble of Soviet tanks but the Red Army’s iron assuredly rammed a wedge through the bleak sandy landscape and rolled on to support the further counterattack.

Battleground: Uncle Red 1944 Scenario

UtahBeach44UncleRed

The action at the “Uncle Red” sector of Utah Beach on D-Day June 6, 1944 is a favorite at Metropolitan Wargamers in Brooklyn, NY. Using one of the club’s sand tables, we have previously run the scenario for Flames of War in 15mm, and this past week we had a go with a game in 20mm using the Battleground skirmish rules.

utahmap2Map of US 4th Infantry Division at Utah Beach June 6, 1944 (“Uncle Red” circled)

The US 4th Infantry Division’s landing was less murderous than the casualties experienced by the Allies at Omaha Beach, but the German 709th Infantry Division’s defense was still substantial. German fortifications eventually fell to US assaults by both infantry and timely tank support arriving successfully on the beach.

IMG_6037 Skirmish Campaigns  “Normandy ’44 – First Hours” scenario book

We’ve been enjoying World War II scenarios at the skirmish level in both 28mm and 20mm, allowing for a more detailed feel to our games taken from the well-researched and detailed Skirmish Campaign books, including the Normandy ’44 – First Hours book.

IMG_6176Table set up for the “Uncle Red” scenario at Utah Beach

The table’s layout featured a heavily-defended beachhead with German machine guns firing from three coastal bunkers, lines of barbed wire, mines and trenches carved into the sand. The short, eight-turn scenario presents the Americans with the objective of taking the three bunkers at the seawall plus one at the rear of the table. The Germans must simply hold off the US invaders from seizing their objectives.

IMG_6179The US 4th Infantry Division arrives in Normandy

IMG_6178US soldiers hit the beach

US arrivals began with one boat of infantry arriving in each of the first two turns. The Americans used both of their actions in each turn to push forward on the beach with an eye on assaulting the bunkers at the German center and left.

IMG_6177American GIs push forward under German machine gun fire

IMG_6180The initial US landings take heavy casualties from German bunkers at Utah Beach

Under no cover on the open beach, the US soldiers took heavy crossfire from German machine guns in each of the three beach bunkers and one squad of infantry tucked behind barbed wire in trenches. The first two turns were deadly. One American squad were reduced to half strength by the time they pushed toward a gap in the minefields and on to their first bunker objective. Combined fire from the US poured into the bunker, cutting the German machine gun’s crew to a barely functioning unit as the Americans swarmed forward.

IMG_6188A brave American close assault leaves the first German bunker in flames

By turn three, the Germans in the trenches had shifted left to cover the oncoming Americans just breaching the seawall. In a close frontal assault the first American squad managed to lob a grenade into the German bunker, incinerating the remaining machine gun crew inside. With one objective one, the GIs set their sites on the bunker at the rear of the table beyond trenches, barbed wire and weakened German forces.

IMG_6194American armored support arrives

IMG_6193US engineers light up a German bunker with a flamethrower

The US Sherman and final boat of engineers arrived in turn four and immediately made way for the right side of the German lines. Exploiting a gap in the wire, the fresh squad made quick work of the bunker on the German right with a blast from a flamethrower in turn six. German infantry at the center trench were cut up through combined HE rounds from the Sherman on the beach and close fire from the encroaching American squad.

IMG_6190US troops get bogged down under German grenades and gunfire

Back at the German left, the initial US success became hung up in a tangle of trenches and barbed wire just beyond the burning bunker. German survivors at the second row of trenches tossed grenades and opened fire on US troops, and the Americans answered back likewise. In the bloody close action, the Germans offered just enough delaying actions while taking heavy casualties. By the time the Germans began to break in turn seven, the American forces were in no position to seize their final two objectives by the game’s end. Despite the aggressive American fight, the beach was held by the Germans.

Having played the Uncle Red scenario now several times using Flames of War rules in 15mm, we really liked the nuance of play at the skirmish level in 20mm. At the larger scale, individual losses and heroic actions seem to mean more and can swing the game from victory to defeat in a heartbeat on the sandy tabletop beach of Normandy.

Battleground: Brecourt Manor 1944 Scenario

brecourt1944

This year’s 71st anniversary of the Allied invasion of Normandy on June 6, 1944 didn’t get the same attention as last year’s full weekend of D-Day gaming at Metropolitan Wargamers in Brooklyn, NY. Even so, a few of us did come together for a quick run through a gamer favorite small-scale battle at Brecourt Manor.

101stABDDaydropsDrop zones of the US 101st Airborne on June 6, 1944 and the area around Brecourt Manor (circled in red)

Made famous in more recent years in the hit HBO series Band Of Brothers, the action at Brecourt Manor by a couple dozen men from the US 101st Airborne has long been a favorite for military historians and a textbook example of a small-scale assault on a heavily defended position. With four 105mm howitzers firing on Utah Beach, the German gunners were defended in a series of shallow trenches by several MG42 heavy machine guns and a number of infantry. Through surprise and quick movement through the trenches, the US Airborne quickly took the position and disabled the German guns.

IMG_6037

Skirmish Campaigns  “Normandy ’44 – First Hours” scenario book

For our replay of Brecourt Manor, we turned to the classic Normandy ’44 – First Hours scenario book from Skirmish Campaigns. The Skirmish Campaigns series of books offers well-researched and detailed campaign scenarios filled with orders of battle, terrain layout maps and deeply descriptive narrative of how actual engagements unfolded during World War II. Adaptable to a number of rules systems, the scenario as outlined in the book scaled nicely to our game. Using most of my recently painted 28mm German and US troops and classic Battleground WWII skirmish rules, we were set to replay Brecourt Manor.

IMG_6025The 101st Airborne plot their assault on Brecourt Manor

Two players split their command as the US Airborne and set their battle plans before my Germans deployed in the trench system. Beginning German positions were defined by four gun emplacements each crewed by a team of five rifle-armed gunners and an officer. I also placed three MG42s at different points in the trench lines and one patrolling battery command squad of four riflemen and two officers deployed at the western end of the position.

IMG_6027Germans sit at the ready in their positions at Brecourt Manor

The Americans moved first, slowly deploying a .30 cal machine gun crew from behind the farmhouse at the northwest corner of the table. Directly to the north, a bazooka team crept into position behind a copse of trees with two fire teams behind the nearby hedgerows in support. To the west and toward the south, the other two US fire teams set up and moved toward the German lines, also under cover of the thick bocage.

IMG_6026105mm gun crews stand at the ready

Spotting the American bazooka team to the north, I quickly redeployed one of my machine guns to hold back the advance on that side of my position. Not waiting to get their machine gun in place, the Americans advanced on two sides and took heavy fire to their fire teams leaving them pinned in place. Hoping to pin down the Germans at the strongly defended north and western edges of the position, the US machine gun attempted to lay down a stream of fire but jammed is the trigger was pulled on its first shot of the day.

IMG_6029A 105mm gun position is destroyed by an American bazooka

Even under fire, the US bazooka team managed to get into place and a shot destroyed the northernmost howitzer, killing one German gunner and suppressing most of the rest of the gun team. On the western side, another of my redeployed machine guns was instantly spotted and raked with American gunfire and all but knocked out of the rest of the game. With only one MG42 left in the western trench line, a US Airborne team moved with over confidence toward making their first assault. The foolhardy bravery of the Americans was met with combined arms fire from my remaining MG42, rifles at the gun position and shots from the command squad. When the smoke cleared, one American fire team was left with just one man standing and the other had been briefly pinned.

IMG_6028   US Airborne units ready for a close assault at Brecourt Manor

By turn three, the American machine gunners cleared their jam and were finally able to lay down strafing fire along the entire western edge of the German trenches. With bullets whizzing overhead, the Germans were forced to the ground and the remaining Airborne came over the hedge and made way for the German howitzer. The Airborne soldiers poured into the German gun position and hand-to-hand combat ensued leaving two Germans and two Americans dead in the melee. With no clear victory in the first close combat of the day, the Americans bounced out of the German position, pulling back toward the hedges from where they had just come.

Back to the north, the American bazooka team had been cut to just one man who had retreated under heavy fire. One other US rifle team at the north had been eliminated, and the last had been whittled to just two injured men. With just a few rattled troops strung along two sides of the field, the US Airborne retreated and left three guns ready to continue raining shells on the beaches in the distance.

What the scenario showed us, as it did on the actual day some 71 years ago, was the importance the US machine gunners in a tight assault like the one at Brecourt Manor. Met with a larger, more well-defended German force, the American machine guns were the equalizer in real life. Had the American soldiers on our tabletop focused their assault after pinning the German defenders, our game this month may very well have gone the way of history with another victory in the hedgerows of Normandy.