Battleground: Bocage HQ Near Le Mesnil-Rouxelin 1944 Scenario

leMesnilRouxelinJune1944

On June 6, 1944, General Dietrich Kraiss and the 7000 some soldiers of his 352nd Infantry Division were at Omaha Beach to meet the Allied invasion. Fighting valiantly against the overwhelming tide of American and British forces, Kraiss and 352nd were stretched thin at the beaches and continued the defense inland for weeks as they fought the Allied advance toward their objective of St. Lo.

LeMesnilStLoMapMap of the area around Le Mesnil-Rouxelin and the US 175th Infantry Regiment June 14-18, 1944 advance

St. Lo was an important crossroads objective which had endured German occupation since 1940. On the morning of June 6, 1944, the city was hit with vicious American artillery bombardments. As the Allies advanced inland after the coastal landings toward St. Lo, the German 352nd and 353rd Infantry Divisions and 3rd Parachute Division formed a line to slow them down. By late July, St. Lo was liberated by the Allies and the 352nd was destroyed. By early August, Kraiss was dead, and the German presence in Northern France was near its end.

SCHeroesofOmahaSkirmish Campaigns “Heroes of Omaha and Panzer Lehr” scenario book

The Heroes of Omaha and Panzer Lehr book from Skirmish Campaigns outlines the eleven engagements during this key period from D-Day to the German counterattack through the Allied breakthrough. This past weekend at Metropolitan Wargamers in Brooklyn, NY we ran through the battle near Le Mesnil-Rouxelin just north of St. Lo on June 17, 1944. With elements of the US 175th Infantry Regiment closing in, General Kraiss and his headquarters quickly assembled an ad hoc force to delay the American advance. In the game, three US rifle squads (each armed with a BAR team) and a lone M4 Sherman must advance and seize the German HQ while being held at bay by several small German teams armed with rifles, Panzerfausts, a mortar and a MG-42. the Americans have to hustle, and they have eight turns to capture the German HQ before Kraiss and his staff can make their escape to fight another day.

IMG_6808Game set up near Le Mesnil-Rouxelin with the German HQ in the distance

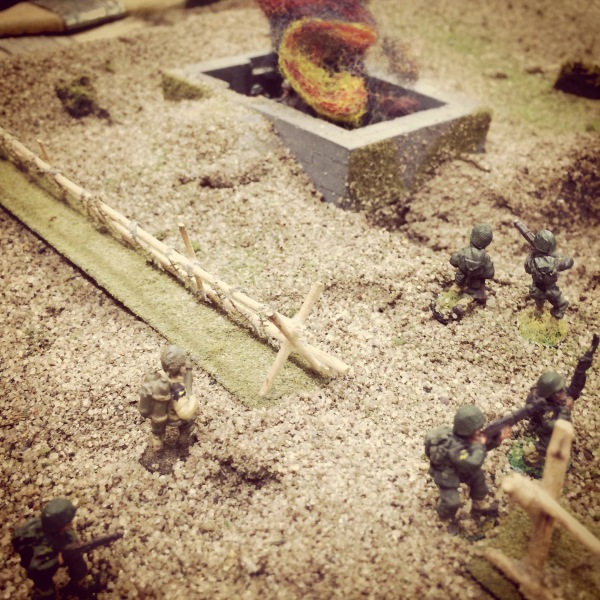
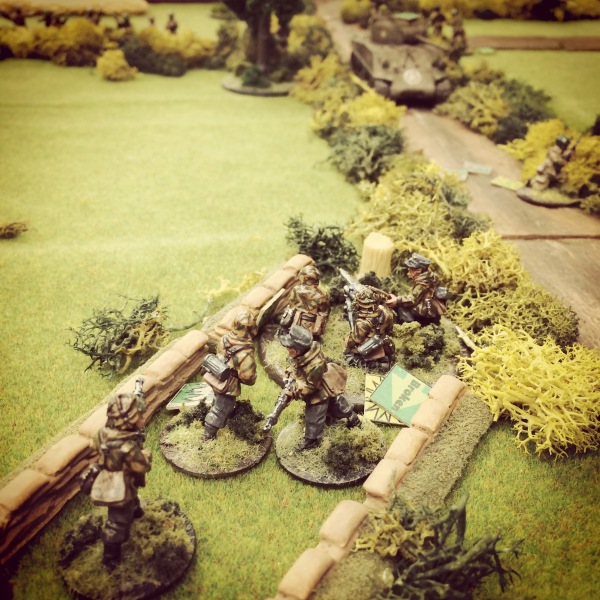
With my US Airborne 28mm models standing in for the American infantry, they spent the first few turns moving in from the north and navigating the bocage hedgerows. Two squads and the US HQ moved to the east of the main road, the Sherman ran straight through the middle and one squad edged toward a French farmhouse mid-field. The German machine gun set up at the road edge in the bocage, looking to cover the advance by road or in the thick fields. Other German riflemen spread out along the hedges, looking to create a defense using their thin units and cover to the best advantage.

IMG_6804

US soldiers push through the fields and bocage

IMG_6805

German soldiers edge into position along the bocage

IMG_6806The Sherman rolls straight along the road toward the objective

By turn four, the firing began. Germans along the bocage made an attempt to shoot the Sherman at close range with a panzerfaust but the shot miraculously missed. The Sherman answered with a burst of machine gun and high explosive shots, forcing the Germans to fall back from the hedge and into the field. The Sherman rolled forward and a second squad of Germans emerged from the bocage and rushed the tank, placing three grenades along its left side. With the charges set to blow, the tank moved forward and rotated its turret to light up the exposed Germans with another round of machine gun fire, destroying the entire unit. Just as the smoke cleared, the grenades blew up along the side of the tank, immobilizing it for the game with its weapons still functional and crew left unharmed. Back in the field at the center, the German rifles and MG-42 took up new positions and the two US rifle squads and HQ continued to creep forward in prone positions.

IMG_6807Germans await the Sherman’s advance from their bocage positions

IMG_6809Germans disperse under machine gun fire from the Sherman

IMG_6810Germans bravely close assault the Sherman from the hedgerow

IMG_6813The Sherman is immobilized but still keeps fighting

With game time running short, the Americans in the field stood to fire on the Germans. Two German riflemen fell and the MG-42 crew took heavy fire, knocking it out for a round as the remaining crew scrambled back into position. At the left of the field, a US squad opened up at the Germans stretched along the hedgerow. Leaping the bocage and rushing forward, the Germans vanished in a hail of bullets, opening the route forward to the German HQ ahead. At the same time, Germans fell back along the right side of the field and the Americans ran forward. On the far US right, the third fire team ran forward, using their broken tank as cover as they made an end run toward the German command team in their farmhouse HQ.

IMG_6811
Two US squads and the platoon HQ advance at prone through the field

IMG_6814

US riflemen and BAR gunner fire into the German MG-42 as another American squad rushes forward in the distance

IMG_6815With the German HQ in sight, the US soldiers push hard to their objective

By the sixth turn, Kraiss and his command staff were on the move, making a run south from the safety of the farm where they had sat in cover for the whole game. With the final German defense in the field breaking, Americans broke through toward the farmhouse straight ahead and to both sides. Four remaining German rifles behind a wall and in a small copse of trees at the farm exchanged fire with the Americans, holding off dozens of GIs as Kraiss continued his run for safety.

IMG_6816American and German soldiers come face-to-face at the German HQ

With the final turn eighth turn’s arrival, the Americans finally reached the edge of the farm. After quick series of shots, another German fell but no Americans were able to seize the HQ in time as Kraiss and a couple straggling men slipped off to the south further toward St. Lo..

Our battle at the German HQ near Le Mesnil-Rouxelin presented a pretty good feel for the fighting that occurred in mid-June 1944. With a wave of Allied forces closing in toward their objective of St. Lo, General Kraiss and the other German commanders struggled to stall the advance. With the four-year German control of Northern France at stake, German forces cobbled together a fierce retreating defense. Beginning with the tide of men landing on the beaches and from the air on D-Day, the war had turned inevitably for the Allies.

Micro Armour: Fielding the GHQ M7 Priests and Infantry Heavy Weapons

m7priest

The 105mm Howitzer Motor Carriage M7 was a powerful invention to support infantry forces during World War II with a combination of a heavy artillery gun, tracked mobility and armor. Christened the ‘Priest’ by British forces due to its round pulpit-like machine-gunner’s ring, the M7 saw service in North Africa, Italy and Normandy and had a powerful showing during the Battle of the Bulge in the winter of 1944-1945.

GHQlogo

I’ve been wrapping up a bunch of lingering modelling projects at multiple scales for the past two months, and I found I still had a number of 6mm models from GHQ to wrap up. Every time I go back to 6mm from my usual 15mm and 28mm modelling, I’m reminded of how much I love working at the micro armour scale. I’m a big fan of how Priests look with their boxy profile and huge gun, and even at the micro scale the GHQ M7 models have a bunch of detail. Finishing these models involved just a quick shot of olive drab armor base coat spray was followed by a brown wash and some dry brushed highlights in a lighter green. Decals add that last bit of detail before the bases are flocked and the models get a matte coat finish.

IMG_0793GHQ M7 Priests

I also had a pack of GHQ US infantry heavy support weapons on hand to add to my other existing ground forces. The M2 mortars and M1919 light machine guns wound up with a pretty tiny, low profile on my flocked washer bases, but they fill out my infantry with flexible support. Along with my new Priests, my tiny US force is diversely equipped for some micro action.

IMG_0797GHQ M2 Mortars

IMG_0795GHQ M1919 Machine Guns

Flames of War: Fielding the US M1 57mm Anti-Tank Platoon

m157mmIt was clear to the Allies from the early years of World War II that German tanks were a big problem. From the early Panzer models to the medium Panthers and finally to the famed Tiger I and Königstiger, German armor combined with German tactics were major threats to Allies forces throughout the war.

To help counter the German armor threat on the battlefield, the Allies quickly evolved their anti-tank weaponry. Building on earlier. lighter guns, the British introduced the “6 pounder” early in the war. Even before entering the war, the United States began production of its version with the M1 57mm anti-tank gun which it exported for use by UK and Soviet forces. Despite the gun’s mixed effectiveness against the strongest German tanks and only occasional use against infantry, the M1 57mm became the standard Allied anti-tank gun of the war with some 15,000 produced.

I’ve previously modeled the British 6 pounder version of these guns for Flames of War, but I wanted to add some of the American M1 57mm models to my miniatures arsenal ahead of the Sint-Oedenrode scenario I’ll be running at the upcoming Fall In! convention in November. As luck would have it, a member of Metropolitan Wargamers in Brooklyn, NY was getting rid of some extra packs of the models and I picked them up on the cheap.

Getting these assembled, painted and ready for the table was a quick process. After gluing everything up and covering the bases in a layer of filler putty, they got hit with a basic olive drab spray base undercoat. Flesh and equipment details got picked out, and skin was topped off in a flesh wash. The guns themselves received a brown wash and a lightened green highlighted brush coat. The bases were flocked, I added little bits of shrubby and then everything got a matte spray finish.

The resulting four guns and two command stands gives me a lot of flexibility to add these to a lot of forces throughout the late war period I generally play. As a ubiquitous gun on the battlefields of World War II, these M1 57mm artillery pieces are certain to be making a lot of appearances in my games to come.

IMG_0786

IMG_0787

IMG_0789

IMG_0790

IMG_0792

IMG_0788

IMG_0785

Flames of War: Fielding the 8.8cm FlaK 36 Platoon

8.8flak2

One of the most common, flexible and deadly weapons used by German forces in World War II was the 8.8cm FlaK 36 gun. Building on earlier models from the late 1920s and early 1930s, the piece could be used for both anti-aircraft and direct anti-tank fire. Known commonly as an “Eighty-Eight,” this iconic artillery was encountered on battlefields from Africa to the Eastern Front to the coast of Normandy in both fixed defensive positions or in support of mobile ground forces.

FOW88flakI’ve been away from modelling any Flames of War miniatures for a while, but I’m planning on running a couple historic beginner games at the HMGS Fall In! convention in Lancaster, PA in early November. One of the scenarios, Sint-Oedenrode, requires some 88s, and I’ve long relied on loaners from other members at Metropolitan Wargamers in Brooklyn, NY. I figured it was high time I add these weapons to my 15mm collection, so I ordered the set from my go-to supplier The Warstore and the box arrived in just over a day.

IMG_0777

IMG_0776

The models, including two metal 88s, a resin Sd. Kfz. 15 command car, two resin Sd. Kfz. 7 half-track tractors and a ton of crew and bits, glued up quickly on the marvelous cast scenic bases I’ve come to expect from FOW designers. My German painting goes pretty quickly with a black spray primer coat followed by some dark grey brushed on as base for uniforms, vehicles and guns.

IMG_0782

IMG_0783

Log emplacements, ammo boxes and equipment get painted up in coats of varying browns and greys. The gun and vehicle grey basecoat are washed in a dark brown and then followed up with some highlights in dry-brushed silver, light grey and brown muds. The huge shells scattered on the ground and fresh rounds in the arms of the crew are done in metallics, and the vehicles are detailed with decals. The final touches are done with static grass applied with white glue around the bases and a few sprays of matte finish to protect the models and dull down any remaining shine.

IMG_0779

IMG_0781In all, the entire platoon took me a couple hours. As with most FOW models, there’s a lot of personality, poses and details in this kit. I love the commander’s stance with binoculars aimed at the horizon and his junior officer reaching for his bag. The main gun bases and the extended separate bases of extra crew make each piece a little diorama of its own. By carefully applying grass to certain areas, I was able to blur the line between the bases, making them appear as one big piece with a quick look. Of course, along with the detail in the models does come some cost, but the usability of these models in so many FOW games makes adding the 8.8cm FlaK 36 platoon a fantastic long-term investment.

IMG_0780

Battleground: Advance to La Fiere 1944 Scenario

LaFiereAerialAllied airborne troops were the first units on the ground in the pre-dawn hours of June 6th, 1944 invasion of Normandy. As the vanguard ahead of the massive beach landings to come on D-Day, the inland goals of the paratroopers was to secure key inland areas and deny German reinforcements a path to the coast. Members of the 505th Parachute Infantry Regiment of the 82nd Airborne Division were tasked with seizing a bridge over the Merderet River at La Fiere and just west of Sainte-Mère-Église.

LaFiereMapMap of the action around La Fiere, June 6-9 1944

There to meet the arriving Americans were elements of the German 1057th Infantry Regiment of the 91st Infantry Division. For three days, German resistance amid the open fields, bocage hedgerows and scattered stone Normandy buildings held out against the elite US airborne troops. By July 9th, however, the Germans withdrew and the way was cleared as Allied troops began to arrive inland from the beaches.

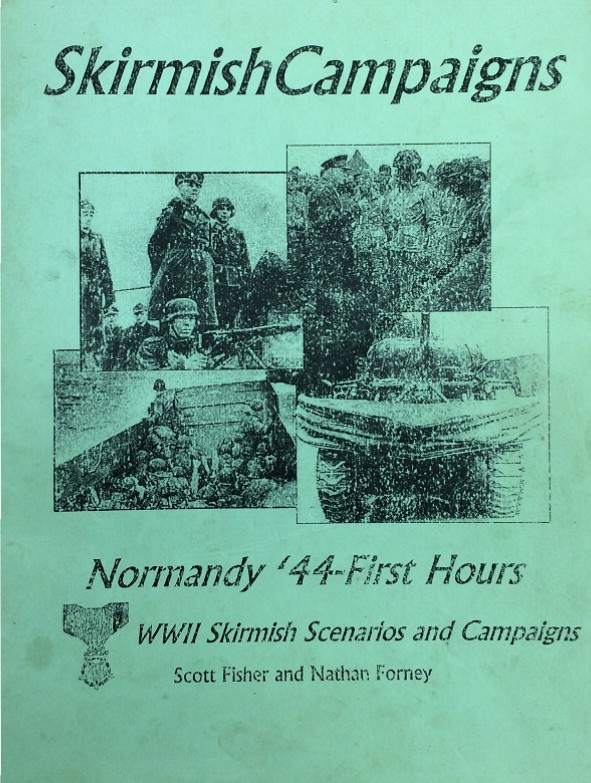
IMG_6037Skirmish Campaigns  “Normandy ’44 – First Hours” scenario book

I’ve previously run a 15mm Flames of War scenario at La Fiere, so I was excited to scale up the battle to 28mm at Metropolitan Wargamers in Brooklyn, NY this past weekend. Our game at La Fiere once again came from the classic Normandy ’44 – First Hours scenario book from Skirmish Campaigns, and we used Battleground rules. The Skirmish Campaigns series offers narratives, orders of battle and terrain layout maps that are brief and to the point, focusing on getting into the game as quickly as possible. For our game at La Fiere, we modified the order of battle and added in my newly-painted Rubicon Models Sherman tank for the US and a German anti-tank unit I’ve also recently completed. The rest of our forces came from my collection of 28mm German and US troops painted over the past year.

IMG_6699Table set up and initial German deployment at La Fiere

At the 28mm scale, we increased the tabletop set-up to a 4′ x 4′ board accommodating two main bocage-lined east-west roads, fields and a large stone house. With an American objective to seize the house, the Germans set-up with an infantry team and light machine gun in a line of trenches stretching through the main field. The German command set-up in the top floor of the house with a tripod-mounted MG 42 and anti-tank unit armed with a Panzershreck and Panzerfausts ready to deploy from the rear of the building. Two small anti-personnel mine fields were also set — one to the east of the house and one protecting the northern end of the German prepared positions.

IMG_6701Entrenched German troops and machine guns shift to meet the arriving Americans

With a game time limit of ten turns, the game began with the US being given the initiative as the Germans lay quietly in wait. The Americans took the first two turns to move on from the far edge of the table to the east and their deployment quickly revealed their plan. To their right, a M1 mortar crew set up behind a tree with their spotter creeping to the edge of the bocage to sight German targets across the field. Next, a .30-calibre machine gun team  set up at the hedgerow, followed by the HQ and a parachute rifle squad all stretched along the thick hedge. Across the road at the American left, one additional rifle squad moved in along the road with their Sherman rolling in support.

IMG_6700US paratroopers advance at the bocage hedgerows supported by a Sherman

Clearly the US plan was to lock down the German forces in their prepared positions with combined mortar, machine gun and infantry fire as the infantry would push through the open field toward the house objective. All the while, the balance of the Americans would creep toward the house using their tank for cover and intimidation. The mortar team confirmed the plan by launching two smoke rounds into the wide field at the end of the second turn, providing drifting cover for the next two turns.

IMG_6706German machine gunners take heavy fire from the American rifles

With the tank’s position revealed at the road, my Germans quickly moved their anti-tank squad around the house through turn three and lay in wait behind the bocage. The Germans also redeployed their tripod-mounted MG 42 to the far right of the trench to stave off the American advance in the field. The German advantage lay solely in their defensive positions, and all they had to do was survive. The Americans were going to have to abandon cover early in the game, but they superior numbers, elite troops and better weapons. Plus, the airborne had a tank.

IMG_6703The Sherman rolls down the road

There were few targets for the Germans soldiers to shoot at through turn four, and they had difficulty spotting through the smoke and distance across the field. The American machine gunners managed to lay down steady fire each turn, forcing some Germans into prone positions, wounding others but not scoring any kills. The American plan shows signs of unraveling early on as the mortar began failing to repeatedly to sight and range in effectively on any German targets in the trenches.

IMG_6705Confident US soldiers make for the open as their tank protects their left

The only other alternative for the Americans was to simply start pushing across the field in the open. With the heavy German machine guns at their center and right jamming and the crew taking fire, the US airborne began a slow advance by turns five and six. Infantry fire from the US included three dice from each Thompson submachine gun and two dice for every M1 rifle. As the paratroopers closed in, grenades were also thrown and knocked the German tripod MG 42 out of commission. All the Germans could answer with were single dice from their rifles and three dice for submachine gun shots from the officers, all in fewer numbers than the larger US squads.

IMG_6702German anti-tank weapons move to meet the advancing American airborne and supporting tank

Across the road, the second American rifle squad crept along on either side of the bocage with the tank rattling along beside them. As the first troops closed near the house, the first minefield was exposed but no Americans were injured as they continued on at a slower pace. Their delay allowed the German anti-tank crew to move into position, firing a few rifle and submachine gun shots along the way at the airborne tip-toeing around the mines. With the tank finally in sight, the Sherman opened up with opportunity fire from its hull, turret and top-mounted .50-calibre machine guns. Under a hail of bullets, the anti-tank crew went prone and took light wounds, disallowing their planned shot at the tank for the turn. By the sixth turn, the assistant gunner was able to crawl to the injured Panzershreck and deliver a crippling shot to the tank’s front track. Rolling for morale after the hit, the American crew rolled a ’20’ — the worst possible outcome — and fled their tank and the field.

IMG_6704German troops hold fast against continued fire from the Americans

With the tank out of the battle, the airborne infantry were left alone to do the job. At the seventh turn, the first US troops to close on the building were mowed down under heavy fire from the German HQ inside the building. The German survivors in the field trenches held out against three waves of US advances. In the open and with no heavy support, the Americans were eaten up in the field despite their superior training and weapons. Against the odds, the German forces had thrown back the US airborne’s advance on La Fiere.

Playing a 28mm battle with the Battleground skirmish rules gives an incredible amount of detailed feel to the game. Wounds, suppression, weapon jams, moving, loading, spotting, morale checks, cover and troop quality all intertwine to effect each figure individually as they contribute to the overall mission of their force. Under battle conditions, unlikely things — like mortars being completely useless or a tank crew fleeing the field– can and did happen. In our game, a well-laid plan by a superior American force was thwarted by Germans who just kept hanging on as the dice went their way.

I Ain’t Been Shot Mum: Pegasus Bridge and Bénouville June 6, 1944 Scenarios

Horsas

There are thousands of little actions in the history of warfare, and a longtime favorite of myself and other wargamers is the capture of Pegasus Bridge on June 6, 1944. Just minutes past midnight, Operation Deadstick delivered some 180 British soldiers from the 6th Airborne Division onto French soil near two key bridges on the far eastern flank of the Allied invasion during the D-Day invasion throughout that historic day.

DDayOverallMapThe D-Day Allied assault routes with the British 6th Airborne Division drop zone (circled in red)

Landing in the dark in six wooden Horsa gliders with only one casualty and minimal other initial incident, the British soldiers and engineers made quick work of the surprisingly meager defense by about 50 men from the German 716th Infantry Division. With the bridge over the Caen Canal secured and another at the nearby River Orne also captured, the initial mission had been accomplished in quick order.

The mission then shifted to a defensive one for the British at the bridges and nearby Bénouville as the German command ordered a counter attack. Another 200 paratroopers from the British 7th Parachute Battalion landed to join in the occupation but were met by German tanks, mortars and guns. Under German sniper fire at the bridge and with few heavy weapons at their disposal, the British held out in the town amid house-to-house fighting in Bénouville until the close of the first day of the invasion.

Too Fat Lardies, makers of the I Ain’t Been Shot Mum company-level WWII rules, provided scenarios for the actions at Pegasus Bridge and Bénouville in the 2006 Summer Special. Playing the scenarios recently at Metropolitan Wargamers in Brooklyn, NY allowed me to use my recently-completed 15mm bridge model from Najewitz Modellbau and refight one of my favorite little moments in the big history of the war.

The Battle for Pegasus Bridge

Like most IABSM games, the fight at the bridge started with hidden German troops and the British entering the board on blinds. Initial blind placements were randomized through a die roll to reflect the off-board glider landings. Owing to the time just past midnight, spotting of any troops was impossible until units closed with just inches of each other.

IMG_6299Initial set up of the scene at Pegasus Bridge

IMG_6300British charge hard into the German positions

IMG_6301A British fire team splits off to attack the German bunker

Dividing my British force, one platoon rushed into an initial German position, took a few hits in a close assault, fell back but charged back to overwhelm the Germans. The remainder of my force (including my engineers) moved slowly, clipped a path through barbed wire and made its way toward the concrete bunker. A brief firefight at the bunker sent the German defenders fleeing toward the canal, the engineers placed their explosives and the rest of the British made way for the bridge.

IMG_6302German troops flee their bunker as the British cut the wire and push onward

IMG_6303British engineers set charges at the bunker as German machine guns open fire across the canal

As the German bunker went up in and explosion of flame, German machine guns revealed themselves on the opposite side of the bridge. Two sniper sentries also appeared and began harassing the advancing British with fire. To clear the way, a British officer took a heroic run at one sniper, capturing the German where he sat.

IMG_6305The bunker burns, the British head over the bridge but take shots from German snipers

IMG_6304A thin line of Germans look to hold off the advancing British

IMG_6306With the Germans in retreat, the British take Pegasus Bridge

With the bunker aflame, the British marching over the Bridge and the thin German defense starting to run, the British had again made quick work of their mission. The bridge was held, but it was on to Bénouville and the inevitable German counterattack.

The Battle for Bénouville

At Bénouville British blinds moved on to the table for six turns, stalling briefly in turns four and five. Taking up occupying positions in the town, the mission was to simply hold against the coming German counterattack. As German blinds began entering the field in the woods and open areas outside the town, the initial British infantry were supported by slow-arriving reinforcements to the rear.

IMG_6307Initial set up of the scene at Bénouville from the British end of the table

IMG_6308British blinds enter and occupy the town

Attacking from a safe position within two buildings, the British over zealously abandoned their defensive mission and attacked to reveal the closing German blinds. In a close assault, the British were thrown back as reinforcing German heavy machine guns and mobile guns moved in. Taking fire from the German guns at close range, the remaining British defenders in the nearest house answered with a side-armored shot from a PIAT which left one German gun burning but the Germans still on the advance.

IMG_6309German troops advance on the town supported by mobile guns

IMG_6310Germans swarm out of the woods toward the British defenders

IMG_6311A British PIAT takes out a German gun

The licky destruction of one German gun was about the last thing to go right for the British. Additional reinforcements were tardy in their arrival as Germans continued to pour into the town. As the Germans set up positions amid the town’s houses, two towed field guns also rumbled into the town. Additional close combat erupted between the buildings with the British continuing to take heavy casualties and losing more ground.

IMG_6312German artillery is towed into the town

As British reserves continued to fail in their arrival, the Germans pressed on. After initially holding four safe positions in the buildings of Bénouville, British positions continued to evaporate and men fell back under continued German combined arms fire and close assaults. By that time of the game, it was clear the British were not going to hold the town and the German counterattack was clearly on its way to victory.

Our final score in the played action at Pegasus Bridge and Bénouville was 1-and-1. The early success at the bridge had not been capitalized upon by the British at Bénouville, upsetting the historic balance from 1944 but still making for a great afternoon of gaming a favorite scenario for the first time.

Battleground: Uncle Red 1944 Scenario

UtahBeach44UncleRed

The action at the “Uncle Red” sector of Utah Beach on D-Day June 6, 1944 is a favorite at Metropolitan Wargamers in Brooklyn, NY. Using one of the club’s sand tables, we have previously run the scenario for Flames of War in 15mm, and this past week we had a go with a game in 20mm using the Battleground skirmish rules.

utahmap2Map of US 4th Infantry Division at Utah Beach June 6, 1944 (“Uncle Red” circled)

The US 4th Infantry Division’s landing was less murderous than the casualties experienced by the Allies at Omaha Beach, but the German 709th Infantry Division’s defense was still substantial. German fortifications eventually fell to US assaults by both infantry and timely tank support arriving successfully on the beach.

IMG_6037 Skirmish Campaigns  “Normandy ’44 – First Hours” scenario book

We’ve been enjoying World War II scenarios at the skirmish level in both 28mm and 20mm, allowing for a more detailed feel to our games taken from the well-researched and detailed Skirmish Campaign books, including the Normandy ’44 – First Hours book.

IMG_6176Table set up for the “Uncle Red” scenario at Utah Beach

The table’s layout featured a heavily-defended beachhead with German machine guns firing from three coastal bunkers, lines of barbed wire, mines and trenches carved into the sand. The short, eight-turn scenario presents the Americans with the objective of taking the three bunkers at the seawall plus one at the rear of the table. The Germans must simply hold off the US invaders from seizing their objectives.

IMG_6179The US 4th Infantry Division arrives in Normandy

IMG_6178US soldiers hit the beach

US arrivals began with one boat of infantry arriving in each of the first two turns. The Americans used both of their actions in each turn to push forward on the beach with an eye on assaulting the bunkers at the German center and left.

IMG_6177American GIs push forward under German machine gun fire

IMG_6180The initial US landings take heavy casualties from German bunkers at Utah Beach

Under no cover on the open beach, the US soldiers took heavy crossfire from German machine guns in each of the three beach bunkers and one squad of infantry tucked behind barbed wire in trenches. The first two turns were deadly. One American squad were reduced to half strength by the time they pushed toward a gap in the minefields and on to their first bunker objective. Combined fire from the US poured into the bunker, cutting the German machine gun’s crew to a barely functioning unit as the Americans swarmed forward.

IMG_6188A brave American close assault leaves the first German bunker in flames

By turn three, the Germans in the trenches had shifted left to cover the oncoming Americans just breaching the seawall. In a close frontal assault the first American squad managed to lob a grenade into the German bunker, incinerating the remaining machine gun crew inside. With one objective one, the GIs set their sites on the bunker at the rear of the table beyond trenches, barbed wire and weakened German forces.

IMG_6194American armored support arrives

IMG_6193US engineers light up a German bunker with a flamethrower

The US Sherman and final boat of engineers arrived in turn four and immediately made way for the right side of the German lines. Exploiting a gap in the wire, the fresh squad made quick work of the bunker on the German right with a blast from a flamethrower in turn six. German infantry at the center trench were cut up through combined HE rounds from the Sherman on the beach and close fire from the encroaching American squad.

IMG_6190US troops get bogged down under German grenades and gunfire

Back at the German left, the initial US success became hung up in a tangle of trenches and barbed wire just beyond the burning bunker. German survivors at the second row of trenches tossed grenades and opened fire on US troops, and the Americans answered back likewise. In the bloody close action, the Germans offered just enough delaying actions while taking heavy casualties. By the time the Germans began to break in turn seven, the American forces were in no position to seize their final two objectives by the game’s end. Despite the aggressive American fight, the beach was held by the Germans.

Having played the Uncle Red scenario now several times using Flames of War rules in 15mm, we really liked the nuance of play at the skirmish level in 20mm. At the larger scale, individual losses and heroic actions seem to mean more and can swing the game from victory to defeat in a heartbeat on the sandy tabletop beach of Normandy.

Battleground: Brecourt Manor 1944 Scenario

brecourt1944

This year’s 71st anniversary of the Allied invasion of Normandy on June 6, 1944 didn’t get the same attention as last year’s full weekend of D-Day gaming at Metropolitan Wargamers in Brooklyn, NY. Even so, a few of us did come together for a quick run through a gamer favorite small-scale battle at Brecourt Manor.

101stABDDaydropsDrop zones of the US 101st Airborne on June 6, 1944 and the area around Brecourt Manor (circled in red)

Made famous in more recent years in the hit HBO series Band Of Brothers, the action at Brecourt Manor by a couple dozen men from the US 101st Airborne has long been a favorite for military historians and a textbook example of a small-scale assault on a heavily defended position. With four 105mm howitzers firing on Utah Beach, the German gunners were defended in a series of shallow trenches by several MG42 heavy machine guns and a number of infantry. Through surprise and quick movement through the trenches, the US Airborne quickly took the position and disabled the German guns.

IMG_6037

Skirmish Campaigns  “Normandy ’44 – First Hours” scenario book

For our replay of Brecourt Manor, we turned to the classic Normandy ’44 – First Hours scenario book from Skirmish Campaigns. The Skirmish Campaigns series of books offers well-researched and detailed campaign scenarios filled with orders of battle, terrain layout maps and deeply descriptive narrative of how actual engagements unfolded during World War II. Adaptable to a number of rules systems, the scenario as outlined in the book scaled nicely to our game. Using most of my recently painted 28mm German and US troops and classic Battleground WWII skirmish rules, we were set to replay Brecourt Manor.

IMG_6025The 101st Airborne plot their assault on Brecourt Manor

Two players split their command as the US Airborne and set their battle plans before my Germans deployed in the trench system. Beginning German positions were defined by four gun emplacements each crewed by a team of five rifle-armed gunners and an officer. I also placed three MG42s at different points in the trench lines and one patrolling battery command squad of four riflemen and two officers deployed at the western end of the position.

IMG_6027Germans sit at the ready in their positions at Brecourt Manor

The Americans moved first, slowly deploying a .30 cal machine gun crew from behind the farmhouse at the northwest corner of the table. Directly to the north, a bazooka team crept into position behind a copse of trees with two fire teams behind the nearby hedgerows in support. To the west and toward the south, the other two US fire teams set up and moved toward the German lines, also under cover of the thick bocage.

IMG_6026105mm gun crews stand at the ready

Spotting the American bazooka team to the north, I quickly redeployed one of my machine guns to hold back the advance on that side of my position. Not waiting to get their machine gun in place, the Americans advanced on two sides and took heavy fire to their fire teams leaving them pinned in place. Hoping to pin down the Germans at the strongly defended north and western edges of the position, the US machine gun attempted to lay down a stream of fire but jammed is the trigger was pulled on its first shot of the day.

IMG_6029A 105mm gun position is destroyed by an American bazooka

Even under fire, the US bazooka team managed to get into place and a shot destroyed the northernmost howitzer, killing one German gunner and suppressing most of the rest of the gun team. On the western side, another of my redeployed machine guns was instantly spotted and raked with American gunfire and all but knocked out of the rest of the game. With only one MG42 left in the western trench line, a US Airborne team moved with over confidence toward making their first assault. The foolhardy bravery of the Americans was met with combined arms fire from my remaining MG42, rifles at the gun position and shots from the command squad. When the smoke cleared, one American fire team was left with just one man standing and the other had been briefly pinned.

IMG_6028   US Airborne units ready for a close assault at Brecourt Manor

By turn three, the American machine gunners cleared their jam and were finally able to lay down strafing fire along the entire western edge of the German trenches. With bullets whizzing overhead, the Germans were forced to the ground and the remaining Airborne came over the hedge and made way for the German howitzer. The Airborne soldiers poured into the German gun position and hand-to-hand combat ensued leaving two Germans and two Americans dead in the melee. With no clear victory in the first close combat of the day, the Americans bounced out of the German position, pulling back toward the hedges from where they had just come.
Back to the north, the American bazooka team had been cut to just one man who had retreated under heavy fire. One other US rifle team at the north had been eliminated, and the last had been whittled to just two injured men. With just a few rattled troops strung along two sides of the field, the US Airborne retreated and left three guns ready to continue raining shells on the beaches in the distance.

What the scenario showed us, as it did on the actual day some 71 years ago, was the importance the US machine gunners in a tight assault like the one at Brecourt Manor. Met with a larger, more well-defended German force, the American machine guns were the equalizer in real life. Had the American soldiers on our tabletop focused their assault after pinning the German defenders, our game this month may very well have gone the way of history with another victory in the hedgerows of Normandy.

28mm: US Airborne Pathfinders And Characters By Artizan Designs

USABcharacters

Among the US 101st Airborne Division, the volunteer pathfinders were a particularly hearty group. Parachuting into France just after midnight on June 6, 1944, the pathfinders were among the first allied troops to set foot on French soil as the D-Day invasion commenced. Tasked with marking the drop zones, the mission of the pathfinders was hampered by poor weather, heavy German defenses, flooded fields and faulty equipment. Despite the challenges hampering the pathfinders on the ground, the Allied air invasion of more than 13,000 men behind the beaches of Normandy proved key to the day’s success.

ADlogo

In continuing to round out my 28mm US Airborne collection, I went back to Artizan Designs for their pathfinder models as well as some additional characters. Two of the pathfinders feature the signature mohawk hairstyles and I added “war paint” markings on their faces as seen in some historic photographs. The other character models will serve as officers since their poses display confidence in command.

AB Paint Scheme

Painting 28mm US Airborne

  1. Clean flash from metal models with a sharp knife and glue to metal washer or plastic bases.
  2. Apply filler putty to bases. When dry, scrape off excess with a sharp knife.
  3. Base coat models and bases with flat black spray primer.
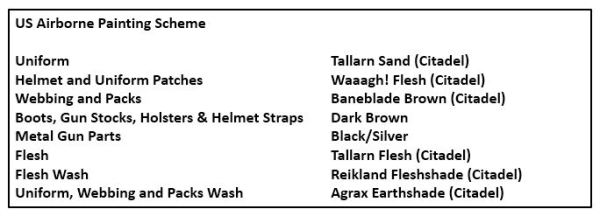
  4. Paint uniforms and bandages on helmets with Tallarn Sand.
  5. Paint helmets and knee and elbow patches with Waaagh! Flesh.
  6. Paint faces and hands with Tallarn Flesh.
  7. Paint webbing and packs with Baneblade Brown.
  8. Paint bases, boots, gun stocks and helmet straps with Dark Brown.
  9. Apply Agrax Earthshade wash to uniforms, helmet netting, webbing and packs.
  10. Mix 50/50 Baneblade Brown and Off White and lightly dry brush packs, webbing and socks.
  11. Lightly dry brush bases, gun stocks, helmet netting, holsters and elbow and shoulder patches with Baneblade Brown.
  12. Paint metal gun parts with black and finish with a light dry brush of metallic silver.
  13. Paint eyes with small dots of Off White and Dark Brown. Clean up around eyes with Tallarn Flesh.
  14. Mix 50/50 Tallarn Flesh and Off White and brush highlights on cheekbones, chins, forehead, nose and hands.
  15. Cover bases in white glue and cover in 50/50 mix of fine light green and dark green grass flock.
  16. Glue small pieces of clump foliage to base.

To finish my models I’ll be adding decals to shoulders and helmets from Company B, followed by a coat of Solvaset decal fixative from Walthers and a spray coat with matte finish. After that, these guys will relive the heroics of D-Day on a tabletop soon.

IMG_0745

IMG_0747

IMG_0748

IMG_0746

IMG_0750

IMG_0749


Flames of War: Najewitz Modellbau 15mm Pegasus Bridge

PegasusBridgeWWII

Most of my 15mm wargaming terrain building I do is generic enough to be used throughout Western Europe during World War II. Even with a large collection of buildings at my disposal, there are a few iconic WWII landmarks that have long stood out in my imagination as projects I should tackle at some point. One of those is Pegasus Bridge at Bénouville, France.

The bridge was made famous by a brief but important battle in the early morning hours of D-Day on June 6, 1944. Glider units from the British 6th Airborne Division landed near two bridges just past midnight and quickly secured the Caen Canal crossings with minimal casualties. The quick nighttime action ensured movement and counterattack by German forces would be significantly limited in the coming days and weeks after the Allied landings in Normandy.

NMlogo

Building Pegasus Bridge would turn out to be a number of firsts for me. The model I picked up from Najewitz Modellbau in Germany is laser-cut, a model material I had not worked with before. The nature of the model and its situation crossing the Caen Canal would also necessitate I create surrounding terrain. In all, the project allowed me to try out a bunch of new things on a signature set piece which wound up being much more of a project than I originally envisioned.

Building the Bridge

The Pegasus Bridge model shipped in plastic bag folded into a flat, short cardboard box which had definitely shown some wear and tear during its journey from Germany to Brooklyn. Some pieces of the model had come loose from the MDF sheets during transit, but everything was there and unbroken. The rest of the model was easily punched or carefully cut out using a fresh blade in a hobby knife. With all the parts cut out, I sorted them on a tray to get a handle on the task of things before me. The model does not ship with assembly instructions, but they are available for download once registered to the Najewitz Modellbau website. The instructions are pretty spare, relying on simple wordless graphics and some imagination to put all the pieces together. I found referring to historic and contemporary images of the bridge online was just as helpful as the actual manufacturer instructions. Since there were no images online of the bridge being constructed, I decided to offer up a visual step-by-step for others looking to add this model to their terrain collection.

IMG_5918

IMG_5919

I started by laying out the parts into subsections, including the little control house which sits adjacent to the bridge and the two large sections which are found at the top of the bridge. I dry fit all the pieces to test them at first and then used carpenters wood glue to put the pieces together. Getting the stairs to the control house together was a little finicky. The curved roof on the small structure at the top of the bridge was achieved by scoring the flat roof and carefully bending it to the shape of the arched roof line.

IMG_5920

IMG_5923

IMG_5921

IMG_5922

IMG_5924

IMG_5925

IMG_5926

Next, I tackled all the trusses and supporting elements of the main bridge structure. This is where the fine lasercut detail really started to pop as I glued pieces together to resemble the plates and seams of the metal work on the bridge. After each section dried, I glued them to the main deck. The fine railings which run all around the bridge again were a challenge to figure out which went where, but some careful test fitting before gluing everything in the correct place.

IMG_5927

IMG_5928

IMG_5929

IMG_5930

IMG_5931

To finish the bridge, I glued the small gatehouse to an extra piece of square basing, attached it to the main bridge and cut some of the railings to fit around the building. The separate piece of the road approach on the other end was glued to the main bridge using a thin piece of cardboard glued to the underside to create a flexible hinge-like connection. The model doesn’t come with crossing guards, so I used extra pieces of the kit’s wood to cut some simple shapes. The cross guards were simply painted white with red stripes. The entire structure got a grey sprayed base coat and was then dry brushed in an off white paint to produce a worn look to the entire bridge.

IMG_5816

IMG_5933

Building the Terrain

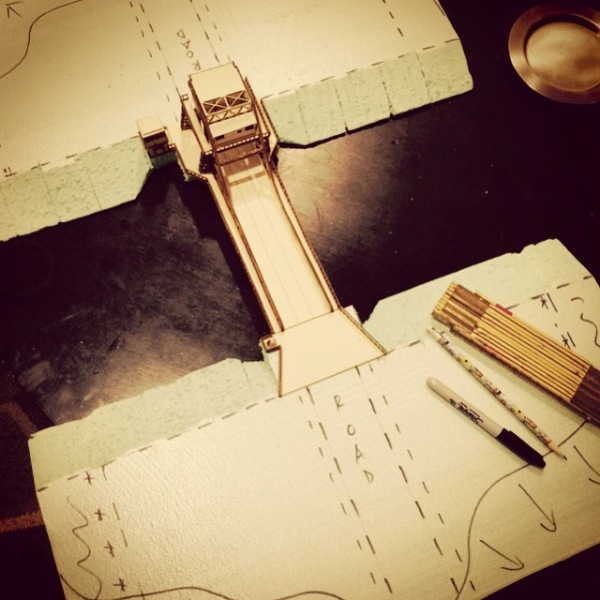
As I was constructing the bridge I quickly realized it was going to need to be elevated off the table to accommodate the graded approach and a span over the canal. I went to the trusty standby of foam sheets in order to create sections of terrain on either side of the canal to create roads to the bridge and banks of the canal.

Using a ruler and marker, I outlined the areas to be cut away and sculpted. After making the rough cuts, I smoothed the edges out using wood filler and then sanding everything to a relative smooth shape. The foundation under each side of the bridge would also feature stone sections which I gently carved by using a pencil to create rows of masonry. Everything got an undercoat of brown spray paint followed by a coat of watered-down white glue and mixed flocking. The stone foundations received several coats of gray and off white dry brushed paint to create a realistic. The roads were likewise dry brushed in various shades of browns. Small chunks of foliage were glued here and there around the stone sections to add a little detail.

IMG_5940

IMG_5851

IMG_5941

IMG_5934

IMG_5935

IMG_5936

IMG_5937

IMG_5938

Pegasus Bridge

With all the painting and construction done, everything got a dull coat spray to seal the model and terrain. I decided to keep the bridge and two terrain section separate and unglued from each other to ease transport and storage. Laid out on the table, the bridge spans the canal with approaches on either side. The only thing left to do is get the model on the table, and the heroic early morning raid on Pegasus Bridge will be ready to be replayed on the tabletop soon.

IMG_5969

IMG_5971

IMG_5970

IMG_5972

IMG_5973