
Like many cities in the Low Countries, the Dutch city of Sint-Oedenrode was occupied by German forces after their invasion of France, Belgium and the Netherlands in the spring of 1940. The southern Netherlands and Belgium were the area of focus for the Allied Operation Market Garden in September 1944 which hoped to take several river crossings before the push on to Germany. At Sint-Oedenrode, the famed US 101st Airborne Division seized the bridge over the Dommel River but were met with a counterattack by German Fallschrimjäger regiments and other supporting forces. The battle that would take place at the crossing of the Dommel was typical of the action of the Allied push along what became known as Hell’s Highway. While Market Garden would ultimately prove to be a fiasco for the Allies overall, the grateful people of Sint-Oedenrode were liberated by US troops after a week of brutal fighting against the German occupiers.

The Flames of War website has a scenario for the engagement at St. Oedenrode available in their list of historical scenarios on their website. The forces in the scenario were originally covered in the now out-of-print Hell’s Highway and A Bridge Too Far FOW books now available as Market Garden for the US, UK and Canadian forces and Bridge By Bridge for the Germans.
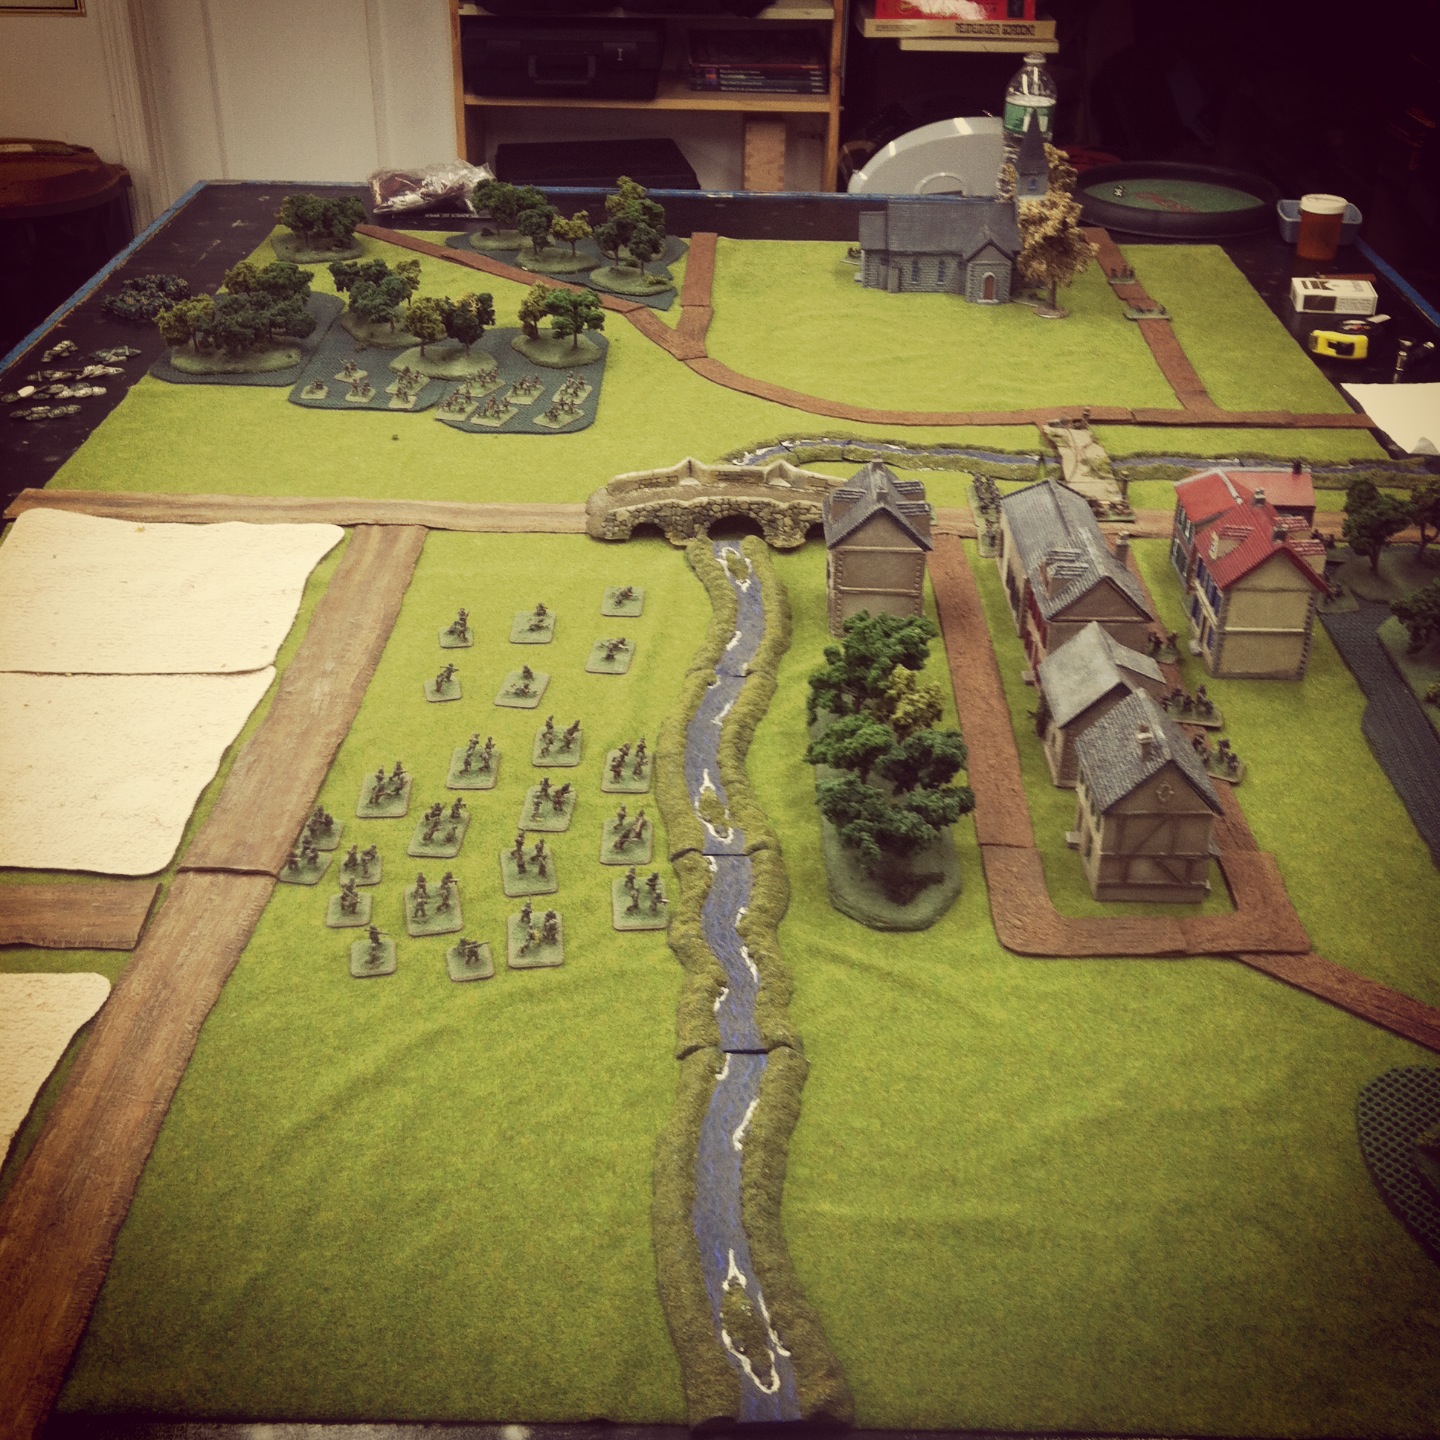
This past weekend at Metropolitan Wargamers in Brooklyn, NY we ran a modified Sint-Oedenrode scenario with the US 101st Airborne facing off against the German Fallschirmjägers. My paratroopers deployed in the fields and woods across the river with two rifle platoons and a light machine gun platoon. In reserve were US mortar and parachute howitzer platoons along with a delayed reserve Sherman and Firefly tank platoon from the Guards Armoured Division. The Germans started defending the two objectives at the bridges with a mortars, heavy machine guns and a rifle-machine gun platoon dug in around the town buildings.
 In the first two turns, the Airborne units made way for the river and first bridge while avoiding shots coming from the defending Germans. The US light machine guns poured fire into the houses across the river, but shots missed on all accounts but did manage to pin the units. With little US progress toward the objectives, my German opponent remained solidly in control of the bridge points in the early third of the game.
 By the third turn, the Germans successfully rolled on their a reserve rifle-machine gun platoon as well as their PaK 40 anti-tank guns. While the US lacked tanks of the board, the US platoon crossing the bridge took heavy combined arms fire from the German artillery outside of the town and the infantry platoons hidden among the town’s houses. Another US platoon made their way across the Dommel, through a small wood and attempted a quick assault on the Germans defending from the nearby buildings. Under heavy fire, the US charge was repulsed with some losses pushing them back into the treeline.
 With the Airborne rifle companies pinned on the bridge and in the trees over the river, I finally threw a successful roll for reserves on the fourth turn and brought in my mortars and howitzers. Firing at a distance from the fields, all my artillery missed their hard-to-hit German targets hidden in the buildings across the river. The platoon on the bridge took an additional round of combined German fire and fled the field. The US light machine guns to one side of the bridge likewise encountered heavy fire, finding themselves pinned and still unable to effectively knock the Germans from their defending positions in the town.
 By turn four, things went from bad to worse for the Allies. With the Guards Armoured forces finally rolling in, they did quickly take out one of the German anti-tank guns. This was unfortunately quickly answered with two Allied tanks being destroyed with return fire from the crack shots from the German PaK 40s. With the beginning of the fifth turn, the US attempted a final series of artillery barrages and tank fire to chase the Germans from the town. Still at nearly full strength, the Germans had clearly overwhelmed the US and I conceded the game.
Even without their Panzer IVs on the table, the German position within the town proved hard to route. In retrospect, a concentrated Airborne end-run over the river and through the town might’ve proved more effective in chasing the Germans out of their defending positions near the bridge entry points. A lack of armoured and artillery reserves until late in the game also left the 101st outgunned and running on their own as German reserve strength mounted. Luckily for the Dutch people of Sint-Oedenrde things went much better for the Allies in 1944, but my replay of the attack just didn’t go my way this day.
Related articles
- Flames of War: Singling 1944 Scenario (brooklynwargaming.com)
- Flames of War: Barkmann’s Corner Scenario (brooklynwargaming.com)
- Flames of War: Fielding the PSC Panzer IV Tank (brooklynwargaming.com)
- Flames of War: Modelling European Western Front Buildings (brooklynwargaming.com)
- Flames of War: Hunner Park 1944 Scenario (brooklynwargaming.com)
- Flames of War: Fielding the Guards Armoured Division (brooklynwargaming.com)
- Flames of War: La Fiere Causeway 1944 Scenario (brooklynwargaming.com)

Great battle report! It makes me want to play the scenario, so top marks!
Pingback: Flames of War: Metropolitan Wargamers Tanksgiving 2013 | Brooklyn Wargaming
Pingback: Getting Ready For HMGS Fall In! 2015 | Brooklyn Wargaming
Pingback: Flames of War: Fielding the 8.8cm FlaK 36 Platoon | Brooklyn Wargaming
Pingback: Flames of War: Fielding the US M1 57mm Anti-Tank Platoon | Brooklyn Wargaming
Pingback: Flames of War: Fielding the 15cm sFH18 Heavy Howitzer Battery | Brooklyn Wargaming