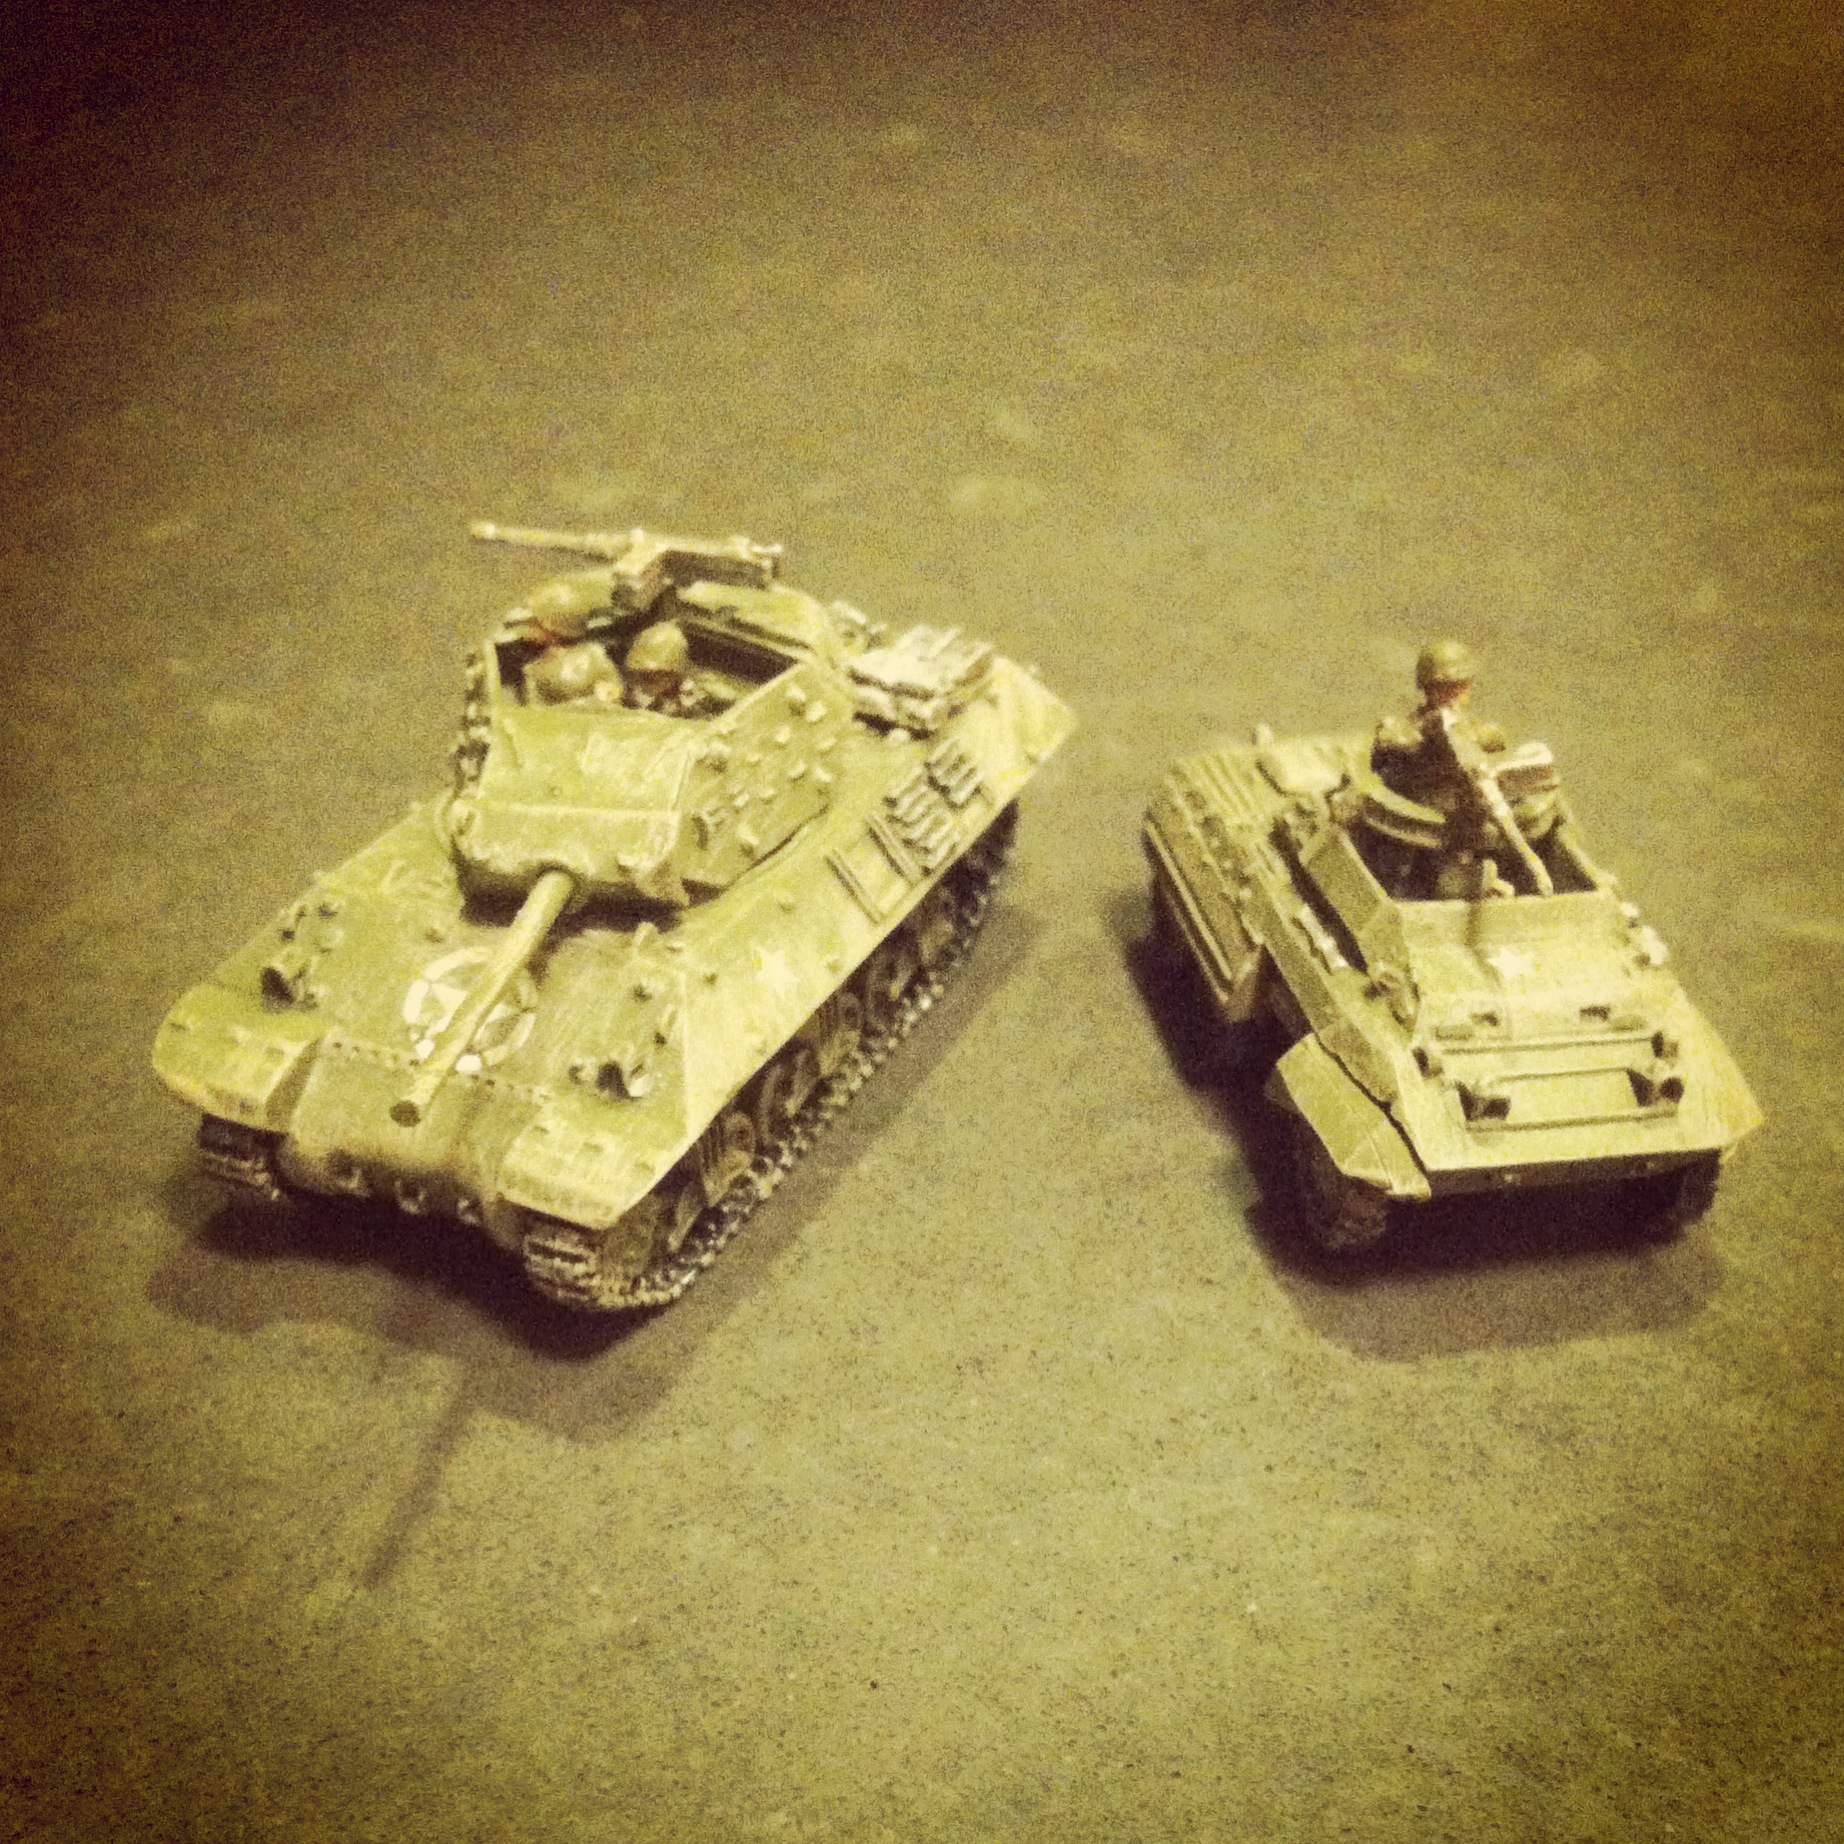
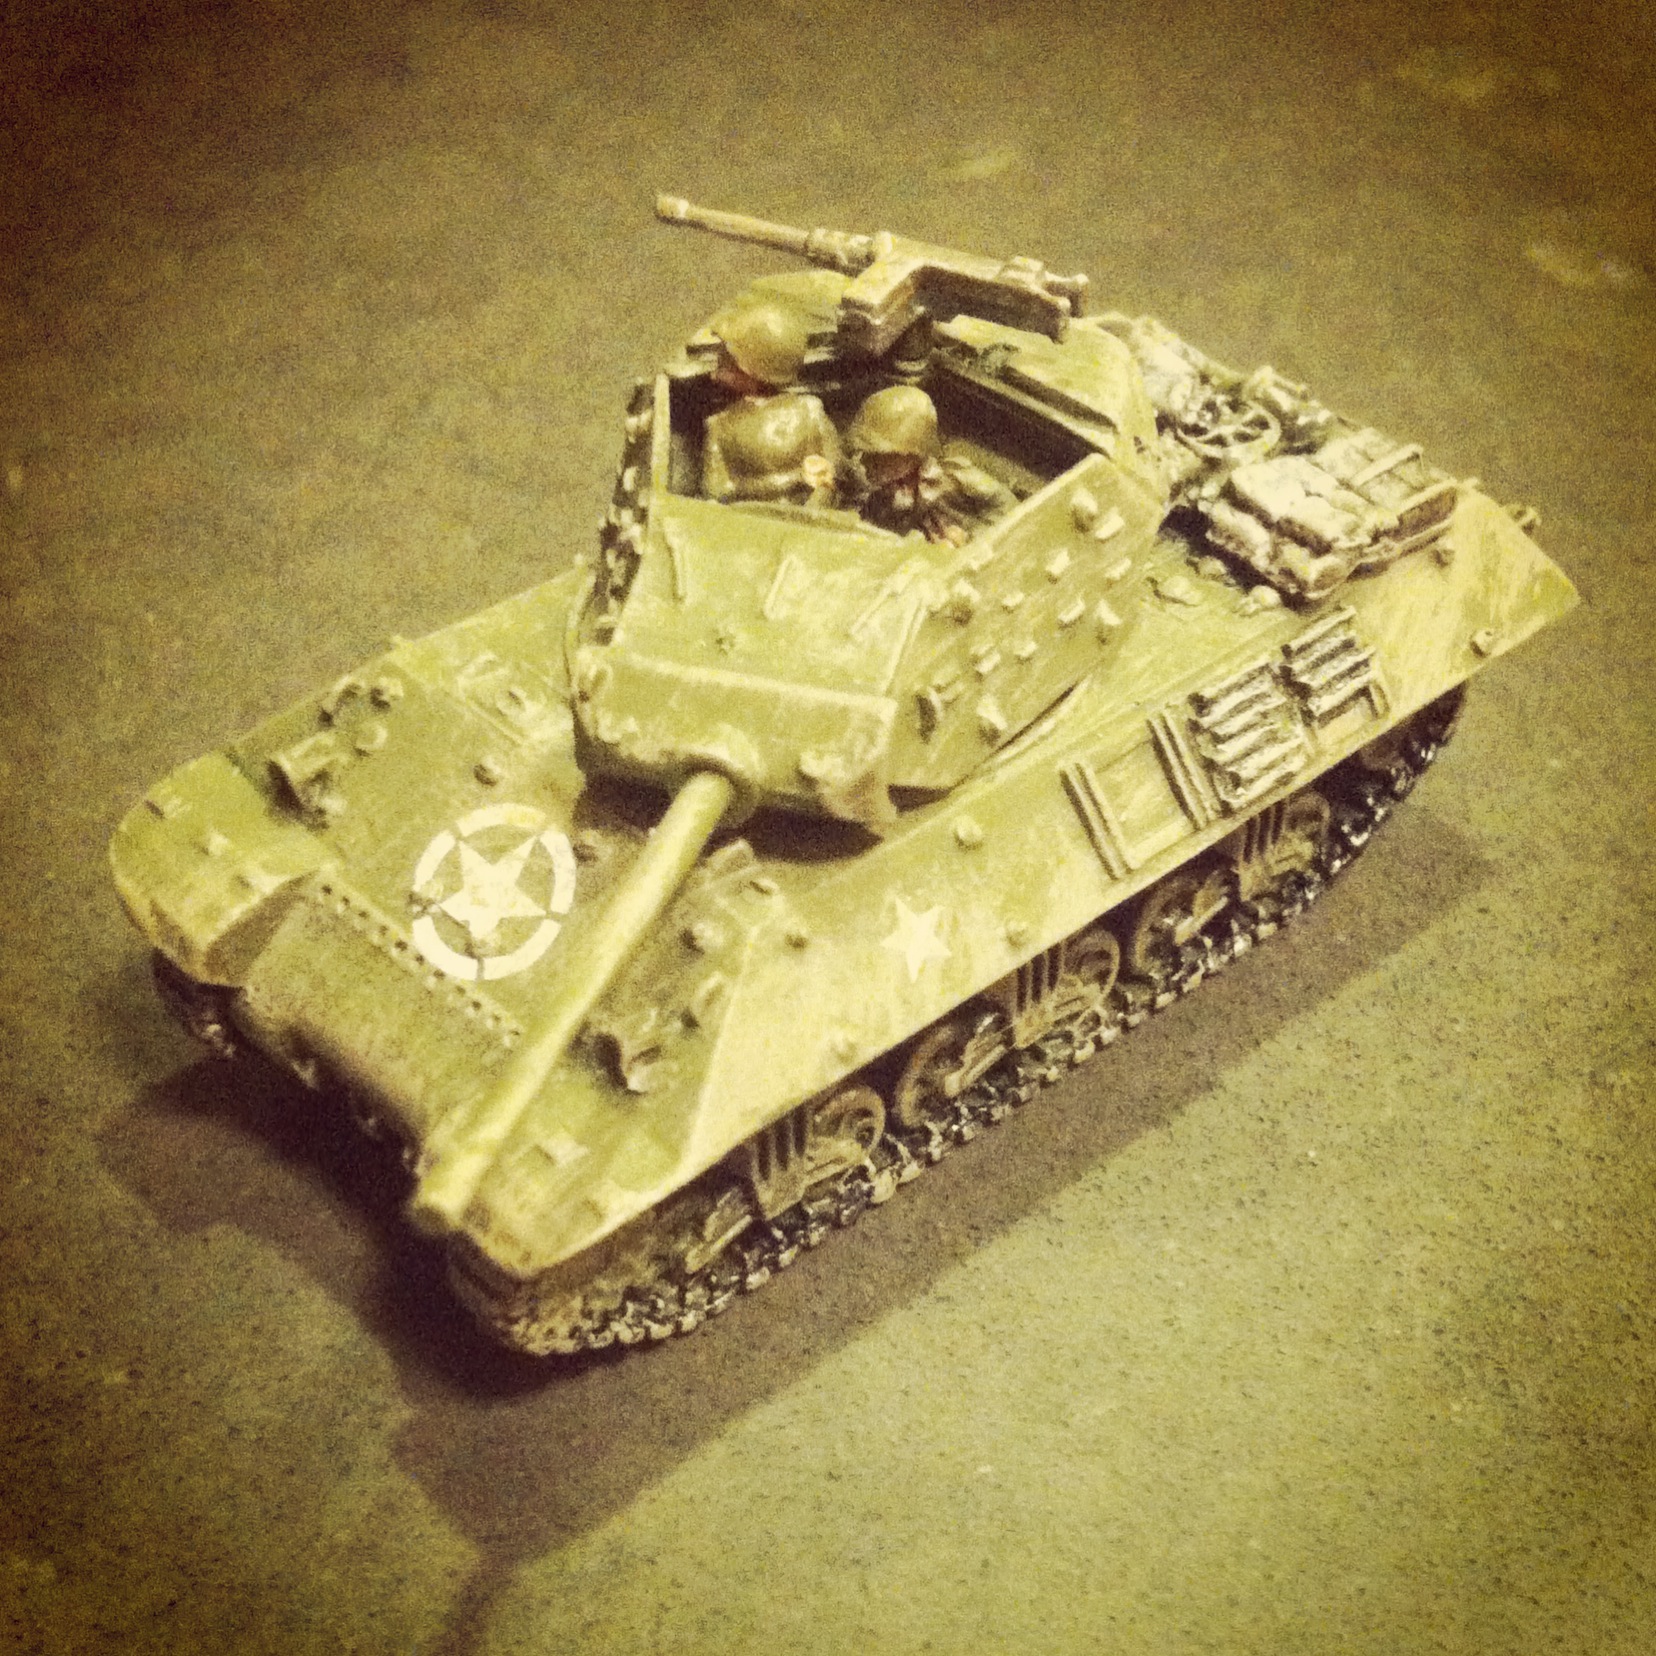
The 105mm Howitzer Motor Carriage M7 was a powerful invention to support infantry forces during World War II with a combination of a heavy artillery gun, tracked mobility and armor. Christened the ‘Priest’ by British forces due to its round pulpit-like machine-gunner’s ring, the M7 saw service in North Africa, Italy and Normandy and had a powerful showing during the Battle of the Bulge in the winter of 1944-1945.
I’ve been wrapping up a bunch of lingering modelling projects at multiple scales for the past two months, and I found I still had a number of 6mm models from GHQ to wrap up. Every time I go back to 6mm from my usual 15mm and 28mm modelling, I’m reminded of how much I love working at the micro armour scale. I’m a big fan of how Priests look with their boxy profile and huge gun, and even at the micro scale the GHQ M7 models have a bunch of detail. Finishing these models involved just a quick shot of olive drab armor base coat spray was followed by a brown wash and some dry brushed highlights in a lighter green. Decals add that last bit of detail before the bases are flocked and the models get a matte coat finish.
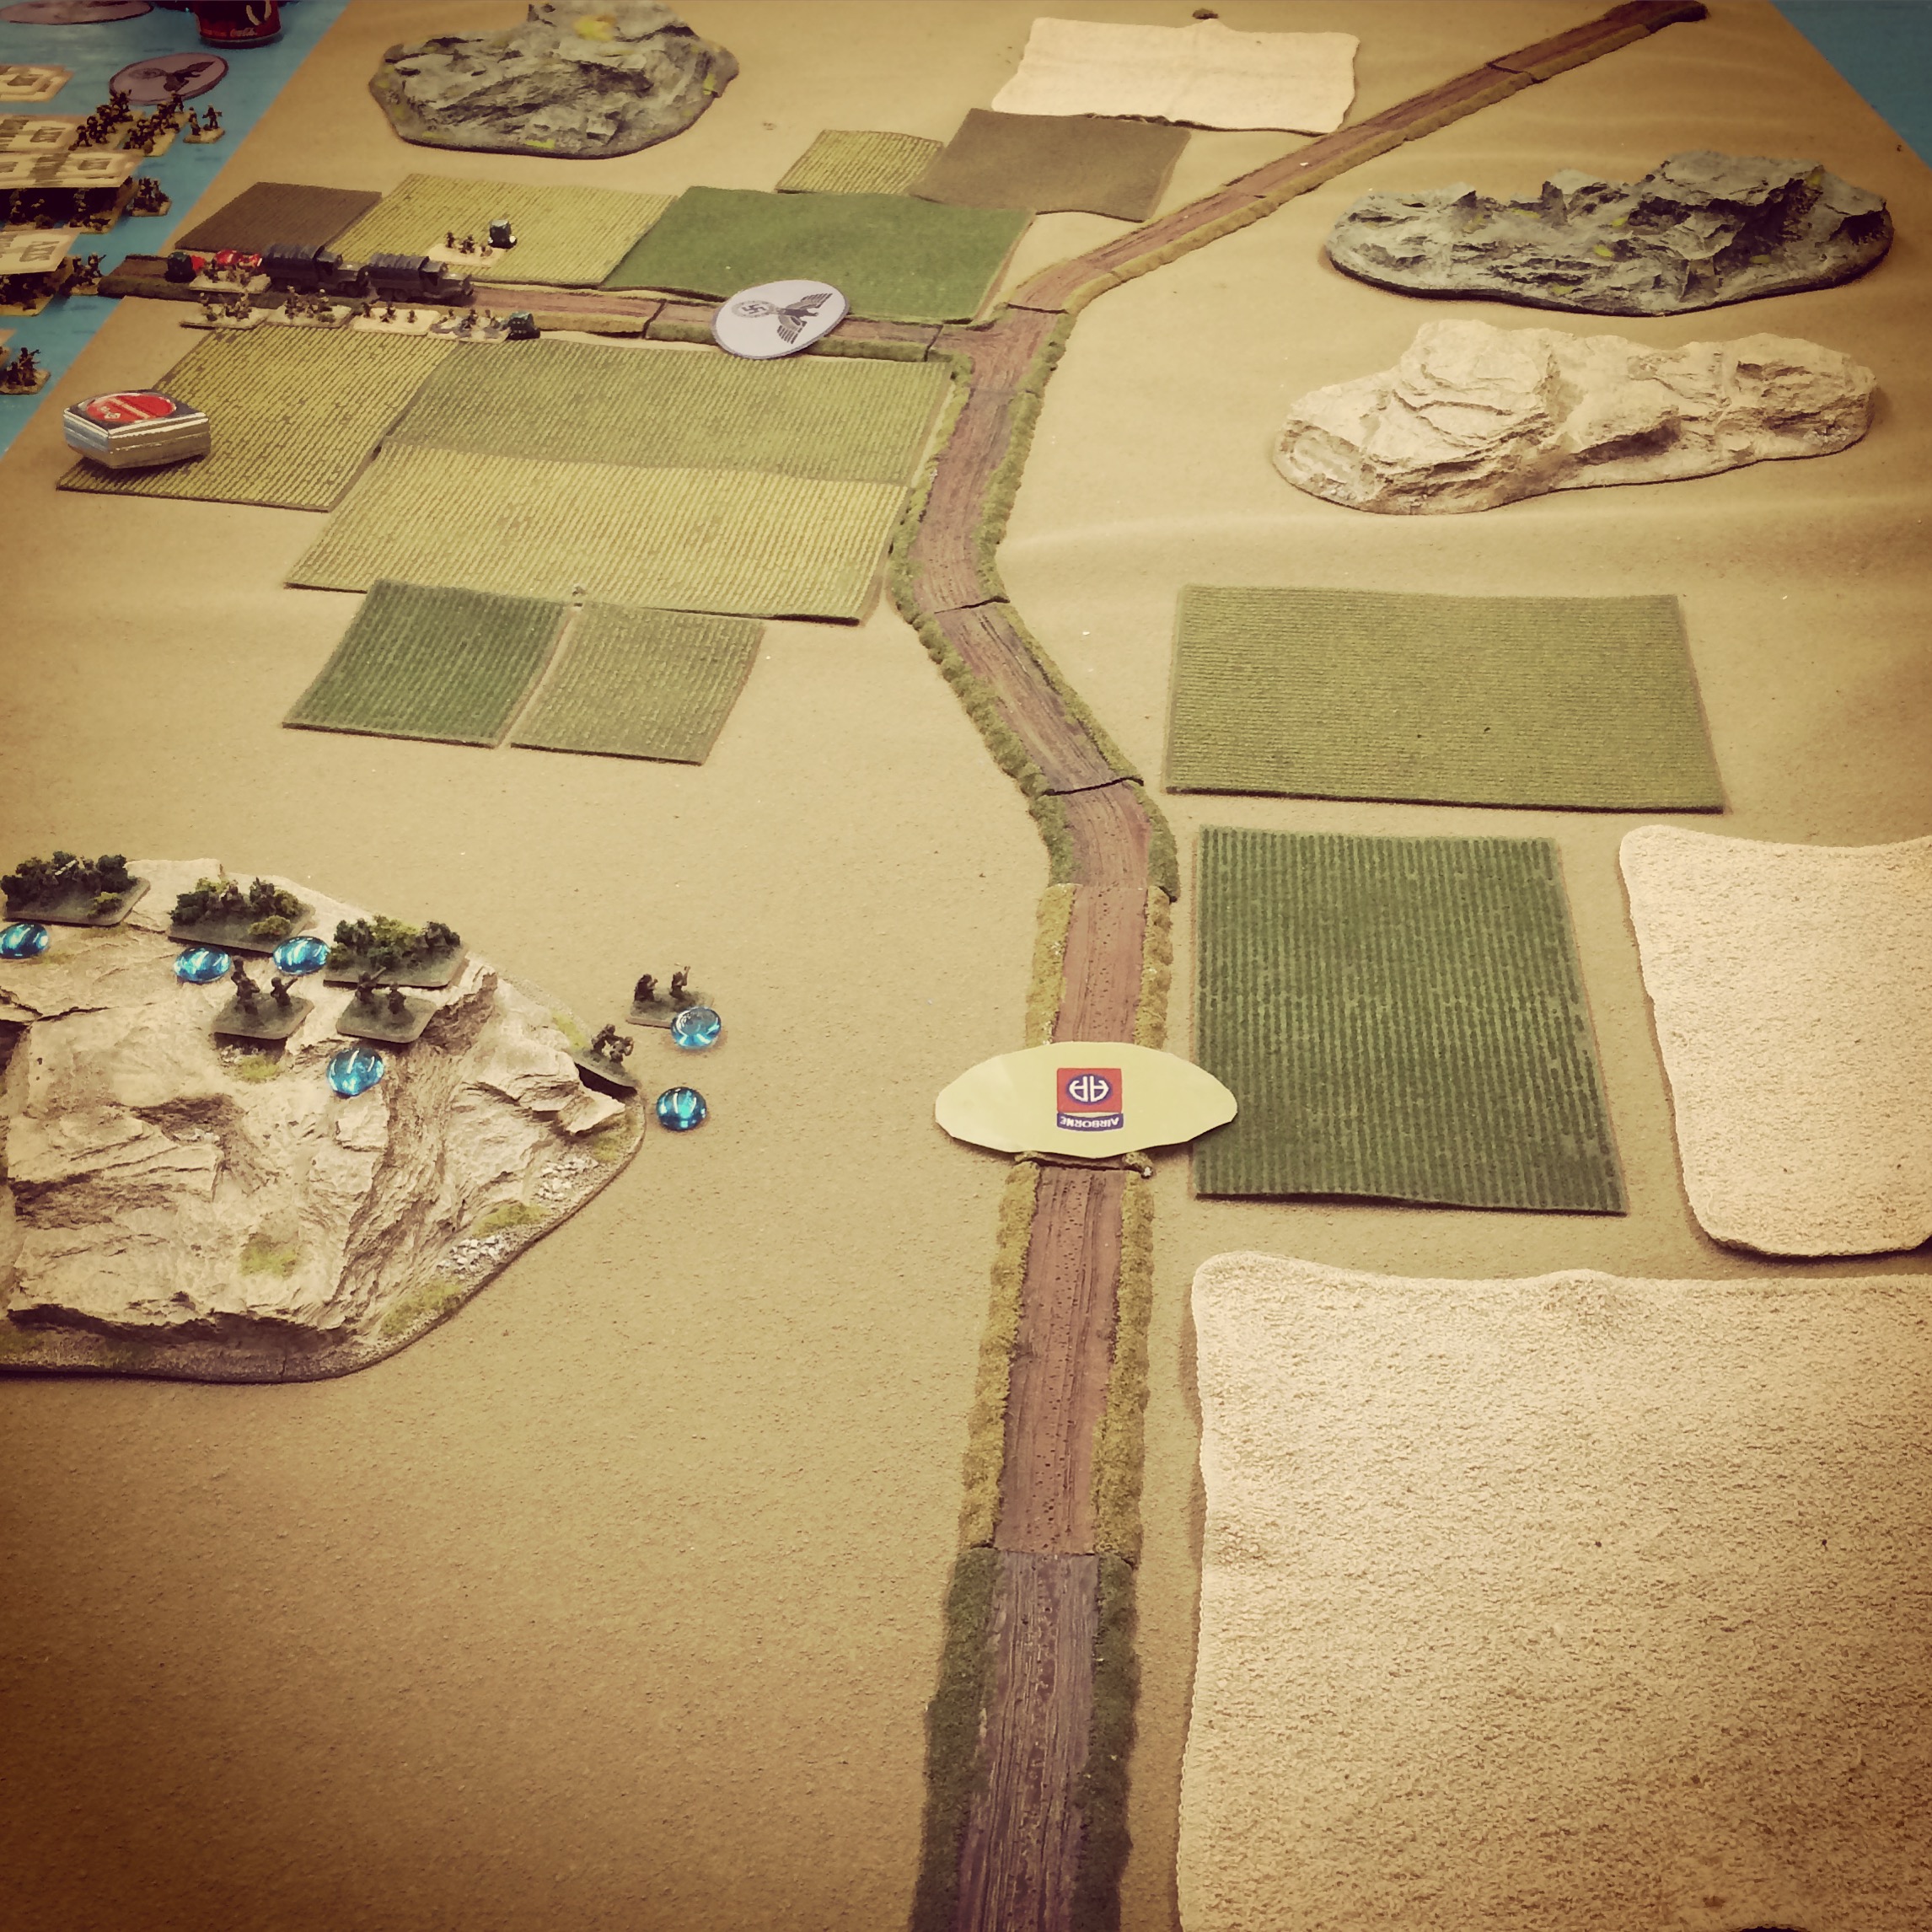
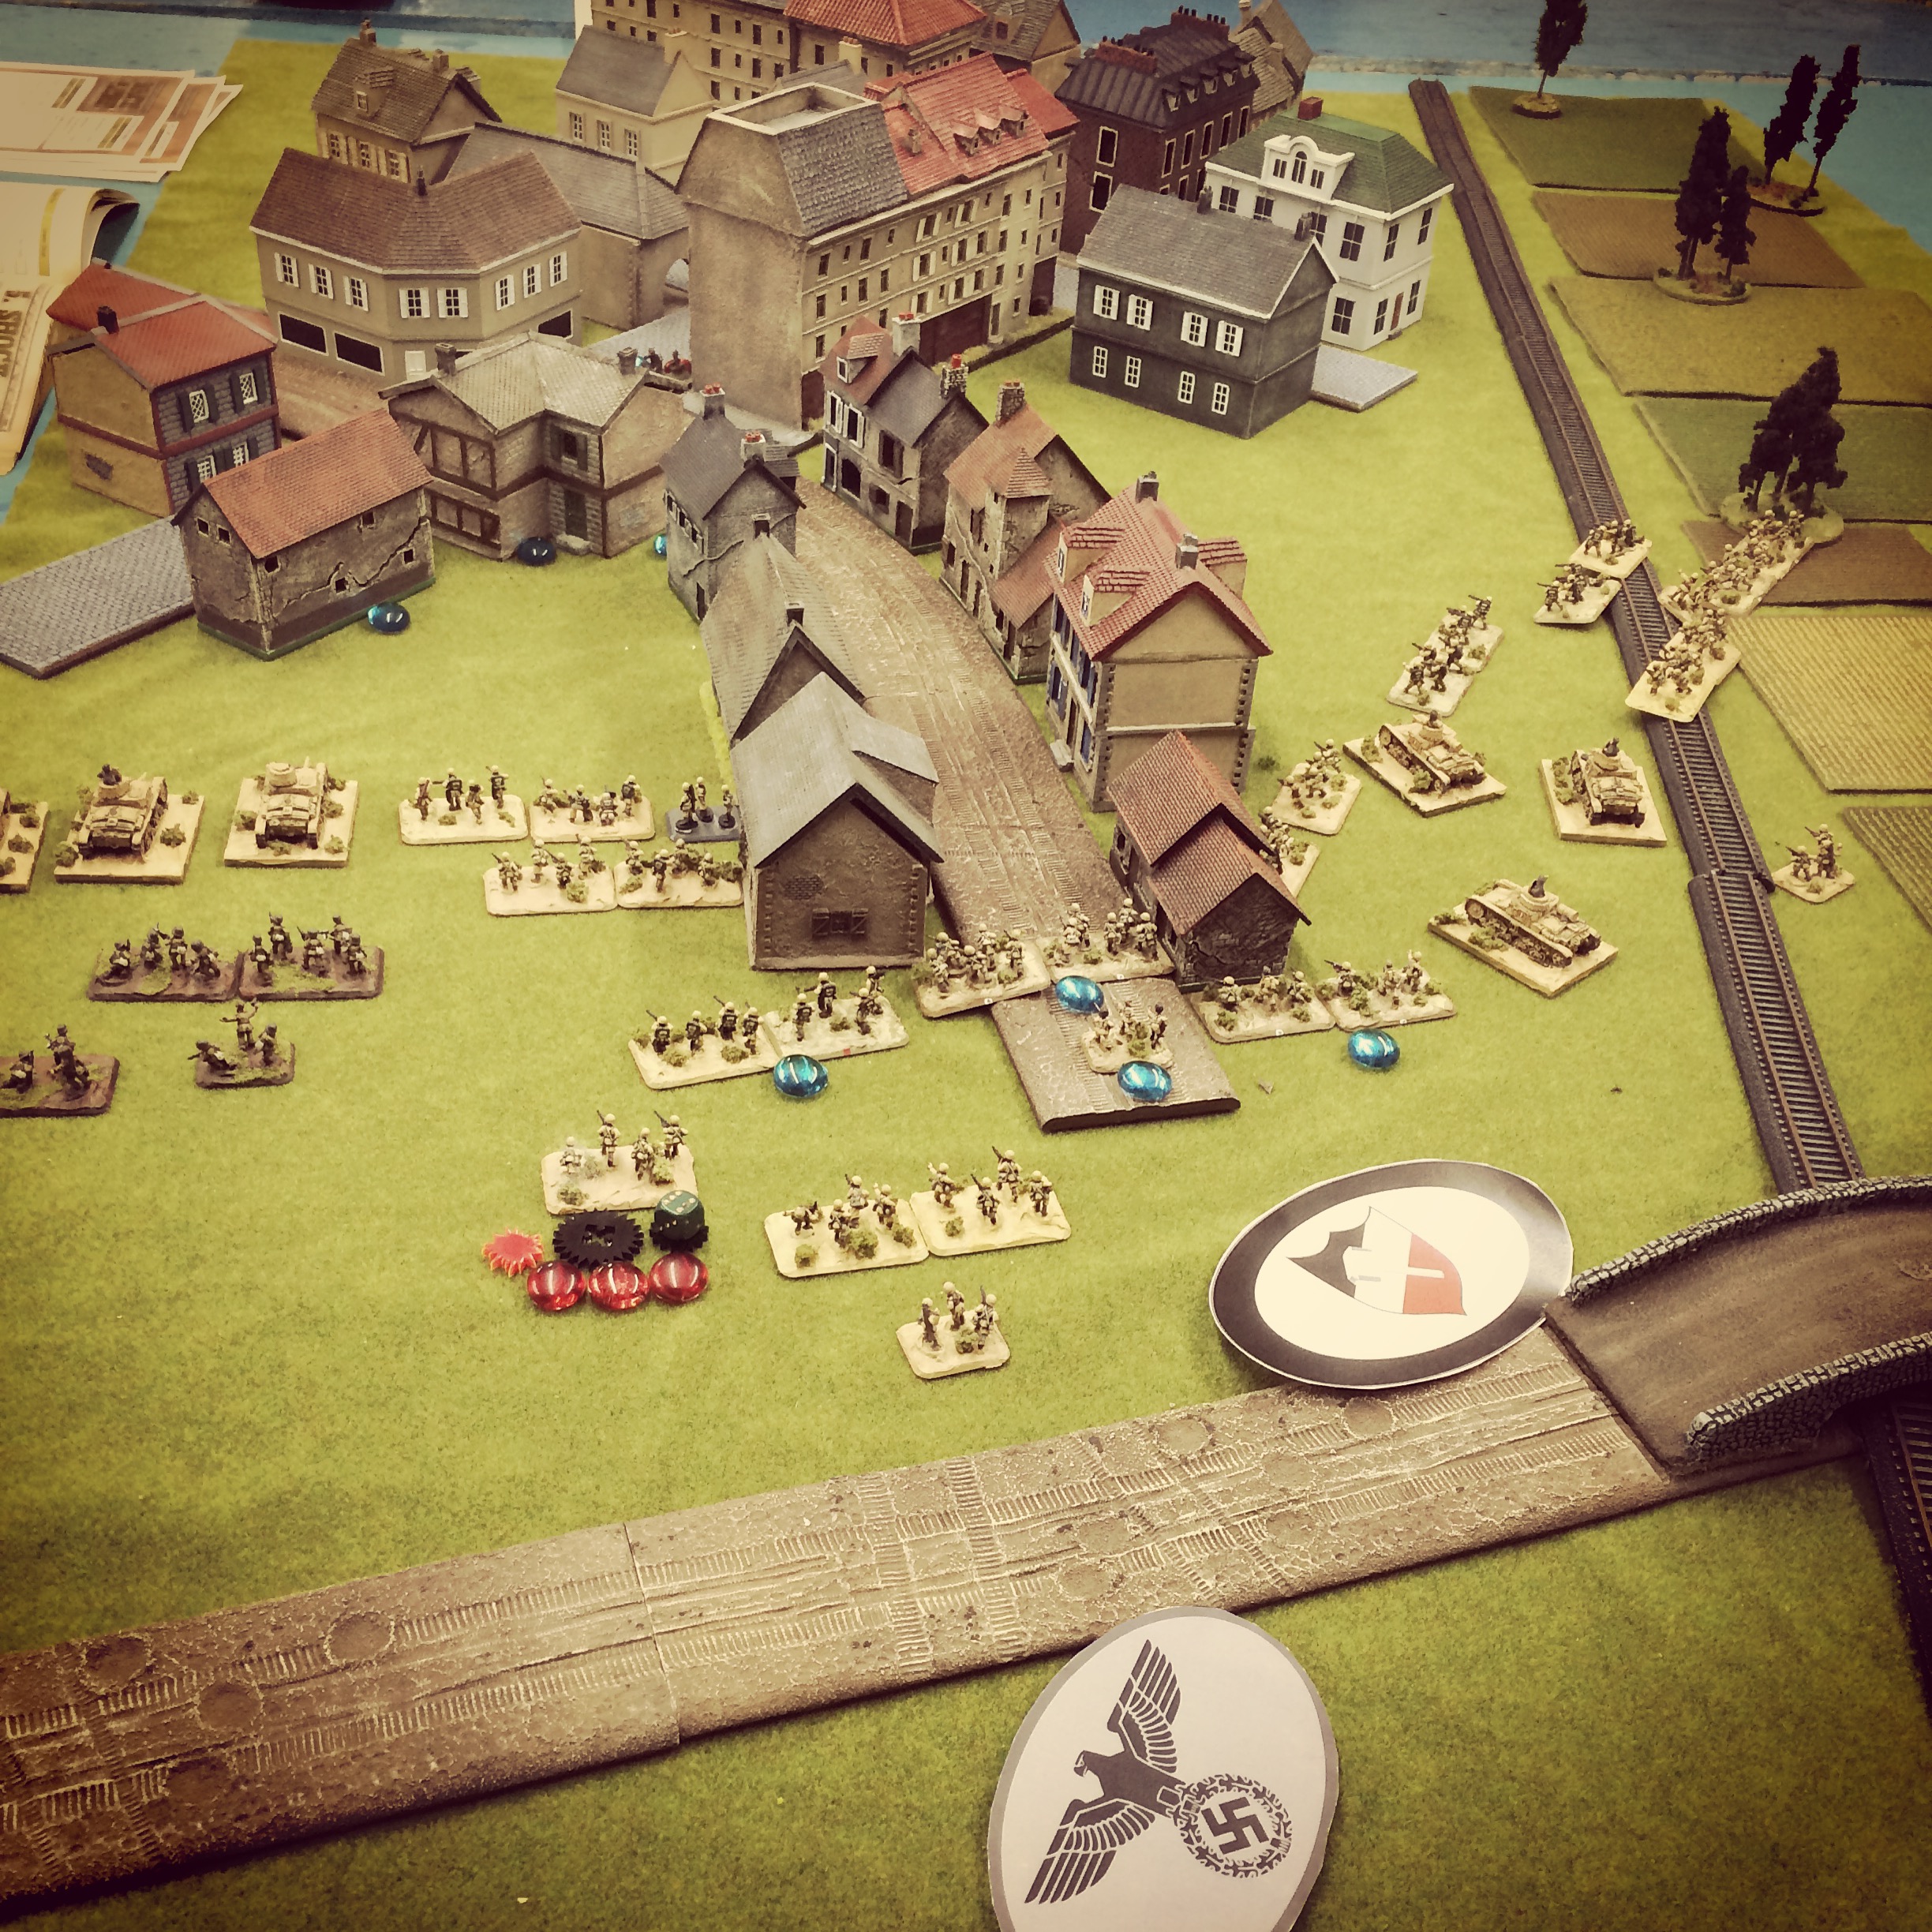
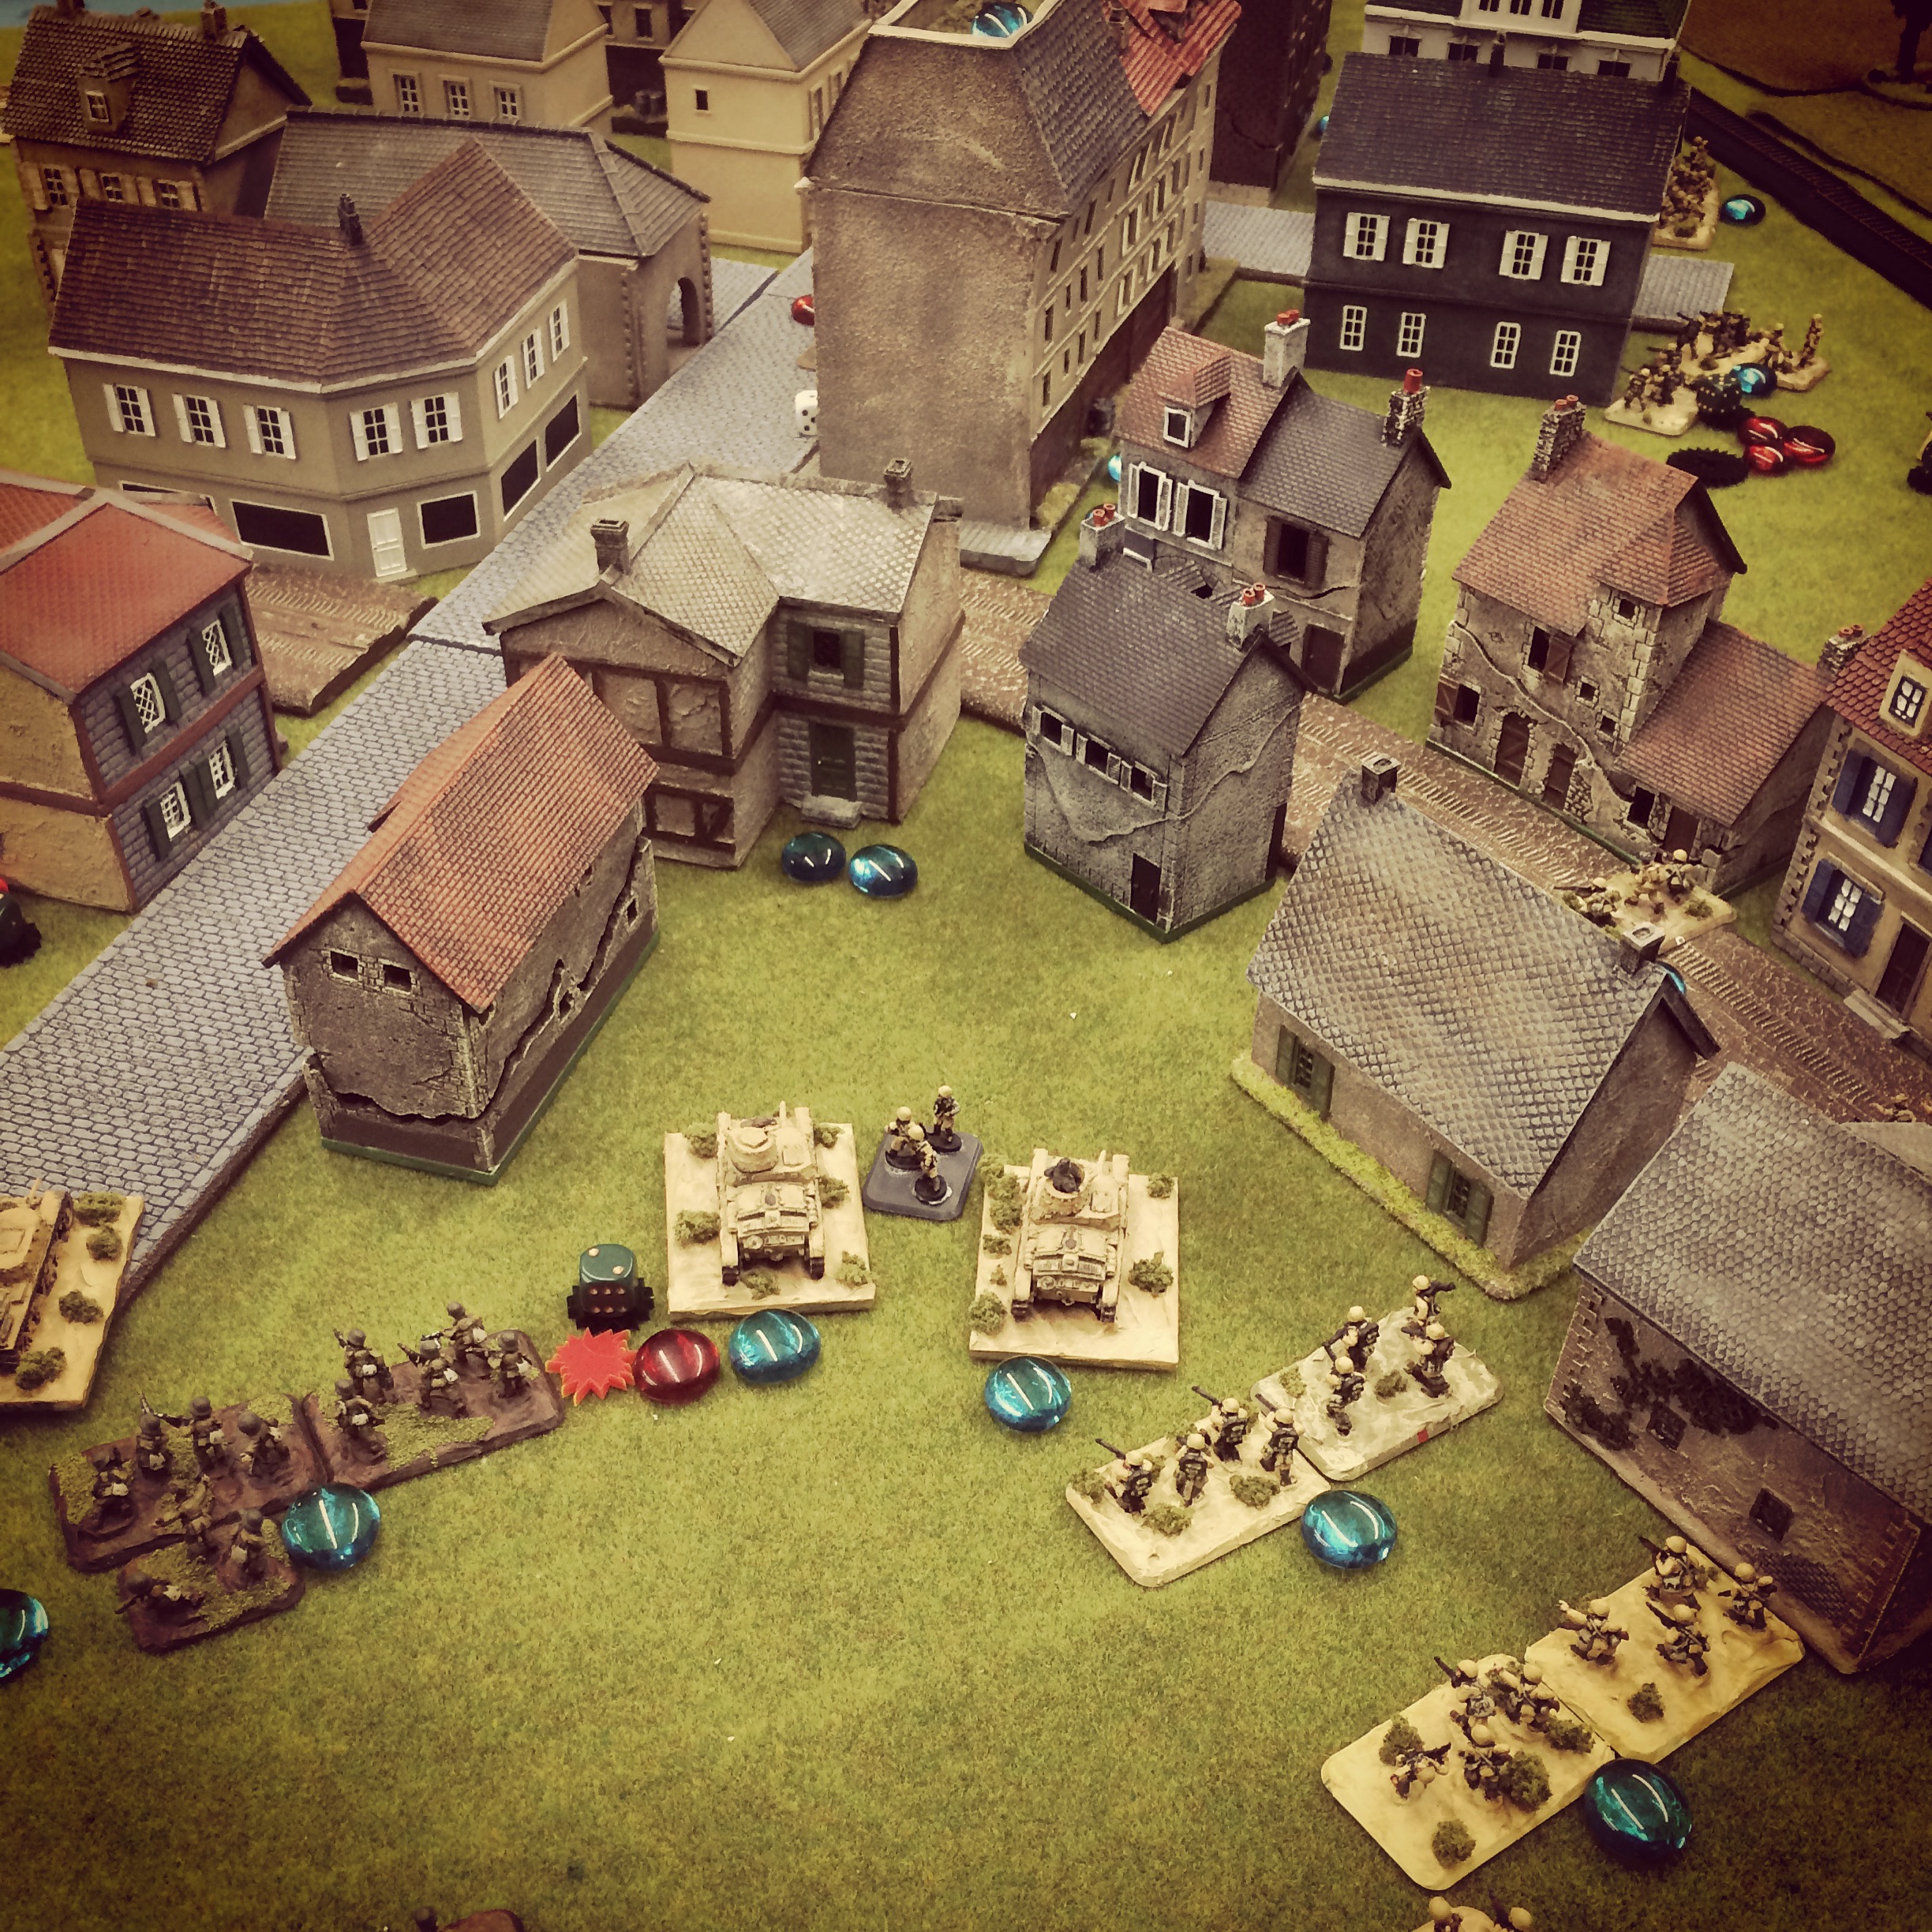
The scenario represents the northeast section of the town of Gela where ferocious fighting had taken place the day before in the early actions of the Allied invasion of Sicily. The table was set up with a couple dozen buildings from a variety of manufacturers, including JR Miniatures, Battlefront, Mark IV Miniatures, Miniature Building Authority and Games of War. The occupying US troops all began hidden in Gela with the Italians arriving on blinds at the opposite end of the table over a small railroad cut, bridge and road surrounded by open farm fields dotted with trees. The objective was simple: the Italians had to take back this corner of Gela and the Americans had to hold what they had fought so hard for the previous day.
‘Sicilian Weekend’ by Too Fat Lardies for their I Ain’t Been Shot Mum WWII rules
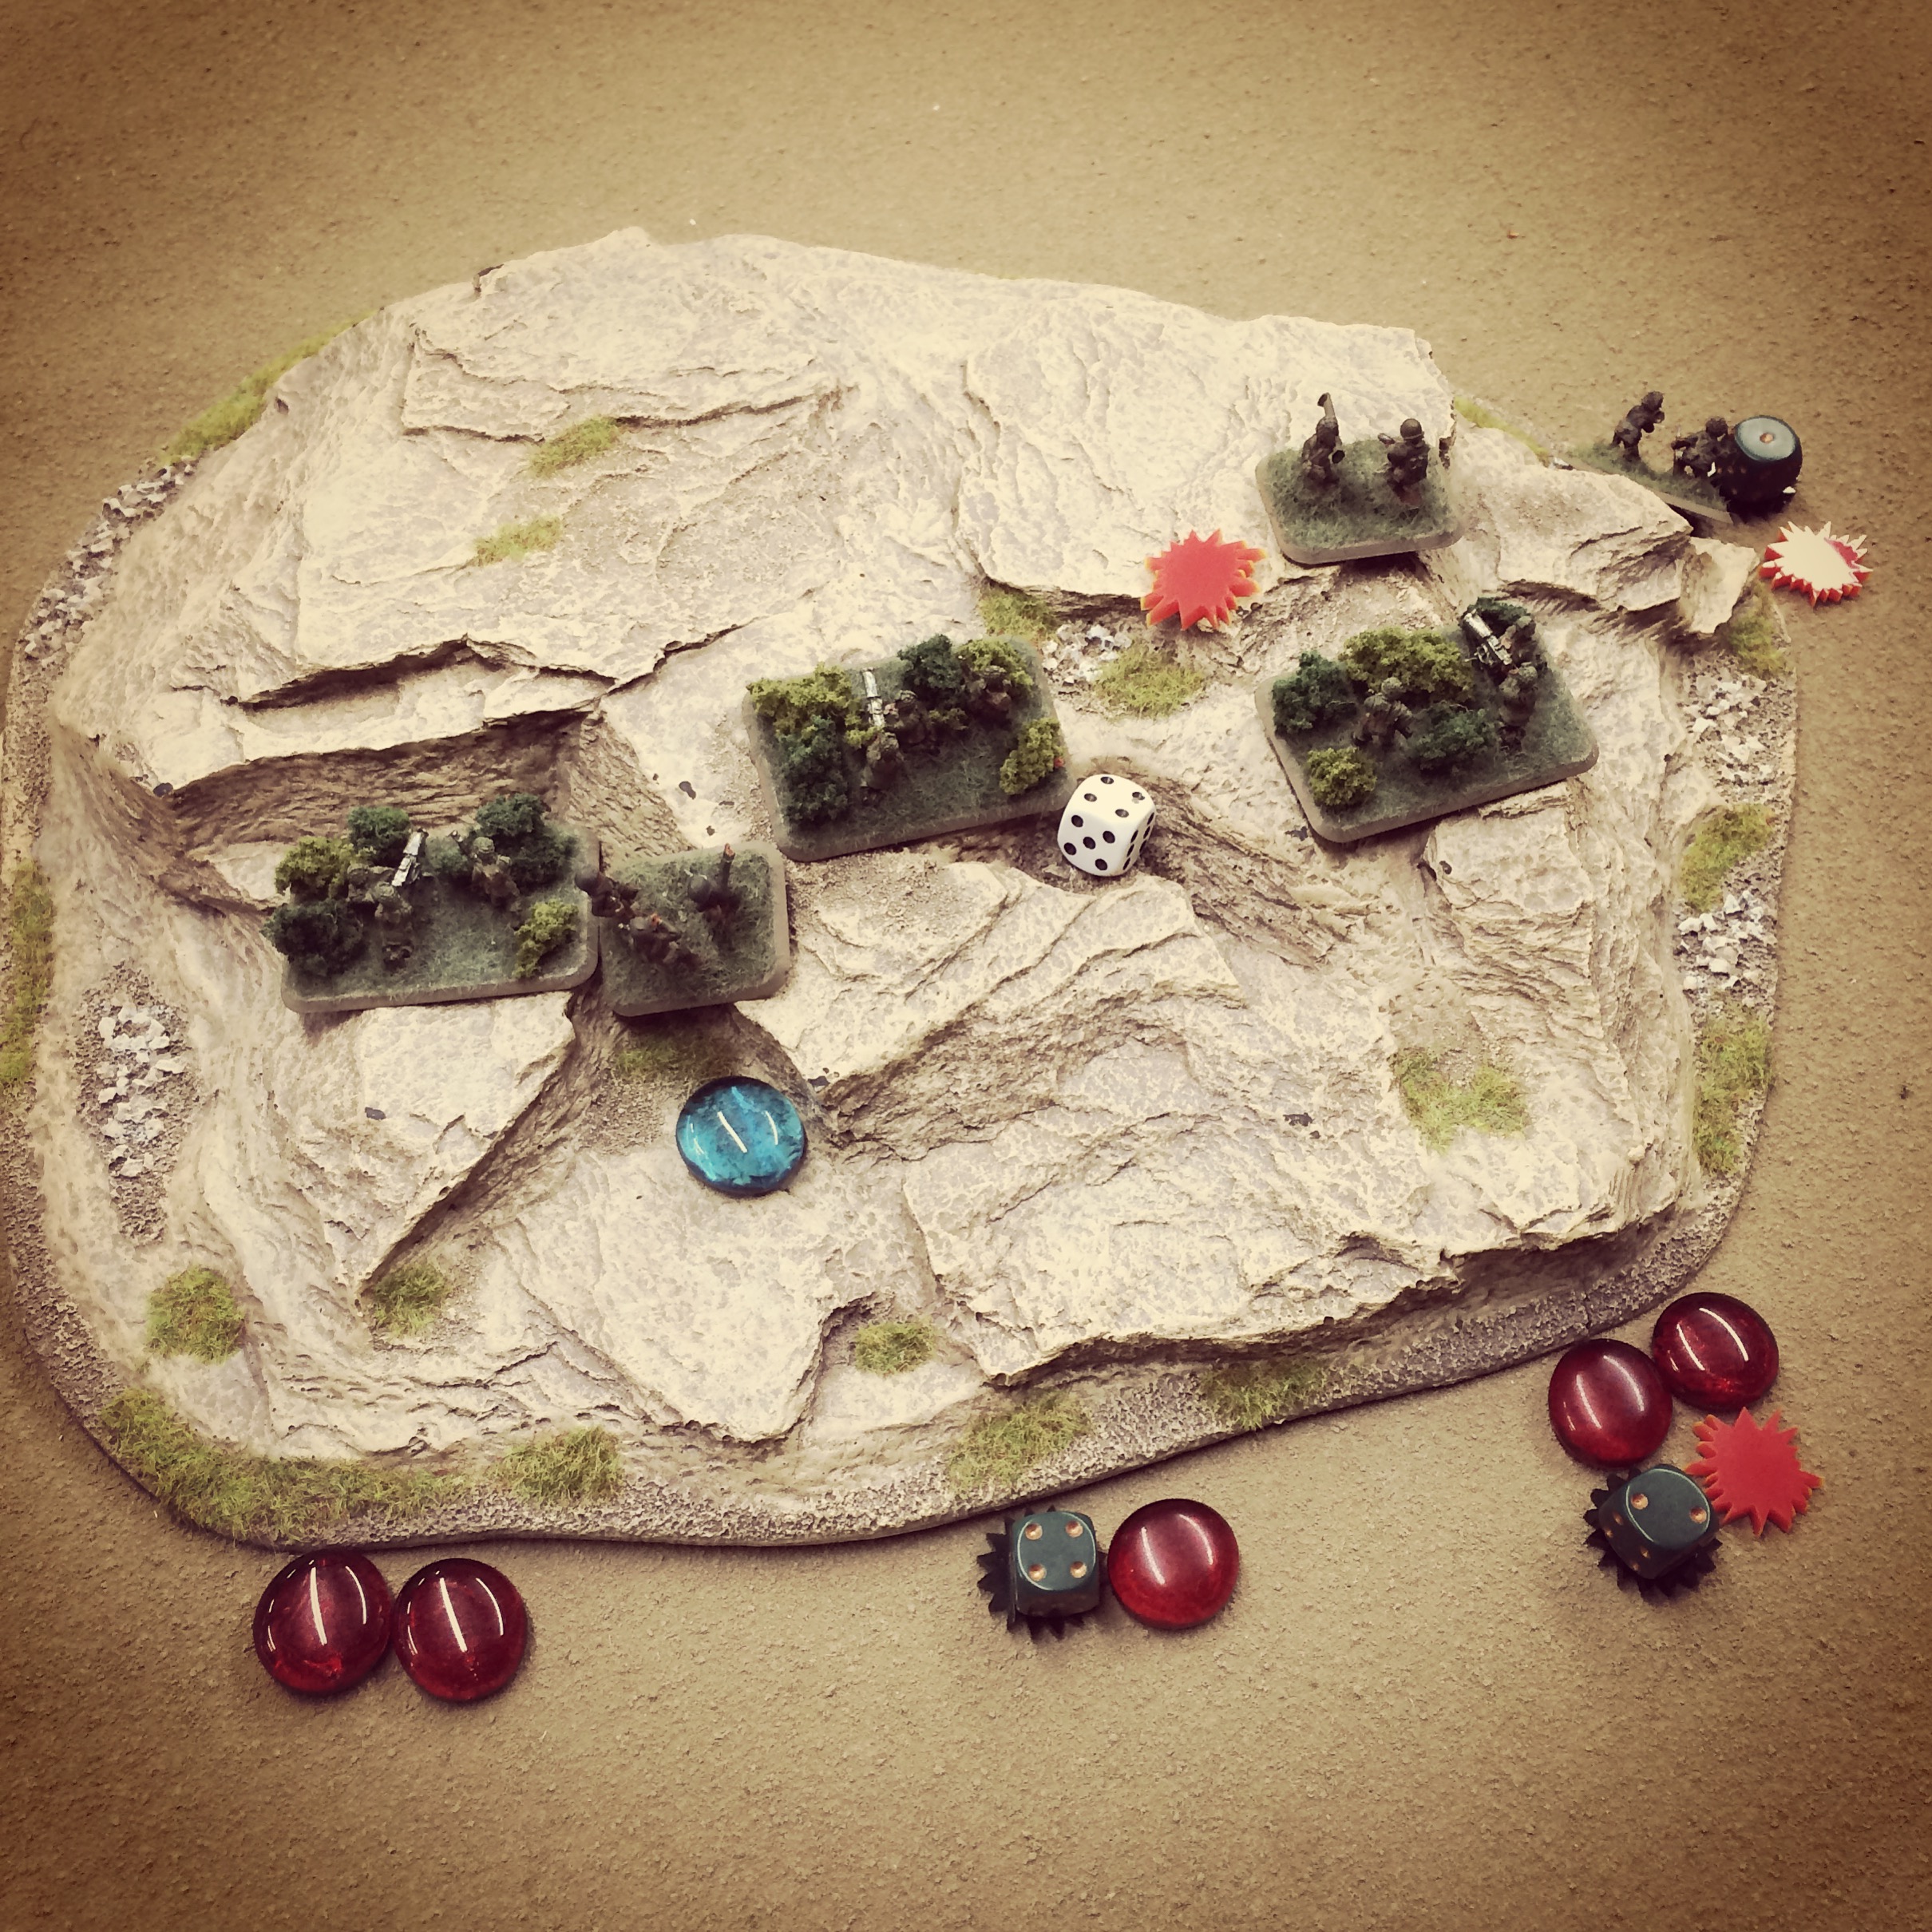
The Americans deployed in well-defended positions in the town with two platoons of rifles and light machine gun squads perched in buildings. A combat engineer platoon armed with a 37mm M3 anti-tank gun in tow sat hidden along the main street through town. Off board, 4.2 inch M2 mortars and 105 mm M2A1 howitzers from the 33rd Field Artillery Battalion were available as support to be called in by the captain from the company HQ perched in the tall building at the center of town. Tough and dug into great positions, the Americans looked to have a clear advantage.
The tabletop battlefield for Gela
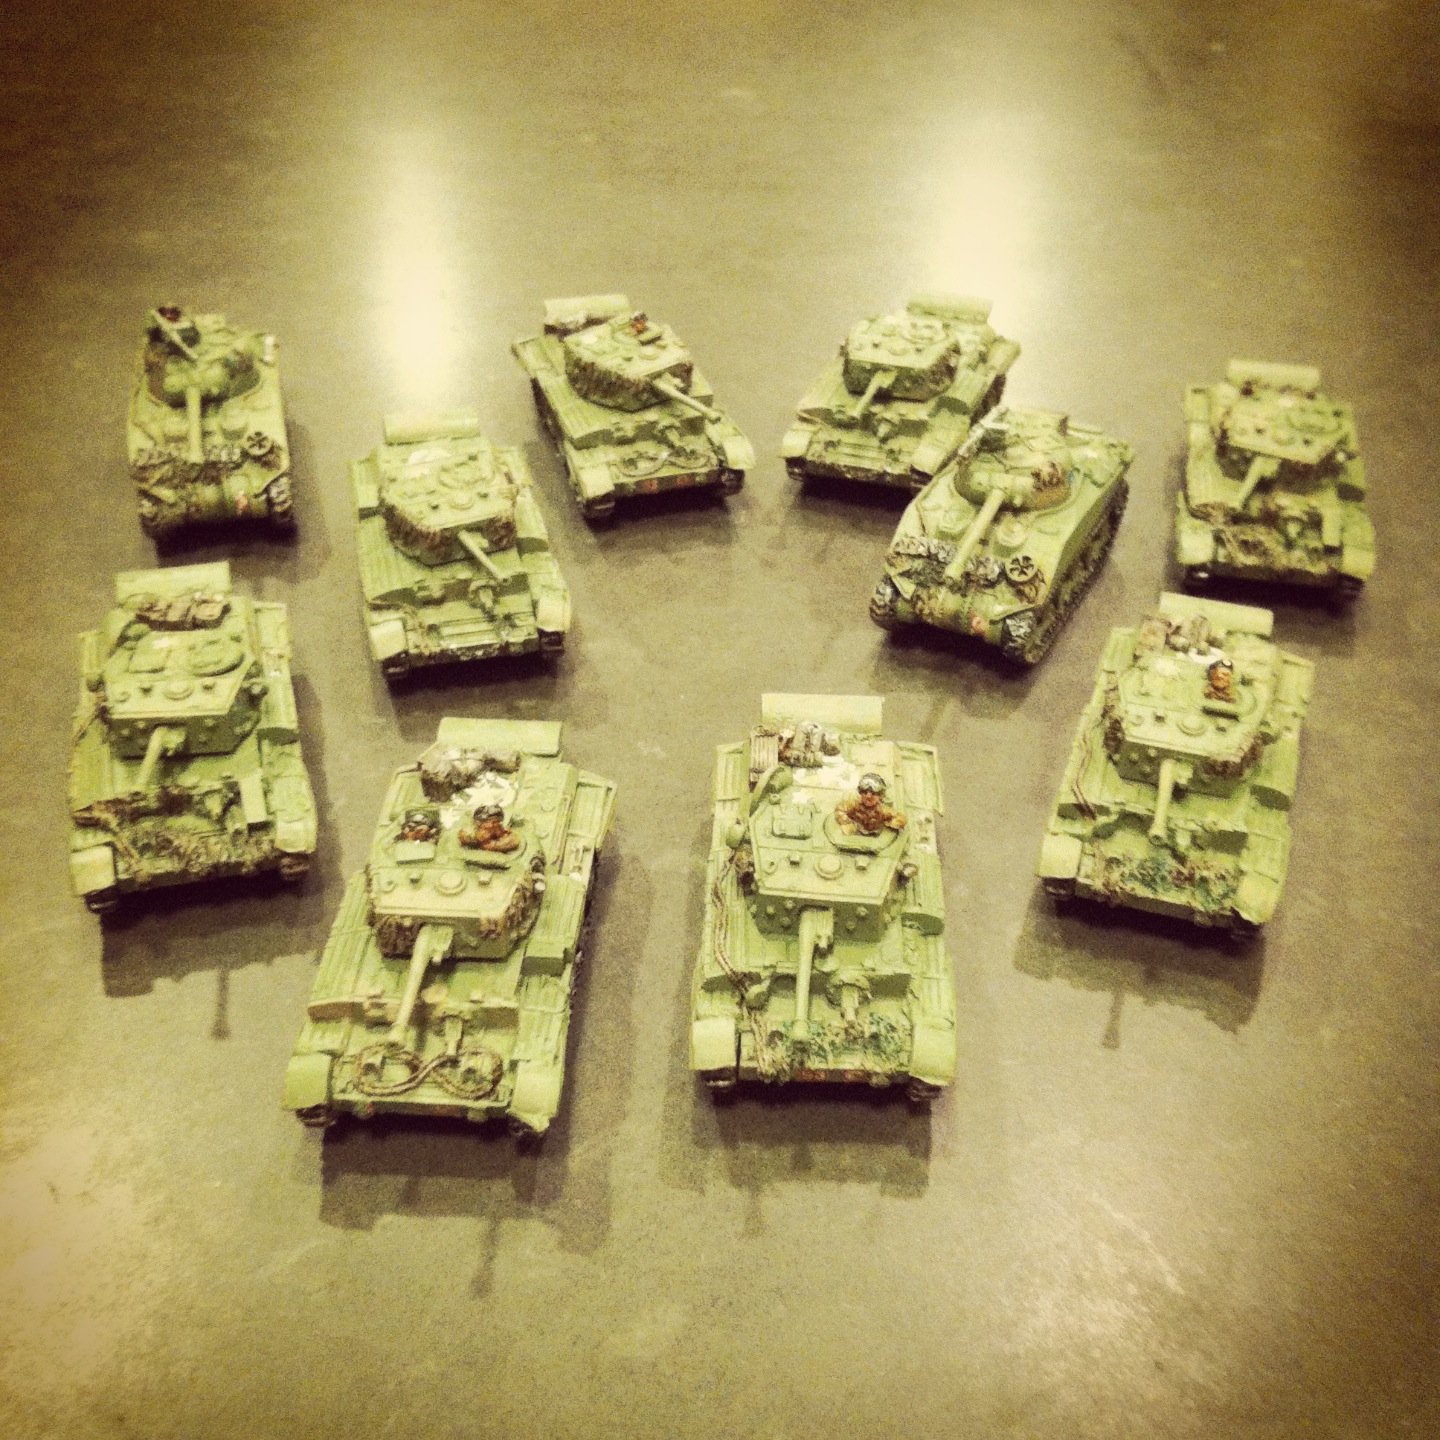
As in the previous scenario southeast of Butera, the Italians again represented a massing of manpower from the Livorno Division with six small rifle platoons and a machine gun support platoon. Accompanying them this time was Mobile Group E compromised of light French Renault R35 tanks and pre-war Italian CV33 Tankettes. What the Italians lacked in a starting position on the field and quality of equipment and troops, they certainly made up for in volume as they began the game arriving on three blinds per turn.
Italians arrive northeast of Gela
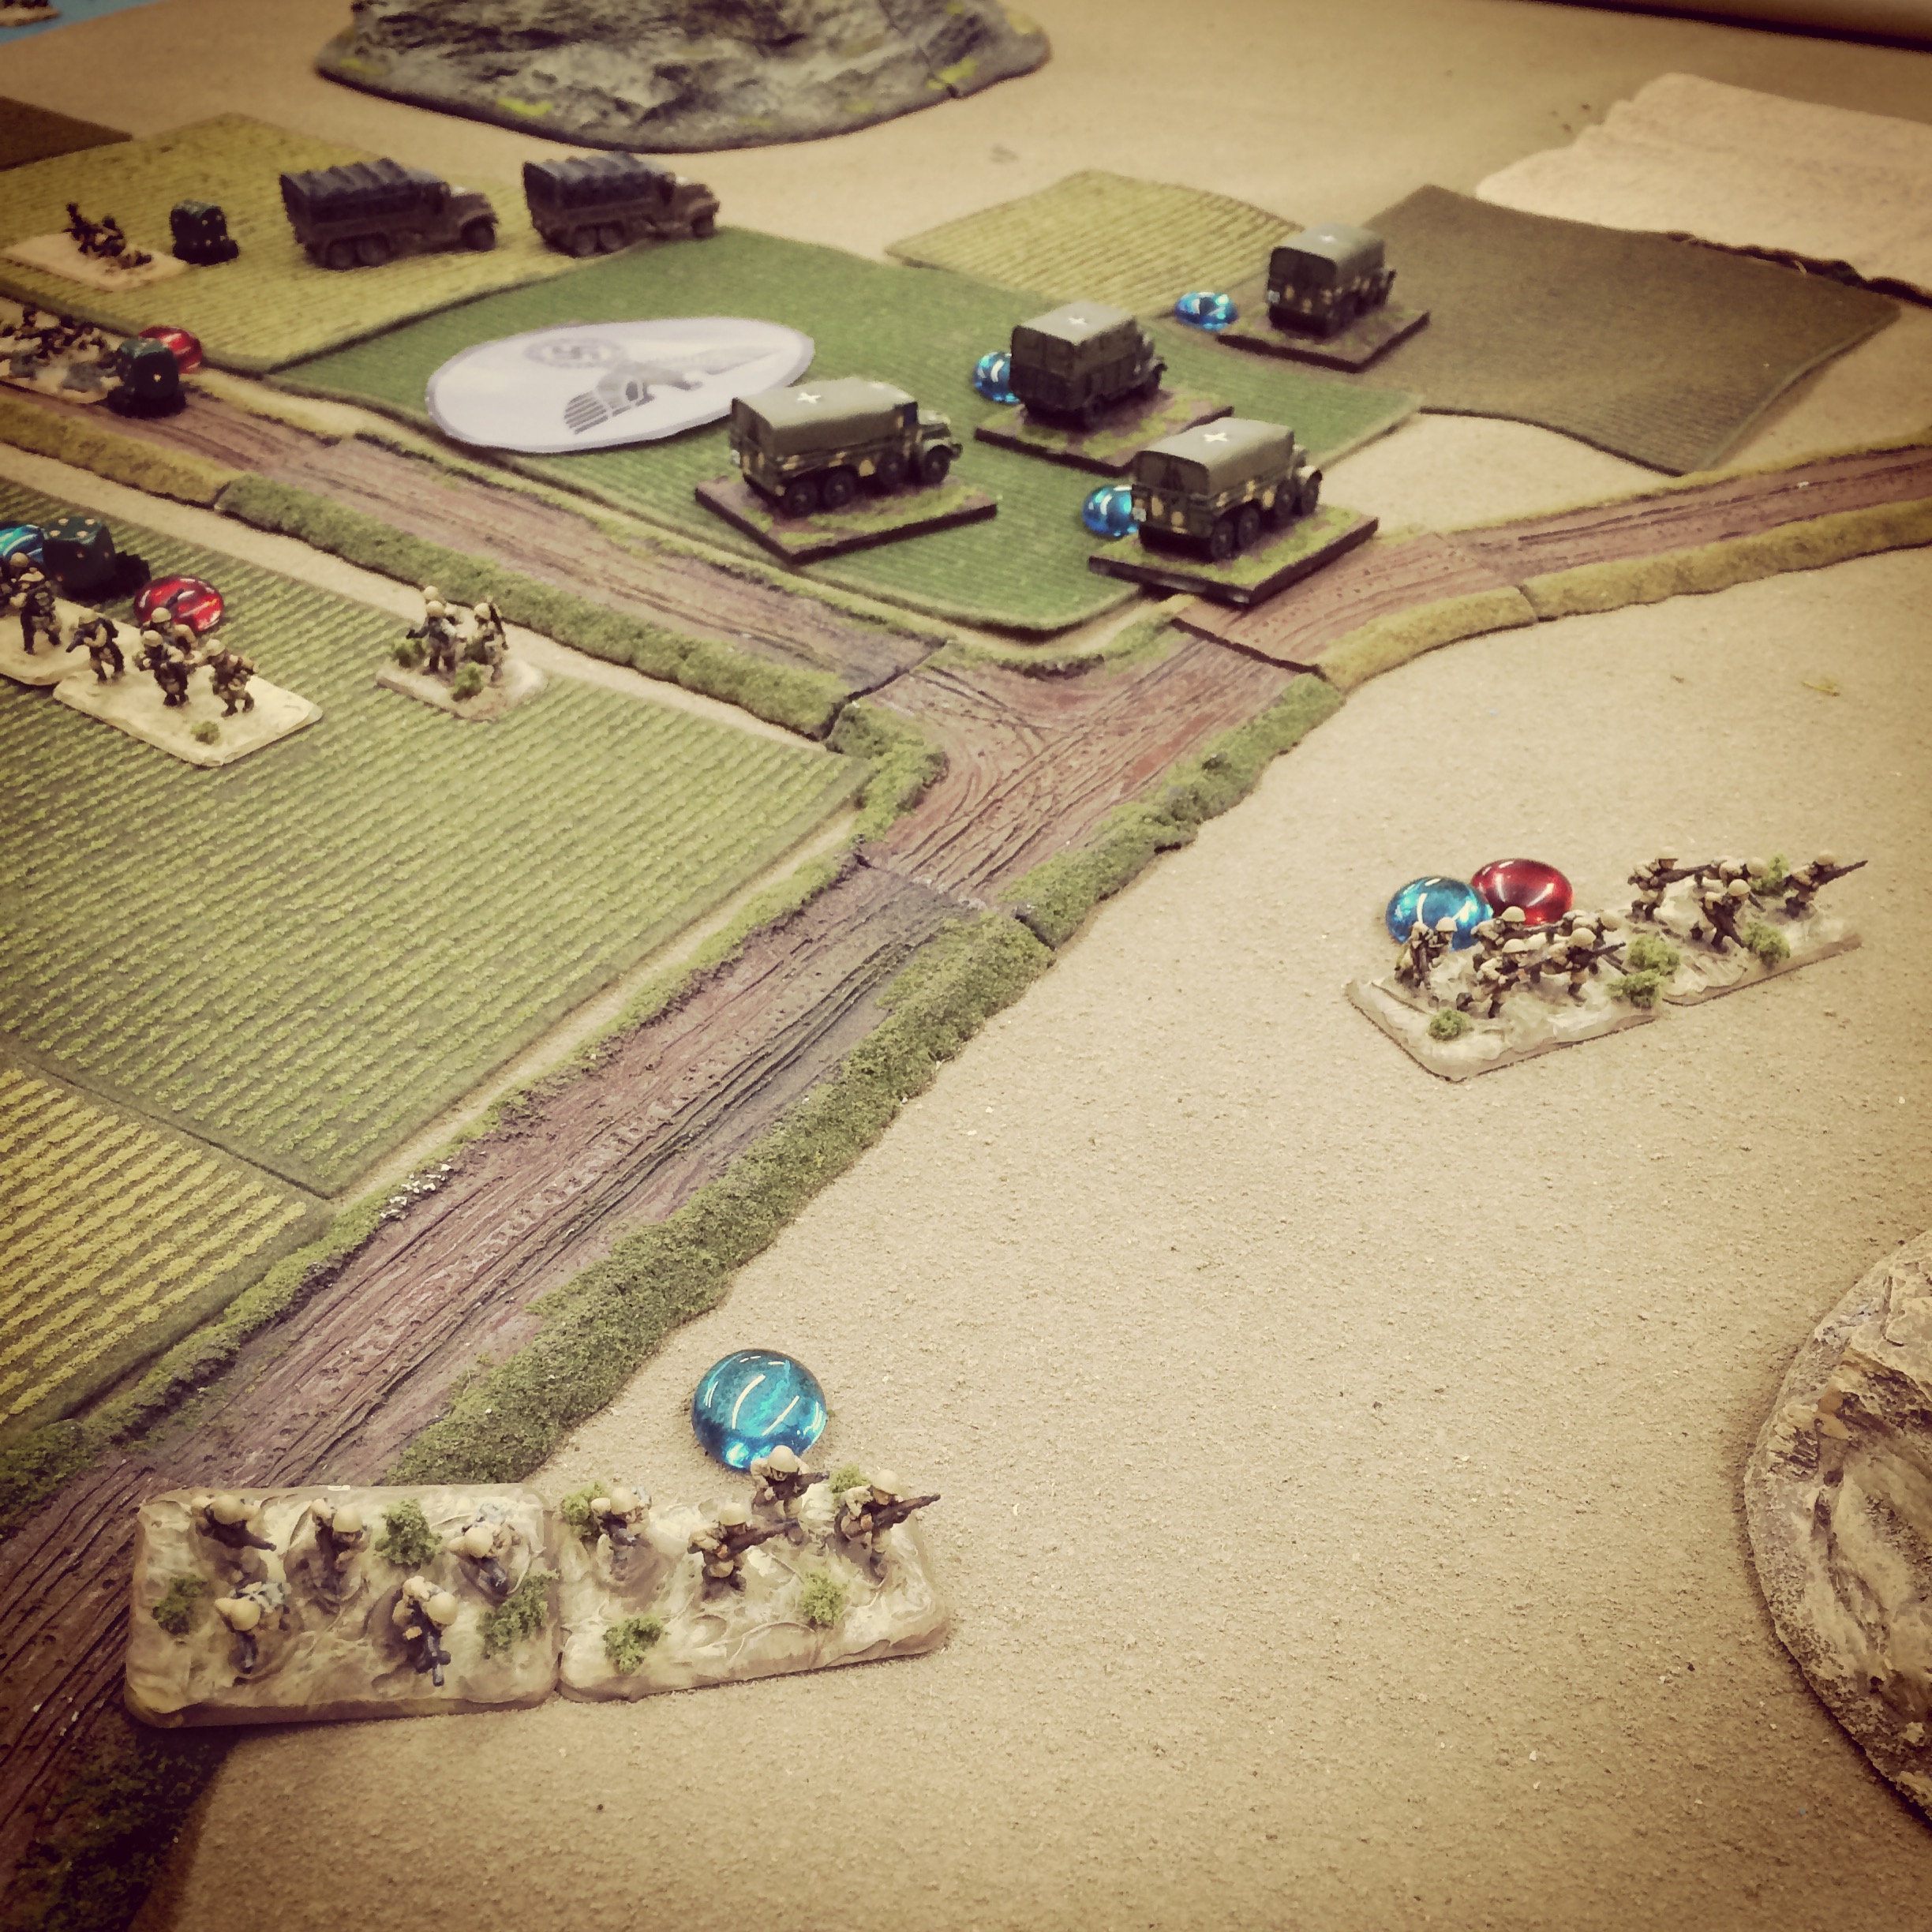
As the Italians neared the town, the Americans bided their time and sought not to reveal their positions until the approaching forces were nearly on top of their positions. Approaching in the open, the Italian blinds were spotted in the open to reveal tanks and infantry closing in at the center and edge of town. With IABSM’s randomly card-activated units mechanic, my US commander was perhaps overly cautious in waiting a turn or two too long to start getting the American cards into the deck. This all but negated off-board US artillery support for the game and allowed the Italian attackers to get dangerously close to seizing a quick victory with nary a shot fired.
Italians swarm the edge of the town and the hidden American positions
On the Italian left, one of their early shots fired down the street took out a crew member of the M3 anti-tank gun, forcing the remaining American crew to haul it back around a corner to safety. In answer, the US engineers opened fire at close range and threw back the initial push by the Italians on the American right. At the center of town, US rifles, machine guns and bazookas firing from within a massive central building ripped into the Italians marching forward in the open. Under heavy fire at their center, the Italians fled for cover to either side as their approach was slowed and their returned rifle and tank shots had little effect on the Americans.
Italians encounter fire from US engineers defending from buildings
Italian infantry duck for cover as they receive heavy combined arms fire from the Americans in the large central building
Italian armor repositions away from American fire
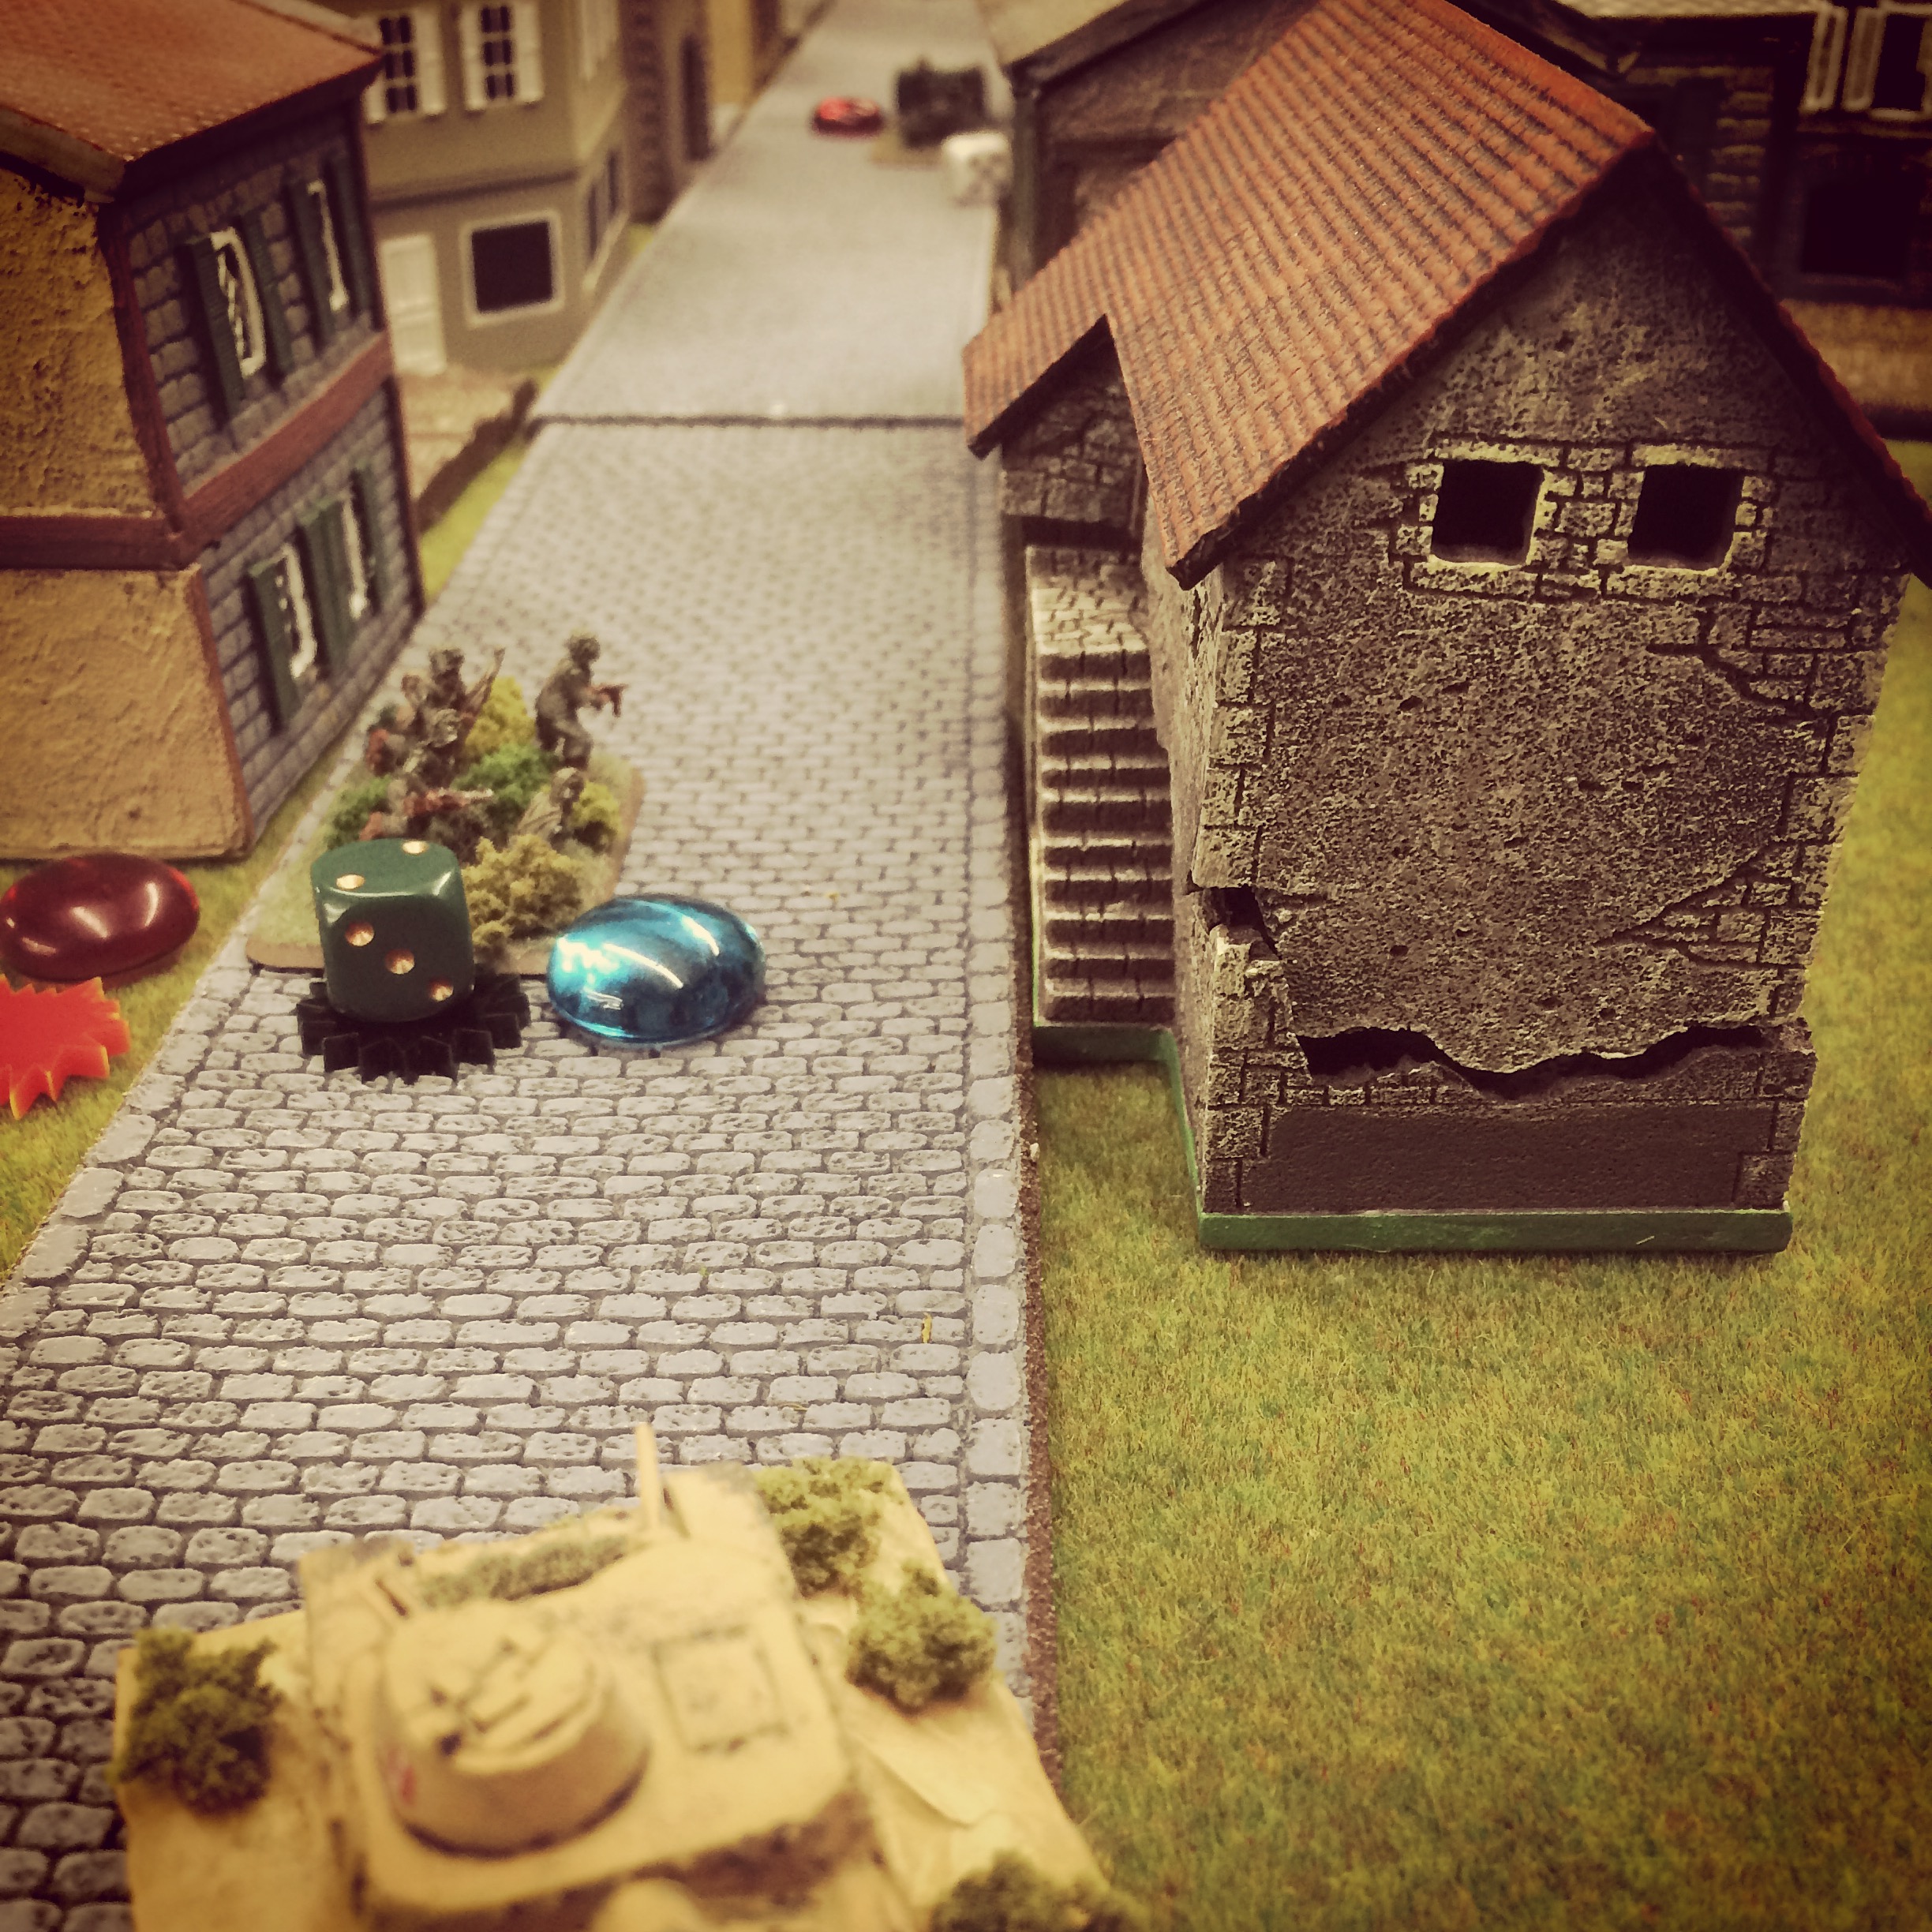
With nowhere to go but forward, an Italian rifle platoon at their left assaulted the US engineers holding down the American right from a building. The Americans took heavy casualties and were thrown backward from their position into the open street to the rear. In response, returned fire from engineers in a nearby building flung the Italians back from their brief victory.
Italian rifles push a US engineer platoon from the building position
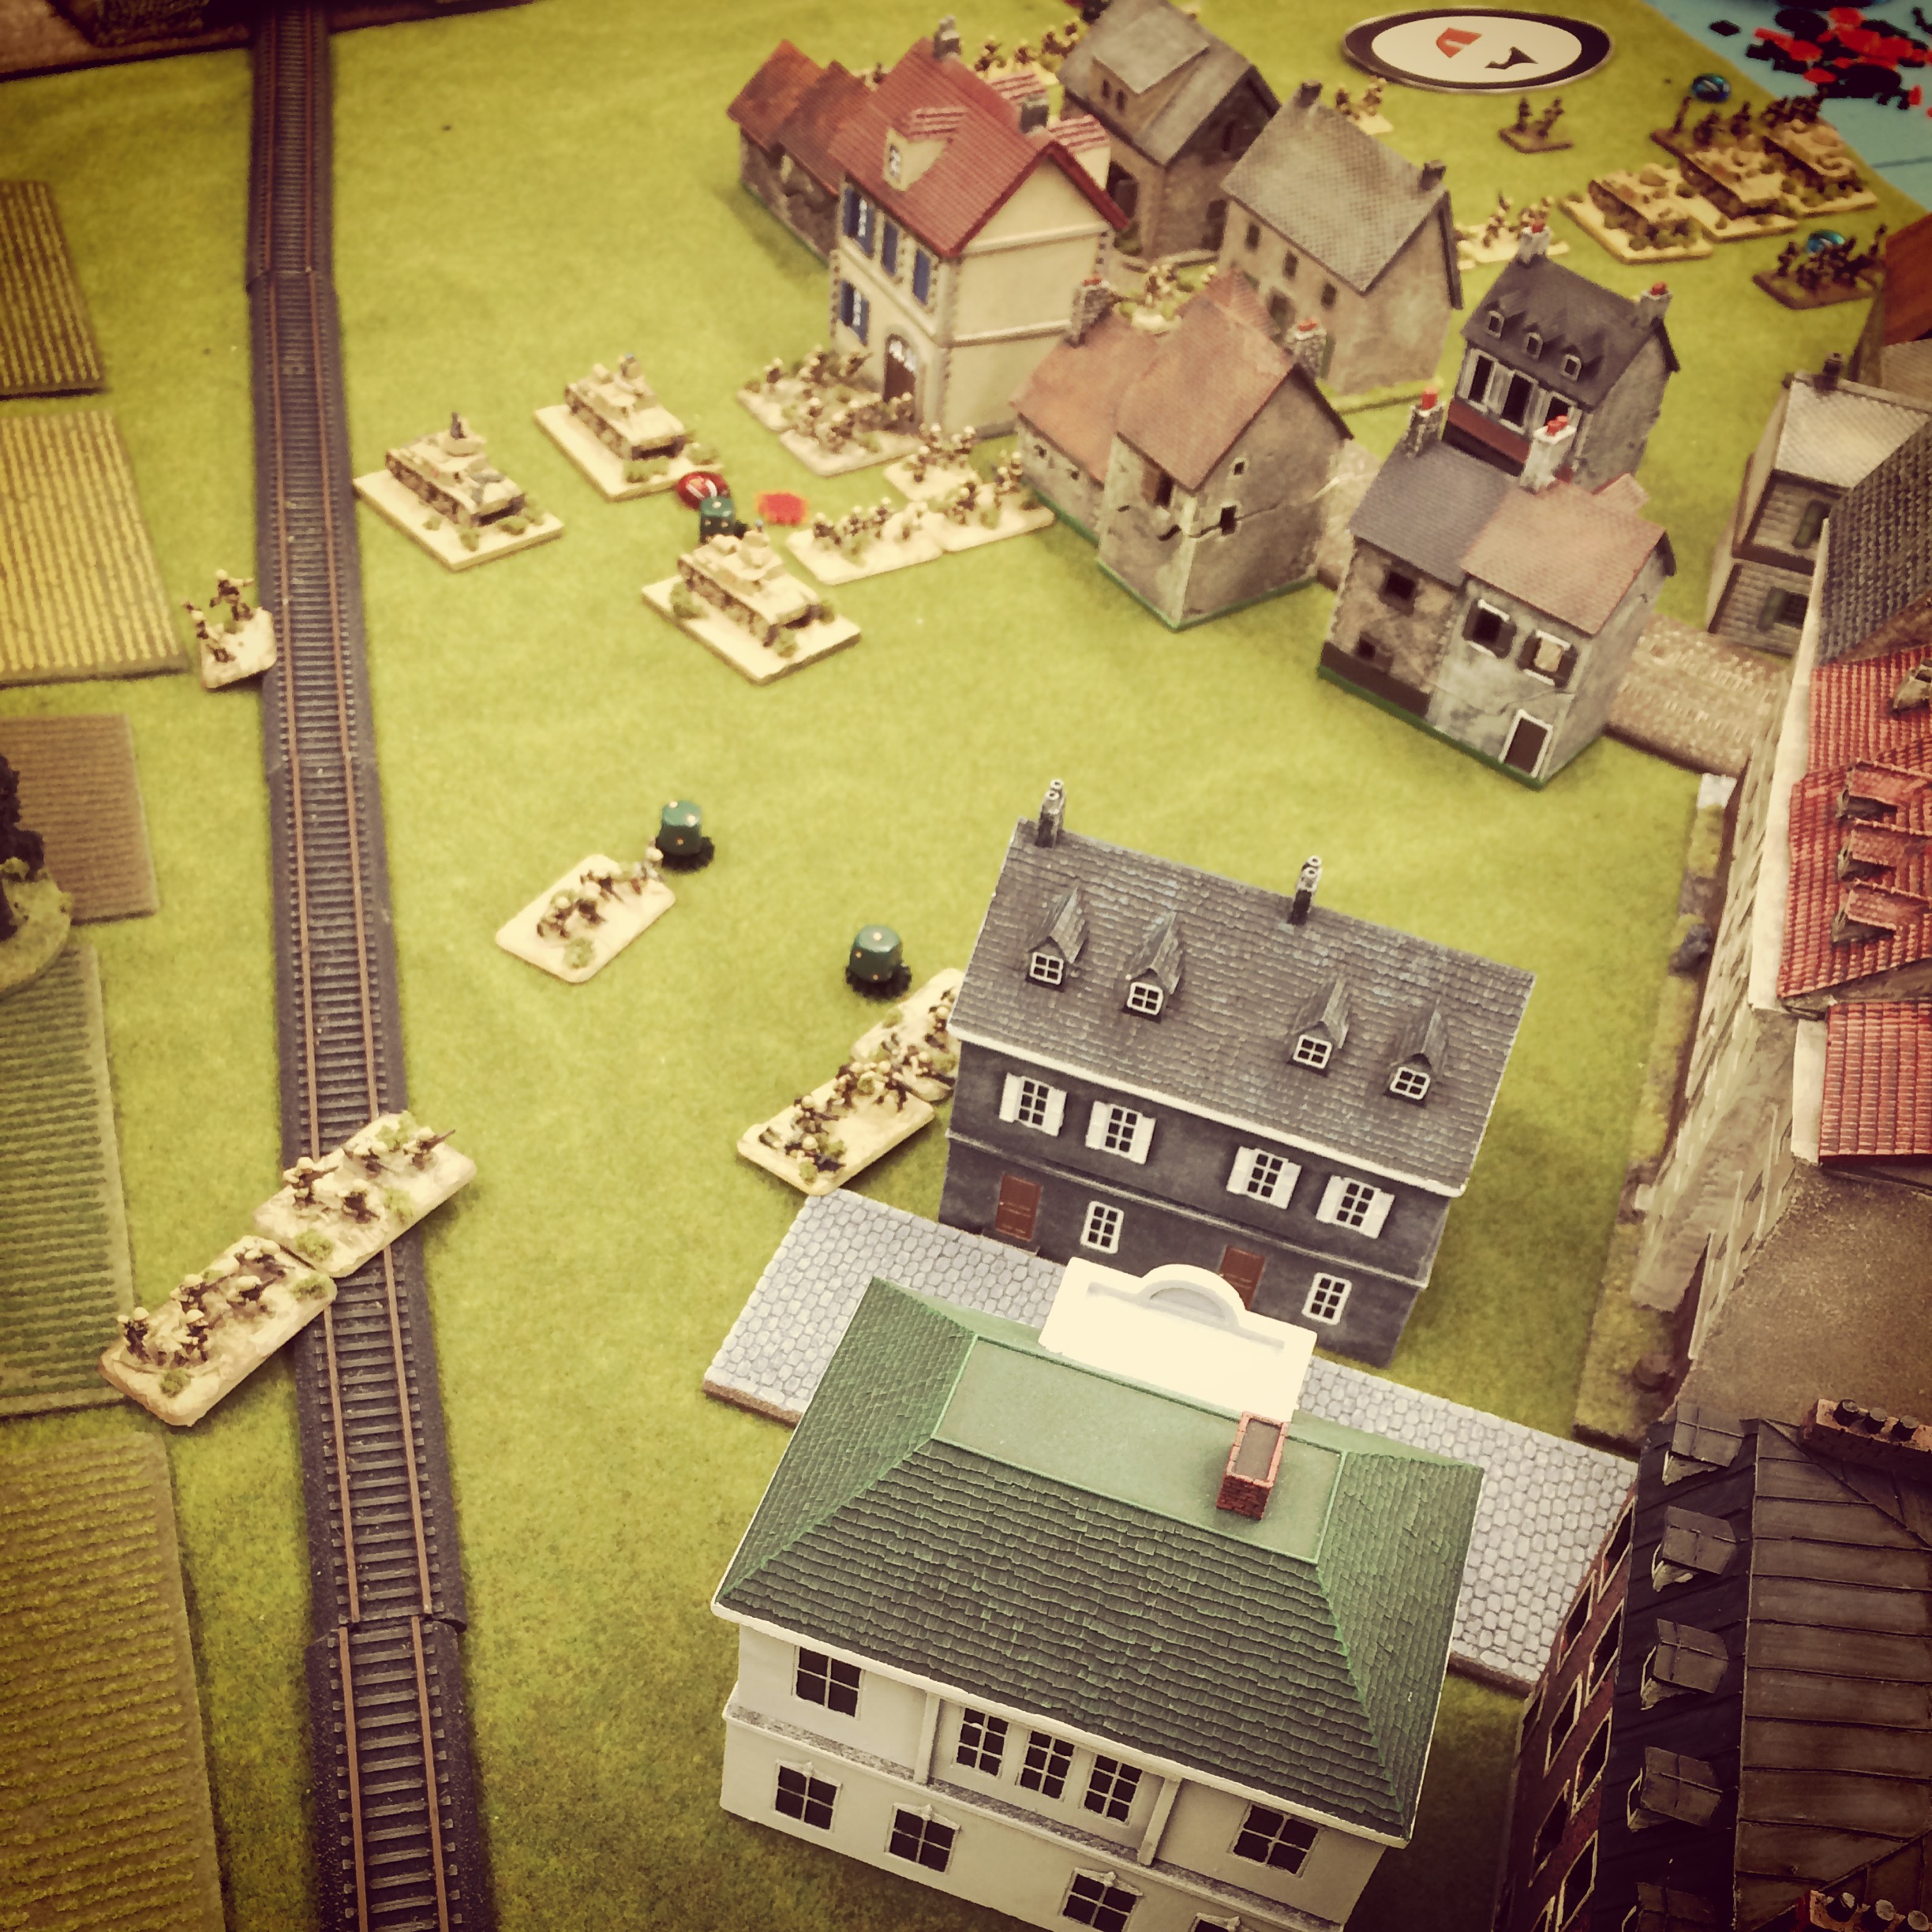
Back at the center, another round of combined arms fire from the Americans in the large central building continued to feed shots into the Italians, forcing them to continue to slide into cover to either side of the open field outside town. While pushing the Italians back with casualties and shocking fire provided a short-term positive for the US, it also allowed the Italians the chance to redeploy and set themselves for a move into town on the American left.
Italians slide from the center toward the American left
Meanwhile on the US right, the surviving engineers were chewed up by additional fire in the street which stalled them out of the action. With the main street into town wide open, the first Italian tank positioned itself to roll down the cobblestones. Waiting in the distance was the American anti-tank gun with a clear field of fire down the street looking to stave off an armored assault into the heart of Gela.
Italian armor sneaks around the American right as the US 37mm M3 anti-tank gun waits in the distance
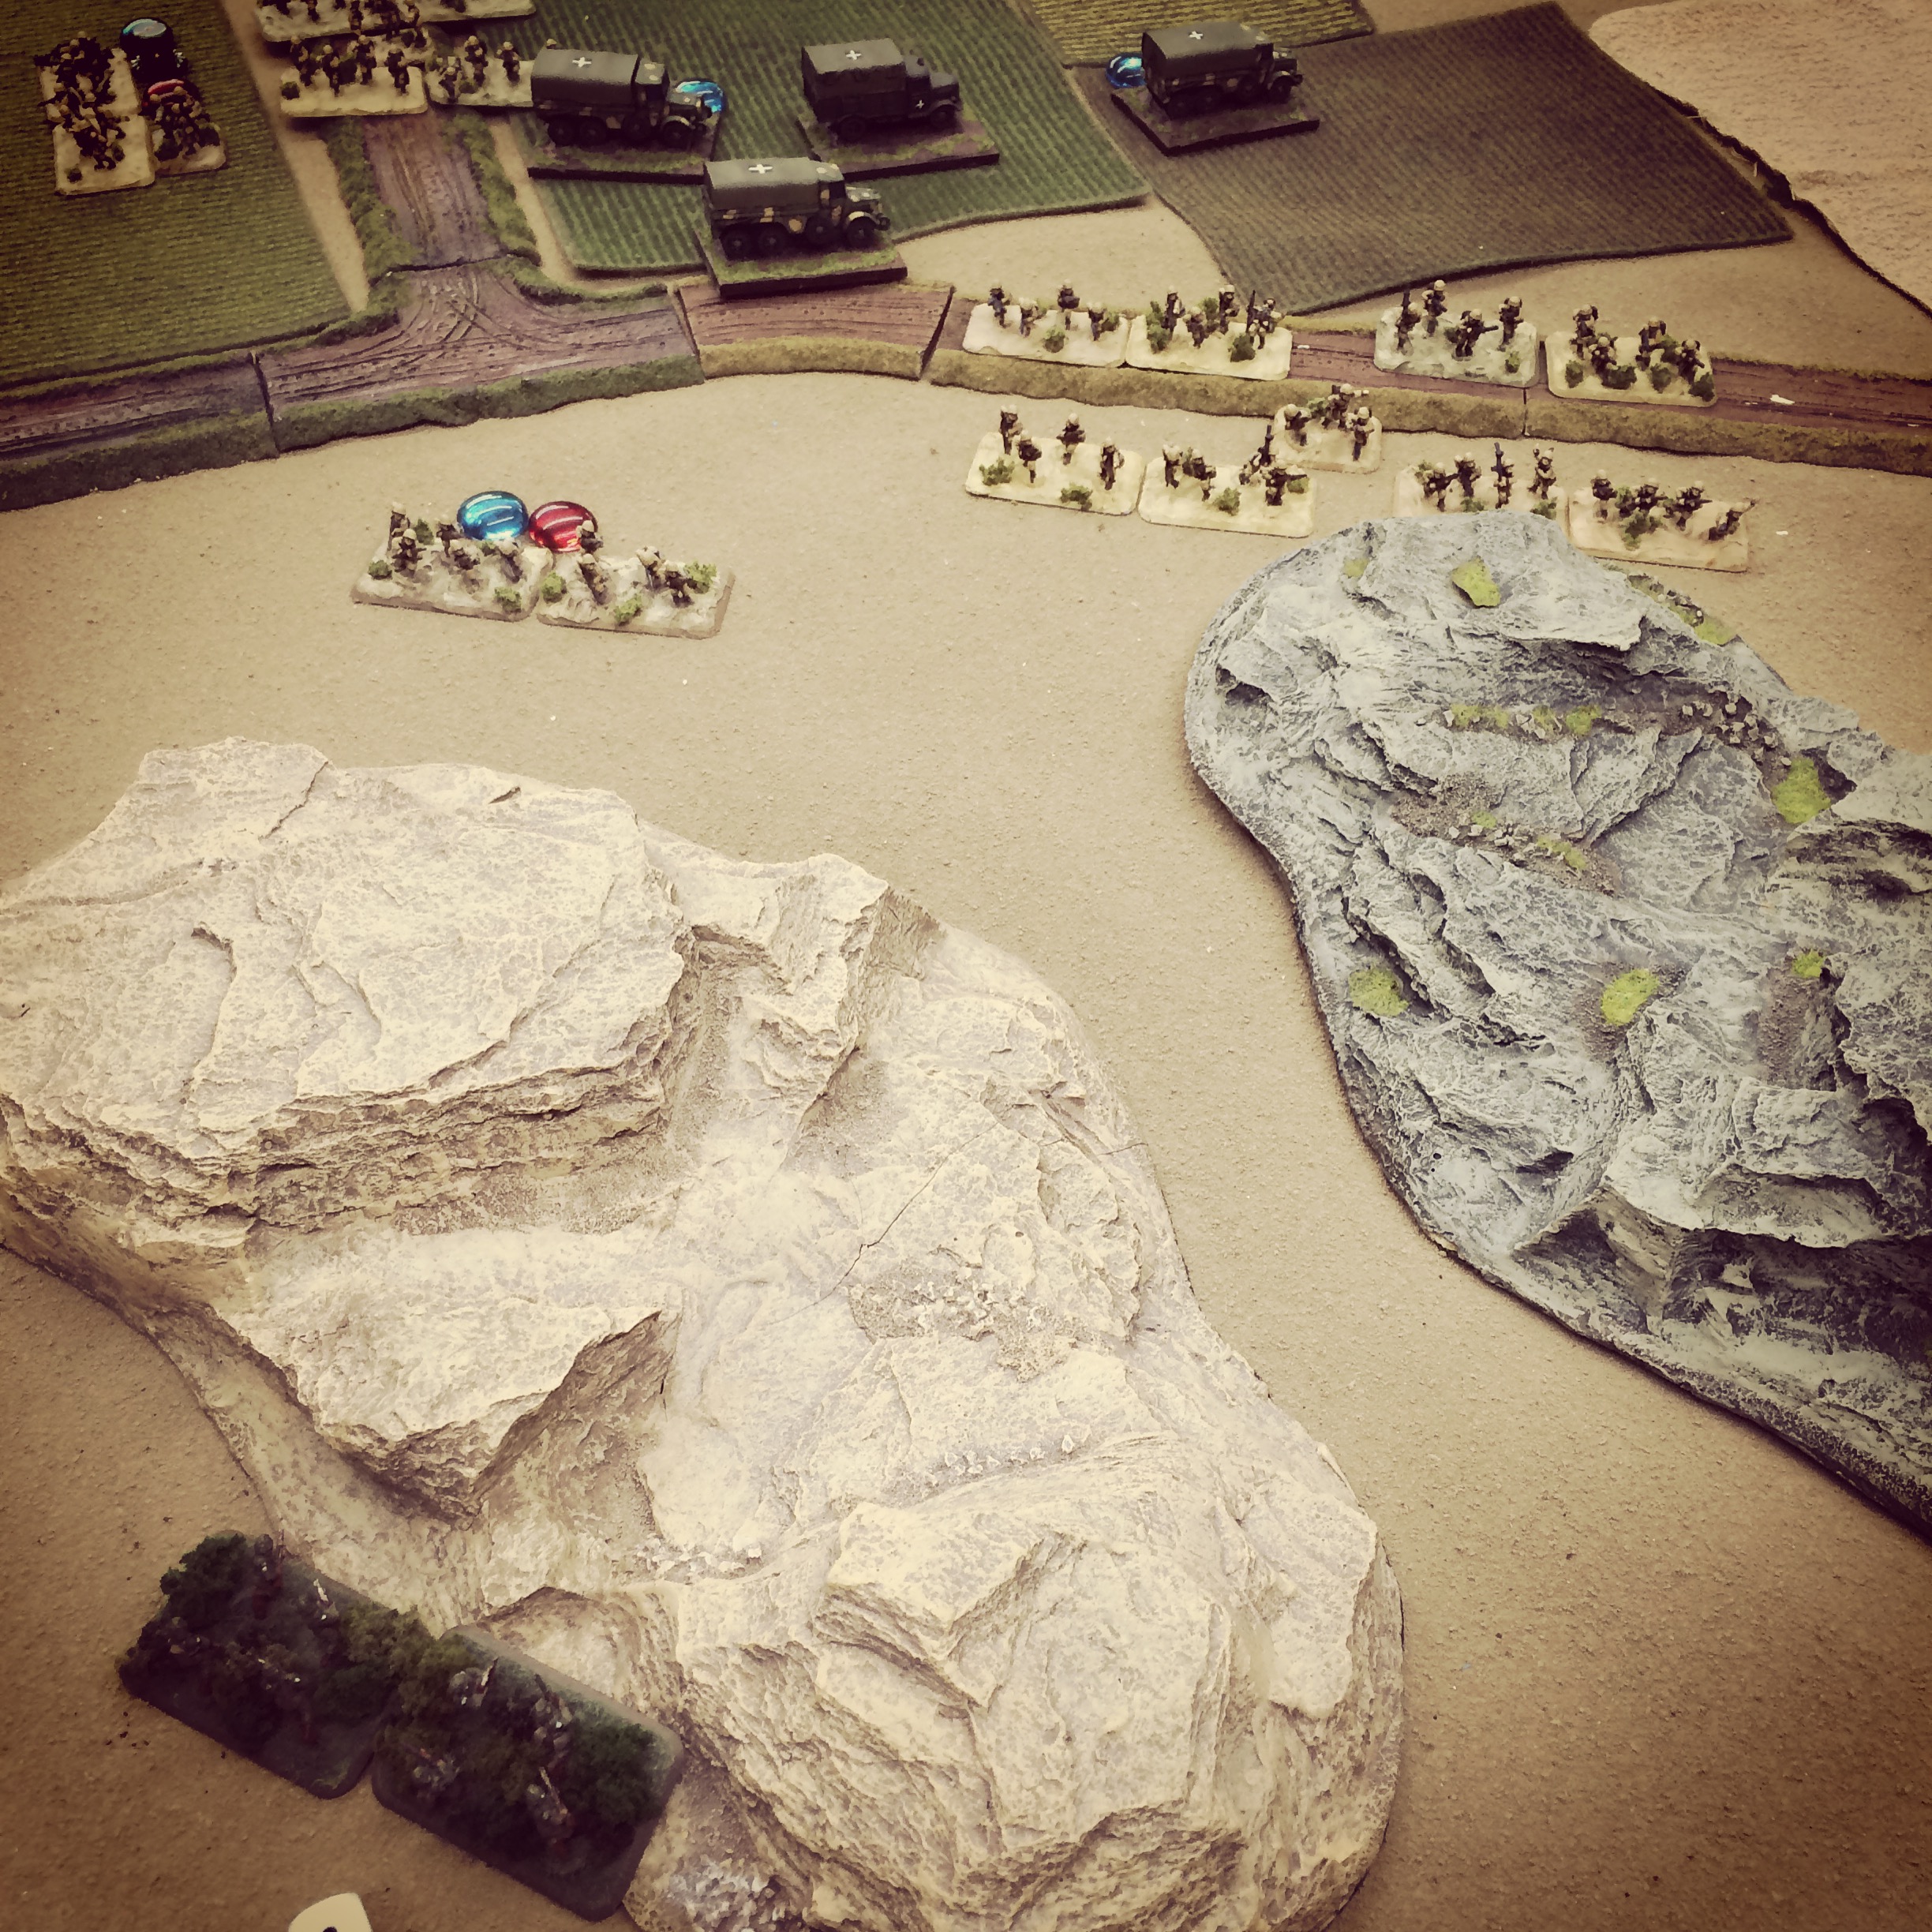
With the Italians abandoning the center, the fight moved to the flanks. One US rifle platoon moved to reposition into buildings further to the edge of town on the American left as two Italian platoons, one already having suffered heavy casualties, snuck between buildings for cover. The American engineers on their right sought to hold down the approaching Italian tanks and three rifle platoons, and the US anti-tank gun crew had yet to fire a shot. The American rifles, machine guns and bazooka crews who had caused so much damage at the center were facing a choice of redeployment as their Italian targets skirted to either side.
Italians mass for an attack on the US engineers
Several hours in, we called the game. The small-scale tactical nature of IABSM is highly contingent on when a platoon or command ‘big man’ card activates. With so many Italian cards in the deck, a run of activated Italian unit cards may have provided the push they needed to get to the main street and victory. That said, each US card drawn was continuing to have devastating results on the somewhat weaker Italians, causing casualties and flinging them into reconsidering different routes. The large number of Italian on the field were still poised to match up with the higher quality American troops, although the US had clearly blown an early opportunity to use their off-board artillery effectively. Good and bad command choices had left Gela contested for the day.
Operation Husky, the Allied invasion of the island of Sicily, commenced on July 9th 1943 with combined naval, air, airborne and amphibious forces from the United States, England and UK colonial nations attacking a largely Italian force backed by their German allies. Over the next five weeks, the Allies took the arid and rocky island of Sicily and opened up the Mediterranean for the eventual invasion of mainland Italy.
Operation Husky, July-August 1943 (area around Butera in green)
The Sicilian Weekendcampaign guide for I Ain’t Been Shot Mum offers 24 scenarios from the opening days of Operation Husky on July 10th and 11th 1943. Like the other scenario books from IABSM publisher Too Fat Lardies, the Sicilian book presents solid historical background and maps, along with force lists and detailed briefings for each side easily adaptable to a number of lines of 15mm WWII miniatures. The scenarios may be played individually or as part of a linked campaign, and so we recently started playing through a few of the Sicily scenarios at Metropolitan Wargamers in Brooklyn, NY.
‘Sicilian Weekend’ by Too Fat Lardies for their I Ain’t Been Shot Mum WWII rules
We began with the eighth scenario in the book, southeast of Butera on the morning of July 11th 1943. Members of US 3rd Infantry Division are presented with a simple mission of aggressively pushing through the field to link up with their fellow Americans at Gela. The Italian force from the 33rd Infantry Regiment of the Livorno Division, must hold the invading Americans back.The scenario presents the Italian and American forces each entering the table in column on blinds. The counter attacking Italians rolled in mounted in trucks at one road at the table edge, and the Americans arrived on foot at one end of the table.
Initial forces arrive on the field in the early turns
Italians rush to the battle and deploy from a column of trucks
My first to arrive American machine gunners and bazookas quickly took up position on a rocky hill overlooking the road and a crossroads in the distance. Italian trucks moved in with their heavy weapons likewise leading the away with machine guns and 81mm mortars deploying at the road edge. Initial long range fire from the US machine guns pushed some of the Italian line back over the road. The Italians offered several rounds combined of direct mortar and machine gun fire in return, spraying bullets and landing rounds amid the bunched-up US machine guns. The Americans scooted back over the crest of the hill and the bazookas ran off to meet the other Americans arriving by the road to their right.
American machine guns take Italian mortar fire and fall back
US machine gunners rally back to their positions and pour fire into the Italian lines
As the heavily-damaged US machine guns rallied, the Italian column continued to advance on the board in force. Four Italian rifle platoons spread out from the road to run at the advancing American column ahead and to cover the crossroads overlooked by two rocky hills. As the Americans moved straight on to meet the Italian front line, a recon platoon accompanied by four bazookas made way for the hills and the Italian flank.
Italian rifle platoons sprint ahead through the open field
A US recon platoon moves to take position atop a hill as Italians deploy at the crossroads
A firefight erupts between two hills as American bazookas hump their way around the Italian flank
The Italian line folds back toward the road under US fire in the field
With an Italian front deployed across the field in several lines and more rifles rushing into the hills at their left, the battle settled into two main firefights. American rifles at the center gradually pushed through the field toward the overwhelming number of Italians. Between the two hills on the Italian left, Italian and American rifles echoed back and forth. As gunfire was exchanged across the lines, US bazookas attempted to run to engage the Italian trucks which had made their way to safety beyond the battle at the rear. Despite moderately mounting Italian casualties, the Americans just could not break through.
The US forces ultimately ceded the field to the Italians. Even with superior command quality, the initial deployment of the US machine guns had been a bit premature and was not met by the quick arrival of supporting rifle platoons. Rushing them to the hills at the crossroads might have made a difference. The Italians had also managed to get the vast majority of their troops on the board early in the game, and their neatly arranged front line allowed them to angle directly over a defense of the road. In our refighting of the early hours of July 11th, 1943 the massed Italian counterattack had stalled the US invaders southeast of Butera. What awaited at Gela later in the day would unfold in our next battle.
As with so many armies past and present, the infantry man was the backbone of the US Army during World War II. Armed with the M1 rifle, his training and an enormous line of supply to the rear, the American soldier was arguably one of the most formidable combatants in the history of warfare.
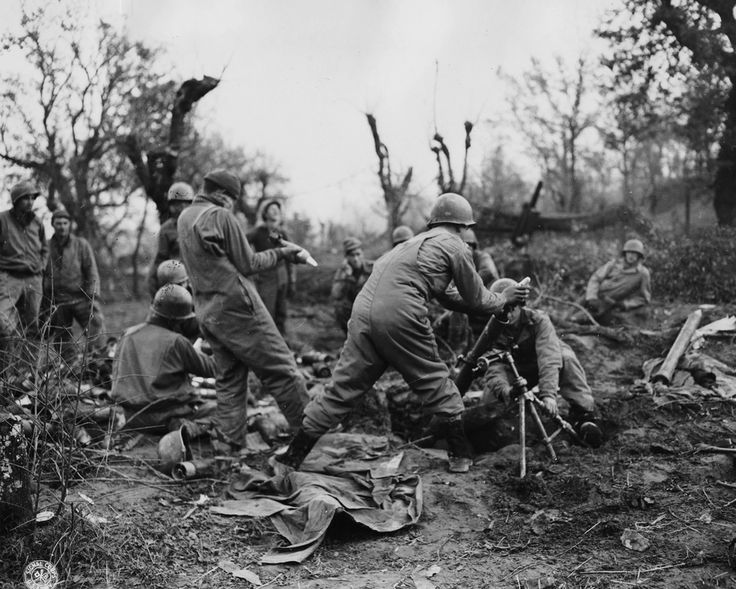
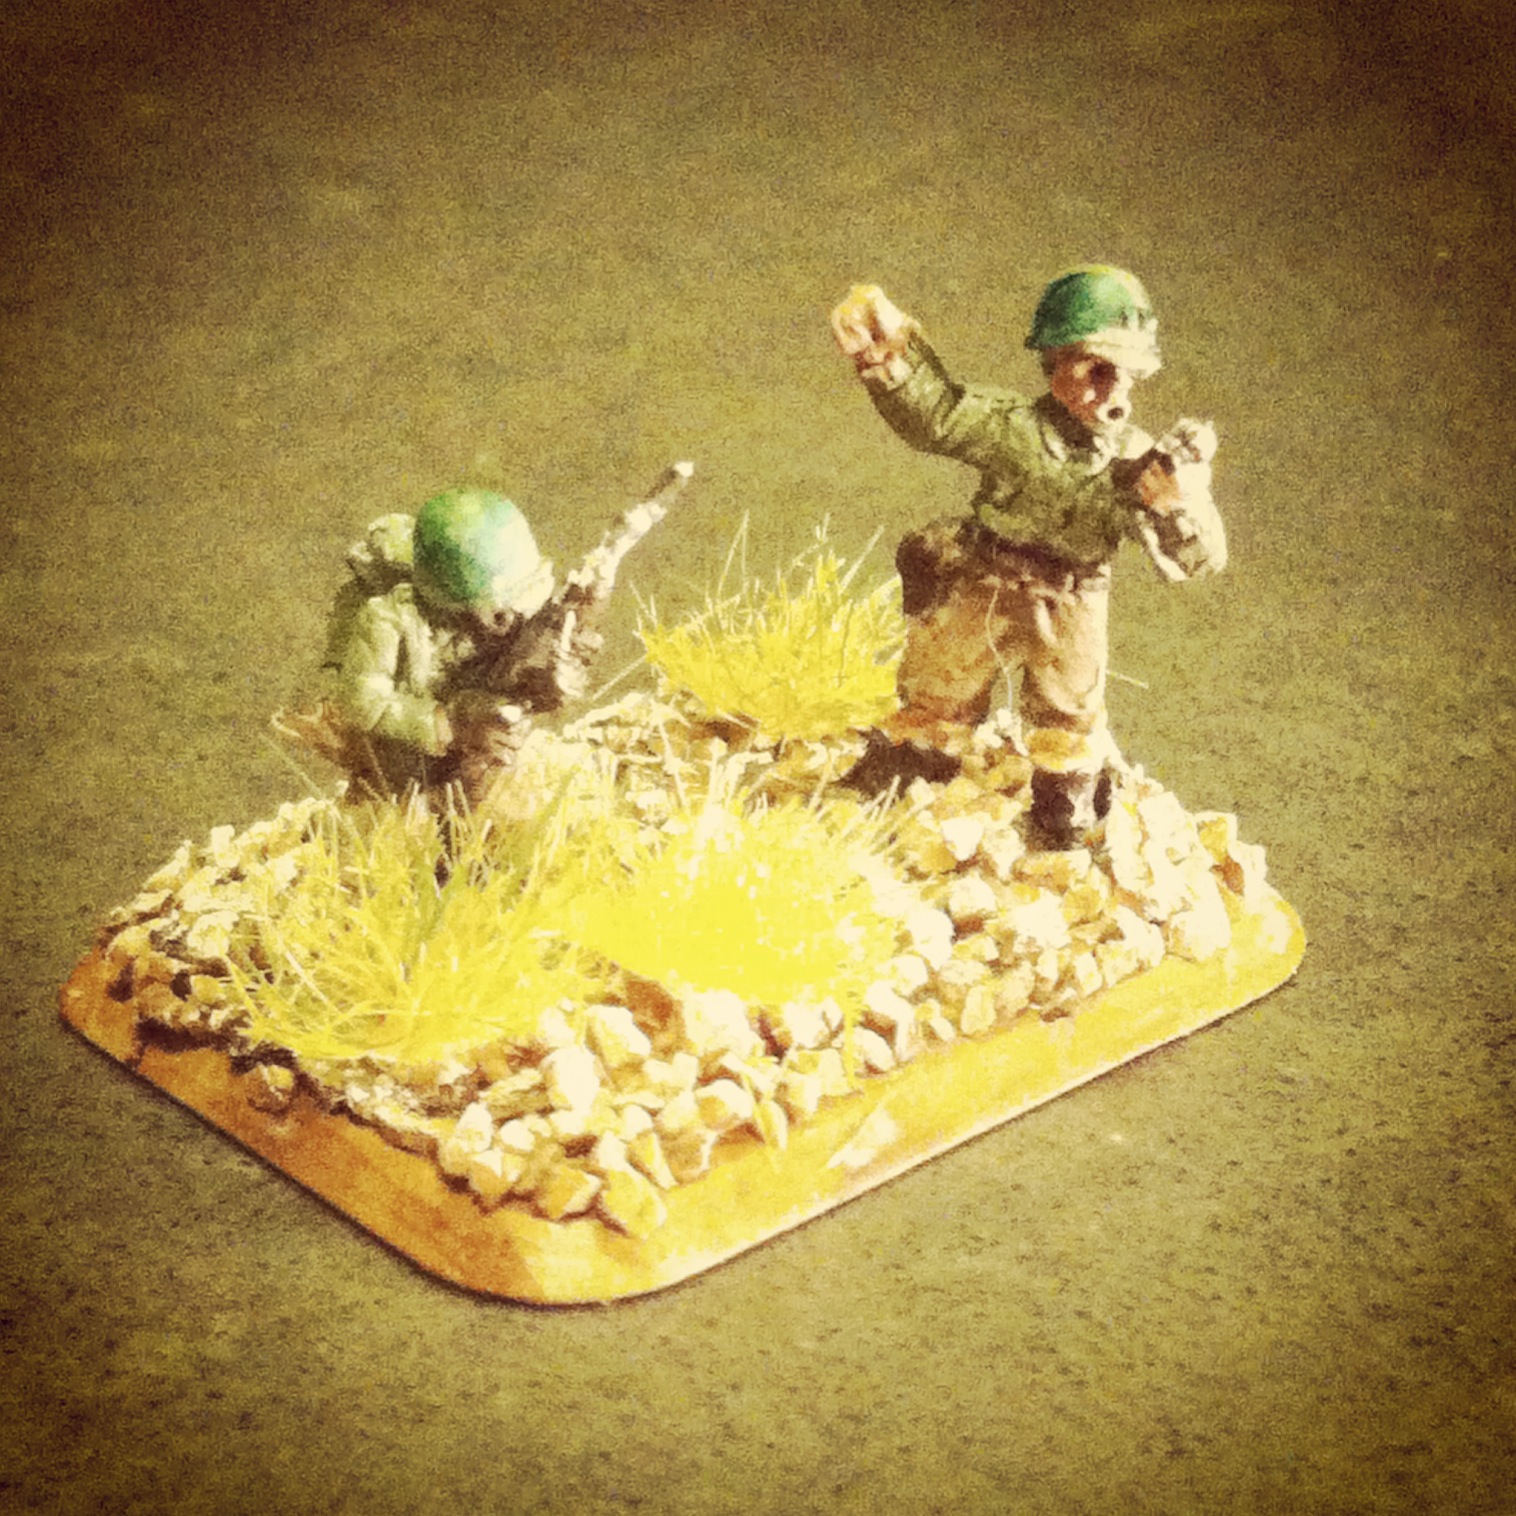
That said, even the most effective foot soldier often needs support. Along with machine gun crews, US infantry companies commonly contained the M2 60mm mortar. Crewed by just two men, the M2 added explosive punch in a highly portable weapon which could move swiftly with ground advances through varied terrain.
M2 4.2 inch chemical mortar in use during World War II
At the battalion level, larger mortars with more diverse ammunition, longer ranges and greater effectiveness were also available. The M1 81mm mortar (pictured at the top of this post) was used throughout the war with its 3000 yard range and mix of explosive shells. The larger mortar, weighing in at about 150 pounds, required a larger team and was commonly transported by cart or mounted in the back of a halftrack.
By the time of the Allied invasion of Italy in 1943, the even heftier M2 4.2 inch chemical mortar was added to the American arsenal. Designed but never used for lobbing various weaponized chemical payloads like poison gas, the M2 was set on a large rectangular base plate with a pinion-like stand to stabilize firing large explosive or smoke payloads over 4000 yards. The weight and over-sized shells of the M2 did limit its portability significantly, but even so, it helped to very effectively fill out the small artillery arsenal at the infantry level.
Sprue detail for the PSC US Heavy Weapons set with 60mm, 81mm and 4.2 inch chemical mortars
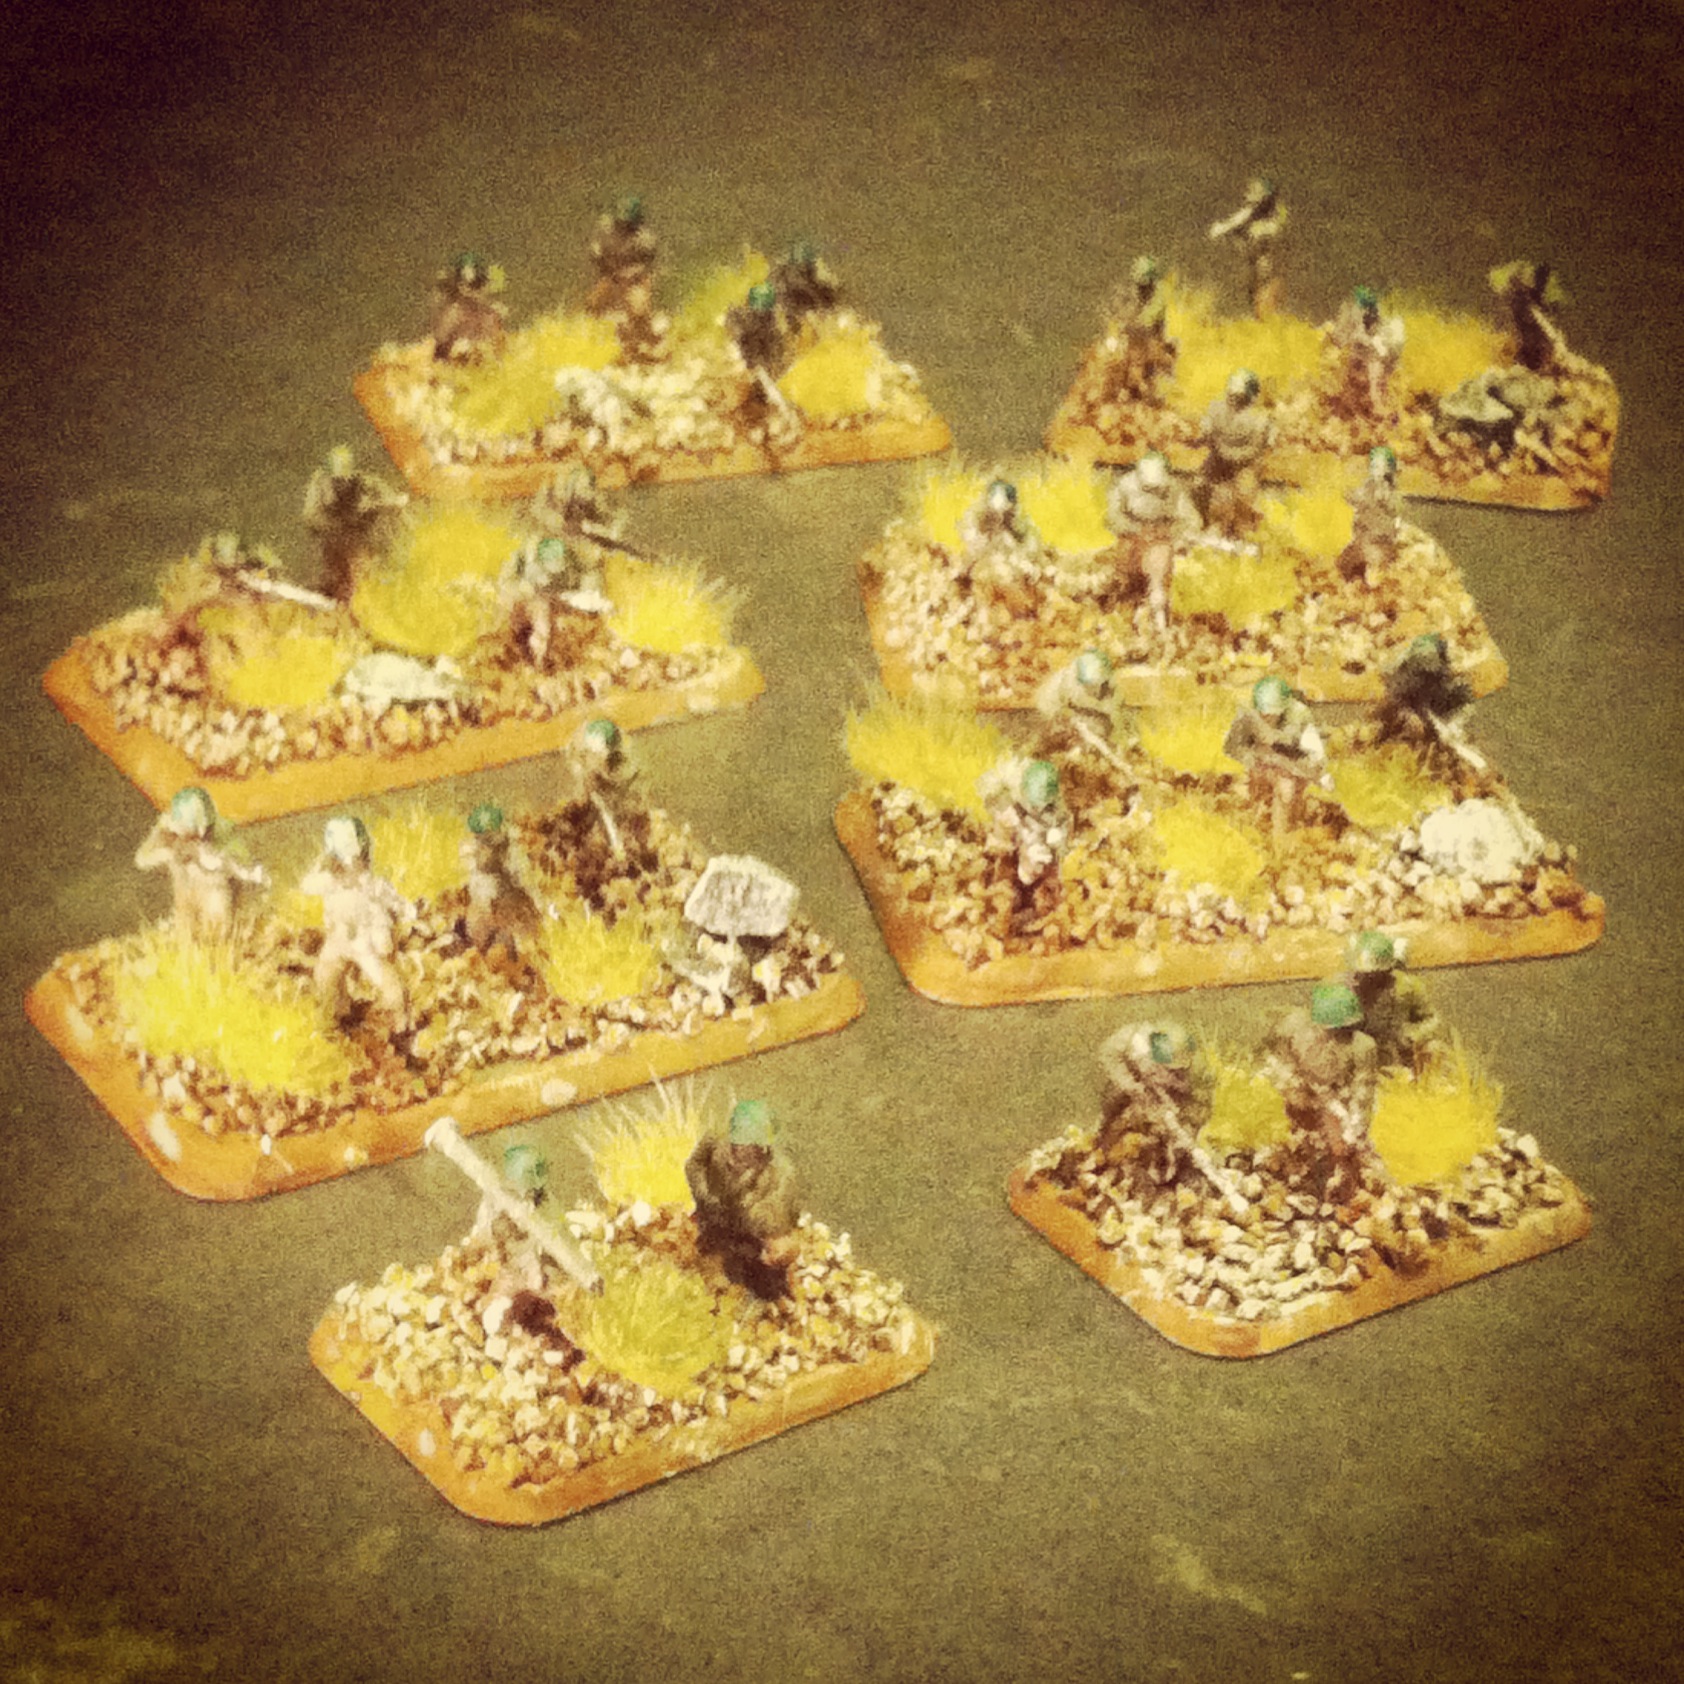
To my initial force, I’ve recently added both 81mm and 4.2 chemical mortar platoons (photos below). I continue to be impressed by the PSC sets both for their sculpting as well as their value. I love the mortar crews holding their ears as the mortars fire and the guys crouching with binoculars. The tiny arms can often be a bit wonky when gluing the figures up, but this also allows some flexibility in poses. I set up one pair of figures in a little vignette of one guy reaching over to console his comrade who has been rattled by all the noise.
Completed 81mm mortar platoon
Detail of 81mm mortar and command
Completed 4.2 chemical mortar platoon
Chemical mortar platoon observer and command stands
Detail of a 4.2 chemical mortar squad
I’m putting my new mortar support platoons to use already in the Infantry Aces Campaign we’ve been running at the club for more than a month now. Although their first outing this past weekend wasn’t very successful, I’ve been studying up on FOW mortar smoke tactics. With strength only in numbers with my relatively inexperienced Confident/Trained riflemen, I’m going to be giving my force another try soon with mortars raining smoke and pinning fire on my German opponents. My hope is the mortars will provide just the support my American infantry need to fight to another tabletop victory.
Although African-Americans have fought in every war in US history, their fight has often come on multiple fronts of prejudice and acceptance at home and abroad. Segregated units such as the famed 54th Massachusetts during the American Civil War and the 369th Infantry Regiment Harlem Hellfighters in World War I have received their due in popular culture in recent years, as have the WWII pilots of the Tuskegee Airmen.
On the ground, African-Americans in WWII were most often relegated to support roles early in the war as truck drivers, stevedores and cooks. By late in the war with reserves of Allied soldiers dwindling throughout the European campaigns, black soldiers were pressed into service at the front lines of the Battle of the Bulge and the Italian Campaign. It was in the actions in Italy where the famed 92nd Infantry Buffalo Soldiers added another chapter to their service history.
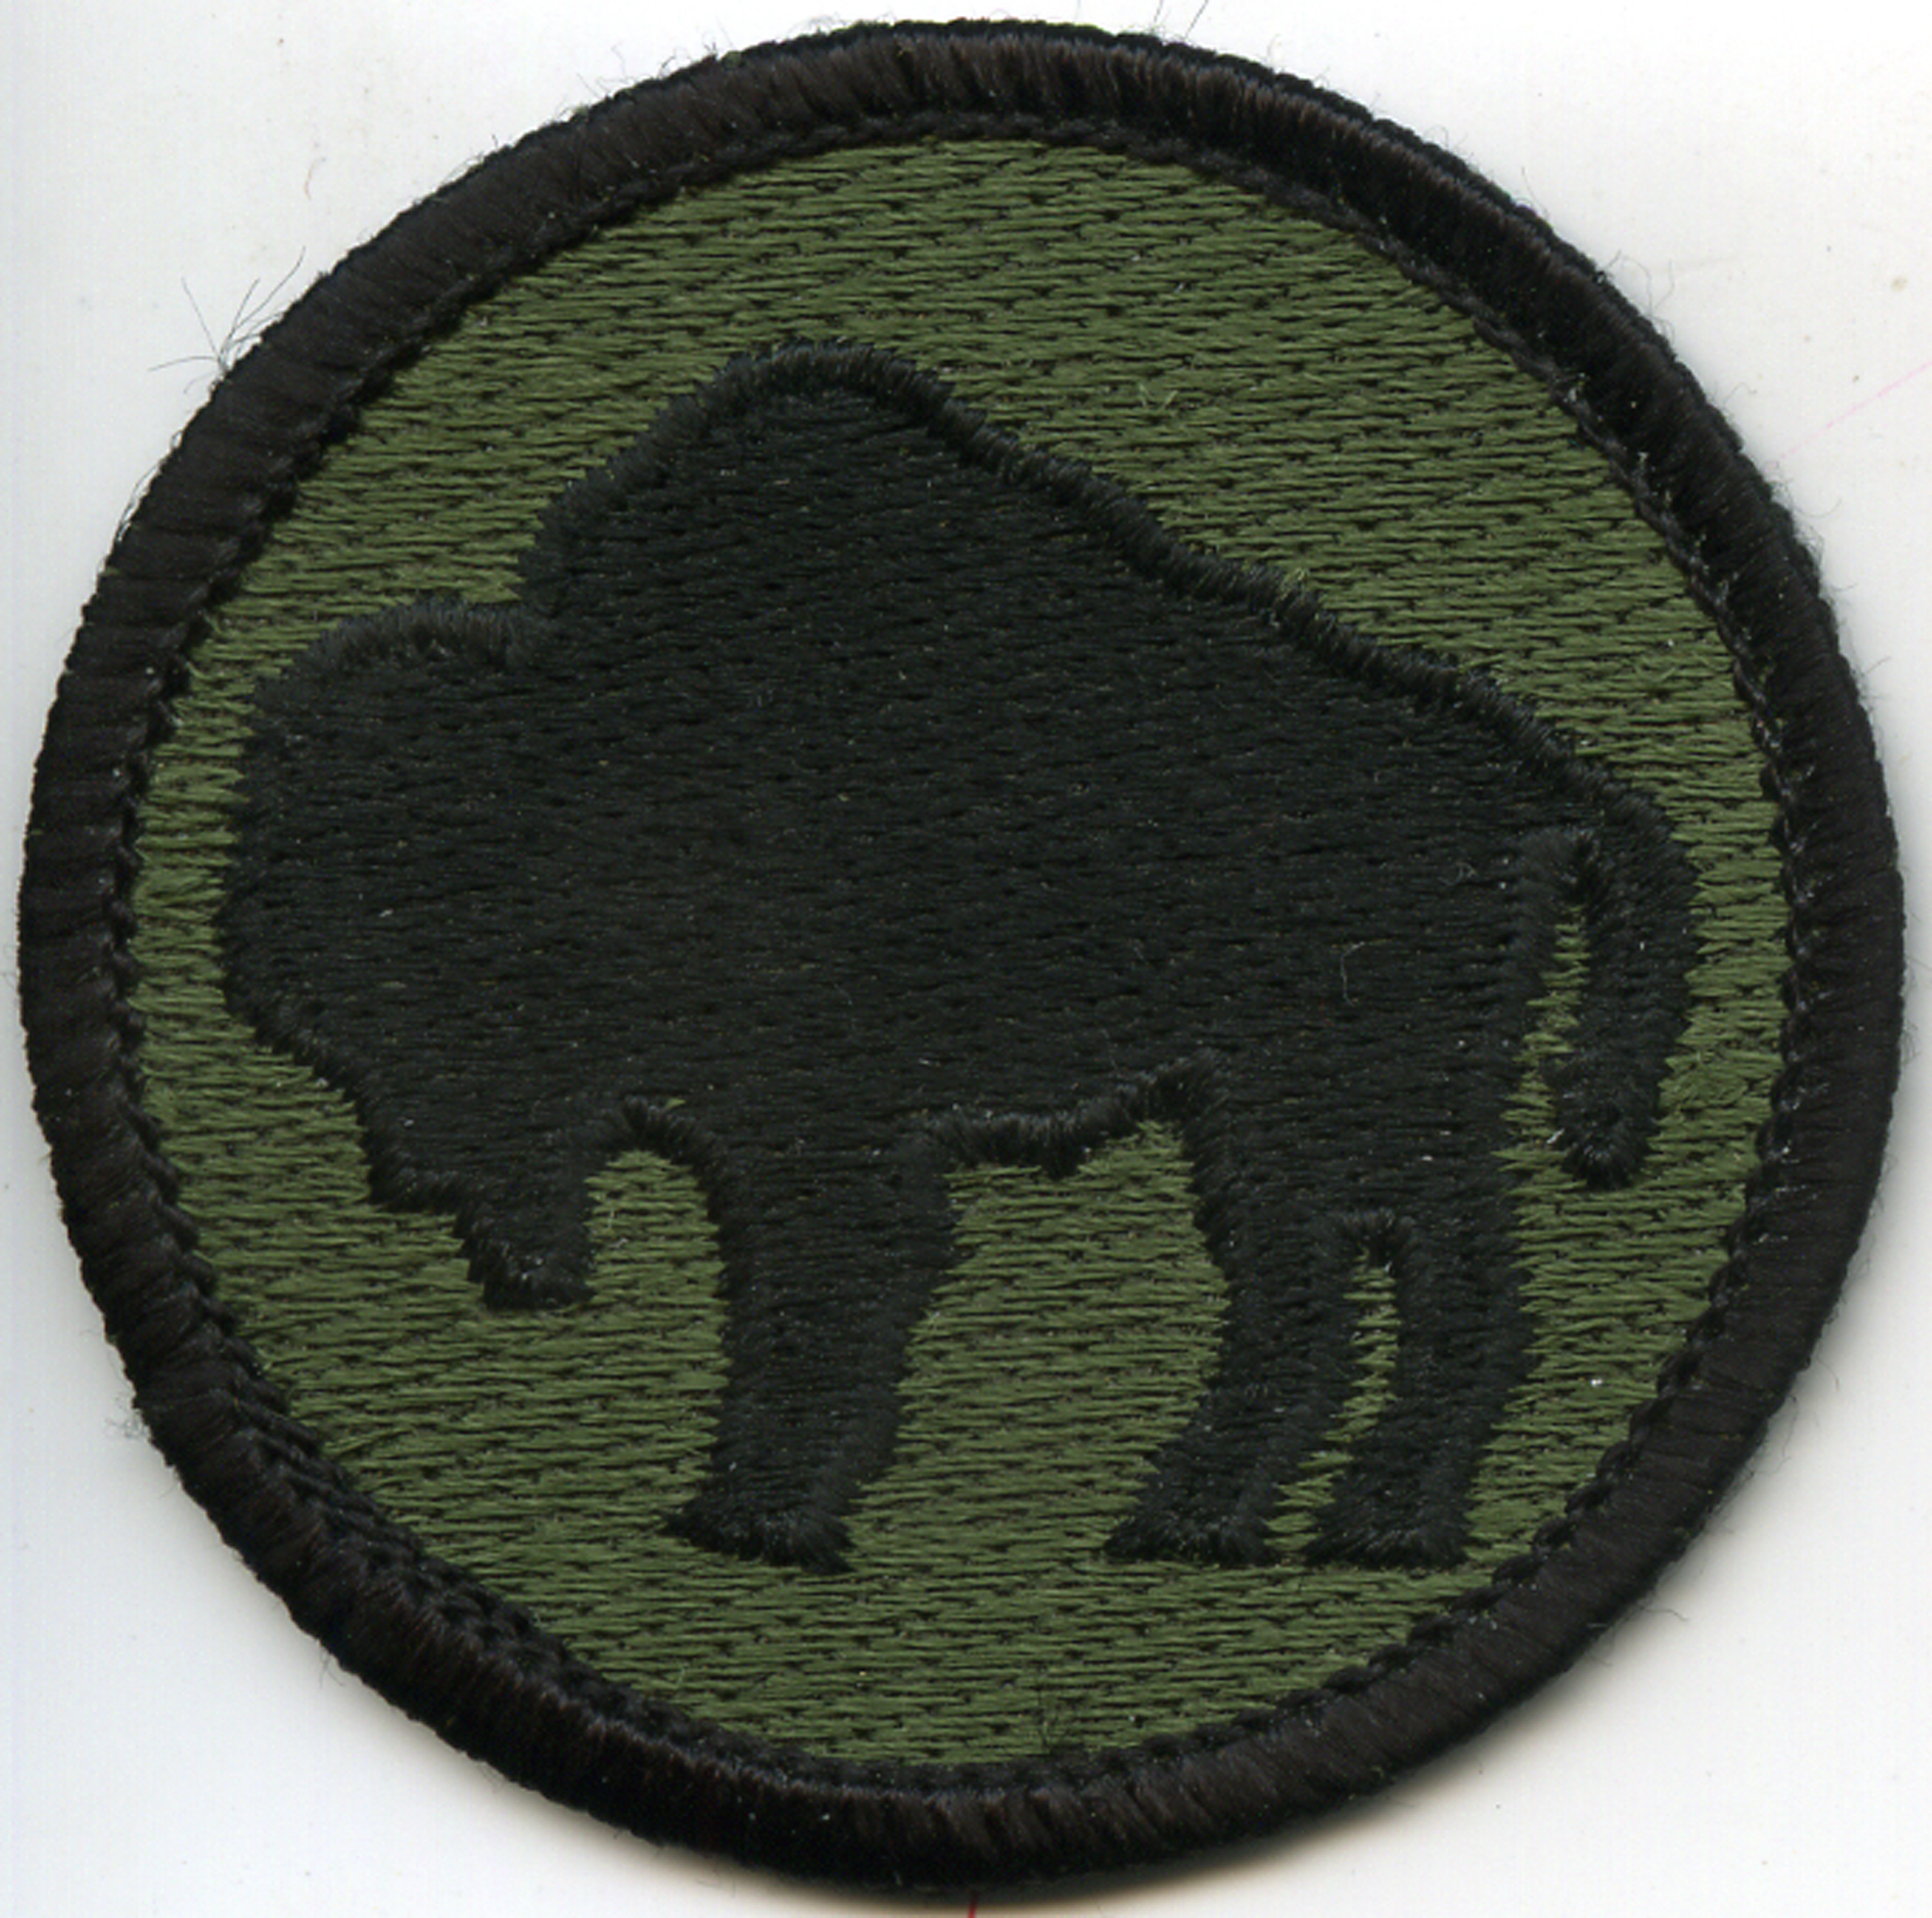
Shoulder insignia of the 92nd Infantry Division ‘Buffalo Soldiers’
The Buffalo Soldiers in the Italian Campaign
The name “Buffalo Soldiers” dates back to the frontier Indian Wars of the 19th-century when post-Civil War free blacks volunteered for service in various US army capacities in the West. Later, these units continued serving in various capacities through the Spanish-American War and into WWI. Reactivated in 1942, the Buffalo Soldiers of the 92nd Infantry Division finally made their way to the war via Italy in the fall of 1944.
Video of the 92nd Infantry arriving in Italy in October 1944
As part of the US 5th Army, the 12,000 men of the 92nd Infantry made up part of the multinational Allied coalition of US, Brazilian, British and UK Commonwealth forces which sought to break the Gothic Line. Cutting across Italy, the Axis hoped to hold off any further Allied progress north to meet with other Allied forces pressing through Europe from Normandy inland toward Berlin.
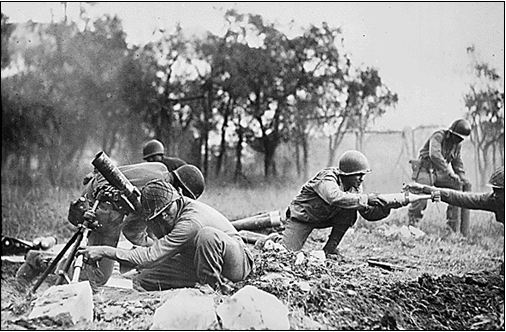
A 92nd Infantry Division mortar crew firing near Massa, Italy
Led by senior white officers in otherwise segregated units, the 92nd Infantry made up a key element of the left flank of the Allied push up through the Italian peninsula. Crossing the Arno River and proceeding north, the 92nd made its way up the Mediterranean coast through Lucca, Massa and on to La Spezia and Genoa by the time of Axis surrender in May 1945.
The legacy of the contributions of the 92nd Infantry Division’s effectiveness in Italy has been much-debated. A paper from the 1950s does what I read to be a good job in explaining the challenges the Buffalo Soldiers faced — delays in reinforcements, shortages in re-supply and a lack of training for the kind of terrain encountered in Italy. I believe much of this can be chalked-up to the ingrained organizational racism against the segregated units. Post-war, the members of the Buffalo Soldiers also returned to a United States still entrenched in racial discrimination. It was not until the late 1990s that two members of the 92nd were recognized with Medal of Honor commendations, some fifty years after the war’s end.
Spike Lee’s Miracle At St. Anna
As a wargamer and film fan, I often turn to the movies to cross-pollinate my interest in a period. Spike Lee’s Miracle At St. Anna from 2008 tells the story of four soldiers from the 92nd Infantry who hide out in a small Tuscan village and bond with its residents amid the oppression and danger of German occupiers. Lee’s movies often run hot and cold, and Miracle at St. Anna met with mixed reviews, poor box office results and a fair amount of criticism over the lack of historical accuracy. All that said, the Italian locations and strong individual performances makes the movie worth a view for a rare glimpse of African-American soldiers in WWII cinema.
Modelling the 92nd Infantry Division for Flames of War
In late February 2014, the revised Flames of WarRoad To Rome and Fortress Italy compilation was released as an updated and expanded guide to the Italy campaign of 1944 and 1945. The Fortress Italy book covers the German and Italian defenders, and Road To Rome outlines the Allied US, British, Polish, French and lesser-known UK Commonwealth forces from Canada, New Zealand, India and South Africa. A third book, Italy Battles, provides special mission rules, battle scenarios and campaign notes for Anzio (aka “Operation Shingle”) and Monte Cassino.
Having dedicated years of my FOW modelling and gaming to Western Europe, these books provided a great opportunity for myself and other members of Metropolitan Wargamers in Brooklyn, NY to dive into a club-wide Italian project. I’ve also been wanting to put together a unique company for my FOW collection, and I was pleased to find the 92nd Infantry Regiment outlined in the Road To Rome book. With all our focus on the Italy theater, we’ve decided to dive headlong into a multi-month FOW Infantry Aces campaign, and there will be more to come with updates on our new Infantry Aces blog.
For my 92nd Infantry I decided to snap up the two sets from the Plastic Soldier Company – Late War US Infantry 1944-45 and US Infantry Heavy Weapons. At about $26 a box from my favorite online dealer The Warstore, the PSC kits are a huge value in fielding an entire infantry company along with bazooka, machine gun and mortar supporting weapons. Assembly involves lots of small parts and bases must be purchased separately, but getting a whole company on the table for a fraction of the costs of FOW models can’t be beaten.
Pvt. Fred “Radio” Rogers and Lt. Daniel McFeeley
To fill out my force, I picked of the FOW Infantry Aces set for about $12. The pack gives you nine stands of character models to create special Infantry Ace command stands for use in the Infantry Aces campaign. The blister pack includes general US, British and German models with special Fallschirmjäger, Japanese-American Nisei, Kiwi and turbaned Indian characters. I shared the models with my fellow players at our club, and modelling these guys really adds some nice personality to the game. For my Command Ace stand, I’ve modeled the fictional Pvt. Fred “Radio” Rogers and Lt. Daniel McFeeley leading the way for my company.
One of my three rifle platoons for the 92nd Infantry Division
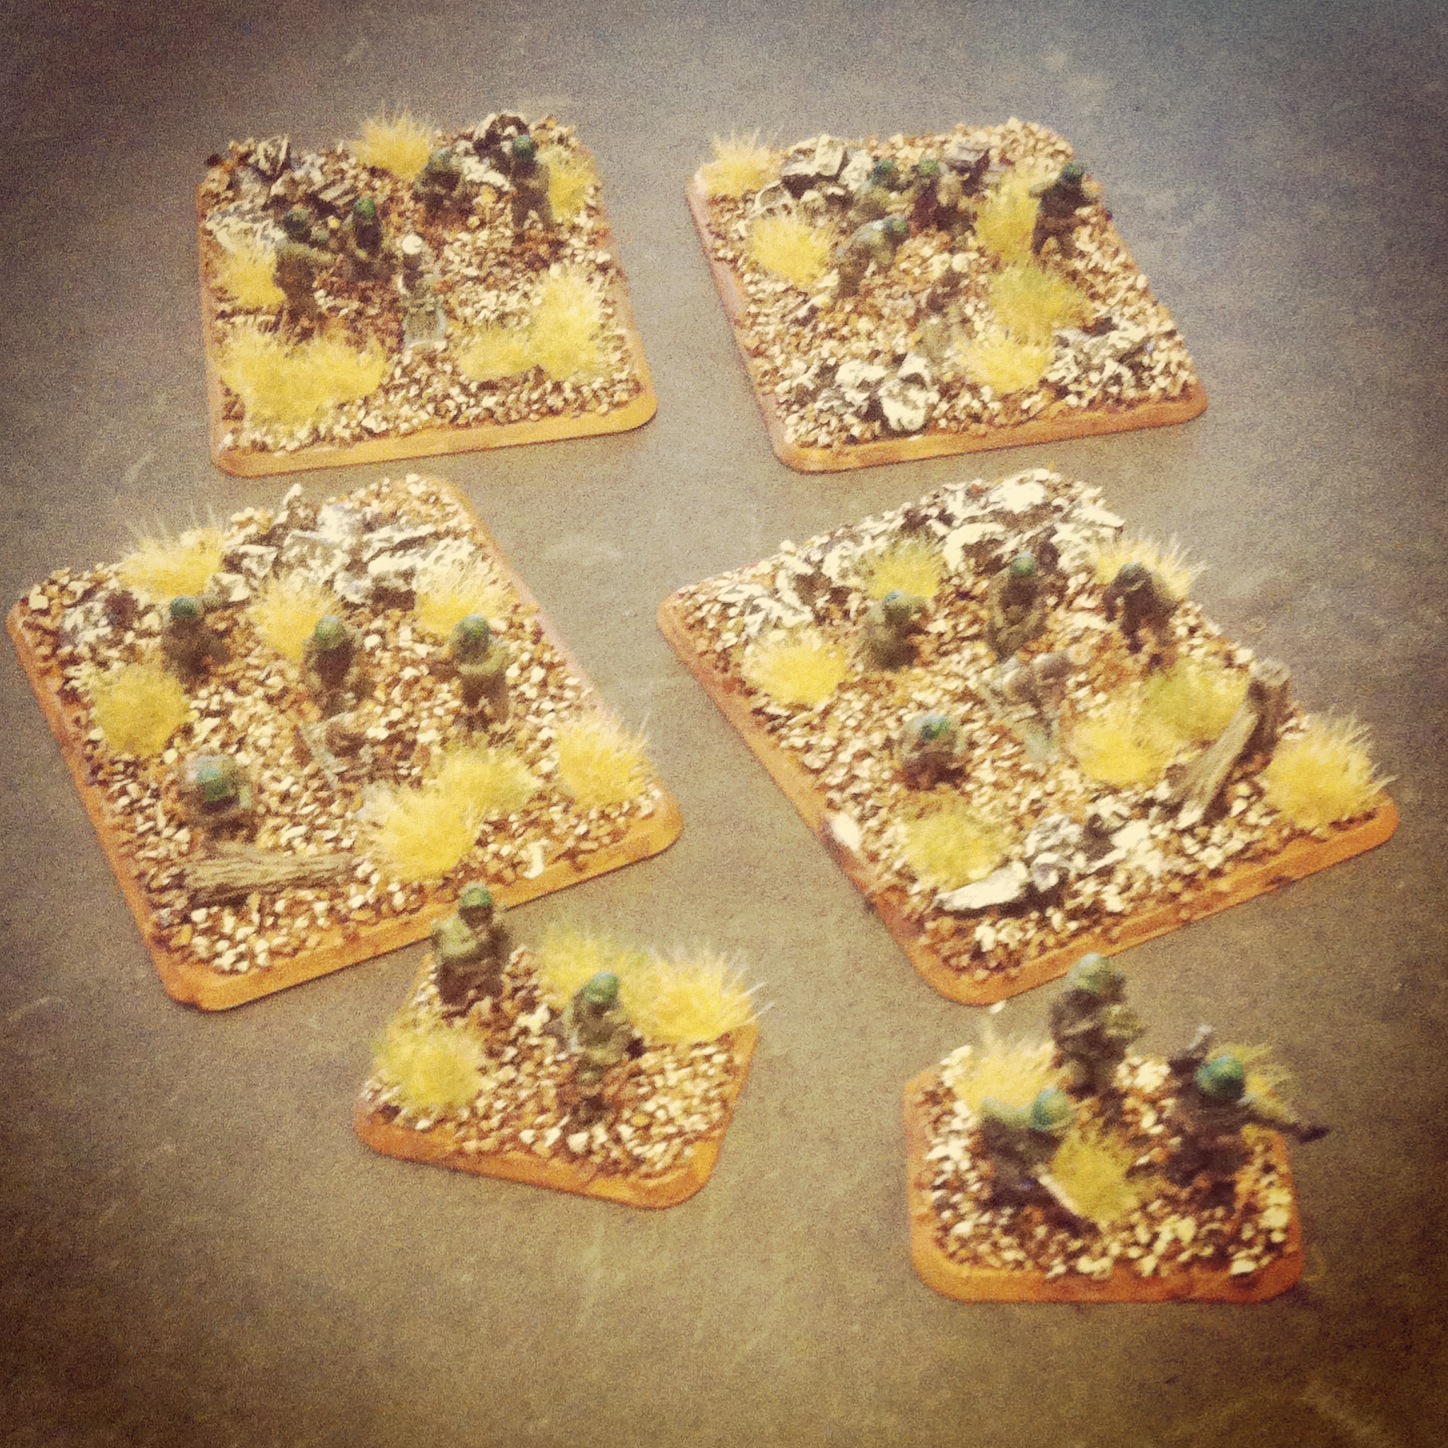
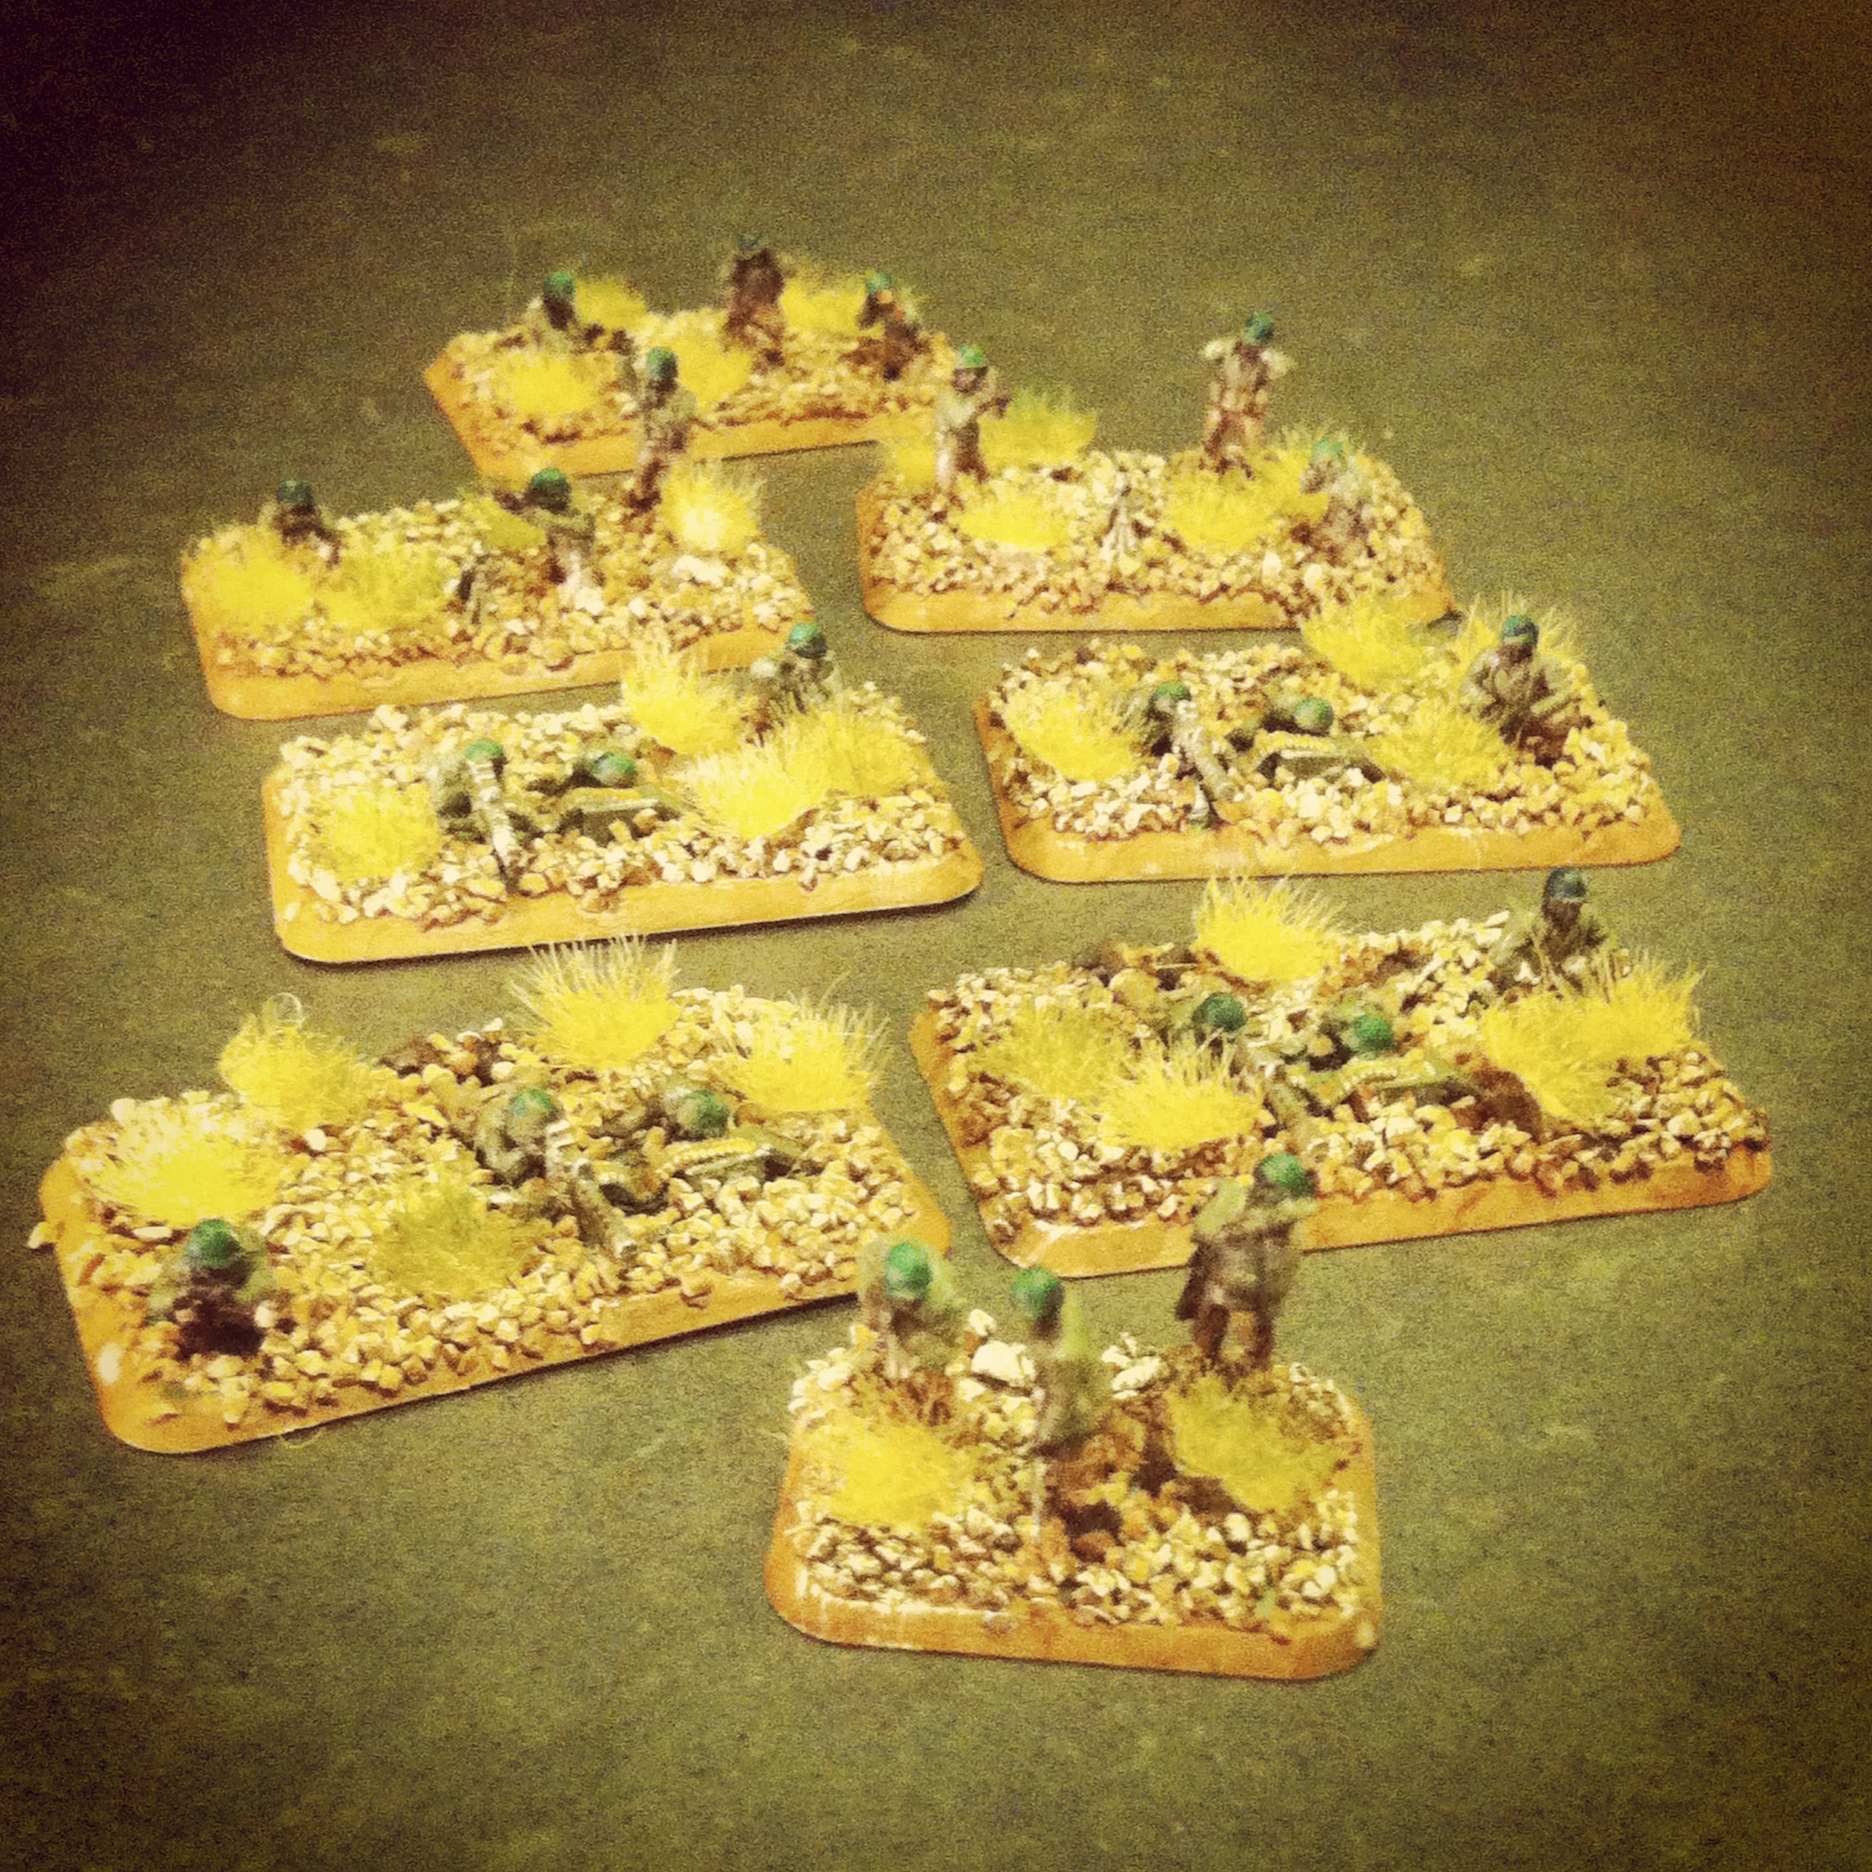
In the FOW Italy campaign, the 92nd Infantry Division is rated as Confident-Trained making my force cheap and numerous. To start, I’ve constructed three rifle platoons with two rifle squads each plus a platoon command and bazooka in support. Along with my rifles and McFeeley and Rogers leading the way, I’m also bringing a weapons platoon in support. The platoon packs a punch with three 60mm mortars and four M1919 machine gun crews.
My Buffalo Soldiers mortar and machine gun weapons platoon
For all my models, I glued the PSC soldiers and equipment onto FOW bases and then hit them with an army green spray coat base. Boots, equipment, rifle stocks and flesh got a dark brown. Pants were done in a tan paint and leggings got a brownish off-white color. Guns were finished off in a metal coat. Basing involved a layer of fine gravel and larger rocks coated in a brown wash and then dry-brushed in a grey-white. Finally, tufts of brown-green grass completed the Mediterranean look of the models.
The beginnings of my platoon will be hitting the tabletop shores of Italy this coming weekend in their first round of our club’s Infantry Aces campaign. In the coming weeks I’ll be adding additional infantry weapons support with additional mortars, machine guns and more infantry. Even before these guys see their first action, I’m pretty thrilled to have put in the time to create some pretty unique models that I haven’t found modeled anywhere else at this scale. As in WWII years ago, I think the 92nd Infantry Buffalo Soldiers have been too often forgotten by mainstream history and many gamers alike. With my soldiers hitting the field again, I hope to bring a bit more glory back to these men who not only contributed to the fight against Axis fascism but also stood bravely against the tide of so much history against them.
The Blitzkreigof German armored forces is one of the more enduring tactics introduced in World War II. Swarmed masses of German tanks and mechanized forces in the early war period rolled through Poland, France, Belgium and the Netherlands in Western Europe and punched into the Soviet Union with Operation Barbarossa in 1941. With early Panzer and later Panther and Tiger tanks ruling the battlefields of Europe, Allied forces struggled for solutions to crack the German tide of iron.
A US M10 tank destroyer comes ashore in Normandy after D-Day in 1944
By mid-war, the Americans had a solution with the M10 tank destroyer. Introduced first into the battlefields of North Africa in 1943, the M10 GMC (“gun motor carriage”) carried a big 3-inch/76mm gun and on a Sherman hull. After success in Africa against earlier model German tanks, M10s became part of the post-D-Day Allied breakthrough campaign. While effective against Panzer III and IV tanks, more heavily-armored Panther and Tiger tanks still proved problematic. Luckily, the M10 was supplemented by the British-modified Sherman 76mm Firefly and the later US-built M18 Hellcat which was quicker on the field. The combination of these three tank destroyers, along with the stalwart work of Allied infantry and deadly air support, turned the tide in Europe.
One of my earliest 15mm WWII purchases years ago, and somewhat at random, was the now-discontinued M10 Tank Destroyer Platoon set from Flames of War. I think at the time, I just liked the look of the models and I was looking to fill-out my new US forces with more variety. To get to a full platoon of four M10s, a fellow club member at Metropolitan Wargamers in Brooklyn, NY recently gave my two more M10s to which I’ve added an additional M20 scout car.
New M10 tank destroyer and M20 scout car
New M10 tank destroyer
New M20 scout car
US tank destroyer platoon with new models (left) and older models (right)
With my existing and new section sections, I now can field a full tank destroyer platoon using a variety of Allied Late War European lists. Anti-tank tactics in the game provide multiple opportunities for the M10 platoon to be used in combination with infantry and other Allied armor on the game table. With optional deployment as a recon platoon using the M20 scout cars, the M10s can create ambushes to wreak havoc on German tanks. Admittedly, using this full platoon will take some practice but I’m certain they’ll be causing headaches for my German opponents in the very near future.
By the time of the Normandy Invasion in June 1944, the British 7th Armoured Division had already seen plenty of war. The division first distinguished itself early in the war in the dusty North African campaign, going brutally head-to-head with General Erwin Rommel’s tough Afrika Korps and earning the nickname “Desert Rats.” In the mid-war invasion of Italy, the division adapted to the southern terrain of Salerno and Naples and helped in securing the Allied push northward.
A British Cromwell in WWII Europe
Sherman Firefly on a street during WWII
Back in the UK following its successes in Africa and Italy, the 7th Armoured rested and retrofitted with new Cromwell and Sherman Firefly tanks in preparation as a follow-on force in the D-Day landings in mid-1944. Over the next six months, the division’s 75mm-armed Cromwells and 17-pound-gunned Fireflies were present during Operation Perch, Operation Goodwood, the Battle of Villers-Bocage, Operation Spring, Operation Bluecoat, Operation Cobra and the final pushes into the Low Countries and Germany. By the war’s end, the battle-weary Desert Rats had cemented themselves as one of the most celebrated divisions in World War II.
After being introduced to British Armoured forces with the excellent plastic Sherman and Firefly models included in Flames of War Open Fire! box set, I’ve recently swung some significant focus on building-out a decent amount of UK late-war forces. Modelling the storied 7th Armoured Division seemed like a logical next step in bringing the UK to my Allied forces on the table.
Through some serendipity, I happened to score a couple of half-price box sets of the FOW Cromwell Armoured Platoon from a fellow club member at Metropolitan Wargamers in Brooklyn, NY. Between the two boxes, I’ve been able to assemble a company command of two Cromwells plus two platoons of three Cromwells and one Firefly each. The models feature individually-cast resin tanks, each with their own detail of stowage and ragged camouflage, along with cast metal treads, gun barrels, crew and other details. Compared to curvaceous US Sherman tanks, I also really enjoy the flatter hull profile and boxy riveted turrets on the Cromwells. Although pricier than alternatives from makes like Plastic Soldier Company and Command Decision from Old Glory Miniatures, official FOW models are generally hard to beat for their heft and historical accuracy.
Primer and base coat on treads and stowage
After assembly, my models were hit with a green armor base coat. Tank treads start with a black coat followed a slight wash of metal. Tools, stowage, ropes and the other stuff on the tanks all get a mix of built-up layers of browns, greens and metallic colors. I especially liked the tiny tennis rackets strapped to a couple of the tanks, a nod to the British gentlemen who came to Europe not only equipped for war but for hopeful yet unlikely leisure pursuits. These details really create a lot of depth, interest and personality among the tanks which can otherwise get very visually redundant en masse on the table. Finally, the exposed crews get a a bit of brown-drab uniform color and some flesh tones to finish off those brave Brits.
Decals being applied (grrrrrr….)
I do have to say, the red-and-white Desert Rats vehicle marking has a really big cool factor for me. The FOW kits conveniently come with appropriate decals for the 7th Armoured Division, making finishing off the tanks one step easier than with competitor model-makers that don’t generally supply decals with their models. That said, I find the FOW decals to be incredibly finicky and fragile, and I found myself re-applying several to get them on just right. Once the decals are dry, all the tanks got splashed with mud here and there with some earthy dry-brushing.
Cromwell command section
One platoon of three Cromwells and one Sherman Firefly
Cromwell close-up
Sherman Firefly close-up
In terms of gameplay, I can’t wait for the 7th Armoured Division to go up against some Germans. The combined one-two punch of the faster-moving Cromwells and the hefty-gunned Fireflies should reinvigorate my games away from the sameness I’ve had in just playing with my large group of US Shermans for a couple years. Already, I want more of these platoons to really get the division bulked-out. I’m thinking a follow-up with Cromwells and Fireflies from the Plastic Soldier Company will supplement the finished FOW models nicely. Until then, the 7thArmoured are ready to roll and there’ll be more to report soon on my post-D-Day British force project.
The Desert Rats ready for action in France and beyond…


 GHQ M7 Priests
 GHQ M2 Mortars
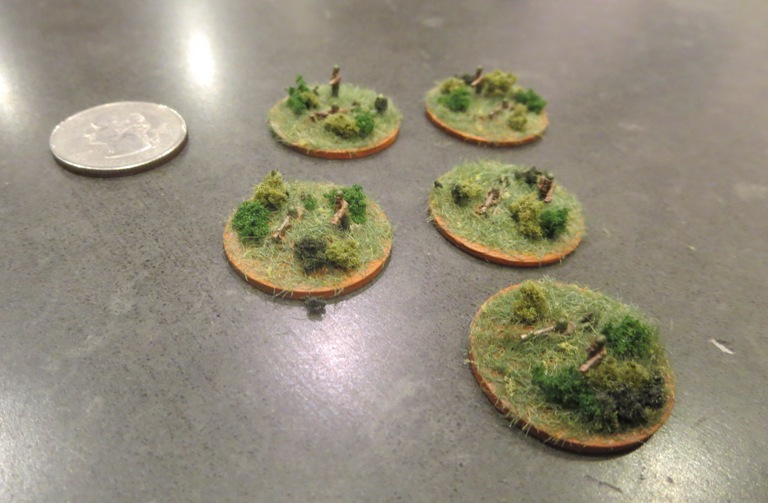 GHQ M1919 Machine Guns


 Operation Husky