I Ain’t Been Shot Mum: Panzer Lehr Counterattack Campaign – ‘Morning of the 902nd’ July 11, 1944 Scenario

OLYMPUS DIGITAL CAMERA

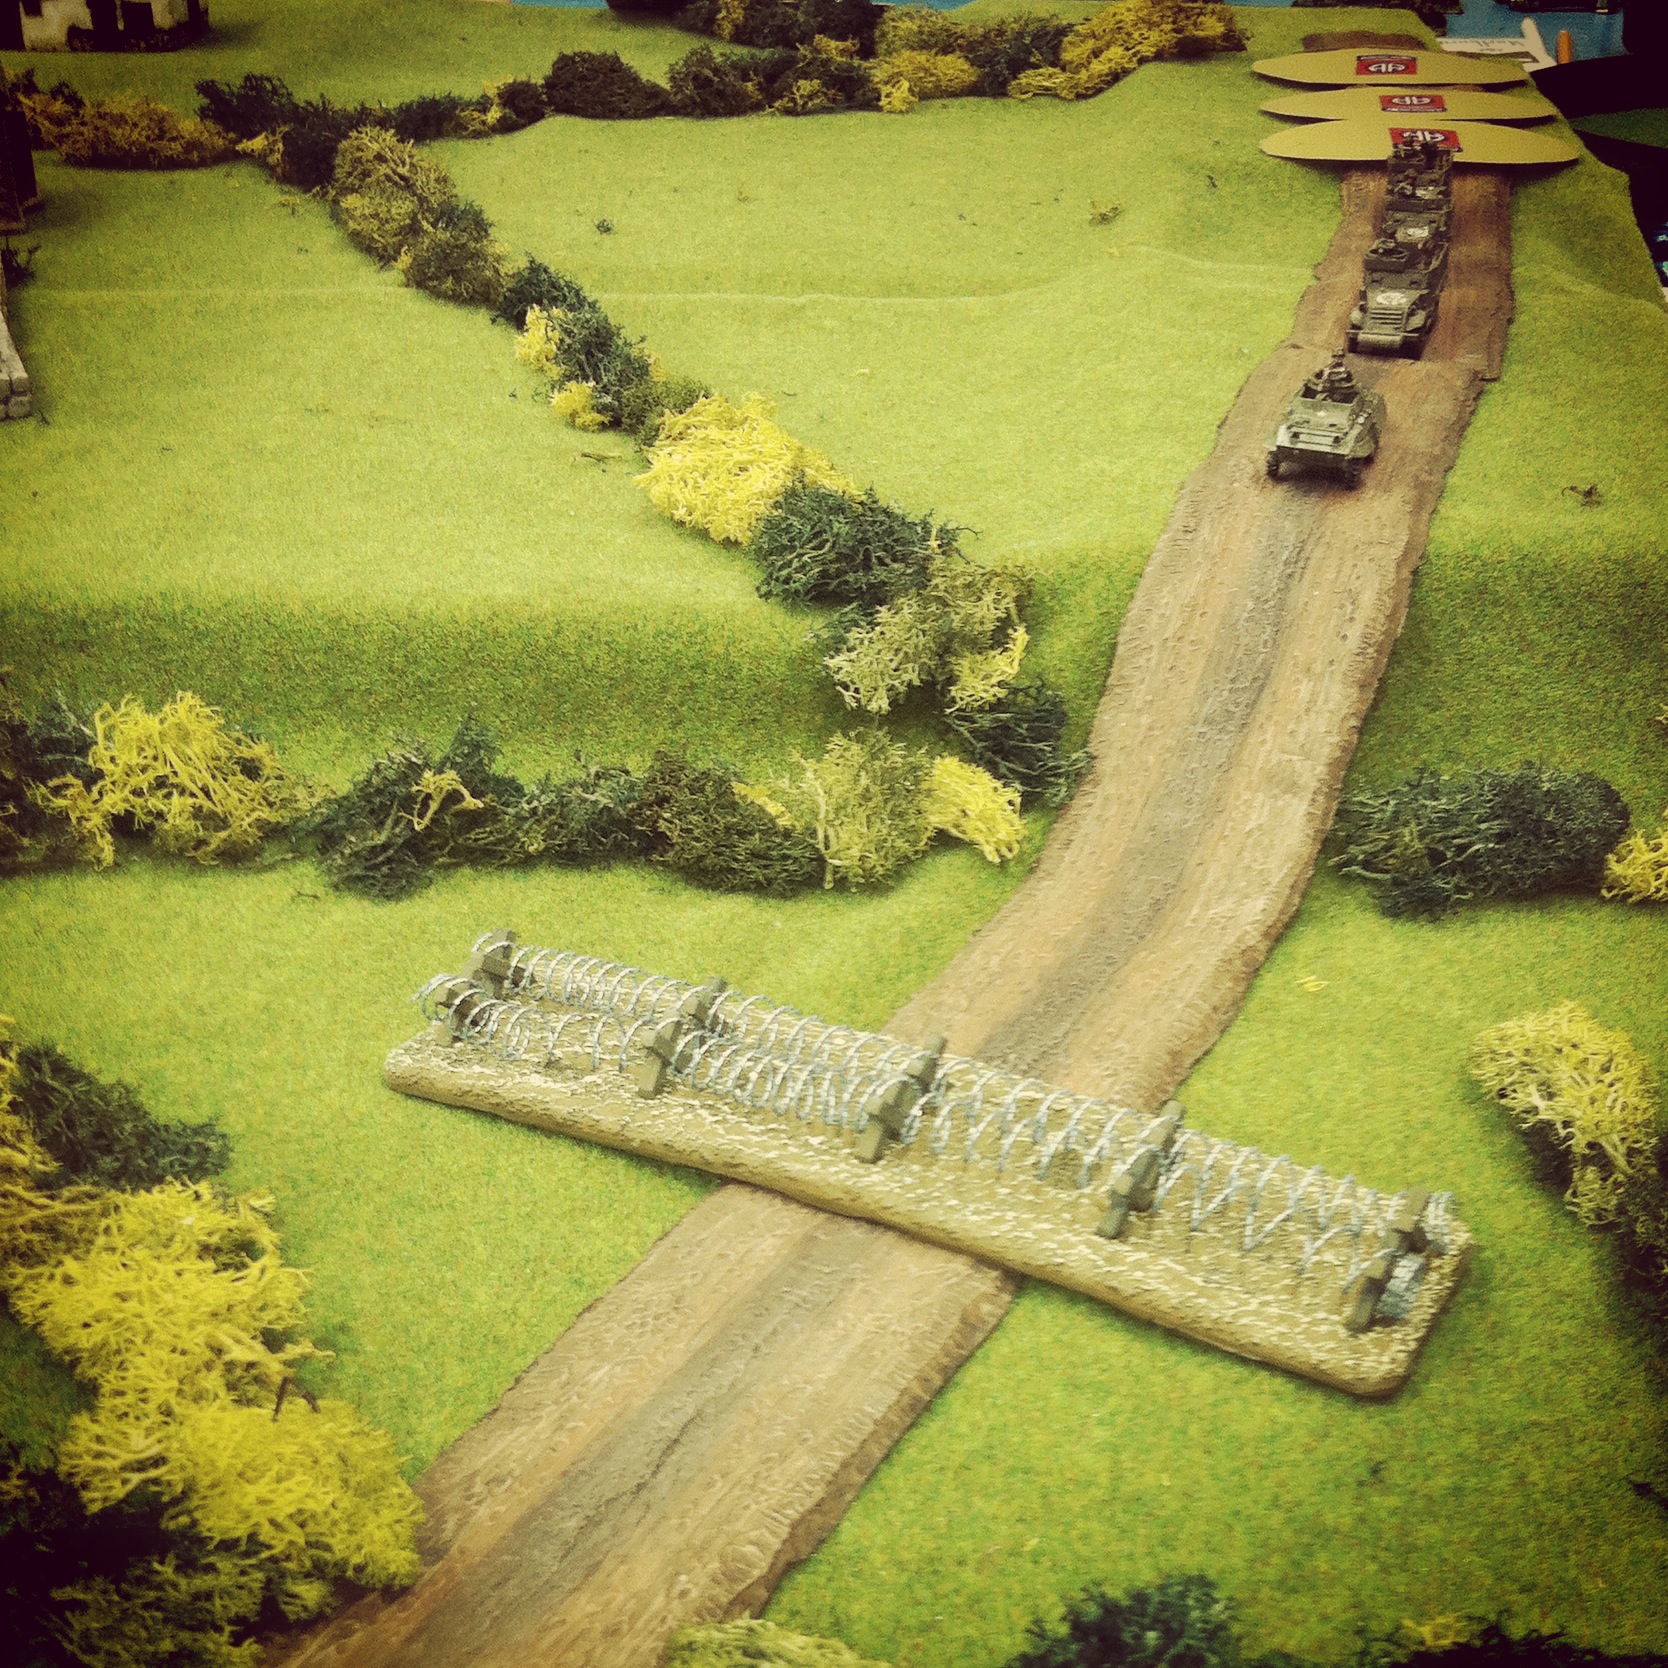
The battle near Hauts-Vents was a two-day affair between the US infantry and armored forces and German Panzer Lehr Division. After a day of intense combat on July 10, 1944, US forces were warned of local movements of the 902 Panzer Grenadier Regiment toward Hauts-Vents. With a German counterattack expected in the early morning hours of the next day, American infantry and armor prepared for a defensive fight under the cover of darkness and foggy, damp weather among the dense bocage hedgerows and under cover of the strong French buildings.

HVJuly44Map
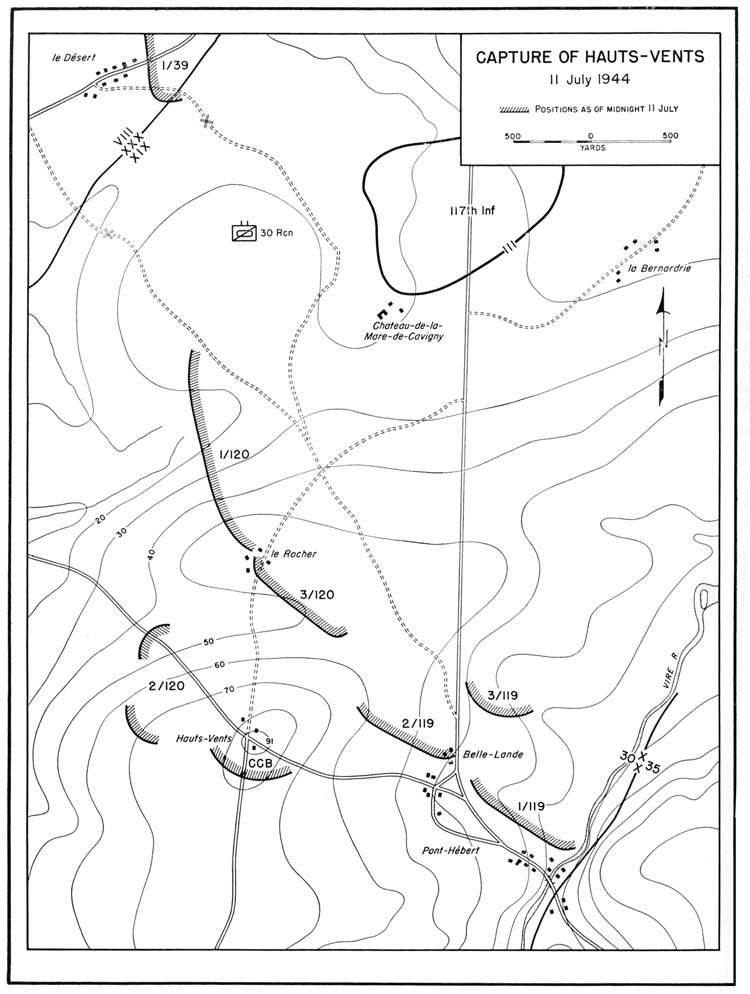
Map of the battle at Hauts-Vents, July 11, 1944

(via US Army Center of Military History)

After a first game loss at Hauts-Vents by the Germans, we continued our campaign at Metropolitan Wargamers in Brooklyn, NY this past week. The second game from the “Panzer Lehr Counterattack” mini campaign from the Heroes of Omaha and Panzer Lehr scenario book from Skirmish Campaigns is called ‘Morning of the 902nd.’ The game uses the same terrain set-up as the first scenario, but this time focuses on the German attempt to recapture Hauts-Vents on July 11 after losing key objectives to the Americans the day before. The game begins under pre-dawn darkness over wet ground with US platoons in hidden positions at the north end of the table and the Germans advancing under blinds from the hill position to the south. The Germans must retake the field by capturing two of the three objective buildings at the center town.

IMG_4251
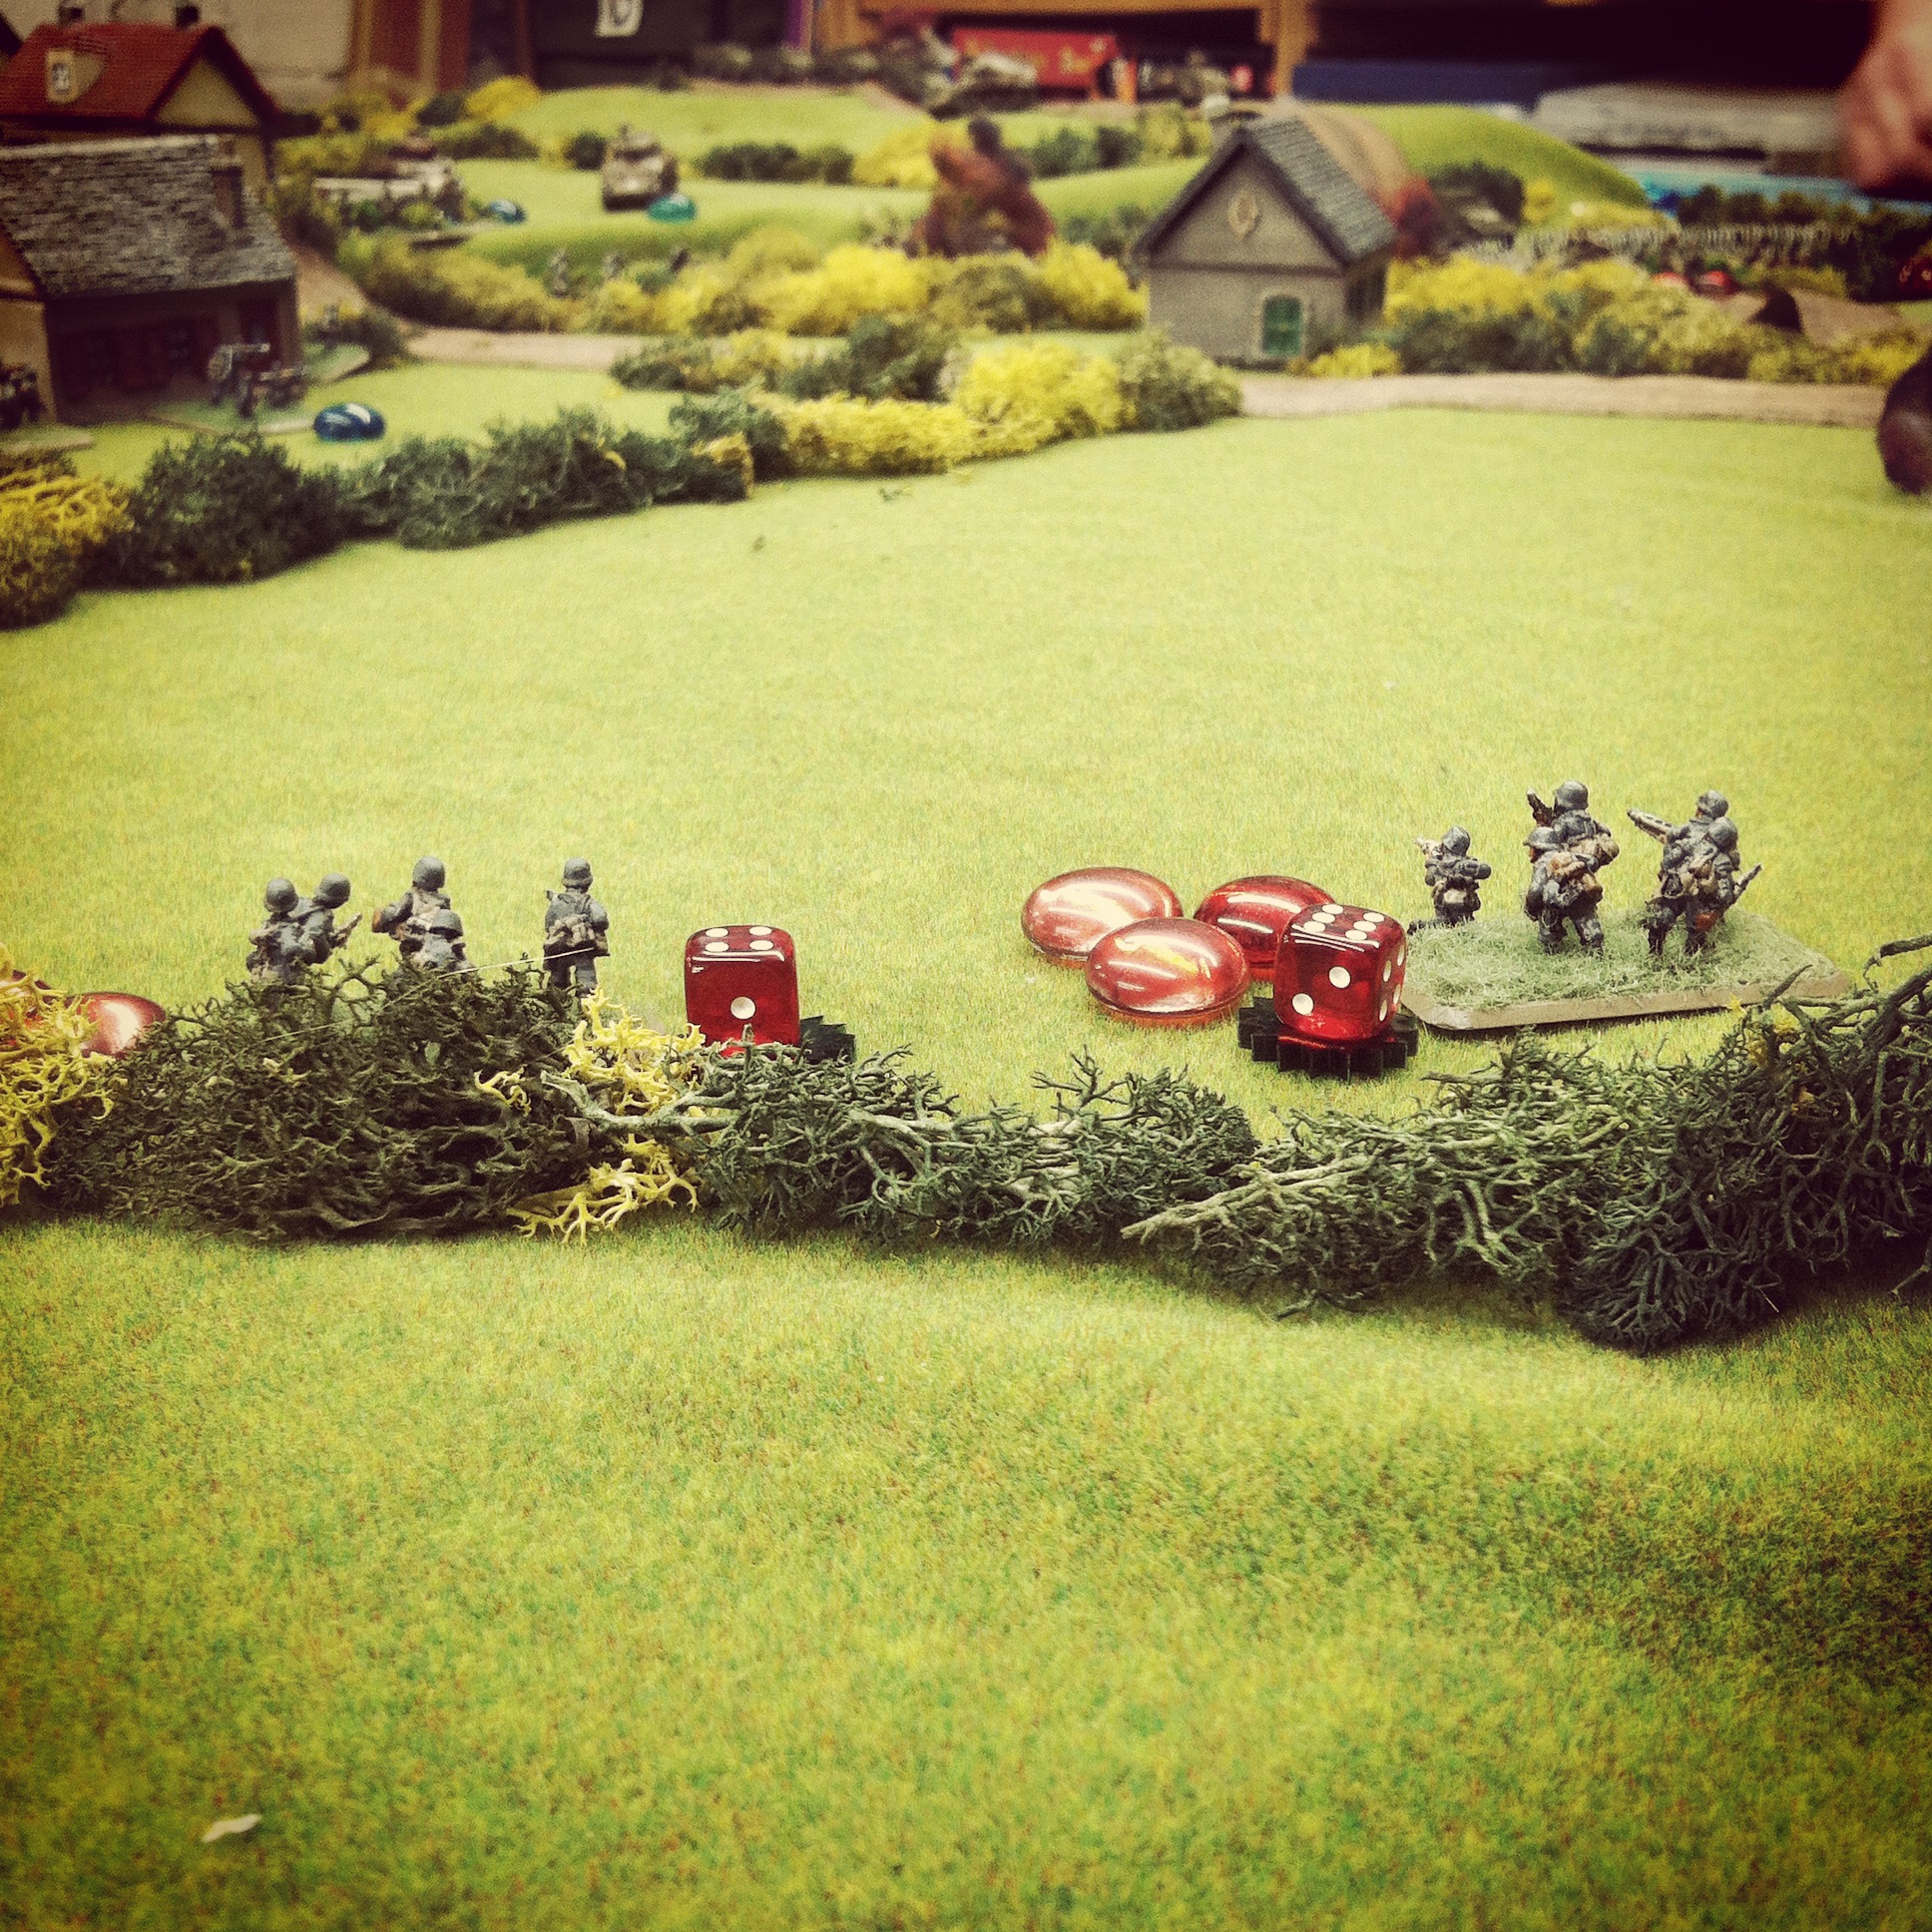
Germans deploy on blinds looking to take back the town

IMG_4253Germans blinds rush forward and immediately hit a minefield

IMG_4254A German platoon encounters a minefield and takes heavy casualties

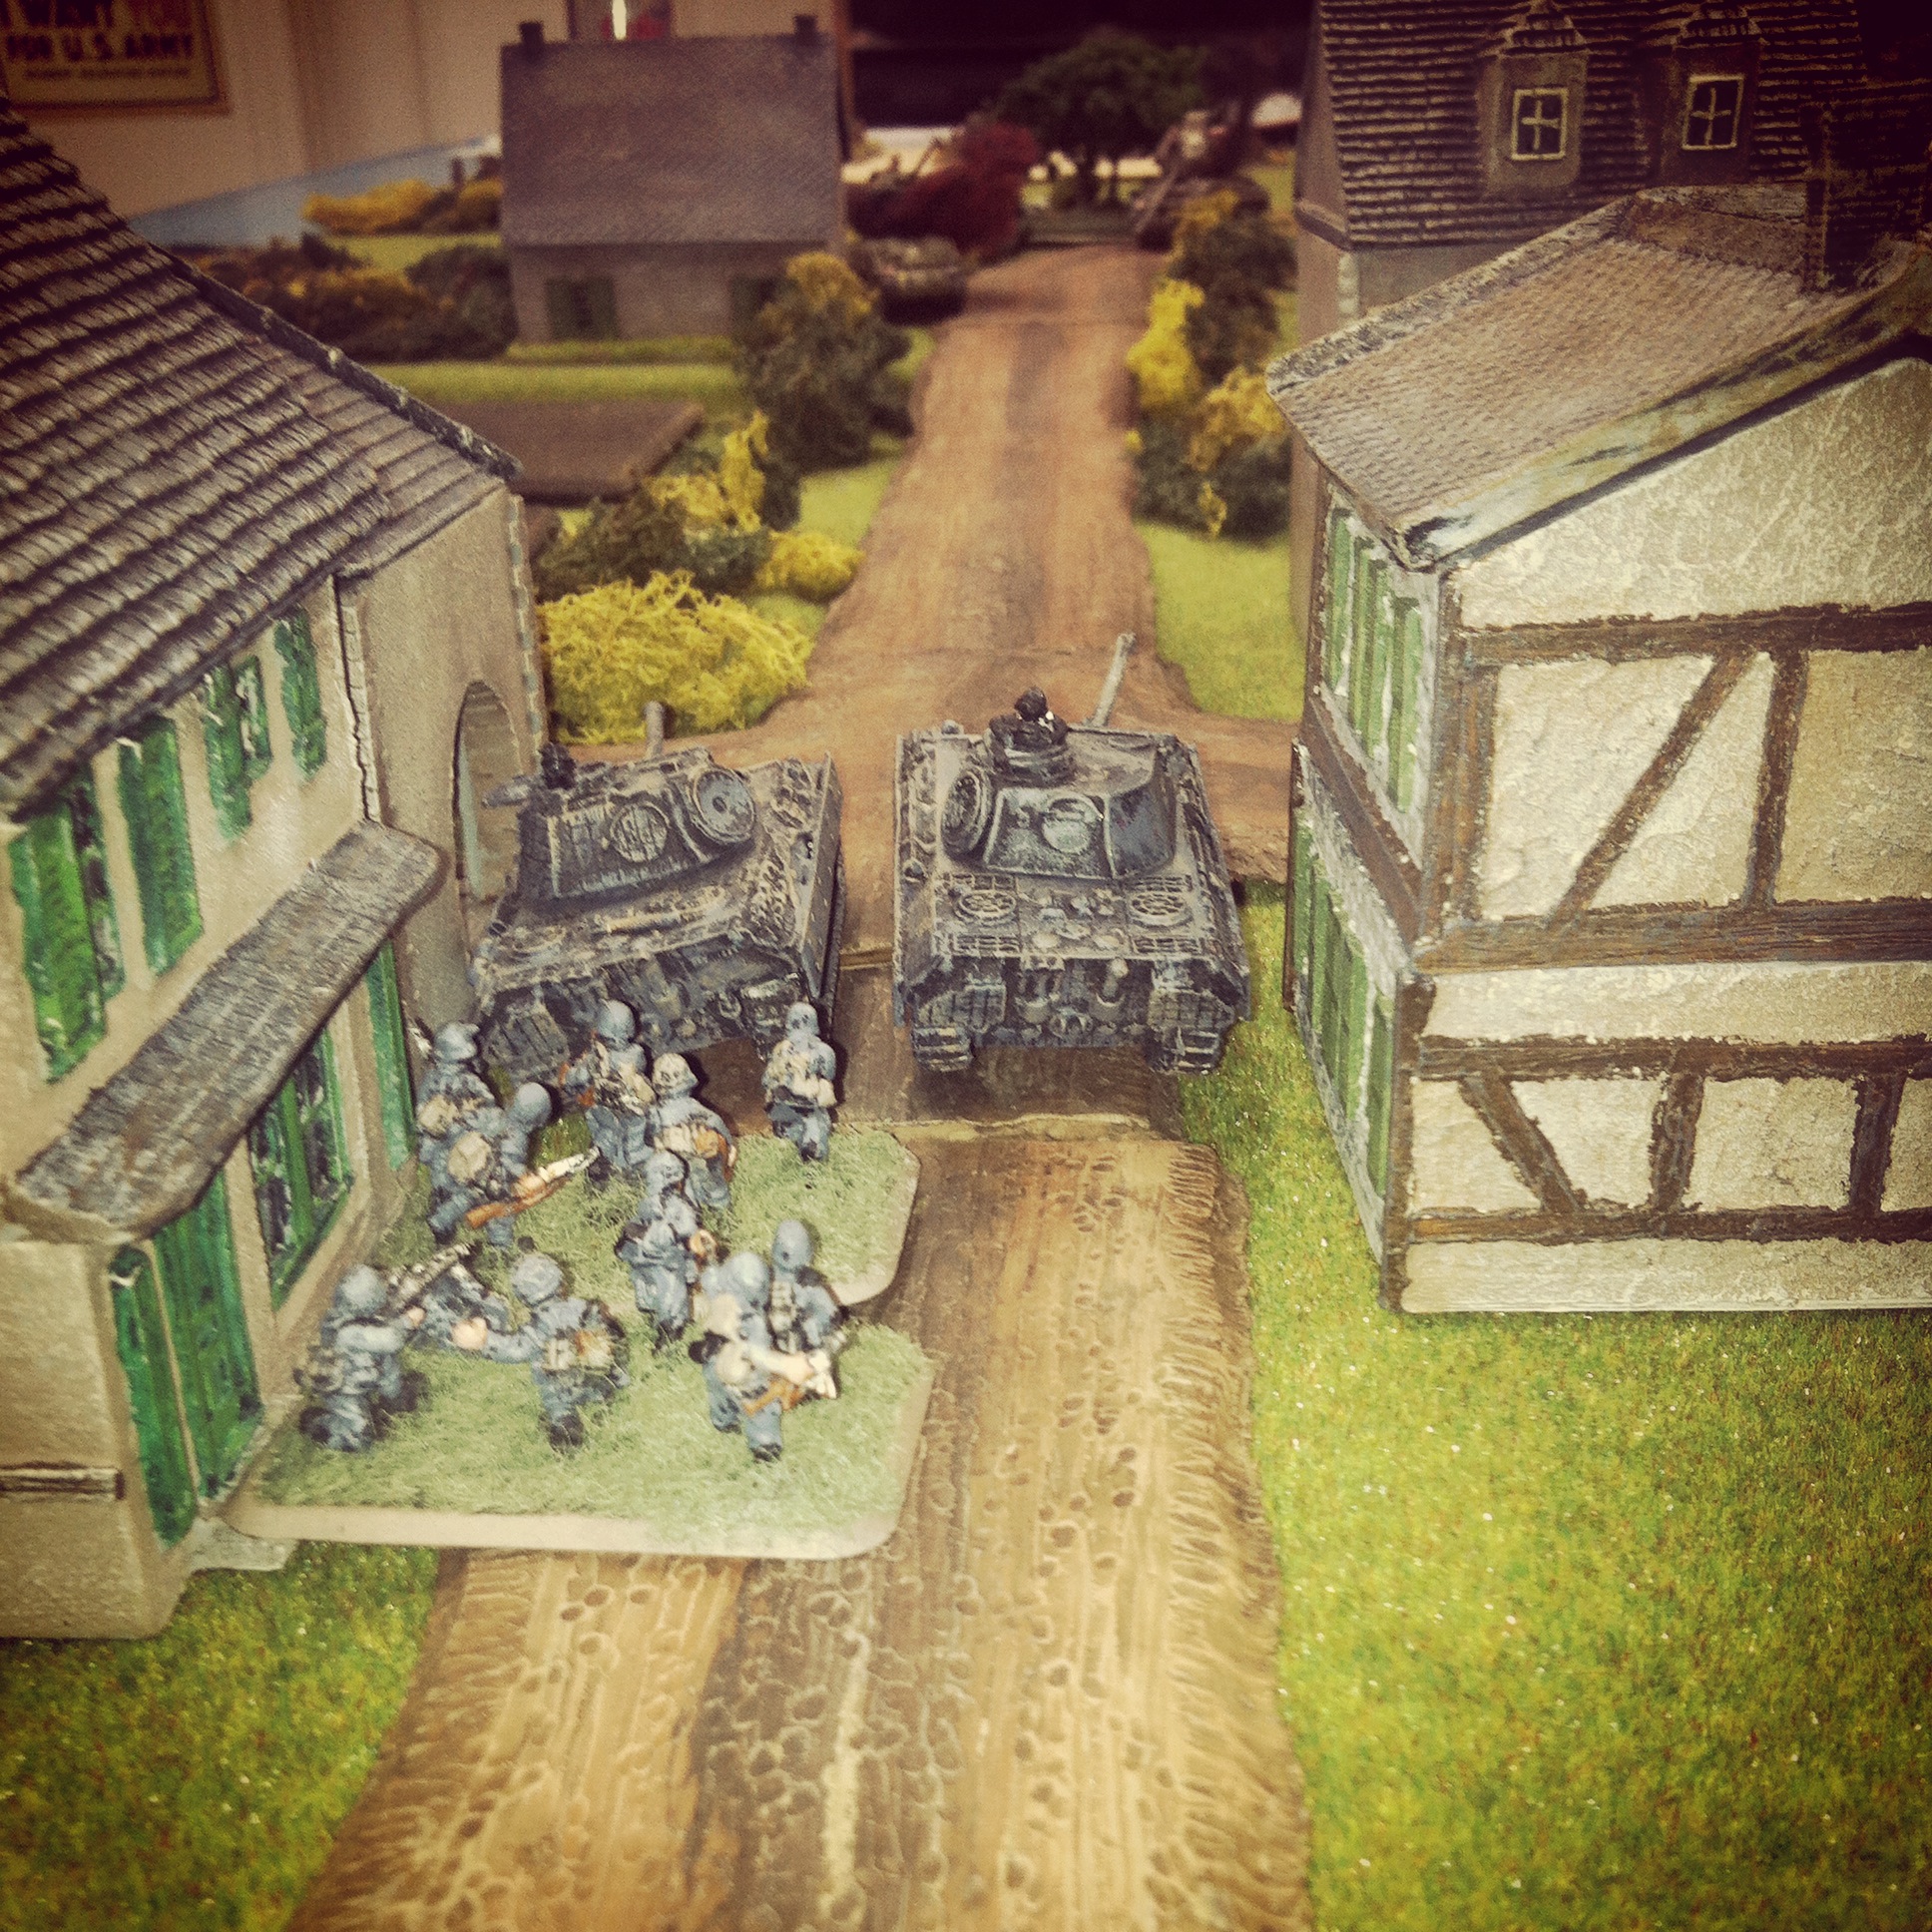
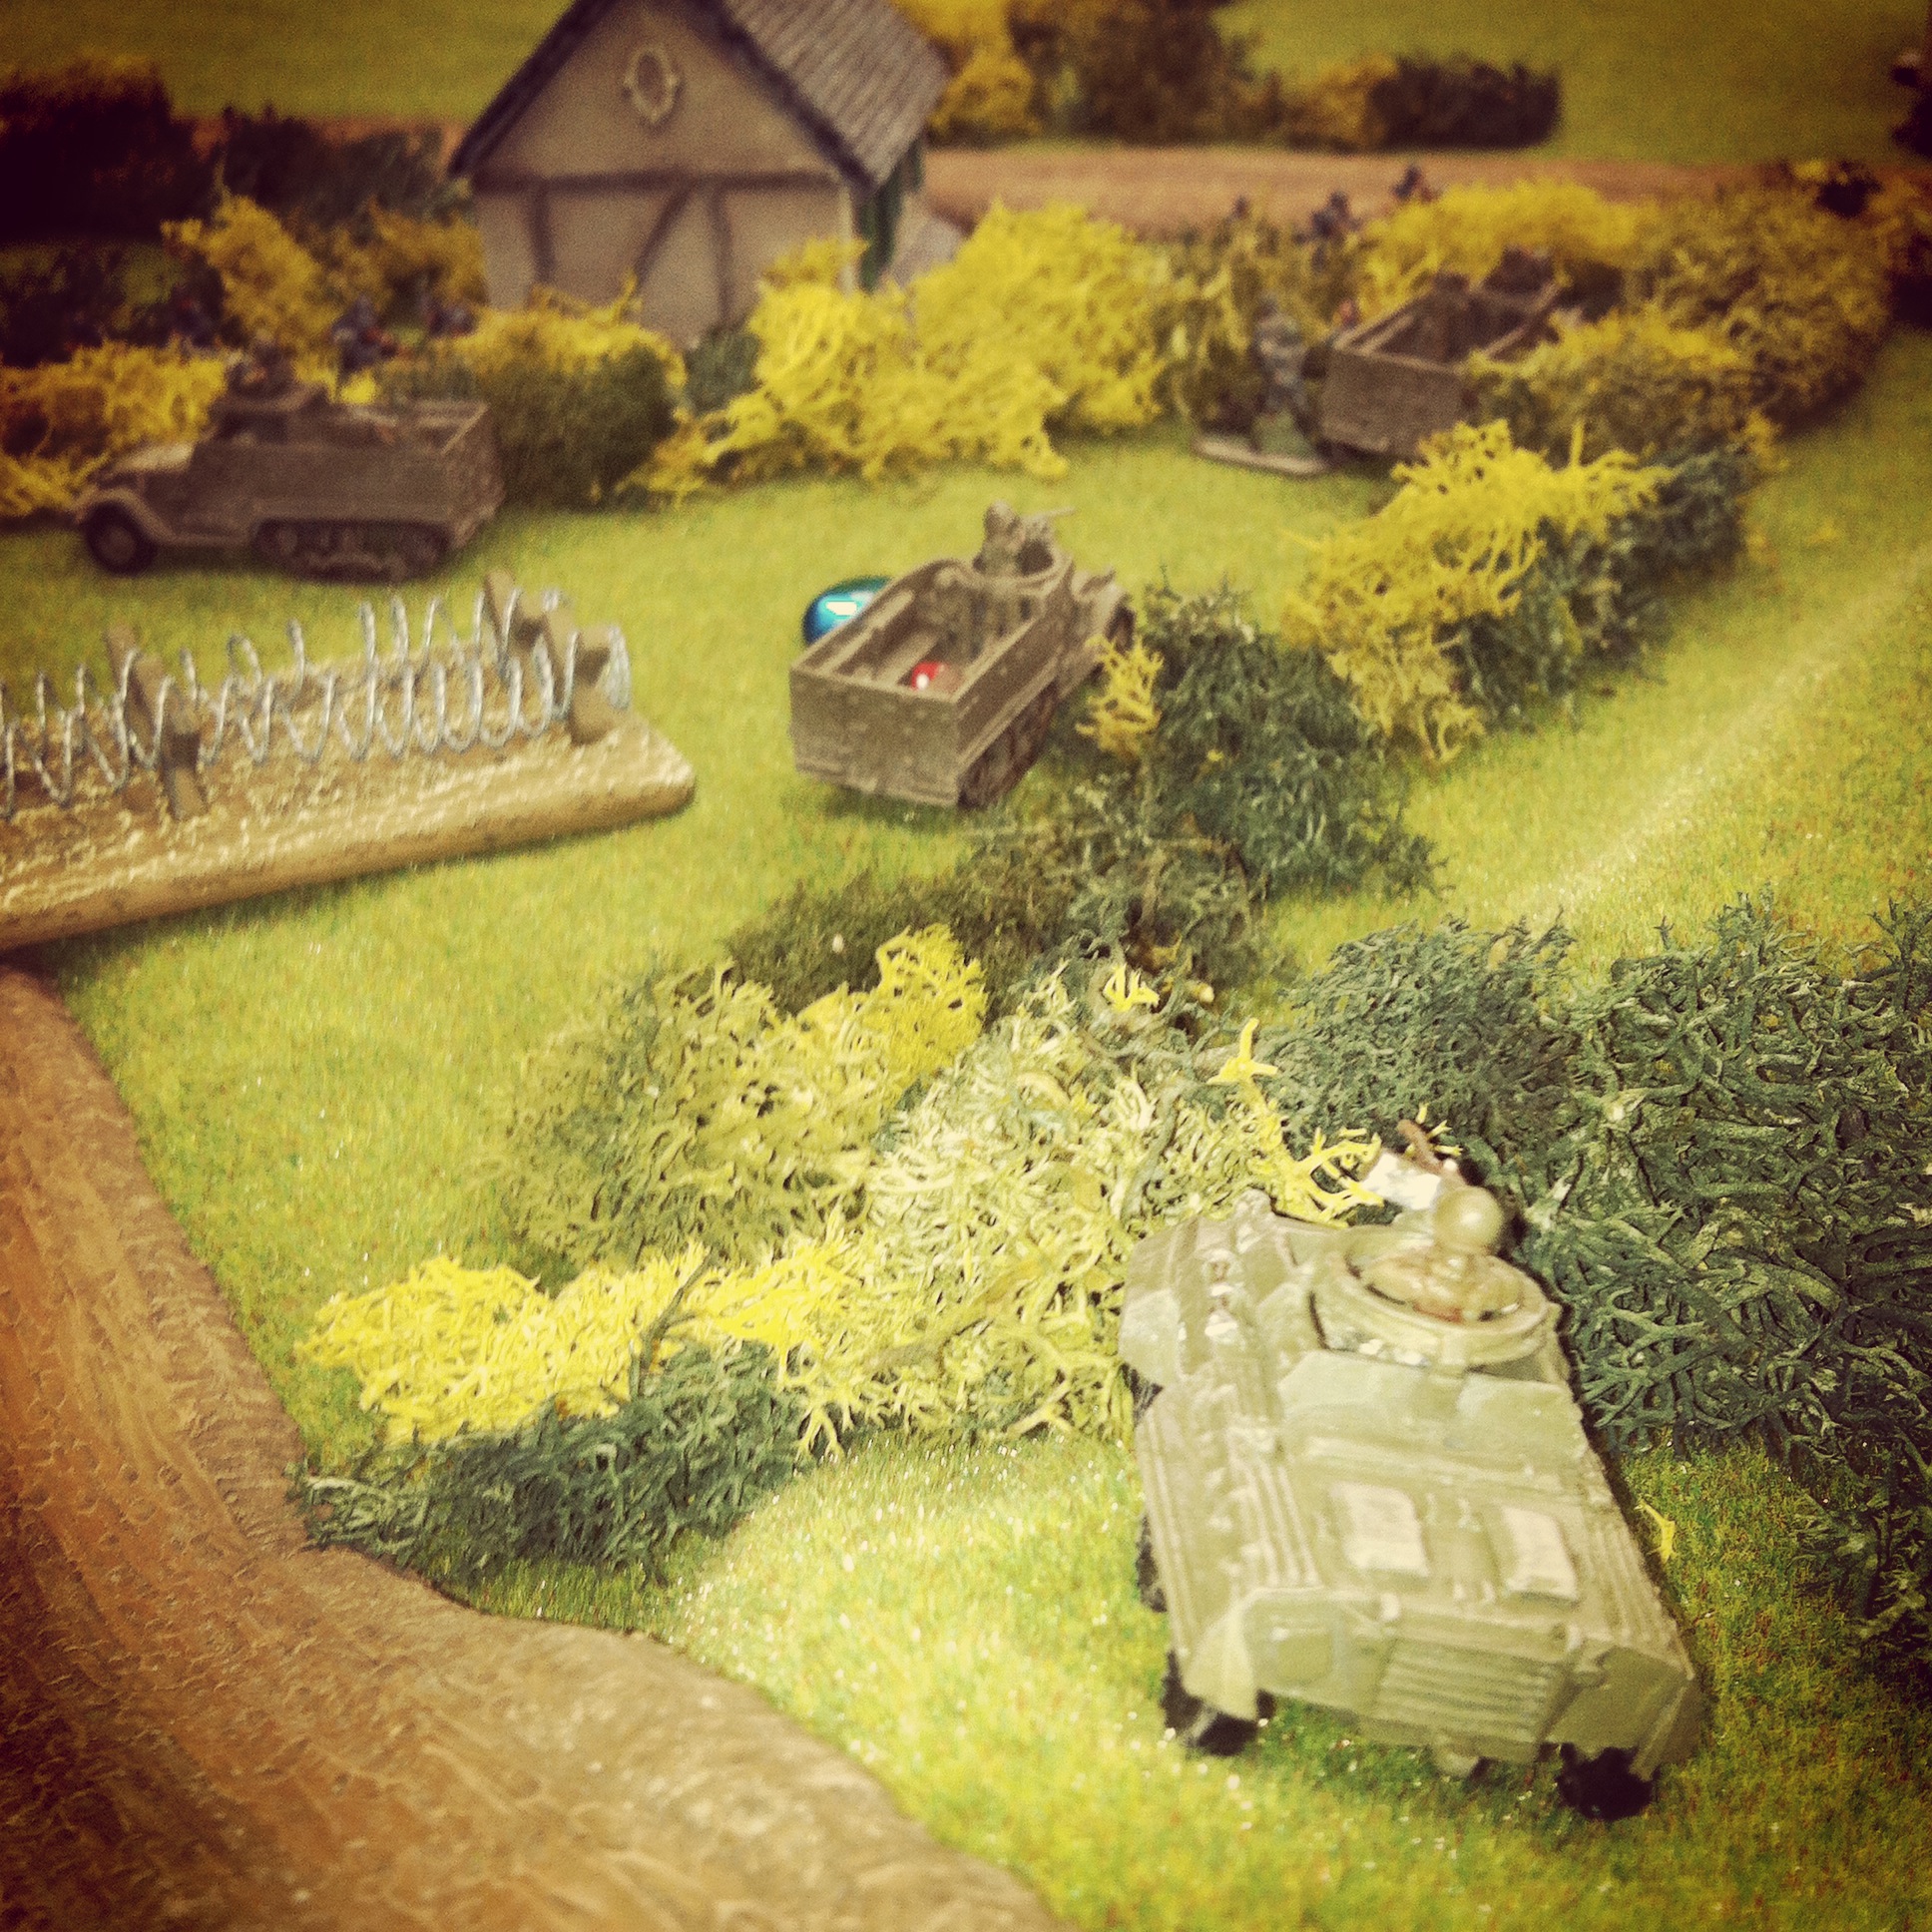
The German advanced on blinds from Hill 91, making a hasty frontal push straight for the town. On the German left, mechanized Grenadiers mounted in Sd. Kfz 251s roared their engines and drove straight into a minefield at the bocage at the bottom of the valley outside town. Making matters worse, American machine guns hiding in the dense hedge sprayed the German line with fire. German infantry and half tracks fired back, destroying one US machine gun team and forcing a retreat of the other to the center of town. At the end of the firefight, the German commanding officer escaped but three fire teams in one platoon took heavy damage, forcing them to fall back.

IMG_4256
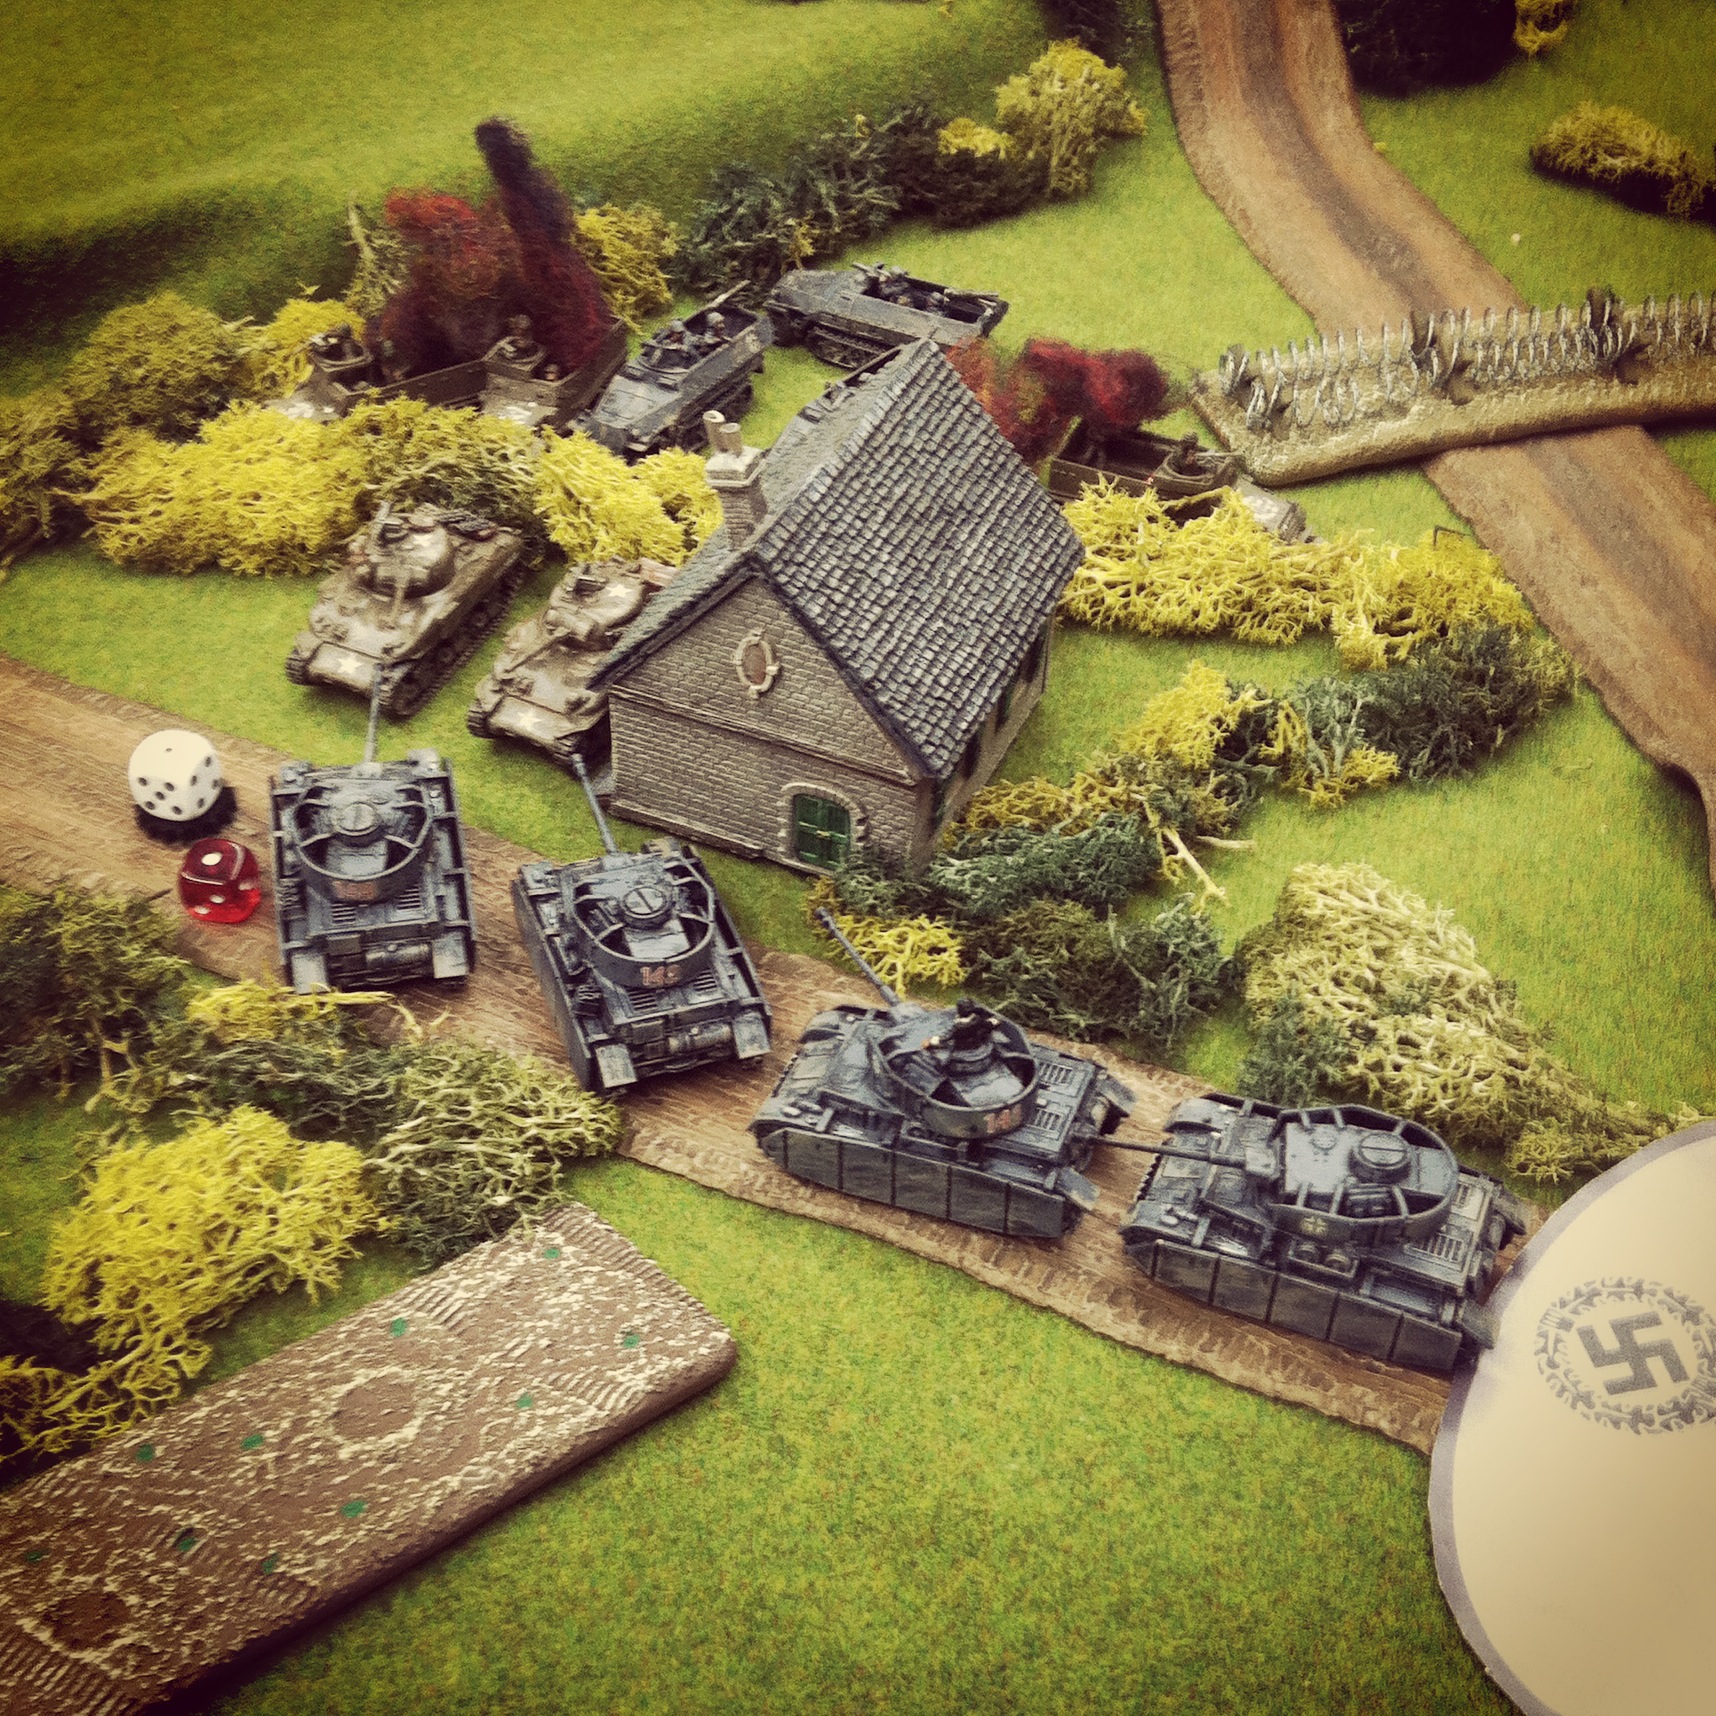
The German Panzer IV column exposes two Shermans behind a farmhouse

IMG_4255
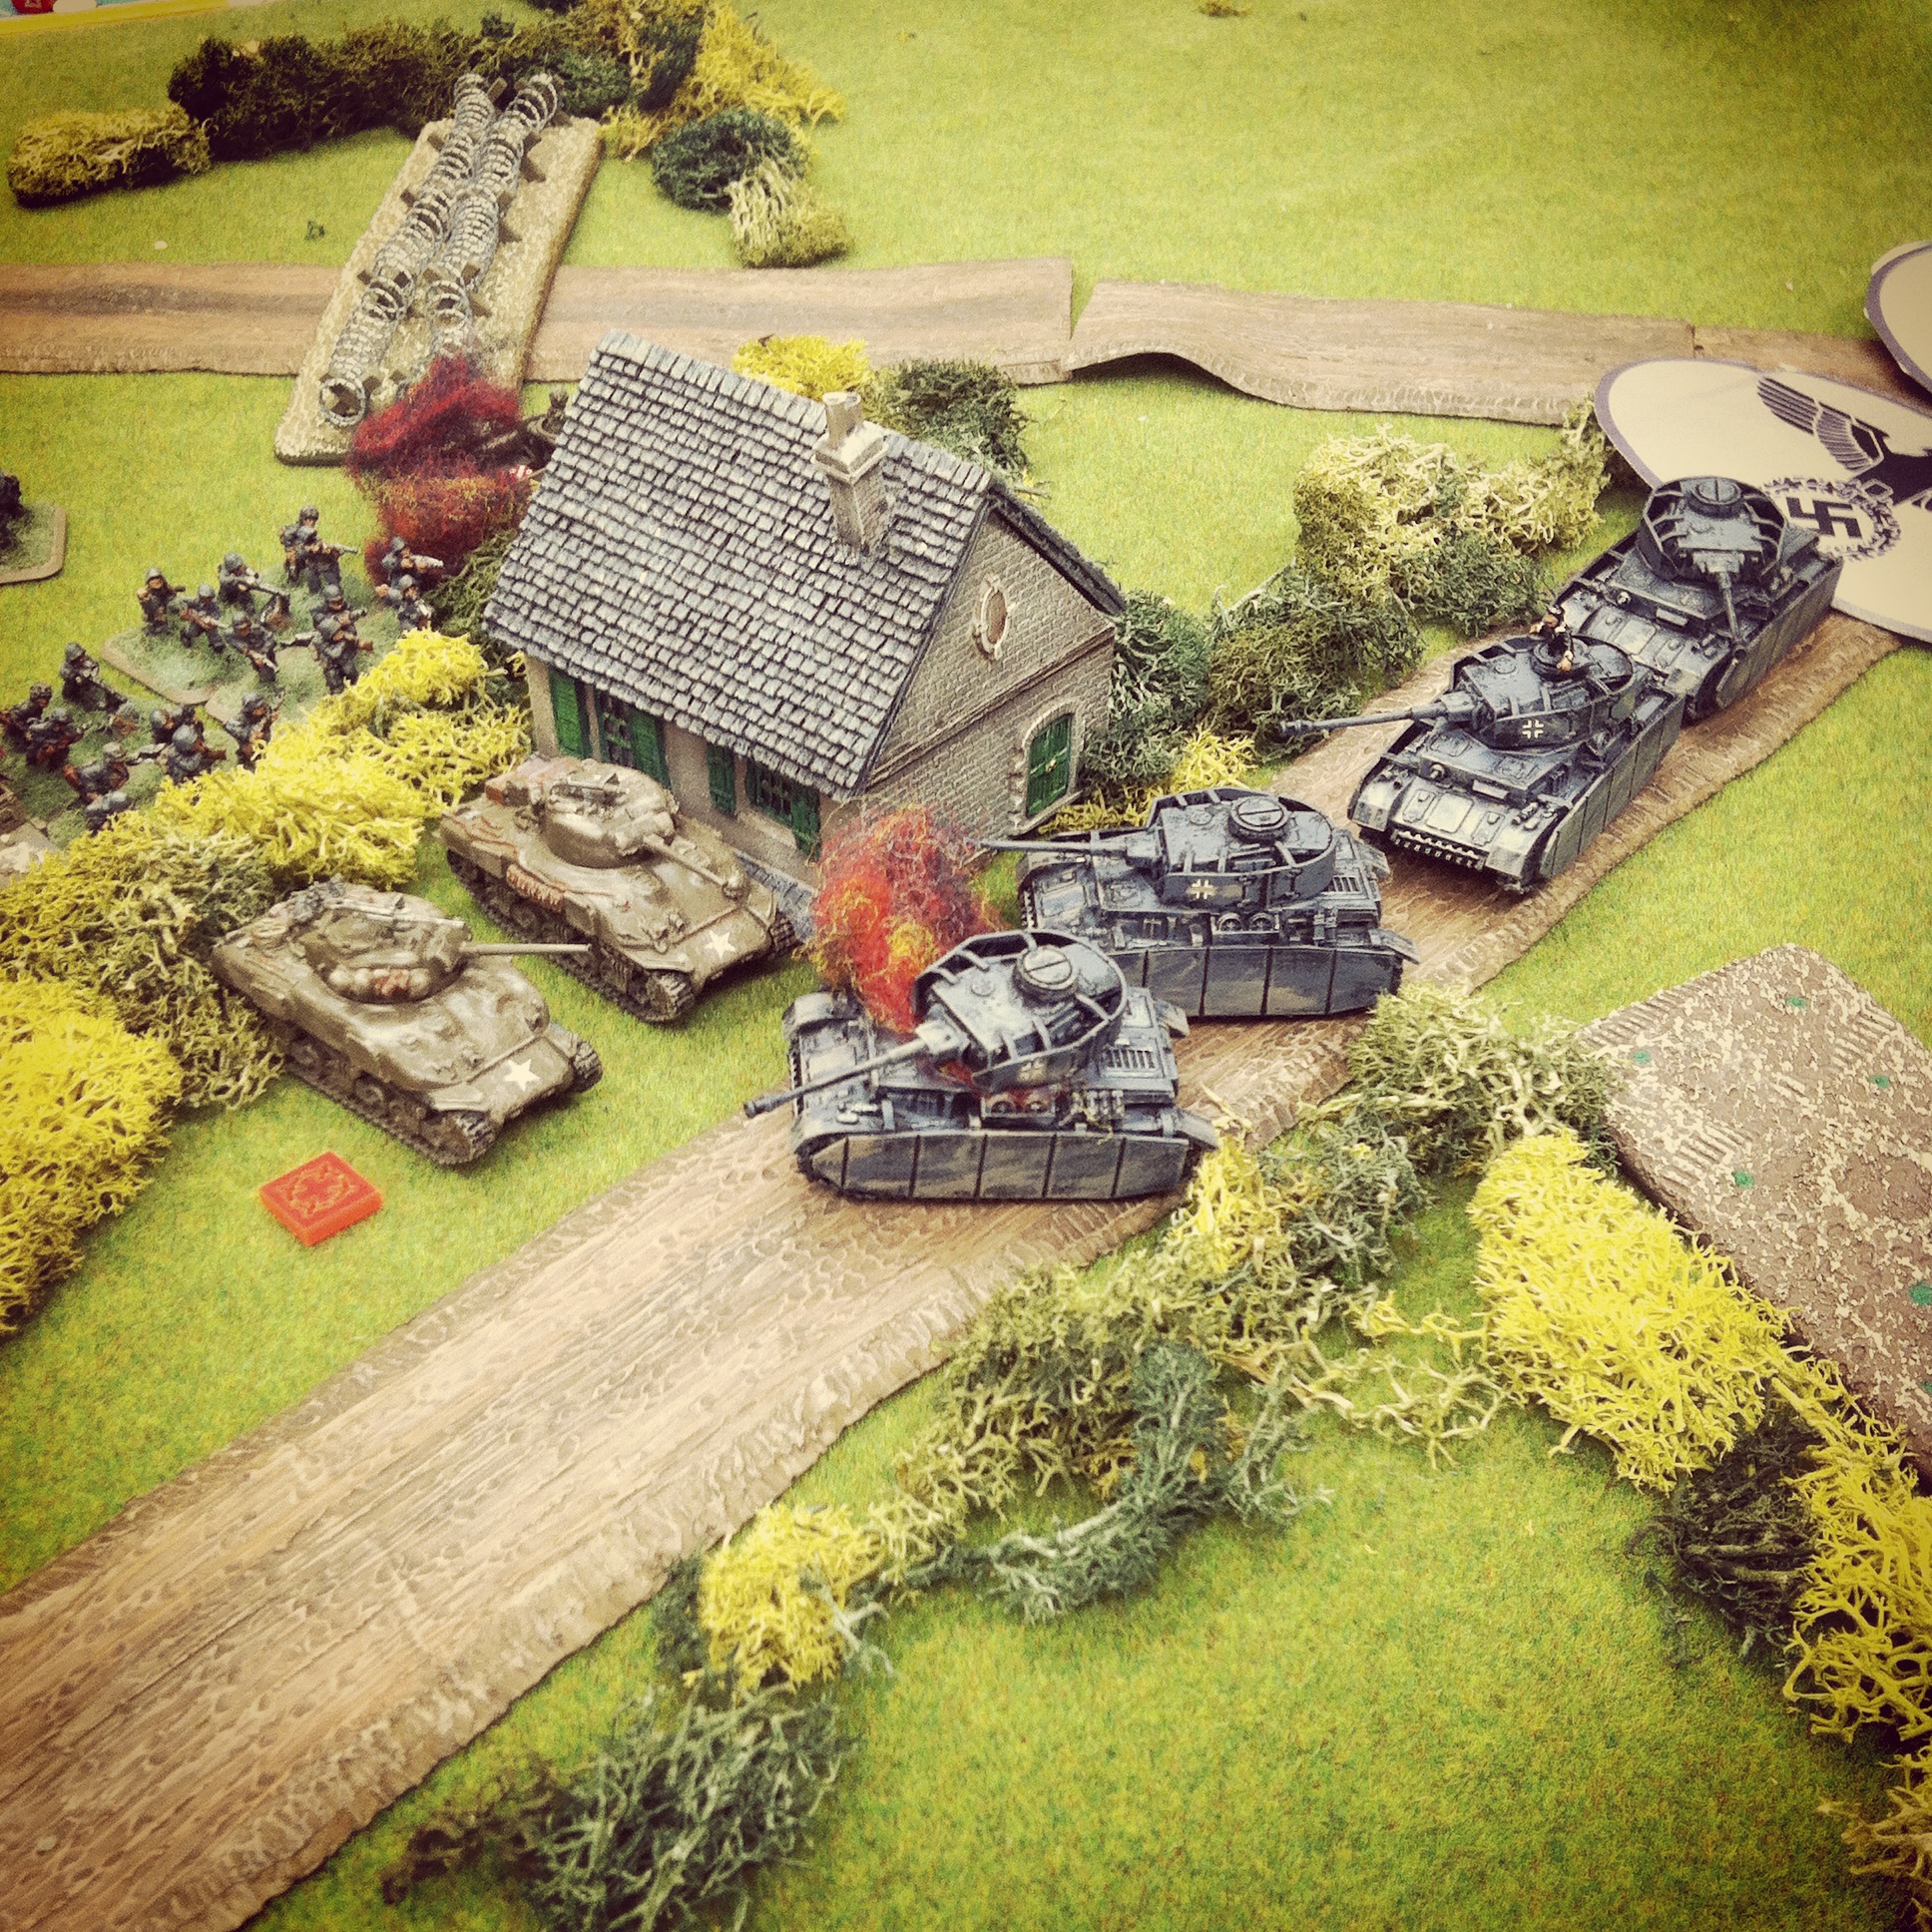
The lead German Panzer IV is destroyed, blocking the road

IMG_4312Panzer IVs switch routes, making for the American flank

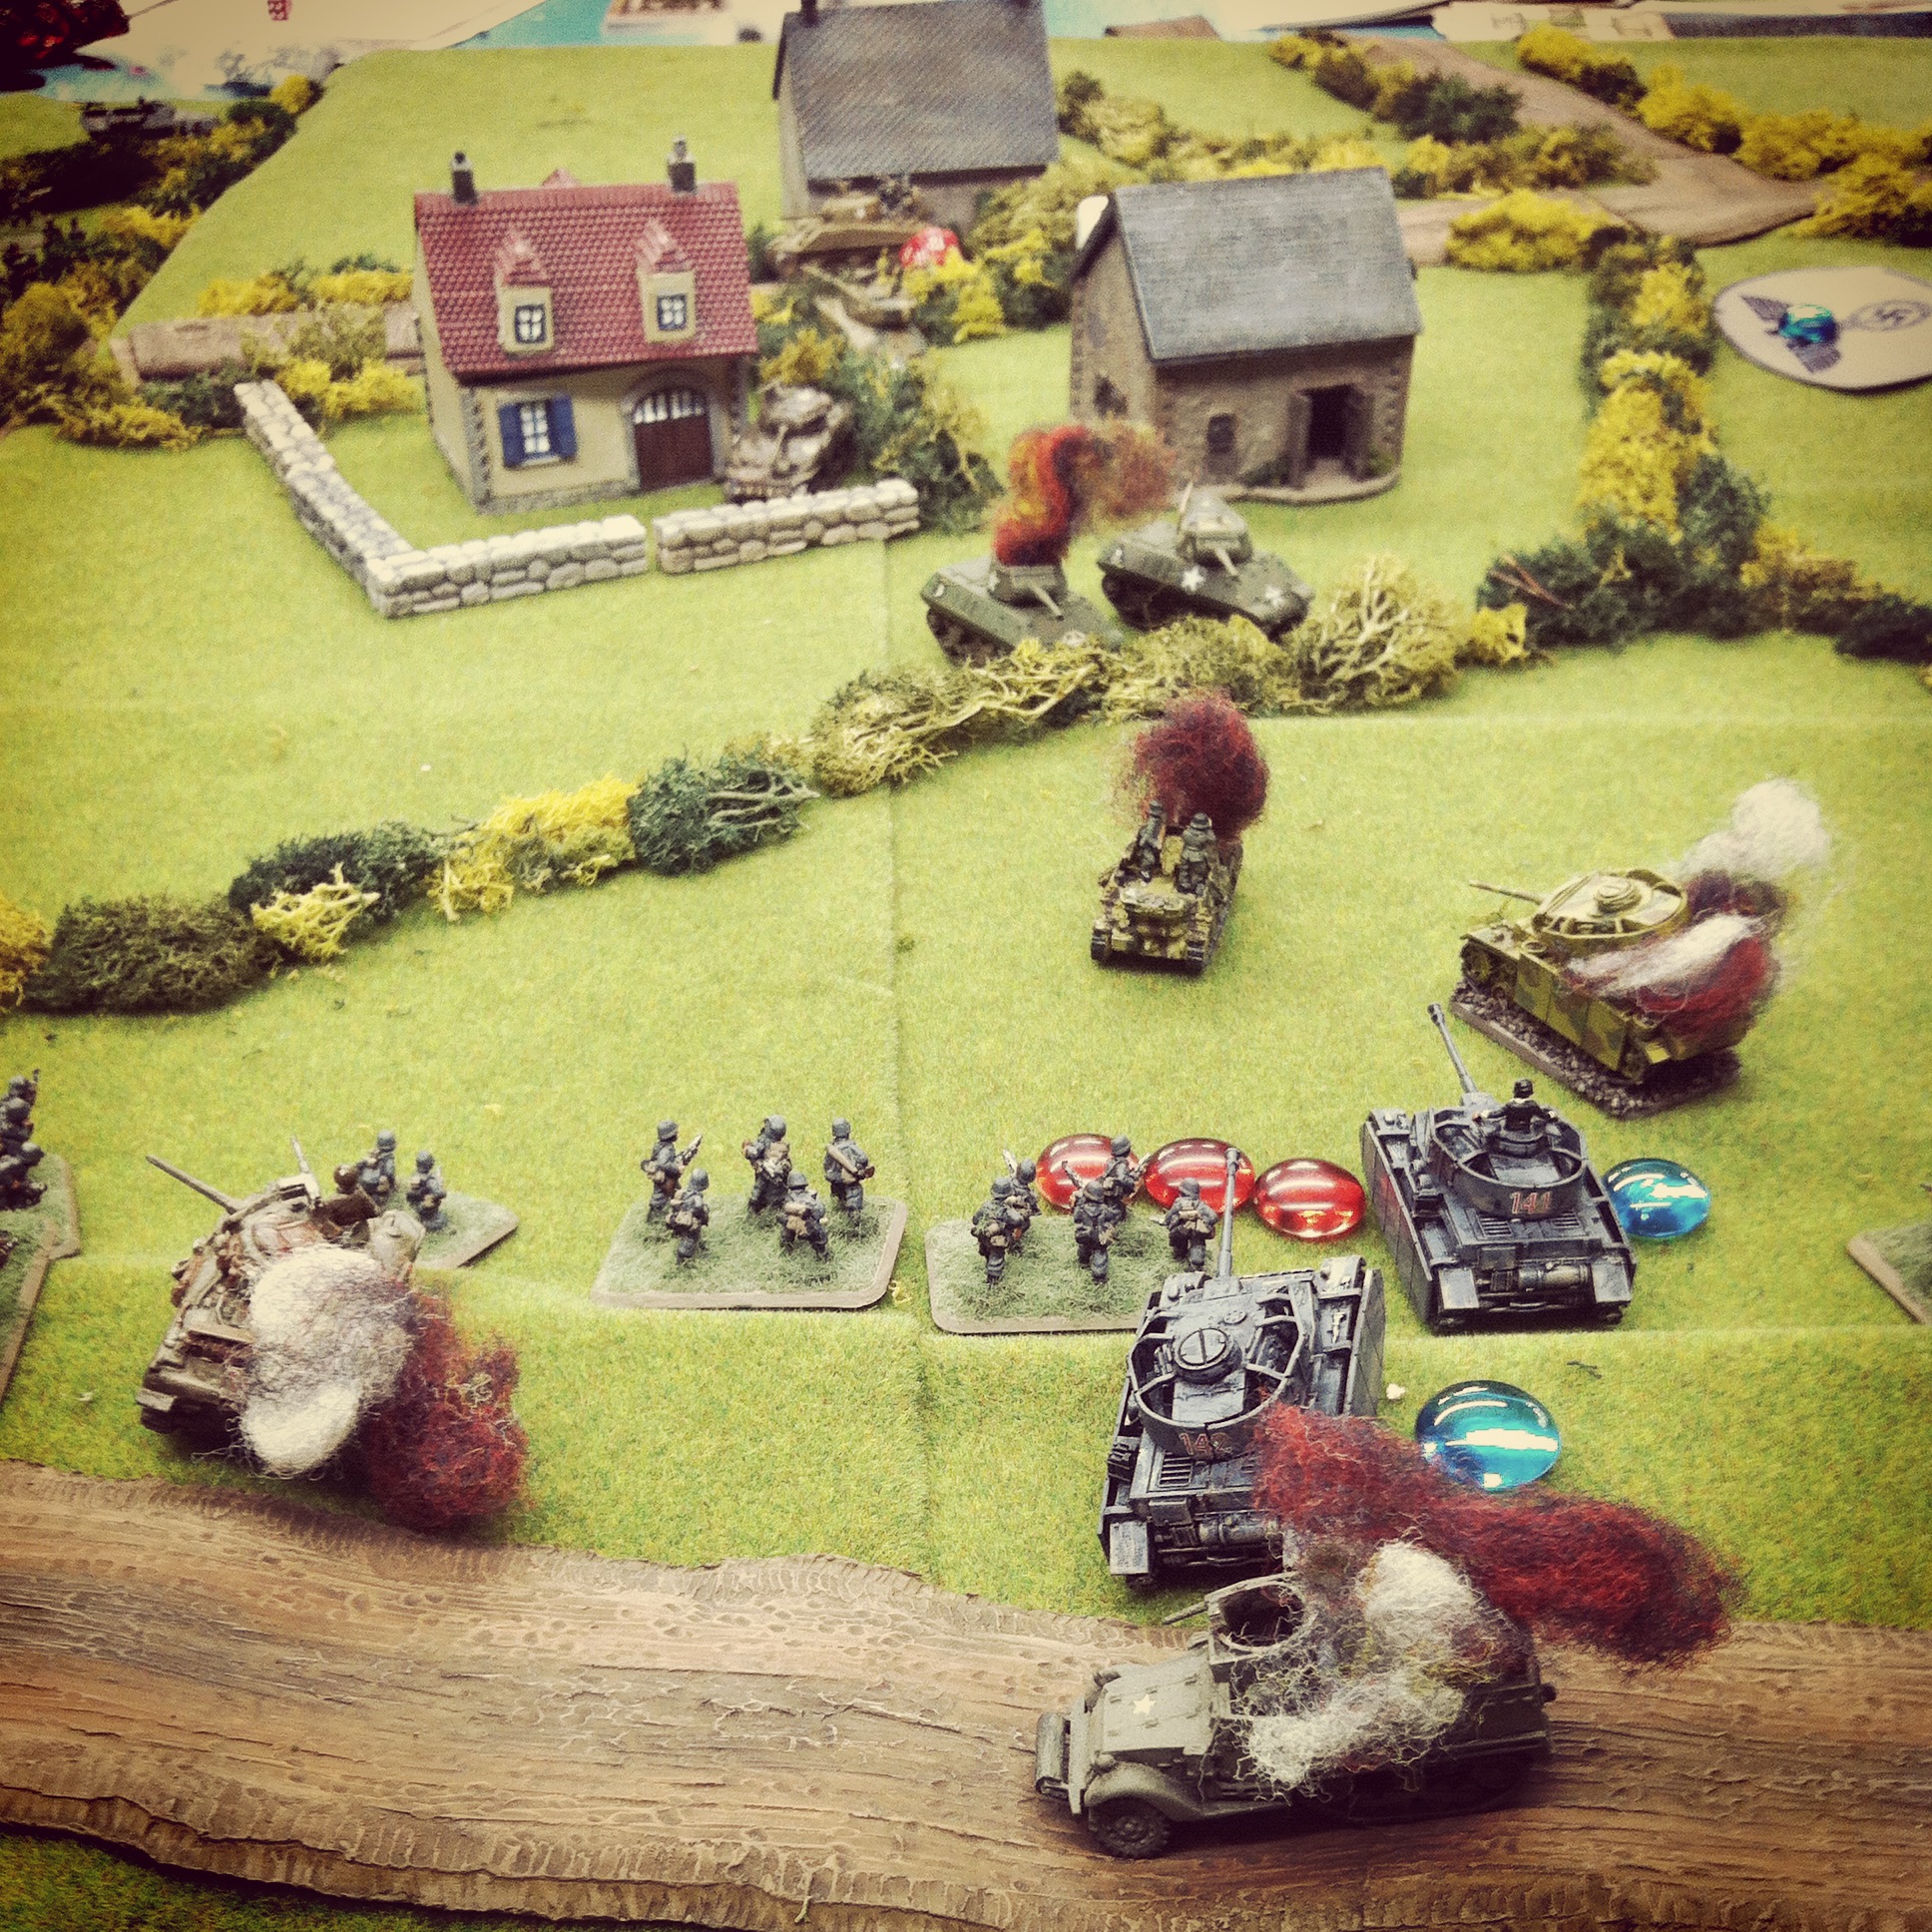
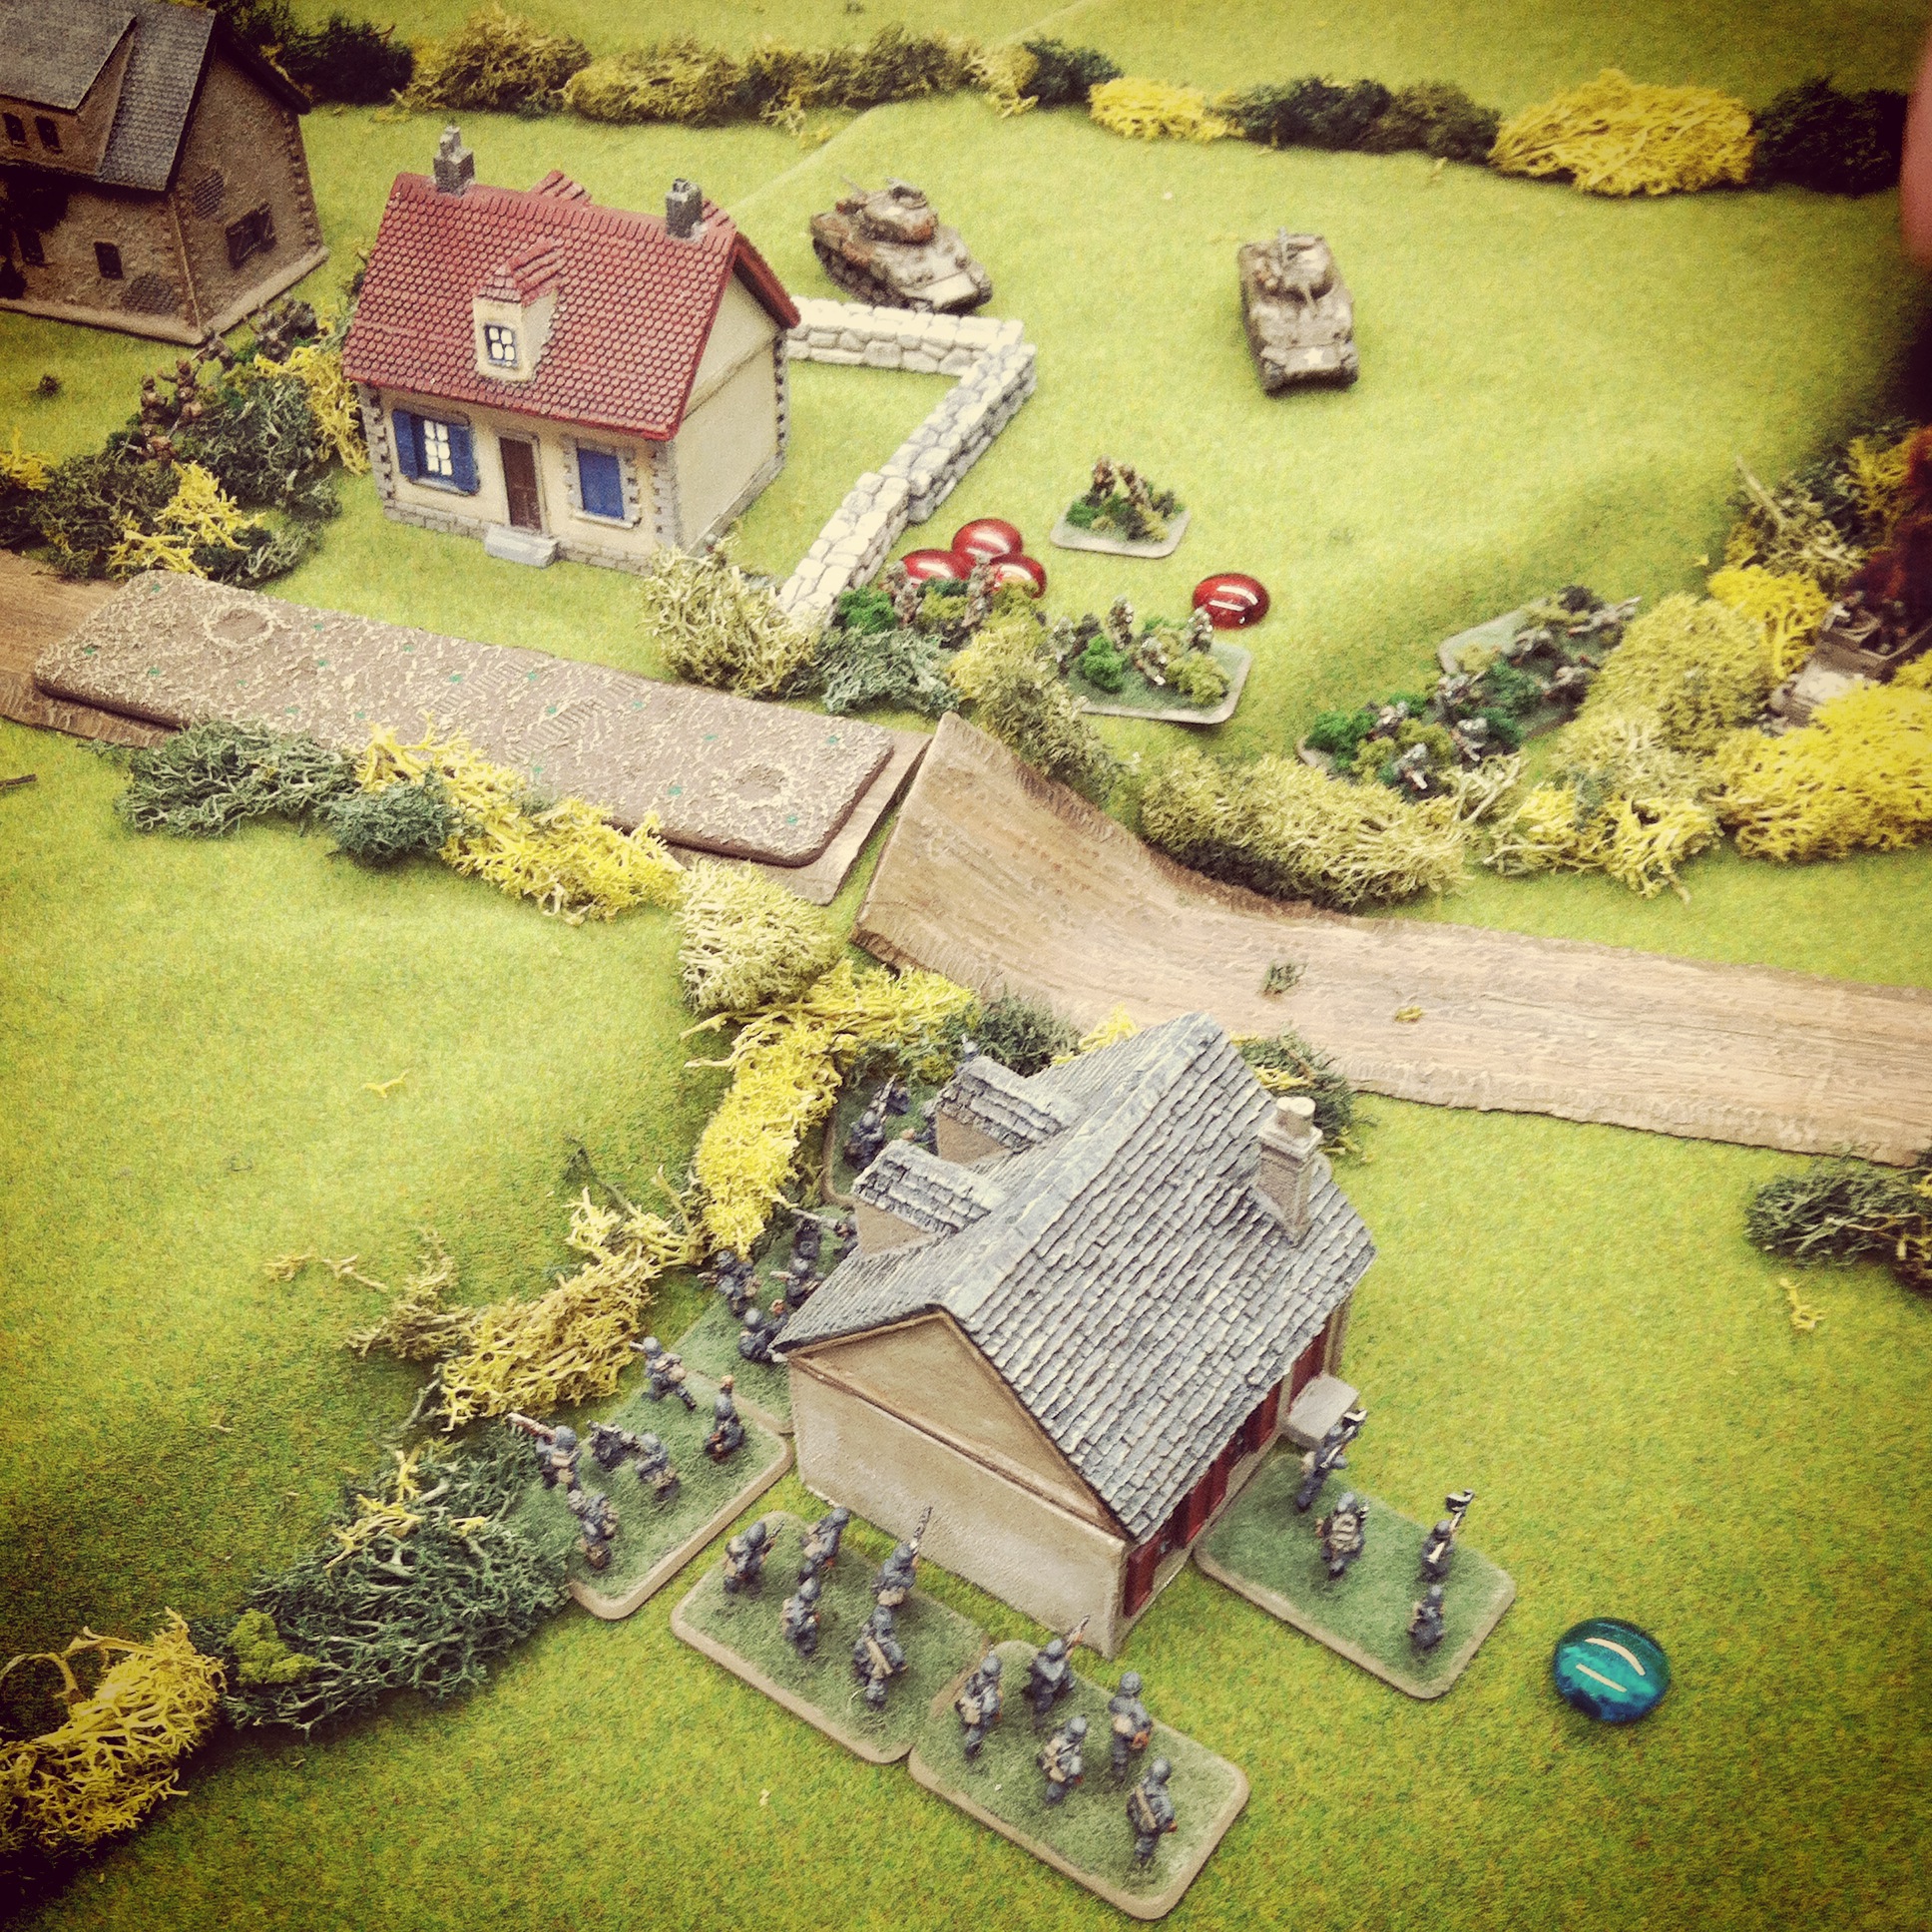
On the German right, things didn’t go much better. A column of Panzer IVs drove on the main road for town, accompanied by a a Grenadier platoon closing in on a farmhouse they had lost the previous day. Waiting hidden at the stone cottage were two M4 Shermans which opened fire at the lead Panzer at close range , leaving it a burning hulk blocking the road forward. Closing in from behind, Grenadiers ran to engage the tanks with a Panzerfaust shot on their rear armor. Several turns of fire were exchanged between the Shermans and Panzer IV second in line as the two rear Panzers reversed direction back to the fork in the road. A few rounds later both Shermans were destroyed, and the surviving three Panzer IVs and the unharmed Grenadiers were heading for the east side of the town.

IMG_4313
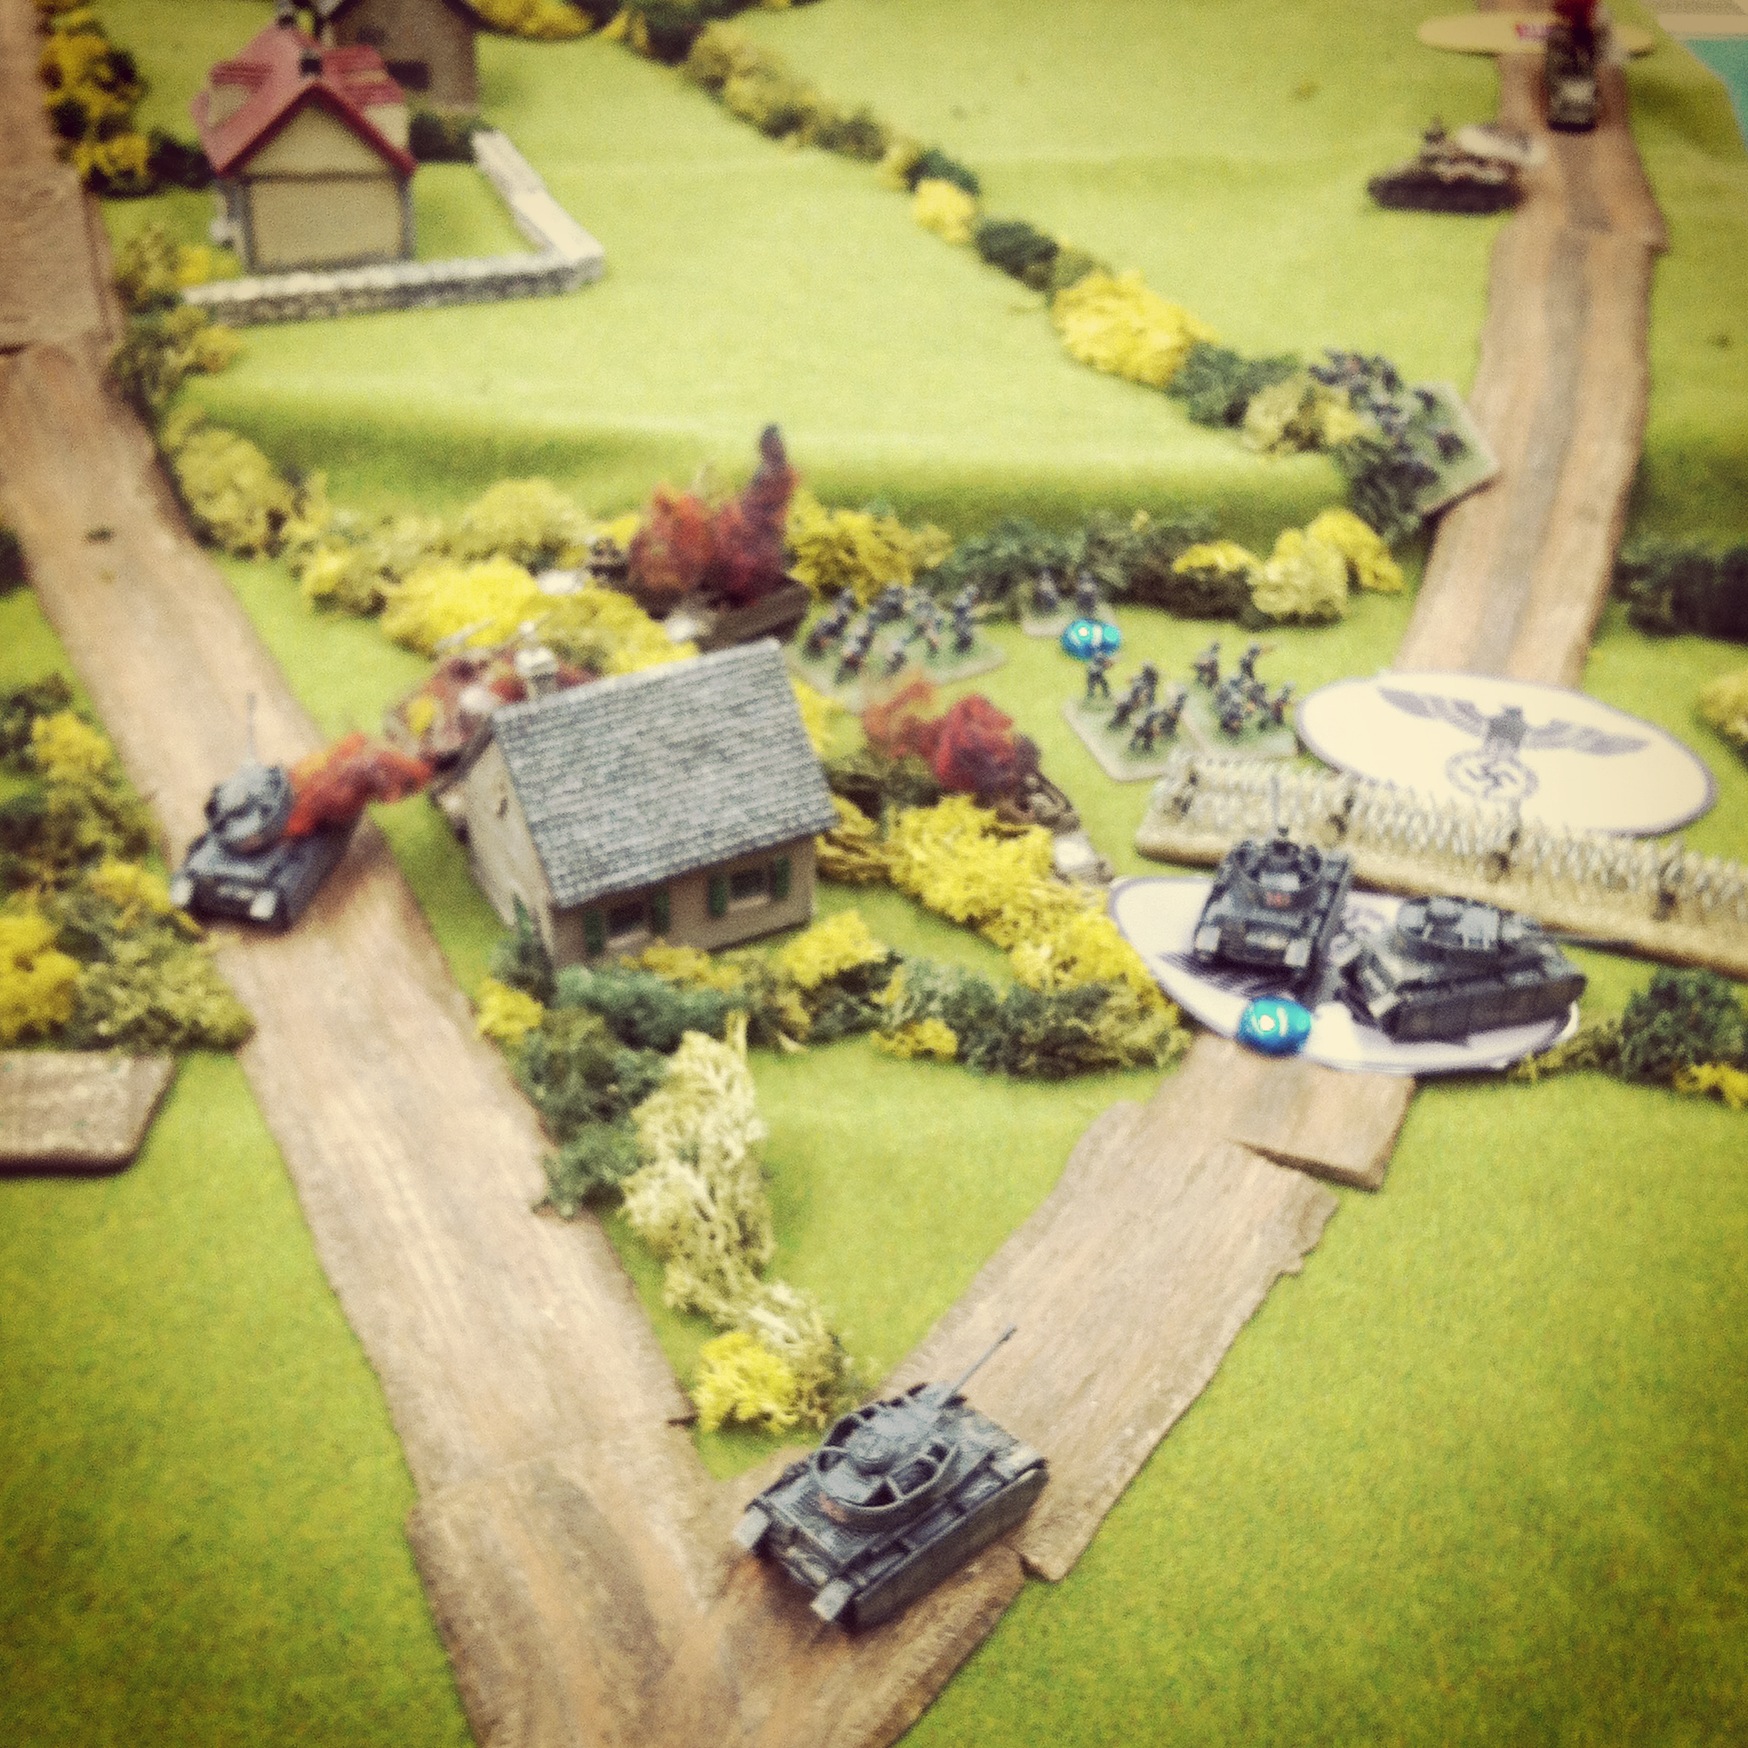
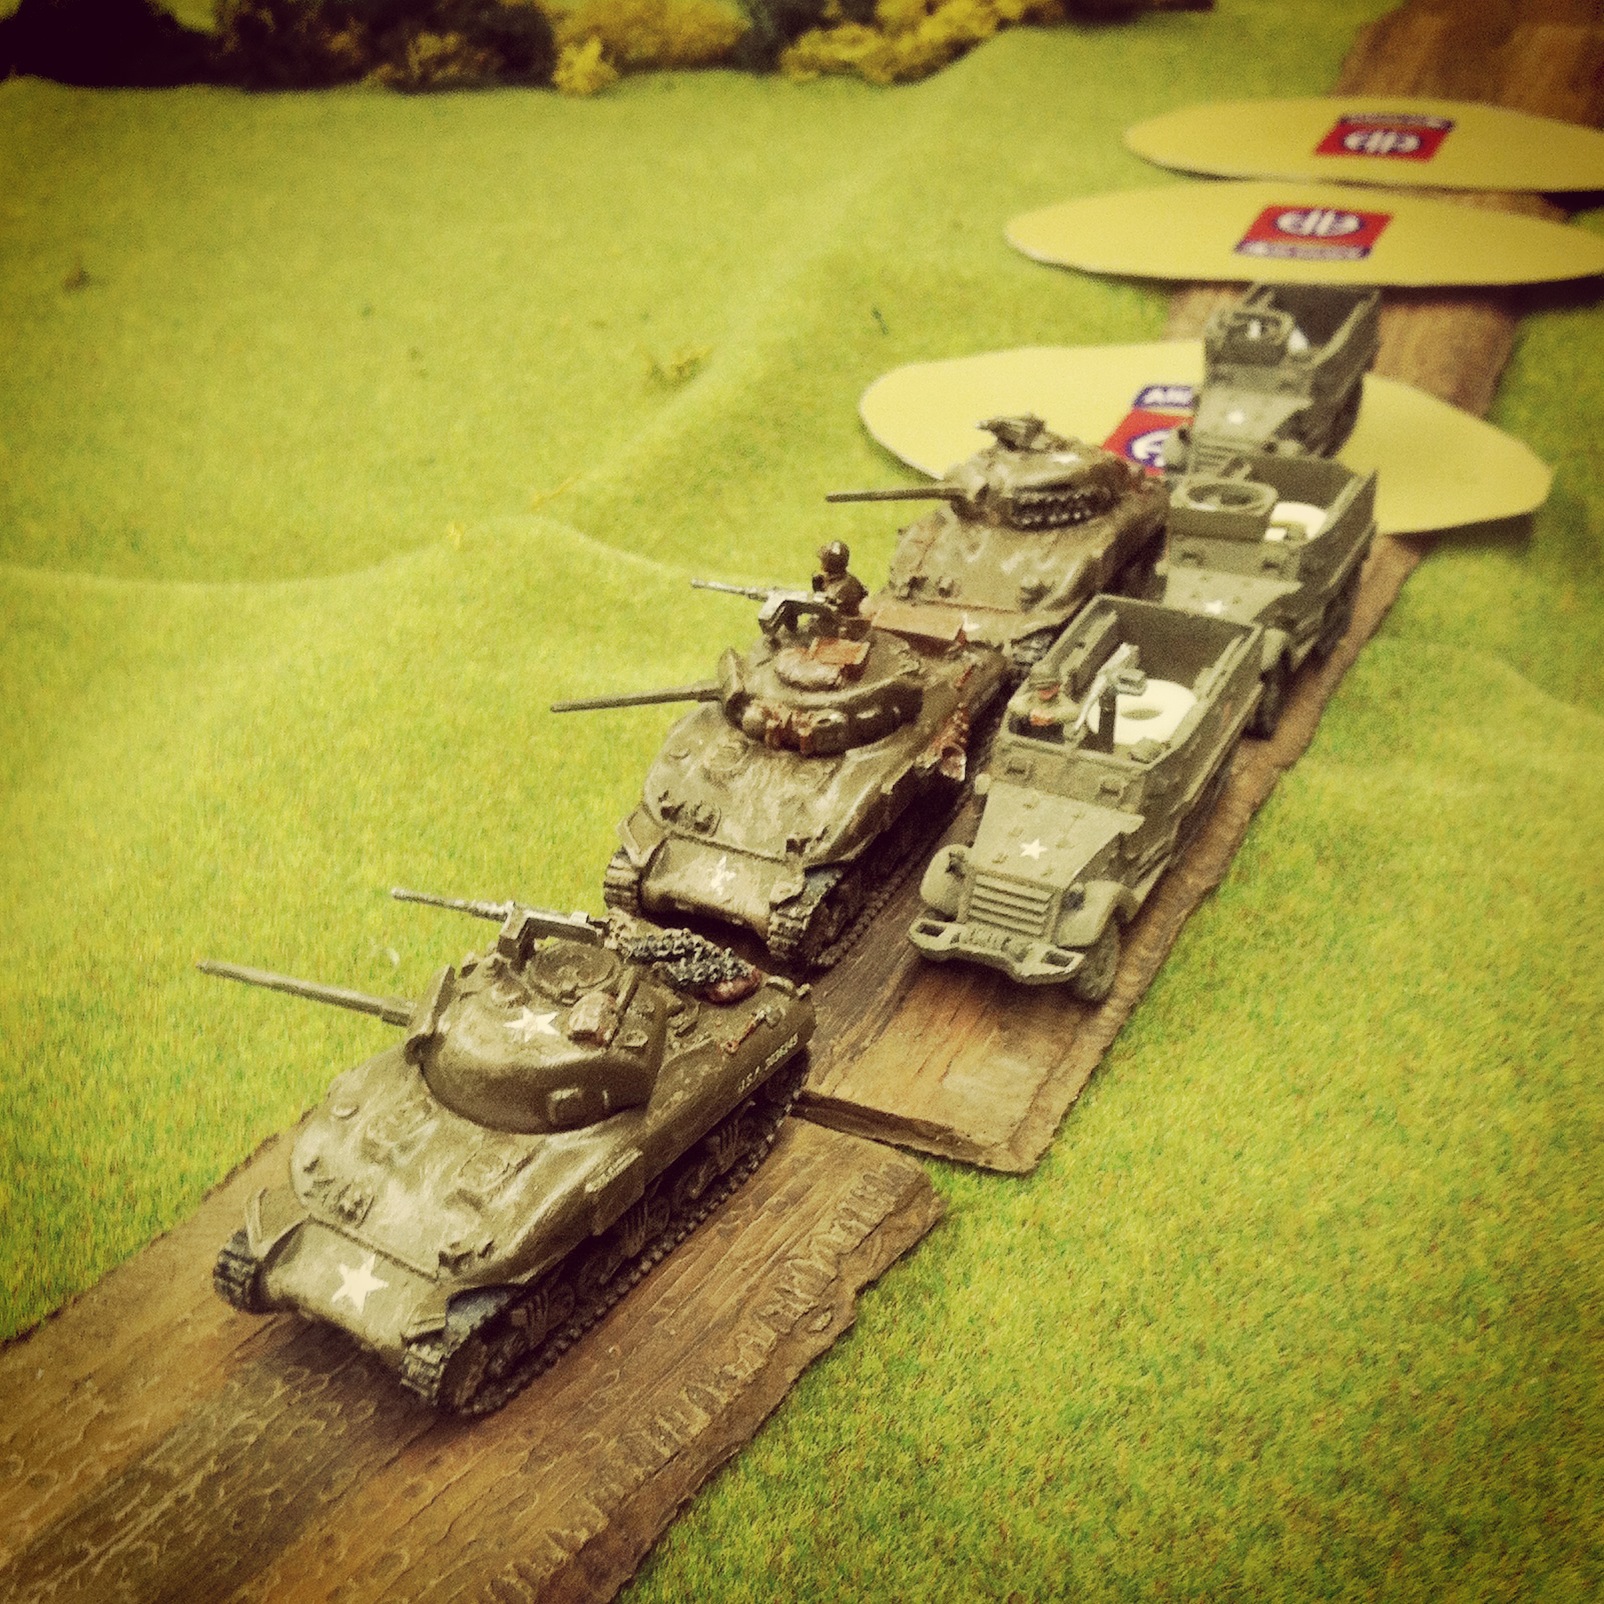
Panzer IVs and Grenadiers move on the US left and expose a Sherman platoon at an objective

The Germans continued their advance up the road on the US left, looking to flank the town. The three Panzer IVs were slowed over the barbed wire blocking the road, and one bogged for the remainder of the action in soggy ground. German infantry spotted a Sherman platoon camped out around one of the objectives and then ran over and around the bocage looking to avoid fire in the field beyond.

IMG_4314
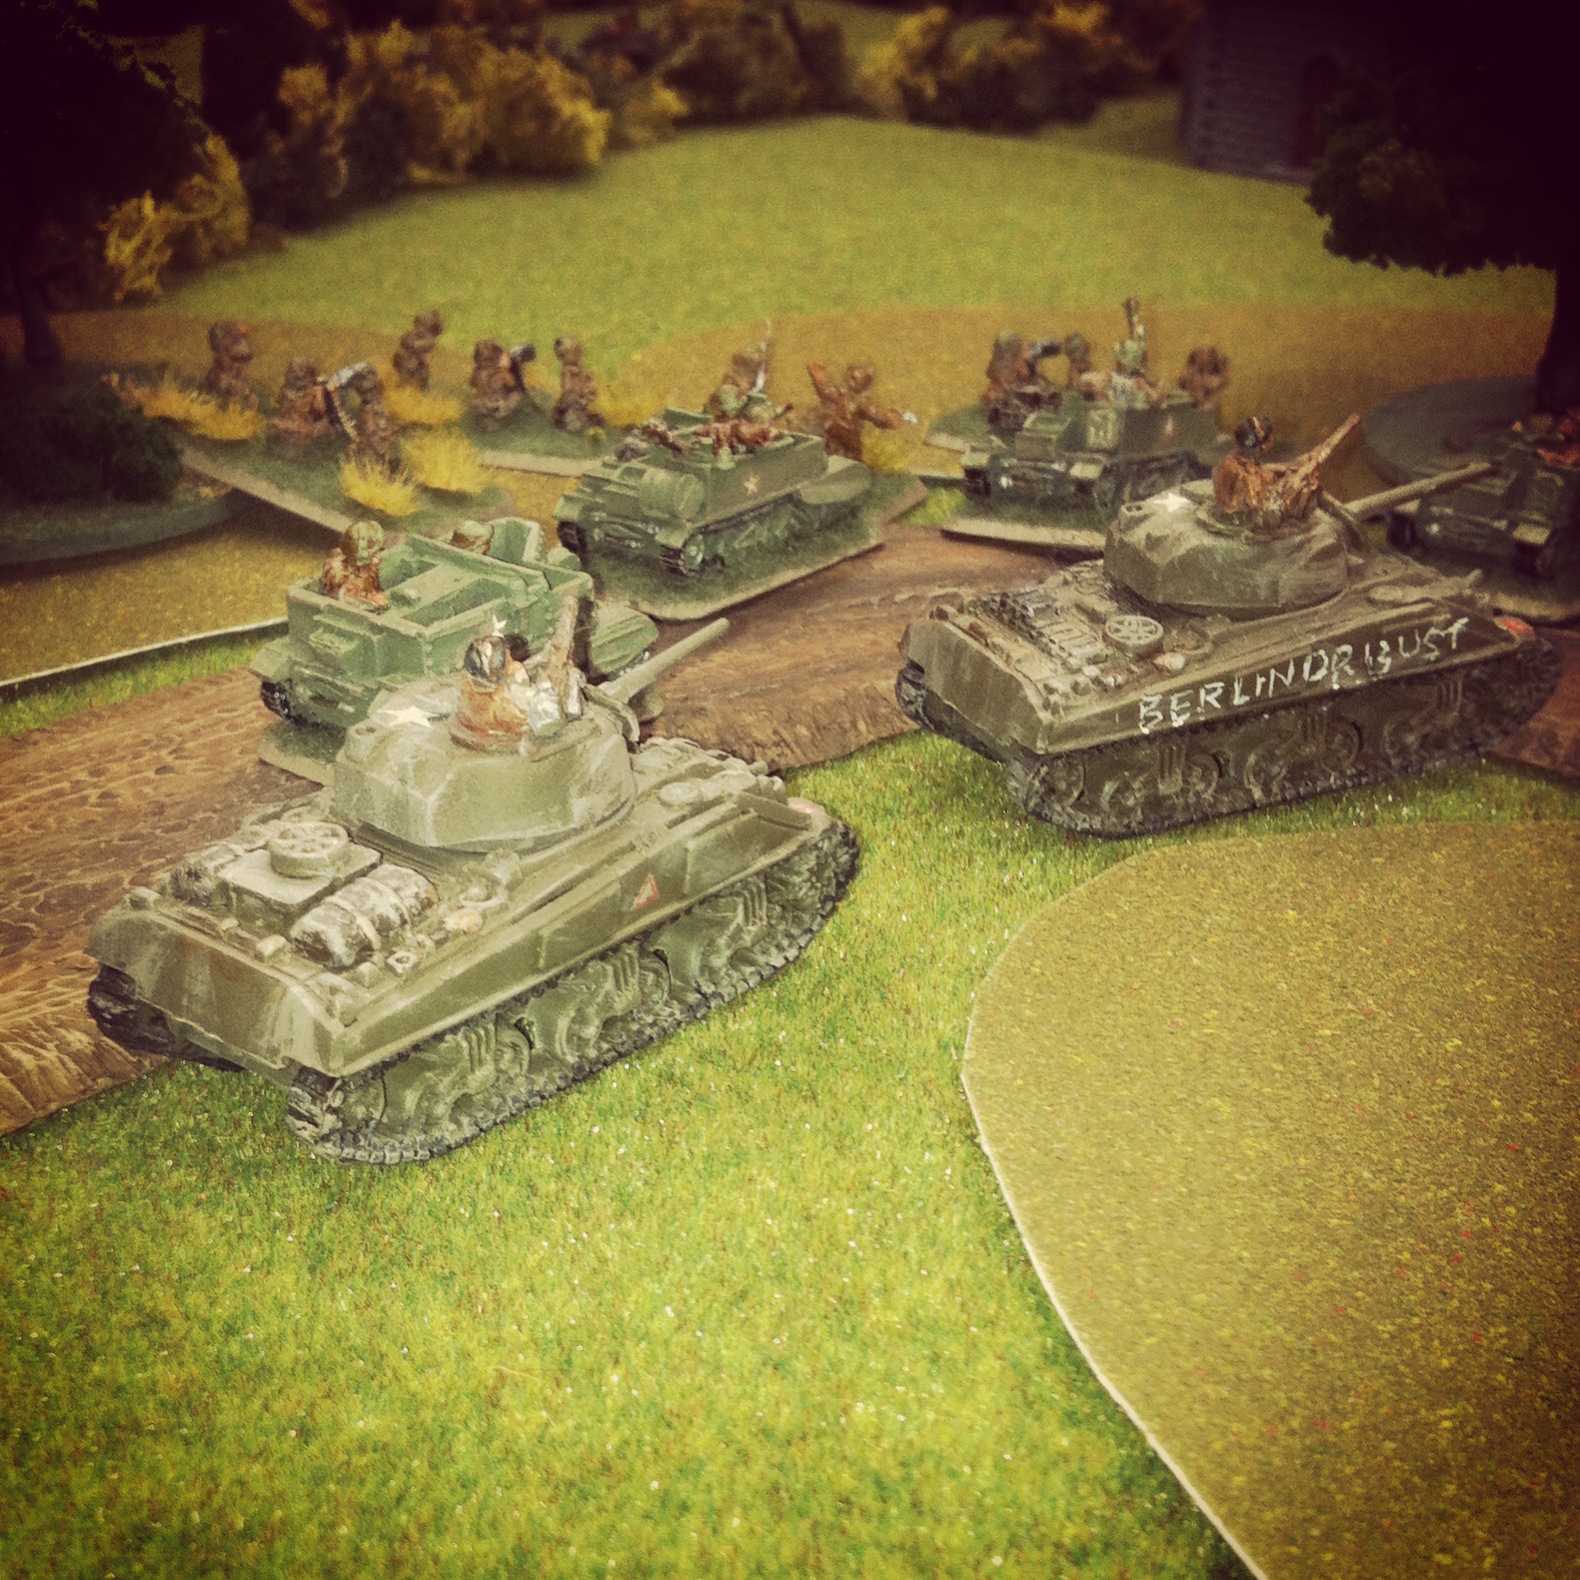
US Wolverines take aim at a German Panzer III flame tank in the open

IMG_4316US and German armor exchange fire, leaving a Wespe, Panzer III and M10 Wolverine in flames

Two remaining German blinds rolled to the field as US tank destroyer M10 Wolverines appeared behind the bocage at the town. The blinds revealed themselves as a Panzer III flame tank and Sd. Kfz. 124 Wespe and both turned to engage the Wolverines. Two quick shots from the flame tank failed to harm the open-topped Wolverines which returned fire and blew up the Panzer III. The German’s mobile gun fired back, destroying one of the Wolverines before subsequently being wrecked by US anti-tank fire. With German armor burning in the field, the Grenadiers continued to sprint over the open area and looked to swing into the town from the rear.

IMG_4317Flares illuminate the town objectives and German mechanized Grenadiers push forward

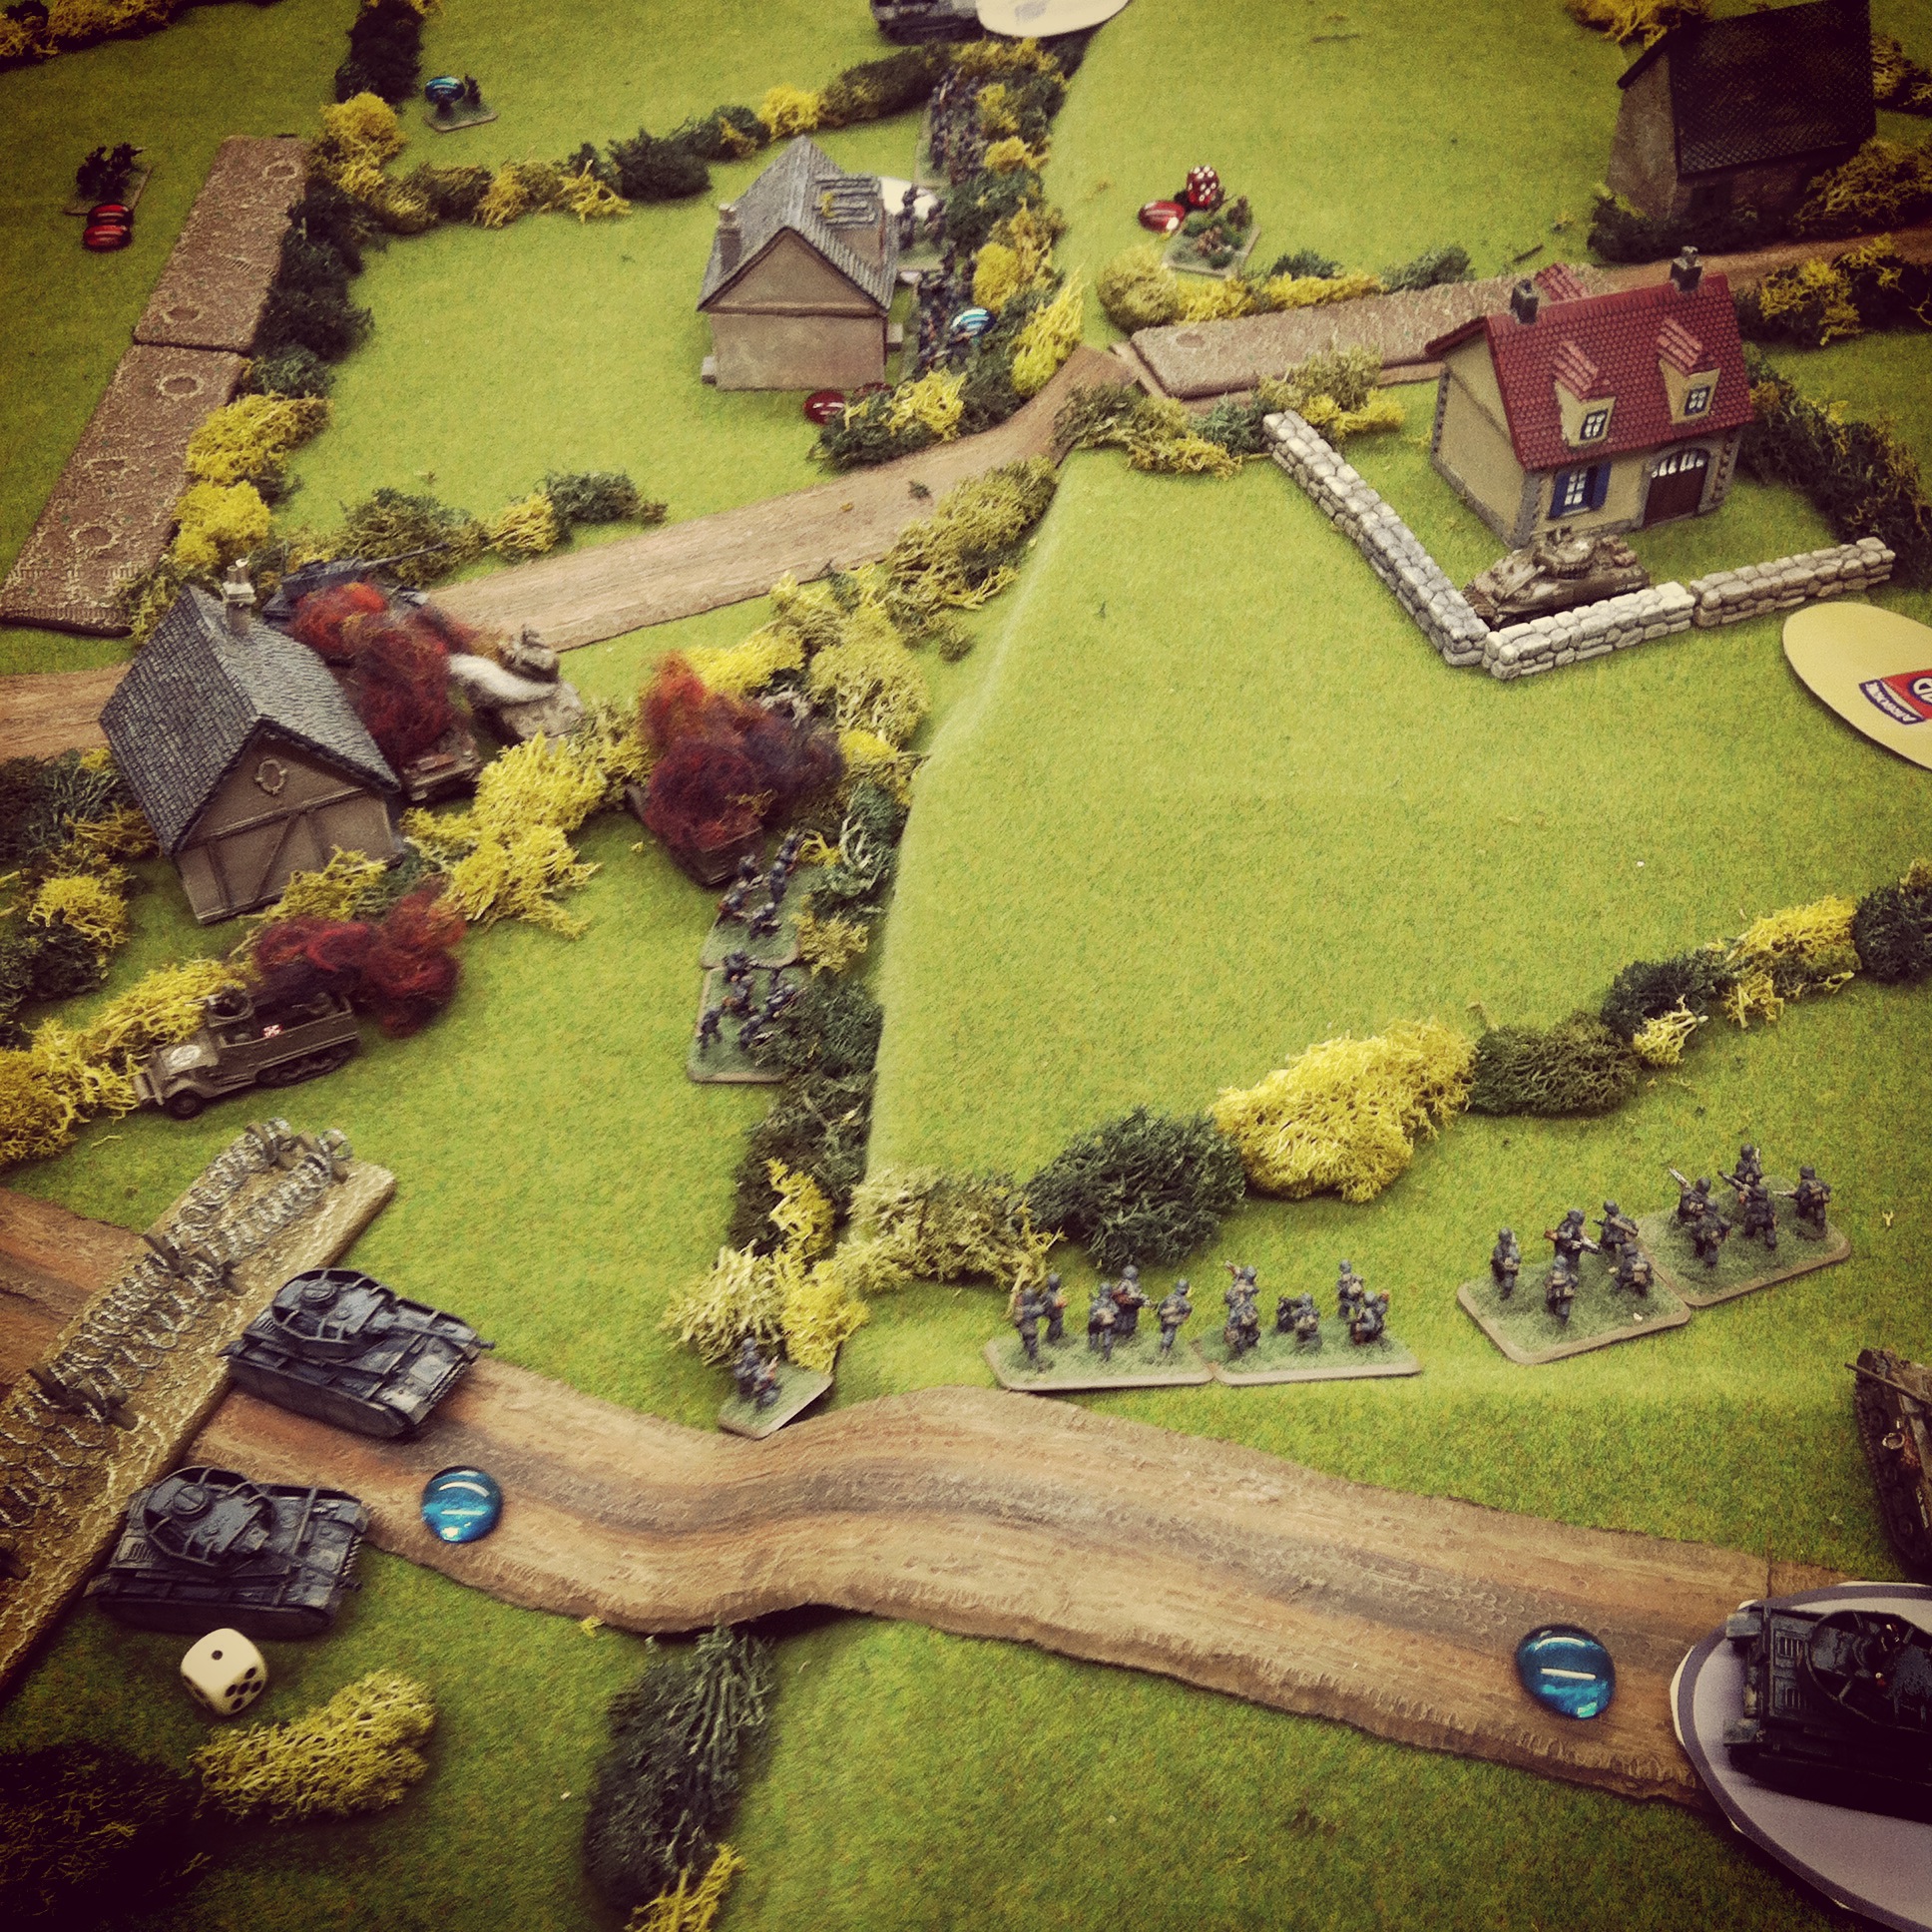
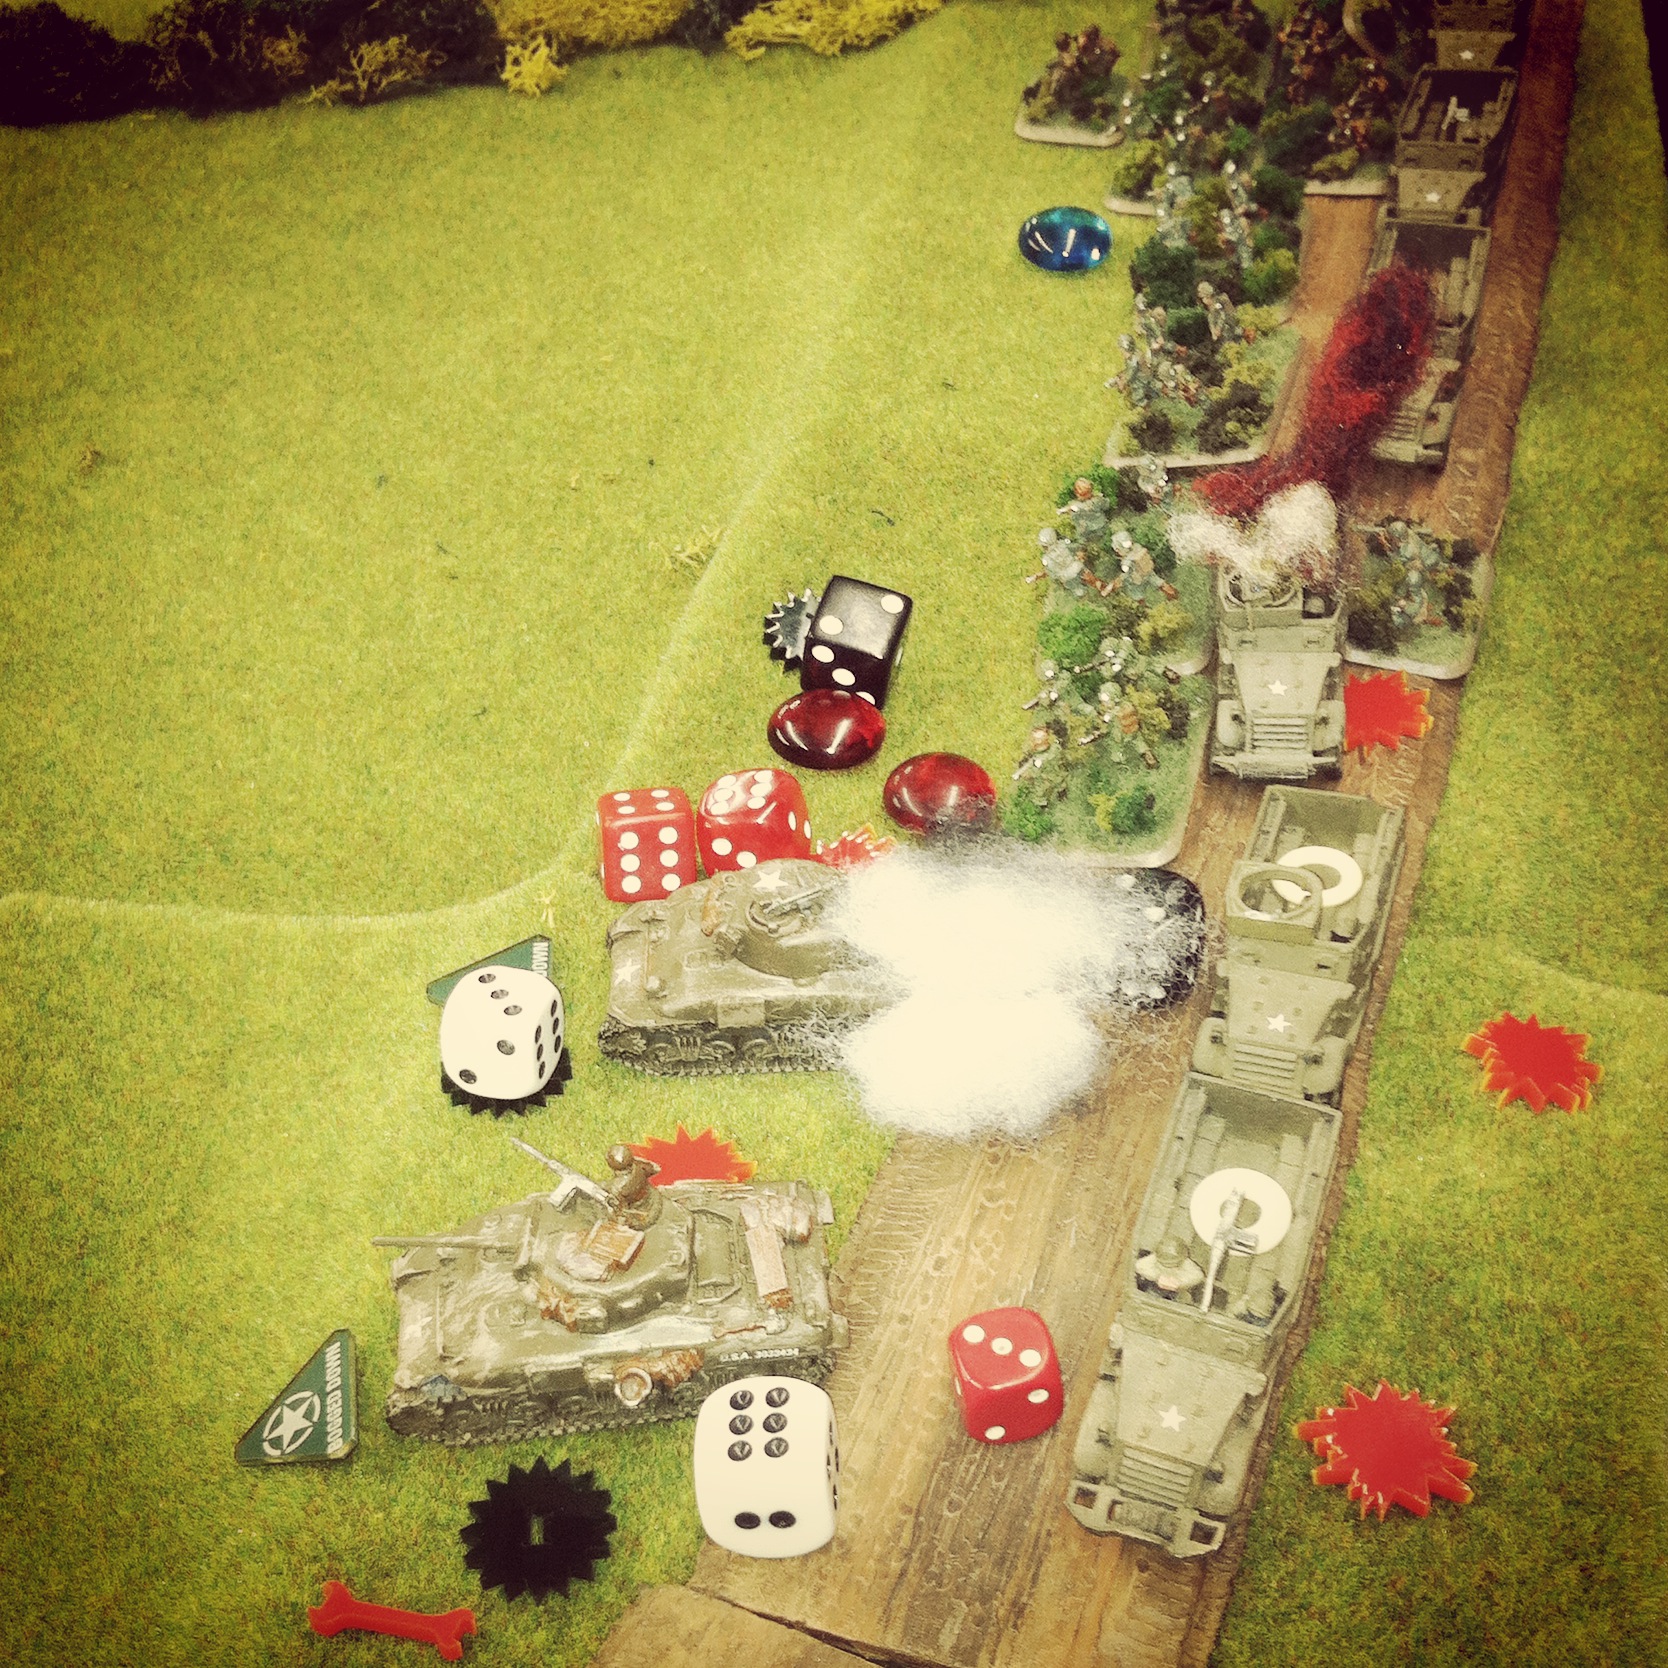
Back on the German left, several Grenadier platoons on foot and mounted in their half tracks moved to the US left in the town as the early morning darkness was lit up with a flare. Two fresh American rifle platoons revealed their positions in two of the objective buildings and gunfire was exchanged with the German platoons moving toward the town. Despite their cover in the stone building, the combined arms fire from the Germans ousted one US platoon from their building and the other took steady damage.IMG_4318
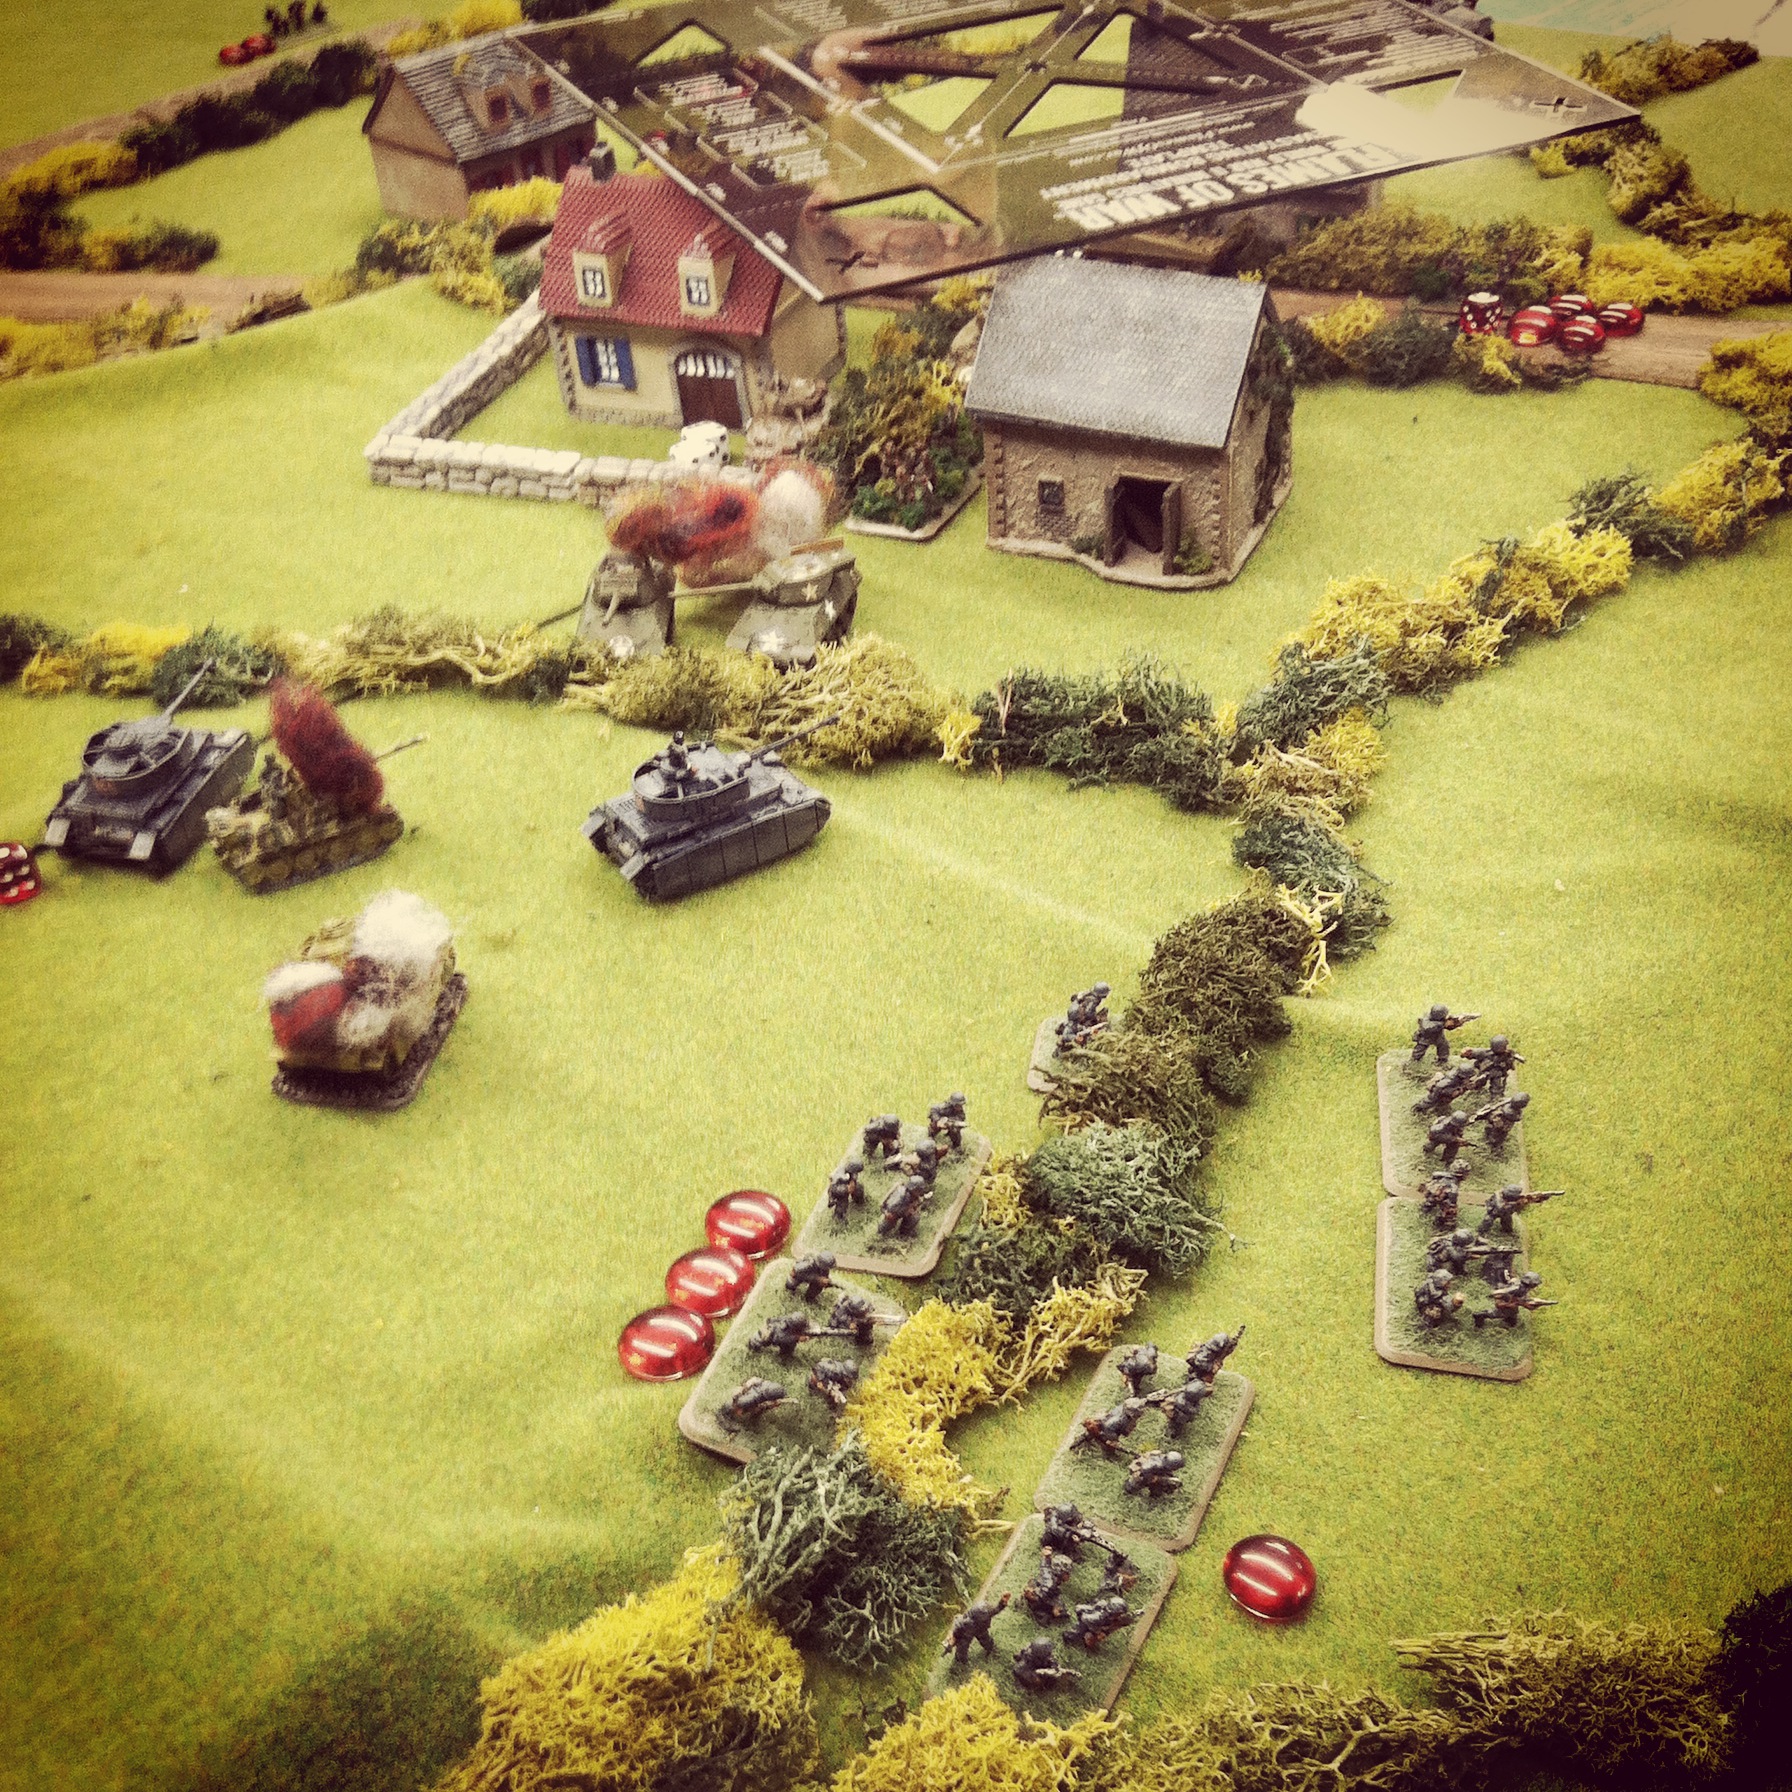
Panzer IVs destroy the final M10 Wolverine as German infantry rush to flank the town from the rear

On the other side of town the two functioning Panzer IVs rolled across the field, shooting at and destroying the last American tank killer. Under continued cover from their Panzers, the Grenadier platoon continued slipping across the field, climbing over the bocage and looping around to the American rear.

IMG_4319A direct hit from Germany artillery arrives in the middle of the American position

With German infantry looking to encircle the town and two Panzers wheeling to engage the Shermans at the center of town, a German artillery barage hit dead center amid the objective buildings. As the smoke cleared, only two Shermans remained fully operational and the surviving US rifle platoons were on the run. As early morning light began to break, the Americans heard encroaching German voices from the hedgerows from every side of the town. The Panzer Lehr counterattack had been a success, and the Americans chose to cut their losses, regroup and fight again.

I Ain’t Been Shot Mum: Panzer Lehr Counterattack Campaign – ‘Hauts-Vents’ July 10, 1944 Scenario

NearStLo

Although the Panzer Lehr Division was held out of action during the Allied D-Day landing at Normandy in June 1944 , they would go on to provide a number of important defensive, delaying and counterattack actions in the months following. They first distinguished themselves in the days immediately after, throwing up a hasty defense at Caen against encroaching British and Canadian forces. After battles at Tilly-sur-Seulles and Villers Bocage in mid-to-late June, the vastly depleted Panzer Lehr Division was called out of the fight. With only a short time to regroup, the war-worn division was ordered west to countetattack he Allied inland progress toward Saint-Lo. While the June battles had run the Germans up against British Commonwealth forces, the July engagements in the hilly fields and bocage-lined roads would be against the armored and infantry forces of the United States.

PLCounterattackJul44Map

Map of the Panzer Lehr Division counterattack in July 1944

(via US Army Center of Military History)

For a few months now at Metropolitan Wargamers in Brooklyn, NY, we’ve been playing a fair amount of I Ain’t Been Shot Mum rules system for World War II. After a number of one-offs and our recent North of Caen game, we finally decided to jump into a mini campaign focusing on the Allied push inland toward St Lo and the German defense following the D-Day landings in  Normandy in June 1944.

SCHeroesofOmahaSkirmish Campaigns  “Heroes of Omaha and Panzer Lehr” scenario book

For our campaign, we’re using the classic Heroes of Omaha and Panzer Lehr scenario book from Skirmish Campaigns. The Skirmish Campaigns series of books offers well-researched and detailed campaign scenarios full of detailed orders of battle, terrain layout maps and deeply descriptive narrative of how actual engagements unfolded during World War II. With just a little bit of work, the Skirmish Campaigns scenarios are easily adaptable to a variety of wargaming rules and scales including Battleground, Bolt Action, Flames of War and I Ain’t Been Shot Mum.

IMG_4207

Scenario set-up with two small houses as objectives at the middle of the table set amid rolling hills, small farms and thick bocage

The scenario at Hauts-Vents is set up on a long table with hills rolling into a valley from either end. Roads cross the table among fields lined with heavy bocage hedgerows. At the center of the table are two farmhouse objectives that are the focus of the US mission. All German platoons are deployed on blinds nearly everywhere on the table, accepting the northeast corner from which the US advance begins.

My Germans deployed on blinds with a Pak 40, a Sdkfz 10/1 and an artillery spotter for the off-board 105mm artillery deployed around a farmhouse atop Hill 91 on the southern end of the table. German rifle platoons armed with Panzerfausts deployed in blinds in and around the objective farmhouses. One platoon also had a MG42 and another contained a Panzerschrek anti-tank team. To block the predicted US advance, one road was blocked with barbed wire and another was laid with mines.

The American blinds moved in straight in column along the road sloping down toward the valley. Heading the advance was a US recon platoon led by an M8 Greyhound armored car. Three platoons of mechanized infantry loaded up in half tracks and a platoon of Sherman tanks fell into line behind.

IMG_4210

A US recon Greyhound at the head of the column exposes barbed wire laid to block passage on the road to the objectives

IMG_4212

The recon unit moves to overlook the German position near the objective house as US half tracks roll into position

IMG_4211

 German infantry move out of the house to engage the US infantry

IMG_4213Fire from German Panzerfausts destroy two half tracks and their passengers

IMG_4215

Germans use their last Panzerfausts to destroy the remaining half track and its crew

The first few turns progressed quickly with the US column moving down the road under blinds while the Germans quietly defended from concealed positions. The lead Greyhound revealed the barbed wire blocking the road, forcing the first platoon of half tracks off the road toward the first objective. Closing in on the house, the German position was revealed and the Germans quickly destroyed two half tracks and their mounted infantry with shots from Panzerfausts. In subsequent turns, the US commander jumped from his vehicle and was followed in by the final half track which was also destroyed. With the lone US commander in the position, the Germans assaulted taking casualties before eliminating all Americans from the disastrous head-on assault on the objective.

IMG_4214

 The column of US Shermans and infantry mounted in half tracks rush down the road

IMG_4216

German 105mm artillery rains in from off the table wreaking havoc on the US column

IMG_4217

A German Pak 40 and Sdkfz 10/1 break their cover on Hill 91 to engage the paralyzed American column

As the first platoon of US infantry fell, the remainder of the column ran into problems of their own. The Shermans attempted a push into the field off the road but two of the three quickly bogged in the rain-soaked ground. With the Shermans stalled and the rest of the column bunched-up on the road, an off-board German 105mm artillery barrage made a direct hit to the US line. As a result, the tanks took severe damage to their sights, main guns and mobility. Infantry jumped from their half tracks and one platoon took immediate fire from German MG42s hidden in the bocage across the nearby field. As the Americans desperately attempted to spread out and move to cover, additional rounds of fire from the Pak 40 and Sdkfz 10/1 on the far hill continued to pour shots into the remnants of the burning US column.

IMG_4218

 US reinforcements arrive at the house and advance on the defending German left

IMG_4220

Germans attempt to hold the flank at the objective

IMG_4219

Smoke is laid down in front of the German position on Hill 91 to cover the US advance

IMG_4245A late game push up Hill 91 by the US Greyhound leaves it in flames

The survivors from the US column swiftly moved to position themselves for another round of assaults on the German position. Two surviving Shermans unbogged and rolled to position along the bocage, destroying the MG42 positions along the way. US infantry rushed in along both flanks of the German survivors at the farmhouse who were quickly reduced to a single operable fire team. US mortars followed up with a directly aimed smoke bombardment in front of the German guns on the hill, providing invaluable cover for the American ground advance. Pressure from the advancing Greyhound forced the Sdkfz 10/1 to fall back late in the game. As the armored car breached the crest of the hill, a quick shot from the Pak 40 eliminated it. Unfortunately for the Germans, this was one of their last bits of glory for the game.

IMG_4242German defenders get routed at the first objective during close assault and fall back

IMG_4243The last platoon of German defenders get spotted at the second objective

IMG_4244The final objective falls to the Americans as the German defenders are caught in combined infantry and artillery fire

Back at the two objectives, the US moved hard toward victory. A close assault at the first house sent the survivors of two German fire teams running for the rear with heavy casualties and all but eliminated from the game. With that, one lone German platoon was exposed at the second house objective, and all US focus turned toward them. Two turns of heavy US artillery strikes and small arms fire from the bocage across the road laid waste to all but a few of the last Germans holding out. With the US Shermans still working their way on the German left and US infantry closing on the front, my Germans threw up their hands in defeat.

The first day of battle at Hauts-Vents went to the Americans, but as dark was drawing near, another battle was already looming before dawn as more Germans rushed to the defense.

Flames of War: Lingevres 1944 Scenario

lingevres1944

By D-Day +8 on June 14, 1944, the British 50th Infantry Division had pressed about 5 miles inland from Gold Beach to the outskirts of Lingevres. Dug in at the town were elements from the Panzer Lehr Division with several Panther tanks ready to force back the looming British attack. With 6-pdr anti-tank guns in tow, the British pushed into town mid-morning following a bombardment by 25-pound artillery and runs from supporting Typhoons above. A ferocious battle commenced between the 4th/7th Royal Dragoon Guards and the German Panthers. When the smoke cleared, several Panthers sat burning as victims of Sherman Firefly and anti-tank gun fire. At day’s end, the British controlled Lingevres.

lingevresAT

British 6-pdr anti-tank gun deployed outside Lingevres, June 14, 1944

The WWPD website has a Lingevres scenario available which two of us adapted for play this past weekend at Metropolitan Wargamers in Brooklyn, NY. Using the scenario as a guideline, we laid out the tabletop battlefield with cornfields stretching outside the town occupying two-thirds of the table. With our 1750-point forces on each side, the Germans began with two platoons of infantry and a heavy machine gun platoon inside two buildings and the church at the center of Lingevres. The British then deployed with their artillery battery, two rifle companies and a recon patrol. All other forces were held off table, with German delayed reserves set to arrive in turn three and British reserves eligible to arrive immediately at the beginning of the game.

Victory conditions as presented were simple — the British needed to take three buildings in the town and the Germans needed to drive the British from the field. How the game played was not simple and once again revealed my need to sink more work into creating accurate, playable scenarios for FOW.

IMG_3163Germans dug in at Lingevres in the town’s buildings while British artillery and infantry deployed from the cornfields in the distance

IMG_3164

Initial movement of British forces into Lingevres with recon carriers moving left and infantry moving into the woods near the church

The first two turns of the game saw the British marching from their edge of the table toward Lingevres. At the town, a German machine gun platoon sat waiting in a building at the crossroads while two other infantry platoons took up position in the church and shops across the road. By turn three, British artillery had opened fire on the machine gunners and pinned them. The first British tank platoon also rumbled onto the table, as did the German Panthers which made way for the center of town.

IMG_3165

Panther reserves roll into the center of Lingevres

IMG_3173

British infantry in the woods take fire and are pinned as armored reserves move from the rear

The first British infantry platoon made way through the woods at the center of the table but were pinned and cut down over two consecutive turns of fire from nearby Germans. The British recon patrol, edging its way through the bocaged fields near the church, was chased away with the appearance of the Panthers.

IMG_3167A British Sherman takes up position to spot for the artillery battery

IMG_3166

British infantry move from the farmhouse across the field

IMG_3169

Panthers destroy a Firefly and the Sherman spotter tank at the edge of town

IMG_3170

British infantry fall back after taking fire from the German half-tracks

On the main road to town, the British ran their Sherman spotter tank and lead Firefly toward the nearby farmhouse. On the other side of the farmhouse, a British infantry platoon moved into position using the building and nearby bocage as cover as they made way for the open field. The heavy British push around the farm was stymied with the arrival of German halftracks which fired machine guns into the field. By turn five, the Sherman spotter tank and spearheading Firefly also lay in flames after some quick shots from the German Panthers.

IMG_3168

British machine gun carriers and tank reserves roll on

IMG_3171

Armored reserves move to support infantry

IMG_3172 British infantry reserves move in near their artillery battery

By turns six and seven the inital British assualt had been repulsed at a safe distance from town. All German infantry platoons remained safely bunkered up in the town’s buildings, and the spotter for the German’s reserve 12cm mortar platoon was now camped out in the church’s bell tower. The three Panthers prowled back and forth at the center of town, and the incoming fire from the British artillery in the distance was the only real agitation to the occupying Germans. The Britsh rolled on their final reserves of machine gun carriers, Sherman/Firefly tanks and a fresh infantry platoon.

Even with all reserves on the table, the British attack was stumped. With one rifle platoon destroyed and a second whittled down, the British had just one intact infantry platoon on the field. One tank platoon struggled through the fields to one side of town, while the second sat idling on the road to town. Clear lines of fire around the church and town center presented open killing zones for the Germans in the town’s buidings and the three Panthers. All the Germans needed to do was sit in place and mow down the coming British.

I love playing wargames for historical scenarios, but our game this past weekend at Lingevres presented some serious limitations to the FOW rules as written. Playing an even match of 1750-point forces per side ultimately did not allow for a satisfying game for either player. What works for a head’s up FOW tournament game or randomly-rolled mission simply does not play well in recreating historic engagements.

In our Lingevres game, the British simply didn’t have enough units to create a critical mass to advance into town under what was sure to be withering fire from the Germans. We decided we liked the scenario, but perhaps the British needed a 50% increase in points, perhaps with additional rifle and tank platoons and a Typhoon providing air support.

With a three-day D-Day weekend being planned at our club this June, we’ve got multiple historic airborne, beach and inland fights to sketch out in the coming months. There’s going to be a lot of playtesting and tweaking to get our historic games to play well. With wargaming, striking the balance between a game that provides both historic accuracy and the potential for different outcomes is the real challenge that lies beyond just the roll fo the dice.