Star Wars Legion: Terrain

Star Wars: Legion – Priority Supplies Battlefield Expansion, Fantasy Flight Games, 2018 — front cover (image provided by the publisher)

One of my favorite aspects of the Star Wars franchise is the environments in which the space opera is set. From the desert planets of Tatooine and Jakku, the snowy Hoth, swampy Dagobah and the volcanic surface of Mustafar, the universe created from the imagination of George Lucas is one of varied settings. Gaming this universe in miniature provides a great opportunity to model and play within terrain of all types. Judging from online photos from the wide community of players of Star Wars Legion from Fantasy Flight Games, fans of the game love terrain.

As a miniatures wargamer for over 30 years, creating and using terrain is one of the many rewards of the hobby. In building out my Star Wars Legion games I’ve relied on my existing collection of trees from Woodland Scenics and other manufacturers, thus creating a forested table like the forested moon of Endor from Return of the Jedi. I glue the trees to round, flocked bases to provide stability on the table and additional visual interest. I also have a big bag of scatter made up of clumps of foliage, lichens and small twigs that I toss around on my flocked green 4′ x 6′ playmat to visually fill in otherwise flat open space.

Fantasy Flight Games includes some simple plastic barricades in the base starter kit for the game and the Priority Supplies expansion with moisture vaporators, communication terminals and crates. I painted up all these pieces in simple layers of grey and metallic dry brushing, picking out some computer panel details in other brighter colors.

Moisture vaporators communication terminals, crates and barricades from Fantasy Flight Games

My existing terrain collection also includes a number of cast, pre-painted rocky hills from Gale Force Nine which can be used in just about any setting. Their Battlefield In A Box line offers a bunch of historical, fantasy, scenic and sci-fi terrain, and the generically-named Galactic Warzones pieces provide some great models for playing Star Wars Legion.

Rocky hill from Gale Force Nine and various pieces from Fantasy Flight Games

I picked up the bunker which is modeled on the one on Endor in ROTJ. Right out the box, the painted resin bunker is ready to play and the removable roof is a big plus for scenarios involving raids or rescue missions. Fantasy Flight also offers an official Imperial Bunker expansion that is slightly larger with additional detail like a sliding blast door. That said, at half the price, I am more than satisfied with the Gale Force Nine model.

Bunker from Gale Force Nine

Finally, Star Wars Legion arrived right at the time when 3D printing has been exploding in the gaming hobby. Countless manufacturers and individual hobbyists have created hundreds of custom, non-licensed models to fill tabletop Star Wars settings with all sorts of alien races, characters, spaceships, buildings and terrain pieces. I’ve grabbed a few spaceship wrecks from Extruded Gaming, each of which also comes with a small rocky outcroppings.

With my existing terrain and few models I’ve recently picked up, I’ve quickly pulled together a nice selection of tabletop scenario options. With Star Wars Legion the terrain possibilities are as vast as the entire Star Wars universe.

Spaceships wrecks from Extruded Gaming

French and Indian War: Campsite Terrain from Renedra Limited, WizKids and Mantic Games

Gaming miniatures scenarios in the wilderness of 18th-century America and the French and Indian War period necessitates terrain that speaks of the period’s stories, often played out far away from towns and homesteads. With campaign seasons hacked through the woods of the Northeast, Ohio Country and Great Lakes region, impermanent campsites are often the more regular terrain encountered during play.

I’ve found a couple manufacturer’s that provide some great, inexpensive plastic terrain to create campsite vignettes on the table. The Terrain Crate Hunter’s Camp from Mantic Games, while produced for fantasy role-playing gaming, is a great out-of-the box foundation for any wilderness camp. The inexpensive box comes with a tent, campfire, bedroll, stack of gear and firewood pile. My one knock on the set is the rubbery plastic that takes flat paint and creates a bit of a gloss.

To supplement this set, I have a couple more bedrolls from the blisterpack from WizKids. These casts are primed and take paint exceedignly well right out of the box. The company has been adding all sorts of terrain, bits and pieces to their line of figures over the past few years including cannons, barrels, boxes, furniture, etc., all of which can find a home in a historical setting.

I painted and glued up all the smaller WizKids and Mantic pieces onto a freeform cut balsa base which I flocked. I kept the tent and campire (mounted on a large metal washer) separate from tha larger campsite scene for ease of tarnsport and a bit more flexibility of use on the table.

I also have a number of ridge tents, a campfire and barrels from Renedra Ltd. Like the other manufacturers above, this UK-based company manufacturers a variety of plastic terrain including buildings, fences and gabions apprpriate to the 18th-century. The barrels glue up from two halves and I mounted them up in various piles on smll strips of balsa.

Along the way, I’ve also picked up a resin cast of a pile of beaver pelts, a key item for traders making their way through the North American back woods of the 1700s. All together, these elements from three manufacturers combine to give me a pretty good sized campsite for trappers adventuring in the wilderness or a European army on campaign.

American Civil War: Converting O Scale Buildings

MPKennedyHouse

I recently scored a few free pre-assembled O scale plastic buildings made by Model Power. The houses are meant to be used in model railroad layouts and look very modern, plastic and toy like. I looked at them and thought that with a little work they might be made suitable for use for in American Civil War wargaming. I started my project with the “Kennedy’s House” model.

IMG_7898

Primed flat black

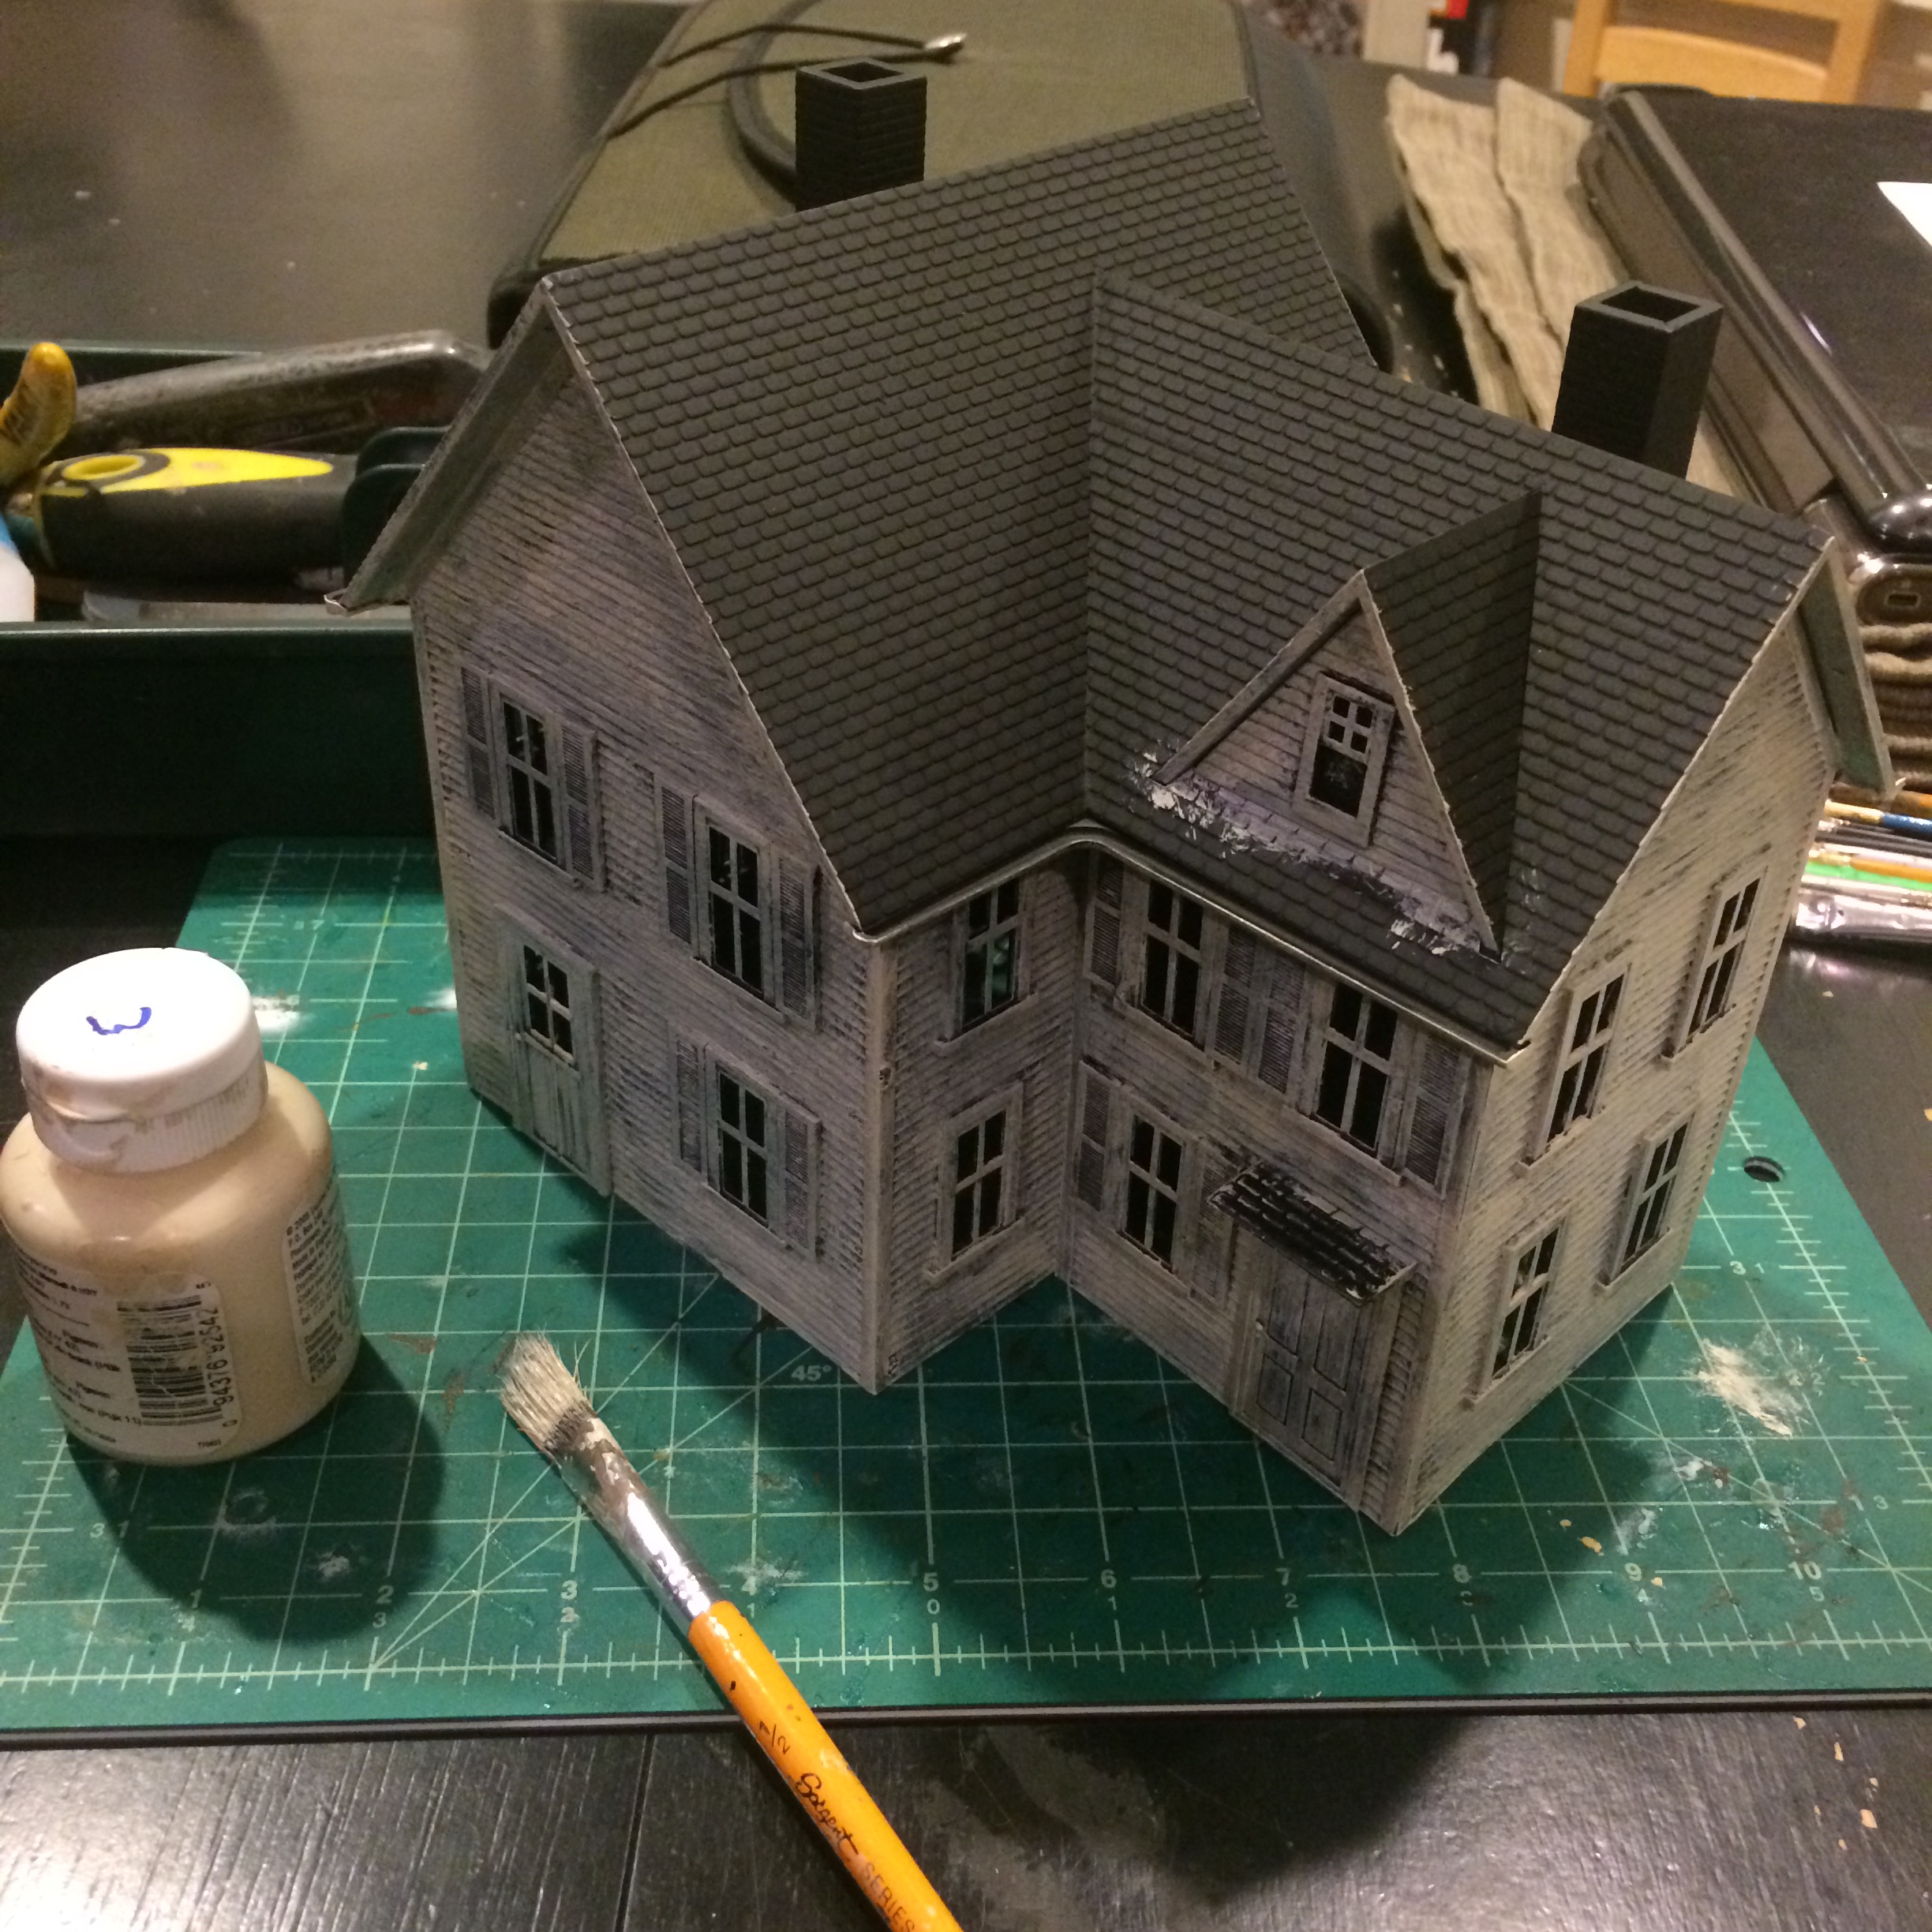
O scale structures are a little on the big side for 28mm, so the first thing I did was to remove the foundation and steps from the building. To make the house a little less grand, I also also removed the decorative front porch. After I re-glued a few loose windows and shutters, the whole model got a coat of flat black primer to knock the sheen off the plastic.

IMG_7900

First dry brush of off white on the siding

IMG_7905

Second dry brush coat in white on the siding

IMG_7906

Two coats of dry brush complete on the siding

Once the primer had set, I dry brushed all the siding, doors and windows with some off white paint. Over the first coat, I built up an additional layer of dry brushed white paint. The final effect I was building up to was a weathered look on the entire exterior.

IMG_7923

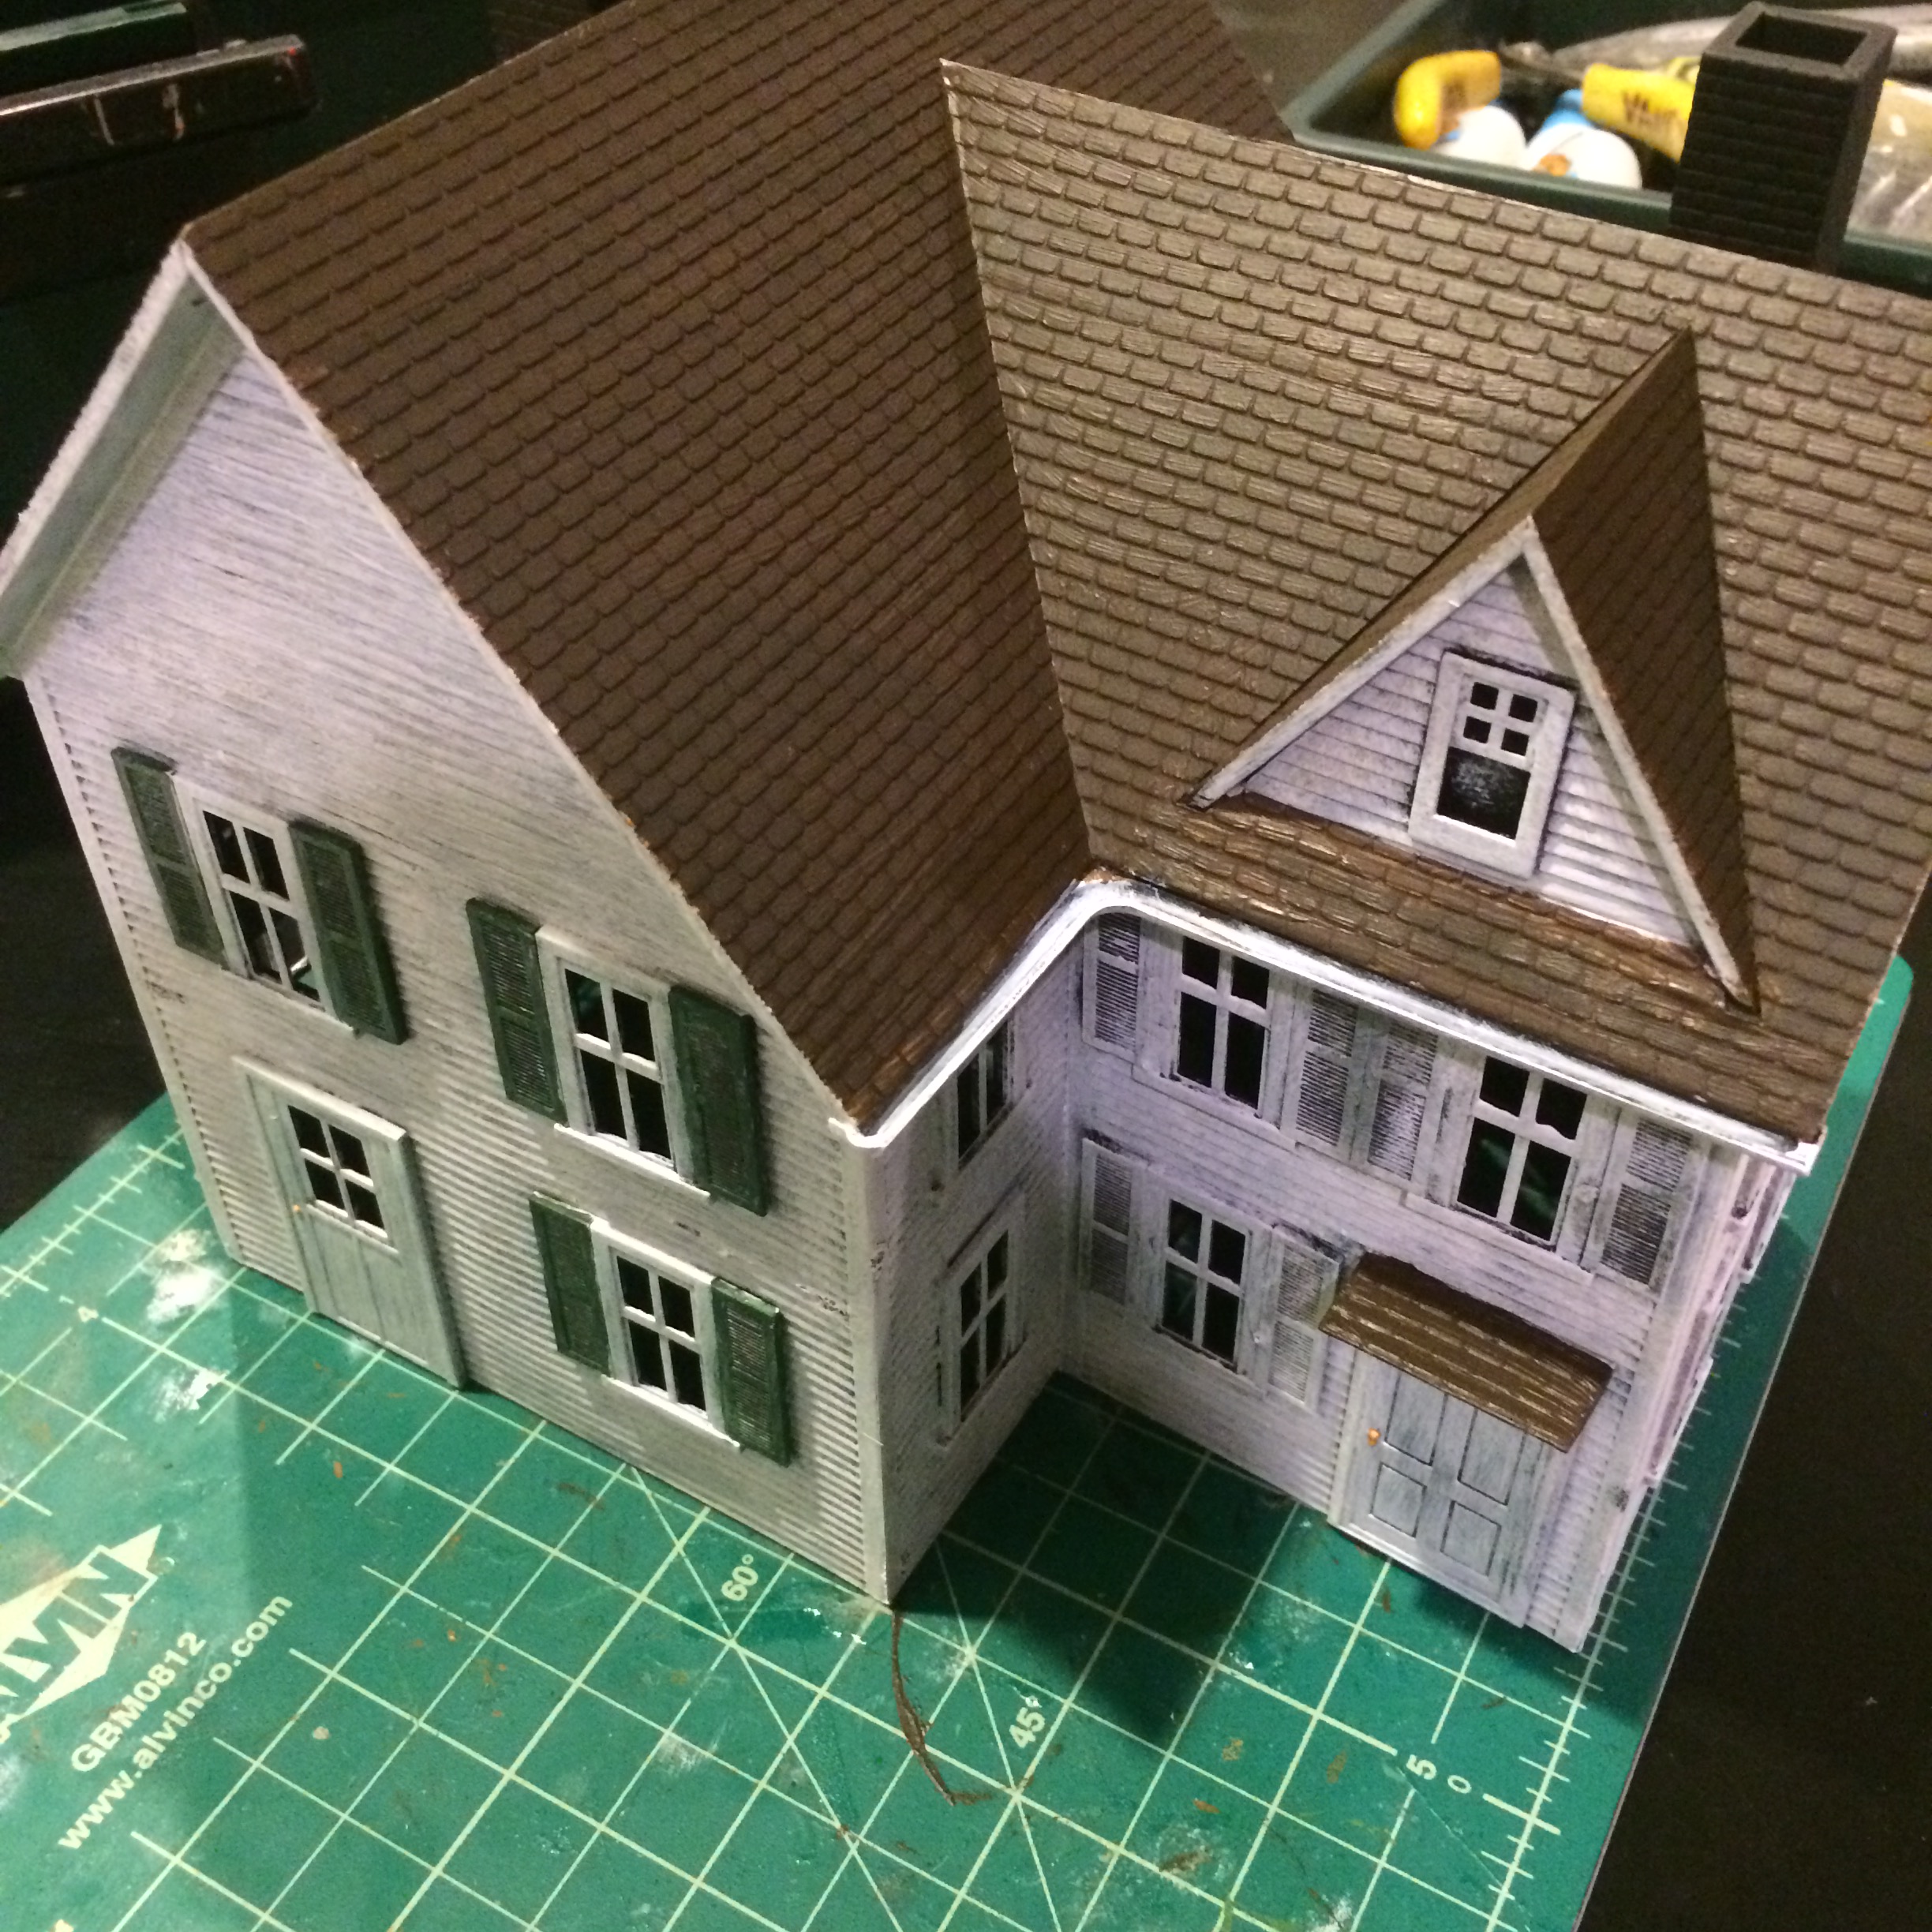
Shutters are dry brushed in green and roof gets dark brown base coat

With the siding complete, the shutters on the building’s facade were dry brushed in a dark green. Again, allowing the layers of paint beneath to show throw added to the lived-in and weathered look to the building.

IMG_7924

Roof is built up with alternating dry brush coats of grays and browns

The roof’s look very modern, so I likewise built up coats of paint to make them look more like wood shake shingles. A base coat of dark brown then received two layers of dark and lighter grays, followed by some lighter brown highlights. The chimneys also got a couple coats of dry brush grays and off white to replicate a irregular stone construction. When done, the completed roof looked very much more like something found in the 19th-century.

IMG_7925

Completed conversion of the Model Power farmhouse

IMG_7927

American Civil War Union soldiers standing guard at the newly completed house

Along with the Model Power buildings, I also picked up some free Woodland Scenics trees which I’ve based individually for my gaming. The trees and rehabbed farmhouse are perhaps a little on the large size for my Perry Miniatures soldiers but considering I’ve received all this terrain at no cost it will all work just fine on the table battlefield.

A Place To Play: Nu Brand Gaming

image

Tucked away on a residential side street in Sunset Park, Brooklyn is an inviting tabletop miniatures players paradise. Located in a former chiropractor’s office decked out in knotty pine paneling, wall to wall carpeting and an assortment of Americana and Wild West decor, Nu Brand Gaming opened in 2015 and is one of the newest and best gamer play spaces in the city.

image

One of the many racks of terrain throughout the space

Nu Brand is operated by Ade Sanya, the resident owner of the building and son of the doctor who formerly served patients in the rooms where dice are now rolled and minis are pushed on tabletop battlefields.  With his family living upstairs, Ade has spent the past year creating an incredibly comfortable and inviting space for gamers focused on historic, fantasy and sci-fi miniatures. His skills as a carpenter and set builder are evident in the sturdy tables and racks of terrain found in the half-dozen well-lit rooms which radiate off the central hallway.

image

Hobby room with supplies and tools to lend

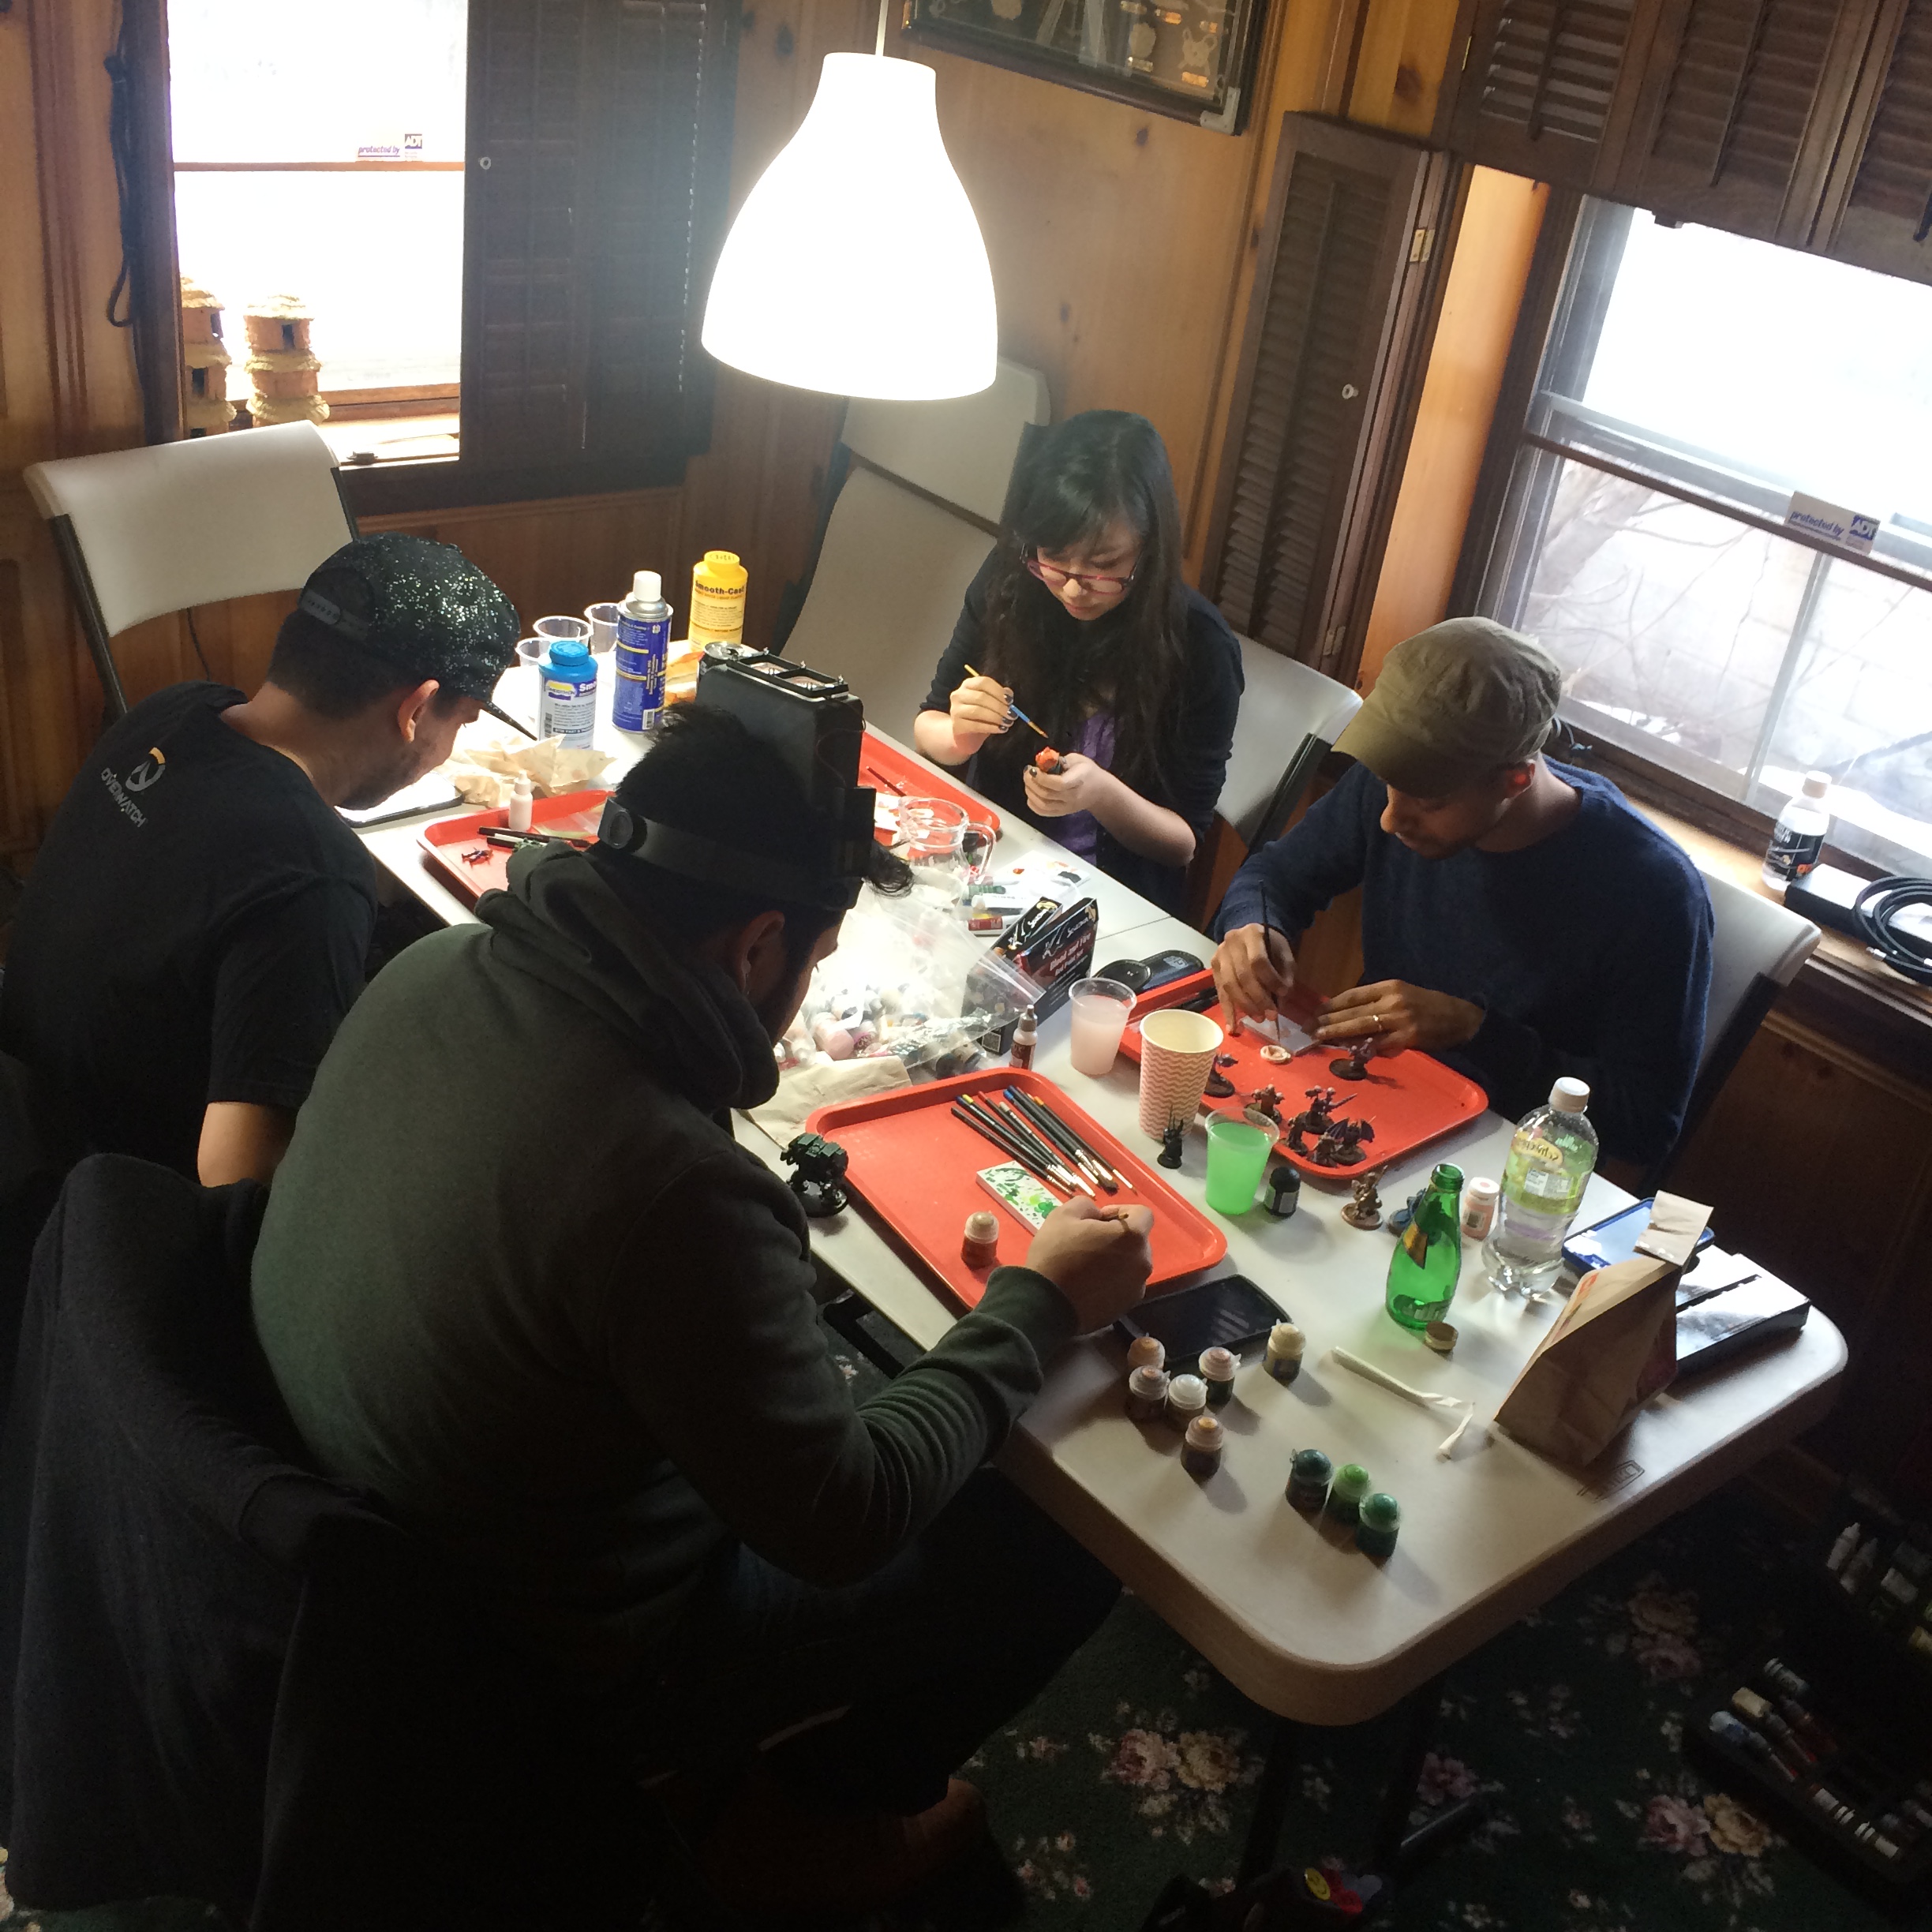
A small hobby room sits at the back of the building where tools and supplies are available for use by members and drop-ins who come to spend time modelling at one of the many comfortable work places throughout the rooms. A small galley kitchen offers drinks, snacks and a refrigerator for visitors to store their own food. Secured storage lockers are also made available to members to store their gaming gear.

IMG_7465

 Miniatures painting in the back room

Membership runs $30 a month at Nu Brand, and a day rate of just $10 is available for people who come to just give the place a try or participate in one of the many growing number of events scheduled. Members can also take advantage of retail discounts with several suppliers Nu Brand is working with to bring product to the community. The space is generally open Wednesdays, Fridays and Saturdays.

IMG_7455

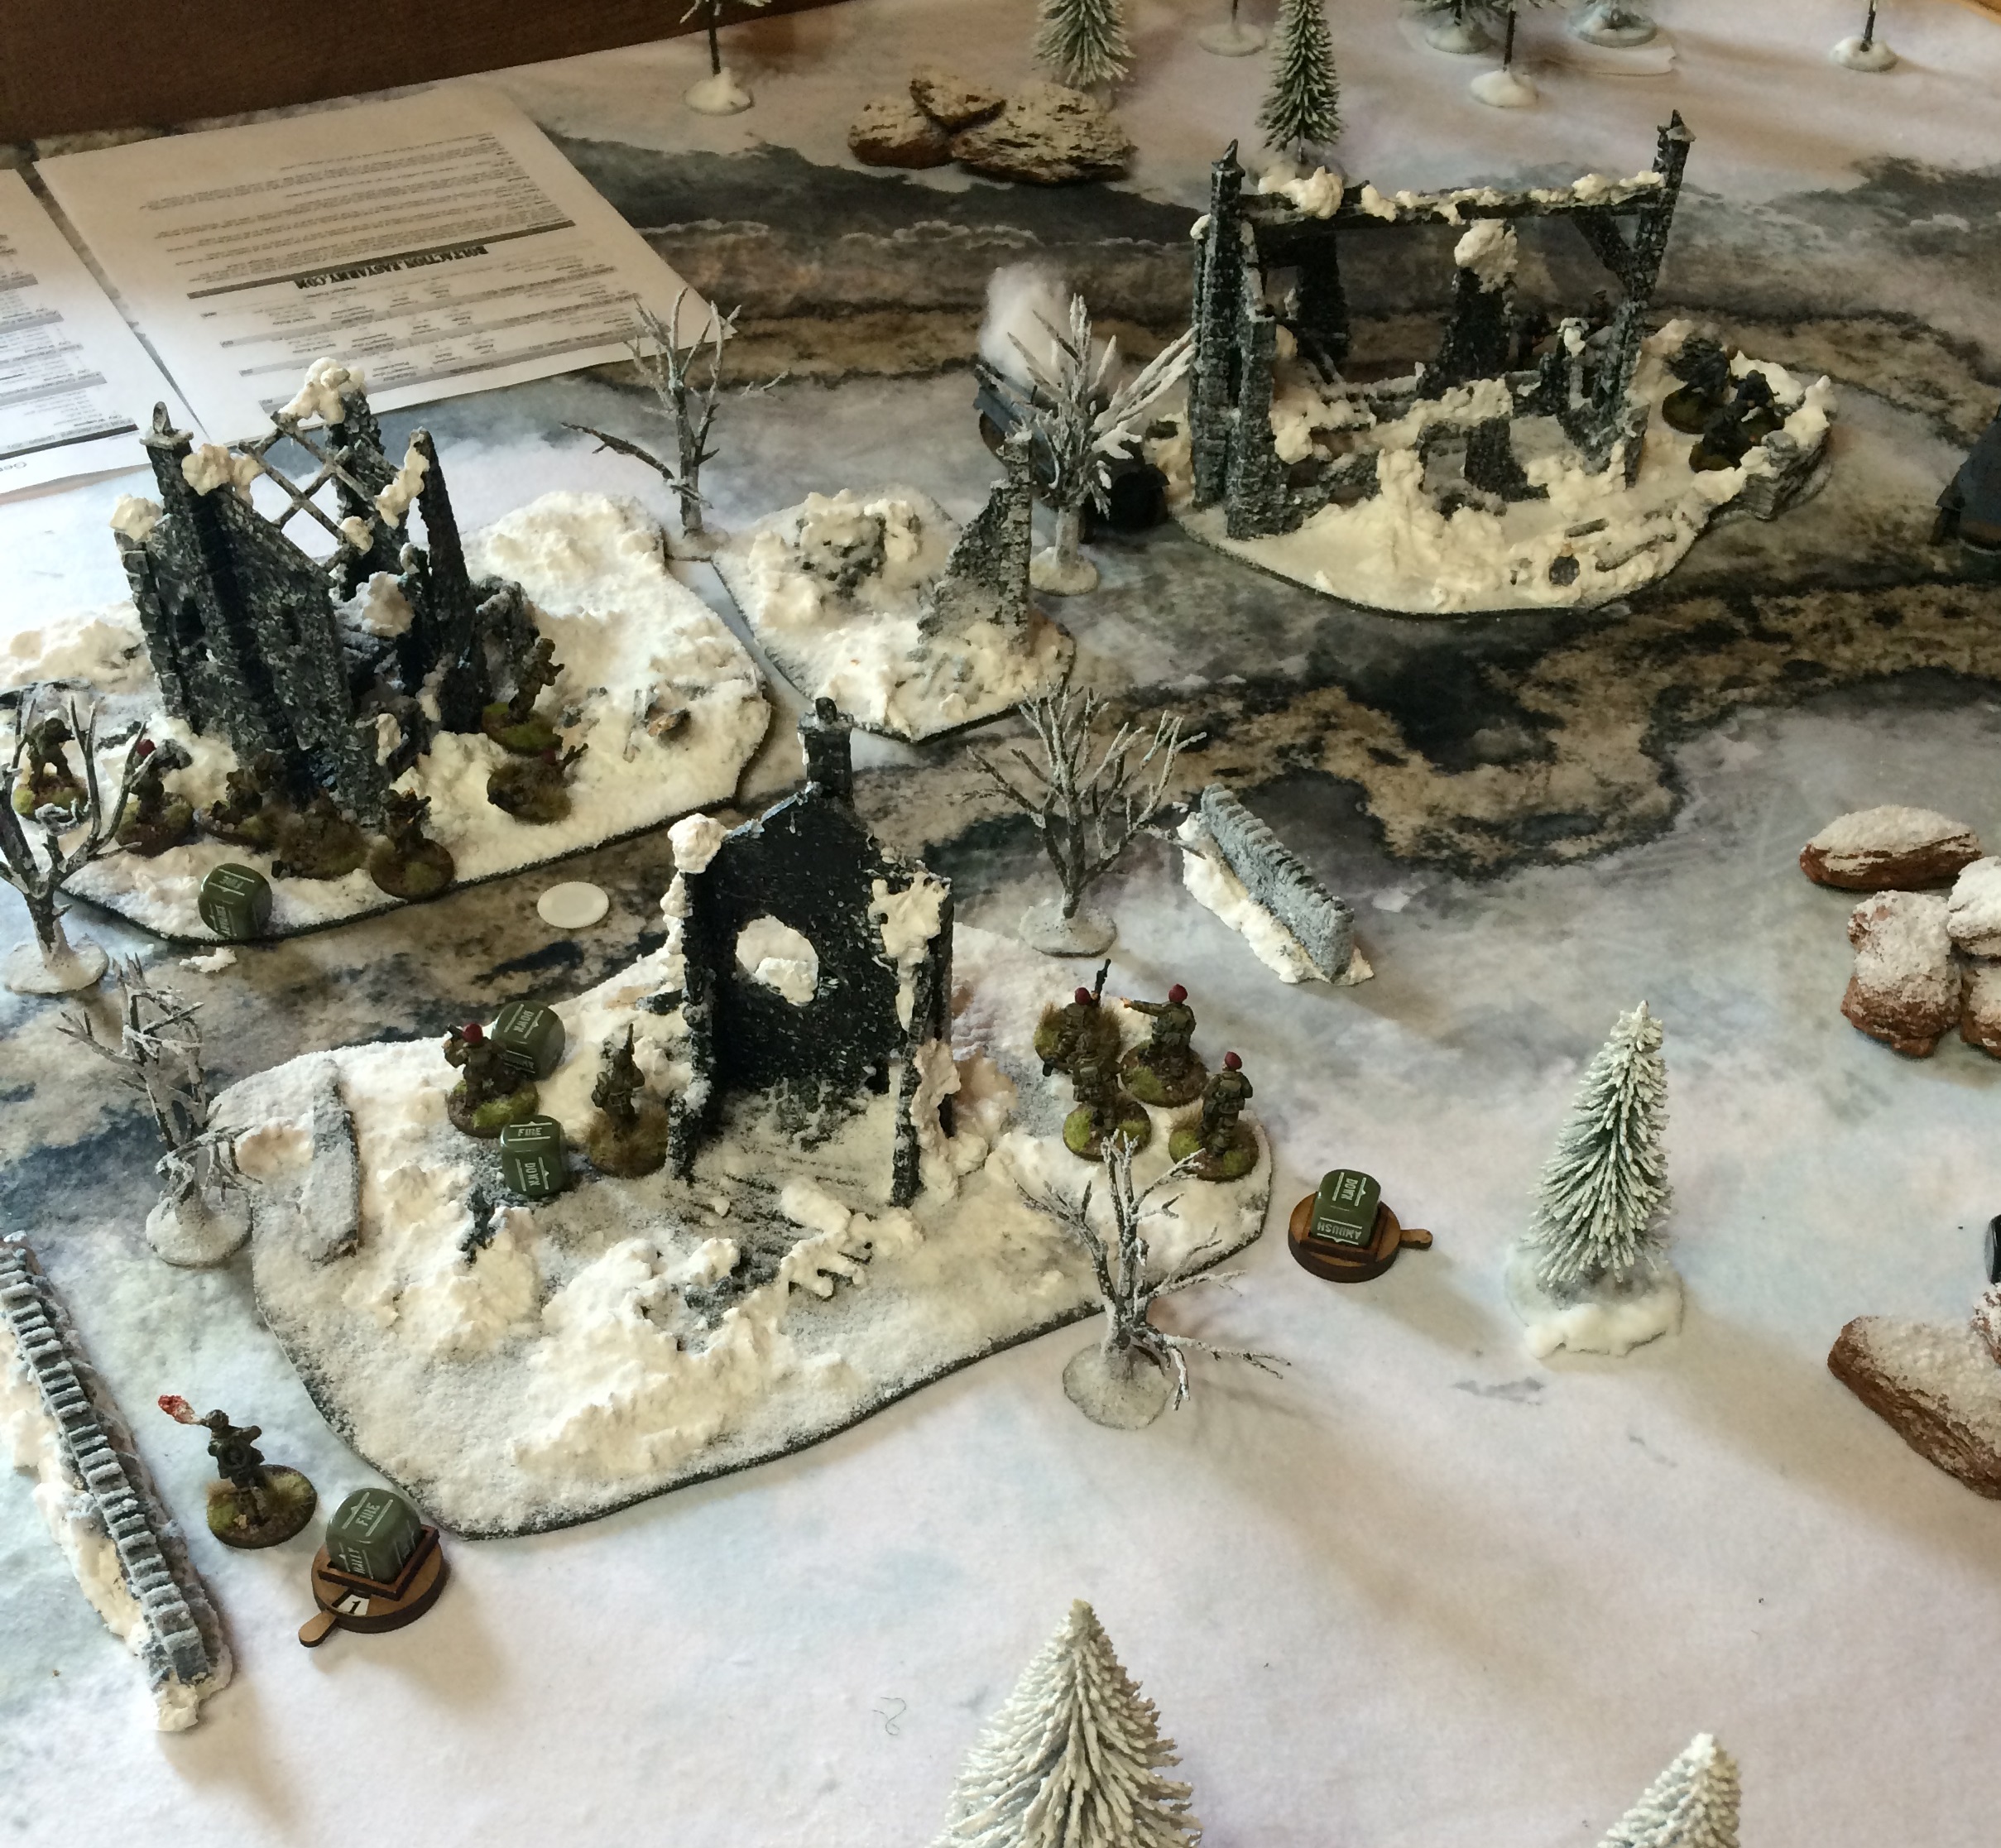
German Fallschirmjager and US Airborne troops clash in a Bolt Action game

IMG_7458

US Airborne assault a German tank in Bolt Action

IMG_7459

More Bolt Action gaming

My first visit to Nu Brand this past weekend found ten gamers playing in a day-long series of Bolt Action 28mm World War II games. Tables were gorgeous — from the towns of late-war Western France and the wintery ruins of an Eastern Front forest to an urban town fight and a clash on a Pacific Island. At the end of the day’s events, certificates were awarded for best painting and force lists, a raffle was held and announcements were made for the new monthly Brooklyn Bolt Action campaign kicking off at Nu Brand this month.

IMG_7462

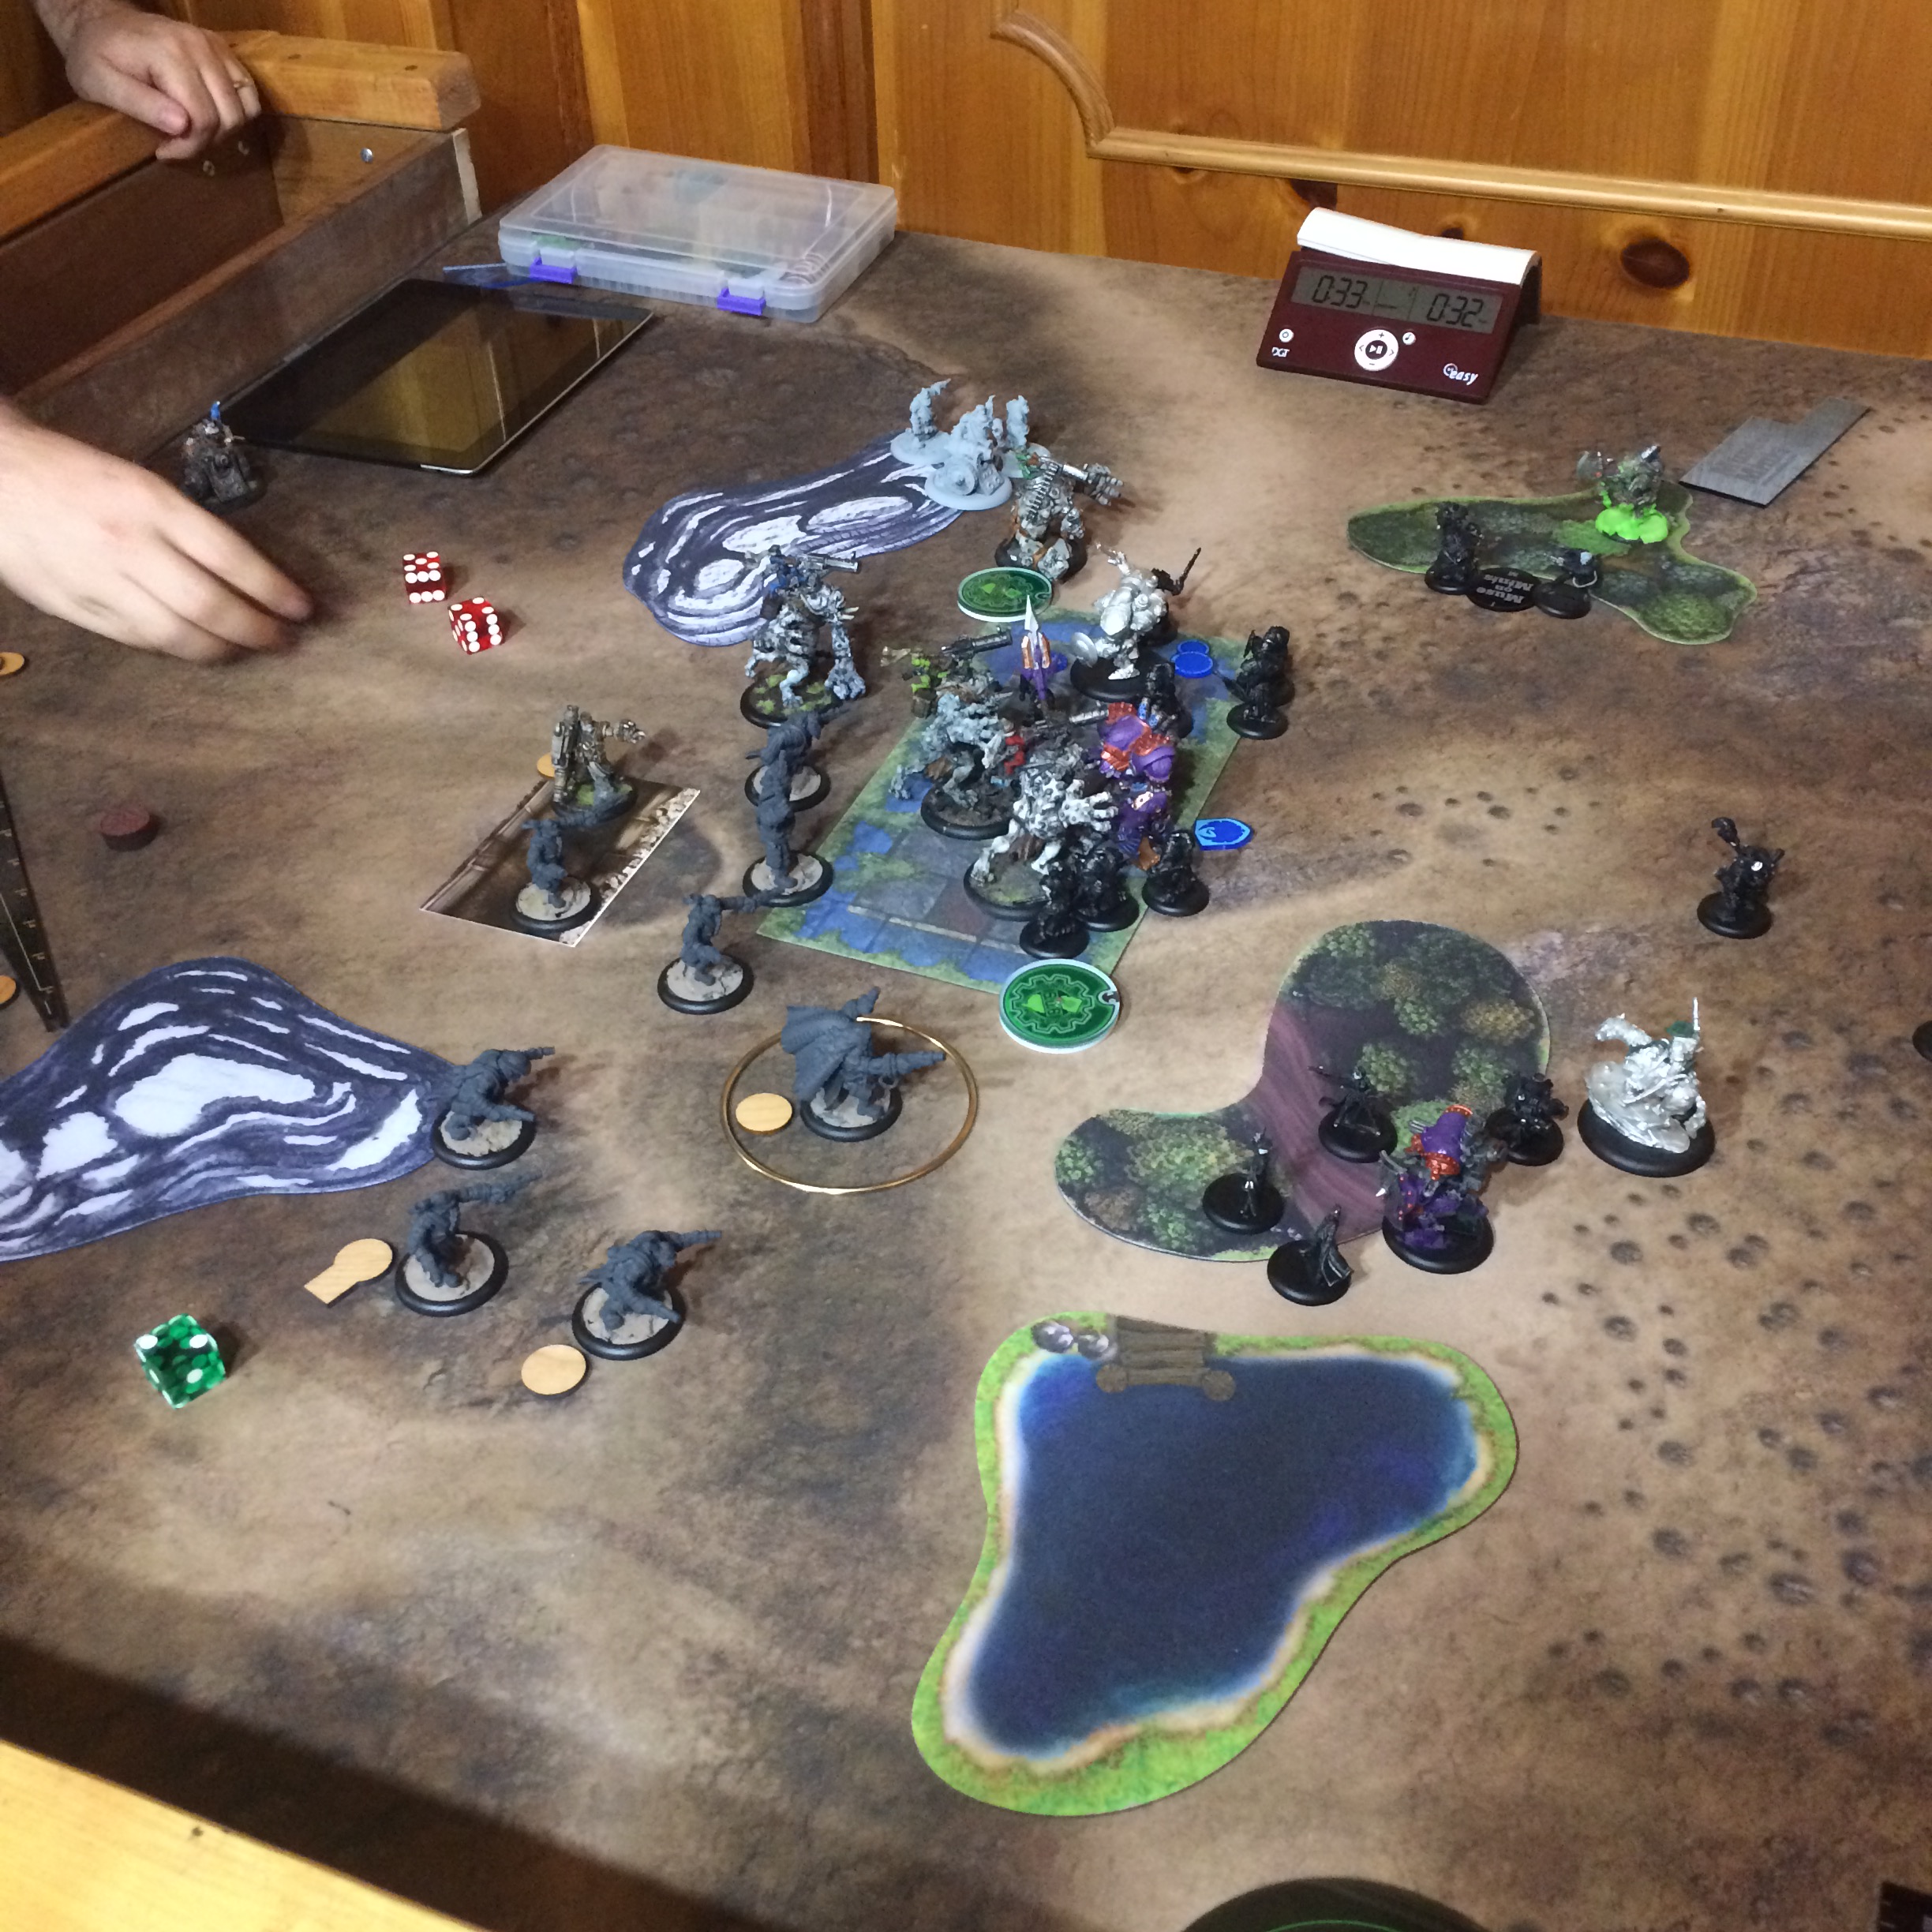
One of the  Warmachine battles in action

IMG_7460

More War Machine gaming

As WWII battles raged in several rooms, other players were occupied with Warmachine and other fantasy games, and four hobbyists were camped out in the back painting away at their miniatures. A variety of games like Star Wars X-Wing, Beyond the Gates of Antares, Malifaux, Mage Wars and Warhammer 40K are played regularly at Nu Brand. Newbies and experts alike all find a spot at Nu Brand. No matter the game, the love of the craft and gaming in the hobby — no matter the era or theme — is evident with everyone who crowds the tables each week.

IMG_7450

Urban terrain set up on one of the many tables

IMG_7466

Modular tables allow for flexible game sizes

The hum of activity and welcoming environment was evident for regulars and newcomers alike at Nu Brand Gaming on my first visit. Aside from myself, two other members of Metropolitan Wargamers were along for the day and we were able to meet and play with a whole host of new people and veteran players who were connected to friends-of-friends throughout the New York City area. Like so many of us in the wide gaming community “keeping table top gaming alive” is the mission of Nu Brand Gaming, and this marvelous place to play is a fantastic new outpost to seize this objective.

Nu Brand Gaming is located at 194 31st Street in Brooklyn, NY 11232 (a short walk from the D/N/R train at 36th Street). Contact them at 646-696-4132 or check them out on their website or Facebook page.


Flames of War: Novus Design Studio 15mm City Block Ruins

ruinsWar is destructive by its very nature, and World War II was the most destructive war in history. Aside from the tens of millions of military personnel and civilian deaths, the war brought unprecedented ruin to the thousands of villages, towns, cities and industrial areas through and over which the war was fought. The nearly immeasurable physical and financial impacts of WWII rippled for decades to come, including enormous effects on buildings and other physical spaces worldwide.

all15mmterrain

My 15mm European terrain during a recent game

For my 15mm WWII wargaming using Flames of War and I Ain’t Been Shot Mum rules systems, my terrain has been modeled almost entirely on Western Europe using buildings from numerous manufacturers collected over the past few years. In all my 15mm modelling, destroyed buildings have largely been absent so far, so I’ve been really happy to add my new city block ruin models from Novus Design Studio to my terrain collection.

NovusLogo

NDS was founded just about a year ago in April 2014 by Robert and Nancy Rumfelt, the founders and original owners of JR Miniatures. Like many wargamers, I’ve got a long history with models from JR Minis and so in many ways I knew what to expect from NDS when the company’s launch was first announced. I watched their inventory grow in the past year covering 6mm, 15mm and 28mm scales across WWII, sci-fi, fantasy and modern themes, and they’ve continued to add new products in the new year.

IMG_4969A complete set of four 15mm city block ruins from Novus Design Studio

The two and three story 15mm urban ruins retail for $26-31 USD each but I picked up a full set of four in a 40% off deal NDS ran at the end of 2014. The straight and corner buildings match up nicely together in a row or bunched into a city block in various configurations. The models also look great placed among buildings from other manufacturers, especially other city row houses from JR Minis. The castings in a creamy resin require a little flash clean up with a sharp hobby knife and air pocket holes show up here and there but don’t distract from the destroyed nature of the structures.

Novus Sample Front BackFront and rear view depicting multiple removable floors of a typical city block ruin model

All the NDS city block ruins feature removable floors molded with plank floors, piles of rubble, walls and interior doorways. The buildings have staircases and walls on the interior, broken window panes and more rubble on the attached sidewalks at the front. Everything about these make them very usable for 15mm gaming whether it be for 20th-century historical scenarios or contemporary and near-future gaming in European or even American urban settings. Getting multiples of the models on the table would easily allow setting up a truly impressive cityscape ravaged by the impacts of war.

IMG_4987Cleaned and primed corner city block ruin model

After cleaning up the flash on the models, I washed them all in warm soapy water to remove excess casting residue. The main building structures got a spray of flat gray as a base coat followed by layers of dry brushed tan, light gray and off white paint on the exteriors. Sidewalks also received grays and off white to highlight piles of ash and broken masonry heaped on the ground. On building had shutters which were painted in a dark blue and green and then highlighted with the same color mixed with a bit of white.

IMG_5670

IMG_5669

For the interiors, the removable floor levels were base coated in flat black. Plank floors were built up in layers of browns ranging from dark to light in each coat. I went basic on interior walls, using an off white to create a simple plaster look. As with the exterior, the rubble and tile floors on the ground floors were built up in grays and off white.

IMG_5672

IMG_5673

After a finish of a few coats of clear matte spray, the city block ruins were done. Arranged in a square block or stretched out in a row, these models easily blend in with other 15mm terrain manufacturers and add a great bit of variety to a tabletop set up. Bringing a bit of destruction to my overly neat wargaming battlefields is a welcome addition with my first buildings from Novus Design Studio.

IMG_5674

IMG_5671

IMG_5675

Flames of War: JR Miniatures 15mm Arnhem Row Houses

arnhemstreet

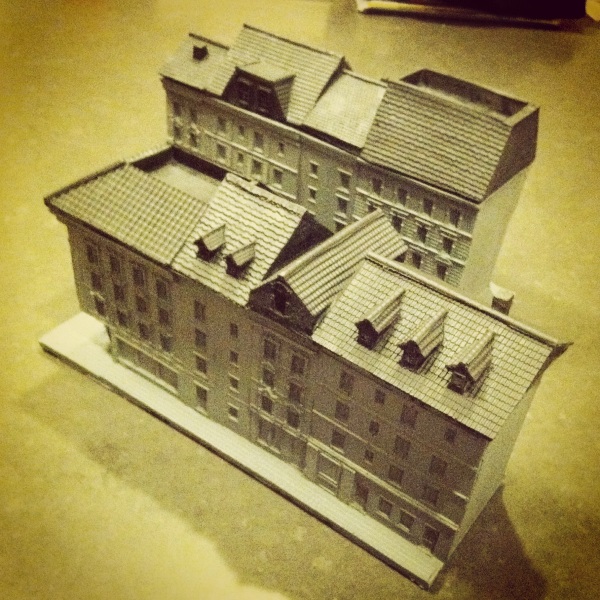
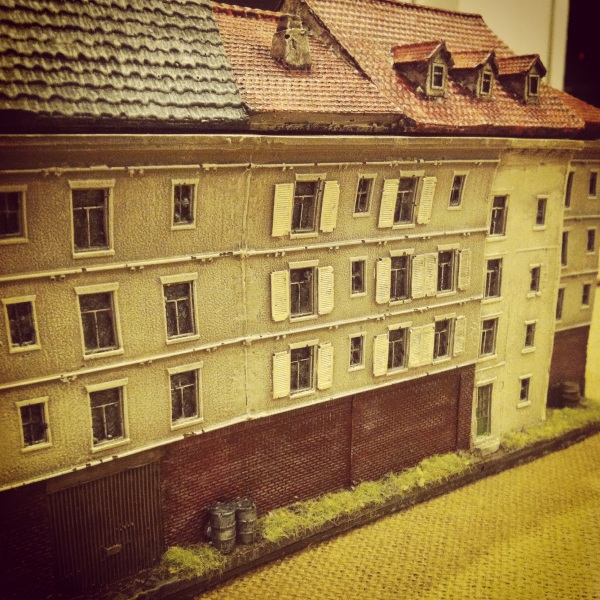
I picked up two different 15mm JR Miniatures Arnhem row house models on my recent trip to the HMGS Fall In! 2014 convention at a real steal of 40% off the list price. At nearly 12″ long and up to 8″ tall, these cast resin models create a quick urban feel to a tabletop battlefield. Each model has lift off roofs and interior floor and wall sections which pull out to allow for stands of troops to occupy varying rooms and levels. The roofs on the models also contain open parapet areas where artillery spotters, machine gunners or other troops can placed to command the battlefield from high upon the rooftops.

IMG_4674Cleaned and primed Arnhem row houses from JR Miniatures

As with most of my experiences with JR Miniatures models, there’s a fair amount of clean up to flash before getting started. The castings also contain a few air holes here and there, but nothing that detracts too much from the overall models. If anything, missing pieces of a cornice or a small hole in a wall might be chalked up to gunfire.

Here’s a simple outline of my technique for painting resin buildings:

Painting Western European Buildings

  1. Use a sharp hobby knife to carefully remove extra resin flash from casting. Particular care should be taken to make sure interior floor sections lift out of the model easily.
  2. Wash models in warm soapy water to remove molding residues. Allow models to dry overnight.
  3. Spray prime roof and removable interior floor sections in flat black and main building sections in flat grey. Allow primer to dry overnight.
  4. Paint roofs:
    1. Tile roofs begin with a dry brush of 50/50 black and red paint, followed by a dry brush coat of red paint and finished with a dry brush of orange paint to highlight.
    2. Shingled roofs begin with a dry brush of dark grey, followed by dry brushed coats of lighter browns, light greys and dark green.
    3. Stuccoed areas in roof gables and dormer windows receive a dry stipple brushed coat of light brown followed by off-white paint dry brushed with the same stipple brush.
  5. Paint floor sections:
    1. Dry brush floorboards with layers of dark and lighter brown paints.
    2. Paint wall sections in off-white paint.
  6. Paint building facades:
    1. Stucco walls receive a dry stipple brushed coat of light brown followed by off-white paint dry brushed with the same stipple brush. Dab some random areas with more off-white to create areas of more fresh stucco to create variations along the street.
    2. Dry brush a slightly heavier amount of off-white paint over cornices and door a window molding to create more depth of highlights.
    3. Stone areas receive a dry brush of light grey followed by off-white dry brush highlights and a dark brown wash in recesses.
    4. Brick areas are dry brushed with 50/50 black and red paint followed by random dry brushing in off white paint to highlight.
    5. Paint doors and shutters with a variety of blues, whites, greens, reds and browns. Follow basecoat with highlight in same color slightly lightened with off-white. Dab doorknobs with brass paint with a fine brush.
    6. Window panes are all carefully given a light coat of black and then dry brushed with dabs of lightly dry brushed white paint to give the illusion of glass.
    7. Sidewalks are dry brushed with light greys over a medium grey basecoat.
  7. Ground areas at the rear of the buildings receive brown and green dry brush coats followed by grass flocking and small clumps of foliage.
  8. Coat models in several layers of spray clear matte finish, allowing each coat to dry before applying an additional coat.

I was able to achieve a pretty decent tabletop quality finish to my buildings with maybe three hours of work on each model using the painting scheme above. Since colors on buildings are rarely monotone (unless newly constructed), I use a plastic surface on which I dab a variety paint shades and mix colors from this palette as I go with my dry brushing. I then build up areas with heavier amounts of one color or another to pull out highlights, create varying textures and differentiate from one building to the next along the street.

IMG_4695A completed JR Miniatures Arnhem row house

IMG_4694 The other completed row house with corner shop

IMG_4692Close up of the corner shop

IMG_4698A view along both row house blocks

IMG_4697Rear detail of one of the blocks

IMG_4693Close up view of the facades

IMG_4696A German Stug parked in front of the row houses

IMG_4691Overhead view of the interior floors

IMG_4690A floor section being removed for placing troops inside

I’m really excited about these models which nearly double the footprint of my existing Western European buildings in 15mm. Models from JR Miniatures fit in nicely with my buildings from Mark IV Miniatures and terrain from a variety of other manufacturers. Although modeled on actual streetscapes of Arnhem, the buildings are easily usable in creating the look of many densely populated areas of France, the Netherlands or elsewhere in Western Europe during late war operations.

Flames of War: Modelling Western European Terrain in 15mm

normandystuartterrain

I’ve had a lot of great feedback from the past year of posting after action reports for Flames of War games. Fellow players have been universally complimentary on the layout of my terrain used in my scenarios. With that, I’m increasingly being asked questions about the make of my models, where I buy them and how I achieve some of the other rerrain modelled  in my games.

Modelling terrain, like any aspect of miniatures wargaming, has to take into account the three main factors of skill, budget and time commitment. I find myself somewhere in the middle of all three categories, and I feel my level of personal investment in my terrain modelling is reflective of this. One of the many benefits of belonging to a club like Metropolitan Wargamers in Brooklyn, NY is the opportunity to share in our massed collections of terrain and create some pretty impressive-looking games.

As a longtime miniatures hobbyist with a passion for scale modelling, I wanted to share a quick round up of the current state of my 15mm terrain collection I use for Flames of War. To date, my FOW gaming has focused on the European Western Front, so the vast majority of my terrain focuses on buildings and other features appropriate for France, the Low Countries and Western Germany. All that said, let’s take a European tour in miniature…

markivposter

Any small town or rural tabletop Western European battlefield needs buildings — barns, houses, shops and cafes — not only for visual appeal, but to provide covering positions and even possible objectives during game play. FOW offers a fine line of pre-painted buildings but I find them to be a bit on the expensive side and toy-like. I also like to paint, so breaking up modelling little tanks and soldiers with some miniature real estate projects makes for a nice change to hobbying routine.

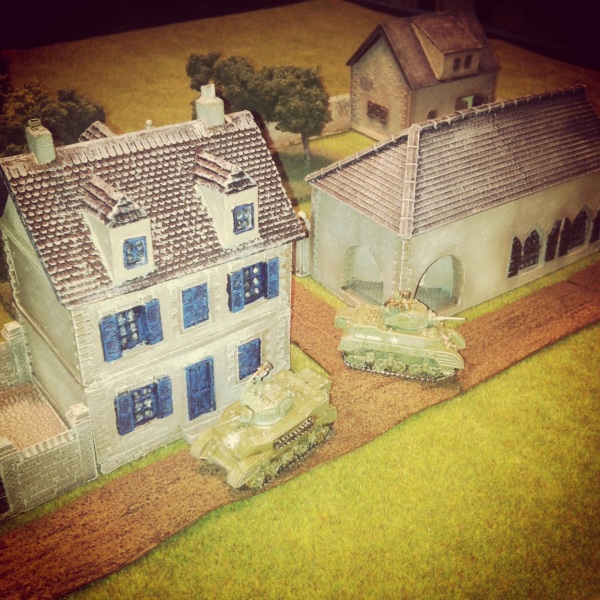
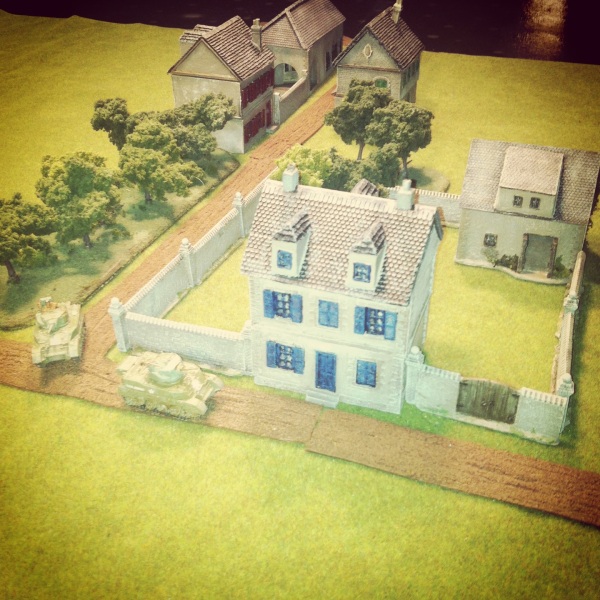
Last year I discovered the cast resin terrain produced by Mark IV Miniatures. As a second-generation wargamer, the owner of Mark IV obviously invests a great deal of care to his Western and Eastern front models. All the buildings come with removable multiple stories and roofs, making their use in FOW gaming a breeze. I just acquired my second set of models from Mark IV (ordered from Musket Miniatures), giving me a number of houses, barns and shops which I set close together as a village center or spread out for use in the countryside. For my towns, I also have a set of Mark IV  walls, a cobblestone courtyard and nifty fountain monument model. At about $18-24 per model, Mark IV’s offerings are my hands-down favorite in miniature buildings.

gowlogo

With so many Mark IV models on my shelf, I wanted to add in a few more commercial structures representing stores or cafes common to European towns small and large. The excellent Model Dads UK blog recently reviewed the 15mm town shop models from Games of War. Based on a shop in Caen, the GOW shops come in three different pre-painted varieties for about $24 each shipped from the UK.

The GOW buildings scale nicely with my Mark IV models, and just a little work weathering the existing paint blends them nicely into the streetscape. I also added some signage and posters to the exterior walls, bringing a bit more sense of liveliness to the townscape.

IMG_3111Painting Mark IV and Games of War buildings

jrlogo

The first 15mm buildings I ever bought were from JR Miniatures. An old standby in the hobby, JR offers a wide variety of scales and themes for eveything from Ancients to Historicals to Sci Fi. I have a small, roughly-cast farmhouse and outbuildings from JR which I use as area terrain. Overall, I find JR’s buildings to be a bit less crisp in detail than those from Mark IV and GOW, and many buildings don’t open for placement of figures.

Last year, I picked up a basic JR European stone bridge at a convention for about $14. The simplicity of the model made it easy to paint with a few stone-colored dry-brushed layers of paint. The model stretches over just about every river running through my gaming tables, and I may very well pick up another bridge in a different design from them soon.

MBAlogo

On the higher end of the terrain options, I’ve always had a thing for the Miniature Building Authority. MBA’s extensive 15mm European line comes pre-painted with lift-off sections to place units in the buildings or model them as destroyed structures. They also carry some rather unique structures and large set-pieces like a multiple-model farm complex or full train depot set-piece.

My brother and his gaming friends have been collecting MBA buildings for years, buying a few buildings a year and sharing in their collection. Taking their gradual approach, I recently started small and ordered a couple of their shops and a large, beautiful hotel model for my collection. Over time, I hope to add more from MBA and grow toward larger, more urban scenarios.

fowcobblestone

Laying out a gaming table almost always necessitates having roads. I bought some rubberized roads years ago at a convention which suit rural unpaved areas well. A small town or rural setting requires having paved streets, and cobblestones provide a suitable road surface for Western Europe at the time of WWII.

I experimented with stone-textured papers and looked at rubberized stone streets, but none of them provided the depth or the solidity inherent in a stone road. Finally, I’ve bitten the bullet and invested in a set of the FOW cobblestone roads  at a slight discount from a seller on eBay. With a total of more than 6-feet of pre-painted cast resin roads, the box has given me what I think to be plenty roadway for my tanks to rumble down.

wslogo

Trees are one of the standard needs for any miniatures wargaming table in any era. Several wargaming manufacturers offer boxes of pre-made tree stands and bases for around $35-40 for maybe a dozen trees. I choose to go the economic bulk route and make my own using trees, flocking and modelling details from Woodland Scenics. For about $75 I’ve been able to make more than enough to fill even the largest battlefields.

IMG_3040Tree-making assembly line

Using two different sized trees from the WS Ready Made Trees Value Pack line, I first glued groups of 2-3 trees to cork coasters picked up at a craft store. On top of the spray-painted green coaster bases, I apply white glue and sprinkles of gravel of varying sizes in random places. After dry, another coat of glue to the remainder of the bases is then flocked with a basic green grass flocking. A few twigs and larger rocks glued here and there add some more depth to the little mini-scenes on each base.

IMG_3041Applying white glue to the tree bases before flocking

Bases are finished off with coarse clumped foliage to represent bushes and undergrowth. Mixing colors of the trees and foliage provides a realistic look. Gravel and larger rocks get hit with some brown washes to tone down the glaring brightness of the paths and piles on each base. All my work is done assembly line style in stages over an old baking sheet so excess flock and gravel shaken from the bases can go back in their containers to use again. When finished, I hit the bases with a matte spray to hold everything in place. In just a few hours time, my model forest on some 30 bases is ready to provide cover for any troops seeking concealment from enemy fire.

IMG_3156Completed homemade trees

Putting it all together, a dozen buildings, cobblestone roads, a bridge and a bunch of my homemade trees gives me more than enough terrain to present rural and town landscapes in Western Europe. Adding in some river sections, dirt roads and fields from fellow club members completes the look of just about any inland battle scenario in Normandy. Check out the pictures below of the results, and keep an eye on my after action reports for future glimpses into my tiny tabletop fields of battle.
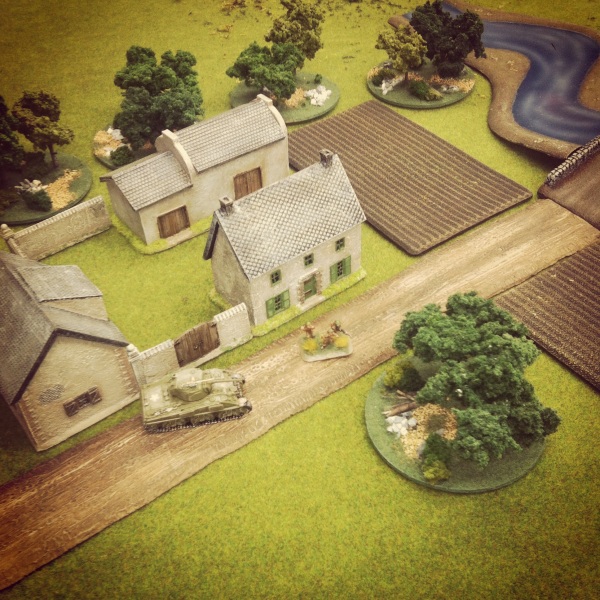
IMG_3161Farm complex with Mark IV buildings and walls, JR Mini bridge and FOW fields and river

IMG_3159Games of War shops with added weathering and signage

IMG_3162Row of Mark IV buildings

IMG_3160Mark IV buildings and monument

IMG_3158Town set-up with terrain from Mark IV, JR Mini, FOW, Games of War and my homemade trees

IMG_3157Town set-up with terrain from Mark IV, JR Mini, FOW, Games of War and my homemade trees

Flames of War: Modelling European Western Front Buildings

153770I got into miniatures wargaming through a combined set of interests I developed as a kid: history, role-playing and scale modelling. One of the aspects of gaming I enjoy is setting up a realistic and engaging tabletop battlefield, both for the visual effect but also to reproduce the playable advantages and challenges found in waging scenarios within scenery.

I’ve been searching high and low for an affordable and well-made set of buildings to add to my 15mm Flames of War World War II gaming set in the post D-Day Western Front. Battlefront Miniatures, the makers of Flames of War, launched their own series of buildings last year. The pre-painted buildings are beautiful, albeit a bit too perfect and pretty expensive at $40-50 each. Miniature Building Authority (MBA) has been a long-time producer of fine pre-painted buildings. Like the structures from Battlefront, MBA models feature removable roofs but also convert into ruined bombed-out versions. At $40-50 for single large buildings or for pairs of smaller ones, the MBA buildings are also pretty pricey. MBA keeps a small line in stock, but they have dozens of out-of-production models which you can also find at conventions and occasionally online. JR Miniatures is another standby in the industry, but I find their relatively low-priced line of buildings is a bit of a mixed bag in terms of casting and playability.

markivWith building up my gaming real estate on my mind, I posted to the message boards at The Miniatures Page. Some suggestions pointed to the above manufacturers, but several posters also mentioned Mark IV Miniatures. The company is run by Jeff McCarron, a second-generation gaming modeller out of Colorado who obviously puts great care and passion into his work. McCarron sells his models directly and distributes them through Musket Miniatures, and I found him to be incredibly responsive to a couple questions I had before ordering. As it turned out, a fellow member of Metropolitan Wargamers had recently picked up the large church model and a couple houses from Mark IV. After playing with his models during our big Summer FOW event and Barkmann’s Corner scenario at the club, I decided these were the buildings to sink an investment into.

1148873_10201247963855523_305675209_nI decided to go with several two and three-story buildings, a barn, a courtyard and some walls, all ordered from Musket Miniatures. With all these models, I’d have the flexibility to set up a fairly decent-sized town or play with them as a separate farm estates. The castings arrived clean and required little tidying-up of residual flash with a knife.

20130830-233936.jpgI did have to put in a bit of work gluing plastic tabs to the undersides of the floors and roofs to provide a snug fit for each story of the buildings. The larger one-story bank building also required a wall and metal cast windows to be glued in place.

20130830-234253.jpgFor painting reference, I searched online for photos of European villages. After a light grey spray basecoat, the stucco walls of the buildings were dabbed with a bit of foam sponge in sandy gray-brown stucco and then dry-brushed with an off-white paint to add variety to the wall surfaces. Exposed stonework, the courtyard cobbles and masonry details at the corners, doors and windows all got combinations of varying shades of grays, browns and whites to create some depth.

IMG_2115Shutters, doors and windows were painted with dull blue, white, green and red trim, mimicking some of the variety in paint schemes I had found in photos online. For the roofs, a black undercoat was dry brushed in a couple shades of grey with a bit of browns and dark green shades mixed in. On the barn model I glued on some thin pieces of lichen to add the look of vines covering part of the walls.

IMG_2117The walled courtyard and modular wall sections got a two-part paint scheme over the gray primer. A watered-down brown-black wash over the bricks and cobbles filled the cracks with a dark shading finished-off with an off-white dry-brushed highlighting coat. The courtyard and wall gates started with a dark brown base with a lighter brown adding aged detail to the wood. Iron hinges got a black undercoat with some rusty metal dabbed over it. The result was some very realistic stone and brickwork walls.

IMG_2112

IMG_2119

IMG_2123

IMG_2125I couldn’t be more pleased with the buildings. They’ve already seen some action on the tabletop in my recent Singling ’44 game and combining them with my existing trees, roads and lichen hedgerows really brings the battlefield to life. I’m already eying a few of the other models offered by Mark IV, including some ruined versions of the same buildings which come cast in some exciting bombed-out interior detail.

At Metropolitan Wargamers, there’s some early plans being laid for another big day of gaming to coincide with the fall’s Flames of War Tanksgiving 2013 event and there’s certain to be plenty of WWII action before then. With my new buildings from Mark IV on the table, these miniature landmarks are certain to add even more depth an interest to all out future games.

Setting The Scene

One of the aspects of wargaming I love most is setting up the tabletop battlefield. I first got into scenery building with a large basement HO scale model railroad as a kid in the 1970s and 80s. Through a mix of sculpting hills and roads, modelling trees and creating realistic tableaus of buildings, I spent hours bringing to life a miniature world.

Setting up a tabletop battlefield serves two purposes. Firstly, playability is affected in terms of terrain contours, defensive cover and lines of sight. Secondly, a well-laid and realistic tabletop brings an aesthetic appeal and excitement only to be found in miniature wargaming. While throwing down a big piece of green fabric and some simple trees or lichen shrubbery and maybe some rocks for outcroppings can provide a bare minimum play area, adding a few pieces of additional model detail really makes a game come to life.

Check out some of my WWII and American Civil War set-ups in the Gaming & Painting section above, and have a quick read on some easy resources below to get your own tabletop ready for battle.

Battlefield Basics

For my groundcover, I use a $10 green fleece throw I picked up in a discount store. I like that I can fold it or open it up to create different sized gaming spaces. You can also use felt or any other cloth easily picked up at a local fabric store. For roads, I use a rubber textured road system I bought at a gaming convention. On the cheap, you can cut felt or other material into strips to create roads of varying lengths and widths. Streams and rivers can also be cut from blue felt. For basic shrubs, a bag or two of lichen from a hobby shop in varying shades of greens and browns provides flexibility in creating hedgerows and other bunches of ground cover. Spreading some gravel or larger stones around the battlefield can also provide some texture and look to the table.

Trees

While a lot of gamers prefer making trees from scratch using twigs and lichen, I like tree systems like those offered by Woodland Scenics. Whether you choose to build your own or buy pre-made trees, you can easily find what you need via websites or stores that cater to model railroading hobbyists. Keep scale in mind that shorter HO-scale trees suffice for 15mm scenarios and taller O-scale trees will stand in nicely for forests and treelines in 28mm games.

 Buildings

There are tons of options for wargaming buildings. Many experienced gamers make their buildings from scratch using foamcore, balsa wood and other kit-building materials found at any decent hobby shop. Another cheap option is downloadable paper cut-out buildings, many examples of which can be found online for free or in easy and immediate pay/download format.

A number of companies specialize in model buildings in lots of scales, eras and geographic locations. Some relatively inexpensive buildings come cast in solid resin and unpainted, while others come completely assembled and detailed with removable floors and roofs. More recently, laser-cut wood buildings are becoming a popular option.

I like using plastic kits from model railroad suppliers, particularly O-scale buildings when I’m gaming the American Civil War in 28mm. These kits are pretty inexpensive ($10-30), easy to find online or in stores, simple to glue together and lightweight. The often simple detailing is easily enhanced with some simple painting and weathering removing the plastic gloss. Companies such as Bachmann (log cabin and covered bridge pictured), Atlas and Lionel all make model railroad buildings which can easily stand on an 18th or 19th-century American battlefield. I love my big Lionel K-Line O-scale American church I picked up for $9 on sale, and it always takes center stage in my American Civil War set-ups.

Boxed Terrain Systems

While pricey, several companies offer full lines of pre-packaged terrain systems made specifically for gaming. Flames of War offers a big line of 15mm WWII terrain through their Battlefield In A Box sets with roads, rivers, buildings and battlefield accessories to fit different regions of the war. Games Workshop also offers a number of products specific to their games from Citadel but much of it could be used for other gaming in Medieval and fantasy gaming environments in 28mm. For gamers with particularly deep pockets, Games Worshop all carries highly-detailed modular gaming boards for nearly $300 each.