New Game Weekend: Wilderness War

WWbox

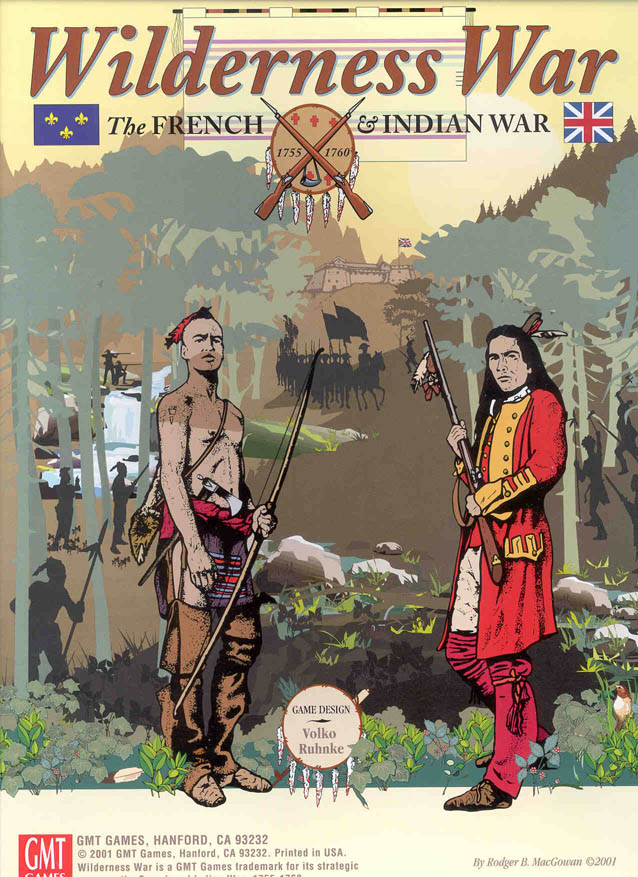
I wound up spending a fair amount of time this past year touring sites related to the French and Indian War period while feeding my gamer’s appetite for the Seven Years War period with A Few Acres of Snow. With a little research and talking with some of the members at Metropolitan Wargamers, I decided I needed to go bigger and dive into a game focused on the French and Indian War. All trails led to GMT’s Wilderness War, and I had a chance to play my first game this past weekend.

Published in 2001, Wilderness War is a game that causes a lot of the gamers I know to glaze over with wide grins. The game is designed by Volko Ruhnke and uses a card-driven mechanic much like his COIN games series also published by GMT. I have a few games of the Runke-designed Cuba Libre and Fire In The Lake under my belt, so I knew that a French and Indian War game from him was certain to be a mix of relatively simple rules wrapped up in a rich historic board game experience.

WWboard

Wilderness War game board

The gorgeous map – hardbound in the latest edition – presents the Northeastern colonial areas of North America in the mid 18th-century. As with the war itself, the game is largely defined by geography. “Cultivated” (ie settled) areas are indicated with boxes, and “wilderness” areas and Indian settlements are printed as circles. Mountainous areas are also depicted with chains spreading through western and central Pennsylvania, the Hudson Valley region and portions of central New England. Connecting these areas are roads or trails and the more important waterways which served as the superhighways of the period. Many of the larger cultivated settlements begin with heavy fortresses protecting the space, while the game set up places a series of French and British forts and stockades throughout the map.

wwchips

Sample Wilderness War game counters

Game components consist primarily of 70 cards and 271 cardboard counters. The counters generally depict movement and combat ratings, with reduced values on the flip side once a unit takes damage in battle, during a wintering period or from an event card. Command markers also carry tactics numbers, which help during combat, and a command value. Cards allow activation of units equal to the number printed or by command rating. Special events may also be played for British (red), French (blue) or either side (red/blue), and cards with a brown-red band are events which may be played at any point during either side’s actions.

wwcards

Sample Wilderness War cards

The game plays with year-long turns each containing an early and late season, each approximating about six months of time. In each season, players begin by being dealt eight cards apiece. Later events and actions may modify a player’s hand size, but in general the French and British player then take turns playing cards to move forces, engage in battle, construct defenses or play out events as depicted on the cards. With some pre-planning, each season moves relatively swiftly toward the conclusion of a year of war. At the end of each year, victory points are tallied and units are checked to see if they suffer losses during the winter period between each yearly season of fighting.

Wilderness War comes with a playbook outlining several small to mid-sized games featuring particular periods in the war or a set-up for the entire war from 1755 to 1762. For my first game, we jumped in with both feet and started from the outset of the war  with me playing as the British and my experienced opponent using the French. The French begin the game with a small force stretched across the Lake Ontario, St. Lawrence River and western Pennsylvania regions. British forces start poised on three fronts along the Hudson River, stretching west toward the eastern tip of Lake Ontario at Oswego and just south of western Pennsylvania. The French are buoyed with their strong alliances with several Indian nations while the British hold enormous access to colonial, regular British troops and numerous commanding officers waiting to be called into service.

Using the swift wilderness movement and  raiding capabilities in the 1755 and 1756 turns, the French sent Indian forces into Pennsylvania, Virginia and New England to raid unprotected British cultivated areas. The British quickly moved to redeploy their meager regulars throughout these areas to build stockades and push back further raids. At the same time, the French massed their forces and captured Fort Oswego. By the end of the second year of play, the French were already sitting on six victory points.

With a string of stockaded defenses set up to the west by the beginning of 1757, the British began to land troops at their coastal port arrivals to offset negative British political effects which stymied the use of more Colonial regulars and militia units. British troops commenced the long march into the Pennsylvania mountains and the nearby target French fort at the Ohio Forks (today’s Pittsburgh). Back to the east, the French began using their new base at Oswego to launch a push to the southeast into the Hudson Valley and the ill-defended areas around Albany, Schenectady and the Oneida region. All the while, the French continued to recruit additional Indian forces to buffer their defenses at the Ohio Forks and continue raids toward the east. The 1757 late season ended with my leaving too many British marooned in the mountains of Pennsylvania in a clear rookie mistake which led to my mass of troops taking heavy losses in the winter season.

IMG_4433

The British stockade defenses on the western frontier lay the groundwork for a push on the French at the Ohio Forks in my first game of Wilderness War

By 1758, my British luck seemed to change a bit for the better. Drawing and playing the William Pitt event card, I was able to increase my card hand size to nine cards and gain access to more British forces. Rushing more British reinforcements west into Pennsylvania, the French fell during a siege at the fort protecting the Ohio Forks, giving the British a firm foothold on the western frontier and awarding two victory points. Additional British troops rushed up the Hudson River Valley to hold back the French push toward Albany. As the British remained engaged in fights, the French began shifting their forces along Lake Ontario and the northern frontier while also raising a large force from the Iroquois in central New York. With 1758 at an end, my British forces were safely wintering on two fronts but in a severely weakened state and still way behind on victory points.

We called the game at its midpoint, deciding to restart another time now that I had been introduced to the general game. I still hadn’t experienced some major facets of the game such as naval movement and amphibious warfare, but I had quickly come to understand some of the major drivers of how the game plays. As a beginner, here are some lessons learned from my first game of Wilderness War:

  1. Defend the frontier. Especially for the British, but for both players, keeping the frontier defended by building stockades and forts is a must. Regular troops caught in wilderness areas are easy targets for Indians and other non-regulars, so having defenses built is key to defending territory. Having a network of stockades and forts to defend from, retreat to and maintain supply line coherence is a necessity if an army is going to succeed in the wilds of North America.
  2. Don’t get caught out in the cold. Open country and mountains are a strong enemy, particularly to 18th-century European armies. Paying attention to stacking limits as each year ends is important to keeping a force at strength. When conducting operations, players need to keep in mind where their troops will all wind up as a year ends and forces settle in for the winter. Nothing is worse than spending a series of turns marching troops into position only to have a portion of them die from starvation, disease and exposure in the period following each year’s turn.
  3. Play the long game. The full game goes to eight years of warfare, so strategy needs to take a long view. The first half of the game most probably belongs to the French as they and their Indian allies sack the wide open and undefended frontier. The British simply can’t be everywhere in the early years of the war, so spending time building defenses while also waiting to get the right cards to call in reinforcements is important. Massing and moving large forces on both sides to be strong enough to siege and capture forts takes a fair amount of planning but pays off in victory points.

Wilderness War is a fantastic playable document of the French and Indian War. The shifting alliances, opportunistic events, geography of the country itself intertwine to capture the period with a realness that might be familiar to any French or British commander on the 18th-century American frontier.

ww logo

I Ain’t Been Shot Mum: Panzer Lehr Counterattack Campaign – ‘Morning of the 902nd’ July 11, 1944 Scenario

OLYMPUS DIGITAL CAMERA

The battle near Hauts-Vents was a two-day affair between the US infantry and armored forces and German Panzer Lehr Division. After a day of intense combat on July 10, 1944, US forces were warned of local movements of the 902 Panzer Grenadier Regiment toward Hauts-Vents. With a German counterattack expected in the early morning hours of the next day, American infantry and armor prepared for a defensive fight under the cover of darkness and foggy, damp weather among the dense bocage hedgerows and under cover of the strong French buildings.

HVJuly44MapMap of the battle at Hauts-Vents, July 11, 1944

(via US Army Center of Military History)

After a first game loss at Hauts-Vents by the Germans, we continued our campaign at Metropolitan Wargamers in Brooklyn, NY this past week. The second game from the “Panzer Lehr Counterattack” mini campaign from the Heroes of Omaha and Panzer Lehr scenario book from Skirmish Campaigns is called ‘Morning of the 902nd.’ The game uses the same terrain set-up as the first scenario, but this time focuses on the German attempt to recapture Hauts-Vents on July 11 after losing key objectives to the Americans the day before. The game begins under pre-dawn darkness over wet ground with US platoons in hidden positions at the north end of the table and the Germans advancing under blinds from the hill position to the south. The Germans must retake the field by capturing two of the three objective buildings at the center town.

IMG_4251Germans deploy on blinds looking to take back the town

IMG_4253Germans blinds rush forward and immediately hit a minefield

IMG_4254A German platoon encounters a minefield and takes heavy casualties

The German advanced on blinds from Hill 91, making a hasty frontal push straight for the town. On the German left, mechanized Grenadiers mounted in Sd. Kfz 251s roared their engines and drove straight into a minefield at the bocage at the bottom of the valley outside town. Making matters worse, American machine guns hiding in the dense hedge sprayed the German line with fire. German infantry and half tracks fired back, destroying one US machine gun team and forcing a retreat of the other to the center of town. At the end of the firefight, the German commanding officer escaped but three fire teams in one platoon took heavy damage, forcing them to fall back.

IMG_4256The German Panzer IV column exposes two Shermans behind a farmhouse

IMG_4255The lead German Panzer IV is destroyed, blocking the road

IMG_4312Panzer IVs switch routes, making for the American flank

On the German right, things didn’t go much better. A column of Panzer IVs drove on the main road for town, accompanied by a a Grenadier platoon closing in on a farmhouse they had lost the previous day. Waiting hidden at the stone cottage were two M4 Shermans which opened fire at the lead Panzer at close range , leaving it a burning hulk blocking the road forward. Closing in from behind, Grenadiers ran to engage the tanks with a Panzerfaust shot on their rear armor. Several turns of fire were exchanged between the Shermans and Panzer IV second in line as the two rear Panzers reversed direction back to the fork in the road. A few rounds later both Shermans were destroyed, and the surviving three Panzer IVs and the unharmed Grenadiers were heading for the east side of the town.

IMG_4313Panzer IVs and Grenadiers move on the US left and expose a Sherman platoon at an objective

The Germans continued their advance up the road on the US left, looking to flank the town. The three Panzer IVs were slowed over the barbed wire blocking the road, and one bogged for the remainder of the action in soggy ground. German infantry spotted a Sherman platoon camped out around one of the objectives and then ran over and around the bocage looking to avoid fire in the field beyond.

IMG_4314US Wolverines take aim at a German Panzer III flame tank in the open

IMG_4316US and German armor exchange fire, leaving a Wespe, Panzer III and M10 Wolverine in flames

Two remaining German blinds rolled to the field as US tank destroyer M10 Wolverines appeared behind the bocage at the town. The blinds revealed themselves as a Panzer III flame tank and Sd. Kfz. 124 Wespe and both turned to engage the Wolverines. Two quick shots from the flame tank failed to harm the open-topped Wolverines which returned fire and blew up the Panzer III. The German’s mobile gun fired back, destroying one of the Wolverines before subsequently being wrecked by US anti-tank fire. With German armor burning in the field, the Grenadiers continued to sprint over the open area and looked to swing into the town from the rear.

IMG_4317Flares illuminate the town objectives and German mechanized Grenadiers push forward

Back on the German left, several Grenadier platoons on foot and mounted in their half tracks moved to the US left in the town as the early morning darkness was lit up with a flare. Two fresh American rifle platoons revealed their positions in two of the objective buildings and gunfire was exchanged with the German platoons moving toward the town. Despite their cover in the stone building, the combined arms fire from the Germans ousted one US platoon from their building and the other took steady damage.IMG_4318Panzer IVs destroy the final M10 Wolverine as German infantry rush to flank the town from the rear

On the other side of town the two functioning Panzer IVs rolled across the field, shooting at and destroying the last American tank killer. Under continued cover from their Panzers, the Grenadier platoon continued slipping across the field, climbing over the bocage and looping around to the American rear.

IMG_4319A direct hit from Germany artillery arrives in the middle of the American position

With German infantry looking to encircle the town and two Panzers wheeling to engage the Shermans at the center of town, a German artillery barage hit dead center amid the objective buildings. As the smoke cleared, only two Shermans remained fully operational and the surviving US rifle platoons were on the run. As early morning light began to break, the Americans heard encroaching German voices from the hedgerows from every side of the town. The Panzer Lehr counterattack had been a success, and the Americans chose to cut their losses, regroup and fight again.

Micro Armour: How To Apply Decals To 6mm Models

tankfactory

I’m working my way through my new 6mm micro armor modelling project using models from GHQ. After painting I arrived at the stage of applying decals which I also ordered from GHQ. Like many hobbyists, I have a love-hate relationship with decals at any scale. Cutting and applying decals can be frustrating as they fold, tear or wind up in the wrong positions on models. On the other hand, getting decals successfully applied to models adds a ton of personality to a paint job and can allow for easier identification during play on the tabletop.

An experienced micro armor modeller and player at Metropolitan Wargamers in Brooklyn, NY turned me on to his technique for applying decals to 6mm models which I’ve found to be fast and easy with great results. Being organized and methodical in an assembly line manner is key. Having the right equipment is also a necessity. Magnifying reading glasses keeps all the tiny decals and models in focus. Working off a clean, flat hobby mat provides an ideal surface to cut decals and also keeps things easy to see. A sharp hobby knife with a fresh blade, some very fine brushes, clean water, white glue, paper towels and a cotton swab round out the basic equipment. Finally, using a decal fixative (I use Walthers Solvaset) gives a good bond for decals once applied, nestling them into the uneven surfaces of the model.

Applying 6mm Decals

  1. Carefully cut around the shape of each decal with a very sharp hobby knife.
  2. Using a finger tip, dot several small beads of  clean water in a row on the work surface.
  3. Apply a small amount of watered-down white glue to the surface of the model where the decal will be applied.
  4. Carefully push a decal into a bead of water using a small brush.
  5. After a few seconds, roll the decal off its paper backing using a fine brush.
  6. Roll the decal onto the model’s surface and gently push it into position.
  7. After a few minutes of drying time, dab the decal area with a cotton swab to remove any excess water.
  8. Coat the decal and the immediate area with a decal fixative solvent.
  9. Once models are completely dry, spray with a protective matte finish.

IMG_4079Applying decals to 6mm American armor

Historic markings varied a lot during World War II, so I largely came up with my own simple plan for my decals. Each one of my half tracks got encircled white air-observation stars on the hood. My Shermans each received two stars, one plain star on the front hull and an encircled white star on the rear deck of the tank. The M10 Wolverines and armored cars likewise received white stars in circles on the rear deck area.

IMG_40776mm US armor and transports with decals applied

I was able to complete all my decals in just two evenings, totaling  just about two hours. I couldn’t be more pleased with the results, and I didn’t lose a single decal in the process. Now that I’ve got my newly-learned technique down, it’s on to my German armor and then the battlefield.

Micro Armour: Getting Started

GHQlogo

After years of wargaming World War II with Flames of War, I’ve been looking for a change of pace for the period. I’ve recently caught up on the vast majority of my modelling projects, including fairly extensive American, British and German Late War forces as well as a bunch of terrain. I’ve also been interested in playing larger battles, something that becomes a bit unwieldy with FOW. In looking for a way to expand my WWII gaming experience, I’ve been weighing factors of scale, cost, storage and time. After a lot of thought, I’m going small and getting started with WWII in micro scale.

The standard in micro scale gaming is GHQ. Founded in the late 1960s and based just outside Minneapolis, Minnesota, GHQ manufactures an extensive line of pewter miniatures for WWII, Modern, Napoleonic, American Civil War and various naval eras. In the early 1990s, GHQ also began offering N and HO scale vehicles targeting model railroading enthusiasts. Along with their gaming models, the company has developed a number of rulesets and terrain-building supplies appropriate for various eras of combat at the micro scale level. For over 40 years GHQ’s models have been held in high regard by wargamers as well as the US military which uses the company’s products for training and planning excercises.

WWIIscales

World War II miniatures scale comparisons (from www.historicalwargames.net)

The 1/285th (6mm) scale of GHQ’s WWII models offers a number of differences and potential advantages to larger scales, such as 1/100th (15mm) FOW miniatures and 1/56 (28mm) models from the expanding Bolt Action game line from Warlord Games.

  • Scale: In 6mm micro scale, an entire infantry platoon can be represented with approximately 3-5 figures mounted to a small square or round base. An inch on the table approximates 100 yards on the battlefield. This allows for larger multi-company or battalion level games compared to smaller single company and platoon skirmish games at a 15mm or 28mm scales.
  • Cost: Wargaming at any scale is an investment, but micro scale allows for the depiction of large battles for a fraction of the cost of larger scales. The starter sets from GHQ provide around twenty tanks for $40, making individual armour models just a couple bucks each compared to the 15mm scale where tanks can run easily to triple that cost. Fielding an entire 6mm infantry and armor company might run just $10-20 while that same company at 15mm could run hundreds of dollars. And, since each micro scale tank represents a platoon and a platoon in FOW may run to maybe six tank models (or more), the game scales cheap and fast into grand scale engagements.
  • Storage: As the website says, I live in Brooklyn, NY, so storage is always an issue for my board games, cards games, miniatures, terrain and hobby supplies. I keep a lot of my miniatures at my local club, Metropolitan Wargamers, but I like having stuff around the apartment for when the gaming mood hits. At the micro scale level, dozens of tanks, infantry and vehicles can be carried in a shoulder bag or kept in a drawer. Compared to my FOW collection which sprawls over multiple bags and boxes, micro scale makes for some quick and easy game deployment just about anywhere.
  • Time: Painting micro scale takes a fraction of time compared to larger scales. A quick spray of white primer followed by a thinned color basecoat, a couple dots of detail, a wash and maybe a tiny decal is all that’s needed to get forces on the table and ready to game.

IMG_3211GHQ’s US Shermans vs. German Panzer IVs box set

IMG_3210GHQ’s US Armoured Infantry Command 1944 box set

To get started at the micro scale, I ordered two sets from GHQ. The Shermans vs. Panzer IVs Battle Box comes with ten tanks per side, a storage case and a set of rules — everything needed to get a game started. To this, I added the US Armoured Infantry Command 1944 set with additional tanks, half-tracks, jeeps, armoured cars and a bunch of infantry. To get some Germans into action, I think I’ll be going for the German Kampfgruppe 1944 for a nice mix of infantry, transport, Marders and even some horse and wagon teams.

IMG_3214Assembly of my first GHQ micro armour sets

In well under less than an hour’s initial work, my first sets of micro armour glued up fast with some careful organization of parts and assembly with superglue and tweezers. Already I’m loving getting so many models ready for paint and then on to the table in no time at all. The saying is “go big or go home” but my new micro armour project looks like its already going to be a massive amount of fun in a very small package.

Flames of War: Metropolitan Wargamers Tanksgiving 2013

Tanksgiving PicAbout ten of us at Metropolitan Wargamers in beautiful Park Slope, Brooklyn kicked off the holiday season this past weekend with a day of WWII armored action in conjunction with our first Flames of War Tanksgiving event. The official rules for the event called for 1500-point companies facing off in multiple games throughout the day. Given we had so many new players interested in playing their first games of Flames of War, a few of the more experienced players decided to play host with our own forces brought along for the day over two tables.

FFAMissionThe bigger of the two tables featured Allied forces facing off against Germans in a Late War Western Europe scenario. The Flames of War website offers a group of basic missions of increasingly-complex scenarios, each easily playable in about three hours. Given we were dealing with an entry-level game, we went with a beginner-friendly Free-For-All mission with two 1500-point companies on each side.

IMG_2442Allied defenders (left) and German attackers (right) deployed

Since this was a tank-focused game, we went easy on terrain with just a smattering of wooded areas, buildings and fields spread over the table. The Allied forces defended, beginning on the side of the table defined primarily by a small river crossing bridge on the Allied right and a field and nearby farmhouse on the Allied left.  On the attacking German side of the table, a walled farm complex surrounded by a tree-lined road sat to the German left and a group of wooded areas to their right. A small town was situated squarely at a crossroad at the center of the field.

IMG_2446Guards Armoured and 101st Airborne started in the farm field

The British Guards Armoured Company began near the farm at their left, deploying its Sherman and Firefly tanks along with one platoon from the US 101st Airborne. Near the bridge, the US 4th Armored Company set its 75mm and 76mm tanks and finally deployed its 105mm artillery platoon at the center of the table edge hidden behind a copse of trees. The Germans deployed Panzer IVs, two Tiger tanks and a Grenadier platoon near a forest at their right. A large group of Panthers started near the center behind the small town with a supporting dismounted Panzergrenadier platoon on their left and a two-tank Panther command platoon at their extreme left.

IMG_2444US 75mm and 76mm Shermans tanks at the bridge near the German objective

With the German player starting things off, their main thrust of Panthers moved toward the center of the table while their Panzer IVs and Tigers made a move looking to shutdown to the advance of the Guards Armoured and US airborne troops. The Panzergrenadiers made their way for the walled farm and the treeline at the neighboring road, and the commanding Panthers looped around the farm toward the river and the American right flank.

IMG_2448A Tiger sits burning after being hit by a Firefly

On the Allied first turn, the 101st Airborne made a beeline for the neighboring forest across from the field while tanks rolled into the gap between the forest and the field. A lucky opening shot from a British Firefly took out a German Tiger, providing one of the only bright spots for the Allies during the entire afternoon. The spotter for the US howitzers ran for the cover of the town’s buildings while the mass of American tanks on the right split to hold off the center German advance as well as the German command section’s coming end-run at the river.

IMG_2453The Armoured Guards take ferocious fire from the German tanks

In the second and third turns, the German players began running the table to their victory. A concentration of fire into the town destroyed the US artillery spotter, effectively shutting down any good chance of Allied artillery support. The Tigers began laying waste to the line of advancing Shermans in the field and rolling in the open. A failed assault on the German tanks by the 101st Airborne out of the woods stalled under a hail of machine gun before it began, but the Guards Armoured managed to route the Panzer IVs off the board and whittle-down the Grenadiers making their way between the town and farm house nearby.

IMG_2460Panzer IVs and Shermans aflame as the 101st Airborne sprints across the field

By the fourth turn, German infantry making their way through the open both for the bridge and objective near the American artillery were mowed down under heavy machine gun fire from the US Shermans. Finding a gap amid the tank fight around them, the 101st made a dash to the next forested area while German tanks poured more fire into the British armor at the rear. At the bridge, American 76mm guns managed to destroy one command tank and bail the crew from the other. Unfortunately, the remnants of the American armor were outgunned and entangled in the burning shells of their comrade’s tanks. With nothing left to stop the advance, German tanks rolled to the center and seized their objective.

IMG_2458Nothing left to stop the German advance to victory

While things raged away on the European table, an Early War showdown between 1500-point British and Italian forces in Africa dustily clamored away one table over. You couldn’t get a more different game with less advanced equipment and differently skilled troops battling in a desert environment laced with prepared defensive positions. Since most of my gaming has focused on Late War Europe, the earlier war stuff fascinates me and I’m definitely going to make some time to try my hand at this other period soon.

IMG_2440Early War Italian and British desert action at Tanksgiving in Brooklyn

As it turned out, the Italians took the game on the Africa table, making our first Tanksgiving event a 2-0 victory for the Axis powers. I learned a mass of German armor is really hard nut to crack unless you’ve got some effective artillery and enough infantry to assault and push to an objective. Every game under my belt gives me ideas for the next. Win or lose, I think a few hours of playing may have hooked a couple new players on Flames of War. For that, we’ll all be thankful as we deploy our platoons for another game very soon.

Flames of War: Breakthrough Mission

bocageShortly after fighting ashore and in the iair drop zones on D-Day, the Allies quickly discovered a new enemy awaiting them: bocage.

Lacing the Normandy countryside, bocage was a tight overgrown network of hedgerows of shrubbery, stone walls and copses of trees lining the rural French fields. All but impassable by Allied armor and difficult to fight through for infantry, bocage slowed the push inland and delayed the taking of key objectives. It was only through the quick-thinking and inventiveness of the Allies that new tactics were hastily developed. To free-up the passage of tanks, hedgerow cutters were welded to the front of armored platoons and demolition crews blasted gaps to continue the forward march. Fighting amidst the bocage would prove to be deadly for both sides, as recounted in the 1988 paper by Captain Michael Doubler. It’s required reading for anyone interested in the tactics of bocage warfare.

This past weekend at Metropolitan Wargamers in Brooklyn, four of us got together to slog it out in the bocage tabletop of a Breakthrough Mission as provided in the Flames of Wars rules. The mission scenario calls for use of the Mobile Reserves rule for the defenders and the Delayed Reserves rule for the attackers. The Germans chose to field a 1250-point Fallschirmjager company backed with heavy machine guns, a Nebelwerfer rocket battery, Stugs and Pak 40 anti-tank guns plus a 1250-point tank company armed with mechanized infantry, Panzer IVs, Stugs and one imposing Tiger tank. We Americans also fielded two companies beginning with a 1250-point rifle company with three infantry platoons, Shermans, a weapons platoon of light machine guns and mortars and a P-47 Thunderbolt for air support. The other US company was pulled from the 82nd Airborne with a Priest mobile artillery battery and Stuart light tanks. To aid in navigation of bocage, the US armor were outfitted with hedgerow cutters. The Germans had six turns to take an objective and it would be the Americans’ job to stop them.

BTMapThe table was laid out thick with bocage surrounding a small village and a nearby farm. Americans rolled as the defenders meaning all our mobile units — all the tanks and artillery we had — were going to be held off the board as reserves. I hid all my rifle platoons in the town’s buildings and stuck the machine guns and mortars in the field between the Germans and their nearest objective. In the opposite corner, the Airborne platoons deployed near the farm hoping to camp out on the German objectives for the duration of the game.

As the attackers, the Germans deployed in their assigned corner of the table. Their rocket battery, anti-tank guns, heavy machine guns and the majority of their infantry dug into the field outside of the town. The large tank company deployed in the adjacent field. Held off-table was a Stug and a Fallschirmjager platoon, hoping for the a delayed reserves roll beginning on the third turn to put them right on top of one of their objectives at the opposite corner.

IMG_2177As the attackers, the Germans got the first turn, quickly pressing their armor toward the center of the table while the rocket battery, heavy machine guns and anti-tank cannons poured fire into the town, pinning one US platoon. Reserves failed to arrive on the first US turn and the P-47’s first run came up empty. As per the plan, the US Airborne pushed into the farm buildings to hold the nearest objective.

IMG_2179

IMG_2181In the second turn, the Germans continued to light up the town with the US companies pinned in the buildings. A Stug opened fire down a lane but the Americans avoided being hit. US bazooka teams moved into the barn at the edge of town and took shots on the a German Stug and approaching half tracks but to no effect. The US machine gunners attempted to fire and then assault the nearing Germans but were thwarted by the thick bocage and failed terror test against a nearby Panzer. The Thunderbolt once again on did nothing its second run while the Airborne units at the farm ran across the road into the treeline, securing the second German objective.

IMG_2183

IMG_2185

IMG_2191In turn three, the German players thankfully failed their first attempt at calling in reserves. Pressing on, German half tracks raced through the town toward the American weapons platoon which took heavy casualties and lost the machine gunners to fire from both sides. Stugs and artillery continued to pound the American rifle platoons in the town. At the top of their turn, the Shermans arrived and made a hasty path to cut a hole in the bocage standing between the rest of their reserves and the nearby road.

IMG_2185

IMG_2189Things really heated up in turn four as the Germans rolled on their first reserved Stug platoon near one of the objectives and the awaiting US Airborne. German infantry and Panzers pushed into the next field, knocking out the US mortars and eliminating their first platoon. The Americans pulled in the rest of their reserves but immediately created a bottleneck of Shermans and Stuarts as paths were cleared through the bocage. The P-47 came in hard on the Germans in the field, knocking out several units and destroying a Panzer. Finally, the fearless Airborne did what they’re trained to do and burst from the treeline to assault the newly-arrived Stug platoon. Two Stugs were destroyed and the third fled the field after a failed morale test. The objective was still held by the Americans but things were looking dicey with Germans coming in from all sides.

IMG_2196

IMG_2187

IMG_2198

IMG_2193

IMG_2200The fifth turn started with the final German reserve platoon arriving amid their burning tanks and assaulting the US Airborne. Through a series of attacks and counterattacks, the two groups whittled each other down. The Germans were eventually ground down to two remaining stands, lost their morale check and were destroyed. The victory for the Americans was short-lived, however, and the heavily-damaged Airborne platoon also failed a morale save and likewise fled the battle. With the game nearing it’s end, a Sherman was destroyed and blocked the road. All the US armor and artillery was effectively shut-out of the game. As the Germans covered an objective, the American P-47 made one final run to force a German morale check but to no avail. The Germans had won the day.

IMG_2208

IMG_2210There were a number of things that had gone wrong for the Americans. The rifle platoons never got out of the town, contributing almost nothing to the battle. Had they hauled their way toward the forest in the middle of the board, pressure would been greater on one of the objectives. The restrictions on the reserves also hurt the Americans, with nearly half their force never getting a chance to get in the fight. The US Airborne were typically deadly in their assaulting enemy armor and ground troops and proved to be the one positive for the Allies. On the German side of the table, much of its large armor platoon, including the Tiger, was sidelined for much of the battle as they navigated the hedgerows and roads.

The game was a new experience for one of the German players who typically games in the wide-open spaces of the Northern Africa theater from earlier in the war. As in 1944, bocage played the role of a third unmovable enemy on the table. The bocage was frustrating for all players but this time sided more with the Germans in their breakthrough victory.