Flames of War: Dust Up Mission With “Blood, Guts and Glory”

tank3

Although actually made up of a number of battles and assaults during World War II, the post-D-Day breakout actions by the Allies in late 1944 in Northern France has become commonly known as the Lorraine Campaign to military historians. Frustrated by poor weather conditions and weak supply lines, the General George Patton’s 3rd Army push into Germany eventually led to the wintery and more famed German counteroffensive with the  Battle of the Bulge in the winter of 1944-1945.

bggbook

Flames of War offers a book outlining the Lorraine Campaign with Blood, Guts and Glory. US lists in the book focus on the powerful tank and armored rifle companies which made up the steely backbone of Patton’s daunting force. For the Germans, the cobbled-together 106 Panzerkorps Felderherrnhalle and 111 Panzer brigade are outlined with forces full of some of the best Late War armor and equipment albeit under somewhat challenging motivation and experience ratings.

A couple of weeks ago at Metropolitan Wargamers in Brooklyn, NY, two of us had a go at a fictional battle set during the Lorraine Campaign. We play against each other a fair amount, and both of us were looking to switch things up commanding some very different forces. The tabletop terrain was also different with a more open battlefield lined with fields, woods, gentle hills and two farms. All of this was quite a departure from the games we have most played set in the days and months after the Normandy Invasion in June of 1944.

dustup

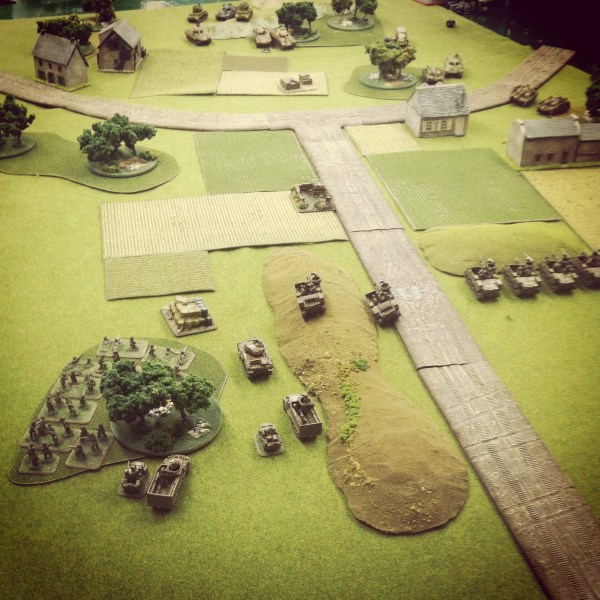
My opponent’s Panzerkompanie was  full of armor – Stugs, Panthers and Panzer IVs – and  supplemented by an Aufklärungs platoon and a couple Wirbelwinds to chase away any US aircraft. For my US force, I wanted to try out some underused rifle platoons which were supported by 105mm M7 Priests, some Shermans and a P-47 Thunderbolt buzzing overhead. We also chose a different game framework, opting for a somewhat complicated Dust Up scenario from the official Flames of War missions list.

pzco

us4th

IMG_3397

Our Dust Up scenario with my US forces in the foreground and Germans in the distance

Well, as the game played out, I quickly discovered I had brought infantry to a tank fight. With one of my infantry platoons camped out in the woods near two objectives, my hope was to stave off the German armor advance with repeated bombardments from my Priests and diving runs from the P-47.

IMG_3398US M7 Priest platoon taking up position

IMG_3399US rifles deploy in the woods to guard a nearby objective

Things went well for me in the early stages as Panthers stalled moving through the woods. A Wirbelwind and two Panthers were subsequently destroyed from 105mm volleys , but my P-47 failed to get any traction in stopping a group of Stugs creeping along the table edge. Even so, a couple turns in I was feeling fairly confident my artillery fire would whittle away the rolling German advance.

IMG_3401A German Panther and Wirbelwind are destroyed by incoming US 105mm fire
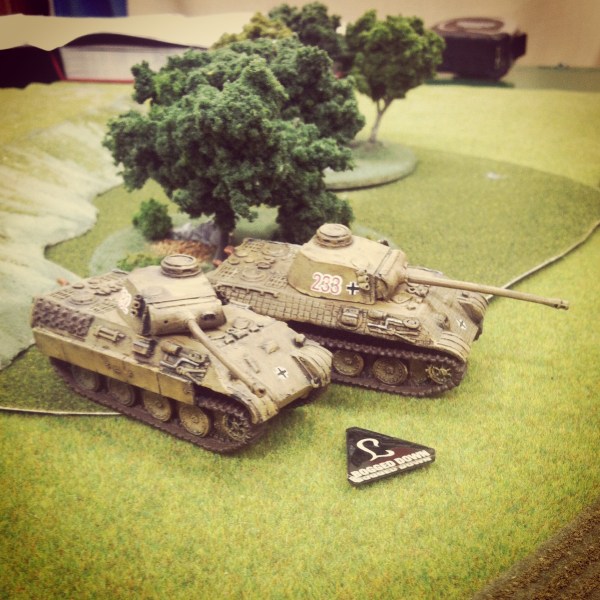
IMG_3400Panthers make through the woods but one bogs in the terrain

IMG_3402The P-47 Thunderbolt attempts a run at a Stug platoon
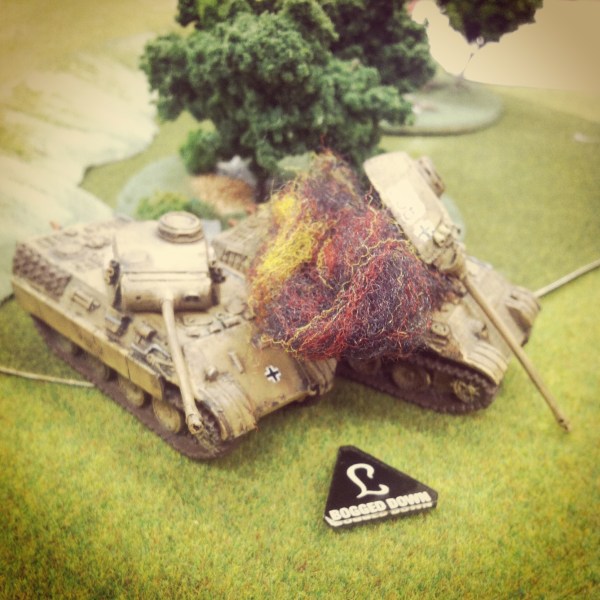
IMG_3403More fire from the Priests take out another Panther

My plan fell apart as the first German Panzer IV reserves came on the table at the corner behind my Priest battery and made quick work of the nearly-armorless US mobile artillery. I swung my surviving Priest and supporting Sherman around and engaged the Germans at close range with direct fire, but succeeded in only cracking open one German tank. In another turn, the Priests were wiped from the board and only my infantry platoon remained to defend my end of the table. The P-47 appeared again to control the center of the battlefield, but missed on its run. The US center and flank were crumbling by the time turn four approached.

IMG_3405Panzer IV reinforcements surprise the Priests from the rear

IMG_3406The Thunderbolt tries to stall the German armor in the middle of the field

My reserve Shermans came on the table near a farm and quickly engaged with the Panthers which swung to meet the US armor advance. Shots from my heavier 76mm guns lit up a Panther and bailed another’s crew. The German tanks returned fire, destroying all but one 76mm Sherman as more Panzer IVs showed up with the Aufklärungs platoon close behind.

IMG_3407Reserve American 75 and 76mm Shermans roll on the board

IMG_3409The last of the Priests burn as more Panzer IVs appear

In the fifth turn, my final supporting infantry platoon arrived in their halftracks, dismounted and made a desperate run for an objective in the open field. The infantry on my side of the table also broke from the woods in a last-ditch assault on a mass of German tanks creeping toward an objective but were repulsed. With German armor swarming an objective, the game went to the Axis.

IMG_3410A reinforcing column of US rifles follows-up the Sherman advance

IMG_3413A lone Sherman survives as the US rifle company dismounts and heads for an objective
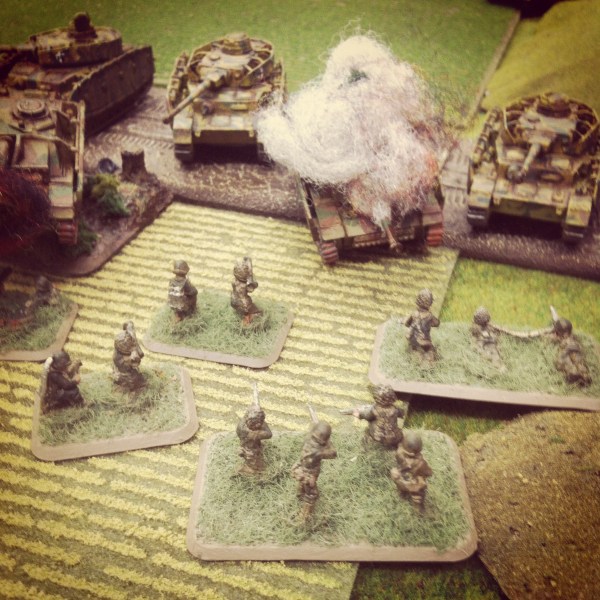
IMG_3414US riflemen break from the woods in a desperate assault on German tanks at an objective

IMG_3415With tanks aflame in the fields, the Germans take an objective

Clearly, my US plan from the outset was a stretch. Had I taken the more historic approach of Patton in the Lorraine Campaign of 1944, a fully-armored US force may very well have stood a fair chance against all the German tanks shuttling here and there on the tabletop. Balancing history and what-ifs is what makes playing Flames of war so engaging over and over again, but next time I’ll be careful not to second-guess the command decisions made in Northern France some 70 years ago.

Flames of War: Fielding the FOW M10 Tank Destroyer Platoon

m10

The Blitzkreig of German armored forces is one of the more enduring tactics introduced in World War II. Swarmed masses of German tanks and mechanized forces in the early war period rolled through Poland, France, Belgium and the Netherlands in Western Europe and punched into the Soviet Union with Operation Barbarossa in 1941. With early Panzer and later Panther and Tiger tanks ruling the battlefields of Europe, Allied forces struggled for solutions to crack the German tide of iron.

m10normandy

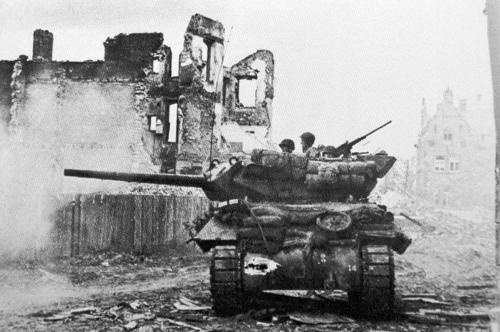
A US M10 tank destroyer comes ashore in Normandy after D-Day in 1944

By mid-war, the Americans had a solution with the M10 tank destroyer. Introduced first into the battlefields of North Africa in 1943, the M10 GMC (“gun motor carriage”) carried a big 3-inch/76mm gun and on a Sherman hull. After success in Africa against earlier model German tanks, M10s became part of the post-D-Day Allied breakthrough campaign. While effective against Panzer III and IV tanks, more heavily-armored Panther and Tiger tanks still proved problematic. Luckily, the M10 was supplemented by the British-modified Sherman 76mm Firefly and the later US-built M18 Hellcat which was quicker on the field. The combination of these three tank destroyers, along with the stalwart work of Allied infantry and deadly air support, turned the tide in Europe.

fowm10set

One of my earliest 15mm WWII purchases years ago, and somewhat at random, was the now-discontinued M10 Tank Destroyer Platoon set from Flames of War. I think at the time, I just liked the look of the models and I was looking to fill-out my new US forces with more variety. To get to a full platoon of four M10s, a fellow club member at Metropolitan Wargamers in Brooklyn, NY recently gave my two more M10s to which I’ve added an additional M20 scout car.

IMG_3389New M10 tank destroyer and M20 scout car

IMG_3388New M10 tank destroyer

IMG_3387New M20 scout car

IMG_3390US tank destroyer platoon with new models (left) and older models (right)

With my existing and new section sections, I now can field a full tank destroyer platoon using a variety of Allied Late War European lists. Anti-tank tactics in the game provide multiple opportunities for the M10 platoon to be used in combination with infantry and other Allied armor on the game table. With optional deployment as a recon platoon using the M20 scout cars, the M10s can create ambushes to wreak havoc on German tanks. Admittedly, using this full platoon will take some practice but I’m certain they’ll be causing headaches for my German opponents in the very near future.

“The Harlem Hellfighters” by Max Brooks

harlemhellfightersbook

My interests in American history, graphic novels and little-known accounts of war have recently intersected with gripping The Harlem Hellfighters by Max Brooks. Written by Brooks — the well-known author of World War Z — and illustrated by Caanan White, The Harlem Hellfighters recounts the struggles and victories of the 369th Infantry Division as the first African-American regiment to see combat in World War I.

369th poster

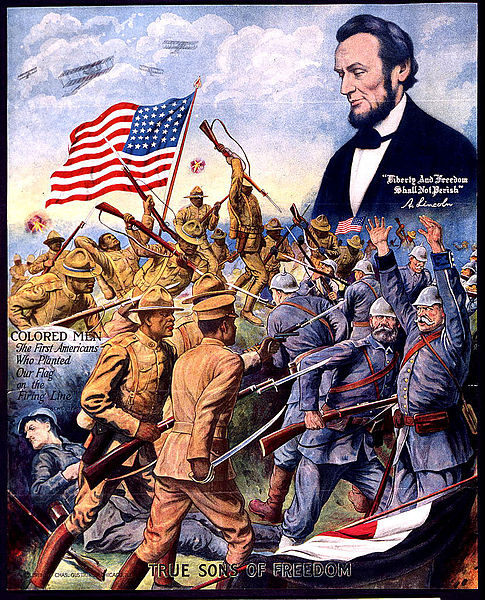
Period poster for the 369th Infantry Regiment

The 369th was composed of a volunteers from many backgrounds reflective of the Harlem Renaissance era’s diverse black population crowding the streets of northern Manhattan. The volunteers included Caribbean and African immigrants, migrants from the American South and native-born New Yorkers. As a green fighting force, the urban laborers, artists, musicians, farm workers and students who fought as the Harlem Hellfighters went on to distinguish themselves in the late stages of WWI and became among the first American Expeditionary Forces to push over the hard-fought German lines.

369th band

James Reese Europe (left) and members of the 369th Infantry Regiment marching band

Brooks has a long-held interest in the Hellfighters, and he had tried unsuccessfully over the years to bring a script to movie or television production. Following on the international success of World War Z, Brooks decided on the graphic novel format to bring the Hellfighter story to a mass audience. Based on real characters in a fictionalized story, the book traces the regiment’s path from basic training in a Jim Crow American South to the trenches of Europe under the command of the French army. Even after winning distinction in early engagements, the members of the Hellfighters ran up against racism which followed them to Europe.

The story of band leader James Reese Europe forms just part of the tale, but is illustrative of both the acceptance of the arrival of black US troops and their rejection by the laws and traditions of white Europeans and their countrymen at home and abroad. Reese is largely credited with introducing jazz to European audiences, and although he would survive the war, he died soon after his return to the States at the hand of fellow band member. The mix of challenges, triumphs and tragedies on and off the field of battle makes the story of the 369th an incredibly compelling story every American should know.

369th trenches

Troops from the 36th Infantry Regiment in the trenches

The Harlem Hellfighters is illustrated in a jagged, dark style by African-American artist White amid pages crowded with rich individual character stories and broader narratives of an era marked by the horrors of modernized warfare as well as lynchings and street-beatings. To the interested reader, there are many jumping-off points into a deeper story of the 369th and their ripple-effects on 20th-century American race history still being wrangled with today.

The 369th arrived back to the States and were celebrated with a heroic parade in New York City. The 369th Infantry Regiment Armory in northern Manhattan still stands today as one of the few monuments to this often-forgotten chapter in a war which is also largely-ignored in our teaching of US history. For the veterans of the Harlem Hellfighters, their fight in Europe would continue back home through the labor and civil rights movements in the decades to come.

Just ahead of the book’s publication in early April, Sony Pictures announced it had acquired the rights to bring the story of the 369th to the big screen with production backing from Will Smith’s Overbrook Entertainment. With the The Harlem Hellfighters and the promise of a movie adaptation, hope springs anew that 100 hundred years on the American men of the 369th get the recognition they earned in spirit and blood.


Flames of War: Lingevres 1944 Scenario

lingevres1944

By D-Day +8 on June 14, 1944, the British 50th Infantry Division had pressed about 5 miles inland from Gold Beach to the outskirts of Lingevres. Dug in at the town were elements from the Panzer Lehr Division with several Panther tanks ready to force back the looming British attack. With 6-pdr anti-tank guns in tow, the British pushed into town mid-morning following a bombardment by 25-pound artillery and runs from supporting Typhoons above. A ferocious battle commenced between the 4th/7th Royal Dragoon Guards and the German Panthers. When the smoke cleared, several Panthers sat burning as victims of Sherman Firefly and anti-tank gun fire. At day’s end, the British controlled Lingevres.

lingevresAT

British 6-pdr anti-tank gun deployed outside Lingevres, June 14, 1944

The WWPD website has a Lingevres scenario available which two of us adapted for play this past weekend at Metropolitan Wargamers in Brooklyn, NY. Using the scenario as a guideline, we laid out the tabletop battlefield with cornfields stretching outside the town occupying two-thirds of the table. With our 1750-point forces on each side, the Germans began with two platoons of infantry and a heavy machine gun platoon inside two buildings and the church at the center of Lingevres. The British then deployed with their artillery battery, two rifle companies and a recon patrol. All other forces were held off table, with German delayed reserves set to arrive in turn three and British reserves eligible to arrive immediately at the beginning of the game.

Victory conditions as presented were simple — the British needed to take three buildings in the town and the Germans needed to drive the British from the field. How the game played was not simple and once again revealed my need to sink more work into creating accurate, playable scenarios for FOW.

IMG_3163Germans dug in at Lingevres in the town’s buildings while British artillery and infantry deployed from the cornfields in the distance

IMG_3164

Initial movement of British forces into Lingevres with recon carriers moving left and infantry moving into the woods near the church

The first two turns of the game saw the British marching from their edge of the table toward Lingevres. At the town, a German machine gun platoon sat waiting in a building at the crossroads while two other infantry platoons took up position in the church and shops across the road. By turn three, British artillery had opened fire on the machine gunners and pinned them. The first British tank platoon also rumbled onto the table, as did the German Panthers which made way for the center of town.

IMG_3165

Panther reserves roll into the center of Lingevres

IMG_3173

British infantry in the woods take fire and are pinned as armored reserves move from the rear

The first British infantry platoon made way through the woods at the center of the table but were pinned and cut down over two consecutive turns of fire from nearby Germans. The British recon patrol, edging its way through the bocaged fields near the church, was chased away with the appearance of the Panthers.

IMG_3167A British Sherman takes up position to spot for the artillery battery

IMG_3166

British infantry move from the farmhouse across the field

IMG_3169

Panthers destroy a Firefly and the Sherman spotter tank at the edge of town

IMG_3170

British infantry fall back after taking fire from the German half-tracks

On the main road to town, the British ran their Sherman spotter tank and lead Firefly toward the nearby farmhouse. On the other side of the farmhouse, a British infantry platoon moved into position using the building and nearby bocage as cover as they made way for the open field. The heavy British push around the farm was stymied with the arrival of German halftracks which fired machine guns into the field. By turn five, the Sherman spotter tank and spearheading Firefly also lay in flames after some quick shots from the German Panthers.

IMG_3168

British machine gun carriers and tank reserves roll on

IMG_3171

Armored reserves move to support infantry

IMG_3172 British infantry reserves move in near their artillery battery

By turns six and seven the inital British assualt had been repulsed at a safe distance from town. All German infantry platoons remained safely bunkered up in the town’s buildings, and the spotter for the German’s reserve 12cm mortar platoon was now camped out in the church’s bell tower. The three Panthers prowled back and forth at the center of town, and the incoming fire from the British artillery in the distance was the only real agitation to the occupying Germans. The Britsh rolled on their final reserves of machine gun carriers, Sherman/Firefly tanks and a fresh infantry platoon.

Even with all reserves on the table, the British attack was stumped. With one rifle platoon destroyed and a second whittled down, the British had just one intact infantry platoon on the field. One tank platoon struggled through the fields to one side of town, while the second sat idling on the road to town. Clear lines of fire around the church and town center presented open killing zones for the Germans in the town’s buidings and the three Panthers. All the Germans needed to do was sit in place and mow down the coming British.

I love playing wargames for historical scenarios, but our game this past weekend at Lingevres presented some serious limitations to the FOW rules as written. Playing an even match of 1750-point forces per side ultimately did not allow for a satisfying game for either player. What works for a head’s up FOW tournament game or randomly-rolled mission simply does not play well in recreating historic engagements.

In our Lingevres game, the British simply didn’t have enough units to create a critical mass to advance into town under what was sure to be withering fire from the Germans. We decided we liked the scenario, but perhaps the British needed a 50% increase in points, perhaps with additional rifle and tank platoons and a Typhoon providing air support.

With a three-day D-Day weekend being planned at our club this June, we’ve got multiple historic airborne, beach and inland fights to sketch out in the coming months. There’s going to be a lot of playtesting and tweaking to get our historic games to play well. With wargaming, striking the balance between a game that provides both historic accuracy and the potential for different outcomes is the real challenge that lies beyond just the roll fo the dice.

Flames of War: Modelling Western European Terrain in 15mm

normandystuartterrain

I’ve had a lot of great feedback from the past year of posting after action reports for Flames of War games. Fellow players have been universally complimentary on the layout of my terrain used in my scenarios. With that, I’m increasingly being asked questions about the make of my models, where I buy them and how I achieve some of the other rerrain modelled  in my games.

Modelling terrain, like any aspect of miniatures wargaming, has to take into account the three main factors of skill, budget and time commitment. I find myself somewhere in the middle of all three categories, and I feel my level of personal investment in my terrain modelling is reflective of this. One of the many benefits of belonging to a club like Metropolitan Wargamers in Brooklyn, NY is the opportunity to share in our massed collections of terrain and create some pretty impressive-looking games.

As a longtime miniatures hobbyist with a passion for scale modelling, I wanted to share a quick round up of the current state of my 15mm terrain collection I use for Flames of War. To date, my FOW gaming has focused on the European Western Front, so the vast majority of my terrain focuses on buildings and other features appropriate for France, the Low Countries and Western Germany. All that said, let’s take a European tour in miniature…

markivposter

Any small town or rural tabletop Western European battlefield needs buildings — barns, houses, shops and cafes — not only for visual appeal, but to provide covering positions and even possible objectives during game play. FOW offers a fine line of pre-painted buildings but I find them to be a bit on the expensive side and toy-like. I also like to paint, so breaking up modelling little tanks and soldiers with some miniature real estate projects makes for a nice change to hobbying routine.

Last year I discovered the cast resin terrain produced by Mark IV Miniatures. As a second-generation wargamer, the owner of Mark IV obviously invests a great deal of care to his Western and Eastern front models. All the buildings come with removable multiple stories and roofs, making their use in FOW gaming a breeze. I just acquired my second set of models from Mark IV (ordered from Musket Miniatures), giving me a number of houses, barns and shops which I set close together as a village center or spread out for use in the countryside. For my towns, I also have a set of Mark IV  walls, a cobblestone courtyard and nifty fountain monument model. At about $18-24 per model, Mark IV’s offerings are my hands-down favorite in miniature buildings.

gowlogo

With so many Mark IV models on my shelf, I wanted to add in a few more commercial structures representing stores or cafes common to European towns small and large. The excellent Model Dads UK blog recently reviewed the 15mm town shop models from Games of War. Based on a shop in Caen, the GOW shops come in three different pre-painted varieties for about $24 each shipped from the UK.

The GOW buildings scale nicely with my Mark IV models, and just a little work weathering the existing paint blends them nicely into the streetscape. I also added some signage and posters to the exterior walls, bringing a bit more sense of liveliness to the townscape.

IMG_3111Painting Mark IV and Games of War buildings

jrlogo

The first 15mm buildings I ever bought were from JR Miniatures. An old standby in the hobby, JR offers a wide variety of scales and themes for eveything from Ancients to Historicals to Sci Fi. I have a small, roughly-cast farmhouse and outbuildings from JR which I use as area terrain. Overall, I find JR’s buildings to be a bit less crisp in detail than those from Mark IV and GOW, and many buildings don’t open for placement of figures.

Last year, I picked up a basic JR European stone bridge at a convention for about $14. The simplicity of the model made it easy to paint with a few stone-colored dry-brushed layers of paint. The model stretches over just about every river running through my gaming tables, and I may very well pick up another bridge in a different design from them soon.

MBAlogo

On the higher end of the terrain options, I’ve always had a thing for the Miniature Building Authority. MBA’s extensive 15mm European line comes pre-painted with lift-off sections to place units in the buildings or model them as destroyed structures. They also carry some rather unique structures and large set-pieces like a multiple-model farm complex or full train depot set-piece.

My brother and his gaming friends have been collecting MBA buildings for years, buying a few buildings a year and sharing in their collection. Taking their gradual approach, I recently started small and ordered a couple of their shops and a large, beautiful hotel model for my collection. Over time, I hope to add more from MBA and grow toward larger, more urban scenarios.

fowcobblestone

Laying out a gaming table almost always necessitates having roads. I bought some rubberized roads years ago at a convention which suit rural unpaved areas well. A small town or rural setting requires having paved streets, and cobblestones provide a suitable road surface for Western Europe at the time of WWII.

I experimented with stone-textured papers and looked at rubberized stone streets, but none of them provided the depth or the solidity inherent in a stone road. Finally, I’ve bitten the bullet and invested in a set of the FOW cobblestone roads  at a slight discount from a seller on eBay. With a total of more than 6-feet of pre-painted cast resin roads, the box has given me what I think to be plenty roadway for my tanks to rumble down.

wslogo

Trees are one of the standard needs for any miniatures wargaming table in any era. Several wargaming manufacturers offer boxes of pre-made tree stands and bases for around $35-40 for maybe a dozen trees. I choose to go the economic bulk route and make my own using trees, flocking and modelling details from Woodland Scenics. For about $75 I’ve been able to make more than enough to fill even the largest battlefields.

IMG_3040Tree-making assembly line

Using two different sized trees from the WS Ready Made Trees Value Pack line, I first glued groups of 2-3 trees to cork coasters picked up at a craft store. On top of the spray-painted green coaster bases, I apply white glue and sprinkles of gravel of varying sizes in random places. After dry, another coat of glue to the remainder of the bases is then flocked with a basic green grass flocking. A few twigs and larger rocks glued here and there add some more depth to the little mini-scenes on each base.

IMG_3041Applying white glue to the tree bases before flocking

Bases are finished off with coarse clumped foliage to represent bushes and undergrowth. Mixing colors of the trees and foliage provides a realistic look. Gravel and larger rocks get hit with some brown washes to tone down the glaring brightness of the paths and piles on each base. All my work is done assembly line style in stages over an old baking sheet so excess flock and gravel shaken from the bases can go back in their containers to use again. When finished, I hit the bases with a matte spray to hold everything in place. In just a few hours time, my model forest on some 30 bases is ready to provide cover for any troops seeking concealment from enemy fire.

IMG_3156Completed homemade trees

Putting it all together, a dozen buildings, cobblestone roads, a bridge and a bunch of my homemade trees gives me more than enough terrain to present rural and town landscapes in Western Europe. Adding in some river sections, dirt roads and fields from fellow club members completes the look of just about any inland battle scenario in Normandy. Check out the pictures below of the results, and keep an eye on my after action reports for future glimpses into my tiny tabletop fields of battle.

IMG_3161Farm complex with Mark IV buildings and walls, JR Mini bridge and FOW fields and river

IMG_3159Games of War shops with added weathering and signage

IMG_3162Row of Mark IV buildings

IMG_3160Mark IV buildings and monument

IMG_3158Town set-up with terrain from Mark IV, JR Mini, FOW, Games of War and my homemade trees

IMG_3157Town set-up with terrain from Mark IV, JR Mini, FOW, Games of War and my homemade trees

Flames of War: Breakthrough Mission

bocageShortly after fighting ashore and in the iair drop zones on D-Day, the Allies quickly discovered a new enemy awaiting them: bocage.

Lacing the Normandy countryside, bocage was a tight overgrown network of hedgerows of shrubbery, stone walls and copses of trees lining the rural French fields. All but impassable by Allied armor and difficult to fight through for infantry, bocage slowed the push inland and delayed the taking of key objectives. It was only through the quick-thinking and inventiveness of the Allies that new tactics were hastily developed. To free-up the passage of tanks, hedgerow cutters were welded to the front of armored platoons and demolition crews blasted gaps to continue the forward march. Fighting amidst the bocage would prove to be deadly for both sides, as recounted in the 1988 paper by Captain Michael Doubler. It’s required reading for anyone interested in the tactics of bocage warfare.

This past weekend at Metropolitan Wargamers in Brooklyn, four of us got together to slog it out in the bocage tabletop of a Breakthrough Mission as provided in the Flames of Wars rules. The mission scenario calls for use of the Mobile Reserves rule for the defenders and the Delayed Reserves rule for the attackers. The Germans chose to field a 1250-point Fallschirmjager company backed with heavy machine guns, a Nebelwerfer rocket battery, Stugs and Pak 40 anti-tank guns plus a 1250-point tank company armed with mechanized infantry, Panzer IVs, Stugs and one imposing Tiger tank. We Americans also fielded two companies beginning with a 1250-point rifle company with three infantry platoons, Shermans, a weapons platoon of light machine guns and mortars and a P-47 Thunderbolt for air support. The other US company was pulled from the 82nd Airborne with a Priest mobile artillery battery and Stuart light tanks. To aid in navigation of bocage, the US armor were outfitted with hedgerow cutters. The Germans had six turns to take an objective and it would be the Americans’ job to stop them.

BTMapThe table was laid out thick with bocage surrounding a small village and a nearby farm. Americans rolled as the defenders meaning all our mobile units — all the tanks and artillery we had — were going to be held off the board as reserves. I hid all my rifle platoons in the town’s buildings and stuck the machine guns and mortars in the field between the Germans and their nearest objective. In the opposite corner, the Airborne platoons deployed near the farm hoping to camp out on the German objectives for the duration of the game.

As the attackers, the Germans deployed in their assigned corner of the table. Their rocket battery, anti-tank guns, heavy machine guns and the majority of their infantry dug into the field outside of the town. The large tank company deployed in the adjacent field. Held off-table was a Stug and a Fallschirmjager platoon, hoping for the a delayed reserves roll beginning on the third turn to put them right on top of one of their objectives at the opposite corner.

IMG_2177As the attackers, the Germans got the first turn, quickly pressing their armor toward the center of the table while the rocket battery, heavy machine guns and anti-tank cannons poured fire into the town, pinning one US platoon. Reserves failed to arrive on the first US turn and the P-47’s first run came up empty. As per the plan, the US Airborne pushed into the farm buildings to hold the nearest objective.

IMG_2179

IMG_2181In the second turn, the Germans continued to light up the town with the US companies pinned in the buildings. A Stug opened fire down a lane but the Americans avoided being hit. US bazooka teams moved into the barn at the edge of town and took shots on the a German Stug and approaching half tracks but to no effect. The US machine gunners attempted to fire and then assault the nearing Germans but were thwarted by the thick bocage and failed terror test against a nearby Panzer. The Thunderbolt once again on did nothing its second run while the Airborne units at the farm ran across the road into the treeline, securing the second German objective.

IMG_2183

IMG_2185

IMG_2191In turn three, the German players thankfully failed their first attempt at calling in reserves. Pressing on, German half tracks raced through the town toward the American weapons platoon which took heavy casualties and lost the machine gunners to fire from both sides. Stugs and artillery continued to pound the American rifle platoons in the town. At the top of their turn, the Shermans arrived and made a hasty path to cut a hole in the bocage standing between the rest of their reserves and the nearby road.

IMG_2185

IMG_2189Things really heated up in turn four as the Germans rolled on their first reserved Stug platoon near one of the objectives and the awaiting US Airborne. German infantry and Panzers pushed into the next field, knocking out the US mortars and eliminating their first platoon. The Americans pulled in the rest of their reserves but immediately created a bottleneck of Shermans and Stuarts as paths were cleared through the bocage. The P-47 came in hard on the Germans in the field, knocking out several units and destroying a Panzer. Finally, the fearless Airborne did what they’re trained to do and burst from the treeline to assault the newly-arrived Stug platoon. Two Stugs were destroyed and the third fled the field after a failed morale test. The objective was still held by the Americans but things were looking dicey with Germans coming in from all sides.

IMG_2196

IMG_2187

IMG_2198

IMG_2193

IMG_2200The fifth turn started with the final German reserve platoon arriving amid their burning tanks and assaulting the US Airborne. Through a series of attacks and counterattacks, the two groups whittled each other down. The Germans were eventually ground down to two remaining stands, lost their morale check and were destroyed. The victory for the Americans was short-lived, however, and the heavily-damaged Airborne platoon also failed a morale save and likewise fled the battle. With the game nearing it’s end, a Sherman was destroyed and blocked the road. All the US armor and artillery was effectively shut-out of the game. As the Germans covered an objective, the American P-47 made one final run to force a German morale check but to no avail. The Germans had won the day.

IMG_2208

IMG_2210There were a number of things that had gone wrong for the Americans. The rifle platoons never got out of the town, contributing almost nothing to the battle. Had they hauled their way toward the forest in the middle of the board, pressure would been greater on one of the objectives. The restrictions on the reserves also hurt the Americans, with nearly half their force never getting a chance to get in the fight. The US Airborne were typically deadly in their assaulting enemy armor and ground troops and proved to be the one positive for the Allies. On the German side of the table, much of its large armor platoon, including the Tiger, was sidelined for much of the battle as they navigated the hedgerows and roads.

The game was a new experience for one of the German players who typically games in the wide-open spaces of the Northern Africa theater from earlier in the war. As in 1944, bocage played the role of a third unmovable enemy on the table. The bocage was frustrating for all players but this time sided more with the Germans in their breakthrough victory.

Flames of War: La Fiere Causeway 1944 Scenario

lafiere1944

In the late evening of June 5th and pre-dawn hours of June 6th, 1944, a steady flow of Allied paratroopers began dropping throughout the French countryside to clear the inland way for the D-Day beach landings to come later that morning. Like elsewhere, scheduled US Airborne drops near Sainte-Mère-Église left paratroopers scattered around the countryside. To the southwest of the town’s target area, a contingent from the 82nd Airborne found itself near a quaint French farm compound and a small bridge over the Merderet River. Recognizing the river crossing as a key defensive line, the assembled paratroopers established a perimeter along the river. A few hours later, the US troops were met by a German Grenadier and armored battallion hoping to stall the Allied invaders from moving inland. The battle that erupted at the river would rage for three days until the German force withdrew in time for the arrival of US infantry and Sherman forces rolling in from Utah Beach on June 9th.

causewaygamemap

The Flames of War website offers a basic scenario of the encounter at La Fiere Causeway suitable for 1500 point forces on either side. This past weekend a visitor to Metropolitan Wargamers and I had a go at the scenario with my US Airborne facing off against his Germans. As with the historical record, my force held closely to the scenario’s outline with two parachute rifle platoons with plenty of bazookas supported by a platoon of light machine guns, parachute engineers, a glider artillery platoon and M18 tank destroyers. On the German side of the table, my opponent lacked the primitive French tanks that historically fought at the battle. Instead, he filled his force with a number of Grenadier platoons mounted in half tracks backed by two small platoons of Panzer IVs and a Nebelwerfer rocket battery.

IMG_2161

IMG_2163

As per the scenario rules, each of us chose half of our platoons to be held in off-table reserve. Beginning with the Germans, we alternated deploying our starting forces on the table. My American engineers took up position in the courtyard of the farm on my left flank, the machine guns lined the hedge on the other side of the bridge and a rifle platoon deployed on my far right flank. As expected, the Germans deployed a tank platoon at the road entry point and the rocket battery and a mounted Grenadier platoon in the field on their left flank.

IMG_2165With the Germans taking the first turn, the first Panzer IV platoon made way for the river crossing at the middle of the table while the half tracks rolled for the ford on the American right flank. Deployed in and around the farm buildings, the US engineers quickly laid down mines at the foot of the bridge and an Airborne platoon crossed the river to meet the approaching Grenadiers and the rocket battery beyond.

IMG_2169

IMG_2167With turn three, German tank and Grenadier reserves appeared on the table edge opposite the farm and pointed their way toward the French buildings and the nearby bridge. Four US bazookas bailed one Panzer in the clearing across  the river but three other Panzers made it across at the middle ford. US tank destroyer reserves came on the table and immediately poured machine gun fire into the half tracks across the river. The Grenadiers bailed from their transports and the half tracks raced to the rear while the Nebelwerfers failed to score effective shots in the hearty US Airborne troops.

IMG_2171With the Grenadiers on the run back to defend the rocket battery, the US tank destroyers turned their attention on the Panzers and quickly destroyed one while the others continued to push on unharmed due to the protection of their side Schurzen armor. At the farm, the approaching Panzer and Grenadier platoons exchanged fire with the engineers and riflemen defending behind the stone walls. Even with heavy casualties, the engineers repelled a direct assault by two Panzers as a fresh rifle platoon rushed to reinforce the farmyard strongpoint.

Alas, by the fifth turn the game was effectively over for the Americans as the late-arriving US howitzers once again failed to hit in one final volley against the Panzers rushing to seize the objective. The Americans had chased both Grenadier platoons from the field and destroyed a couple Panzers, but the Airborne focus on defending rather than seizing objectives allowed the Germans to take the table.

At the game’s outset, both of us shook our heads with the difficult mission ahead of us. The Airborne never effectively engaged in a close-quarters assault that might’ve taken out more of the tanks sooner on in the game, and artillery on both sides contributed nothing to the game. As with the last few FOW games I’ve played, the engagement at La Fiere once again pointed out the strength and tactical importance that infantry played in WWII. Keeping men moving and in the fight is key to victory, and this time around the German troops got the better of the day.

Flames of War: Modelling European Western Front Buildings

153770I got into miniatures wargaming through a combined set of interests I developed as a kid: history, role-playing and scale modelling. One of the aspects of gaming I enjoy is setting up a realistic and engaging tabletop battlefield, both for the visual effect but also to reproduce the playable advantages and challenges found in waging scenarios within scenery.

I’ve been searching high and low for an affordable and well-made set of buildings to add to my 15mm Flames of War World War II gaming set in the post D-Day Western Front. Battlefront Miniatures, the makers of Flames of War, launched their own series of buildings last year. The pre-painted buildings are beautiful, albeit a bit too perfect and pretty expensive at $40-50 each. Miniature Building Authority (MBA) has been a long-time producer of fine pre-painted buildings. Like the structures from Battlefront, MBA models feature removable roofs but also convert into ruined bombed-out versions. At $40-50 for single large buildings or for pairs of smaller ones, the MBA buildings are also pretty pricey. MBA keeps a small line in stock, but they have dozens of out-of-production models which you can also find at conventions and occasionally online. JR Miniatures is another standby in the industry, but I find their relatively low-priced line of buildings is a bit of a mixed bag in terms of casting and playability.

markivWith building up my gaming real estate on my mind, I posted to the message boards at The Miniatures Page. Some suggestions pointed to the above manufacturers, but several posters also mentioned Mark IV Miniatures. The company is run by Jeff McCarron, a second-generation gaming modeller out of Colorado who obviously puts great care and passion into his work. McCarron sells his models directly and distributes them through Musket Miniatures, and I found him to be incredibly responsive to a couple questions I had before ordering. As it turned out, a fellow member of Metropolitan Wargamers had recently picked up the large church model and a couple houses from Mark IV. After playing with his models during our big Summer FOW event and Barkmann’s Corner scenario at the club, I decided these were the buildings to sink an investment into.

1148873_10201247963855523_305675209_nI decided to go with several two and three-story buildings, a barn, a courtyard and some walls, all ordered from Musket Miniatures. With all these models, I’d have the flexibility to set up a fairly decent-sized town or play with them as a separate farm estates. The castings arrived clean and required little tidying-up of residual flash with a knife.

20130830-233936.jpgI did have to put in a bit of work gluing plastic tabs to the undersides of the floors and roofs to provide a snug fit for each story of the buildings. The larger one-story bank building also required a wall and metal cast windows to be glued in place.

20130830-234253.jpgFor painting reference, I searched online for photos of European villages. After a light grey spray basecoat, the stucco walls of the buildings were dabbed with a bit of foam sponge in sandy gray-brown stucco and then dry-brushed with an off-white paint to add variety to the wall surfaces. Exposed stonework, the courtyard cobbles and masonry details at the corners, doors and windows all got combinations of varying shades of grays, browns and whites to create some depth.

IMG_2115Shutters, doors and windows were painted with dull blue, white, green and red trim, mimicking some of the variety in paint schemes I had found in photos online. For the roofs, a black undercoat was dry brushed in a couple shades of grey with a bit of browns and dark green shades mixed in. On the barn model I glued on some thin pieces of lichen to add the look of vines covering part of the walls.

IMG_2117The walled courtyard and modular wall sections got a two-part paint scheme over the gray primer. A watered-down brown-black wash over the bricks and cobbles filled the cracks with a dark shading finished-off with an off-white dry-brushed highlighting coat. The courtyard and wall gates started with a dark brown base with a lighter brown adding aged detail to the wood. Iron hinges got a black undercoat with some rusty metal dabbed over it. The result was some very realistic stone and brickwork walls.

IMG_2112

IMG_2119

IMG_2123

IMG_2125I couldn’t be more pleased with the buildings. They’ve already seen some action on the tabletop in my recent Singling ’44 game and combining them with my existing trees, roads and lichen hedgerows really brings the battlefield to life. I’m already eying a few of the other models offered by Mark IV, including some ruined versions of the same buildings which come cast in some exciting bombed-out interior detail.

At Metropolitan Wargamers, there’s some early plans being laid for another big day of gaming to coincide with the fall’s Flames of War Tanksgiving 2013 event and there’s certain to be plenty of WWII action before then. With my new buildings from Mark IV on the table, these miniature landmarks are certain to add even more depth an interest to all out future games.