I Ain’t Been Shot Mum: Pegasus Bridge and Bénouville June 6, 1944 Scenarios

Horsas

There are thousands of little actions in the history of warfare, and a longtime favorite of myself and other wargamers is the capture of Pegasus Bridge on June 6, 1944. Just minutes past midnight, Operation Deadstick delivered some 180 British soldiers from the 6th Airborne Division onto French soil near two key bridges on the far eastern flank of the Allied invasion during the D-Day invasion throughout that historic day.

DDayOverallMap
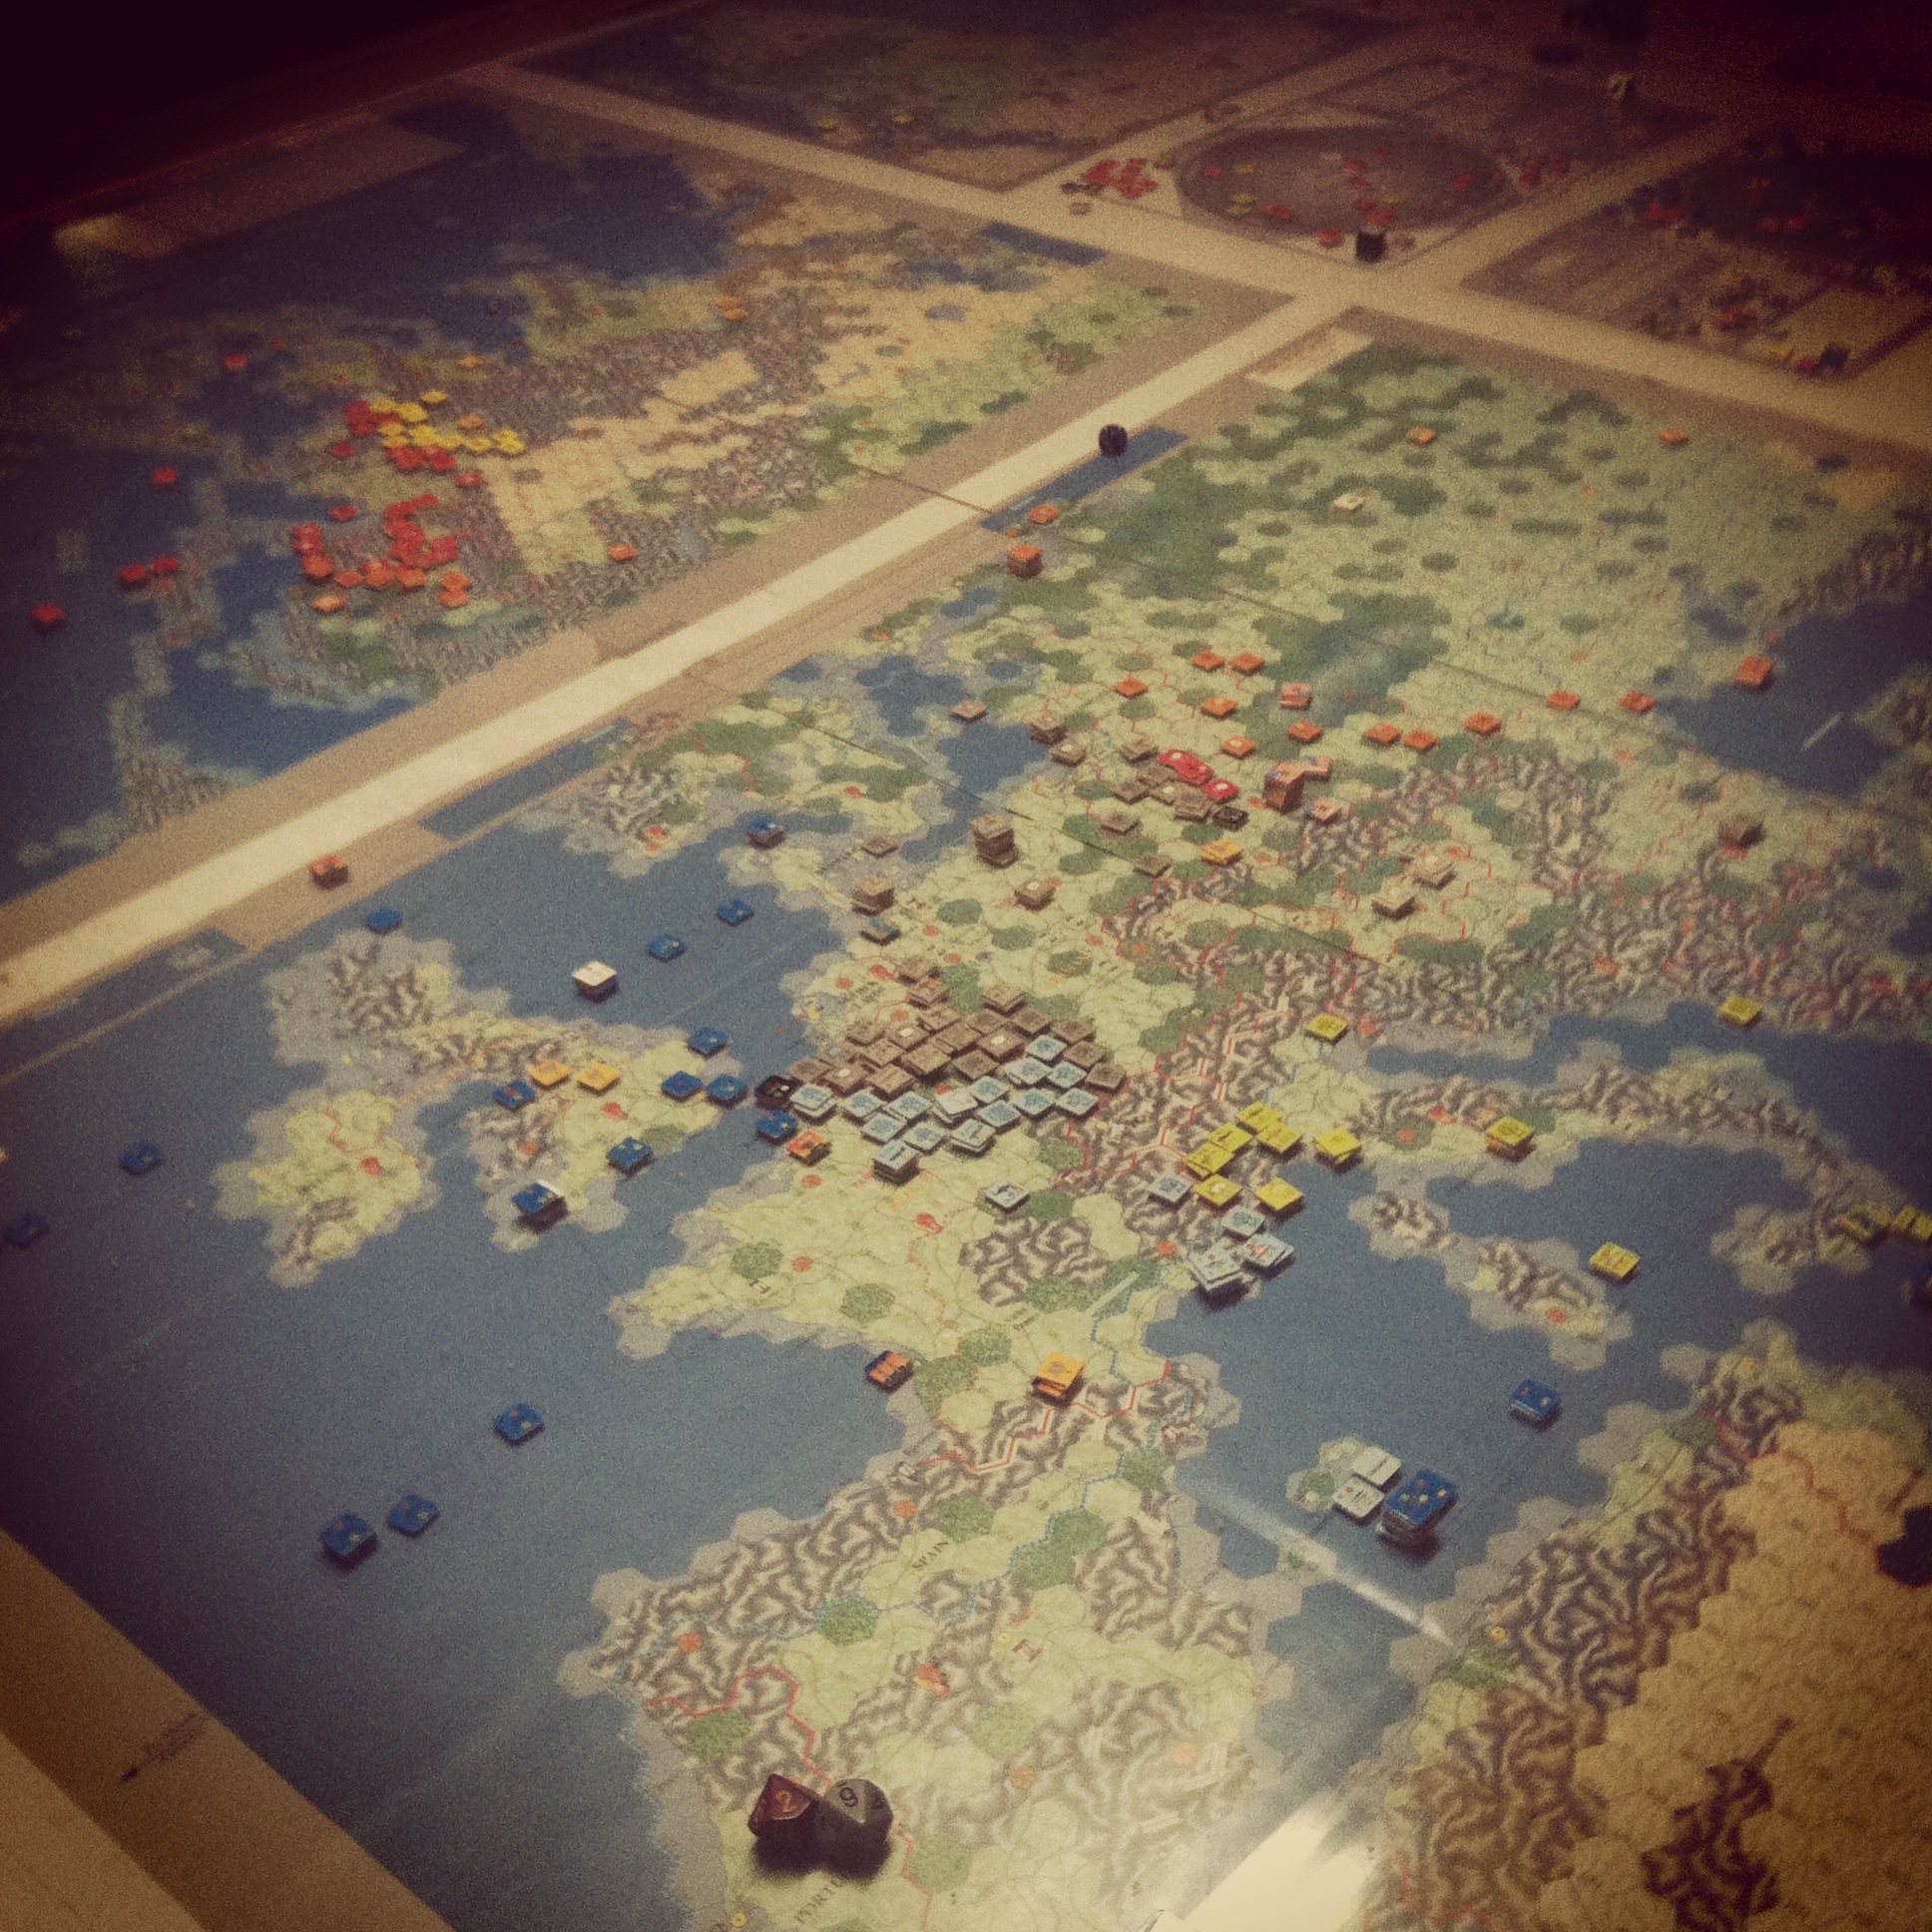
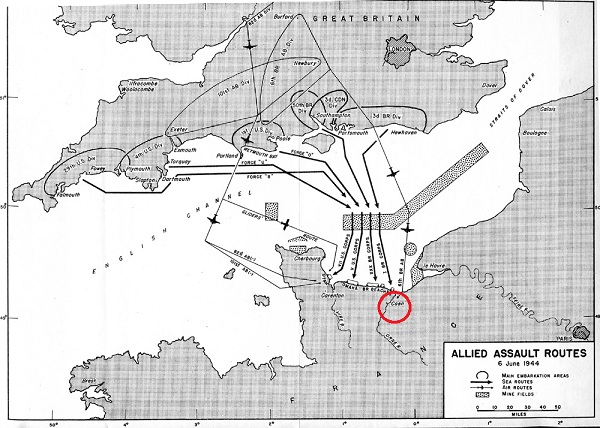
The D-Day Allied assault routes with the British 6th Airborne Division drop zone (circled in red)

Landing in the dark in six wooden Horsa gliders with only one casualty and minimal other initial incident, the British soldiers and engineers made quick work of the surprisingly meager defense by about 50 men from the German 716th Infantry Division. With the bridge over the Caen Canal secured and another at the nearby River Orne also captured, the initial mission had been accomplished in quick order.

The mission then shifted to a defensive one for the British at the bridges and nearby Bénouville as the German command ordered a counter attack. Another 200 paratroopers from the British 7th Parachute Battalion landed to join in the occupation but were met by German tanks, mortars and guns. Under German sniper fire at the bridge and with few heavy weapons at their disposal, the British held out in the town amid house-to-house fighting in Bénouville until the close of the first day of the invasion.

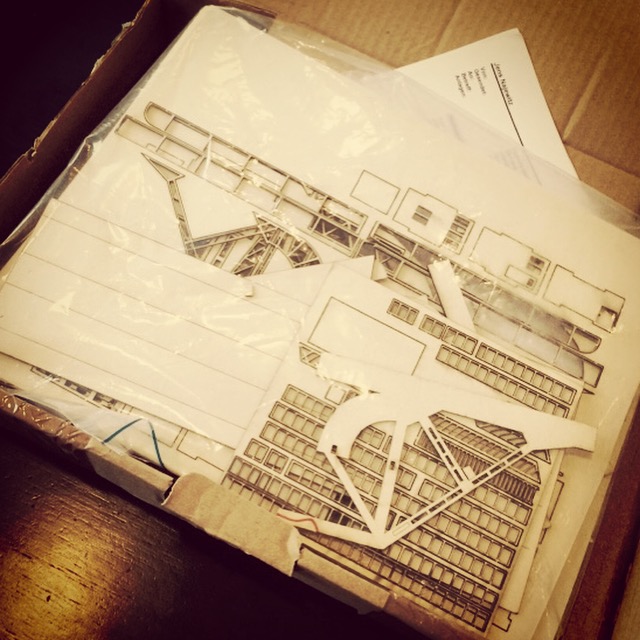
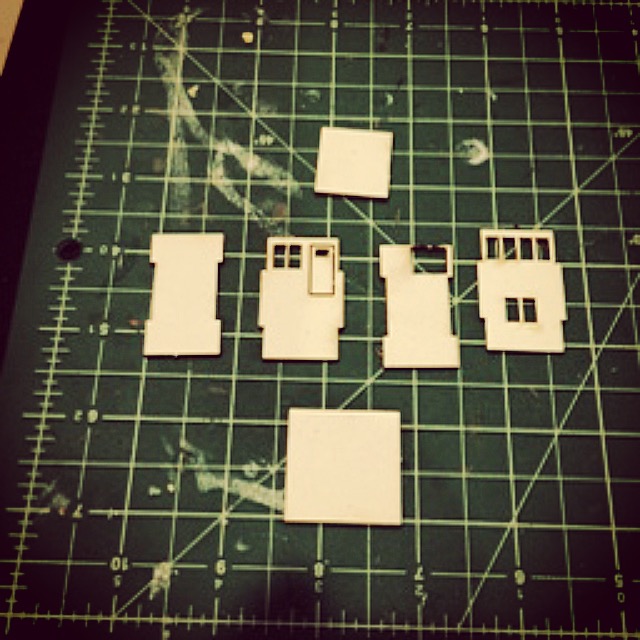
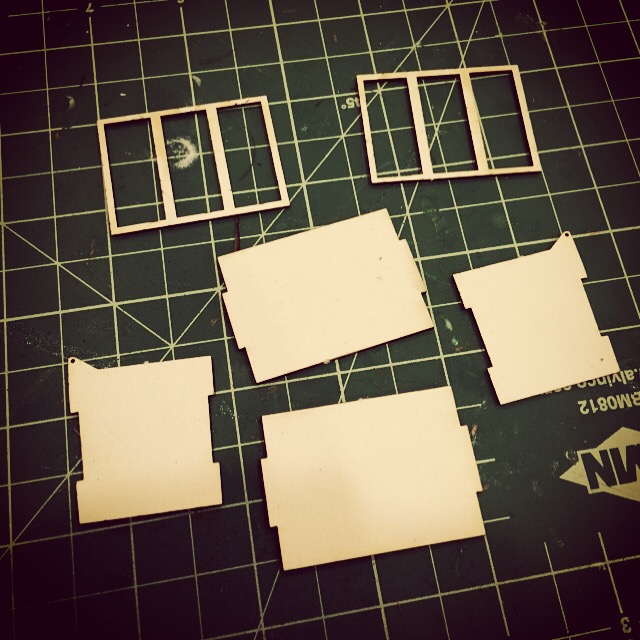
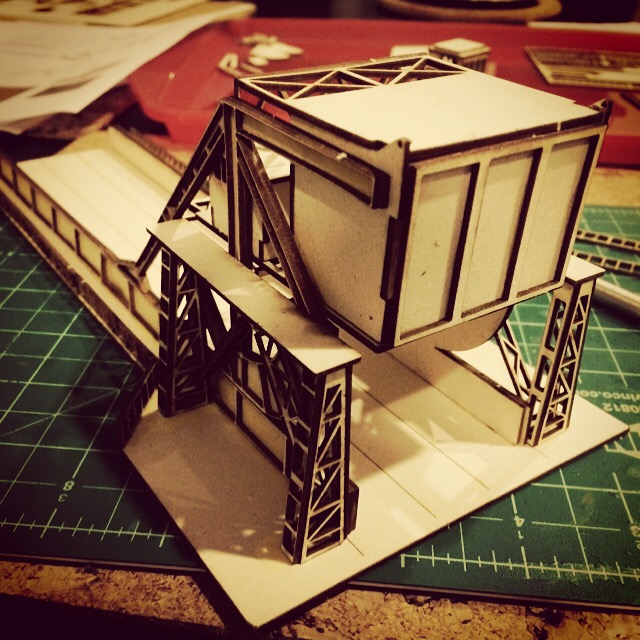
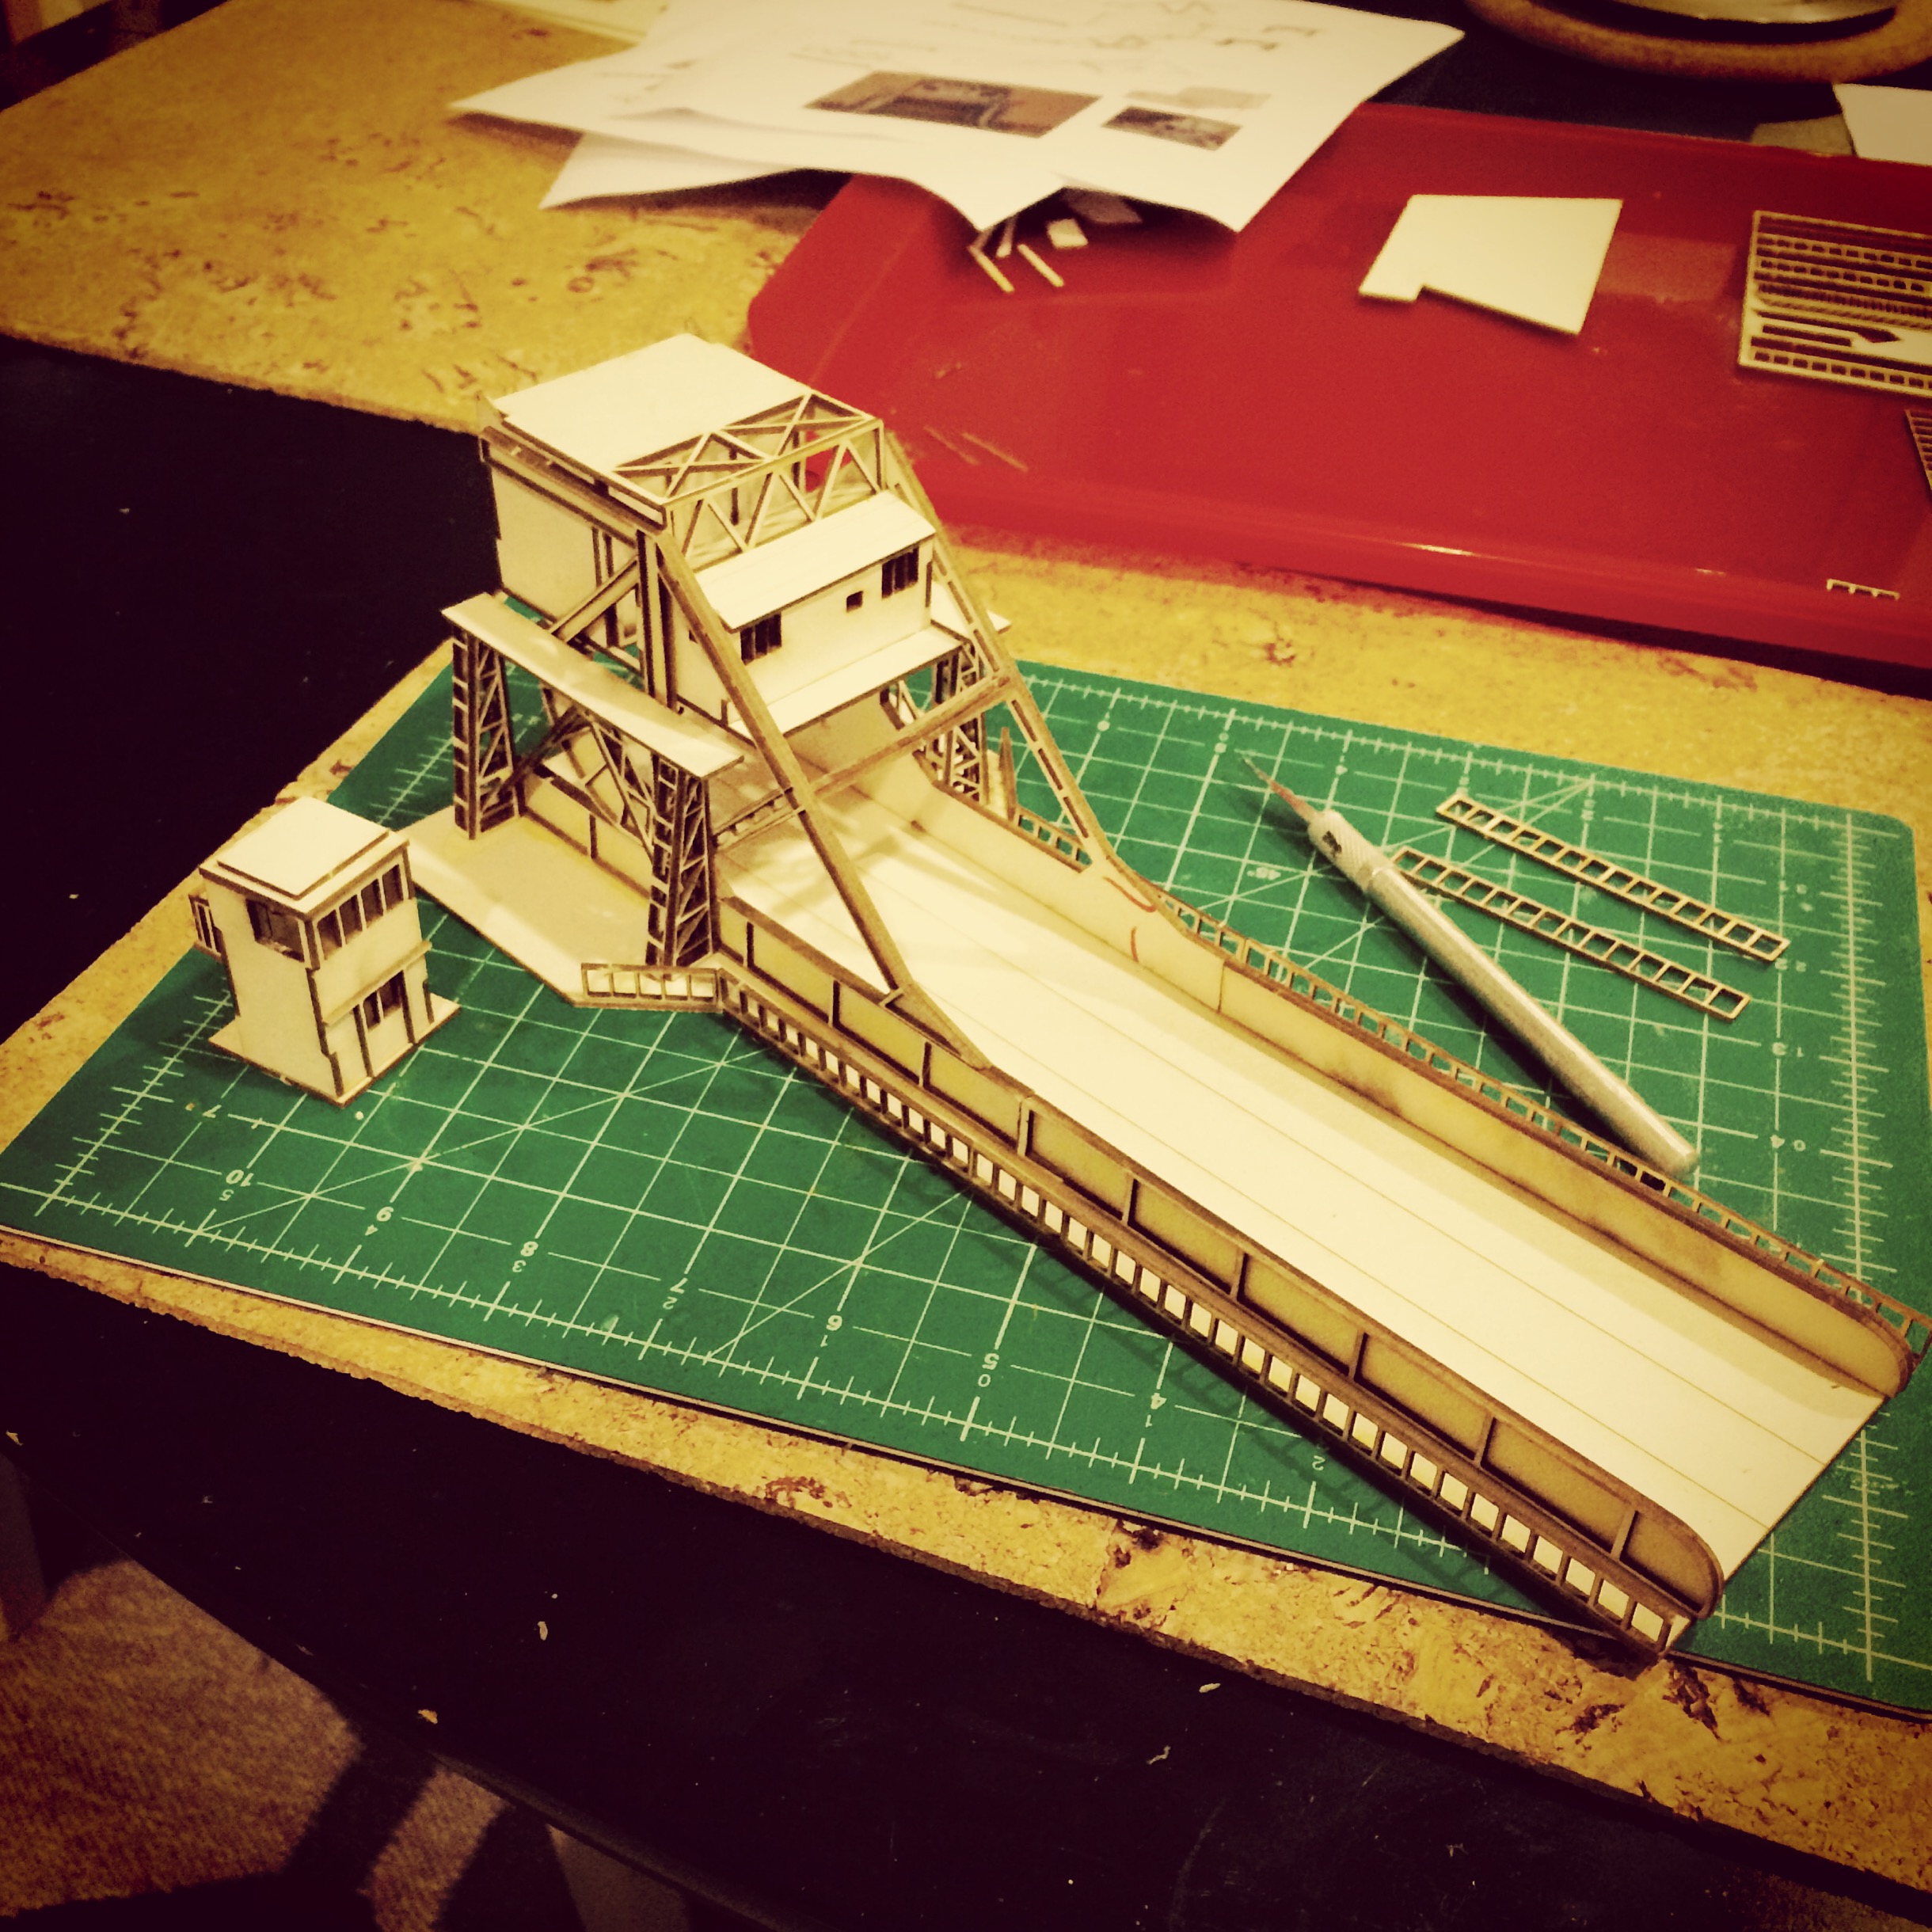
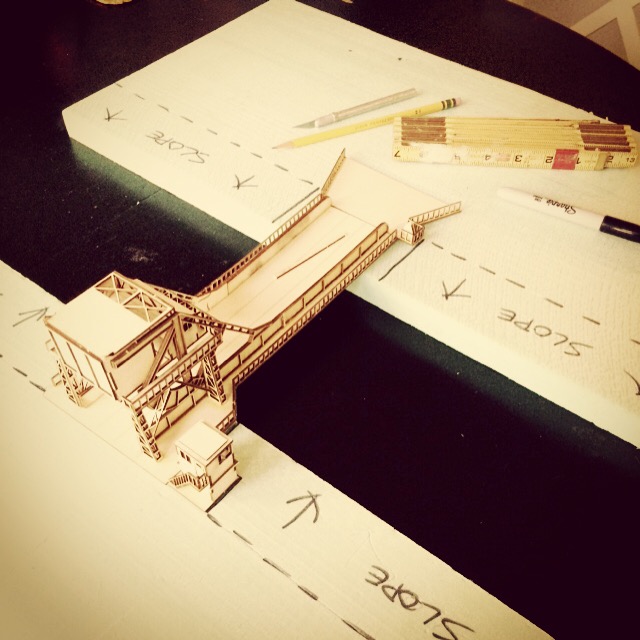
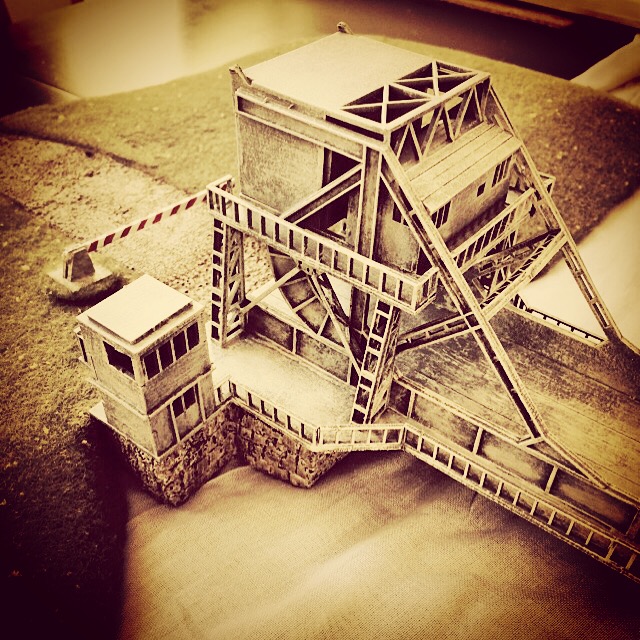
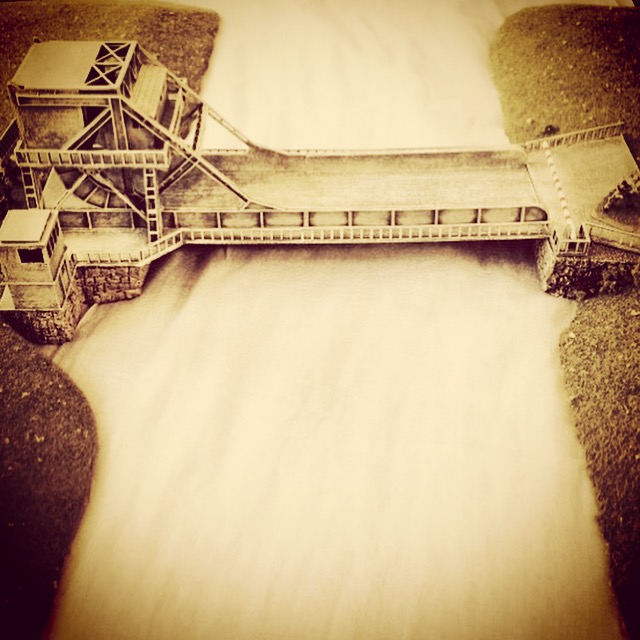
Too Fat Lardies, makers of the I Ain’t Been Shot Mum company-level WWII rules, provided scenarios for the actions at Pegasus Bridge and Bénouville in the 2006 Summer Special. Playing the scenarios recently at Metropolitan Wargamers in Brooklyn, NY allowed me to use my recently-completed 15mm bridge model from Najewitz Modellbau and refight one of my favorite little moments in the big history of the war.

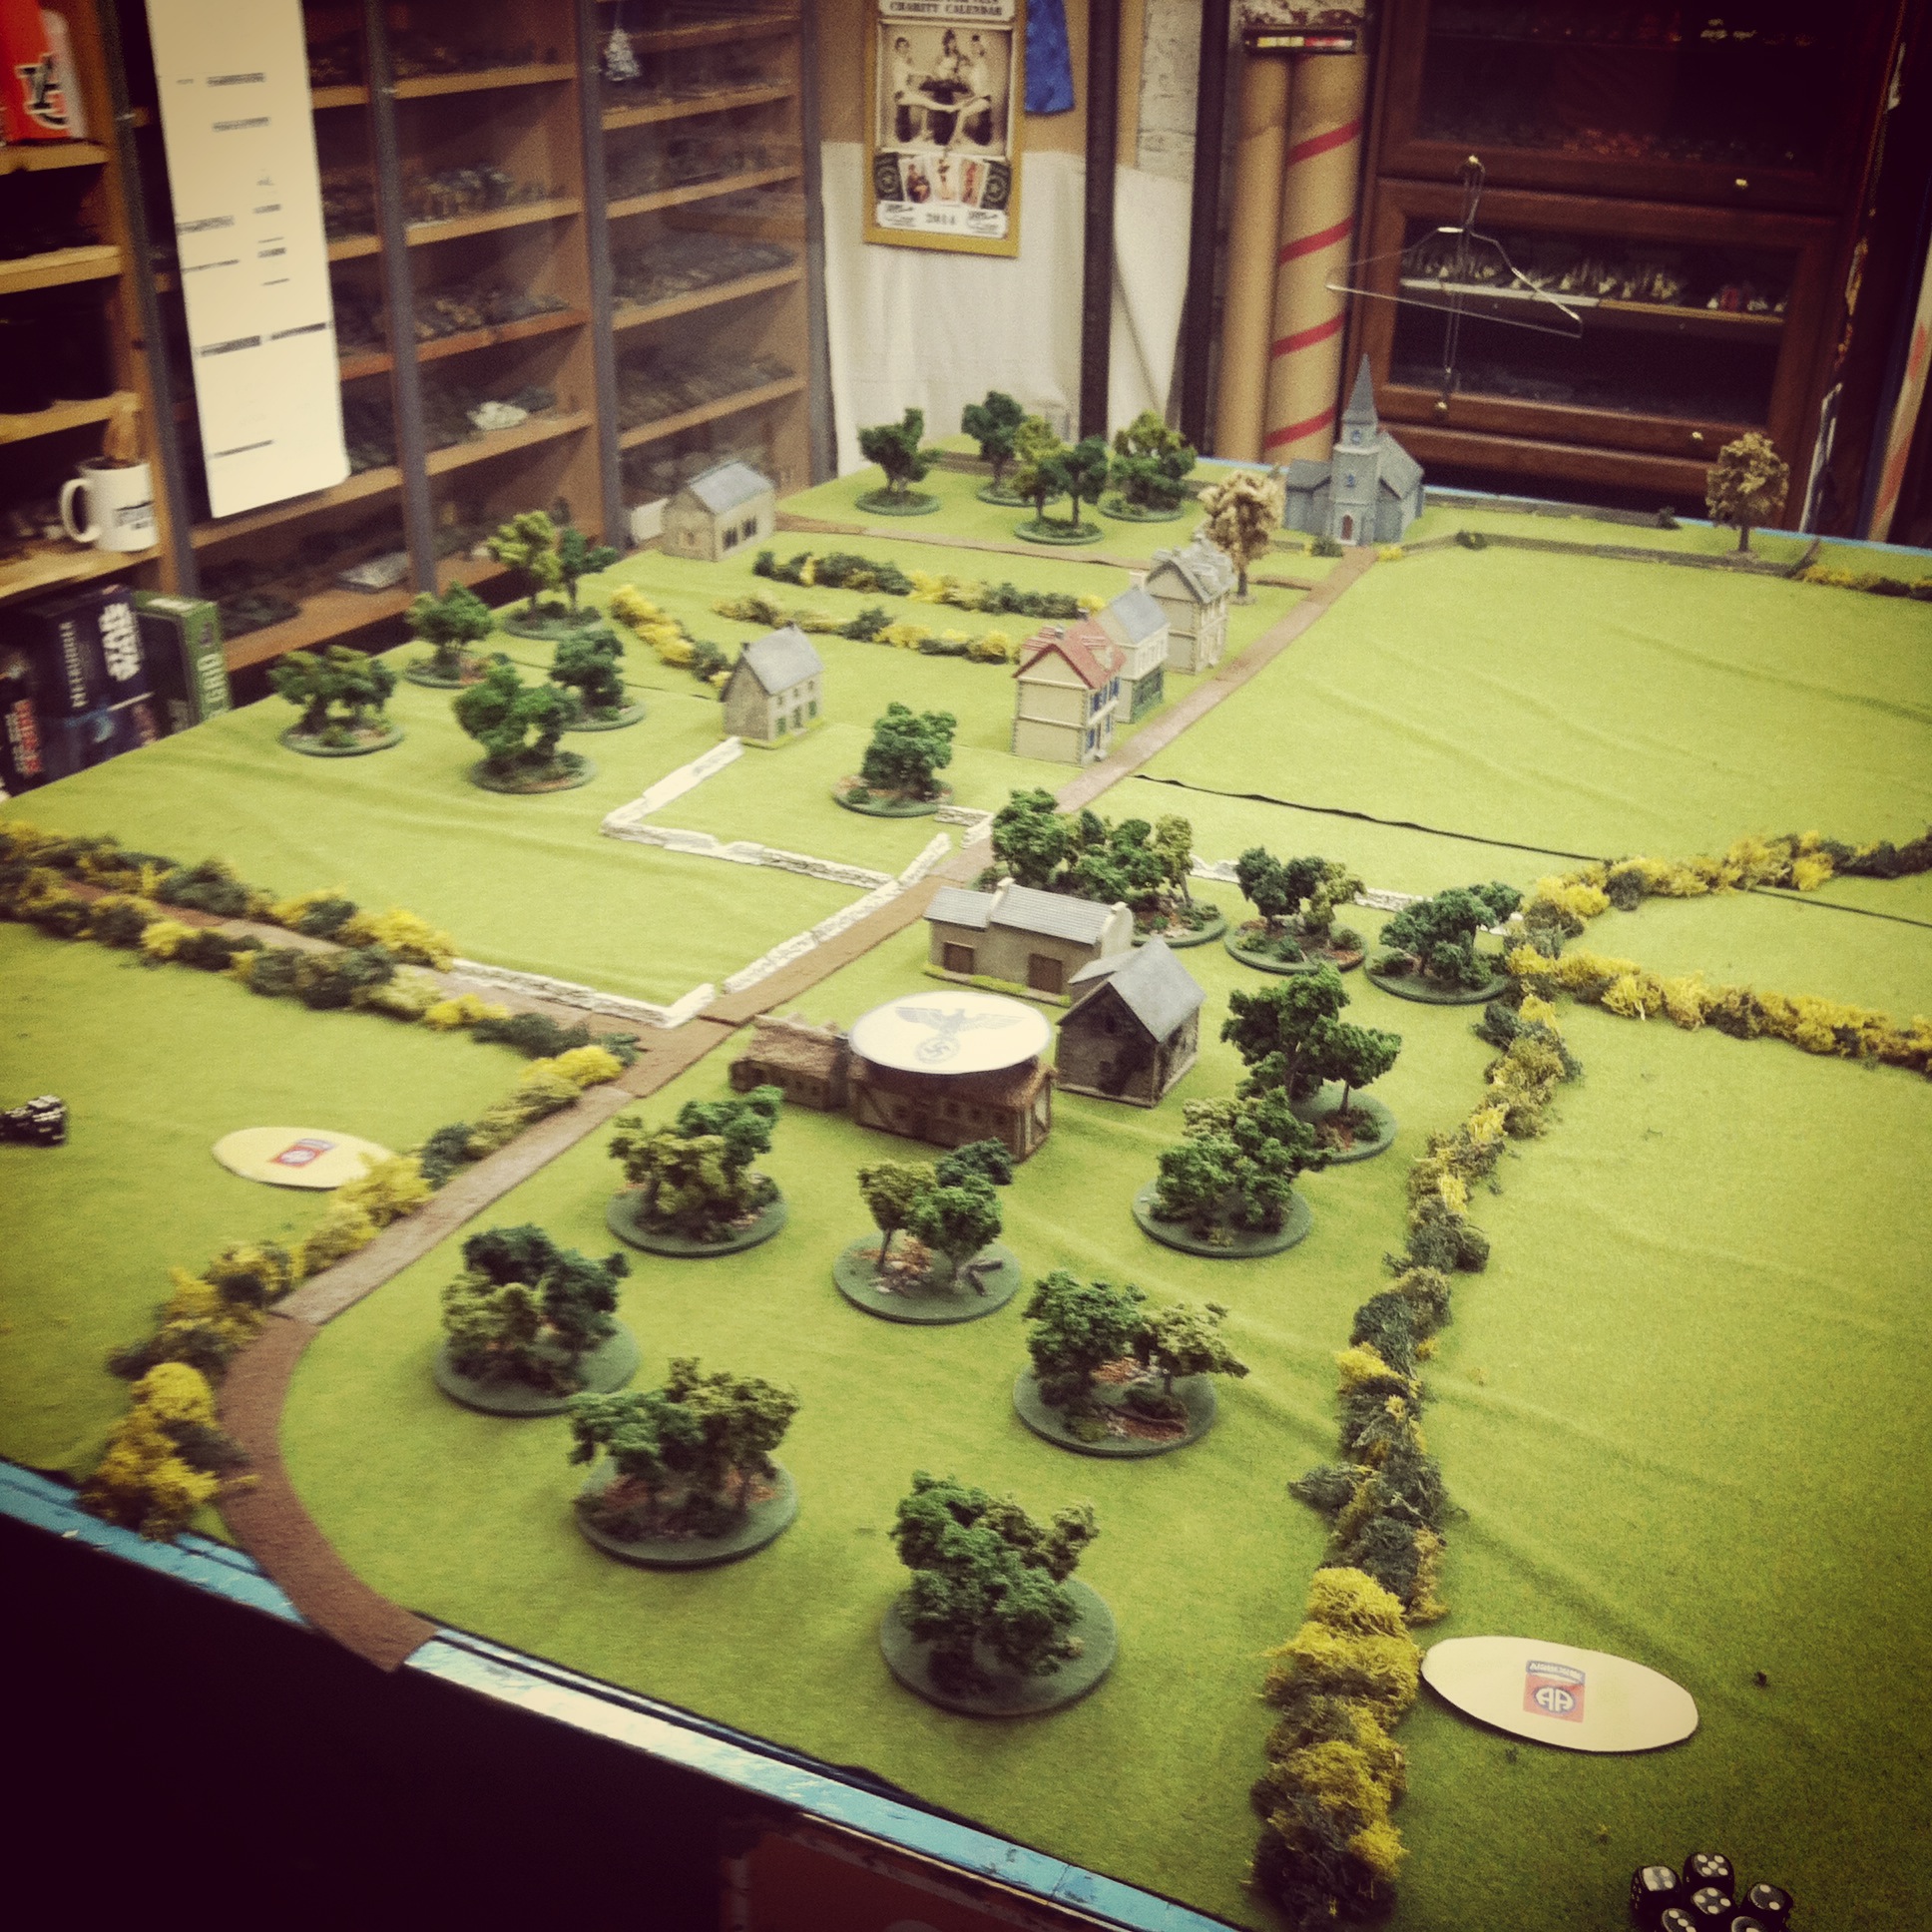
The Battle for Pegasus Bridge

Like most IABSM games, the fight at the bridge started with hidden German troops and the British entering the board on blinds. Initial blind placements were randomized through a die roll to reflect the off-board glider landings. Owing to the time just past midnight, spotting of any troops was impossible until units closed with just inches of each other.

IMG_6299
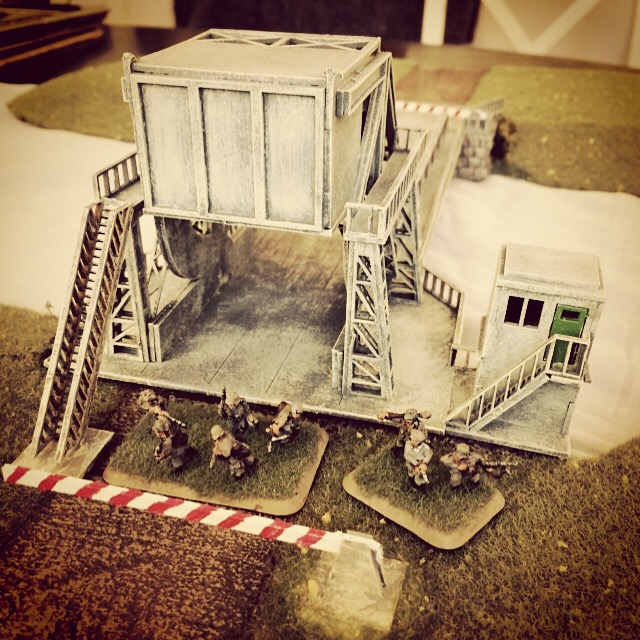
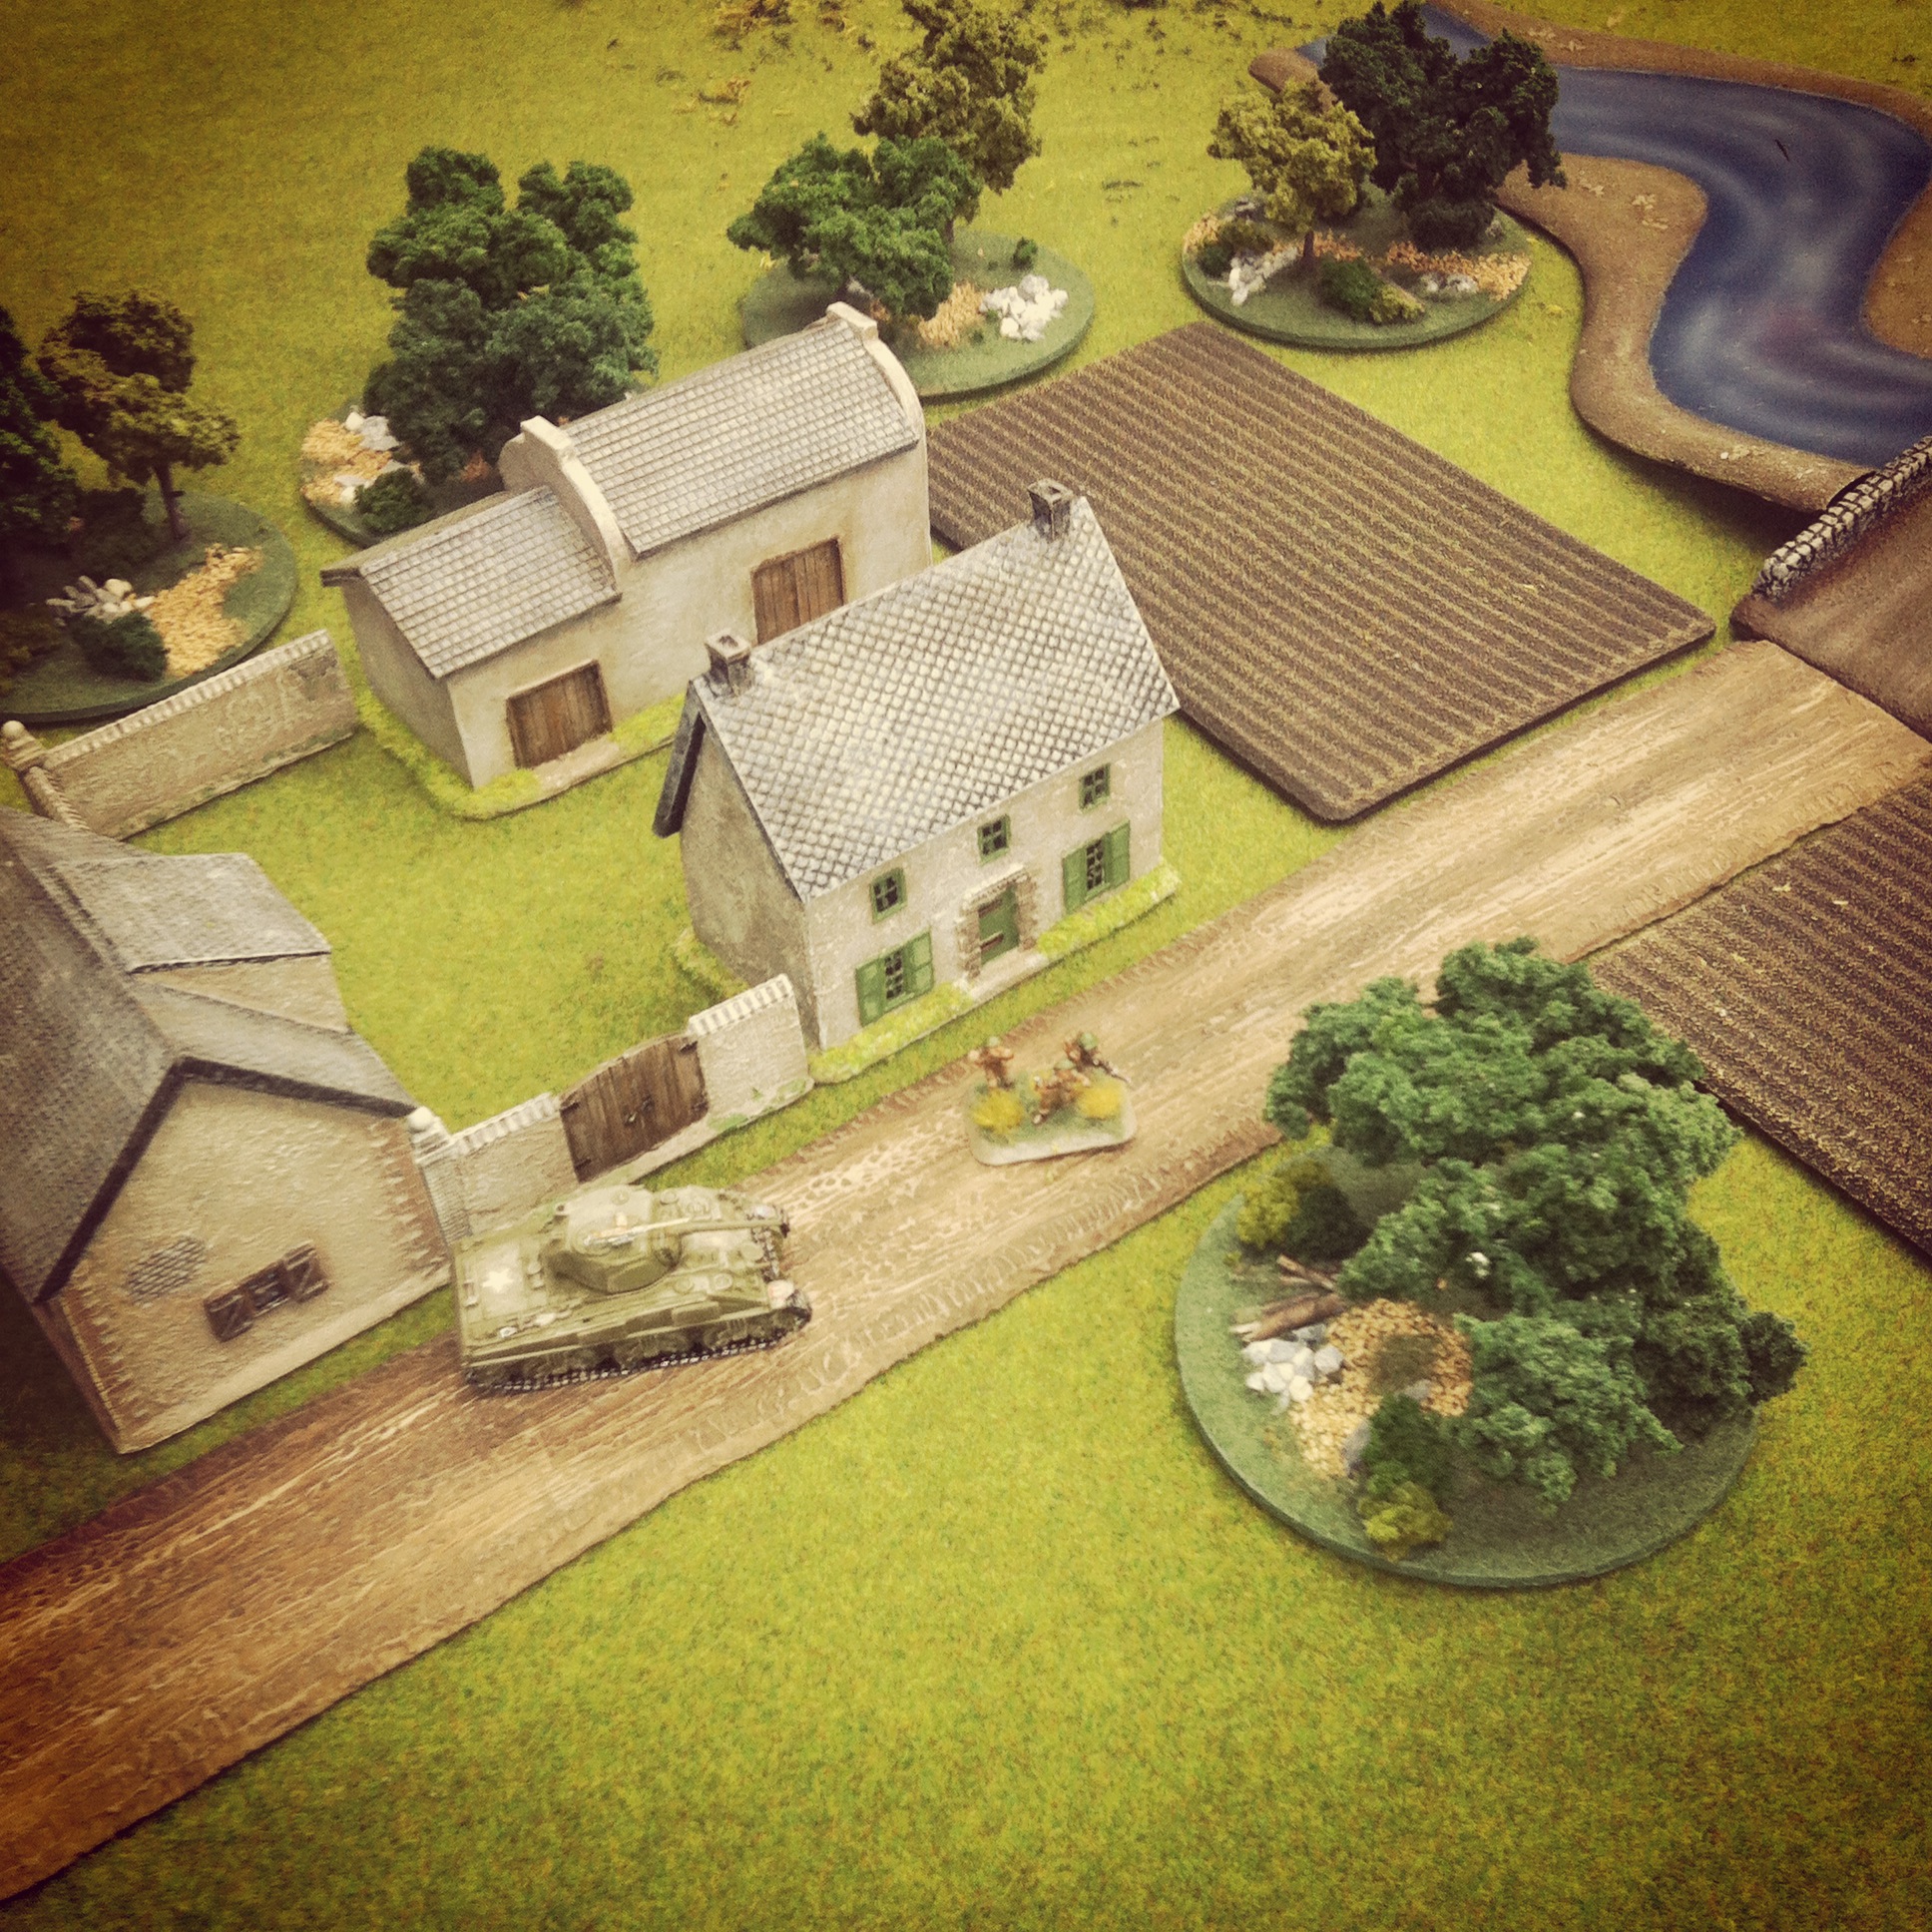
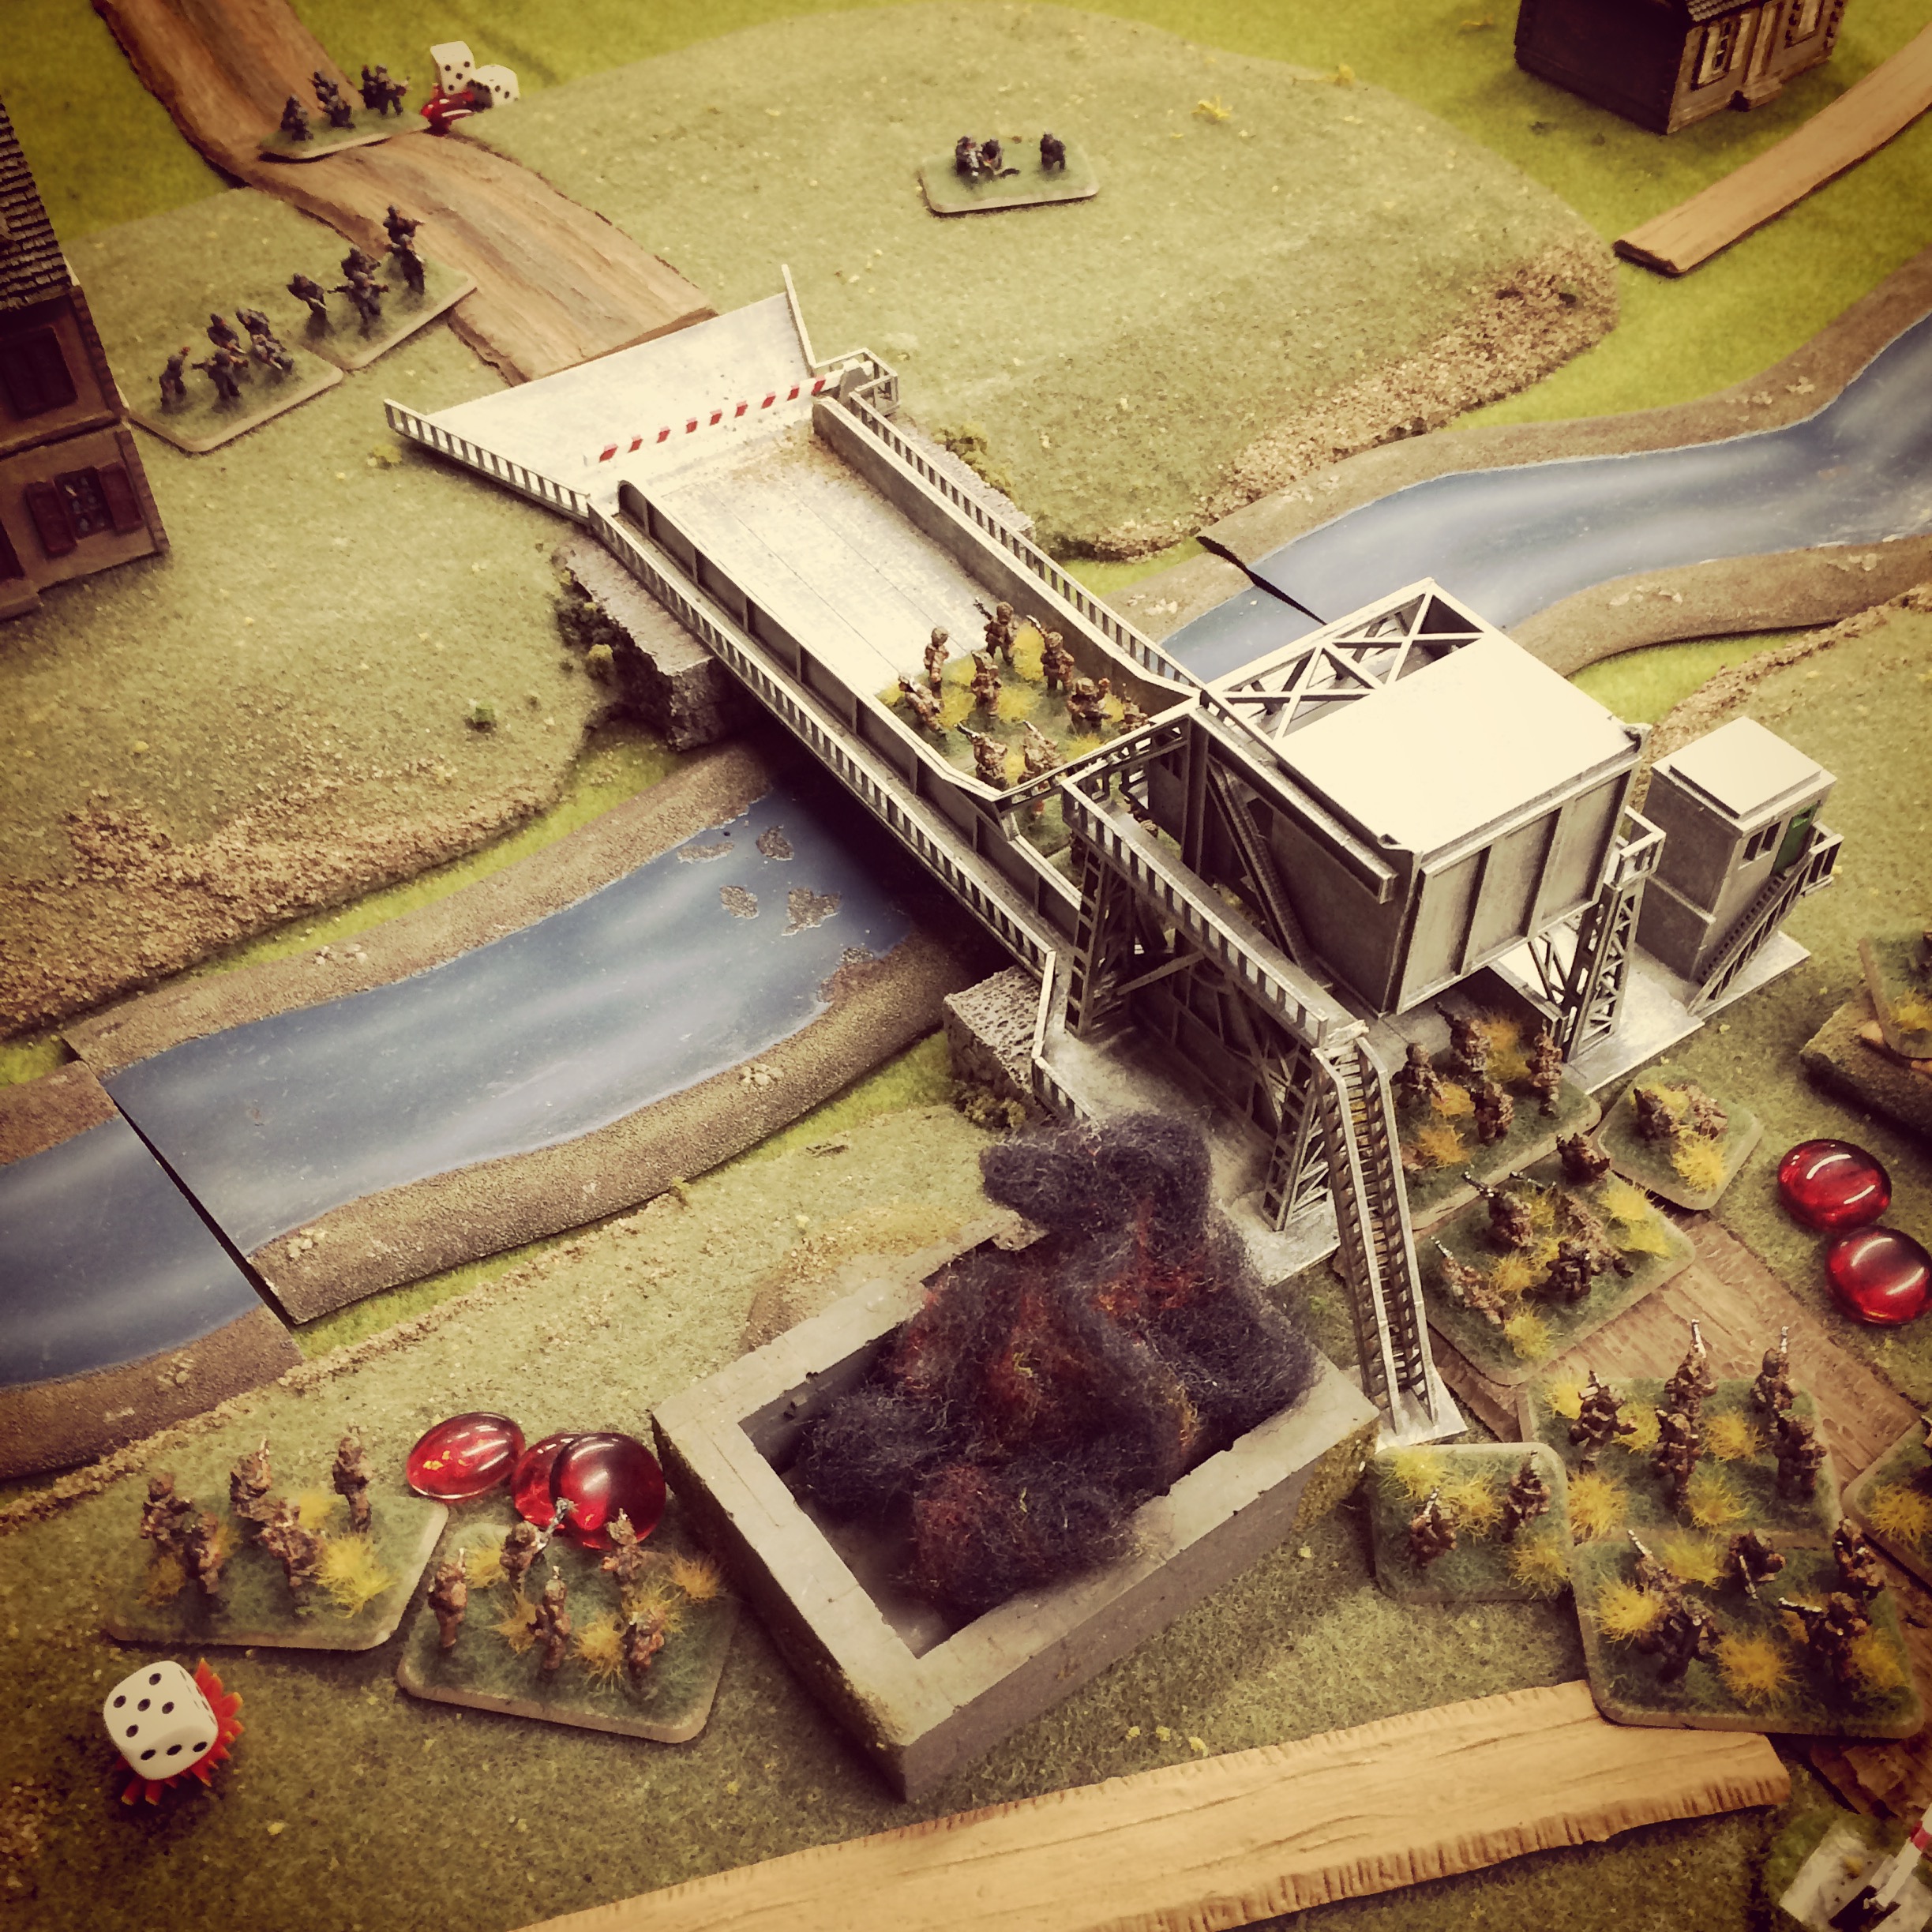
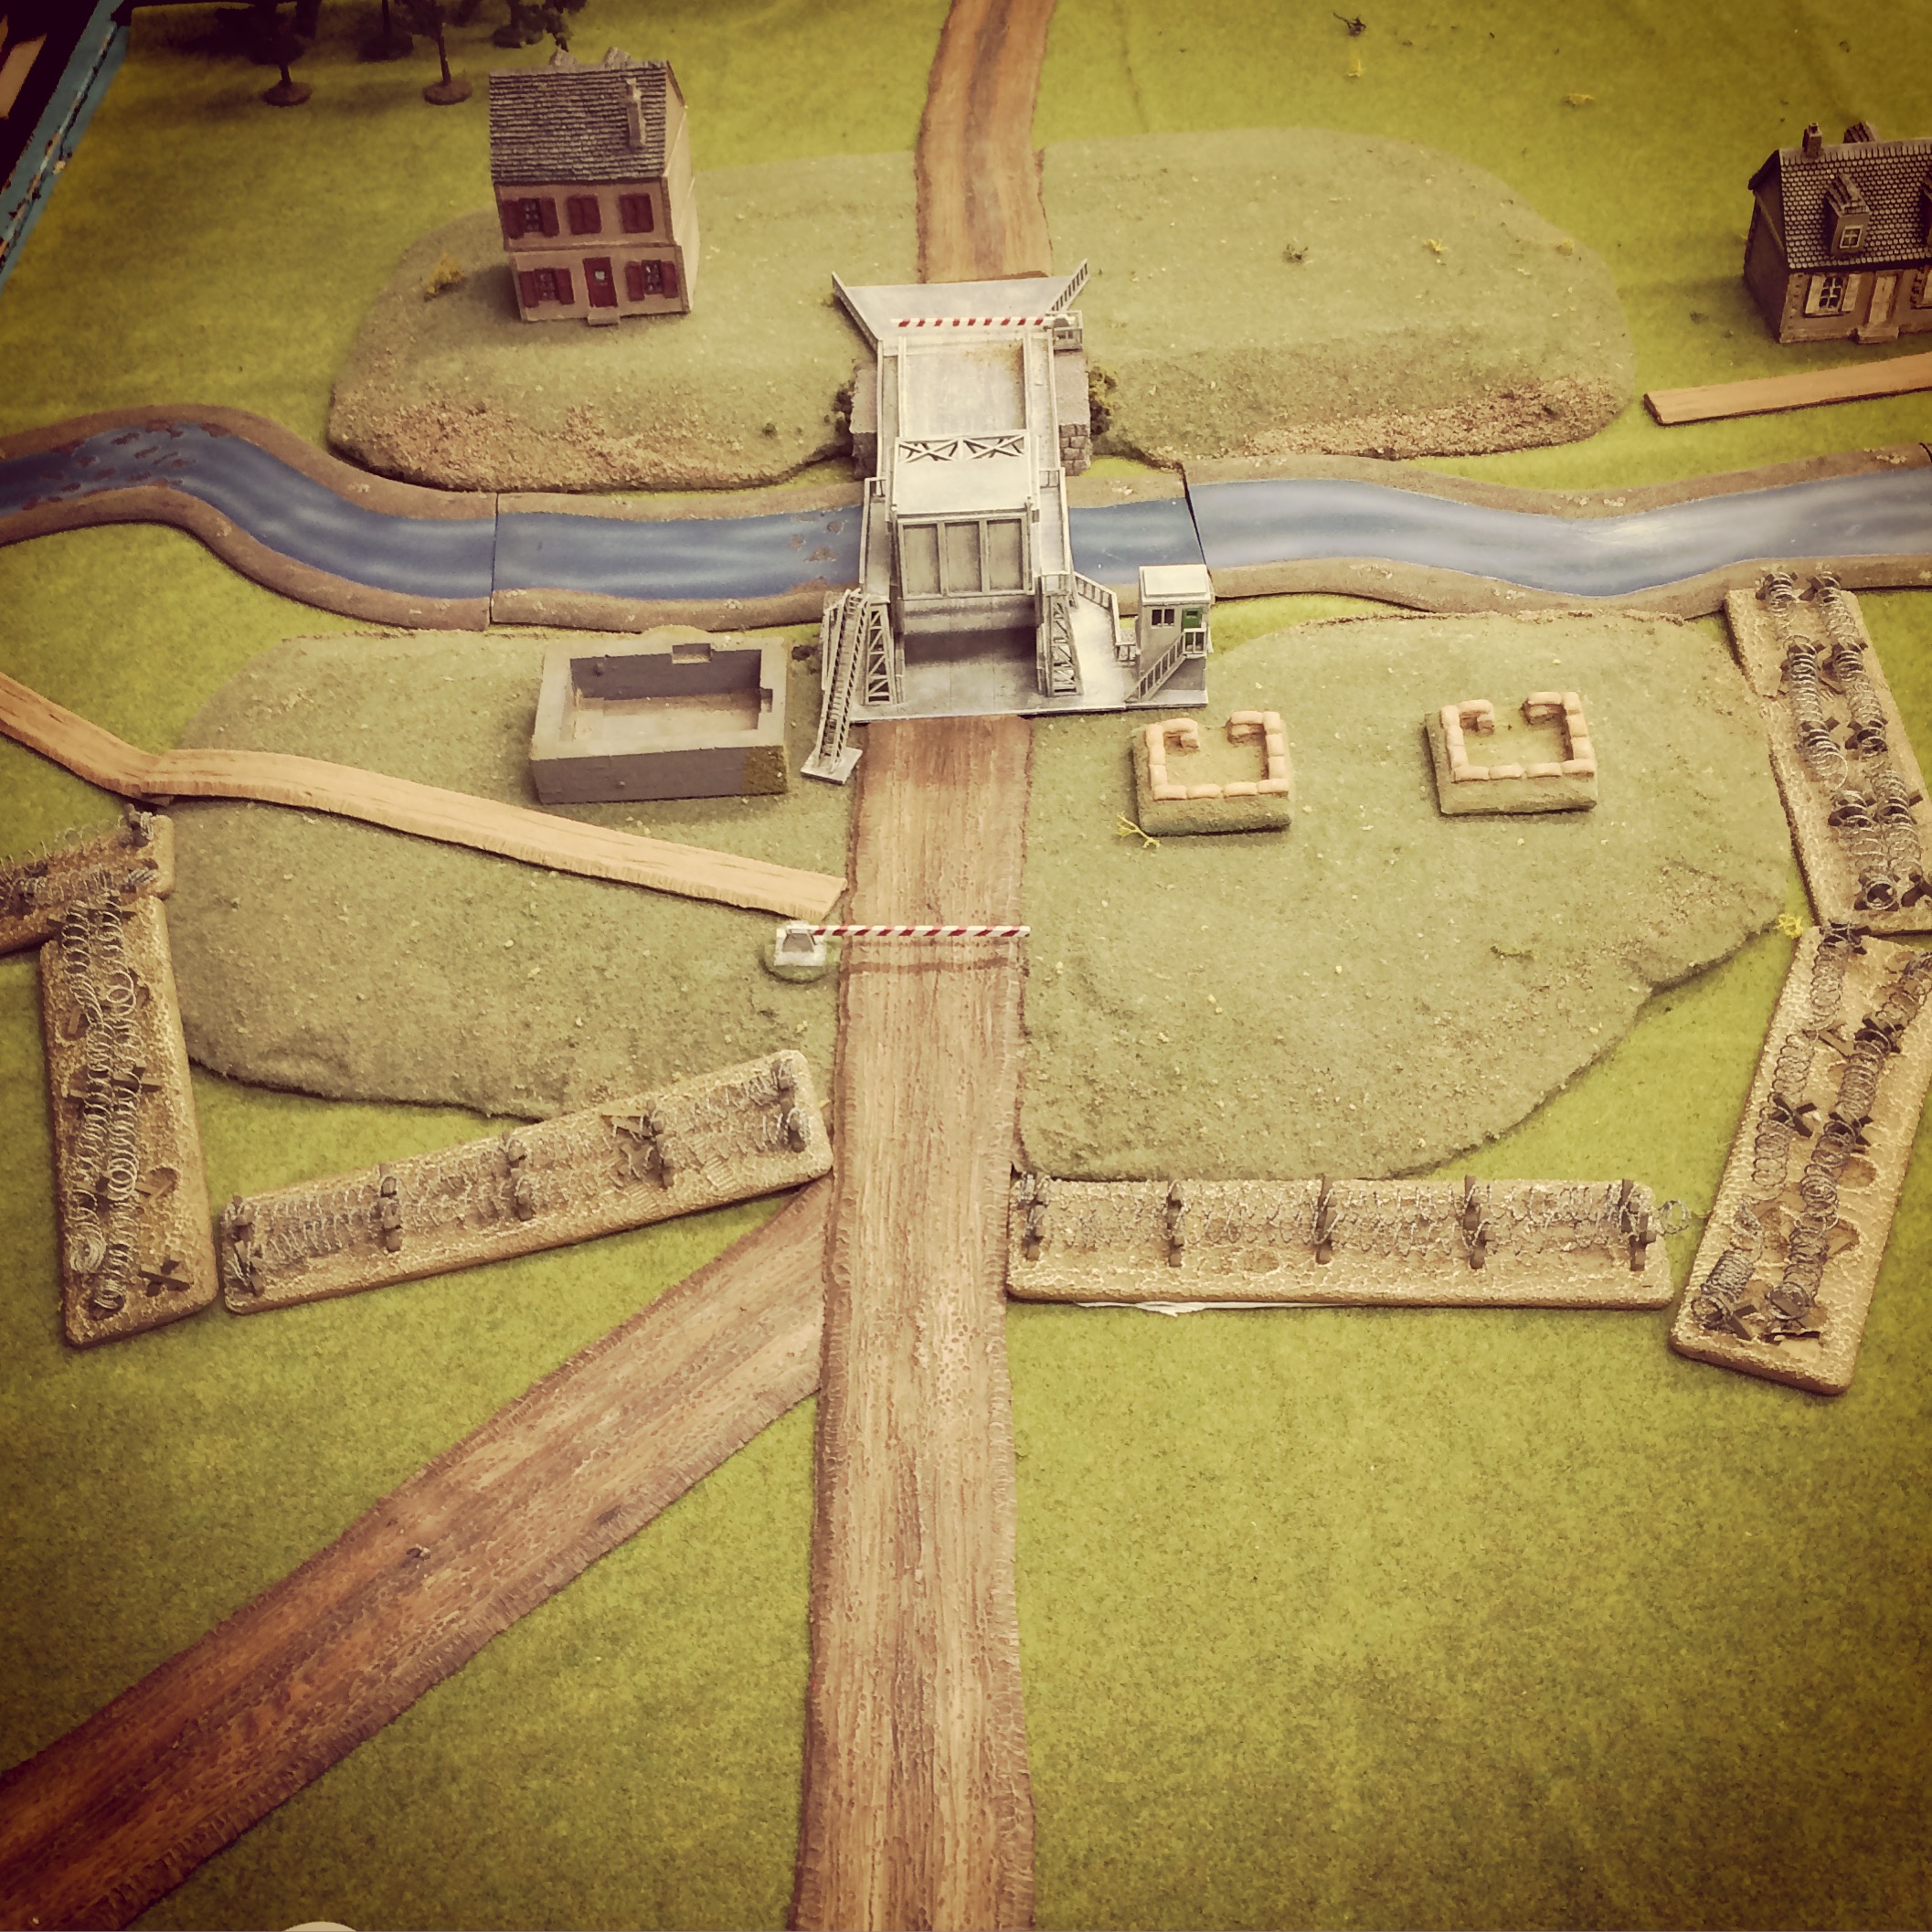
Initial set up of the scene at Pegasus Bridge

IMG_6300British charge hard into the German positions

IMG_6301
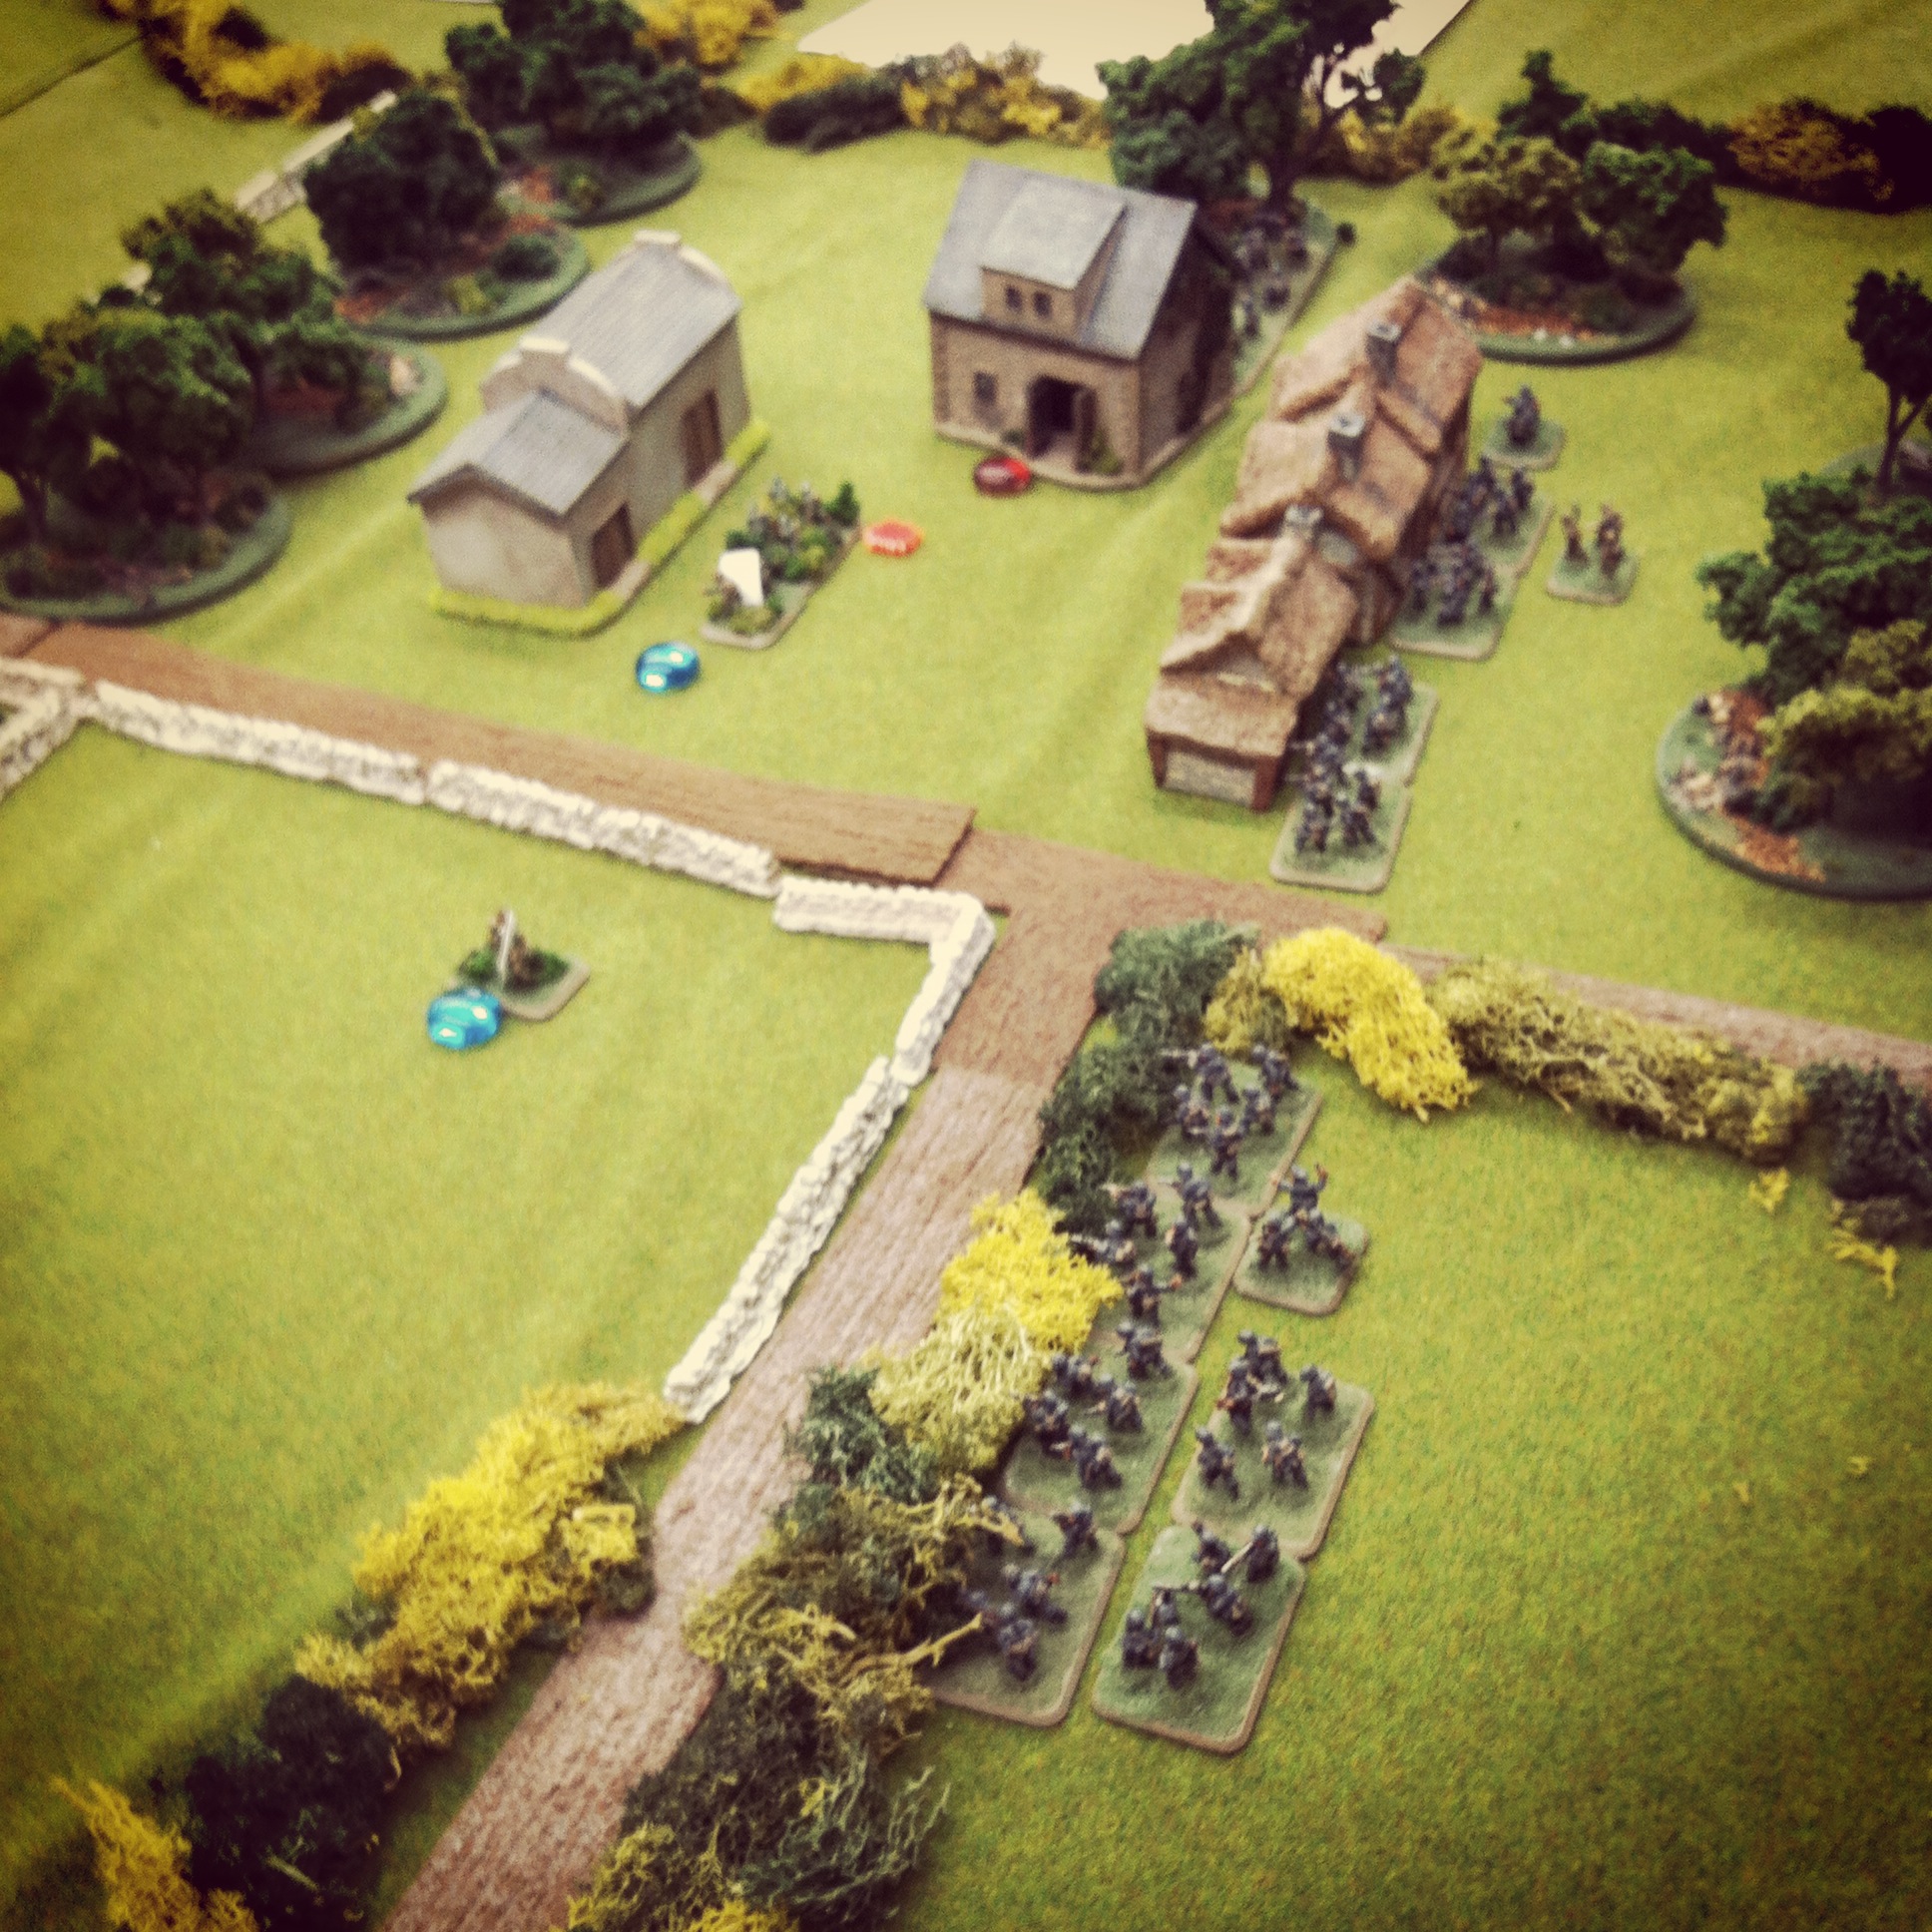
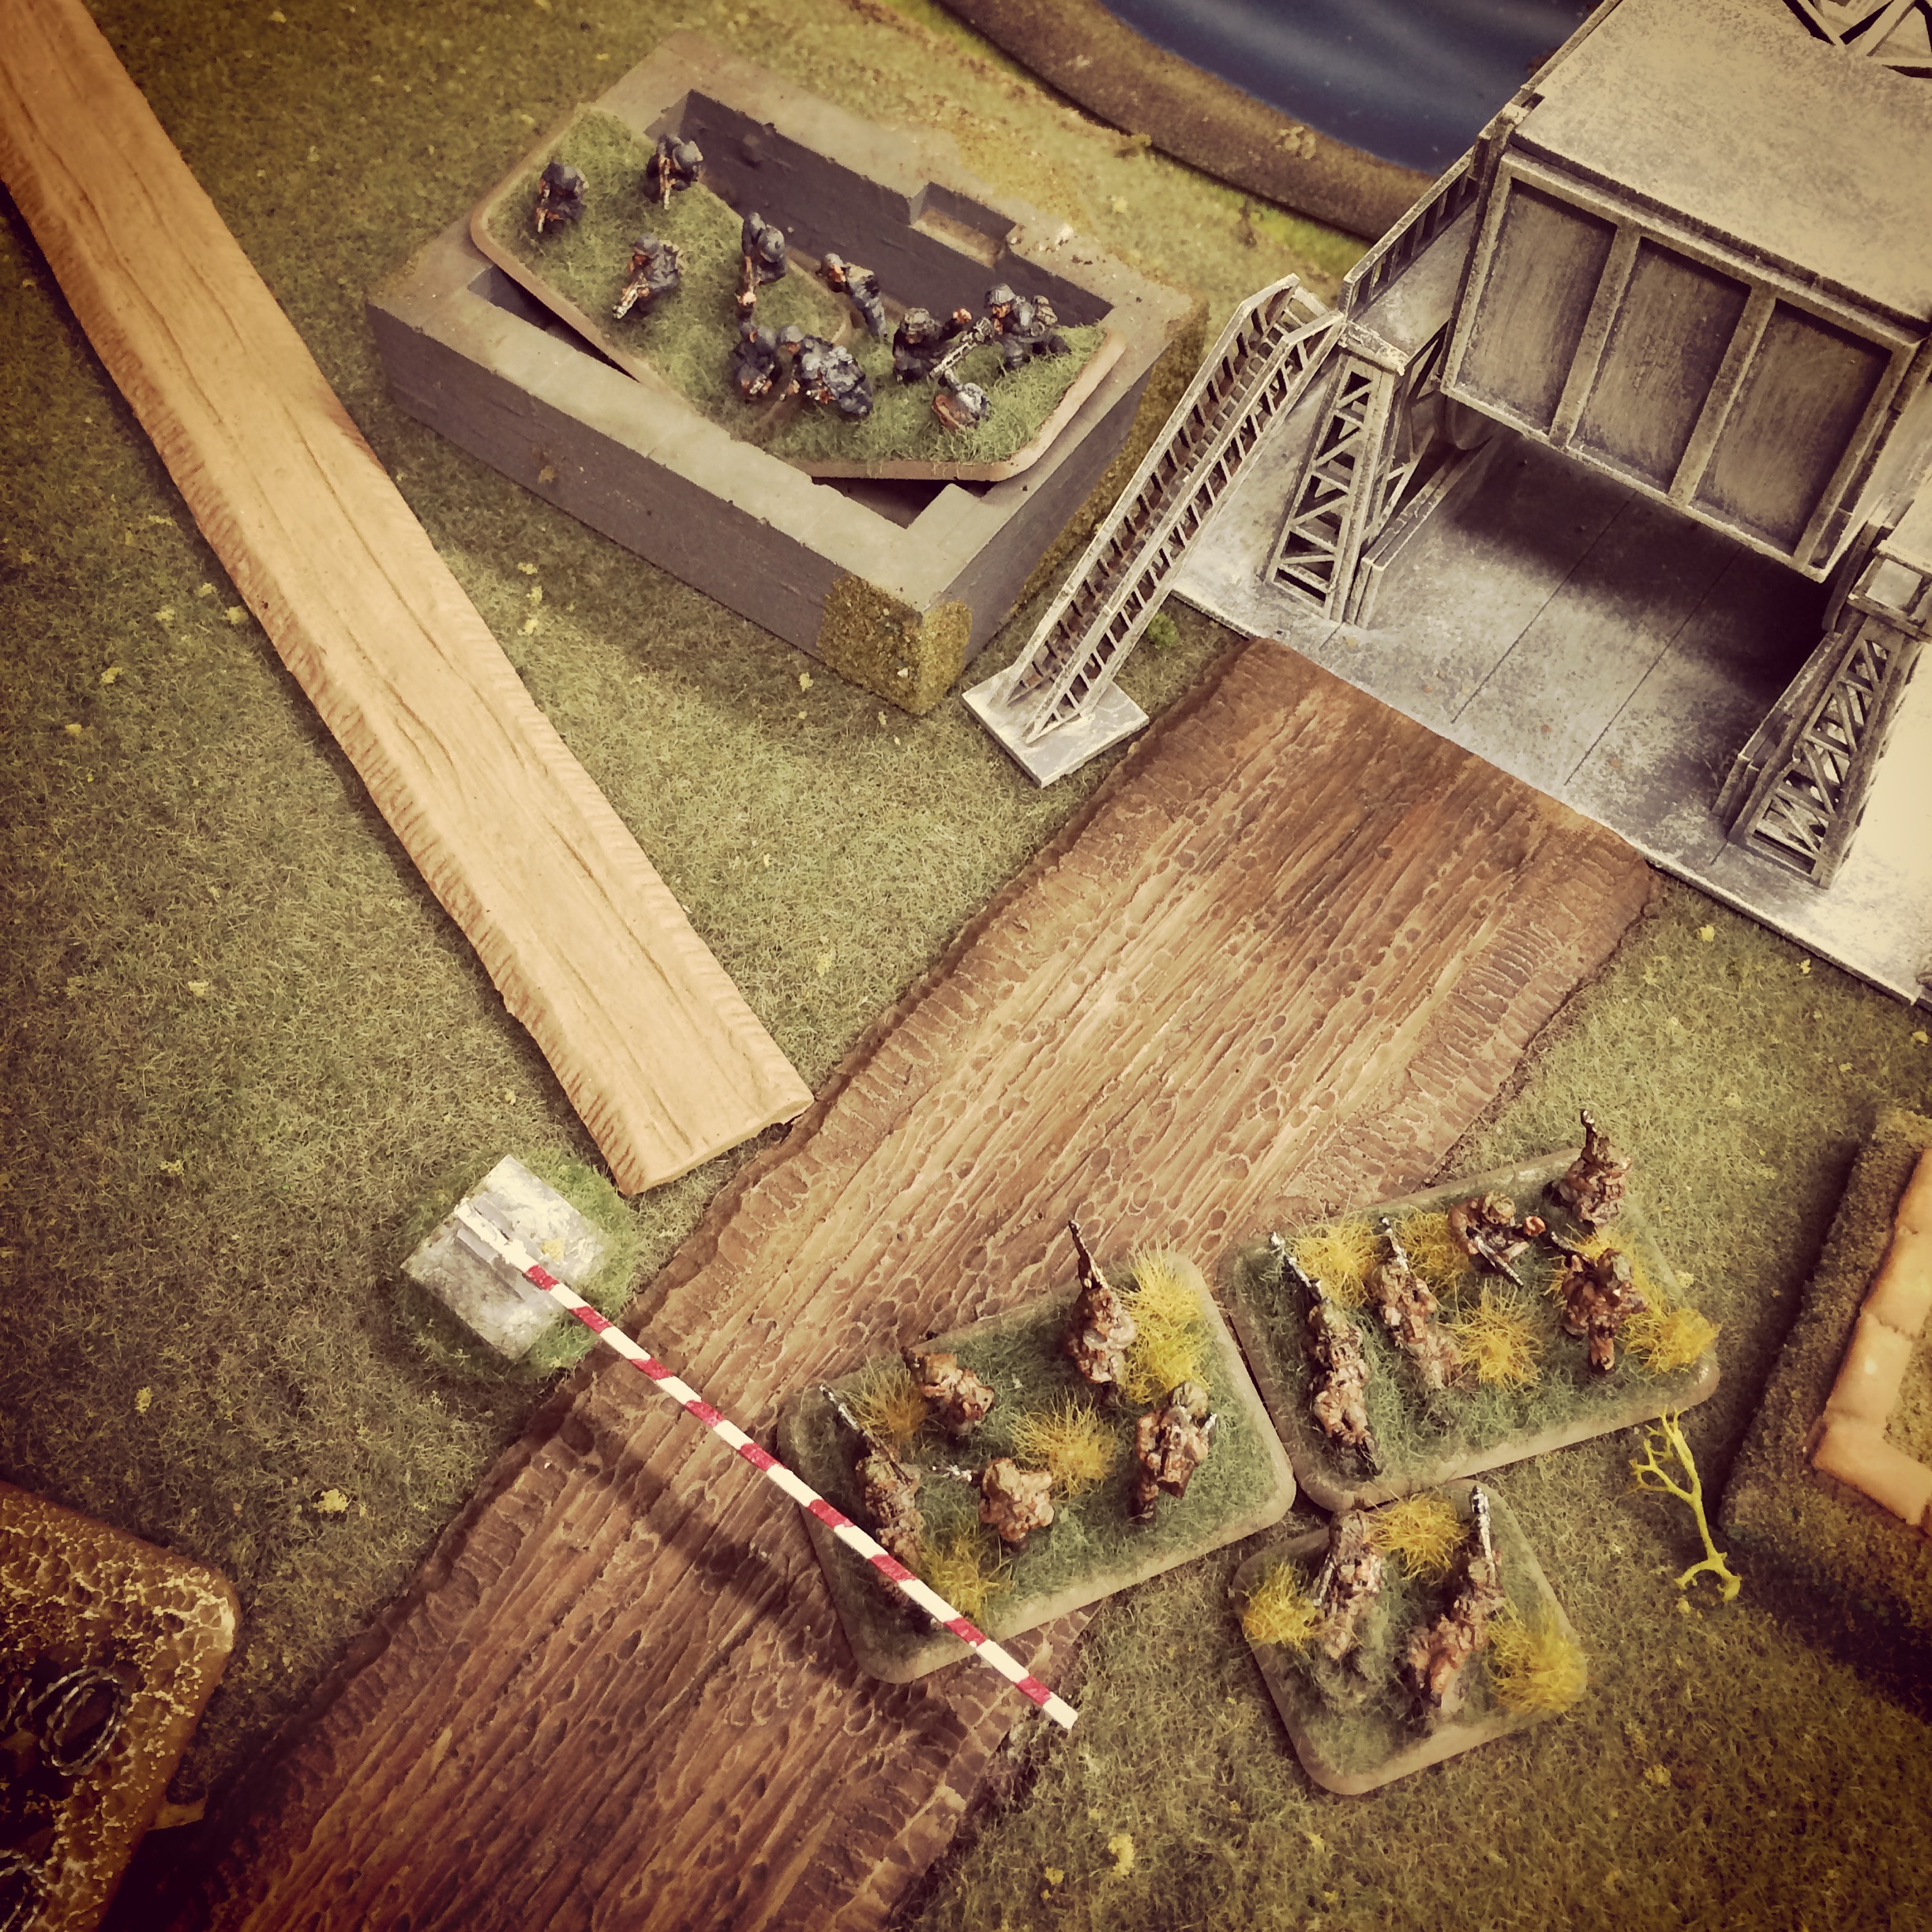
A British fire team splits off to attack the German bunker

Dividing my British force, one platoon rushed into an initial German position, took a few hits in a close assault, fell back but charged back to overwhelm the Germans. The remainder of my force (including my engineers) moved slowly, clipped a path through barbed wire and made its way toward the concrete bunker. A brief firefight at the bunker sent the German defenders fleeing toward the canal, the engineers placed their explosives and the rest of the British made way for the bridge.

IMG_6302German troops flee their bunker as the British cut the wire and push onward

IMG_6303
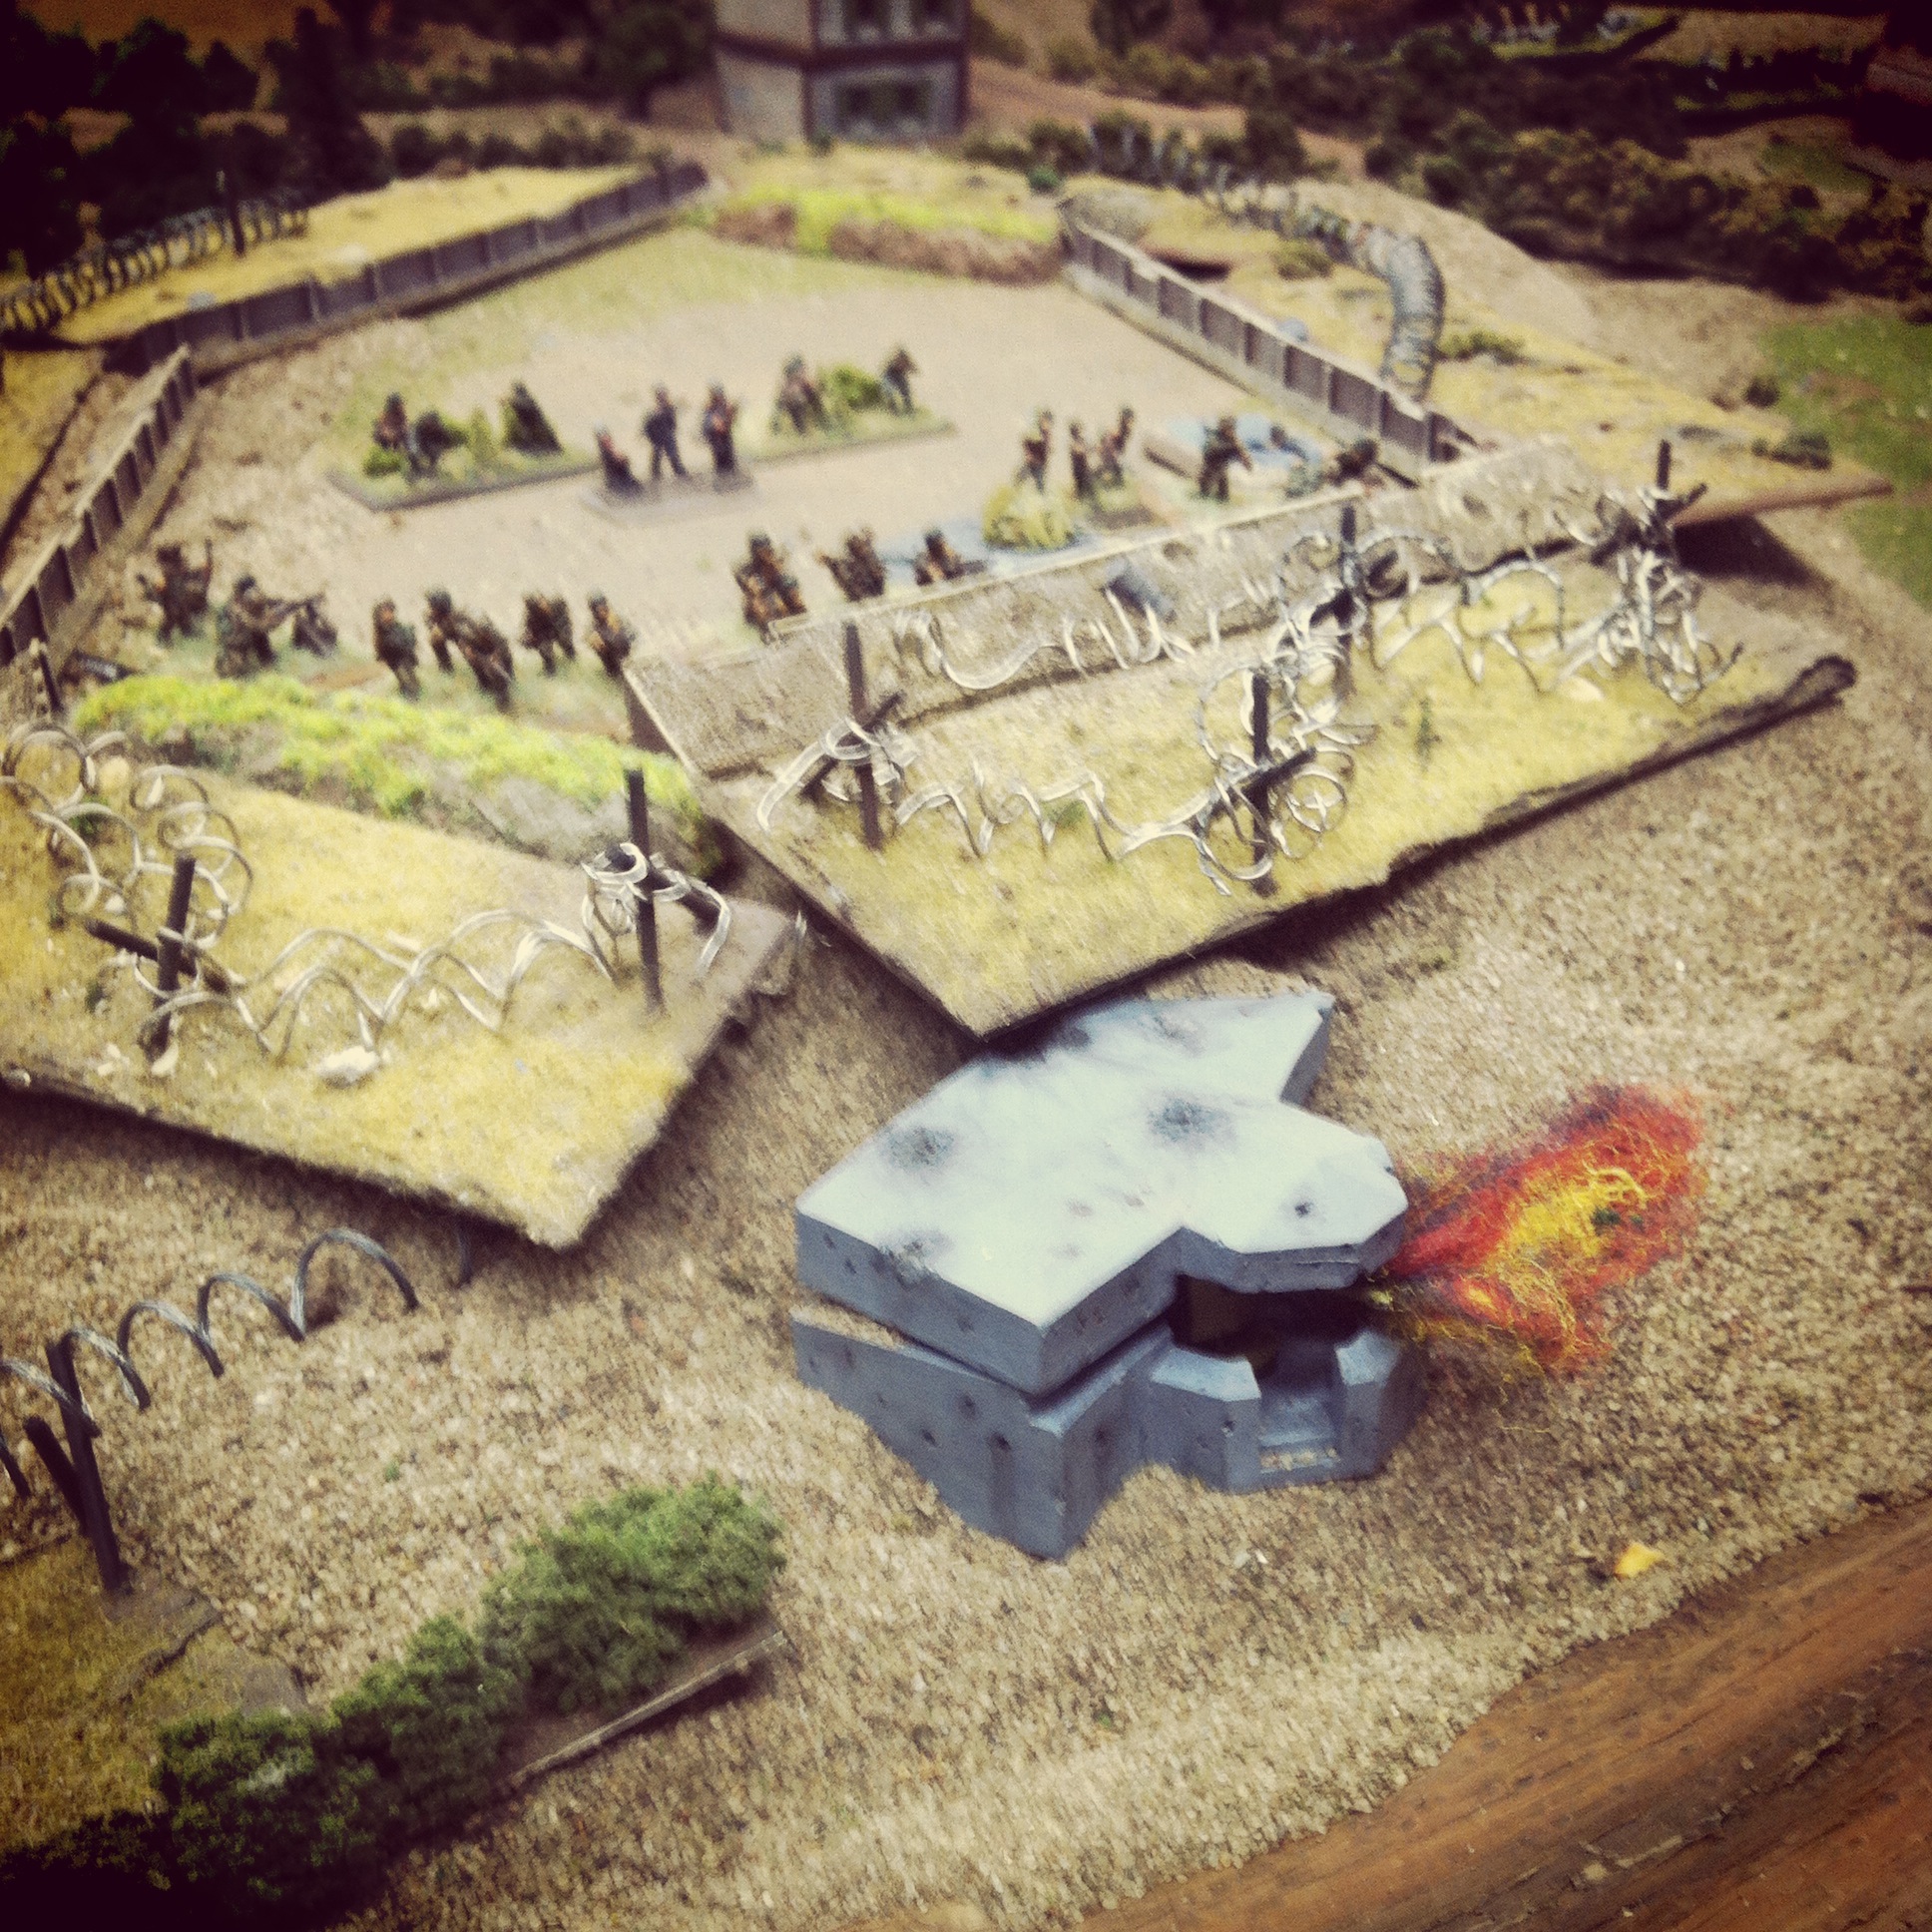
British engineers set charges at the bunker as German machine guns open fire across the canal

As the German bunker went up in and explosion of flame, German machine guns revealed themselves on the opposite side of the bridge. Two sniper sentries also appeared and began harassing the advancing British with fire. To clear the way, a British officer took a heroic run at one sniper, capturing the German where he sat.

IMG_6305The bunker burns, the British head over the bridge but take shots from German snipers

IMG_6304A thin line of Germans look to hold off the advancing British

IMG_6306
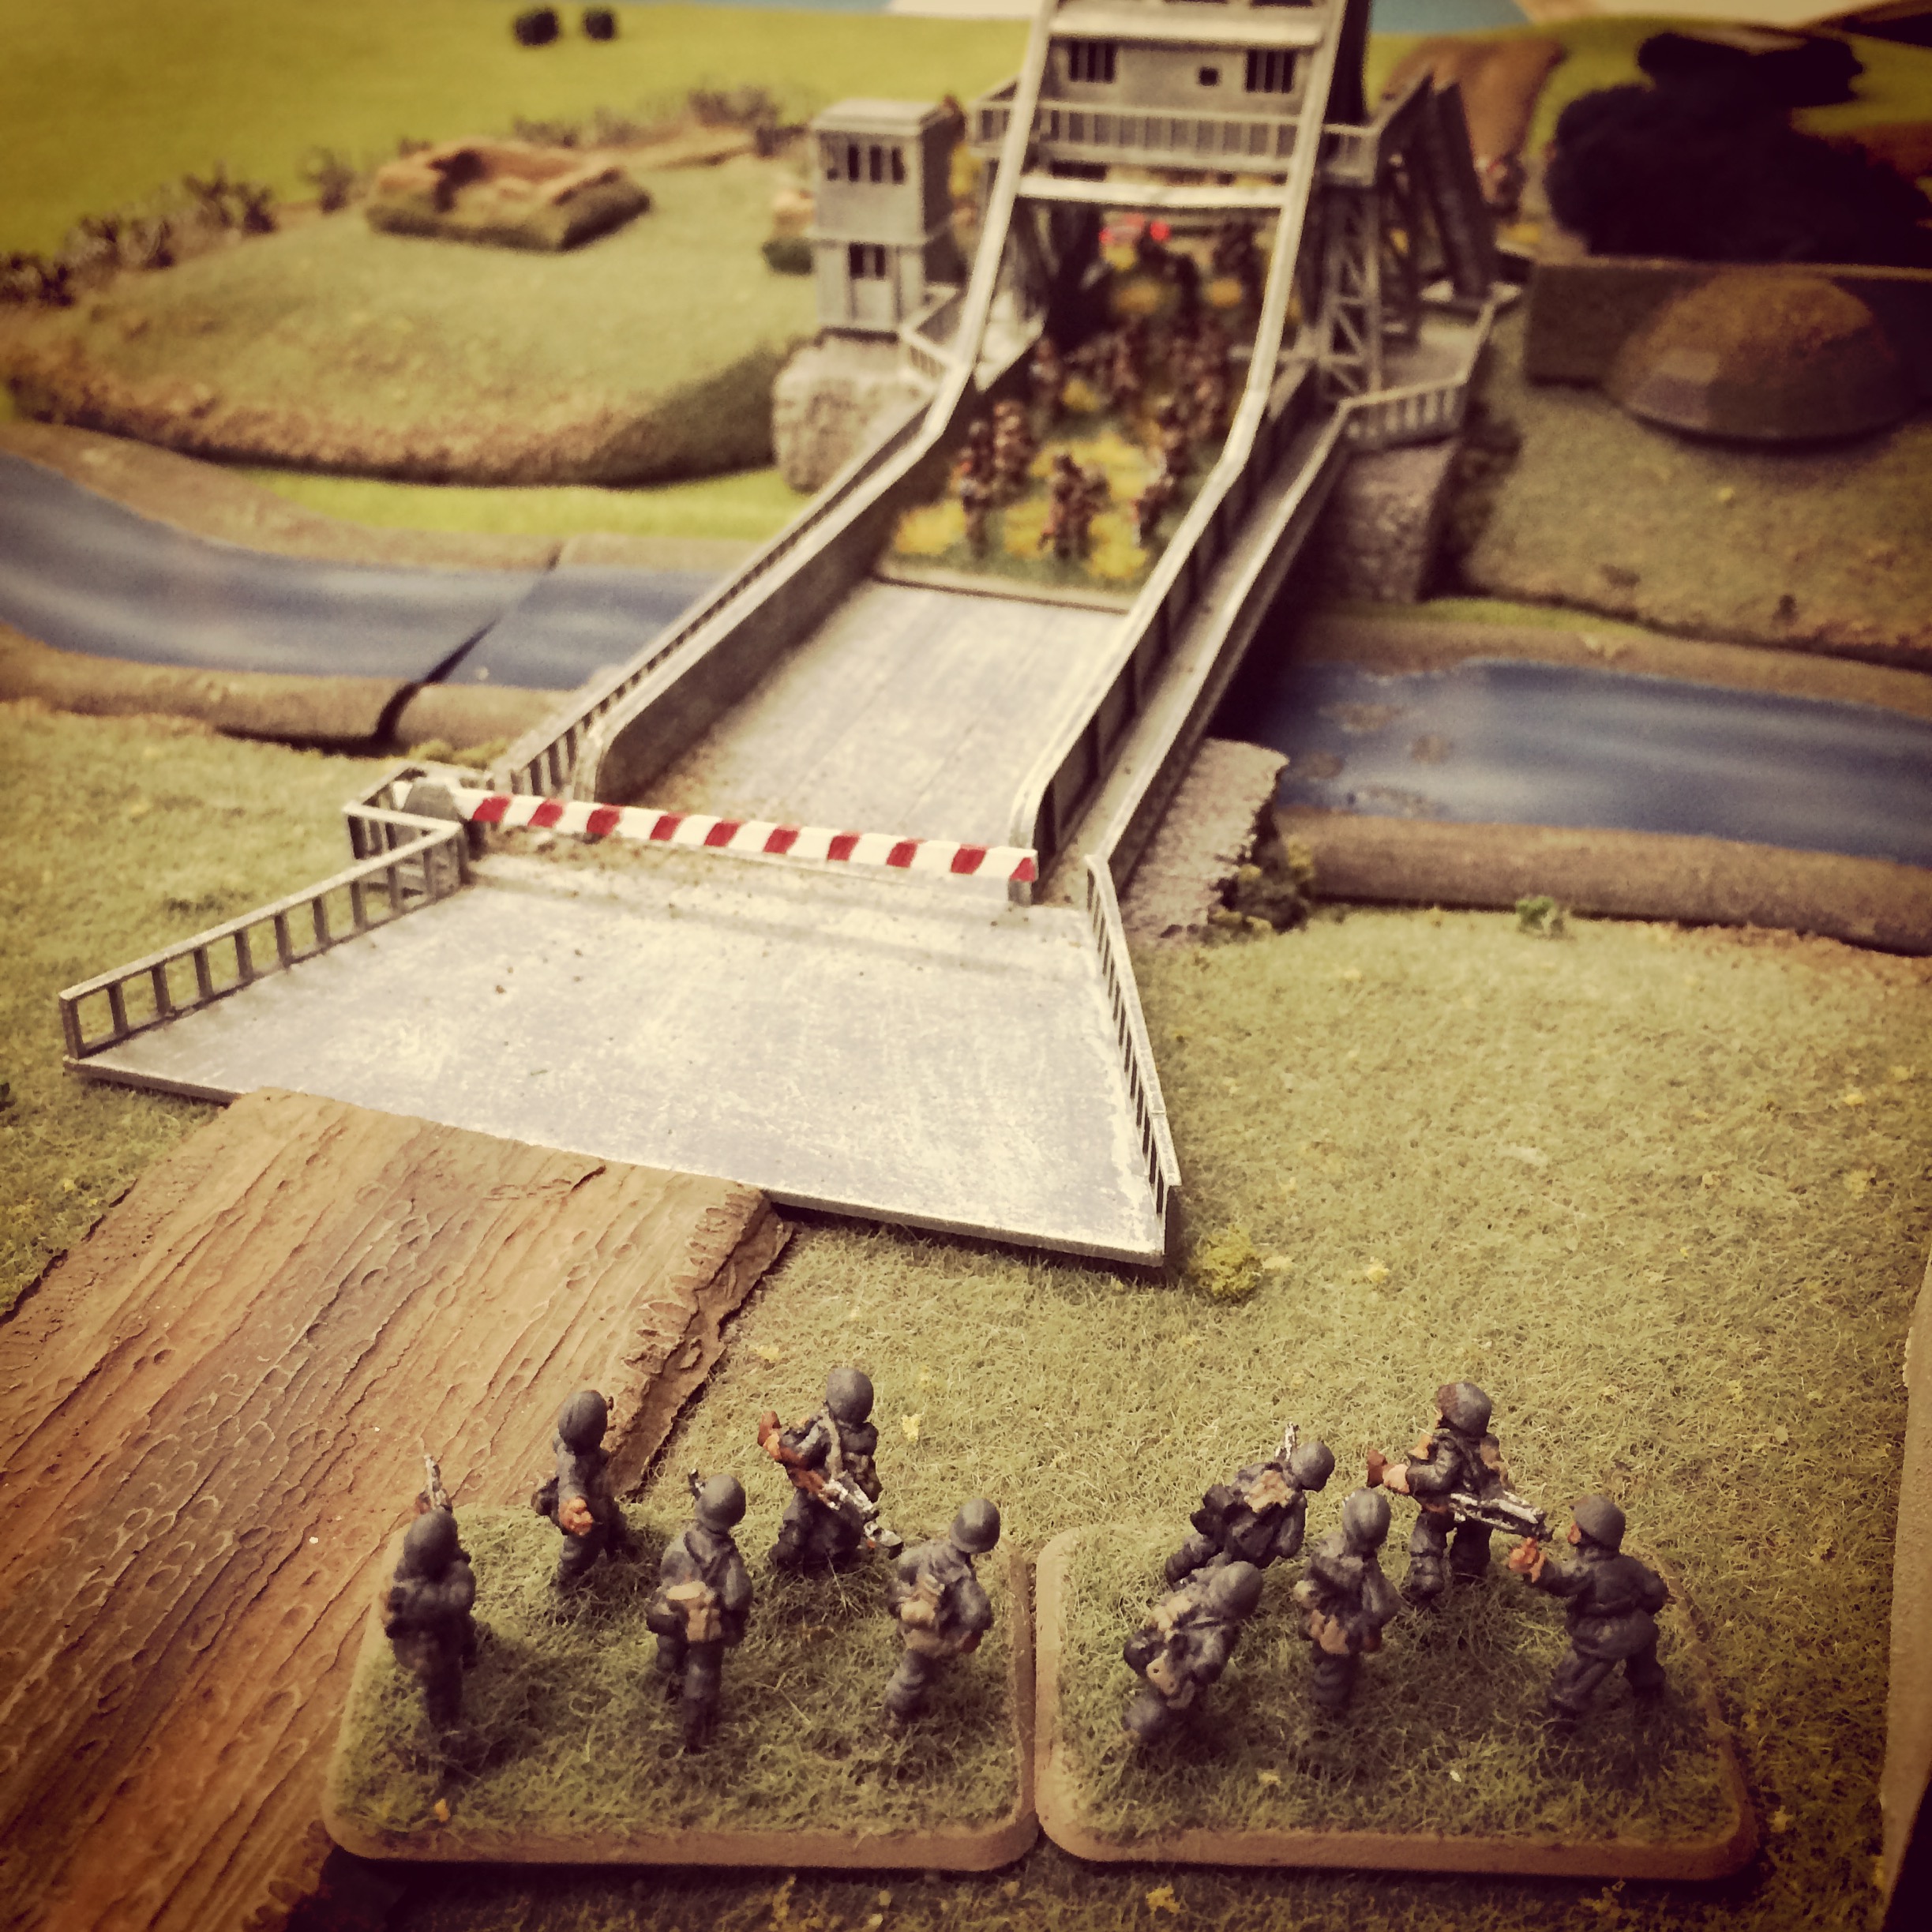
With the Germans in retreat, the British take Pegasus Bridge

With the bunker aflame, the British marching over the Bridge and the thin German defense starting to run, the British had again made quick work of their mission. The bridge was held, but it was on to Bénouville and the inevitable German counterattack.

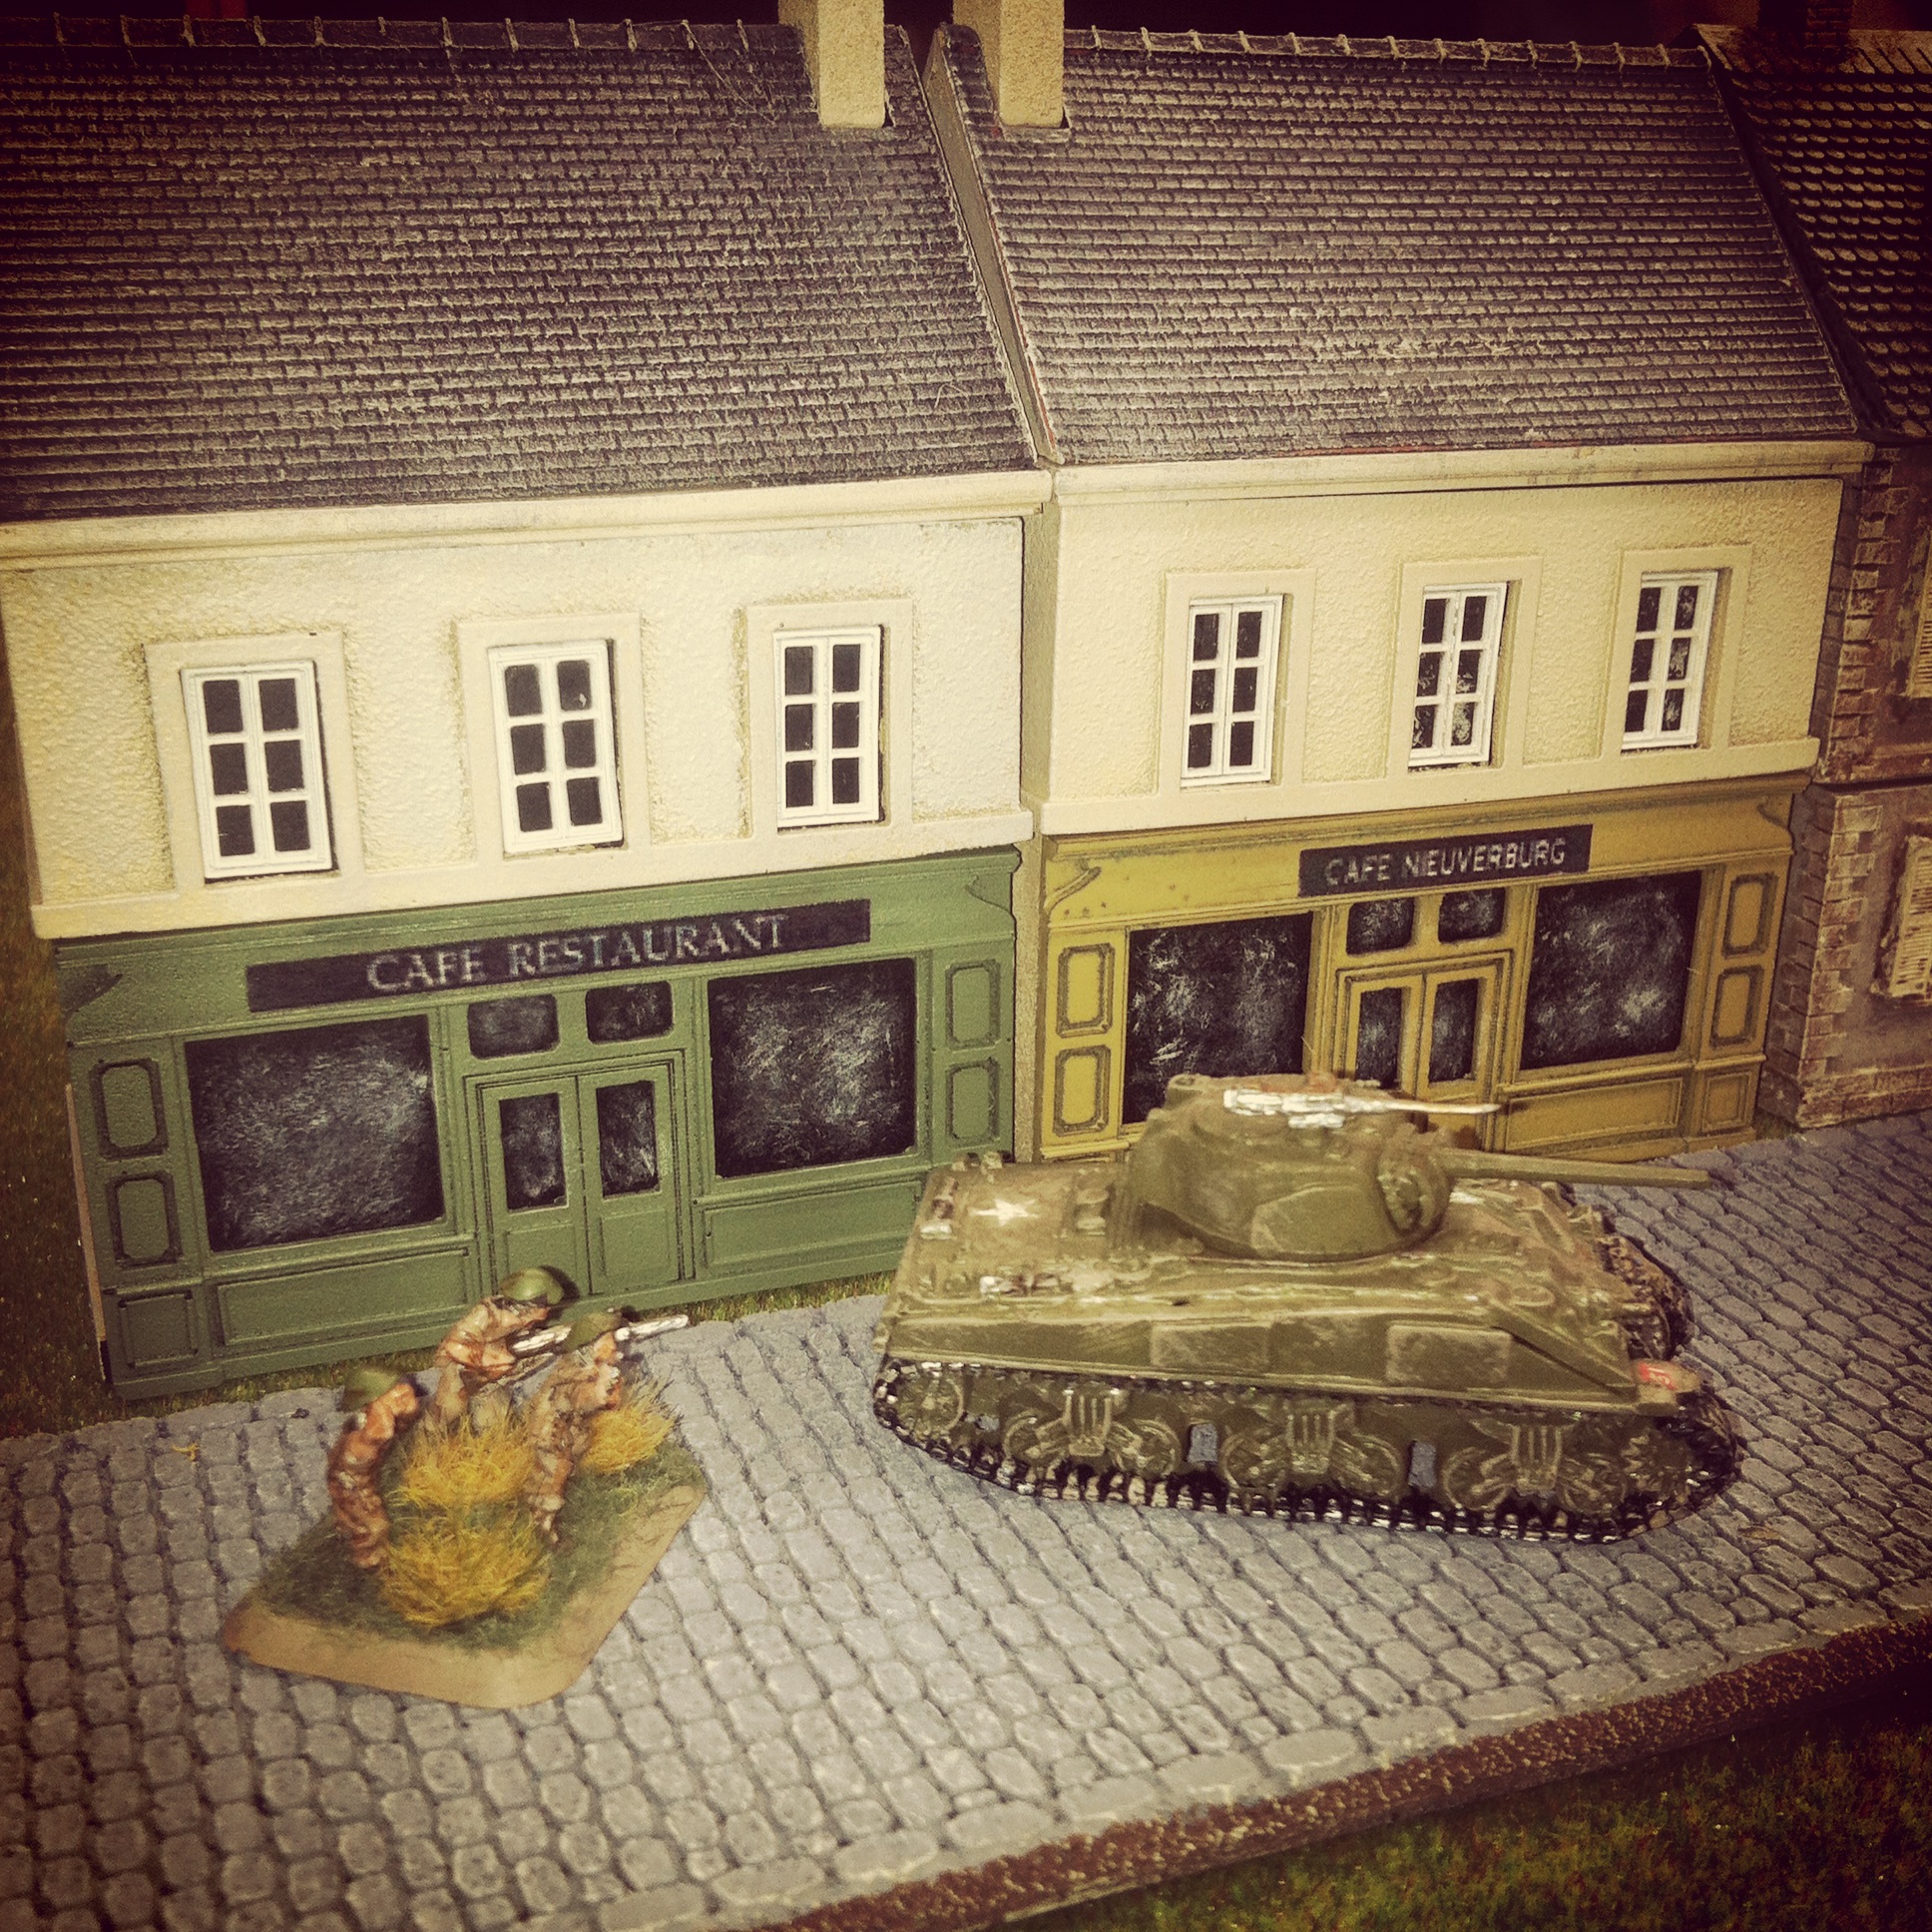
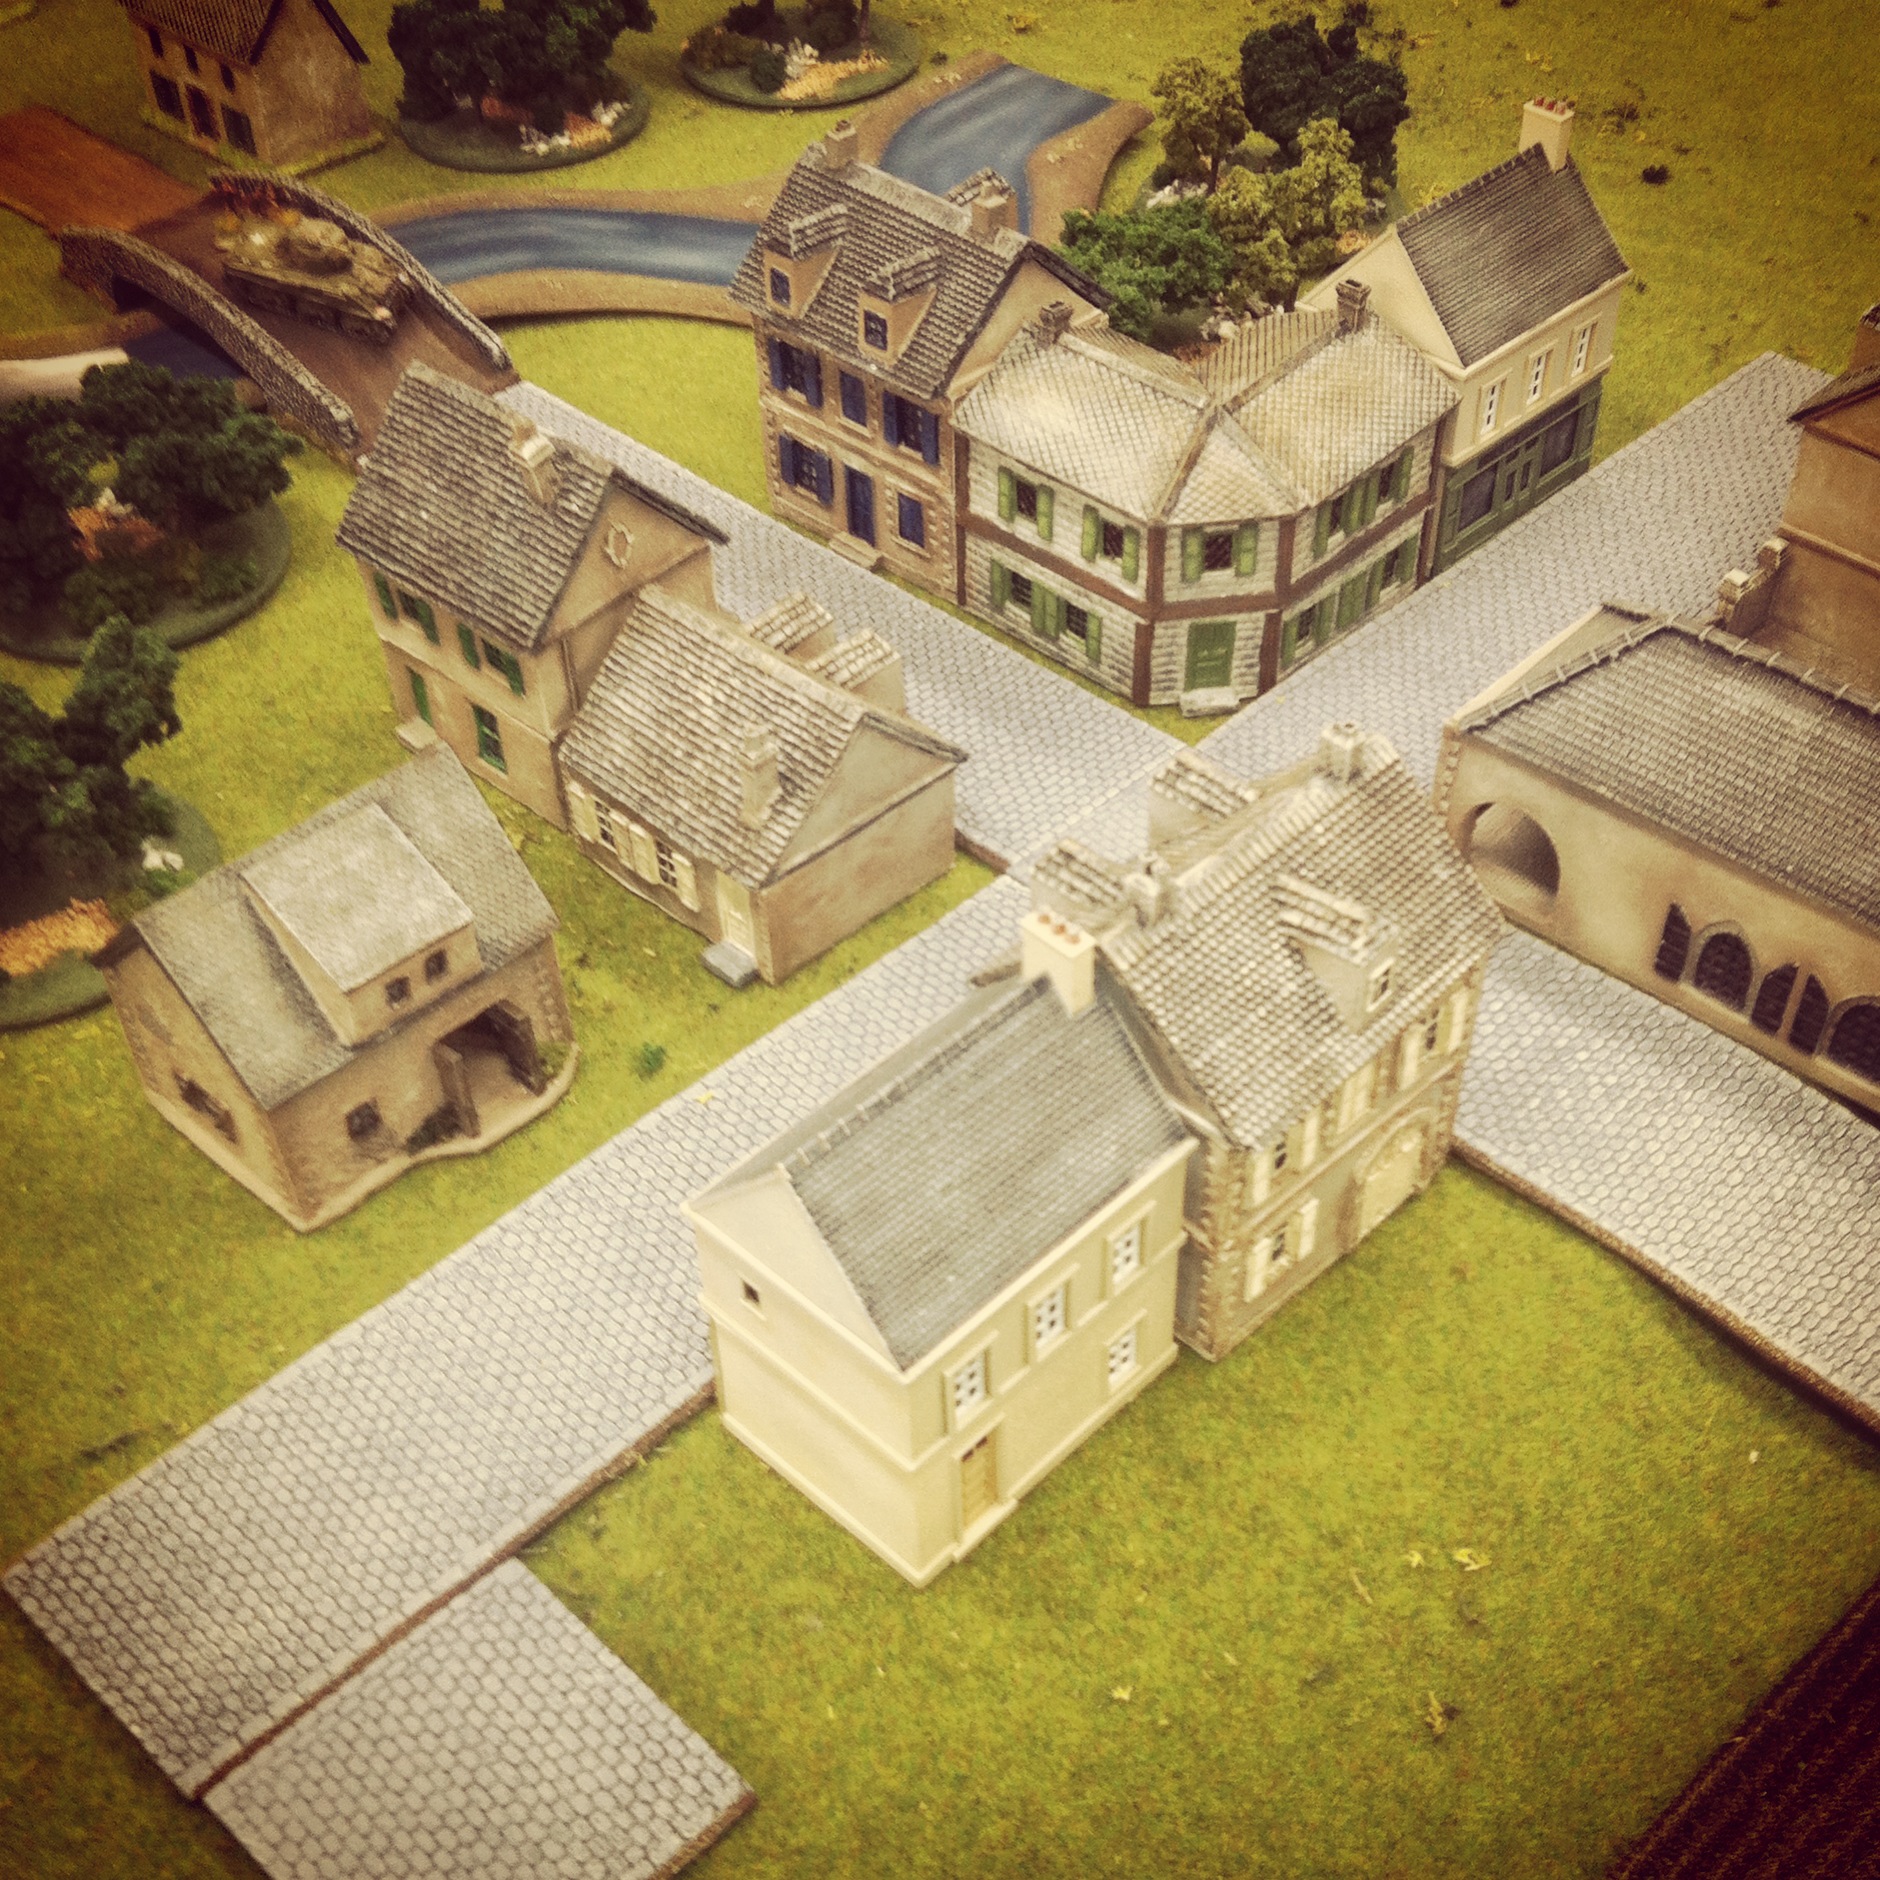
The Battle for Bénouville

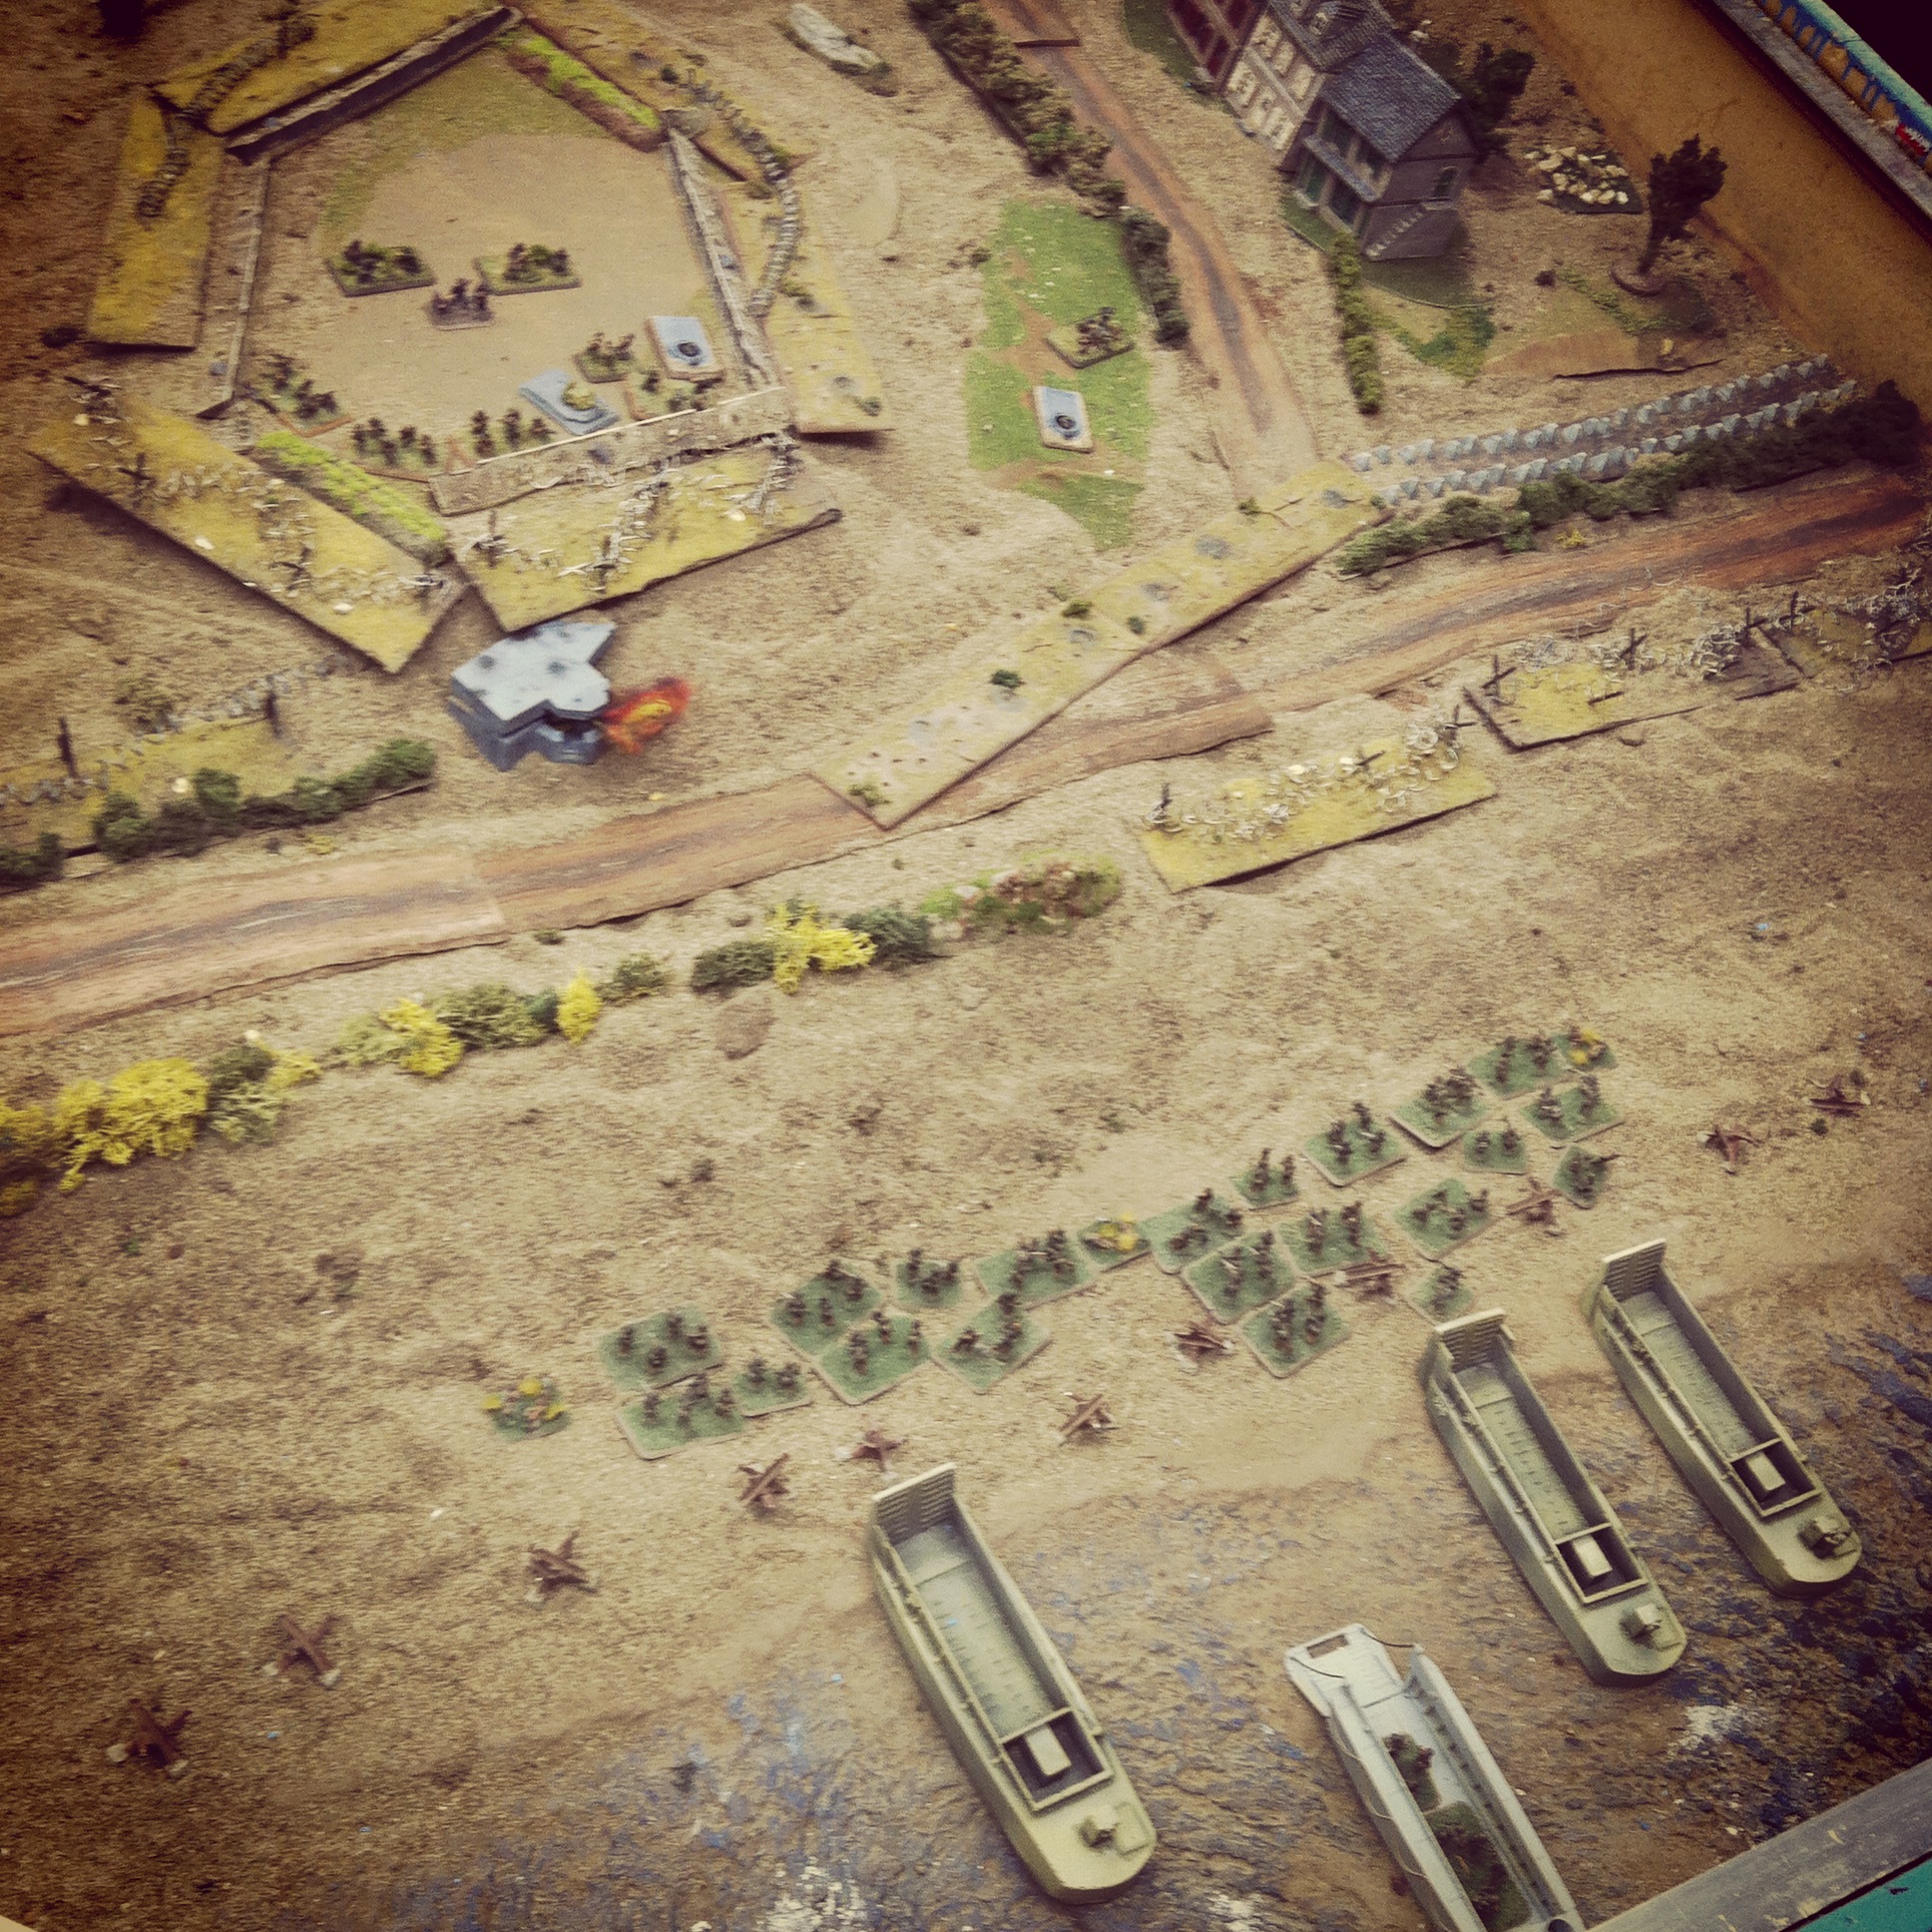
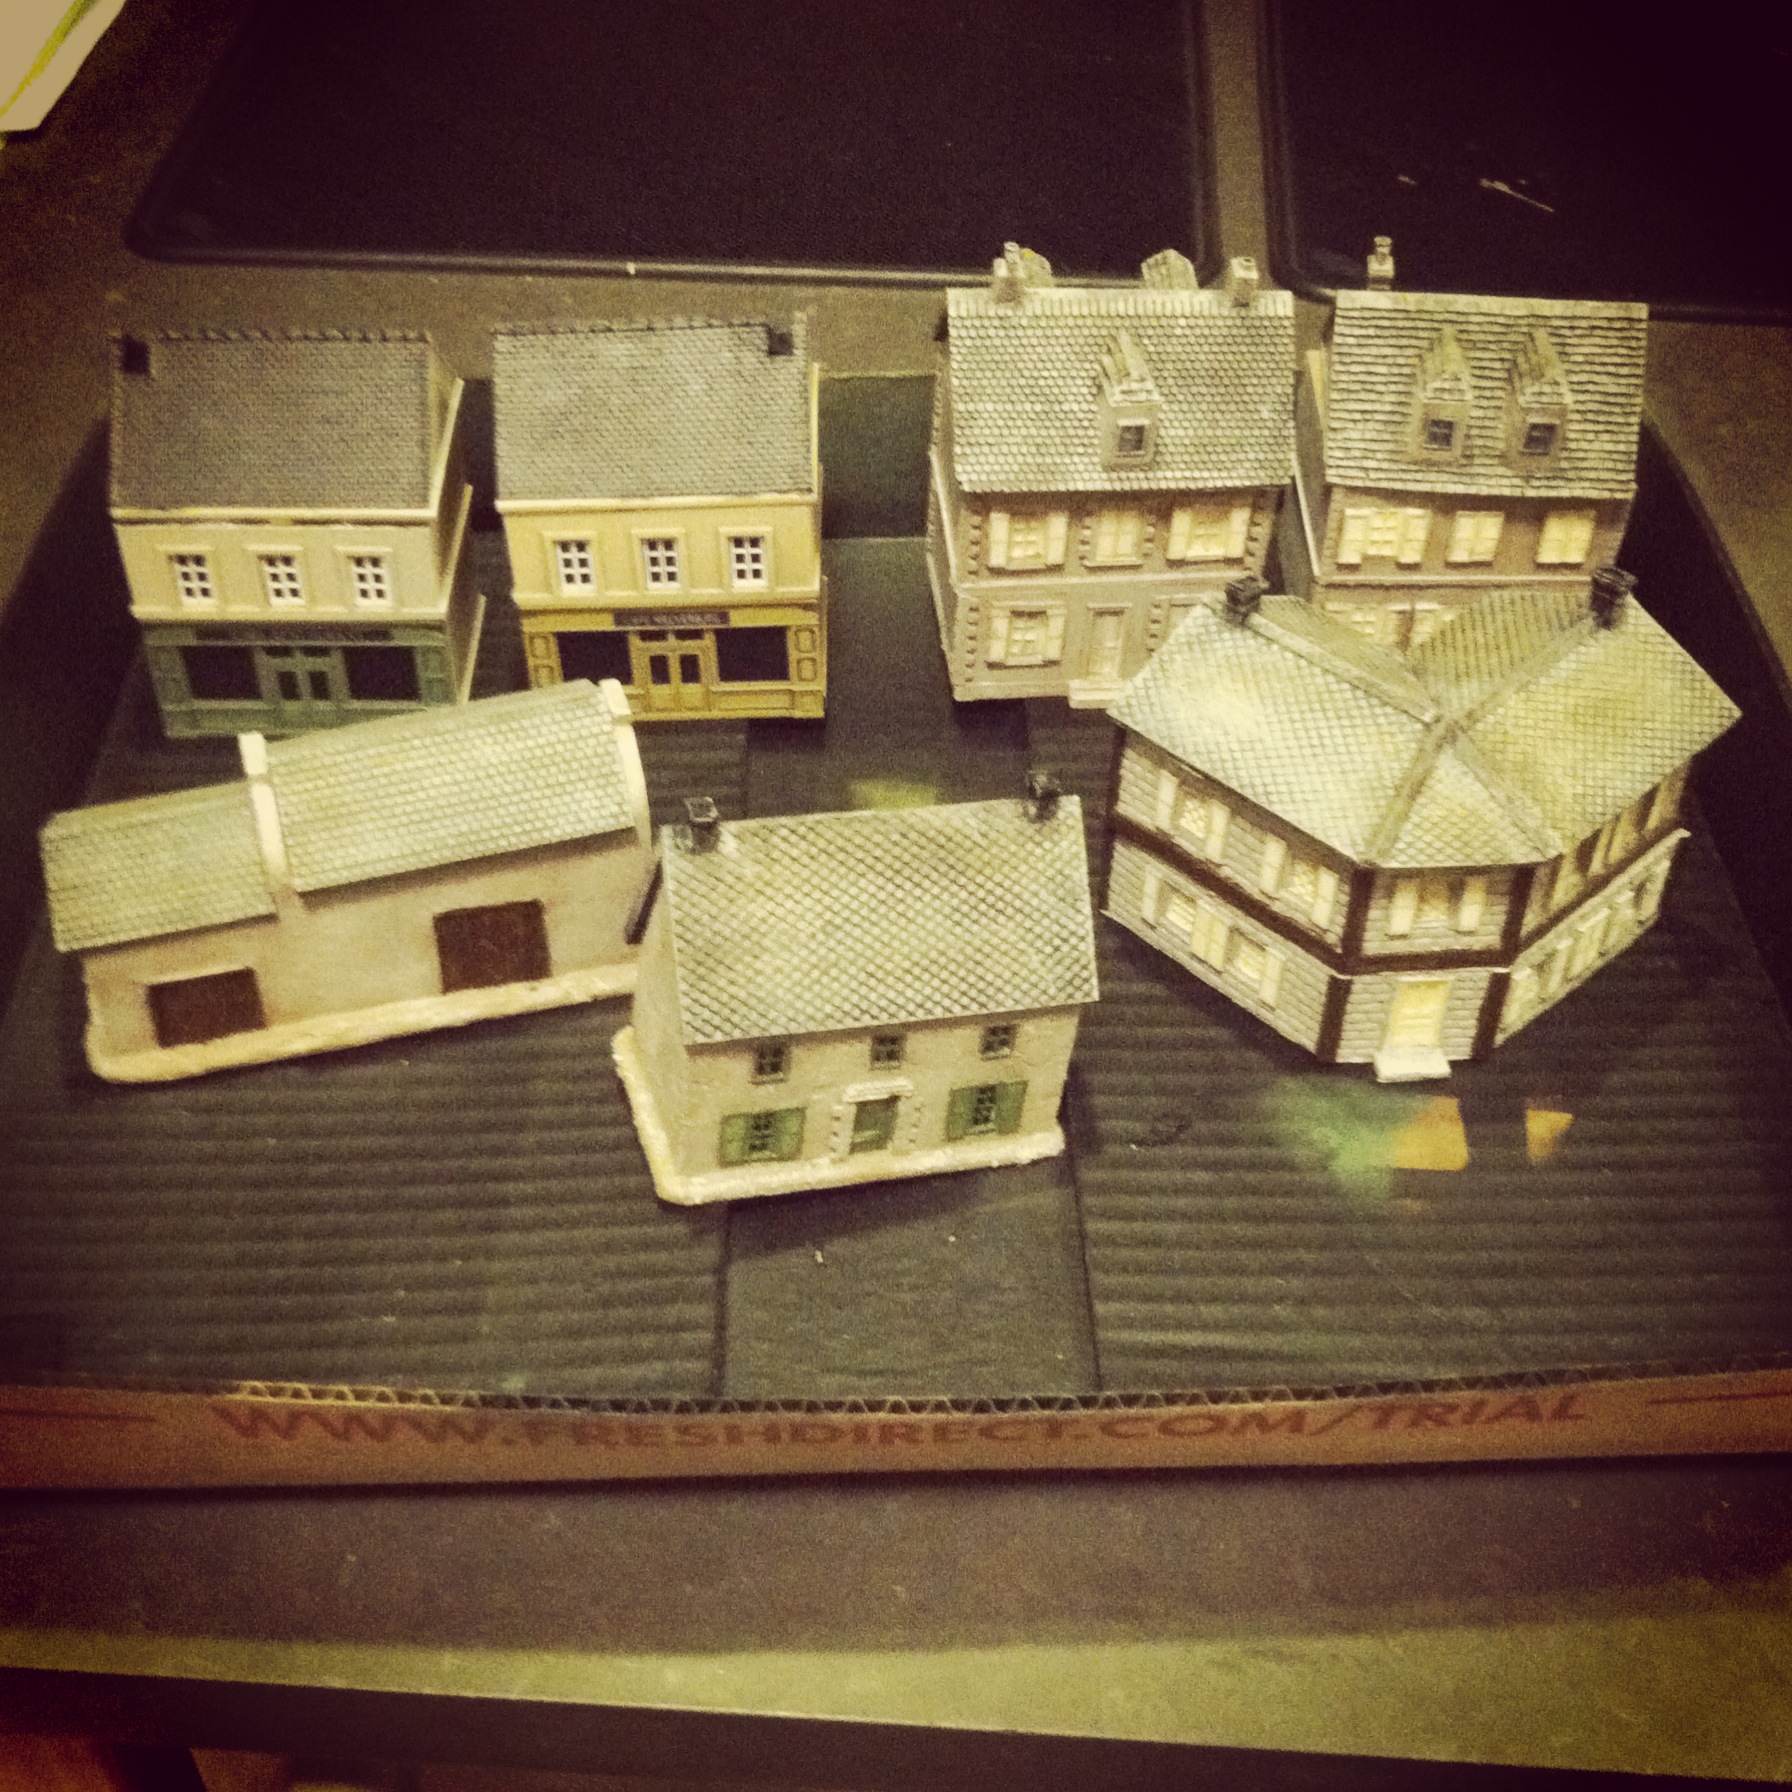
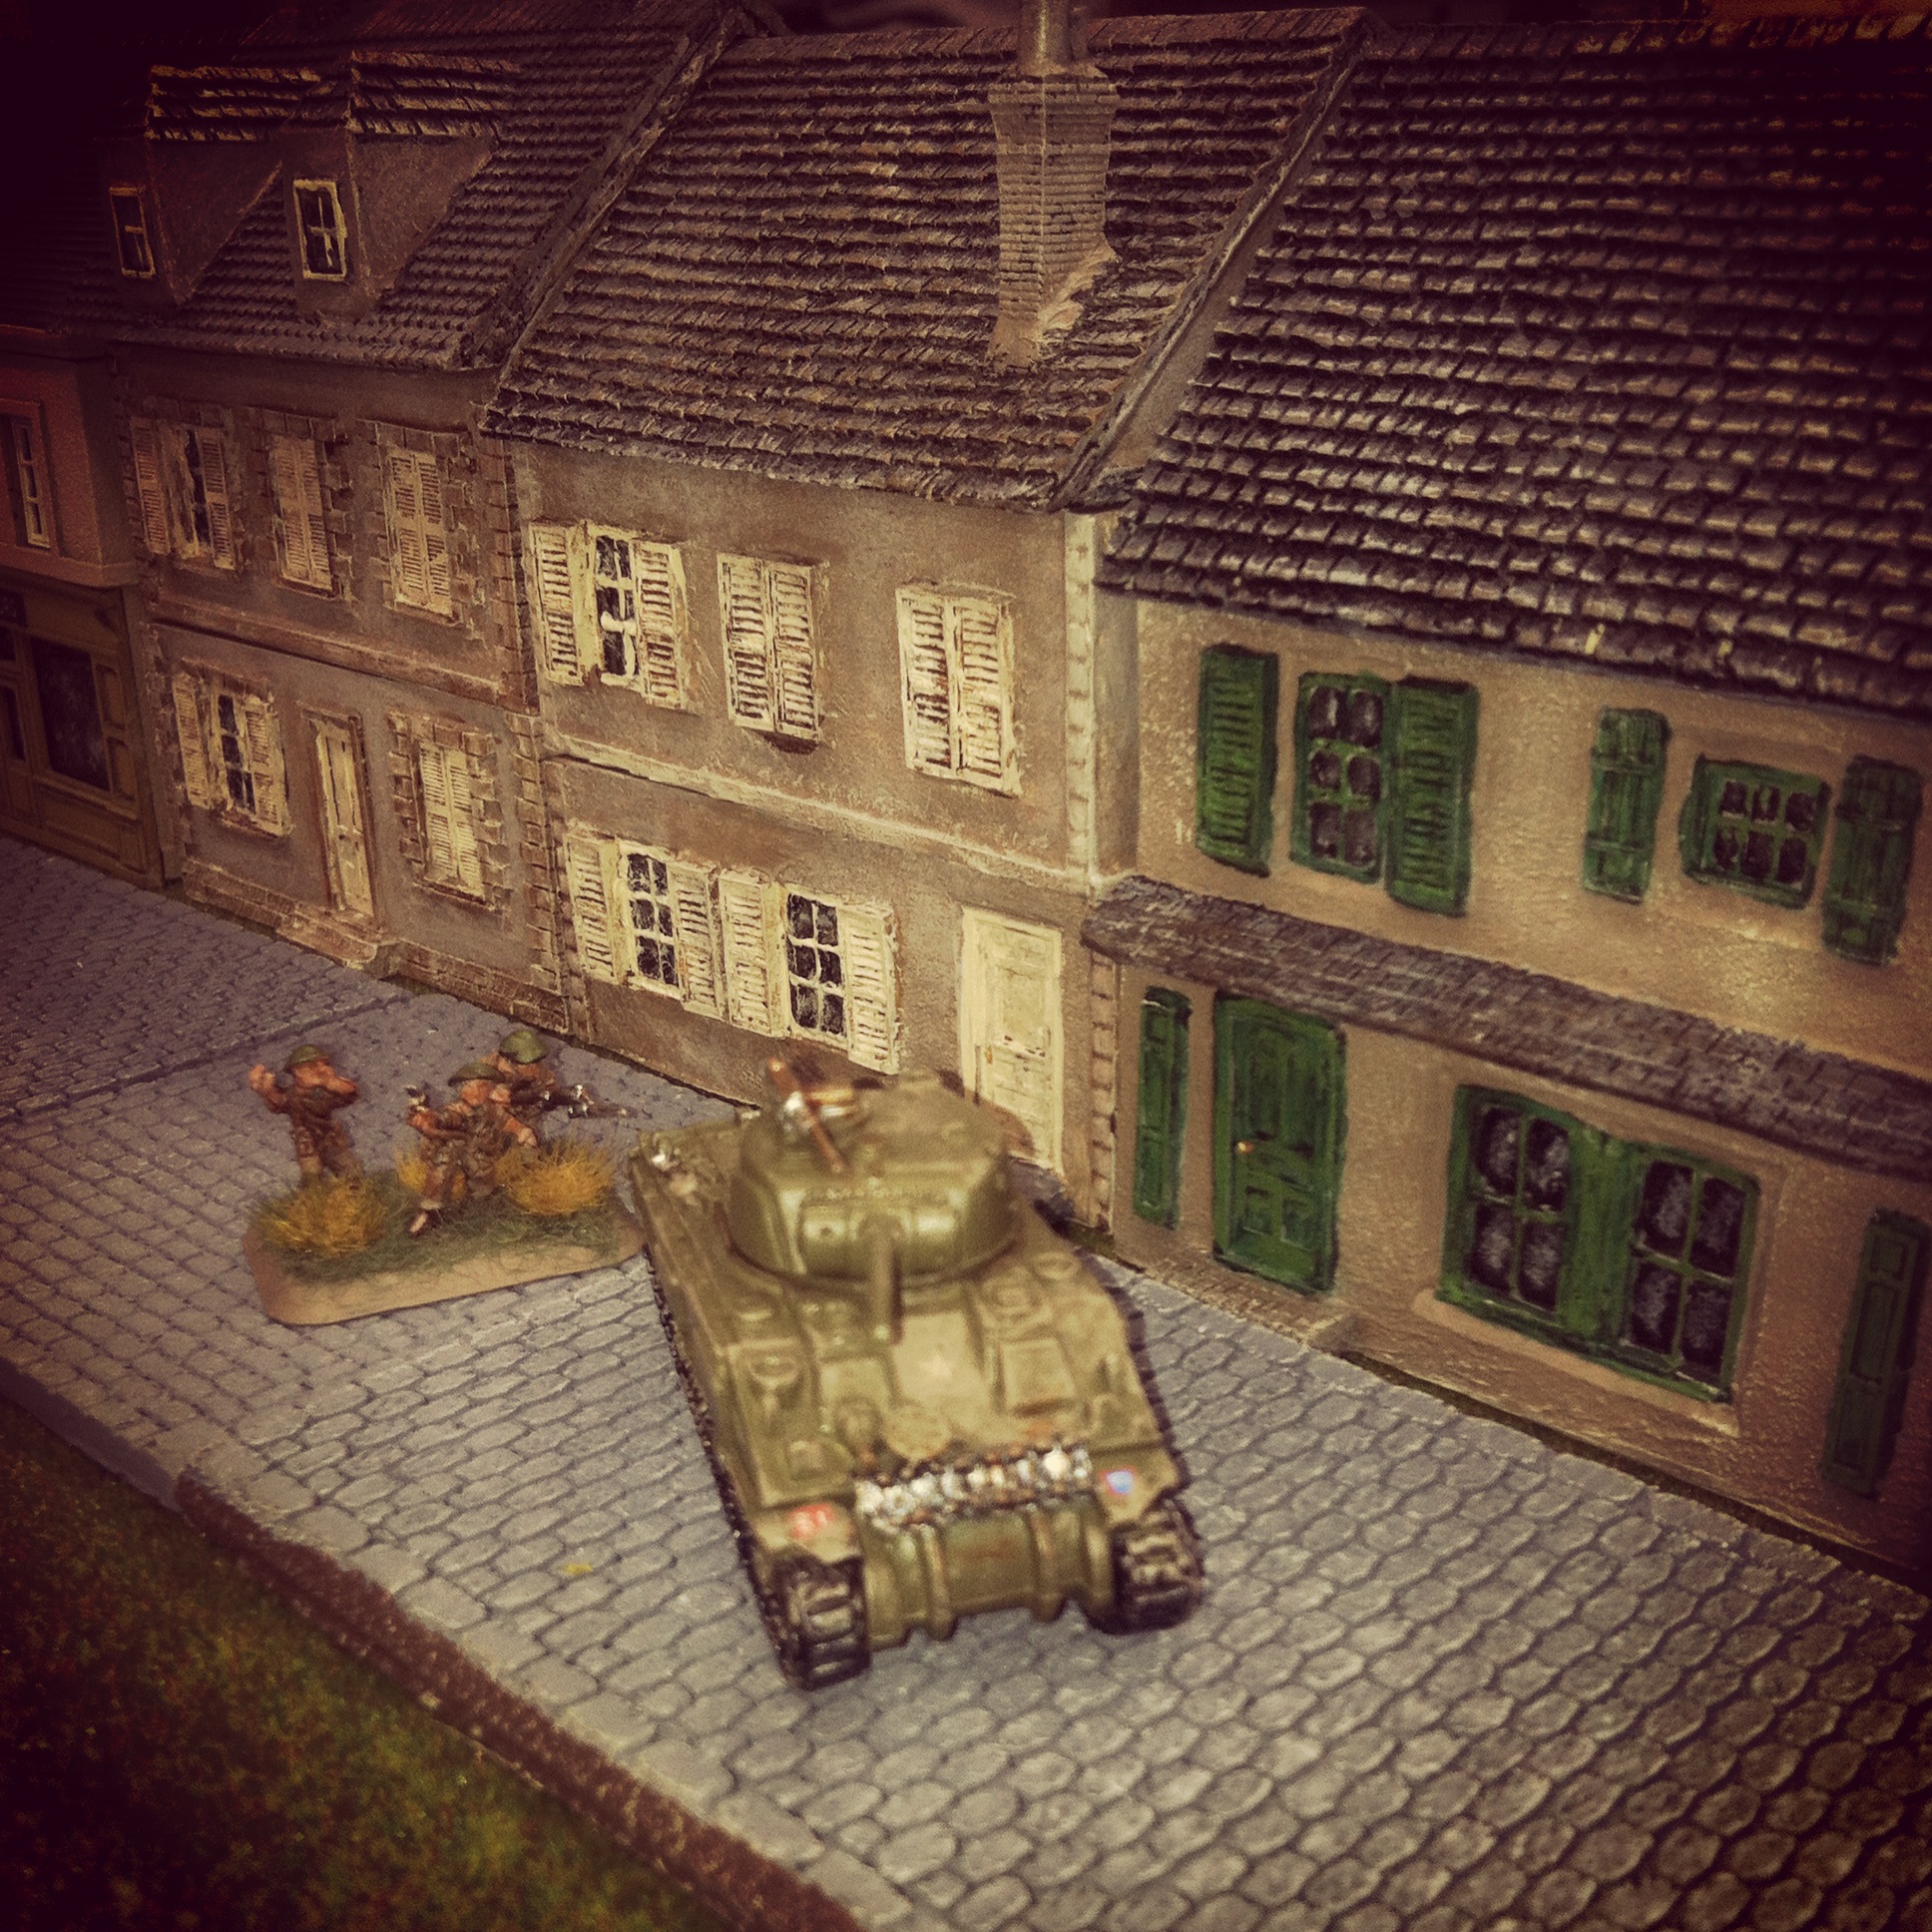
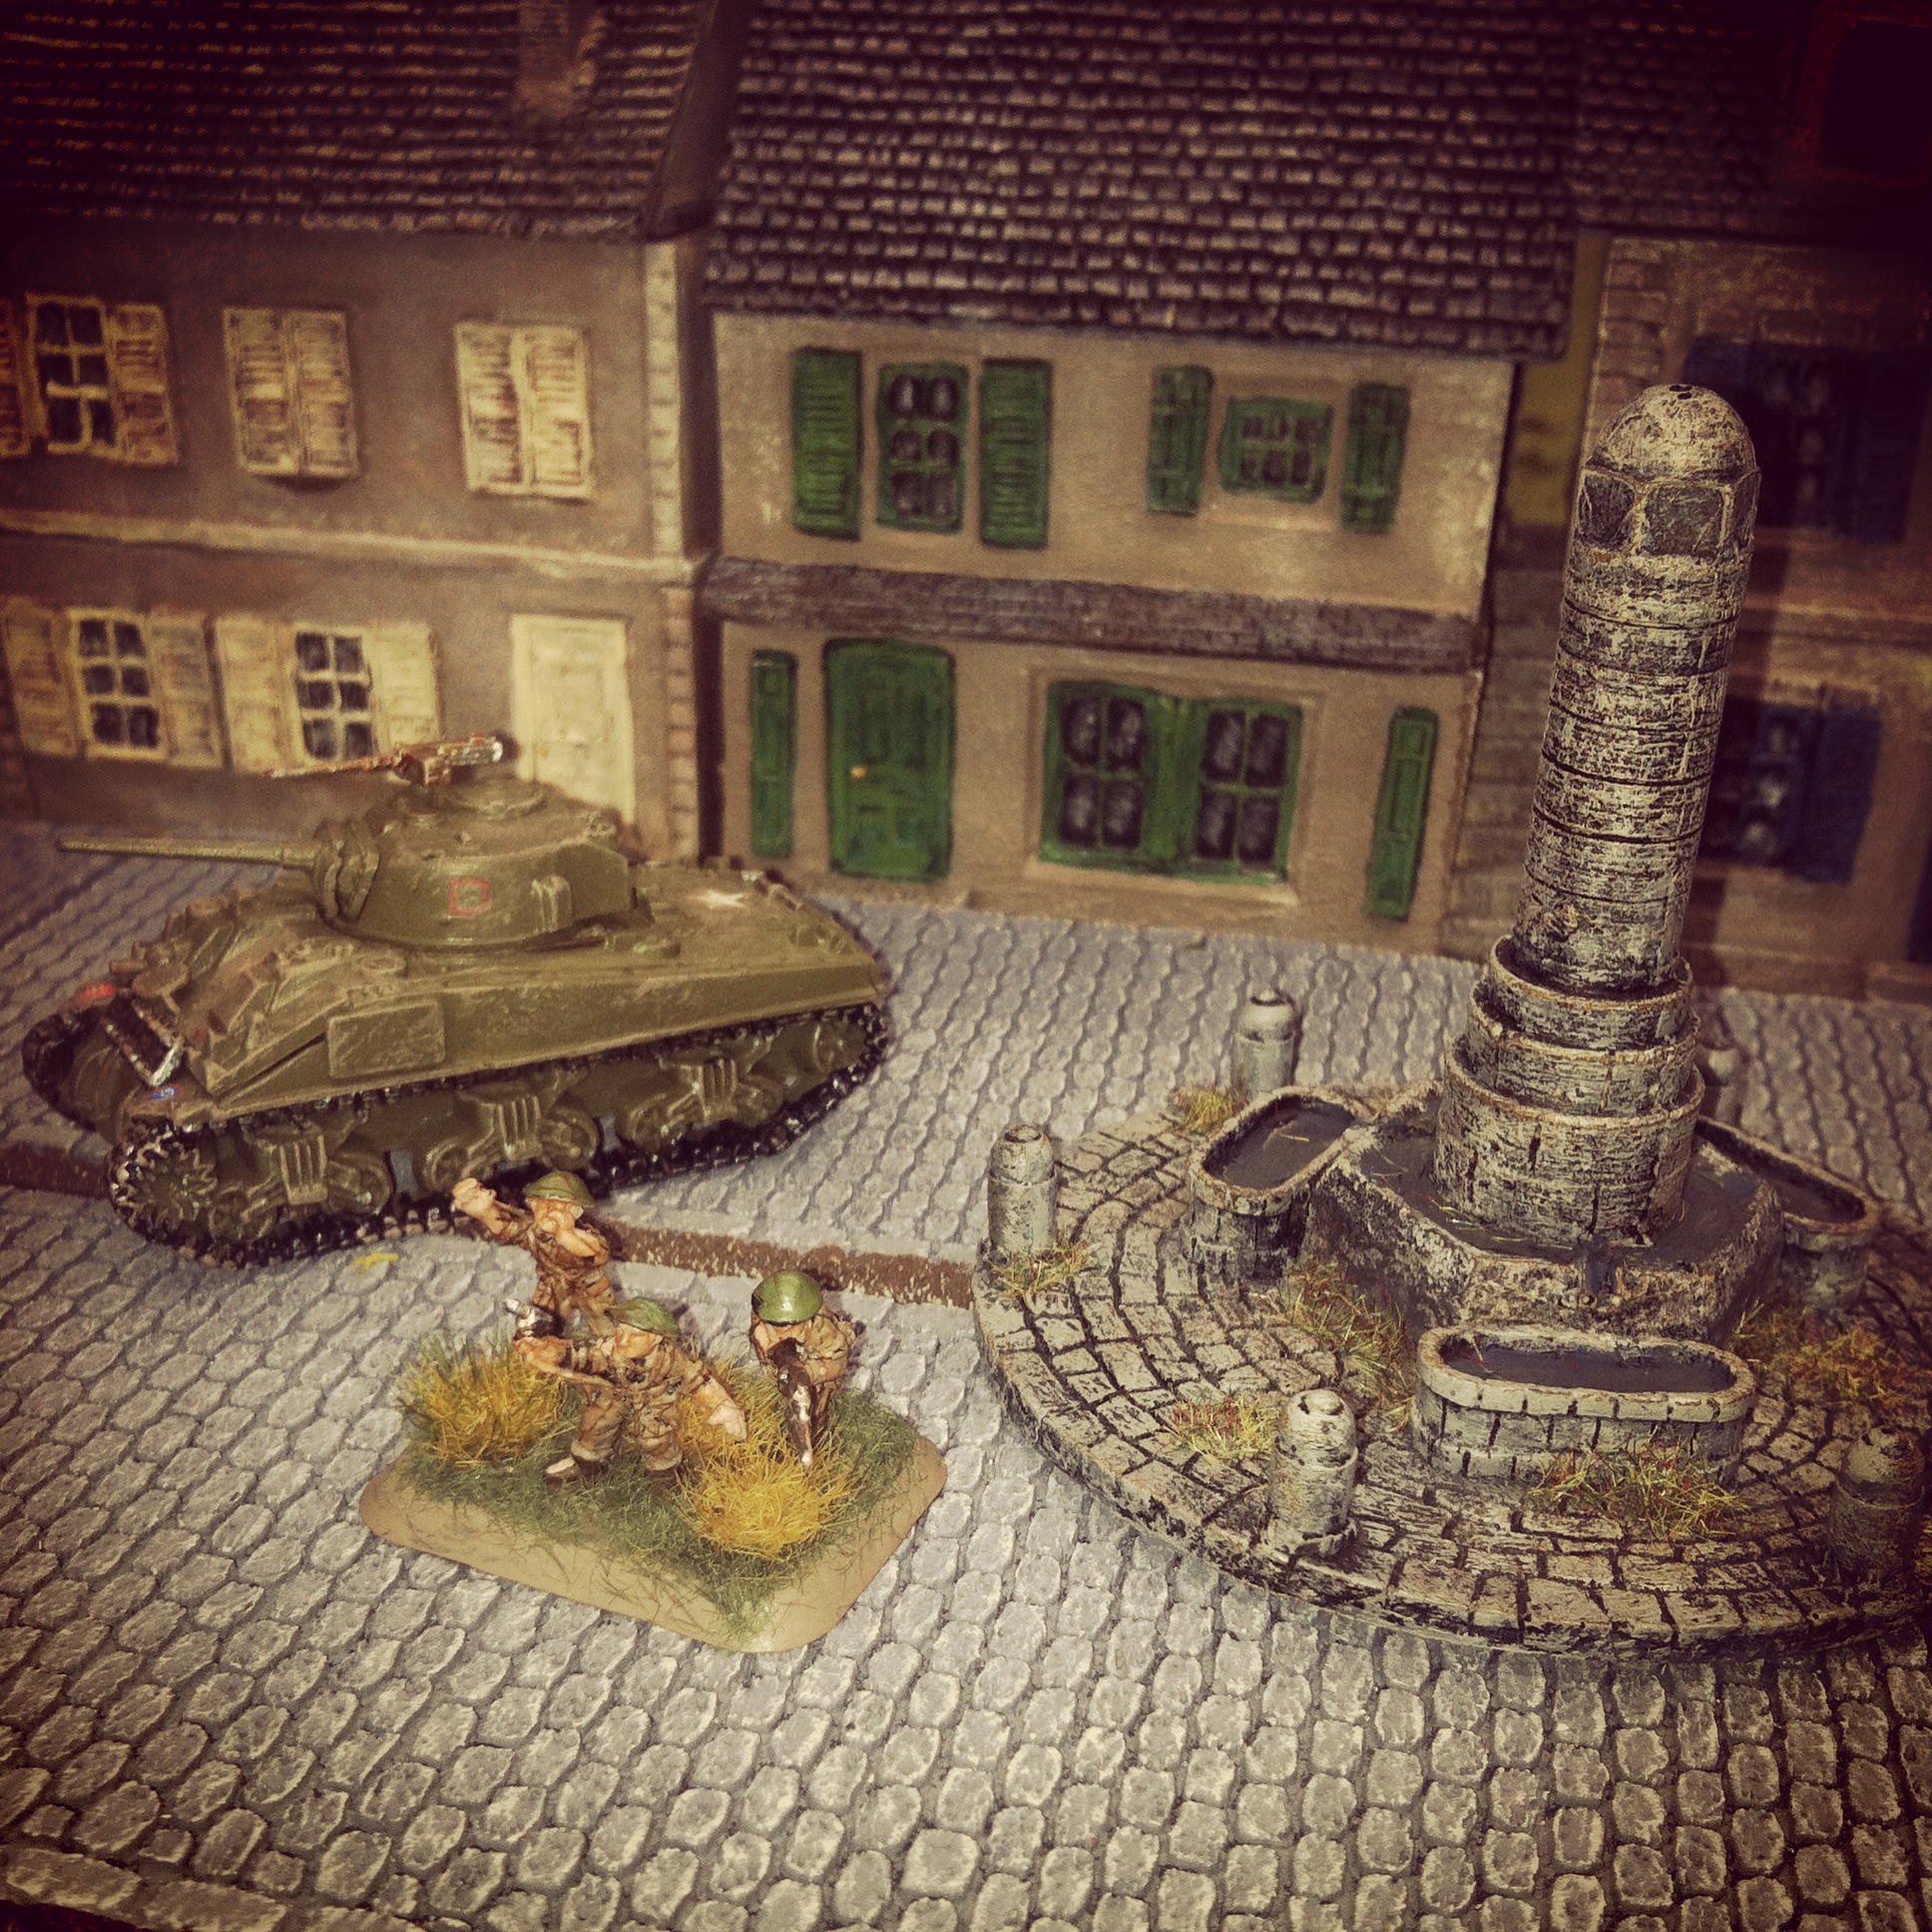
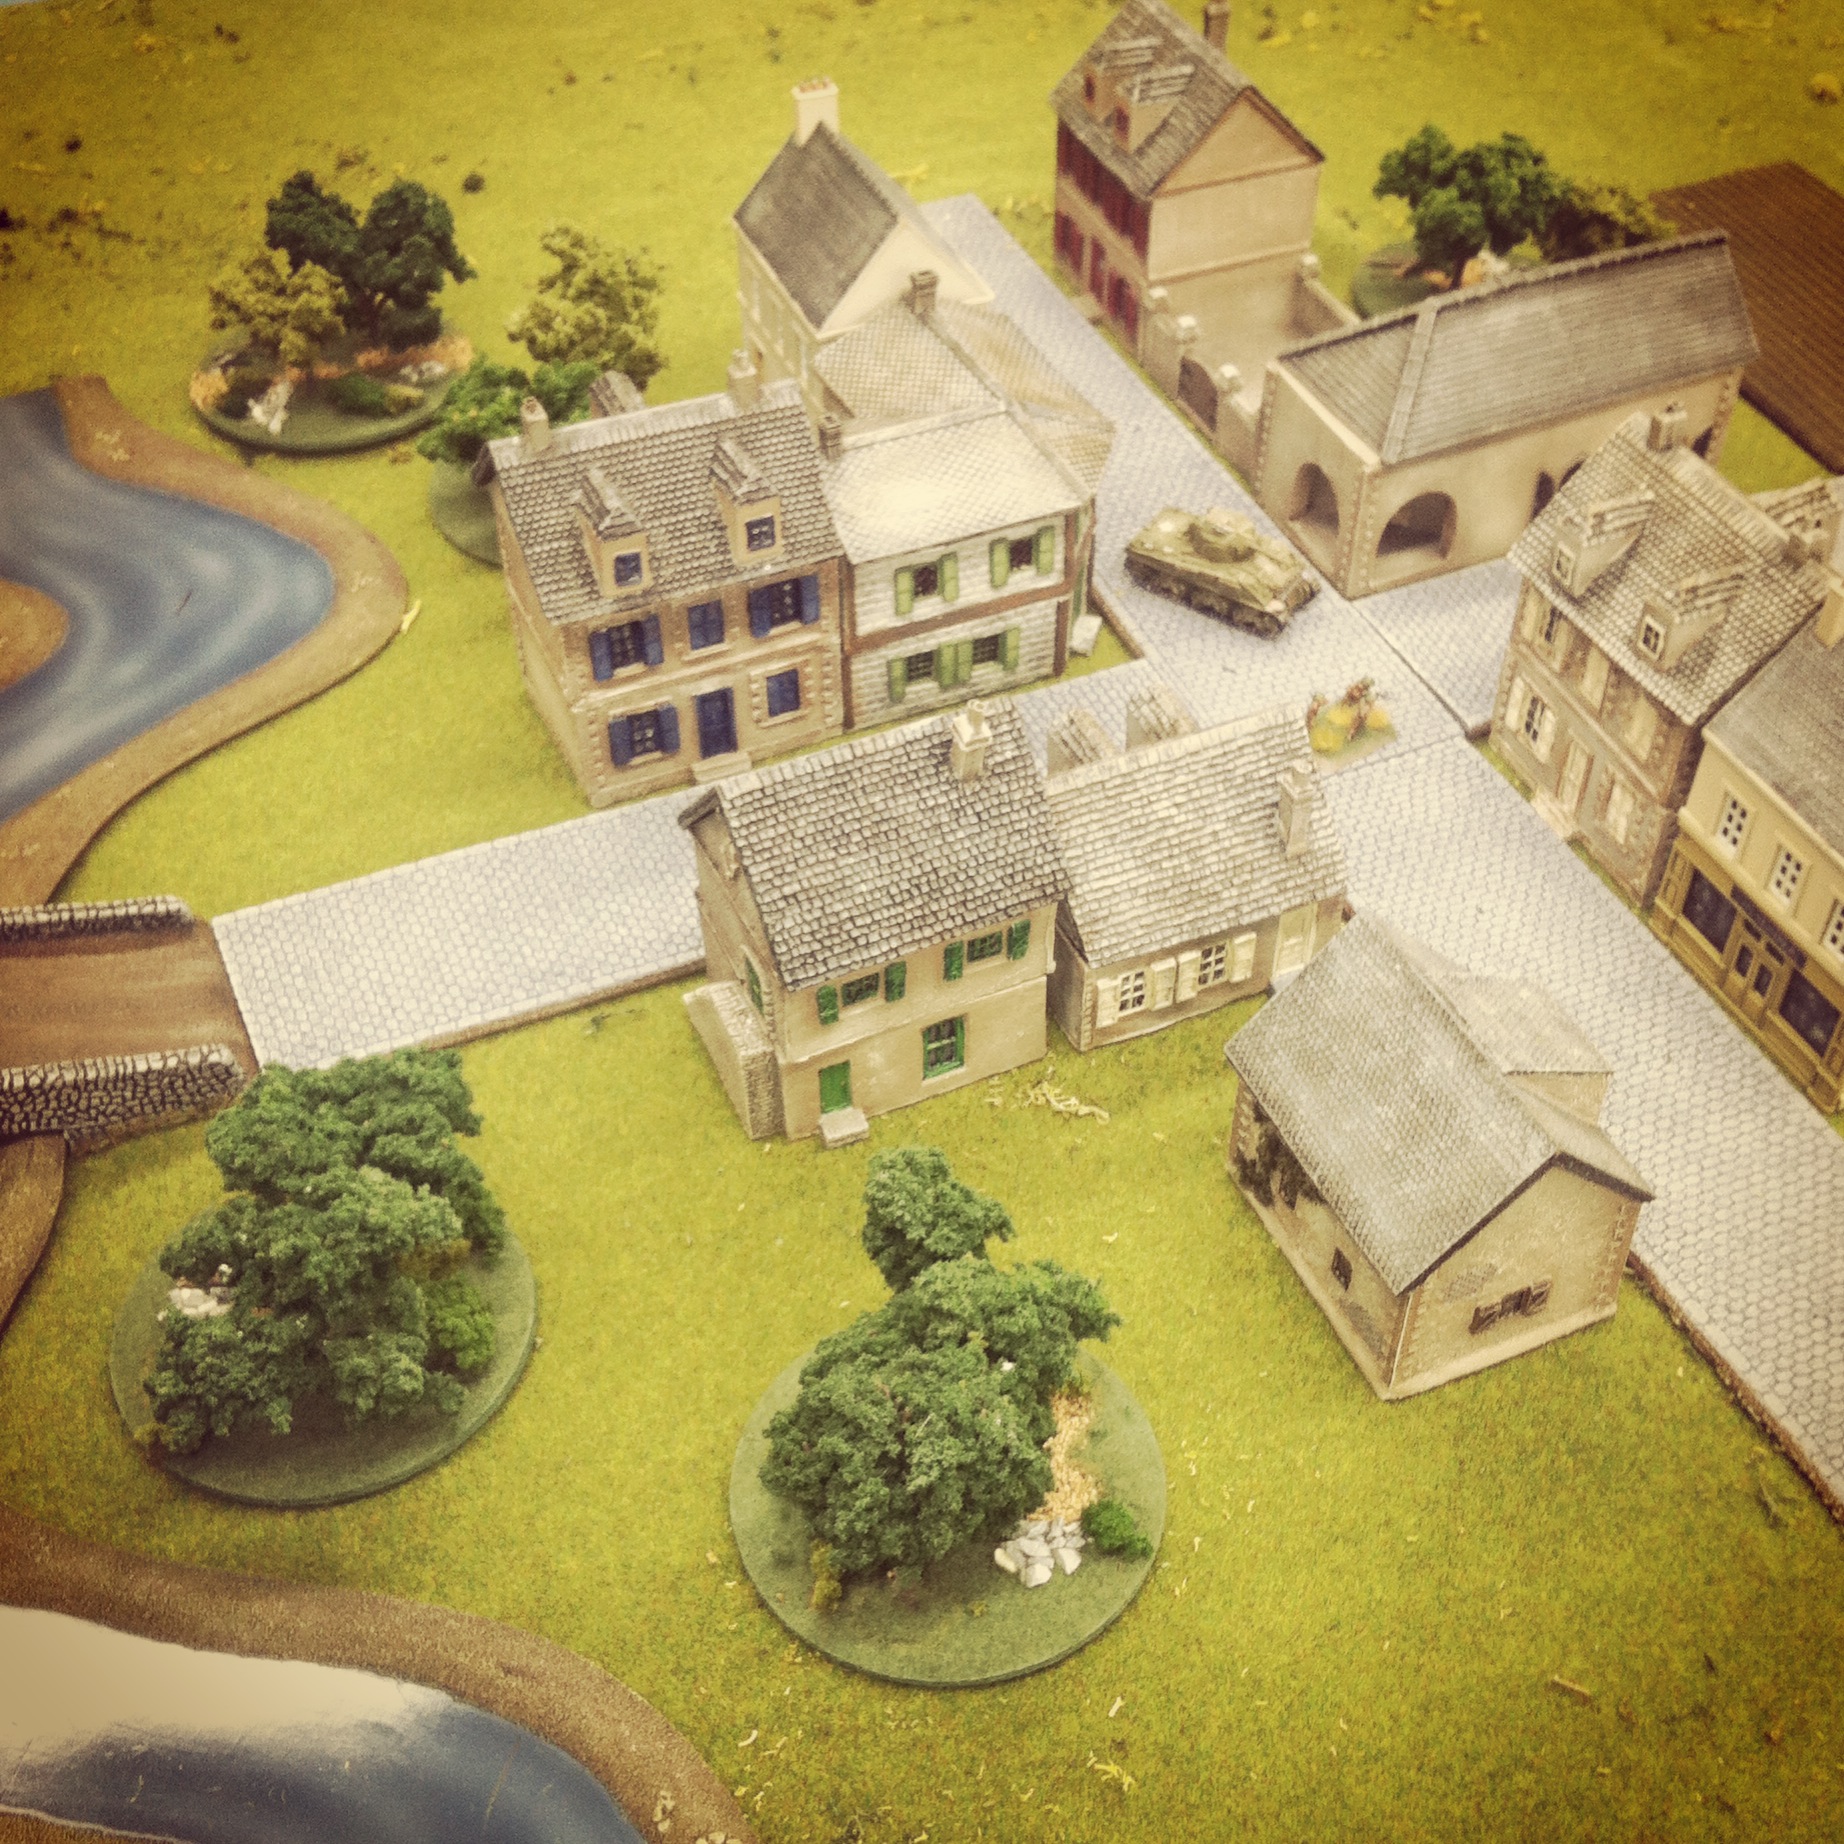
At Bénouville British blinds moved on to the table for six turns, stalling briefly in turns four and five. Taking up occupying positions in the town, the mission was to simply hold against the coming German counterattack. As German blinds began entering the field in the woods and open areas outside the town, the initial British infantry were supported by slow-arriving reinforcements to the rear.

IMG_6307
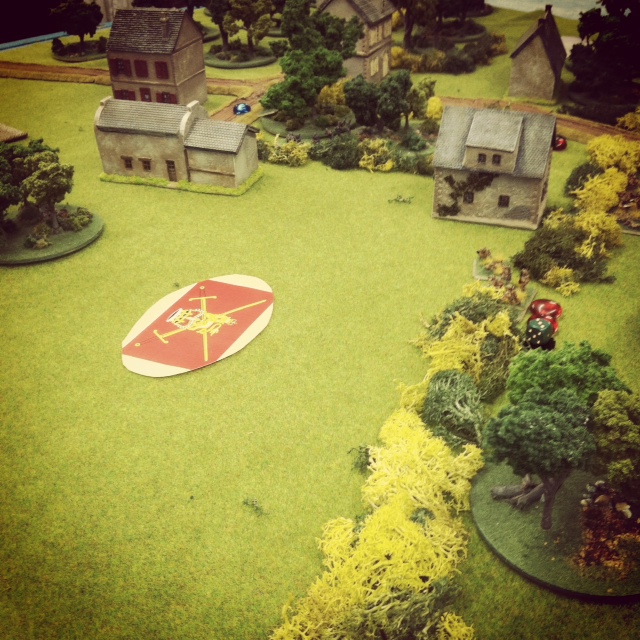
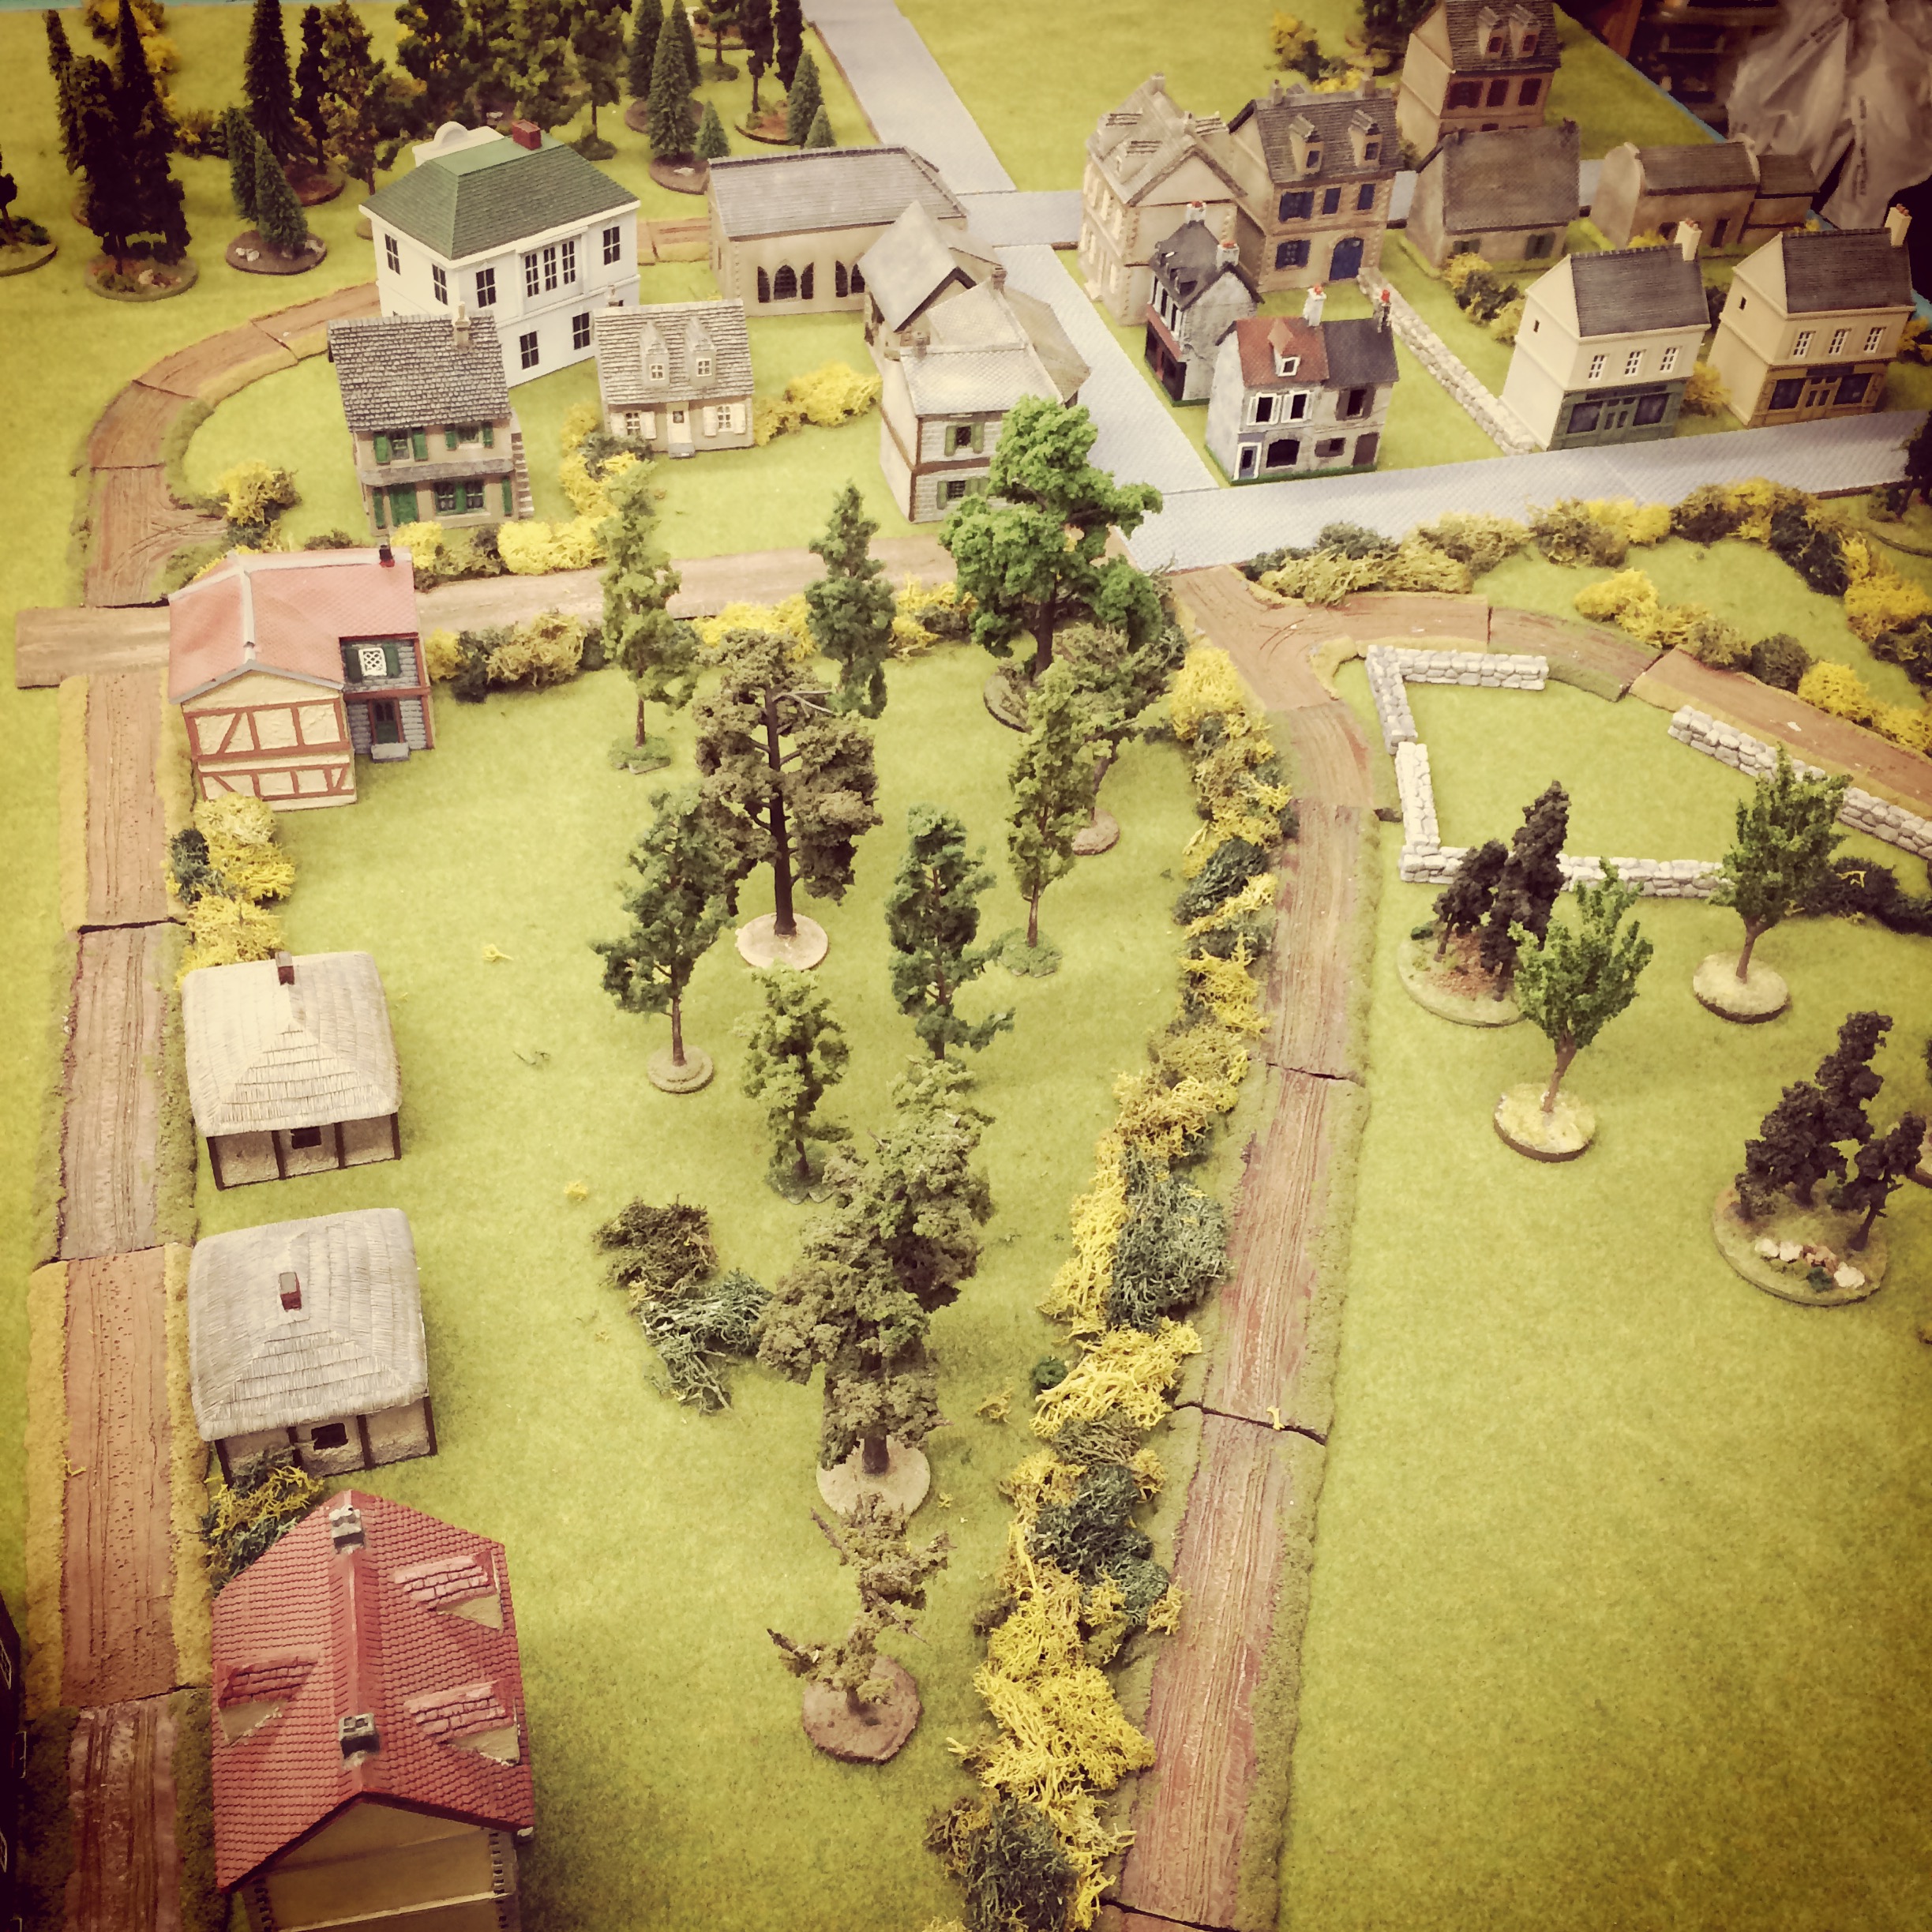
Initial set up of the scene at Bénouville from the British end of the table

IMG_6308British blinds enter and occupy the town

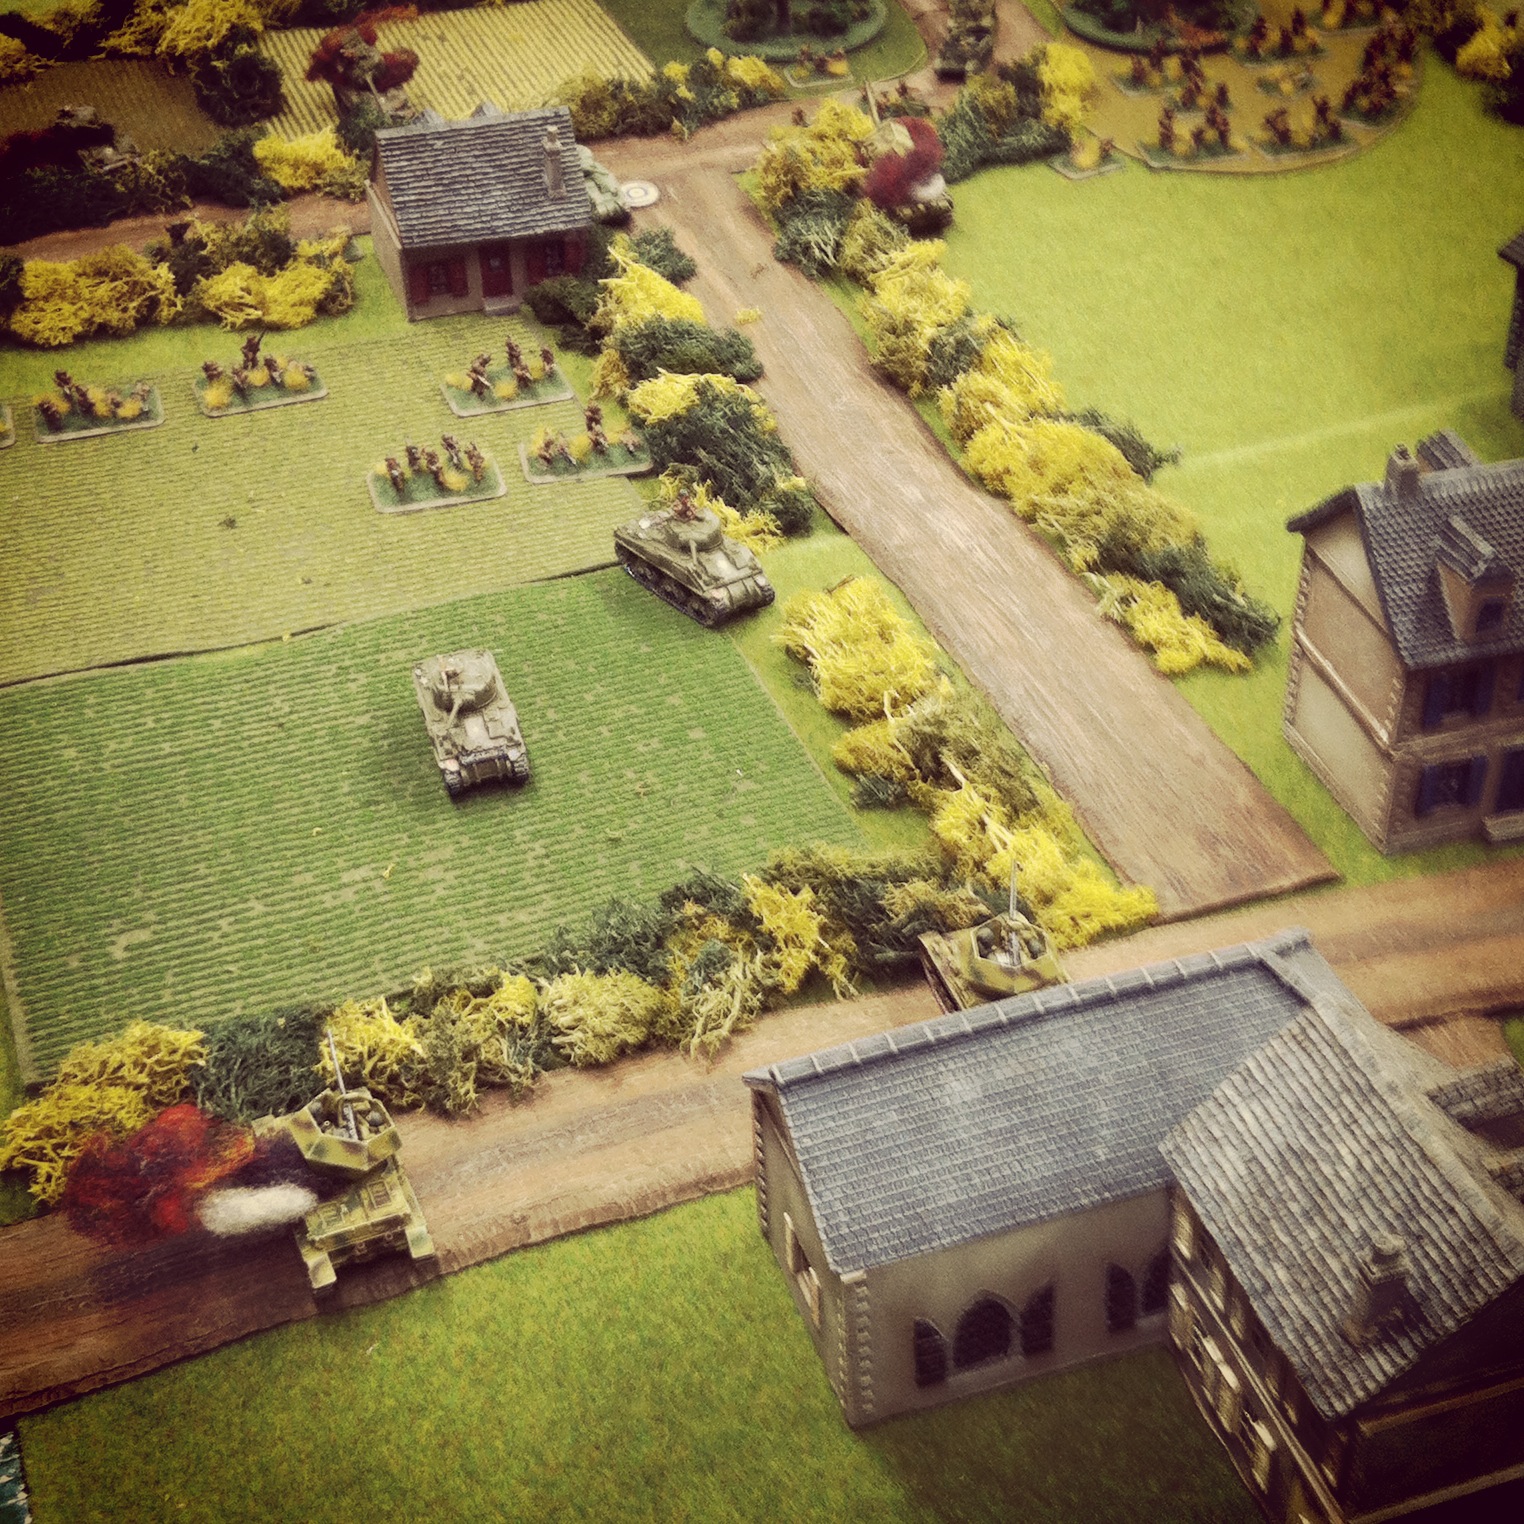
Attacking from a safe position within two buildings, the British over zealously abandoned their defensive mission and attacked to reveal the closing German blinds. In a close assault, the British were thrown back as reinforcing German heavy machine guns and mobile guns moved in. Taking fire from the German guns at close range, the remaining British defenders in the nearest house answered with a side-armored shot from a PIAT which left one German gun burning but the Germans still on the advance.

IMG_6309German troops advance on the town supported by mobile guns

IMG_6310Germans swarm out of the woods toward the British defenders

IMG_6311A British PIAT takes out a German gun

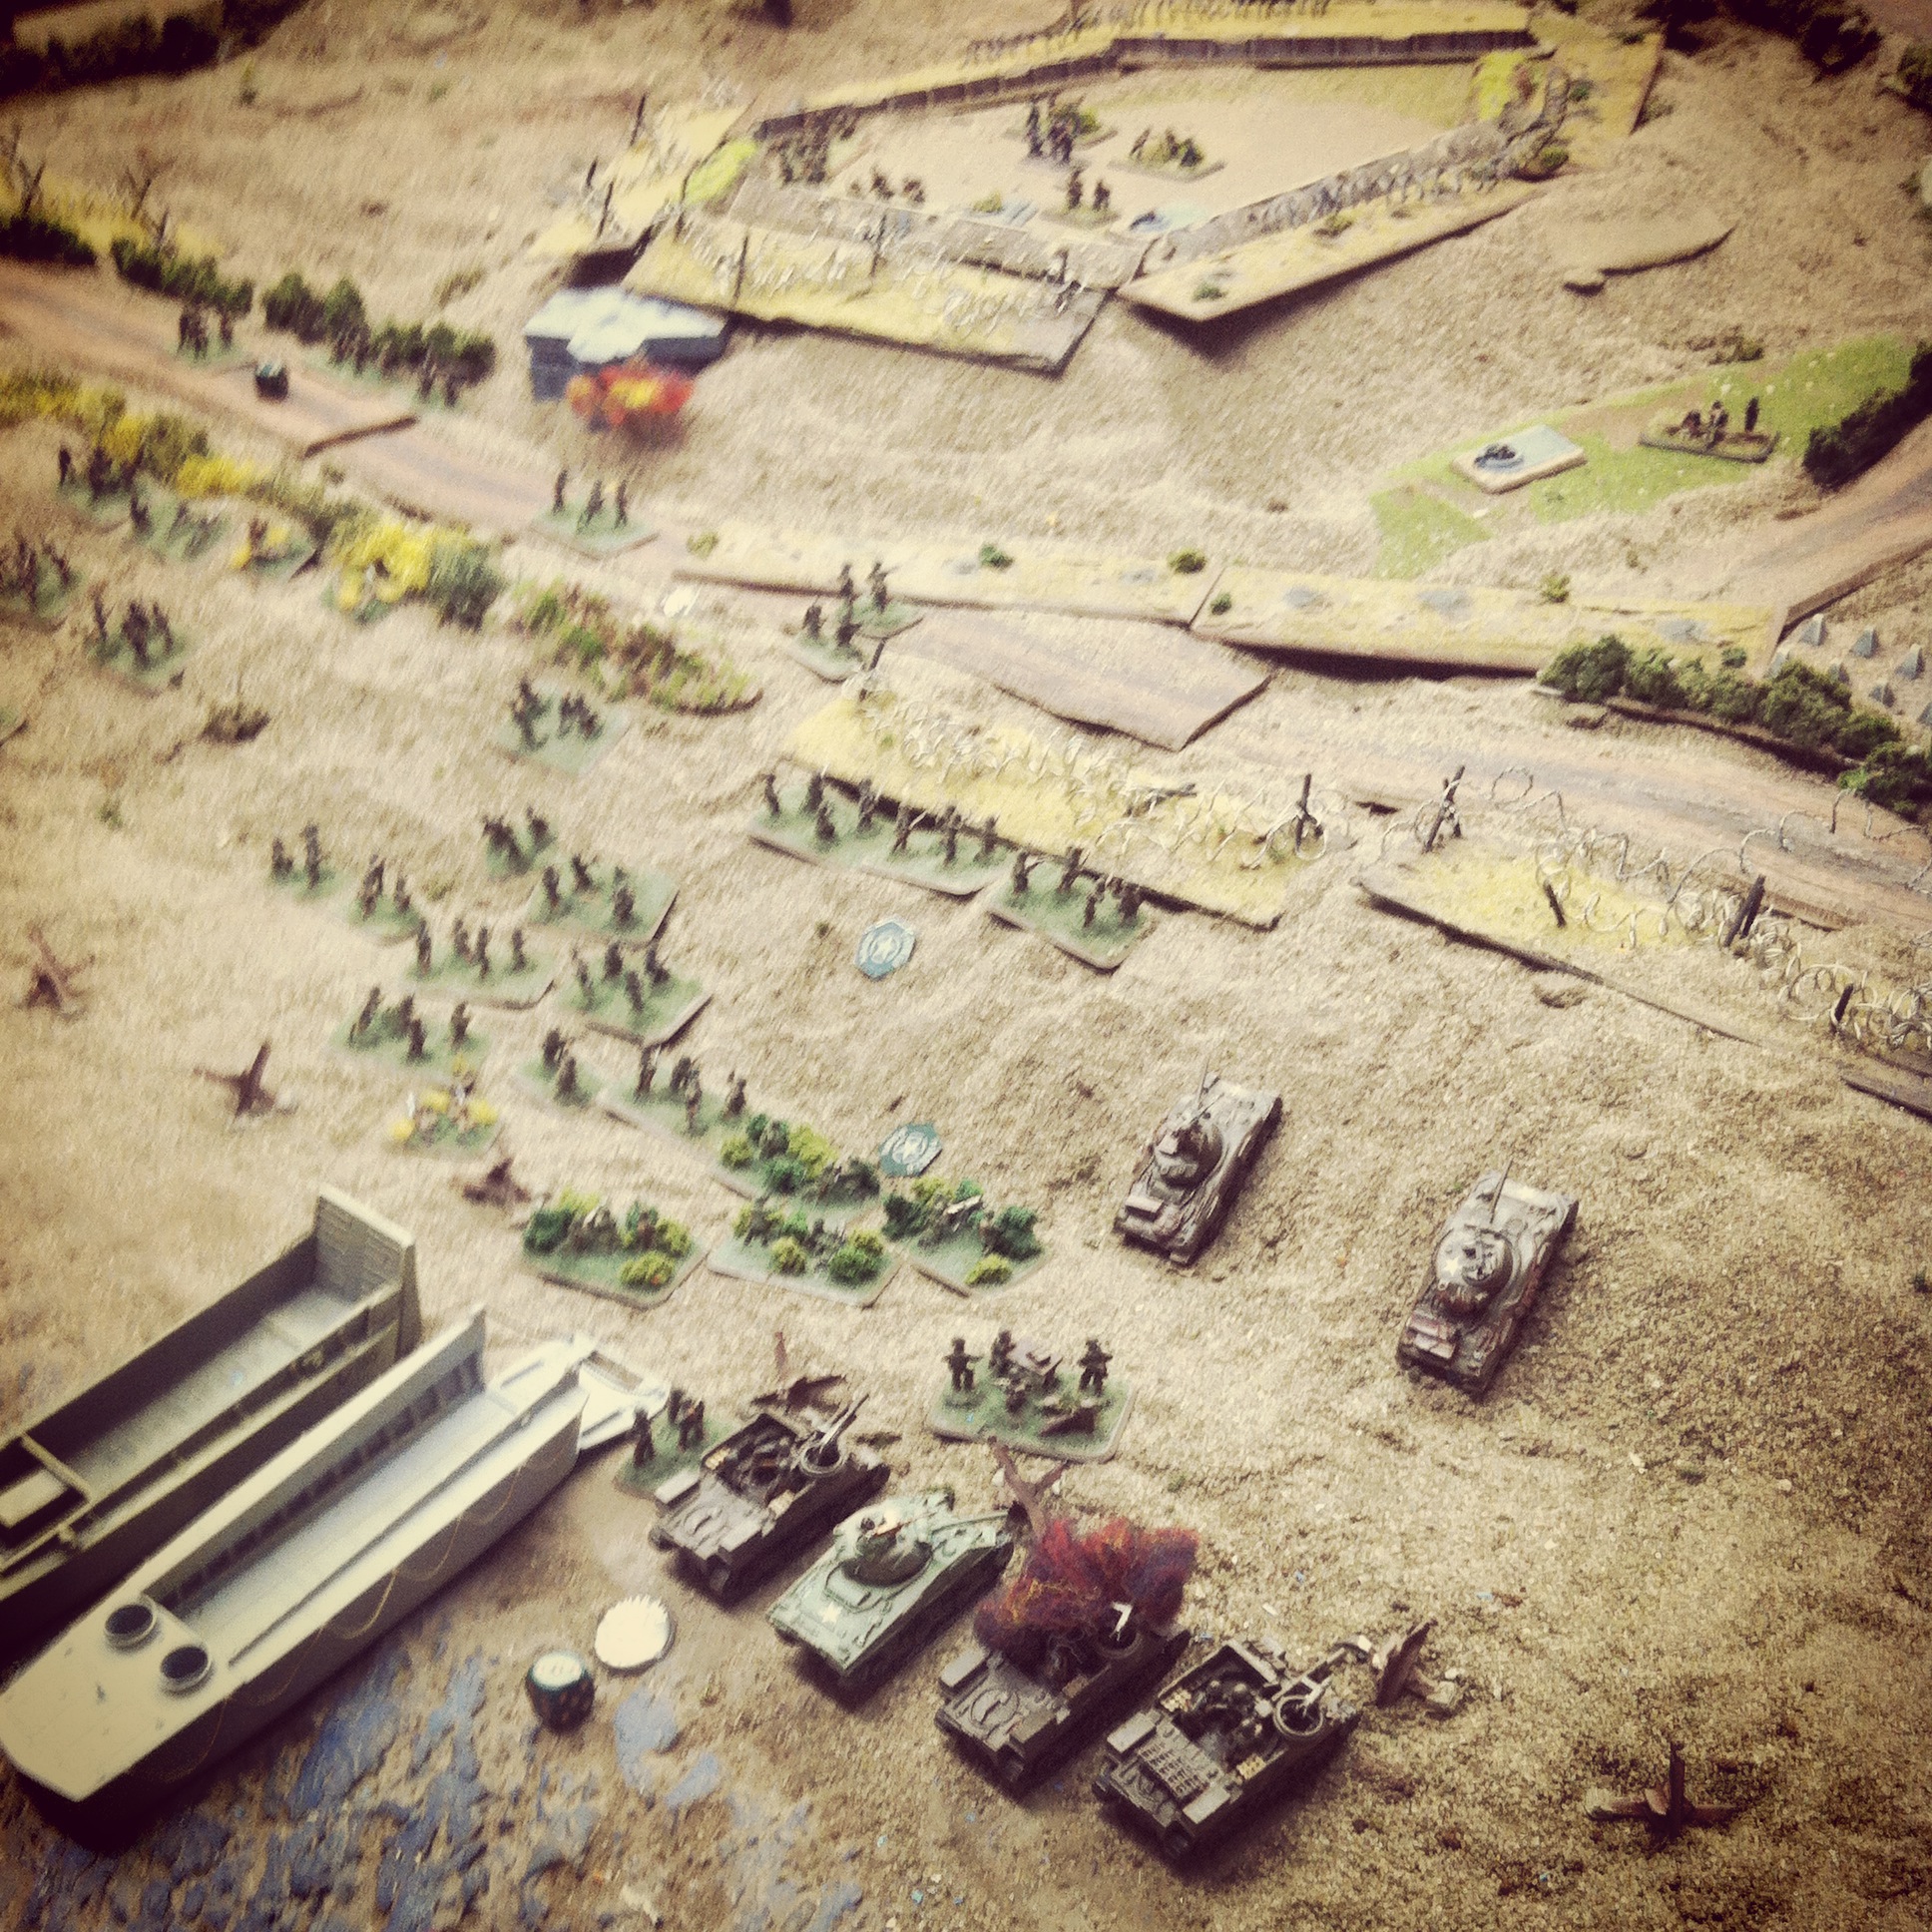
The licky destruction of one German gun was about the last thing to go right for the British. Additional reinforcements were tardy in their arrival as Germans continued to pour into the town. As the Germans set up positions amid the town’s houses, two towed field guns also rumbled into the town. Additional close combat erupted between the buildings with the British continuing to take heavy casualties and losing more ground.

IMG_6312German artillery is towed into the town

As British reserves continued to fail in their arrival, the Germans pressed on. After initially holding four safe positions in the buildings of Bénouville, British positions continued to evaporate and men fell back under continued German combined arms fire and close assaults. By that time of the game, it was clear the British were not going to hold the town and the German counterattack was clearly on its way to victory.

Our final score in the played action at Pegasus Bridge and Bénouville was 1-and-1. The early success at the bridge had not been capitalized upon by the British at Bénouville, upsetting the historic balance from 1944 but still making for a great afternoon of gaming a favorite scenario for the first time.

Flames of War: Najewitz Modellbau 15mm Pegasus Bridge

PegasusBridgeWWII

Most of my 15mm wargaming terrain building I do is generic enough to be used throughout Western Europe during World War II. Even with a large collection of buildings at my disposal, there are a few iconic WWII landmarks that have long stood out in my imagination as projects I should tackle at some point. One of those is Pegasus Bridge at Bénouville, France.

The bridge was made famous by a brief but important battle in the early morning hours of D-Day on June 6, 1944. Glider units from the British 6th Airborne Division landed near two bridges just past midnight and quickly secured the Caen Canal crossings with minimal casualties. The quick nighttime action ensured movement and counterattack by German forces would be significantly limited in the coming days and weeks after the Allied landings in Normandy.

NMlogo

Building Pegasus Bridge would turn out to be a number of firsts for me. The model I picked up from Najewitz Modellbau in Germany is laser-cut, a model material I had not worked with before. The nature of the model and its situation crossing the Caen Canal would also necessitate I create surrounding terrain. In all, the project allowed me to try out a bunch of new things on a signature set piece which wound up being much more of a project than I originally envisioned.

Building the Bridge

The Pegasus Bridge model shipped in plastic bag folded into a flat, short cardboard box which had definitely shown some wear and tear during its journey from Germany to Brooklyn. Some pieces of the model had come loose from the MDF sheets during transit, but everything was there and unbroken. The rest of the model was easily punched or carefully cut out using a fresh blade in a hobby knife. With all the parts cut out, I sorted them on a tray to get a handle on the task of things before me. The model does not ship with assembly instructions, but they are available for download once registered to the Najewitz Modellbau website. The instructions are pretty spare, relying on simple wordless graphics and some imagination to put all the pieces together. I found referring to historic and contemporary images of the bridge online was just as helpful as the actual manufacturer instructions. Since there were no images online of the bridge being constructed, I decided to offer up a visual step-by-step for others looking to add this model to their terrain collection.

IMG_5918

IMG_5919

I started by laying out the parts into subsections, including the little control house which sits adjacent to the bridge and the two large sections which are found at the top of the bridge. I dry fit all the pieces to test them at first and then used carpenters wood glue to put the pieces together. Getting the stairs to the control house together was a little finicky. The curved roof on the small structure at the top of the bridge was achieved by scoring the flat roof and carefully bending it to the shape of the arched roof line.

IMG_5920

IMG_5923

IMG_5921

IMG_5922

IMG_5924

IMG_5925

IMG_5926

Next, I tackled all the trusses and supporting elements of the main bridge structure. This is where the fine lasercut detail really started to pop as I glued pieces together to resemble the plates and seams of the metal work on the bridge. After each section dried, I glued them to the main deck. The fine railings which run all around the bridge again were a challenge to figure out which went where, but some careful test fitting before gluing everything in the correct place.

IMG_5927

IMG_5928

IMG_5929

IMG_5930

IMG_5931

To finish the bridge, I glued the small gatehouse to an extra piece of square basing, attached it to the main bridge and cut some of the railings to fit around the building. The separate piece of the road approach on the other end was glued to the main bridge using a thin piece of cardboard glued to the underside to create a flexible hinge-like connection. The model doesn’t come with crossing guards, so I used extra pieces of the kit’s wood to cut some simple shapes. The cross guards were simply painted white with red stripes. The entire structure got a grey sprayed base coat and was then dry brushed in an off white paint to produce a worn look to the entire bridge.

IMG_5816

IMG_5933

Building the Terrain

As I was constructing the bridge I quickly realized it was going to need to be elevated off the table to accommodate the graded approach and a span over the canal. I went to the trusty standby of foam sheets in order to create sections of terrain on either side of the canal to create roads to the bridge and banks of the canal.

Using a ruler and marker, I outlined the areas to be cut away and sculpted. After making the rough cuts, I smoothed the edges out using wood filler and then sanding everything to a relative smooth shape. The foundation under each side of the bridge would also feature stone sections which I gently carved by using a pencil to create rows of masonry. Everything got an undercoat of brown spray paint followed by a coat of watered-down white glue and mixed flocking. The stone foundations received several coats of gray and off white dry brushed paint to create a realistic. The roads were likewise dry brushed in various shades of browns. Small chunks of foliage were glued here and there around the stone sections to add a little detail.

IMG_5940

IMG_5851

IMG_5941

IMG_5934

IMG_5935

IMG_5936

IMG_5937

IMG_5938

Pegasus Bridge

With all the painting and construction done, everything got a dull coat spray to seal the model and terrain. I decided to keep the bridge and two terrain section separate and unglued from each other to ease transport and storage. Laid out on the table, the bridge spans the canal with approaches on either side. The only thing left to do is get the model on the table, and the heroic early morning raid on Pegasus Bridge will be ready to be replayed on the tabletop soon.

IMG_5969

IMG_5971

IMG_5970

IMG_5972

IMG_5973

I Ain’t Been Shot Mum: North of Caen 1944 Scenario

BritsCaen1944The city of Caen presented a big target during the Allied invasion of Normandy in June 1944. One of the larger cities in the region of the invasion, it also occupied an important series of crossroads straddling the Orne River. Less than ten miles from the British Commonwealth forces landing zone of Sword Beach, Caen was a target for British and Canadians wading ashore on June 6th. Despite a relatively easy landing at the beach, Allies with their eye on Caen were met with a hastily-organized armored counterattack from the German 21st Panzer Division. By the end of the day, the British sat just halfway to their objective and Caen remained in Axis control.

CaenMap1944Map of the Battle for Caen, July 8-9 1944

Over the next two months, the area around Caen became a bogged-down front as Anglo-Canadian forces positioned themselves around the city. The eventual capture of the city on August 6th was costly for all involved. The ancient city was nearly leveled with Allied bombing campaigns and much of the French civilian population fled. The British forces suffered around 50,000 casualties, a devastating loss of men and equipment for British commander Bernard Montgomery. With the costly British victory, it had achieved not only the occupation of Caen but had also provided an enormous distraction for German forces which suffered even greater losses than the Allies.

iabsmlogo

This past weekend at Metropolitan Wargamers in Brooklyn, NY, a couple of us ran through a non-historical scenario typical of the British-Germany engagements just north of Caen in early July 1944. The “North of Caen” scenario is provided in the basic rule book for I Ain’t Been Shot Mum, the fantastic company-level World War II game that has fast become a favorite for some of us at the club.

Caen1British infantry advance through an orchard under blinds north of Caen

The small infantry engagement is set in the fictional hamlet of Le Moulin on a table of flat, open terrain with fields, orchards, low hedge rows and five stone buildings set at a crossroads. The game begins with three British infantry platoons entering from the north under blinds after an initial off-board artillery bombardment of the Germans dug under in around the farm and crossroads. The objective of the game is for the Germans to eliminate the British advance while the British are tasked with seizing four of the five buildings or otherwise eliminating the German troops.

Caen2A British rifle platoon takes heavy German MG42 fire and is pinned behind a barn

Following my initial bombardment, my British advanced under blinds for a few turns through the orchard northeast of the crossroads. The German blinds positioned themselves in a wood at the crossroads and in a small orchard southwest of the hamlet. Three of my blinds moved toward cover to my left behind a barn while my third false blind moved toward the road. My first blind was spotted behind the barn by a German platoon armed with three rifle sections and a deadly MG42. With the Germans deploying in a nearby barn and within the orchard, they opened up on the British rifles. With not enough cover behind the small barn, one British rifle section was all but eliminated in the first round of fire.

Caen4A British platoon runs bravely under a blind across an open field between two barns

The British survivors behind the barn returned fire, firing their rifles and 2″ mortar into the Germans in the orchards and nearby barn. In the meantime, my false blind was revealed as a second British platoon slipped to the hedge to the other side of the barn. Firing at the Germans from each side of the barn, the MG42 was forced to retreat back south of the crossroads. But the damage had been done to my first platoon at the barn, and two fire teams fell back to the orchard leaving one safely inside the barn. Sensing a brief opening, my final blind sprinted across the wide open field between the barn.

Caen3The British blind is exposed, take fire and break for hedge in the distance

Midway through the field, the German rifles in the second barn spotted and revealed my blind, slowing their run and forcing them to deploy in the open. The final German blind revealed itself among the buildings west of the crossroads. My fresh British platoon hopped the hedges and likewise crossed to the west of the road, opening fire at the Germans in the building just the other side of a small orchard. Subsequent turns of fire were exchanged and my British losses started to pile up on my right.

Back at the field on the British left, combined rifle and mortar fire poured into the Germans in the barn. Despite shock stocking up on the Germans, their position in the barn allowed great enough cover allowing them to slowly begin wearing down the exposed British platoon which became pinned from movement. With British taking losses to the right and less against well-protected Germans in the heavy stone buildings, it was not working out as a good day for the British who ceded the tiny hamlet to the Germans. More costly days were to come after this day just north of Caen, but a month off there would be victory for the British.

Metropolitan Wargamers D-Day Plus 70 Event Report

NYTimesDDay

This past weekend at Metropolitan Wargamers in Brooklyn, NY, dozens of gamers came together for three days commemorating the 70th anniversary of the Allied invasion of Normandy on June 6, 1944. Throughout the weekend, we ran multiple WWII-themed games, including Normandy ’44, I Ain’t Been Shot Mum, Flames of War, World In Flames and Memoir ’44. Dice were rolled, strategies were debated, prizes were won and Allied and Axis forces vied for control of France. In all, it was another great weekend full of gaming at our club’s space in the heart of Brooklyn.

Friday Games

IMG_3586The invasion of France begins with Normandy ’44 at Metropolitan Wargamers

Friday kicked off after work with a few players unpacking a fresh copy of the classic Normandy ’44 from GMT Games. This one-map game covers the pre-dawn D-Day Airborne landing areas, five Allied invasion beaches and the charge to the initial inland objectives. The game scale plays with regiments and battalions with each turn representing one day of action. The small, self-contained game provides a great introduction to game mechanics at this scale with a tight, clear rules set. With a quick look at the game, I decided I’m going to have to personally give this one a shot sometime soon.

IMG_3587 US infantry blinds move toward unsuspecting German defenders at a farm outside Vierville

At the back of the club, we ran a game of our new favorite WWII tactical miniatures game, IABSM  from Too Fat Lardies. In our ongoing campaign of the Normandy scenarios in the IABSM Where The Hell Have You Been Boys? book, our game focused on the battle at Vierville-sur-Mer. With the 116th Infantry Division supported by the 5th Ranger Batallion, the Allied mission was to drive inland to capture and defend the church at Vierville.

IMG_3589

German and US units exchange fire in and around the farm at Vierville

As per the scenario, initial Allied blinds approach a farm outside Vierville where a German blind sits unknowingly in the complex of buildings. With Allied infantry closing in over dense bocage hedgerows and orchards, a firefight erupted and drove the German defenders through the buildings and into the orchard beyond.

IMG_3590

German reserves arrive at the flanks of the advancing US infantry outside Vierville

IMG_3633

Germans reinforcements push the Americans from the farm

As the first force of Germans fled the farm, their reinforcing comrades came on to the rear and flank of the US infantry. The Americans made consecutive moves of firing and moving back to defend at a series of stone walls across the road from the farm. The retreating defensive US actions held off the German onslaught until enough Americans could take up position amid Vierville’s houses. At the same time, the US Rangers moved in at the far end of town to hold the objective at the church.

IMG_3632

Americans pull back from the farm to take position in Vierville

The game eventually settled into a bloody house-to-house and hedge-to-hedge fight along the road leading toward the church. Occasional lucky shots from US Ranger light machine guns at the church also harassed the Germans lying low behind their stone wall position at the farm’s orchard. By midnight, much of the initial American force had been destroyed or was retreating to a final stand at the church held by the Rangers. While the Germans had also lost a sizable amount of their force, their heavy machine guns were still in play as they closed in through the town. This time around, we called the action at Vierville a draw.

Saturday Games

IMG_3603The Americans hit the Easy Green sector of Omaha Beach

The next day kicked-off with a running of a FOW beach landing at Easy Green on Omaha Beach. We have been play testing the FOW scenario over the past two months, tweaking our forces and strategies to cope with the clumsy beach landing rules. In our past games, the US invaders only manage to win about a third of the time. Even so, we decided no D-Day weekend was complete without a return to “Bloody Omaha” on one of the club’s award-winning sand tables.

IMG_3604German defenders hold their positions behind a burning bunker

The opening turns found a lot of US boats on the beach and a quick push to the seawall. So early combined arms fire managed to destroy the main bunker at the beach, but the battle was far from over. The initial US push followed on to the left of the beach, but multiple turns at clearing the barbed wire stalled the advance as the Americans took heavy fire.

IMG_3606

American armor and artillery follow-up the infantry landings

As US armor arrived, several tanks managed to drive off the beach to the minefield position to lay down fire on the German trenches. One tank wound up spending three turns bobbing in the surf offshore only to arrive and bog for two more turns on the beach. As this most inexperienced tank crew in Normandy struggled, the other Shermans took fire from German rockets and reserve tank platoon which rolled to bulk up the beach defense. American artillery also arrived but proved pretty ineffective to the Germans at the trenches. Wave after wave of US infantry pushed to the trenches, eliminating most of the defenders but never managing to clear the barbed wire lines to seize the German position. At the final turn, the Americans just hadn’t made enough headway to control the beach.

IMG_3627World In Flames continued over D-Day weekend

With action raging on the sand table, a group of club members showed up to continue playing their massive World In Flames game. Australian Design Group’s WIF from 1985 is the standard in grand-scale strategic fighting of the entire WWII period. The game’s rich playable detail, dizzying number of 1400 playing counters and sprawling maps makes it a commitment for only the most experienced gamers over many months of play.

IMG_3630Allied forces push from the beaches inland to Caen in Normandy ’44

The Normandy ’44 game from the evening before concluded with a decisive Allied victory Saturday afternoon. Pushing the Germans back from all but Utah Beach, the Allies captured Bayeux and several smaller towns. With German defenders routed from roads leading inland from the landing beaches, the victors rolled in to control half of Caen by the game’s end.

IMG_3625No one was going hungry at Metropolitan Wargamers over the weekend

Saturday also included a lot of other club members down for the usual variety of board, Euro and card games, making for a packed house. As the crowd rolled in, a longtime club member showed up with an enormous fresh-caught fish which he proceeded to gut with a huge military-style knife. With fish on the grill and food ordered in, there was plenty of food to sustain the crowd of gamers throughout the day.

We all took a mid-afternoon break to dice-off in a game, books, DVD and miniatures raffle to raise funds for the club. I was fortunate to score a copy of A Few Acres of Snow from Treefrog Games, and another lucky person picked up an unused copy of out-of-print the Games Workshop classic Dreadfleet.

IMG_3631

Initial deployment of Allied and Axis blinds in our Saturday evening IABSM scenario

As the main crowd thinned out, we ran an evening IABSM game continuing the assault beyond Easy Green. The scenario found initial US forces deployed around a small French farm with the objective of moving men off the table on the roads beyond. The Germans were tasked with preventing the American advance and seizing the farmhouse stronghold.

IMG_3607

Settling in for a contested fight at the farmhouse above Omaha Beach

Using initial blind deployment, Germans quickly moved to the farm along thick hedgerows as the Americans drove into the building for cover. Turns followed with the Americans jumping from cover to fire on the dwindling German force which returned fire over the hedges to unfortunate US infantry hanging out in the open. A US flamethrower attack from the window of the farmhouse decimated another German squad sitting close behind a nearby hedge. Pressing their luck, a group from the farmhouse made a run for the road exit only to be stalled by a reinforcing German heavy machine gun squad. Returning fire, the German MG42s were eliminated from their position in the open field. However, the damage had been done. Although the Germans had not captured the farm objective, the Americans no longer had a sufficient force to push off the table. The night ended with a German victory beyond Easy Green.

Sunday Games

IMG_3620The war continues on the Memoir ’44 Hedgerow Hell battle map

With the first days of Operation Overlord behind us, Sunday’s game focused on the breakout actions. A couple visiting players showed up for the club’s Memoir ’44 game around noon on Sunday. Using the wide Hedgerow Hell expansion map, the Allies beat the scenario odds to win the game in the Overlord scenario. There was much talk of getting larger games of Memoir ’44 back in rotation at the club soon, so hopefully getting the game back on the table will bring some renewed interest in the coming months.

 IMG_3621

The initial armored encounter outside Lingevres leaves British tanks in flames

I finished off my weekend as the British at Lingevres using the same scenario I first ran at the club a few months ago. The mission ahead for the Brits was to move into the heavily defended town and take two of the buildings. Historically, the battle played out as a tank duel between UK Sherman Firefly and German Panther tanks, and our game this past weekend played out in a similar way.

IMG_3624

A Panther meets its end at the hand of the British Royal Artillery as a close assault is attempted on another in the woods nearby

At the outset, my first platoon of tanks got a bit overly aggressive and charged into contact with the full Panther platoon at the farm outside Lingevres. With the first Firefly destroyed in the opening turns, my remaining Shermans pulled back as the Panthers rattled to the middle of the field to hold off UK infantry advancing through the woods and bocage-lined fields beyond. One Panther bogged on a hedgerow and another was destroyed in an initial volley from the Royal Artillery in the fields outside town. Several turns became ensnared in attempted infantry assaults on the third Panther in the woods, but eventually the German tank rolled away to deal with the building reinforcing infantry and tank platoon in the fields on the other side of the table.

IMG_3622British Shermans and infantry break across a field toward Lingevres

With the Panthers moving away, fresh British infantry and the surviving Shermans moved to the farm and fields beyond. British artillery fire winnowed and pinned the German platoon in the church over several turns. Artillery fire also sought to keep the reinforcing German spotter pinned to limit the effectiveness of the reserve Nebelwerfer battery which as delayed reserves to the rear of Lingevres.

IMG_3623

The duel between the Panther and Firefly ends with the British tank in flames as the remaining Shermans destroy a Panzer IV platoon in the distance

In the meantime, a multi-turn tank duel had settled in between a lone Firefly and Panther while a reinforcing Panzer IV platoon arrived at the edge of town. Both tank groups traded fire, and in the end, the Panzers were routed with two or their three destroyed and the Firefly fell to the Panther’s gun. Back at the farm field, Shermans traded fire with Pak 40s and destroyed an anti-aircraft platoon defending the town’s flank. With two Panthers left on either side of the church, Shermans on each side of town and advancing British infantry, we called the game a draw.

 Weekend Debrief

After more than 20 hours of gaming over two nights and days, I was pretty worn out, but the interest in the D-Day event had made the weekend well worth it. WWII still holds enormous interest to this day, as demonstrated not only by our weekend of gaming but by the mainstream media’s coverage of D-Day over the week leading up. In the next week, we’re kicking off an FOW Infantry Aces campaign with fresh forces hitting the tables in rounds of Italy-themed WWII games. This fall we’ll be playing out some Market Garden battles and by the winter we hope to host some Battle of the Bulge engagements. It was a pretty special weekend in Brooklyn, but for regular visitors to Metropolitan Wargamers, there’s always the next game in this very unique New York City community.

Flames of War: Modelling Western European Terrain in 15mm

normandystuartterrain

I’ve had a lot of great feedback from the past year of posting after action reports for Flames of War games. Fellow players have been universally complimentary on the layout of my terrain used in my scenarios. With that, I’m increasingly being asked questions about the make of my models, where I buy them and how I achieve some of the other rerrain modelled  in my games.

Modelling terrain, like any aspect of miniatures wargaming, has to take into account the three main factors of skill, budget and time commitment. I find myself somewhere in the middle of all three categories, and I feel my level of personal investment in my terrain modelling is reflective of this. One of the many benefits of belonging to a club like Metropolitan Wargamers in Brooklyn, NY is the opportunity to share in our massed collections of terrain and create some pretty impressive-looking games.

As a longtime miniatures hobbyist with a passion for scale modelling, I wanted to share a quick round up of the current state of my 15mm terrain collection I use for Flames of War. To date, my FOW gaming has focused on the European Western Front, so the vast majority of my terrain focuses on buildings and other features appropriate for France, the Low Countries and Western Germany. All that said, let’s take a European tour in miniature…

markivposter

Any small town or rural tabletop Western European battlefield needs buildings — barns, houses, shops and cafes — not only for visual appeal, but to provide covering positions and even possible objectives during game play. FOW offers a fine line of pre-painted buildings but I find them to be a bit on the expensive side and toy-like. I also like to paint, so breaking up modelling little tanks and soldiers with some miniature real estate projects makes for a nice change to hobbying routine.

Last year I discovered the cast resin terrain produced by Mark IV Miniatures. As a second-generation wargamer, the owner of Mark IV obviously invests a great deal of care to his Western and Eastern front models. All the buildings come with removable multiple stories and roofs, making their use in FOW gaming a breeze. I just acquired my second set of models from Mark IV (ordered from Musket Miniatures), giving me a number of houses, barns and shops which I set close together as a village center or spread out for use in the countryside. For my towns, I also have a set of Mark IV  walls, a cobblestone courtyard and nifty fountain monument model. At about $18-24 per model, Mark IV’s offerings are my hands-down favorite in miniature buildings.

gowlogo

With so many Mark IV models on my shelf, I wanted to add in a few more commercial structures representing stores or cafes common to European towns small and large. The excellent Model Dads UK blog recently reviewed the 15mm town shop models from Games of War. Based on a shop in Caen, the GOW shops come in three different pre-painted varieties for about $24 each shipped from the UK.

The GOW buildings scale nicely with my Mark IV models, and just a little work weathering the existing paint blends them nicely into the streetscape. I also added some signage and posters to the exterior walls, bringing a bit more sense of liveliness to the townscape.

IMG_3111Painting Mark IV and Games of War buildings

jrlogo

The first 15mm buildings I ever bought were from JR Miniatures. An old standby in the hobby, JR offers a wide variety of scales and themes for eveything from Ancients to Historicals to Sci Fi. I have a small, roughly-cast farmhouse and outbuildings from JR which I use as area terrain. Overall, I find JR’s buildings to be a bit less crisp in detail than those from Mark IV and GOW, and many buildings don’t open for placement of figures.

Last year, I picked up a basic JR European stone bridge at a convention for about $14. The simplicity of the model made it easy to paint with a few stone-colored dry-brushed layers of paint. The model stretches over just about every river running through my gaming tables, and I may very well pick up another bridge in a different design from them soon.

MBAlogo

On the higher end of the terrain options, I’ve always had a thing for the Miniature Building Authority. MBA’s extensive 15mm European line comes pre-painted with lift-off sections to place units in the buildings or model them as destroyed structures. They also carry some rather unique structures and large set-pieces like a multiple-model farm complex or full train depot set-piece.

My brother and his gaming friends have been collecting MBA buildings for years, buying a few buildings a year and sharing in their collection. Taking their gradual approach, I recently started small and ordered a couple of their shops and a large, beautiful hotel model for my collection. Over time, I hope to add more from MBA and grow toward larger, more urban scenarios.

fowcobblestone

Laying out a gaming table almost always necessitates having roads. I bought some rubberized roads years ago at a convention which suit rural unpaved areas well. A small town or rural setting requires having paved streets, and cobblestones provide a suitable road surface for Western Europe at the time of WWII.

I experimented with stone-textured papers and looked at rubberized stone streets, but none of them provided the depth or the solidity inherent in a stone road. Finally, I’ve bitten the bullet and invested in a set of the FOW cobblestone roads  at a slight discount from a seller on eBay. With a total of more than 6-feet of pre-painted cast resin roads, the box has given me what I think to be plenty roadway for my tanks to rumble down.

wslogo

Trees are one of the standard needs for any miniatures wargaming table in any era. Several wargaming manufacturers offer boxes of pre-made tree stands and bases for around $35-40 for maybe a dozen trees. I choose to go the economic bulk route and make my own using trees, flocking and modelling details from Woodland Scenics. For about $75 I’ve been able to make more than enough to fill even the largest battlefields.

IMG_3040Tree-making assembly line

Using two different sized trees from the WS Ready Made Trees Value Pack line, I first glued groups of 2-3 trees to cork coasters picked up at a craft store. On top of the spray-painted green coaster bases, I apply white glue and sprinkles of gravel of varying sizes in random places. After dry, another coat of glue to the remainder of the bases is then flocked with a basic green grass flocking. A few twigs and larger rocks glued here and there add some more depth to the little mini-scenes on each base.

IMG_3041Applying white glue to the tree bases before flocking

Bases are finished off with coarse clumped foliage to represent bushes and undergrowth. Mixing colors of the trees and foliage provides a realistic look. Gravel and larger rocks get hit with some brown washes to tone down the glaring brightness of the paths and piles on each base. All my work is done assembly line style in stages over an old baking sheet so excess flock and gravel shaken from the bases can go back in their containers to use again. When finished, I hit the bases with a matte spray to hold everything in place. In just a few hours time, my model forest on some 30 bases is ready to provide cover for any troops seeking concealment from enemy fire.

IMG_3156Completed homemade trees

Putting it all together, a dozen buildings, cobblestone roads, a bridge and a bunch of my homemade trees gives me more than enough terrain to present rural and town landscapes in Western Europe. Adding in some river sections, dirt roads and fields from fellow club members completes the look of just about any inland battle scenario in Normandy. Check out the pictures below of the results, and keep an eye on my after action reports for future glimpses into my tiny tabletop fields of battle.

IMG_3161Farm complex with Mark IV buildings and walls, JR Mini bridge and FOW fields and river

IMG_3159Games of War shops with added weathering and signage

IMG_3162Row of Mark IV buildings

IMG_3160Mark IV buildings and monument

IMG_3158Town set-up with terrain from Mark IV, JR Mini, FOW, Games of War and my homemade trees

IMG_3157Town set-up with terrain from Mark IV, JR Mini, FOW, Games of War and my homemade trees