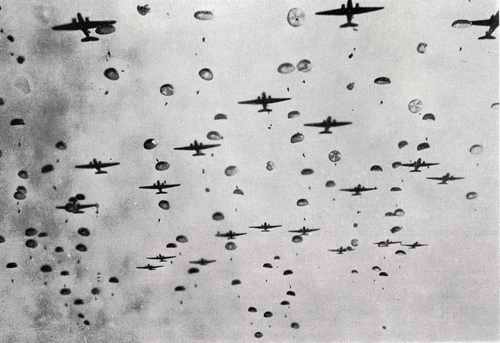
In September 1944, Allied forces launched the now-infamous Operation Market Garden. Fought in the Netherlands and Germany, the ill-fated plan was an attempt to aggressively take and control various river crossings through a series of bold airborne and armored assaults along key German strongpoints.
This past weekend at Metropolitan Wargamers, two of us threw together a quick Flames of War game based on the doomed Allied attempt to take the large bridge over the Waal River at Nijmegen, the oldest city in the Netherlands. Battlefront Miniatures, the makers of Flames of War, offer a PDF of the Hunner Park scenario which we used to broadly set the scene using the diagram below.
We each fielded small, relatively balanced 1000 point forces. My US Airborne company consisted of two parachute rifle platoons, a machine gun support platoon and a US tank platoon consisting of four Shermans. The German Fallschirmjägers fielded two rifle-machine gun platoons, a heavy-machine gun support platoon and a three-tank Panzer IV platoon. The Germans deployed one rifle-machine gun platoon in the center of the town and the rest near the bridge, as per the scenario rules. My US Airborne deployed fully along the far edge.
 The scenario’s goals call for the US Airborne to take the bridge and center of town with the Germans playing a defensive game, all within the six turn time limit. Since the Allies are at a pretty clear historical disadvantage in the scenario, I modified the game’s terrain to include some additional bocage and cover at the American end of the table to help balance the game.
My plan was to quickly run one parachute rifle platoon along the side of the table, into the woods and up the road to the bridge while the remainder of my force would slug it out against the German platoons hunkered down in the town. After one turn of movement, the second turn found the US Shermans and machine gun platoon pouring fire into the Germans occupying the town’s buildings but with no result. My other rifle platoon ran at the double to occupy the woods opposite the town while a German rifle-MG platoon and their heavy MG platoon converged to meet them.
 By the third turn, the Panzers showed up in the middle of town and quickly destroyed their first Sherman tank. In the woods, the German and US platoons began exchanging fire with the Americans finding themselves pinned after the first firefight and the Germans already taking heavy casulties. Through turns four and five, the Panzers went on to destroy two more Shermans while the American machine gun platoon and additional rifle platoon began to make headway with the German infantry hidden in the buildings. Over in the woods, the tough American Airborne managed to destroy the two German platoons and finally rolled to unpin themselves. It was a bit too little too, late. By the time of the sixth and final turn, the game was pretty well lost for the Americans as the final Sherman fled the field, a last-ditch US assault on the pinned Germans holding the town was repulsed and the German armor rolled back to meet the Americans just emerging from the woods.
Historically, Operation Market Garden was an Allied debacle, so our game play of the scenario near the Nijmegen bridge wasn’t too far off. With just under three hours to play, the game did offer a quick, varied bit of play with plenty of opportunity for both sides to get some decent shots in. It was also a good warm-up as we prepare for a large all-day Flames of War event next Saturday at the club when I hope my US Airborne roll a bit better toward victory in Europe.


Great AAR, love Hunner Park and all Market Garden stuff!
Pingback: Flames of War: Barkmann’s Corner Scenario | Brooklyn Wargaming
Pingback: Flames of War: Fielding the M3 Stuart Tank | Brooklyn Wargaming
Pingback: Flames of War: Singling 1944 Scenario | Brooklyn Wargaming
Pingback: Flames of War: Modelling European Western Front Buildings | Brooklyn Wargaming
Pingback: Flames of War: Fielding the PSC German Heavy Weapons and FOW Artillery Command | Brooklyn Wargaming
Pingback: Flames of War: Fielding the FOW Cromwell and Firefly Tank | Brooklyn Wargaming
Pingback: Flames of War: Fielding the Guards Armoured Division Part II | Brooklyn Wargaming
Pingback: Flames of War: Sint-Oedenrode 1944 Scenario | Brooklyn Wargaming