I Ain’t Been Shot Mum: Gela July 11, 1943 Scenario

gelaWe continued our play through Operation Husky and the invasion of Sicily in July 1943 this past weekend at Metropolitan Wargamers in Brooklyn, NY. We’re working our way through the events of July 11th in the Sicilian Weekend book by Too Fat Lardies for their I Ain’t Been Shot Mum rules for 15mm World War II play.

HuskyMap2Operation Husky, July-August 1943 (Gela in green)

The scenario represents the northeast section of the town of Gela where ferocious fighting had taken place the day before in the early actions of the Allied invasion of Sicily. The table was set up with a couple dozen buildings from a variety of manufacturers, including JR Miniatures, Battlefront, Mark IV Miniatures, Miniature Building Authority and Games of War. The occupying US troops all began hidden in  Gela with the Italians arriving on blinds at the opposite end of the table over a small railroad cut, bridge and road surrounded by open farm fields dotted with trees. The objective was simple: the Italians had to take back this corner of Gela and the Americans had to hold what they had fought so hard for the previous day.

Sicilianweekendcover‘Sicilian Weekend’ by Too Fat Lardies for their I Ain’t Been Shot Mum WWII rules

The Americans deployed in well-defended positions in the town with two platoons of rifles and light machine gun squads perched in buildings. A combat engineer platoon armed with a 37mm M3 anti-tank gun in tow sat hidden along the main street through town. Off board, 4.2 inch M2 mortars and 105 mm M2A1 howitzers from the 33rd Field Artillery Battalion were available as support to be called in by the captain from the company HQ perched in the tall building at the center of town. Tough and dug into great positions, the Americans looked to have a clear advantage.

IMG_5651The tabletop battlefield for Gela

As in the previous scenario southeast of Butera, the Italians again represented a massing of manpower from the Livorno Division with six small rifle platoons and a machine gun support platoon. Accompanying them this time was Mobile Group E compromised of light French Renault R35 tanks and pre-war Italian CV33 Tankettes. What the Italians lacked in a starting position on the field and quality of equipment and troops, they certainly made up for in volume as they began the game arriving on three blinds per turn.

IMG_5652Italians arrive northeast of Gela

As the Italians neared the town, the Americans bided their time and sought not to reveal their positions until the approaching forces were nearly on top of their positions. Approaching in the open, the Italian blinds were spotted in the open to reveal tanks and infantry closing in at the center and edge of town. With IABSM’s randomly card-activated units mechanic, my US commander was perhaps overly cautious in waiting a turn or two too long to start getting the American cards into the deck. This all but negated off-board US artillery support for the game and allowed the Italian attackers to get dangerously close to seizing a quick victory with nary a shot fired.

IMG_5653Italians swarm the edge of the town and the hidden American positions

On the Italian left, one of their early shots fired down the street took out a crew member of the M3 anti-tank gun, forcing the remaining American crew to haul it back around a corner to safety. In answer, the US engineers opened fire at close range and threw back the initial push by the Italians on the American right. At the center of town, US rifles, machine guns and bazookas firing from within a massive central building ripped into the Italians marching forward in the open. Under heavy fire at their center, the Italians fled for cover to either side as their approach was slowed and their returned rifle and tank shots had little effect on the Americans.

IMG_5654Italians encounter fire from US engineers defending from buildings

IMG_5655Italian infantry duck for cover as they receive heavy combined arms fire from the Americans in the large central building

IMG_5656Italian armor repositions away from American fire

With nowhere to go but forward, an Italian rifle platoon at their left assaulted the US engineers holding down the American right from a building. The Americans took heavy casualties and were thrown backward from their position into the open street to the rear. In response, returned fire from engineers in a nearby building flung the Italians back from their brief victory.

IMG_5657Italian rifles push a US engineer platoon from the building position

Back at the center, another round of combined arms fire from the Americans in the large central building continued to feed shots into the Italians, forcing them to continue to slide into cover to either side of the open field outside town. While pushing the Italians back with casualties and shocking fire provided a short-term positive for the US, it also allowed the Italians the chance to redeploy and set themselves for a move into town on the American left.

IMG_5658Italians slide from the center toward the American left

Meanwhile on the US right, the surviving engineers were chewed up by additional fire in the street which stalled them out of the action. With the main street into town wide open, the first Italian tank positioned itself to roll down the cobblestones. Waiting in the distance was the American anti-tank gun with a clear field of fire down the street looking to stave off an armored assault into the heart of Gela.

IMG_5659Italian armor sneaks around the American right as the US 37mm M3 anti-tank gun waits in the distance

With the Italians abandoning the center, the fight moved to the flanks. One US rifle platoon moved to reposition into buildings further to the edge of town on the American left as two Italian platoons, one already having suffered heavy casualties, snuck between buildings for cover. The American engineers on their right sought to hold down the approaching Italian tanks and three rifle platoons, and the US anti-tank gun crew had yet to fire a shot. The American rifles, machine guns and bazooka crews who had caused so much damage at the center were facing a choice of redeployment as their Italian targets skirted to either side.

IMG_5644Italians mass for an attack on the US engineers

Several hours in, we called the game. The small-scale tactical nature of IABSM is highly contingent on when a platoon or command ‘big man’ card activates. With so many Italian cards in the deck, a run of activated Italian unit cards may have provided the push they needed to get to the main street and victory. That said, each US card drawn was continuing to have devastating results on the somewhat weaker Italians, causing casualties and flinging them into reconsidering different routes. The large number of Italian on the field were still poised to match up with the higher quality American troops, although the US had clearly blown an early opportunity to use their off-board artillery effectively. Good and bad command choices had left Gela contested for the day.

New Game Weekend: Force On Force

Enduring FreedomFor a person who spends an outsized amount of time reading about, researching, modelling historic soldiers and playing wars of the past, I have pretty much ignored the wars of my own lifetime from the late 1960s to present. Born during the Vietnam War, I grew up in the last two decades of the Cold War. From there, the protracted engagements in Iraq and Afghanistan and the ever-shifting nation-less “War On Terror” have occupied my adult years. The United States has been at war for most of my life and all that of my two sons. For a whole host of reasons, I prefer to set my wargaming in the comfortable distance of the past.

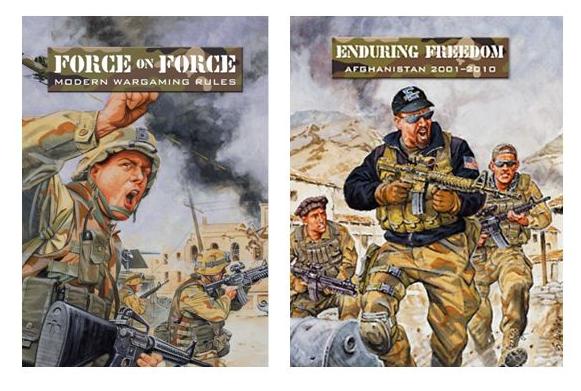
FOFRulesForce On Force rule books from Ambush Alley Games

This past weekend at Metropolitan Wargamers in Brooklyn, NY, I took a rare trip to a modern tabletop battlefield with my first play through a couple of scenarios using the Force On Force rules system. Published in 2009 by Ambush Alley Games and distributed by Osprey Publishing since 2011, FOF has become the go-to rule set for miniatures gamers focused on modern conflict. The rules provide elegant gaming mechanics for asymmetric warfare between elite regular units and irregular forces. Using this, the FOF system accounts for the more advanced tactics, leadership, communications and equipment of US and NATO forces against the highly motivated yet less professional and poorly equipped irregular Taliban forces.

IMG_4793

The Afghanistan battlefield for our Force On Force scenarios

Our two scenarios presented a generic engagement between US Marines and Taliban forces in and around two typical walled compounds in rural Afghanistan in 2010. Amid the arid trees, hills and fields, the table was set with a hefty collection of 25mm Middle East structures from the Miniature Building Authority. The eight-turn scenario involved two four-man Marine squads attempting to hold a walled compound against the encroaching Taliban forces.

IMG_4792US Marines squad in Force On Force

As elite forces in FOF, the US Marines carry initiative and announce two actions  at the beginning of the turn. Actions include combinations of such things as shooting, remaining on overwatch, hiding, tactical movement of up to 6″ or rapid movement up to 12″ with a subsequent penalty for firing. The elite nature of American Marine regulars allows the unit to function without a troop quality check. Shooting for the US is achieved with D8s, one for each figure in the squad, with additional dice thrown into the mix for special or heavier weapons. For the Taliban without leaders present, movement must first be determined with a troop quality check with one D12 per each figure in the squad, and shooting is done using D6s. With their local knowledge, Taliban forces can also choose to move anywhere at any distance on the table provided they do not cross line of sight of any US forces.

IMG_4790Taliban unit in Force On Force

Thus the differing size of the dice thrown for each squad type — US regulars and Taliban irregulars — is used to determine all the variations in asymmetric troop quality. In FOF, any rolls of 4+ are considered successes, so the relatively easy D12 motivation tests for the Taliban account for their zealous dedication while their weaker D6 combat rolls mimic their relatively untrained fighters and poor weaponry with only a 50/50 chance of hitting anything. In addition, a Taliban figure firing a rocket-propelled grenade RPG gains two extra D6 but hits must be re-rolled with results of a 1 indicating a dud rocket and no effect to the target. On the other hand, US forces hit 2/3rds of the time using their D8s. Hits are applied randomly to figures in the unit, except for successful hits from US snipers which allows for a choice of targets.

IMG_4794

Second US Marines squad with sniper advances

In our game, the first US Marine squad began in a field adjacent to the objective compound with a single Taliban unit perched on an adjacent rooftop. The Marines chose to remain in cover on overwatch, allowing the Taliban a first ineffective round of fire. The Marines returned fire killing one of the Taliban fighters. Turn two saw the entry of the second US Marines team, including a sniper, while the first team scooted into the compound at a full 12″ of rapid movement through two open doors. The Taliban’s second unit, including an RPG, entered the table with a lucky roll of 6 which allowed them to deploy at the corner near the second US unit and the compound.

IMG_4795

Second US Marine squad takes heavy fire from two Taliban units

Over the next two turns, the first US team remained within the compound guarding the objective while the second US squad crept to a copse of trees just outside the compound’s walls. At the wall, the Taliban fired their RPG to open a hole in the wall to expose the US Marines inside. Another Taliban unit with two RPGs and a leader rolled another 6 to also deploy near the compound, moving close to their nearby allies to give the other unit the benefit of the leader.

Along the way, “fog of war” event cards were drawn on rolls of 1 during reactive fire. These cards add an extra element of randomness to a FOF game. The first card eliminated the Taliban’s ability to move anywhere on the table out of line of sight due to an US drone launching overhead. The second card drawn allowed the Taliban to set an improvised explosive device (IED) between the second US squad and the compound, effectively eliminating a direct path to the objective. The final card was pulled by the Americans an allowed for an “excellent position” to be created to protect the second team at the trees.

In the meantime, combined fire from the Taliban eliminated the US sniper in the trees and injured the other three members of the squad, effectively pinning them for the remainder of the game with no friendly force nearby to attempt a first aid check. With one American squad left and the Taliban poised to close in on the compound from multiple directions, the game went to the Taliban.

We switched sides for the second game with one US Marine unit immediately taking up position within the compound and the second unit moving under cover through the nearby ruins and trees. The Taliban reinforcements were not as lucky with their placement, and all entered at the far end of the table with stalled movement due to a lack of leadership. Again, a fog of war card eliminated the Taliban’s free movement on the table. A RPG shot blew up one building in the target compound, but the Marines survived and pulled back to another building. By turn six, the second US squad most moving to protect the compound and the Taliban forces, while great in number, had failed to advance far enough to prove a threat. A final fog of war card brought in a sandstorm, effectively shutting down shooting and movement for the remainder of the game. The US Marines had done their job and held the objective and the day.

One of the benefits of gaming modern war is the wealth of immediate information available in refighting actual engagements or creating other realistic scenarios. For our battle, some of the excellent coverage from National Geographic’s documentary Inside The Afghanistan War was used, and countless books, articles, photos, videos and websites provide further information and inspiration. The Force On Force rules do a masterful job at representing small engagements between regular and irregular forces, and I look forward to another series of games bringing in additional types of weapons, support and vehicles to the mix. Yes, our modern wars are still unfolding immediately in real-time, but with FOF a better appreciation of the tactics and challenges of today’s soldier is well represented for the interested wargamer.

Flames of War: Tanksgiving 2014 After Action Report

Tanks2014AAR

This past weekend seven of us gathered at Metropolitan Wargamers in Brooklyn, NY for our second annual Flames of War Tanksgiving event. One new player and six experienced FOW gamers (including two father/son pairs) played through five Late War games using 1750-point companies stretching over three tables — two from Western Europe and one from the Eastern Front. Over the course of the afternoon, British, US, German, Soviet and Hungarian forces fought it out with a mixed results but a slight edge toward the Axis for the day.

IMG_4722

Setting up two Western Europe tables for Tanksgiving 2014

IMG_4723

Western European tables ready to go at Metropolitan Wargamers with an Eastern Front table at the back

British Guards Armoured vs German Schwere SS-Panzerkompanie

The first Western Europe table presented a No Retreat Mission with the Guards Armoured defending a small town from a raiding Tiger-led German force attacking from the open farm area across a river. The Guards deployed an eight 25-pound gun Royal Artillery at the back edge of the table and one objective near the bridge spanning the river to the town. With three other platoons of Sherman and Sherman Firefly tanks in reserve, the initial British force would need to hold fast against the German onslaught.

IMG_4724

Guards Armoured tanks deploy at an objective

IMG_4726

Tigers roll toward the bridge and are covered in smoke rounds

The Germans began the game fully deployed and slowly moving their Tigers toward the bridge and an objective just beyond. With famed tank ace Michael Wittman commanding, the key for the spare British force was to stay away from the deadly guns of the German tanks. At the river ford in the center, the Panzer IVs moved to flank the other side of town with Panzer Grenadiers mounted in half tracks at the rear. The best the British could do was fire smoke rounds into the Tigers across the river and follow-up with long-range shots from the single Firefly deployed at the beginning of the game.

IMG_4727

A Firefly destroys a Tiger at the bridge

IMG_4728

Panzer IVs and Shermans face off in the town streets as a Firefly covers the bridge

Over the next two turns, British reserves arrived and made way for the center of the town, using the tight cobblestone streets and buildings as cover. Artillery spotters stationed in the rooftops of buildings called in several turns of artillery fire but failed to have any effect on the Tigers and destroying only one German halftrack at the river. A crack shot from a Firefly at the center of the town destroyed the first Tiger over the bridge. By the end of the fourth turn, the Panzer IVs wheeled to get into the town at the British left but were pushed back by fire from British Shermans.

IMG_4730

Reserve platoons from the Guards Armoured arrive to engage the Panzer IVs

IMG_4731

Tigers position themselves on two flanks of the town

In the fifth turn, the two remaining platoons from the Guards Armoured arrived to the British left and pushed forward toward the Panzer IVs. With two German tanks quickly lit up, the surviving Panzer IV fell back to the treeline where it was destroyed in the next turn. The British held their left for the moment, but in the cover of the raging tank fight, the dismounted Panzer Grenadiers had managed to slip into the town’s buildings unharmed.

IMG_4732

Firefly Shermans and Tigers face off to protect the objective

IMG_4733

Three Tigers charge hard toward the objective beyond the road

As smoke continued to hold the Tigers from firing at the bridge, a second Tiger was destroyed from a volley from the same Firefly that had sent the first Tiger into flames. While action at the bridge stalled, the three other Tigers had been working their way through wrecking the British tanks which had destroyed the Panzer IVs. All the while, the German infantry had continued to work through the town’s building’s untouched and toward the objective back the rear of town. The British command tanks rolled to stall the advance of the Panzer Grenadiers with machine gun fire and cover the objective.

With most of the British armour ablaze throughout the town, three Tigers rolled toward the objective at the bridge. The surviving British tanks had continued to make successful morale checks with the benefit of their special rerolls. The two surviving Firefly Shermans took a combined shot at a Tiger’s rear and missed. The Tiger’s spun around to return fire, destroying a Firefly. With further ineffective artillery rounds and just one Firefly sitting between three Tigers and the objective, the game was called with a victory for the Germans.

Final Result: Victory for the Germans!

Soviet Tankovy Batalon vs. Hungarian Harckocsizó Század

The day also saw a couple Eastern Front games with Hungarian and Soviet forces facing off on tables set up using a random terrain generator. The Eastern Front table showcased log structures from the excellent Miniature Building Authority Russian Village set along with some rural farm buildings from FOW. Each game saw the Soviets as the attacker, the first taking place on a table representing the bleak steppes of Russia in a Fighting Withdrawal Mission. The defending Hungarians began in prepared positions with a howitzer battery and Panzer IVs to their right, infantry at the center and tanks at the left. The Soviets with T-34 obr 1942 tanks at their extreme  left and right,  SU-100 tank killers and a Gvardeyskiy Tyazheliy Tankovy company at the center and a heavy mortar company at the rear.

IMG_4725The Soviet line moves toward the Hungarian positions

IMG_4719

Soviet tanks roll toward the Hungarian positions

IMG_4720

Hungarian armor proves to be no match for the Soviets

The second Eastern Europe match-up occurred around a collective farm complex with a Dust Up Mission. Starting from opposite corners, both the Hungarians and Soviets positioned themselves into a fantastic series of turns in and around the small farm. With both players moving, dodging for cover and firing at close range, the Hungarians and Soviets sparred for victory as tanks burned all around.

IMG_4721

Game two on the Eastern Front with the central Soviet farm complex

As Hungarian reserves arrived late in the game, infantry climbed out of their trucks and assaulted the Soviet T-34s. Soviet reserves likewise entered the game and made way for the Hungarian howitzers and the objective at the opposite corner. With two intense assaults at either end of the field, the Soviets gained a slight edge and were able to score their second victory on the day.

Final Results: Two Victories for the Soviets!

US 7th Division vs. German Panzer Ausbildungs Abteilung

Back on the other Western Front table a spare rural village anchored by a prominent church and surrounding hill and forests, a deadly force of German Panthers, Tiger Is and Königstigers squared off against the US 7th Division. The Americans rolled into the first Pincer Mission with standard Shermans, M4A3E8 Easy Eights and M4A3E2 Jumbo. At the rear, M7 Priests and 81mm mortars mounted in half tracks were positioned to cover the field in smoke while a P-47 Thunderbolt was on call to swoop in against the German force.

IMG_4742

The US 7th Division deploys in cover on the Western Front

Hoping to avoid German fire, the US tanks crowded into position using the church and other structures for cover as they eased across the field. Once engaged, the Jumbos did their job of eating up fire from the German guns and allowed the other US tanks to advance toward the objectives. Even with smoke cover fired from the rear, air support above and a mass of US armor, the cautious pace of the Americans was no match against the German Tigers firing from the woods. By the time the Americans made a push for the objective in the open, the German tanks were squarely deployed to defend the objective and take the game.

IMG_4740

American tanks bide their time waiting for clear shots at the heavy German armor

IMG_4739

Overwhelming German presence holds the objective

The players switched sides in the second No Retreat Mission on the same table. Again, the Americans came on the table on the far side of the town but this time chose to race aggressively toward their objectives. Defending from the wooded areas again, the Germans were able to fire at will on the advancing Americans. Quickly moving to a close series of short-range duels, tanks on both sides shifted to get into important side armor shot positions. With a tight cluster of models crowding the field near the objectives, American artillery smoke and air support quickly became irrelevant and some lively debate erupted around lines of sight and facings. The second game was a much closer match, but in the end, the thick hulls of the German tanks were no match for the American guns.

IMG_4741

Tanks on both sides jockey for effective shots near an objective

With two victories for the Germans, there was a fair amount of discussion as to whether the Panzer Ausbildungs Abteilung list is an example of a “broken” and unbeatable list in FOW. The Americans tried their best with both cautious and forceful tactics using some great available equipment

Final Results: Two victories for the Germans!

At day’s end, the Axis came out with a slight edge of a 3-2 victory over the Allies across two European fronts. The presence of tough late war German Tiger tanks are a hard force to crack, even with quality American and British armor with lots of air and artillery support. On the other hand, the Russian tank horde always proves to be a formidable Allied opponent whether facing Hungarians or Germans. Force quality, tactics and a bit of luck always play a role, and our five Tanksgiving games were all unique examples of how Flames of War tank battles can go on any given day.

Flames of War: Modelling Western European Terrain in 15mm

normandystuartterrain

I’ve had a lot of great feedback from the past year of posting after action reports for Flames of War games. Fellow players have been universally complimentary on the layout of my terrain used in my scenarios. With that, I’m increasingly being asked questions about the make of my models, where I buy them and how I achieve some of the other rerrain modelled  in my games.

Modelling terrain, like any aspect of miniatures wargaming, has to take into account the three main factors of skill, budget and time commitment. I find myself somewhere in the middle of all three categories, and I feel my level of personal investment in my terrain modelling is reflective of this. One of the many benefits of belonging to a club like Metropolitan Wargamers in Brooklyn, NY is the opportunity to share in our massed collections of terrain and create some pretty impressive-looking games.

As a longtime miniatures hobbyist with a passion for scale modelling, I wanted to share a quick round up of the current state of my 15mm terrain collection I use for Flames of War. To date, my FOW gaming has focused on the European Western Front, so the vast majority of my terrain focuses on buildings and other features appropriate for France, the Low Countries and Western Germany. All that said, let’s take a European tour in miniature…

markivposter

Any small town or rural tabletop Western European battlefield needs buildings — barns, houses, shops and cafes — not only for visual appeal, but to provide covering positions and even possible objectives during game play. FOW offers a fine line of pre-painted buildings but I find them to be a bit on the expensive side and toy-like. I also like to paint, so breaking up modelling little tanks and soldiers with some miniature real estate projects makes for a nice change to hobbying routine.

Last year I discovered the cast resin terrain produced by Mark IV Miniatures. As a second-generation wargamer, the owner of Mark IV obviously invests a great deal of care to his Western and Eastern front models. All the buildings come with removable multiple stories and roofs, making their use in FOW gaming a breeze. I just acquired my second set of models from Mark IV (ordered from Musket Miniatures), giving me a number of houses, barns and shops which I set close together as a village center or spread out for use in the countryside. For my towns, I also have a set of Mark IV  walls, a cobblestone courtyard and nifty fountain monument model. At about $18-24 per model, Mark IV’s offerings are my hands-down favorite in miniature buildings.

gowlogo

With so many Mark IV models on my shelf, I wanted to add in a few more commercial structures representing stores or cafes common to European towns small and large. The excellent Model Dads UK blog recently reviewed the 15mm town shop models from Games of War. Based on a shop in Caen, the GOW shops come in three different pre-painted varieties for about $24 each shipped from the UK.

The GOW buildings scale nicely with my Mark IV models, and just a little work weathering the existing paint blends them nicely into the streetscape. I also added some signage and posters to the exterior walls, bringing a bit more sense of liveliness to the townscape.

IMG_3111Painting Mark IV and Games of War buildings

jrlogo

The first 15mm buildings I ever bought were from JR Miniatures. An old standby in the hobby, JR offers a wide variety of scales and themes for eveything from Ancients to Historicals to Sci Fi. I have a small, roughly-cast farmhouse and outbuildings from JR which I use as area terrain. Overall, I find JR’s buildings to be a bit less crisp in detail than those from Mark IV and GOW, and many buildings don’t open for placement of figures.

Last year, I picked up a basic JR European stone bridge at a convention for about $14. The simplicity of the model made it easy to paint with a few stone-colored dry-brushed layers of paint. The model stretches over just about every river running through my gaming tables, and I may very well pick up another bridge in a different design from them soon.

MBAlogo

On the higher end of the terrain options, I’ve always had a thing for the Miniature Building Authority. MBA’s extensive 15mm European line comes pre-painted with lift-off sections to place units in the buildings or model them as destroyed structures. They also carry some rather unique structures and large set-pieces like a multiple-model farm complex or full train depot set-piece.

My brother and his gaming friends have been collecting MBA buildings for years, buying a few buildings a year and sharing in their collection. Taking their gradual approach, I recently started small and ordered a couple of their shops and a large, beautiful hotel model for my collection. Over time, I hope to add more from MBA and grow toward larger, more urban scenarios.

fowcobblestone

Laying out a gaming table almost always necessitates having roads. I bought some rubberized roads years ago at a convention which suit rural unpaved areas well. A small town or rural setting requires having paved streets, and cobblestones provide a suitable road surface for Western Europe at the time of WWII.

I experimented with stone-textured papers and looked at rubberized stone streets, but none of them provided the depth or the solidity inherent in a stone road. Finally, I’ve bitten the bullet and invested in a set of the FOW cobblestone roads  at a slight discount from a seller on eBay. With a total of more than 6-feet of pre-painted cast resin roads, the box has given me what I think to be plenty roadway for my tanks to rumble down.

wslogo

Trees are one of the standard needs for any miniatures wargaming table in any era. Several wargaming manufacturers offer boxes of pre-made tree stands and bases for around $35-40 for maybe a dozen trees. I choose to go the economic bulk route and make my own using trees, flocking and modelling details from Woodland Scenics. For about $75 I’ve been able to make more than enough to fill even the largest battlefields.

IMG_3040Tree-making assembly line

Using two different sized trees from the WS Ready Made Trees Value Pack line, I first glued groups of 2-3 trees to cork coasters picked up at a craft store. On top of the spray-painted green coaster bases, I apply white glue and sprinkles of gravel of varying sizes in random places. After dry, another coat of glue to the remainder of the bases is then flocked with a basic green grass flocking. A few twigs and larger rocks glued here and there add some more depth to the little mini-scenes on each base.

IMG_3041Applying white glue to the tree bases before flocking

Bases are finished off with coarse clumped foliage to represent bushes and undergrowth. Mixing colors of the trees and foliage provides a realistic look. Gravel and larger rocks get hit with some brown washes to tone down the glaring brightness of the paths and piles on each base. All my work is done assembly line style in stages over an old baking sheet so excess flock and gravel shaken from the bases can go back in their containers to use again. When finished, I hit the bases with a matte spray to hold everything in place. In just a few hours time, my model forest on some 30 bases is ready to provide cover for any troops seeking concealment from enemy fire.

IMG_3156Completed homemade trees

Putting it all together, a dozen buildings, cobblestone roads, a bridge and a bunch of my homemade trees gives me more than enough terrain to present rural and town landscapes in Western Europe. Adding in some river sections, dirt roads and fields from fellow club members completes the look of just about any inland battle scenario in Normandy. Check out the pictures below of the results, and keep an eye on my after action reports for future glimpses into my tiny tabletop fields of battle.

IMG_3161Farm complex with Mark IV buildings and walls, JR Mini bridge and FOW fields and river

IMG_3159Games of War shops with added weathering and signage

IMG_3162Row of Mark IV buildings

IMG_3160Mark IV buildings and monument

IMG_3158Town set-up with terrain from Mark IV, JR Mini, FOW, Games of War and my homemade trees

IMG_3157Town set-up with terrain from Mark IV, JR Mini, FOW, Games of War and my homemade trees

Flames of War: Modelling European Western Front Buildings

153770I got into miniatures wargaming through a combined set of interests I developed as a kid: history, role-playing and scale modelling. One of the aspects of gaming I enjoy is setting up a realistic and engaging tabletop battlefield, both for the visual effect but also to reproduce the playable advantages and challenges found in waging scenarios within scenery.

I’ve been searching high and low for an affordable and well-made set of buildings to add to my 15mm Flames of War World War II gaming set in the post D-Day Western Front. Battlefront Miniatures, the makers of Flames of War, launched their own series of buildings last year. The pre-painted buildings are beautiful, albeit a bit too perfect and pretty expensive at $40-50 each. Miniature Building Authority (MBA) has been a long-time producer of fine pre-painted buildings. Like the structures from Battlefront, MBA models feature removable roofs but also convert into ruined bombed-out versions. At $40-50 for single large buildings or for pairs of smaller ones, the MBA buildings are also pretty pricey. MBA keeps a small line in stock, but they have dozens of out-of-production models which you can also find at conventions and occasionally online. JR Miniatures is another standby in the industry, but I find their relatively low-priced line of buildings is a bit of a mixed bag in terms of casting and playability.

markivWith building up my gaming real estate on my mind, I posted to the message boards at The Miniatures Page. Some suggestions pointed to the above manufacturers, but several posters also mentioned Mark IV Miniatures. The company is run by Jeff McCarron, a second-generation gaming modeller out of Colorado who obviously puts great care and passion into his work. McCarron sells his models directly and distributes them through Musket Miniatures, and I found him to be incredibly responsive to a couple questions I had before ordering. As it turned out, a fellow member of Metropolitan Wargamers had recently picked up the large church model and a couple houses from Mark IV. After playing with his models during our big Summer FOW event and Barkmann’s Corner scenario at the club, I decided these were the buildings to sink an investment into.

1148873_10201247963855523_305675209_nI decided to go with several two and three-story buildings, a barn, a courtyard and some walls, all ordered from Musket Miniatures. With all these models, I’d have the flexibility to set up a fairly decent-sized town or play with them as a separate farm estates. The castings arrived clean and required little tidying-up of residual flash with a knife.

20130830-233936.jpgI did have to put in a bit of work gluing plastic tabs to the undersides of the floors and roofs to provide a snug fit for each story of the buildings. The larger one-story bank building also required a wall and metal cast windows to be glued in place.

20130830-234253.jpgFor painting reference, I searched online for photos of European villages. After a light grey spray basecoat, the stucco walls of the buildings were dabbed with a bit of foam sponge in sandy gray-brown stucco and then dry-brushed with an off-white paint to add variety to the wall surfaces. Exposed stonework, the courtyard cobbles and masonry details at the corners, doors and windows all got combinations of varying shades of grays, browns and whites to create some depth.

IMG_2115Shutters, doors and windows were painted with dull blue, white, green and red trim, mimicking some of the variety in paint schemes I had found in photos online. For the roofs, a black undercoat was dry brushed in a couple shades of grey with a bit of browns and dark green shades mixed in. On the barn model I glued on some thin pieces of lichen to add the look of vines covering part of the walls.

IMG_2117The walled courtyard and modular wall sections got a two-part paint scheme over the gray primer. A watered-down brown-black wash over the bricks and cobbles filled the cracks with a dark shading finished-off with an off-white dry-brushed highlighting coat. The courtyard and wall gates started with a dark brown base with a lighter brown adding aged detail to the wood. Iron hinges got a black undercoat with some rusty metal dabbed over it. The result was some very realistic stone and brickwork walls.

IMG_2112

IMG_2119

IMG_2123

IMG_2125I couldn’t be more pleased with the buildings. They’ve already seen some action on the tabletop in my recent Singling ’44 game and combining them with my existing trees, roads and lichen hedgerows really brings the battlefield to life. I’m already eying a few of the other models offered by Mark IV, including some ruined versions of the same buildings which come cast in some exciting bombed-out interior detail.

At Metropolitan Wargamers, there’s some early plans being laid for another big day of gaming to coincide with the fall’s Flames of War Tanksgiving 2013 event and there’s certain to be plenty of WWII action before then. With my new buildings from Mark IV on the table, these miniature landmarks are certain to add even more depth an interest to all out future games.