New Game Weekend: Wilderness War

WWbox

I wound up spending a fair amount of time this past year touring sites related to the French and Indian War period while feeding my gamer’s appetite for the Seven Years War period with A Few Acres of Snow. With a little research and talking with some of the members at Metropolitan Wargamers, I decided I needed to go bigger and dive into a game focused on the French and Indian War. All trails led to GMT’s Wilderness War, and I had a chance to play my first game this past weekend.

Published in 2001, Wilderness War is a game that causes a lot of the gamers I know to glaze over with wide grins. The game is designed by Volko Ruhnke and uses a card-driven mechanic much like his COIN games series also published by GMT. I have a few games of the Runke-designed Cuba Libre and Fire In The Lake under my belt, so I knew that a French and Indian War game from him was certain to be a mix of relatively simple rules wrapped up in a rich historic board game experience.

WWboard

Wilderness War game board

The gorgeous map – hardbound in the latest edition – presents the Northeastern colonial areas of North America in the mid 18th-century. As with the war itself, the game is largely defined by geography. “Cultivated” (ie settled) areas are indicated with boxes, and “wilderness” areas and Indian settlements are printed as circles. Mountainous areas are also depicted with chains spreading through western and central Pennsylvania, the Hudson Valley region and portions of central New England. Connecting these areas are roads or trails and the more important waterways which served as the superhighways of the period. Many of the larger cultivated settlements begin with heavy fortresses protecting the space, while the game set up places a series of French and British forts and stockades throughout the map.

wwchips

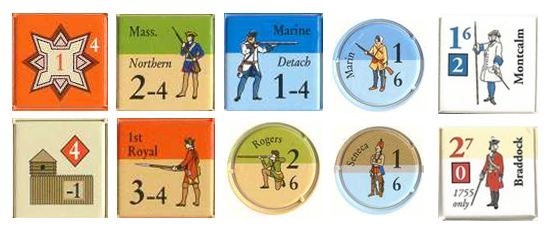
Sample Wilderness War game counters

Game components consist primarily of 70 cards and 271 cardboard counters. The counters generally depict movement and combat ratings, with reduced values on the flip side once a unit takes damage in battle, during a wintering period or from an event card. Command markers also carry tactics numbers, which help during combat, and a command value. Cards allow activation of units equal to the number printed or by command rating. Special events may also be played for British (red), French (blue) or either side (red/blue), and cards with a brown-red band are events which may be played at any point during either side’s actions.

wwcards

Sample Wilderness War cards

The game plays with year-long turns each containing an early and late season, each approximating about six months of time. In each season, players begin by being dealt eight cards apiece. Later events and actions may modify a player’s hand size, but in general the French and British player then take turns playing cards to move forces, engage in battle, construct defenses or play out events as depicted on the cards. With some pre-planning, each season moves relatively swiftly toward the conclusion of a year of war. At the end of each year, victory points are tallied and units are checked to see if they suffer losses during the winter period between each yearly season of fighting.

Wilderness War comes with a playbook outlining several small to mid-sized games featuring particular periods in the war or a set-up for the entire war from 1755 to 1762. For my first game, we jumped in with both feet and started from the outset of the war  with me playing as the British and my experienced opponent using the French. The French begin the game with a small force stretched across the Lake Ontario, St. Lawrence River and western Pennsylvania regions. British forces start poised on three fronts along the Hudson River, stretching west toward the eastern tip of Lake Ontario at Oswego and just south of western Pennsylvania. The French are buoyed with their strong alliances with several Indian nations while the British hold enormous access to colonial, regular British troops and numerous commanding officers waiting to be called into service.

Using the swift wilderness movement and  raiding capabilities in the 1755 and 1756 turns, the French sent Indian forces into Pennsylvania, Virginia and New England to raid unprotected British cultivated areas. The British quickly moved to redeploy their meager regulars throughout these areas to build stockades and push back further raids. At the same time, the French massed their forces and captured Fort Oswego. By the end of the second year of play, the French were already sitting on six victory points.

With a string of stockaded defenses set up to the west by the beginning of 1757, the British began to land troops at their coastal port arrivals to offset negative British political effects which stymied the use of more Colonial regulars and militia units. British troops commenced the long march into the Pennsylvania mountains and the nearby target French fort at the Ohio Forks (today’s Pittsburgh). Back to the east, the French began using their new base at Oswego to launch a push to the southeast into the Hudson Valley and the ill-defended areas around Albany, Schenectady and the Oneida region. All the while, the French continued to recruit additional Indian forces to buffer their defenses at the Ohio Forks and continue raids toward the east. The 1757 late season ended with my leaving too many British marooned in the mountains of Pennsylvania in a clear rookie mistake which led to my mass of troops taking heavy losses in the winter season.

IMG_4433

The British stockade defenses on the western frontier lay the groundwork for a push on the French at the Ohio Forks in my first game of Wilderness War

By 1758, my British luck seemed to change a bit for the better. Drawing and playing the William Pitt event card, I was able to increase my card hand size to nine cards and gain access to more British forces. Rushing more British reinforcements west into Pennsylvania, the French fell during a siege at the fort protecting the Ohio Forks, giving the British a firm foothold on the western frontier and awarding two victory points. Additional British troops rushed up the Hudson River Valley to hold back the French push toward Albany. As the British remained engaged in fights, the French began shifting their forces along Lake Ontario and the northern frontier while also raising a large force from the Iroquois in central New York. With 1758 at an end, my British forces were safely wintering on two fronts but in a severely weakened state and still way behind on victory points.

We called the game at its midpoint, deciding to restart another time now that I had been introduced to the general game. I still hadn’t experienced some major facets of the game such as naval movement and amphibious warfare, but I had quickly come to understand some of the major drivers of how the game plays. As a beginner, here are some lessons learned from my first game of Wilderness War:

  1. Defend the frontier. Especially for the British, but for both players, keeping the frontier defended by building stockades and forts is a must. Regular troops caught in wilderness areas are easy targets for Indians and other non-regulars, so having defenses built is key to defending territory. Having a network of stockades and forts to defend from, retreat to and maintain supply line coherence is a necessity if an army is going to succeed in the wilds of North America.
  2. Don’t get caught out in the cold. Open country and mountains are a strong enemy, particularly to 18th-century European armies. Paying attention to stacking limits as each year ends is important to keeping a force at strength. When conducting operations, players need to keep in mind where their troops will all wind up as a year ends and forces settle in for the winter. Nothing is worse than spending a series of turns marching troops into position only to have a portion of them die from starvation, disease and exposure in the period following each year’s turn.
  3. Play the long game. The full game goes to eight years of warfare, so strategy needs to take a long view. The first half of the game most probably belongs to the French as they and their Indian allies sack the wide open and undefended frontier. The British simply can’t be everywhere in the early years of the war, so spending time building defenses while also waiting to get the right cards to call in reinforcements is important. Massing and moving large forces on both sides to be strong enough to siege and capture forts takes a fair amount of planning but pays off in victory points.

Wilderness War is a fantastic playable document of the French and Indian War. The shifting alliances, opportunistic events, geography of the country itself intertwine to capture the period with a realness that might be familiar to any French or British commander on the 18th-century American frontier.

ww logo

I Ain’t Been Shot Mum: North of Caen 1944 Scenario

BritsCaen1944The city of Caen presented a big target during the Allied invasion of Normandy in June 1944. One of the larger cities in the region of the invasion, it also occupied an important series of crossroads straddling the Orne River. Less than ten miles from the British Commonwealth forces landing zone of Sword Beach, Caen was a target for British and Canadians wading ashore on June 6th. Despite a relatively easy landing at the beach, Allies with their eye on Caen were met with a hastily-organized armored counterattack from the German 21st Panzer Division. By the end of the day, the British sat just halfway to their objective and Caen remained in Axis control.

CaenMap1944Map of the Battle for Caen, July 8-9 1944

Over the next two months, the area around Caen became a bogged-down front as Anglo-Canadian forces positioned themselves around the city. The eventual capture of the city on August 6th was costly for all involved. The ancient city was nearly leveled with Allied bombing campaigns and much of the French civilian population fled. The British forces suffered around 50,000 casualties, a devastating loss of men and equipment for British commander Bernard Montgomery. With the costly British victory, it had achieved not only the occupation of Caen but had also provided an enormous distraction for German forces which suffered even greater losses than the Allies.

iabsmlogo

This past weekend at Metropolitan Wargamers in Brooklyn, NY, a couple of us ran through a non-historical scenario typical of the British-Germany engagements just north of Caen in early July 1944. The “North of Caen” scenario is provided in the basic rule book for I Ain’t Been Shot Mum, the fantastic company-level World War II game that has fast become a favorite for some of us at the club.

Caen1British infantry advance through an orchard under blinds north of Caen

The small infantry engagement is set in the fictional hamlet of Le Moulin on a table of flat, open terrain with fields, orchards, low hedge rows and five stone buildings set at a crossroads. The game begins with three British infantry platoons entering from the north under blinds after an initial off-board artillery bombardment of the Germans dug under in around the farm and crossroads. The objective of the game is for the Germans to eliminate the British advance while the British are tasked with seizing four of the five buildings or otherwise eliminating the German troops.

Caen2A British rifle platoon takes heavy German MG42 fire and is pinned behind a barn

Following my initial bombardment, my British advanced under blinds for a few turns through the orchard northeast of the crossroads. The German blinds positioned themselves in a wood at the crossroads and in a small orchard southwest of the hamlet. Three of my blinds moved toward cover to my left behind a barn while my third false blind moved toward the road. My first blind was spotted behind the barn by a German platoon armed with three rifle sections and a deadly MG42. With the Germans deploying in a nearby barn and within the orchard, they opened up on the British rifles. With not enough cover behind the small barn, one British rifle section was all but eliminated in the first round of fire.

Caen4A British platoon runs bravely under a blind across an open field between two barns

The British survivors behind the barn returned fire, firing their rifles and 2″ mortar into the Germans in the orchards and nearby barn. In the meantime, my false blind was revealed as a second British platoon slipped to the hedge to the other side of the barn. Firing at the Germans from each side of the barn, the MG42 was forced to retreat back south of the crossroads. But the damage had been done to my first platoon at the barn, and two fire teams fell back to the orchard leaving one safely inside the barn. Sensing a brief opening, my final blind sprinted across the wide open field between the barn.

Caen3The British blind is exposed, take fire and break for hedge in the distance

Midway through the field, the German rifles in the second barn spotted and revealed my blind, slowing their run and forcing them to deploy in the open. The final German blind revealed itself among the buildings west of the crossroads. My fresh British platoon hopped the hedges and likewise crossed to the west of the road, opening fire at the Germans in the building just the other side of a small orchard. Subsequent turns of fire were exchanged and my British losses started to pile up on my right.

Back at the field on the British left, combined rifle and mortar fire poured into the Germans in the barn. Despite shock stocking up on the Germans, their position in the barn allowed great enough cover allowing them to slowly begin wearing down the exposed British platoon which became pinned from movement. With British taking losses to the right and less against well-protected Germans in the heavy stone buildings, it was not working out as a good day for the British who ceded the tiny hamlet to the Germans. More costly days were to come after this day just north of Caen, but a month off there would be victory for the British.

Flames of War: Metropolitan Wargamers Infantry Aces Campaign

MWGInfantry Aces

Two weekends ago we kicked off a Flames of War Infantry Aces campaign at Metropolitan Wargamers in Brooklyn, NY.

A friend of the club and organizer of the campaign has created a special Infantry Aces blog to track the campaign’s progress throughout the summer. The site will be updated weekly as the battle unfolds with after action reports, lots of photos and tracking of each player’s progress in the campaign.
While the battle rumbles on, here’s a brief look at the forces we’ve had fun researching, modelling and painting specifically for our campaign for Italy.

Allied Forces

FOWIAAllies

(clockwise from top left) 504th Parachute Infantry, 92nd Infantry “Buffalo Soldiers,” Gurkha Rifles and members of the 2nd New Zealand Division

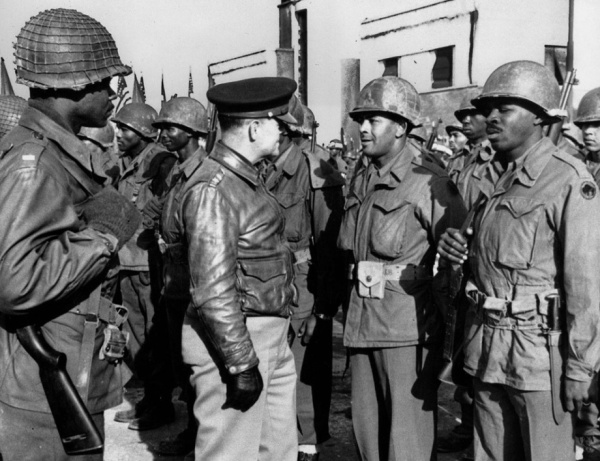
Our Allied forces are a mixed group from the Road To Rome book and reflect the mutlinational forces which came together in the late war Italy campaign to break the Axis lines. From the United States, the 504th Parachute Infantry Regiment is bringing their experience to the field after having fought for years from North Africa and Sicily in 1943 to Operation Market Garden to The Battle of The Bulge in 1944. Joining them, are the untested 92nd Infantry Division “Buffalo Soldiers,” the first African-American infantry to fight as wholly-segregated unit in the war.

Allied with the US troops are some unique UK Commonwealth forces. The Indian Gurkha Rifles had a long history in service of the British dating back to the mid-19th-century, and their skill in close combat and rocky terrain would serve them well in Italy. The  2nd New Zealand Division served most of the war in North Africa and hopping around the islands of the Mediterranean until joining the Allied effort to break the Axis lines severing Italy from the rest of Europe.

Axis Forces

germanyia (clockwise from top left) Fallschirmjagers, Hermann Göring troops and Grenadiers

Using the updated Fortress Italy book, our Axis players have fielded some of the classic, war-hardened forces whose mission it was to hold the line against the Allied push up the Italian Peninsula. The 1. Fallschirmjägerdivision in Italy had already proven themselves throughout Europe with wide-ranging early war operations in Denmark and Norway, the Netherlands, Crete and the invasion of the Soviet Union with Operation Barbarossa.

Two other veteran companies fill out the Axis forces. The Hermann Göring Fallschirmpanzerdivision saw action throughout Europe and Africa before fighting in Italy. Finally, the 362.Infanterie-division had seen a long war (including the Battle of Stalingrad) by the time they joined the final Axis defense of Italy.

The Campaign Begins…

IMG_3685

Recent FOW Infantry Aces campaign action at Metropolitan Wargamers

We’ve got two weeks of campaign games in so far, and playing with small infantry forces of 500 points has been a refreshing break from the larger FOW games in which we all usually play. Special rules, varying troop ratings and small tables clogged with Italian terrain have also added to the challenges and enjoyment we’ve all had so far. There’s a lot of gaming to do as the campaign escalates over the coming weeks to 700 and 900 point companies with added support. Check back frequently for more of the action over at the Infantry Aces Metropolitan Wargamers Italian Flames of War site.

Flames of War: Fielding the 92nd Infantry Division Buffalo Soldiers

buffalsoldierscmnd

Although African-Americans have fought in every war in US history, their fight has often come on multiple fronts of prejudice and acceptance at home and abroad. Segregated units such as the famed 54th Massachusetts during the American Civil War and the 369th Infantry Regiment Harlem Hellfighters in World War I have received their due in popular culture in recent years, as have the WWII pilots of the Tuskegee Airmen.

On the ground, African-Americans in WWII were most often relegated to support roles early in the war as truck drivers, stevedores and cooks. By late in the war with reserves of Allied soldiers dwindling throughout the European campaigns, black soldiers were pressed into service at the front lines of the Battle of the Bulge and the Italian Campaign. It was in the actions in Italy where the famed 92nd Infantry Buffalo Soldiers added another chapter to their service history.

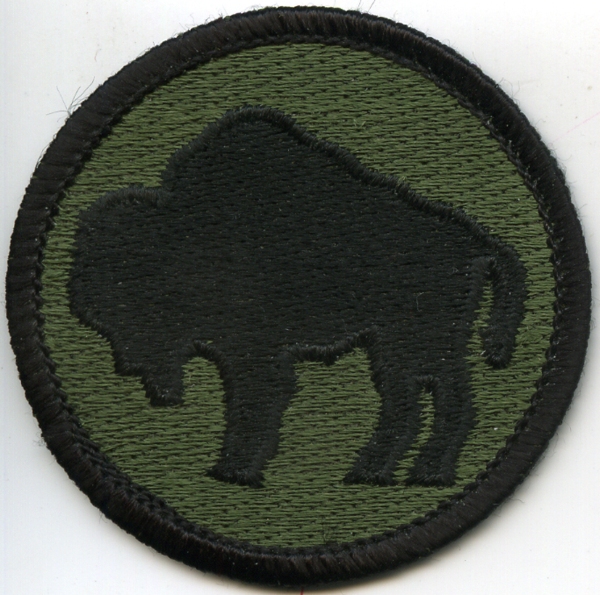
92ndpatch

Shoulder insignia of the 92nd Infantry Division ‘Buffalo Soldiers’

The Buffalo Soldiers in the Italian Campaign

The name “Buffalo Soldiers” dates back to the frontier Indian Wars of the 19th-century when post-Civil War free blacks volunteered for service in various US army capacities in the West. Later, these units continued serving in various capacities through the Spanish-American War and into WWI. Reactivated in 1942, the Buffalo Soldiers of the 92nd Infantry Division finally made their way to the war via Italy in the fall of 1944.

Video of the 92nd Infantry arriving in Italy in October 1944

As part of the US 5th Army, the 12,000 men of the 92nd Infantry made up part of the multinational Allied coalition of US, Brazilian, British and UK Commonwealth forces which sought to break the Gothic Line. Cutting across Italy, the Axis hoped to hold off any further Allied progress north to meet with other Allied forces pressing through Europe from Normandy inland toward Berlin.

92mortar

A 92nd Infantry Division mortar crew firing near Massa, Italy

Led by senior white officers in otherwise segregated units, the 92nd Infantry made up a key element of the left flank of the Allied push up through the Italian peninsula. Crossing the Arno River and proceeding north, the 92nd made its way up the Mediterranean coast  through Lucca, Massa and on to La Spezia and Genoa by the time of Axis surrender in May 1945.

The legacy of the contributions of the 92nd Infantry Division’s effectiveness in Italy has been much-debated. A paper from the 1950s does what I read to be a good job in explaining the challenges the Buffalo Soldiers faced — delays in reinforcements,  shortages in re-supply and a lack of training for the kind of terrain encountered in Italy. I believe much of this can be chalked-up to the ingrained organizational racism against the segregated units. Post-war, the members of the Buffalo Soldiers also returned to a United States still entrenched in racial discrimination. It was not until the late 1990s that two members of the 92nd were recognized with Medal of Honor commendations, some fifty years after the war’s end.

Spike Lee’s Miracle At St. Anna

StAnna

As a wargamer and film fan, I often turn to the movies to cross-pollinate my interest in a period. Spike Lee’s Miracle At St. Anna from 2008 tells the story of four soldiers from the 92nd Infantry who hide out in a small Tuscan village and bond with its residents amid the oppression and danger of German occupiers. Lee’s movies often run hot and cold, and Miracle at St. Anna met with mixed reviews, poor box office results and a fair amount of criticism over the lack of historical accuracy. All that said, the Italian locations and strong individual performances makes the movie worth a view for a rare glimpse of African-American soldiers in WWII cinema.

Modelling the 92nd Infantry Division for Flames of War

fowroadtorome

In late February 2014, the revised Flames of War Road To Rome and Fortress Italy compilation was released as an updated and expanded guide to the Italy campaign of 1944 and 1945. The Fortress Italy book covers the German and Italian defenders, and Road To Rome outlines the Allied US, British, Polish, French and lesser-known UK Commonwealth forces from Canada, New Zealand, India and South Africa. A third book, Italy Battles, provides special mission rules, battle scenarios and campaign notes for Anzio (aka “Operation Shingle”) and Monte Cassino.

infantry aces

Having dedicated years of my FOW modelling and gaming to Western Europe, these books provided a great opportunity for myself and other members of Metropolitan Wargamers in Brooklyn, NY to dive into a club-wide Italian project. I’ve also been wanting to put together a unique company for my FOW collection, and I was pleased to find the 92nd Infantry Regiment outlined in the Road To Rome book. With all our focus on the Italy theater, we’ve decided to dive headlong into a multi-month FOW Infantry Aces campaign, and there will be more to come with updates on our new Infantry Aces blog.

PSCUSinf

For my 92nd Infantry I decided to snap up the two sets from the Plastic Soldier Company – Late War US Infantry 1944-45 and US Infantry Heavy Weapons. At about $26 a box from my favorite online dealer The Warstore, the PSC kits are a huge value in fielding an entire infantry company along with bazooka, machine gun and mortar supporting weapons. Assembly involves lots of small parts and bases must be purchased separately, but getting a whole company on the table for a fraction of the costs of FOW models can’t be beaten.

IMG_3669

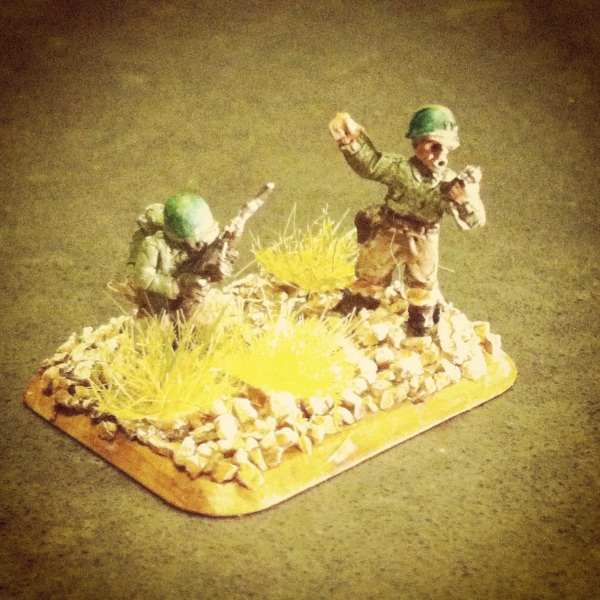
Pvt. Fred “Radio” Rogers and Lt. Daniel McFeeley

To fill out my force, I picked of the FOW Infantry Aces set for about $12. The pack gives you nine stands of character models to create special Infantry Ace command stands for use in the Infantry Aces campaign. The blister pack includes general US, British and German models with special Fallschirmjäger, Japanese-American Nisei, Kiwi and turbaned Indian characters. I shared the models with my fellow players at our club, and modelling these guys really adds some nice personality to the game. For my Command Ace stand, I’ve modeled the fictional Pvt. Fred “Radio” Rogers and Lt. Daniel McFeeley leading the way for my company.

IMG_3670One of my three rifle platoons for the 92nd Infantry Division

In the FOW Italy campaign, the 92nd Infantry Division is rated as Confident-Trained making my force cheap and numerous. To start, I’ve constructed three rifle platoons with two rifle squads each plus a platoon command and bazooka in support. Along with my rifles and McFeeley and Rogers leading the way, I’m also bringing a weapons platoon in support. The platoon packs a punch with three 60mm mortars and four M1919 machine gun crews.

IMG_3671My Buffalo Soldiers mortar and machine gun weapons platoon

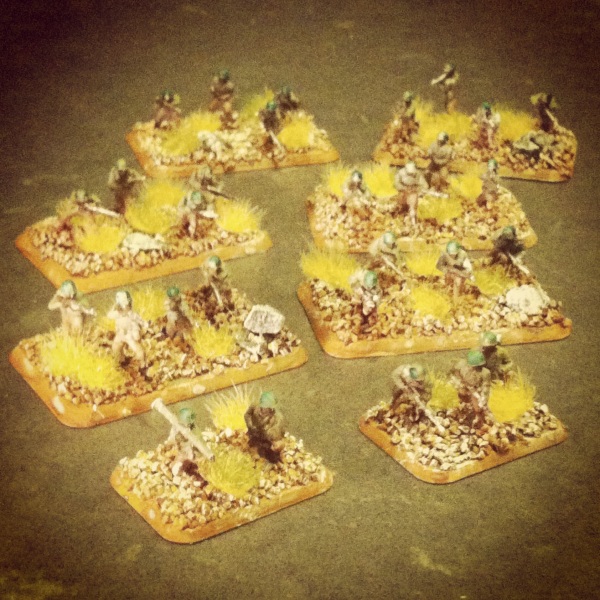
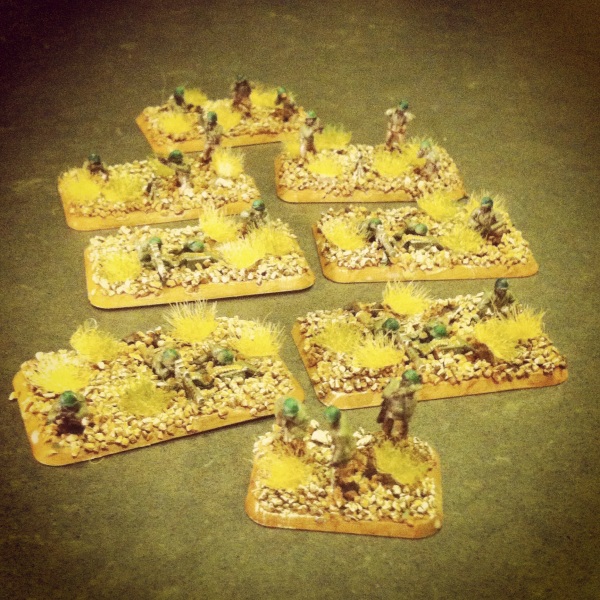
For all my models, I glued the PSC soldiers and equipment onto FOW bases and then hit them with an army green spray coat base. Boots, equipment, rifle stocks and flesh got a dark brown. Pants were done in a tan paint and leggings got a brownish off-white color. Guns were finished off in a metal coat. Basing involved a layer of fine gravel and larger rocks coated in a brown wash and then dry-brushed in a grey-white. Finally, tufts of brown-green grass completed the Mediterranean look of the models.

The beginnings of my platoon will be hitting the tabletop shores of Italy this coming weekend in their first round of our club’s Infantry Aces campaign. In the coming weeks I’ll be adding additional infantry weapons support with additional mortars, machine guns and more infantry. Even before these guys see their first action, I’m pretty thrilled to have put in the time to create some pretty unique models that I haven’t found modeled anywhere else at this scale. As in WWII years ago, I think the 92nd Infantry Buffalo Soldiers have been too often forgotten by mainstream history and many gamers alike. With my soldiers hitting the field again, I hope to bring a bit more glory back to these men who not only contributed to the fight against Axis fascism but also stood bravely against the tide of so much history against them.

New Game Weekend: A Few Acres of Snow

AFewAcrescover

 “You know that these two nations are at war about a few acres of snow somewhere around Canada, and that they are spending on this beautiful war more than all Canada is worth.” — Voltaire, Candide (1758)

In the 17th and 18th centuries, the area of what would become the Northeastern United States and the neighboring Canadian Provinces of Ontario and Quebec were a battlefield for French, British and Native American control. With the two European empires locked in a protracted series of large and small wars around the globe, the American colonies were often a sideshow to the global conflict. In the colonies, King William’s War (1689–97), Queen Anne’s War (1702-13), King George’s War (1744–48) and the French and Indian War (1754–63) each played a role in shaping not only the birth of the United States of America but also the face of the entire globe for centuries to come.

Colonies

A mid-18th century map of British and French colonies in North America

(from New York Public Library Map Division)

I grew up in Western New York State, spent most of my twenties in Eastern Michigan and Western Pennsylvania, and finally settled in New York City nearly twenty years ago. In my life I’ve logged many a road trip to the landmarks of British and French military control at Fort Stanwix, Fort Ticonderoga, Fort William Henry and Fort Niagara, along with various battlefields and stops at roadside markers. In July, I’ll be swinging by Fort Necessity in Pennsylvania where a British officer named George Washington first commanded troops in an opening battle of the French and Indian War. I’ll also be swinging through Letchworth State Park which was occupied by the western edges of the Iroquois Confederacy which sided with the British during the era of European conflict. In short, I’ve spent my entire life living amid the ghosts of the contested colonial regions of the North American colonial wars.

AcresCardsSample cards from A Few Acres of Snow

At the recent D-Day Plus 70 weekend at Metropolitan Wargamers in Brooklyn, NY I was fortunate to score a copy of A Few Acres of Snow in a dice-off raffle. Created by famed designer Martin Wallace and released by Treefrog Games in 2011, the game takes its name from a quote from Voltaire’s Candide commenting on the absurdity of European focus on colonial wars for territory. AFAOS takes players through the French-British colonial period in North America as each nation competed for control of the continent. Within the theme, the game is a rich mix of deck-building and area control mechanics as players seek to settle and defend key areas of the map.

snowsymbolsCard symbols from A Few Acres of Snow

(Wagon, Bateaux, Settler, Military Strength, Money, Fur, Ambush and Ship)

The two-player game begins with players choosing a side as the British or French with a set number of settled outposts in the wilderness of 17th and 18th century North America. British begin with their main settlements in New York and Boston while the French player starts with Quebec. Players begin with a draw deck from which they start with five cards. Playing cards in turns of two actions each, players perform a variety of actions including settlement, fortification, raids, sieges, trade, piracy and a number of card management options. Symbols depicted on each card allow for enormous flexibility in how each player executes their strategy of expansion. For example, a player might begin with a Location card setting off from an existing settlement. From there, a card is played with the appropriate movement symbol like a Bateaux along a river. Once at a new location, a card with a Settler might be played to create a new settlement. As a player’s holdings expand, their decks grow in size and options, leading to even more potential paths of empire growth. Once all settlement tokens are used or major settlements like Boston or Quebec are captured, the games ends and victory points are scored.

IMG_3640My first play of A Few Acres of Snow

In my first play through AFAOS, I faced off with my son playing the French and me playing as the British. The game plays in about an hour, but on our first run we went to a bit over 90 minutes as we wrapped our heads around the rules. After I quickly sailed to and settled Halifax well within the bounds of French country, several  sieges commenced. In his first siege attempt, my son was repelled by my superior military might powered by my store of money. He then took a few turns to quickly trade a lot of fur (one of the strengths of the French player) to buy additional forces for a second siege which chased my British from his territory.

IMG_3647My heavily-settled British Atlantic Coast in A Few Acres of Snow

In the meantime, I pushed inland with a string a settlements toward the Great Lakes in the hopes it would expose Quebec to a siege. However, my son quickly landed a stronghold in my coastal territory in a siege victory at Pemaquid. I retaliated with two failed attacks on Pemaquid using Native American raiding parties. Having held on, my son launched an attack on Boston and my British rule of the colonies fell.

Our first game showed us how quickly AFAOS can move once you get the mechanics. Getting the right cards in and out of your hand is key to winning the game, and the cards shift in importance as the game quickly unfolds. The balance of trade, expansion and military actions does a fantastic job in re-enacting the dynamics which played out between the British, French and shifting Native American allies over some 150 years. Even though we upset the course of history, we both walked away pretty thrilled over our new game and chatting up strategies for the next time we meet up in the woods and along the coasts of Colonial America.

afaosart

Metropolitan Wargamers D-Day Plus 70 Event – June 6th-8th 2014

MWGDDay

This June is the 70th Anniversary of the Allied D-Day landings at Normandy, and New York City’s oldest and largest wargaming club Metropolitan Wargamers is celebrating with a full weekend of events.

IMG_2161

La Fiere Causeway at Metropolitan Wargamers in Brooklyn, NY

Whether you’re new to the hobby or an experienced gamer, there will be plenty of WWII action the entire weekend. On the evening of Friday June 6th we’ll begin with Flames of War airborne landing scenarios. Saturday June 7th kicks off at noon with a FOW beach landing scenario on one of the club’s famed sand tables. Sunday wraps up the weekend with a couple FOW breakthrough battles and a large Memoir ’44 board game. Other WWII-themed games will run throughout the weekend.

IMG_2816

Utah Beach on one of the sand tables at Metropolitan Wargamers

We’ll have FOW scenarios set up for the weekend with plenty of miniatures and stunning terrain on the club’s tables, so all you need to bring is your passion for wargaming and history. Our FOW miniatures games are fun and a feast for the eyes, and you can get a sense of what’s in store for the weekend by viewing some of our past scenarios at the club here.

Admission for the full weekend of gaming is just $10 and a great opportunity to visit a very unique community of gamers in the heart of Brooklyn’s Park Slope neighborhood.

For more information and to RSVP for the D-Day Plus 70 weekend, check the Metropolitan Wargamers website or join our Yahoo group.

Flames of War: Fielding the FOW M10 Tank Destroyer Platoon

m10

The Blitzkreig of German armored forces is one of the more enduring tactics introduced in World War II. Swarmed masses of German tanks and mechanized forces in the early war period rolled through Poland, France, Belgium and the Netherlands in Western Europe and punched into the Soviet Union with Operation Barbarossa in 1941. With early Panzer and later Panther and Tiger tanks ruling the battlefields of Europe, Allied forces struggled for solutions to crack the German tide of iron.

m10normandy

A US M10 tank destroyer comes ashore in Normandy after D-Day in 1944

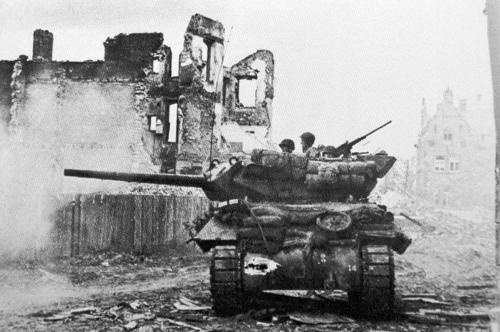
By mid-war, the Americans had a solution with the M10 tank destroyer. Introduced first into the battlefields of North Africa in 1943, the M10 GMC (“gun motor carriage”) carried a big 3-inch/76mm gun and on a Sherman hull. After success in Africa against earlier model German tanks, M10s became part of the post-D-Day Allied breakthrough campaign. While effective against Panzer III and IV tanks, more heavily-armored Panther and Tiger tanks still proved problematic. Luckily, the M10 was supplemented by the British-modified Sherman 76mm Firefly and the later US-built M18 Hellcat which was quicker on the field. The combination of these three tank destroyers, along with the stalwart work of Allied infantry and deadly air support, turned the tide in Europe.

fowm10set

One of my earliest 15mm WWII purchases years ago, and somewhat at random, was the now-discontinued M10 Tank Destroyer Platoon set from Flames of War. I think at the time, I just liked the look of the models and I was looking to fill-out my new US forces with more variety. To get to a full platoon of four M10s, a fellow club member at Metropolitan Wargamers in Brooklyn, NY recently gave my two more M10s to which I’ve added an additional M20 scout car.

IMG_3389New M10 tank destroyer and M20 scout car

IMG_3388New M10 tank destroyer

IMG_3387New M20 scout car

IMG_3390US tank destroyer platoon with new models (left) and older models (right)

With my existing and new section sections, I now can field a full tank destroyer platoon using a variety of Allied Late War European lists. Anti-tank tactics in the game provide multiple opportunities for the M10 platoon to be used in combination with infantry and other Allied armor on the game table. With optional deployment as a recon platoon using the M20 scout cars, the M10s can create ambushes to wreak havoc on German tanks. Admittedly, using this full platoon will take some practice but I’m certain they’ll be causing headaches for my German opponents in the very near future.

Flames of War: Fielding the FOW Hawker Typhoon

Typhoon

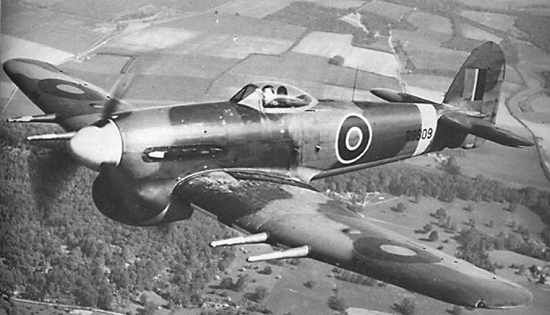
The story of the British Hawker Typhoon in WWII is one best told in two acts. Its early use beginning  in 1941 met with very mixed service results against superior planes in the German Luftwaffe  and production of the plane was nearly scrapped by the Royal Air Force. However, with a bit of re-purposing, the Typhoon’s speed was soon coupled with increasingly-heavy bomb payloads to become an effective fighter bomber against ground targets.

In 1943, the Typhoon really came into its own when armed with wing-mounted rockets and fuel tanks providing greater flight range. While of questionable effectiveness against tough-armored German tanks, a run from a squadron of  Typhoons with rockets firing struck fear into German forces and devastated supply lines and production facilities in Western Europe. The Typhoon’s role in D-Day, Operation Goodwood, Operation Varsity and other engagements was both disruptive and deadly in support of ground campaigns all the way to the war’s end.

fowtyphoon

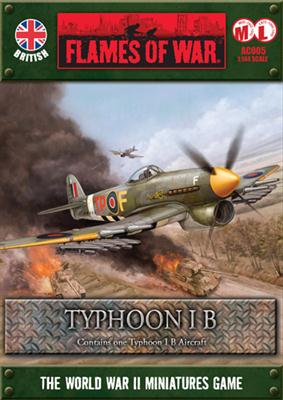
Flames of War offers a model of the Typhoon as well as a short online guide to painting their model. With my British ground forces fairly well built out with artillery, tanks, infantry and support weapons, adding some air support seemed to be the next natural step as well as another interesting modelling project.

IMG_3206

I picked up my model online at a slight discount online and went straight to work. I painted the plane in a RAF grey and green camouflage pattern with yellow details to the nose and leading wing edges. Next, I added black and white “invasion stripes” which had been used on Typhoons since earlier in the war, although my plane was going to be flying over late war Normandy. The decals included with the kit finished off the plane with “V” markings, subtly allowing me to add my own initial to my completed plane. Finally, a little watery rusty brown wash brushed along the seams in the fuselage added a weathered look of many previously-flown missions.

IMG_3207

With my existing American P-47 Thunderbolt, having the Typhoon in my miniature Allied arsenal is sure to add more depth and choice to my Late War Western Europe gaming. With the Typhoon hitting the table in the near future, my hope is its presence above the battlefield will rain rocket-fueled terror and distraction on my German opponents just as they did over Europe some 70 years ago.

Flames of War: Lingevres 1944 Scenario

lingevres1944

By D-Day +8 on June 14, 1944, the British 50th Infantry Division had pressed about 5 miles inland from Gold Beach to the outskirts of Lingevres. Dug in at the town were elements from the Panzer Lehr Division with several Panther tanks ready to force back the looming British attack. With 6-pdr anti-tank guns in tow, the British pushed into town mid-morning following a bombardment by 25-pound artillery and runs from supporting Typhoons above. A ferocious battle commenced between the 4th/7th Royal Dragoon Guards and the German Panthers. When the smoke cleared, several Panthers sat burning as victims of Sherman Firefly and anti-tank gun fire. At day’s end, the British controlled Lingevres.

lingevresAT

British 6-pdr anti-tank gun deployed outside Lingevres, June 14, 1944

The WWPD website has a Lingevres scenario available which two of us adapted for play this past weekend at Metropolitan Wargamers in Brooklyn, NY. Using the scenario as a guideline, we laid out the tabletop battlefield with cornfields stretching outside the town occupying two-thirds of the table. With our 1750-point forces on each side, the Germans began with two platoons of infantry and a heavy machine gun platoon inside two buildings and the church at the center of Lingevres. The British then deployed with their artillery battery, two rifle companies and a recon patrol. All other forces were held off table, with German delayed reserves set to arrive in turn three and British reserves eligible to arrive immediately at the beginning of the game.

Victory conditions as presented were simple — the British needed to take three buildings in the town and the Germans needed to drive the British from the field. How the game played was not simple and once again revealed my need to sink more work into creating accurate, playable scenarios for FOW.

IMG_3163Germans dug in at Lingevres in the town’s buildings while British artillery and infantry deployed from the cornfields in the distance

IMG_3164

Initial movement of British forces into Lingevres with recon carriers moving left and infantry moving into the woods near the church

The first two turns of the game saw the British marching from their edge of the table toward Lingevres. At the town, a German machine gun platoon sat waiting in a building at the crossroads while two other infantry platoons took up position in the church and shops across the road. By turn three, British artillery had opened fire on the machine gunners and pinned them. The first British tank platoon also rumbled onto the table, as did the German Panthers which made way for the center of town.

IMG_3165

Panther reserves roll into the center of Lingevres

IMG_3173

British infantry in the woods take fire and are pinned as armored reserves move from the rear

The first British infantry platoon made way through the woods at the center of the table but were pinned and cut down over two consecutive turns of fire from nearby Germans. The British recon patrol, edging its way through the bocaged fields near the church, was chased away with the appearance of the Panthers.

IMG_3167A British Sherman takes up position to spot for the artillery battery

IMG_3166

British infantry move from the farmhouse across the field

IMG_3169

Panthers destroy a Firefly and the Sherman spotter tank at the edge of town

IMG_3170

British infantry fall back after taking fire from the German half-tracks

On the main road to town, the British ran their Sherman spotter tank and lead Firefly toward the nearby farmhouse. On the other side of the farmhouse, a British infantry platoon moved into position using the building and nearby bocage as cover as they made way for the open field. The heavy British push around the farm was stymied with the arrival of German halftracks which fired machine guns into the field. By turn five, the Sherman spotter tank and spearheading Firefly also lay in flames after some quick shots from the German Panthers.

IMG_3168

British machine gun carriers and tank reserves roll on

IMG_3171

Armored reserves move to support infantry

IMG_3172 British infantry reserves move in near their artillery battery

By turns six and seven the inital British assualt had been repulsed at a safe distance from town. All German infantry platoons remained safely bunkered up in the town’s buildings, and the spotter for the German’s reserve 12cm mortar platoon was now camped out in the church’s bell tower. The three Panthers prowled back and forth at the center of town, and the incoming fire from the British artillery in the distance was the only real agitation to the occupying Germans. The Britsh rolled on their final reserves of machine gun carriers, Sherman/Firefly tanks and a fresh infantry platoon.

Even with all reserves on the table, the British attack was stumped. With one rifle platoon destroyed and a second whittled down, the British had just one intact infantry platoon on the field. One tank platoon struggled through the fields to one side of town, while the second sat idling on the road to town. Clear lines of fire around the church and town center presented open killing zones for the Germans in the town’s buidings and the three Panthers. All the Germans needed to do was sit in place and mow down the coming British.

I love playing wargames for historical scenarios, but our game this past weekend at Lingevres presented some serious limitations to the FOW rules as written. Playing an even match of 1750-point forces per side ultimately did not allow for a satisfying game for either player. What works for a head’s up FOW tournament game or randomly-rolled mission simply does not play well in recreating historic engagements.

In our Lingevres game, the British simply didn’t have enough units to create a critical mass to advance into town under what was sure to be withering fire from the Germans. We decided we liked the scenario, but perhaps the British needed a 50% increase in points, perhaps with additional rifle and tank platoons and a Typhoon providing air support.

With a three-day D-Day weekend being planned at our club this June, we’ve got multiple historic airborne, beach and inland fights to sketch out in the coming months. There’s going to be a lot of playtesting and tweaking to get our historic games to play well. With wargaming, striking the balance between a game that provides both historic accuracy and the potential for different outcomes is the real challenge that lies beyond just the roll fo the dice.

Flames of War: Aalst 1944 Scenario

aalst

The ultimately unsuccessful week-long Operation Market Garden commenced on September 17, 1944 with an Allied push toward Germany. The ground “Market” portion of the campaign saw the British Guards Armoured Division taking point on the push into the Low Countries.

On the second day of the operation, a column of the Guards Armoured had rolled to the southern outskirts of Aalst, a Belgian town occupied by German forces since 1940. Led by Col. Joe Vandeleur, the division’s tanks encountered the remnants of German troops and guns which were dug in but heavily-damaged by the previous day’s Allied air bombings and artillery barrages. For the Germans, Aalst was a line in the sand protecting the Allied advance northeast to Antwerp and  the Netherlands beyond. For the Allies, keeping the long column of armour moving was key to reinforcing the Allied airborne troops already engaged with German forces along several bridges.

This past weekend at Metropolitan Wargamers in Brooklyn, NY we ran the Aalst scenario for Flames of War with 2000-point forces on either side of the table. We pulled our British and German lists from the Market Garden and Bridge By Bridge books. As a jumping off point for the game’s outline, we referenced an Aaalst scenario originally designed for Battlefront. We planned a 10-turn game with points scored for destroyed platoons and an immediate end to the game when the British rolled a platoon off the German-defended north end of the table.

IMG_3026

German set-up at Aalst

As per the actual situation at Aalst in 1944, the Germans began setting up with half their force heavily dug in just north of the town’s center. Deadly 8.8 cm Flak guns were positioned on roads to their right and left flanks, and 7.5 cm PaK 40 anti-tank guns stood closer to town. Infantry and heavy machine gun platoons hunkered down in the fields just outside of town, and a single Jagdpanther idled nearby. Expecting both ground and possible air forces, the German guns were well-prepared for the arriving British.

IMG_3027

German 88’s dug in at the northeast and northwest ends of town

IMG_3016

British set-up at Aalst

The British laid out their 8-gun 25 pdr battery at the rear of the table and rolled on two platoons from the Guards with Joe Vandeleur attached. Spotters for the artillery were deployed in Shermans to the right and left hoping to provide eyes across the entire table for. Towed 6 pdr anti-tank guns, infantry, machine gunners and additional tanks lay in reserve off-table to follow the initial wave of armour. The plan was to use Vandeleur’s special rules to rush tanks to the center of the table, saturate the Germans with artillery fire and pave the way from additional supporting platoons.

IMG_3029

 Vandeleur leads the Guards into position behind the town

IMG_3028

German infantry and Pagdpanther make for the church at the center of Aalst

In the first two turns, the Guards quickly rolled up to take position behind the town to the south with their Vickers machine gun platoon riding on the tanks. The British artillery spotter hopped from his Sherman tank and ran for back door of a building. The Germans made way to the north of town with infantry looking to occupy the church at Aalst with a lone Jagdpanther in support.

IMG_3031

A Firefly lays waste to the approaching Jagdpanther with its first shot

IMG_3032

The Guards take heavy fire and two Shermans and a Firefly sit in flames

Fire opened up in the next two turns with a well-positioned Firefly scoring a kill on the nearing Jagdpanther. Returning fire, German 88s destroyed the Firefly and PaK 40s bailed and subsequently wrecked two other Shermans. Machine gunners made their saves, jumped off their tanks and made way for cover in a nearby building at the town’s intersection. Meanwhile, British artillery lobbed a volley over the town hoping to slow down the German infantry and machine guns looking to take hold of the town’s buildings. The barrage resulted in a destroyed PaK 40 just to the north of the church, but the German infantry pressed on to take up positions in the church.

IMG_3034

British infantry move to assault the church as reserve armor rolls to the town center

With British infantry reserves moved at the double to the town and then moved in a subsequent turn to assault the church. At the same time, a reinforcing Guards tank platoon raced to the town center. Shots from the Shermans failed to destroy nearby PaK 40s but fire from the Vickers guns in a nearby building pinned the Germans in the church ahead of the assault. Despite all the British fire lighting up the center of town, the assault failed and the British infantry fell back to the other side of the street.

IMG_3033

German armored reserves arrive

With the British stalled at the crossroads in Aalst, German reserves moved onto the table. A Stug platoon, Wirbelwinds and a fresh Jagdpanther began closing in from the northwest of town, drawing fire from the British battery looking to slow their advance. Volleys from the 25-pound guns blew up an 88 and a PaK 40, but the mass of German hardware kept rolling forward.

IMG_3035

British command tanks move to engage the Germans

IMG_3036

A swarm of German armor and troops push forward under British artillery fire

IMG_3037

A Panzerfaust lights up a British command tank

Hoping for a hard push of combined arms on the German right, British command tanks followed by two platoons of infantry pressed forward from a nearby woods. The British tankies proved to be tough, surviving a turn of fire from nearby Stugs and an attempted infantry assault with  Panzerfaust-wielding infantry as British guns continued to range in and rain shells on the Germans to no effect.

IMG_3038

The lone surviving command British tank awaits its fate from the German onslought

Back at the center of town, the last tank platoon took fire from the 88s, PaK 40s and a Panzerfaust in the church steeple and was destroyed. The one lone command tank on the western outskirts of town was surrounded and destroyed by combined tank and artillery fire. With only the remnants two rifle platoons and the Vickers left spread through the town, the game was lost for the British. As the sun set in the west, Aalst remained in Axis hands.

In our discussion after, the British artillery had only been effective only about 50% of the time and only eliminated a few units throughout the game. Too many British tanks burned too quickly against overwhelming crossfire from German guns, and reinforcing British infantry could never make headway beyond Aalst’s crossroads. More British tank platoons with Fireflies might have gone a long way toward at least pushing through the town.

Fortunately for the people of Aalst, the engagement during Market Garden resulted in the liberation of the town by the British. Pictures from the victory show a very different outcome from our game with smiling faces all around. The very nature of wargaming sometimes just makes things go a different way, and this past weekend the dice rolled against the tide of history with a victory for the Germans at Aaalst.