French and Indian War: British Regular Infantry from Conquest Miniatures

French Indian War 1754-1763: British Regular Infantry boxed set

I’m a longtime miniatures painter in multiple scales and periods, but the 18th-century has always intimidated me. Large masses of European troops standing in lines, a sameness of pose and uniform bedecked with multicolored facings and detail all seemed a bit much. And if I was going to be playing the French and Indian War I was going to need British Redcoats – lots of British Redcoats.

I turned to a couple books to stoke my interest I turned to a couple books focused on my soon-to-be subjects. An old standby in the hobby is Osprey Publishing, and I picked up a copy of 1996’s British Redcoat, 1740-93 by Stuart Reid. While good for a few detailed illustrations by Richard Hook, the slim volume also gives a solid intro into the recruitment, training and life of a British soldier of the period. My interest piqued, I dove deeper into the topic with Stephen Brumwell’s Redcoats: The British Soldier and War in the Americas, 1755-1763 from 2002. The book is scholarly yet very readable, and Brumwell goes a long way in smashing common myths about English soldiering during the FIW.

ConquestLogo

Warlordlogo

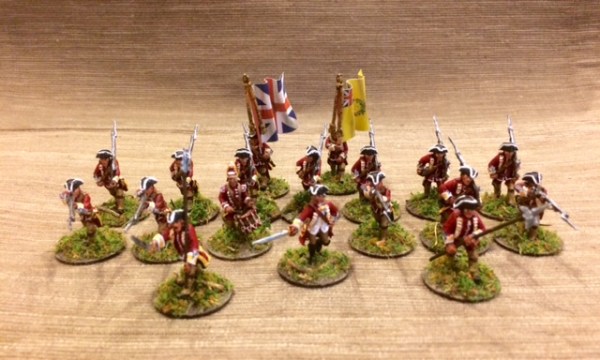
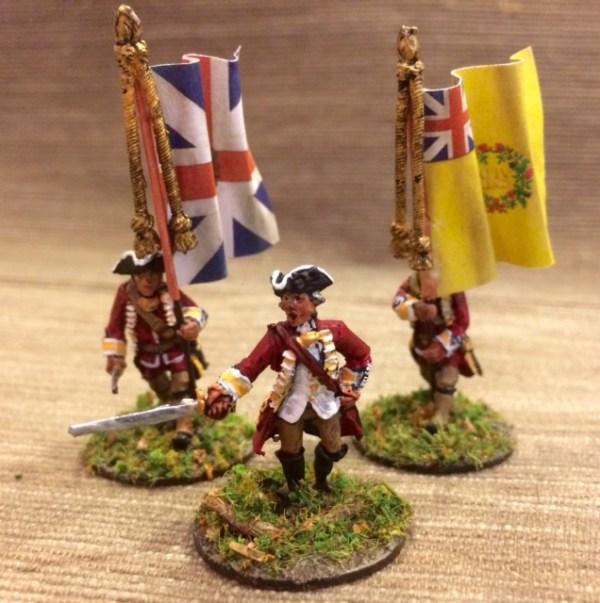
With inspiration fired, I picked my first set of metal figures in the British Regular Infantry box offered by Warlord Games. Made from castings by Conquest Miniatures, the box comes with a nice selection of 18 models: four men firing, eight marching aggressively forward and a six-man command group including two flag bearers, a drummer, two junior officers and a commander.

I decided to paint my first British soldiers of the period to represent the 44th Regiment of Foot due to their role in the Braddock Expedition, the Battle of the Monongahela and other major engagements of the FIW. For my first time painting facings, I also thought the bright yellow against the red of the 44th Foot would also pop nicely on the table.

img_8917

My first test redcoat with basic colors blocked in

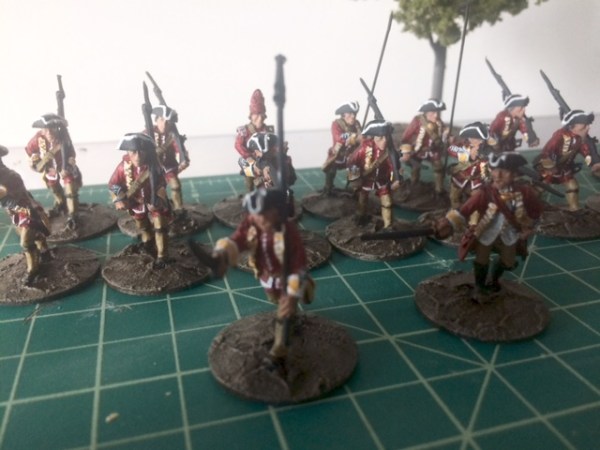
After basing the models on washers, filling the bases with rough wood filler and spraying a black primer coat, I blocked in the colors. I didn’t get carried away on exact colors, relying on a basic red for the coats, waistcoats and pants, basic yellow for the facings and a brown buff for the leggings. The cuffs were done in two steps, first with a bright white and then finished with a thin line of yellow. With a fine brush, white details were added on the basic black tricorn hats and on trim to the waistcoats and lapels.

fullsizerender

Halfway through my first batch of British Redcoats

Details were finished off with the same brown buff on stripes and belts, a basic brown to the guns and metal to finish off the guns, bayonets and officer swords. Finally, flesh and eyes were painted. Exposed skin and the leather leggings and straps got a careful light coat of brown wash to finish the painting. Flags were made by photocopying those included in the Warlord box, the bases were covered in my new favorite groundcover – Green Adirondack from Scenic Express.

fullsizerender-18

fullsizerender-14

fullsizerender-15

fullsizerender-16

fullsizerender-17

On The Trail of the Sullivan-Clinton Campaign

SullivanClintonMap

As I’ve written here many times before, I grew up amid the fields of great wars which shaped world history for more than two centuries hence. These conflicts of the 18th-century — the French and Indian War and the American War of Independence — partially played out in my childhood backyard of Western New York State. It was there in the 1750s-1780s where the European powers of France and England, many American indigenous civilizations and upstart Colonial settlers clashed over the continent savagely and ultimately formed the North American continent we know to this day.

A few months ago I had occasion to journey back again from my current home in Brooklyn to my original hometown in the Genesee Valley of Western New York. In doing so, I was able to partially retrace the movement of once-great alliances of armies and tribes of 1779.

Idealized images of the American War of Independence

Tracing the route of the Sullivan-Clinton Campaign uncovers some of the complexity to the story of the American Revolution and the country’s creation myths. Like most Americans, my view of the War of Independence was shaped at an early age with idealistic impressions of the era, its events and its legendary personalities — the Boston Tea Party, the Boston Massacre, Colonial Minutemen firing at British Redcoats, Paul Revere’s ride, Washington crossing the Delaware River, Betsy Ross sewing the first American flag and Molly Pitcher at the Battle on Monmouth. The portrayal of history with a heroic flourishes is not uncommon for sure, but stops along the Sullivan-Clinton Campaign route boldly reveal where many of our gaps between legend and reality persist in how we interpret our history.

The Sullivan-Clinton Campaign

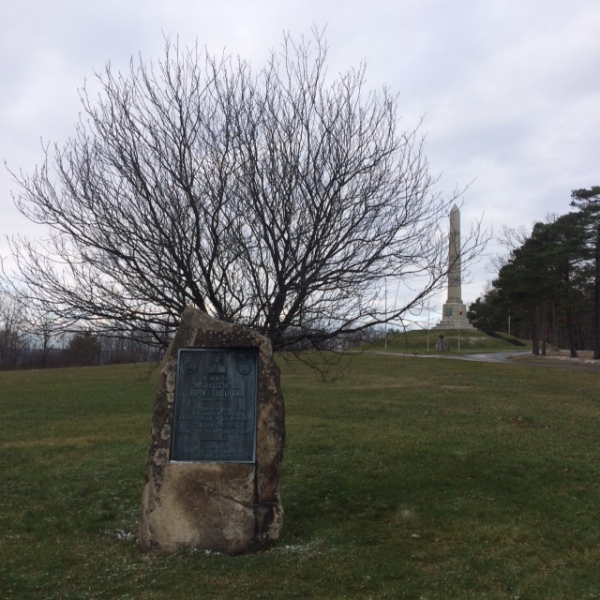
IMG_7308

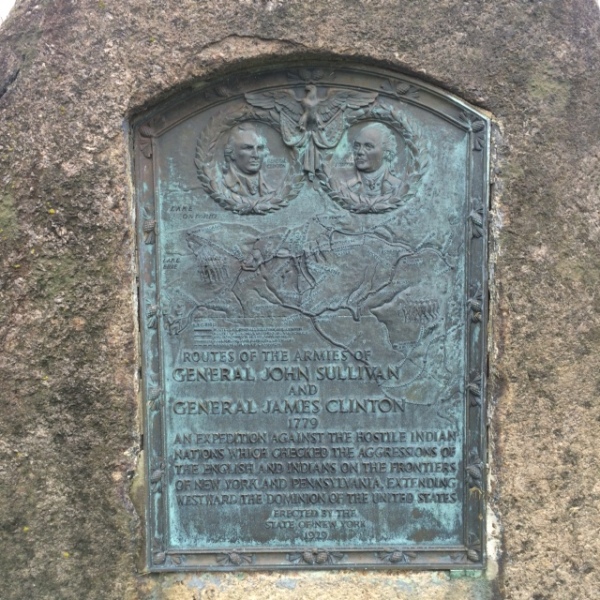
Monument to the Sullivan-Clinton Campaign erected at various sites throughout the region on the 150th anniversary in 1929

By the summer of 1779, the American Revolution was at its midpoint. The surrender of the British at the Battle of Saratoga in October 1777 encouraged France to join the war in 1778. Even with much-needed support flowing to the Colonies, the alliance between the Iroquois Confederacy and the British was holding the New York State frontier in the hands of England. Encouraged by British and Tory sympathizers operating from Fort Niagara across Western New York, the Iroquois harassed and killed settlers in the Mohawk Valley and also provided support to the British army in the form of food supplies.

In retaliation, General George Washington set his eyes on crushing the Iroquois alliance to “war upon them in their own style; penetrate their country, lay waste their villages and settlements.” The task was assigned to Major General John Sullivan with Brigadier General James Clinton acting as second in command. Sullivan set off northwest from Easton, PA and joined Clinton at Tioga near present day Athens, PA at the New York border in August 1779. Against military tradition, Washington assigned a major portion of the Continental Army (four brigades of over 4500 men) away from the front against the British. Committing such a sizable amount of men and supplies to the back country campaign points to the importance Washington placed on the mission.

Newtown Battlefield

NewtownMap

Setting out from their encampment on August 26, 1779, the well-supplied columns of the Clinton-Sullivan force marched along the Chemung River. Three days later, the expedition encountered Royalist forces comprised of a handful of British regulars, a couple hundred Tory militia and perhaps 1000 Iroquois warriors lying in wait in well-hidden earthworks.

IMG_7343

A view from atop the Newton Battlefield park

The militia at the Battle of Newtown were the famed Butler’s Rangers, commanded by Loyalist John Butler. Butler’s relationship with the British stretched back to the French and Indian War with his irregular troops participating in a number of key battles in Upstate New York and the Northeast region. Known for their green jackets and tactics which departed from standard 18th-century European line fighting, Butler’s Rangers were well-adapted to fighting in the thick woods of the American frontier. Leading the Iroquois at Newtown was Joseph Brant, a Mohawk who had likewise begun his military career fighting alongside British forces in the French and Indian War.

IMG_7347

Monuments to John Sullivan and the battle at Newtown Battlefield

Despite their dug in positions, Loyalist forces were greatly outnumbered at Newtown and a plan was quickly devised by Sullivan once the enemy’s presence was revealed. With Colonial cannon fire pouring into Loyalist positions, flanking troops were sent east and west. Despite relatively low casualties on both sides, the Loyalist forces ceded the field. The Battle of Newtown, the largest engagement of the Sullivan-Clinton campaign, left a lasting impression on the Iroquois in particular who retreated from the Colonial’s guns and superior numbers.

Groveland Ambuscade

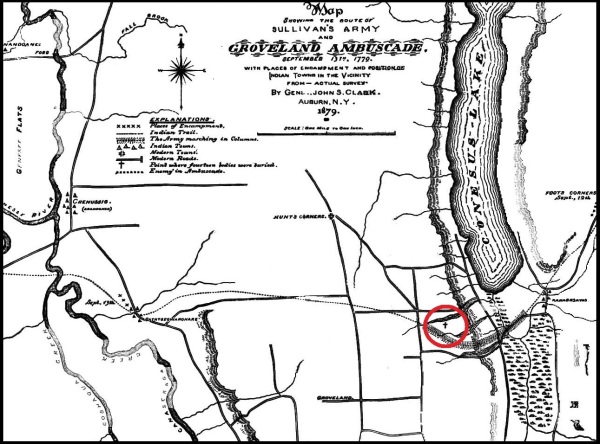
AmbuscadeMap

 Map of the Genesee Valley and the site of the ambush of the Boyd-Parker expedition on September 13, 1779

After Newtown, Sullivan and Clinton continued marching northwest. With the Iroquois on the run westward, the Colonials cut a swath of destruction against largely civilian tribes people. Fields of crops were cut down and dozens of villages were burned. What we would deem today as atrocities were meted out on the Iroquois population of the Finger Lakes Region with Washington’s orders of a scorched-earth mission delivered mercilessly.

IMG_7301

Roadside sign to the Groveland Ambuscade

By mid-September 1779, the Sullivan-Clinton expedition had reached up through the Genesee Valley. In the dense terrain differing from the wider fields of Newtown a month prior, the Colonials were slowed and at a disadvantage without opportunities to use their cannon effectively. On September 12, Clinton assigned Lt. Thomas Boyd, Sergeant Michael Parker and just over 20 men to find the Iroquois village of Little Beard’s Town. Lying again in ambush were Butler’s men and hundreds of Senecas.

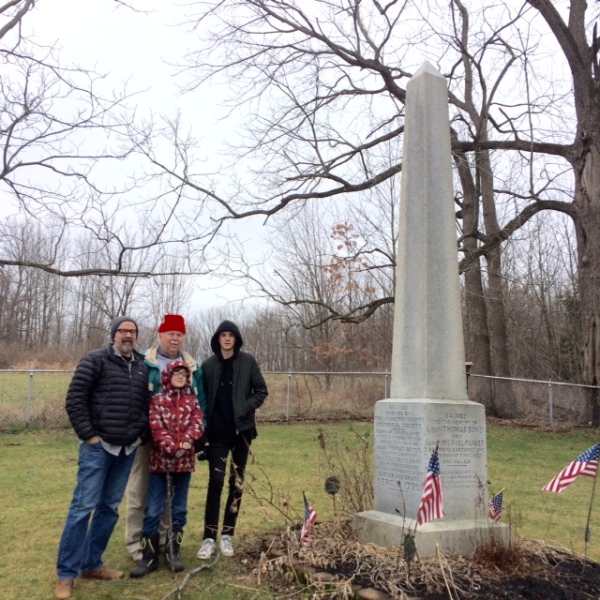
FullSizeRender

Me, my father and sons at the Groveland Ambuscade monument

The following morning on September 13, 1779, Boyd’s scouting party engaged in a brief gunfight with a half-dozen Senecas near Conesus Lake and present-day Groveland. Against the advisement of his guide, Boyd pursued the Indians into a trap where they were quickly surrounded by Butler and Brant’s large force. In the ensuing ambush, about a dozen of Boyd’s men were killed. As the smoke cleared, another twelve men were captured along with Boyd and Parker themselves. Today, the Groveland Ambuscade park and monument marks the place of this quick and yet bloody skirmish.

Boyd-Parker Park

BoydParkerSign

Historical marker at the Boyd-Parker “torture tree” site in Cuylerville, NY

The captured Colonials were led to nearby Little Beard’s Town some five miles west of the ambush near present day Cuylerville, NY. After enduring a summer of unrelenting viciousness at the hands of the Sullivan-Clinton campaign, Brant was anxious to confront his now-imprisoned enemies face to face. With his questioning over, Brant left the men to the Senecas who tortured and killed Boyd, Parker and all but one of their men.

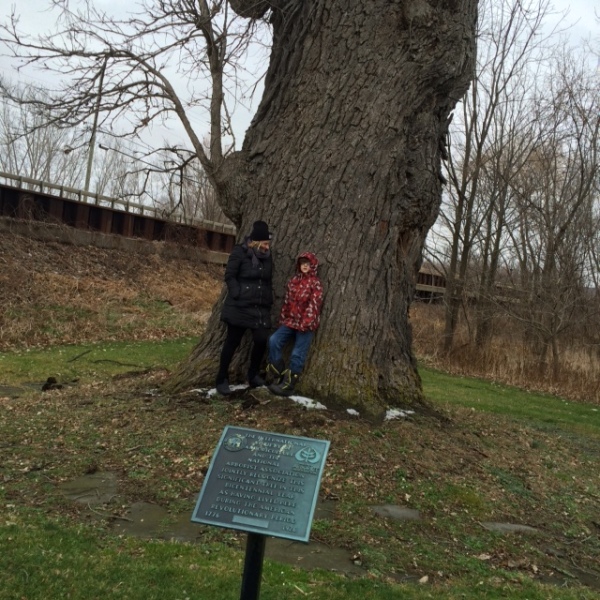
IMG_7306

My wife and son at the Boyd-Parker “torture tree”

The centerpiece of the present day Boyd-Parker Park is the infamous “torture tree.” Soaring over 70 feet high and some 24 feet in circumference, the 250-year-old bur oak tree is a direct living link to the past events of the valley centuries ago. While legend has it the tree is the actual spot where Boyd and Parker met their end through horrendous acts of torture, the name is dubious since no actual documentation exists to prove the exact tree’s location.Two days after the deaths of the Boyd and Parker’s group, Sullivan’s main force arrived to destroy Little Beard’s Town and bury their comrades.

BoydParkerShrine

One of many plaques at the Boyd-Parker park

In the weeks following the events in the Genesee Valley toward the end of September 1779, Sullivan and Clinton’s expedition force began to disband to winter quarters. While a decisive blow had not been dealt to the Iroquois, thousands of Indians were dispersed throughout Western New York and into Canada as winter set in with starvation and disease devastating the already weakened population.

Memory of the Sullivan-Clinton Campaign

Touring the landscapes and monuments of the Sullivan-Clinton Campaign in the Genesee Valley is a remarkable experience. Attempting to place yourself back in a time of a region dotted with large Indian towns, large fields of mature agriculture and scattered white settlers takes a great leap of imagination. The modern plaques and signage along roadsides and memorial parks document the events of 1779 with words like “hostile” and “aggression” applied repeatedly to the Iroquois who peacefully lived their lives for centuries before becoming embroiled in the wars of Europeans and American colonists. On the flip side, the upstart Colonials who set on a single-minded destructive campaign against the locals are portrayed heroically as “undaunted” and sacrificially giving their blood for “American freedom.” Following the trail of history today leads to ongoing battles of a different sort — battles to square the nation’s history myths with the realities of the events of over two centuries ago.

Flames of War: Metropolitan Wargamers Tanksgiving 2015

MWG Tanksgiving 2015

For the third year running, we’ll be hosting a day of armored Flames of War tank battles on Sunday November 22nd, 2015 at noon at Metropolitan Wargamers in Park Slope, Brooklyn. This year we’ll be taking over the entire back room of the club running multiple Late War Europe games using 1900 points of armored forces on a side. US, British, German and Soviet armies will rolling and fighting on tables filled with beautiful terrain, so experienced players can bring their own forces or newcomers are welcome to just come along, push some armor, roll some dice learn the game.

You can check out the photos below from our previous Tanksgiving events from 2014 and 2013, and more photos and after action reports can be found at the links in the captions.

IMG_4725

Soviet and Hungarian armor collide in one of the five games from Tanksgiving 2014

IMG_2460

US and German forces clash during Tanksgiving 2013

This year’s Tanksgiving 2015 will be held at Metropolitan Wargamers at 522 5th Street in Park Slope, Brooklyn (enter through basement level). Visitors pay just $15 and regular club members are free. The event will be a great opportunity for new people to meet some of us at the club and experience the New York City’s premier wargaming community. If you’d like to come, RSVP via our club’s Yahoo group.

New Game Weekend: The Battle Of Bushy Run

BushyRunMap

The end of the French and Indian War in 1763 was less than satisfactory for many of the participants, especially the Native American tribes which had been entwined in decades of alliances with British and French forces. After losing their attachment to their longtime French allies in the Great Lakes Region, many Indian tribes were angered by the post-war British policies which aggressive opened white settlement to the Ohio Territory (present day Western Pennsylvania and Ohio), Illinois Country (portions of present day Illinois, Indiana and Michigan) and wider Great Lakes Region (including present day Western New York). British promises to continue the flow of gifts to the tribes in the region were also cut back, further angering the Native peoples who had become dependent on European trade goods over the years.

Feeling duped by British colonial rule, a confederation of more than a dozen tribes rose up in a unified force led by Ottawa leader Pontiac (among other tribal leaders in the region). In the spring of 1763, groups of white settlers and multiple British forts and in the disputed territories were attacked. After the destruction of several smaller forts and an unsuccessful siege at Fort Detroit, another at Fort Pitt also occurred. With a British relief column en route from the east, many of the Indians at Fort Pitt broke off to the meet the British. What resulted was the Battle of Bushy Run on August 5-6, 1763.

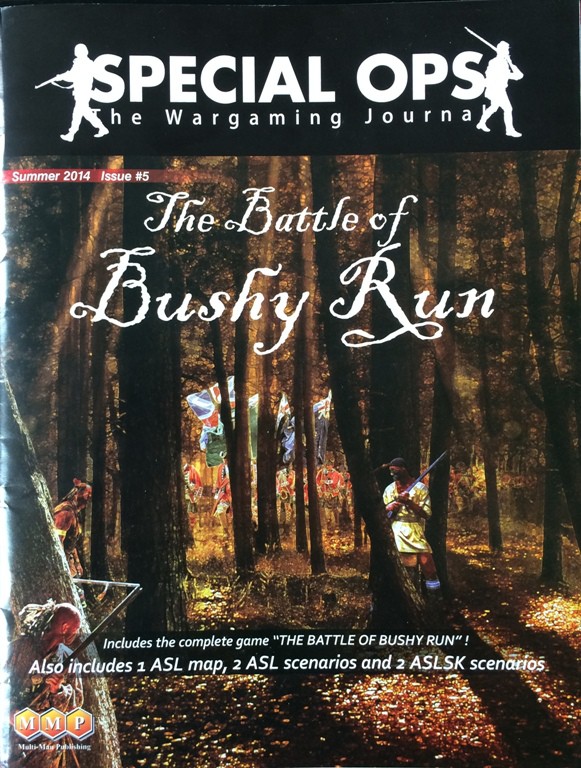
IMG_6397MMP’s Special Ops Issue #5 from September 2014

Multi-Man Publishing is best known for it’s 20th-century wargames (including the classic Advanced Squad Leader), but the September 2014 issue of their Special Ops magazine contains a nifty little game for the Battle of Bushy Run. Packed into just four pages of rules, 88 cardboard counters and two beautiful maps, MMP’s presentation of the two-day battle in the thick woods of Western Pennsylvania is an incredibly satisfying game.

IMG_6392Indian and British force counters for MMP’s Battle of Bushy Run

IMG_6395Fire and random turn event markers for MMP’s Battle of Bushy Run

I had a chance to punch and play a new copy of the game this past weekend at Metropolitan Wargamers in Brooklyn, NY. Giving the game it’s first spin with me was a fellow club member who is an instructor at a local college and an expert in 18th-century North American colonial warfare. The playing counters have tidy artwork and are divided into force chips and a variety of other game markers. The British force markers depict the various historic units at the battle with values for strength and movement and step losses. A supply wagon piece provides the path of victory for the British looking to move it off the board and onward to relieve Fort Pitt. Special British scout markers also play as a way to counteract the nature of how the Indian force markers work in the game.

IMG_6386Indian hidden movement map

The Indian force markers display the various tribes present at Bushy Run, and each have an identical strength and movement value. Each also has just one step loss, but the way they work in the game does not reward the Indian player for simply standing to fight against the British. Along with the larger game map where the British column begins fully deployed, the Indians deploy on a smaller hidden map. Throughout the game, the Indian player may move their units from one map to the other as they attack, hide or come back concealed. Additionally, some Indian pieces are dummy markers which can add an additional layer of confusion for the British player struggling to see where their enemy are. These simple markers and the double maps helps to create a fantastic simulation of the challenge of the regular British troops in fighting Indians fading in and out of the woods with harassing attacks. Since movement is by the area, each with it’s own defensive equal for both sides, choosing where and when to fight is important for the British and Indians alike.

IMG_6389MMP’s The Battle of Bushy Run in progress

Further adding to the unpredictability of the frontier fight is a series of random turn events which can potentially benefit each side in a turn. With the British objective of getting their wagon off the board, the European force must balance choices on when to move, when to engage the surrounding Indian forces and when to stand still to take a round of volley fire. The Indians must capture the wagon using a force which lacks the military superiority of the British, but make up for it in their ability to appear, disappear, move and reappear throughout the battle. Indian casualties can mount quickly under British fire, and the Redcoats can also win by eliminating 14 Indian units.

Our first game resulted in a narrow victory for the British, just wheeling their wagon off the board as the final mass of surviving Indians closed in on all sides. We found the British scouts to be pretty ineffective, but they didn’t hinder the game either. My Indian casualties were high, owing to my more aggressive early game engagement with the British as I worked out how effective the concealed and hidden movement could be. The British also learned some lessons by probably sitting still a turn or two too long, standing and awaiting to fire on the encroaching Indians rather than hustling their column forward from the get-go. For a tiny game depicting a small battle in a largely forgotten period of conflict in Colonial American history, MMP’s The Battle of Bushy Run is a tactical and historical thrill.

Boardgames of the American Revolution, Part I

DOI

Last month, Quartz published a crowd-sourced online survey of how the rest of the world learns about the American Revolution in school. For most outside the US, the war is variably seen as a sideshow to other 18th-century European conflicts, an extension of the Enlightenment or ignored altogether. Children in the United States itself often leave school and march into adult citizenship with only the broadest mythic stories and American patriotic heroes of the war under their belts.

My interest in the American War of Independence has fluctuated over time since growing up as a kid amid the United States Bicentennial fervor of the mid-1970s. Having been in Brooklyn for almost two decades now, I’ve developed a growing interest in the war as I live and commute daily through the ground fought over during the Battle of Brooklyn and Battle of New York in 1776. Over the past year or two I’ve also been working through a minor obsession with boardgames of the American War of Independence. I’ve played many and collected a few ranging from classics of the early 1970s to modern games varied in scope and mechanics.

Presented here is by no means a complete list of games themed on America’s defining early conflict, but an overview of the ones I’ve played or chosen to add to my inventory of wargames. Style, scope and time commitments vary with these games, offering interested gamers – both new and experienced – an opportunity to play and learn about the American Revolution anew with each tabletop session.

AMRevSPI

The American Revolution 1775-1783 (SPI)

Simulation Publications Inc (SPI) rolled out The American Revolution 1775-1783 in 1972 a few years ahead of the Bicentennial celebration, and launched some revolutionary new aspects to wargaming along with it. Breaking from the tradition of a hex-based wargame map of the time, SPI’s game is laid out in a graphic abstract series of areas and regions with their own victory point values. Rules for the game are slim, and reference charts for turn sequence, movement, winter attrition, combat and reinforcements by turn season and year are all printed right on the map. The overall design, from the slick Helvetica font on the plain white box edition to the map itself has a great retro feel that sets it apart from other games of the early 70s. I’ve played In short, the game feels very ‘modern’ despite being more than forty years old.

AmRevSPIgameSPI’s The American Revolution 1775-1783

Cardboard chits with simple iconic graphics display force strength for the two main sides of the war, and movement is standardized in terrain marked simply as either as wilderness or open. Colonial forces move more effectively in wilderness areas than the British, making it easier for them to evade confrontation with the superior English troops. Staying away from the British until enough Colonial forces can be raised is key to any success for the Revolution.

The arrival of additional British troops into ports is scheduled specifically according to the year and season of the game outlined at the edge of the board, and Colonial forces are raised and deployed through a random die roll levy. The mechanics whereby Colonial Militia and Tory forces deploy I find to be pretty accurately reflective of the regional politics of the era. Tories appear only once when British Regulars enter a region, and Colonial Militia take up arms against the British when they first enter a region they do not control and each time the British lose control. French forces arrive after a ‘major success’ (five or more losses by the British) in combat by the Colonials. All these well-thought deployment mechanisms stand out as big historical differentiators for me with this game.

Combat is resolved through a die roll check on a simple table in a corner of the board which can result in very bloody losses to both sides as they meet in battle. First losses in battle always go to Tories of Militia forces which historically often left battlefields when the going got tough. Sieges are pretty simple with forces defending in forts getting triple their combat strength and attackers outside the fort doubling their value when counter-attacked by the fortified foes. Victory for the British comes by controlling a value of 51 victory points on the board, and the Colonials can win with three ‘major success’ battles. In all its abstract area movement and control, SPI’s game offers a slick game that captures just enough of the nuanced history of the period to more than satisfy.

 IMG_6366

1776 (Avalon Hill)

The other big game to come out before the Bicentennial was Avalon Hill’s 1776 from 1974. With rules running almost three times as long as those in SPI’s game, 1776 is often viewed as the more detailed play experience of the two. Some 400 counters represent infantry, artillery and dragoons for the Continental Army, British Regulars, Colonial and Tory Militia, French Regulars, Indians, and British and French naval units. The large mounted hex maps are filled with detailed terrain with each feature effecting movement and combat in different ways. Other tables for combat and turn sequence are contained on a series of additional reference charts, and tactical cards and scenario sheets round out the components in the hefty box.

IMG_6370Avalon Hill’s 1776

I’ve only recently picked up a copy of 1776 and I’m not certain when I’m going to be able to find an opponent to give this one a proper play. A read through the lengthy rules outline the game from a quick beginner’s experience to specific historic scenarios within the war to a full campaign mode covering the entire war. Advanced rules go deep in simulating the role of supply, forts, entrenchments, naval movement and combat, river movement by bateaux, wintering effects, French entrance to the war and the arrival of additional troops throughout the chosen game. Combat is achieved by a ratio of force size and a die roll modified by factors of supply, defense from forts and trenches and presence of artillery. Control of specific locations within a region is the key factor to the game, creating an interestingly complex dynamic for the raising additional forces as well as a path of victory. Aside from the game itself, the splendid designer notes offer a great general meditation on the trade-offs inherent to historic war simulation balanced with playability. For the gamer really wanting to roll their sleeves up with the intricacies of the American Revolution, 1776 is probably the game.

IMG_6365

Liberty: The American Revolution 1775-83 (Columbia Games)

Liberty: The American Revolution 1775-1783, published by Columbia Games in 2003, bridges the gap from traditional wargames to the present with relatively swift play, wooden blocks to represent British, Colonial, French and Native American forces, and simple cards driving force activation and supply during each game turn. The long game map consists of large hexes with forest, swamp and river terrain features which affect movement as well as geographic supply towns and key victory point locations. British and French West Indies ports allow for additional options in naval movement and combat. The game strikes a balance between simple rules and rich re-playability, and my time with the game has seen victories for either side depending on the session.

IMG_6372

Liberty: The American Revolution 1775-83 by Columbia Games

In each year of the game, a hand of five dealt cards activate forces and re-supply existing forces which have taken step losses in previous turns. Actions may either move forces already on the map or bring new units onto the board by selecting from a random pool of blocks. A limited number of Native American blocks are allied with the British player only, and French forces may arrive randomly after the first turn beginning in 1776. Colonial forces arrive in controlled supply areas, British and French forces arrive by sea to available ports and Tory Militia rise from British-controlled supply areas. When opposing forces move into contact, combat is resolved by simple die rolls depending on the quality and strength of the blocks available. Blocks are reduced in strength and then eliminated as ‘prisoners’ which may be exchanged at the end of the turn and returned to each player’s pool of available forces. At the end of combat, forces may have the option to withdraw or stay in the fight. Weather plays a random role in the game, potentially limiting combat during a turn year, and troops may be also eliminated in a wintering phase at the end of turn. Victory is tallied at the end of each hand of cards and year with the British winning with 30 supply points and the Colonials by driving the British to under 12 supply points.

1775box

1775: Rebellion (Academy Games)

I’ve written previously in detail about 2013’s 1775: Rebellion from the Birth of America series from Academy Games, one of my favorite quick-playing boardgames of the American Revolution. The game plays different from most in the period with two to four players able to command the American Continental Army, Patriot Militia, British Army and Loyalist forces in a game driven by card activation and randomized turn order.

IMG_2757

1775: Rebellion from Academy Games

The four main forces plus French, Hessian and Native American allies are all represented by simple colored cubes moving and warring over a gorgeous game board representing the the colonies, territories and Canadian provinces of the northeastern American continent of the late 18th-century. Cards drive the action with movement, period-specific events and personalities, and special color-coded dice resolve combat as forces are either destroyed or flee to return in later turns. Areas flip to British or American control as combat is resolved. When two special Treaty of Paris cards are played, the game ends with victory rewarded to the player holding the most control of the board. If I’m going to play the American Revolution with a relatively inexperienced player or non-gamer, this is my go-to game for the period.

Worthington1776KS

New York 1776 and Trenton 1776 (Worthington Publishing)

In 2014, Worthington Publishing launched their ambitious Campaigns of the American Revolution series with New York 1776 followed by Trenton 1776 in 2015. These strategic block games, funded through popular Kickstarter campaigns I backed, take players through specific stages of the war beginning with the action on Long Island and in and around New York City in the summer and fall of 1776 and continuing the conflict into New Jersey in the winter of 1776 and 1777.

While the games do not directly connect to each other in a grand campaign, each two-hour game is well-scaled to the strategy inherent to each series of battles in the early years of the war. Randomized turn order, variable numbers of turn actions and the block components provide a fog of war mechanic to the game as forces move by themselves or as groups under the command of the many leaders present on each side. Movement is broadly point-to-point on game boards simply illustrated with towns, ports, forts or other key geographic points of control. Combat goes off as forces meet on the map with infantry, artillery, leaders and fortified positions playing into results that can include withdrawals, retreats, fleeing Militia and follow up attacks. Command plays several roles in these games, including being able to move groups of forces and other scenario-specific special rules in battle, deployment and victory conditions.

NY1776gameplayWorthington Publishing’s New York 1776

New York 1776 presents the largest meeting of troops during the American Revolution with the professional British army and navy, along with their hired Hessian allies, looking to halt the uprising of the new American Colonial army and Militia in the early months of the war. Controlling the waterways and supply routes around New York with the British navy plays a big part in the British player’s path to either capturing Washington or controlling New York by game’s end. For the Colonial player, the game is largely one of avoiding the mass of better rated British troops, preventing their control of New York or reducing the superior British army by 20 points.

IMG_6368Worthington Publishing’s Trenton 1776

In Trenton 1776, the action moves to smaller scale engagements in New Jersey as the British looked to smash the Colonial army and Militia retreating from their defeat in New York. With Washington in command, he risks bold counterattacks to push the British back out of southern New Jersey or simply moving to safety south of the Delaware. Howe’s pursuing British army must mass its forces against the rebel army at key towns and river crossings and hopefully push to seize Philadelphia as the icy winter settles in. With similar rules but at a smaller scale than New York 1776, multiple plays of Trenton 1776 can really show players how cautious or aggressive decisions can make or break a campaign.

GMTLibertyDeath

Liberty Or Death: The American Insurrection (GMT Games)

I’m really looking forward to the release of Liberty Or Death: The American Resurrection, due out late this year. The sixth game in the counterinsurgency (COIN) series from GMT Games, I’ve had this one on pre-order based on my love for the other COIN games. Playing from solo to four players, Liberty Or Death will present the war as one of insurgent and counterinsurgency forces of American Colonials, British, French and Native Americans warring for control of the North American continent. As in the other COIN games, shifting alliances, varied turn order, separate victory conditions, irregular forces and historically-themed event cards will each play into a game which will greatly expand beyond the typical presentation of the war as one between just two opposing nations. Early reports from game tests and some sneak looks at artwork make this my personally most anticipated game of the year, and I’ll surely be back with a full report in the coming months.

So where to start with the American Revolution?

The 1970s era SPI and Avalon Hill games will appeal the most to experienced strategy players looking to really dig into hours of the broad complexity of some or all the war within a very traditional wargame. On the flipside, the Worthington Publishing games provide short but replayable intros to gaming the period for younger players or those just getting into block games. The Columbia Games take on the war splits the difference by offering up relatively simple mechanics of a card-activated block game representing the entire war over a couple hours of play. The Academy Games game expands play to four players and allied forces in an abstracted area control strategy game that likewise covers the entire war in mix of card and dice action. The forthcoming game from GMT Games will reinvent the conflict anew within the context of four separate interests vying for victory.

Players wishing to play through advanced strategic simulation of 18th-century warfare will be rewarded by time invested in the Avalon Hill and SPI games. The Columbia Games and Worthington Publishing games will also provide a satisfying  combat simulation albeit at a much simplified level. To experience more abstracted combat as well as the interplay of politics, alliances and events within the period of the war, the Academy Games and GMT Games games provide both relatively fast play as well as more of a learning experience about broader aspects of the American Revolution.

Each game above paints the American Revolution large or small, and together they are a fine reflection of the evolving mechanics of wargaming over the past forty years. There are numerous additional games of the American Revolution, some focusing on specific regional campaigns and many others presenting the full war. Games still on my shortlist to try include 2010’s Washington’s War from GMT Games and its 1994 predecessor We The People by Avalon Hill which helped launch the modern trend in card-driven wargaming.

There’s a point of entry for gamers of every type to get in on the War of Independence and relive what Thomas Paine famously called, “the times that try men’s souls.”

I Ain’t Been Shot Mum: Pegasus Bridge and Bénouville June 6, 1944 Scenarios

Horsas

There are thousands of little actions in the history of warfare, and a longtime favorite of myself and other wargamers is the capture of Pegasus Bridge on June 6, 1944. Just minutes past midnight, Operation Deadstick delivered some 180 British soldiers from the 6th Airborne Division onto French soil near two key bridges on the far eastern flank of the Allied invasion during the D-Day invasion throughout that historic day.

DDayOverallMapThe D-Day Allied assault routes with the British 6th Airborne Division drop zone (circled in red)

Landing in the dark in six wooden Horsa gliders with only one casualty and minimal other initial incident, the British soldiers and engineers made quick work of the surprisingly meager defense by about 50 men from the German 716th Infantry Division. With the bridge over the Caen Canal secured and another at the nearby River Orne also captured, the initial mission had been accomplished in quick order.

The mission then shifted to a defensive one for the British at the bridges and nearby Bénouville as the German command ordered a counter attack. Another 200 paratroopers from the British 7th Parachute Battalion landed to join in the occupation but were met by German tanks, mortars and guns. Under German sniper fire at the bridge and with few heavy weapons at their disposal, the British held out in the town amid house-to-house fighting in Bénouville until the close of the first day of the invasion.

Too Fat Lardies, makers of the I Ain’t Been Shot Mum company-level WWII rules, provided scenarios for the actions at Pegasus Bridge and Bénouville in the 2006 Summer Special. Playing the scenarios recently at Metropolitan Wargamers in Brooklyn, NY allowed me to use my recently-completed 15mm bridge model from Najewitz Modellbau and refight one of my favorite little moments in the big history of the war.

The Battle for Pegasus Bridge

Like most IABSM games, the fight at the bridge started with hidden German troops and the British entering the board on blinds. Initial blind placements were randomized through a die roll to reflect the off-board glider landings. Owing to the time just past midnight, spotting of any troops was impossible until units closed with just inches of each other.

IMG_6299Initial set up of the scene at Pegasus Bridge

IMG_6300British charge hard into the German positions

IMG_6301A British fire team splits off to attack the German bunker

Dividing my British force, one platoon rushed into an initial German position, took a few hits in a close assault, fell back but charged back to overwhelm the Germans. The remainder of my force (including my engineers) moved slowly, clipped a path through barbed wire and made its way toward the concrete bunker. A brief firefight at the bunker sent the German defenders fleeing toward the canal, the engineers placed their explosives and the rest of the British made way for the bridge.

IMG_6302German troops flee their bunker as the British cut the wire and push onward

IMG_6303British engineers set charges at the bunker as German machine guns open fire across the canal

As the German bunker went up in and explosion of flame, German machine guns revealed themselves on the opposite side of the bridge. Two sniper sentries also appeared and began harassing the advancing British with fire. To clear the way, a British officer took a heroic run at one sniper, capturing the German where he sat.

IMG_6305The bunker burns, the British head over the bridge but take shots from German snipers

IMG_6304A thin line of Germans look to hold off the advancing British

IMG_6306With the Germans in retreat, the British take Pegasus Bridge

With the bunker aflame, the British marching over the Bridge and the thin German defense starting to run, the British had again made quick work of their mission. The bridge was held, but it was on to Bénouville and the inevitable German counterattack.

The Battle for Bénouville

At Bénouville British blinds moved on to the table for six turns, stalling briefly in turns four and five. Taking up occupying positions in the town, the mission was to simply hold against the coming German counterattack. As German blinds began entering the field in the woods and open areas outside the town, the initial British infantry were supported by slow-arriving reinforcements to the rear.

IMG_6307Initial set up of the scene at Bénouville from the British end of the table

IMG_6308British blinds enter and occupy the town

Attacking from a safe position within two buildings, the British over zealously abandoned their defensive mission and attacked to reveal the closing German blinds. In a close assault, the British were thrown back as reinforcing German heavy machine guns and mobile guns moved in. Taking fire from the German guns at close range, the remaining British defenders in the nearest house answered with a side-armored shot from a PIAT which left one German gun burning but the Germans still on the advance.

IMG_6309German troops advance on the town supported by mobile guns

IMG_6310Germans swarm out of the woods toward the British defenders

IMG_6311A British PIAT takes out a German gun

The licky destruction of one German gun was about the last thing to go right for the British. Additional reinforcements were tardy in their arrival as Germans continued to pour into the town. As the Germans set up positions amid the town’s houses, two towed field guns also rumbled into the town. Additional close combat erupted between the buildings with the British continuing to take heavy casualties and losing more ground.

IMG_6312German artillery is towed into the town

As British reserves continued to fail in their arrival, the Germans pressed on. After initially holding four safe positions in the buildings of Bénouville, British positions continued to evaporate and men fell back under continued German combined arms fire and close assaults. By that time of the game, it was clear the British were not going to hold the town and the German counterattack was clearly on its way to victory.

Our final score in the played action at Pegasus Bridge and Bénouville was 1-and-1. The early success at the bridge had not been capitalized upon by the British at Bénouville, upsetting the historic balance from 1944 but still making for a great afternoon of gaming a favorite scenario for the first time.

Flames of War: Najewitz Modellbau 15mm Pegasus Bridge

PegasusBridgeWWII

Most of my 15mm wargaming terrain building I do is generic enough to be used throughout Western Europe during World War II. Even with a large collection of buildings at my disposal, there are a few iconic WWII landmarks that have long stood out in my imagination as projects I should tackle at some point. One of those is Pegasus Bridge at Bénouville, France.

The bridge was made famous by a brief but important battle in the early morning hours of D-Day on June 6, 1944. Glider units from the British 6th Airborne Division landed near two bridges just past midnight and quickly secured the Caen Canal crossings with minimal casualties. The quick nighttime action ensured movement and counterattack by German forces would be significantly limited in the coming days and weeks after the Allied landings in Normandy.

NMlogo

Building Pegasus Bridge would turn out to be a number of firsts for me. The model I picked up from Najewitz Modellbau in Germany is laser-cut, a model material I had not worked with before. The nature of the model and its situation crossing the Caen Canal would also necessitate I create surrounding terrain. In all, the project allowed me to try out a bunch of new things on a signature set piece which wound up being much more of a project than I originally envisioned.

Building the Bridge

The Pegasus Bridge model shipped in plastic bag folded into a flat, short cardboard box which had definitely shown some wear and tear during its journey from Germany to Brooklyn. Some pieces of the model had come loose from the MDF sheets during transit, but everything was there and unbroken. The rest of the model was easily punched or carefully cut out using a fresh blade in a hobby knife. With all the parts cut out, I sorted them on a tray to get a handle on the task of things before me. The model does not ship with assembly instructions, but they are available for download once registered to the Najewitz Modellbau website. The instructions are pretty spare, relying on simple wordless graphics and some imagination to put all the pieces together. I found referring to historic and contemporary images of the bridge online was just as helpful as the actual manufacturer instructions. Since there were no images online of the bridge being constructed, I decided to offer up a visual step-by-step for others looking to add this model to their terrain collection.

IMG_5918

IMG_5919

I started by laying out the parts into subsections, including the little control house which sits adjacent to the bridge and the two large sections which are found at the top of the bridge. I dry fit all the pieces to test them at first and then used carpenters wood glue to put the pieces together. Getting the stairs to the control house together was a little finicky. The curved roof on the small structure at the top of the bridge was achieved by scoring the flat roof and carefully bending it to the shape of the arched roof line.

IMG_5920

IMG_5923

IMG_5921

IMG_5922

IMG_5924

IMG_5925

IMG_5926

Next, I tackled all the trusses and supporting elements of the main bridge structure. This is where the fine lasercut detail really started to pop as I glued pieces together to resemble the plates and seams of the metal work on the bridge. After each section dried, I glued them to the main deck. The fine railings which run all around the bridge again were a challenge to figure out which went where, but some careful test fitting before gluing everything in the correct place.

IMG_5927

IMG_5928

IMG_5929

IMG_5930

IMG_5931

To finish the bridge, I glued the small gatehouse to an extra piece of square basing, attached it to the main bridge and cut some of the railings to fit around the building. The separate piece of the road approach on the other end was glued to the main bridge using a thin piece of cardboard glued to the underside to create a flexible hinge-like connection. The model doesn’t come with crossing guards, so I used extra pieces of the kit’s wood to cut some simple shapes. The cross guards were simply painted white with red stripes. The entire structure got a grey sprayed base coat and was then dry brushed in an off white paint to produce a worn look to the entire bridge.

IMG_5816

IMG_5933

Building the Terrain

As I was constructing the bridge I quickly realized it was going to need to be elevated off the table to accommodate the graded approach and a span over the canal. I went to the trusty standby of foam sheets in order to create sections of terrain on either side of the canal to create roads to the bridge and banks of the canal.

Using a ruler and marker, I outlined the areas to be cut away and sculpted. After making the rough cuts, I smoothed the edges out using wood filler and then sanding everything to a relative smooth shape. The foundation under each side of the bridge would also feature stone sections which I gently carved by using a pencil to create rows of masonry. Everything got an undercoat of brown spray paint followed by a coat of watered-down white glue and mixed flocking. The stone foundations received several coats of gray and off white dry brushed paint to create a realistic. The roads were likewise dry brushed in various shades of browns. Small chunks of foliage were glued here and there around the stone sections to add a little detail.

IMG_5940

IMG_5851

IMG_5941

IMG_5934

IMG_5935

IMG_5936

IMG_5937

IMG_5938

Pegasus Bridge

With all the painting and construction done, everything got a dull coat spray to seal the model and terrain. I decided to keep the bridge and two terrain section separate and unglued from each other to ease transport and storage. Laid out on the table, the bridge spans the canal with approaches on either side. The only thing left to do is get the model on the table, and the heroic early morning raid on Pegasus Bridge will be ready to be replayed on the tabletop soon.

IMG_5969

IMG_5971

IMG_5970

IMG_5972

IMG_5973

I Ain’t Been Shot Mum: South East of Butera July 11, 1943 Scenario

SicilyJuly1943Operation Husky, the Allied invasion of the island of Sicily, commenced on July 9th 1943 with combined naval, air, airborne and amphibious forces from the United States, England and UK colonial nations attacking a largely Italian force backed by their German allies. Over the next five weeks, the Allies took the arid and rocky island of Sicily and opened up the Mediterranean for the eventual invasion of mainland Italy.

HuskyMapOperation Husky, July-August 1943 (area around Butera in green)

The Sicilian Weekend campaign guide for I Ain’t Been Shot Mum offers 24 scenarios from the opening days of Operation Husky on July 10th and 11th 1943. Like the other scenario books from IABSM publisher Too Fat Lardies, the Sicilian book presents solid historical background and maps, along with force lists and detailed briefings for each side easily adaptable to a number of lines of 15mm WWII miniatures. The scenarios may be played individually or as part of a linked campaign, and so we recently started playing through a few of the Sicily scenarios at Metropolitan Wargamers in Brooklyn, NY.

Sicilianweekendcover‘Sicilian Weekend’ by Too Fat Lardies for their I Ain’t Been Shot Mum WWII rules

We began with the eighth scenario in the book, southeast of Butera on the morning of July 11th 1943. Members of US 3rd Infantry Division are presented with a simple mission of aggressively pushing through the field to link up with their fellow Americans at Gela. The Italian force from the 33rd Infantry Regiment of the Livorno Division, must hold the invading Americans back.The scenario presents the Italian and American forces each entering the table in column on blinds. The counter attacking Italians rolled in mounted in trucks at one road at the table edge, and the Americans arrived on foot at one end of the table.

IMG_5605Initial forces arrive on the field in the early turns

IMG_5606Italians rush to the battle and deploy from a column of trucks

My first to arrive American machine gunners and bazookas quickly took up position on a rocky hill overlooking the road and a crossroads in the distance. Italian trucks moved in with their heavy weapons likewise leading the away with machine guns and 81mm mortars deploying at the road edge. Initial long range fire from the US machine guns pushed some of the Italian line back over the road. The Italians offered several rounds combined of direct mortar and machine gun fire in return, spraying bullets and landing rounds amid the bunched-up US machine guns. The Americans scooted back over the crest of the hill and the bazookas ran off to meet the other Americans arriving by the road to their right.

IMG_5608American machine guns take Italian mortar fire and fall back

IMG_5607US machine gunners rally back to their positions and pour fire into the Italian lines

 As the heavily-damaged US machine guns rallied, the Italian column continued to advance on the board in force. Four Italian rifle platoons spread out from the road to run at the advancing American column ahead and to cover the crossroads overlooked by two rocky hills. As the Americans moved straight on to meet the Italian front line, a recon platoon accompanied by four bazookas made way for the hills and the Italian flank.

IMG_5609Italian rifle platoons sprint ahead through the open field

IMG_5611A US recon platoon moves to take position atop a hill as Italians deploy at the crossroads

IMG_5612A firefight erupts between two hills as American bazookas hump their way around the Italian flank

IMG_5613The Italian line folds back toward the road under US fire in the field

With an Italian front deployed across the field in several lines and more rifles rushing into the hills at their left, the battle settled into two main firefights. American rifles at the center gradually pushed through the field toward the overwhelming number of Italians. Between the two hills on the Italian left, Italian and American rifles echoed back and forth. As gunfire was exchanged across the lines, US bazookas attempted to run to engage the Italian trucks which had made their way to safety beyond the battle at the rear. Despite moderately mounting Italian casualties, the Americans just could not break through.

The US forces ultimately ceded the field to the Italians. Even with superior command quality, the initial deployment of the US machine guns had been a bit premature and was not met by the quick arrival of supporting rifle platoons. Rushing them to the hills at the crossroads might have made a difference. The Italians had also managed to get the vast majority of their troops on the board early in the game, and their neatly arranged front line allowed them to angle directly over a defense of the road. In our refighting of the early hours of July 11th, 1943 the massed Italian counterattack had stalled the US invaders southeast of Butera. What awaited at Gela later in the day would unfold in our next battle.

Flames of War: Tanksgiving 2014 After Action Report

Tanks2014AAR

This past weekend seven of us gathered at Metropolitan Wargamers in Brooklyn, NY for our second annual Flames of War Tanksgiving event. One new player and six experienced FOW gamers (including two father/son pairs) played through five Late War games using 1750-point companies stretching over three tables — two from Western Europe and one from the Eastern Front. Over the course of the afternoon, British, US, German, Soviet and Hungarian forces fought it out with a mixed results but a slight edge toward the Axis for the day.

IMG_4722

Setting up two Western Europe tables for Tanksgiving 2014

IMG_4723

Western European tables ready to go at Metropolitan Wargamers with an Eastern Front table at the back

British Guards Armoured vs German Schwere SS-Panzerkompanie

The first Western Europe table presented a No Retreat Mission with the Guards Armoured defending a small town from a raiding Tiger-led German force attacking from the open farm area across a river. The Guards deployed an eight 25-pound gun Royal Artillery at the back edge of the table and one objective near the bridge spanning the river to the town. With three other platoons of Sherman and Sherman Firefly tanks in reserve, the initial British force would need to hold fast against the German onslaught.

IMG_4724

Guards Armoured tanks deploy at an objective

IMG_4726

Tigers roll toward the bridge and are covered in smoke rounds

The Germans began the game fully deployed and slowly moving their Tigers toward the bridge and an objective just beyond. With famed tank ace Michael Wittman commanding, the key for the spare British force was to stay away from the deadly guns of the German tanks. At the river ford in the center, the Panzer IVs moved to flank the other side of town with Panzer Grenadiers mounted in half tracks at the rear. The best the British could do was fire smoke rounds into the Tigers across the river and follow-up with long-range shots from the single Firefly deployed at the beginning of the game.

IMG_4727

A Firefly destroys a Tiger at the bridge

IMG_4728

Panzer IVs and Shermans face off in the town streets as a Firefly covers the bridge

Over the next two turns, British reserves arrived and made way for the center of the town, using the tight cobblestone streets and buildings as cover. Artillery spotters stationed in the rooftops of buildings called in several turns of artillery fire but failed to have any effect on the Tigers and destroying only one German halftrack at the river. A crack shot from a Firefly at the center of the town destroyed the first Tiger over the bridge. By the end of the fourth turn, the Panzer IVs wheeled to get into the town at the British left but were pushed back by fire from British Shermans.

IMG_4730

Reserve platoons from the Guards Armoured arrive to engage the Panzer IVs

IMG_4731

Tigers position themselves on two flanks of the town

In the fifth turn, the two remaining platoons from the Guards Armoured arrived to the British left and pushed forward toward the Panzer IVs. With two German tanks quickly lit up, the surviving Panzer IV fell back to the treeline where it was destroyed in the next turn. The British held their left for the moment, but in the cover of the raging tank fight, the dismounted Panzer Grenadiers had managed to slip into the town’s buildings unharmed.

IMG_4732

Firefly Shermans and Tigers face off to protect the objective

IMG_4733

Three Tigers charge hard toward the objective beyond the road

As smoke continued to hold the Tigers from firing at the bridge, a second Tiger was destroyed from a volley from the same Firefly that had sent the first Tiger into flames. While action at the bridge stalled, the three other Tigers had been working their way through wrecking the British tanks which had destroyed the Panzer IVs. All the while, the German infantry had continued to work through the town’s building’s untouched and toward the objective back the rear of town. The British command tanks rolled to stall the advance of the Panzer Grenadiers with machine gun fire and cover the objective.

With most of the British armour ablaze throughout the town, three Tigers rolled toward the objective at the bridge. The surviving British tanks had continued to make successful morale checks with the benefit of their special rerolls. The two surviving Firefly Shermans took a combined shot at a Tiger’s rear and missed. The Tiger’s spun around to return fire, destroying a Firefly. With further ineffective artillery rounds and just one Firefly sitting between three Tigers and the objective, the game was called with a victory for the Germans.

Final Result: Victory for the Germans!

Soviet Tankovy Batalon vs. Hungarian Harckocsizó Század

The day also saw a couple Eastern Front games with Hungarian and Soviet forces facing off on tables set up using a random terrain generator. The Eastern Front table showcased log structures from the excellent Miniature Building Authority Russian Village set along with some rural farm buildings from FOW. Each game saw the Soviets as the attacker, the first taking place on a table representing the bleak steppes of Russia in a Fighting Withdrawal Mission. The defending Hungarians began in prepared positions with a howitzer battery and Panzer IVs to their right, infantry at the center and tanks at the left. The Soviets with T-34 obr 1942 tanks at their extreme  left and right,  SU-100 tank killers and a Gvardeyskiy Tyazheliy Tankovy company at the center and a heavy mortar company at the rear.

IMG_4725The Soviet line moves toward the Hungarian positions

IMG_4719

Soviet tanks roll toward the Hungarian positions

IMG_4720

Hungarian armor proves to be no match for the Soviets

The second Eastern Europe match-up occurred around a collective farm complex with a Dust Up Mission. Starting from opposite corners, both the Hungarians and Soviets positioned themselves into a fantastic series of turns in and around the small farm. With both players moving, dodging for cover and firing at close range, the Hungarians and Soviets sparred for victory as tanks burned all around.

IMG_4721

Game two on the Eastern Front with the central Soviet farm complex

As Hungarian reserves arrived late in the game, infantry climbed out of their trucks and assaulted the Soviet T-34s. Soviet reserves likewise entered the game and made way for the Hungarian howitzers and the objective at the opposite corner. With two intense assaults at either end of the field, the Soviets gained a slight edge and were able to score their second victory on the day.

Final Results: Two Victories for the Soviets!

US 7th Division vs. German Panzer Ausbildungs Abteilung

Back on the other Western Front table a spare rural village anchored by a prominent church and surrounding hill and forests, a deadly force of German Panthers, Tiger Is and Königstigers squared off against the US 7th Division. The Americans rolled into the first Pincer Mission with standard Shermans, M4A3E8 Easy Eights and M4A3E2 Jumbo. At the rear, M7 Priests and 81mm mortars mounted in half tracks were positioned to cover the field in smoke while a P-47 Thunderbolt was on call to swoop in against the German force.

IMG_4742

The US 7th Division deploys in cover on the Western Front

Hoping to avoid German fire, the US tanks crowded into position using the church and other structures for cover as they eased across the field. Once engaged, the Jumbos did their job of eating up fire from the German guns and allowed the other US tanks to advance toward the objectives. Even with smoke cover fired from the rear, air support above and a mass of US armor, the cautious pace of the Americans was no match against the German Tigers firing from the woods. By the time the Americans made a push for the objective in the open, the German tanks were squarely deployed to defend the objective and take the game.

IMG_4740

American tanks bide their time waiting for clear shots at the heavy German armor

IMG_4739

Overwhelming German presence holds the objective

The players switched sides in the second No Retreat Mission on the same table. Again, the Americans came on the table on the far side of the town but this time chose to race aggressively toward their objectives. Defending from the wooded areas again, the Germans were able to fire at will on the advancing Americans. Quickly moving to a close series of short-range duels, tanks on both sides shifted to get into important side armor shot positions. With a tight cluster of models crowding the field near the objectives, American artillery smoke and air support quickly became irrelevant and some lively debate erupted around lines of sight and facings. The second game was a much closer match, but in the end, the thick hulls of the German tanks were no match for the American guns.

IMG_4741

Tanks on both sides jockey for effective shots near an objective

With two victories for the Germans, there was a fair amount of discussion as to whether the Panzer Ausbildungs Abteilung list is an example of a “broken” and unbeatable list in FOW. The Americans tried their best with both cautious and forceful tactics using some great available equipment

Final Results: Two victories for the Germans!

At day’s end, the Axis came out with a slight edge of a 3-2 victory over the Allies across two European fronts. The presence of tough late war German Tiger tanks are a hard force to crack, even with quality American and British armor with lots of air and artillery support. On the other hand, the Russian tank horde always proves to be a formidable Allied opponent whether facing Hungarians or Germans. Force quality, tactics and a bit of luck always play a role, and our five Tanksgiving games were all unique examples of how Flames of War tank battles can go on any given day.

Flames of War: Metropolitan Wargamers Tanksgiving 2014

Tanks2014

For the second year in a row, we’ll be hosting a day of armored Flames of War tank battles on Sunday November 30th at noon at Metropolitan Wargamers in Park Slope, Brooklyn. At last year’s Tanksgiving 2013 we hosted about ten players stretched over two tables participating in Early War Africa and a Late War Europe scenarios. This year we’ll be running multiple Late War Europe games using 1500 points of armored forces on a side. We’ll have plenty of US, British, Germand and Russian models on some gorgeous tables, so experienced players can bring their own forces or newcomers are welcome to just come along, move some armor, roll some dice learn the game.

The event will be held at Metropolitan Wargamers at 522 5th Street in Park Slope, Brooklyn (enter through basement level). Visitors pay just $15 and regular club members are free. The event will be a great opportunity for new people to meet some of us at the club and experience the best and oldest wargaming community in New York City. If you’d like to come, RSVP via our club’s Yahoo group.