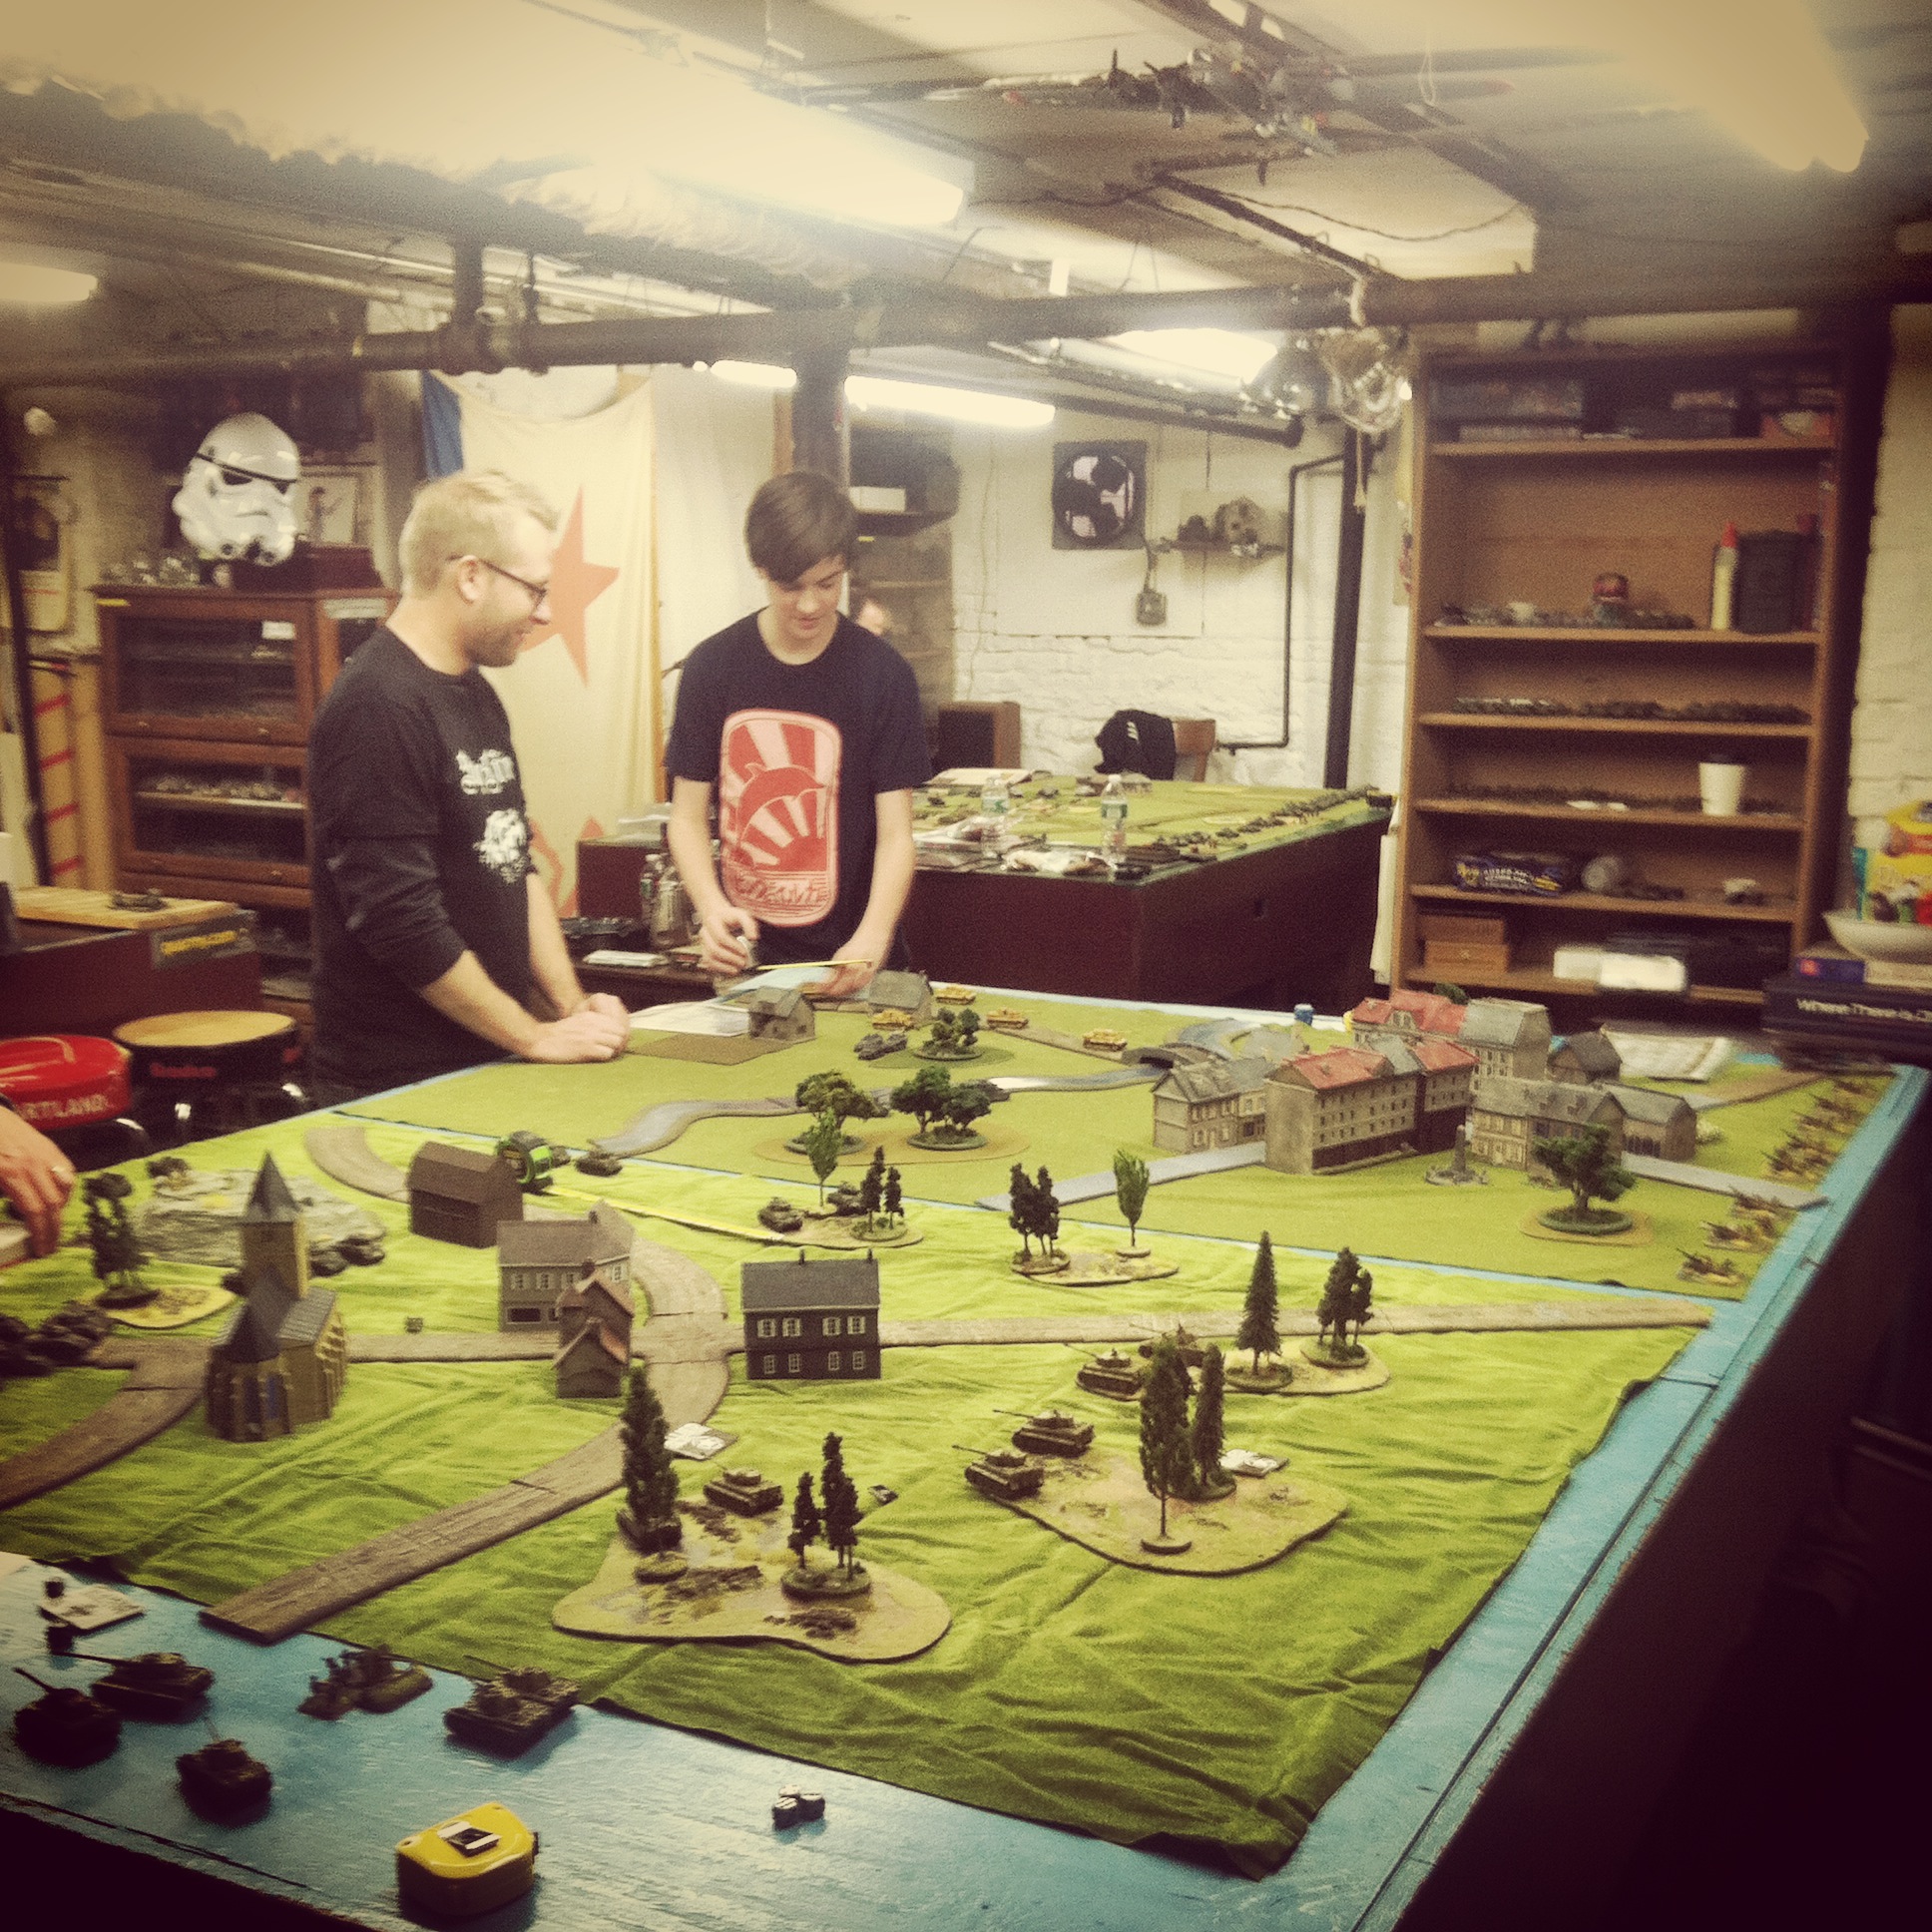
This past weekend seven of us gathered at Metropolitan Wargamers in Brooklyn, NY for our second annual Flames of War Tanksgiving event. One new player and six experienced FOW gamers (including two father/son pairs) played through five Late War games using 1750-point companies stretching over three tables — two from Western Europe and one from the Eastern Front. Over the course of the afternoon, British, US, German, Soviet and Hungarian forces fought it out with a mixed results but a slight edge toward the Axis for the day.

Setting up two Western Europe tables for Tanksgiving 2014

Western European tables ready to go at Metropolitan Wargamers with an Eastern Front table at the back
British Guards Armoured vs German Schwere SS-Panzerkompanie
The first Western Europe table presented a No Retreat Mission with the Guards Armoured defending a small town from a raiding Tiger-led German force attacking from the open farm area across a river. The Guards deployed an eight 25-pound gun Royal Artillery at the back edge of the table and one objective near the bridge spanning the river to the town. With three other platoons of Sherman and Sherman Firefly tanks in reserve, the initial British force would need to hold fast against the German onslaught.

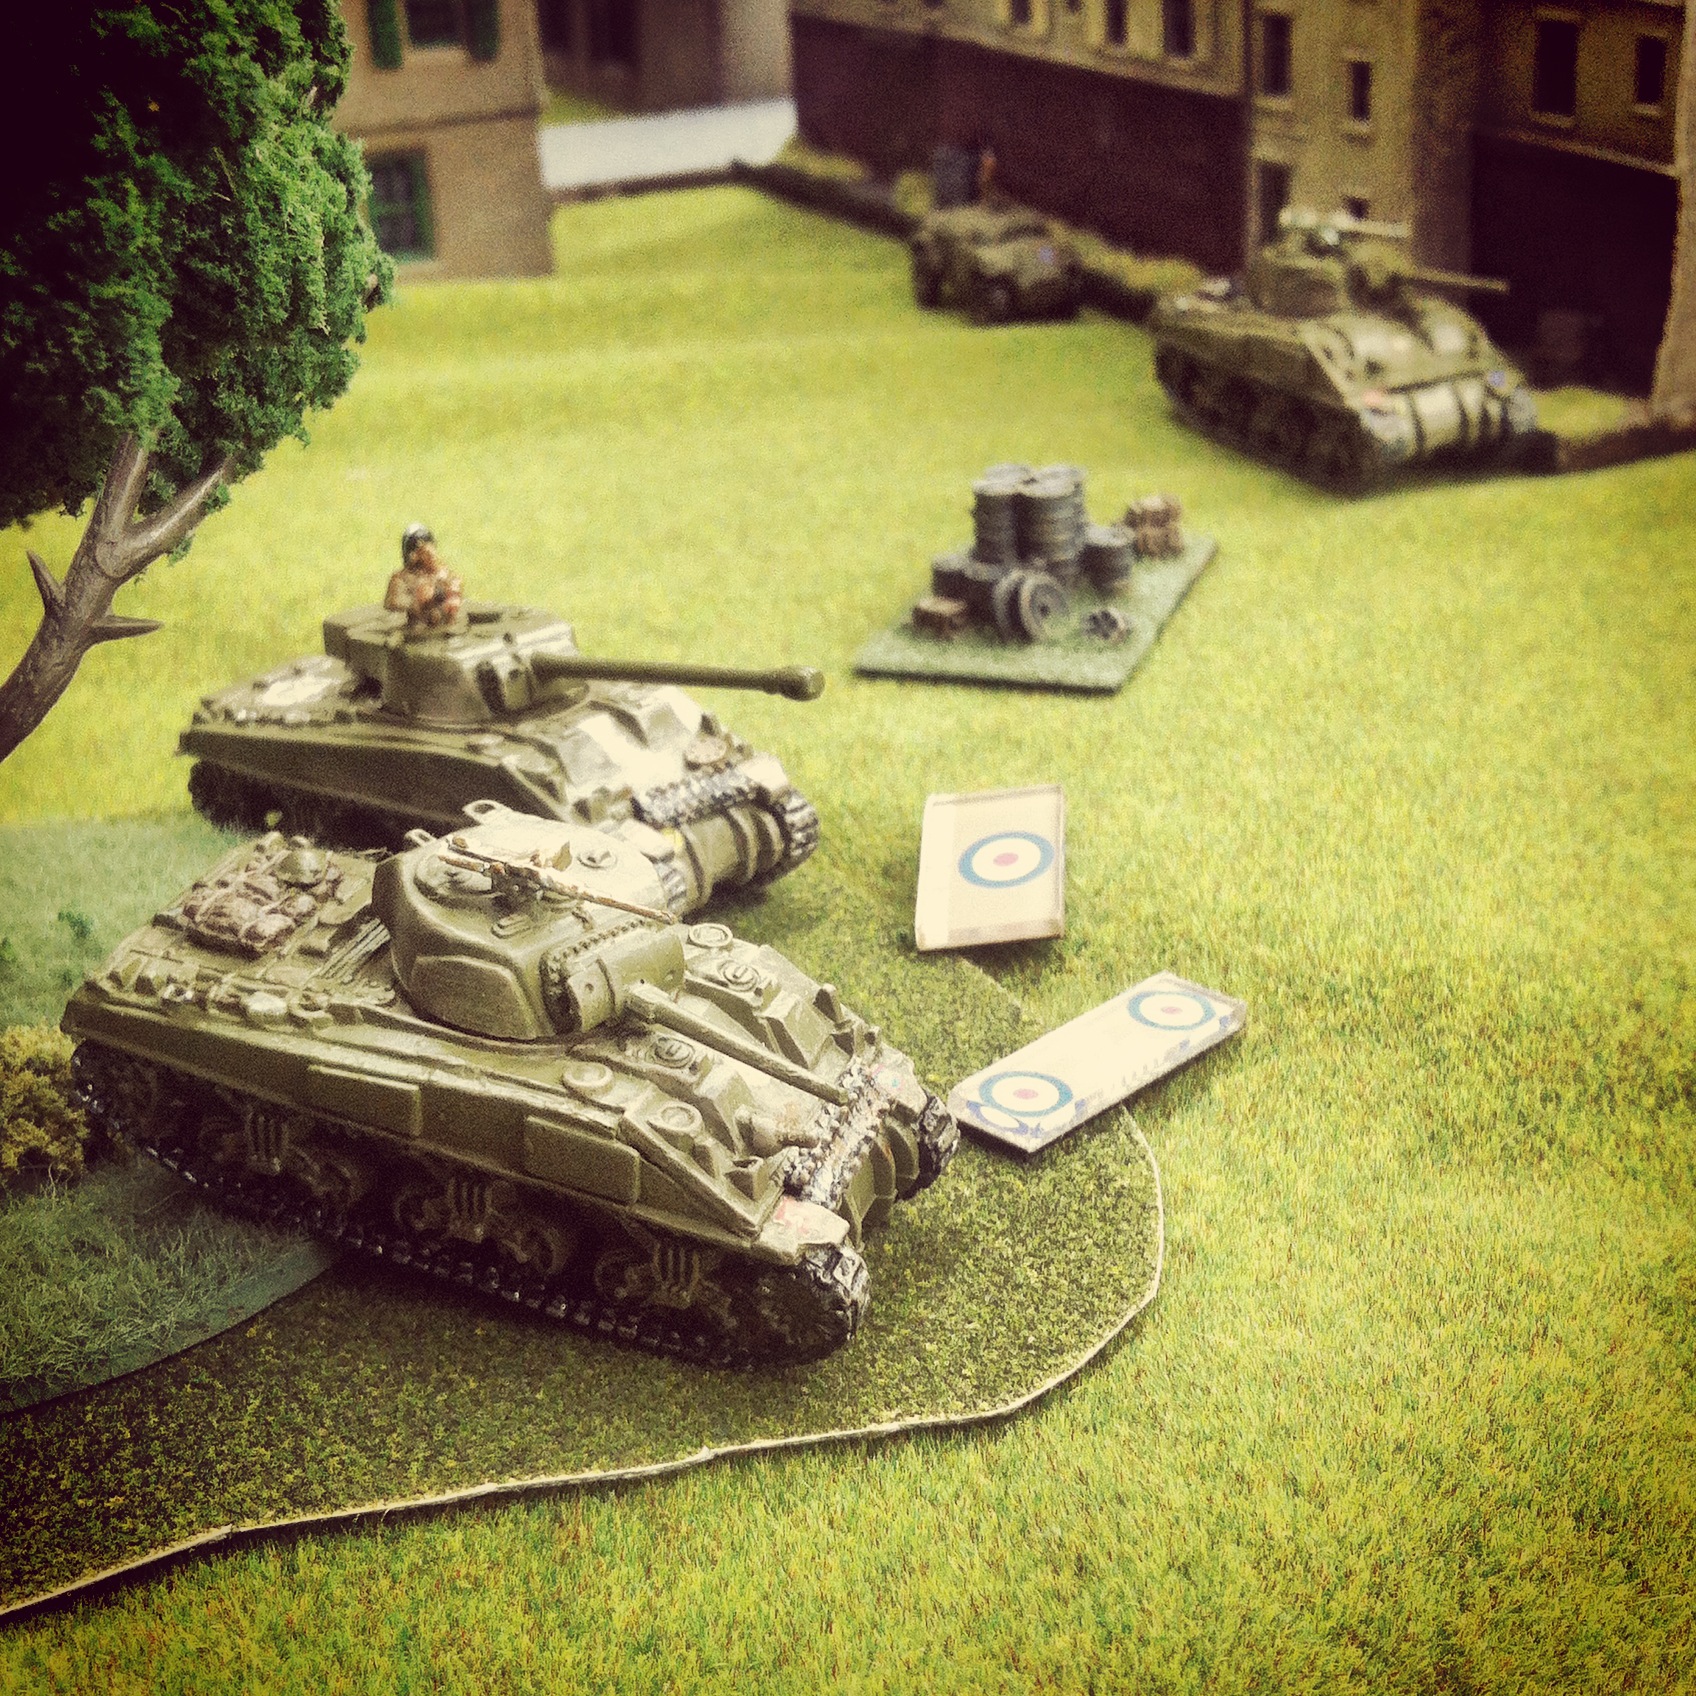
Guards Armoured tanks deploy at an objective

Tigers roll toward the bridge and are covered in smoke rounds
The Germans began the game fully deployed and slowly moving their Tigers toward the bridge and an objective just beyond. With famed tank ace Michael Wittman commanding, the key for the spare British force was to stay away from the deadly guns of the German tanks. At the river ford in the center, the Panzer IVs moved to flank the other side of town with Panzer Grenadiers mounted in half tracks at the rear. The best the British could do was fire smoke rounds into the Tigers across the river and follow-up with long-range shots from the single Firefly deployed at the beginning of the game.

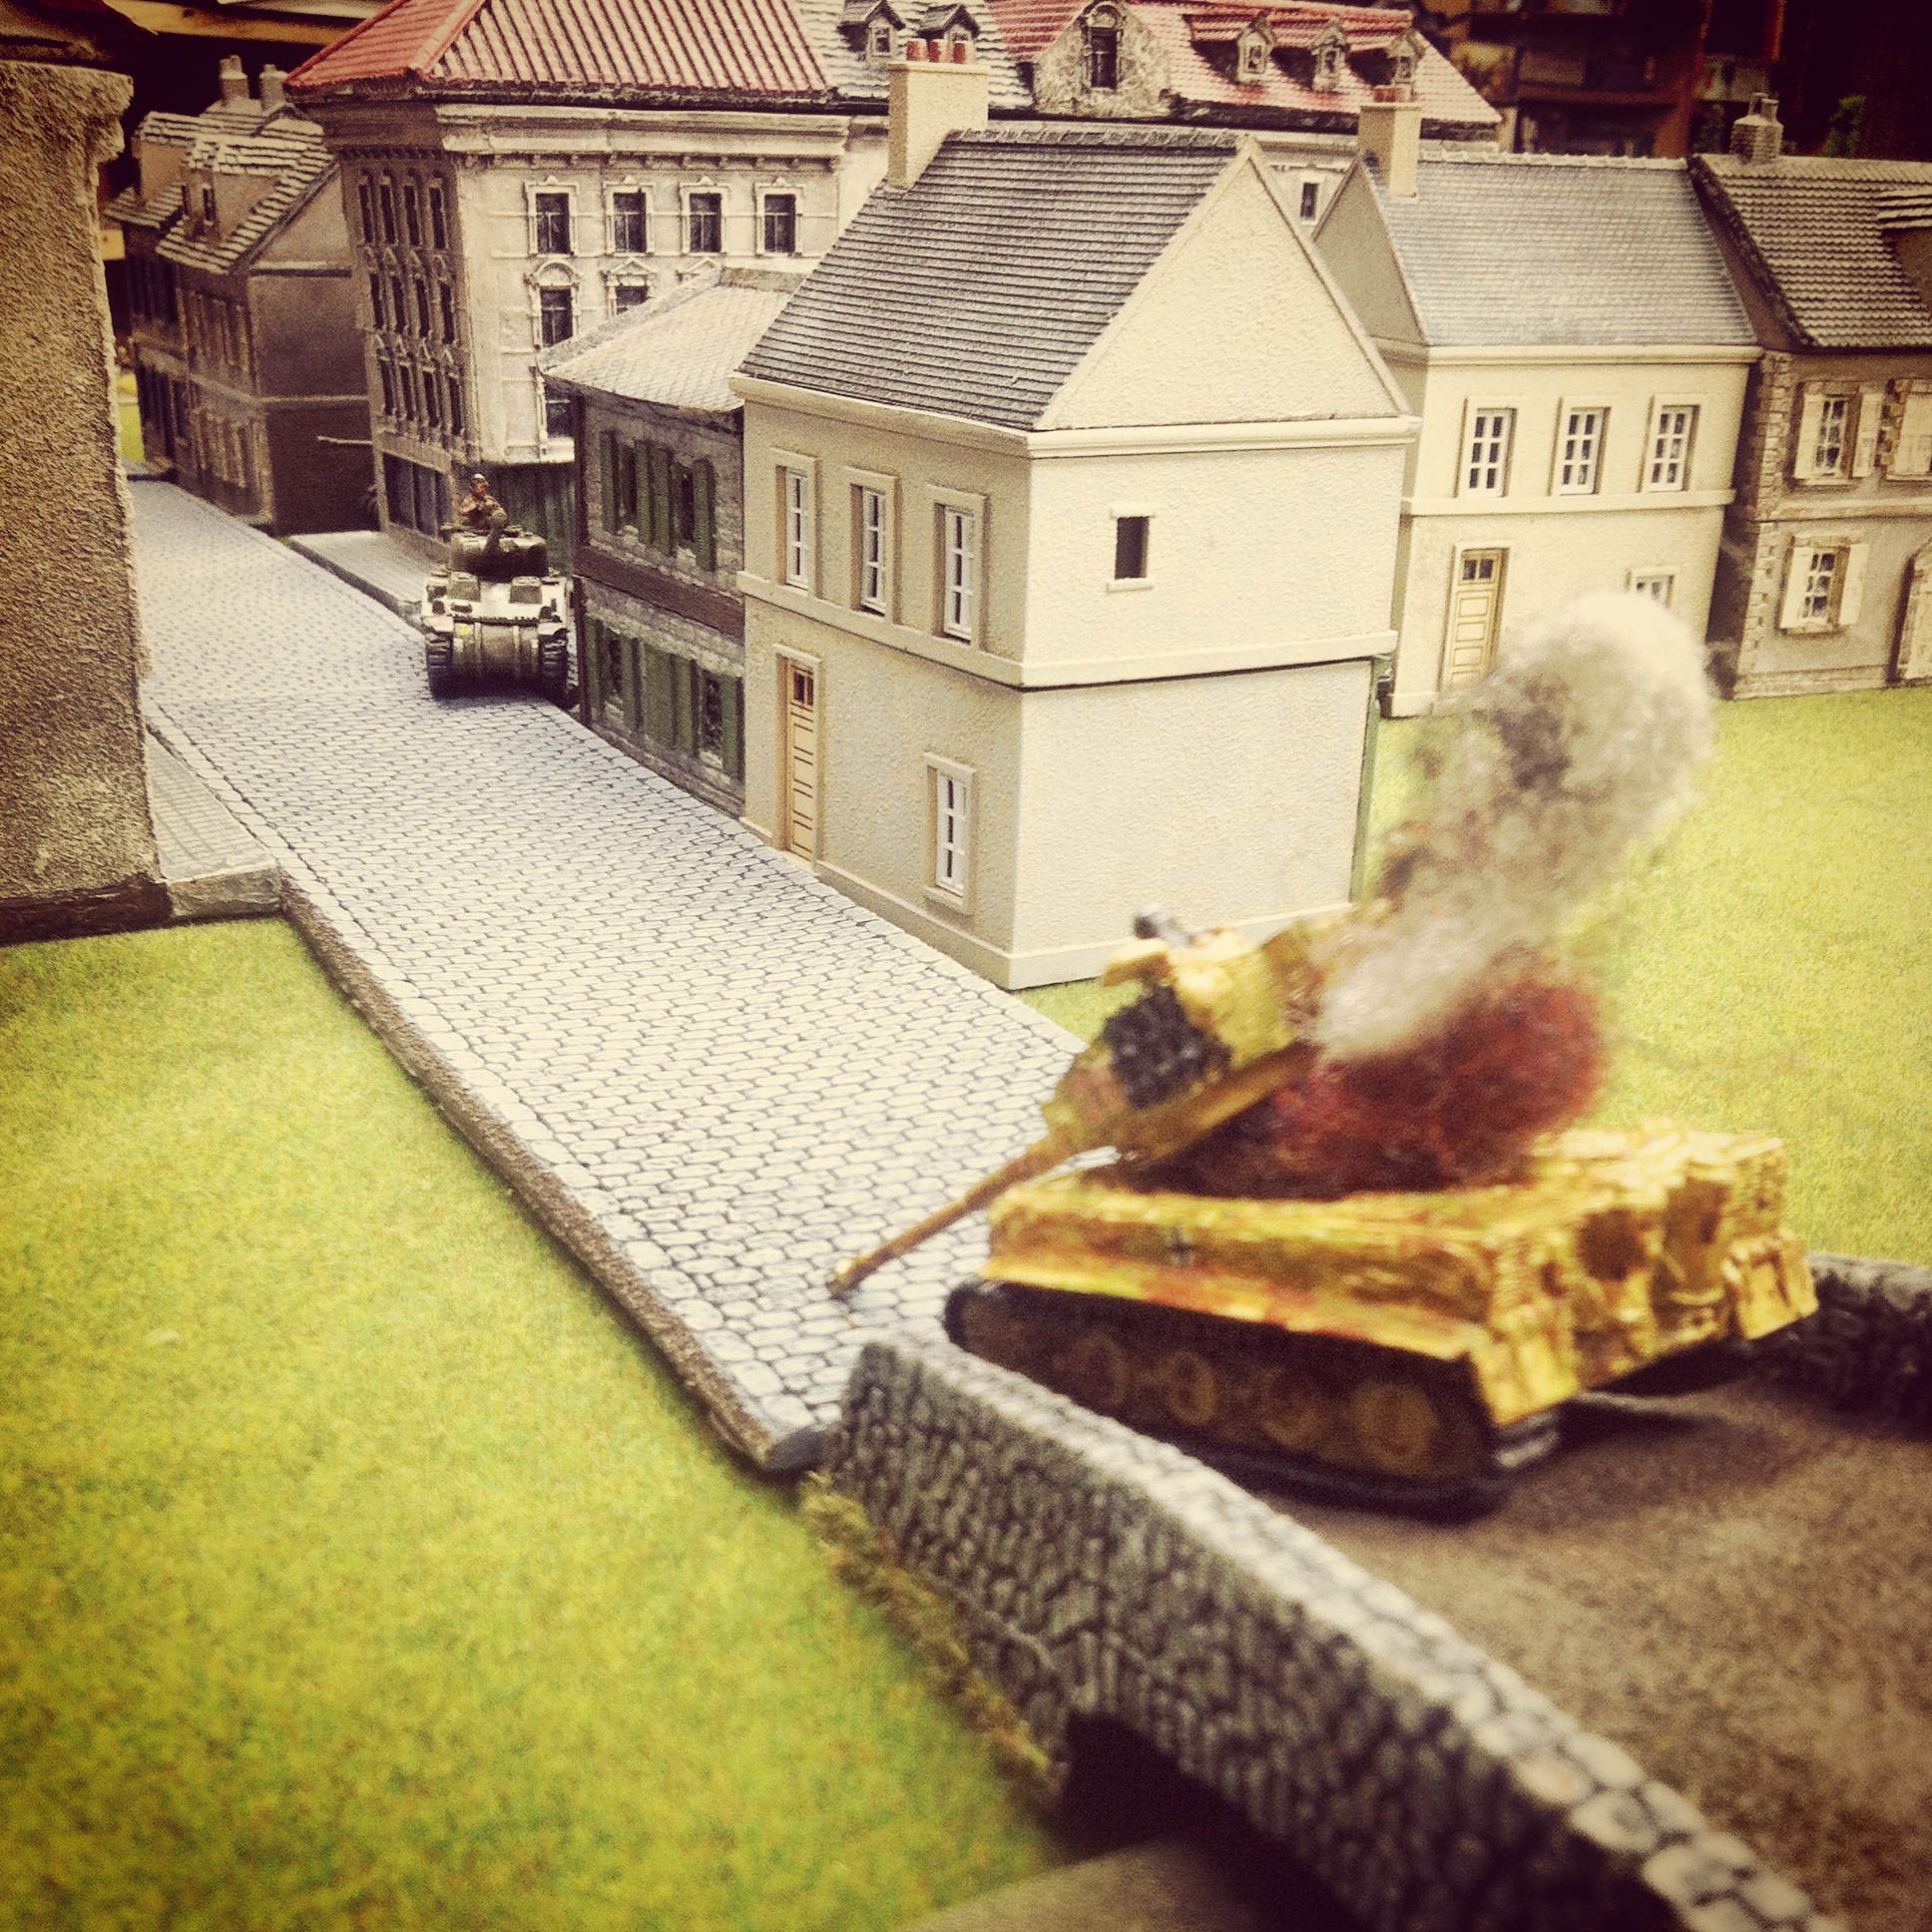
A Firefly destroys a Tiger at the bridge

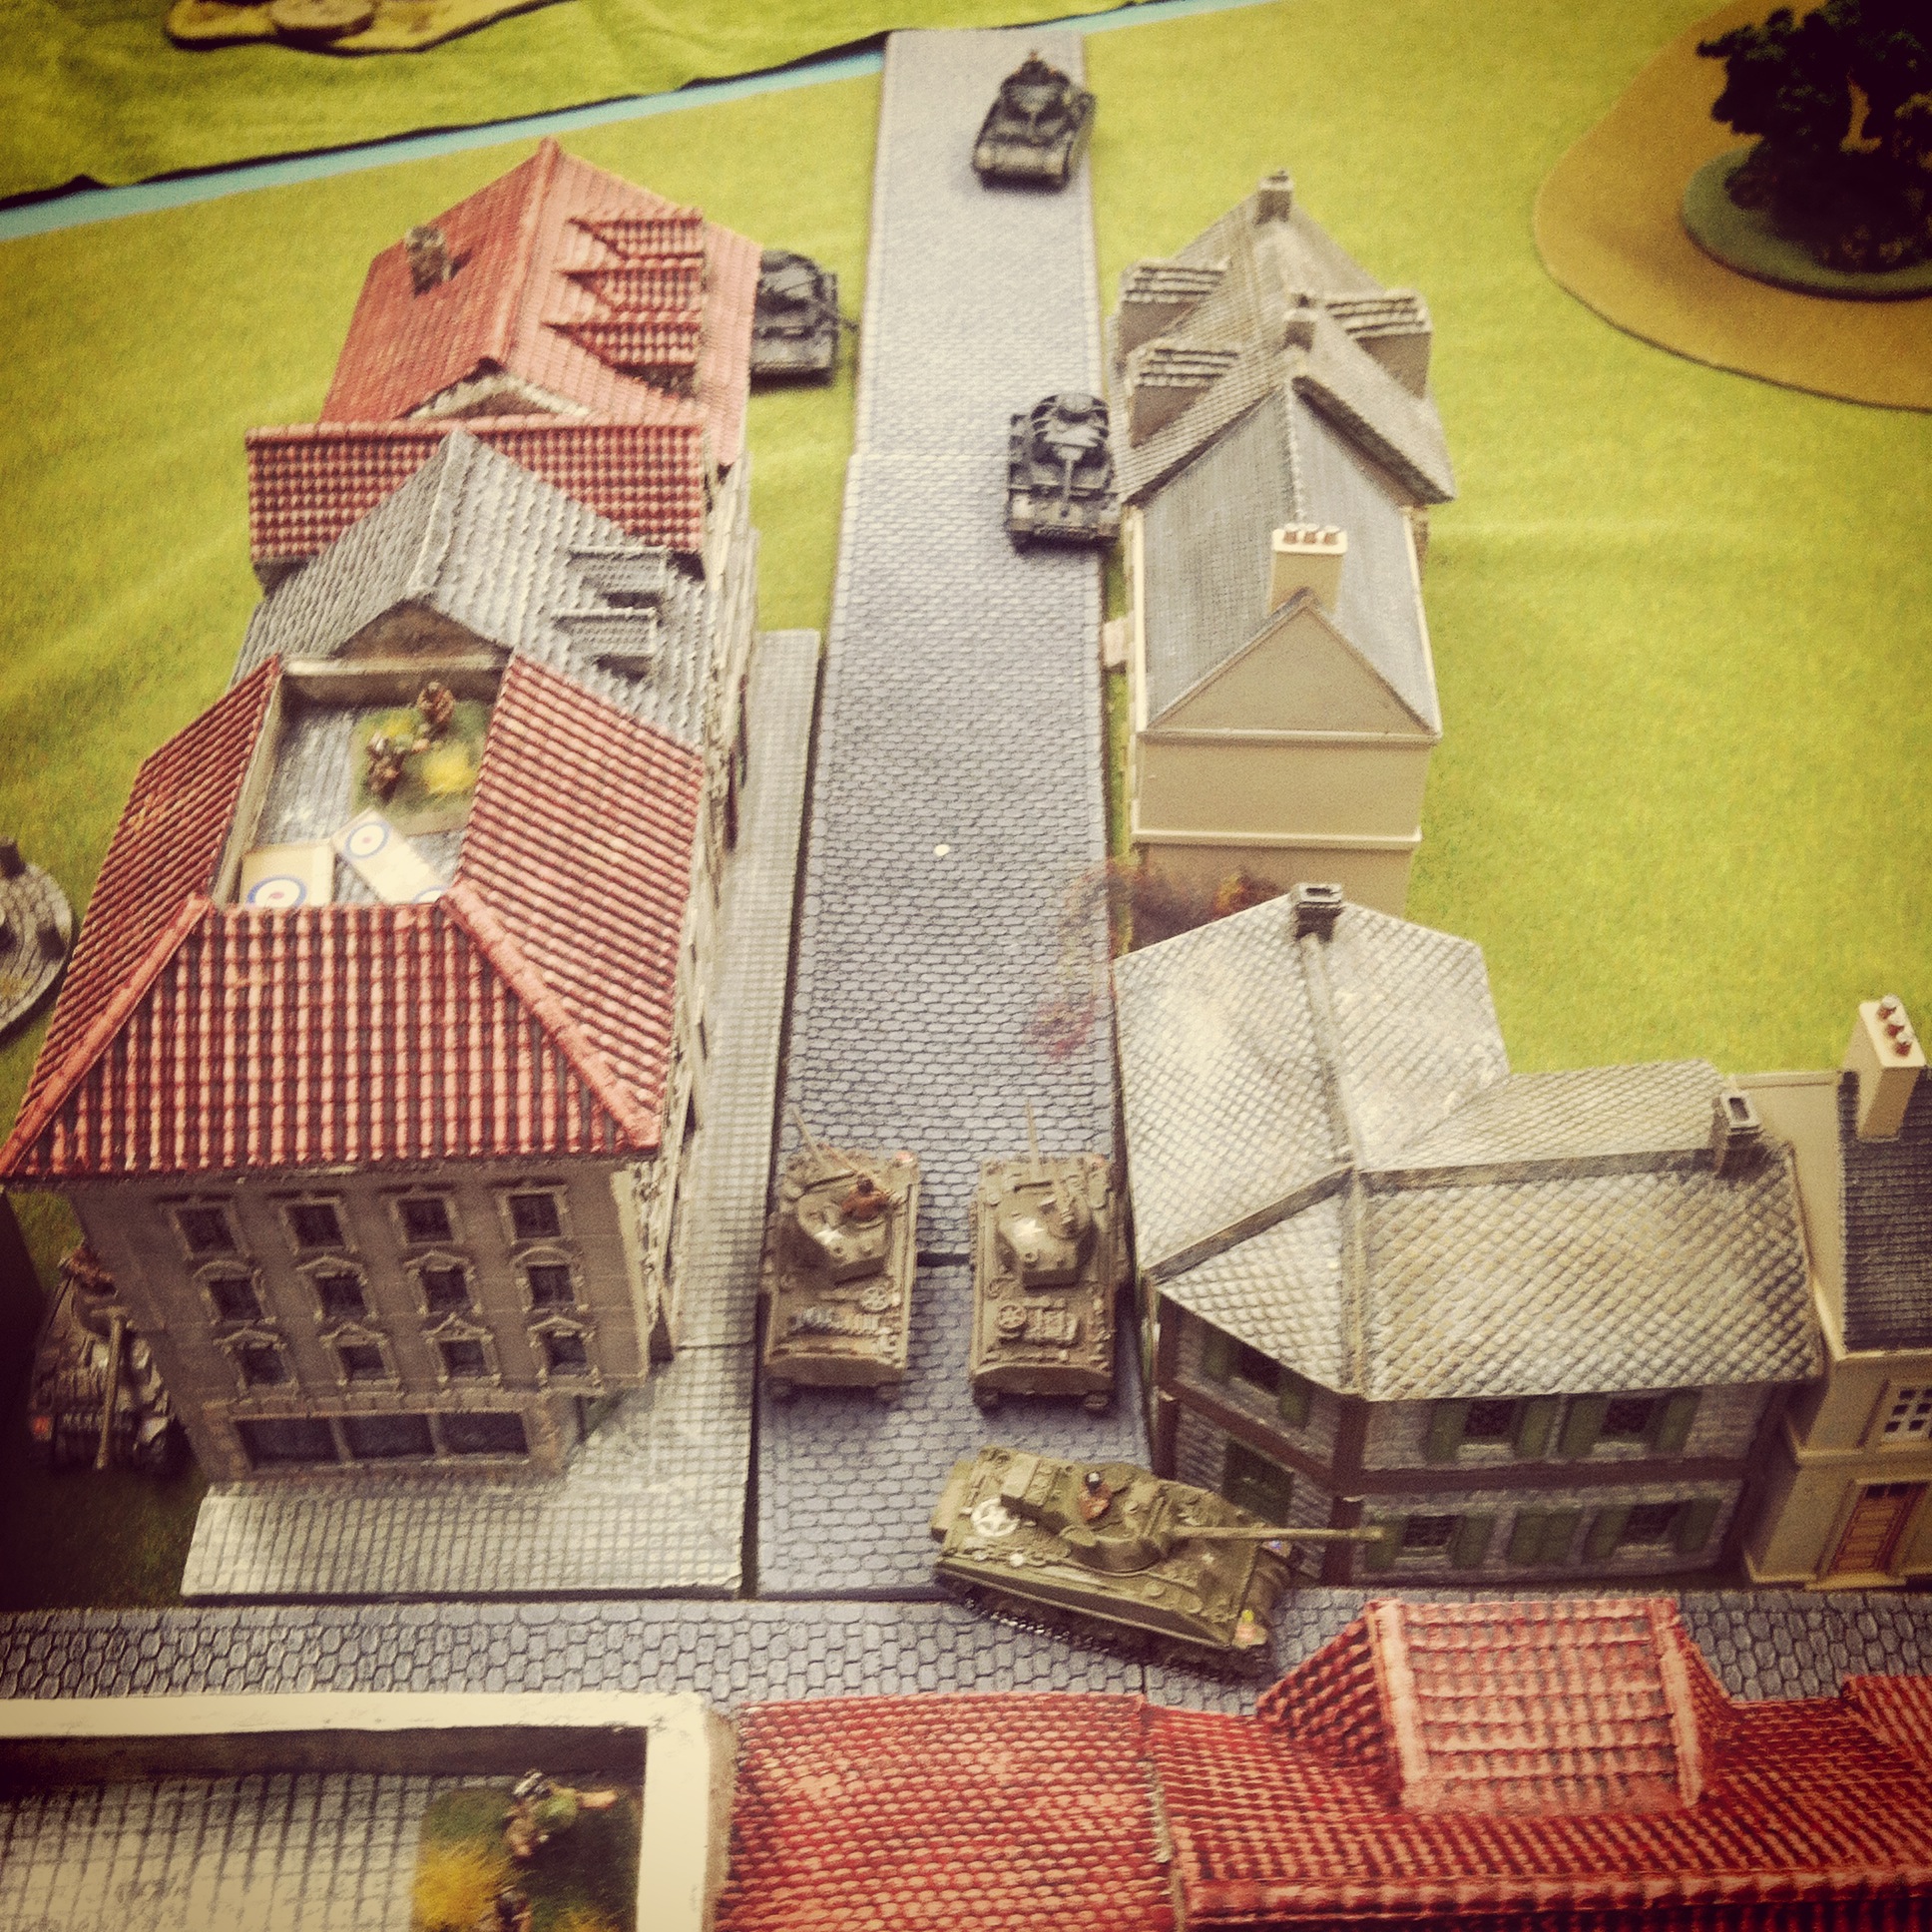
Panzer IVs and Shermans face off in the town streets as a Firefly covers the bridge
Over the next two turns, British reserves arrived and made way for the center of the town, using the tight cobblestone streets and buildings as cover. Artillery spotters stationed in the rooftops of buildings called in several turns of artillery fire but failed to have any effect on the Tigers and destroying only one German halftrack at the river. A crack shot from a Firefly at the center of the town destroyed the first Tiger over the bridge. By the end of the fourth turn, the Panzer IVs wheeled to get into the town at the British left but were pushed back by fire from British Shermans.

Reserve platoons from the Guards Armoured arrive to engage the Panzer IVs

Tigers position themselves on two flanks of the town
In the fifth turn, the two remaining platoons from the Guards Armoured arrived to the British left and pushed forward toward the Panzer IVs. With two German tanks quickly lit up, the surviving Panzer IV fell back to the treeline where it was destroyed in the next turn. The British held their left for the moment, but in the cover of the raging tank fight, the dismounted Panzer Grenadiers had managed to slip into the town’s buildings unharmed.

Firefly Shermans and Tigers face off to protect the objective

Three Tigers charge hard toward the objective beyond the road
As smoke continued to hold the Tigers from firing at the bridge, a second Tiger was destroyed from a volley from the same Firefly that had sent the first Tiger into flames. While action at the bridge stalled, the three other Tigers had been working their way through wrecking the British tanks which had destroyed the Panzer IVs. All the while, the German infantry had continued to work through the town’s building’s untouched and toward the objective back the rear of town. The British command tanks rolled to stall the advance of the Panzer Grenadiers with machine gun fire and cover the objective.
With most of the British armour ablaze throughout the town, three Tigers rolled toward the objective at the bridge. The surviving British tanks had continued to make successful morale checks with the benefit of their special rerolls. The two surviving Firefly Shermans took a combined shot at a Tiger’s rear and missed. The Tiger’s spun around to return fire, destroying a Firefly. With further ineffective artillery rounds and just one Firefly sitting between three Tigers and the objective, the game was called with a victory for the Germans.
Final Result: Victory for the Germans!
Soviet Tankovy Batalon vs. Hungarian Harckocsizó Század
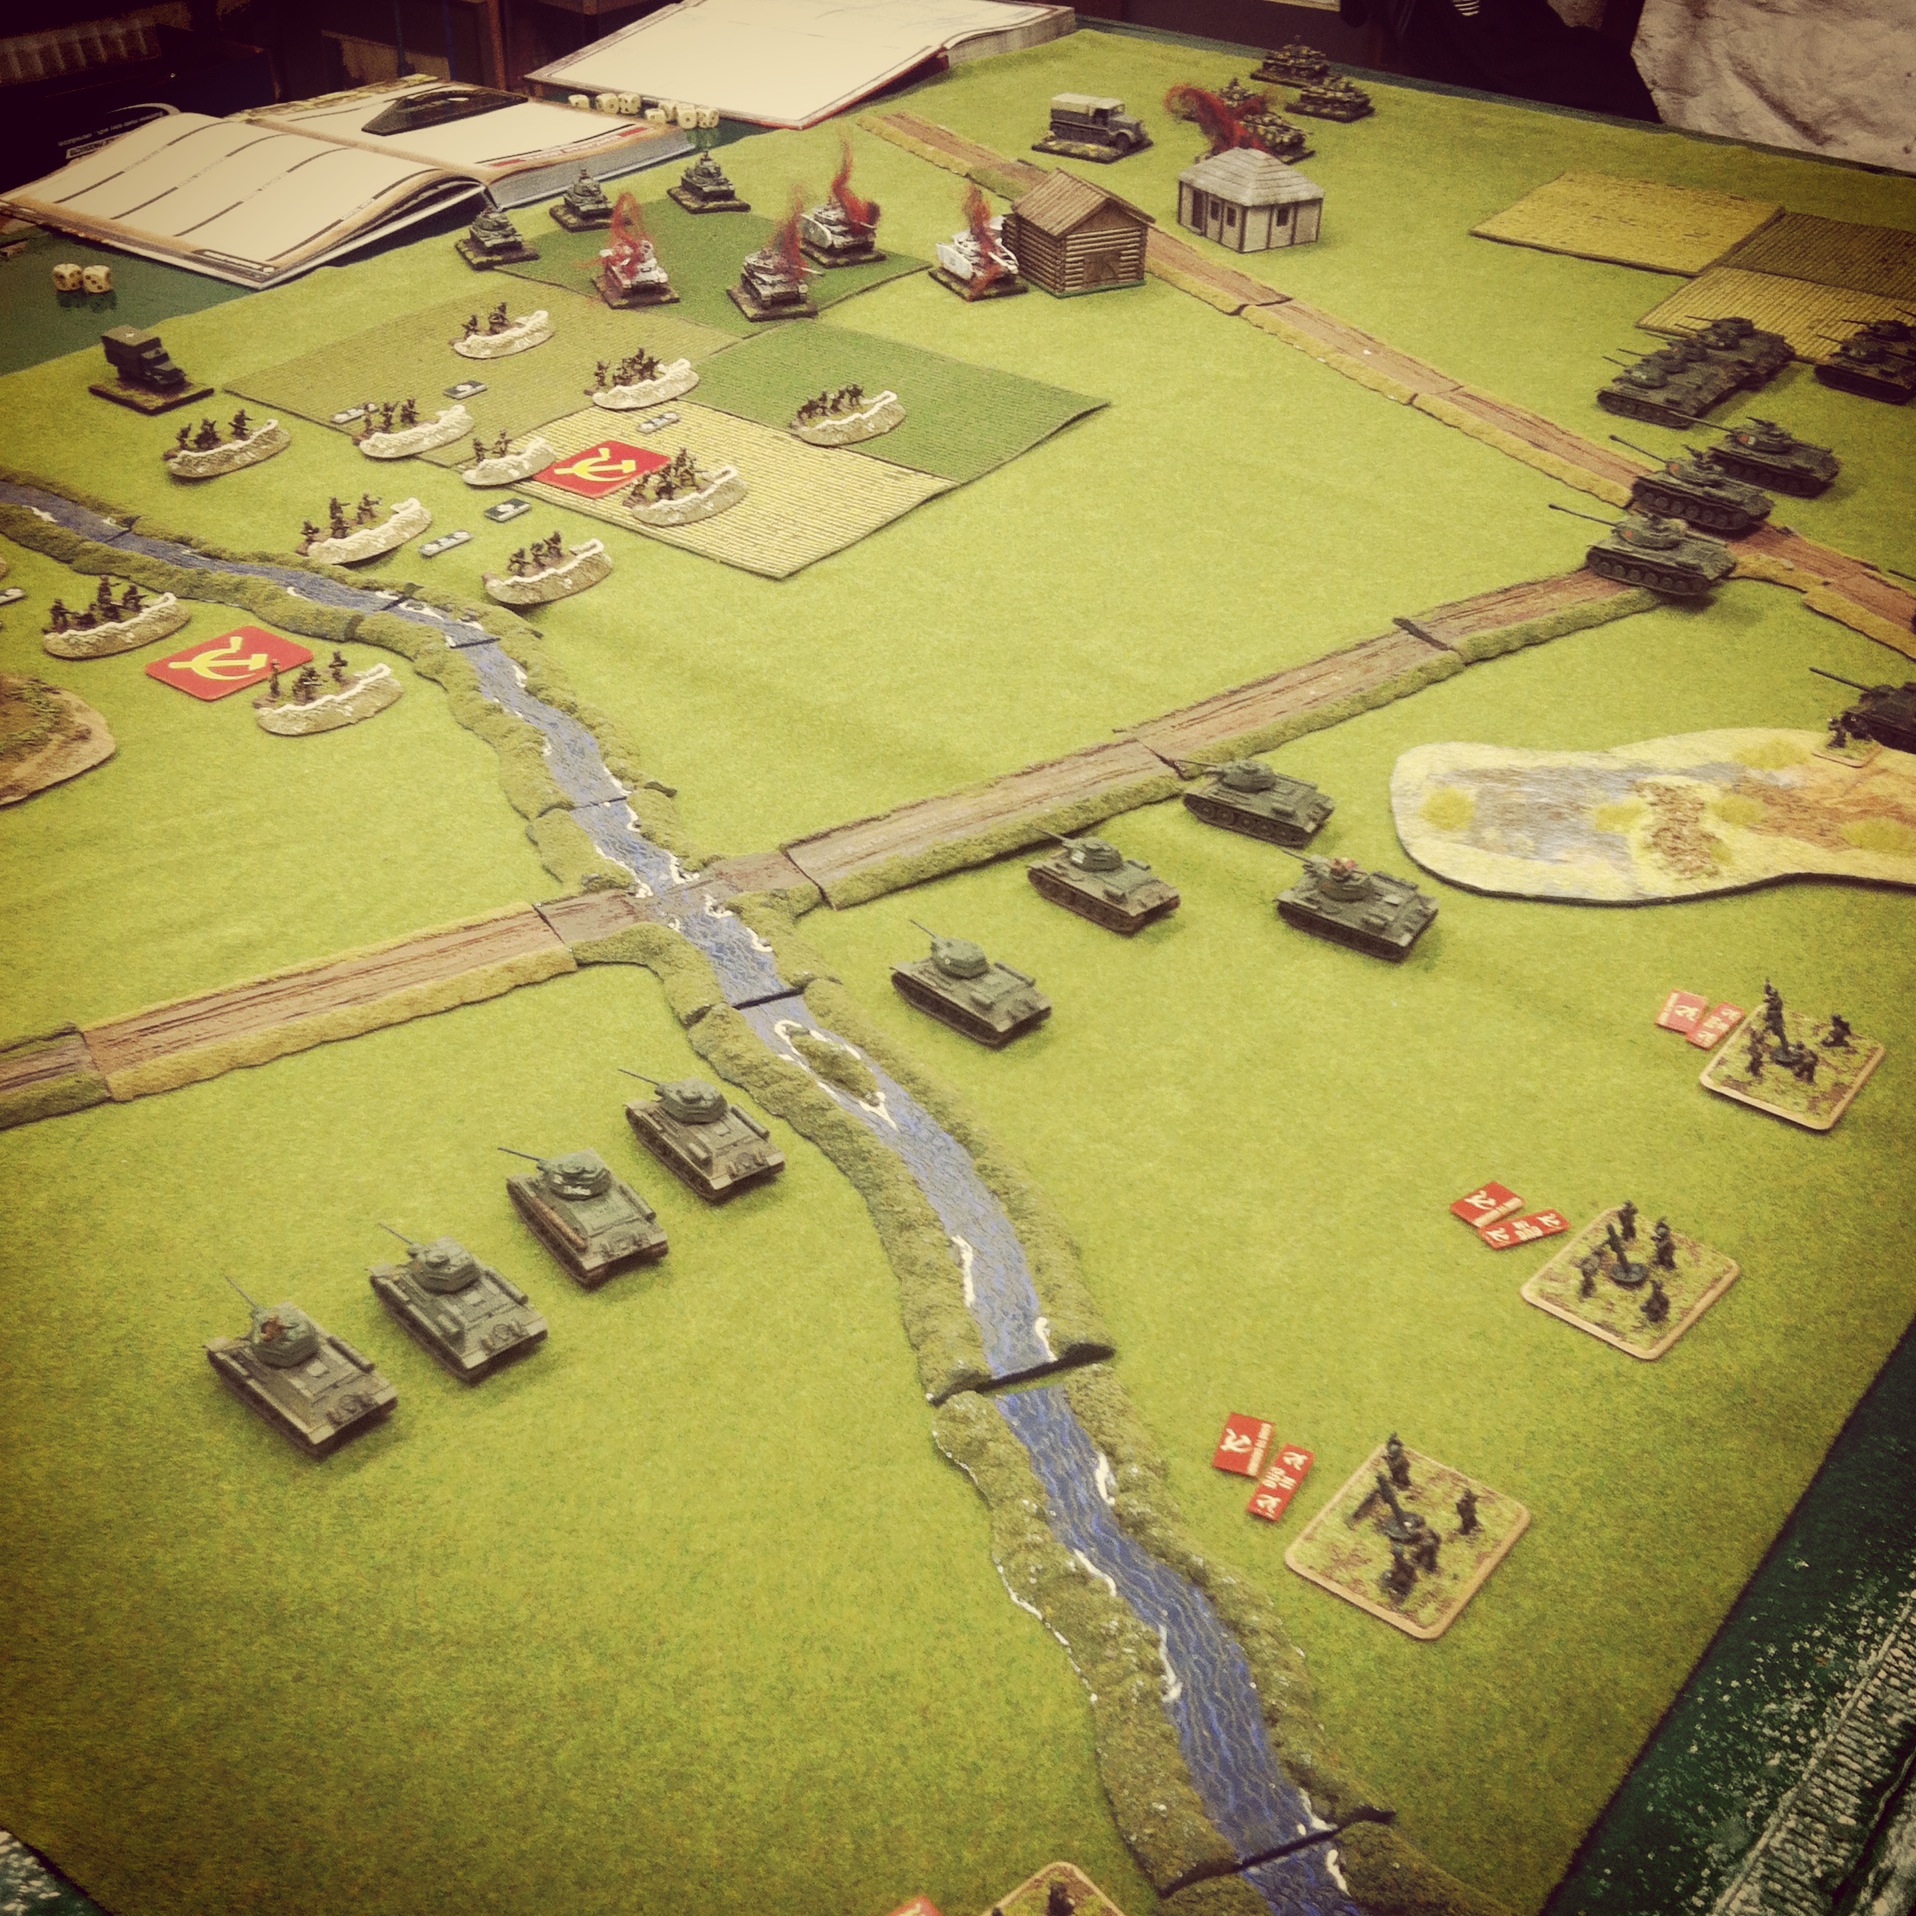
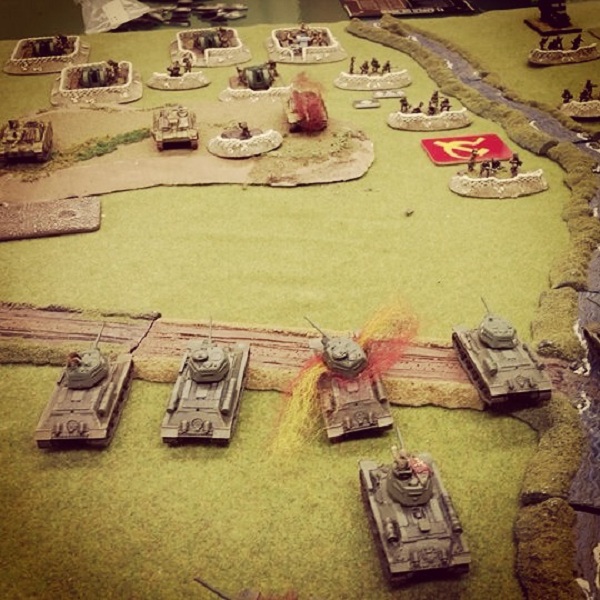
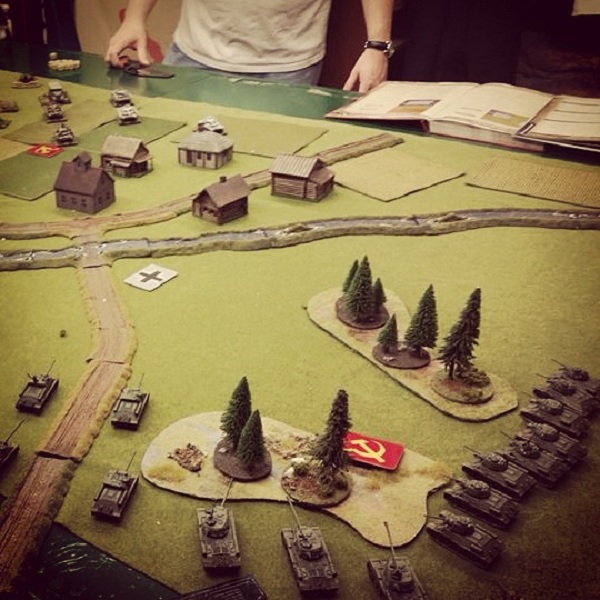
The day also saw a couple Eastern Front games with Hungarian and Soviet forces facing off on tables set up using a random terrain generator. The Eastern Front table showcased log structures from the excellent Miniature Building Authority Russian Village set along with some rural farm buildings from FOW. Each game saw the Soviets as the attacker, the first taking place on a table representing the bleak steppes of Russia in a Fighting Withdrawal Mission. The defending Hungarians began in prepared positions with a howitzer battery and Panzer IVs to their right, infantry at the center and tanks at the left. The Soviets with T-34 obr 1942 tanks at their extreme left and right, SU-100 tank killers and a Gvardeyskiy Tyazheliy Tankovy company at the center and a heavy mortar company at the rear.
 The Soviet line moves toward the Hungarian positions

Soviet tanks roll toward the Hungarian positions

Hungarian armor proves to be no match for the Soviets
The second Eastern Europe match-up occurred around a collective farm complex with a Dust Up Mission. Starting from opposite corners, both the Hungarians and Soviets positioned themselves into a fantastic series of turns in and around the small farm. With both players moving, dodging for cover and firing at close range, the Hungarians and Soviets sparred for victory as tanks burned all around.

Game two on the Eastern Front with the central Soviet farm complex
As Hungarian reserves arrived late in the game, infantry climbed out of their trucks and assaulted the Soviet T-34s. Soviet reserves likewise entered the game and made way for the Hungarian howitzers and the objective at the opposite corner. With two intense assaults at either end of the field, the Soviets gained a slight edge and were able to score their second victory on the day.
Final Results: Two Victories for the Soviets!
US 7th Division vs. German Panzer Ausbildungs Abteilung
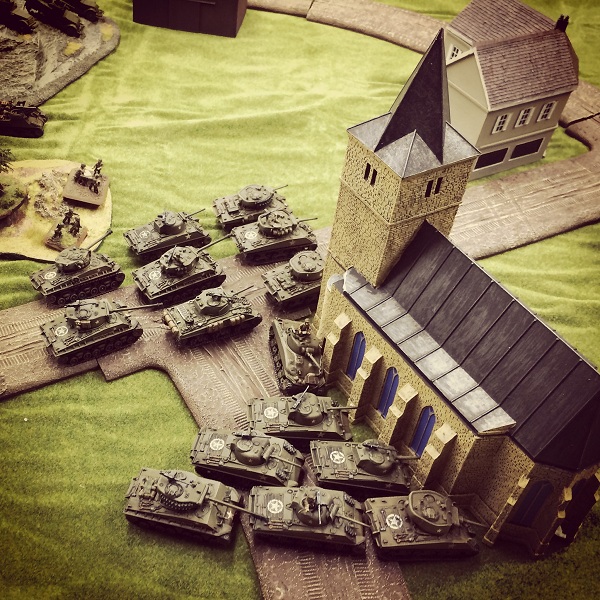
Back on the other Western Front table a spare rural village anchored by a prominent church and surrounding hill and forests, a deadly force of German Panthers, Tiger Is and Königstigers squared off against the US 7th Division. The Americans rolled into the first Pincer Mission with standard Shermans, M4A3E8 Easy Eights and M4A3E2 Jumbo. At the rear, M7 Priests and 81mm mortars mounted in half tracks were positioned to cover the field in smoke while a P-47 Thunderbolt was on call to swoop in against the German force.

The US 7th Division deploys in cover on the Western Front
Hoping to avoid German fire, the US tanks crowded into position using the church and other structures for cover as they eased across the field. Once engaged, the Jumbos did their job of eating up fire from the German guns and allowed the other US tanks to advance toward the objectives. Even with smoke cover fired from the rear, air support above and a mass of US armor, the cautious pace of the Americans was no match against the German Tigers firing from the woods. By the time the Americans made a push for the objective in the open, the German tanks were squarely deployed to defend the objective and take the game.

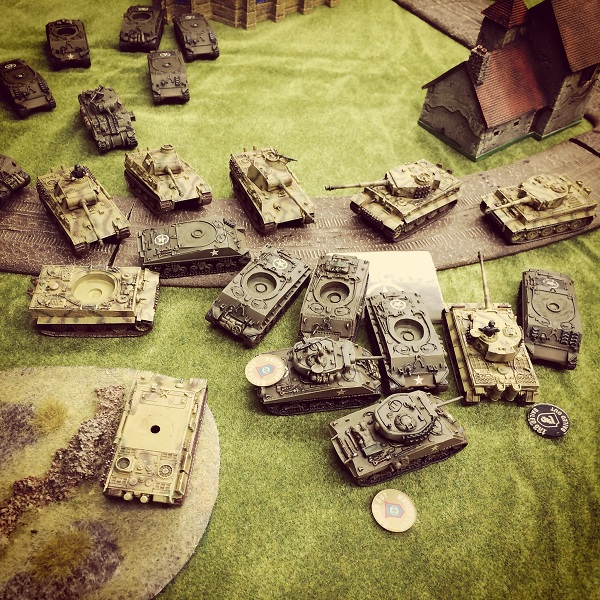
American tanks bide their time waiting for clear shots at the heavy German armor

Overwhelming German presence holds the objective
The players switched sides in the second No Retreat Mission on the same table. Again, the Americans came on the table on the far side of the town but this time chose to race aggressively toward their objectives. Defending from the wooded areas again, the Germans were able to fire at will on the advancing Americans. Quickly moving to a close series of short-range duels, tanks on both sides shifted to get into important side armor shot positions. With a tight cluster of models crowding the field near the objectives, American artillery smoke and air support quickly became irrelevant and some lively debate erupted around lines of sight and facings. The second game was a much closer match, but in the end, the thick hulls of the German tanks were no match for the American guns.

Tanks on both sides jockey for effective shots near an objective
With two victories for the Germans, there was a fair amount of discussion as to whether the Panzer Ausbildungs Abteilung list is an example of a “broken” and unbeatable list in FOW. The Americans tried their best with both cautious and forceful tactics using some great available equipment
Final Results: Two victories for the Germans!
At day’s end, the Axis came out with a slight edge of a 3-2 victory over the Allies across two European fronts. The presence of tough late war German Tiger tanks are a hard force to crack, even with quality American and British armor with lots of air and artillery support. On the other hand, the Russian tank horde always proves to be a formidable Allied opponent whether facing Hungarians or Germans. Force quality, tactics and a bit of luck always play a role, and our five Tanksgiving games were all unique examples of how Flames of War tank battles can go on any given day.
 War is destructive by its very nature, and World War II was the most destructive war in history. Aside from the tens of millions of military personnel and civilian deaths, the war brought unprecedented ruin to the thousands of villages, towns, cities and industrial areas through and over which the war was fought. The nearly immeasurable physical and financial impacts of WWII rippled for decades to come, including enormous effects on buildings and other physical spaces worldwide.

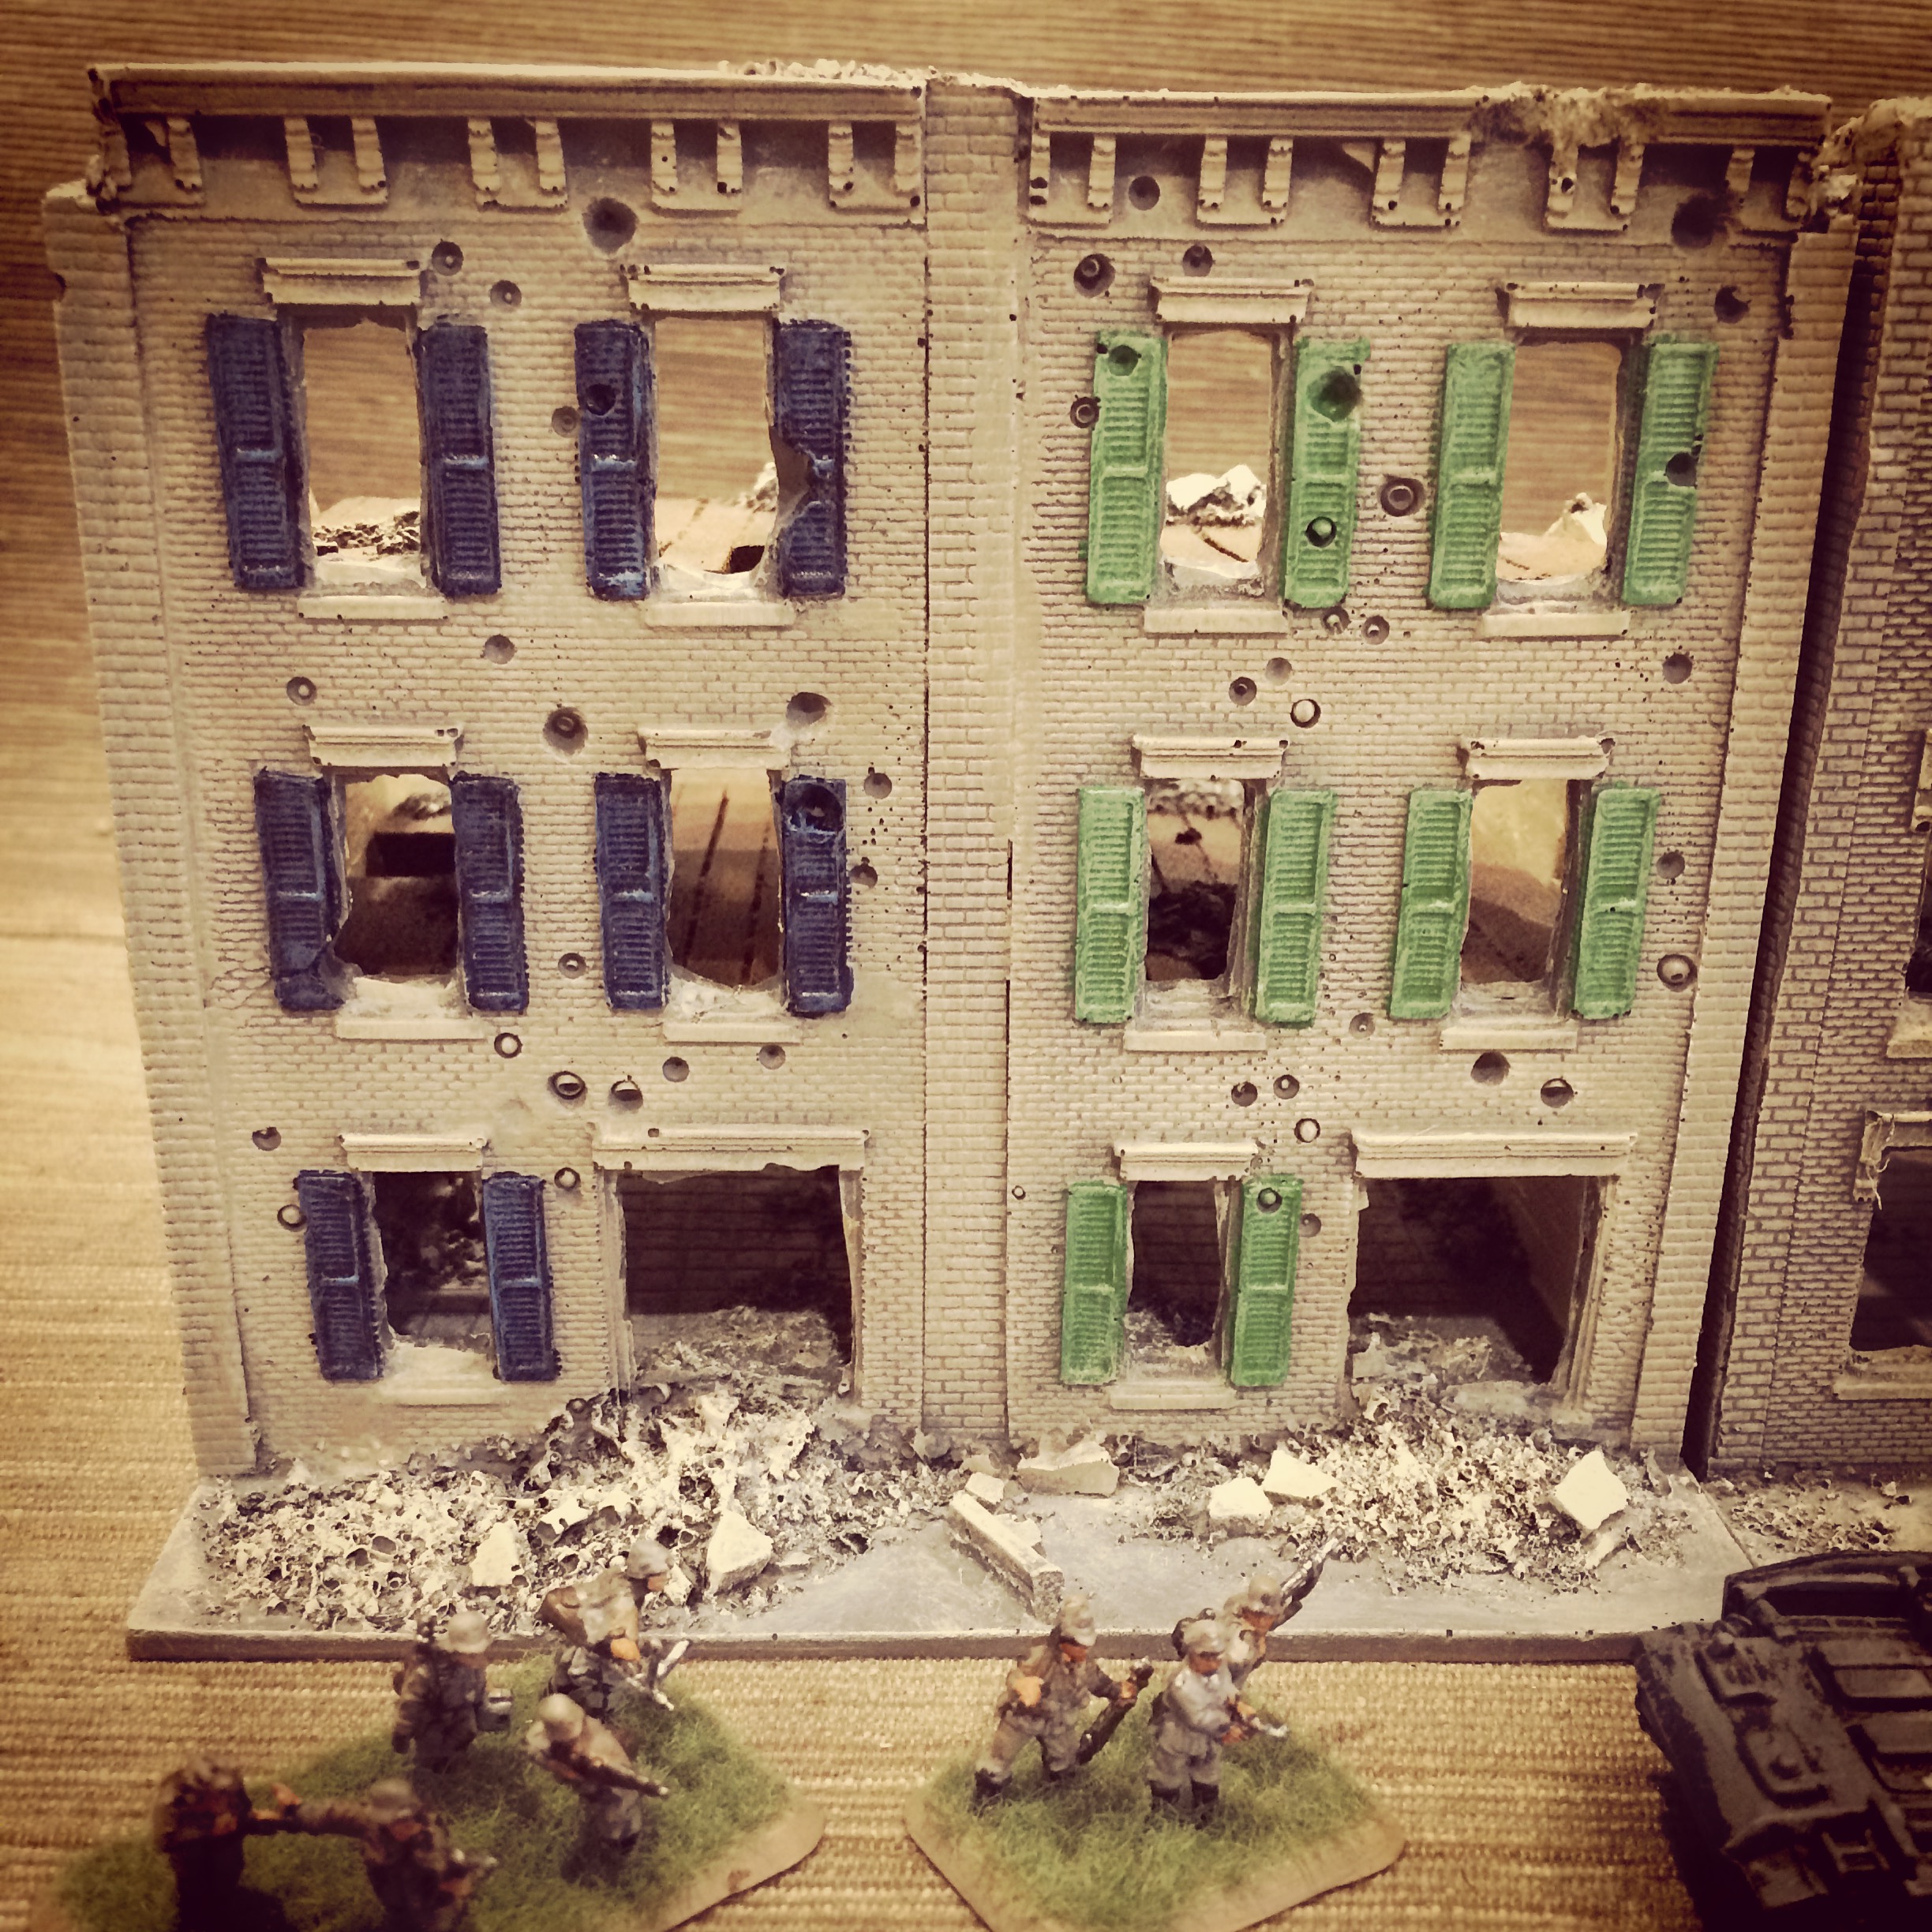
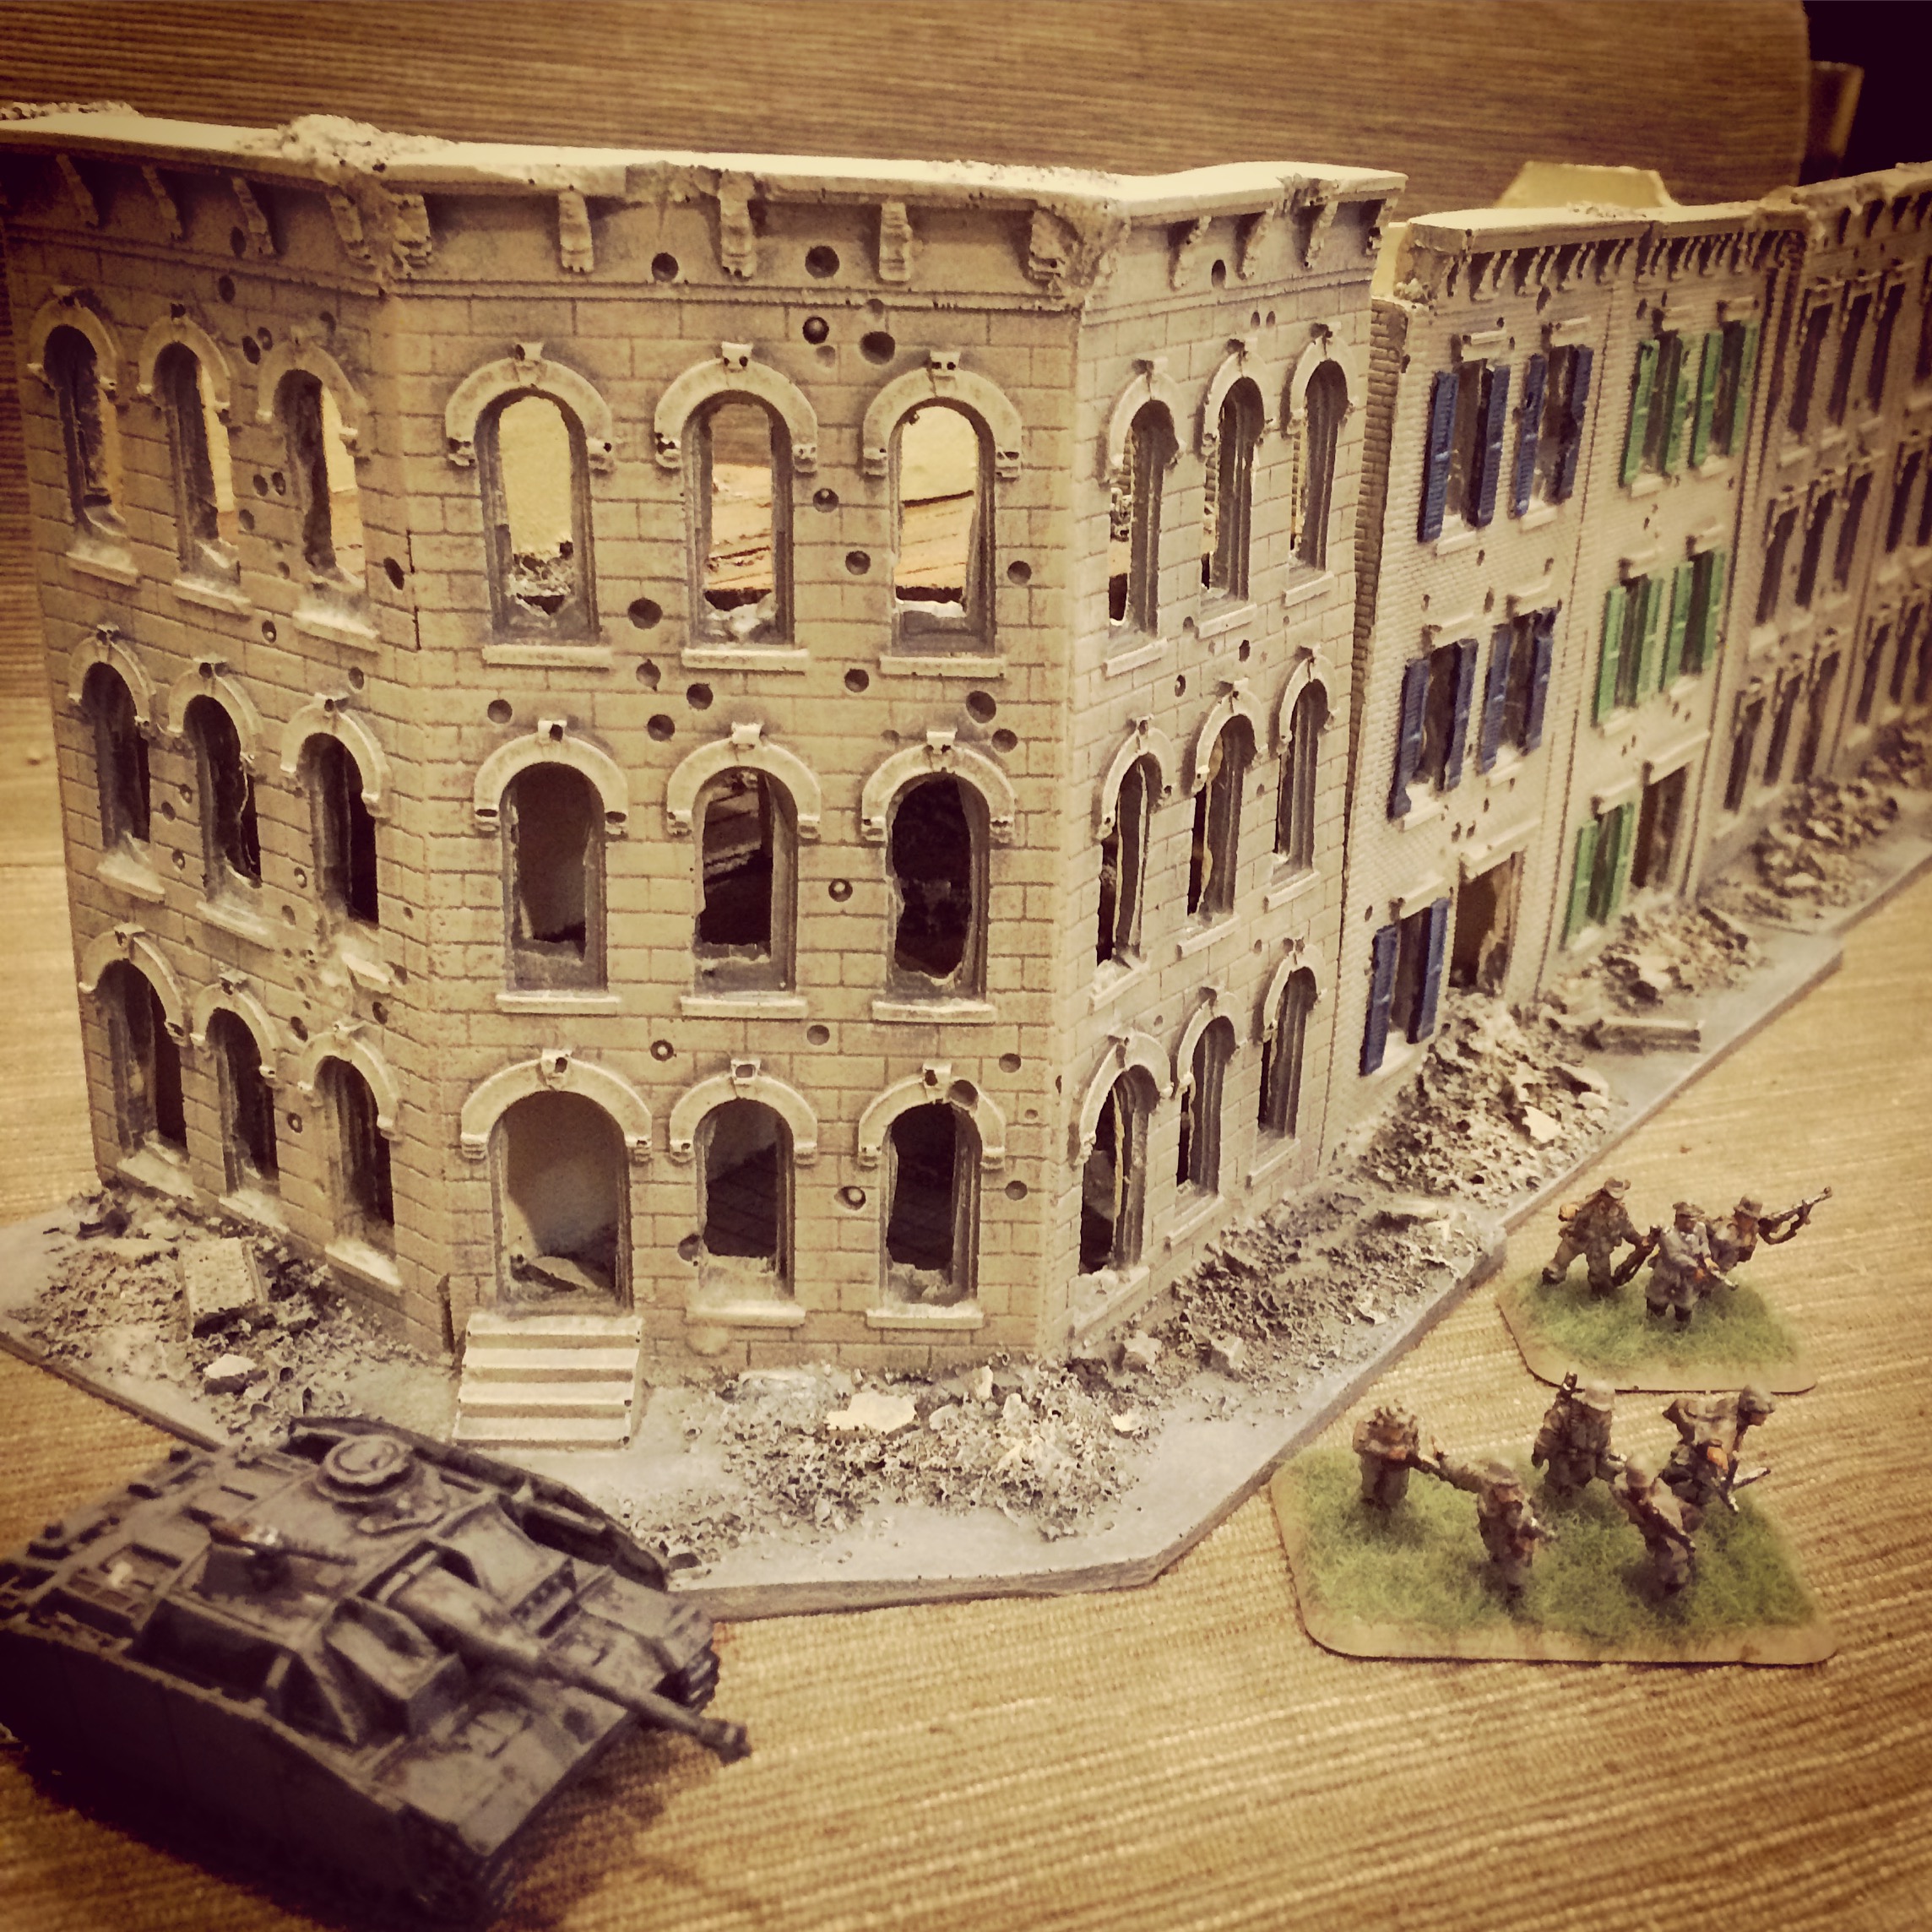
 A complete set of four 15mm city block ruins from Novus Design Studio
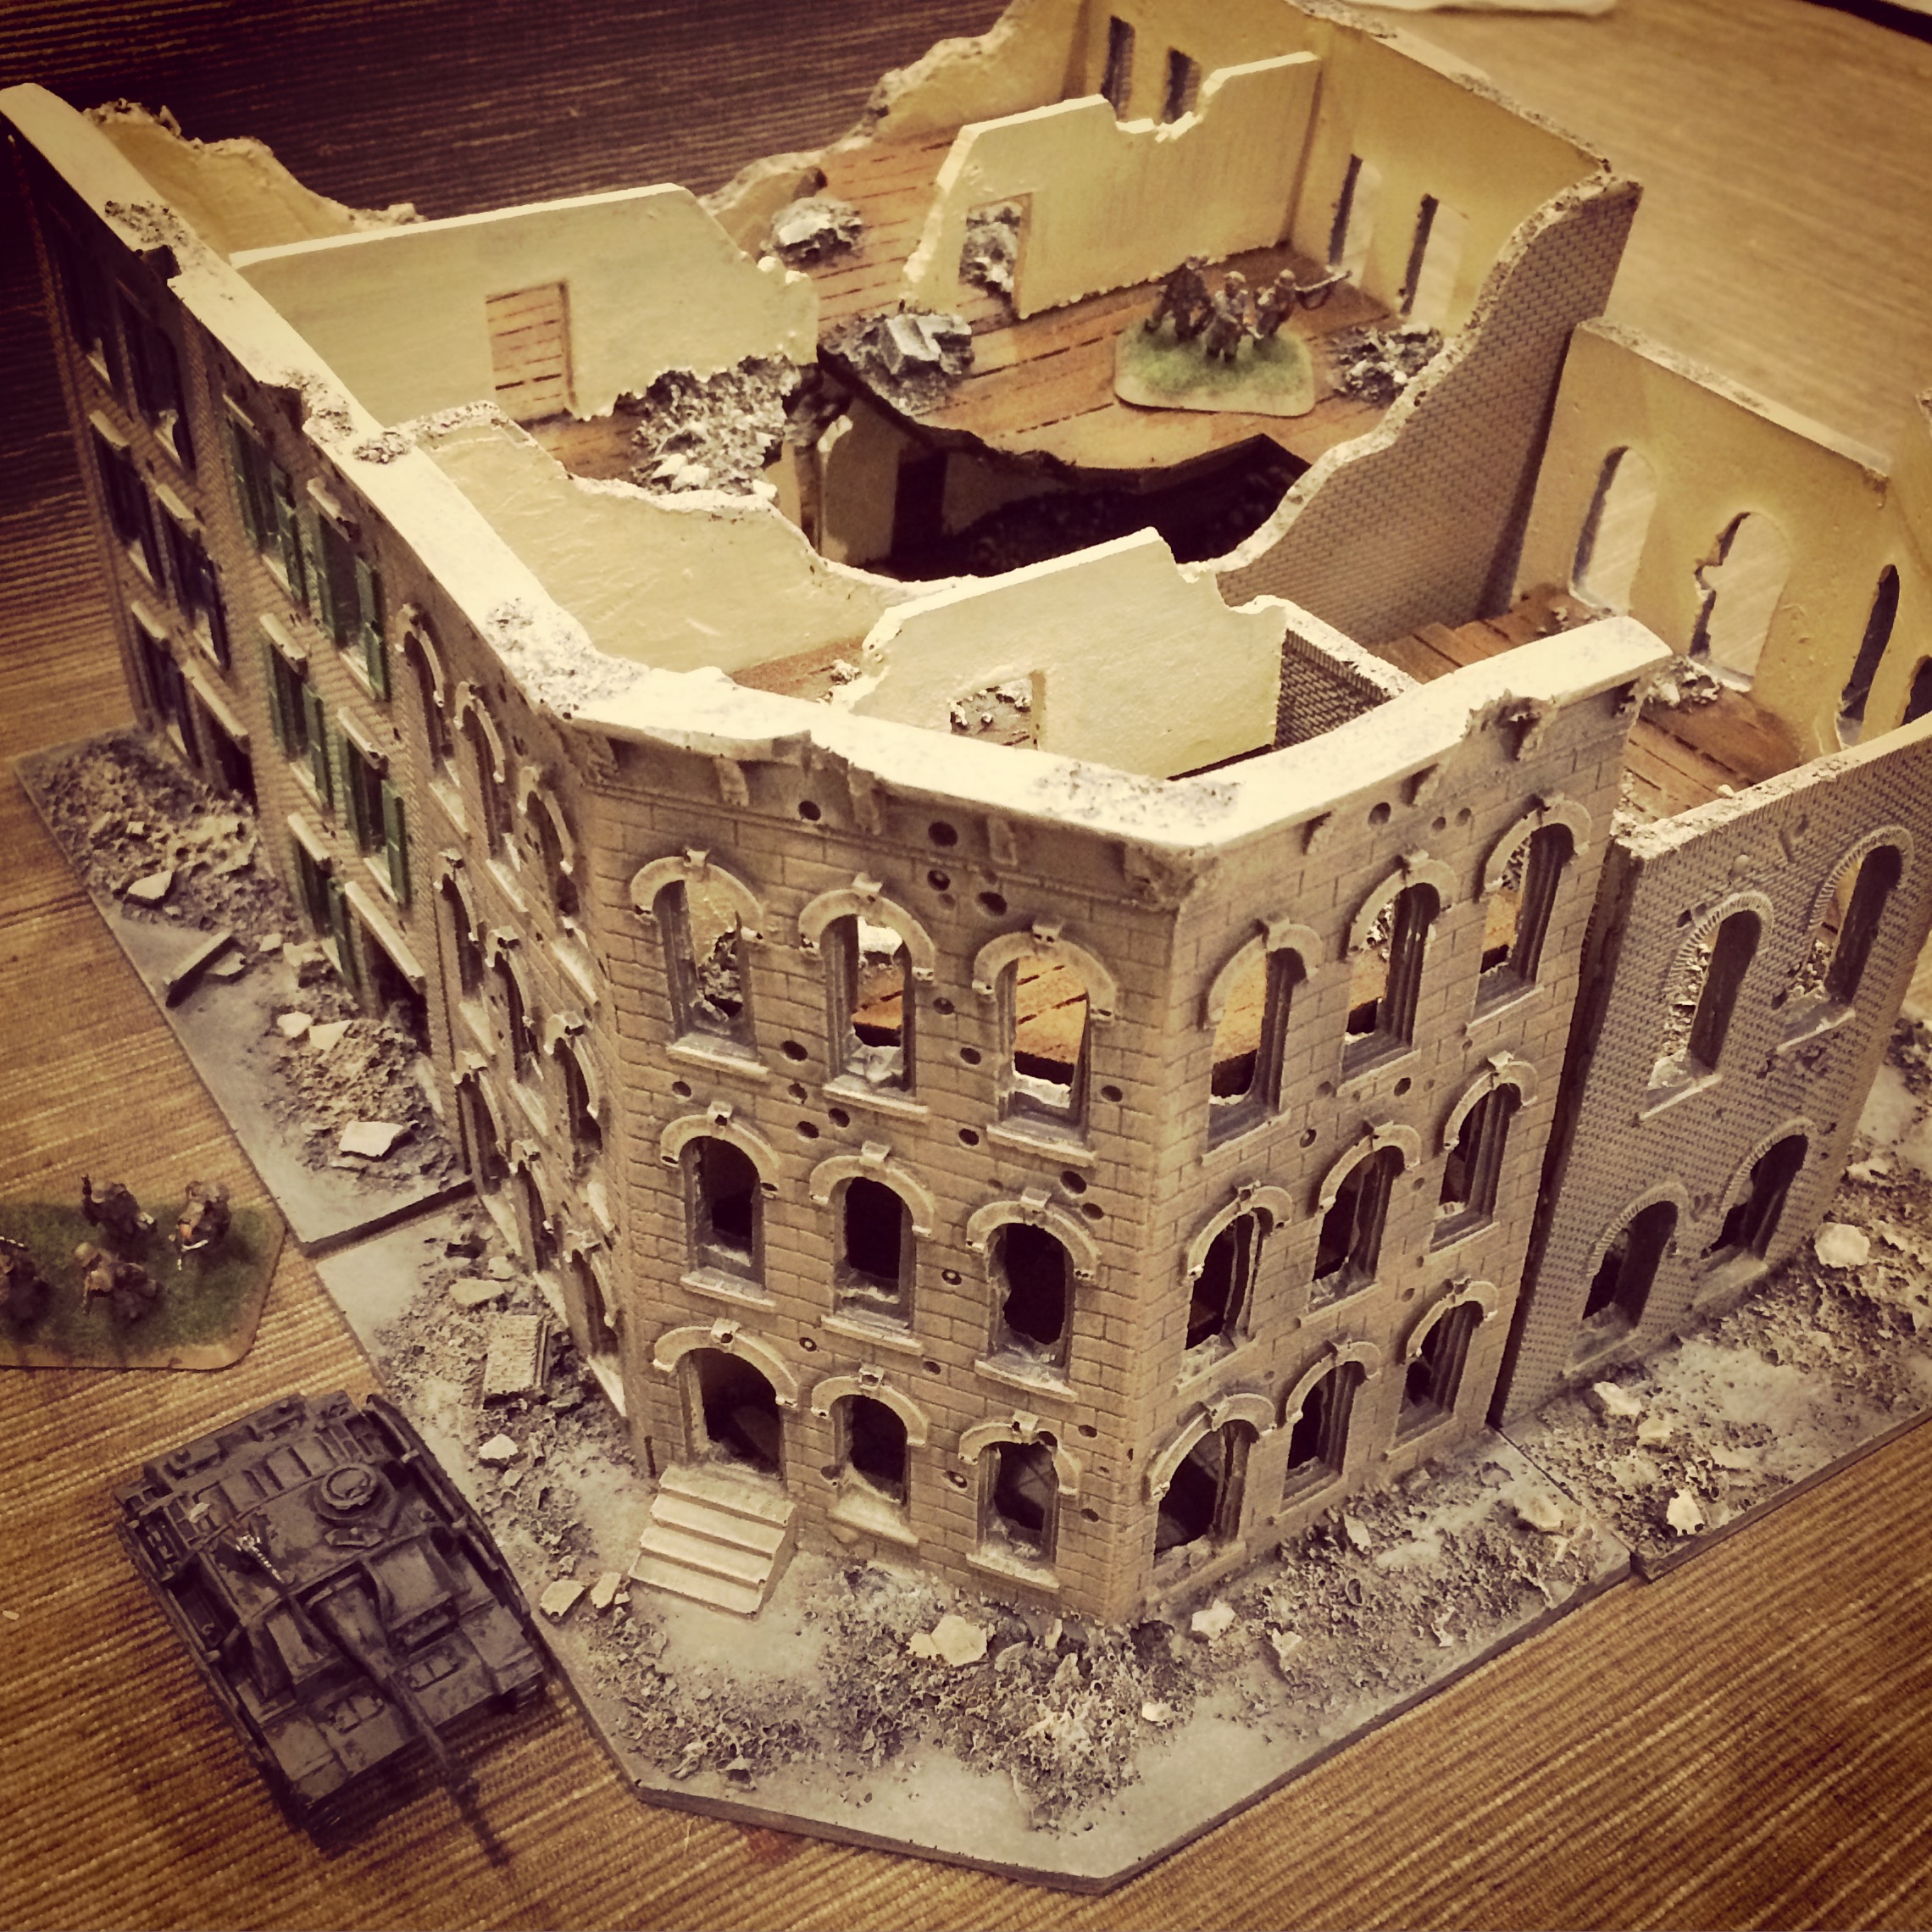
 Front and rear view depicting multiple removable floors of a typical city block ruin model
 Cleaned and primed corner city block ruin model