Rebuilding a 28mm Wilderness Fortification

IMG_1403

The construction of 17th and 18th-century European fortifications were revolutionized by the writing of Sébastien Le Prestre de Vauban, the French military engineer and author of A Manual of Siegecraft and Fortification. His formal star-shaped forts of the era defined military and city defensive architecture throughout Europe and in overseas colonies.

North American wilderness warfare of the French and Indian War often called for more hastily-built backcountry defenses. A paper by Military Architecture of the American Frontier, made available online by the National Park Service, provides an overview of how Vauban’s and other writings of the period influenced fort building in a very different environment. Blockhouses and stockades were common, and some reconstructed examples like Fort Necessity and Fort Ligonier can be visited today. Given even less time and planning, dirt, plentiful trees, and woven gabions filled with rocks could be used to create a somewhat formidable defensive position by throwing the strong backs of soldiers and hired civilians into the effort. While some Vauban-style grand forts of the period like Fort Niagara and Fort Ticonderoga still stand centuries later in the United States, countless small, temporary fortifications have been long lost to time.

FortLigonier.jpg

A plan of Fort Ligonier, Pennsylvania from “A Set of Plans and Forts in America. Reduced from Actual Surveys” by John Rocque (c. 1750)

My local club Metropolitan Wargamers in Brooklyn, NY has hundreds of pieces of terrain in multiple scales spanning many historical eras. Some of these pieces are decades old, once belonging to members who have long since moved on. They reflect different wargaming modeling techniques of the past and some bear the markings of manufacturers long gone.

I’ve taken it upon myself recently to rebuild and refresh some of these pieces, particularly a number of 28mm buildings and scratch built terrain models appropriate to 18th-century scenarios of the French and Indian War era. With this in mind, a large, banged-up and dusty wilderness fortress piece recently caught my eye on the club’s shelf and I set to work making it usable again.

IMG_1401

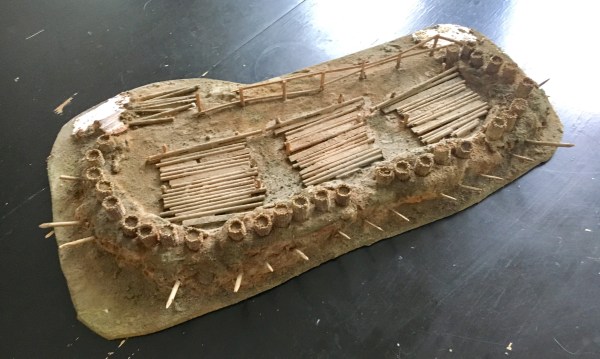
A decades-old scratchbuilt piece of terrain in need of repair

Mounted on a piece of quarter-inch plywood measuring about 8″ x 18″, this hefty model features three canon positions on a plaster raised earth mound surrounded by resin-cast wicker gabions and sharpened wooden stakes. The years had not been kind to the model. Original trees had snapped off long ago, several breaks in the plaster were evident, grass had worn off, fences were broken and overall, the whole model had taken on a drab appearance.

IMG_1406

Some initial repairs and a fresh coat of paint

The first step was to clean the model of the layers of dust accumulated over the years, remove remnants of broken trees and trim off flaking and broken bits of plaster. Next, I filled cracks and missing areas of plaster with lightweight wood filler. All the earthen areas then received a fresh coat of dark brown paint over which I dry brushed varying layers of browns and gray paints.

With the base repainted, I made small glued repairs to broken fencing. I also added a few spare sticks and a barrel to bring some detail to the model as if repairs were an ongoing part of the fortification’s use. From there, the logs, fence, sharpened stakes and gabions were repainted and weathered using more dry brushed coats of browns and grays.

IMG_1407

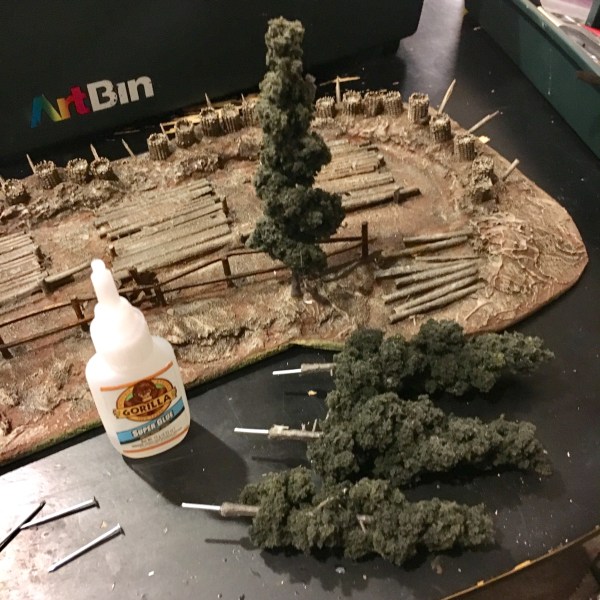
New trees are glued to the model

With most of the new painting done, I turned to adding new trees. I drilled and glued nails into the trunks of pre-made trees from Woodland Scenics which were then glued into holes in the base at the rear along the fence. The trees added textural and vertical interest to an otherwise flat model and also provided some additional color to the overall earthiness of the terrain.

IMG_1408

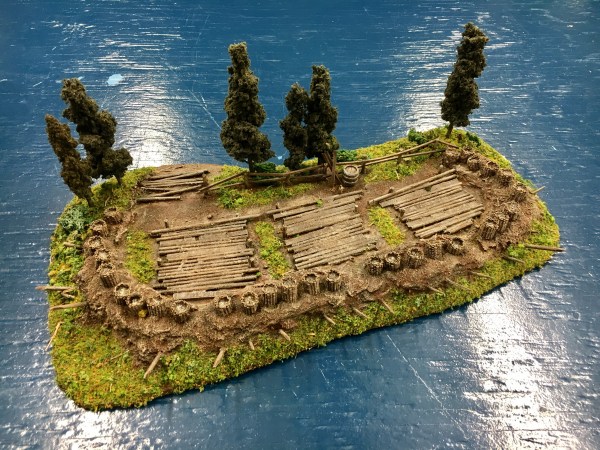
A layer of new groundcover is applied over the model

Further texture and color was added with my favorite Adirondack Blend from Scenic Express. This material contains grass of varying color and texture along with other larger bits of scattered twigs and wood chips which give a highly detailed look that reflects the ground of the North American wilderness. To attach, I heavily brushed white glue on a section at a time all around the base of the fortification and then shook a thick layer of the grass over the glue. Some areas around the logs also received a bit of grass to break up the sameness of the main battery area. Once dry, I lightly tapped the excess grass off the model, carefully scooping up the extra for use again. Finally, a couple small bits of clump foliage were glued around the trees and in random areas along the model’s base. With everything dry, the model got a matte spray coat to hold on the grass and seal the new paint.

In less than a couple hours work, the whole model popped back to life after sitting unused for years. The fortress also has a look more consistent with some of my other terrain pieces, allowing for a more unified look on the table. The project has inspired me to have a look at rebuilding other long-ignored pieces of terrain at the club, bringing them into a new century of miniature wargaming for hopefully years to come.

IMG_1498

IMG_1499

French and Indian War: British Regular Infantry from Blue Moon Manufacturing


In continuing to build out my collection of  British Redcoats for the French and Indian War, I’ve turned to Blue Moon Manufacturing — an old standard in wargaming miniatures.

BM_Web Page Logo.jpg

Blue Moon produces a tight selection of metal 28mm figures in a line called “Drums In The Ohio Valley.” I picked up a box of 30 marching British which includes two commanders, two NCOs, four flag bearers, two drummers and 20 soldiers marching at shoulder arms. The officers all come resting with pole arms, something commonly found in FIW miniatures but little seen in the wooded areas of battle of the period. Four flag bearers were twice as many as I needed and the drummers are nice to have but not necessary at the skirmish scale and rulesets I play. I set these figures aside for another day and turned to the many body of troops.

IMG_9554
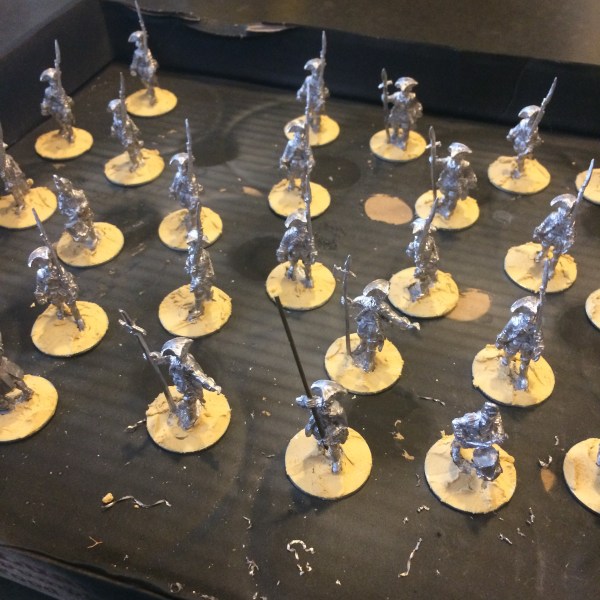
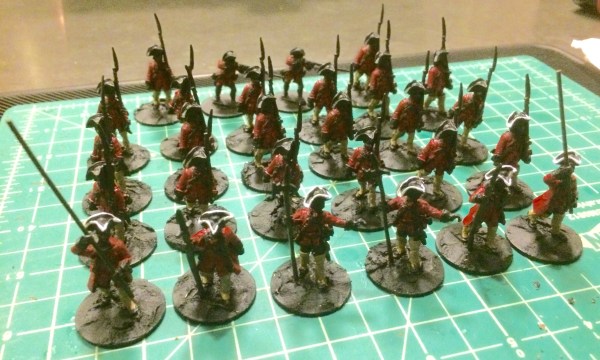
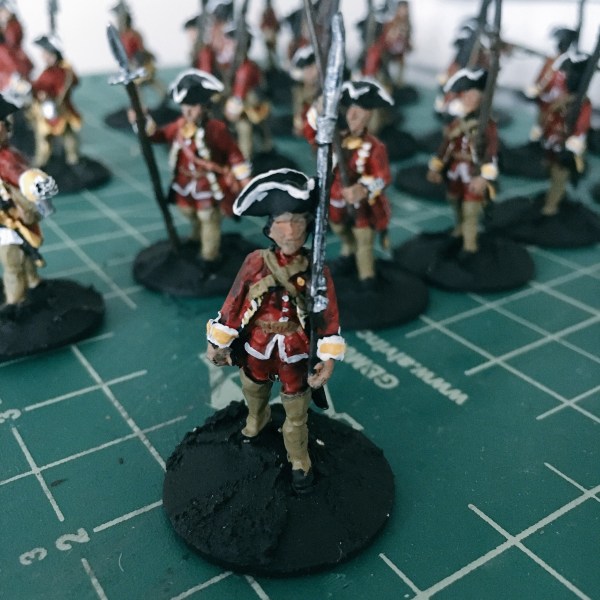
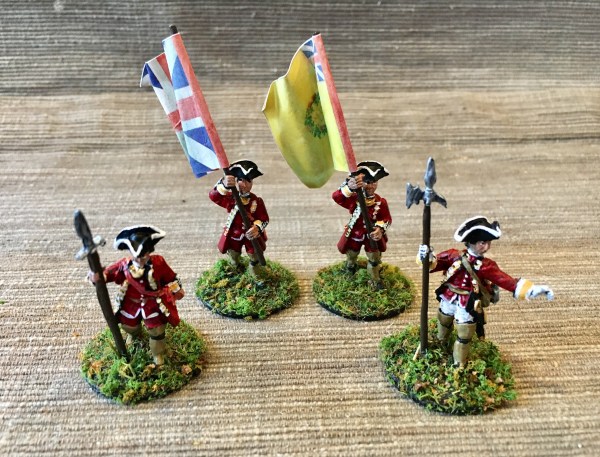
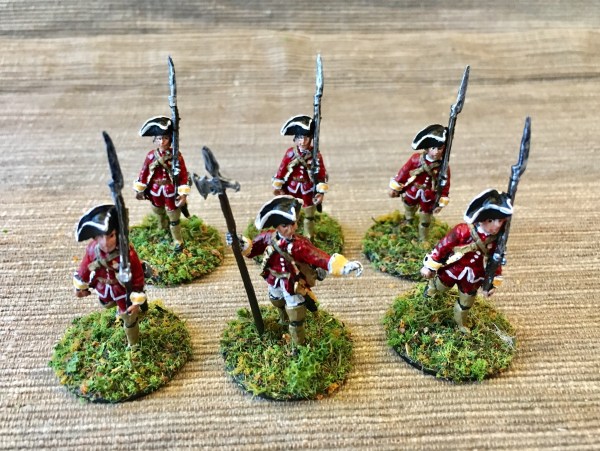
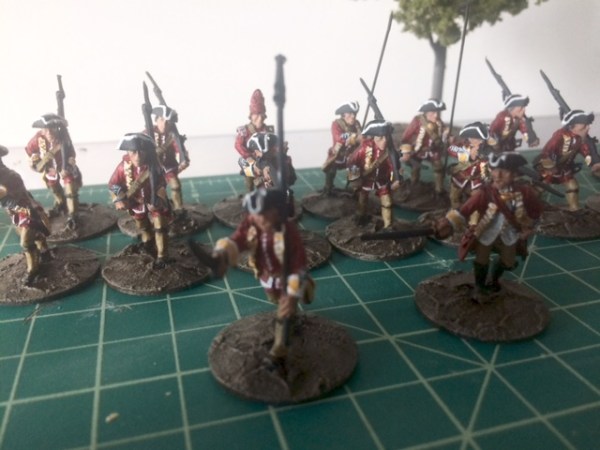
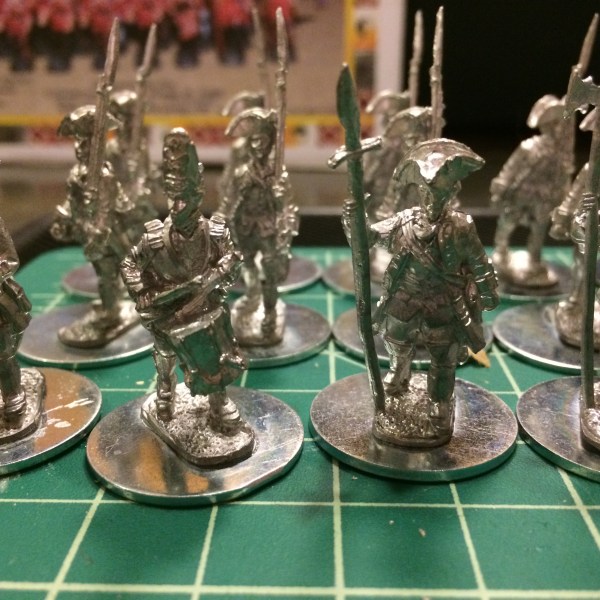
Blue Moon British stand ready to receive paint

Since these models are going to be sharing the table with my other British from Conquest Miniatures sold by Warlord Games, I made some immediate comparisons in casting and scales. The Conquest figures tend to be a bit thin and lean toward 25mm. The chunkier Blue Moon miniatures are a full 28mm and more heroic in scale. My Virginia Provincials from Galloping Major scale more equally with these Blue Moon models.

IMG_9553

Thick base (right) filed to a thinner height (left)

A main factor in driving the size differential among manufacturers is that the Blue Moon British stand overly tall on thick bases. I had been forewarned of this but I was pretty surprised at how this little extra amount of metal made the size noticeably different. With some tedious cutting and filing, I brought them down a bit in height to be a bit more in line with the height of the Conquest models.

IMG_9579

Brass rod inserted as a flag pole

The flag bearers also required some small brass rod to be cut and inserted through holes I drilled through their hands. This gave me the excuse to acquire a pin vise drill, a long overdue addition to my hobby kit. In all, there was a lot of prep work on the Blue Moon figures before I could start any painting.

IMG_9552

My painting area swarming with British being prepped for painting

The Blue Moon line of figures fits exactly with my focus for the war. I’m painting all my British soldiers of the period to represent the 44th Regiment of Foot mostly for their presence in the Ohio Country, specifically in the Braddock Expedition and the Battle of the Monongahela.

IMG_9576

Based and ready for priming

After basing the models on washers, filling the bases with rough wood filler and spraying a black primer coat, I blocked in the colors. I didn’t get carried away on exact colors, relying on a basic red for the coats, waistcoats and pants, basic yellow for the facings and a brown buff for the leggings.

IMG_0218

Coats and leggings blocked in starting on hat trim

IMG_0503

Details begun on the lapels, turn backs and cuffs

The cuffs were done in two steps, first with a thick bright white stripe and then finished with a thin line of yellow. With a fine brush, white details were added on the basic black tricorn hats and on trim to the waistcoats and lapels.

IMG_0534

Equipment straps and white uniform detail progressing

IMG_0550

Most colors blocked in and just needing some final details, clean-up and shading

Details were finished off with the same brown buff on stripes and belts, a basic brown to the guns and metal to finish off the guns, bayonets and officer swords. Finally, flesh and eyes were painted. Exposed skin and the leather leggings and straps got a careful light coat of brown wash to finish the painting. I had leftover flag photocopies from my previous British so my standards would all blend together nicely. Finally, the bases were covered with my favorite groundcover – Green Adirondack from Scenic Express.

IMG_0753

IMG_0754

IMG_0755

IMG_0752

French and Indian War: Woodland Indians from Conquest Miniatures

After facing my fear of painting all the details on my first 18th-century British Redcoats, I turned next to North American Indians and another challenge – painting lots of flesh. Getting Indians in the mix with my French and Indian War gaming project was key, and my focus on the era of the Braddock Expedition and the Battle of the Monongahela meant I was going to need lots of Indians. In addition and since both the British and the French allied with different tribes throughout the war, I was going to need a fair amount of variety from the figures I chose.


As I entered into modelling my first North American Indians of the 18th-century, I went to two books. Jill Lepore’s The Name of War: King Philip’s War and the Origins of American Identity (1998) focuses on how warfare in New England in the 1670s shaped the mindsets of European settlers as well the native people they encountered. In a follow-up of sorts, Our Savage Neighbors: How Indian War Transformed Early America (2007) by Peter Silver picks up this thread in the Mid-Atlantic colonies of the 1700s as multiple nationalities and ethnicities of Europeans again ran up against a population of natives set on halting the expansion of these new arrivals. Both books are remarkable and still ring as relevant to this day as fear and violence remain a cultural and poltical driver as we Americans continue to grapple with new cultures of people looking to share space.

ConquestLogo
Warlordlogo
With a bit of reading under my belt, I was fortunate to have a fellow member at Metropolitan Wargamers in Brooklyn, NY who had piles of extra Indians from Conquest Miniatures sitting in a box. These metal cast models are now carried by Warlord Games in both boxed sets like the Woodland Indian War Party and in smaller packages. From my friend’s stash and without duplicating poses, I was able to pull out a couple dozen different models to build my initial Indian force. The models show a lot of unique personality and equipment with both traditional weapons (bows, war clubs, knives and hatchets) and European guns. The mode of dress also varies, with some figures wearing only the minimum of a loincloth and leggings while others are in long-sleeved shirts.
img_8685
My first Indians get their base flesh coat
As per my usual process at this scale, all the metal was cleaned up, the figures were based on washers and the bases were filled in roughly with wood putty. After a black spray coat, the first challenge was in finding a proper flesh tone to represent Native woodland Indians of northeastern North America. I read a lot online debate on how to capture the skin tone of a varied people, so I settled on a two-part process of my own.
fullsizerender-2
A second lighter flesh coat is added
Over the black primer I applied a first coat to exposed skin areas using a 50/50 mix of red and dark brown paints. As the paint was drying, I immediately noticed the skin was a good dark color but translating as overly red even at arm’s length. In order to preserve the richness of the color while also tempering the bright redness, I gently dry brushed a coat of light brown over all the skin areas again. Once dried a second time, I felt I had a fairly decent tabletop rendition of skin tone capturing the creases, shadows and shape of the bared muscles without tipping into caricature.
fullsizerender-3
Details in equipment and clothing begin to be blocked out
As opposed to the sameness of European uniforms of the FIW period, the real fun in painting these Indian models is in the imagination that can be put into them. Not surprisingly, there’s not much of a detailed historic visual record of exact modes of dress for Native Americans of this period. With that, I let my creativity reign. Most leggings, loincloths and satchels got a basic leather brown color with fringe highlighted in slightly lighter brown. Jewelry such as necklaces, earrings and bracelets got a mix of metallic and red, blue or green colors to represent precious stones or trade beads.
Since decoration was very prominent with most tribes of the Northeast, all bags, leggings, belts and other gear got a mix of geometric patterns applied to represent this native craftsmanship. Detail also extended to some of the flesh on the models, with most receiving body paints or tattoos in red, dark blue, black and white. In the end some of the figures wound up with their arms, heads or even entire torsos covered in paint.
img_8738
Painted models are finished off in a woodland-like basing mix
While half the models carried the look of their native cultures, the other models sported more European-style clothing with long shirts, blankets and leggings, all of which were done in various colors. I especially liked one figure who seems to be striding along proudly wearing a captured British red coat. With everything painted, the bases were finished with Green Adirondack ground cover from Scenic Express.
My first two dozen completed Indians wound up dividing nicely into two groups of twelve. This will make them easier to identify as diffrent units on the same side or different tribes altogther choosing to swing their aliance to the opposing British and French.
fullsizerender-9
fullsizerender-10
fullsizerender-11
fullsizerender-12
fullsizerender-13
fullsizerender-21
fullsizerender-20
fullsizerender-19

French and Indian War: British Regular Infantry from Conquest Miniatures

French Indian War 1754-1763: British Regular Infantry boxed set

I’m a longtime miniatures painter in multiple scales and periods, but the 18th-century has always intimidated me. Large masses of European troops standing in lines, a sameness of pose and uniform bedecked with multicolored facings and detail all seemed a bit much. And if I was going to be playing the French and Indian War I was going to need British Redcoats – lots of British Redcoats.

I turned to a couple books to stoke my interest I turned to a couple books focused on my soon-to-be subjects. An old standby in the hobby is Osprey Publishing, and I picked up a copy of 1996’s British Redcoat, 1740-93 by Stuart Reid. While good for a few detailed illustrations by Richard Hook, the slim volume also gives a solid intro into the recruitment, training and life of a British soldier of the period. My interest piqued, I dove deeper into the topic with Stephen Brumwell’s Redcoats: The British Soldier and War in the Americas, 1755-1763 from 2002. The book is scholarly yet very readable, and Brumwell goes a long way in smashing common myths about English soldiering during the FIW.

ConquestLogo

Warlordlogo

With inspiration fired, I picked my first set of metal figures in the British Regular Infantry box offered by Warlord Games. Made from castings by Conquest Miniatures, the box comes with a nice selection of 18 models: four men firing, eight marching aggressively forward and a six-man command group including two flag bearers, a drummer, two junior officers and a commander.

I decided to paint my first British soldiers of the period to represent the 44th Regiment of Foot due to their role in the Braddock Expedition, the Battle of the Monongahela and other major engagements of the FIW. For my first time painting facings, I also thought the bright yellow against the red of the 44th Foot would also pop nicely on the table.

img_8917

My first test redcoat with basic colors blocked in

After basing the models on washers, filling the bases with rough wood filler and spraying a black primer coat, I blocked in the colors. I didn’t get carried away on exact colors, relying on a basic red for the coats, waistcoats and pants, basic yellow for the facings and a brown buff for the leggings. The cuffs were done in two steps, first with a bright white and then finished with a thin line of yellow. With a fine brush, white details were added on the basic black tricorn hats and on trim to the waistcoats and lapels.

fullsizerender

Halfway through my first batch of British Redcoats

Details were finished off with the same brown buff on stripes and belts, a basic brown to the guns and metal to finish off the guns, bayonets and officer swords. Finally, flesh and eyes were painted. Exposed skin and the leather leggings and straps got a careful light coat of brown wash to finish the painting. Flags were made by photocopying those included in the Warlord box, the bases were covered in my new favorite groundcover – Green Adirondack from Scenic Express.

fullsizerender-18

fullsizerender-14

fullsizerender-15

fullsizerender-16

fullsizerender-17