Flames of War: Metropolitan Wargamers Tanksgiving 2014

Tanks2014

For the second year in a row, we’ll be hosting a day of armored Flames of War tank battles on Sunday November 30th at noon at Metropolitan Wargamers in Park Slope, Brooklyn. At last year’s Tanksgiving 2013 we hosted about ten players stretched over two tables participating in Early War Africa and a Late War Europe scenarios. This year we’ll be running multiple Late War Europe games using 1500 points of armored forces on a side. We’ll have plenty of US, British, Germand and Russian models on some gorgeous tables, so experienced players can bring their own forces or newcomers are welcome to just come along, move some armor, roll some dice learn the game.

The event will be held at Metropolitan Wargamers at 522 5th Street in Park Slope, Brooklyn (enter through basement level). Visitors pay just $15 and regular club members are free. The event will be a great opportunity for new people to meet some of us at the club and experience the best and oldest wargaming community in New York City. If you’d like to come, RSVP via our club’s Yahoo group.

World War I: The Battle of Vimy Ridge 1917 with Price of Glory

VimyRidgepic

The Battle of Vimy Ridge, France over four days in early April 1917 was not just a victory for the Allies during World War I. The battle also served as a shining example of Canadian national pride as the overwhelming Canadian-led force was able to stand on its own for the first time without British leadership on the field against Germany. The decisive capture of the German lines at the ridge would hold this section of the Western Front for the Allies until the end of the war.

pogcover“Price of Glory” by Iron Ivan Games

This past weekend at Metropolitan Wargamers we finally got some WWI gaming in with a quick scenario modelled on the Canadian exploits at Vimy Ridge with the Price of Glory rules from Iron Ivan Games. We unpacked over six feet of beautifully modelled trench works that had laid too long in storage and set up a gorgeous collection of 28mm WWI German and Canadian troops from Great War Miniatures. The three of us new to the rules divided the Canadians among ourselves with four rifle and machine gun squads, a grenade-armed bombing party and a Vickers machine gun to our right. Facing us across the cratered and barb-wired field was two lines of German trenches initially defended by two teams of Germans and a MG 08 on their right flank. The level of Canadian victory would be measured by the capture of the German front line, rear set of trenches or the treeline beyond in a ten-turn game.

IMG_4620

Canadian troops advance on the German lines at Vimy Ridge

The Canadians initially plotted four artillery targets along the front and rear trench lines. After the starting German deployment, we rolled off for the artillery bombardment which we had luckily ranged-in directly on the German rifles and machine gun on the front line. Unfortunately the dice were not with the Canadians, and all four artillery shots missed. From there, the Price of Glory rules progressed simple enough with a D10 roll-off for initiative which the Canadians won and began their advance. Teams alternate on each side of the table taking move, fire or melee actions with short movement of 3″ allowing for a full rate of fire, 6″ at fire at half-rate and a 9″ sprint allowing for now firing.

IMG_4621

Germans hold the front line in the trenches

As the first few turns elapsed, the Canadians at the right slowly advanced from crater to crater as they took heavy fire from the German rifles and machine gun. Defending from the trenches, the Germans were a hard target with only a “1” result counting as a hit on the fistfuls of D10s being thrown. In the rules, a team taking fire must also roll a D10 morale check or become suppressed. Morale rating is based on the command strength of the squad, with squads on both sides initially beginning with two officers each at a “7” and “8” rating. A morale check equal to or less than the command rating for the squad passes and may take an action on their turn. A squad losing their morale check must use their next activation to rally.

IMG_4622

Canadians advance through a gap in the wire

By mid-game, one Canadian squad had met their doom in the open wasteland in front of the German line and a second was torn in half as they limped to the trench line at the German left. At the center, a full Canadian squad made their way through a center gap followed by the bomb team. On the German right, the machine gun was eliminated and a final squad of fresh Canadians made way for the trenches. The Canadians continued to win initiative roll-offs which were modified at -1 on each side for lost squads or squads failing morale checks.

IMG_4623

Germans flee the front line to defend from the next line of trenches

As the remnants of one surviving squad of Germans fled the first line of defense after losing two morale checks against the encroaching Canadians, two reserve units of Germans emerged from the woods to the rear and ran to defend the secondary line of trenches. From there, the final turns of the game became a shoot-out between the two trenches with the Canadian bomb crew and a German rifle squad being nearly eliminated in the firefight. At the final turn, the Canadians had scored a minor yet costly victory by securing the first line of the German trenches for the Allies.

IMG_4625

The Canadian bombing party occupies the first line of trenches

IMG_4626

Germans hold the second line at Vimy Ridge

IMG_4624

Canadians hold the first line for victory

I hadn’t played a WWI game in a couple of years, and the figures and terrain at the club hadn’t hit the table in quite some time either. The Price of Glory rules ran fast, and we were all generally of the opinion it captured the combined fire and morale effects found during the conflict. We also agreed another larger game with a bit more complexity and perhaps some artillery, armor and cavalry would be in order. With many worldwide commemorations this year of the Great War’s 100th anniversary (including an excellent site from the Imperial War Museum), is was good to make time for our own journey back to the Western Front.

New Game Weekend: Wilderness War

WWbox

I wound up spending a fair amount of time this past year touring sites related to the French and Indian War period while feeding my gamer’s appetite for the Seven Years War period with A Few Acres of Snow. With a little research and talking with some of the members at Metropolitan Wargamers, I decided I needed to go bigger and dive into a game focused on the French and Indian War. All trails led to GMT’s Wilderness War, and I had a chance to play my first game this past weekend.

Published in 2001, Wilderness War is a game that causes a lot of the gamers I know to glaze over with wide grins. The game is designed by Volko Ruhnke and uses a card-driven mechanic much like his COIN games series also published by GMT. I have a few games of the Runke-designed Cuba Libre and Fire In The Lake under my belt, so I knew that a French and Indian War game from him was certain to be a mix of relatively simple rules wrapped up in a rich historic board game experience.

WWboard

Wilderness War game board

The gorgeous map – hardbound in the latest edition – presents the Northeastern colonial areas of North America in the mid 18th-century. As with the war itself, the game is largely defined by geography. “Cultivated” (ie settled) areas are indicated with boxes, and “wilderness” areas and Indian settlements are printed as circles. Mountainous areas are also depicted with chains spreading through western and central Pennsylvania, the Hudson Valley region and portions of central New England. Connecting these areas are roads or trails and the more important waterways which served as the superhighways of the period. Many of the larger cultivated settlements begin with heavy fortresses protecting the space, while the game set up places a series of French and British forts and stockades throughout the map.

wwchips

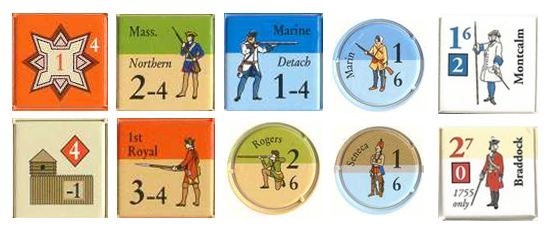
Sample Wilderness War game counters

Game components consist primarily of 70 cards and 271 cardboard counters. The counters generally depict movement and combat ratings, with reduced values on the flip side once a unit takes damage in battle, during a wintering period or from an event card. Command markers also carry tactics numbers, which help during combat, and a command value. Cards allow activation of units equal to the number printed or by command rating. Special events may also be played for British (red), French (blue) or either side (red/blue), and cards with a brown-red band are events which may be played at any point during either side’s actions.

wwcards

Sample Wilderness War cards

The game plays with year-long turns each containing an early and late season, each approximating about six months of time. In each season, players begin by being dealt eight cards apiece. Later events and actions may modify a player’s hand size, but in general the French and British player then take turns playing cards to move forces, engage in battle, construct defenses or play out events as depicted on the cards. With some pre-planning, each season moves relatively swiftly toward the conclusion of a year of war. At the end of each year, victory points are tallied and units are checked to see if they suffer losses during the winter period between each yearly season of fighting.

Wilderness War comes with a playbook outlining several small to mid-sized games featuring particular periods in the war or a set-up for the entire war from 1755 to 1762. For my first game, we jumped in with both feet and started from the outset of the war  with me playing as the British and my experienced opponent using the French. The French begin the game with a small force stretched across the Lake Ontario, St. Lawrence River and western Pennsylvania regions. British forces start poised on three fronts along the Hudson River, stretching west toward the eastern tip of Lake Ontario at Oswego and just south of western Pennsylvania. The French are buoyed with their strong alliances with several Indian nations while the British hold enormous access to colonial, regular British troops and numerous commanding officers waiting to be called into service.

Using the swift wilderness movement and  raiding capabilities in the 1755 and 1756 turns, the French sent Indian forces into Pennsylvania, Virginia and New England to raid unprotected British cultivated areas. The British quickly moved to redeploy their meager regulars throughout these areas to build stockades and push back further raids. At the same time, the French massed their forces and captured Fort Oswego. By the end of the second year of play, the French were already sitting on six victory points.

With a string of stockaded defenses set up to the west by the beginning of 1757, the British began to land troops at their coastal port arrivals to offset negative British political effects which stymied the use of more Colonial regulars and militia units. British troops commenced the long march into the Pennsylvania mountains and the nearby target French fort at the Ohio Forks (today’s Pittsburgh). Back to the east, the French began using their new base at Oswego to launch a push to the southeast into the Hudson Valley and the ill-defended areas around Albany, Schenectady and the Oneida region. All the while, the French continued to recruit additional Indian forces to buffer their defenses at the Ohio Forks and continue raids toward the east. The 1757 late season ended with my leaving too many British marooned in the mountains of Pennsylvania in a clear rookie mistake which led to my mass of troops taking heavy losses in the winter season.

IMG_4433

The British stockade defenses on the western frontier lay the groundwork for a push on the French at the Ohio Forks in my first game of Wilderness War

By 1758, my British luck seemed to change a bit for the better. Drawing and playing the William Pitt event card, I was able to increase my card hand size to nine cards and gain access to more British forces. Rushing more British reinforcements west into Pennsylvania, the French fell during a siege at the fort protecting the Ohio Forks, giving the British a firm foothold on the western frontier and awarding two victory points. Additional British troops rushed up the Hudson River Valley to hold back the French push toward Albany. As the British remained engaged in fights, the French began shifting their forces along Lake Ontario and the northern frontier while also raising a large force from the Iroquois in central New York. With 1758 at an end, my British forces were safely wintering on two fronts but in a severely weakened state and still way behind on victory points.

We called the game at its midpoint, deciding to restart another time now that I had been introduced to the general game. I still hadn’t experienced some major facets of the game such as naval movement and amphibious warfare, but I had quickly come to understand some of the major drivers of how the game plays. As a beginner, here are some lessons learned from my first game of Wilderness War:

  1. Defend the frontier. Especially for the British, but for both players, keeping the frontier defended by building stockades and forts is a must. Regular troops caught in wilderness areas are easy targets for Indians and other non-regulars, so having defenses built is key to defending territory. Having a network of stockades and forts to defend from, retreat to and maintain supply line coherence is a necessity if an army is going to succeed in the wilds of North America.
  2. Don’t get caught out in the cold. Open country and mountains are a strong enemy, particularly to 18th-century European armies. Paying attention to stacking limits as each year ends is important to keeping a force at strength. When conducting operations, players need to keep in mind where their troops will all wind up as a year ends and forces settle in for the winter. Nothing is worse than spending a series of turns marching troops into position only to have a portion of them die from starvation, disease and exposure in the period following each year’s turn.
  3. Play the long game. The full game goes to eight years of warfare, so strategy needs to take a long view. The first half of the game most probably belongs to the French as they and their Indian allies sack the wide open and undefended frontier. The British simply can’t be everywhere in the early years of the war, so spending time building defenses while also waiting to get the right cards to call in reinforcements is important. Massing and moving large forces on both sides to be strong enough to siege and capture forts takes a fair amount of planning but pays off in victory points.

Wilderness War is a fantastic playable document of the French and Indian War. The shifting alliances, opportunistic events, geography of the country itself intertwine to capture the period with a realness that might be familiar to any French or British commander on the 18th-century American frontier.

ww logo

A Gamer’s Guide to Manhattan’s Hobby Shops

PolksHobbiesGF

I’ve mentioned here more than once that my childhood was full of hobbies including model rocketry, model railroading, plastic kit building, Dungeons & Dragons, comic books and miniatures wargaming. Like generations before me, hobby stores and the now-vanished hobby areas of large department stores and five-and-dimes were where I felt at home from an early age.

I moved to New York City in the mid-1990s when much of Old New York started breathing its last gasps. Along with the closings of many storied NYC bars, restaurants, clubs, book stores, comic shops and movie theaters, hobby shops of all types are becoming more and more a thing of the past here in the Five Boroughs. The causes of the decline of hobby shops in the city are many, including rising rents, loss of customer interest, the growth of online hobby retail and many owners simply retiring or passing away.

PolksHobbiesLogo

The New York Times recently did a great little story on Rudy’s Hobby and Art in Astoria, Queens, and I’ve also become a semi-frequent visitor to Trainworld just a few subway stops away from my apartment in Brooklyn. These outposts in the outer boroughs hold on, but many of the classic shops in Manhattan have not. At the top of many city hobbyist memories is Polk’s Hobby Department Store which once occupied five floors at 314 5th Avenue. Like many businesses, Polk’s was a family-run affair headed up by two brothers beginning in the 1930s. The iconic store carried radio controlled boats and planes, slot cars, plastic model kits, trains and all matter hobby supplies which fueled the imaginations for generations of kids and adults. For the observant nostalgic, a quick glimpse of Polk’s survives in a scene from 1972’s The Godfather (photo at top).

Like Polk’s, most of Manhattan’s other hobby stores, like Carmen Webster’s on 45th Street and America’s Hobby Center on West 22nd Street, have likewise vanished from the city’s streets in recent years. At the same time, Brooklyn has seen a surge in gaming-specific stores and play spaces such as Kings Games, Brooklyn Game Lab, Twenty-Sided Store, The Brooklyn Strategist and Nu Brand Gaming. In Greenwich Village, The Uncommons now sits along the old “Chess Row” south of Washington Square, and a Games Workshop can be found a few blocks away well stocked with Warhammer and 40K players on any given weekend.

For the dedicated scale model hobbyist and gaming enthusiast, a few remnants of the traditional densely stocked hobby store of the past still live on in Manhattan. In almost all cases, online suppliers are a more economical option than purchasing from a local hobby or gaming brick-and-mortar store. However, it’s still hard to beat the experience of browsing a shop in person and having conversations with fellow customers and proprietors who share a passion for a hobby. I recently spent a sunny late summer day poking around in a few of my favorite NYC hobby shops that tap into that unique experience that still lives on.


Jan’s Hobby Shop

1435 Lexington Avenue

(212) 987-4765

IMG_4284Way up on Lexington Avenue in the East 90s,  Jan’s Hobby Shop is just the kind of store that fired my youthful imagination. Plastic soldiers, model kits, model rockets, paints, brushes, videos, books and hobby magazines are stacked floor to ceiling in the tight space of this classic hobbyist’s paradise. Kits from hundreds of manufacturers from around the world, from the common to the obscure, cover all eras, skill levels, scales and price ranges. Ships from the Age of Sail sit across from Star Wars X-Wings, ancient siege weapons are just down the aisle from Cold War artillery and all manner of cars, tanks, ships and planes fill every bit of space between. For the more advanced scale modeller, a handy selection of balsa, plastic styrene, brass tubing and specialized glues and construction materials sit at the ready.

IMG_4286Plastic soldiers from a variety of manufacturers, eras and scales at Jan’s

IMG_4287Paints and plastic model kits line the walls at Jan’s

IMG_4285Fred Hutchins’s WWII era experimental aircraft models

At the heart of the store on any given morning, store manager Fred Hutchins sits behind his workbench working away on his latest project. In my short visit with Fred, I learned of his lifelong love and work in aeronautical engineering. His ongoing project, at the rate of 30-50 models per year, is to build to scale every experimental aircraft built during World War II. In the cases nearby, much of Fred’s exquisite work is on display, and if you are a polite and patient visitor, he is more than happy to engage in a brief history lesson. Conversation with Fred, modeller-to-modeller, is just the kind of experience only found in a hobby shop and makes a visit to Jan’s worth the trip.


The Red Caboose

23 West 45th Street

(212) 575-0155

www.theredcaboose.com

IMG_4282

For a hobbyist like me, basements are portals to secret worlds of play hidden away from the normal world above. That’s where you’ll find The Red Caboose, tucked at the end of an easy-to-miss entry hall and then down some narrow stairs to a subterranean hobby wonderland. Focused largely on N and HO scale model railroading, The Red Caboose is lined with glass cases of rolling stock and engines from the steam era to today. Tourists may also find their way here to buy up some authentic scale New York MTA subway cars which may be special ordered to reflect specific routes past or present.

IMG_4283Cases of trains and row upon row of model kits at The Red Caboose

The Red Caboose is a place beyond trains, too.  Rows of shelves are devoted to kits for all sorts of buildings, bridges, industrial complexes and natural scenery, some of which have made their way to my wargaming tables over the years. Rotating racks of scale scratch building plastic, metal and wood parts, along with paints, brushes and other supplies provide a solid inventory for miniature modellers. A decent selection of military and civilian plastic kits and pre-built die-cast scale models can likewise by found, making a stop at The Red Caboose about much more than just trains.


The Compleat Strategist

11 East 33rd Street

(212) 685-3880

www.thecompleatstrategist.com

IMG_4280

As a budding role playing gamer in the 70s and 80s, I was fortunate to live near a college town where the local bookstore and five-and-dime each stocked a handy selection of Dungeons & Dragons books, miniatures and magazines. Tucked in the pages of later issues of those magazines, I occasionally saw ads for The Compleat Strategist with an inventory which sounded like a dream for my hungry gaming appetite. As a resident New Yorker today, a quick visit to “The Strat” over a lunch hour or on a weekend is an amazing escape for a quick purchase or just time spent browsing the latest in gaming.

IMG_4281The Compleat Strategist is NYC’s destination for serious gamers

The store is long, narrow and deep, with shelves of games, books, miniatures and accessories piled to the ceiling. Boardgames, chess sets and puzzles occupy the rear half of the store. A massive selection of boxed historical strategy games stretch down one wall toward an inventory of paints and miniatures ranging from Games Workshop and other fantasy lines to collectible games like Heroclix. RPG books and reference materials fill out the front of the shop along with buckets of dice, stacks of collectible cards like Magic: The Gathering and two large racks of gaming periodicals. Downstairs, the Compleat Strategist also hosts mini gaming tournaments most weekends, rounding out the total experience for the city gamer looking to stay connected to a vital hobby community.


Gotham Model Trains

224 West 35th Street, 13th Floor

(212) 643-4400

www.gothammodeltrains.com

IMG_4278

Down a generic block just north of Penn Station, the tiny and well kept Gotham Model Trains occupies a thirteenth floor space in a building housing a jumble of small businesses and professional offices. The shop is mostly about trains, and the tight inventory offers a well-edited counterpoint to the sprawling warren of shelves at The Red Caboose. I like the nice selection of Woodland Scenics ground cover, shrubbery, trees, gravel and other scratch-building materials in plastic, metal and wood on the walls and racks.

IMG_4279The well-curated inventory of Gotham Model Trains

But trains are the thing at Gotham Model Trains, and over the years this has been my local go-to for a few pieces of track needed in getting a little circular railroad running under my Christmas tree. Multiple scales, controllers, buildings, scale figures and a small selection of railfan books round out the inventory surrounding the sweet little N scale layout greeting you at the shop’s entrance. Stopping in at Gotham Model Trains, like a visit to any of Manhattan’s surviving hobby shops, you can’t help but have the irreplaceable experience of a living breathing hobby.

I Ain’t Been Shot Mum: Panzer Lehr Counterattack Campaign – ‘Hauts-Vents’ July 10, 1944 Scenario

NearStLo

Although the Panzer Lehr Division was held out of action during the Allied D-Day landing at Normandy in June 1944 , they would go on to provide a number of important defensive, delaying and counterattack actions in the months following. They first distinguished themselves in the days immediately after, throwing up a hasty defense at Caen against encroaching British and Canadian forces. After battles at Tilly-sur-Seulles and Villers Bocage in mid-to-late June, the vastly depleted Panzer Lehr Division was called out of the fight. With only a short time to regroup, the war-worn division was ordered west to countetattack he Allied inland progress toward Saint-Lo. While the June battles had run the Germans up against British Commonwealth forces, the July engagements in the hilly fields and bocage-lined roads would be against the armored and infantry forces of the United States.

PLCounterattackJul44Map

Map of the Panzer Lehr Division counterattack in July 1944

(via US Army Center of Military History)

For a few months now at Metropolitan Wargamers in Brooklyn, NY, we’ve been playing a fair amount of I Ain’t Been Shot Mum rules system for World War II. After a number of one-offs and our recent North of Caen game, we finally decided to jump into a mini campaign focusing on the Allied push inland toward St Lo and the German defense following the D-Day landings in  Normandy in June 1944.

SCHeroesofOmahaSkirmish Campaigns  “Heroes of Omaha and Panzer Lehr” scenario book

For our campaign, we’re using the classic Heroes of Omaha and Panzer Lehr scenario book from Skirmish Campaigns. The Skirmish Campaigns series of books offers well-researched and detailed campaign scenarios full of detailed orders of battle, terrain layout maps and deeply descriptive narrative of how actual engagements unfolded during World War II. With just a little bit of work, the Skirmish Campaigns scenarios are easily adaptable to a variety of wargaming rules and scales including Battleground, Bolt Action, Flames of War and I Ain’t Been Shot Mum.

IMG_4207

Scenario set-up with two small houses as objectives at the middle of the table set amid rolling hills, small farms and thick bocage

The scenario at Hauts-Vents is set up on a long table with hills rolling into a valley from either end. Roads cross the table among fields lined with heavy bocage hedgerows. At the center of the table are two farmhouse objectives that are the focus of the US mission. All German platoons are deployed on blinds nearly everywhere on the table, accepting the northeast corner from which the US advance begins.

My Germans deployed on blinds with a Pak 40, a Sdkfz 10/1 and an artillery spotter for the off-board 105mm artillery deployed around a farmhouse atop Hill 91 on the southern end of the table. German rifle platoons armed with Panzerfausts deployed in blinds in and around the objective farmhouses. One platoon also had a MG42 and another contained a Panzerschrek anti-tank team. To block the predicted US advance, one road was blocked with barbed wire and another was laid with mines.

The American blinds moved in straight in column along the road sloping down toward the valley. Heading the advance was a US recon platoon led by an M8 Greyhound armored car. Three platoons of mechanized infantry loaded up in half tracks and a platoon of Sherman tanks fell into line behind.

IMG_4210

A US recon Greyhound at the head of the column exposes barbed wire laid to block passage on the road to the objectives

IMG_4212

The recon unit moves to overlook the German position near the objective house as US half tracks roll into position

IMG_4211

 German infantry move out of the house to engage the US infantry

IMG_4213Fire from German Panzerfausts destroy two half tracks and their passengers

IMG_4215

Germans use their last Panzerfausts to destroy the remaining half track and its crew

The first few turns progressed quickly with the US column moving down the road under blinds while the Germans quietly defended from concealed positions. The lead Greyhound revealed the barbed wire blocking the road, forcing the first platoon of half tracks off the road toward the first objective. Closing in on the house, the German position was revealed and the Germans quickly destroyed two half tracks and their mounted infantry with shots from Panzerfausts. In subsequent turns, the US commander jumped from his vehicle and was followed in by the final half track which was also destroyed. With the lone US commander in the position, the Germans assaulted taking casualties before eliminating all Americans from the disastrous head-on assault on the objective.

IMG_4214

 The column of US Shermans and infantry mounted in half tracks rush down the road

IMG_4216

German 105mm artillery rains in from off the table wreaking havoc on the US column

IMG_4217

A German Pak 40 and Sdkfz 10/1 break their cover on Hill 91 to engage the paralyzed American column

As the first platoon of US infantry fell, the remainder of the column ran into problems of their own. The Shermans attempted a push into the field off the road but two of the three quickly bogged in the rain-soaked ground. With the Shermans stalled and the rest of the column bunched-up on the road, an off-board German 105mm artillery barrage made a direct hit to the US line. As a result, the tanks took severe damage to their sights, main guns and mobility. Infantry jumped from their half tracks and one platoon took immediate fire from German MG42s hidden in the bocage across the nearby field. As the Americans desperately attempted to spread out and move to cover, additional rounds of fire from the Pak 40 and Sdkfz 10/1 on the far hill continued to pour shots into the remnants of the burning US column.

IMG_4218

 US reinforcements arrive at the house and advance on the defending German left

IMG_4220

Germans attempt to hold the flank at the objective

IMG_4219

Smoke is laid down in front of the German position on Hill 91 to cover the US advance

IMG_4245A late game push up Hill 91 by the US Greyhound leaves it in flames

The survivors from the US column swiftly moved to position themselves for another round of assaults on the German position. Two surviving Shermans unbogged and rolled to position along the bocage, destroying the MG42 positions along the way. US infantry rushed in along both flanks of the German survivors at the farmhouse who were quickly reduced to a single operable fire team. US mortars followed up with a directly aimed smoke bombardment in front of the German guns on the hill, providing invaluable cover for the American ground advance. Pressure from the advancing Greyhound forced the Sdkfz 10/1 to fall back late in the game. As the armored car breached the crest of the hill, a quick shot from the Pak 40 eliminated it. Unfortunately for the Germans, this was one of their last bits of glory for the game.

IMG_4242German defenders get routed at the first objective during close assault and fall back

IMG_4243The last platoon of German defenders get spotted at the second objective

IMG_4244The final objective falls to the Americans as the German defenders are caught in combined infantry and artillery fire

Back at the two objectives, the US moved hard toward victory. A close assault at the first house sent the survivors of two German fire teams running for the rear with heavy casualties and all but eliminated from the game. With that, one lone German platoon was exposed at the second house objective, and all US focus turned toward them. Two turns of heavy US artillery strikes and small arms fire from the bocage across the road laid waste to all but a few of the last Germans holding out. With the US Shermans still working their way on the German left and US infantry closing on the front, my Germans threw up their hands in defeat.

The first day of battle at Hauts-Vents went to the Americans, but as dark was drawing near, another battle was already looming before dawn as more Germans rushed to the defense.

Micro Armour: How To Apply Decals To 6mm Models

tankfactory

I’m working my way through my new 6mm micro armor modelling project using models from GHQ. After painting I arrived at the stage of applying decals which I also ordered from GHQ. Like many hobbyists, I have a love-hate relationship with decals at any scale. Cutting and applying decals can be frustrating as they fold, tear or wind up in the wrong positions on models. On the other hand, getting decals successfully applied to models adds a ton of personality to a paint job and can allow for easier identification during play on the tabletop.

An experienced micro armor modeller and player at Metropolitan Wargamers in Brooklyn, NY turned me on to his technique for applying decals to 6mm models which I’ve found to be fast and easy with great results. Being organized and methodical in an assembly line manner is key. Having the right equipment is also a necessity. Magnifying reading glasses keeps all the tiny decals and models in focus. Working off a clean, flat hobby mat provides an ideal surface to cut decals and also keeps things easy to see. A sharp hobby knife with a fresh blade, some very fine brushes, clean water, white glue, paper towels and a cotton swab round out the basic equipment. Finally, using a decal fixative (I use Walthers Solvaset) gives a good bond for decals once applied, nestling them into the uneven surfaces of the model.

Applying 6mm Decals

  1. Carefully cut around the shape of each decal with a very sharp hobby knife.
  2. Using a finger tip, dot several small beads of  clean water in a row on the work surface.
  3. Apply a small amount of watered-down white glue to the surface of the model where the decal will be applied.
  4. Carefully push a decal into a bead of water using a small brush.
  5. After a few seconds, roll the decal off its paper backing using a fine brush.
  6. Roll the decal onto the model’s surface and gently push it into position.
  7. After a few minutes of drying time, dab the decal area with a cotton swab to remove any excess water.
  8. Coat the decal and the immediate area with a decal fixative solvent.
  9. Once models are completely dry, spray with a protective matte finish.

IMG_4079Applying decals to 6mm American armor

Historic markings varied a lot during World War II, so I largely came up with my own simple plan for my decals. Each one of my half tracks got encircled white air-observation stars on the hood. My Shermans each received two stars, one plain star on the front hull and an encircled white star on the rear deck of the tank. The M10 Wolverines and armored cars likewise received white stars in circles on the rear deck area.

IMG_40776mm US armor and transports with decals applied

I was able to complete all my decals in just two evenings, totaling  just about two hours. I couldn’t be more pleased with the results, and I didn’t lose a single decal in the process. Now that I’ve got my newly-learned technique down, it’s on to my German armor and then the battlefield.

Robin Williams (1951-2014) – Comedian, Actor, Gamer

williamstoysAmerican comedian and actor Robin Williams died yesterday from an apparent suicide after battling years of depression and addiction. While his award-winning acting, frenetic comedy performances and activism are what he will no doubt be best remembered for, to a certain set of fans like myself, his lifetime interest in gaming and toy soldiers likewise leaves a mark.

As a lonely, oddball child of wealthy parents, Williams developed an early escape valve through play with toy soldiers. In a 1993 New York Magazine profile, Williams’s mother recounted his boyhood obsession with toy soldiers:

“Robin had the entire third floor,” his mother, Laurie Williams, says. “He put his toy soldiers — he had thousands of them — in those rooms, carefully divided according to period.” Williams not only staged intricate battles between soldiers of different eras, he created dialogue for them in what was, essentially, a childhood version of his performance style.”

Not only was Williams a toy soldier fan from an early age, but gaming was a lifelong passion. He was an avowed Warhammer 40K player (apparently favoring Eldar forces), even posing for photos with staff and other players during stops at local gaming stores. He is also listed among celebrity players of Dungeons & Dragons, going so far as to participate in major gaming events up until a few years ago. His passion for gaming also extended to online and video gaming, and his daughter Zelda is rumored to have been named for the popular adventure fantasy video game series from Nintendo.

morkboardgame1979’s Mork & Mindy board game from Parker Brothers

Like a lot of kids growing up in the 1970s and 1980s, Williams’s starring role in Mork & Mindy from 1978 to 1982 was a fixture in my weekly TV viewing. Starring as Mork, a zany alien from the planet Ork, Williams’s catchphrases, mannerisms and signature look became firmly imbedded in my young mind. There was definitely Mork madness in my life and in the culture for a bit, extending to toys, games and even rainbow suspenders (yes, I had a pair).

Williams certainly went on to much bigger and often more serious professional work, but that period in my youth where I was becoming an impassioned gamer myself definitely informed some of my own willingness to stretch into characters outside the bounds of reality. Williams’s life of playing characters, switching roles and acting out wild fantasies brought so much joy to audiences around the world, but for me, I like to imagine him as that little boy crouching over his little soldiers and creating a universe that was just his for a moment.

Retro Gaming The 70s & 80s: Crossbows and Catapults

CandCBox

In 1983, I was 15 years old and living in a heyday of gaming. I already had a few years of Dungeons & Dragons under my belt and I was starting to stretch into some other fantasy role-playing, board and miniatures games. Video games had also become a big part of my social life, both in my friends’ living rooms and in the arcades popping up in the malls and main streets near where I grew up.

Sears1983CandC

Crossbows and Catapults as featured in a 1983 Sears catalog (only $12.99!)

Out of this early 80s mix of increasingly sophisticated RPG and video gaming came the decidedly low-tech Crossbows and Catapults from Lakeside Games. The basic play set came with a bunch of wonderful plastic toys representing enemy kingdoms of vikings and barbarians. Each side had a simple castle-like tower and loosely fitting bricks to construct a stronghold on a square mat depicting a moated island.

CandCbaseset

Crossbows and Catapults “Battle Set” components from basic instruction book

But the name of the game wasn’t Crossbows and Catapults for nothing, and that’s where the real fun of the game came in. The opposing sides were each armed with rubber band powered catapults and crossbows (really more like ballistas, but the alliterative name certainly looked better on the box). In alternating turns, players would fling and fire round carom discs at the opposing player’s stronghold and troops. Knocking over figures were scored as casualties and landing caroms in enemy territory allowed advances in raiding forces. The game was won when a player revealed and seized the treasure buried beneath the other player’s castle.

IMG_3949

Components from the Crossbows and Catapults “Battle Set”

I’m fortunate to have a massive archive of well-kept childhood toys stored at my boyhood home, and I was recently able to dig through my surviving Crossbows and Catapults sets. All the rubber bands needed to be replaced, but everything else survives in near-perfect working order. Pieces from my decades old collection are shown in the pictures throughout this post.

CandCsetup

Game set-up instructions from the Crossbows and Catapults “Battle Set”

I also managed to preserve all the original instruction books from the “Battle Set” base game and the various expansions which were subsequently released (some scans included here). The “Castle Outpost” contains larger towers with a rubber banded platform that pops figures and flags into the air if the door is hit by an incoming carom. In the “Trojan Horse” set, the catapult-tailed horse “explodes” from the sides when hit on the base of its front feet, and the accompanying crossbow-armed “battle shield” pops open when struck at the front. My favorite expansion, the “Battling Giants” set, came with 8-inch tall minotaur and cyclops models which fling caroms at the enemy by pushing a button at their backs.

IMG_3950

Crossbows and Catapults “Castle Outpost” expansion  set

IMG_3948

Crossbows and Catapults “Trojan Horse” expansion set

IMG_3947

Crossbows and Catapults “Battling Giants” expansion set

Every Crossbows and Catapults expansion came with new rules and components for each side, allowing for a lot of additional play options on the floor battlefield. The expanded rules for each set allowed for standalone games or for incorporating the new pieces into the base “Battle Set” game. All the instructions also encouraged players to make up their own rules, something my brothers, friends and I did endlessly in our brief period of Crossbows and Catapults obsession.

HGWLW

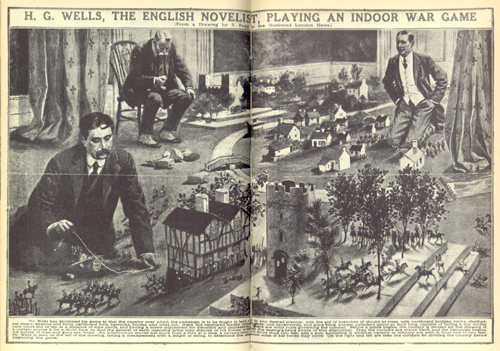
H.G. Wells, author of “Little Wars,” and his friends wargaming on a parlor floor

In revisiting my teen delight over Crossbows and Catapults my mind went straight to the descriptions of early 20th-century gaming laid out in Little Wars by H.G. Wells. The tiny 1913 book is seen today as the formative basis for what would become miniatures wargaming in the coming decades. Building on the more abstract Kriegsspiel tradition of the early 1800s, the genesis moment for using toys in wargaming is described in the book as an idea of one of Wells’s friends:

“I believe that if one set up a few obstacles on the floor, volumes of the British Encyclopedia and so forth, to make a Country, and moved these soldiers and guns about, one could have rather a good game…”

britains4.7navalgun

Early 20th-century die-cast Britains spring-loaded 4.7 naval gun

As you read through the game descriptions and rules set forth by Wells, quite a number of similarities to Crossbows and Catapults arise. Rudimentary buildings or forts are placed on small boards, much like the plastic mats provided in Crossbows and Catapults. Resolving combat in the games played by Wells and his gentlemanly friends was commonly achieved through the firing of wooden pegs with the spring-loaded Britains 4.7 naval gun at opponent’s infantry, calvary, buildings and walls constructed of wooden blocks.

Seventy years after Little Wars, Crossbows and Catapults presented a very similar floor game. The rubber-band catapults and ballistas firing caroms at the soldiers, castles and plastic brick walls. In both games, proximity of infantry to artillery — a naval gun of Wells’s day or a catapult in the modern game — determines whether that piece may fire. The measurement of the play area as set forth by Wells and outlined in the Crossbows and Catapults basic rules are uncannily similar.

BGCandC

“Battleground: Crossbows and Catapults” re-release from 2007

The Crossbows and Catapults license passed through a number of game publishers over the years and was re-released as “Battleground: Crossbows and Catapults” in 2007. The game was modified and updated with orcs versus knights plus some redesigned components and additional expansion sets.

I had a chance to play with my Crossbows and Catapults sets again this past week, some 30 years after I first I bent down on my teenaged knees to do battle between barbarians and vikings. Playing with my nine-year-old son, all the fun of launching plastic discs at opposing armies came back. The game is largely a shoot-out of skill and aim wrapped around some still-nifty game pieces. In the early 1980s I didn’t know about Wells and his Little Wars floor games, but a hundred years on now I can see the connection, tradition and joy in commanding armies on the floor and flinging attacks with Crossbows and Catapults.

Collector’s Note: You can find the 1983 “Crossbows and Catapults Battle Set” in the original box for $50-200 on eBay, and many of the expansions can be picked up for around $20. The re-released “Battleground: Crossbows and Catapults” set from 2007 can also be had for about $50.

Flames of War: Fielding the 92nd Infantry Division Buffalo Soldiers

buffalsoldierscmnd

Although African-Americans have fought in every war in US history, their fight has often come on multiple fronts of prejudice and acceptance at home and abroad. Segregated units such as the famed 54th Massachusetts during the American Civil War and the 369th Infantry Regiment Harlem Hellfighters in World War I have received their due in popular culture in recent years, as have the WWII pilots of the Tuskegee Airmen.

On the ground, African-Americans in WWII were most often relegated to support roles early in the war as truck drivers, stevedores and cooks. By late in the war with reserves of Allied soldiers dwindling throughout the European campaigns, black soldiers were pressed into service at the front lines of the Battle of the Bulge and the Italian Campaign. It was in the actions in Italy where the famed 92nd Infantry Buffalo Soldiers added another chapter to their service history.

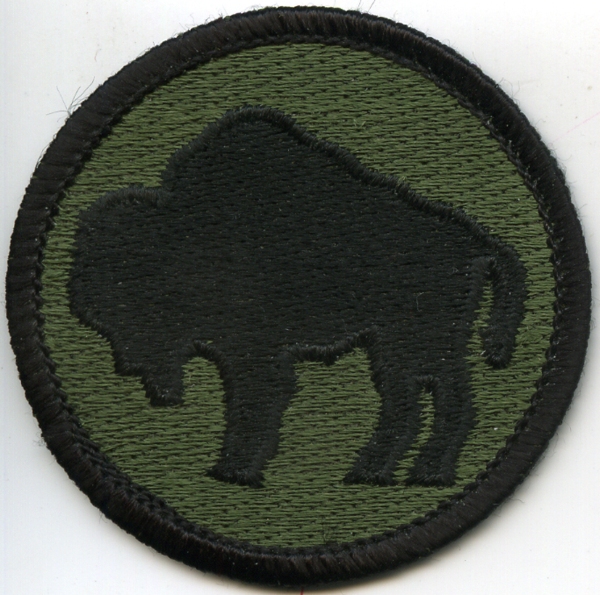
92ndpatch

Shoulder insignia of the 92nd Infantry Division ‘Buffalo Soldiers’

The Buffalo Soldiers in the Italian Campaign

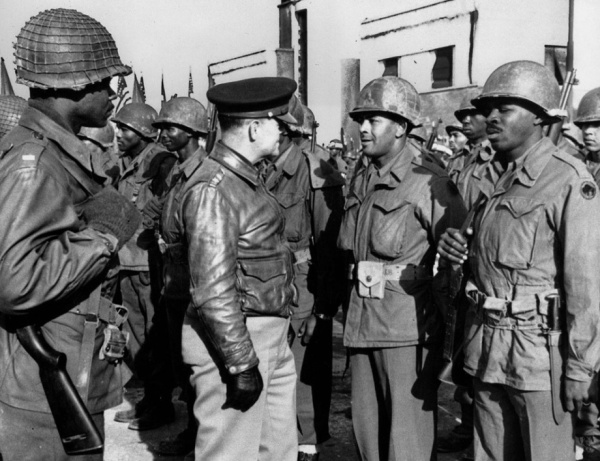
The name “Buffalo Soldiers” dates back to the frontier Indian Wars of the 19th-century when post-Civil War free blacks volunteered for service in various US army capacities in the West. Later, these units continued serving in various capacities through the Spanish-American War and into WWI. Reactivated in 1942, the Buffalo Soldiers of the 92nd Infantry Division finally made their way to the war via Italy in the fall of 1944.

Video of the 92nd Infantry arriving in Italy in October 1944

As part of the US 5th Army, the 12,000 men of the 92nd Infantry made up part of the multinational Allied coalition of US, Brazilian, British and UK Commonwealth forces which sought to break the Gothic Line. Cutting across Italy, the Axis hoped to hold off any further Allied progress north to meet with other Allied forces pressing through Europe from Normandy inland toward Berlin.

92mortar

A 92nd Infantry Division mortar crew firing near Massa, Italy

Led by senior white officers in otherwise segregated units, the 92nd Infantry made up a key element of the left flank of the Allied push up through the Italian peninsula. Crossing the Arno River and proceeding north, the 92nd made its way up the Mediterranean coast  through Lucca, Massa and on to La Spezia and Genoa by the time of Axis surrender in May 1945.

The legacy of the contributions of the 92nd Infantry Division’s effectiveness in Italy has been much-debated. A paper from the 1950s does what I read to be a good job in explaining the challenges the Buffalo Soldiers faced — delays in reinforcements,  shortages in re-supply and a lack of training for the kind of terrain encountered in Italy. I believe much of this can be chalked-up to the ingrained organizational racism against the segregated units. Post-war, the members of the Buffalo Soldiers also returned to a United States still entrenched in racial discrimination. It was not until the late 1990s that two members of the 92nd were recognized with Medal of Honor commendations, some fifty years after the war’s end.

Spike Lee’s Miracle At St. Anna

StAnna

As a wargamer and film fan, I often turn to the movies to cross-pollinate my interest in a period. Spike Lee’s Miracle At St. Anna from 2008 tells the story of four soldiers from the 92nd Infantry who hide out in a small Tuscan village and bond with its residents amid the oppression and danger of German occupiers. Lee’s movies often run hot and cold, and Miracle at St. Anna met with mixed reviews, poor box office results and a fair amount of criticism over the lack of historical accuracy. All that said, the Italian locations and strong individual performances makes the movie worth a view for a rare glimpse of African-American soldiers in WWII cinema.

Modelling the 92nd Infantry Division for Flames of War

fowroadtorome

In late February 2014, the revised Flames of War Road To Rome and Fortress Italy compilation was released as an updated and expanded guide to the Italy campaign of 1944 and 1945. The Fortress Italy book covers the German and Italian defenders, and Road To Rome outlines the Allied US, British, Polish, French and lesser-known UK Commonwealth forces from Canada, New Zealand, India and South Africa. A third book, Italy Battles, provides special mission rules, battle scenarios and campaign notes for Anzio (aka “Operation Shingle”) and Monte Cassino.

infantry aces

Having dedicated years of my FOW modelling and gaming to Western Europe, these books provided a great opportunity for myself and other members of Metropolitan Wargamers in Brooklyn, NY to dive into a club-wide Italian project. I’ve also been wanting to put together a unique company for my FOW collection, and I was pleased to find the 92nd Infantry Regiment outlined in the Road To Rome book. With all our focus on the Italy theater, we’ve decided to dive headlong into a multi-month FOW Infantry Aces campaign, and there will be more to come with updates on our new Infantry Aces blog.

PSCUSinf

For my 92nd Infantry I decided to snap up the two sets from the Plastic Soldier Company – Late War US Infantry 1944-45 and US Infantry Heavy Weapons. At about $26 a box from my favorite online dealer The Warstore, the PSC kits are a huge value in fielding an entire infantry company along with bazooka, machine gun and mortar supporting weapons. Assembly involves lots of small parts and bases must be purchased separately, but getting a whole company on the table for a fraction of the costs of FOW models can’t be beaten.

IMG_3669

Pvt. Fred “Radio” Rogers and Lt. Daniel McFeeley

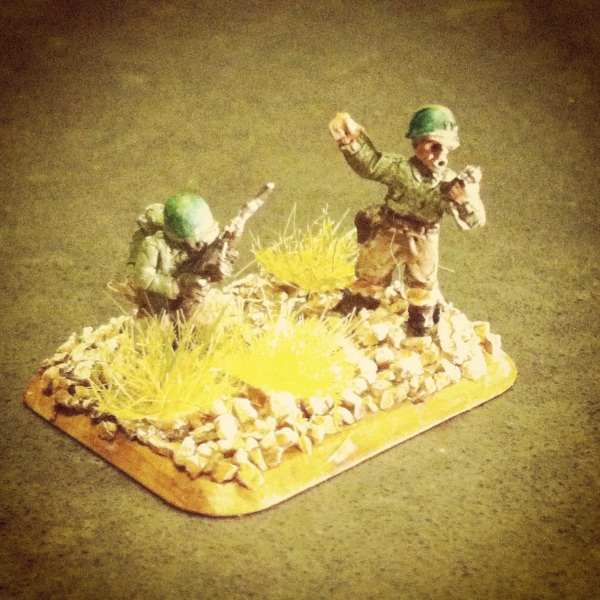
To fill out my force, I picked of the FOW Infantry Aces set for about $12. The pack gives you nine stands of character models to create special Infantry Ace command stands for use in the Infantry Aces campaign. The blister pack includes general US, British and German models with special Fallschirmjäger, Japanese-American Nisei, Kiwi and turbaned Indian characters. I shared the models with my fellow players at our club, and modelling these guys really adds some nice personality to the game. For my Command Ace stand, I’ve modeled the fictional Pvt. Fred “Radio” Rogers and Lt. Daniel McFeeley leading the way for my company.

IMG_3670One of my three rifle platoons for the 92nd Infantry Division

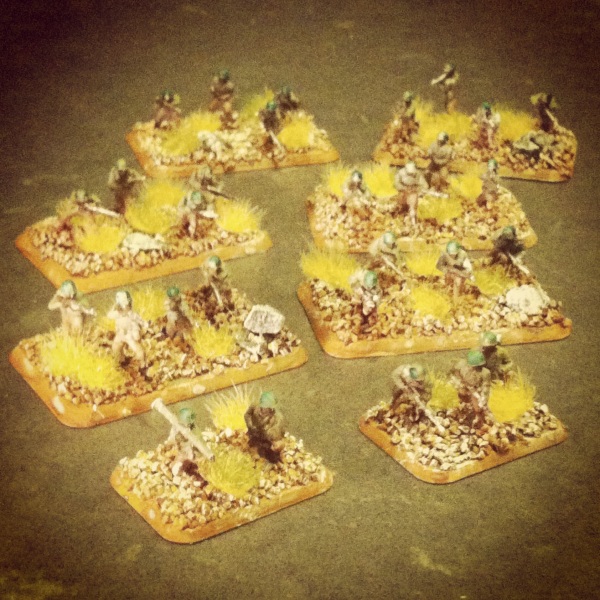
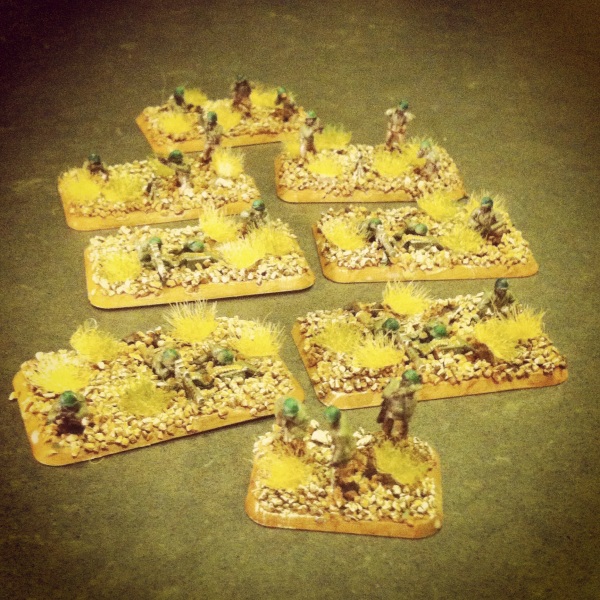
In the FOW Italy campaign, the 92nd Infantry Division is rated as Confident-Trained making my force cheap and numerous. To start, I’ve constructed three rifle platoons with two rifle squads each plus a platoon command and bazooka in support. Along with my rifles and McFeeley and Rogers leading the way, I’m also bringing a weapons platoon in support. The platoon packs a punch with three 60mm mortars and four M1919 machine gun crews.

IMG_3671My Buffalo Soldiers mortar and machine gun weapons platoon

For all my models, I glued the PSC soldiers and equipment onto FOW bases and then hit them with an army green spray coat base. Boots, equipment, rifle stocks and flesh got a dark brown. Pants were done in a tan paint and leggings got a brownish off-white color. Guns were finished off in a metal coat. Basing involved a layer of fine gravel and larger rocks coated in a brown wash and then dry-brushed in a grey-white. Finally, tufts of brown-green grass completed the Mediterranean look of the models.

The beginnings of my platoon will be hitting the tabletop shores of Italy this coming weekend in their first round of our club’s Infantry Aces campaign. In the coming weeks I’ll be adding additional infantry weapons support with additional mortars, machine guns and more infantry. Even before these guys see their first action, I’m pretty thrilled to have put in the time to create some pretty unique models that I haven’t found modeled anywhere else at this scale. As in WWII years ago, I think the 92nd Infantry Buffalo Soldiers have been too often forgotten by mainstream history and many gamers alike. With my soldiers hitting the field again, I hope to bring a bit more glory back to these men who not only contributed to the fight against Axis fascism but also stood bravely against the tide of so much history against them.

Metropolitan Wargamers D-Day Plus 70 Event Report

NYTimesDDay

This past weekend at Metropolitan Wargamers in Brooklyn, NY, dozens of gamers came together for three days commemorating the 70th anniversary of the Allied invasion of Normandy on June 6, 1944. Throughout the weekend, we ran multiple WWII-themed games, including Normandy ’44, I Ain’t Been Shot Mum, Flames of War, World In Flames and Memoir ’44. Dice were rolled, strategies were debated, prizes were won and Allied and Axis forces vied for control of France. In all, it was another great weekend full of gaming at our club’s space in the heart of Brooklyn.

Friday Games

IMG_3586The invasion of France begins with Normandy ’44 at Metropolitan Wargamers

Friday kicked off after work with a few players unpacking a fresh copy of the classic Normandy ’44 from GMT Games. This one-map game covers the pre-dawn D-Day Airborne landing areas, five Allied invasion beaches and the charge to the initial inland objectives. The game scale plays with regiments and battalions with each turn representing one day of action. The small, self-contained game provides a great introduction to game mechanics at this scale with a tight, clear rules set. With a quick look at the game, I decided I’m going to have to personally give this one a shot sometime soon.

IMG_3587 US infantry blinds move toward unsuspecting German defenders at a farm outside Vierville

At the back of the club, we ran a game of our new favorite WWII tactical miniatures game, IABSM  from Too Fat Lardies. In our ongoing campaign of the Normandy scenarios in the IABSM Where The Hell Have You Been Boys? book, our game focused on the battle at Vierville-sur-Mer. With the 116th Infantry Division supported by the 5th Ranger Batallion, the Allied mission was to drive inland to capture and defend the church at Vierville.

IMG_3589

German and US units exchange fire in and around the farm at Vierville

As per the scenario, initial Allied blinds approach a farm outside Vierville where a German blind sits unknowingly in the complex of buildings. With Allied infantry closing in over dense bocage hedgerows and orchards, a firefight erupted and drove the German defenders through the buildings and into the orchard beyond.

IMG_3590

German reserves arrive at the flanks of the advancing US infantry outside Vierville

IMG_3633

Germans reinforcements push the Americans from the farm

As the first force of Germans fled the farm, their reinforcing comrades came on to the rear and flank of the US infantry. The Americans made consecutive moves of firing and moving back to defend at a series of stone walls across the road from the farm. The retreating defensive US actions held off the German onslaught until enough Americans could take up position amid Vierville’s houses. At the same time, the US Rangers moved in at the far end of town to hold the objective at the church.

IMG_3632

Americans pull back from the farm to take position in Vierville

The game eventually settled into a bloody house-to-house and hedge-to-hedge fight along the road leading toward the church. Occasional lucky shots from US Ranger light machine guns at the church also harassed the Germans lying low behind their stone wall position at the farm’s orchard. By midnight, much of the initial American force had been destroyed or was retreating to a final stand at the church held by the Rangers. While the Germans had also lost a sizable amount of their force, their heavy machine guns were still in play as they closed in through the town. This time around, we called the action at Vierville a draw.

Saturday Games

IMG_3603The Americans hit the Easy Green sector of Omaha Beach

The next day kicked-off with a running of a FOW beach landing at Easy Green on Omaha Beach. We have been play testing the FOW scenario over the past two months, tweaking our forces and strategies to cope with the clumsy beach landing rules. In our past games, the US invaders only manage to win about a third of the time. Even so, we decided no D-Day weekend was complete without a return to “Bloody Omaha” on one of the club’s award-winning sand tables.

IMG_3604German defenders hold their positions behind a burning bunker

The opening turns found a lot of US boats on the beach and a quick push to the seawall. So early combined arms fire managed to destroy the main bunker at the beach, but the battle was far from over. The initial US push followed on to the left of the beach, but multiple turns at clearing the barbed wire stalled the advance as the Americans took heavy fire.

IMG_3606

American armor and artillery follow-up the infantry landings

As US armor arrived, several tanks managed to drive off the beach to the minefield position to lay down fire on the German trenches. One tank wound up spending three turns bobbing in the surf offshore only to arrive and bog for two more turns on the beach. As this most inexperienced tank crew in Normandy struggled, the other Shermans took fire from German rockets and reserve tank platoon which rolled to bulk up the beach defense. American artillery also arrived but proved pretty ineffective to the Germans at the trenches. Wave after wave of US infantry pushed to the trenches, eliminating most of the defenders but never managing to clear the barbed wire lines to seize the German position. At the final turn, the Americans just hadn’t made enough headway to control the beach.

IMG_3627World In Flames continued over D-Day weekend

With action raging on the sand table, a group of club members showed up to continue playing their massive World In Flames game. Australian Design Group’s WIF from 1985 is the standard in grand-scale strategic fighting of the entire WWII period. The game’s rich playable detail, dizzying number of 1400 playing counters and sprawling maps makes it a commitment for only the most experienced gamers over many months of play.

IMG_3630Allied forces push from the beaches inland to Caen in Normandy ’44

The Normandy ’44 game from the evening before concluded with a decisive Allied victory Saturday afternoon. Pushing the Germans back from all but Utah Beach, the Allies captured Bayeux and several smaller towns. With German defenders routed from roads leading inland from the landing beaches, the victors rolled in to control half of Caen by the game’s end.

IMG_3625No one was going hungry at Metropolitan Wargamers over the weekend

Saturday also included a lot of other club members down for the usual variety of board, Euro and card games, making for a packed house. As the crowd rolled in, a longtime club member showed up with an enormous fresh-caught fish which he proceeded to gut with a huge military-style knife. With fish on the grill and food ordered in, there was plenty of food to sustain the crowd of gamers throughout the day.

We all took a mid-afternoon break to dice-off in a game, books, DVD and miniatures raffle to raise funds for the club. I was fortunate to score a copy of A Few Acres of Snow from Treefrog Games, and another lucky person picked up an unused copy of out-of-print the Games Workshop classic Dreadfleet.

IMG_3631

Initial deployment of Allied and Axis blinds in our Saturday evening IABSM scenario

As the main crowd thinned out, we ran an evening IABSM game continuing the assault beyond Easy Green. The scenario found initial US forces deployed around a small French farm with the objective of moving men off the table on the roads beyond. The Germans were tasked with preventing the American advance and seizing the farmhouse stronghold.

IMG_3607

Settling in for a contested fight at the farmhouse above Omaha Beach

Using initial blind deployment, Germans quickly moved to the farm along thick hedgerows as the Americans drove into the building for cover. Turns followed with the Americans jumping from cover to fire on the dwindling German force which returned fire over the hedges to unfortunate US infantry hanging out in the open. A US flamethrower attack from the window of the farmhouse decimated another German squad sitting close behind a nearby hedge. Pressing their luck, a group from the farmhouse made a run for the road exit only to be stalled by a reinforcing German heavy machine gun squad. Returning fire, the German MG42s were eliminated from their position in the open field. However, the damage had been done. Although the Germans had not captured the farm objective, the Americans no longer had a sufficient force to push off the table. The night ended with a German victory beyond Easy Green.

Sunday Games

IMG_3620The war continues on the Memoir ’44 Hedgerow Hell battle map

With the first days of Operation Overlord behind us, Sunday’s game focused on the breakout actions. A couple visiting players showed up for the club’s Memoir ’44 game around noon on Sunday. Using the wide Hedgerow Hell expansion map, the Allies beat the scenario odds to win the game in the Overlord scenario. There was much talk of getting larger games of Memoir ’44 back in rotation at the club soon, so hopefully getting the game back on the table will bring some renewed interest in the coming months.

 IMG_3621

The initial armored encounter outside Lingevres leaves British tanks in flames

I finished off my weekend as the British at Lingevres using the same scenario I first ran at the club a few months ago. The mission ahead for the Brits was to move into the heavily defended town and take two of the buildings. Historically, the battle played out as a tank duel between UK Sherman Firefly and German Panther tanks, and our game this past weekend played out in a similar way.

IMG_3624

A Panther meets its end at the hand of the British Royal Artillery as a close assault is attempted on another in the woods nearby

At the outset, my first platoon of tanks got a bit overly aggressive and charged into contact with the full Panther platoon at the farm outside Lingevres. With the first Firefly destroyed in the opening turns, my remaining Shermans pulled back as the Panthers rattled to the middle of the field to hold off UK infantry advancing through the woods and bocage-lined fields beyond. One Panther bogged on a hedgerow and another was destroyed in an initial volley from the Royal Artillery in the fields outside town. Several turns became ensnared in attempted infantry assaults on the third Panther in the woods, but eventually the German tank rolled away to deal with the building reinforcing infantry and tank platoon in the fields on the other side of the table.

IMG_3622British Shermans and infantry break across a field toward Lingevres

With the Panthers moving away, fresh British infantry and the surviving Shermans moved to the farm and fields beyond. British artillery fire winnowed and pinned the German platoon in the church over several turns. Artillery fire also sought to keep the reinforcing German spotter pinned to limit the effectiveness of the reserve Nebelwerfer battery which as delayed reserves to the rear of Lingevres.

IMG_3623

The duel between the Panther and Firefly ends with the British tank in flames as the remaining Shermans destroy a Panzer IV platoon in the distance

In the meantime, a multi-turn tank duel had settled in between a lone Firefly and Panther while a reinforcing Panzer IV platoon arrived at the edge of town. Both tank groups traded fire, and in the end, the Panzers were routed with two or their three destroyed and the Firefly fell to the Panther’s gun. Back at the farm field, Shermans traded fire with Pak 40s and destroyed an anti-aircraft platoon defending the town’s flank. With two Panthers left on either side of the church, Shermans on each side of town and advancing British infantry, we called the game a draw.

 Weekend Debrief

After more than 20 hours of gaming over two nights and days, I was pretty worn out, but the interest in the D-Day event had made the weekend well worth it. WWII still holds enormous interest to this day, as demonstrated not only by our weekend of gaming but by the mainstream media’s coverage of D-Day over the week leading up. In the next week, we’re kicking off an FOW Infantry Aces campaign with fresh forces hitting the tables in rounds of Italy-themed WWII games. This fall we’ll be playing out some Market Garden battles and by the winter we hope to host some Battle of the Bulge engagements. It was a pretty special weekend in Brooklyn, but for regular visitors to Metropolitan Wargamers, there’s always the next game in this very unique New York City community.