I Ain’t Been Shot Mum: Cabourg June 6, 1944 Scenario

LandingatOmaha
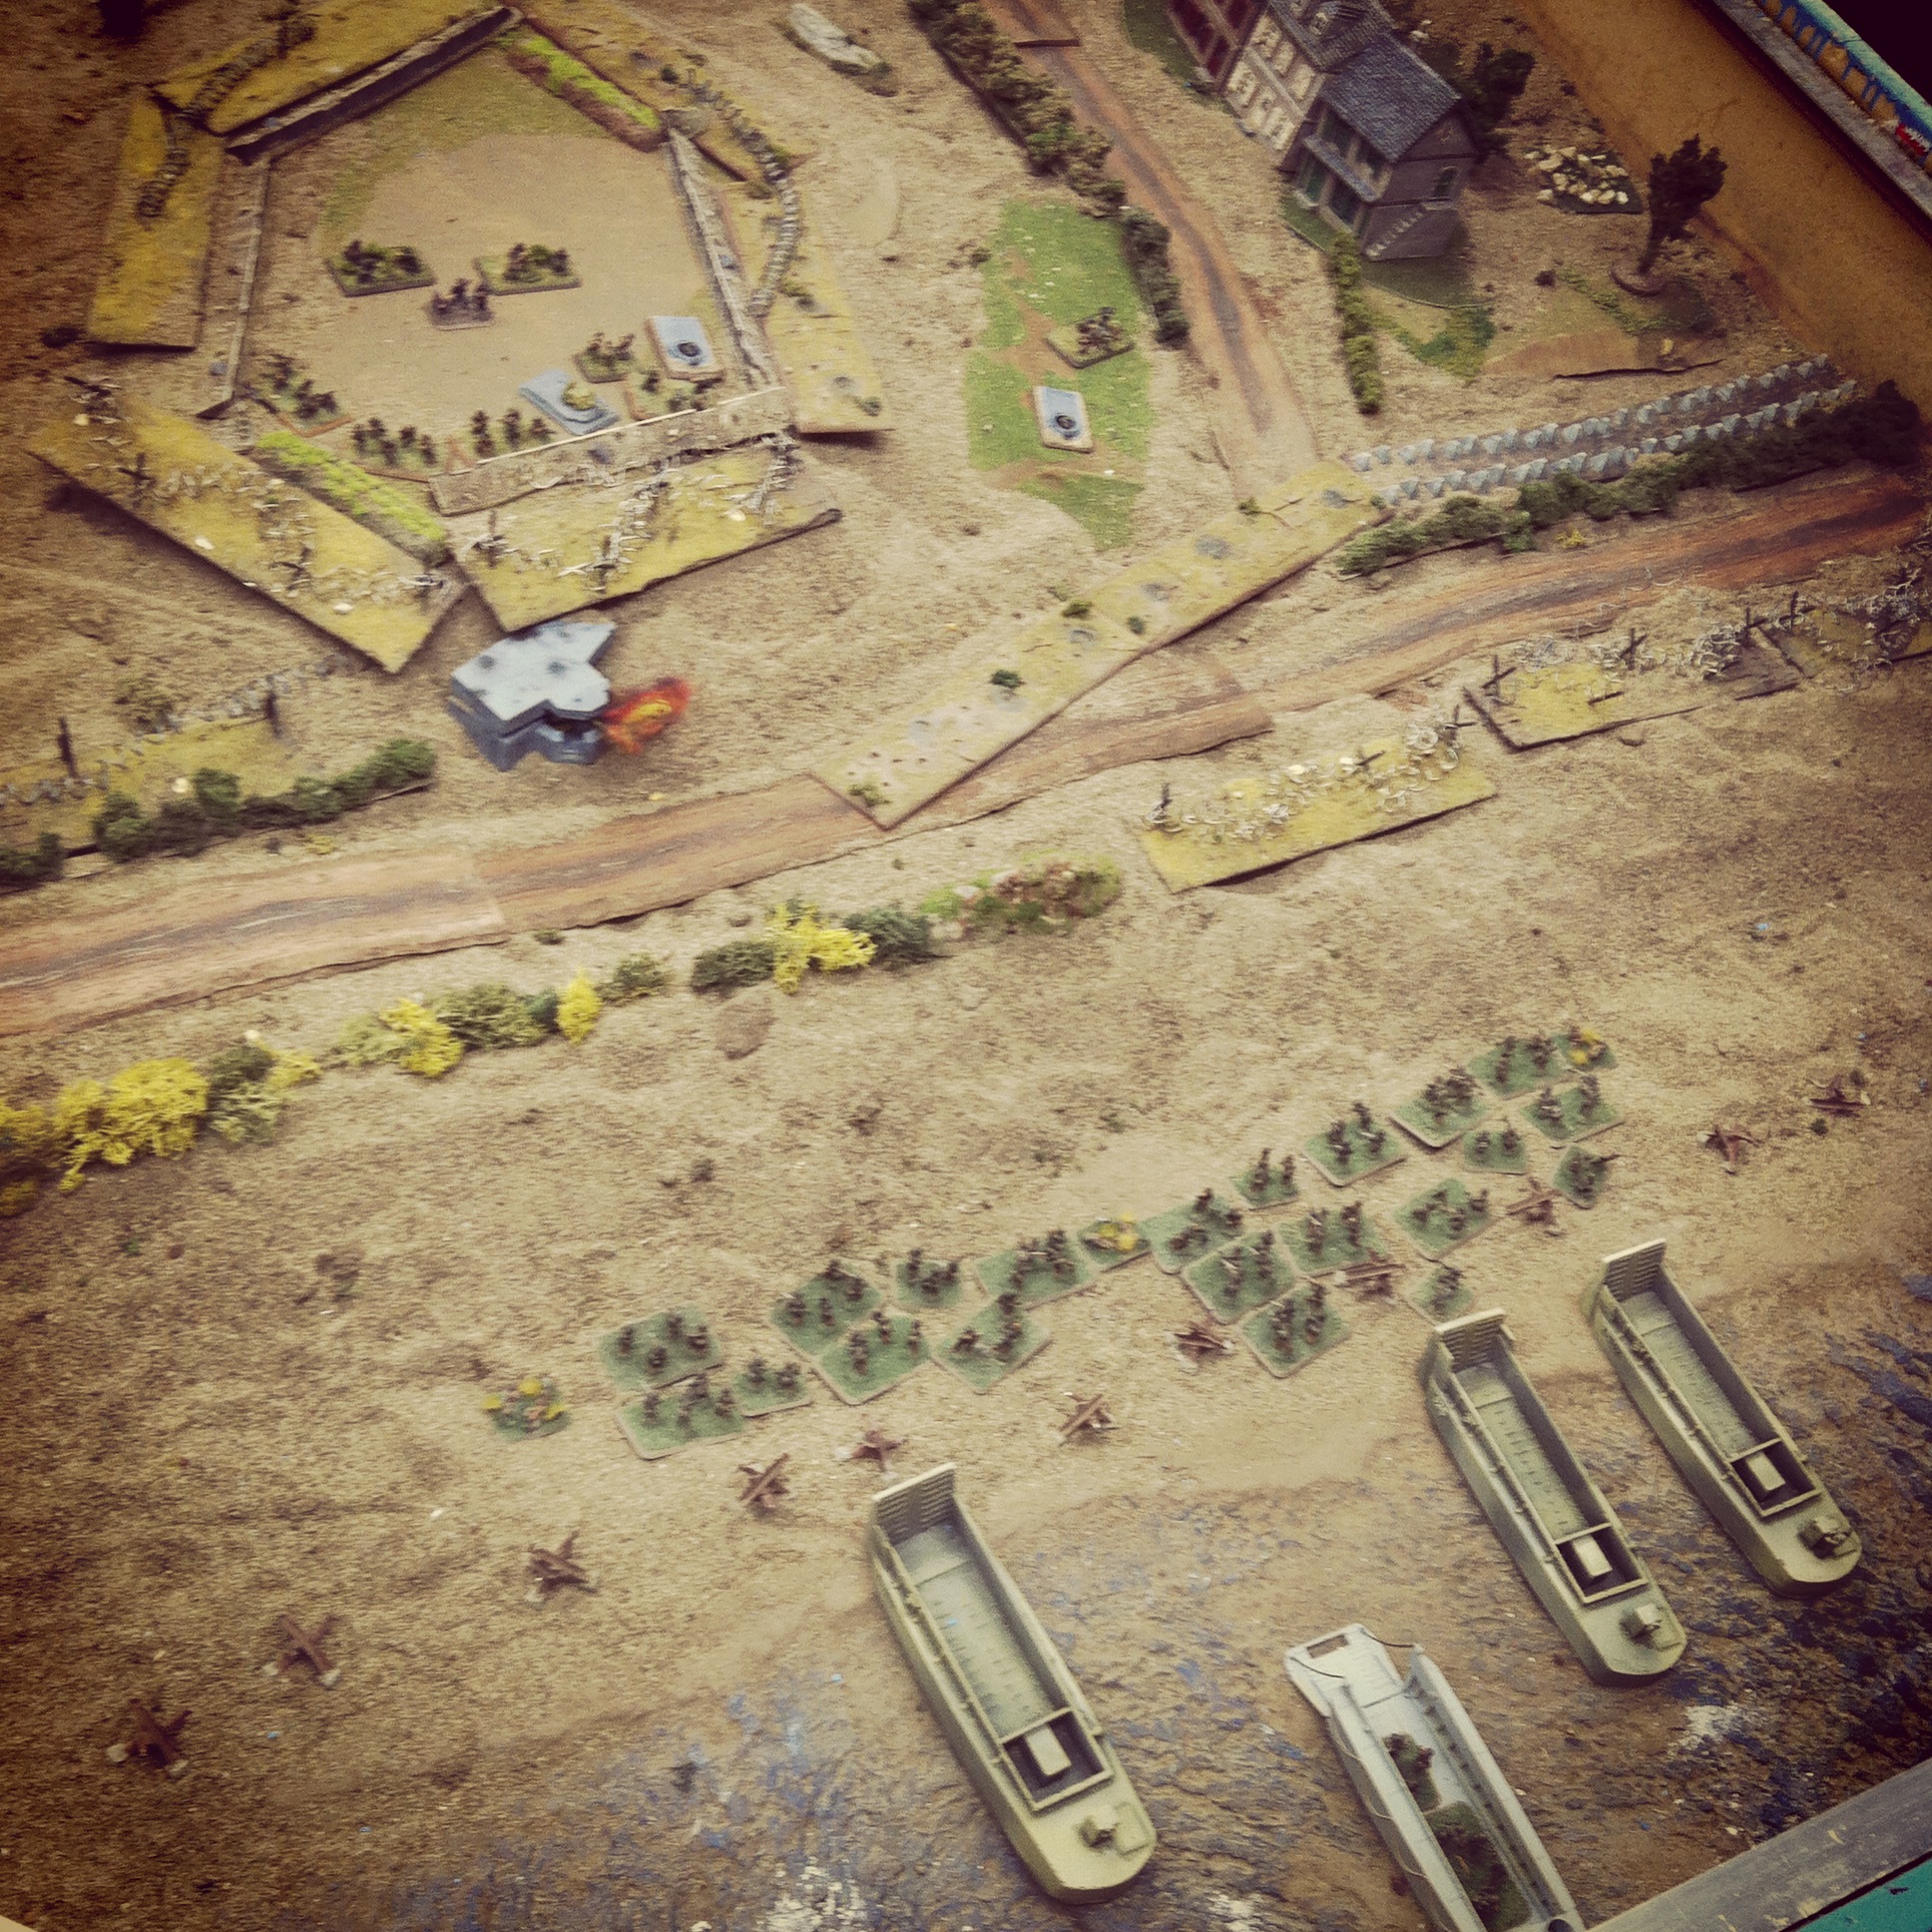
On the morning of the Normandy Landings of June 6, 1944, taking the eastern sector of Omaha Beach fell to the United States 1st Infantry Division. Despite some missed targeted landing zones on the beach and heavy losses at the far ends, the exit “draws” were largely secured by mid-morning. As additional troops and supplies began to arrive, the push inland began.

Omaha to Cobourg
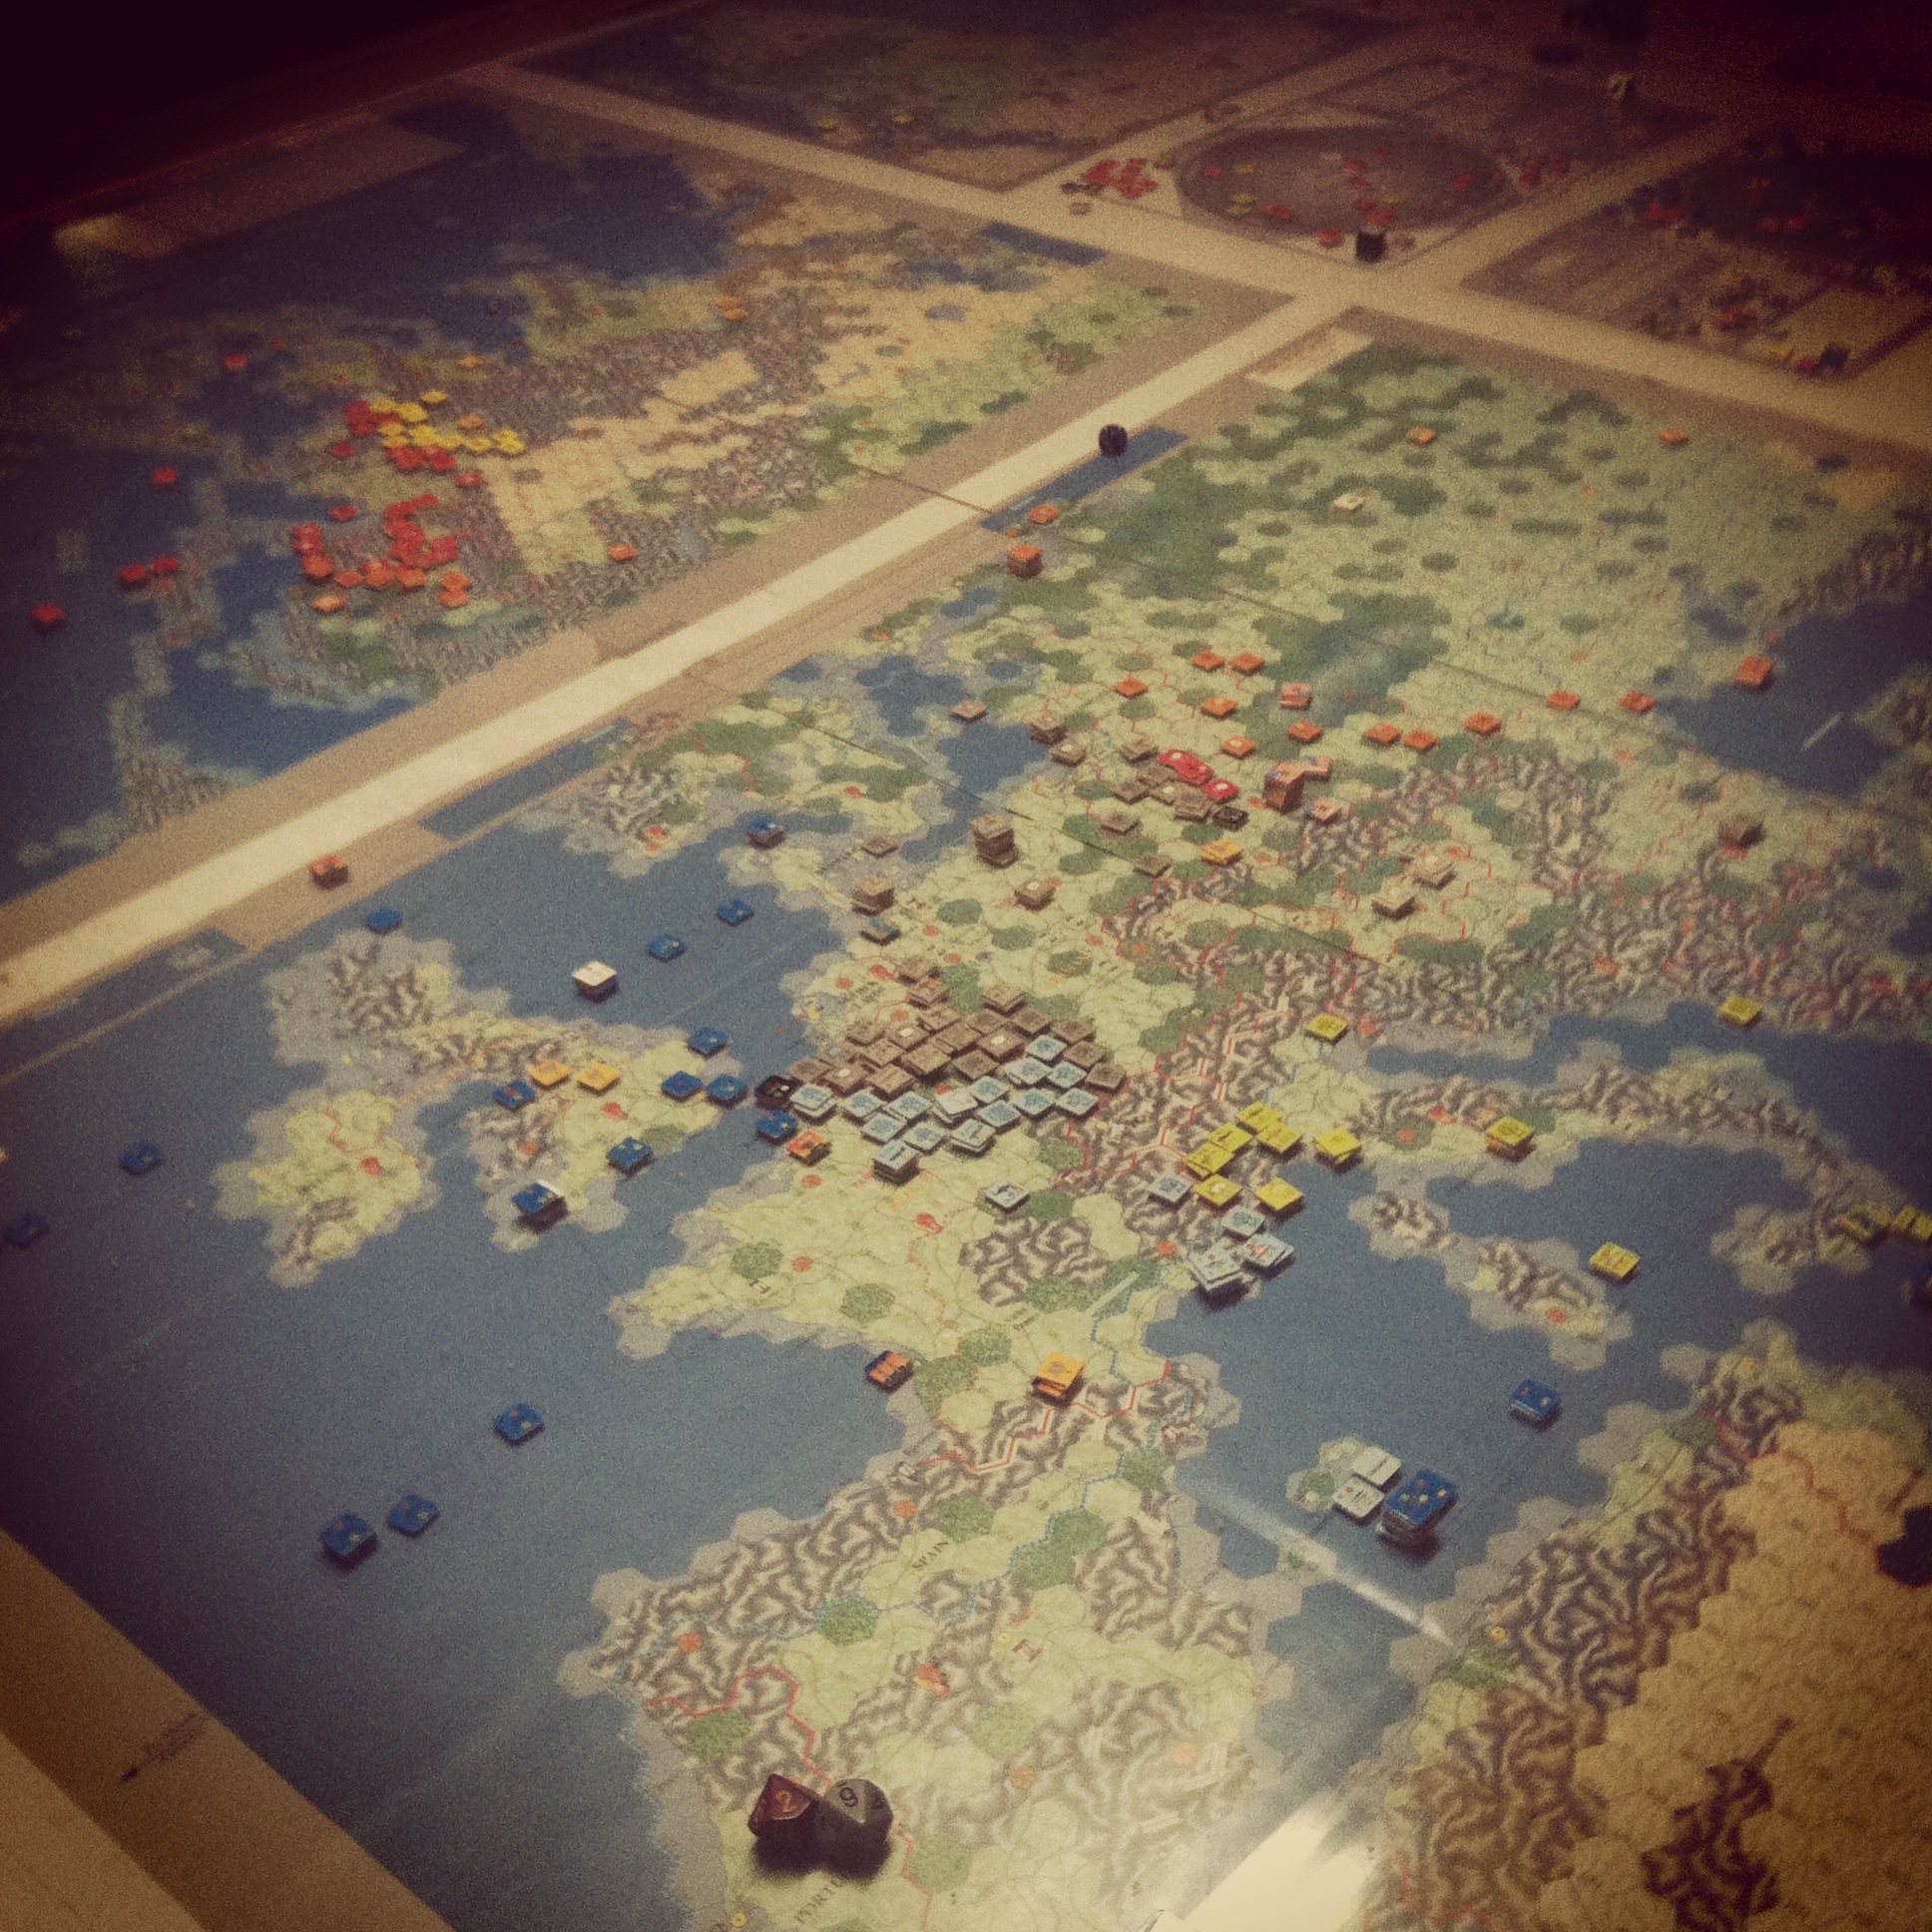
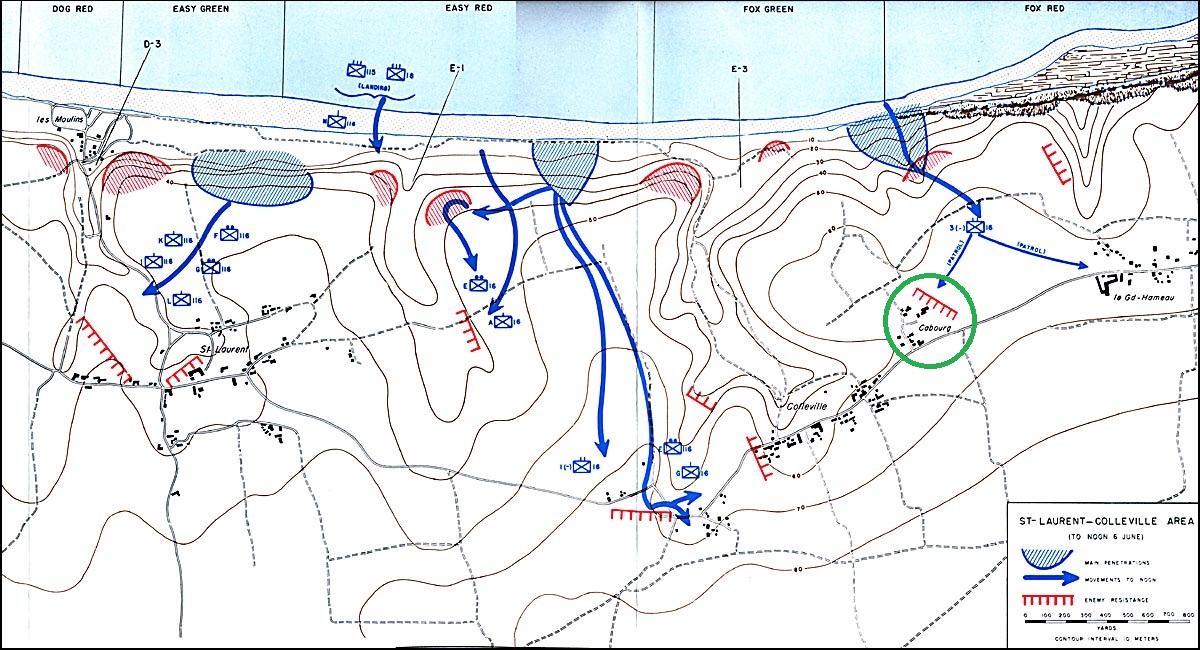
Map of the US push to Cabourg from Omaha Beach, June 6, 1944

(via US Army Center of Military History)

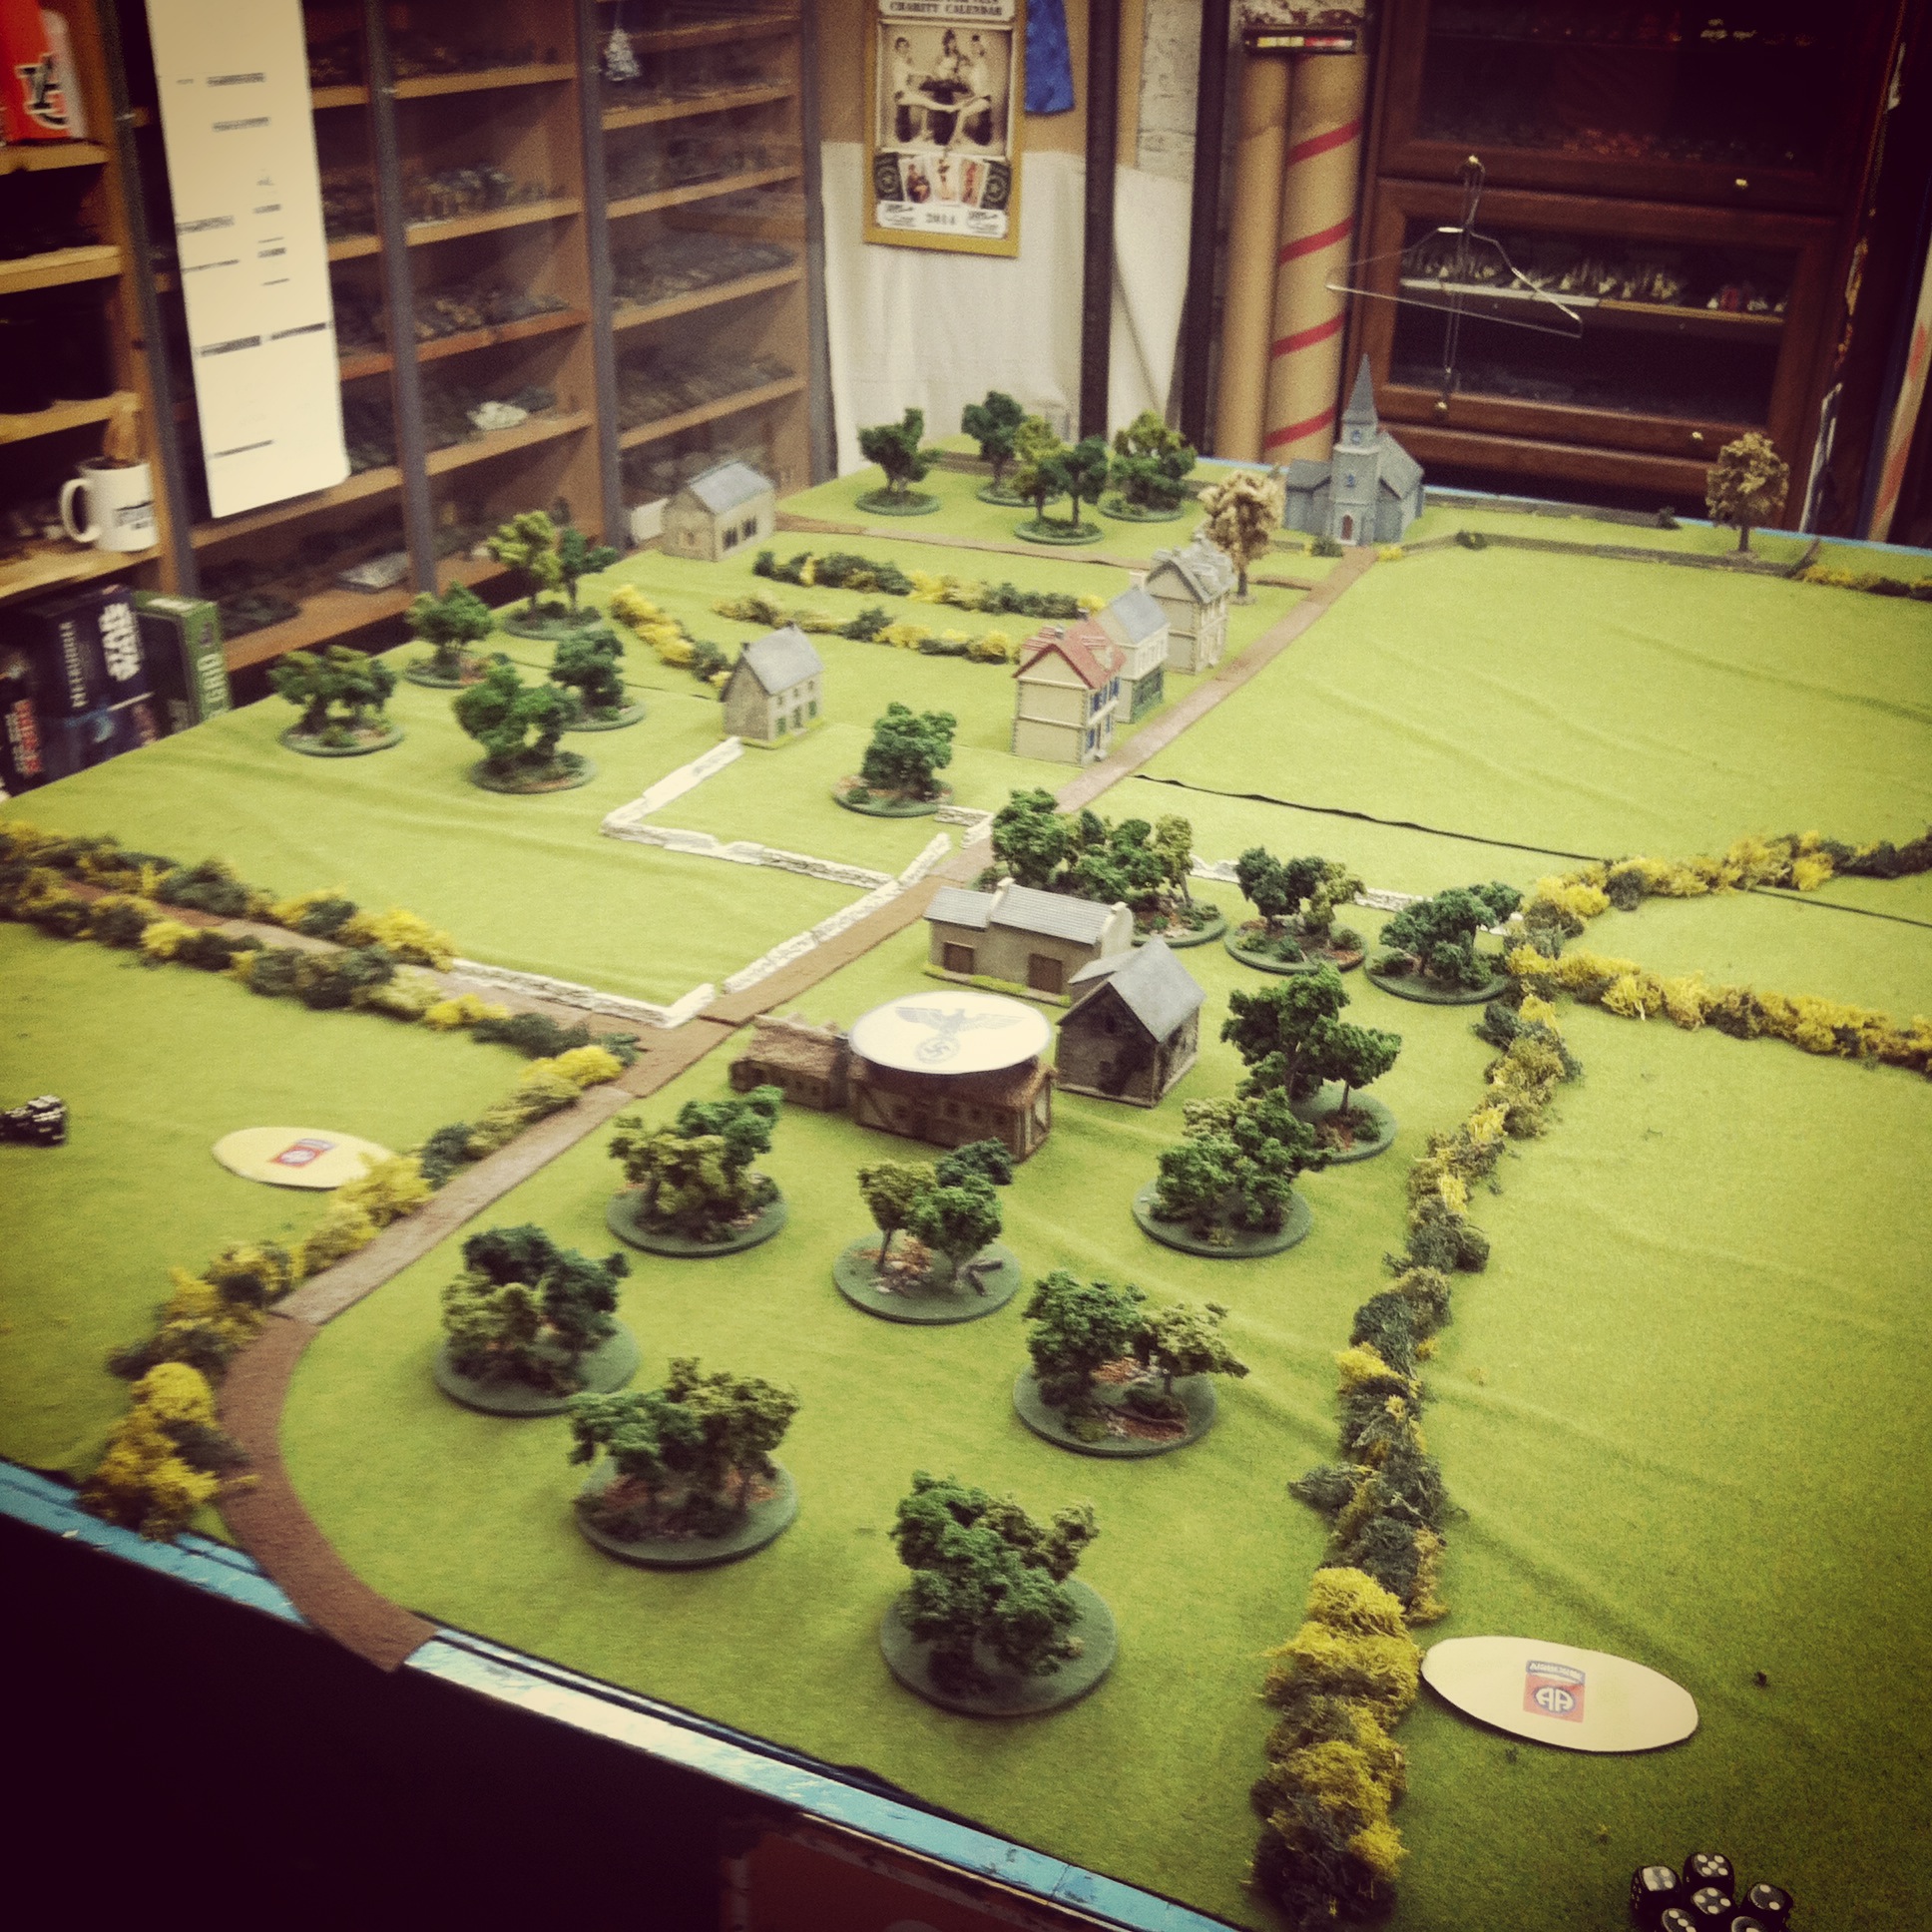
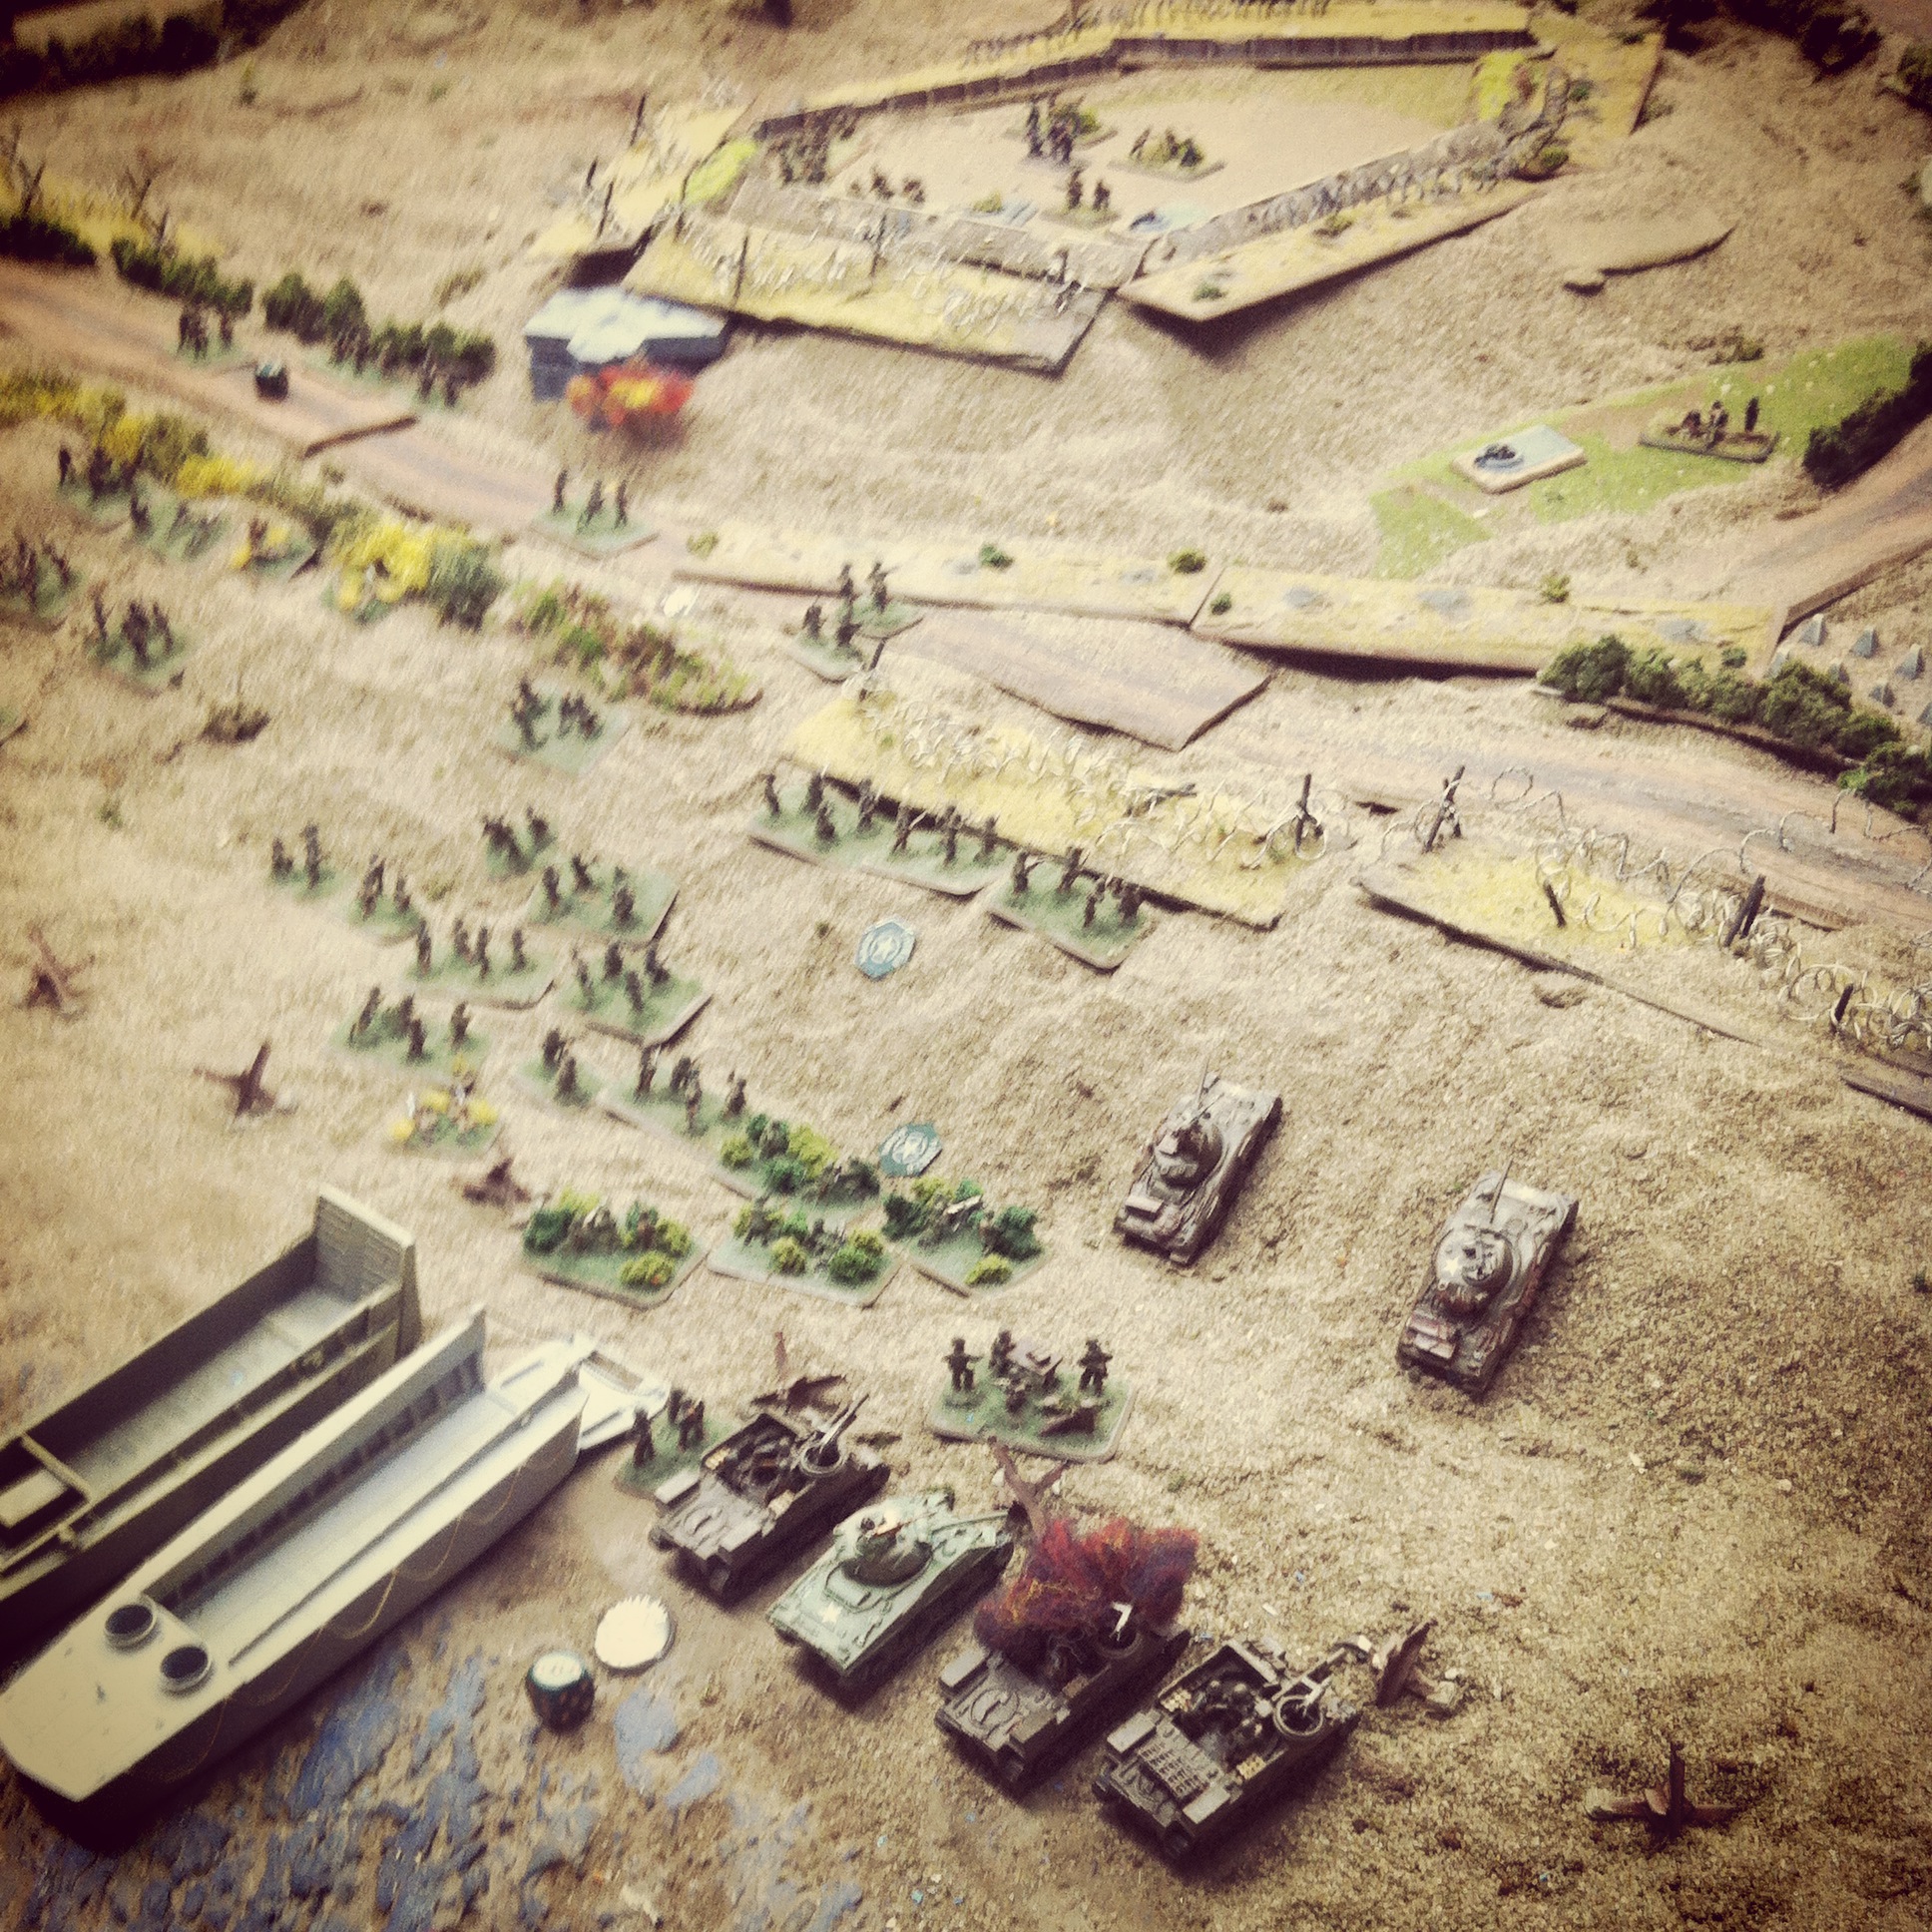
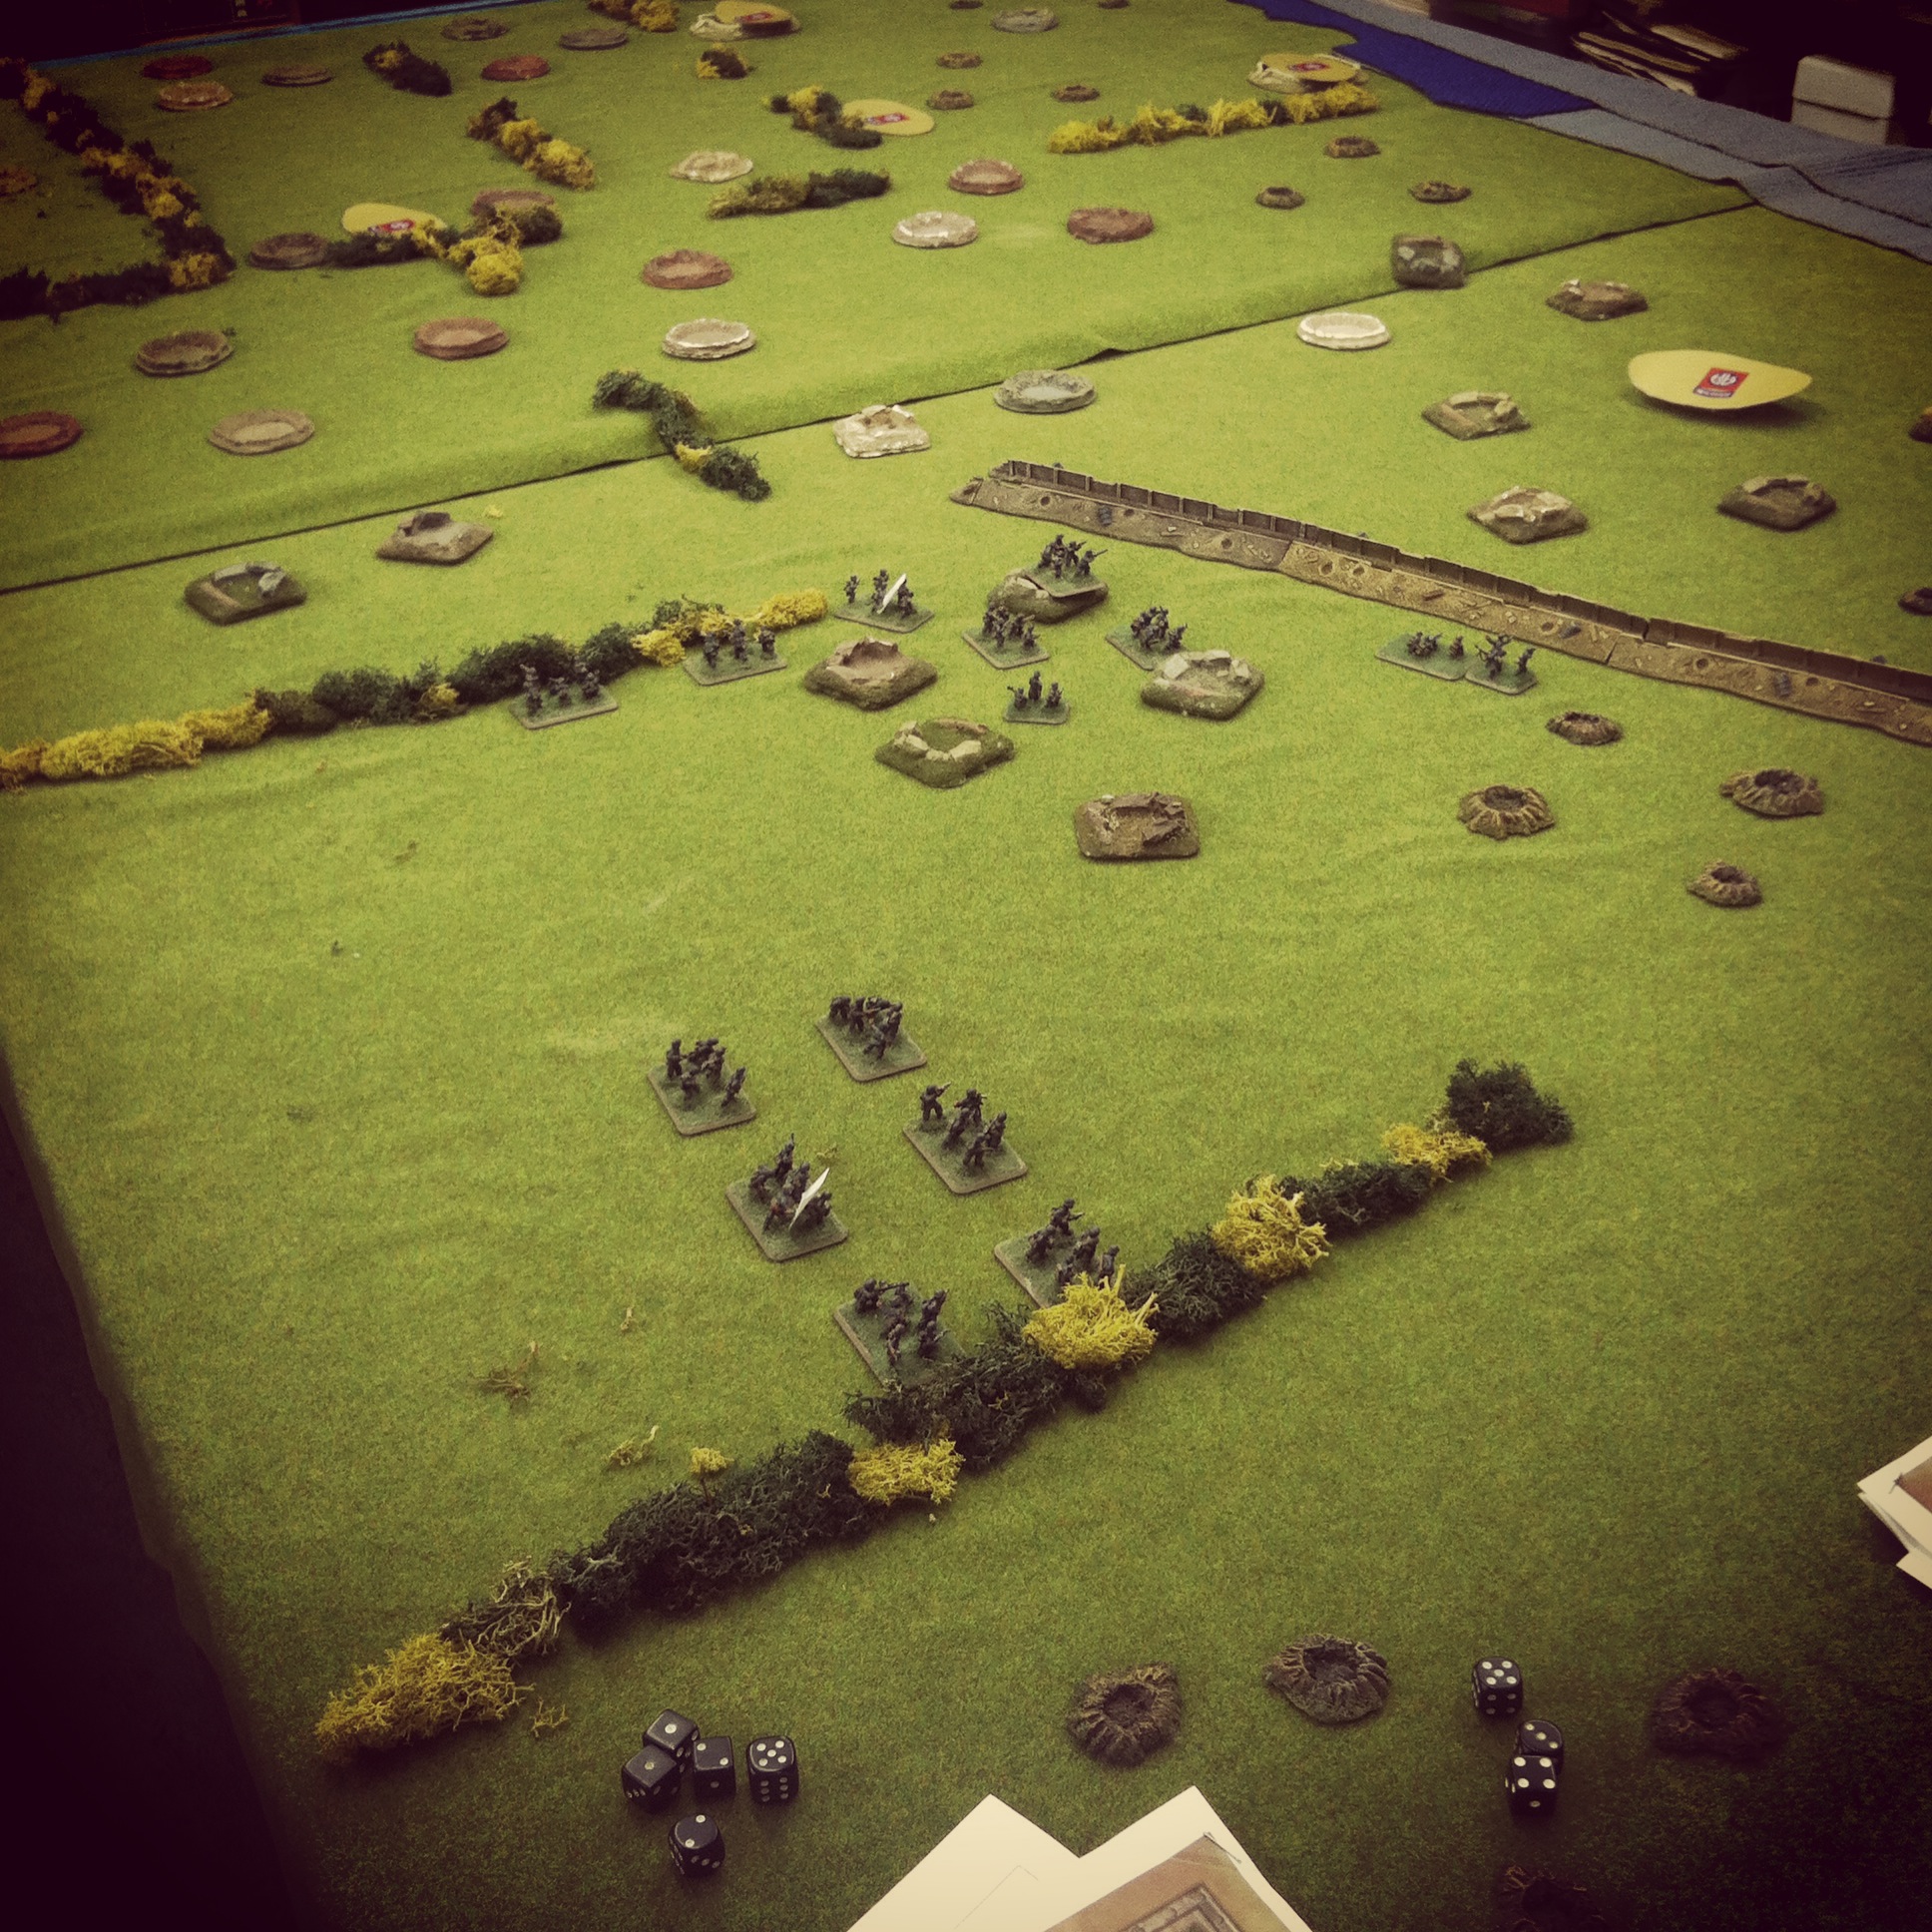
Moving toward the objective of Colleville-sur-Mer, probing forces from the 1st Infantry Division pressed forward through the seaside fields of Normandy and began to encounter German defenders in various states of disarray. Tired from the fighting at the beach, the first group of Americans on patrol moved cautiously into Cabourg from the north and east while the German force scrambled to hold against any additional headway by the invaders. WhereTheHell After a couple of month hiatus, we jumped back into a 15mm World War II game at Metropolitan Wargamers in Brooklyn, NY this past weekend centering on the action at Cabourg. Using the I Ain’t Been Shot Mum rules and a post-D-Day scenario from the Where The Hell Have You Been Boys? book, all from Too Fat Lardies, our table was set to show the American advance and German defense at Cabourg.

IMG_4940
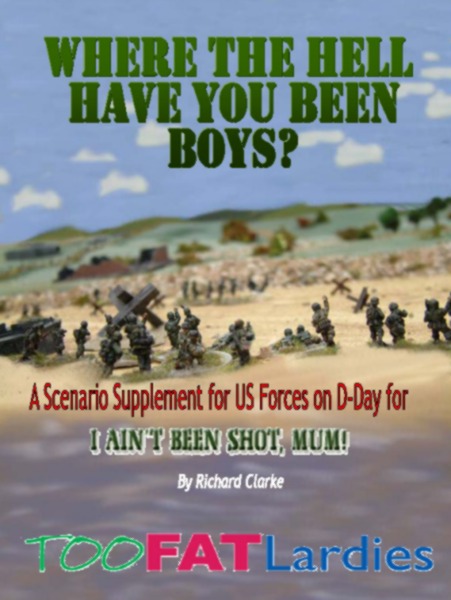
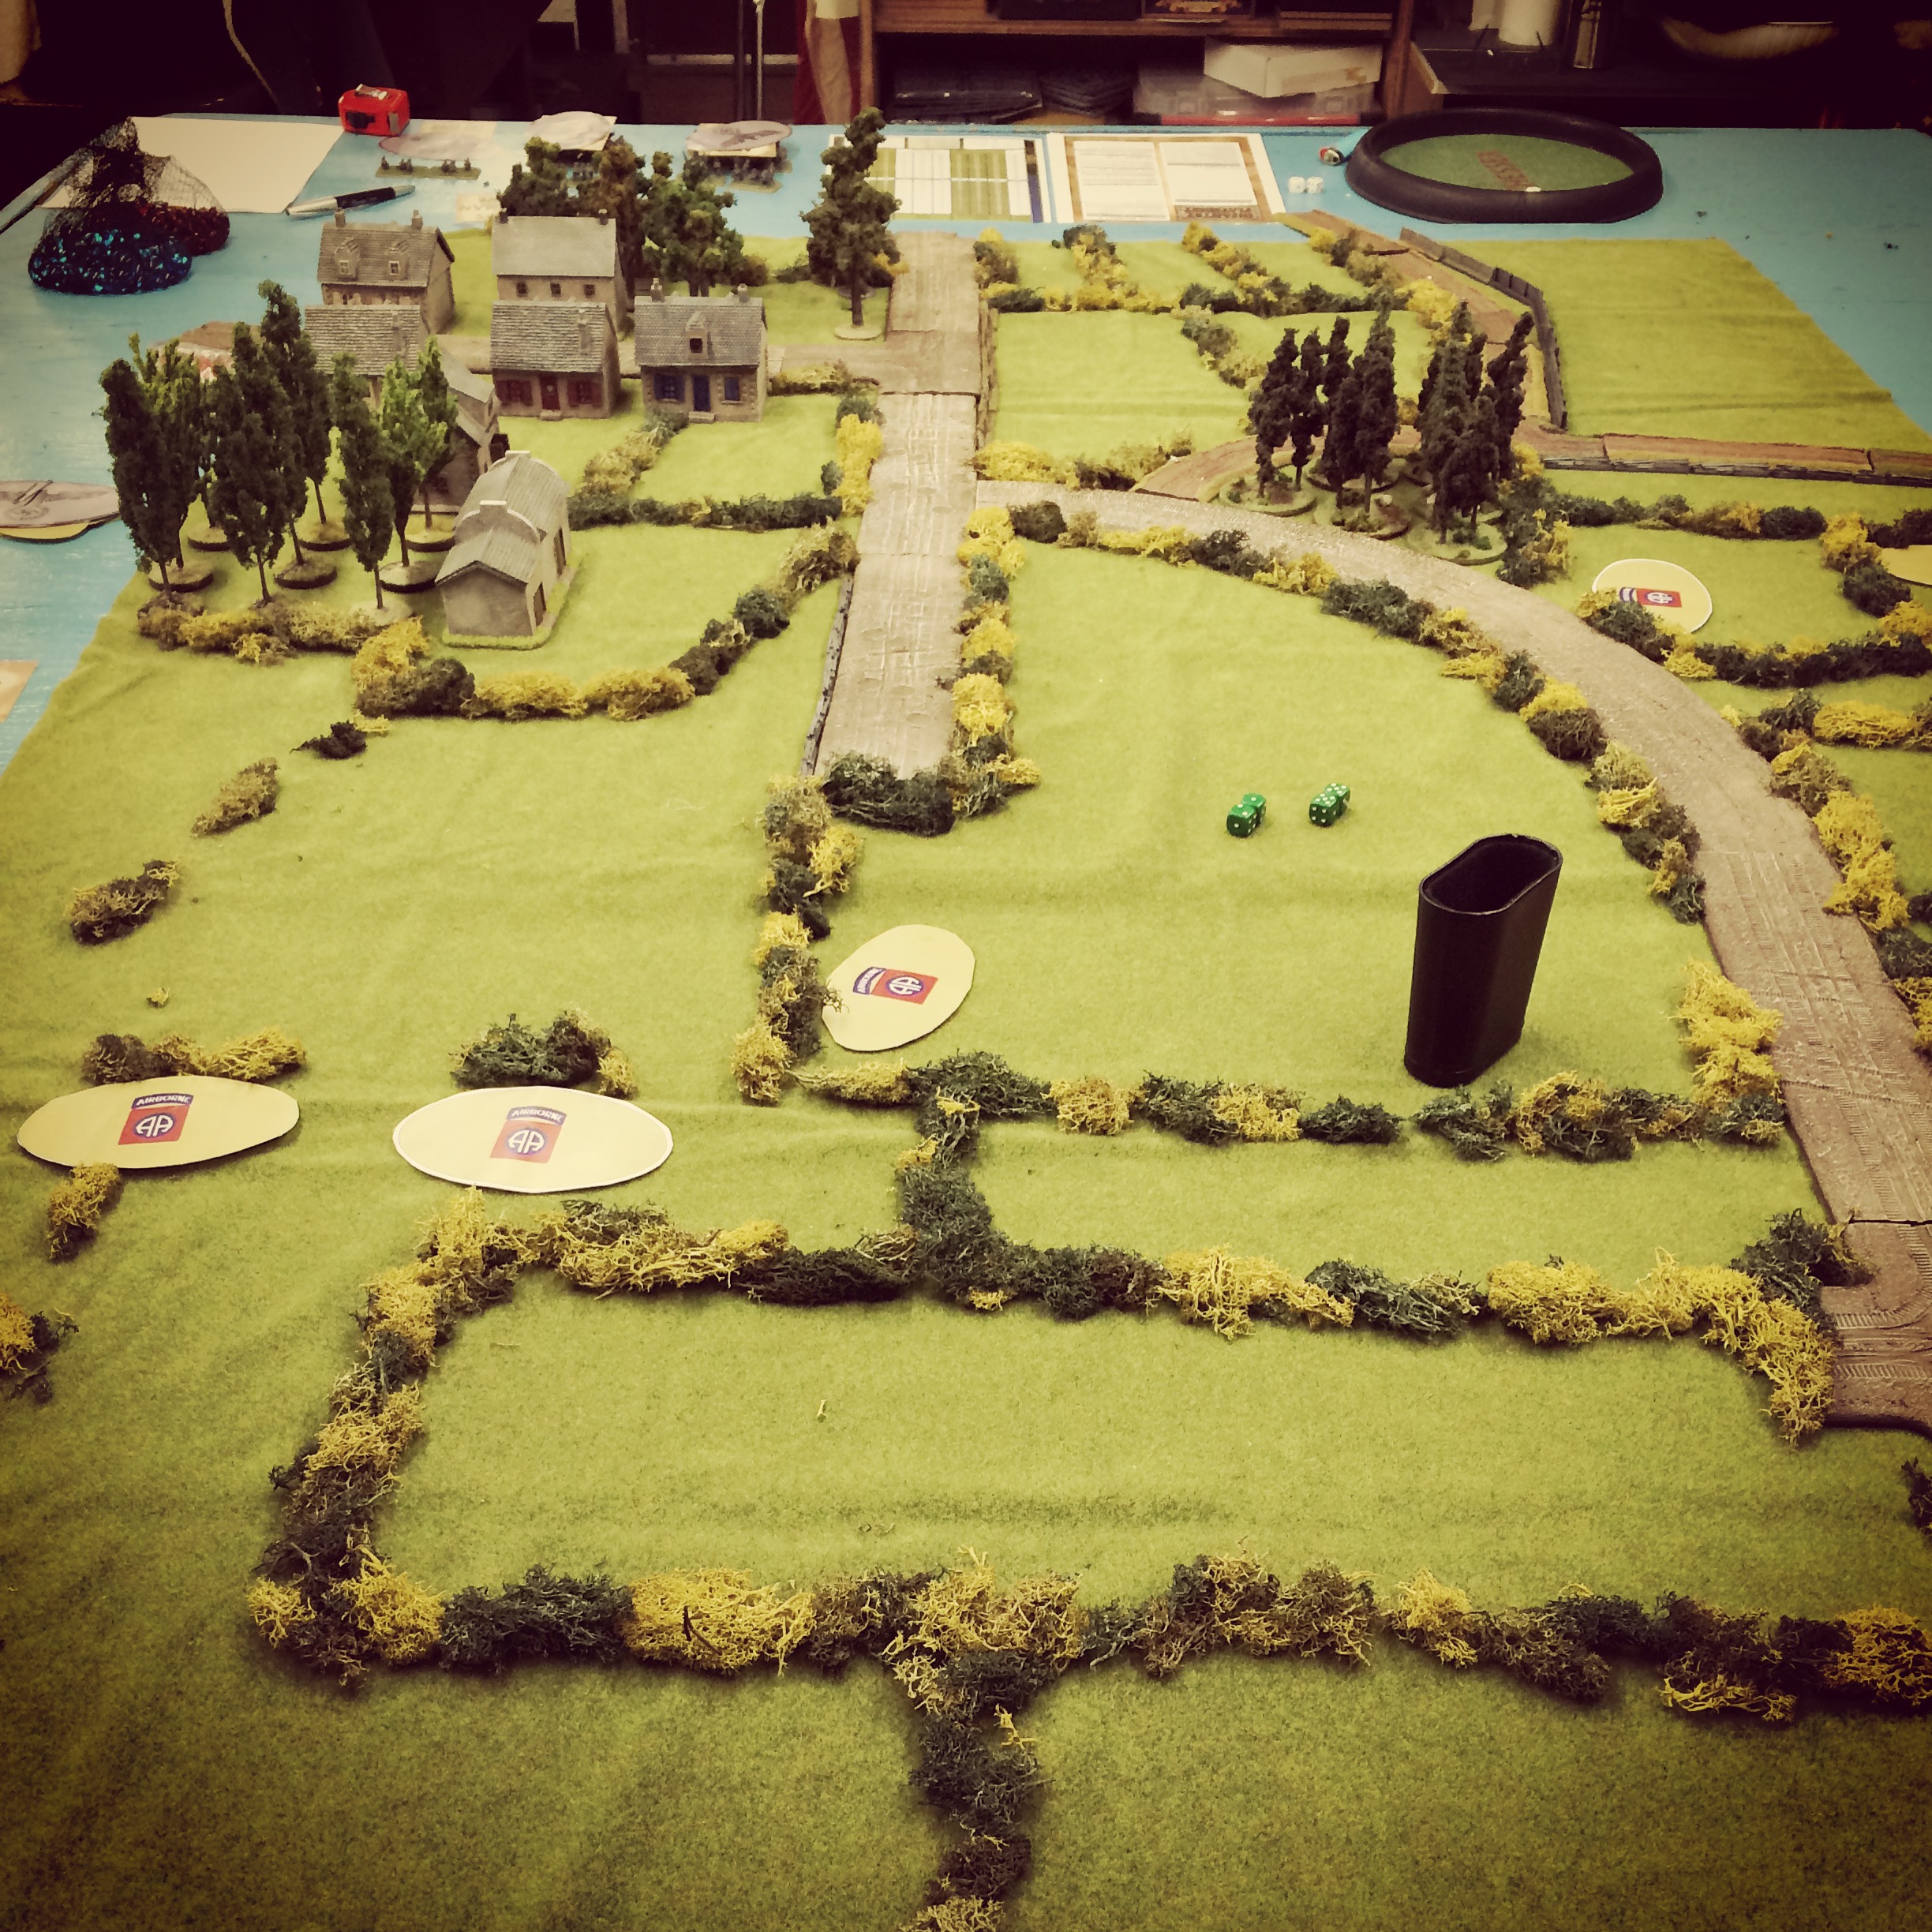
Initial advance of US forces on blinds from the east and north toward Cabourg

Playing on the US side, my partner and I divided our force of three rifle platoons under blinds plus three false blinds. I swung two platoons and a false blind directly at the village from the east while my teammate took the other two false blinds and a single platoon around to the north behind a copse of trees. The mass of US blinds hiding a force only half the actual size provided a great simulation of the confusion the Germans felt that morning as they also lay hidden in and around the village in defense.

IMG_4941US forces near Cabourg on blinds from the east

IMG_4942The first US forces are revealed beyond a wood north of Cabourg

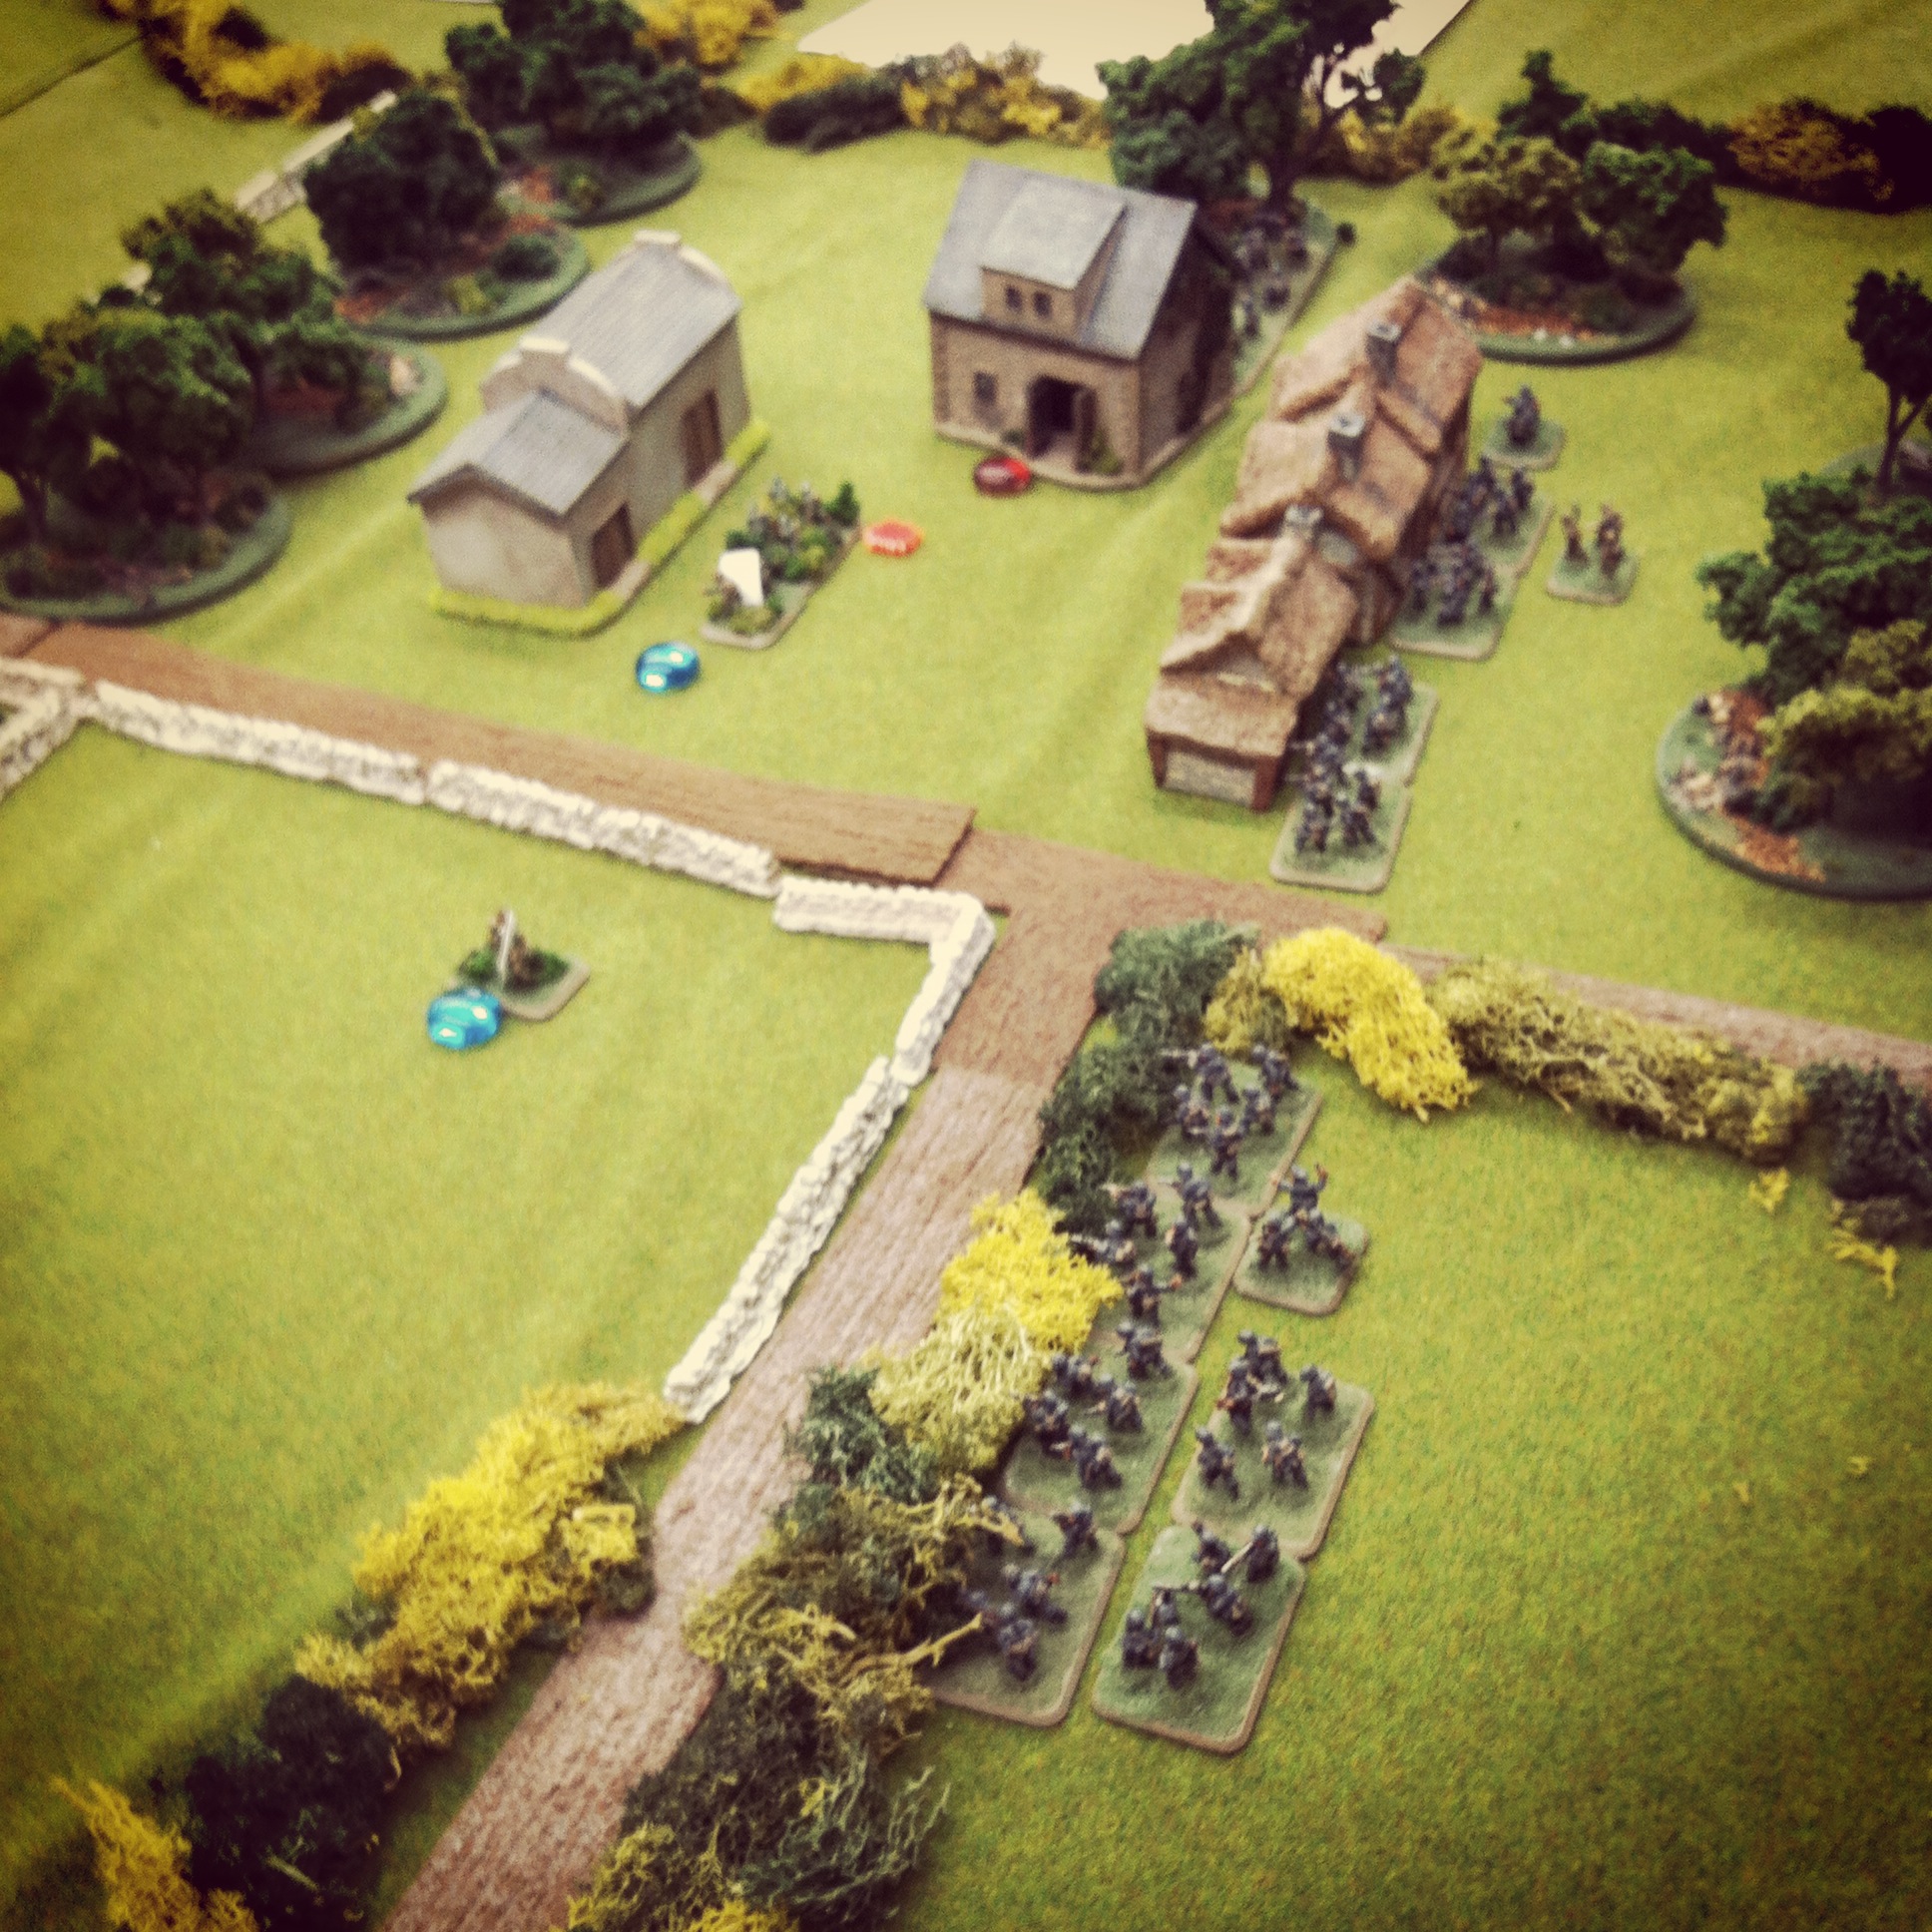
After a couple turns of US movement and prodding for Germans outside the town, the Germans spotted the Americans moving cautiously to the north. With two false blinds exposed, the third American blind revealed a rifle platoon armed with a mortar and two officers present. A false blind was also revealed near a farm at the eastern edge of the town as the Germans continued to burn up turn actions trying to find out where the Americans actually were.

IMG_4943American and German forces simultaneously surprise each other near the farm

IMG_4944
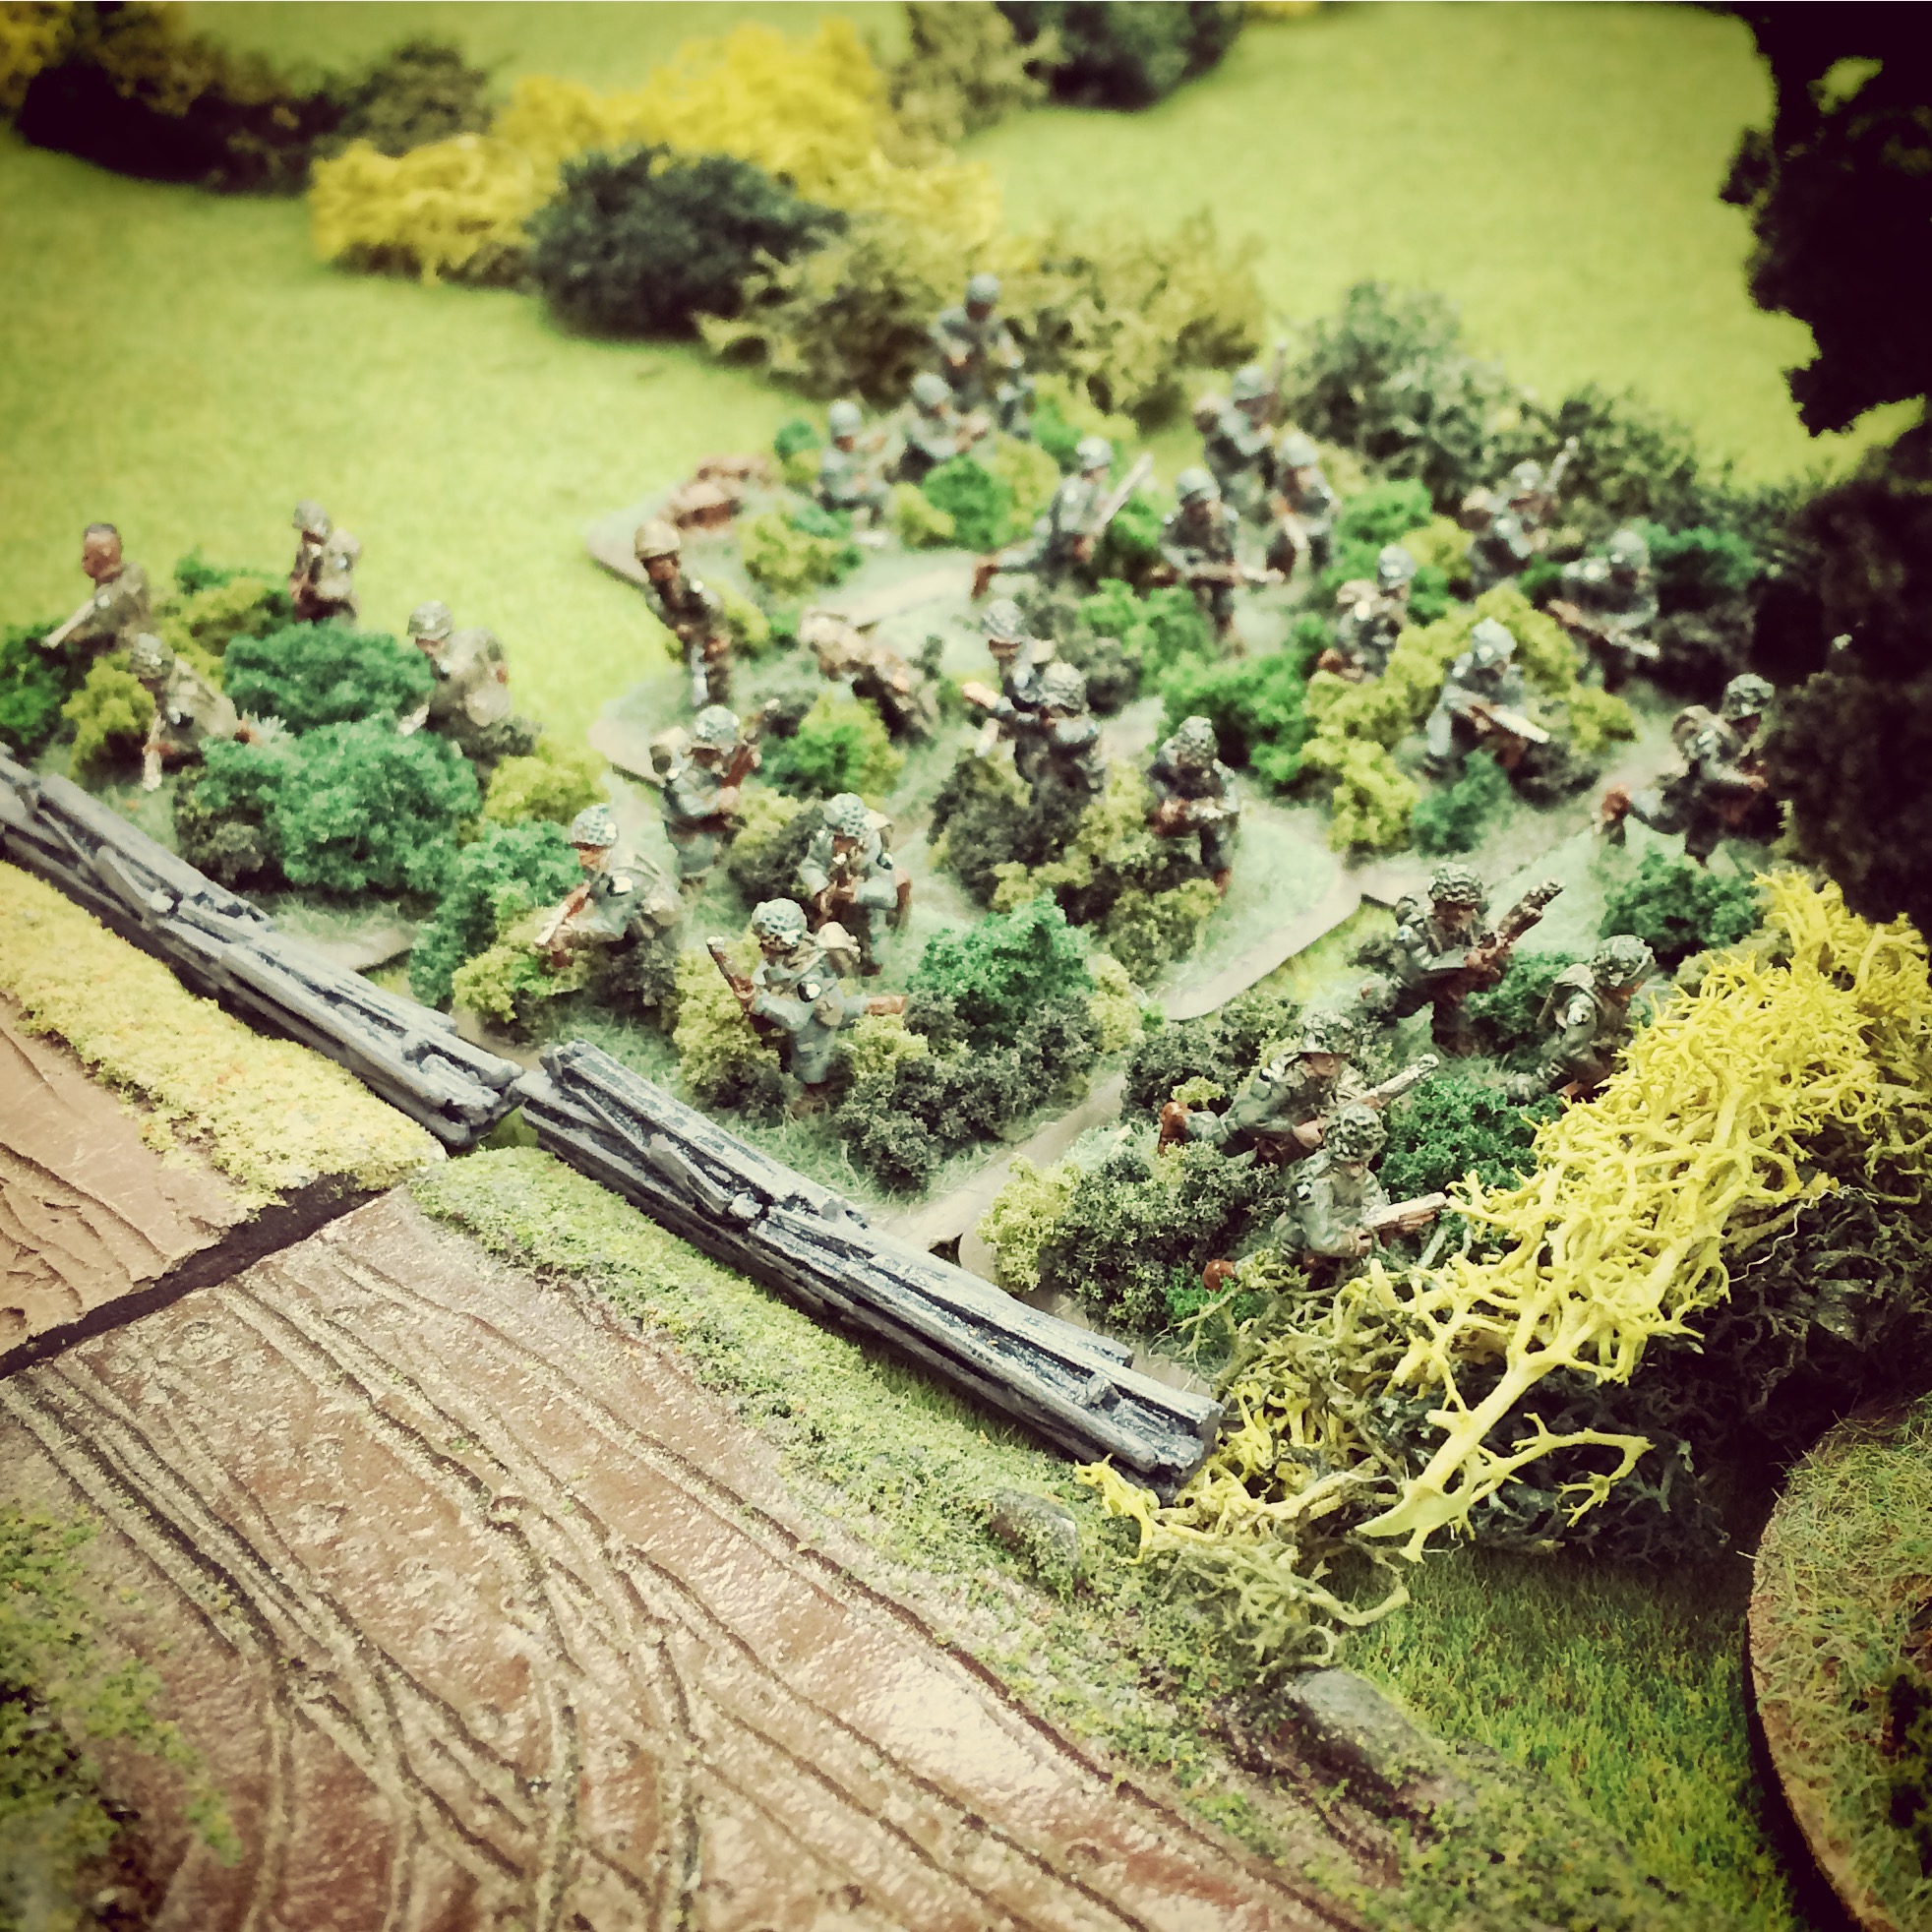
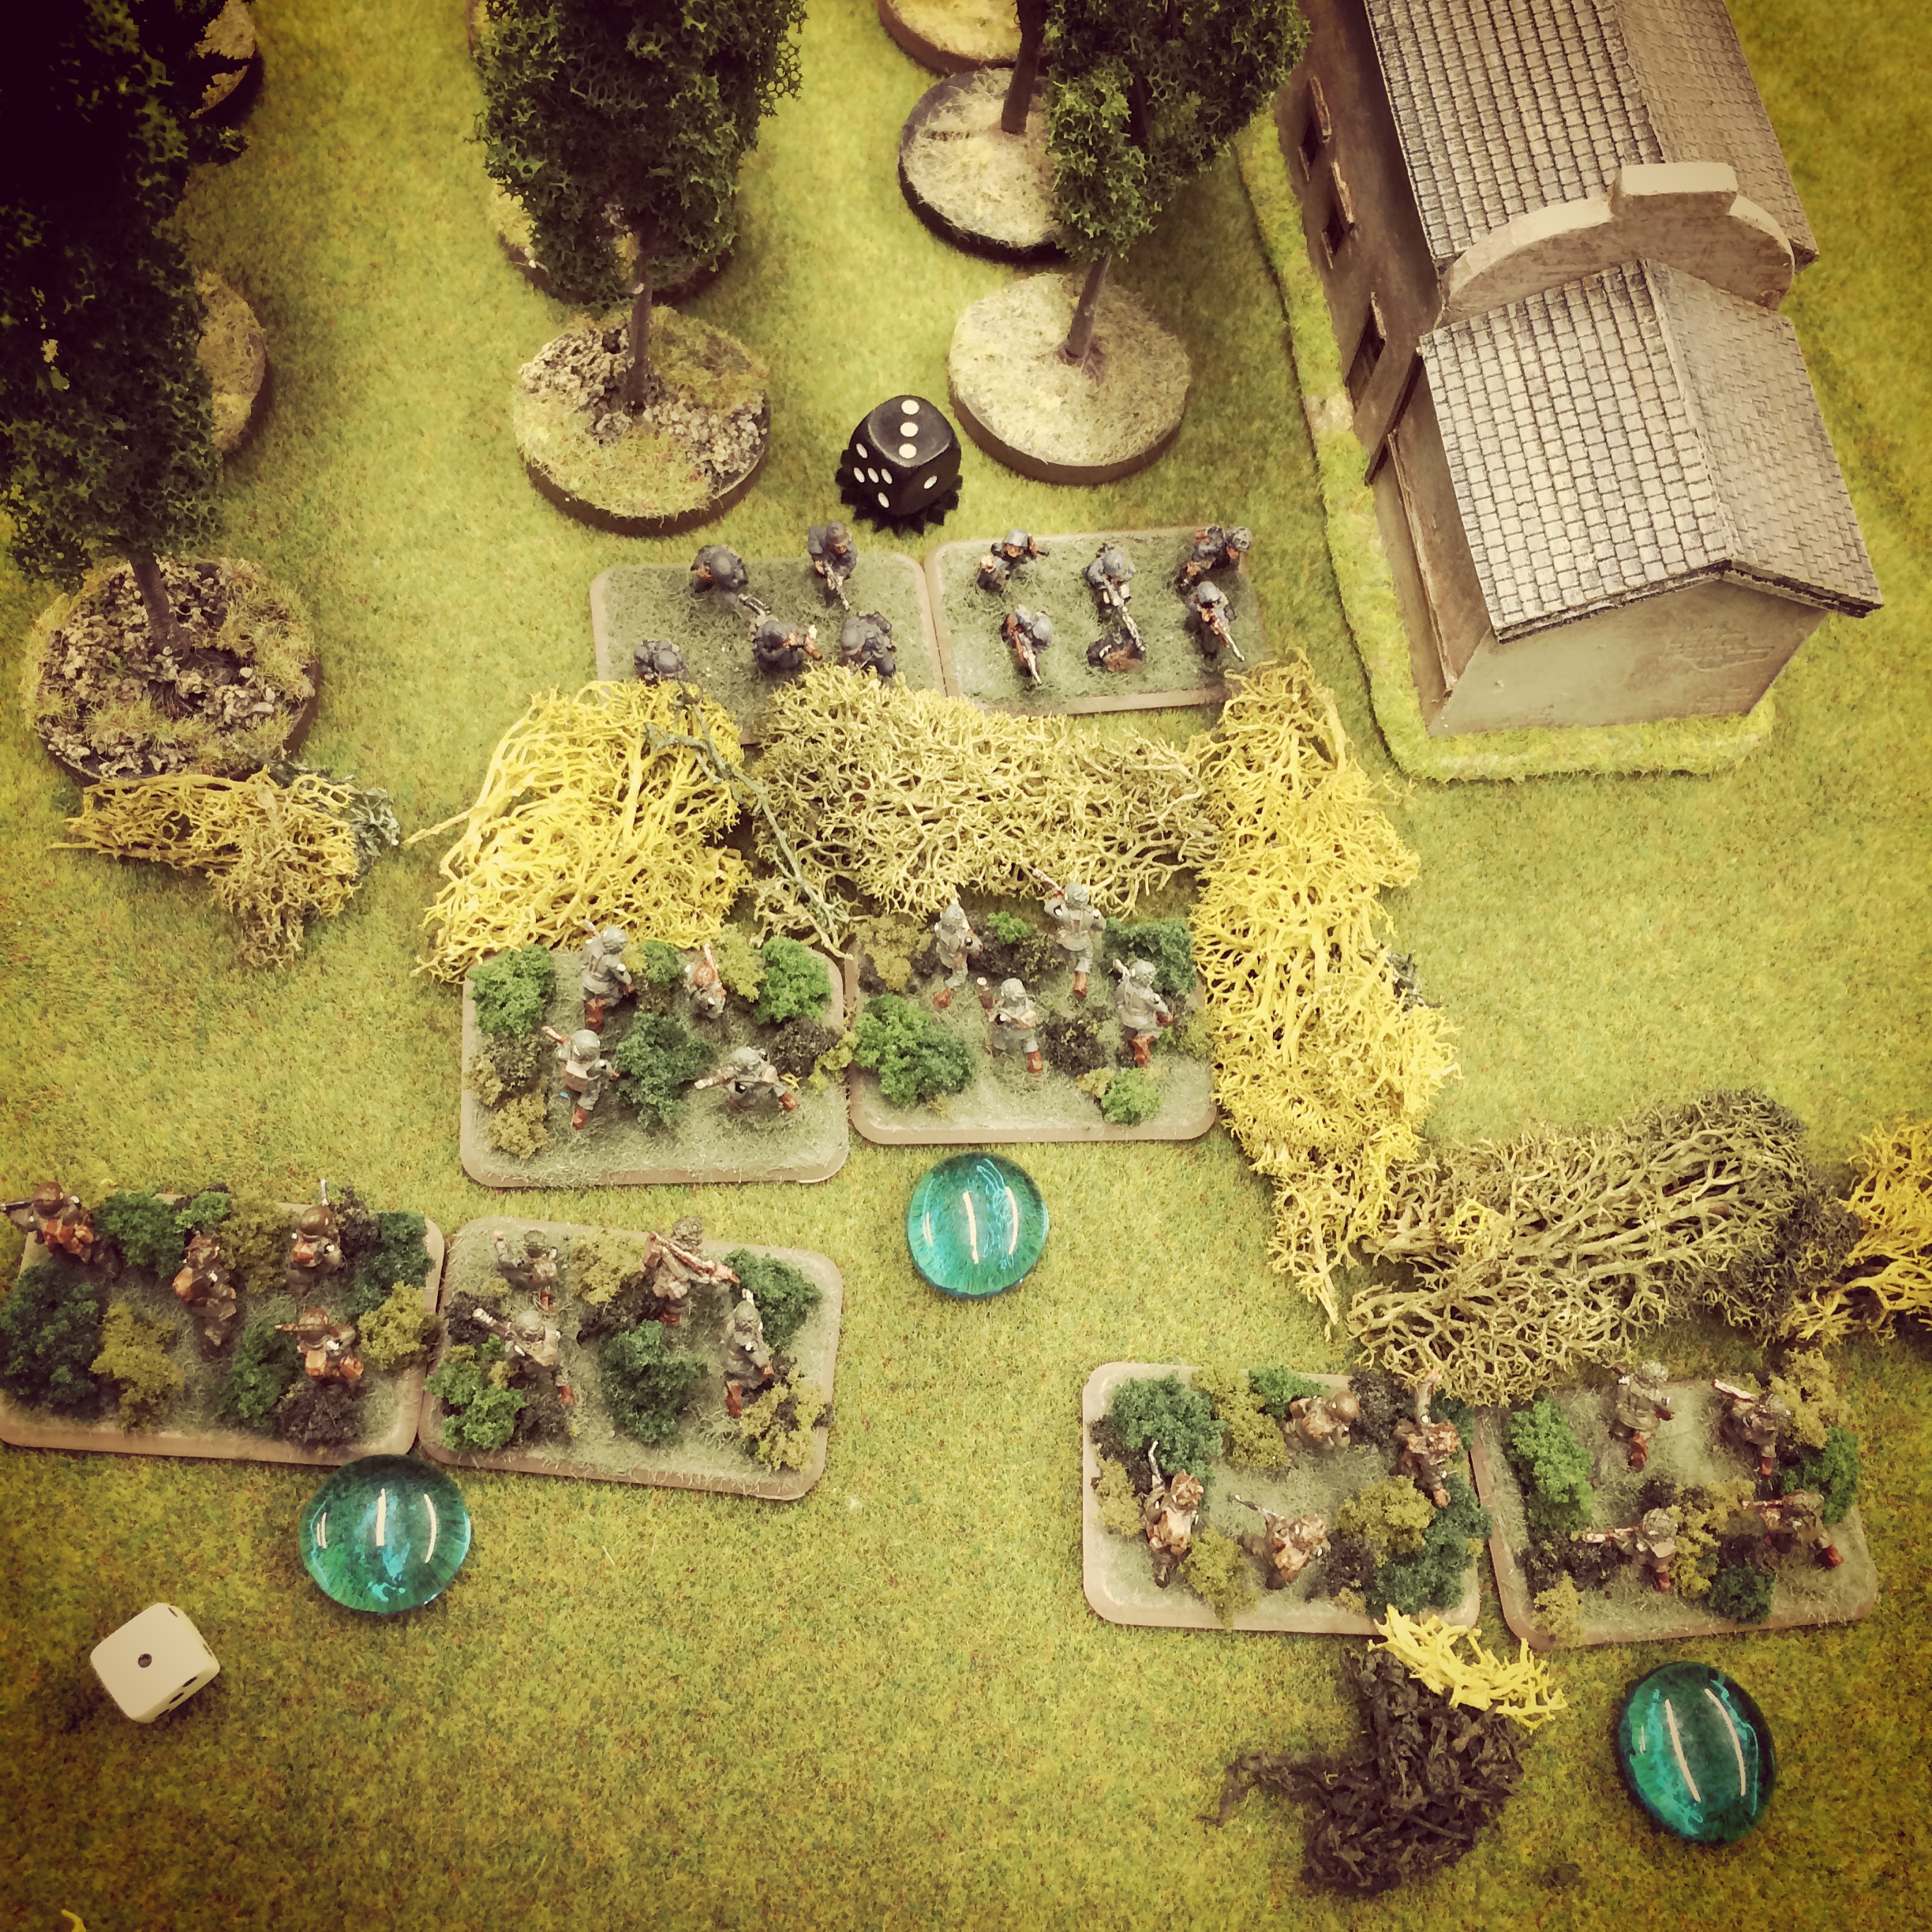
A close assault erupts in the woods behind the barn

In close proximity to each other to the rear of a barn at the farm, US and German blinds were exposed nearly simultaneously with American gunfire tearing into the outnumbered Germans. A close assault at a hedgerow quickly pushed the first German fire team to the rear and out the action for the game. The remainder of the German platoon stayed to continue on firing from within the first barn and a hede nearby.

IMG_4945
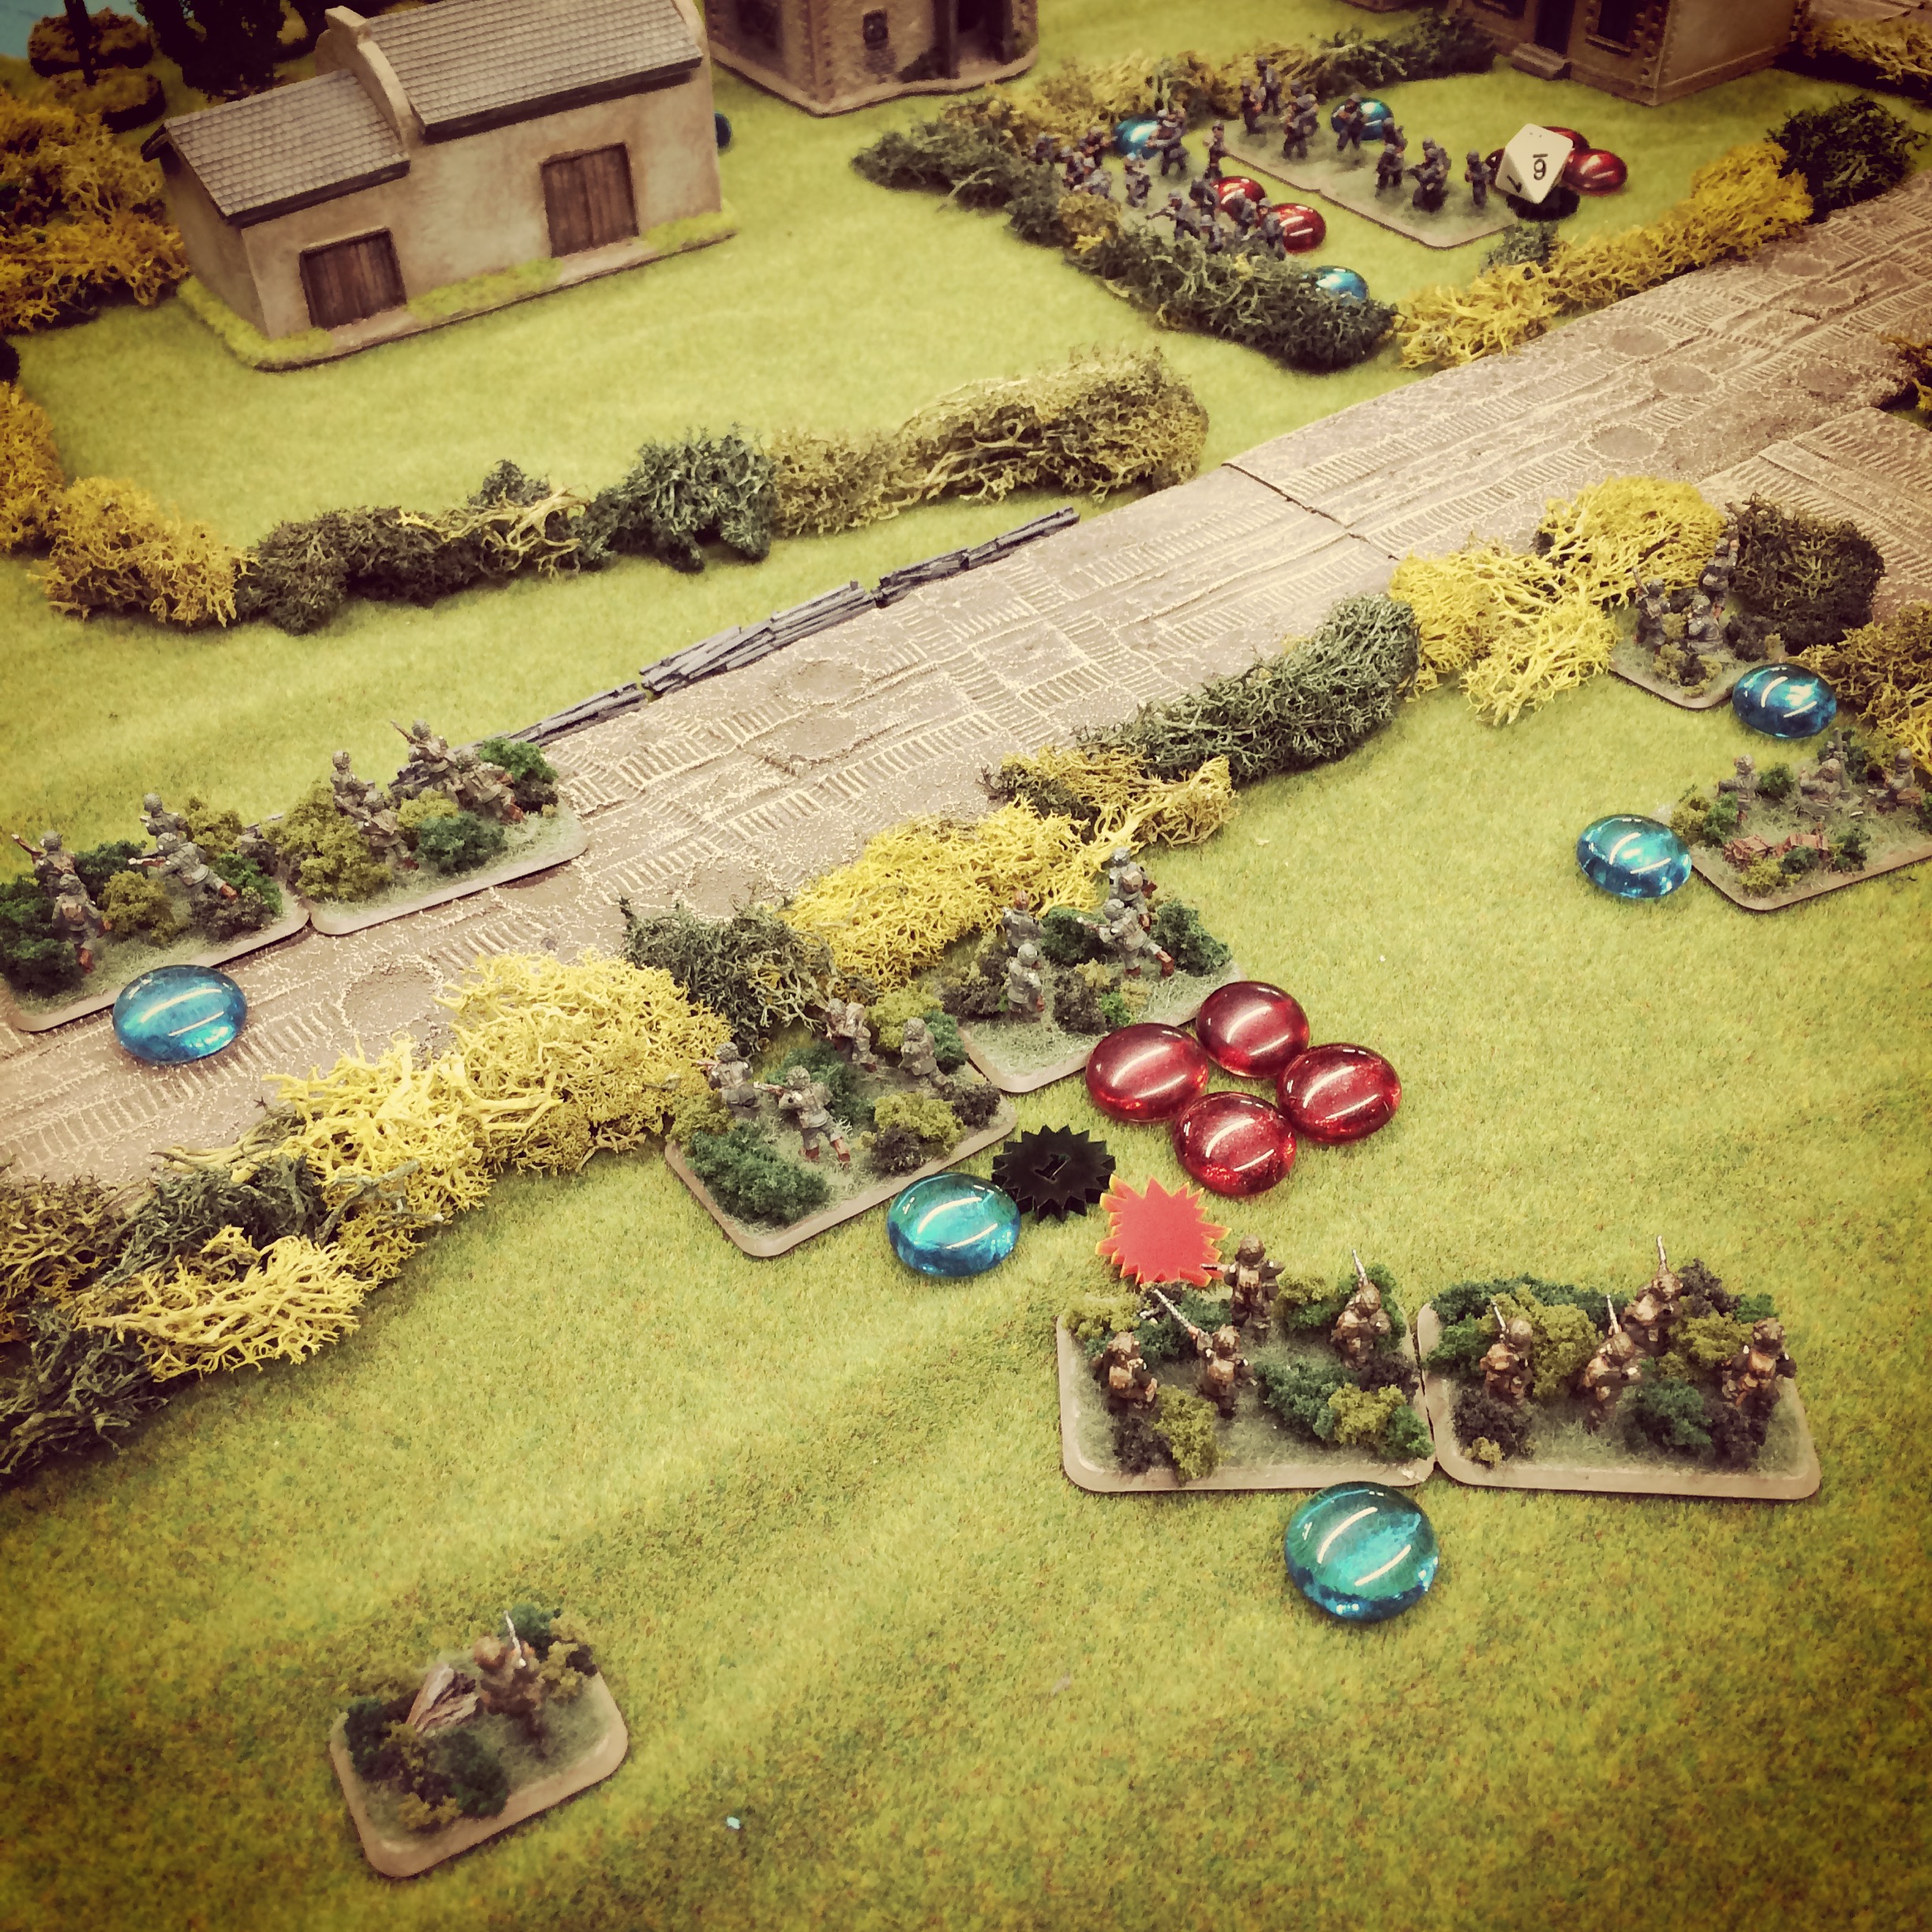
The final American blind is exposed just north of the farm

IMG_4946Americans give and take fire at a hedgerow

On the other side of the farm, the final American blind revealed another rifle platoon hunkered behind a hedge lining a road to town. At long-range, shots were exchanged between German defenders in and around the barn and the Americans now shooting from both sides of the barn. The action at the east end of Cabourg settled into a stalemate of fire across the fields and around the barns.

IMG_4947
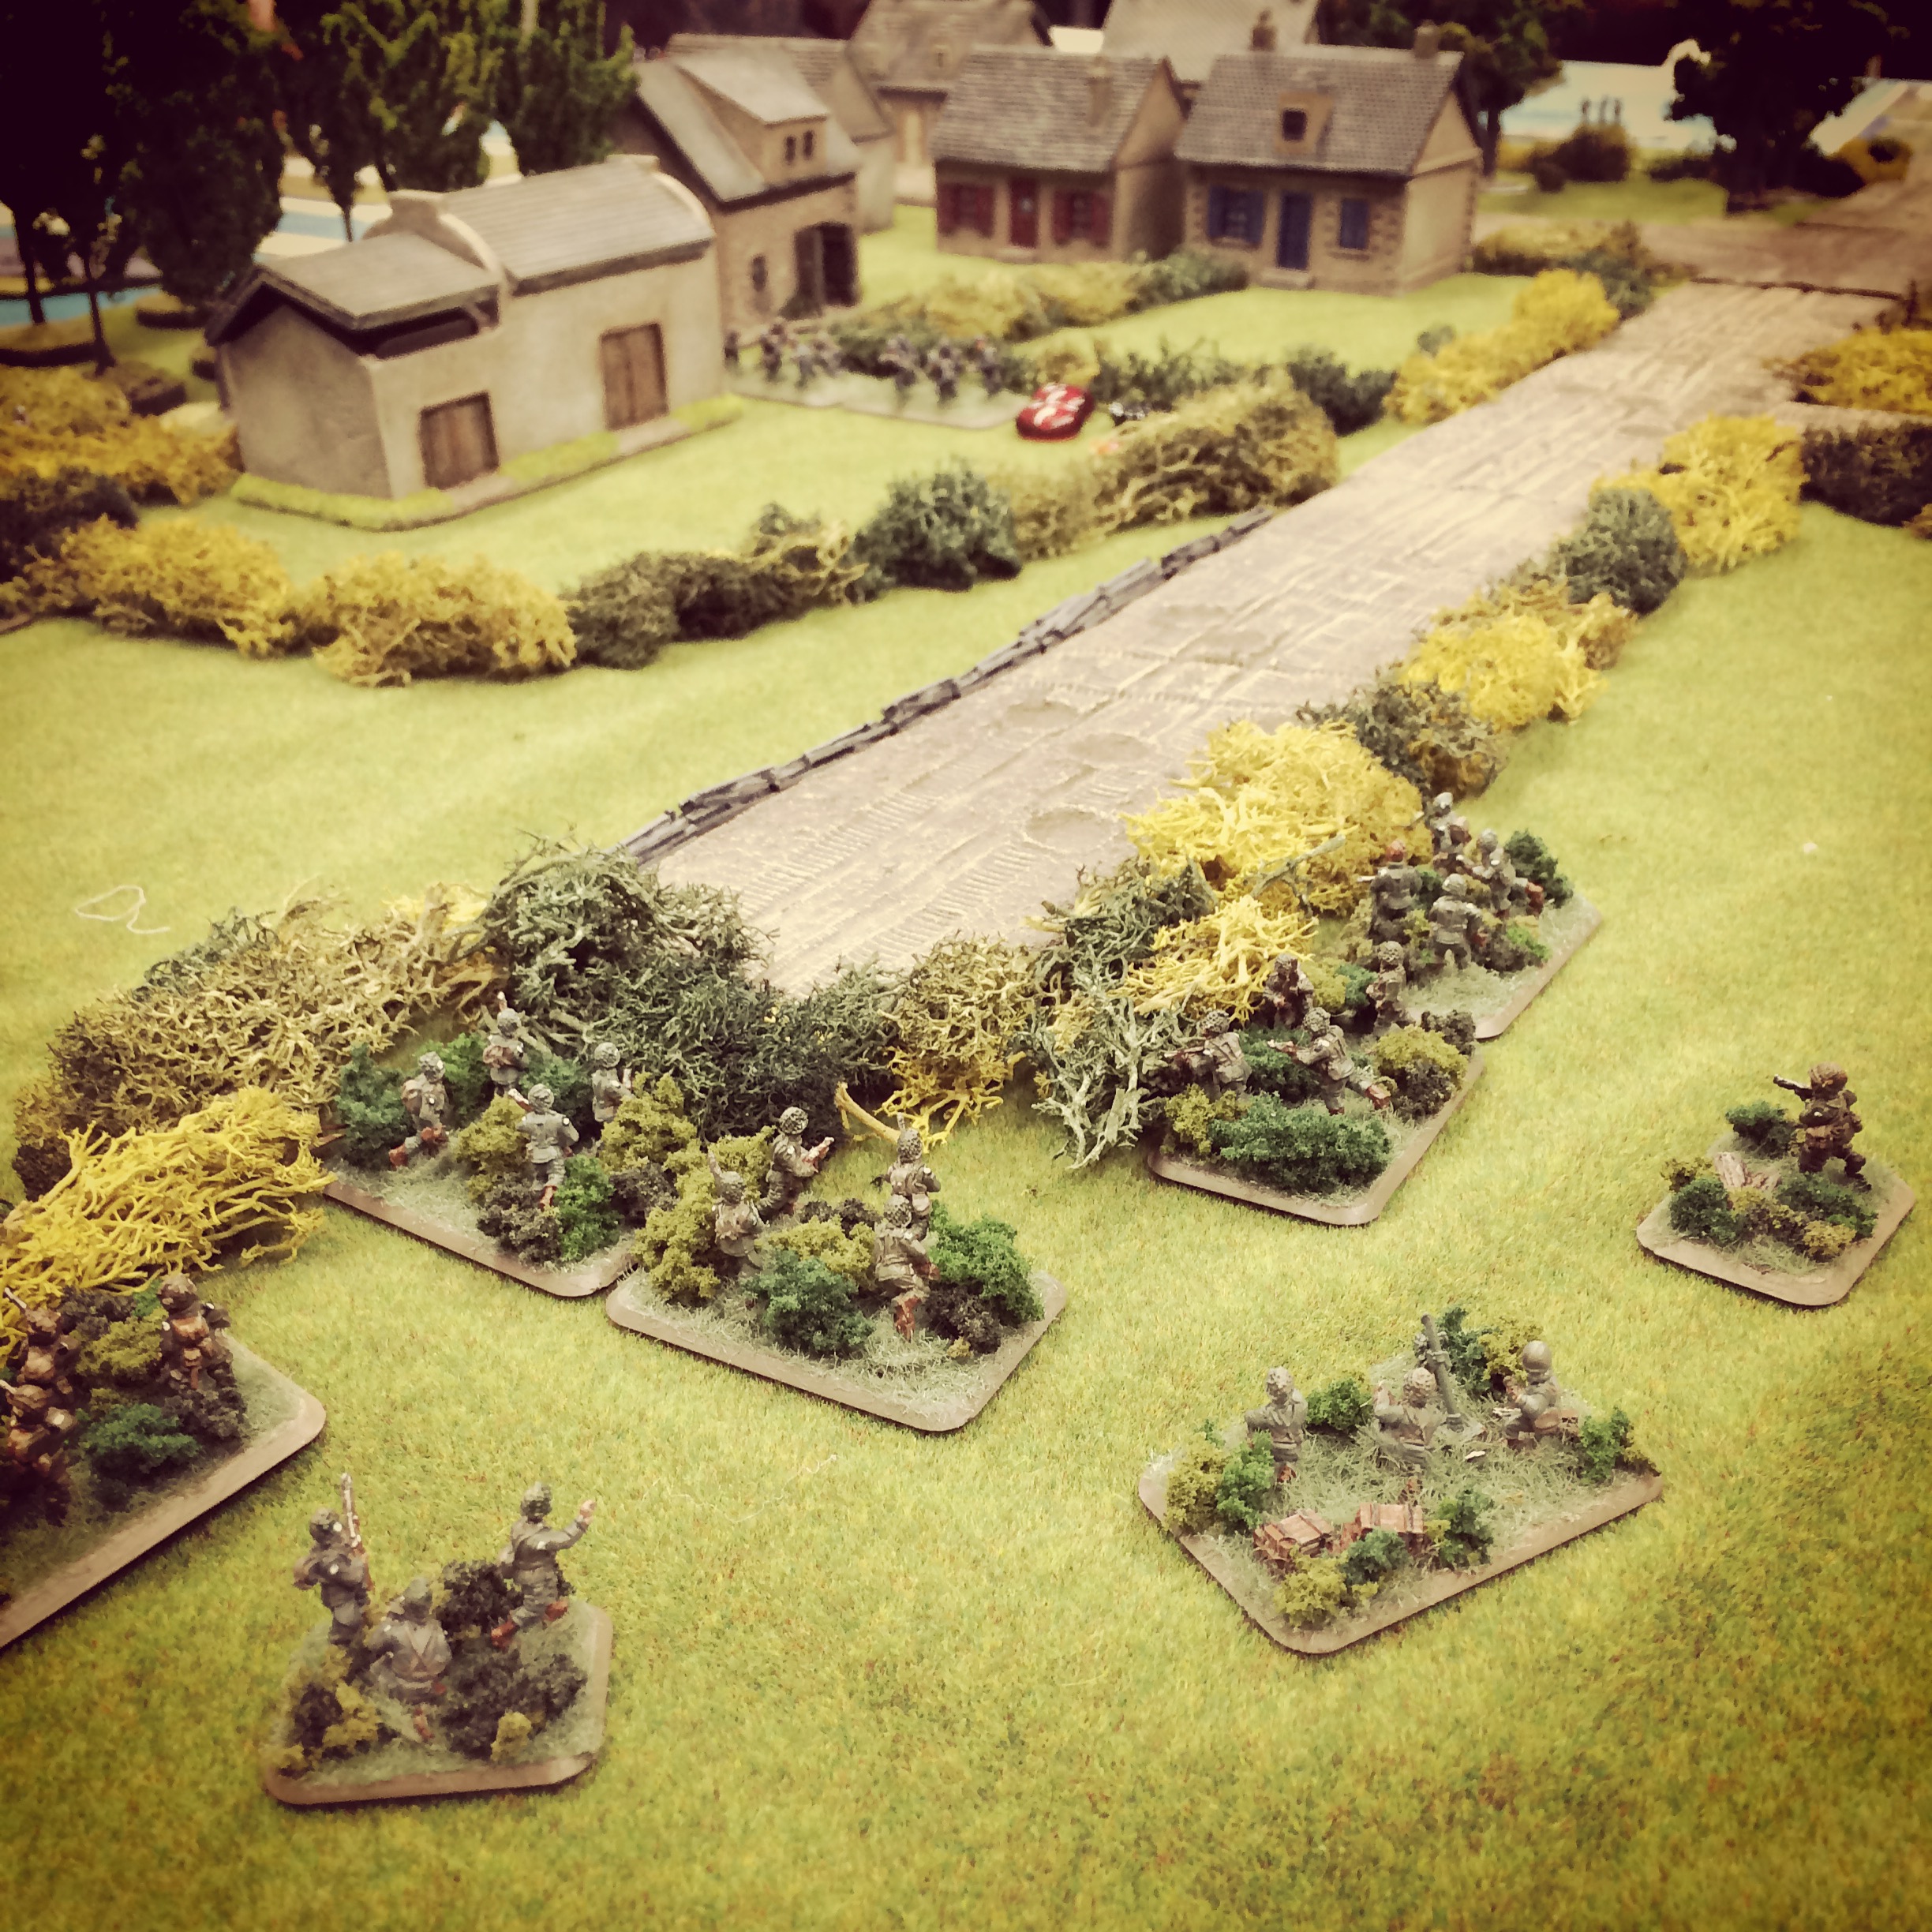
US forces inch toward Cabourg across hedges and fields from the north

IMG_4949US forces stall out to the northeast of Cabourg

Back to the north of town, the lone US platoon on the moved cautiously along a road and over fields, fences and hedgerows. With the Americans creeping toward Cabourg, the Germans opened up with MG 42s positioned in an upper story of a second barn and from the garret of a farmhouse near the entry road to town. With a cross-fire of heavy machine gun pouring into the Americans at the north and east, the US advance stalled somewhat until something could be done about the German fire ripping from building windows.

IMG_4948
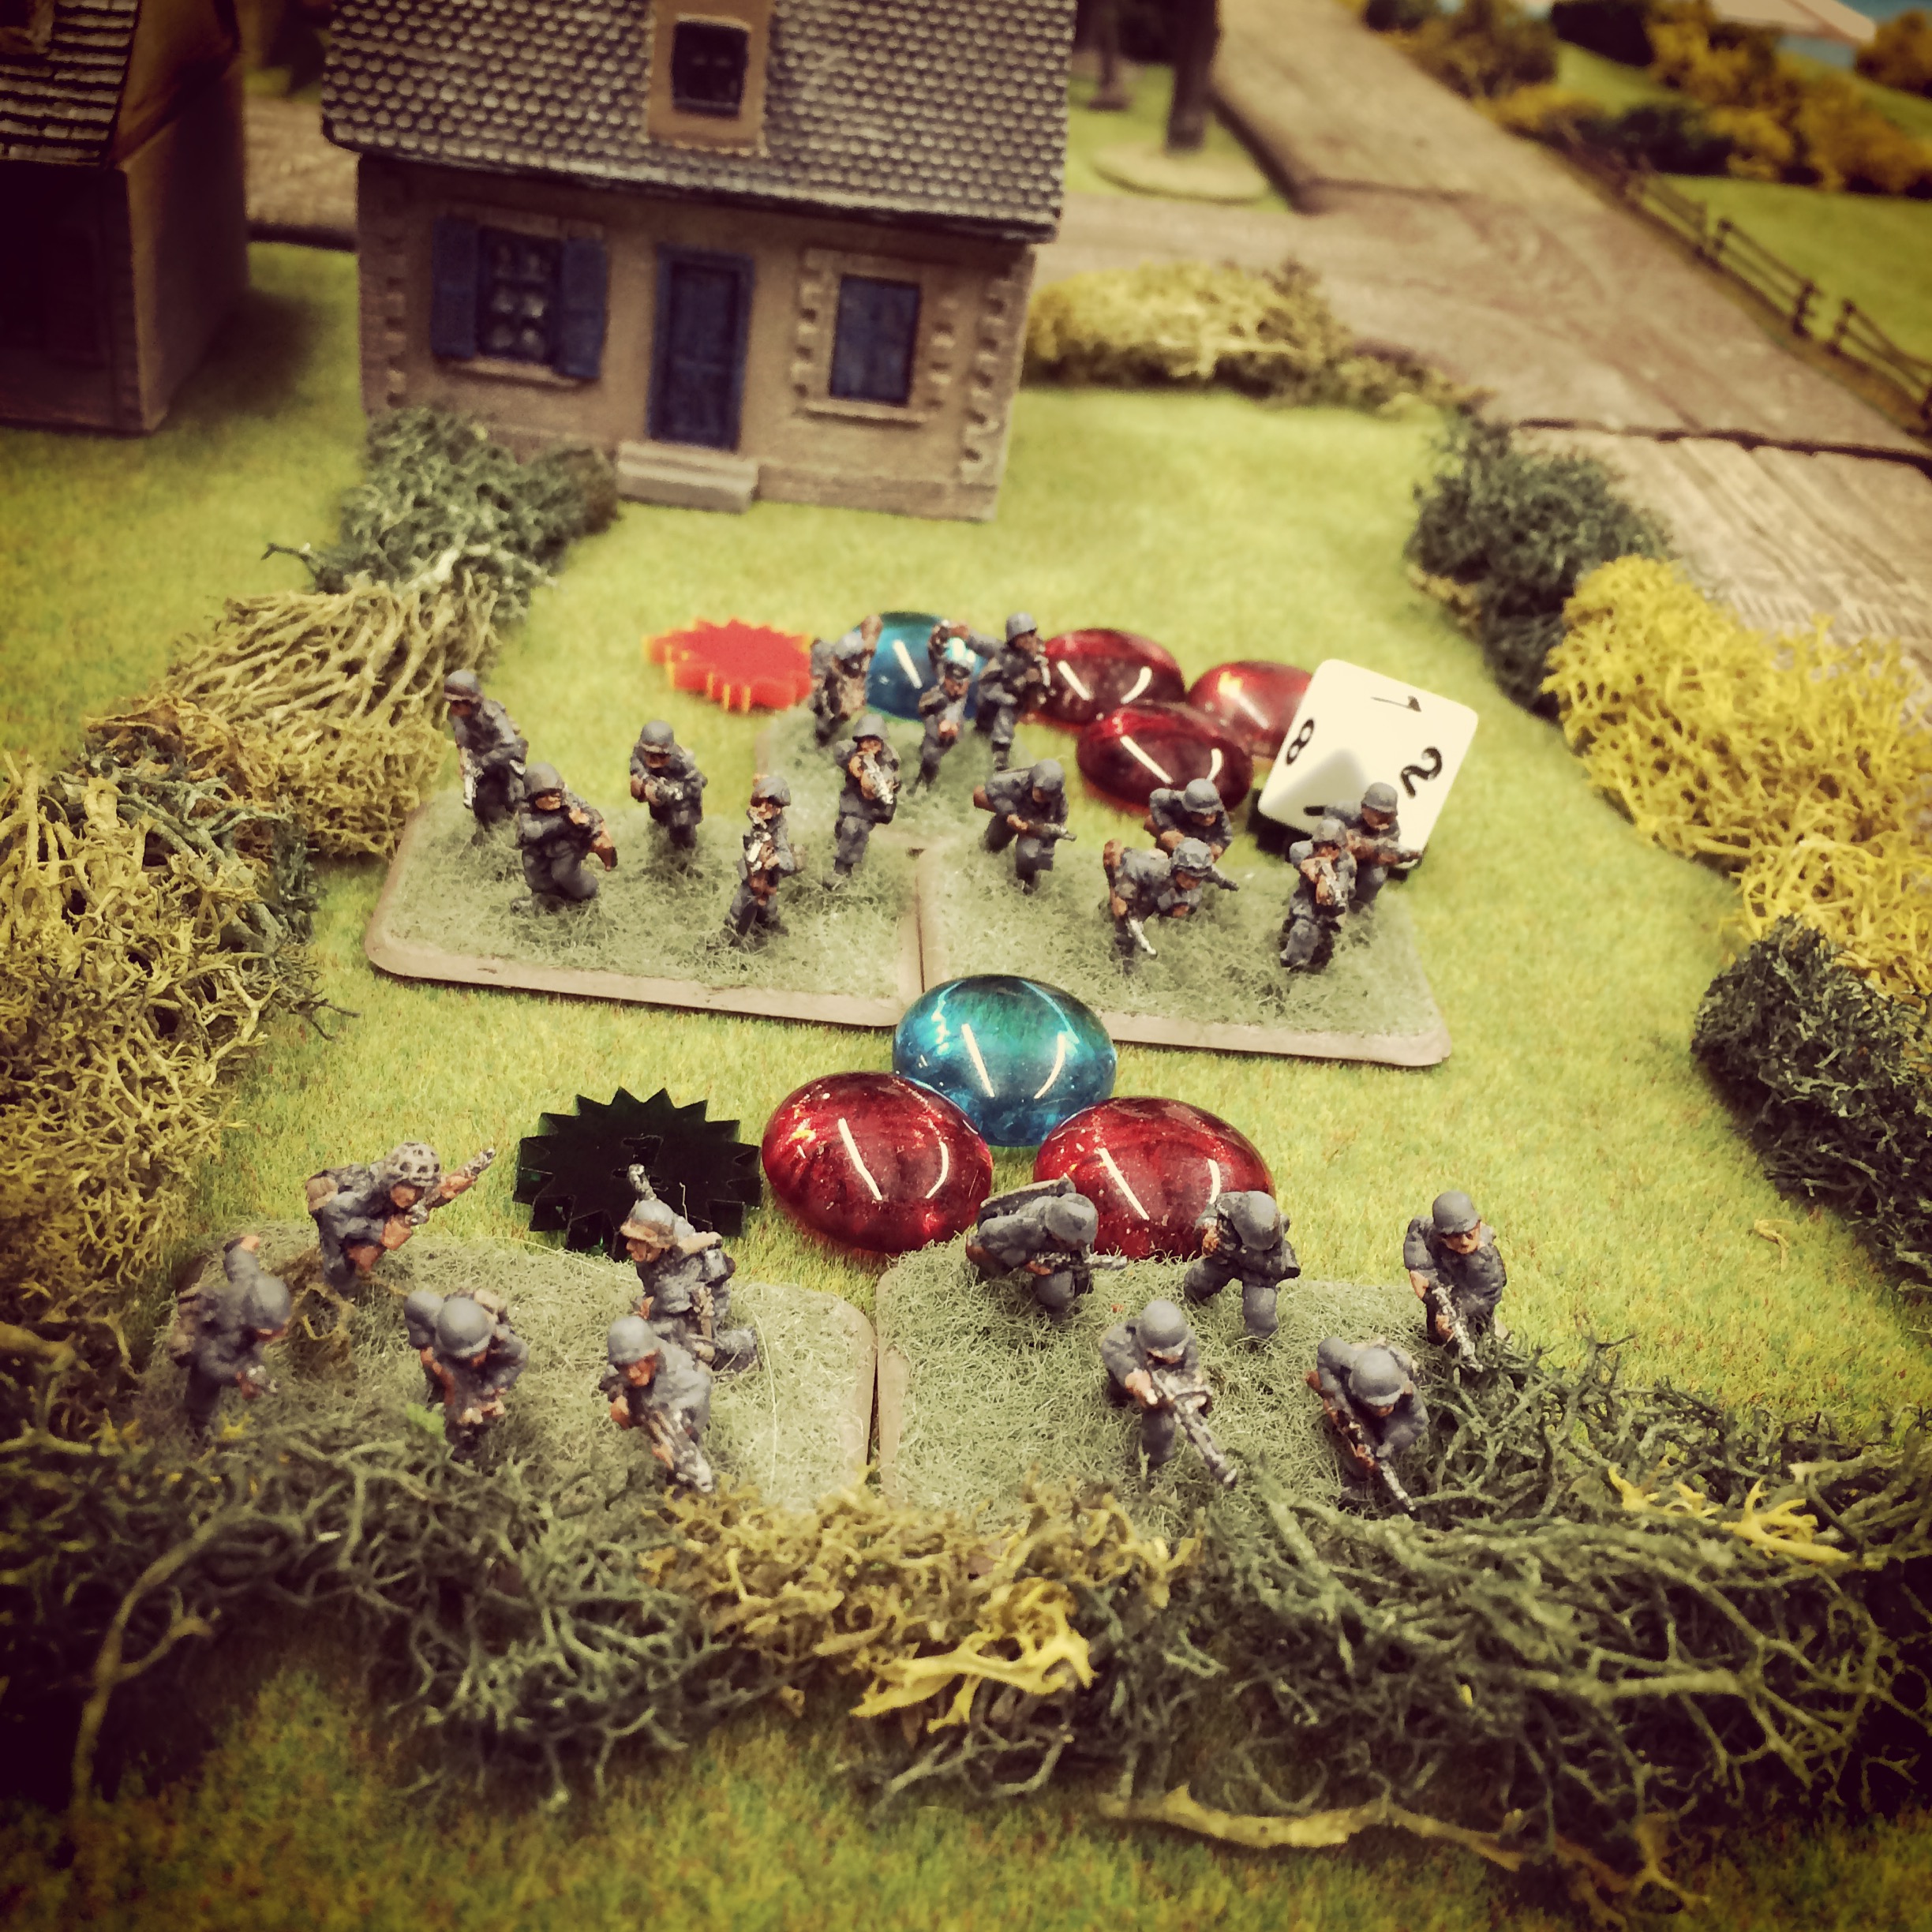
The remnants of the first German rifle platoon look to reposition to cover

IMG_4950
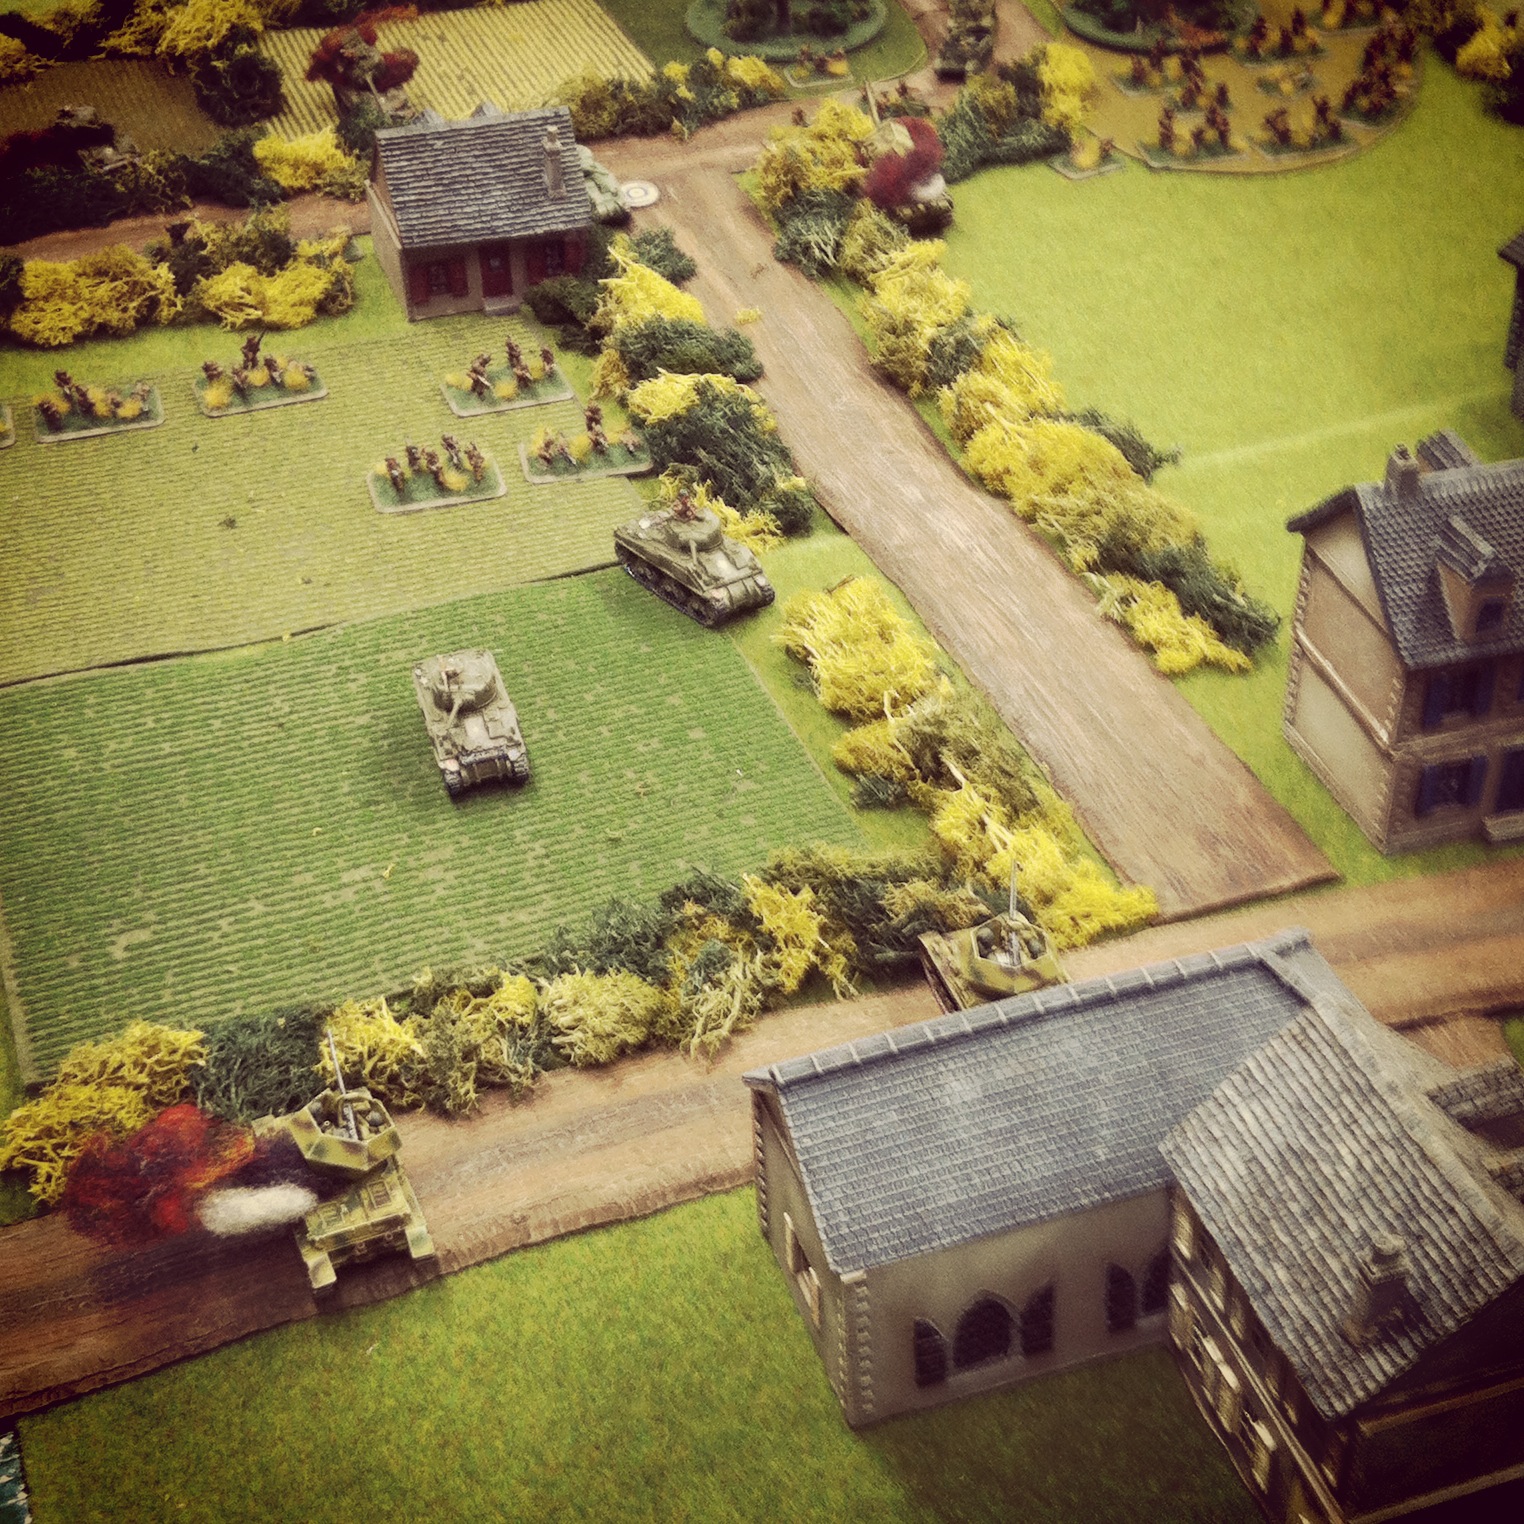
Americans move to assault the German machine guns at the second barn

Back at the two barns, one US platoon swung around to the rear of the barn to assault the German machine gun crew inside. With the MG 42 crew thrown back into a retreat from the barn, the surviving German rifles on the other side of the barn retreated from fire into a nearby house. Firing from their new position, the Germans stalled the Americans pushing around the barns to the village. At the same time, the other MG 42 continued to fire into the other US platoon now pinned with dwindling numbers behind a hedge.

IMG_4951
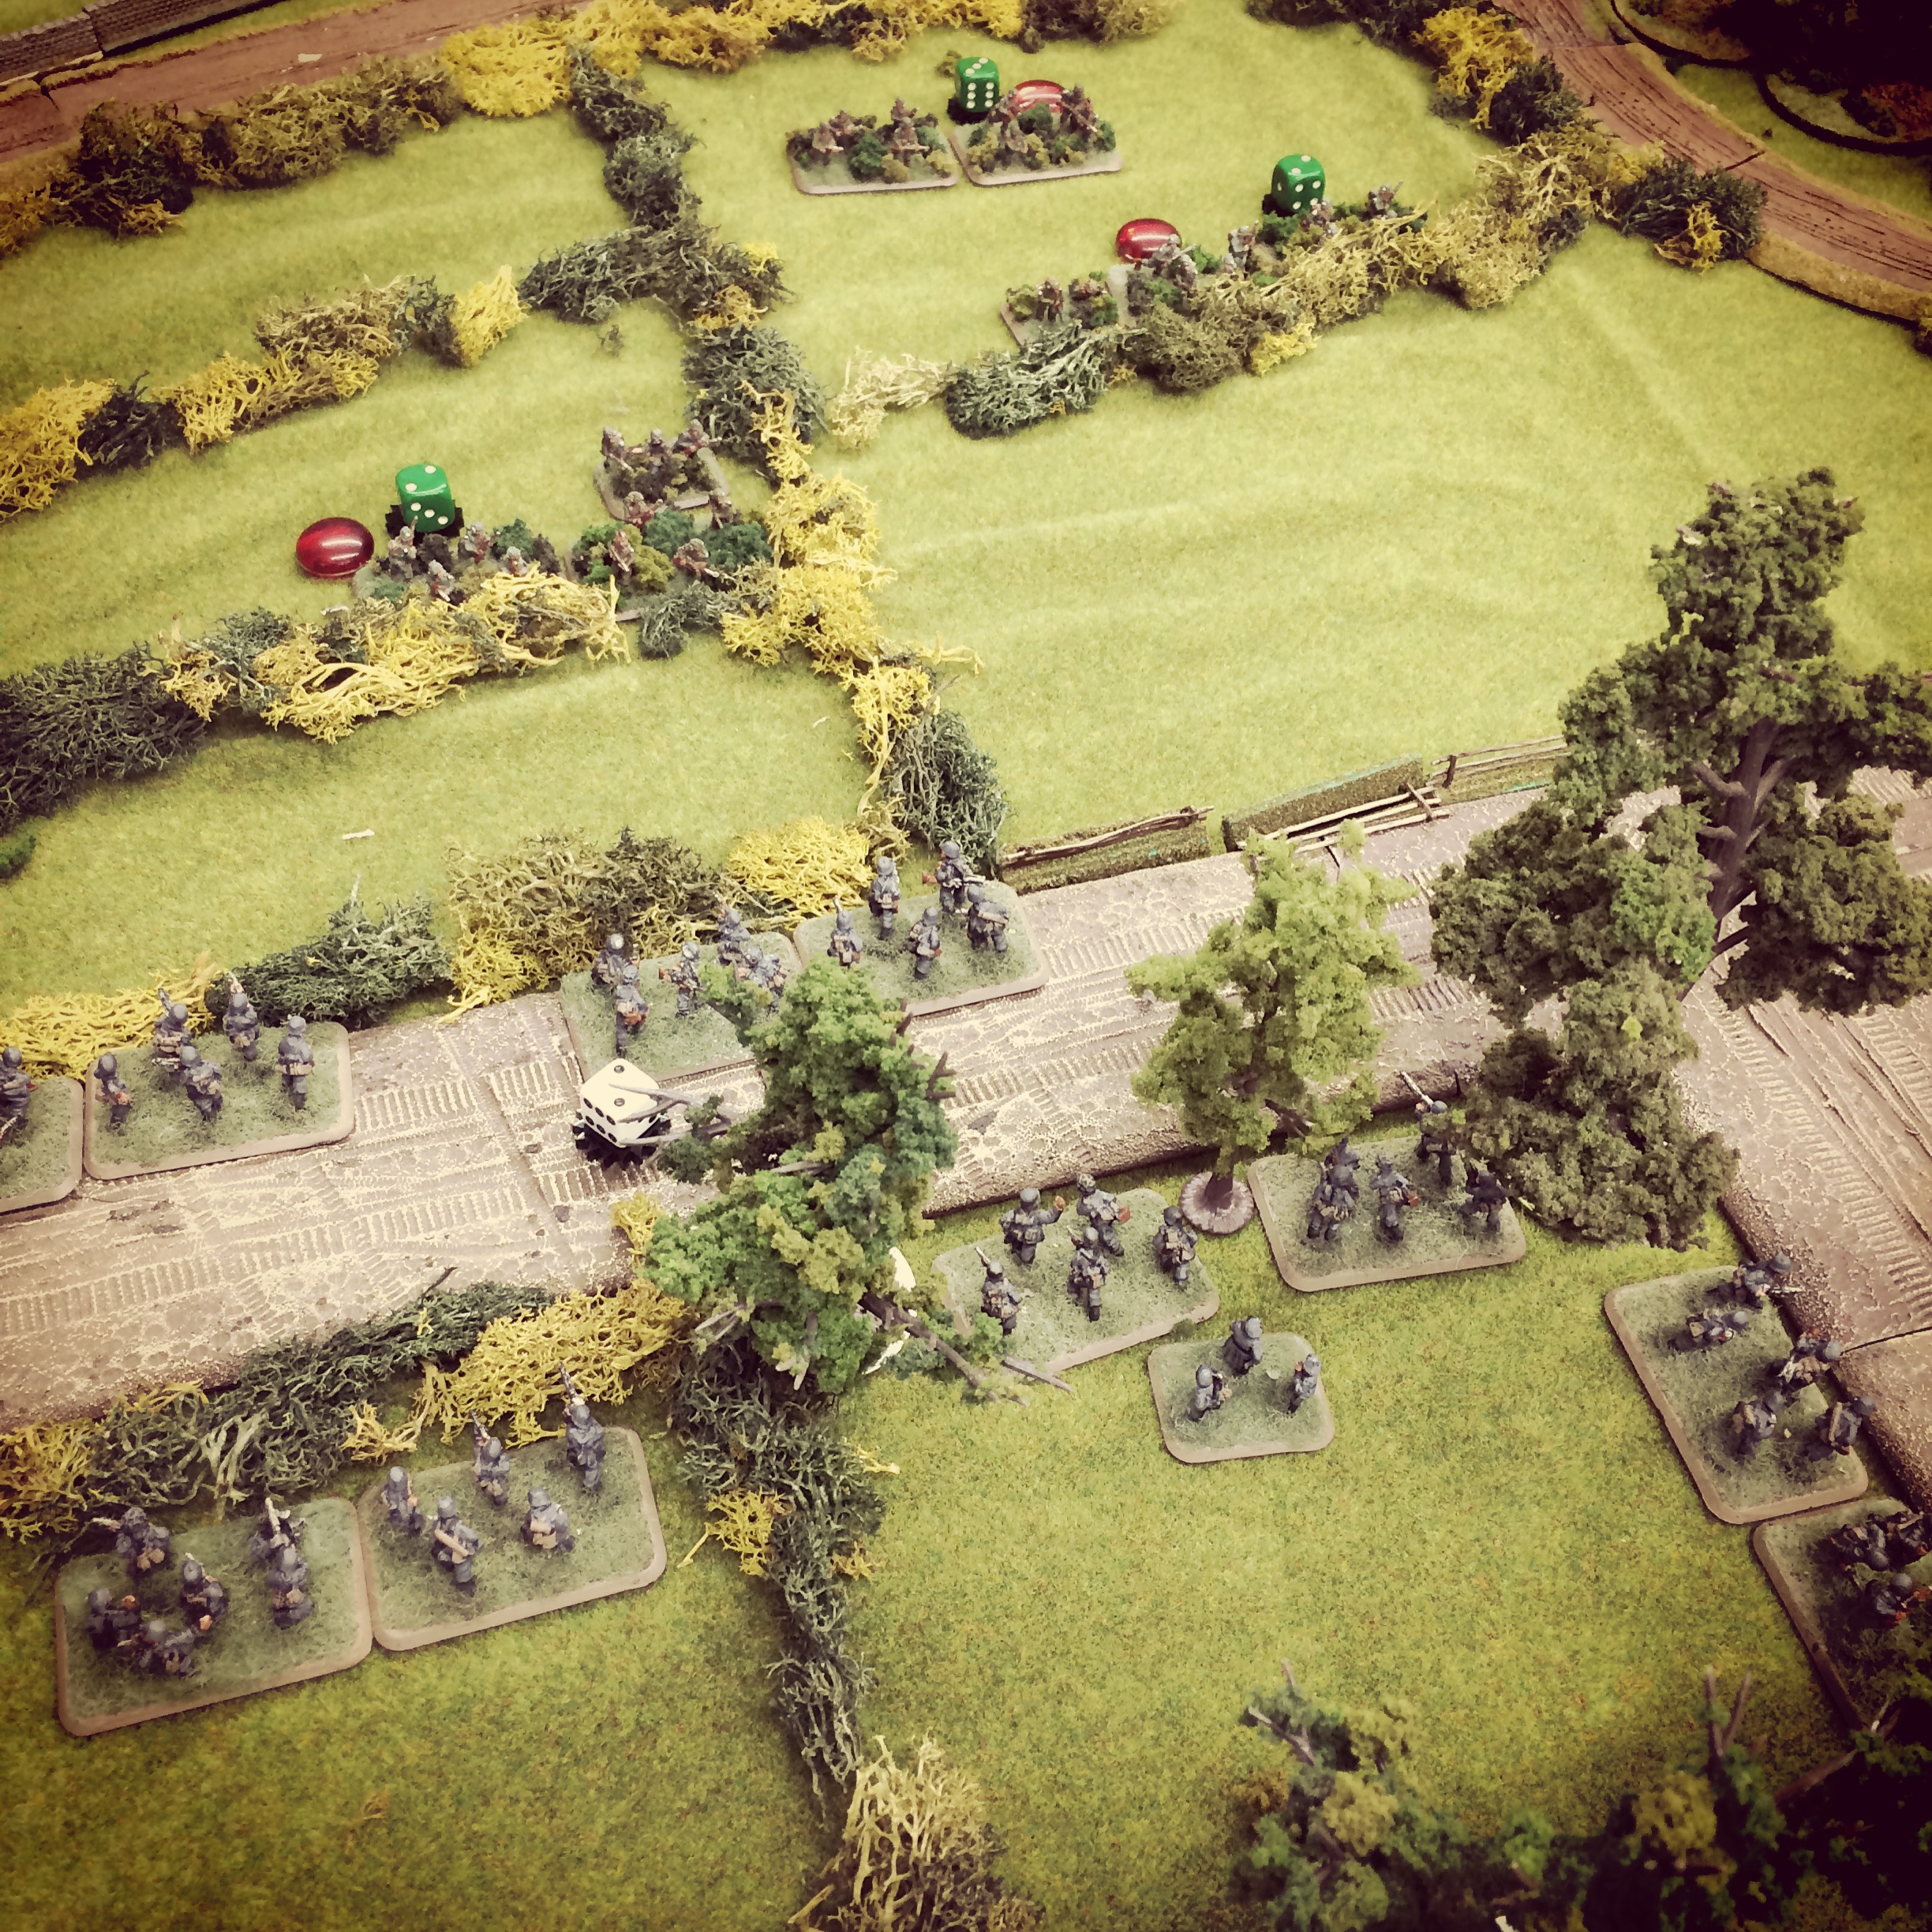
German reserves arrive late in the day to defend against the American push from the north

As the engagement progressed late into the scenario, the game’s referee announced the arrival of reserves on both sides. From the west, a fresh German rifle platoon joined the fight at the road and tree line at the northern edge of town. At full strength, two German platoons focused fire on the lone American platoon which had so cautiously moved toward that end of the village. Taking casualties, the shrinking US force began to fall back over the hedges and fields from where they had just come.

On the far end of the table, three more American platoons arrived from the beach to the east. Looking to advance quickly on the road straight toward town, the US reserves just couldn’t get in the fight fast enough. With the US forces already near Cabourg greatly reduced and in retreat to defensive positions, the game was called with the Germans holding Cabourg from the American assault.

At Normandy in 1944, the result was the same and the German defense halted the US advance which broke off by mid afternoon. The IABSM scenario at Cabourg is a great illustration of the dozens of small inland battles which raged after the morning’s landings along the Normandy coast over 70 years ago, and we’ll be returning to more follow-up actions in the weeks to come.

Metropolitan Wargamers D-Day Plus 70 Event Report

NYTimesDDay

This past weekend at Metropolitan Wargamers in Brooklyn, NY, dozens of gamers came together for three days commemorating the 70th anniversary of the Allied invasion of Normandy on June 6, 1944. Throughout the weekend, we ran multiple WWII-themed games, including Normandy ’44, I Ain’t Been Shot Mum, Flames of War, World In Flames and Memoir ’44. Dice were rolled, strategies were debated, prizes were won and Allied and Axis forces vied for control of France. In all, it was another great weekend full of gaming at our club’s space in the heart of Brooklyn.

Friday Games

IMG_3586The invasion of France begins with Normandy ’44 at Metropolitan Wargamers

Friday kicked off after work with a few players unpacking a fresh copy of the classic Normandy ’44 from GMT Games. This one-map game covers the pre-dawn D-Day Airborne landing areas, five Allied invasion beaches and the charge to the initial inland objectives. The game scale plays with regiments and battalions with each turn representing one day of action. The small, self-contained game provides a great introduction to game mechanics at this scale with a tight, clear rules set. With a quick look at the game, I decided I’m going to have to personally give this one a shot sometime soon.

IMG_3587 US infantry blinds move toward unsuspecting German defenders at a farm outside Vierville

At the back of the club, we ran a game of our new favorite WWII tactical miniatures game, IABSM  from Too Fat Lardies. In our ongoing campaign of the Normandy scenarios in the IABSM Where The Hell Have You Been Boys? book, our game focused on the battle at Vierville-sur-Mer. With the 116th Infantry Division supported by the 5th Ranger Batallion, the Allied mission was to drive inland to capture and defend the church at Vierville.

IMG_3589

German and US units exchange fire in and around the farm at Vierville

As per the scenario, initial Allied blinds approach a farm outside Vierville where a German blind sits unknowingly in the complex of buildings. With Allied infantry closing in over dense bocage hedgerows and orchards, a firefight erupted and drove the German defenders through the buildings and into the orchard beyond.

IMG_3590

German reserves arrive at the flanks of the advancing US infantry outside Vierville

IMG_3633

Germans reinforcements push the Americans from the farm

As the first force of Germans fled the farm, their reinforcing comrades came on to the rear and flank of the US infantry. The Americans made consecutive moves of firing and moving back to defend at a series of stone walls across the road from the farm. The retreating defensive US actions held off the German onslaught until enough Americans could take up position amid Vierville’s houses. At the same time, the US Rangers moved in at the far end of town to hold the objective at the church.

IMG_3632

Americans pull back from the farm to take position in Vierville

The game eventually settled into a bloody house-to-house and hedge-to-hedge fight along the road leading toward the church. Occasional lucky shots from US Ranger light machine guns at the church also harassed the Germans lying low behind their stone wall position at the farm’s orchard. By midnight, much of the initial American force had been destroyed or was retreating to a final stand at the church held by the Rangers. While the Germans had also lost a sizable amount of their force, their heavy machine guns were still in play as they closed in through the town. This time around, we called the action at Vierville a draw.

Saturday Games

IMG_3603The Americans hit the Easy Green sector of Omaha Beach

The next day kicked-off with a running of a FOW beach landing at Easy Green on Omaha Beach. We have been play testing the FOW scenario over the past two months, tweaking our forces and strategies to cope with the clumsy beach landing rules. In our past games, the US invaders only manage to win about a third of the time. Even so, we decided no D-Day weekend was complete without a return to “Bloody Omaha” on one of the club’s award-winning sand tables.

IMG_3604German defenders hold their positions behind a burning bunker

The opening turns found a lot of US boats on the beach and a quick push to the seawall. So early combined arms fire managed to destroy the main bunker at the beach, but the battle was far from over. The initial US push followed on to the left of the beach, but multiple turns at clearing the barbed wire stalled the advance as the Americans took heavy fire.

IMG_3606

American armor and artillery follow-up the infantry landings

As US armor arrived, several tanks managed to drive off the beach to the minefield position to lay down fire on the German trenches. One tank wound up spending three turns bobbing in the surf offshore only to arrive and bog for two more turns on the beach. As this most inexperienced tank crew in Normandy struggled, the other Shermans took fire from German rockets and reserve tank platoon which rolled to bulk up the beach defense. American artillery also arrived but proved pretty ineffective to the Germans at the trenches. Wave after wave of US infantry pushed to the trenches, eliminating most of the defenders but never managing to clear the barbed wire lines to seize the German position. At the final turn, the Americans just hadn’t made enough headway to control the beach.

IMG_3627World In Flames continued over D-Day weekend

With action raging on the sand table, a group of club members showed up to continue playing their massive World In Flames game. Australian Design Group’s WIF from 1985 is the standard in grand-scale strategic fighting of the entire WWII period. The game’s rich playable detail, dizzying number of 1400 playing counters and sprawling maps makes it a commitment for only the most experienced gamers over many months of play.

IMG_3630Allied forces push from the beaches inland to Caen in Normandy ’44

The Normandy ’44 game from the evening before concluded with a decisive Allied victory Saturday afternoon. Pushing the Germans back from all but Utah Beach, the Allies captured Bayeux and several smaller towns. With German defenders routed from roads leading inland from the landing beaches, the victors rolled in to control half of Caen by the game’s end.

IMG_3625No one was going hungry at Metropolitan Wargamers over the weekend

Saturday also included a lot of other club members down for the usual variety of board, Euro and card games, making for a packed house. As the crowd rolled in, a longtime club member showed up with an enormous fresh-caught fish which he proceeded to gut with a huge military-style knife. With fish on the grill and food ordered in, there was plenty of food to sustain the crowd of gamers throughout the day.

We all took a mid-afternoon break to dice-off in a game, books, DVD and miniatures raffle to raise funds for the club. I was fortunate to score a copy of A Few Acres of Snow from Treefrog Games, and another lucky person picked up an unused copy of out-of-print the Games Workshop classic Dreadfleet.

IMG_3631

Initial deployment of Allied and Axis blinds in our Saturday evening IABSM scenario

As the main crowd thinned out, we ran an evening IABSM game continuing the assault beyond Easy Green. The scenario found initial US forces deployed around a small French farm with the objective of moving men off the table on the roads beyond. The Germans were tasked with preventing the American advance and seizing the farmhouse stronghold.

IMG_3607

Settling in for a contested fight at the farmhouse above Omaha Beach

Using initial blind deployment, Germans quickly moved to the farm along thick hedgerows as the Americans drove into the building for cover. Turns followed with the Americans jumping from cover to fire on the dwindling German force which returned fire over the hedges to unfortunate US infantry hanging out in the open. A US flamethrower attack from the window of the farmhouse decimated another German squad sitting close behind a nearby hedge. Pressing their luck, a group from the farmhouse made a run for the road exit only to be stalled by a reinforcing German heavy machine gun squad. Returning fire, the German MG42s were eliminated from their position in the open field. However, the damage had been done. Although the Germans had not captured the farm objective, the Americans no longer had a sufficient force to push off the table. The night ended with a German victory beyond Easy Green.

Sunday Games

IMG_3620The war continues on the Memoir ’44 Hedgerow Hell battle map

With the first days of Operation Overlord behind us, Sunday’s game focused on the breakout actions. A couple visiting players showed up for the club’s Memoir ’44 game around noon on Sunday. Using the wide Hedgerow Hell expansion map, the Allies beat the scenario odds to win the game in the Overlord scenario. There was much talk of getting larger games of Memoir ’44 back in rotation at the club soon, so hopefully getting the game back on the table will bring some renewed interest in the coming months.

 IMG_3621

The initial armored encounter outside Lingevres leaves British tanks in flames

I finished off my weekend as the British at Lingevres using the same scenario I first ran at the club a few months ago. The mission ahead for the Brits was to move into the heavily defended town and take two of the buildings. Historically, the battle played out as a tank duel between UK Sherman Firefly and German Panther tanks, and our game this past weekend played out in a similar way.

IMG_3624

A Panther meets its end at the hand of the British Royal Artillery as a close assault is attempted on another in the woods nearby

At the outset, my first platoon of tanks got a bit overly aggressive and charged into contact with the full Panther platoon at the farm outside Lingevres. With the first Firefly destroyed in the opening turns, my remaining Shermans pulled back as the Panthers rattled to the middle of the field to hold off UK infantry advancing through the woods and bocage-lined fields beyond. One Panther bogged on a hedgerow and another was destroyed in an initial volley from the Royal Artillery in the fields outside town. Several turns became ensnared in attempted infantry assaults on the third Panther in the woods, but eventually the German tank rolled away to deal with the building reinforcing infantry and tank platoon in the fields on the other side of the table.

IMG_3622British Shermans and infantry break across a field toward Lingevres

With the Panthers moving away, fresh British infantry and the surviving Shermans moved to the farm and fields beyond. British artillery fire winnowed and pinned the German platoon in the church over several turns. Artillery fire also sought to keep the reinforcing German spotter pinned to limit the effectiveness of the reserve Nebelwerfer battery which as delayed reserves to the rear of Lingevres.

IMG_3623

The duel between the Panther and Firefly ends with the British tank in flames as the remaining Shermans destroy a Panzer IV platoon in the distance

In the meantime, a multi-turn tank duel had settled in between a lone Firefly and Panther while a reinforcing Panzer IV platoon arrived at the edge of town. Both tank groups traded fire, and in the end, the Panzers were routed with two or their three destroyed and the Firefly fell to the Panther’s gun. Back at the farm field, Shermans traded fire with Pak 40s and destroyed an anti-aircraft platoon defending the town’s flank. With two Panthers left on either side of the church, Shermans on each side of town and advancing British infantry, we called the game a draw.

 Weekend Debrief

After more than 20 hours of gaming over two nights and days, I was pretty worn out, but the interest in the D-Day event had made the weekend well worth it. WWII still holds enormous interest to this day, as demonstrated not only by our weekend of gaming but by the mainstream media’s coverage of D-Day over the week leading up. In the next week, we’re kicking off an FOW Infantry Aces campaign with fresh forces hitting the tables in rounds of Italy-themed WWII games. This fall we’ll be playing out some Market Garden battles and by the winter we hope to host some Battle of the Bulge engagements. It was a pretty special weekend in Brooklyn, but for regular visitors to Metropolitan Wargamers, there’s always the next game in this very unique New York City community.

New Game Weekend: I Ain’t Been Shot Mum

IABSMbook

As a World War II gamer, I have a newly-discovered love for a game which doubles my gaming possibilities with all the time and money I’ve  got invested in the 15mm Flames of War game which is the modern standard for the period. The past two weekends at Metropolitan Wargamers in Brooklyn, NY, I’ve been turned on to I Ain’t Been Shot Mum which is billed as “the other World War II miniatures game. For gamers with a lot of miniatures on hand and a hankering to play WWII at a different and more historical level, IABSM is well worth it.

TFLlogoNow in its third edition, IABSM has been published since 2002 by Too Fat Lardies, UK-based makers of a number of wargaming rules systems for a variety of historical periods. Overall, the game provides WWII wargamers with a simple, sleek set of skirmish rules that focuses far less on fielding shiny models and more on tactical decisions on the tabletop. IABSM is a true “what you see is what you get” system with a 1:1 scale at 15mm but easily adaptable to other model scales. One guy on the table equals one soldier in the field during battle, taking the game down to a level that really “feels” like commanding a group of troops. The smaller, less abstract scale of IABSM games provides a lot less “gaminess” to the systems, and relies a lot more on the decision-making skill of players commanding forces on each side. In many ways, the game is a throwback to original Kriegsspiel invented for use in Prussian army training two hundred years ago.

IABSMcardsSample cards from I Ain’t Been Shot Mum from Too Fat Lardies

The core rules of IABSM retail at under $20, and provide a number of basic underlying mechanics easily usable in any battle or theater of WWII. As an avid FOW player who is often faced with hundreds of pages of more grand-scale rules, army lists and ongoing modifications, the elegance of the skirmish-level IABSM comes down to five main areas:

1. Random Activation: Rather than playing by a simple “I go, you go” turn-based mechanic, IABSM games are powered by a set of cards which randomly activate deployed troops in the field. At the beginning of the game, a deck of cards is shuffled with each card representing a unit in the game. Cards are drawn and units are activated in turn, with units choosing a number of actions based on their quality. Highly-trained US Airborne troops may have four actions when activated, while less elite regulars may only have three. Actions include movement, firing, spotting the enemy and many other activities which makes commanding a unit’s turn one of many possible choices. Cards are added to the deck as new units arrive and removed if a unit is destroyed. Drawing a “tea break” card ends the turn with one final round of shooting for available inactivated units before the cards are shuffled a new turn begins.

2. Morale: Troop morale is nearly as important as firepower on actual battlefields. A well-armed but rattled group of soldiers may prove to be nearly ineffective in the field without some stalwart command leading the way. IABSM offers several levels of morale with pinning, shock and suppression which progressively eats into how effective a particular force can perform on the table. When being shot at, a simple table resolves possible kills as well as whether a unit is progressively shocked into poorer performance in subsequent turns or entirely immobilized due to overwhelming fire.

3. Command: Commanding and junior officers in IABSM are represented as “big men,” with individual cards allowing for their separate officer actions to drive gameplay. Through proximity or attachment to their forces, commanders can greatly affect morale by clearing shock from troops and boosting their strength in subsequent exchanges with the enemy. The presence of command also doubles the chance of troop activation, as a drawn “big man” card can press an attached unit into action without its own card being drawn.

4. Blinds: In real-world combat, knowing the enemy position through intelligence, observation or contact is almost as important as the engagements that result. While many miniatures games present an open table where nearly everything is known from the get-go, IABSM preserves a “fog of war” element with the deployment of “blinds” on the table. Represented by oval-shaped markers, blinds are able to move around the table without revealing their actual make-up. Thus, a player might move a small unit, a large platoon or even a false blind containing no troops around the table without the enemy knowing its true make-up until revealed. This allows players to add an element of diversion to the game, as an enemy way burn up several turns chasing a ghost across the table as real forces jockey into position.

5. The Game Referee: One of the hallmarks of wargames until recent decades was an all-seeing, all-controlling game referee. As a non-player, the referee not only provides clarifications on rules and contested play on the table, but they also are able to maintain a level of secrecy between each player as a scenario unfolds. The game can be played without a referee, but the presence of one adds yet another depth of to the “fog of war” randomness employed already with blinds and random card activation.

WTHbook

Beyond the base rules, Too Fat Lardies offers a number of IABSM scenario and guide books for Europe, Italy, North Africa and the Pacific. General lists allow for the creation of custom scenarios, but I really like the historically-specific books. The past two weekends, I played the first two games in the D-Day-themed Where The Hell Have You Been Boys? book which contains over twenty scenarios from Omaha and Utah beaches to the inland. Following the United States advance and subsequent German counterattacks, each scenario lays out a simple briefing for the German and US players along with a referee sheet, terrain map and a guide to forces and cards needed for play.

IMG_3554“Protect The Guns” scenario set-up for IABSM

IABSMGameScenes from the German defense above Pointe du Hoc in “Protect The Guns”

My first game — “Protect The Guns” — saw me playing as the defending Germans looking to hold off the Allied advance from Pointe du Hoc with a couple heavy machine guns, snipers and some off-board artillery. One of the remarkable things about IABSM is the vast amount of space represented on the table, making decisions of movement and firing  very important. My artillery was also very unreliable, representing some of the German communication challenges come alive. That said, with only a few men at my disposal, I was able to stave off and force the Americans to redirect through constant harassing fire until their reinforcements entered under a blind at my rear. With one of my machine guns and both snipers finally destroyed, the last of my Germans found themselves pinched on two sides of more-skilled US troops who took the game.

IMG_3553

“Holding The Pointe” scenario set-up from IABSM

In “Holding The Pointe,” my Germans were on the counter-offensive and looking to push the Americans back into the sea. With all my forces deployed at the game’s start and all American units under blinds, my Germans began in overwhelmed confusion. This disadvantage made the game play so much more like the actual action in Normandy as German forces scrambled to head-off the Allied attack inland. Rather than focus my attack, I made the poor gamble of splitting myself to chase two sets of US targets. By the time a large force of German reinforcements arrived in the seventh turn, my initial force had gotten chewed-up in a series of stand-off firefights amidst the thick bocage near my original deployment. My divided force tactics were ultimately my undoing, and I’m certain a more textbook massed attack may very well have giving me a greater shot at victory.

With a couple of games under our belts, we’re going to continue right through the IABSM D-Day scenarios and beyond. We’ve managed our games without a referee so far through some really good fair play, but we’re anxious to try some scenarios with the referee element. Overall, the up-close feel for command and the heightened tactical realism in IABSM has given me a second WWII game to love at the 15mm scale.