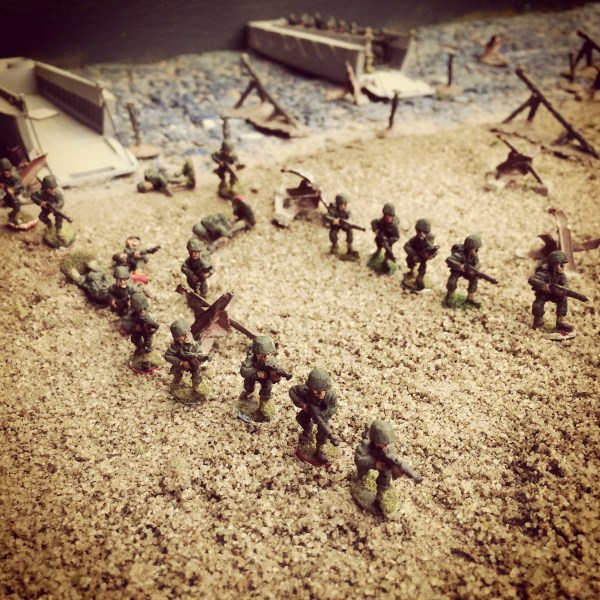
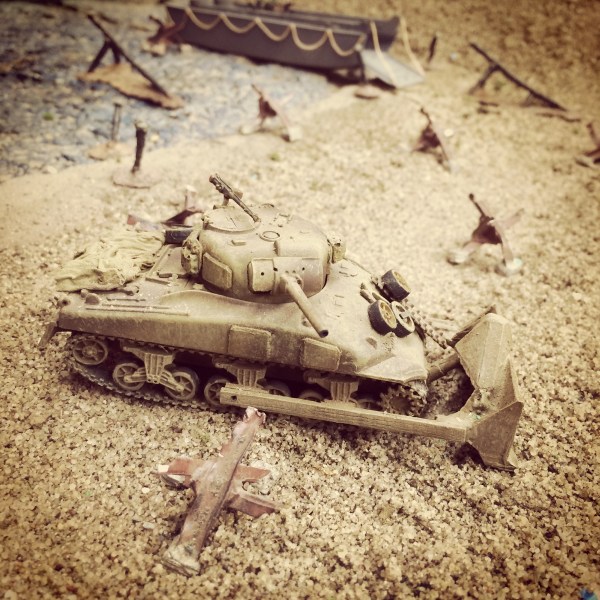
Flames of War: Metropolitan Wargamers Tanksgiving 2015

MWG Tanksgiving 2015

For the third year running, we’ll be hosting a day of armored Flames of War tank battles on Sunday November 22nd, 2015 at noon at Metropolitan Wargamers in Park Slope, Brooklyn. This year we’ll be taking over the entire back room of the club running multiple Late War Europe games using 1900 points of armored forces on a side. US, British, German and Soviet armies will rolling and fighting on tables filled with beautiful terrain, so experienced players can bring their own forces or newcomers are welcome to just come along, push some armor, roll some dice learn the game.

You can check out the photos below from our previous Tanksgiving events from 2014 and 2013, and more photos and after action reports can be found at the links in the captions.

IMG_4725

Soviet and Hungarian armor collide in one of the five games from Tanksgiving 2014

IMG_2460

US and German forces clash during Tanksgiving 2013

This year’s Tanksgiving 2015 will be held at Metropolitan Wargamers at 522 5th Street in Park Slope, Brooklyn (enter through basement level). Visitors pay just $15 and regular club members are free. The event will be a great opportunity for new people to meet some of us at the club and experience the New York City’s premier wargaming community. If you’d like to come, RSVP via our club’s Yahoo group.

Flames of War: Fielding the 15cm sFH18 Heavy Howitzer Battery

15cmsFH18wwii

The long-lived and commonly-found 15cm sFH18 howitzer was fielded by German forces from the 1930s and all through World War II. Tough to haul and a lesser weapon than many of the large artillery pieces fielded by Allied forces during the war, the German gun nevertheless went through several wartime design iterations and served multiple nations in post-war decades.

I’ve been in the home stretch of getting ready for my Flames of War Sint-Oedenrode scenario at the upcoming HMGS Fall In! convention, and getting some big German 15cm sFH18 howitzers finished was the last on my to-paint list. FOW offers a beautiful box set of the German heavy artillery battery, featuring four guns, crew, staff, command, spotting teams and individually-sculpted resin bases. The set of models is a bit pricey, but given the heft of models and their usefulness in so many German army lists, the battery is sure to pay off over time.

FOWGermanHowitzers

With so many parts in the box, getting organized from the get go is key. After cleaning up and dry-fitting all the pieces, I get everything glued up. After drying, I use wood filler to cover the spotter and command bases and to also hide any seams where the figures glue into the cast resin bases. From there, my usual German painting scheme in greys over flat black primer plus other details makes finishing the models move pretty quickly.

IMG_6818

Parts get cleaned and organized before assembly

IMG_6821

Glued models with filler being added to the bases

IMG_6862Base coats painted on the guns, uniforms, bases and ruins

As with most of the big sets of FOW models, the details on the models is a lot of fun. The intensely-posed four-figure vignette of the staff team in their little bombed-out bunker is a new favorite of mine. Even with repetitive gun crew figures, each unique base makes the whole battery just varied enough at arm’s length and are certain to make an impact when the Axis next hit the table.

IMG_0802

IMG_0808

IMG_0807

IMG_0809

IMG_0804

IMG_0803

IMG_0806

IMG_0805

IMG_0801

News 12 Brooklyn Visits Metropolitan Wargamers

11209682_10206667634583904_3605183596875950904_n

I was fortunate to be elected as President of Metropolitan Wargamers in Brooklyn, NY a few months back, having been a visitor and then a member for much of the past ten years. Our club occupies a private basement space on a quiet residential street in the heart of historic Park Slope. Members have 24/7 access to the space, and the walls are lined with shelves holding all manner of miniatures and board games covering just about every scale and genre imaginable. We meet up to game practically every day of the week, and our weekends can see board games and miniatures scenarios playing out on our multiple tables, including several sand tables. The games we play can last ten minutes to ten months. Our membership spans a large age group of early 20s to mid-70s, and we hail from a wide variety of backgrounds and interests. What our membership has shared in over three decades of existence is a passion for gaming, and Metropolitan Wargamers continues to be one of the premier gaming spaces in New York City.

Recently, we were visited by a News 12 Brooklyn reporter who captured just a little bit of the flavor of our corner of the New York City gaming universe.

If you’re interested in joining our group, please register at our NYC Wargamers Yahoo group, introduce yourself and come by to play a game.

NewMWGLogo

Battleground: Bocage HQ Near Le Mesnil-Rouxelin 1944 Scenario

leMesnilRouxelinJune1944

On June 6, 1944, General Dietrich Kraiss and the 7000 some soldiers of his 352nd Infantry Division were at Omaha Beach to meet the Allied invasion. Fighting valiantly against the overwhelming tide of American and British forces, Kraiss and 352nd were stretched thin at the beaches and continued the defense inland for weeks as they fought the Allied advance toward their objective of St. Lo.

LeMesnilStLoMapMap of the area around Le Mesnil-Rouxelin and the US 175th Infantry Regiment June 14-18, 1944 advance

St. Lo was an important crossroads objective which had endured German occupation since 1940. On the morning of June 6, 1944, the city was hit with vicious American artillery bombardments. As the Allies advanced inland after the coastal landings toward St. Lo, the German 352nd and 353rd Infantry Divisions and 3rd Parachute Division formed a line to slow them down. By late July, St. Lo was liberated by the Allies and the 352nd was destroyed. By early August, Kraiss was dead, and the German presence in Northern France was near its end.

SCHeroesofOmahaSkirmish Campaigns “Heroes of Omaha and Panzer Lehr” scenario book

The Heroes of Omaha and Panzer Lehr book from Skirmish Campaigns outlines the eleven engagements during this key period from D-Day to the German counterattack through the Allied breakthrough. This past weekend at Metropolitan Wargamers in Brooklyn, NY we ran through the battle near Le Mesnil-Rouxelin just north of St. Lo on June 17, 1944. With elements of the US 175th Infantry Regiment closing in, General Kraiss and his headquarters quickly assembled an ad hoc force to delay the American advance. In the game, three US rifle squads (each armed with a BAR team) and a lone M4 Sherman must advance and seize the German HQ while being held at bay by several small German teams armed with rifles, Panzerfausts, a mortar and a MG-42. the Americans have to hustle, and they have eight turns to capture the German HQ before Kraiss and his staff can make their escape to fight another day.

IMG_6808Game set up near Le Mesnil-Rouxelin with the German HQ in the distance

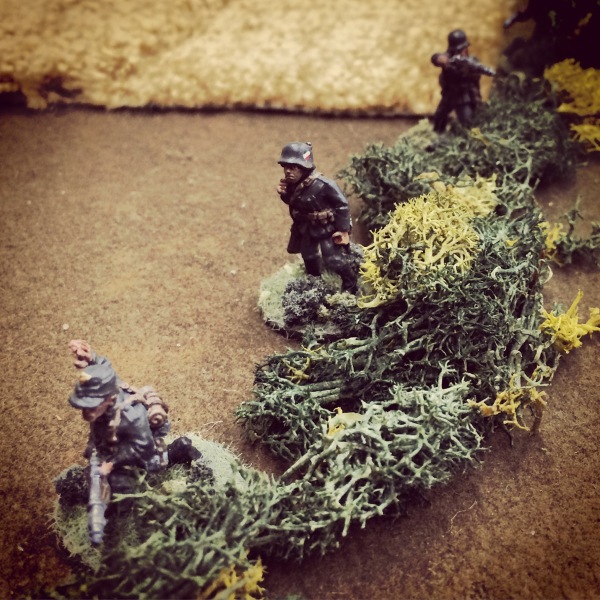
With my US Airborne 28mm models standing in for the American infantry, they spent the first few turns moving in from the north and navigating the bocage hedgerows. Two squads and the US HQ moved to the east of the main road, the Sherman ran straight through the middle and one squad edged toward a French farmhouse mid-field. The German machine gun set up at the road edge in the bocage, looking to cover the advance by road or in the thick fields. Other German riflemen spread out along the hedges, looking to create a defense using their thin units and cover to the best advantage.

IMG_6804

US soldiers push through the fields and bocage
IMG_6805

German soldiers edge into position along the bocage
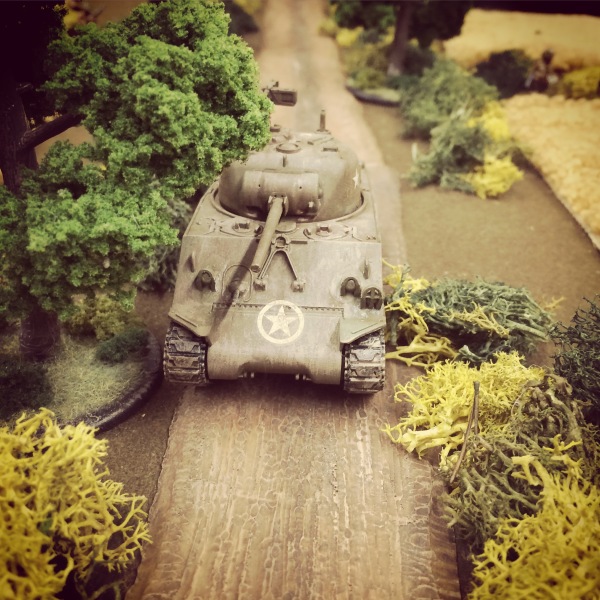
IMG_6806The Sherman rolls straight along the road toward the objective

By turn four, the firing began. Germans along the bocage made an attempt to shoot the Sherman at close range with a panzerfaust but the shot miraculously missed. The Sherman answered with a burst of machine gun and high explosive shots, forcing the Germans to fall back from the hedge and into the field. The Sherman rolled forward and a second squad of Germans emerged from the bocage and rushed the tank, placing three grenades along its left side. With the charges set to blow, the tank moved forward and rotated its turret to light up the exposed Germans with another round of machine gun fire, destroying the entire unit. Just as the smoke cleared, the grenades blew up along the side of the tank, immobilizing it for the game with its weapons still functional and crew left unharmed. Back in the field at the center, the German rifles and MG-42 took up new positions and the two US rifle squads and HQ continued to creep forward in prone positions.

IMG_6807Germans await the Sherman’s advance from their bocage positions

IMG_6809Germans disperse under machine gun fire from the Sherman

IMG_6810Germans bravely close assault the Sherman from the hedgerow

IMG_6813The Sherman is immobilized but still keeps fighting

With game time running short, the Americans in the field stood to fire on the Germans. Two German riflemen fell and the MG-42 crew took heavy fire, knocking it out for a round as the remaining crew scrambled back into position. At the left of the field, a US squad opened up at the Germans stretched along the hedgerow. Leaping the bocage and rushing forward, the Germans vanished in a hail of bullets, opening the route forward to the German HQ ahead. At the same time, Germans fell back along the right side of the field and the Americans ran forward. On the far US right, the third fire team ran forward, using their broken tank as cover as they made an end run toward the German command team in their farmhouse HQ.

IMG_6811
Two US squads and the platoon HQ advance at prone through the field

IMG_6814

US riflemen and BAR gunner fire into the German MG-42 as another American squad rushes forward in the distance

IMG_6815With the German HQ in sight, the US soldiers push hard to their objective

By the sixth turn, Kraiss and his command staff were on the move, making a run south from the safety of the farm where they had sat in cover for the whole game. With the final German defense in the field breaking, Americans broke through toward the farmhouse straight ahead and to both sides. Four remaining German rifles behind a wall and in a small copse of trees at the farm exchanged fire with the Americans, holding off dozens of GIs as Kraiss continued his run for safety.

IMG_6816American and German soldiers come face-to-face at the German HQ

With the final turn eighth turn’s arrival, the Americans finally reached the edge of the farm. After quick series of shots, another German fell but no Americans were able to seize the HQ in time as Kraiss and a couple straggling men slipped off to the south further toward St. Lo..

Our battle at the German HQ near Le Mesnil-Rouxelin presented a pretty good feel for the fighting that occurred in mid-June 1944. With a wave of Allied forces closing in toward their objective of St. Lo, General Kraiss and the other German commanders struggled to stall the advance. With the four-year German control of Northern France at stake, German forces cobbled together a fierce retreating defense. Beginning with the tide of men landing on the beaches and from the air on D-Day, the war had turned inevitably for the Allies.

Micro Armour: Fielding the GHQ M7 Priests and Infantry Heavy Weapons

m7priest

The 105mm Howitzer Motor Carriage M7 was a powerful invention to support infantry forces during World War II with a combination of a heavy artillery gun, tracked mobility and armor. Christened the ‘Priest’ by British forces due to its round pulpit-like machine-gunner’s ring, the M7 saw service in North Africa, Italy and Normandy and had a powerful showing during the Battle of the Bulge in the winter of 1944-1945.

GHQlogo

I’ve been wrapping up a bunch of lingering modelling projects at multiple scales for the past two months, and I found I still had a number of 6mm models from GHQ to wrap up. Every time I go back to 6mm from my usual 15mm and 28mm modelling, I’m reminded of how much I love working at the micro armour scale. I’m a big fan of how Priests look with their boxy profile and huge gun, and even at the micro scale the GHQ M7 models have a bunch of detail. Finishing these models involved just a quick shot of olive drab armor base coat spray was followed by a brown wash and some dry brushed highlights in a lighter green. Decals add that last bit of detail before the bases are flocked and the models get a matte coat finish.

IMG_0793GHQ M7 Priests

I also had a pack of GHQ US infantry heavy support weapons on hand to add to my other existing ground forces. The M2 mortars and M1919 light machine guns wound up with a pretty tiny, low profile on my flocked washer bases, but they fill out my infantry with flexible support. Along with my new Priests, my tiny US force is diversely equipped for some micro action.

IMG_0797GHQ M2 Mortars

IMG_0795GHQ M1919 Machine Guns

Flames of War: Fielding the US M1 57mm Anti-Tank Platoon

m157mmIt was clear to the Allies from the early years of World War II that German tanks were a big problem. From the early Panzer models to the medium Panthers and finally to the famed Tiger I and Königstiger, German armor combined with German tactics were major threats to Allies forces throughout the war.

To help counter the German armor threat on the battlefield, the Allies quickly evolved their anti-tank weaponry. Building on earlier. lighter guns, the British introduced the “6 pounder” early in the war. Even before entering the war, the United States began production of its version with the M1 57mm anti-tank gun which it exported for use by UK and Soviet forces. Despite the gun’s mixed effectiveness against the strongest German tanks and only occasional use against infantry, the M1 57mm became the standard Allied anti-tank gun of the war with some 15,000 produced.

I’ve previously modeled the British 6 pounder version of these guns for Flames of War, but I wanted to add some of the American M1 57mm models to my miniatures arsenal ahead of the Sint-Oedenrode scenario I’ll be running at the upcoming Fall In! convention in November. As luck would have it, a member of Metropolitan Wargamers in Brooklyn, NY was getting rid of some extra packs of the models and I picked them up on the cheap.

Getting these assembled, painted and ready for the table was a quick process. After gluing everything up and covering the bases in a layer of filler putty, they got hit with a basic olive drab spray base undercoat. Flesh and equipment details got picked out, and skin was topped off in a flesh wash. The guns themselves received a brown wash and a lightened green highlighted brush coat. The bases were flocked, I added little bits of shrubby and then everything got a matte spray finish.

The resulting four guns and two command stands gives me a lot of flexibility to add these to a lot of forces throughout the late war period I generally play. As a ubiquitous gun on the battlefields of World War II, these M1 57mm artillery pieces are certain to be making a lot of appearances in my games to come.

IMG_0786

IMG_0787

IMG_0789

IMG_0790

IMG_0792

IMG_0788

IMG_0785

Flames of War: Fielding the 8.8cm FlaK 36 Platoon

8.8flak2

One of the most common, flexible and deadly weapons used by German forces in World War II was the 8.8cm FlaK 36 gun. Building on earlier models from the late 1920s and early 1930s, the piece could be used for both anti-aircraft and direct anti-tank fire. Known commonly as an “Eighty-Eight,” this iconic artillery was encountered on battlefields from Africa to the Eastern Front to the coast of Normandy in both fixed defensive positions or in support of mobile ground forces.

FOW88flakI’ve been away from modelling any Flames of War miniatures for a while, but I’m planning on running a couple historic beginner games at the HMGS Fall In! convention in Lancaster, PA in early November. One of the scenarios, Sint-Oedenrode, requires some 88s, and I’ve long relied on loaners from other members at Metropolitan Wargamers in Brooklyn, NY. I figured it was high time I add these weapons to my 15mm collection, so I ordered the set from my go-to supplier The Warstore and the box arrived in just over a day.

IMG_0777

IMG_0776

The models, including two metal 88s, a resin Sd. Kfz. 15 command car, two resin Sd. Kfz. 7 half-track tractors and a ton of crew and bits, glued up quickly on the marvelous cast scenic bases I’ve come to expect from FOW designers. My German painting goes pretty quickly with a black spray primer coat followed by some dark grey brushed on as base for uniforms, vehicles and guns.

IMG_0782

IMG_0783

Log emplacements, ammo boxes and equipment get painted up in coats of varying browns and greys. The gun and vehicle grey basecoat are washed in a dark brown and then followed up with some highlights in dry-brushed silver, light grey and brown muds. The huge shells scattered on the ground and fresh rounds in the arms of the crew are done in metallics, and the vehicles are detailed with decals. The final touches are done with static grass applied with white glue around the bases and a few sprays of matte finish to protect the models and dull down any remaining shine.

IMG_0779

IMG_0781In all, the entire platoon took me a couple hours. As with most FOW models, there’s a lot of personality, poses and details in this kit. I love the commander’s stance with binoculars aimed at the horizon and his junior officer reaching for his bag. The main gun bases and the extended separate bases of extra crew make each piece a little diorama of its own. By carefully applying grass to certain areas, I was able to blur the line between the bases, making them appear as one big piece with a quick look. Of course, along with the detail in the models does come some cost, but the usability of these models in so many FOW games makes adding the 8.8cm FlaK 36 platoon a fantastic long-term investment.

IMG_0780

28mm: German Wehrmacht By Black Tree Design

Wehrmacht

I recently got back to my 28mm World War II projects with some Wermacht from Black Tree Design. After painting up a bunch of German troops in camouflage smocks, I wanted to get some more Heer infantry into the mix. And so, on the back of a big sale this summer, I’ve just about doubled my Axis forces at this scale.

BTD

I was really pleased when I received my large order and marveled at all the detail on these figures. Lots of varied poses, weapons, equipment and personality make these casting from Black Tree Design stand as equals with all my other troops. As always, the customer service from the company was superb with nice hand-written notes included in each order boxed up in a little metal tin.

WehrDecalsGerman infantry decals from Company B

Along with my figure order, I also went back to Company B to order up some decals for the helmets. Even though it might not be as historical, I went with the national colors of the double decal helmet configuration which was phased out fairly early in the war. I really just wanted a bit more color on the otherwise monotone color scheme. And, while I’m on the subject of color, I really liked how the Skavenlight Dinge from Citadel Paint captured a nice mix of grey-green-blue tones of the standard German uniform.

IMG_6375A painted figure gets decals applied

Painting 28mm German Infantry

  1. Clean flash from metal models with a sharp knife and glue to metal washer or plastic bases.
  2. Apply filler putty to bases. When dry, scrape off excess with a sharp knife.
  3. Basecoat models and bases with flat black spray primer.
  4. Paint pants, helmets, soft hats, officer greatcoats and gas mask containers with Skavenlight Dinge.
  5. Paint faces and hands with Tallarn Flesh.
  6. Paint packs ans straps with Baneblade Brown.
  7. Paint boots and equipment straps Black.
  8. Paint bases, gun stocks, water bottles and helmet straps with Dark Brown.
  9. Apply Agrax Earthshade wash to webbing and packs.
  10. Dry brush pants, helmets, soft hats and officer greatcoats with Light Grey.
  11. Lightly dry brush bases and gun stocks with Baneblade Brown.
  12. Paint metal gun and water bottle parts with black and finish with a light dry brush of Metallic Silver.
  13. Dry brush gasmask containers with metallic Silver.
  14. Paint eyes with small dots of Off White and Dark Brown. Clean up around eyes with Tallarn Flesh.
  15. Mix 50/50 Tallarn Flesh and Off White and brush highlights on cheekbones, chins, forehead, nose and hands.
  16. Cover bases in white glue and cover in 50/50 mix of fine light green and dark green grass flock.
  17. Glue small pieces of clump foliage to base.
  18. Spray coat completed models with matte finish.

I really like how these models scale with all my previous 28mm miniatures from Artizan Designs and Warlord Games, and my Wermacht forces will fit nicely in the defense of Europe from the tabletop assault of my Allied troops.

IMG_0762

IMG_0767

IMG_0769

IMG_0771

IMG_0773

IMG_0764

IMG_0766

IMG_0768

IMG_0772

IMG_0770

IMG_0765

IMG_0774

IMG_0763

Battleground: Iron Wedge 1943 Scenario

KurskT34sOur latest Battleground scenario at Metropolitan Wargamers in Brooklyn, NY took us back to one of our club’s sand tables and the area northwest of Ulianovo during Operation Kutuzov in July 1943. The Soviet 11th Guards Army and 1st and 5th Tank Corps led the counteroffensive action against a thin but dug in German force, resulting in some of the heaviest losses to both sides during Operation Citadel and the Battle of Kursk.

IMG_6214

Using 20mm miniatures and the scenario from the Red Guards At Kursk book from the Skirmish Campaigns series, the game sets up a 12 turn limit with the Soviet objective of pushing tanks through the German defenders. The German side is tasked with holding off the largely armored Soviet force of T-34s and T-70s with infantry and two Pak 38 anti-tank guns.

IMG_6239Battlefield layout with German infantry and anti-tank guns in dug in positions

The bleak, open table was set up with Germans in foxholes spread over half the field. The two anti-tank gun positions sat at the left rear of the German position with a mine field laid to channel the Soviets toward the river at the other side of the battlefield. Sparse wooded areas and small hill to the Soviet left formed the areas of safer ground for the Red Army’s tanks.

IMG_6233The first T-34s take position at the top of the hill

IMG_6234The second T-34s and tank riders move to the middle

The Soviets quickly ate up two of the game’s turns moving their first T-34 platoon forward toward the hilltop. By turns three and four, the second T-34 platoon entered at the right and the T-70s moved to the center with both groups of tanks carrying tank-riding infantry.

IMG_6231The center German Pak-38 position

IMG_6236T-34s race to engage German foxholes at close range in the center

With the German anti-tank guns at too long range to effective hit the Soviet tanks, the Red Army’s armor rolled aggressively to engage the German infantry at close range. Tank riders took some initial hits but the tanks pushed in to fire HE rounds into the German foxholes, quickly causing several casualties. German infantry answered back with several soldiers effectively setting off close assaults with satchel charges being placed and several tank riding Soviets being killed.

IMG_6235Close engagements between T-34s and German infantry in foxholes

IMG_6232The second Pak-38 on the German left

By mid-game, one T-34 at the Soviet left had been left in flames and a second at the center had a track blown out and was permanently immobilized. The Pak-38s continued to fire rounds at long range with one more T-34 crew bailed out in a delay while they fixed their tank for a number of turns. In the meantime, the German foxholes were emptied as surviving Soviet tanks and infantry poured fire into the positions.

IMG_6237T-34s are destroyed and immobilized as they push forward

IMG_6240T-70s provide cover in the center as surviving T-34s move to the river

As the T-34s closed into the German side of the field, one of the anti-tank positions was completely destroyed while another had their crew eliminated. With the Germans scrambling to man their surviving gun, the three functioning T-34s raced to the river at the German right while the light T-70s cleared out resistance in the remaining center German defenses. With only a few crossing checks at the river, the Soviets were assured a victory as they continued to rattle to the German edge of the field and on to a victory by alluding the last German defenders.

With only a sparse historic defense, the Germans performed remarkably well in our replay of the scenario. The German infantry had a tall order holding off the rumble of Soviet tanks but the Red Army’s iron assuredly rammed a wedge through the bleak sandy landscape and rolled on to support the further counterattack.

Battleground: Uncle Red 1944 Scenario

UtahBeach44UncleRed

The action at the “Uncle Red” sector of Utah Beach on D-Day June 6, 1944 is a favorite at Metropolitan Wargamers in Brooklyn, NY. Using one of the club’s sand tables, we have previously run the scenario for Flames of War in 15mm, and this past week we had a go with a game in 20mm using the Battleground skirmish rules.

utahmap2Map of US 4th Infantry Division at Utah Beach June 6, 1944 (“Uncle Red” circled)

The US 4th Infantry Division’s landing was less murderous than the casualties experienced by the Allies at Omaha Beach, but the German 709th Infantry Division’s defense was still substantial. German fortifications eventually fell to US assaults by both infantry and timely tank support arriving successfully on the beach.

IMG_6037 Skirmish Campaigns  “Normandy ’44 – First Hours” scenario book

We’ve been enjoying World War II scenarios at the skirmish level in both 28mm and 20mm, allowing for a more detailed feel to our games taken from the well-researched and detailed Skirmish Campaign books, including the Normandy ’44 – First Hours book.

IMG_6176Table set up for the “Uncle Red” scenario at Utah Beach

The table’s layout featured a heavily-defended beachhead with German machine guns firing from three coastal bunkers, lines of barbed wire, mines and trenches carved into the sand. The short, eight-turn scenario presents the Americans with the objective of taking the three bunkers at the seawall plus one at the rear of the table. The Germans must simply hold off the US invaders from seizing their objectives.

IMG_6179The US 4th Infantry Division arrives in Normandy

IMG_6178US soldiers hit the beach

US arrivals began with one boat of infantry arriving in each of the first two turns. The Americans used both of their actions in each turn to push forward on the beach with an eye on assaulting the bunkers at the German center and left.

IMG_6177American GIs push forward under German machine gun fire

IMG_6180The initial US landings take heavy casualties from German bunkers at Utah Beach

Under no cover on the open beach, the US soldiers took heavy crossfire from German machine guns in each of the three beach bunkers and one squad of infantry tucked behind barbed wire in trenches. The first two turns were deadly. One American squad were reduced to half strength by the time they pushed toward a gap in the minefields and on to their first bunker objective. Combined fire from the US poured into the bunker, cutting the German machine gun’s crew to a barely functioning unit as the Americans swarmed forward.

IMG_6188A brave American close assault leaves the first German bunker in flames

By turn three, the Germans in the trenches had shifted left to cover the oncoming Americans just breaching the seawall. In a close frontal assault the first American squad managed to lob a grenade into the German bunker, incinerating the remaining machine gun crew inside. With one objective one, the GIs set their sites on the bunker at the rear of the table beyond trenches, barbed wire and weakened German forces.

IMG_6194American armored support arrives

IMG_6193US engineers light up a German bunker with a flamethrower

The US Sherman and final boat of engineers arrived in turn four and immediately made way for the right side of the German lines. Exploiting a gap in the wire, the fresh squad made quick work of the bunker on the German right with a blast from a flamethrower in turn six. German infantry at the center trench were cut up through combined HE rounds from the Sherman on the beach and close fire from the encroaching American squad.

IMG_6190US troops get bogged down under German grenades and gunfire

Back at the German left, the initial US success became hung up in a tangle of trenches and barbed wire just beyond the burning bunker. German survivors at the second row of trenches tossed grenades and opened fire on US troops, and the Americans answered back likewise. In the bloody close action, the Germans offered just enough delaying actions while taking heavy casualties. By the time the Germans began to break in turn seven, the American forces were in no position to seize their final two objectives by the game’s end. Despite the aggressive American fight, the beach was held by the Germans.

Having played the Uncle Red scenario now several times using Flames of War rules in 15mm, we really liked the nuance of play at the skirmish level in 20mm. At the larger scale, individual losses and heroic actions seem to mean more and can swing the game from victory to defeat in a heartbeat on the sandy tabletop beach of Normandy.