New Game Weekend: I Ain’t Been Shot Mum

IABSMbook

As a World War II gamer, I have a newly-discovered love for a game which doubles my gaming possibilities with all the time and money I’ve  got invested in the 15mm Flames of War game which is the modern standard for the period. The past two weekends at Metropolitan Wargamers in Brooklyn, NY, I’ve been turned on to I Ain’t Been Shot Mum which is billed as “the other World War II miniatures game. For gamers with a lot of miniatures on hand and a hankering to play WWII at a different and more historical level, IABSM is well worth it.

TFLlogoNow in its third edition, IABSM has been published since 2002 by Too Fat Lardies, UK-based makers of a number of wargaming rules systems for a variety of historical periods. Overall, the game provides WWII wargamers with a simple, sleek set of skirmish rules that focuses far less on fielding shiny models and more on tactical decisions on the tabletop. IABSM is a true “what you see is what you get” system with a 1:1 scale at 15mm but easily adaptable to other model scales. One guy on the table equals one soldier in the field during battle, taking the game down to a level that really “feels” like commanding a group of troops. The smaller, less abstract scale of IABSM games provides a lot less “gaminess” to the systems, and relies a lot more on the decision-making skill of players commanding forces on each side. In many ways, the game is a throwback to original Kriegsspiel invented for use in Prussian army training two hundred years ago.

IABSMcardsSample cards from I Ain’t Been Shot Mum from Too Fat Lardies

The core rules of IABSM retail at under $20, and provide a number of basic underlying mechanics easily usable in any battle or theater of WWII. As an avid FOW player who is often faced with hundreds of pages of more grand-scale rules, army lists and ongoing modifications, the elegance of the skirmish-level IABSM comes down to five main areas:

1. Random Activation: Rather than playing by a simple “I go, you go” turn-based mechanic, IABSM games are powered by a set of cards which randomly activate deployed troops in the field. At the beginning of the game, a deck of cards is shuffled with each card representing a unit in the game. Cards are drawn and units are activated in turn, with units choosing a number of actions based on their quality. Highly-trained US Airborne troops may have four actions when activated, while less elite regulars may only have three. Actions include movement, firing, spotting the enemy and many other activities which makes commanding a unit’s turn one of many possible choices. Cards are added to the deck as new units arrive and removed if a unit is destroyed. Drawing a “tea break” card ends the turn with one final round of shooting for available inactivated units before the cards are shuffled a new turn begins.

2. Morale: Troop morale is nearly as important as firepower on actual battlefields. A well-armed but rattled group of soldiers may prove to be nearly ineffective in the field without some stalwart command leading the way. IABSM offers several levels of morale with pinning, shock and suppression which progressively eats into how effective a particular force can perform on the table. When being shot at, a simple table resolves possible kills as well as whether a unit is progressively shocked into poorer performance in subsequent turns or entirely immobilized due to overwhelming fire.

3. Command: Commanding and junior officers in IABSM are represented as “big men,” with individual cards allowing for their separate officer actions to drive gameplay. Through proximity or attachment to their forces, commanders can greatly affect morale by clearing shock from troops and boosting their strength in subsequent exchanges with the enemy. The presence of command also doubles the chance of troop activation, as a drawn “big man” card can press an attached unit into action without its own card being drawn.

4. Blinds: In real-world combat, knowing the enemy position through intelligence, observation or contact is almost as important as the engagements that result. While many miniatures games present an open table where nearly everything is known from the get-go, IABSM preserves a “fog of war” element with the deployment of “blinds” on the table. Represented by oval-shaped markers, blinds are able to move around the table without revealing their actual make-up. Thus, a player might move a small unit, a large platoon or even a false blind containing no troops around the table without the enemy knowing its true make-up until revealed. This allows players to add an element of diversion to the game, as an enemy way burn up several turns chasing a ghost across the table as real forces jockey into position.

5. The Game Referee: One of the hallmarks of wargames until recent decades was an all-seeing, all-controlling game referee. As a non-player, the referee not only provides clarifications on rules and contested play on the table, but they also are able to maintain a level of secrecy between each player as a scenario unfolds. The game can be played without a referee, but the presence of one adds yet another depth of to the “fog of war” randomness employed already with blinds and random card activation.

WTHbook

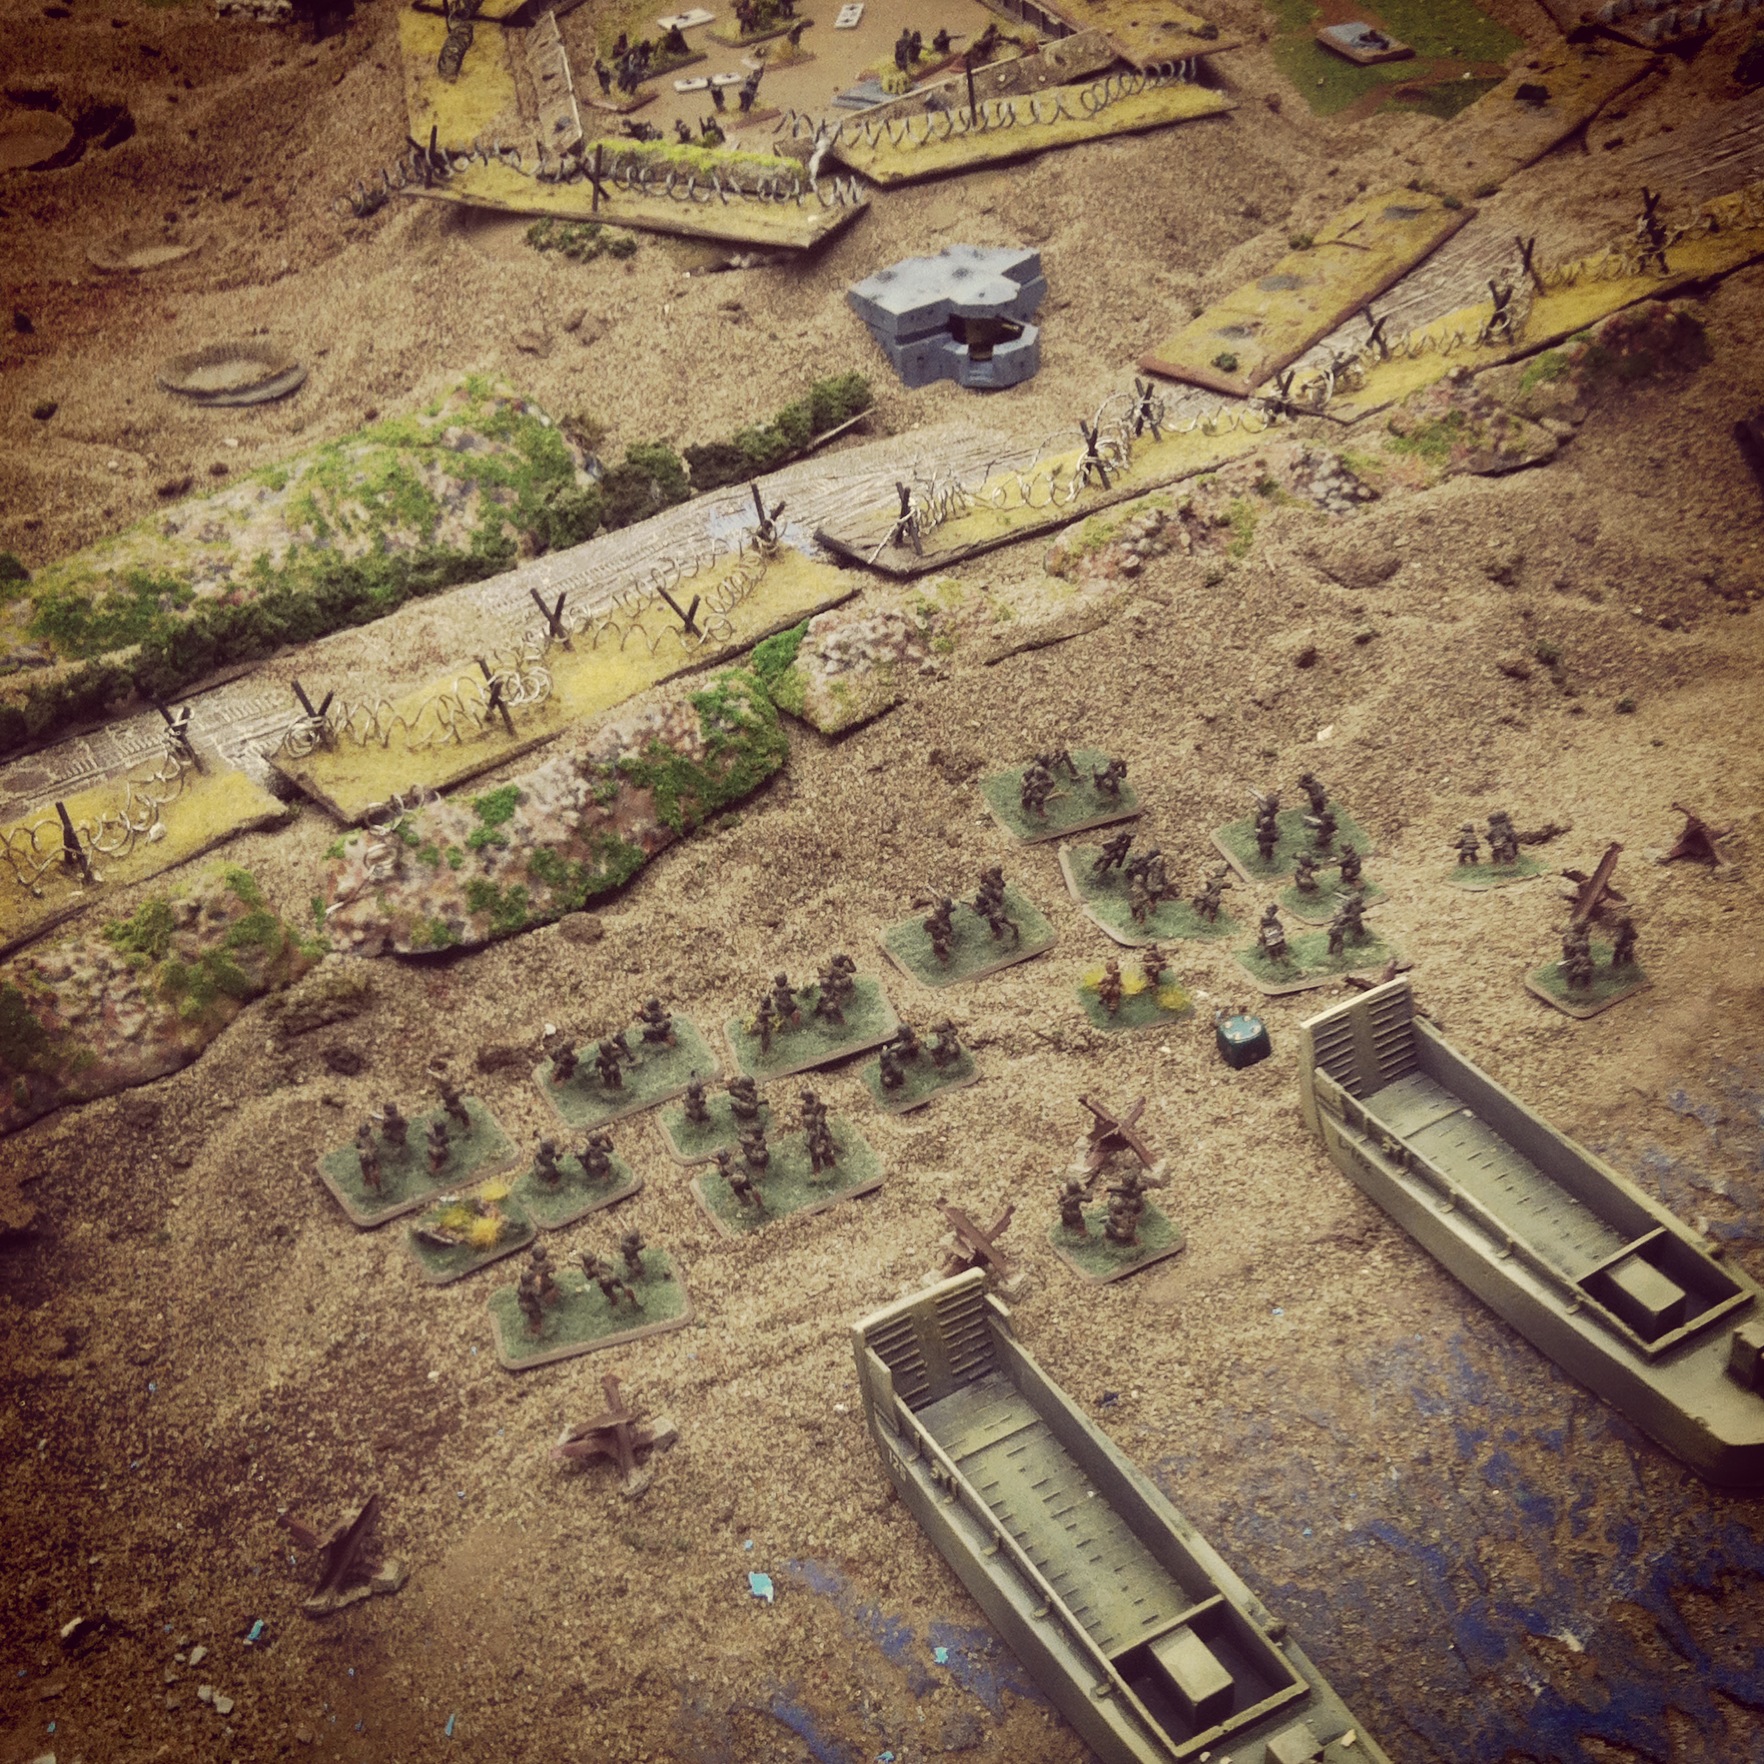
Beyond the base rules, Too Fat Lardies offers a number of IABSM scenario and guide books for Europe, Italy, North Africa and the Pacific. General lists allow for the creation of custom scenarios, but I really like the historically-specific books. The past two weekends, I played the first two games in the D-Day-themed Where The Hell Have You Been Boys? book which contains over twenty scenarios from Omaha and Utah beaches to the inland. Following the United States advance and subsequent German counterattacks, each scenario lays out a simple briefing for the German and US players along with a referee sheet, terrain map and a guide to forces and cards needed for play.

IMG_3554
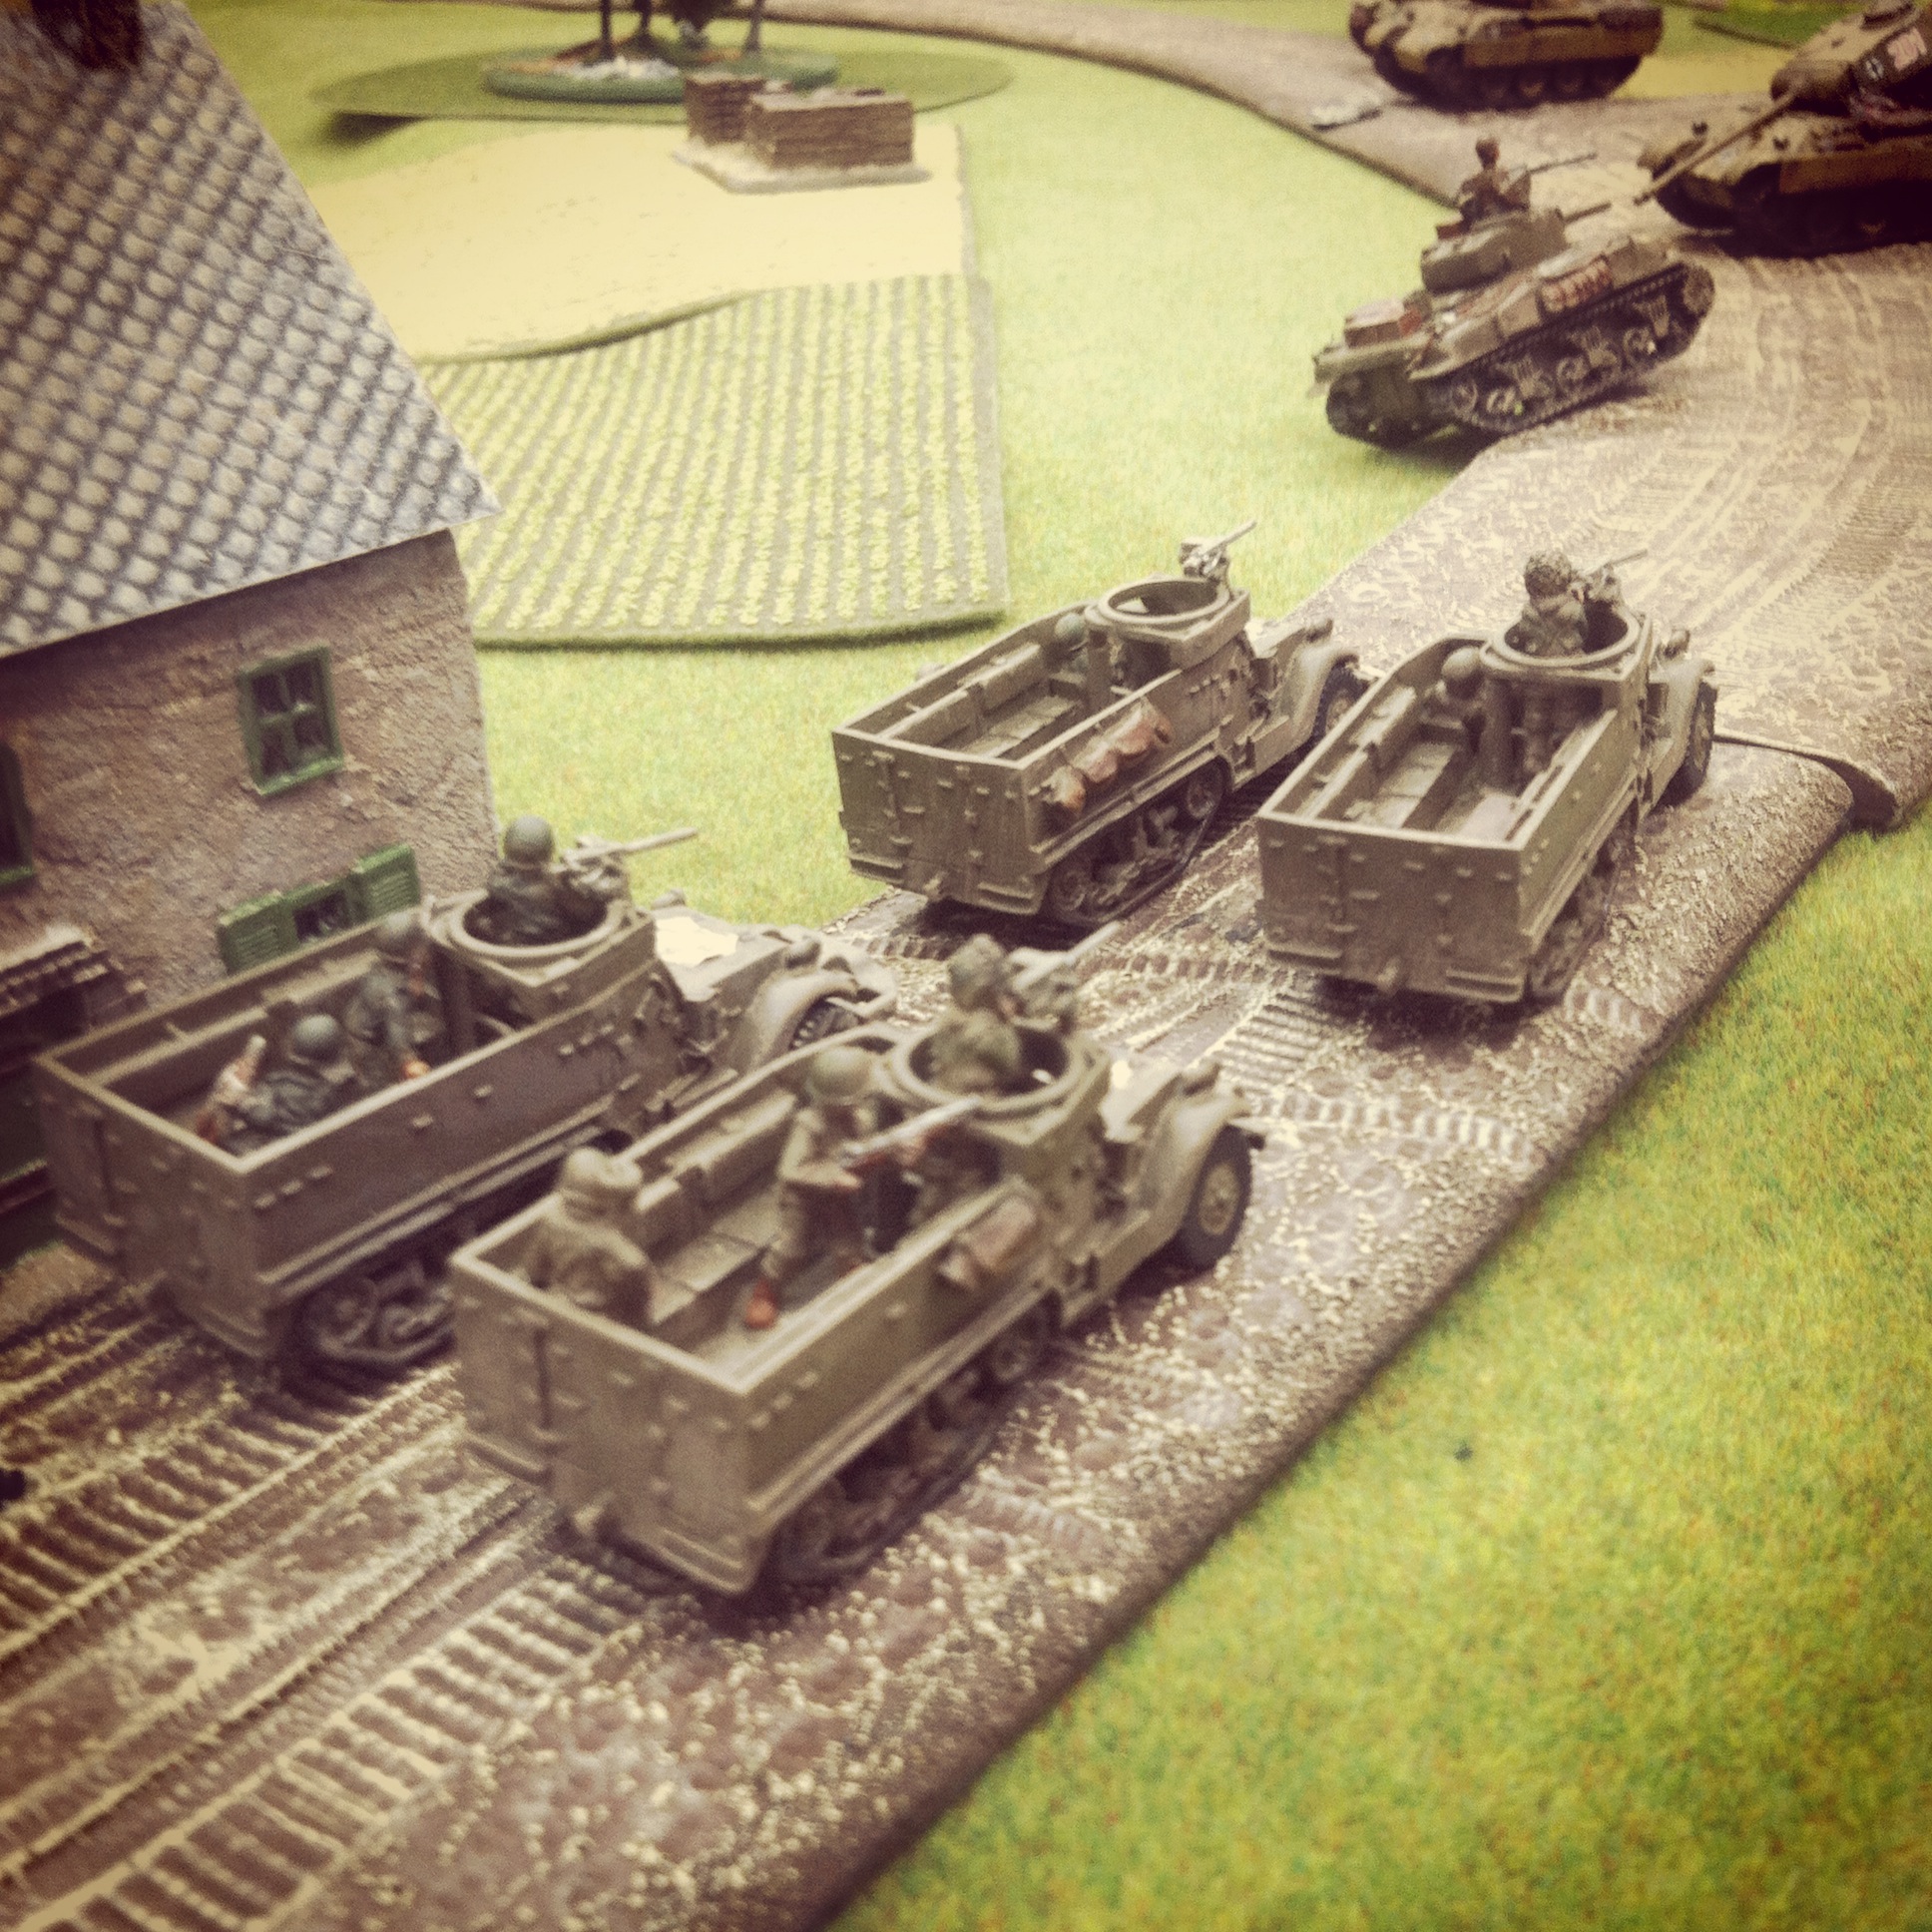
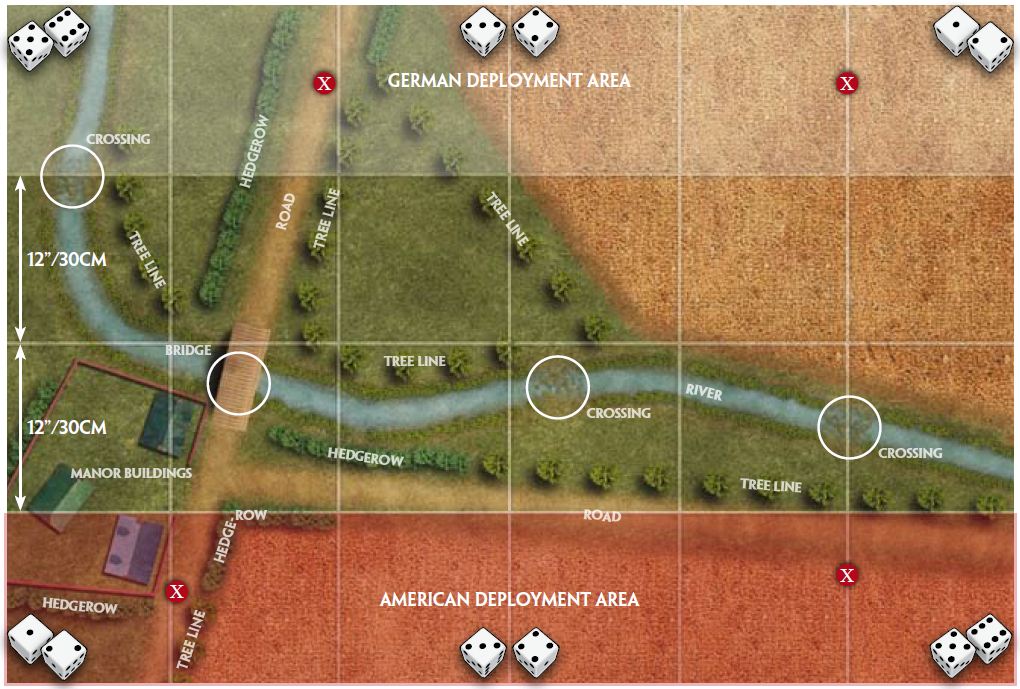
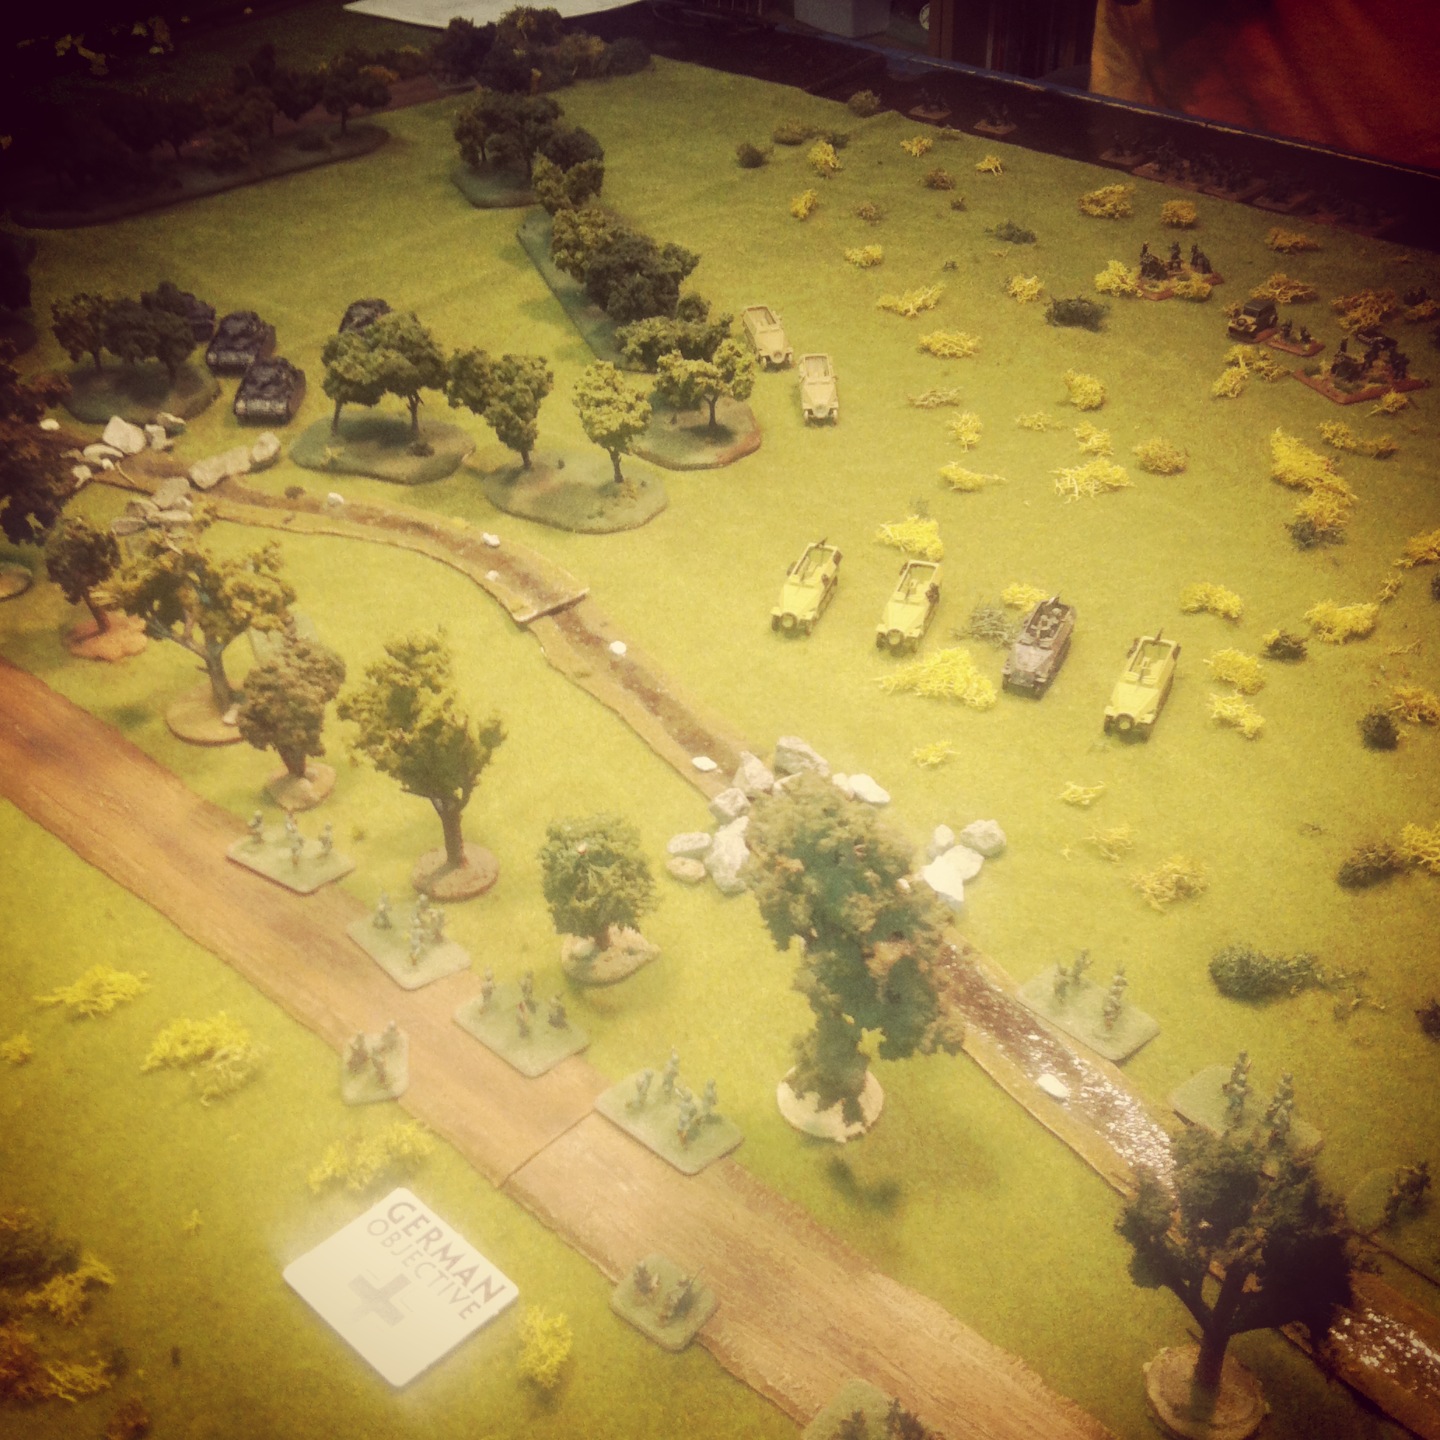
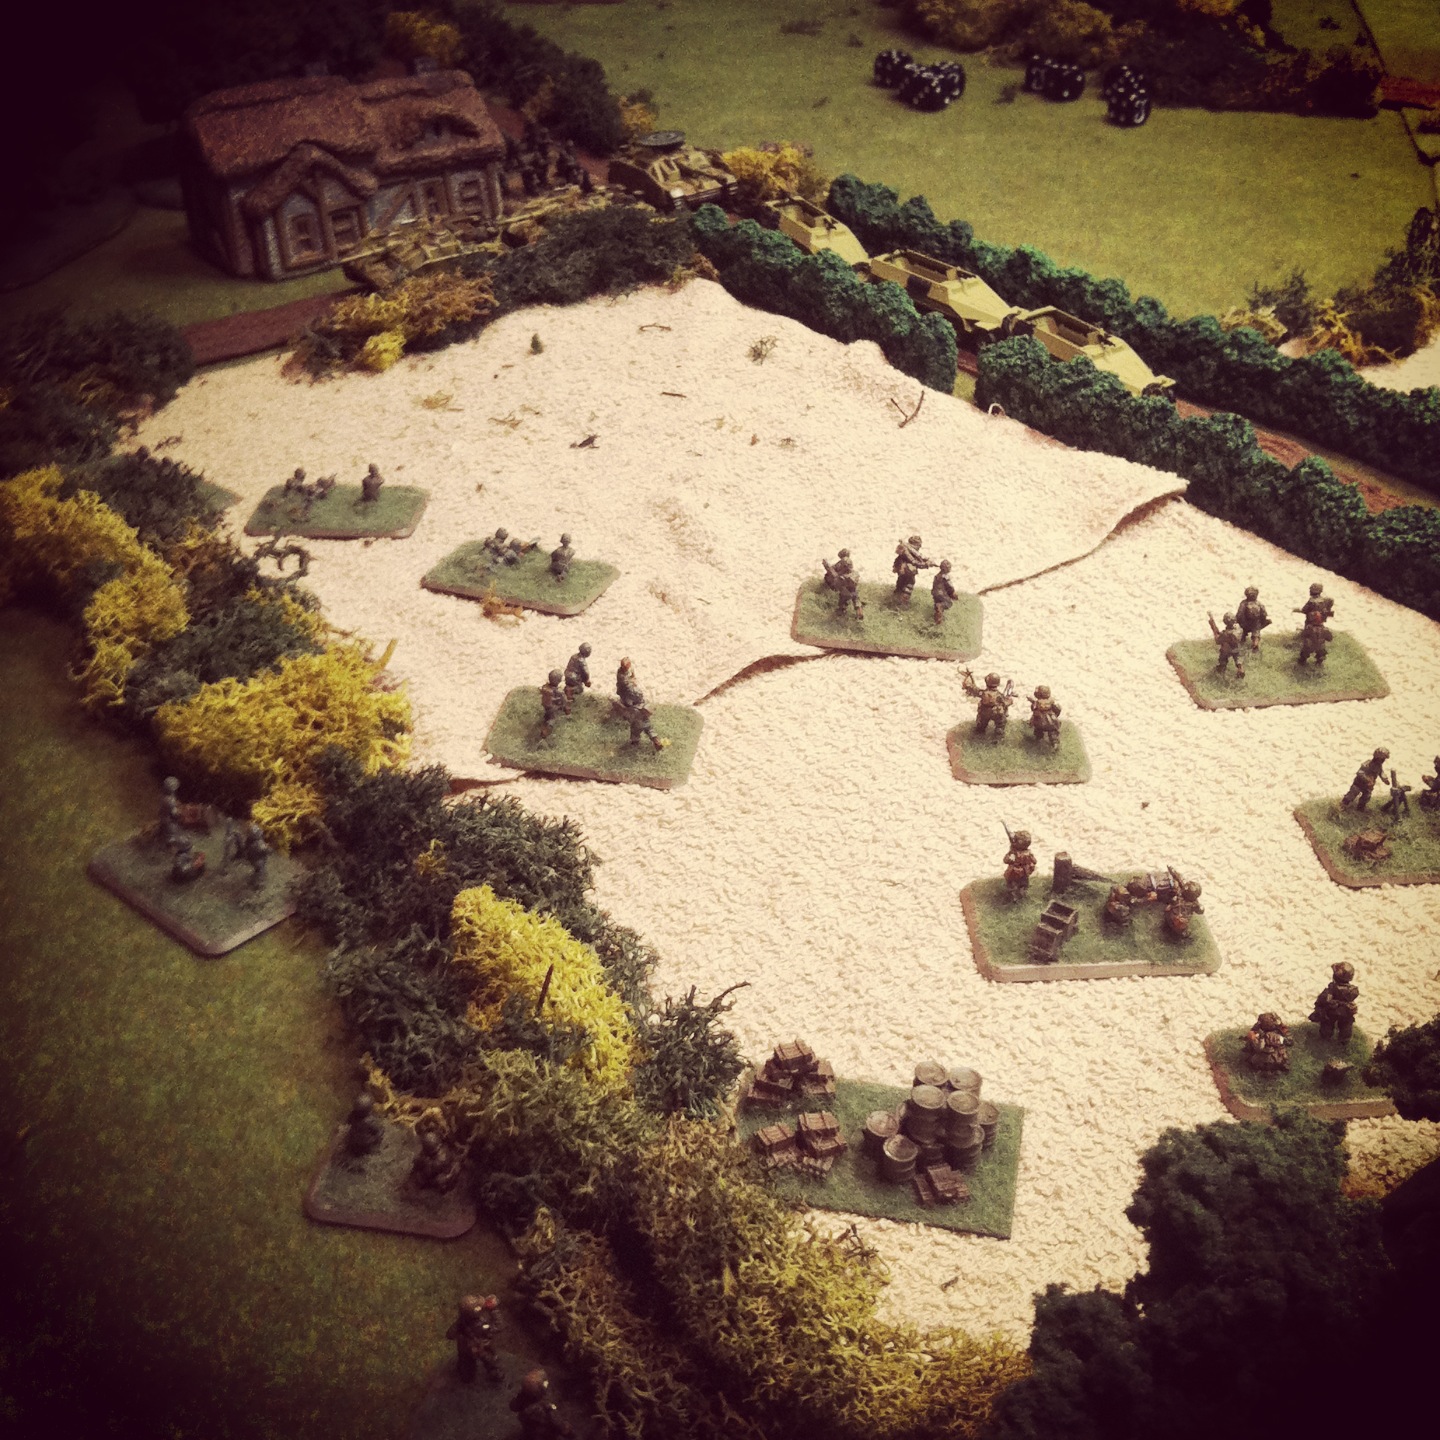
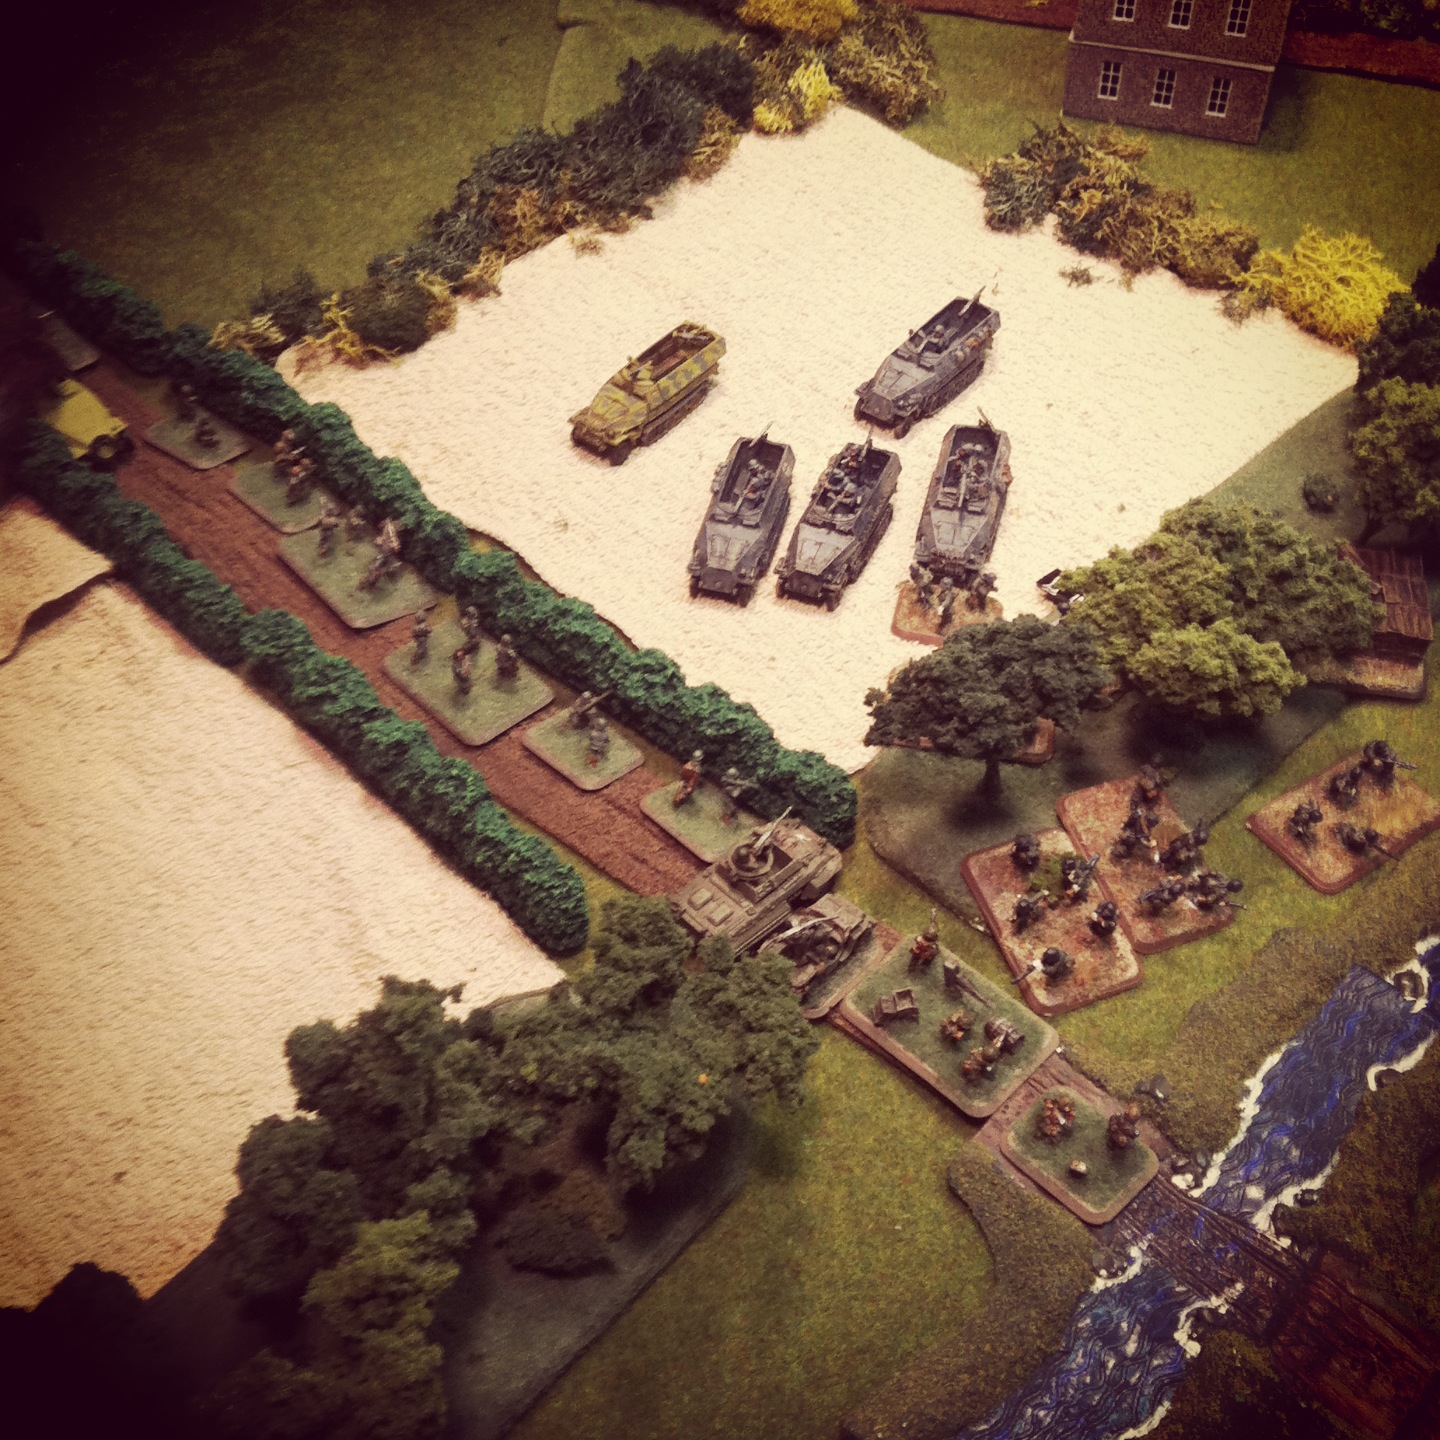
“Protect The Guns” scenario set-up for IABSM

IABSMGame
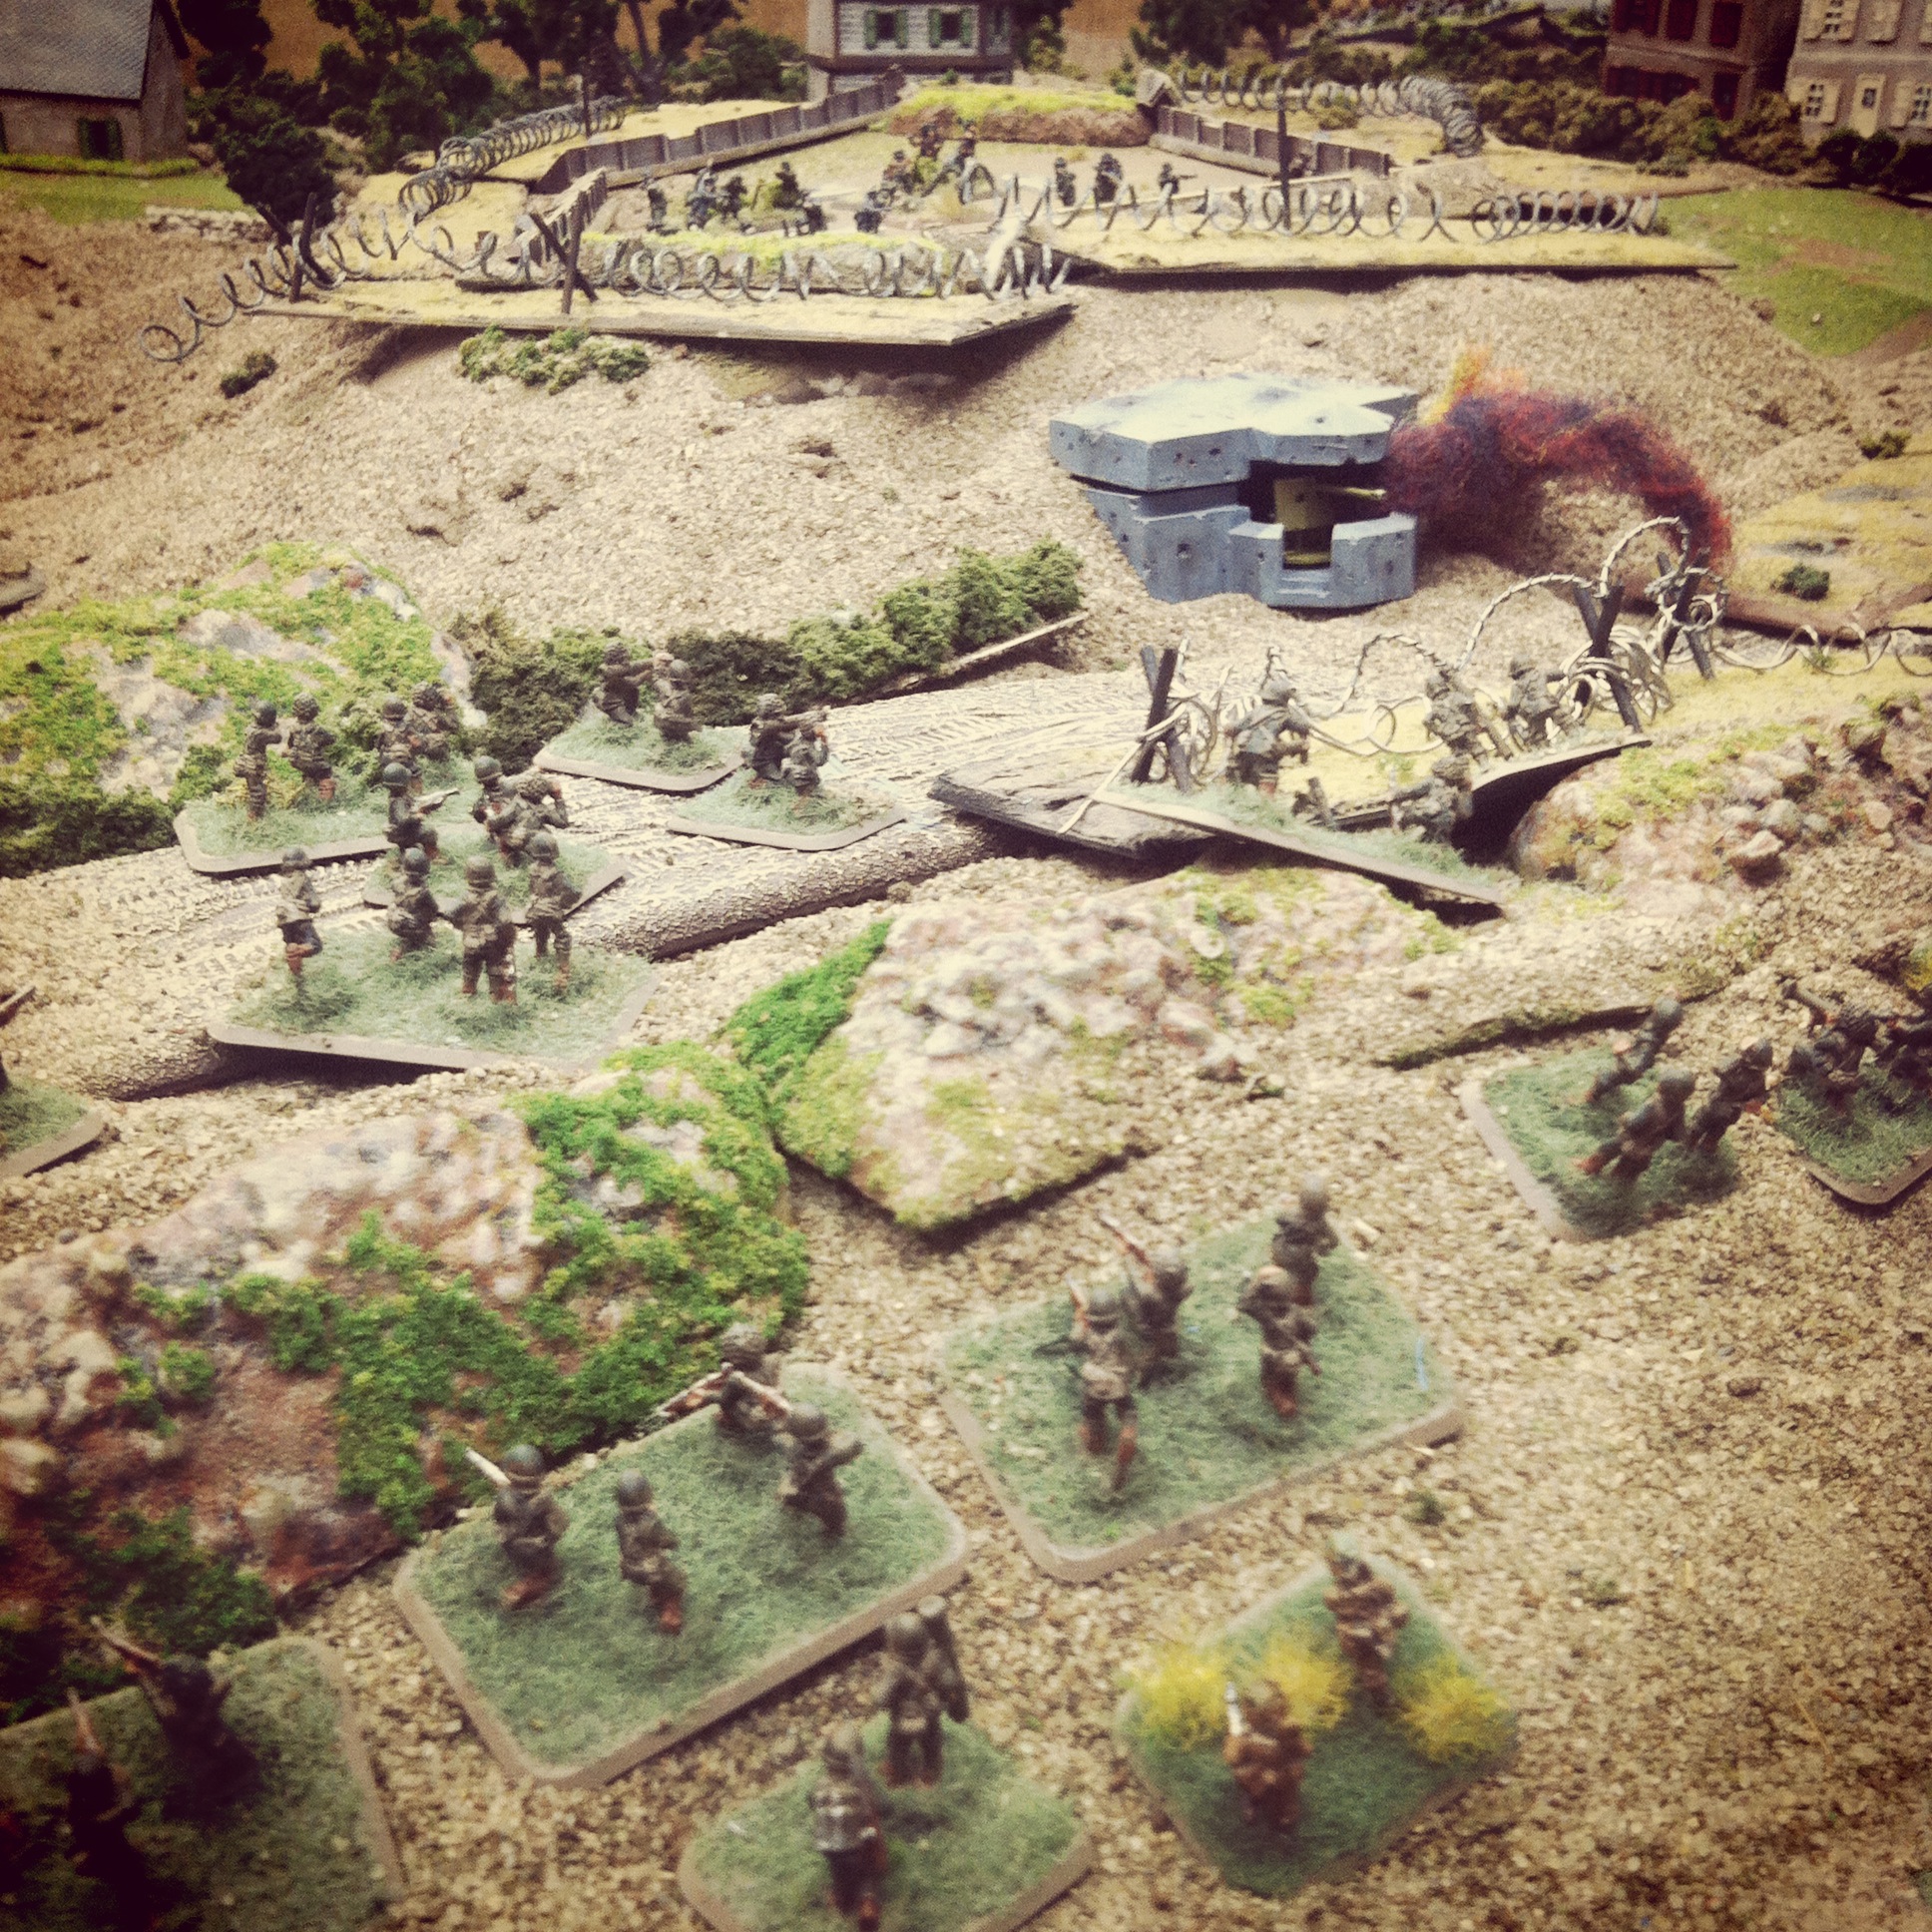
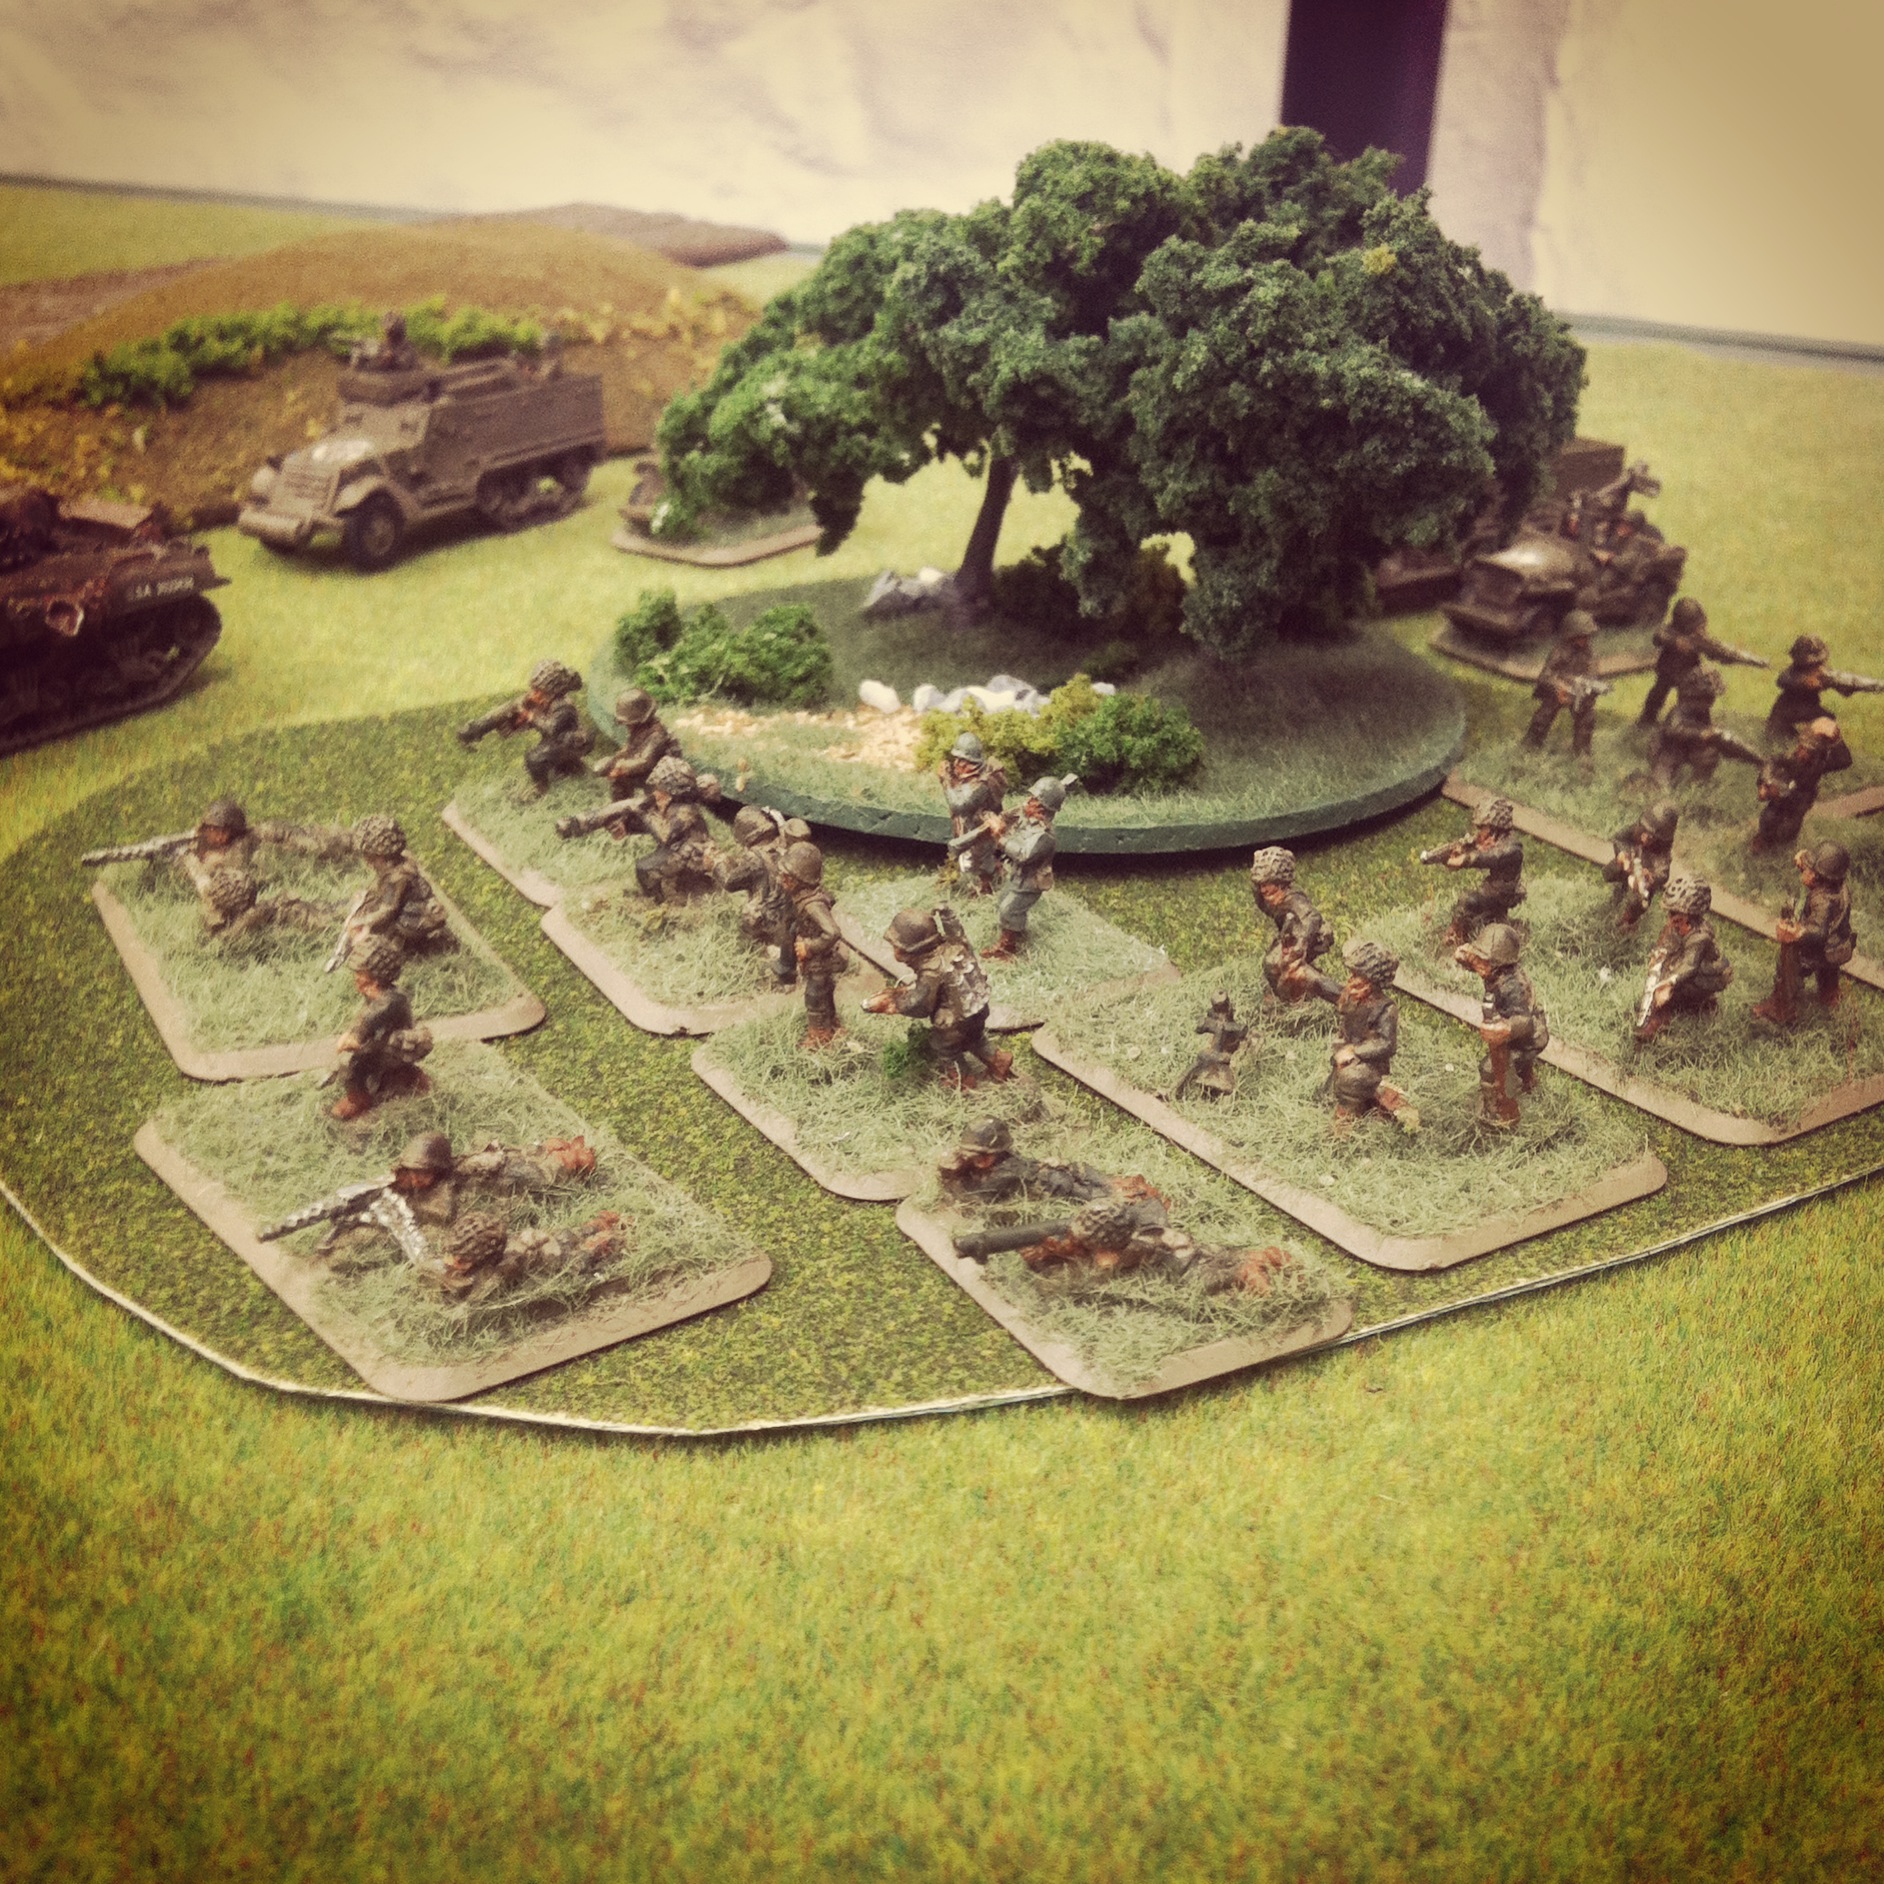
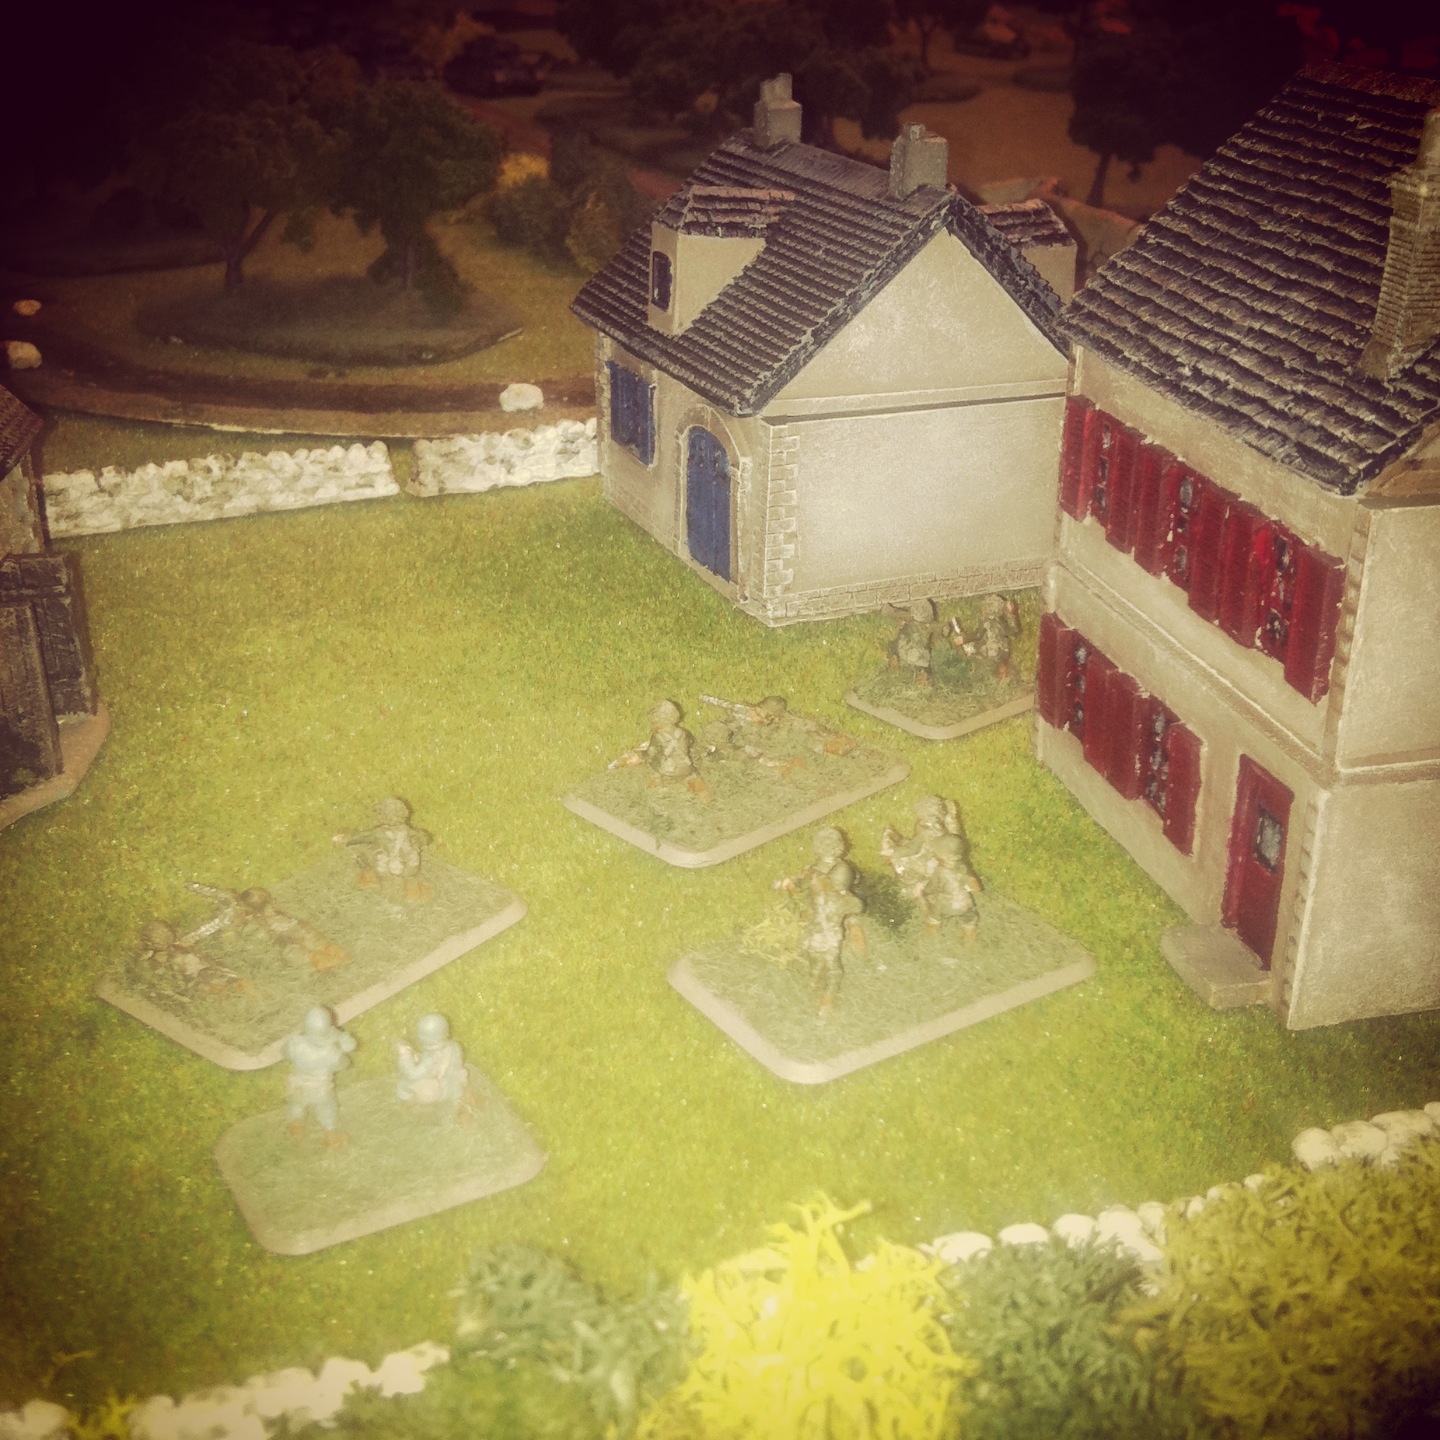
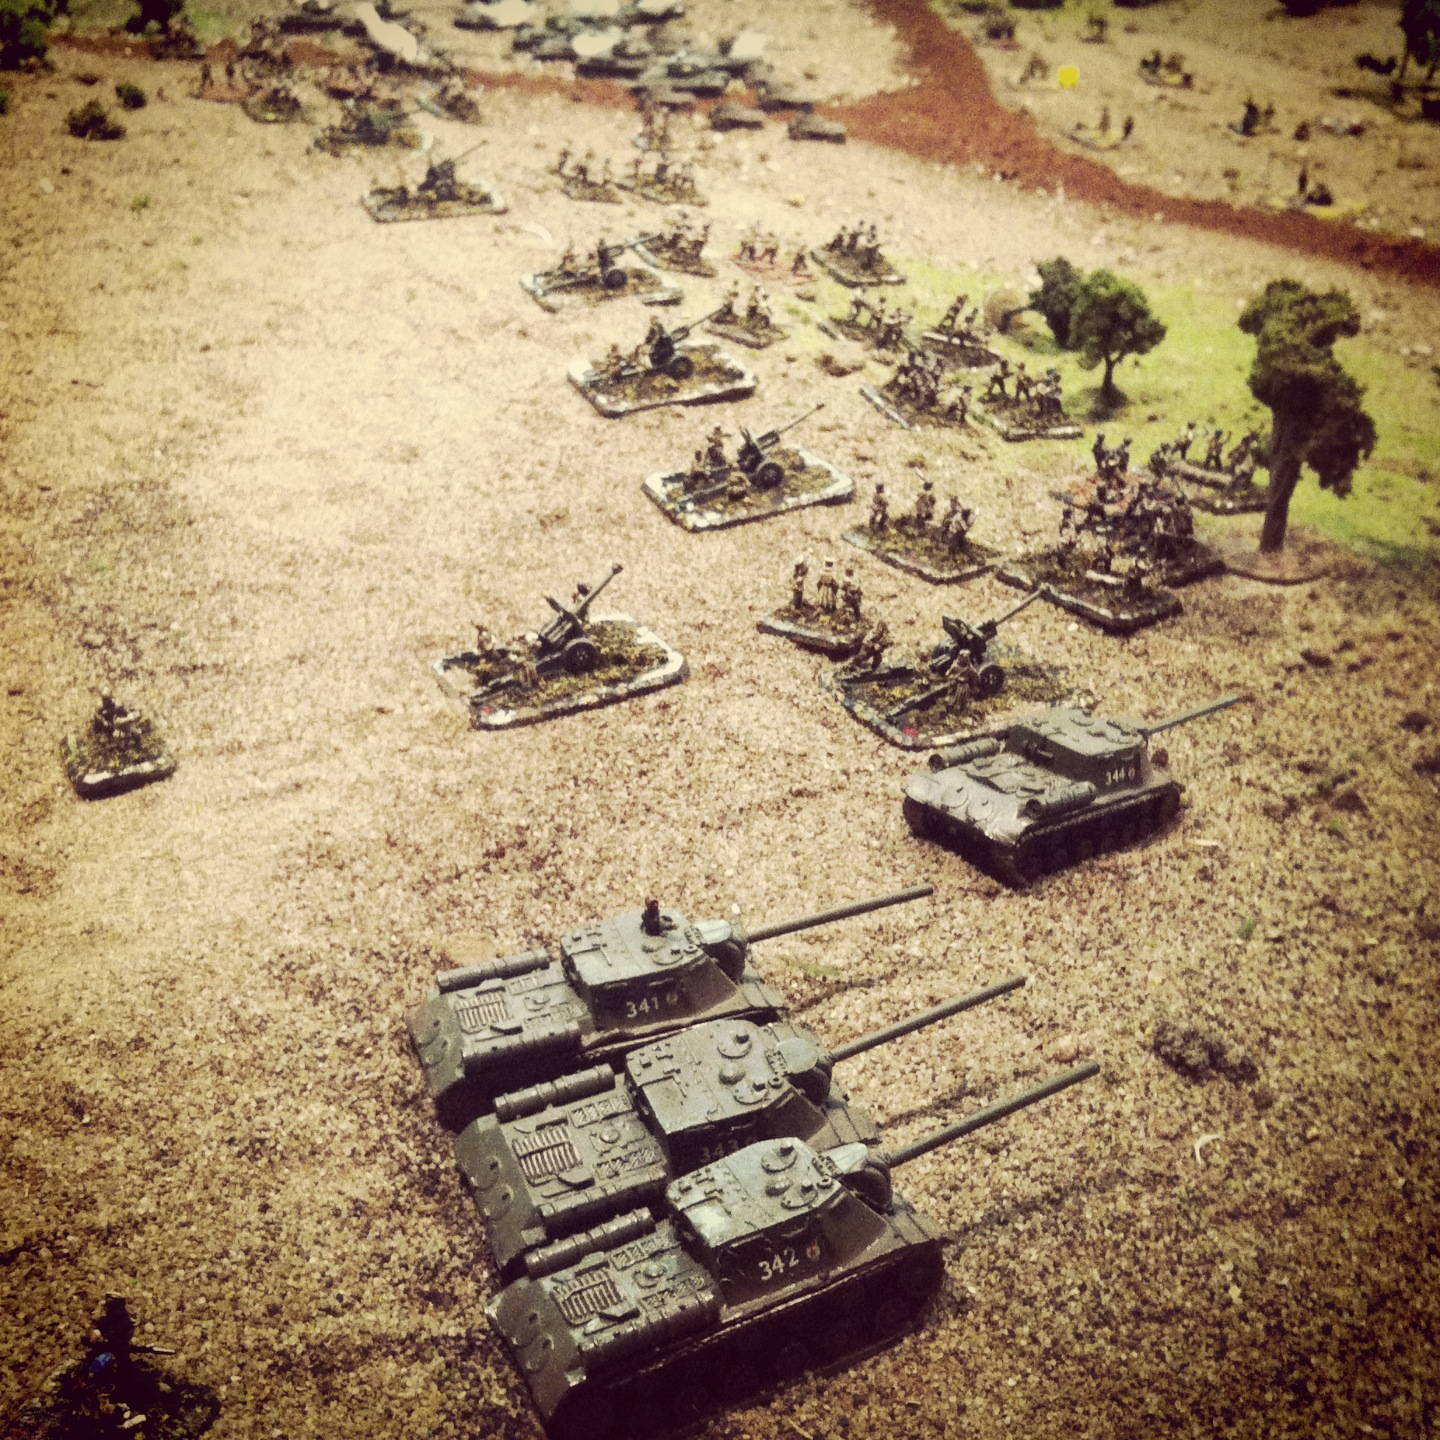
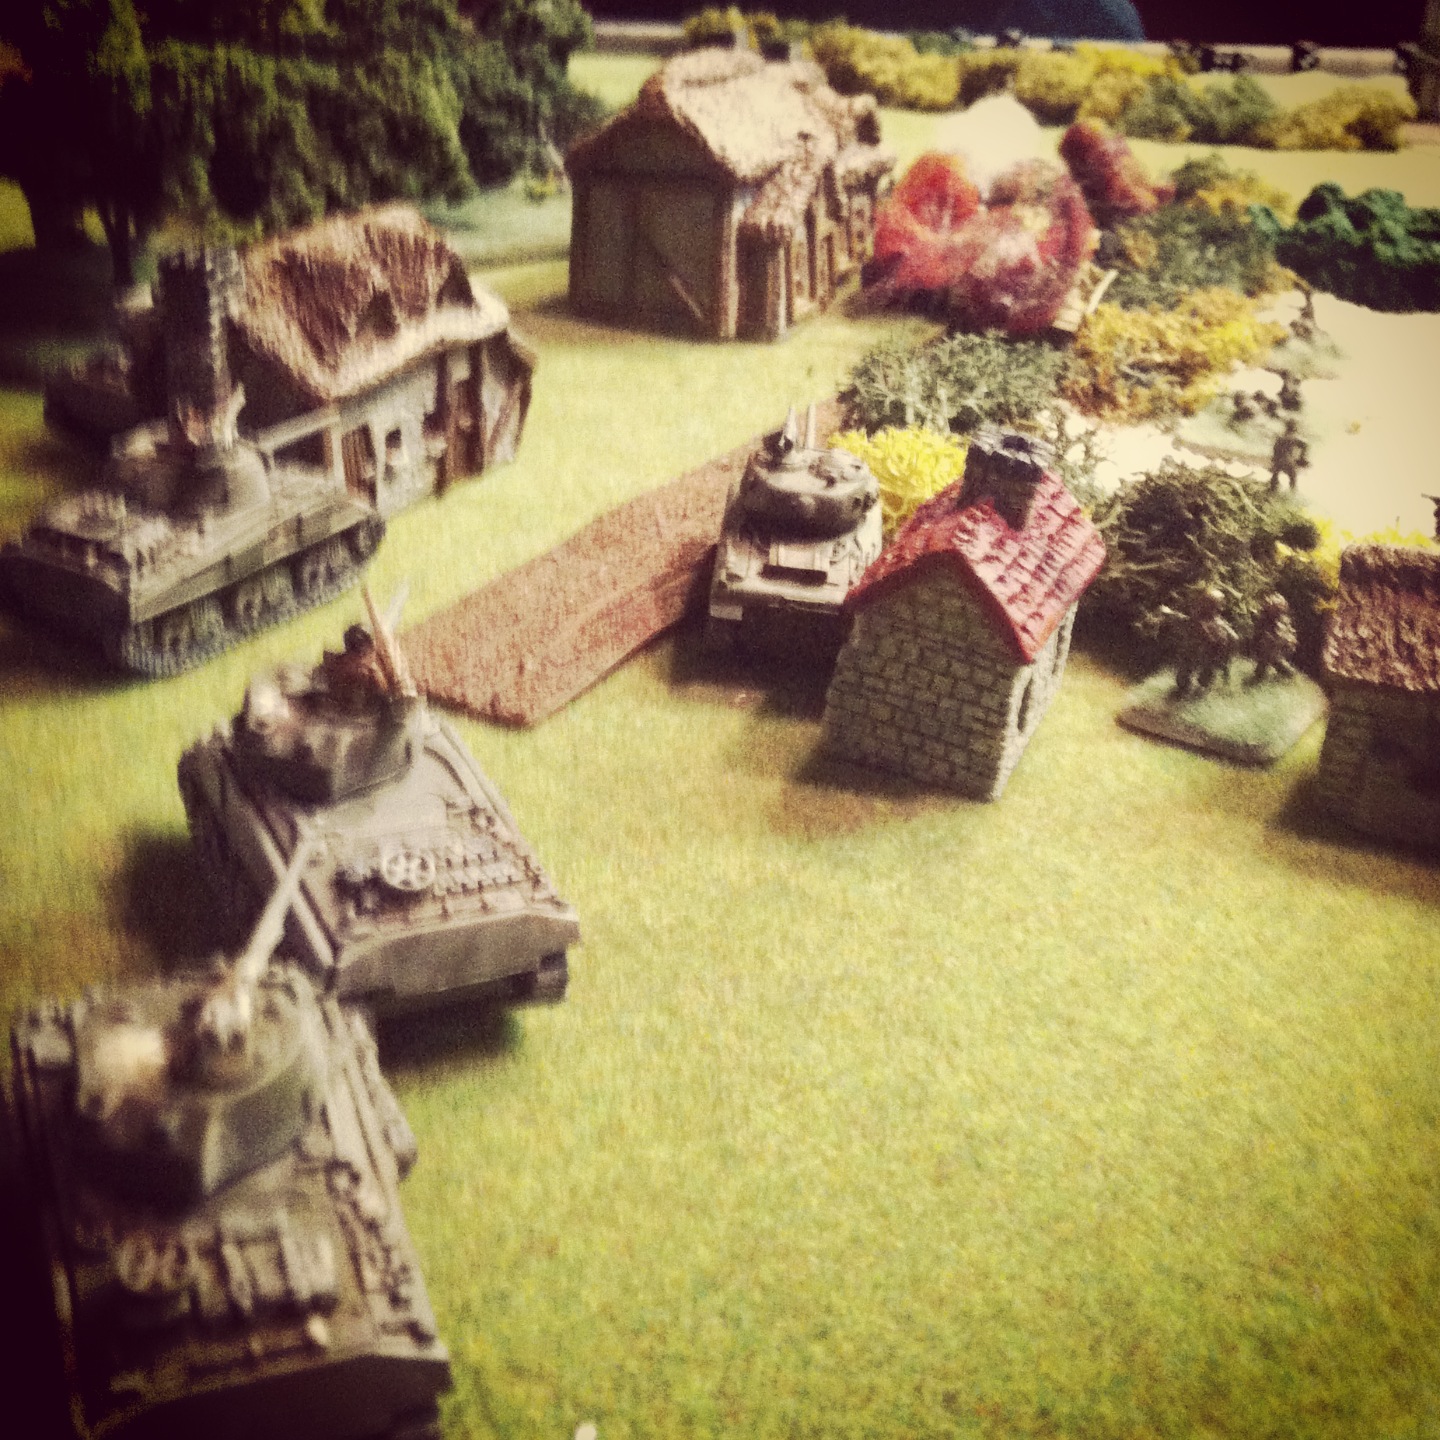
Scenes from the German defense above Pointe du Hoc in “Protect The Guns”

My first game — “Protect The Guns” — saw me playing as the defending Germans looking to hold off the Allied advance from Pointe du Hoc with a couple heavy machine guns, snipers and some off-board artillery. One of the remarkable things about IABSM is the vast amount of space represented on the table, making decisions of movement and firing  very important. My artillery was also very unreliable, representing some of the German communication challenges come alive. That said, with only a few men at my disposal, I was able to stave off and force the Americans to redirect through constant harassing fire until their reinforcements entered under a blind at my rear. With one of my machine guns and both snipers finally destroyed, the last of my Germans found themselves pinched on two sides of more-skilled US troops who took the game.

IMG_3553

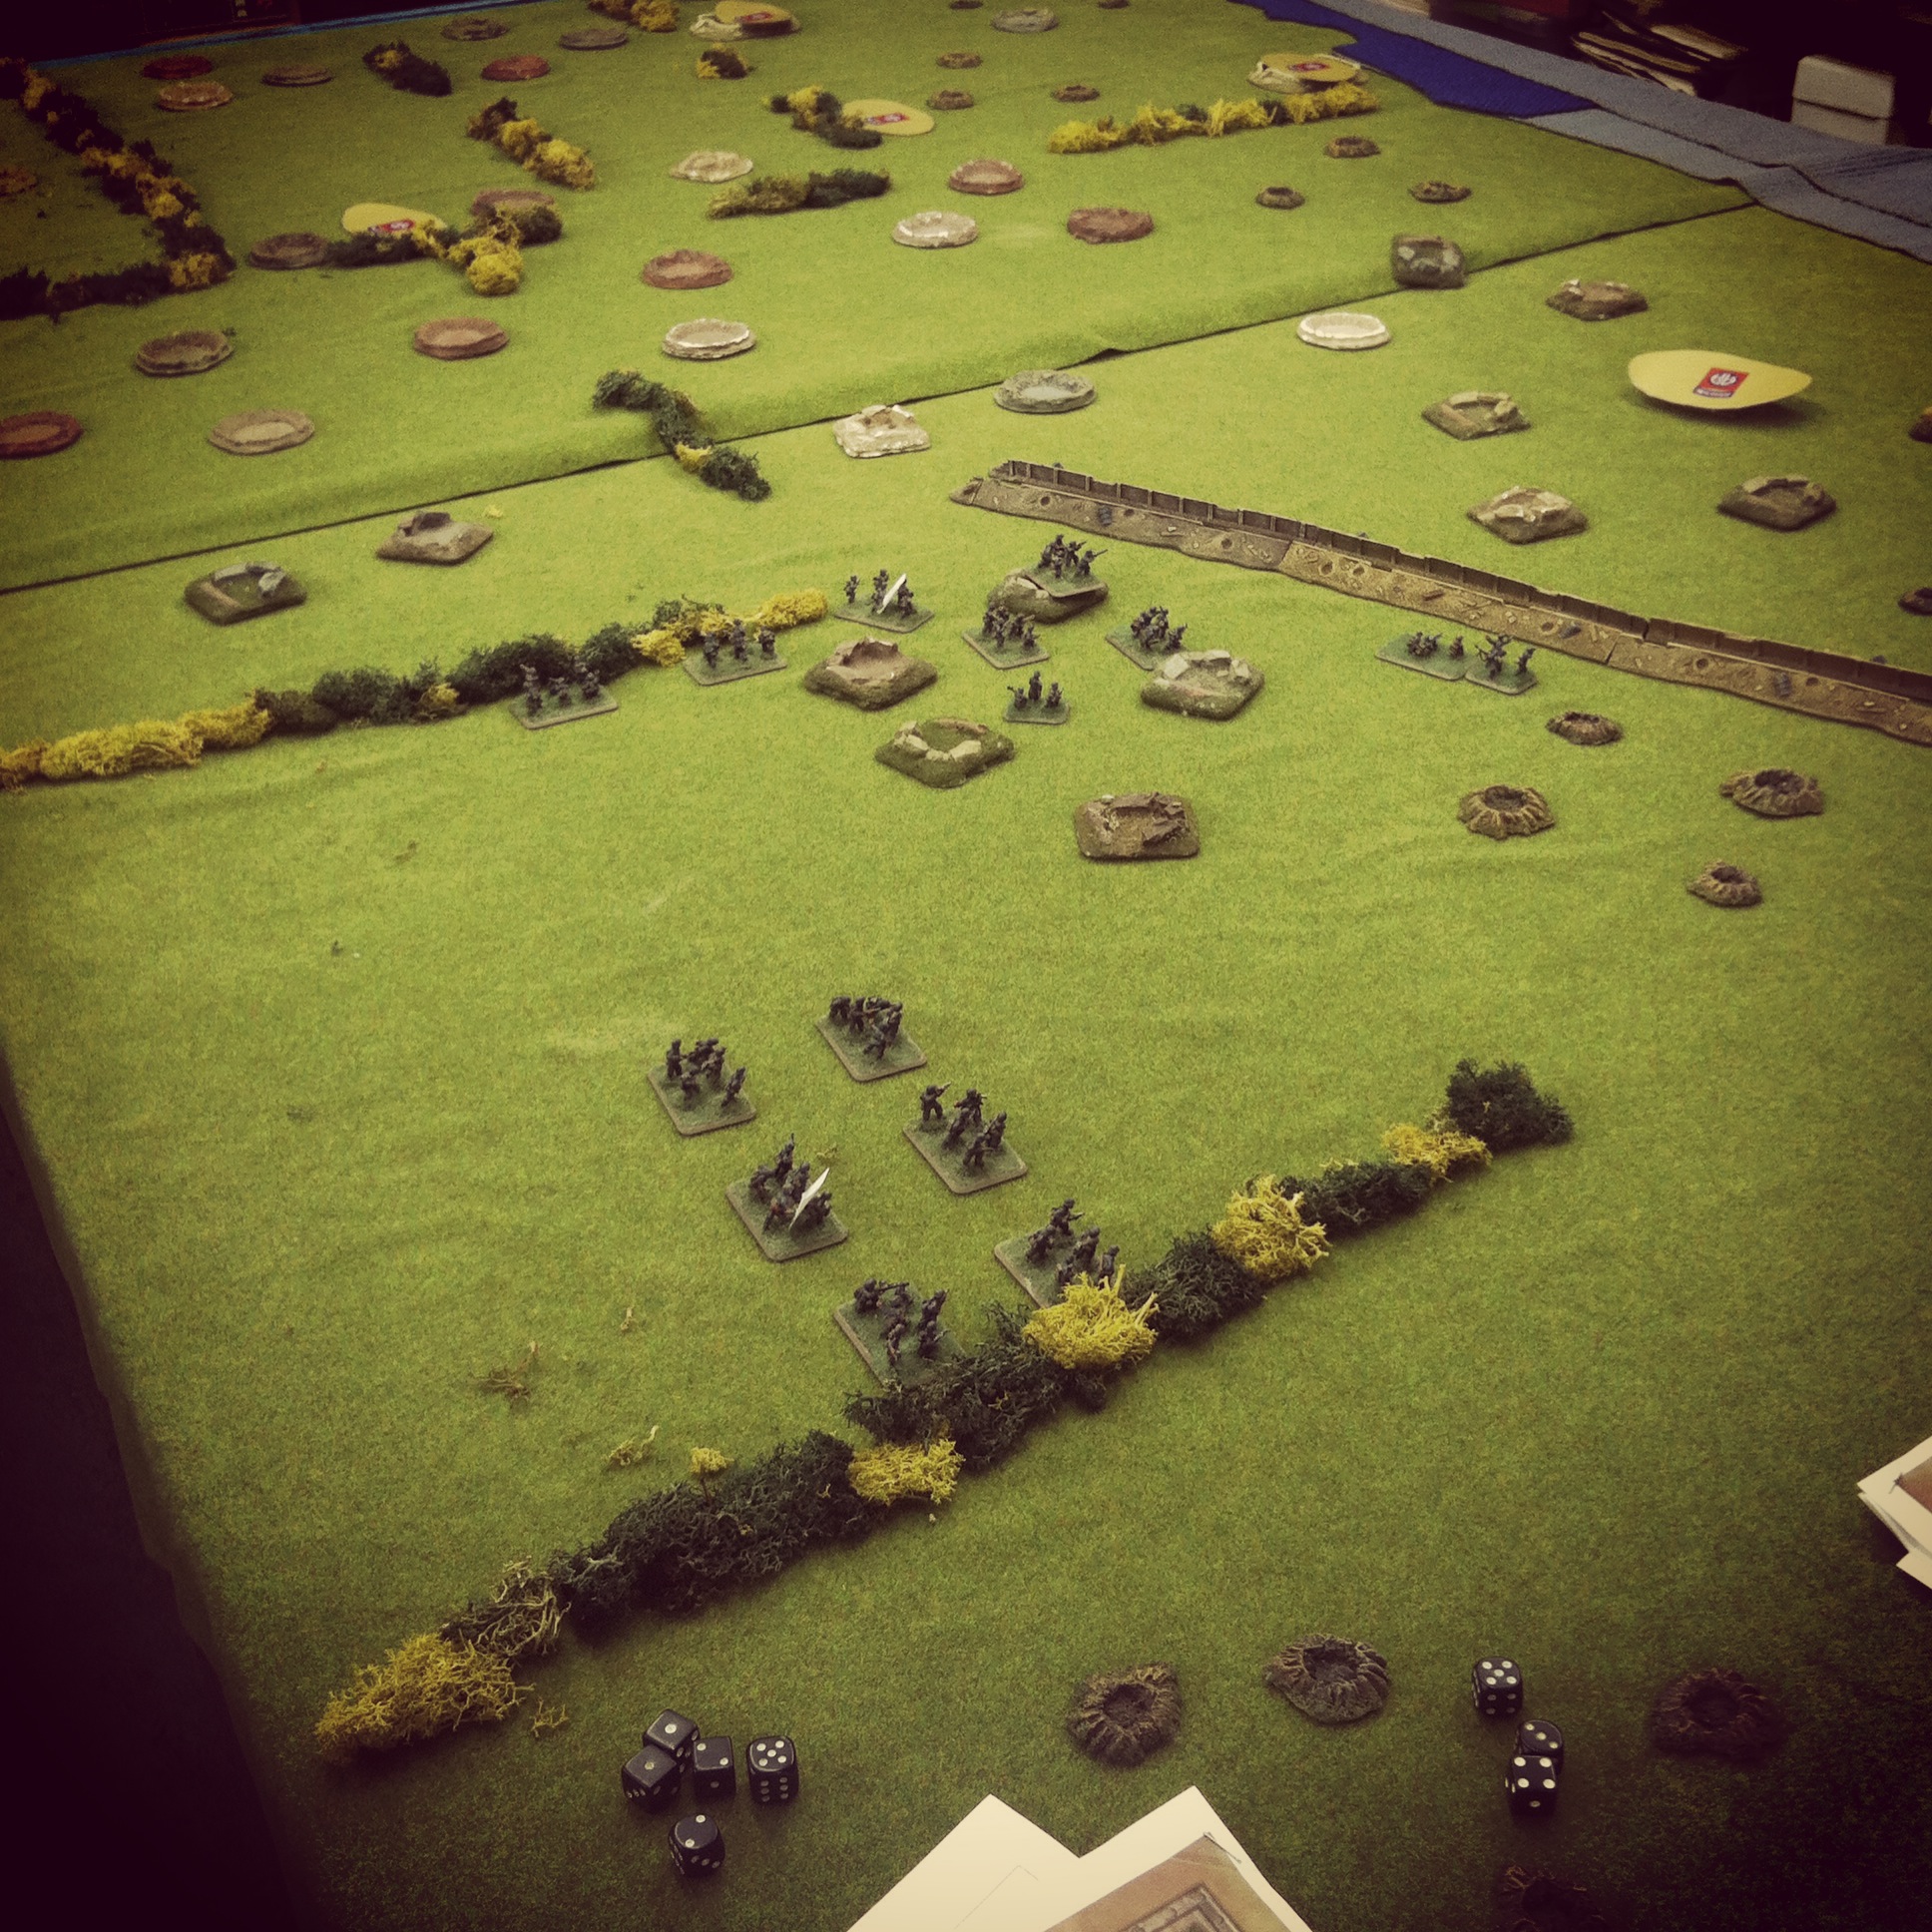
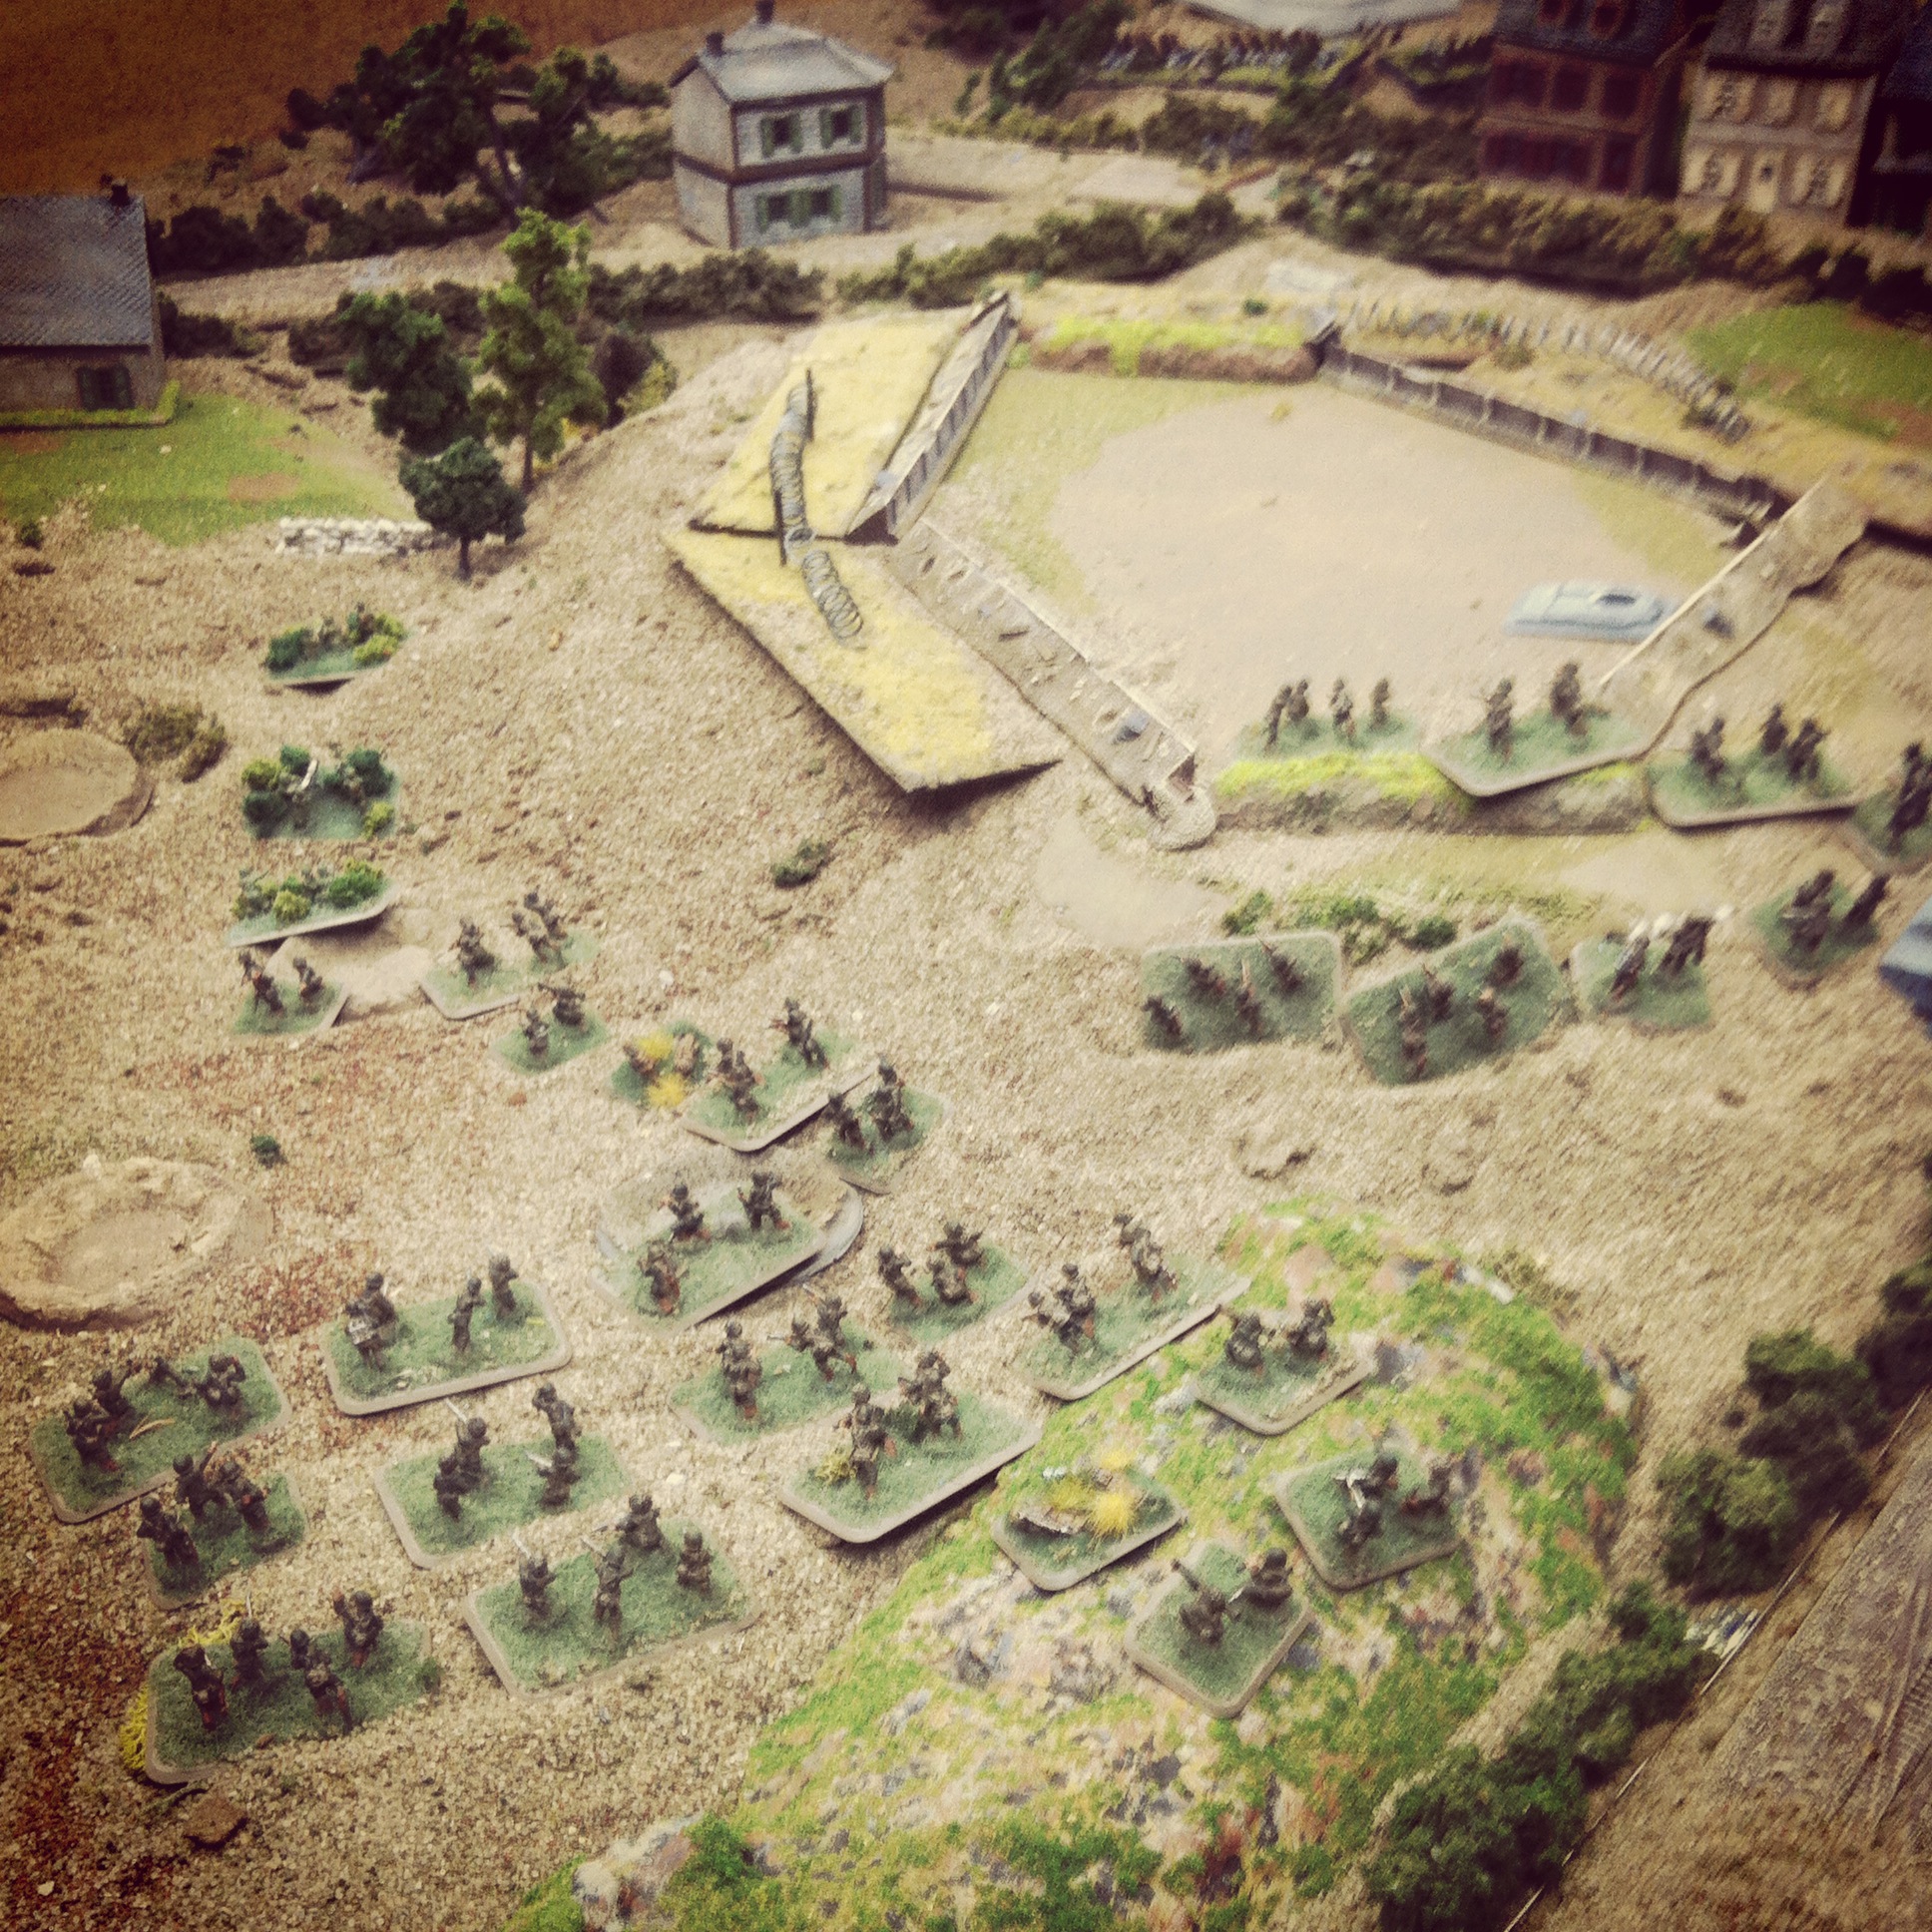
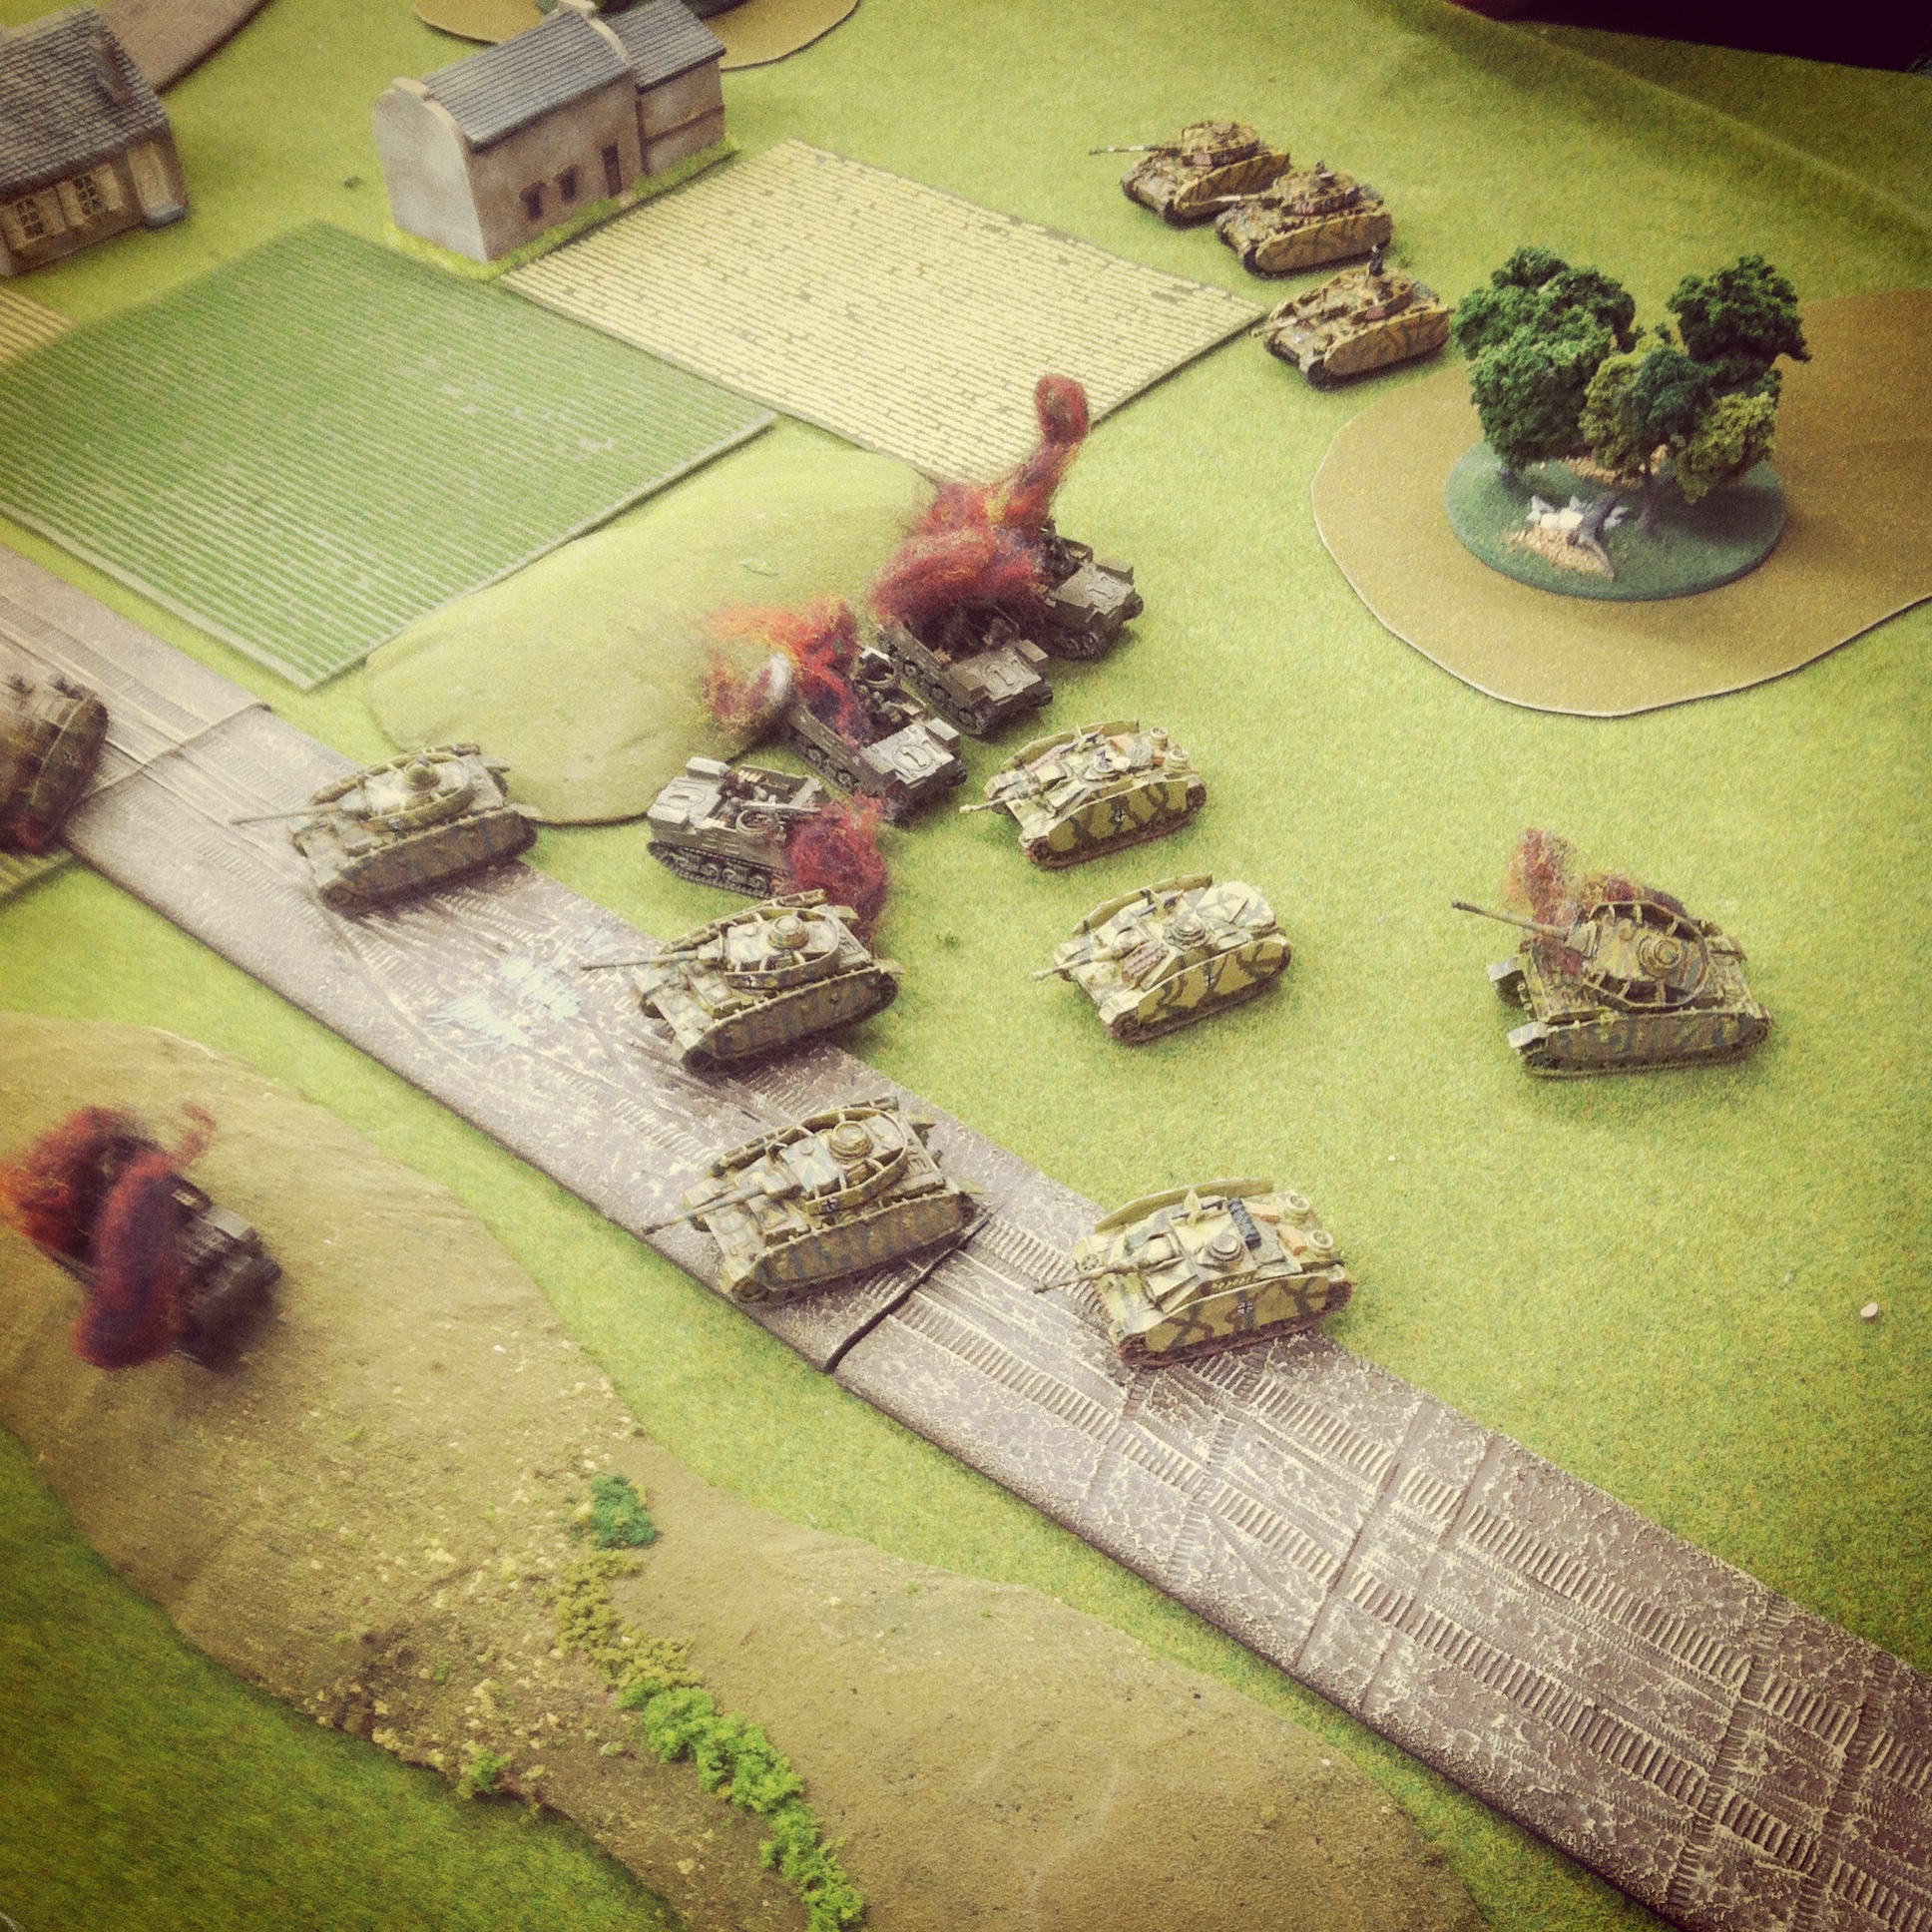
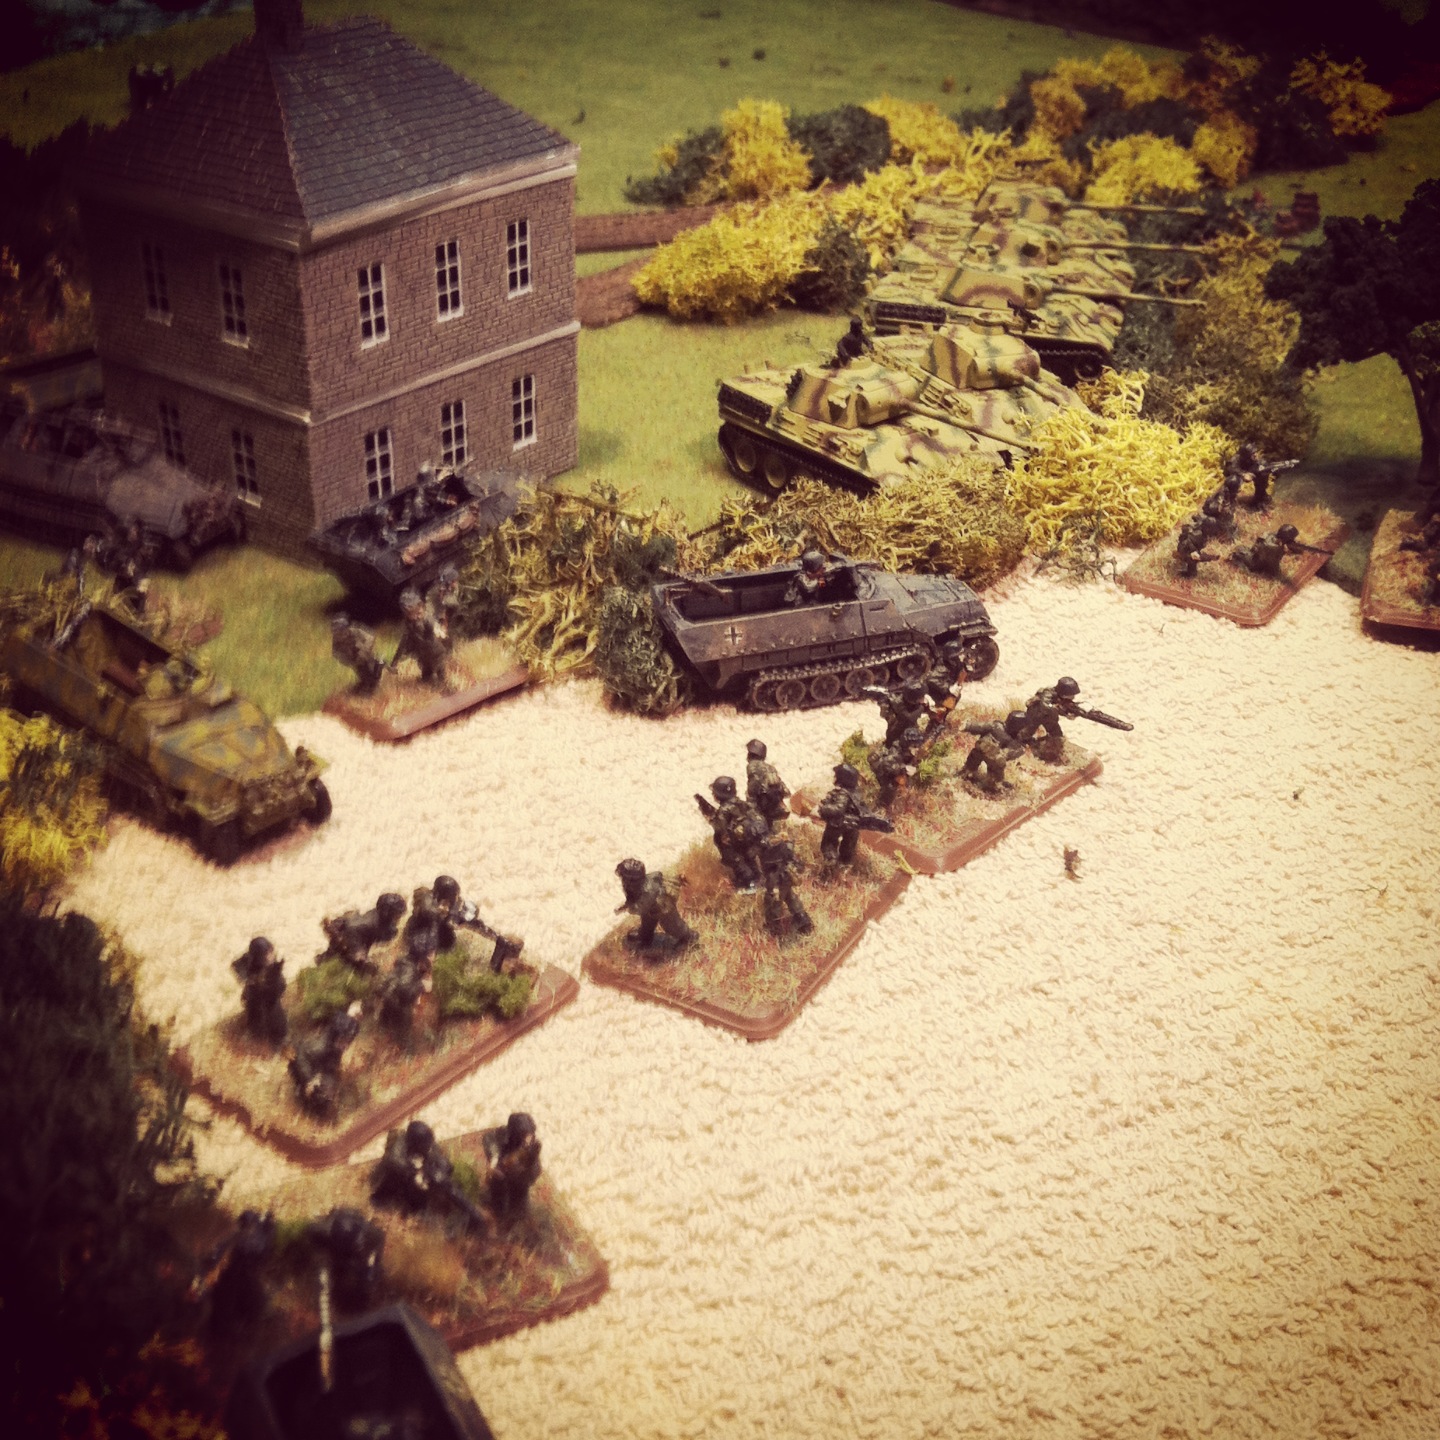
“Holding The Pointe” scenario set-up from IABSM

In “Holding The Pointe,” my Germans were on the counter-offensive and looking to push the Americans back into the sea. With all my forces deployed at the game’s start and all American units under blinds, my Germans began in overwhelmed confusion. This disadvantage made the game play so much more like the actual action in Normandy as German forces scrambled to head-off the Allied attack inland. Rather than focus my attack, I made the poor gamble of splitting myself to chase two sets of US targets. By the time a large force of German reinforcements arrived in the seventh turn, my initial force had gotten chewed-up in a series of stand-off firefights amidst the thick bocage near my original deployment. My divided force tactics were ultimately my undoing, and I’m certain a more textbook massed attack may very well have giving me a greater shot at victory.

With a couple of games under our belts, we’re going to continue right through the IABSM D-Day scenarios and beyond. We’ve managed our games without a referee so far through some really good fair play, but we’re anxious to try some scenarios with the referee element. Overall, the up-close feel for command and the heightened tactical realism in IABSM has given me a second WWII game to love at the 15mm scale.

Flames of War: Omaha Beach “Easy Green” 1944 Scenario

OmahaBeachSandwiched between tall bluffs on either end, a five-mile stretch of Normandy coastline was designated Omaha Beach near the center of the Allied D-Day landings on June 6th, 1944. Landing at Omaha was the relatively fresh US 29th Infantry Division. With British and Canadian troops landing on beaches to the left and other US men landing at Omaha Beach to the right, the 40,000 Americans at Omaha met with the highest rate of casualties of the day with some 3,000 falling in the French surf and sand.

OmahaEasyGreen“Easy Green” sector on Omaha Beach, Normandy 1944

Lying in wait at Omaha was a mix of green recruits and older veterans in the German 352nd Infantry Division. Dug in at the coast in a wall of pillboxes, bunkers, gun pits and trenches, the German men (and unknown number of boys) met the US invaders with a storm of machine gun, artillery, mortar and rocket fire. For the US, little went right as landing craft drifted off course and special floating DD M4 Sherman tanks were swamped and sank offshore. Only through improvised efforts and a slow, methodical pace under withering fire did the American infantry finally make it through the German lines to control the beach by the close of the day.

EasyGreenFOWMap set-up for the Flames of War “Easy Green” scenario

In preparation for our upcoming D-Day Plus 70 weekend at Metropolitan Wargamers in Brooklyn, NY on June 6th-8th, a couple of us have been playing out beach landing practice games. Flames of War offers a specific outline for coastal assaults with their “Hit The Beach” rules, but we’ve found them to be very difficult to play with US invaders losing more often than not. Last summer we ran through our first beach landing on one of the club’s sand tables with a Utah Beach “Easy Red” scenario in which the US failed horribly. Since then we’ve been studying up, tweaking our forces and diving deep into the particular rules for a tabletop beach landing game.

German352

29thinf

This past week we ran through the Omaha Beach “Easy Green” scenario to what was probably our most evenly matched and played game to date. The scenario sticks pretty closely to the situation at Easy Green with one beach exit road guarded by lines of barbed wire, trenches, mines and anti-tank obstacles. Finally, a combined defense of heavy machine guns, a 5 cm KwK 39 gun bunkered at the coast and Nebelwerfer rockets at the rear provide a daunting nut for the US infantry to crack. For our game, my German opponent was able to field forces as outlined in the published FOW scenario but I had to modify my American list slightly to fit my model collection. Even with slight changes, our final lists had the US at a few more points stronger than the Germans as per the mission outline and the game rules.

IMG_3452The first US boats land and platoons rush ashore

After an initial US naval bombardment which destroyed one stand of German infantry, my boats and DD tanks headed for the beach. In the initial wave, one DD tank sank in the water offshore and one boat was delayed in the bouncing surf. With two platoons of US infantry on French ground, they made way for the barb-wired seawall. Further down the beach to the right, my three surviving Shermans rolled to the one exit causeway from the beach.

IMG_3453DD Sherman tanks make it across the beach toward the exit ramp

In the opening salvo from the Germans, rocket fire came in from the rear of the table as entrenched guns fired from the beach defensive lines. US troops did well with dice roll saves and lost just a few teams before ending the turn pinned high on the beach.

IMG_3454German Nebelwerfers sit atop a hill overlooking the Allied objective

In the next couple turns, landing craft continued to meet mixed success in landing and stalling on the sea. Luckily, most boats didn’t drift too far down the beach, allowing me to execute my general plan of running infantry to the left while my tanks dealt with the heavier nests and pillbox to the center and right. One tank bogged in the sand but the other two rolled over the barbed wire to take up position at the line of minefields, sending fire into the Tobruk nests and gun bunker. A couple turns in, the bunker was in flames and the German machine guns had been dealt with. The way was clearing for the US infantry to push inward.

IMG_3455The 5 cm KwK burns in its bunker as US troops push over the seawall

IMG_3456DD tanks struggle through the coastal defenses and take heavy combined fire

With several US platoons whittled-down in their struggle through several tiers of barbwire, one platoon of German infantry arrived and made way for the row houses near the objective and remaining rockets on the hill. In the open, the Germans took fire from naval guns but most survived to find shelter in the buildings. Back on the beach, my final US reserves of M7 Priests landed at the center of the beach and one heavy machine gun section tramped forward at the extreme left. With these late arrivals so far back from the main action, it was up to the forces already inland to get the job done.

IMG_3475German defenders rain mortar and machine gun fire into oncoming US troops

IMG_3476With German defenders destroyed at the beach, the 29th Infantry Division hustles inland

With the major defenses eliminated at the beach, the Shermans turned their machine guns on the remaining German infantry manning the trench line high on the central hill. At the same time, US infantry began pushing into the German position after spending turns alternately being pinned by rocket and mortar fire, removing barbwire and shooting back with light machine gun, rifle and direct mortar fire. Despite their losses, the combined arms of my US troops really shined, as was often the fateful experience of their German opponents 70 years ago.

As the game moved into the second-to-last turn, the Americans were ultimately just too far away and too weakened to make the final push to the objective still held by the remaining German infantry comfortably defending from the nearby houses. It had been a pretty even match, but timing was everything. Luckily for the Allies on June 6th, 1944, the only limits on the day’s outcome at “Bloody Omaha” was the grit and dedication of the storm of humanity hitting the beach.

Metropolitan Wargamers D-Day Plus 70 Event – June 6th-8th 2014

MWGDDay

This June is the 70th Anniversary of the Allied D-Day landings at Normandy, and New York City’s oldest and largest wargaming club Metropolitan Wargamers is celebrating with a full weekend of events.

IMG_2161

La Fiere Causeway at Metropolitan Wargamers in Brooklyn, NY

Whether you’re new to the hobby or an experienced gamer, there will be plenty of WWII action the entire weekend. On the evening of Friday June 6th we’ll begin with Flames of War airborne landing scenarios. Saturday June 7th kicks off at noon with a FOW beach landing scenario on one of the club’s famed sand tables. Sunday wraps up the weekend with a couple FOW breakthrough battles and a large Memoir ’44 board game. Other WWII-themed games will run throughout the weekend.

IMG_2816

Utah Beach on one of the sand tables at Metropolitan Wargamers

We’ll have FOW scenarios set up for the weekend with plenty of miniatures and stunning terrain on the club’s tables, so all you need to bring is your passion for wargaming and history. Our FOW miniatures games are fun and a feast for the eyes, and you can get a sense of what’s in store for the weekend by viewing some of our past scenarios at the club here.

Admission for the full weekend of gaming is just $10 and a great opportunity to visit a very unique community of gamers in the heart of Brooklyn’s Park Slope neighborhood.

For more information and to RSVP for the D-Day Plus 70 weekend, check the Metropolitan Wargamers website or join our Yahoo group.

Flames of War: Dust Up Mission With “Blood, Guts and Glory”

tank3

Although actually made up of a number of battles and assaults during World War II, the post-D-Day breakout actions by the Allies in late 1944 in Northern France has become commonly known as the Lorraine Campaign to military historians. Frustrated by poor weather conditions and weak supply lines, the General George Patton’s 3rd Army push into Germany eventually led to the wintery and more famed German counteroffensive with the  Battle of the Bulge in the winter of 1944-1945.

bggbook

Flames of War offers a book outlining the Lorraine Campaign with Blood, Guts and Glory. US lists in the book focus on the powerful tank and armored rifle companies which made up the steely backbone of Patton’s daunting force. For the Germans, the cobbled-together 106 Panzerkorps Felderherrnhalle and 111 Panzer brigade are outlined with forces full of some of the best Late War armor and equipment albeit under somewhat challenging motivation and experience ratings.

A couple of weeks ago at Metropolitan Wargamers in Brooklyn, NY, two of us had a go at a fictional battle set during the Lorraine Campaign. We play against each other a fair amount, and both of us were looking to switch things up commanding some very different forces. The tabletop terrain was also different with a more open battlefield lined with fields, woods, gentle hills and two farms. All of this was quite a departure from the games we have most played set in the days and months after the Normandy Invasion in June of 1944.

dustup

My opponent’s Panzerkompanie was  full of armor – Stugs, Panthers and Panzer IVs – and  supplemented by an Aufklärungs platoon and a couple Wirbelwinds to chase away any US aircraft. For my US force, I wanted to try out some underused rifle platoons which were supported by 105mm M7 Priests, some Shermans and a P-47 Thunderbolt buzzing overhead. We also chose a different game framework, opting for a somewhat complicated Dust Up scenario from the official Flames of War missions list.

pzco

us4th

IMG_3397

Our Dust Up scenario with my US forces in the foreground and Germans in the distance

Well, as the game played out, I quickly discovered I had brought infantry to a tank fight. With one of my infantry platoons camped out in the woods near two objectives, my hope was to stave off the German armor advance with repeated bombardments from my Priests and diving runs from the P-47.

IMG_3398US M7 Priest platoon taking up position

IMG_3399US rifles deploy in the woods to guard a nearby objective

Things went well for me in the early stages as Panthers stalled moving through the woods. A Wirbelwind and two Panthers were subsequently destroyed from 105mm volleys , but my P-47 failed to get any traction in stopping a group of Stugs creeping along the table edge. Even so, a couple turns in I was feeling fairly confident my artillery fire would whittle away the rolling German advance.

IMG_3401
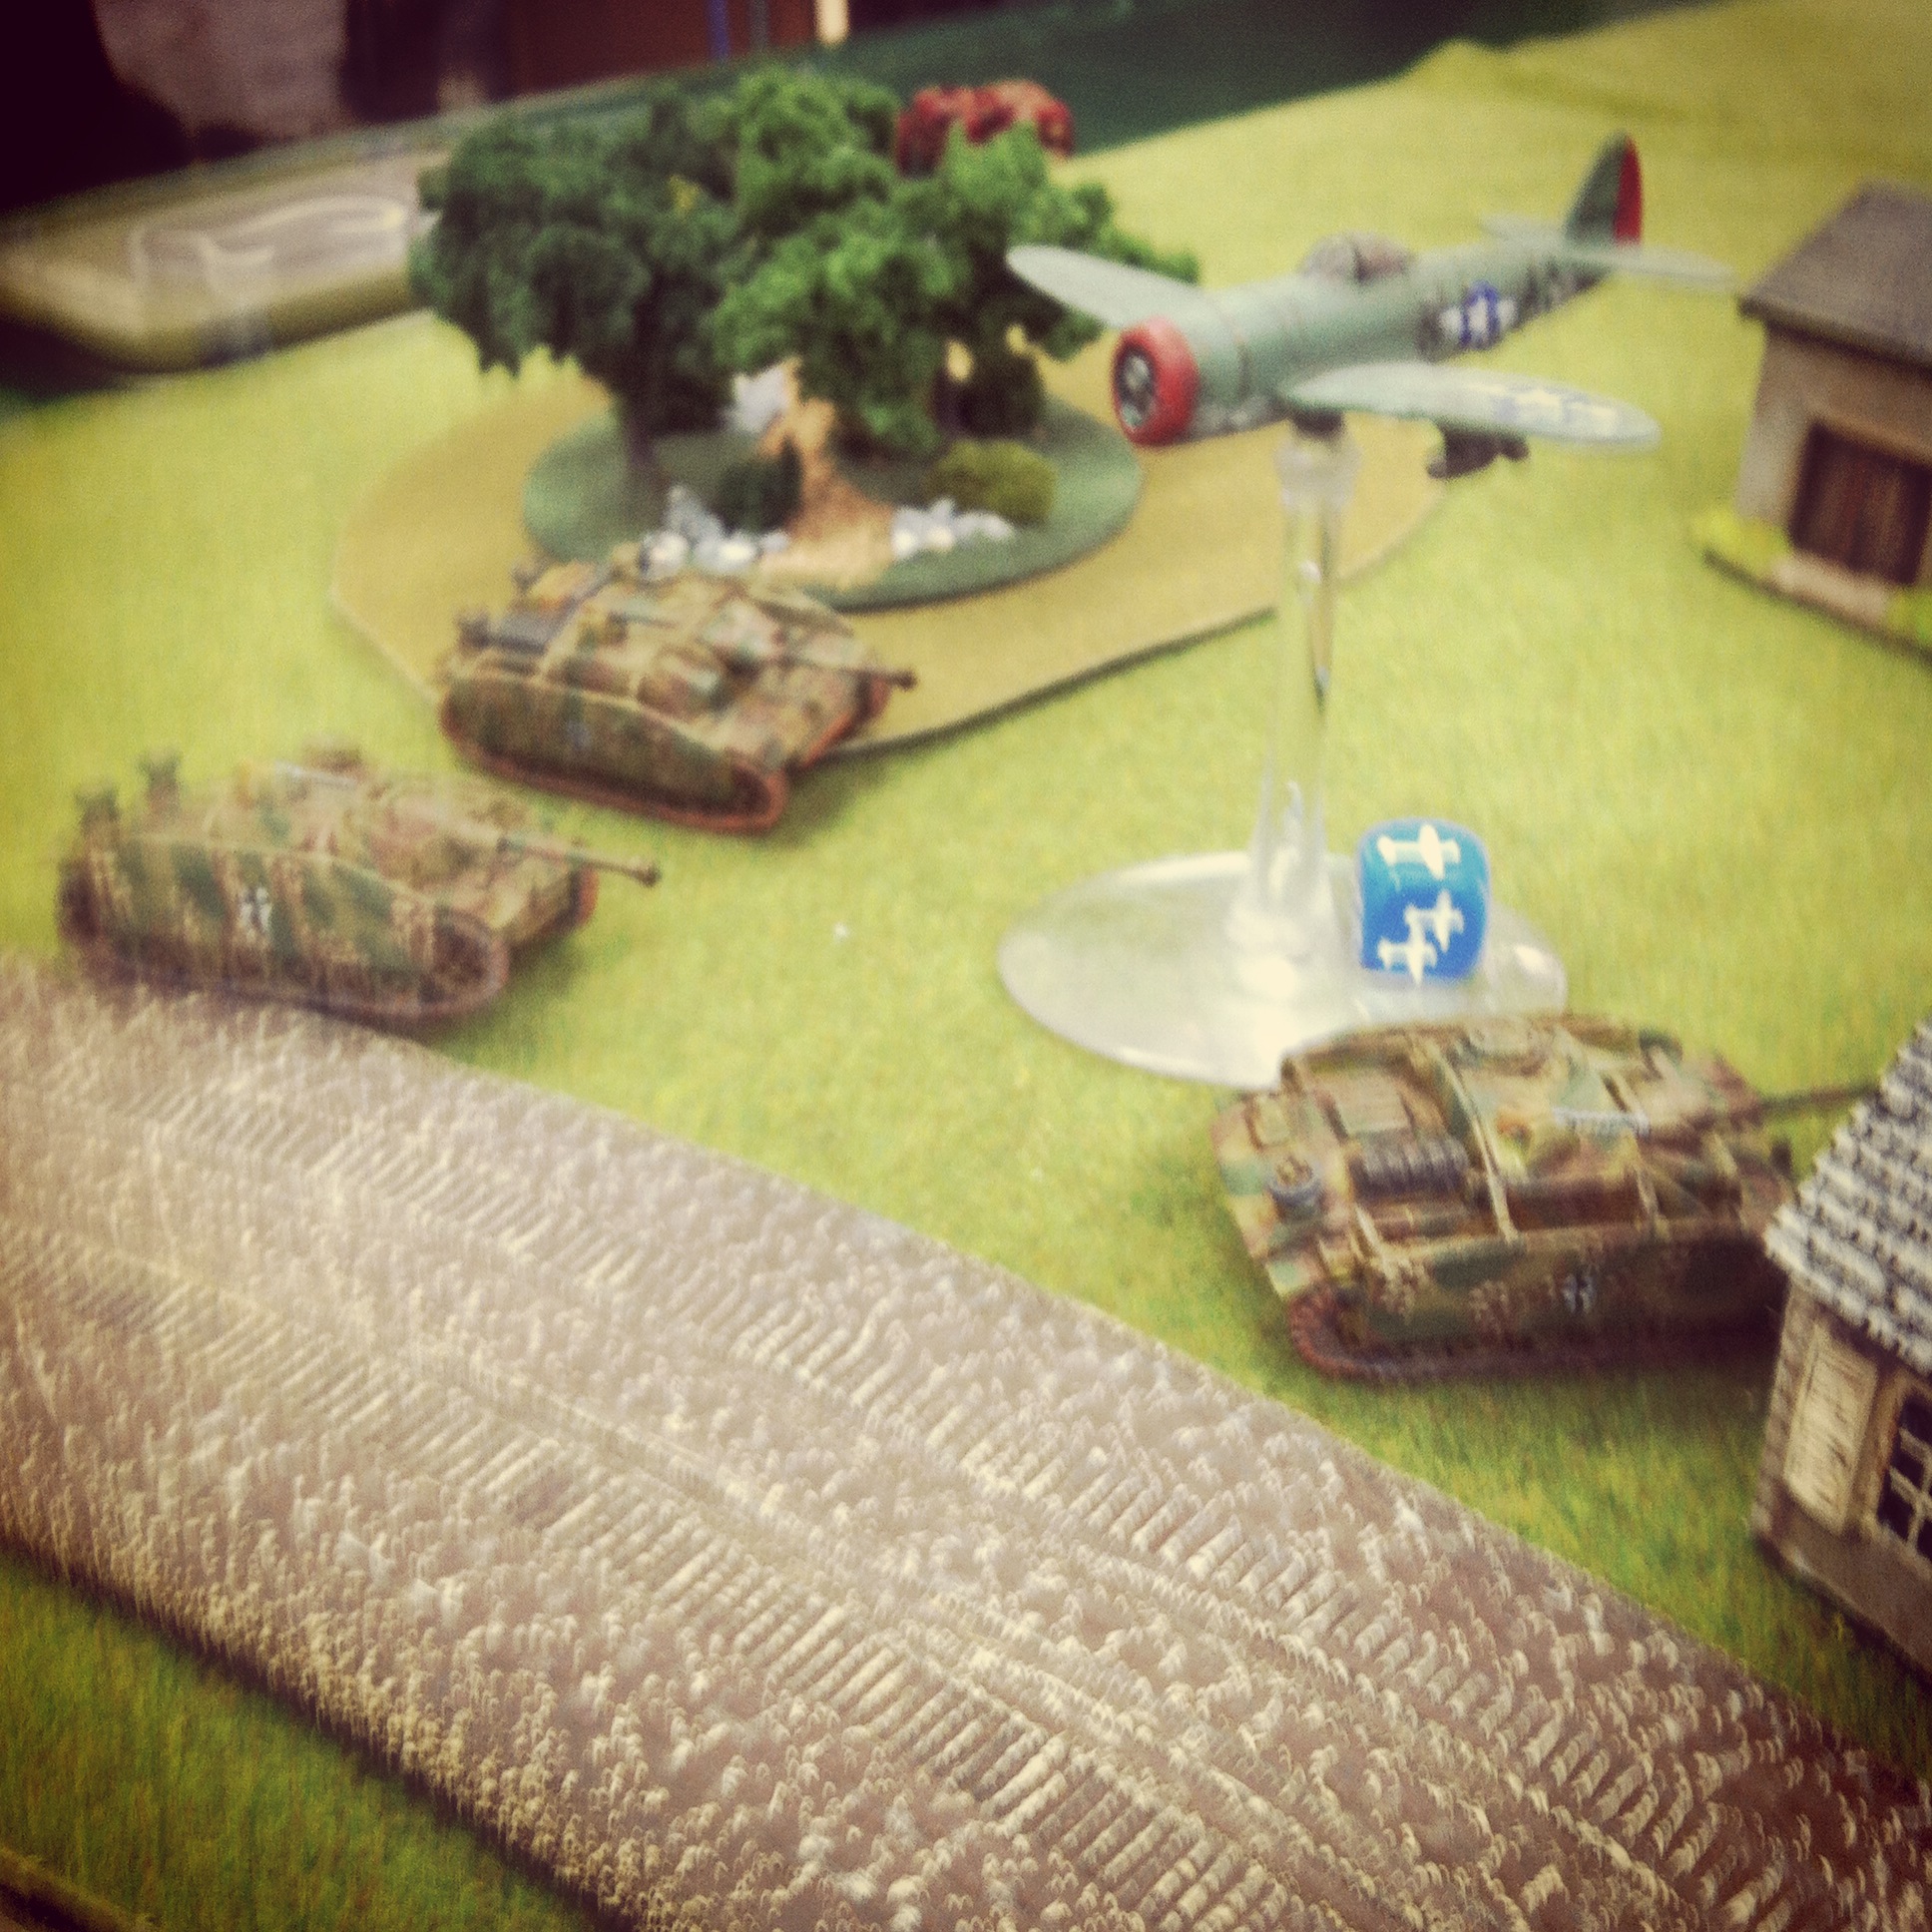
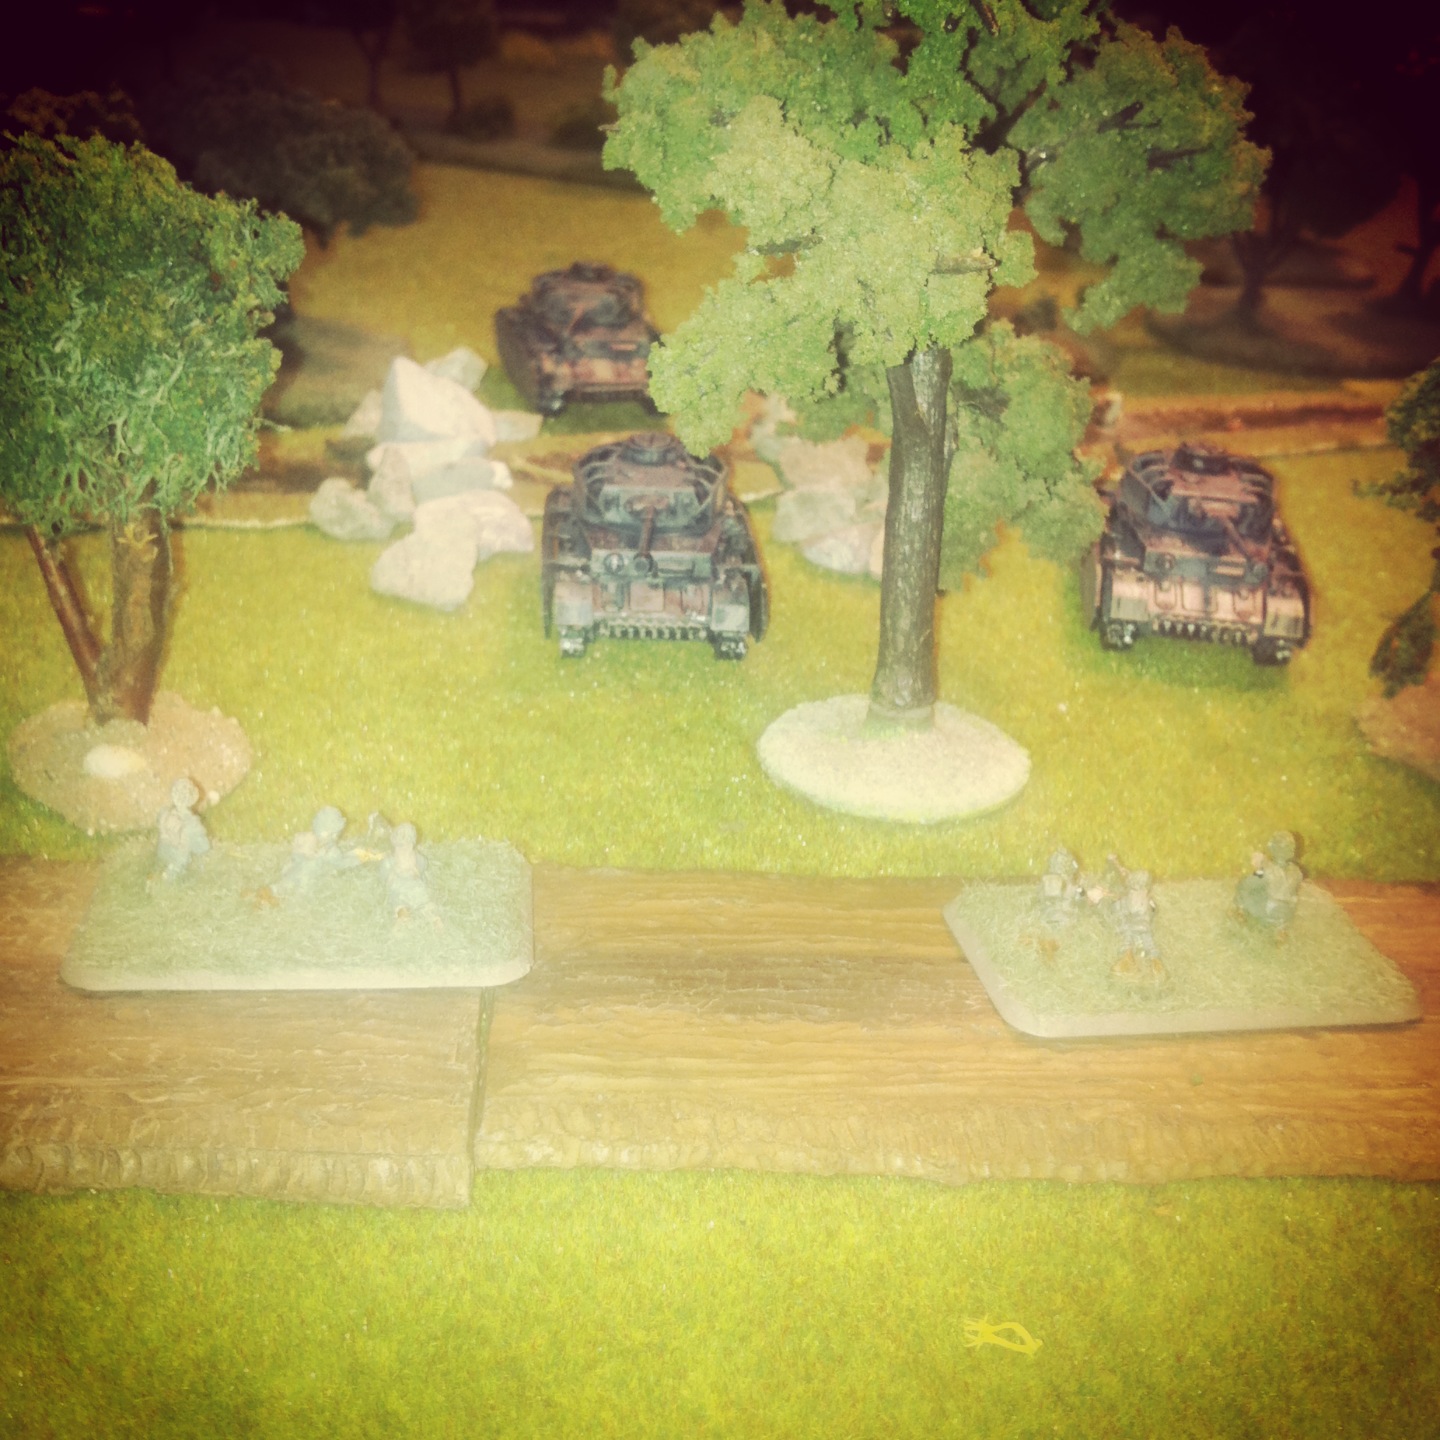
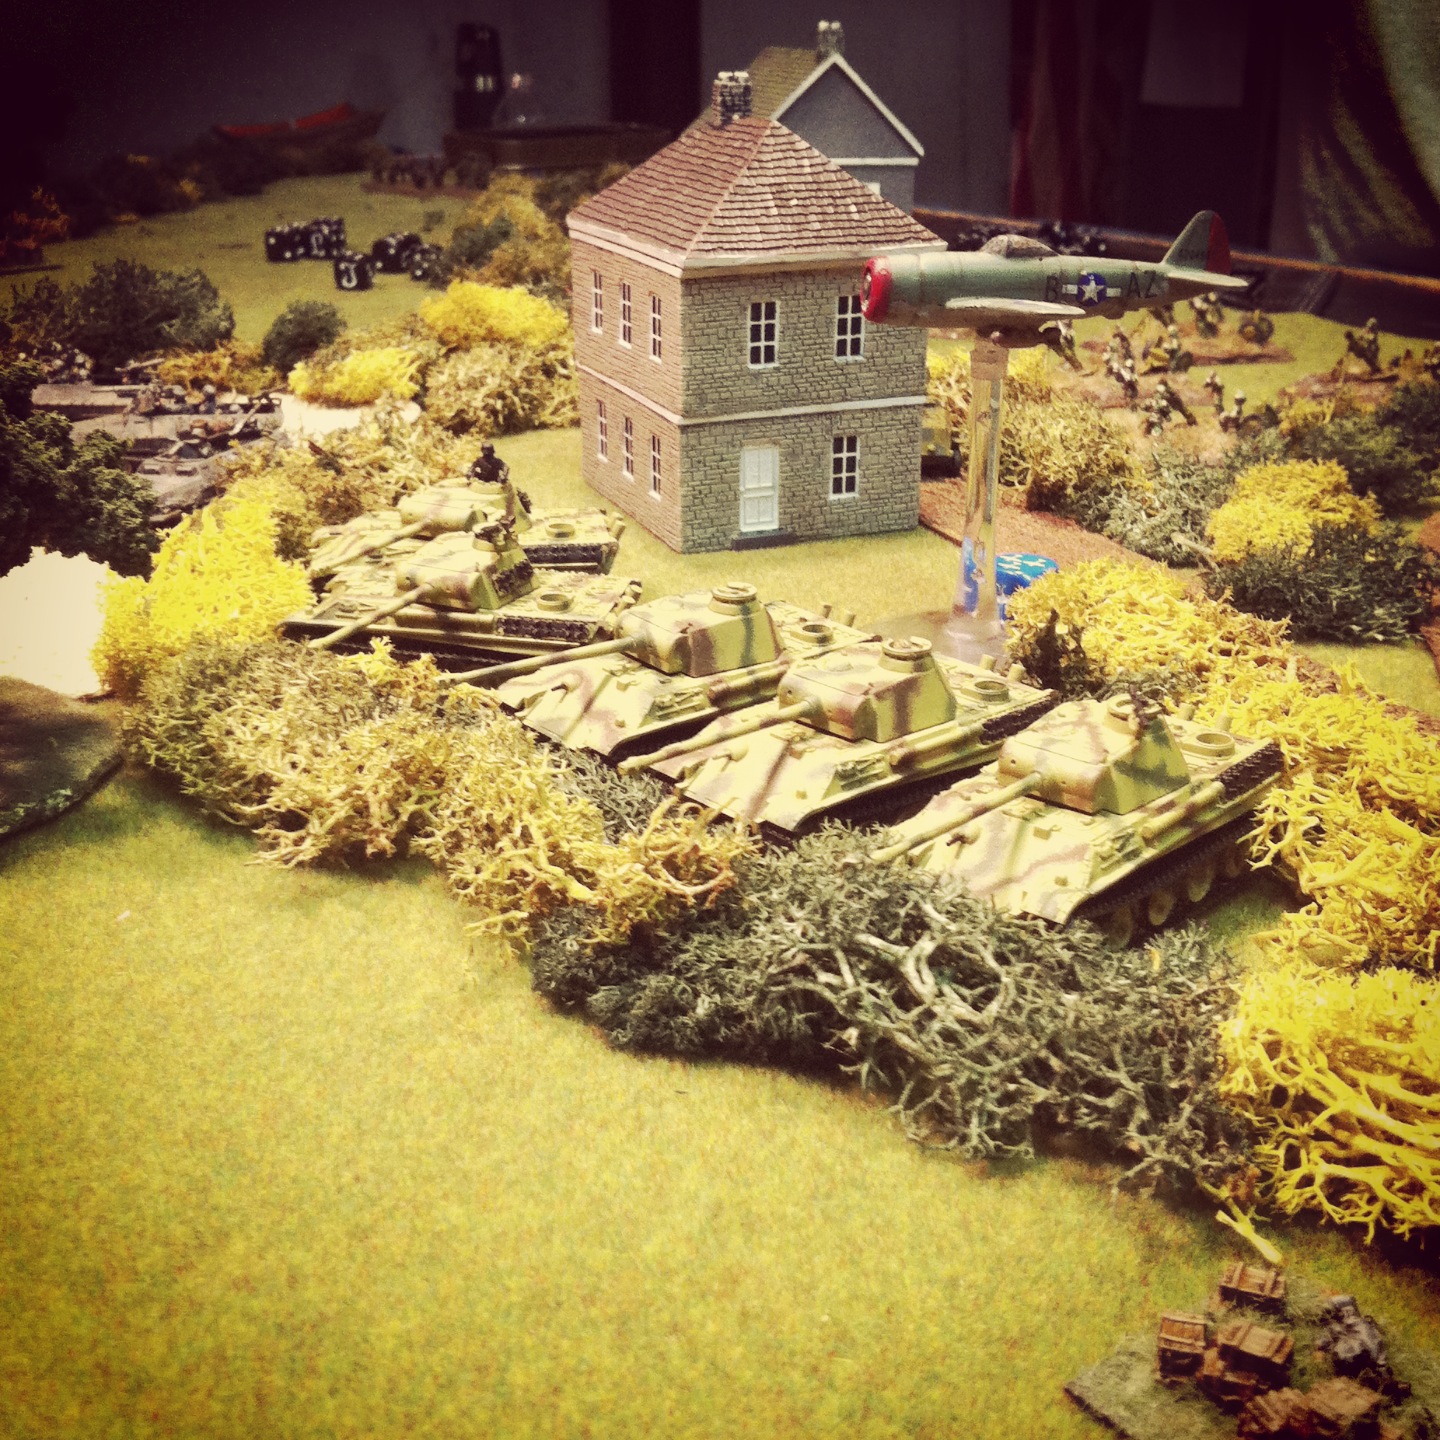
A German Panther and Wirbelwind are destroyed by incoming US 105mm fire

IMG_3400Panthers make through the woods but one bogs in the terrain

IMG_3402The P-47 Thunderbolt attempts a run at a Stug platoon

IMG_3403More fire from the Priests take out another Panther

My plan fell apart as the first German Panzer IV reserves came on the table at the corner behind my Priest battery and made quick work of the nearly-armorless US mobile artillery. I swung my surviving Priest and supporting Sherman around and engaged the Germans at close range with direct fire, but succeeded in only cracking open one German tank. In another turn, the Priests were wiped from the board and only my infantry platoon remained to defend my end of the table. The P-47 appeared again to control the center of the battlefield, but missed on its run. The US center and flank were crumbling by the time turn four approached.

IMG_3405Panzer IV reinforcements surprise the Priests from the rear

IMG_3406The Thunderbolt tries to stall the German armor in the middle of the field

My reserve Shermans came on the table near a farm and quickly engaged with the Panthers which swung to meet the US armor advance. Shots from my heavier 76mm guns lit up a Panther and bailed another’s crew. The German tanks returned fire, destroying all but one 76mm Sherman as more Panzer IVs showed up with the Aufklärungs platoon close behind.

IMG_3407Reserve American 75 and 76mm Shermans roll on the board

IMG_3409The last of the Priests burn as more Panzer IVs appear

In the fifth turn, my final supporting infantry platoon arrived in their halftracks, dismounted and made a desperate run for an objective in the open field. The infantry on my side of the table also broke from the woods in a last-ditch assault on a mass of German tanks creeping toward an objective but were repulsed. With German armor swarming an objective, the game went to the Axis.

IMG_3410A reinforcing column of US rifles follows-up the Sherman advance

IMG_3413A lone Sherman survives as the US rifle company dismounts and heads for an objective

IMG_3414US riflemen break from the woods in a desperate assault on German tanks at an objective

IMG_3415With tanks aflame in the fields, the Germans take an objective

Clearly, my US plan from the outset was a stretch. Had I taken the more historic approach of Patton in the Lorraine Campaign of 1944, a fully-armored US force may very well have stood a fair chance against all the German tanks shuttling here and there on the tabletop. Balancing history and what-ifs is what makes playing Flames of war so engaging over and over again, but next time I’ll be careful not to second-guess the command decisions made in Northern France some 70 years ago.

Flames of War: Fielding the FOW M10 Tank Destroyer Platoon

m10

The Blitzkreig of German armored forces is one of the more enduring tactics introduced in World War II. Swarmed masses of German tanks and mechanized forces in the early war period rolled through Poland, France, Belgium and the Netherlands in Western Europe and punched into the Soviet Union with Operation Barbarossa in 1941. With early Panzer and later Panther and Tiger tanks ruling the battlefields of Europe, Allied forces struggled for solutions to crack the German tide of iron.

m10normandy

A US M10 tank destroyer comes ashore in Normandy after D-Day in 1944

By mid-war, the Americans had a solution with the M10 tank destroyer. Introduced first into the battlefields of North Africa in 1943, the M10 GMC (“gun motor carriage”) carried a big 3-inch/76mm gun and on a Sherman hull. After success in Africa against earlier model German tanks, M10s became part of the post-D-Day Allied breakthrough campaign. While effective against Panzer III and IV tanks, more heavily-armored Panther and Tiger tanks still proved problematic. Luckily, the M10 was supplemented by the British-modified Sherman 76mm Firefly and the later US-built M18 Hellcat which was quicker on the field. The combination of these three tank destroyers, along with the stalwart work of Allied infantry and deadly air support, turned the tide in Europe.

fowm10set

One of my earliest 15mm WWII purchases years ago, and somewhat at random, was the now-discontinued M10 Tank Destroyer Platoon set from Flames of War. I think at the time, I just liked the look of the models and I was looking to fill-out my new US forces with more variety. To get to a full platoon of four M10s, a fellow club member at Metropolitan Wargamers in Brooklyn, NY recently gave my two more M10s to which I’ve added an additional M20 scout car.

IMG_3389New M10 tank destroyer and M20 scout car

IMG_3388New M10 tank destroyer

IMG_3387New M20 scout car

IMG_3390US tank destroyer platoon with new models (left) and older models (right)

With my existing and new section sections, I now can field a full tank destroyer platoon using a variety of Allied Late War European lists. Anti-tank tactics in the game provide multiple opportunities for the M10 platoon to be used in combination with infantry and other Allied armor on the game table. With optional deployment as a recon platoon using the M20 scout cars, the M10s can create ambushes to wreak havoc on German tanks. Admittedly, using this full platoon will take some practice but I’m certain they’ll be causing headaches for my German opponents in the very near future.

“The Harlem Hellfighters” by Max Brooks

harlemhellfightersbook

My interests in American history, graphic novels and little-known accounts of war have recently intersected with gripping The Harlem Hellfighters by Max Brooks. Written by Brooks — the well-known author of World War Z — and illustrated by Caanan White, The Harlem Hellfighters recounts the struggles and victories of the 369th Infantry Division as the first African-American regiment to see combat in World War I.

369th poster

Period poster for the 369th Infantry Regiment

The 369th was composed of a volunteers from many backgrounds reflective of the Harlem Renaissance era’s diverse black population crowding the streets of northern Manhattan. The volunteers included Caribbean and African immigrants, migrants from the American South and native-born New Yorkers. As a green fighting force, the urban laborers, artists, musicians, farm workers and students who fought as the Harlem Hellfighters went on to distinguish themselves in the late stages of WWI and became among the first American Expeditionary Forces to push over the hard-fought German lines.

369th band

James Reese Europe (left) and members of the 369th Infantry Regiment marching band

Brooks has a long-held interest in the Hellfighters, and he had tried unsuccessfully over the years to bring a script to movie or television production. Following on the international success of World War Z, Brooks decided on the graphic novel format to bring the Hellfighter story to a mass audience. Based on real characters in a fictionalized story, the book traces the regiment’s path from basic training in a Jim Crow American South to the trenches of Europe under the command of the French army. Even after winning distinction in early engagements, the members of the Hellfighters ran up against racism which followed them to Europe.

The story of band leader James Reese Europe forms just part of the tale, but is illustrative of both the acceptance of the arrival of black US troops and their rejection by the laws and traditions of white Europeans and their countrymen at home and abroad. Reese is largely credited with introducing jazz to European audiences, and although he would survive the war, he died soon after his return to the States at the hand of fellow band member. The mix of challenges, triumphs and tragedies on and off the field of battle makes the story of the 369th an incredibly compelling story every American should know.

369th trenches

Troops from the 36th Infantry Regiment in the trenches

The Harlem Hellfighters is illustrated in a jagged, dark style by African-American artist White amid pages crowded with rich individual character stories and broader narratives of an era marked by the horrors of modernized warfare as well as lynchings and street-beatings. To the interested reader, there are many jumping-off points into a deeper story of the 369th and their ripple-effects on 20th-century American race history still being wrangled with today.

The 369th arrived back to the States and were celebrated with a heroic parade in New York City. The 369th Infantry Regiment Armory in northern Manhattan still stands today as one of the few monuments to this often-forgotten chapter in a war which is also largely-ignored in our teaching of US history. For the veterans of the Harlem Hellfighters, their fight in Europe would continue back home through the labor and civil rights movements in the decades to come.

Just ahead of the book’s publication in early April, Sony Pictures announced it had acquired the rights to bring the story of the 369th to the big screen with production backing from Will Smith’s Overbrook Entertainment. With the The Harlem Hellfighters and the promise of a movie adaptation, hope springs anew that 100 hundred years on the American men of the 369th get the recognition they earned in spirit and blood.


New Game Weekend: Axis & Allies: Guadalcanal

AandAguadalcanalboxThe  Battle of Guadalcanal between August 1942 and February 1943 was the first major Allied campaign set on crushing the Japanese foothold in the Pacific region. Fought in bloody air, sea and island engagements, the seven months of battle resulted in a significant shift in superiority to the Allies in the region and led to the beginnings of the downfall of the Japanese Empire in the Pacific.

Most of my wargaming happens on dry land and usually somewhere in Europe. The Pacific War in WWII always seems so separate, sprawling and overwhelming to me with its mix of different combined combats, complex supply lines and different territorial agendas. That said, dabbling in this portion of the war gives me a chance to use some very different tactics and strategies I’m not used to gaming. So, with a short couple of hours to spare recently at Metropolitan Wargamers in Brooklyn, NY, I tried my hand at some WWII Pacific action with Axis & Allies: Guadalcanal.

AandAlogo

The popular Axis & Allies boardgame series from Avalon Hill (owned by Wizards of the Coast) has been around for more than 20 years and covers many specific eras, battles and theaters of WWII. More recently, a WWI game has also been added in time for the 100th-anniversary of that conflict. The A&A games are readily available from a number of book and department stores, and they vary in complexity and time commitment. Mt first introduction to the series was with the Spring 1942 game which weaned my younger son and I off much simpler war board games like Risk forever. The great design, hundreds of sculpted plastic playing pieces, economic factors and combat mechanics make the A&A games a great way for old and new wargamers alike to engage in hours of very satisfying play.

AandAguadalcnalcontents

A&A: Guadalcanal board and game pieces (including the “battle box” at left)

The Guadalcanal game presents a map of the South Pacific islands and sea zones contested by US and Japanese forces. Victory points are determined by building and controlling island airstrips. As in the actual campaign, quickly capturing islands and building airstrips is critical not only to endgame victory but in providing bases to supply and deploy additional forces. Aside from capturing islands, controlling the three main sea zones at the center of the board (aka “The Slot”) is key in controlling the transport of crucial supllies and reinforcements.

The combat system in the game uses a “battle box” containing a dozen dice which are shaken and reveal various randomized target effects. With land, air and sea units crowding the board, the confused mass of combined arms is neatly accounted for with a few shakes of the unique battle box.

IMG_2895

Axis & Allies: Guadalcanal at Metropolitan Wargamers

In my first play as the Americans, I quickly captured the southern half of Guadalcanal while my Japanese opponent began a big push with his navy toward The Slot. In the second turn I was able to press on to Malaita and build a second airstrip of Guadalcanal to take an early lead in victory points.

With the Japanese navy massing in the central sea zone I made a risky gamble in turn three sending in a huge air attack which destroyed a few ships and damaged a battleship but was repulsed with overwhelming deadly force. With a vastly-depleted air force, I scrambled to build myself back up as the Japanese built an airstrip on Bougainville and I made moves toward Santa Isabel. By turn four my navy headed west along the southern coast of New georgia in the hopes of catching the Japanese navy from behind. While I was able to destroy a number of Japanese submarines at the western edge of the island, my attack on Santa Isabel was halted and the Japanese took the game.

A&A: Guadalcanal moves fast for two players, playing in about 2 hours. The short nature of the game makes every move from turn one onward important with little room for error. My lesson learned in the first game was not to run too fast toward facing-off against the superior Japanese fleet early, perhaps opting instead for a greater build-up of supply to gain island footholds to launch later game attacks.

The Axis & Allies series is fantastic for out-of-the-box playability with the different game versions each offering realistically-specific game dynamics for several WWII theaters and battles. Not being a big Pacific War gamer, A&A: Guadalcanal makes for a perfect way for me to get my feet wet and expand a bit of my gaming experience to another corner of the 20th-century’s greatest conflict.

Flames of War: Fielding the Guards Armoured Division Part II

UKguards

Since starting with 15mm World War II Flames of War gaming a number of years ago now, my Allied modelling has focused exclusively on United States forces. Beginning with basic US infantry rifle, artillery and armored companies, I eventually added in some US Airborne forces plus some air support. Recently I’ve felt maxed-out on the US, so I’ve taken to looking to build out my Allies with another country’s army.

eagUARDSTEMP

After a bit of research and reading, I’ve settled on the British Guards Armored Division. I began this new journey with the plastic Guards Armored Sherman and Firefly models included in the excellent Open Fire! starter game box set. While these can be played as Allied support to my existing US Airborne, I really wanted to give the British their own space on the board.

IMG_2737

Along with my existing plastic Shermans and Fireflies I already have painted-up, I bought another set from a fellow member at Metropolitan Wargamers in Brooklyn, NY. This gives me a full four-platoon armoured squadron with four Shermans in the command section.

IMG_2738

 To fill out my Guards Armored Division, I’ve also added the special Lieutenent Colonel Joe Vandeleur warrior character. As a leader of the Irish Guards during such famed actions as Operation Market Garden, Vandeleur proved to be a solid field commander known for his by-the-book leadership.

Caine

 Michael Caine as Lt. Col. Joe Vandeleur in ‘Bridge Too Far’

I’m a big fan of 1977’s A Bridge Too Far in which Michael Caine co-stars as Vandeleur during Market Garden, so I couldn’t help but add this model to my new force with the colonel riding upright in his armoured car.

IMG_2735

IMG_2734

IMG_2733

In the coming month or so I’ll be filling out my British force. I have one completed Royal Artillery section and another on the workbench, enabling me to field a full eight-battery platoon. I’ve also got Battlefront’s British Rifle Company box allowing me to march three full platoons on the table of what was known affectionately during WWII as the PBI – Poor Bloody Infantry.

IMG_2732

I’m really looking forward to playing with my new British units this coming year, along with all their special national rules. The Brits are really going to open possibilities with new scenarios and new fronts. As Caine says as Vandeleur in A Bridge Too Far, “I’ve got nothing else planned.” At least for now.

Related articles

Flames of War: La Fiere Causeway 1944 Scenario

lafiere1944

In the late evening of June 5th and pre-dawn hours of June 6th, 1944, a steady flow of Allied paratroopers began dropping throughout the French countryside to clear the inland way for the D-Day beach landings to come later that morning. Like elsewhere, scheduled US Airborne drops near Sainte-Mère-Église left paratroopers scattered around the countryside. To the southwest of the town’s target area, a contingent from the 82nd Airborne found itself near a quaint French farm compound and a small bridge over the Merderet River. Recognizing the river crossing as a key defensive line, the assembled paratroopers established a perimeter along the river. A few hours later, the US troops were met by a German Grenadier and armored battallion hoping to stall the Allied invaders from moving inland. The battle that erupted at the river would rage for three days until the German force withdrew in time for the arrival of US infantry and Sherman forces rolling in from Utah Beach on June 9th.

causewaygamemap

The Flames of War website offers a basic scenario of the encounter at La Fiere Causeway suitable for 1500 point forces on either side. This past weekend a visitor to Metropolitan Wargamers and I had a go at the scenario with my US Airborne facing off against his Germans. As with the historical record, my force held closely to the scenario’s outline with two parachute rifle platoons with plenty of bazookas supported by a platoon of light machine guns, parachute engineers, a glider artillery platoon and M18 tank destroyers. On the German side of the table, my opponent lacked the primitive French tanks that historically fought at the battle. Instead, he filled his force with a number of Grenadier platoons mounted in half tracks backed by two small platoons of Panzer IVs and a Nebelwerfer rocket battery.

IMG_2161

IMG_2163

As per the scenario rules, each of us chose half of our platoons to be held in off-table reserve. Beginning with the Germans, we alternated deploying our starting forces on the table. My American engineers took up position in the courtyard of the farm on my left flank, the machine guns lined the hedge on the other side of the bridge and a rifle platoon deployed on my far right flank. As expected, the Germans deployed a tank platoon at the road entry point and the rocket battery and a mounted Grenadier platoon in the field on their left flank.

IMG_2165With the Germans taking the first turn, the first Panzer IV platoon made way for the river crossing at the middle of the table while the half tracks rolled for the ford on the American right flank. Deployed in and around the farm buildings, the US engineers quickly laid down mines at the foot of the bridge and an Airborne platoon crossed the river to meet the approaching Grenadiers and the rocket battery beyond.

IMG_2169

IMG_2167With turn three, German tank and Grenadier reserves appeared on the table edge opposite the farm and pointed their way toward the French buildings and the nearby bridge. Four US bazookas bailed one Panzer in the clearing across  the river but three other Panzers made it across at the middle ford. US tank destroyer reserves came on the table and immediately poured machine gun fire into the half tracks across the river. The Grenadiers bailed from their transports and the half tracks raced to the rear while the Nebelwerfers failed to score effective shots in the hearty US Airborne troops.

IMG_2171With the Grenadiers on the run back to defend the rocket battery, the US tank destroyers turned their attention on the Panzers and quickly destroyed one while the others continued to push on unharmed due to the protection of their side Schurzen armor. At the farm, the approaching Panzer and Grenadier platoons exchanged fire with the engineers and riflemen defending behind the stone walls. Even with heavy casualties, the engineers repelled a direct assault by two Panzers as a fresh rifle platoon rushed to reinforce the farmyard strongpoint.

Alas, by the fifth turn the game was effectively over for the Americans as the late-arriving US howitzers once again failed to hit in one final volley against the Panzers rushing to seize the objective. The Americans had chased both Grenadier platoons from the field and destroyed a couple Panzers, but the Airborne focus on defending rather than seizing objectives allowed the Germans to take the table.

At the game’s outset, both of us shook our heads with the difficult mission ahead of us. The Airborne never effectively engaged in a close-quarters assault that might’ve taken out more of the tanks sooner on in the game, and artillery on both sides contributed nothing to the game. As with the last few FOW games I’ve played, the engagement at La Fiere once again pointed out the strength and tactical importance that infantry played in WWII. Keeping men moving and in the fight is key to victory, and this time around the German troops got the better of the day.

Flames of War: Metropolitan Wargamers Summer 2013 FOW Day

Taking advantage of a renewed interest in the popular Flames of War 15mm miniatures WWII wargame, Metropolitan Wargamers in Park Slope, Brooklyn hosted a big day of gaming this past weekend. Both experienced and new players alike came together on two of the club’s largest tables to play to big scenarios over the better part of Saturday afternoon.

Metropolitan Wargamers

MWGFOWI mention it often, but the amazing group of people who make up the Metropolitan Wargamers club bears mentioning again. The club will celebrate its 20th anniversary next year, and it’s a real gamers paradise for those of us living in New York City. Visitors and a core group of long-time members drop by the club throughout the week and engage in all manner of games, from boardgame favorites and card games to large scale historical miniatures battles and grand strategic campaigns. The club’s space occupies an entire basement-level of a typical Brooklyn rowhouse and is lined with shelves full of games and miniatures collected by members over two decades. Playing space includes a number of the club’s award-winning sand tables, regular tables and racks on which ongoing games can be stored as they are played out over the course of weeks or even months.

The club is an incredibly diverse and supportive environment for those of us who share our common passion in gaming. With 2014’s anniversary coming up, I hope to dedicate more space here in the near future with some history and perspectives from members.

Summer 2013 FOW Day

totalwarThe folks at Flames of War provide special Total War rules for gaming large-scale matches like those we played this past weekend. With a few weeks of planning, I helped round up 10 players for the day’s game. We settled on two games from the late war, one each on the Eastern and Western Front. The Western Front game featured two teams of two players each on the German and US sides with each team running 3000 points on a 4’x8′ table. On the Eastern Front, two three-player teams squared off in a tank-heavy scenario on one of the club’s famed sand tables with each team compromised of 5000 points. Each game featured endgame objectives and were slated to run to eight turns. With games these large, we were up for a very long day of action.

On the Eastern Front, the table was wide open with widely-sloping sculpted sand hills, small copses of trees along each long side and a Y-shaped road bisecting the table. I spent the day riveted to my own game on the Western Front table, but the German and Russian armor spent the day pounding away at each other. By mid-day, things had looked pretty good for the Germans as many destroyed Russian tanks stood smouldering midfield. All that changed in the latter half of the game as the Russians rallied to victory.

IMG_1908

IMG_1912

My game on the Western Front featured a generic French landscape cut up into winding narrow roads lined with the notoriously difficult bocage hedgerows which stymied both sides in the engagements fought in the region throughout 1944 and 1945. A church stared across the board to a stone bridge crossing a narrow stream to a small village. On the other end of the table, a small farm was set beside two wheatfields with two more rural stone houses in the near distance.

IMG_1903Our US plan was to place the majority of our armor on our right flank, supported by mobile infantry deployed in a small wood. On the left flank, the US Airborne deployed just outside the wheatfields with its small parachute battery to the rear. At the center of the board, our M7 Priests with their 105mm guns formed another battery while one lone Airborne platoon pushed to hold the buildings in the town with a vantage covering the bridge.

The game started poorly for the Americans as the Germans quickly pummeled the American Shermans and kept the infantry hiding in the woods. In the center, the US infantry struggled to occupy the buildings as the Germans quickly rolled five exceedingly threatening tanks behind a row of bocage overlooking two objectives. The American’s P7 Thunderbolt was likewise ineffective through the first few turns of the gaming, missing all targets except on German tank which burst into flames while bogged over a hedgerow.

IMG_1918

IMG_1906

IMG_1916

The fight on the American left went better from the start as the US Airborne filled the wheatfields and headed for the hedge and road beyond. A brief scare from a platoon of German Stugs, a row of halftracks and a platoon occupying the farmhouse  was solved with our trusty American Shermans. With a combination of artillery bombardments, heavy fire from the US tanks and some shooting from the advancing Airborne, the crossroads in front of the farm was turned into a smoking mass of destroyed German armor. Just as the German right flank stood wide open to the rolling Shermans, the command tank bogged in the woods where it and its entire platoon would remain for the rest of the game.

IMG_1914

IMG_1924By mid-game things looked good for the Germans, but the resilience of the Americans would prove to be the edge in the second half. The American armor was pretty torn up on our right flank, but the US kept making some remarkable morale rolls to stay on in the fight with the dwindling German tanks. At the center, the Priests had lost one of their guns but snuck back into cover to continue taking direct shots across the river at the remaining German armor. The US Airborne platoon occupying the town’s buildings risked a run toward the river, taking casualties along the way despite the smoke covering the German line on the far side. The fight between the wheatfields and adjoining treeline saw the Germans and Americans whittling each other down.

IMG_1926

IMG_1910

IMG_1920

IMG_1928

In the final turn, the 101st Airborne finally got in close enough for a tank assault, destroying one tank and pushing another back from an objective. It was a bloody fight, but in the end it was an American victory with four of six objectives held. On both tables, it had been a good day for the Allies.

And it was a long one, too. With a nearly eight hours of gaming and only brief breaks to grab a drink from the fridge up front or a hotdog off the grill out back, the two games had been exhausting but enjoyed by everyone – win or lose. That’s the kind of spirit we at the club experience every week, and already there’s some after-action discussion about when we’re planning our next big Flames of War day in Brooklyn.