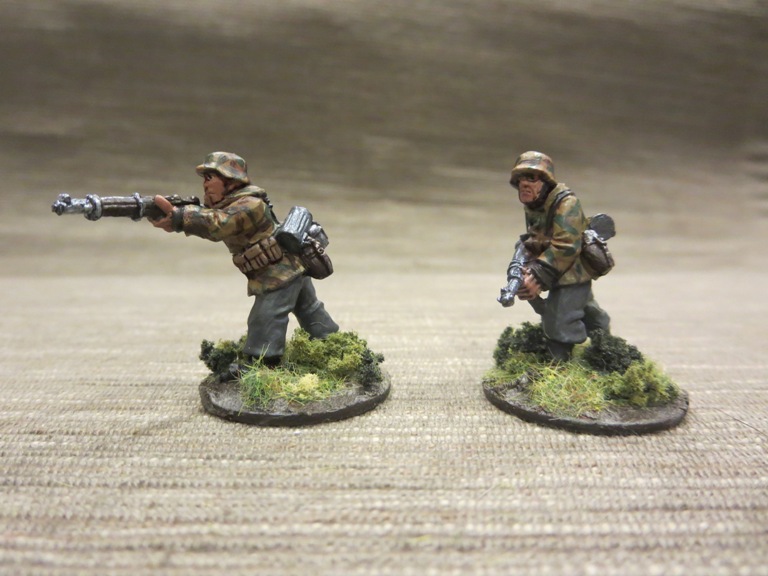
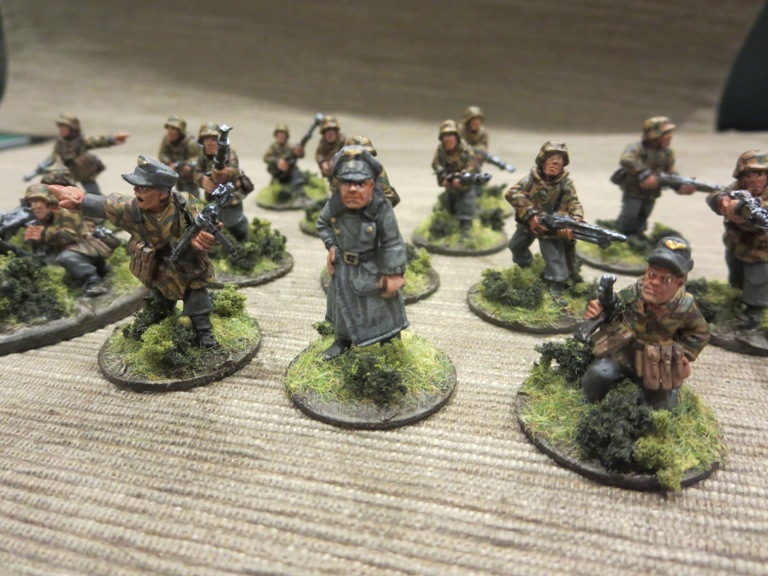
After wrapping up my first 28mm US Airborne troops, I set to work on some Germans. I ordered a bunch of Late War German infantry and command, plus an MG 42 team by Artizan Designs from Brigade Games and received them speedily. The detail in the figures really pops, and the personality and variety in the poses make them really engaging at this scale. I particularly like the stern officer in his greatcoat and the other figures screaming out orders and gesturing on the move. Painting WWII Germans for the first time at this scale, I really wanted to go for more detail than I do at 6mm or 15mm. Artizan Designs offers some great painting references on their website, including a general uniform guide and a lot of detail on German camoflage patterns. Using paints I had on hand plus a few more colors I picked up from Citadel’s paint line, I came up with a palette and painting scheme that produced some great results on my first go. The Artizan figures require little flash clean up before being glued to metal washers. The three man machine gun crew went on a 60mm plastic base I picked up from Proxie Models. Here’s the steps in detail for painting my German infantry.
Painting 28mm German Infantry
Clean flash from metal models with a sharp knife and glue to metal washer or plastic bases.
Apply filler putty to bases. When dry, scrape off excess with a sharp knife.
Basecoat models and bases with flat black spray primer.
Paint smocks and helmets with Tallarn Sand.
Paint pants, soft hats, officer greatcoat and gas mask containers with Skavenlight Dinge.
Paint camouflage on helmets and smocks with alternating Waaagh! Flesh and Dark Brown.
Paint faces and hands with Tallarn Flesh.
Paint packs with Baneblade Brown.
Paint boots and equipment straps Black.
Paint bases, gun stocks, water bottles and helmet straps with Dark Brown.
Apply Agrax Earthshade wash to uniforms, helmet netting, webbing and packs.
Mix 50/50 Baneblade Brown and Off White and lightly dry brush packs, webbing, socks and holsters.
Dry brush pants, soft hats and officer great coat with Light Grey.
Lightly dry brush bases and gun stocks with Baneblade Brown.
Paint metal gun and water bottle parts with black and finish with a light dry brush of Metallic Silver.
Dry brush gasmask containers with metallic Silver.
Paint eyes with small dots of Off White and Dark Brown. Clean up around eyes with Tallarn Flesh.
Mix 50/50 Tallarn Flesh and Off White and brush highlights on cheekbones, chins, forehead, nose and hands.
Cover bases in white glue and cover in 50/50 mix of fine light green and dark green grass flock.
Glue small pieces of clump foliage to base.
Spray coat completed models with matte finish.
Helmets, smocks and pants base coated on the MG 42 team and infantry models
Infantry and officer uniforms base coated
Flesh base coats and helmet camouflage added to infantry and officer
Camouflage painted on helmets, and gun stocks and water bottles painted brown
Equipment detail being painted
Here’s a round up of my finished German infantry from Artizan Designs…
Now that I’ve got my core German and US forces completed, I’ll be looking to fill out forces on both sides with some additional support weapons and some more infantry from some other manufacturers. In no time at all, my 28mm force continues to grow.
After a lot of modelling and gaming World War II over the years at the 15mm scale and some toes dipped into 6mm last year, I decided to move up to 28mm at the beginning of 2015. At this larger scale, there’s a lot less needed in terms of getting numbers of models on the table and there’s an opportunity for much more detail and personality in the figures, too. At about $2 USD per metal figure on average across a number of manufacturers, a more than healthy sized force for squad level engagements can be had with 30-40 or so figures on a side for under $100 USD.
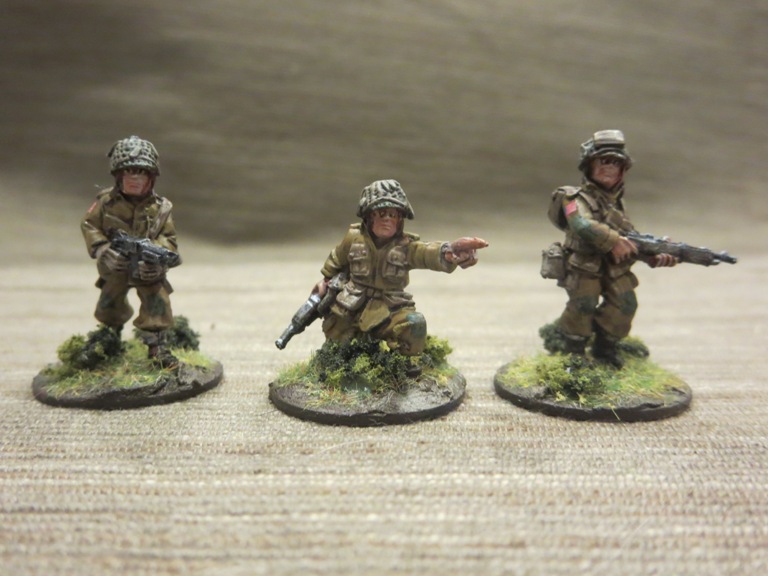
To get started, I happened a timely sale deal for Artizan Designs miniatures ordered from Brigade Games. I’m very much a late war post-D-Day player, so I purchased a variety of US Airborne riflemen, officers, characters and a M1919 30 cal. machine gun team. I really like the detail in sculpts on the Artizan figures, so the prospect of getting these guys painted up was pretty exciting.
Artizan Designs provides a lot of painting reference information on their site, and the US Airborne painting guide gave me a good jumping off point. I have plenty of experience painting the US 101st Airborne Division in 15mm, and the larger 28mm scale gave me the opportunity to work through a lot more detail with my miniatures. My existing paint inventory as well as a few extra colors from Citadel gave me all I needed to whip up a solid painting scheme.
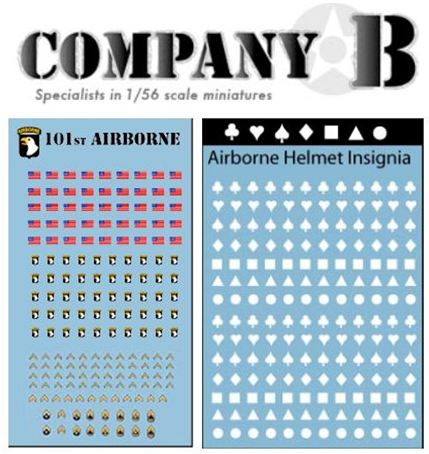
US 101st Airborne decals from Company B
To finish off my figures, I really wanted to add that last bit of realism at this scale with the appropriate patches and uniform markings. Since my painting skills don’t extend to the level of detail needed in painting patches and insignia, I was pleased to come across decals at this scale from Company B.
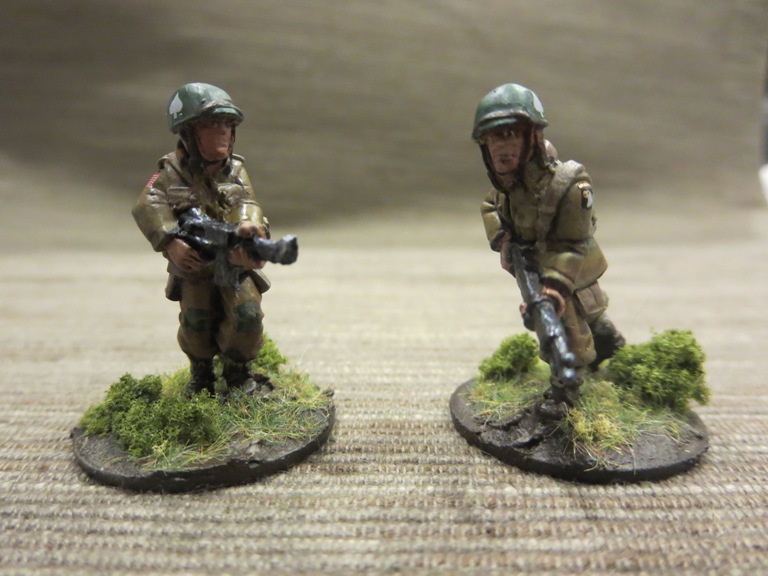
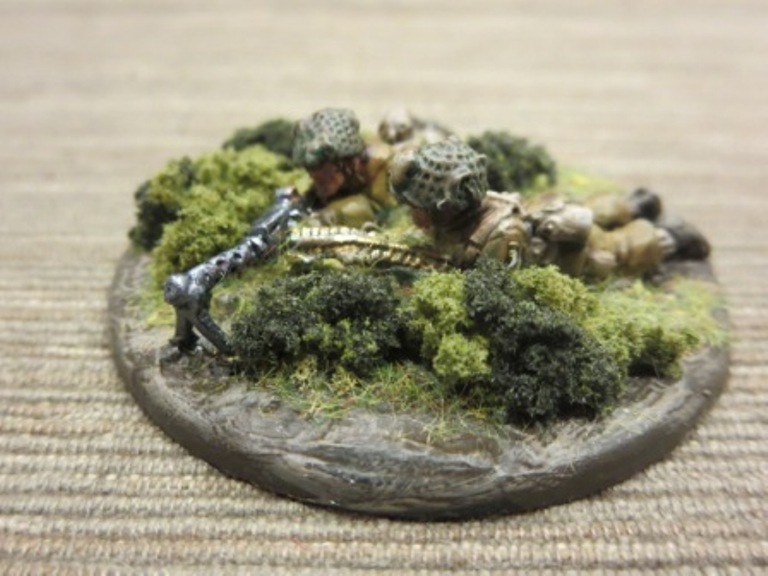
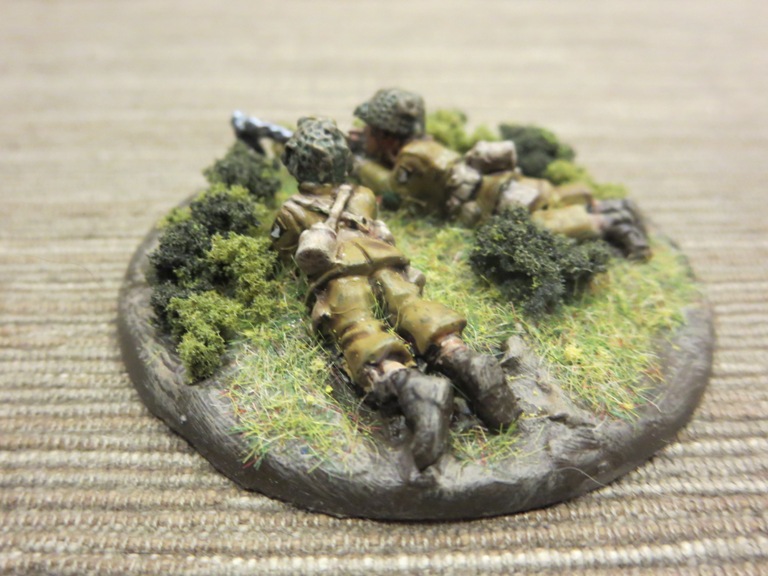
After some minimal flash clean-up, the individual figures got glued to metal washer bases. The prone LMG team went on a 60mm plastic base from Proxie Models and the two-man team on the move was glued to a larger metal washer. Here’s the painting guide in detail for my US Airborne:
Painting 28mm US Airborne
Clean flash from metal models with a sharp knife and glue to metal washer or plastic bases.
Apply filler putty to bases. When dry, scrape off excess with a sharp knife.
Base coat models and bases with flat black spray primer.
Paint uniforms and bandages on helmets with Tallarn Sand.
Paint helmets and knee and elbow patches with Waaagh! Flesh.
Paint faces and hands with Tallarn Flesh.
Paint webbing and packs with Baneblade Brown.
Paint bases, boots, gun stocks and helmet straps with Dark Brown.
Apply Agrax Earthshade wash to uniforms, helmet netting, webbing and packs.
Mix 50/50 Baneblade Brown and Off White and lightly dry brush packs, webbing and socks.
Lightly dry brush bases, gun stocks, helmet netting, holsters and elbow and shoulder patches with Baneblade Brown.
Paint metal gun parts with black and finish with a light dry brush of metallic silver.
Paint eyes with small dots of Off White and Dark Brown. Clean up around eyes with Tallarn Flesh.
Mix 50/50 Tallarn Flesh and Off White and brush highlights on cheekbones, chins, forehead, nose and hands.
Apply decals to shoulders and helmets, followed by a coat of Solvaset decal fixative from Walthers.
Cover bases in white glue and cover in 50/50 mix of fine light green and dark green grass flock.
Glue small pieces of clump foliage to base.
Spray coat completed models with matte finish.
Filler putty applied to US Airborne .30 cal machine gun teams
Helmet and uniform base coats on US Airborne riflemen
Flesh base coat on hands and faces on riflemen and command figures
Uniform, helmet and flesh base coats on the .30 cal machine gun teams
Washes and dry brush layers added to the .30 cal machine gun models and bases
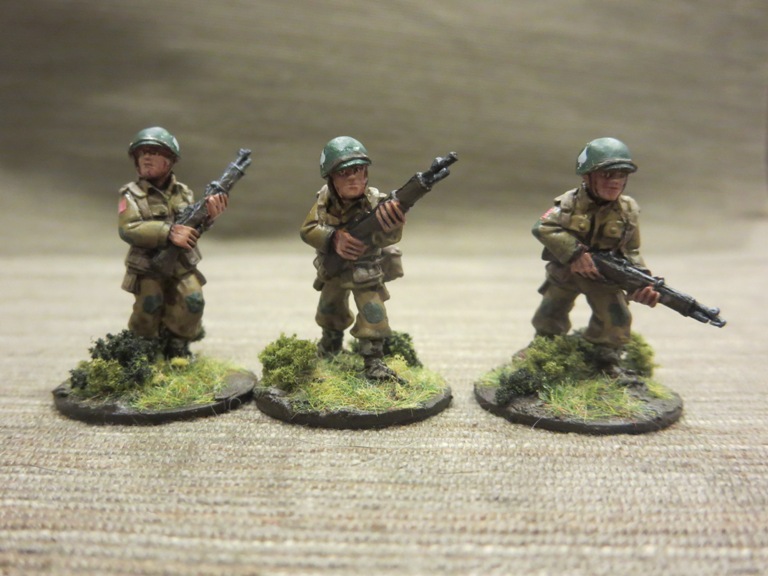
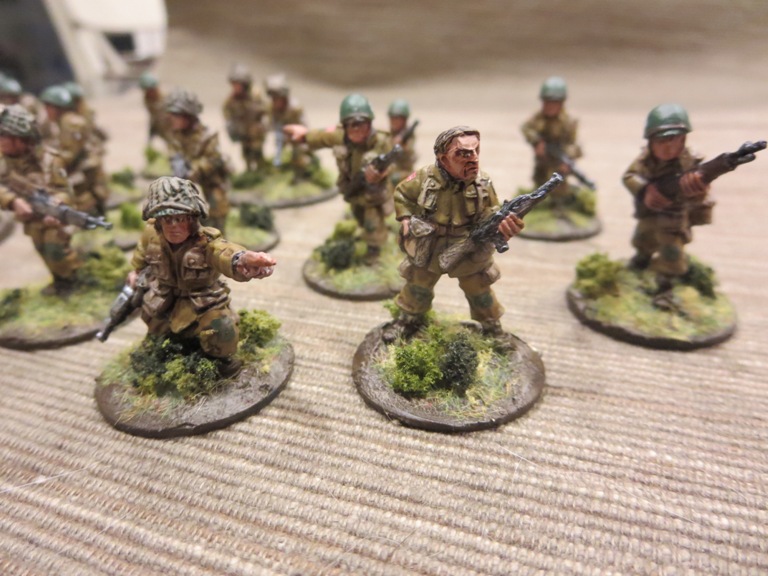
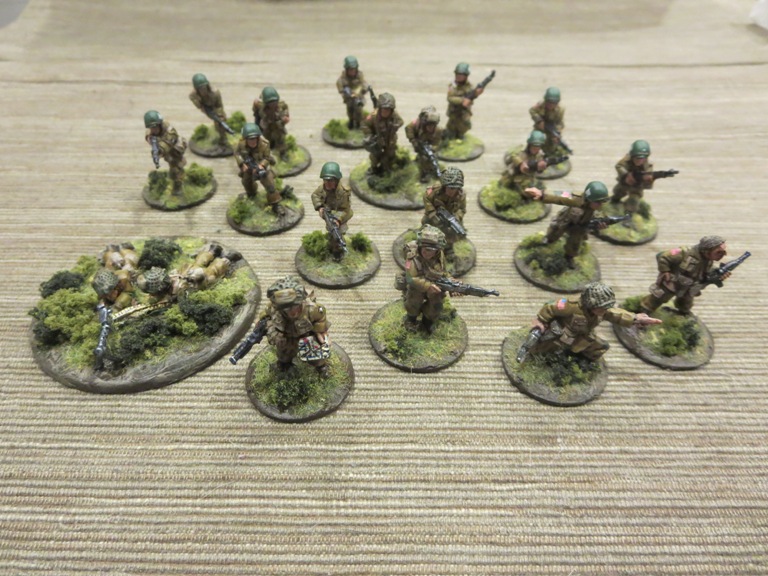
And now, a whole series of my completed US airborne troops from Artizan Designs…
I still want to fill out my US forces with some additional troops and support weapons, so there will be more to come from Artizan and some other manufacturers. Getting some Germans ready for the table is another pending project on the workbench. Transport and armored vehicles are also very much on my mind. I’m also still debating rule sets, and I’ve been reading up on a variety including the popular Bolt Action from Warlord Games and Nuts! from Two Hour Wargames. With my first 28mm troops ready for action, WWII at a new scale is keeping the period exciting for what I’m certain will be another new year of painting and playing.
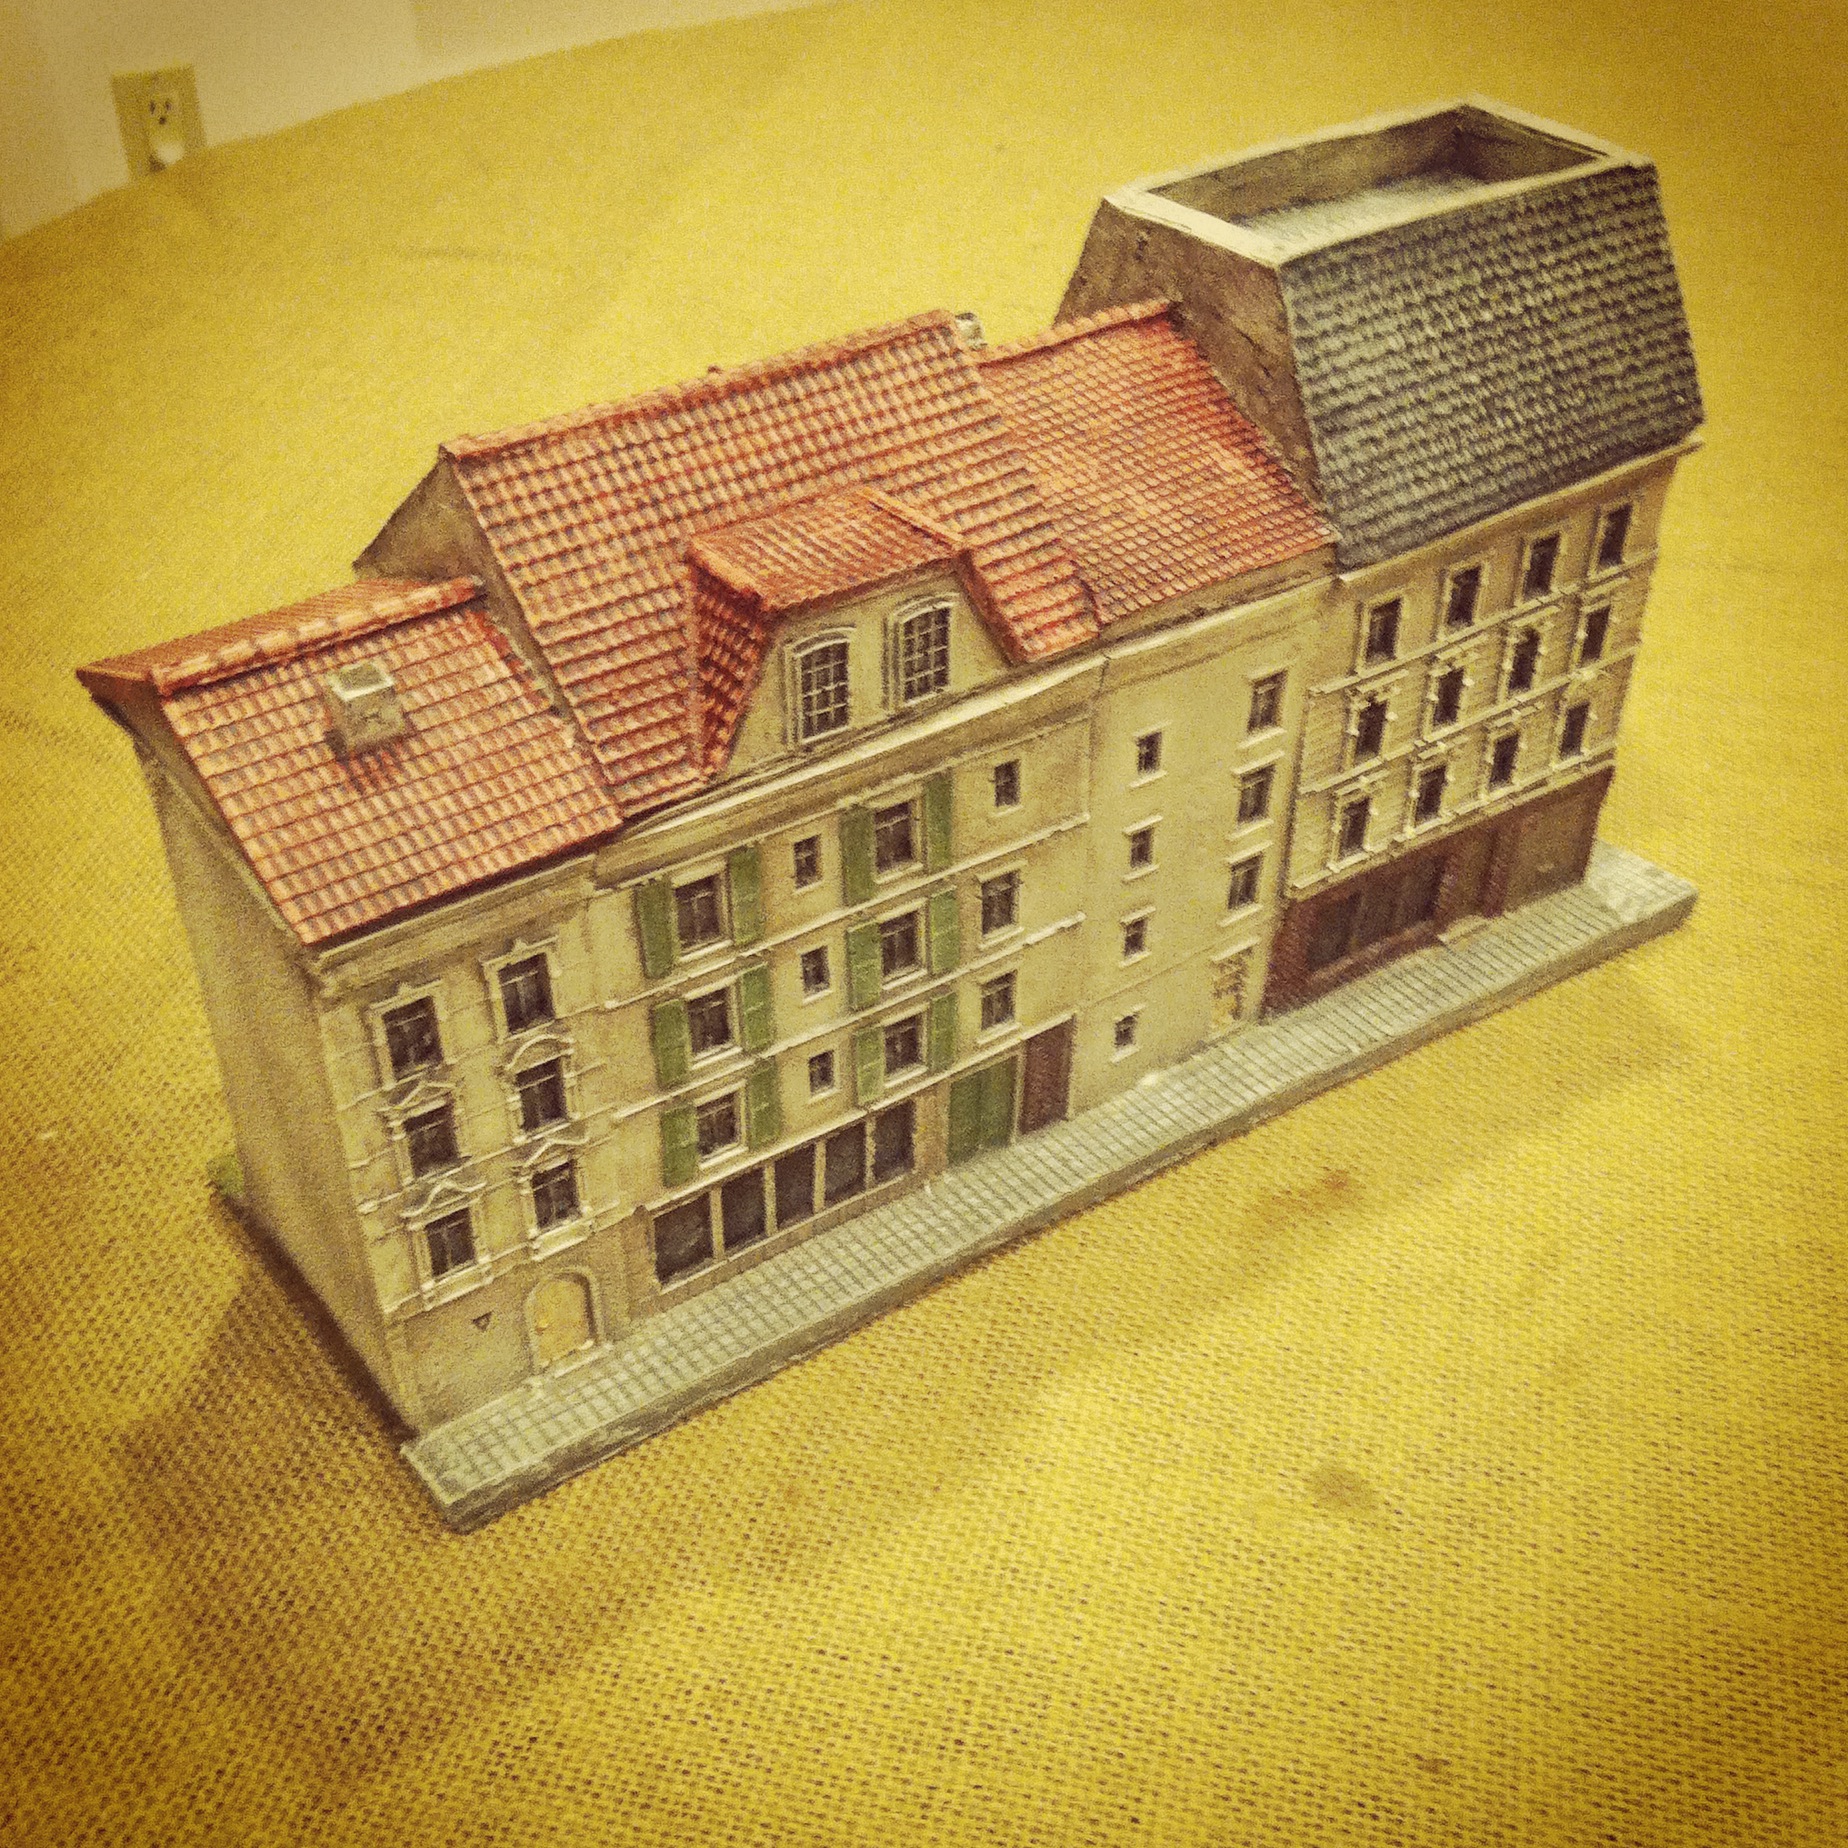
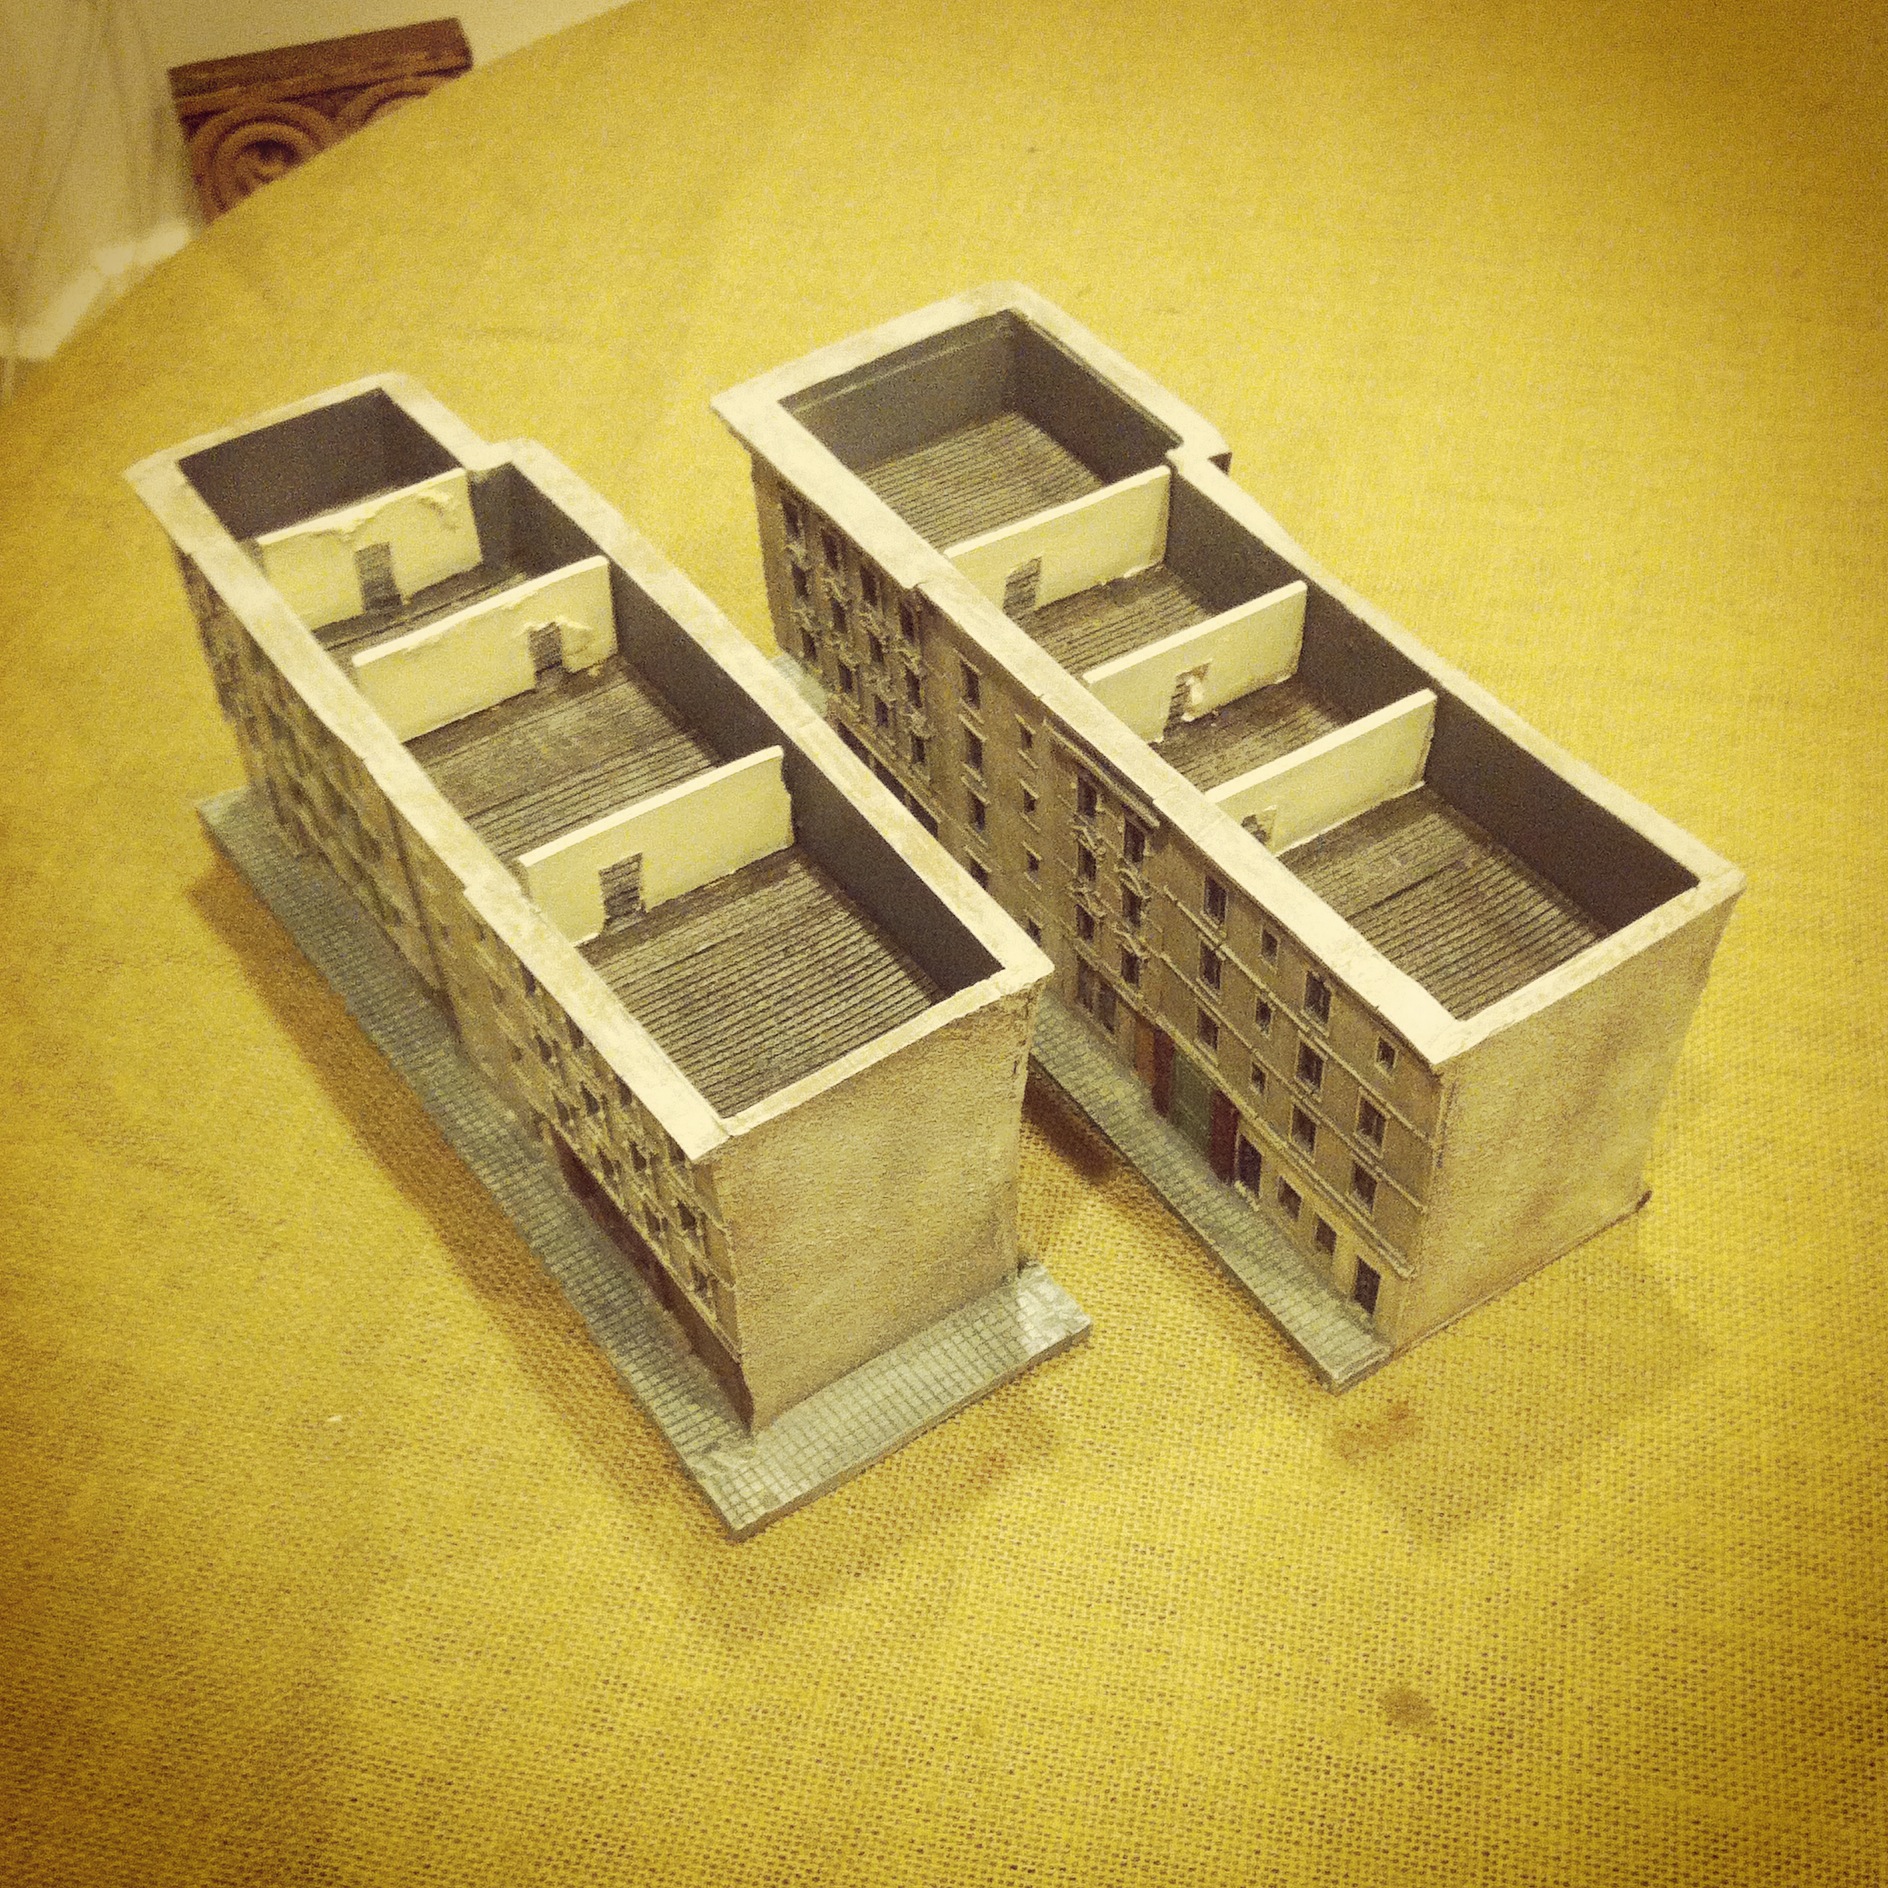
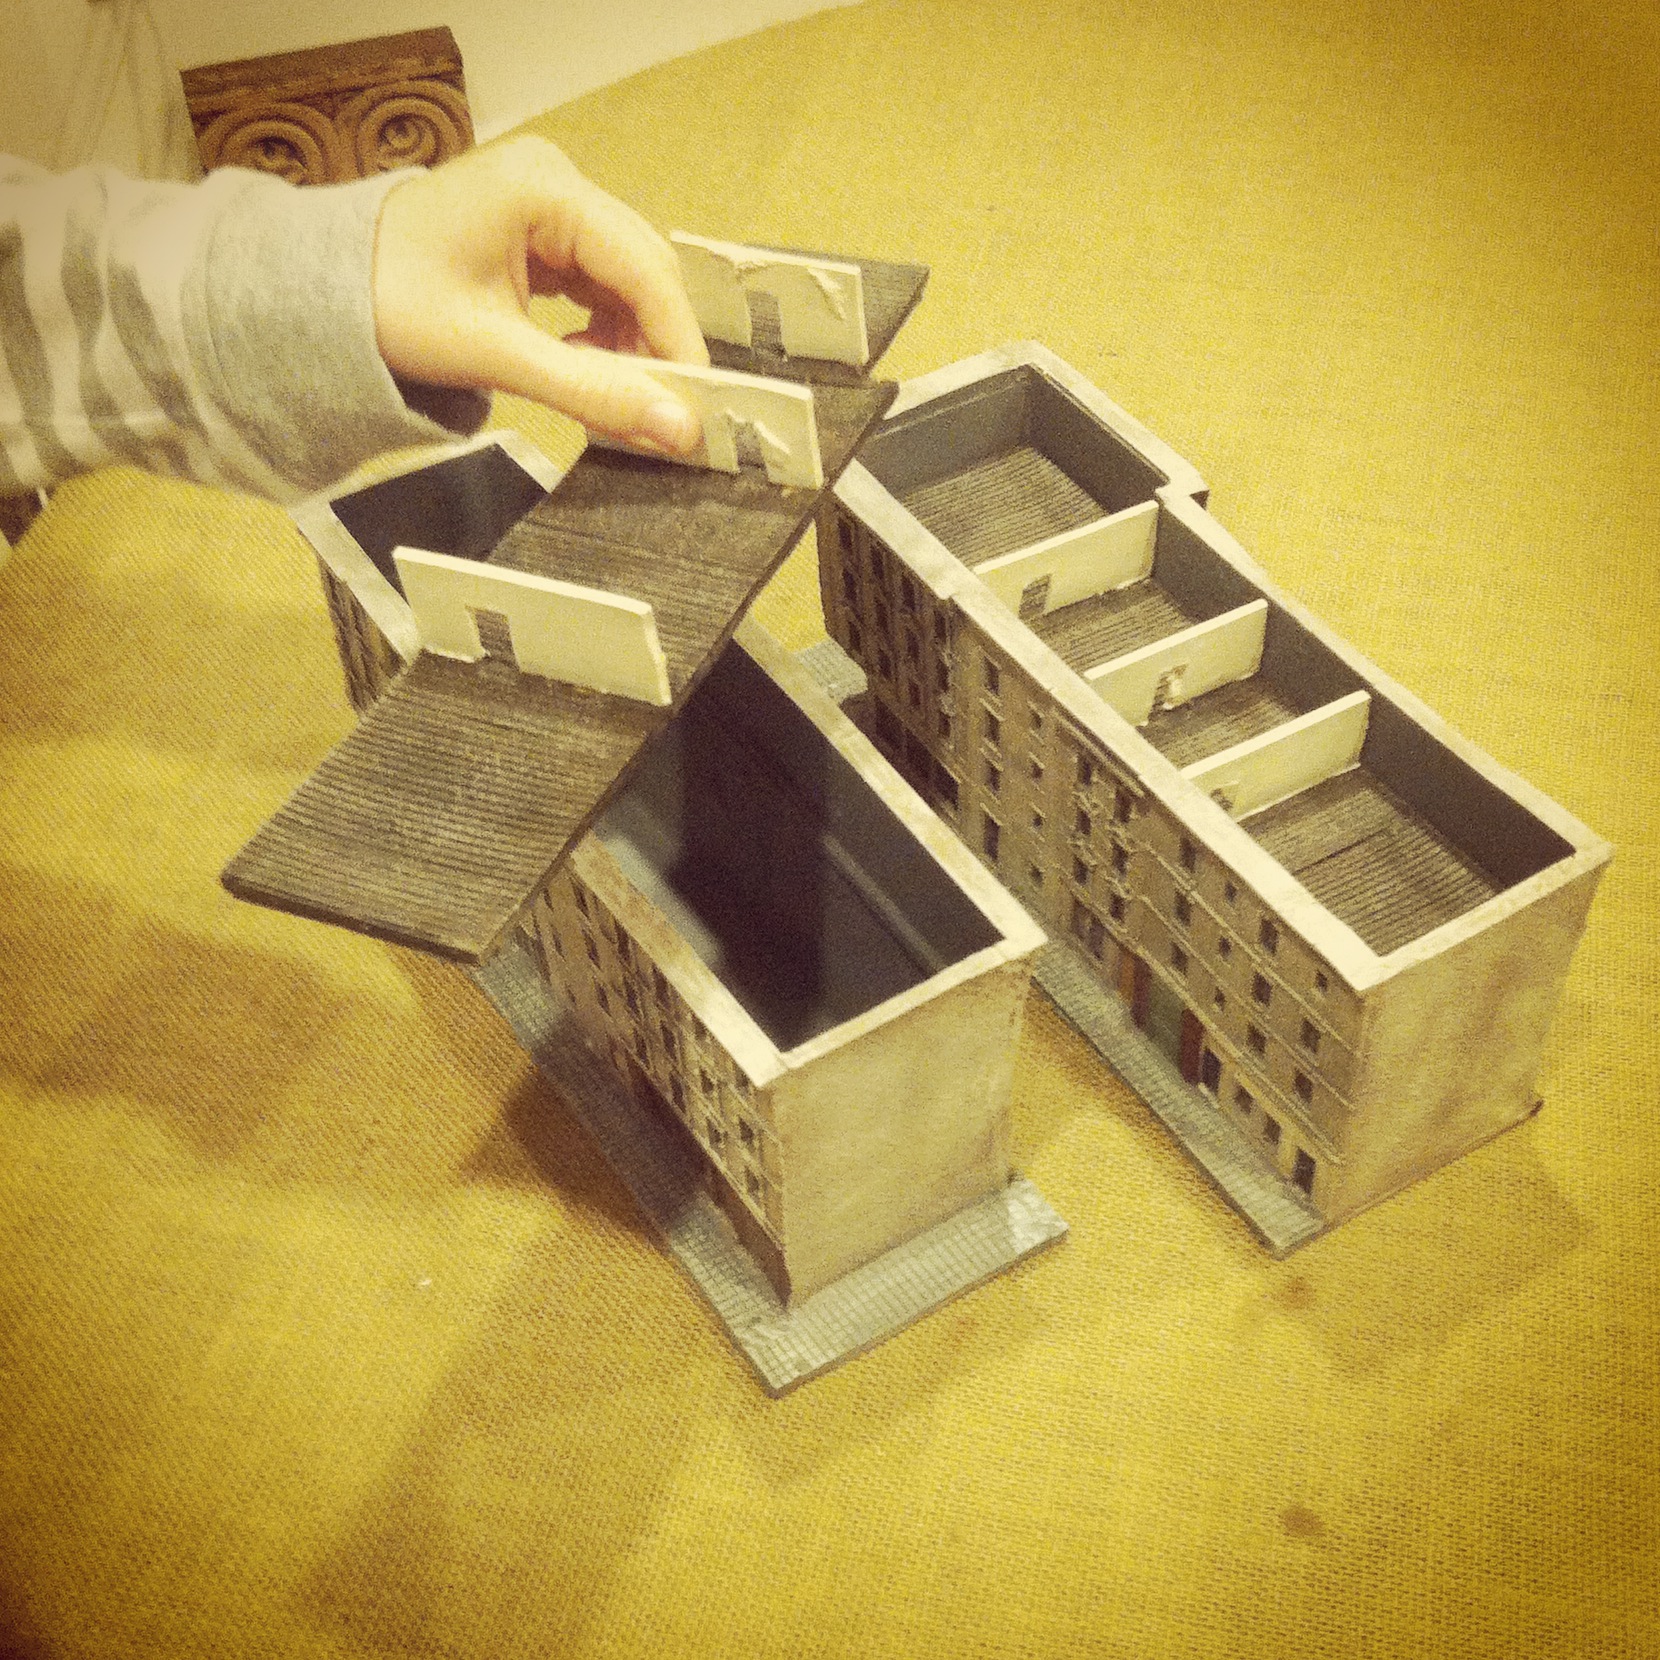
I picked up two different 15mm JR MiniaturesArnhem row house models on my recent trip to the HMGS Fall In! 2014 convention at a real steal of 40% off the list price. At nearly 12″ long and up to 8″ tall, these cast resin models create a quick urban feel to a tabletop battlefield. Each model has lift off roofs and interior floor and wall sections which pull out to allow for stands of troops to occupy varying rooms and levels. The roofs on the models also contain open parapet areas where artillery spotters, machine gunners or other troops can placed to command the battlefield from high upon the rooftops.
Cleaned and primed Arnhem row houses from JR Miniatures
As with most of my experiences with JR Miniatures models, there’s a fair amount of clean up to flash before getting started. The castings also contain a few air holes here and there, but nothing that detracts too much from the overall models. If anything, missing pieces of a cornice or a small hole in a wall might be chalked up to gunfire.
Here’s a simple outline of my technique for painting resin buildings:
Painting Western European Buildings
Use a sharp hobby knife to carefully remove extra resin flash from casting. Particular care should be taken to make sure interior floor sections lift out of the model easily.
Wash models in warm soapy water to remove molding residues. Allow models to dry overnight.
Spray prime roof and removable interior floor sections in flat black and main building sections in flat grey. Allow primer to dry overnight.
Paint roofs:
Tile roofs begin with a dry brush of 50/50 black and red paint, followed by a dry brush coat of red paint and finished with a dry brush of orange paint to highlight.
Shingled roofs begin with a dry brush of dark grey, followed by dry brushed coats of lighter browns, light greys and dark green.
Stuccoed areas in roof gables and dormer windows receive a dry stipple brushed coat of light brown followed by off-white paint dry brushed with the same stipple brush.
Paint floor sections:
Dry brush floorboards with layers of dark and lighter brown paints.
Paint wall sections in off-white paint.
Paint building facades:
Stucco walls receive a dry stipple brushed coat of light brown followed by off-white paint dry brushed with the same stipple brush. Dab some random areas with more off-white to create areas of more fresh stucco to create variations along the street.
Dry brush a slightly heavier amount of off-white paint over cornices and door a window molding to create more depth of highlights.
Stone areas receive a dry brush of light grey followed by off-white dry brush highlights and a dark brown wash in recesses.
Brick areas are dry brushed with 50/50 black and red paint followed by random dry brushing in off white paint to highlight.
Paint doors and shutters with a variety of blues, whites, greens, reds and browns. Follow basecoat with highlight in same color slightly lightened with off-white. Dab doorknobs with brass paint with a fine brush.
Window panes are all carefully given a light coat of black and then dry brushed with dabs of lightly dry brushed white paint to give the illusion of glass.
Sidewalks are dry brushed with light greys over a medium grey basecoat.
Ground areas at the rear of the buildings receive brown and green dry brush coats followed by grass flocking and small clumps of foliage.
Coat models in several layers of spray clear matte finish, allowing each coat to dry before applying an additional coat.
I was able to achieve a pretty decent tabletop quality finish to my buildings with maybe three hours of work on each model using the painting scheme above. Since colors on buildings are rarely monotone (unless newly constructed), I use a plastic surface on which I dab a variety paint shades and mix colors from this palette as I go with my dry brushing. I then build up areas with heavier amounts of one color or another to pull out highlights, create varying textures and differentiate from one building to the next along the street.
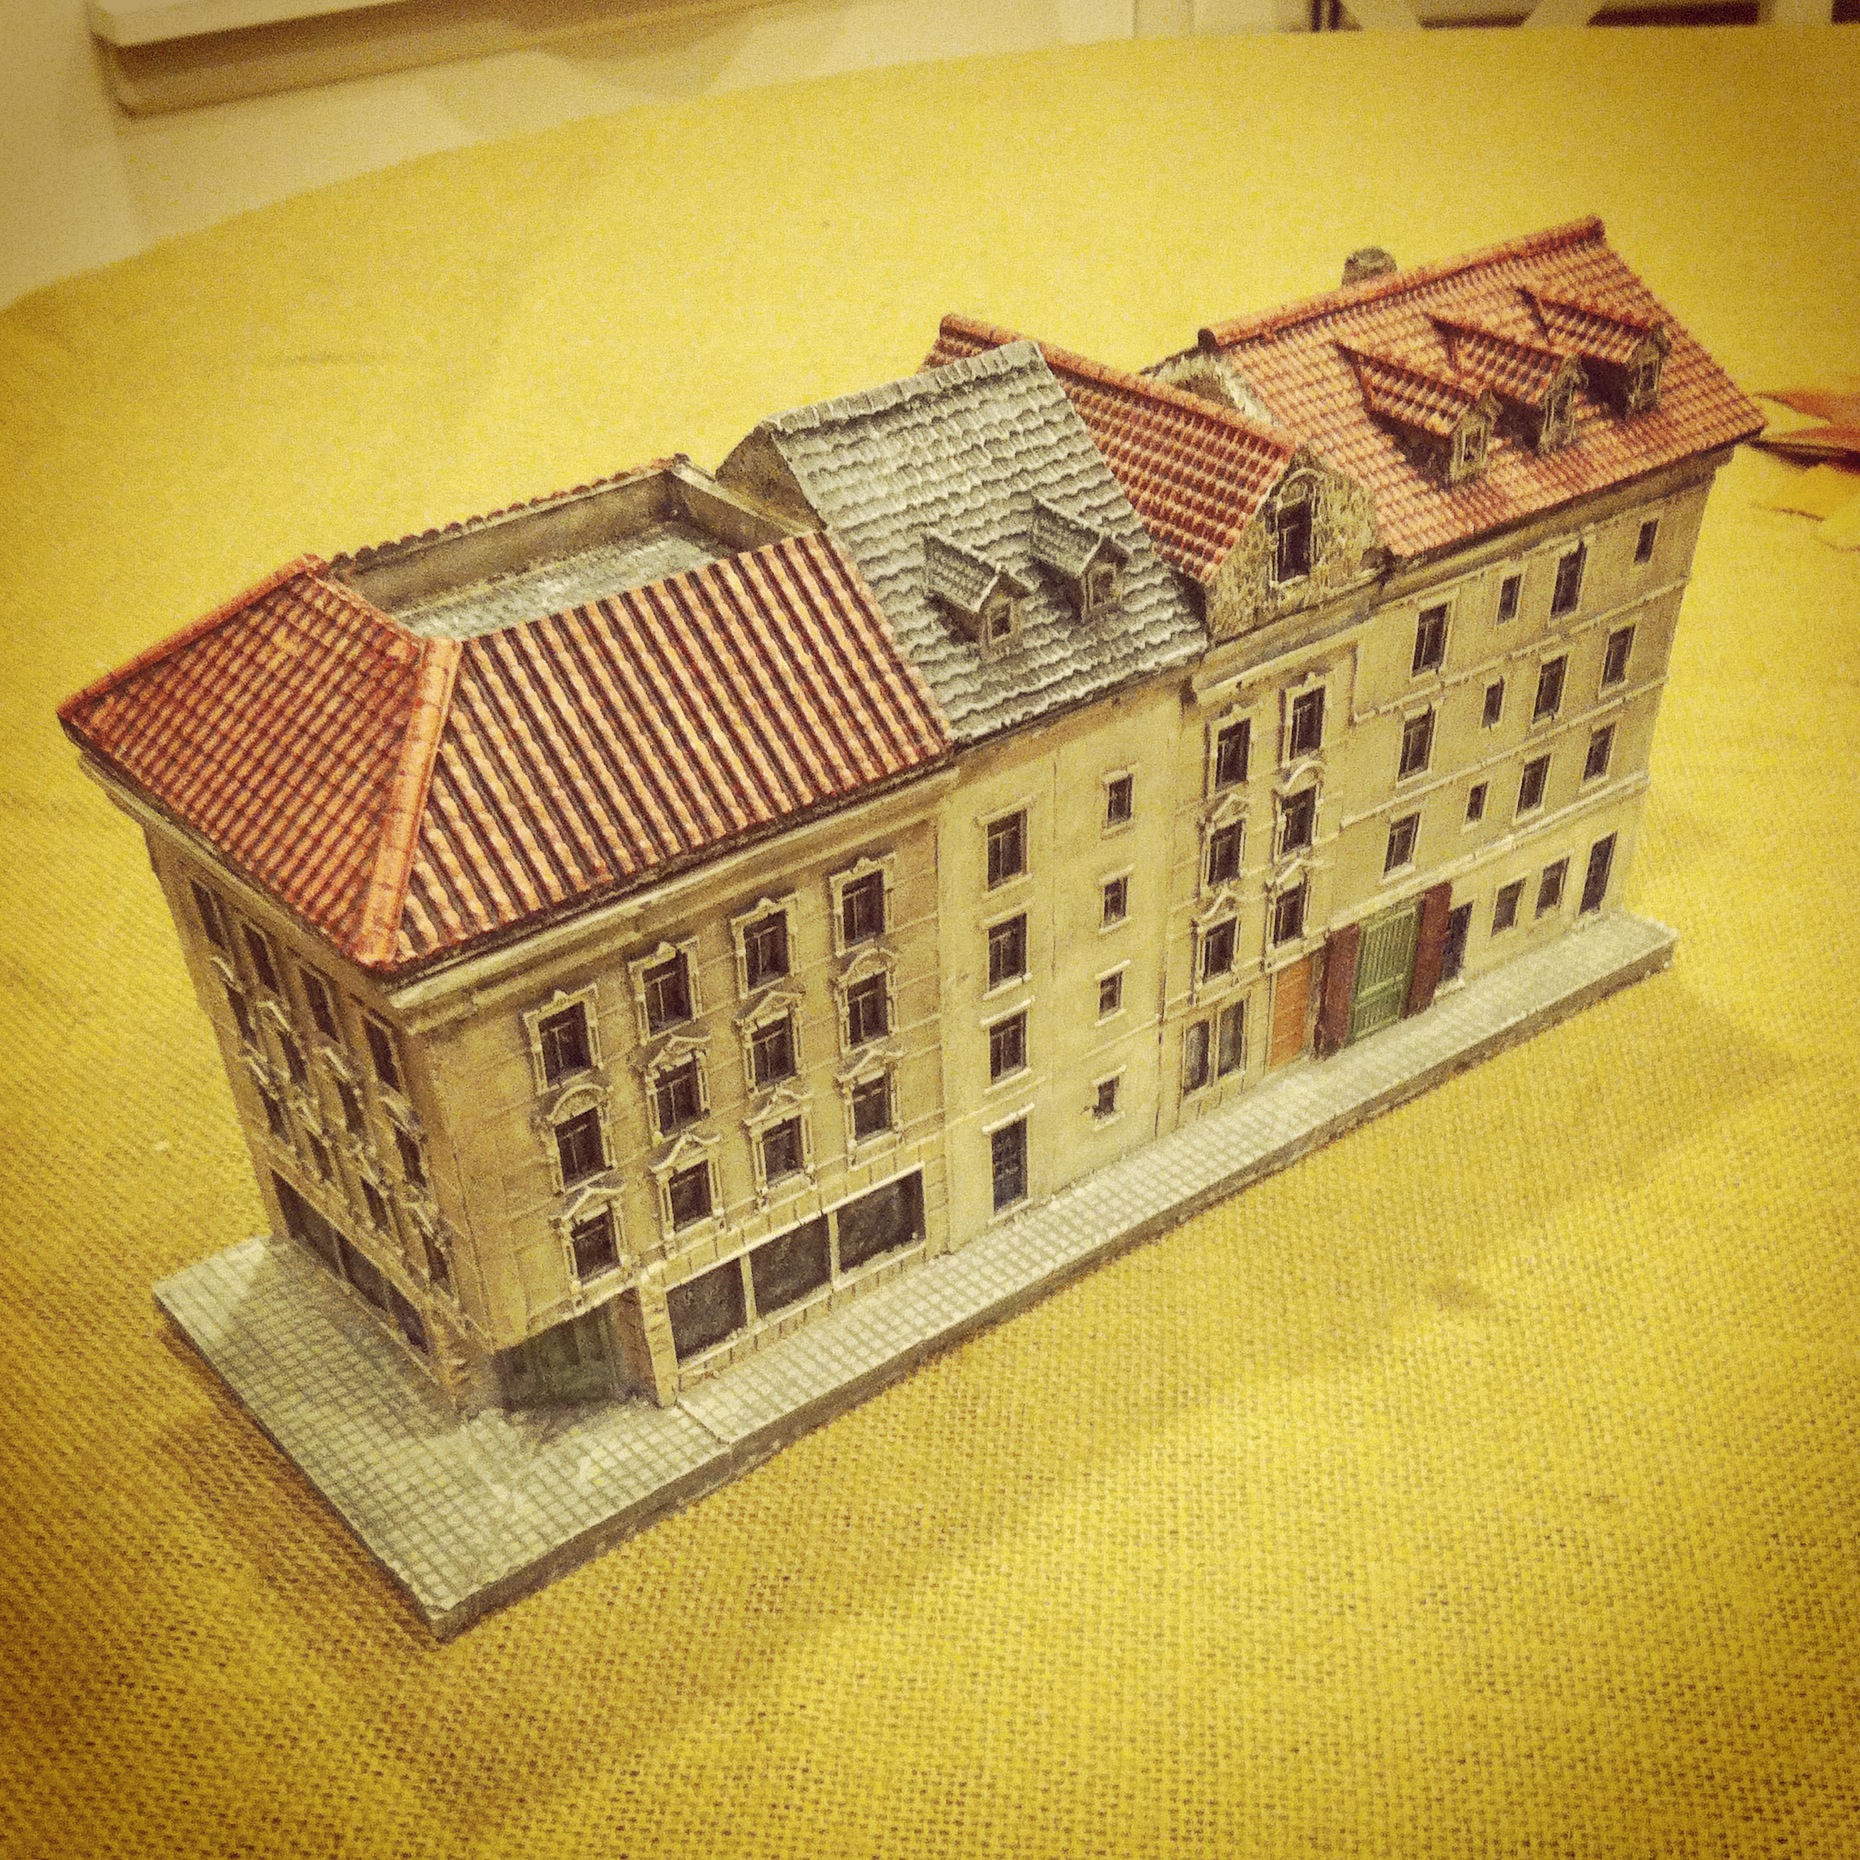
A completed JR Miniatures Arnhem row house
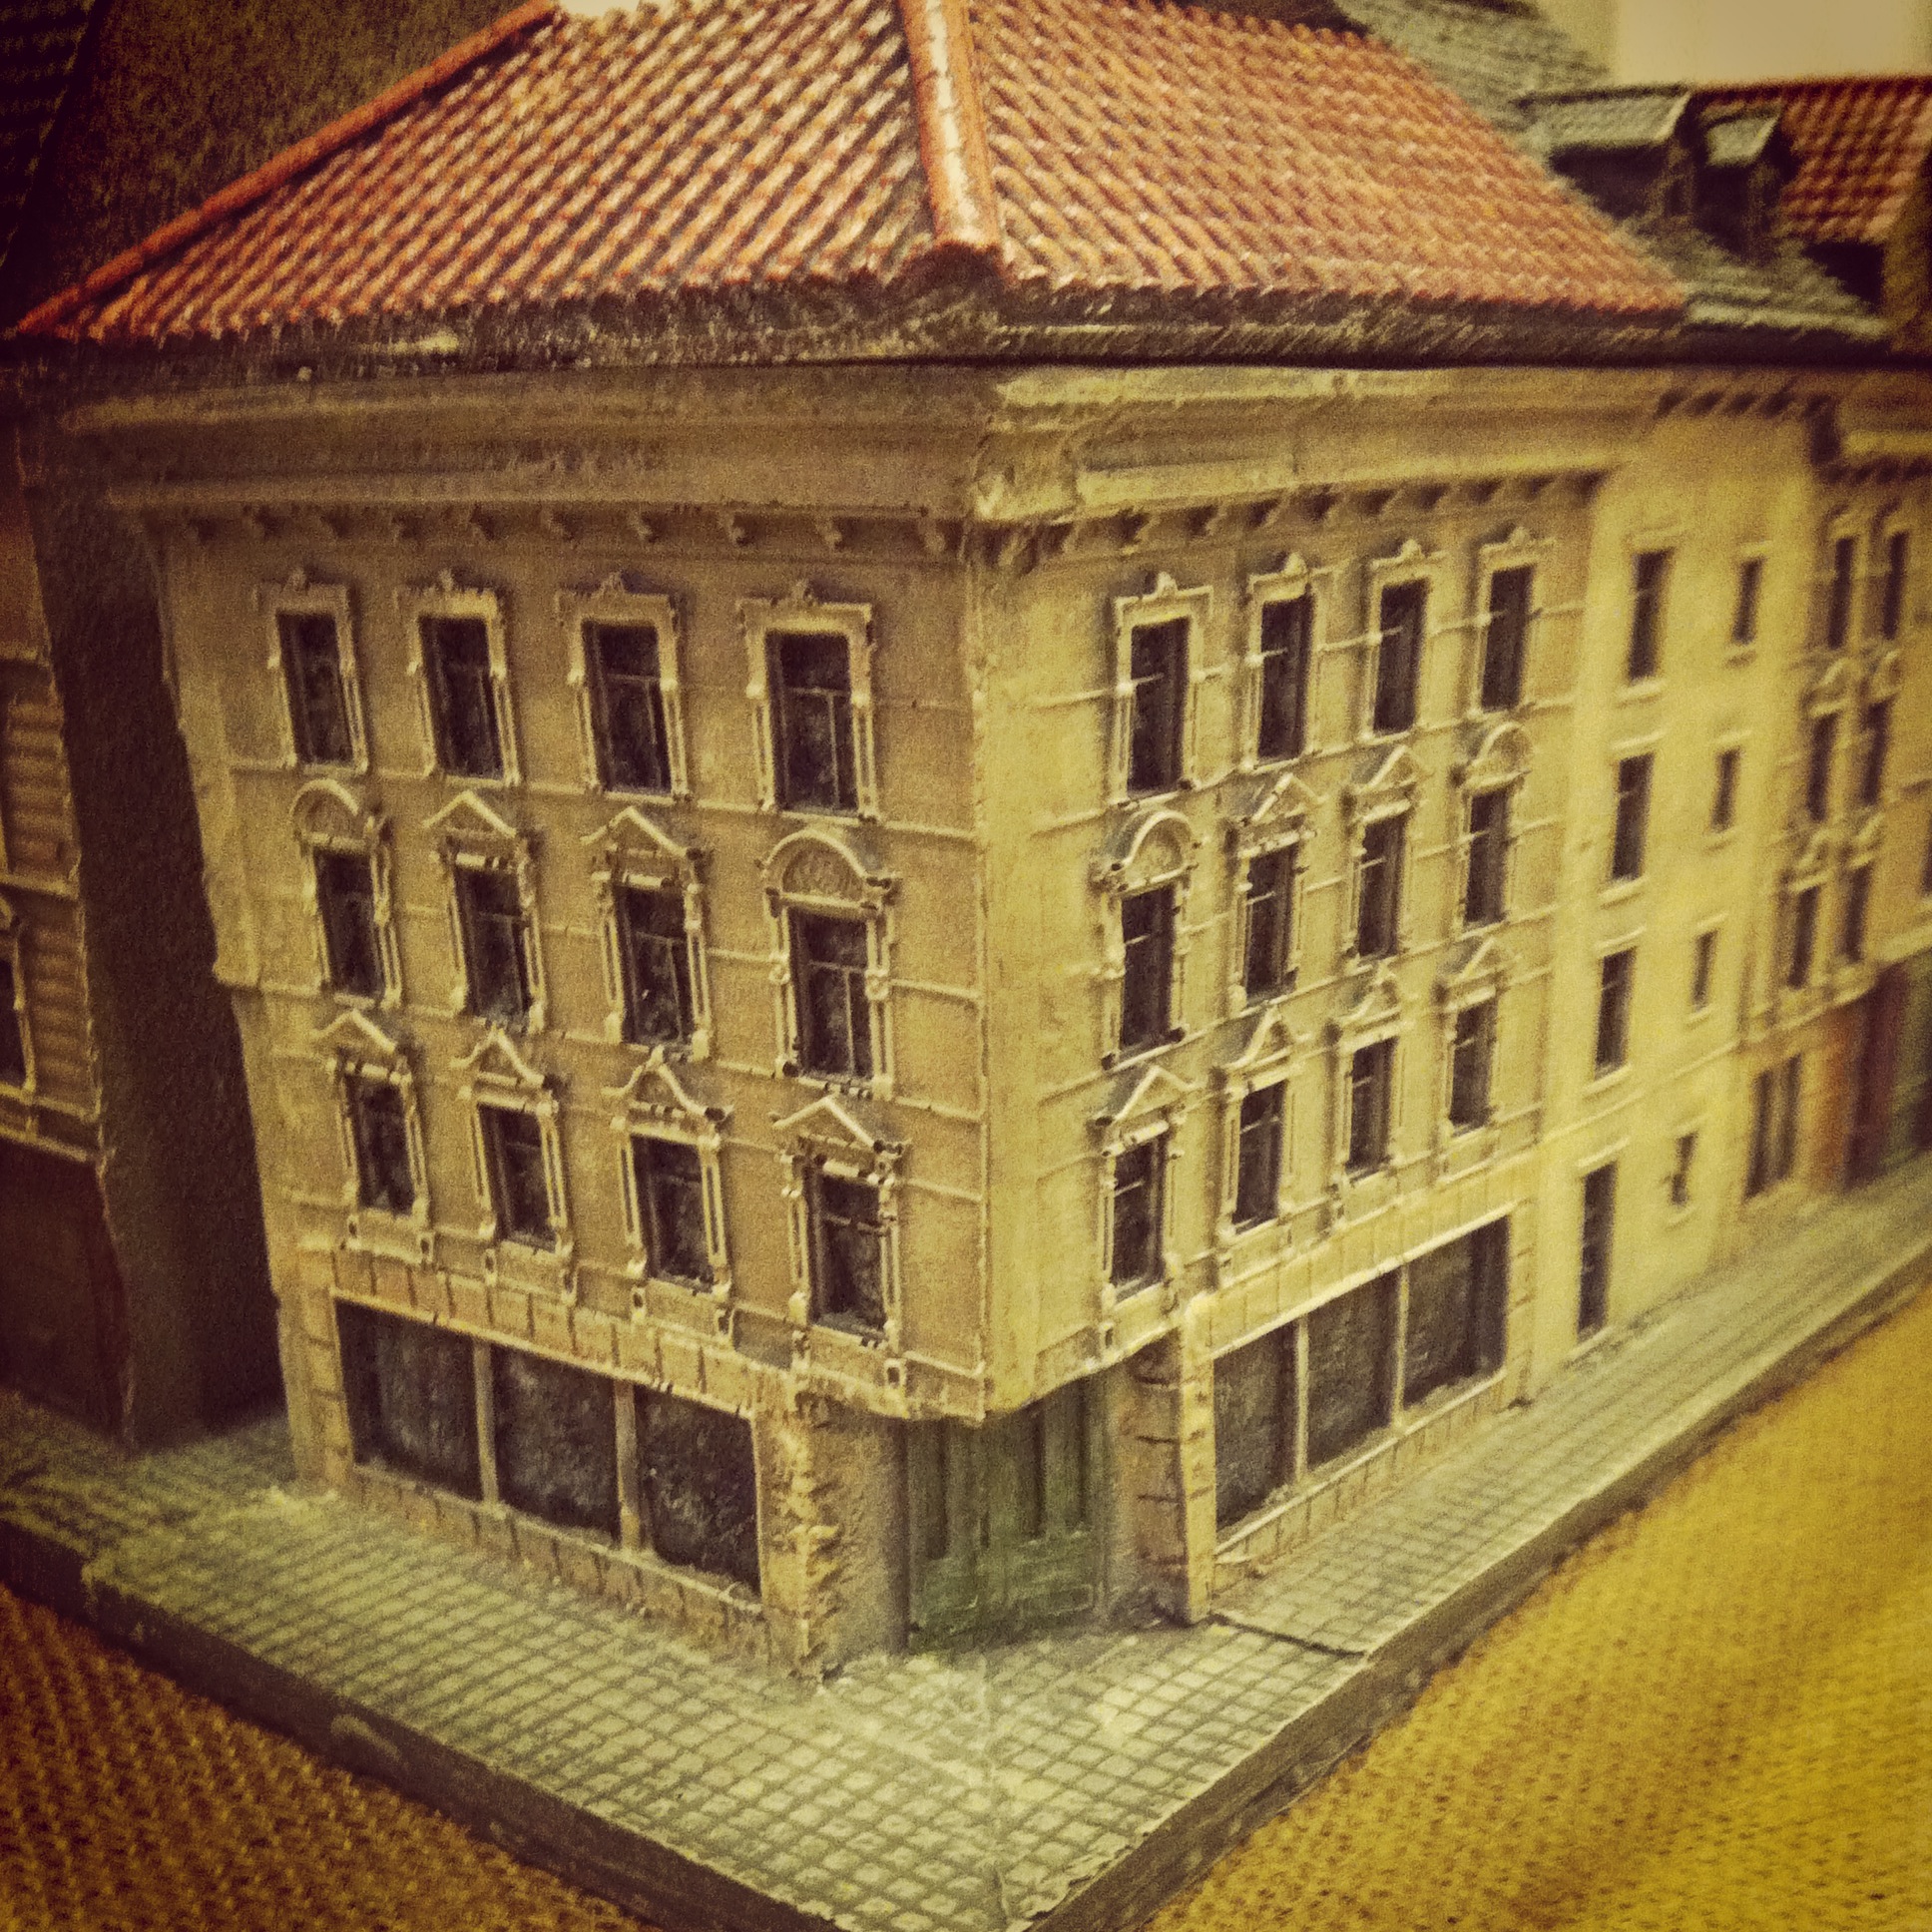
The other completed row house with corner shop
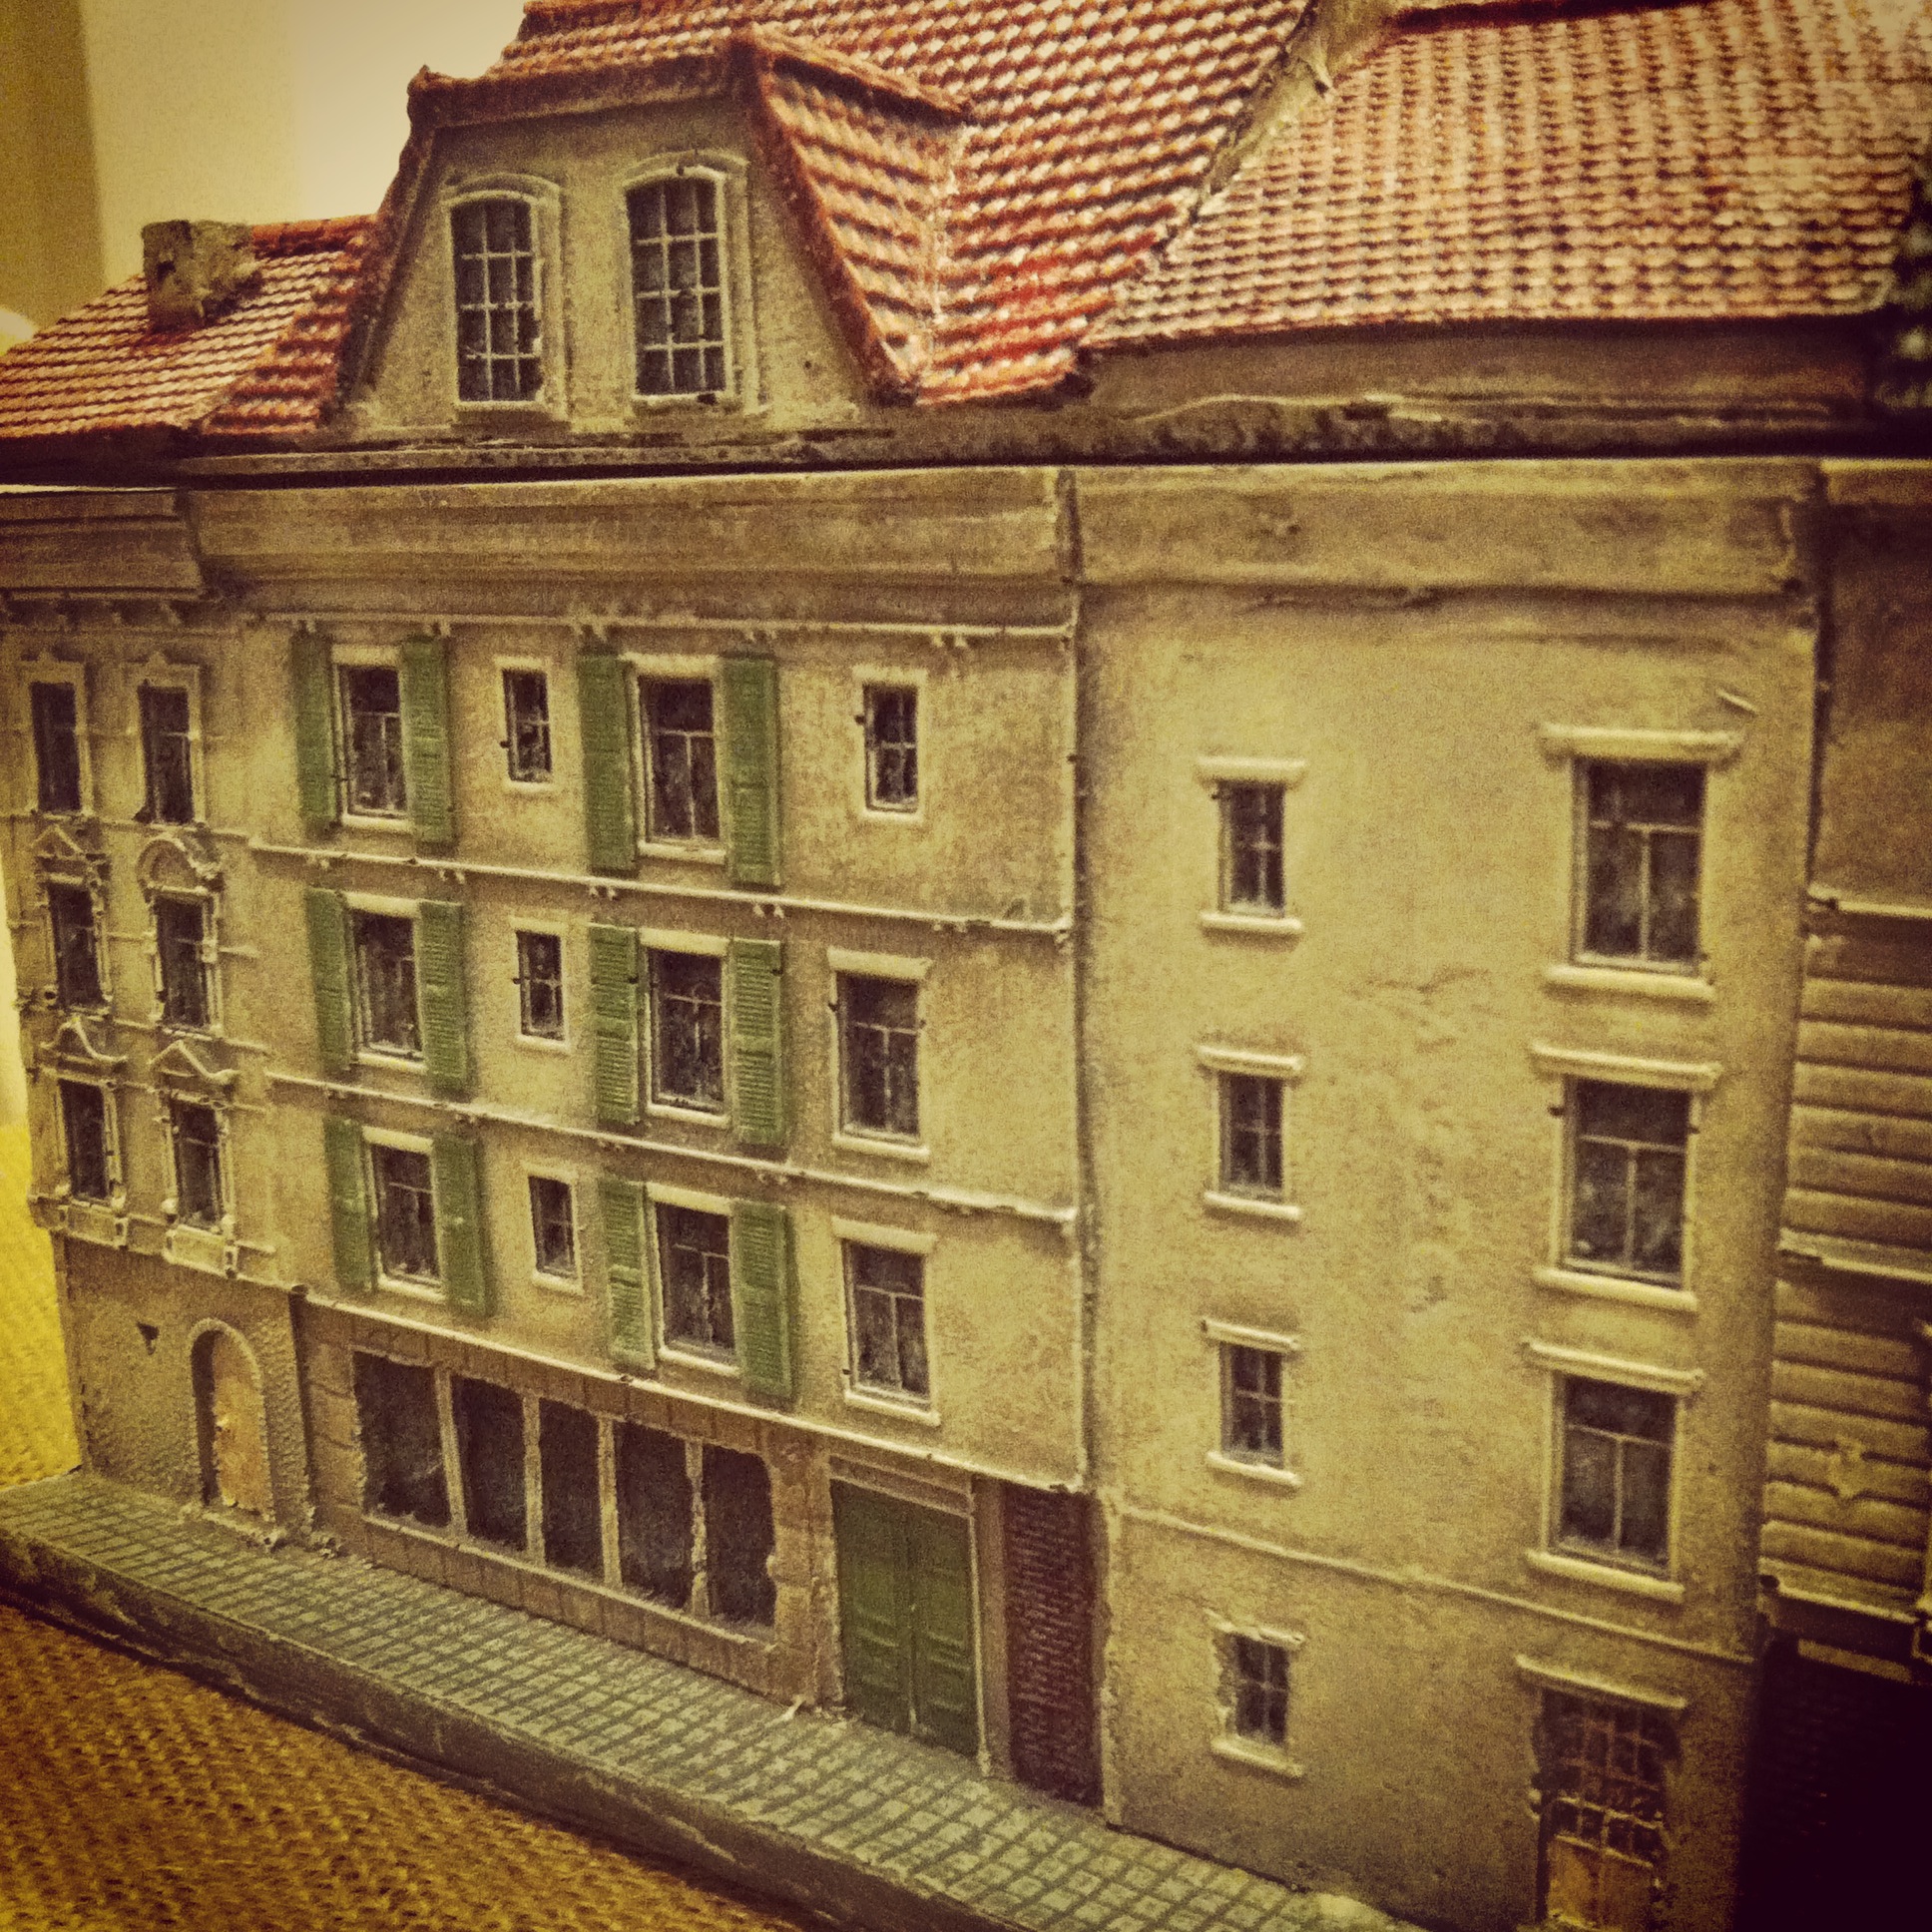
Close up of the corner shop
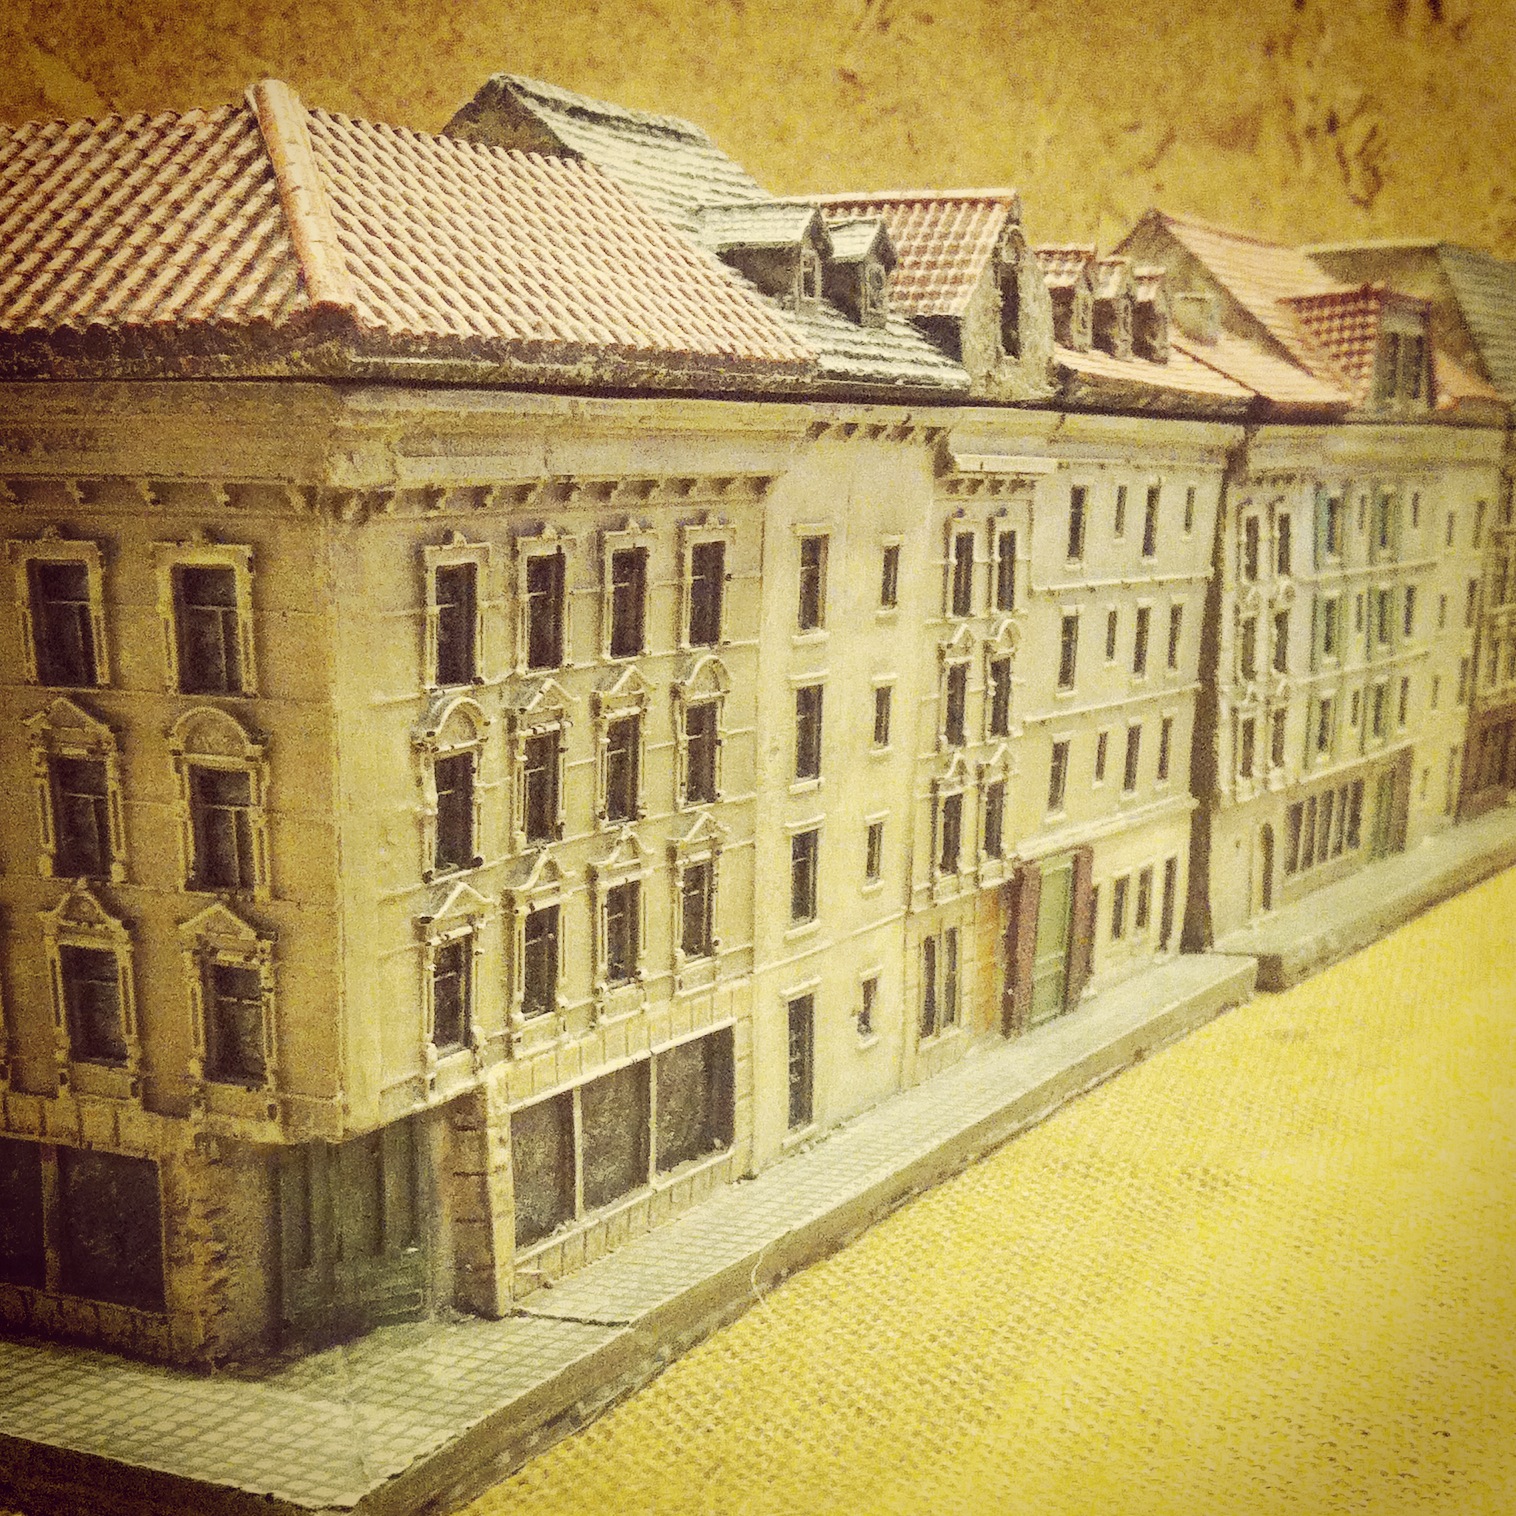
A view along both row house blocks
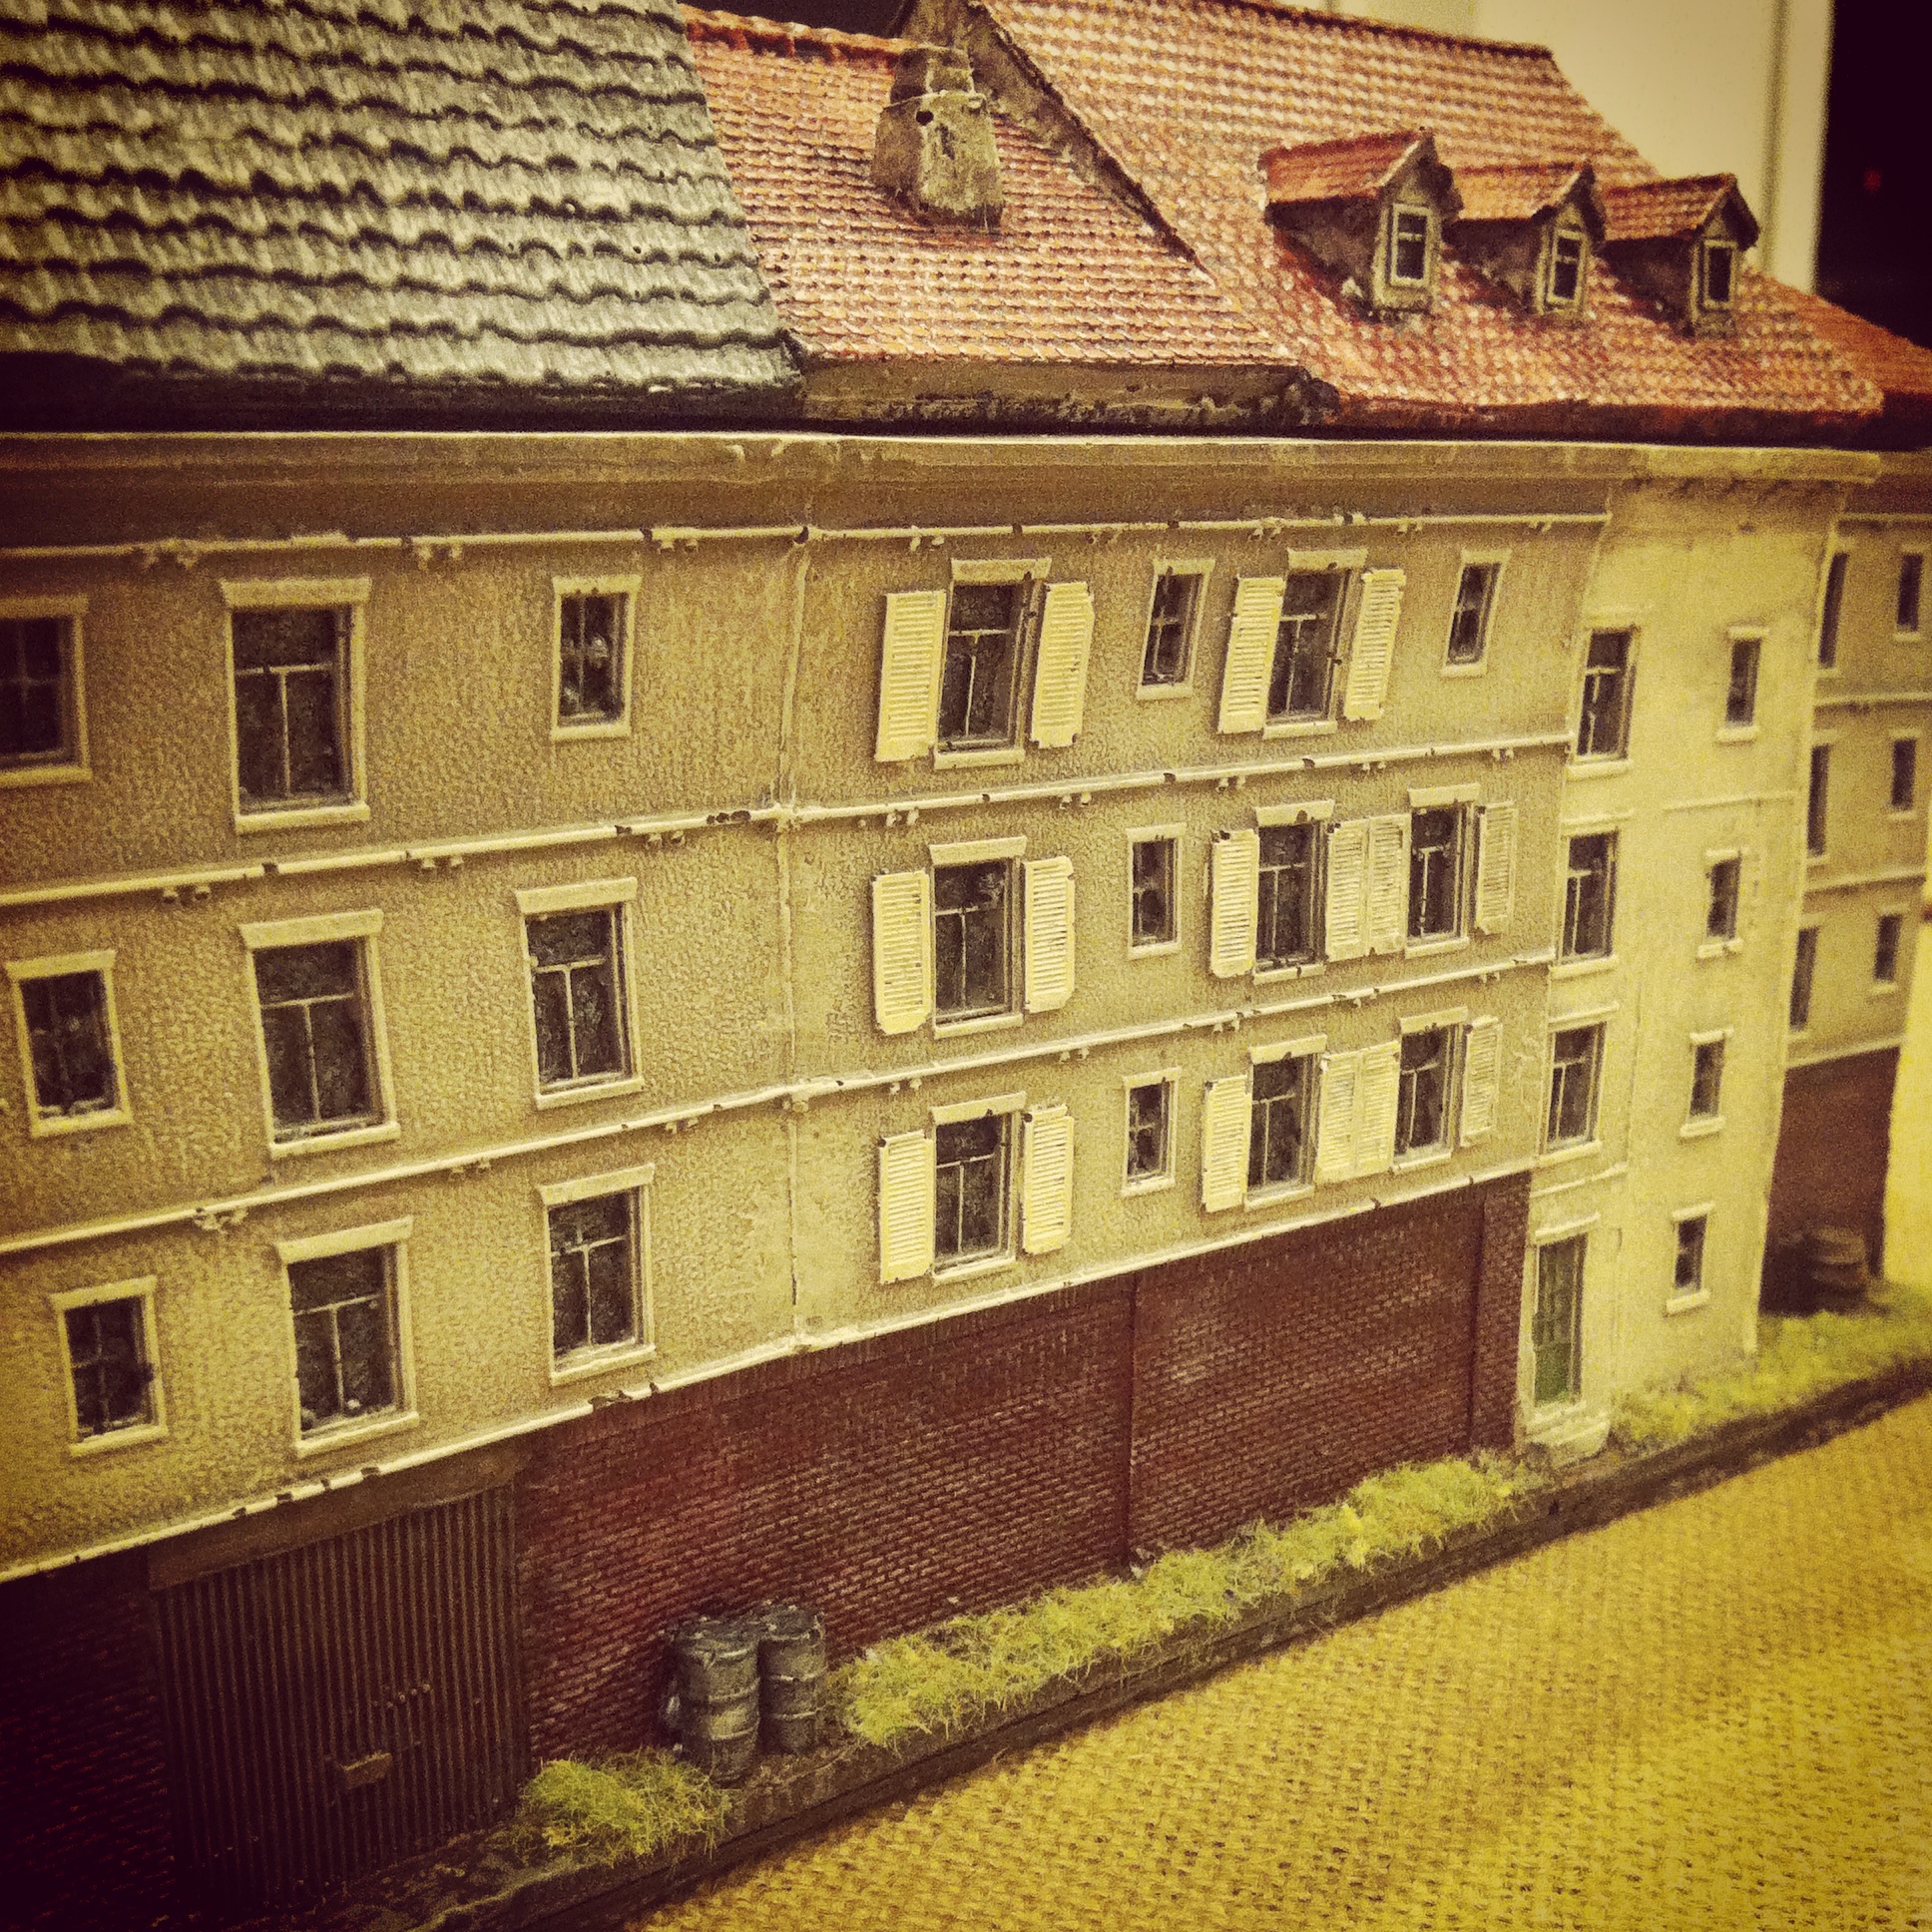
Rear detail of one of the blocks
Close up view of the facades
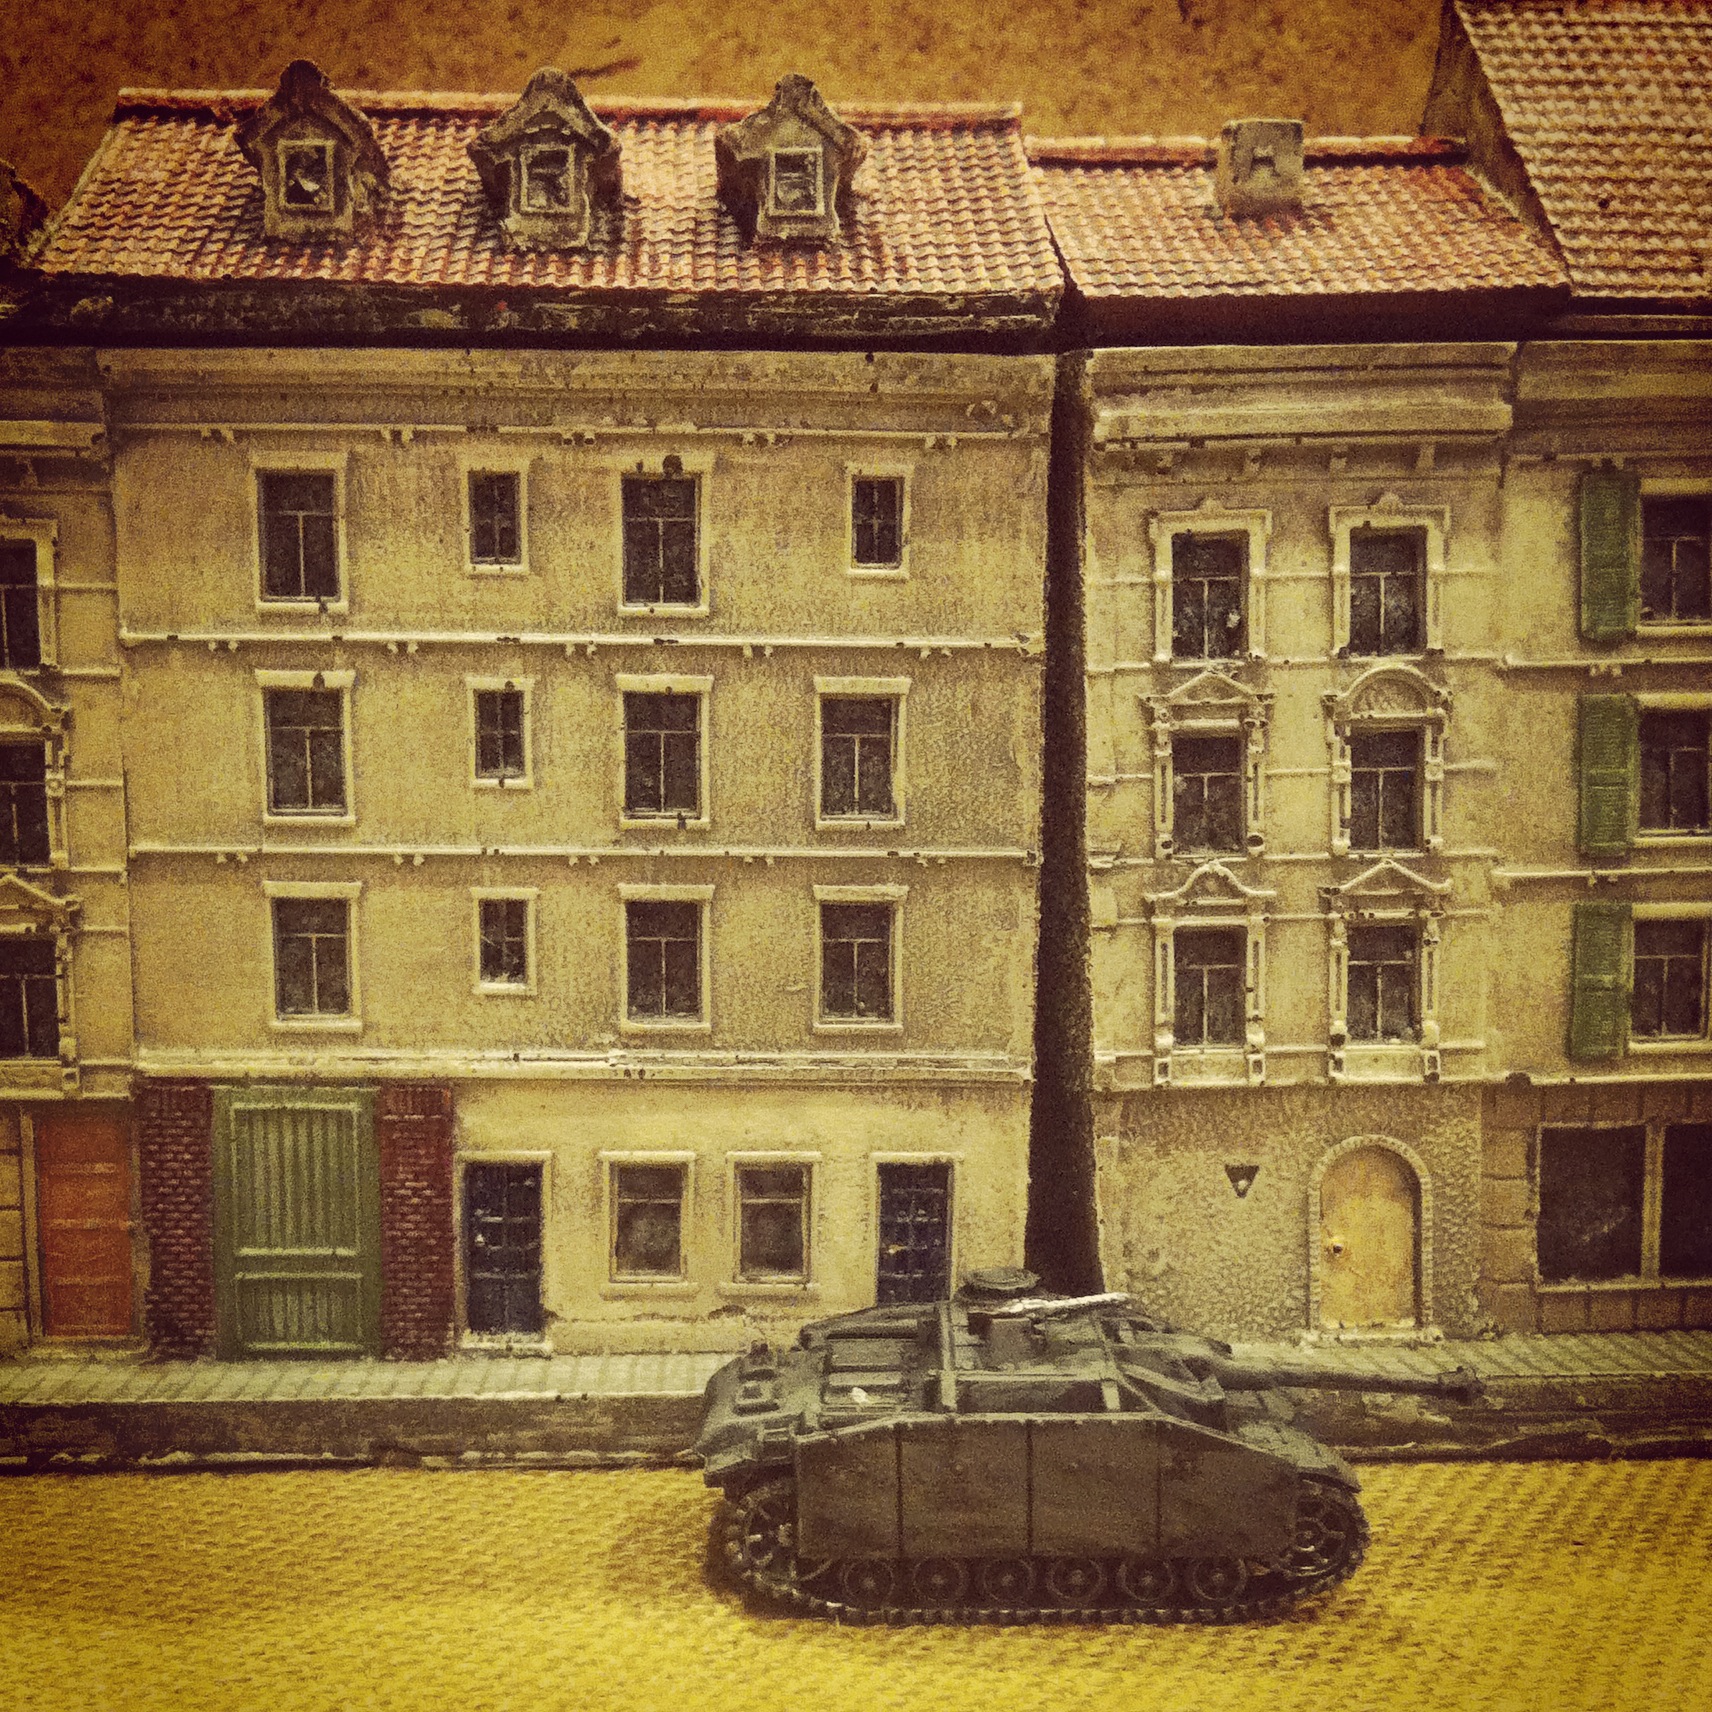
A German Stug parked in front of the row houses
Overhead view of the interior floors
A floor section being removed for placing troops inside
I’m really excited about these models which nearly double the footprint of my existing Western European buildings in 15mm. Models from JR Miniatures fit in nicely with my buildings from Mark IV Miniatures and terrain from a variety of other manufacturers. Although modeled on actual streetscapes of Arnhem, the buildings are easily usable in creating the look of many densely populated areas of France, the Netherlands or elsewhere in Western Europe during late war operations.
As a wargamer and scale miniatures modeller working my way through the latter half of my 40s, eyesight has become more of an issue for me. It’s a reality of just getting older (I like to think, more experienced) as I’ve aged through about 30 years in the hobby.
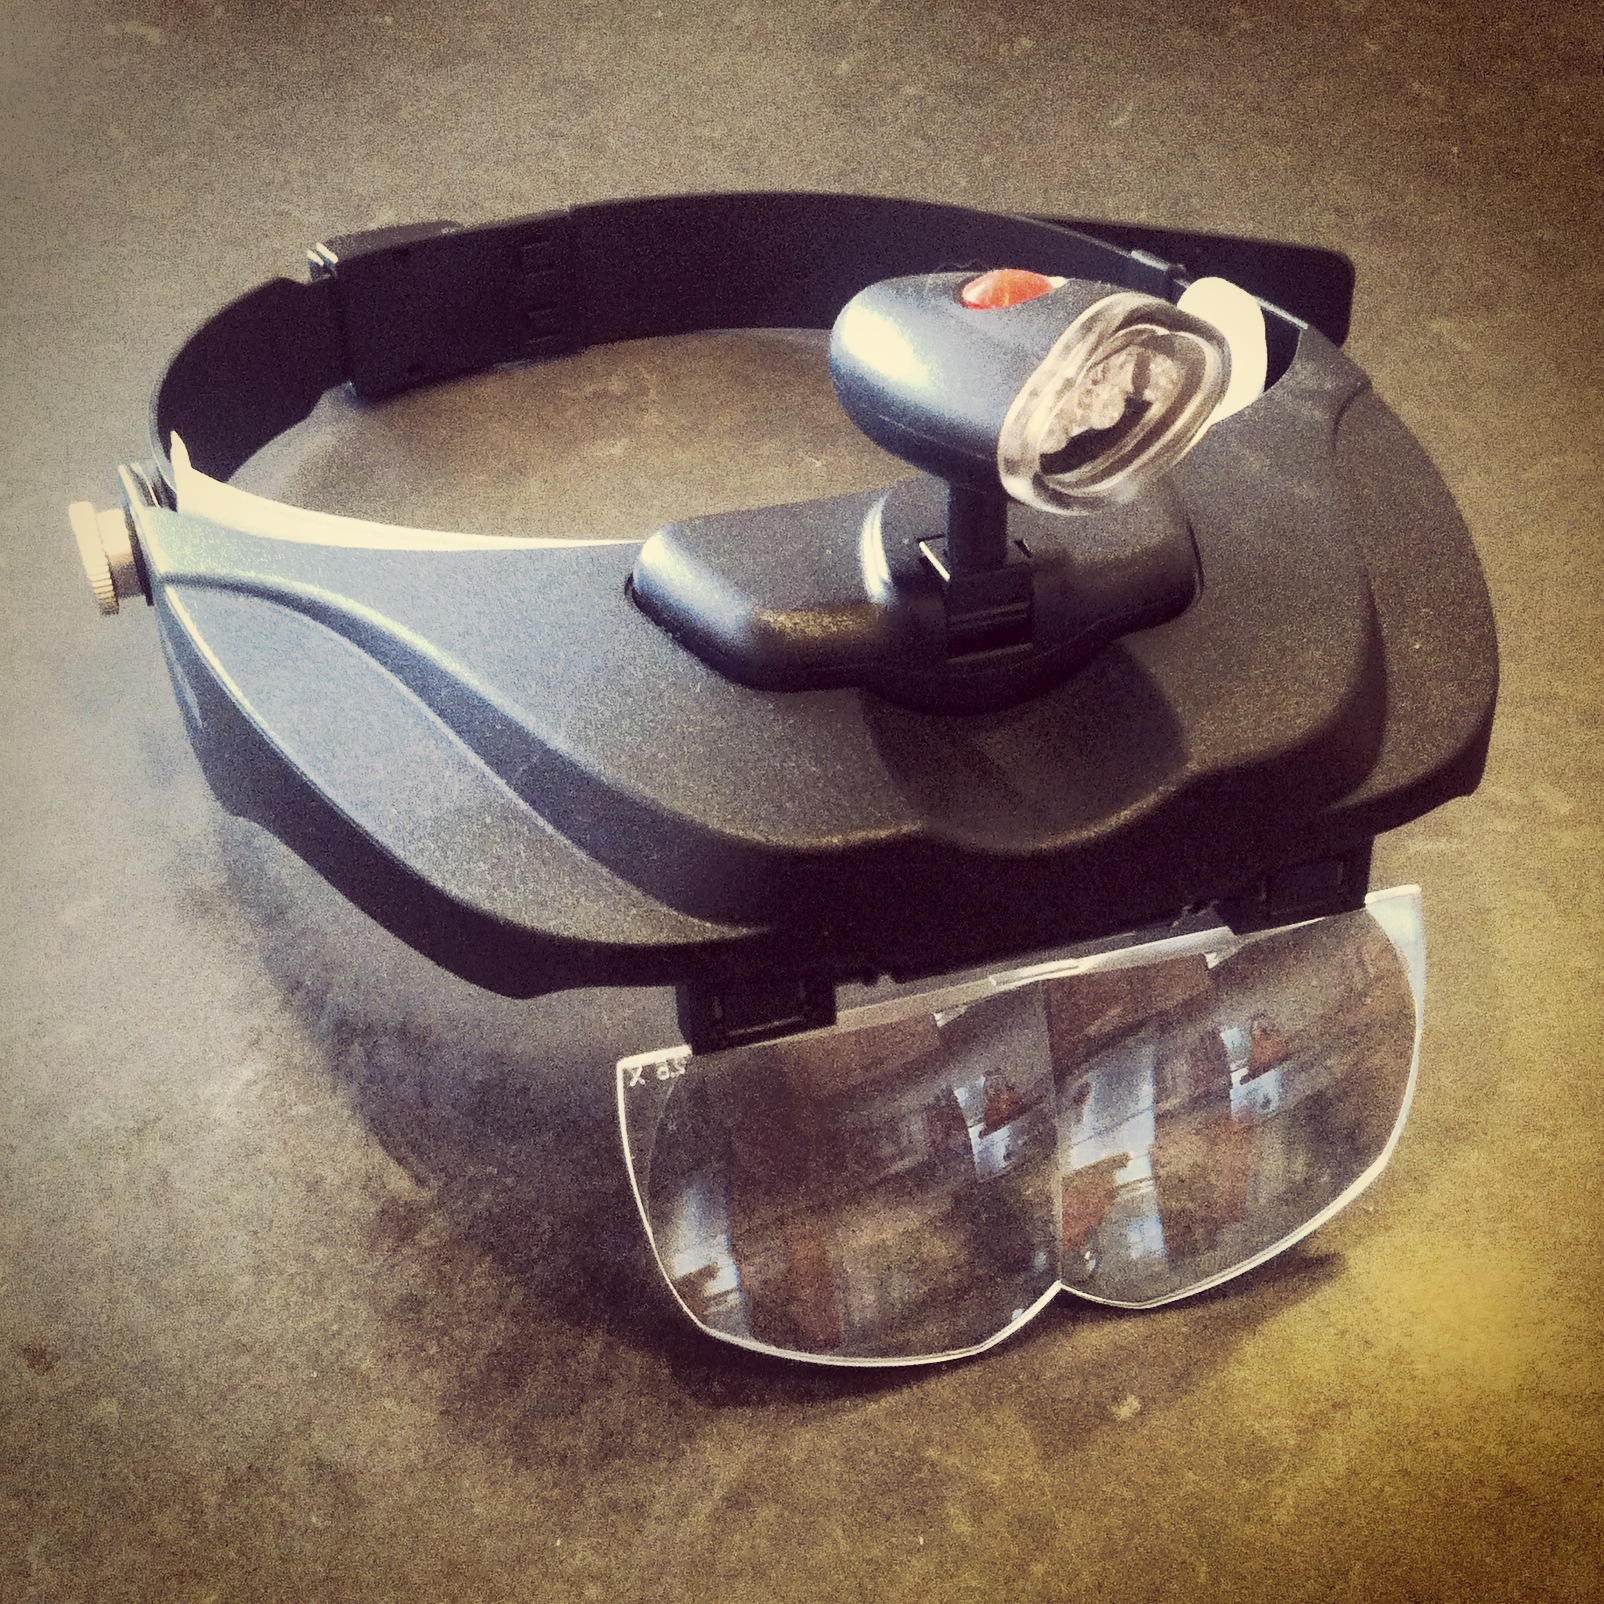
Recently, I picked up the magnifying visor from Sharper Image and it’s become a welcome addition to my modelling tool kit. Retailing for about $60 (and less expensive with an additional 10% off for new customers), the visor brings a number of great features which separates it from other magnifiers I’ve seen. The adjustable visor comes with four lenses at 1.5x, 2x, 2.5x and 3x strengths stored in a separate small plastic case. Each lens snaps into the visor and flips up and down easily with a flick of the wrist while painting. Most visors or magnifying eyeglasses used by hobbyists come with just one fixed lens strength, so being able to adjust the level of magnification depending on the project adds a lot of use to the Sharper Image’s visor.
Living in an a Brooklyn apartment, I do most of my modelling projects in natural light at the dining table flanked by a tall set of large windows. For a lot of other hobbyists relegated to painting in basements or small, darker rooms, lighting is often supplemented with workbench lights or a separate camping-style headlamp. For hobbyists like me without a permanent workspace, tabletop lights just aren’t practical and adding a headlamp is just one more thing to store. With these factors in mind, the added feature of a powerful LED light on the Sharper Image visor is also a welcome addition. The light adjusts easily to angles which can direct a beam of cool, white light directly to the area needed. Again, this kind of thing just isn’t found on lesser magnifiers.
I got the Sharper Image visor just as I started going to a smaller scale with 6mm World War II microscale models from GHQ. Whether painting or applying decals, the visor makes details pop on these tiniest of models. At this scale, I found the 2.5x lens to be the best option. The smallest bits of equipment and other features on models practically jump out at me when wearing the visor, and I feel I could practically apply paint with a house painting brush if I had to. I’ve got some other 15mm projects coming up in the coming months, and I’ll be using the visor at that scale for the first time, too.
Regardless of the scale and veteran status in the miniatures hobby, the outlay for the magnifying visor from Sharper Image is a solid investment. As I soon head into another decade in the hobby, I’m grateful to have this new tool to keep my future projects in focus.
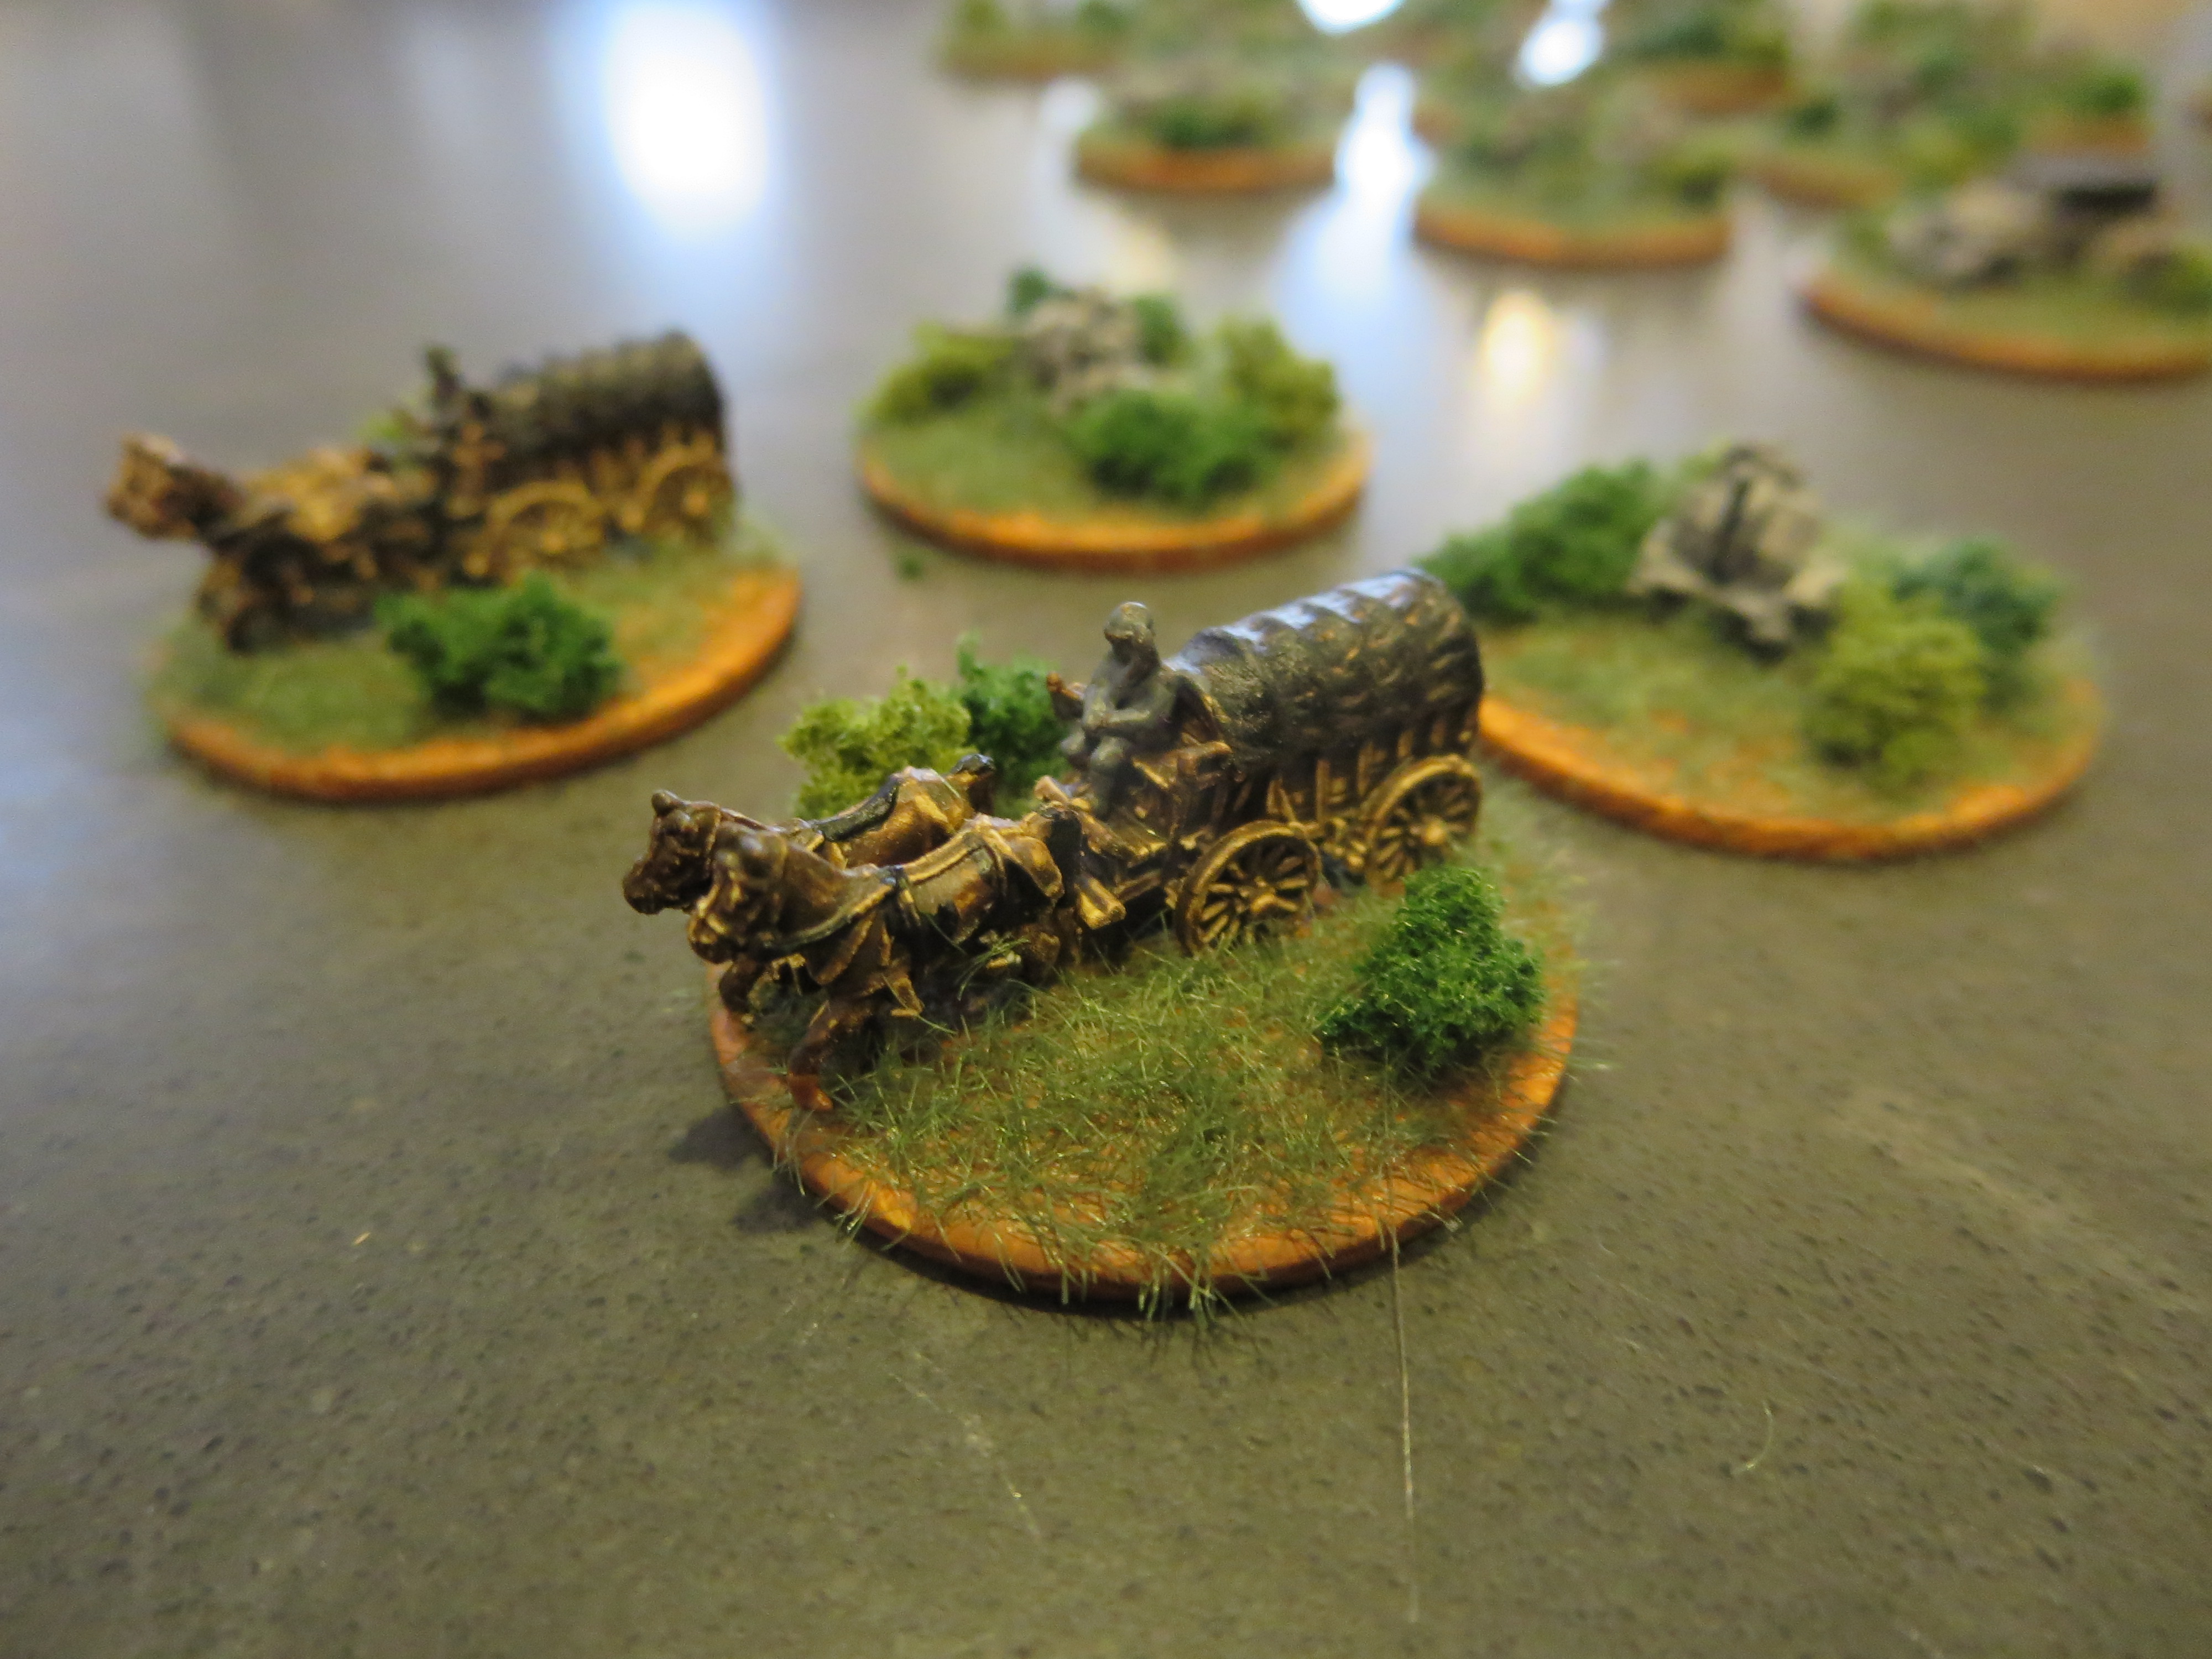
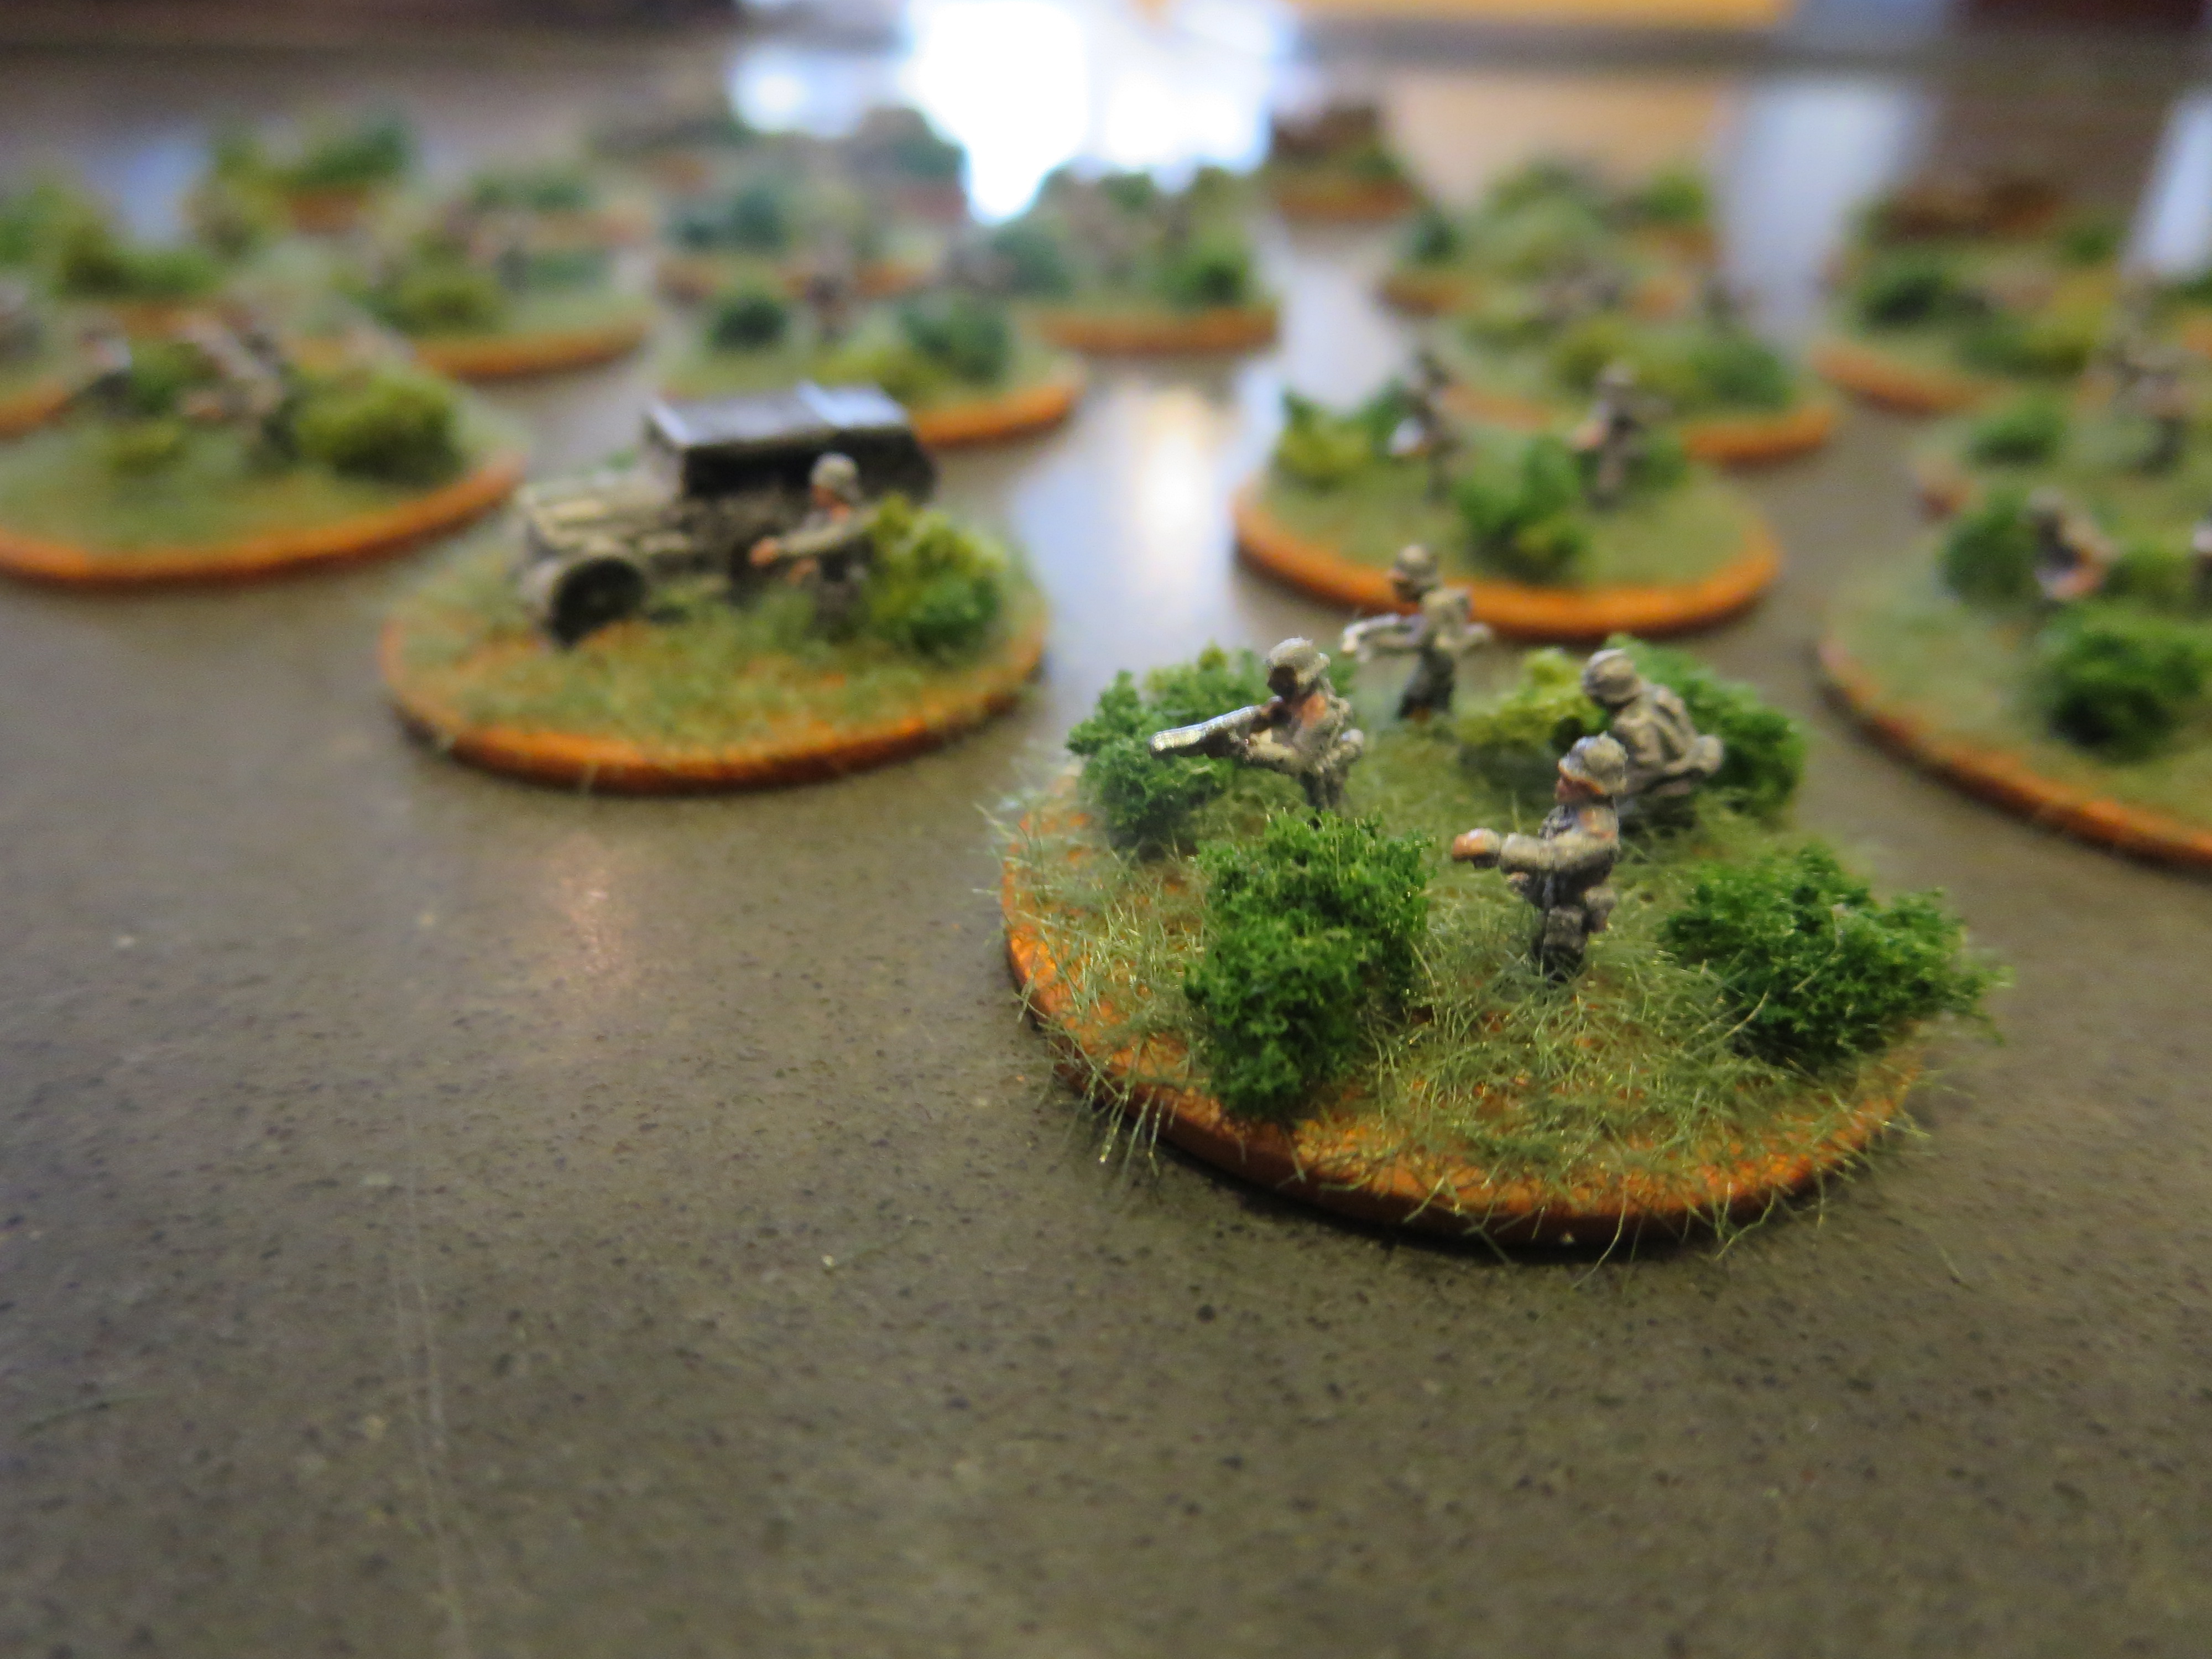
After getting my initial GHQ 6mm US armored infantry and tank force painted-up a few weeks ago, I’ve moved on to my Germans next. My Axis starter force comes from two GHQ box sets. Ten Panzer IV tanks are included in the Shermans vs. Panzer IVs Battle Box. To this armor I’ve added the contents of the German Kampfgruppe 1944 box set which includes two towed 20mm Flak guns, two Marder IIIs, two 150mm Bisons, two Sdkfz 10/1 transports, a Kfz 15 command car, a couple horse-drawn wagons, infantry mortars, machine gun teams and a pile of infantry. All together, this gives me a pretty hefty late war German set of models with a solid mix of infantry weapons, tanks, transports and supporting heavy weapons.
GHQ’s Kampfgruppe 1944 Combat Command box set
As with my basic US force in 6mm, I’ve worked up a simple painting method for my Germans. The key is to get an even, thin base coat on the models so tiny details can show through as highlighted areas as I add subsequent colors. Using a magnifier is also a necessity at this scale, and staring at tiny models through the lenses makes painting a downright breeze.
Getting the models and workspace organized is key when working with 6mm
GHQ German infantry, machine guns, Sdkfz 10/11 and Marder IIIs
Painting German Infantry
Glue a small piece of card over the center hole of washers.
Glue models to washer bases.
Basecoat models and bases with white spray primer.
Wash models in a mix of 1 part dark grey, 1 part light grey and 5 parts water.
Paint boots, gun stocks and equipment details dark brown,
Paint hands and faces flesh.
Paint gun barrels and equipment details gun-metal silver.
Paint bases dirt brown.
Cover bases in white glue and cover in 50/50 mix of fine light green and dark green grass flock.
Glue small pieces of clump foliage to base.
Completed GHQ Panzer IVs
Painting German Armor and Transports
Glue a small piece of card over the center hole of washers.
Glue models to washer bases.
Basecoat models and bases with white spray primer.
Wash models in a mix of 1 part dark grey and 5 parts water.
Lightly coat models in mud brown wash.
Dry brush light grey highlights to models.
Dry brush tracks, machine guns and body details gun-metal silver.
Paint bases dirt brown.
Cover bases in white glue and cover in 50/50 mix of fine light green and dark green grass flock.
Glue small pieces of clump foliage to base.
Paint tire tracks on bases dark brown.
Getting decals applied to the Panzer IVs is finicky, but with some trial and error using my process I did get that last little bit needed to get my Germans rolling onto the table at a very small scale.
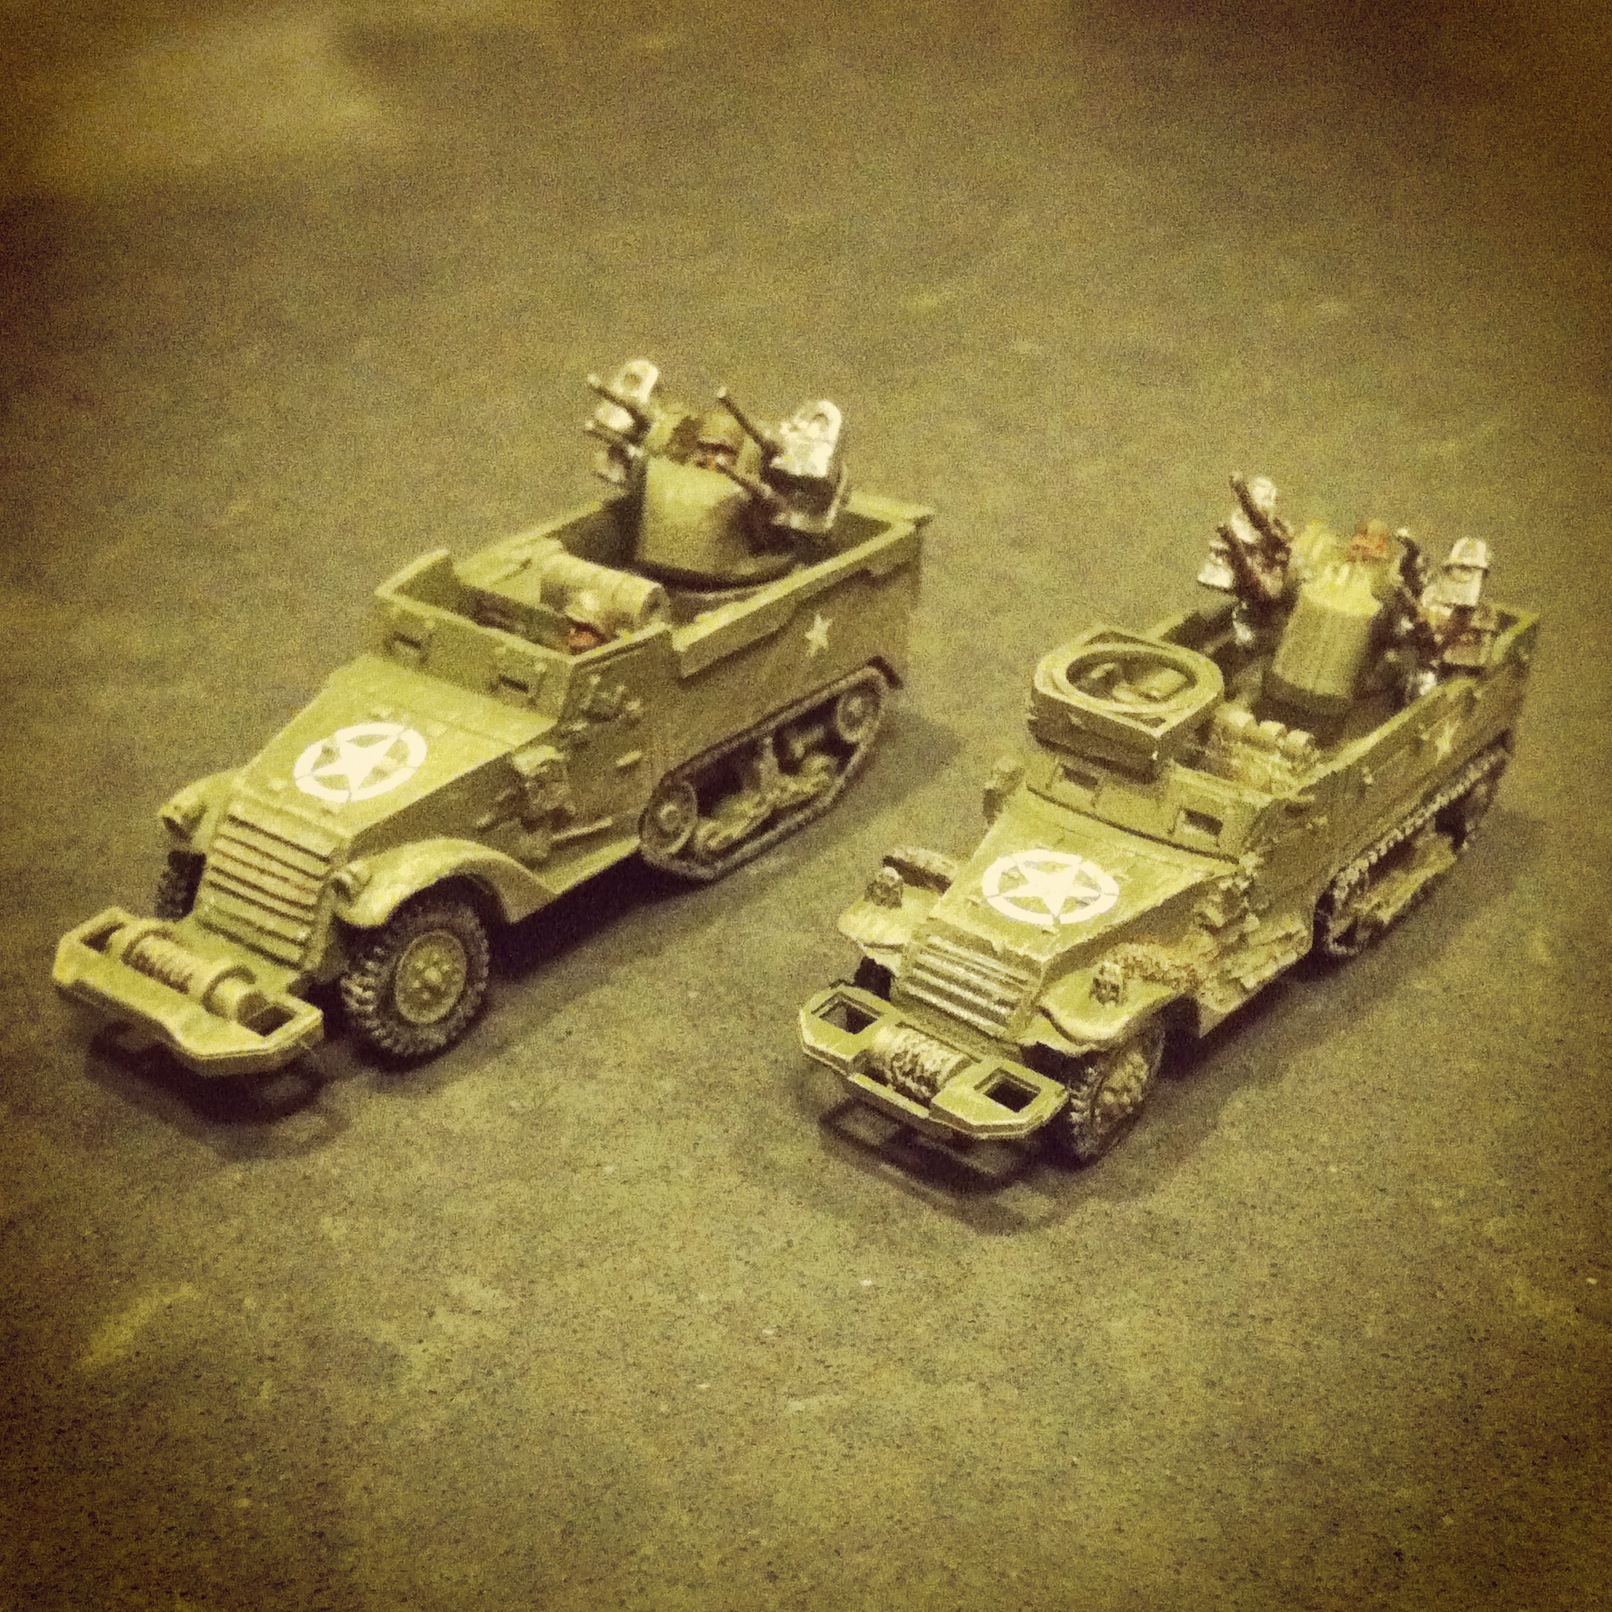
One of my favorite blogs, War Is Boring, recently ran an article about the famed Browning M2 machine gun. Introduced in the 1930s, the .50 cal machine gun went on to become one of the most common heavy weapons used in the field by US infantry, mounted on ground vehicles and installed in aircraft. Whether used on the ground or against air targets, the gun is beloved by troops for its ferocious stopping power. Installed in combinations in half tracks as anti-aircraft guns, the weapon earned affectionate nicknames like the “Ma Deuce,” the “Quad 50” or simply “The Fifty.” To this day, the .50 cal is still in wide use wherever US forces deploy.
M13/M16 MGMC AA model comparisons with Flames of War (left) and Command Decision (right)
My recent projects for my 15mm World War II gaming have focused on filling in extra support units, and adding some AA was key to filling a gap in my forces. Needing four models for a full platoon, I was faced with a choice of manufacturers. Flames of War sells their M13 MGMC models separately for about $13 each. Old Glory Miniatures offers a 3-pack of M16 Quad AA SP Halftracks for $25. So, I was looking at choices of purchasing four of the FOW models for $52, buying two of the CD sets for $50 (and having two leftover, unused models) or ordering from each manufacturer and getting exactly the four models I needed for $38.
I opted for the economical route and wound up with some pretty different models. Side-by-side, the FOW resin and plastic truck is taller, longer and wider than the CD all-metal castings. Everything glued-up nicely, but the guns for both companies proved to be very delicate and prone to bending. The FOW model has crisper lines, but the rougher CD half tracks have a fair amount more detail.
My completed M13/M16 MGMC AA platoon
With four half tracks in the platoon, the larger FOW model literally stands out among the other three smaller CD models. With its bigger profile, I’ve decided to take advantage of its differences and use the FOW half track as the command model in the unit. Since I won’t be fielding the platoon all the time, the delicate gun barrels are less of concern as they are bound to sit comfortably in one corner of the table and blaze away at any Axis aircraft or unfortunate ground forces who dare get too close.
Piper Aircraft was founded in the late 1920s with an eye toward building planes for general civilian use. From 1938 to 1947, Piper sold nearly 30,000 of their relatively inexpensive J-3 Cub models, making the plane one of the most ubiquitous non-commercial planes soaring over the United States by the mid-20th-century.
1943 industrial film of the building of a Piper Aircraft J-3 Cub
During World War II, Piper supplied the US Army Air Forces with nearly 6000 of their J-3 Cub planes in a modified military version known as the L-4 Grasshopper. The main modification of the light plane was the installation of wide banks of plexiglass windows, making it usable as a radio observer and reconnaissance plane during key missions like the Allied invasion of Normandy in June 1944. The Grasshopper also found varied service transporting supplies to the front, carrying wounded to the rear and ferrying military and political dignitaries. In rare cases later in the war, the plane was also equipped with light weapons for use as an air-to-ground attack platform.
My completed Flames of War US AOP Grasshopper
My modelling for Flames of War has been focusing as of late on filling in some odd little gaps in my forces. Since I run some US artillery from time to time, adding an air observation plane not only allowed me to add to my gaming but also take a break to model another plane. This time around I also decided to pay a bit more attention to basing my plane to add a bit of visual interest to an otherwise simple model. I like the quick work on the base so much that I’m going to go back and add the same to my US P-47 Thunderbolt and British Hawker Typhoon models. While relatively inexpensive and easy to assemble and paint like my other aircraft, my one criticism of the FOW Grasshopper model is the lack of decals.
Even with the one shortcoming in markings, my new Grasshopper will be a welcome addition to my FOW games. In most American army lists, adding an AOP is a cheap point spend while also greatly expanding the effectiveness of the already devastating US 105mm howitzer battery. Getting this little plane zipping over the heads of my Axis opponents on the tabletop battlefield may not prove to be a total game changer. It is, however, going to give the enemy one more thing to worry about and may just provide an edge like this classic of American engineering did some 70 years ago in the skies of Europe.
I’m working my way through my new 6mm micro armor modelling project using models from GHQ. After painting I arrived at the stage of applying decals which I also ordered from GHQ. Like many hobbyists, I have a love-hate relationship with decals at any scale. Cutting and applying decals can be frustrating as they fold, tear or wind up in the wrong positions on models. On the other hand, getting decals successfully applied to models adds a ton of personality to a paint job and can allow for easier identification during play on the tabletop.
An experienced micro armor modeller and player at Metropolitan Wargamers in Brooklyn, NY turned me on to his technique for applying decals to 6mm models which I’ve found to be fast and easy with great results. Being organized and methodical in an assembly line manner is key. Having the right equipment is also a necessity. Magnifying reading glasses keeps all the tiny decals and models in focus. Working off a clean, flat hobby mat provides an ideal surface to cut decals and also keeps things easy to see. A sharp hobby knife with a fresh blade, some very fine brushes, clean water, white glue, paper towels and a cotton swab round out the basic equipment. Finally, using a decal fixative (I use Walthers Solvaset) gives a good bond for decals once applied, nestling them into the uneven surfaces of the model.
Applying 6mm Decals
Carefully cut around the shape of each decal with a very sharp hobby knife.
Using a finger tip, dot several small beads of clean water in a row on the work surface.
Apply a small amount of watered-down white glue to the surface of the model where the decal will be applied.
Carefully push a decal into a bead of water using a small brush.
After a few seconds, roll the decal off its paper backing using a fine brush.
Roll the decal onto the model’s surface and gently push it into position.
After a few minutes of drying time, dab the decal area with a cotton swab to remove any excess water.
Coat the decal and the immediate area with a decal fixative solvent.
Once models are completely dry, spray with a protective matte finish.
Applying decals to 6mm American armor
Historic markings varied a lot during World War II, so I largely came up with my own simple plan for my decals. Each one of my half tracks got encircled white air-observation stars on the hood. My Shermans each received two stars, one plain star on the front hull and an encircled white star on the rear deck of the tank. The M10 Wolverines and armored cars likewise received white stars in circles on the rear deck area.
6mm US armor and transports with decals applied
I was able to complete all my decals in just two evenings, totaling just about two hours. I couldn’t be more pleased with the results, and I didn’t lose a single decal in the process. Now that I’ve got my newly-learned technique down, it’s on to my German armor and then the battlefield.
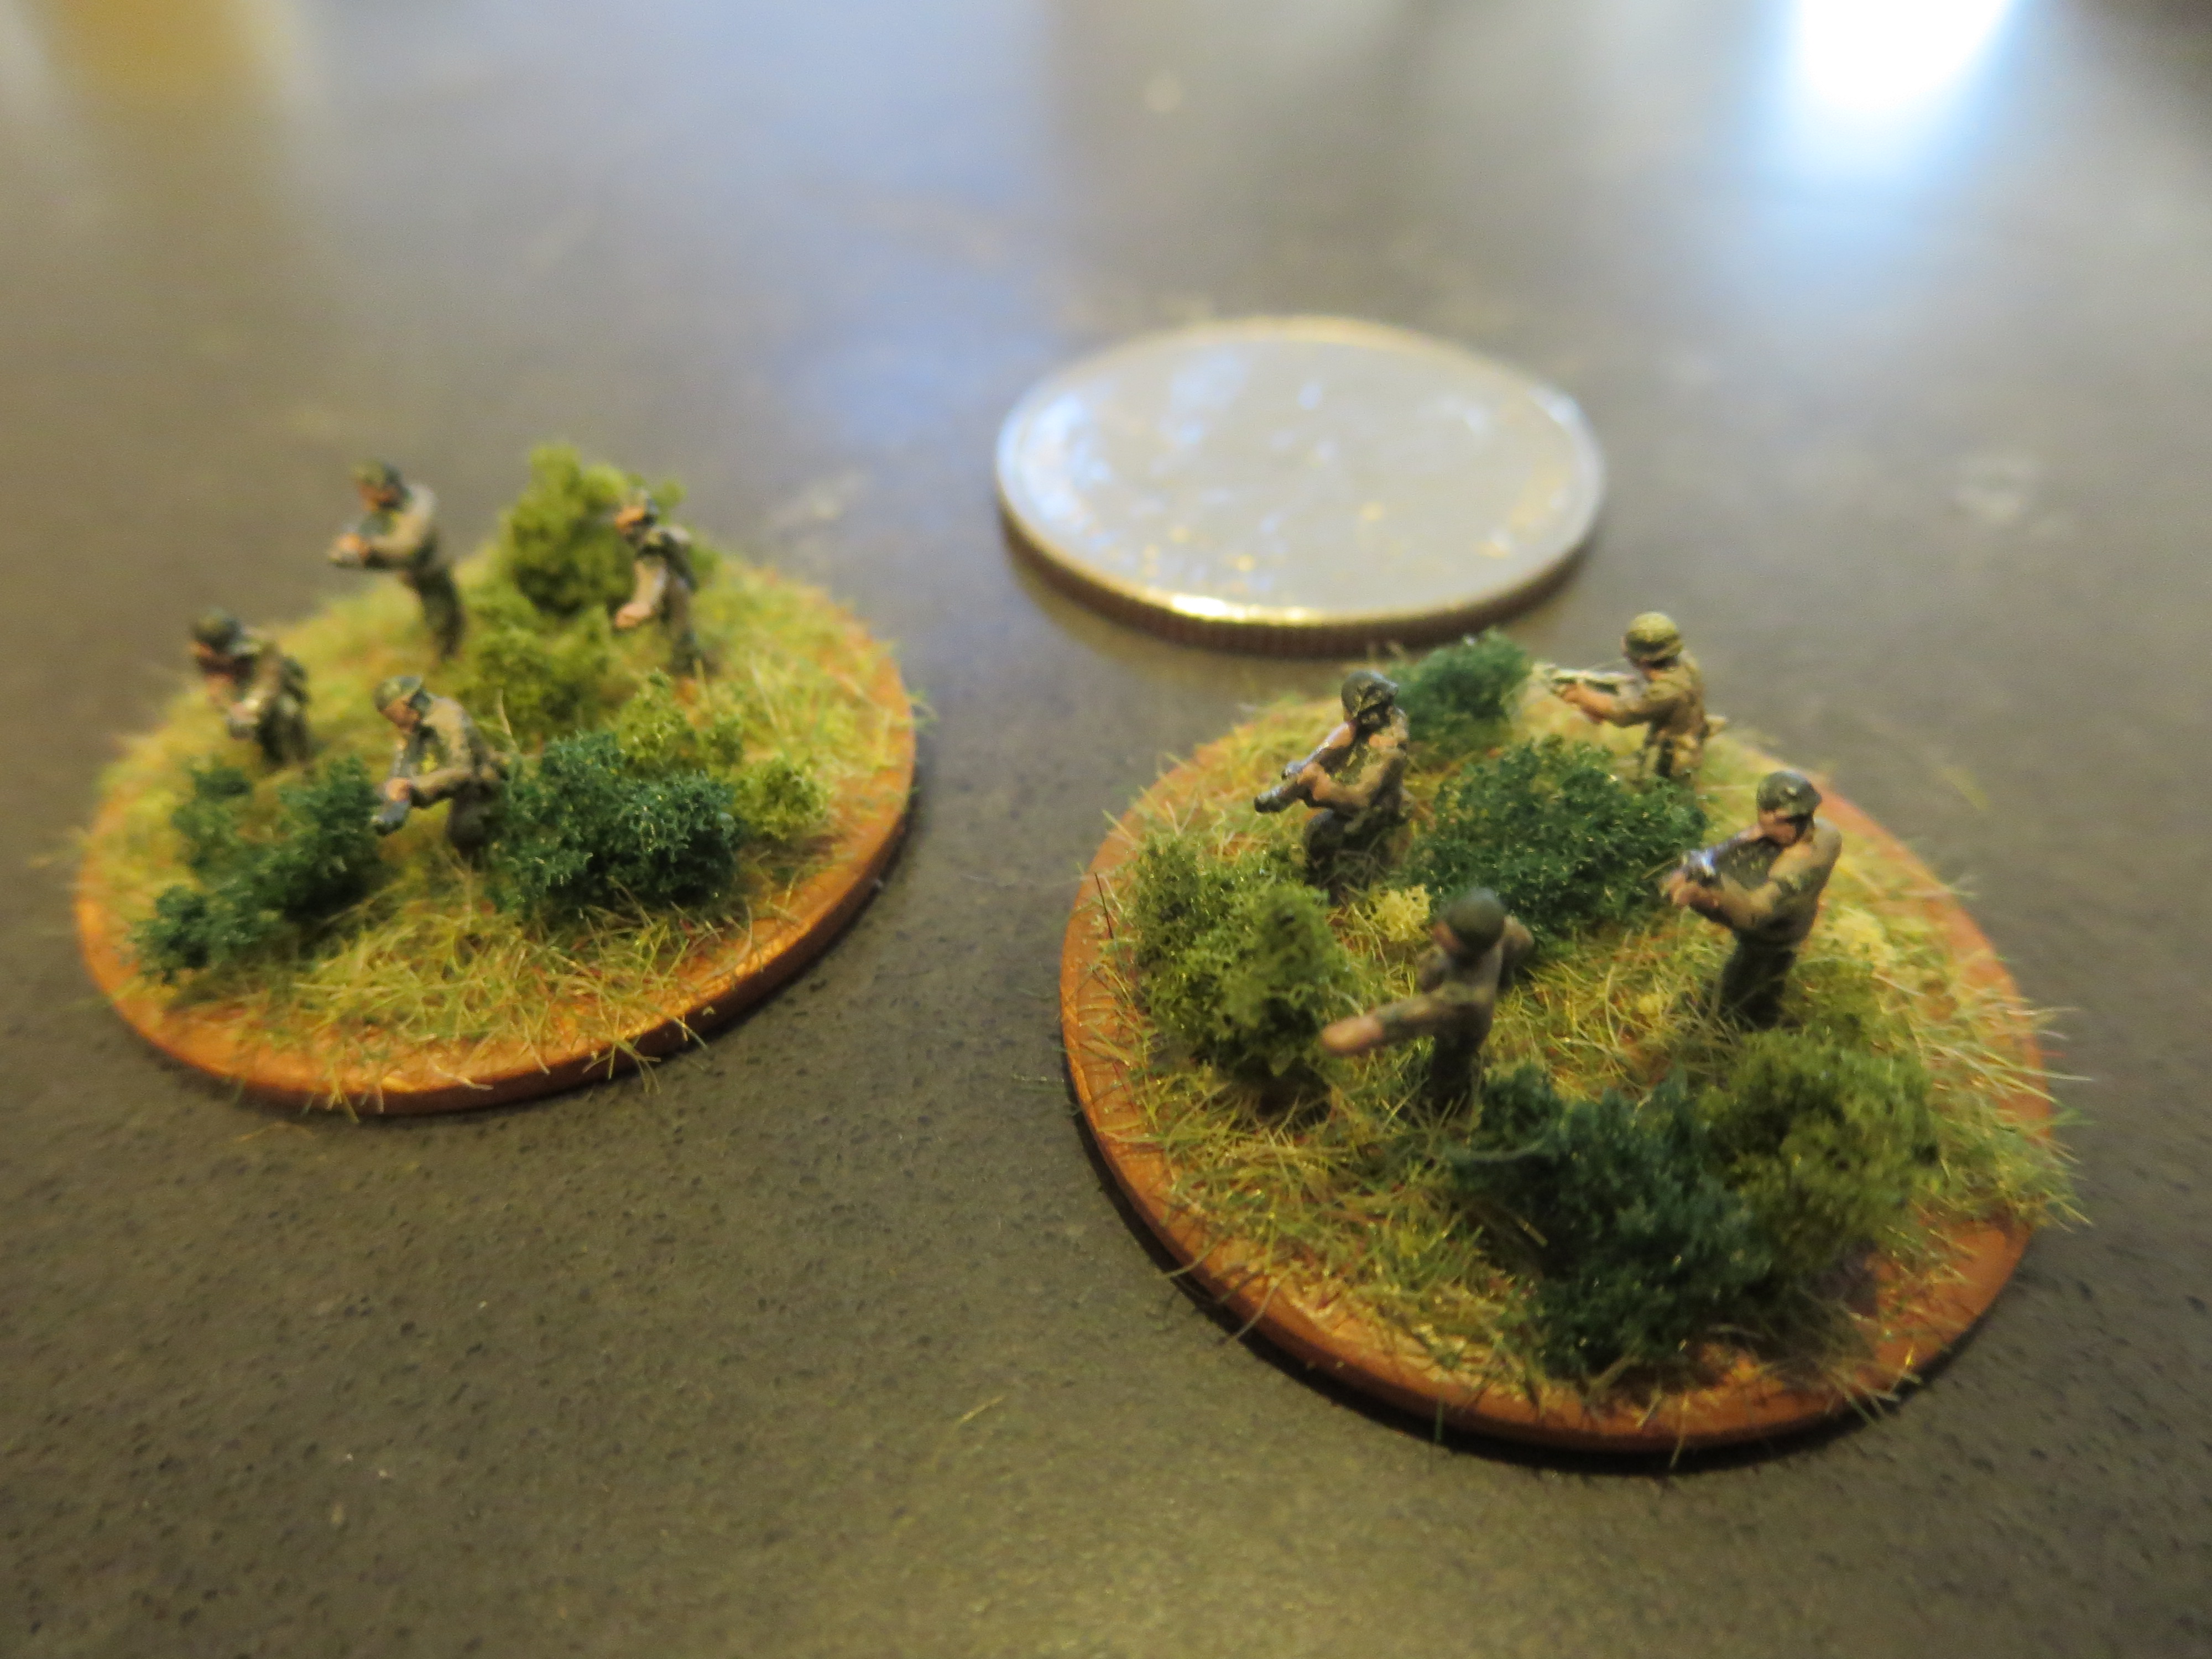
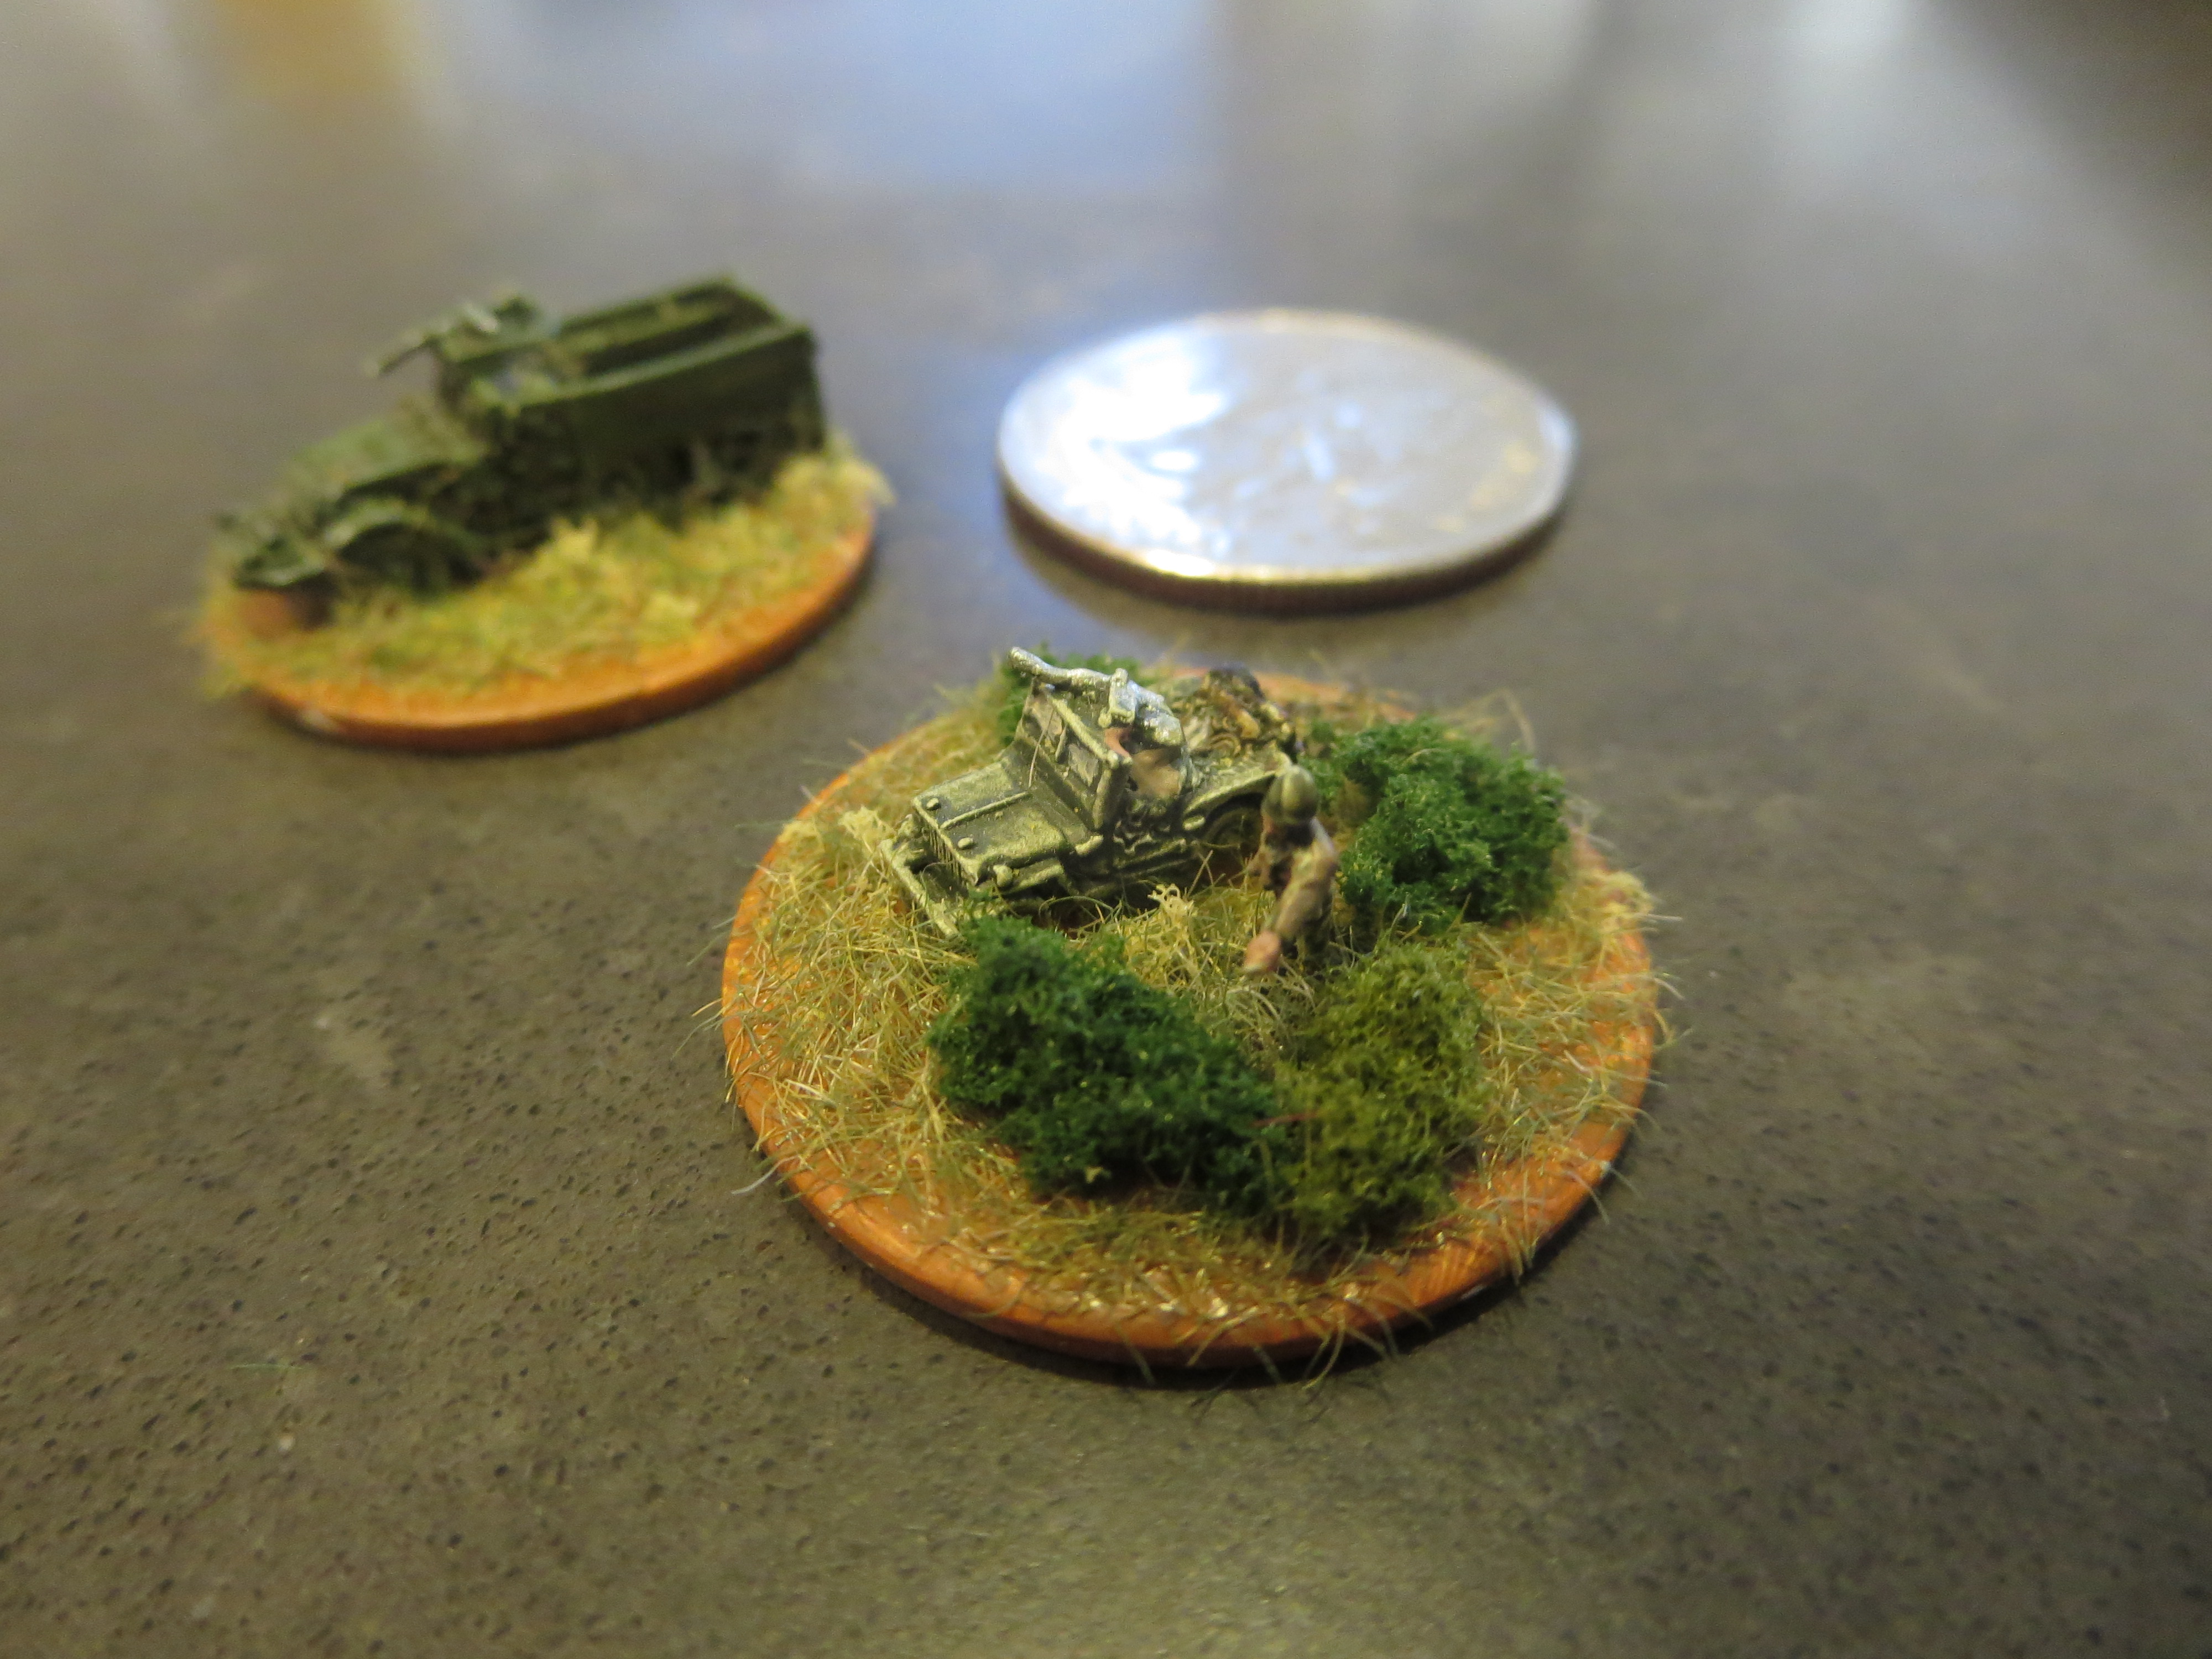
This was my first time painting 6mm models, so I worked out a quick technique for painting infantry, transports and armor that gave pretty great results. I picked up a pair of 1.5x strength reading glasses which really helped in bringing the models into focus as I dabbed paint to the models using an ultra fine brush. By gluing the models to metal washers I was able to affix the models to a strip of magnetic basing, allowing me to rotate the models easily to paint from every angle.
Two completed stands of GHQ US infantry
Painting US Infantry
Glue a small piece of card over the center hole of washers.
Glue models to washer bases.
Basecoat models and bases with white spray primer.
Wash models in a mix of 1 part dark green, 1 part light green and 5 parts water.
Paint jackets tan.
Paint boots, gun stocks and equipment details dark brown,
Paint hands and faces flesh.
Paint gun barrels and equipment details gun-metal silver.
Paint bases dirt brown.
Cover bases in white glue and cover in 50/50 mix of fine light green and dark green grass flock.
Glue small pieces of clump foliage to base.
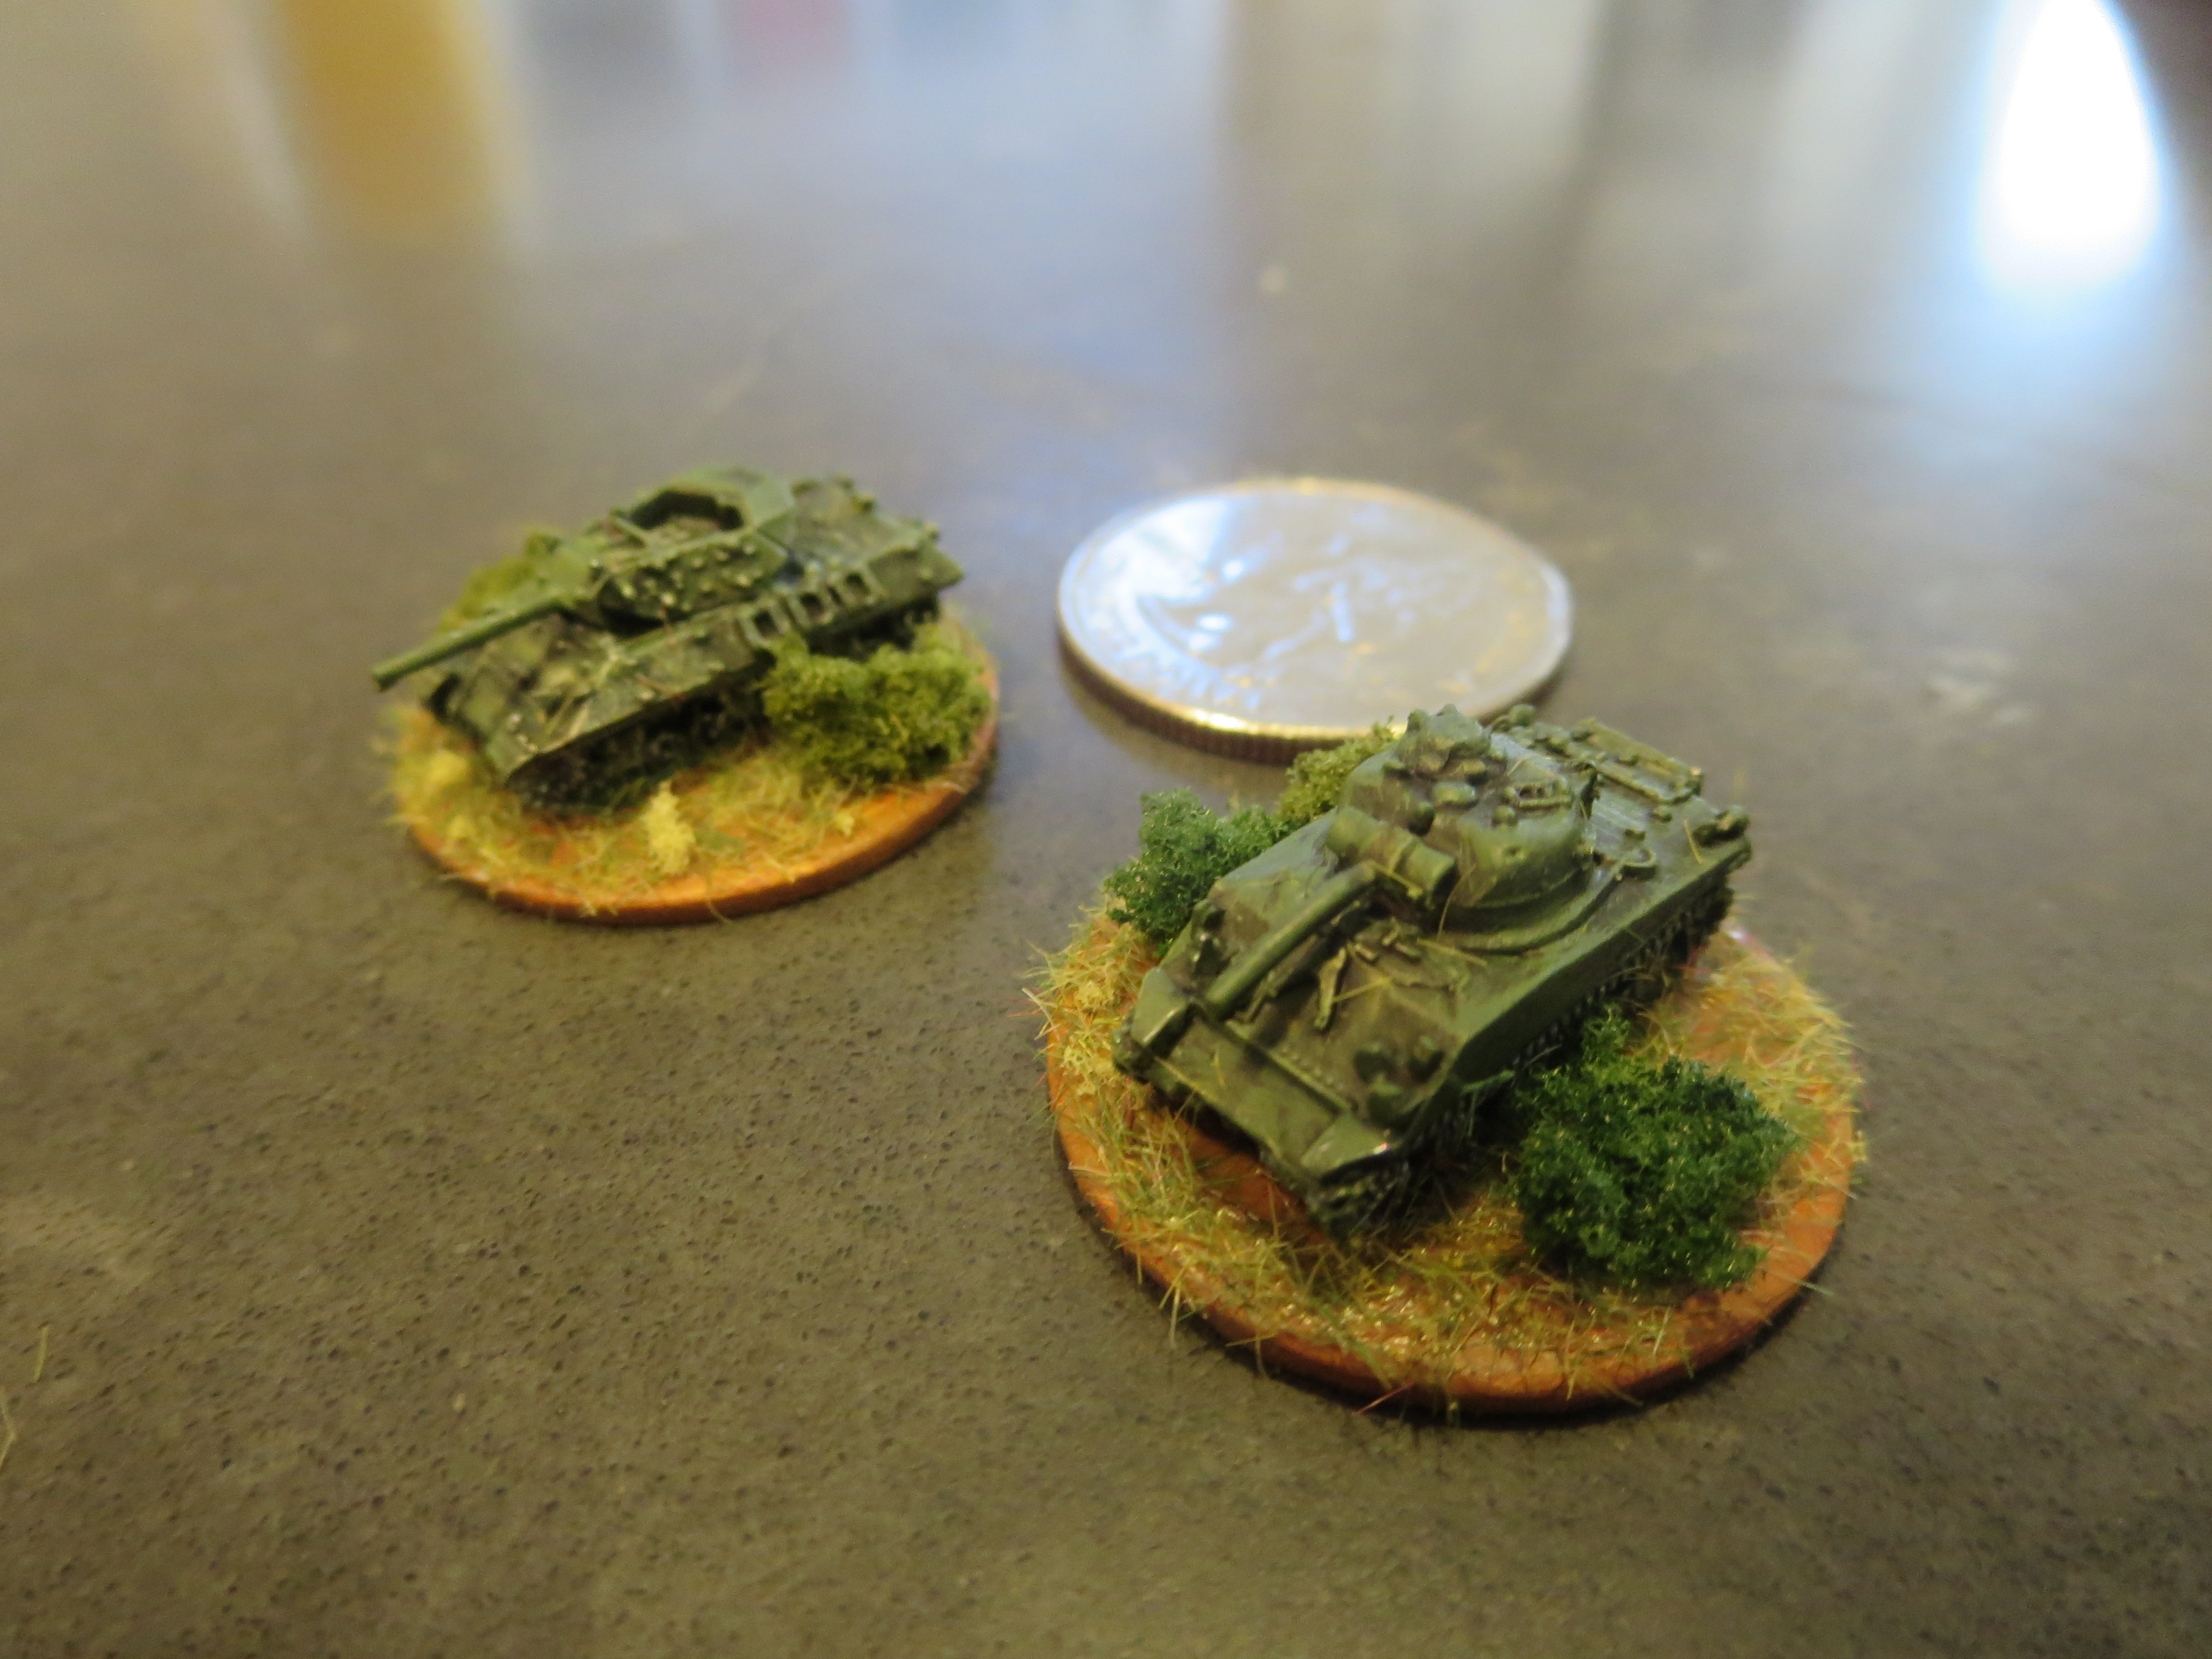
GHQ M10 Wolverine and Sherman tank
Painting US Armor and Transports
Glue a small piece of card over the center hole of washers.
Glue models to washer bases.
Basecoat models and bases with white spray primer.
Wash models in a mix of 1 part dark green, 1 part light green and 5 parts water.
Lightly coat models in mud brown wash.
Dry brush light green highlights to models.
Dry brush tracks, machine guns and body details gun-metal silver.
Paint bases dirt brown.
Cover bases in white glue and cover in 50/50 mix of fine light green and dark green grass flock.
Glue small pieces of clump foliage to base.
Paint tire tracks on bases dark brown.
All that’s left now for my US force is to apply some tiny decals on my tanks, armored vehicles and transports. Up next, I’ve got my eye on some additional German armoured infantry to go along with the Panzer IVs I already have on hand. Once I have my Germans on the workbench I’ll get some pics and process notes on painting up my first Axis troops at this scale. Until then, have a look a more photos below of where I am so far on my wargaming project in 6mm.
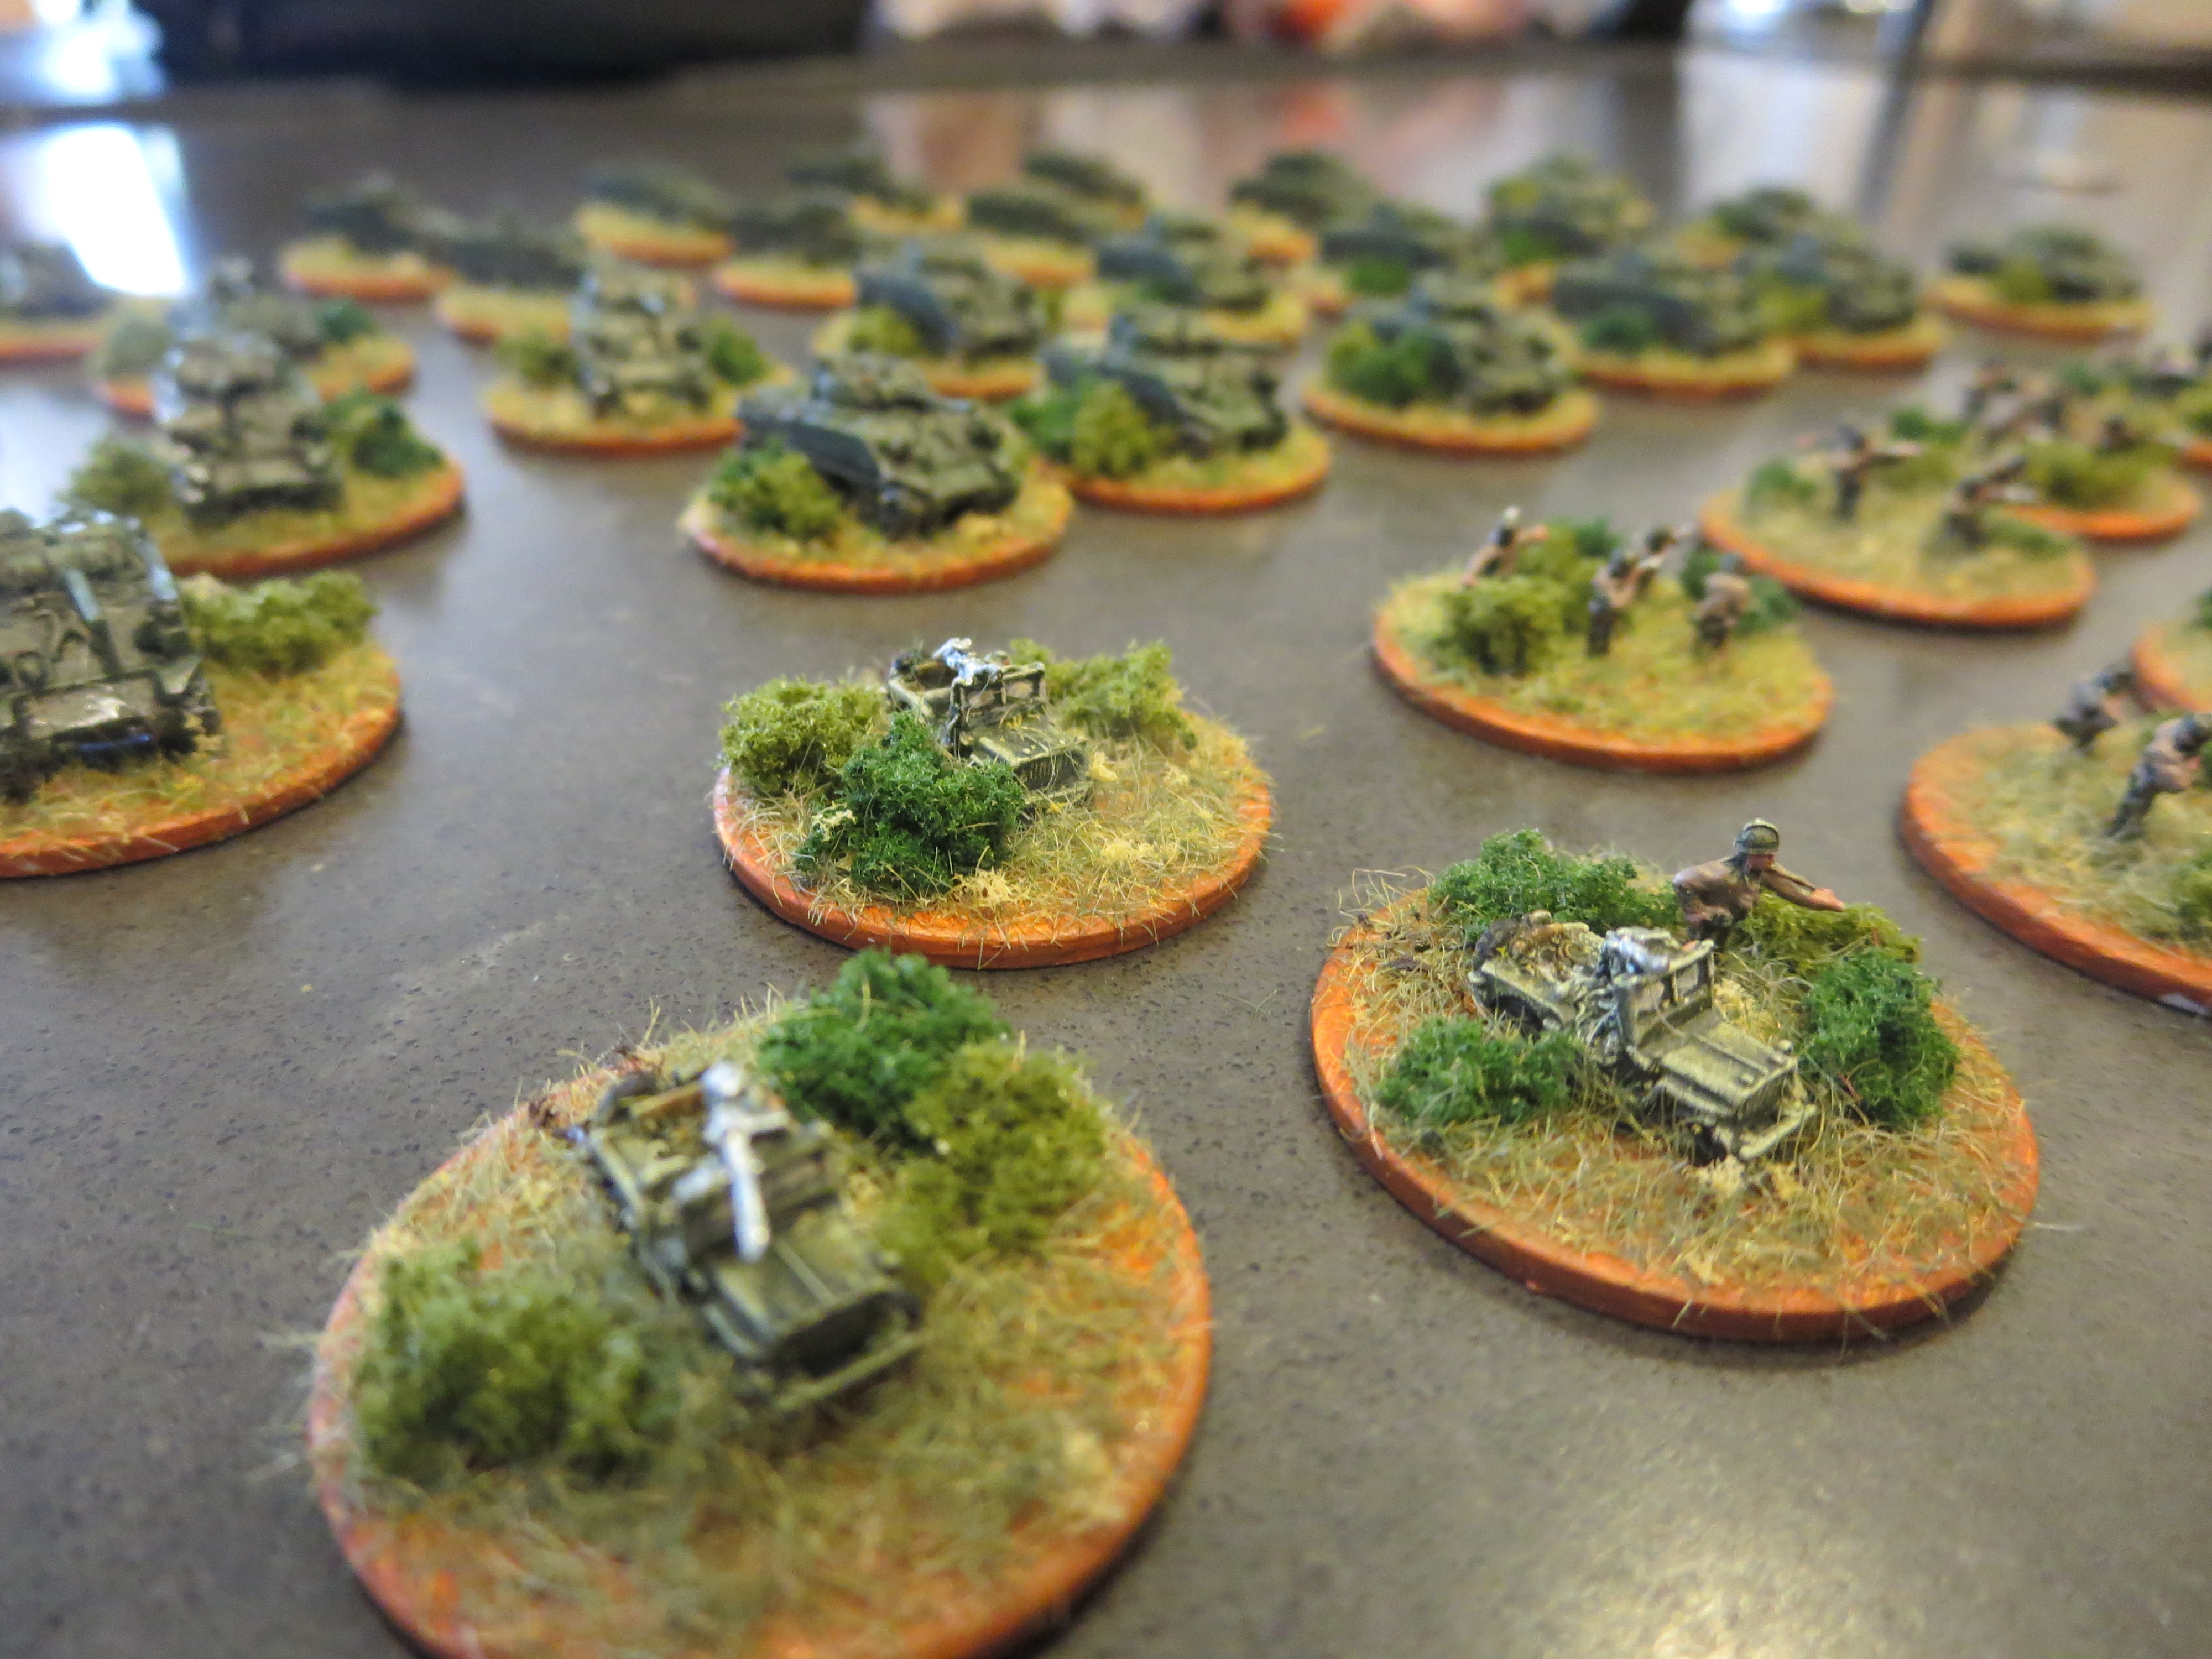
GHQ half track and command stand with Jeep and officer
GHQ M10 Wolverines
GHQ M8 and M20 armored cars
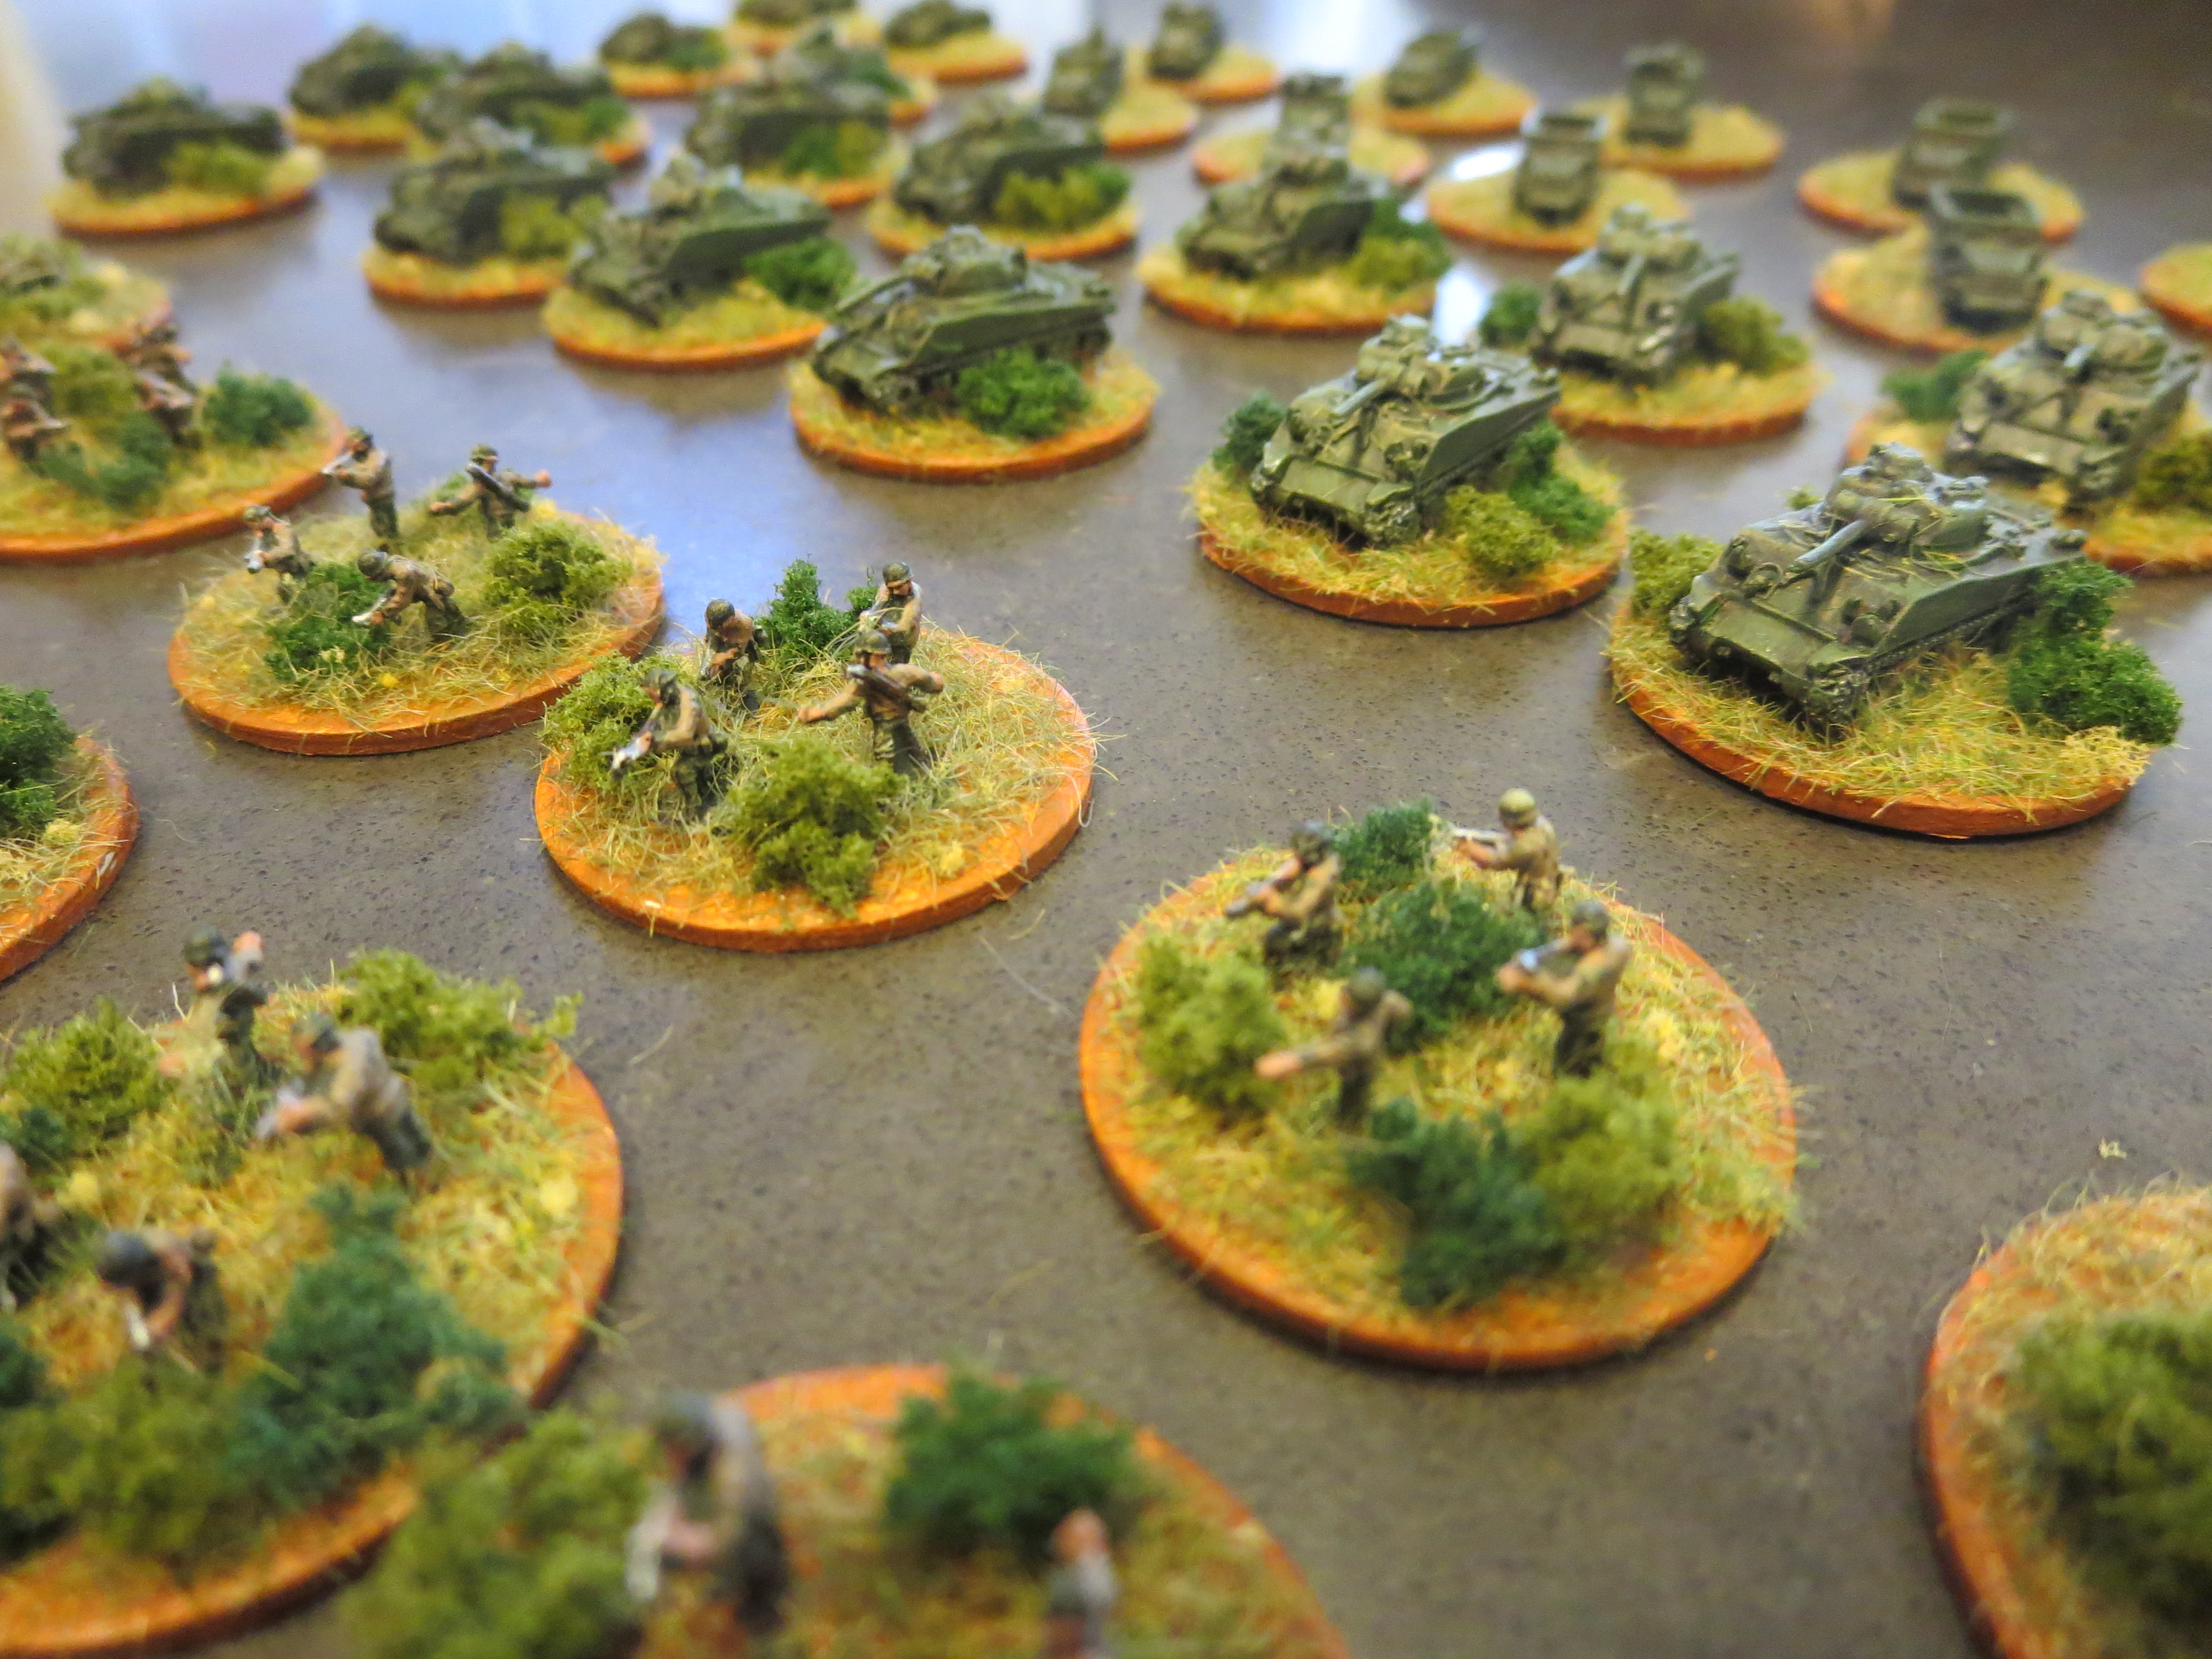
Close-ups of my completed GHQ US armored infantry and Sherman tank force
Another close-up of my completed GHQ US armored infantry and Sherman tank force
Although African-Americans have fought in every war in US history, their fight has often come on multiple fronts of prejudice and acceptance at home and abroad. Segregated units such as the famed 54th Massachusetts during the American Civil War and the 369th Infantry Regiment Harlem Hellfighters in World War I have received their due in popular culture in recent years, as have the WWII pilots of the Tuskegee Airmen.
On the ground, African-Americans in WWII were most often relegated to support roles early in the war as truck drivers, stevedores and cooks. By late in the war with reserves of Allied soldiers dwindling throughout the European campaigns, black soldiers were pressed into service at the front lines of the Battle of the Bulge and the Italian Campaign. It was in the actions in Italy where the famed 92nd Infantry Buffalo Soldiers added another chapter to their service history.
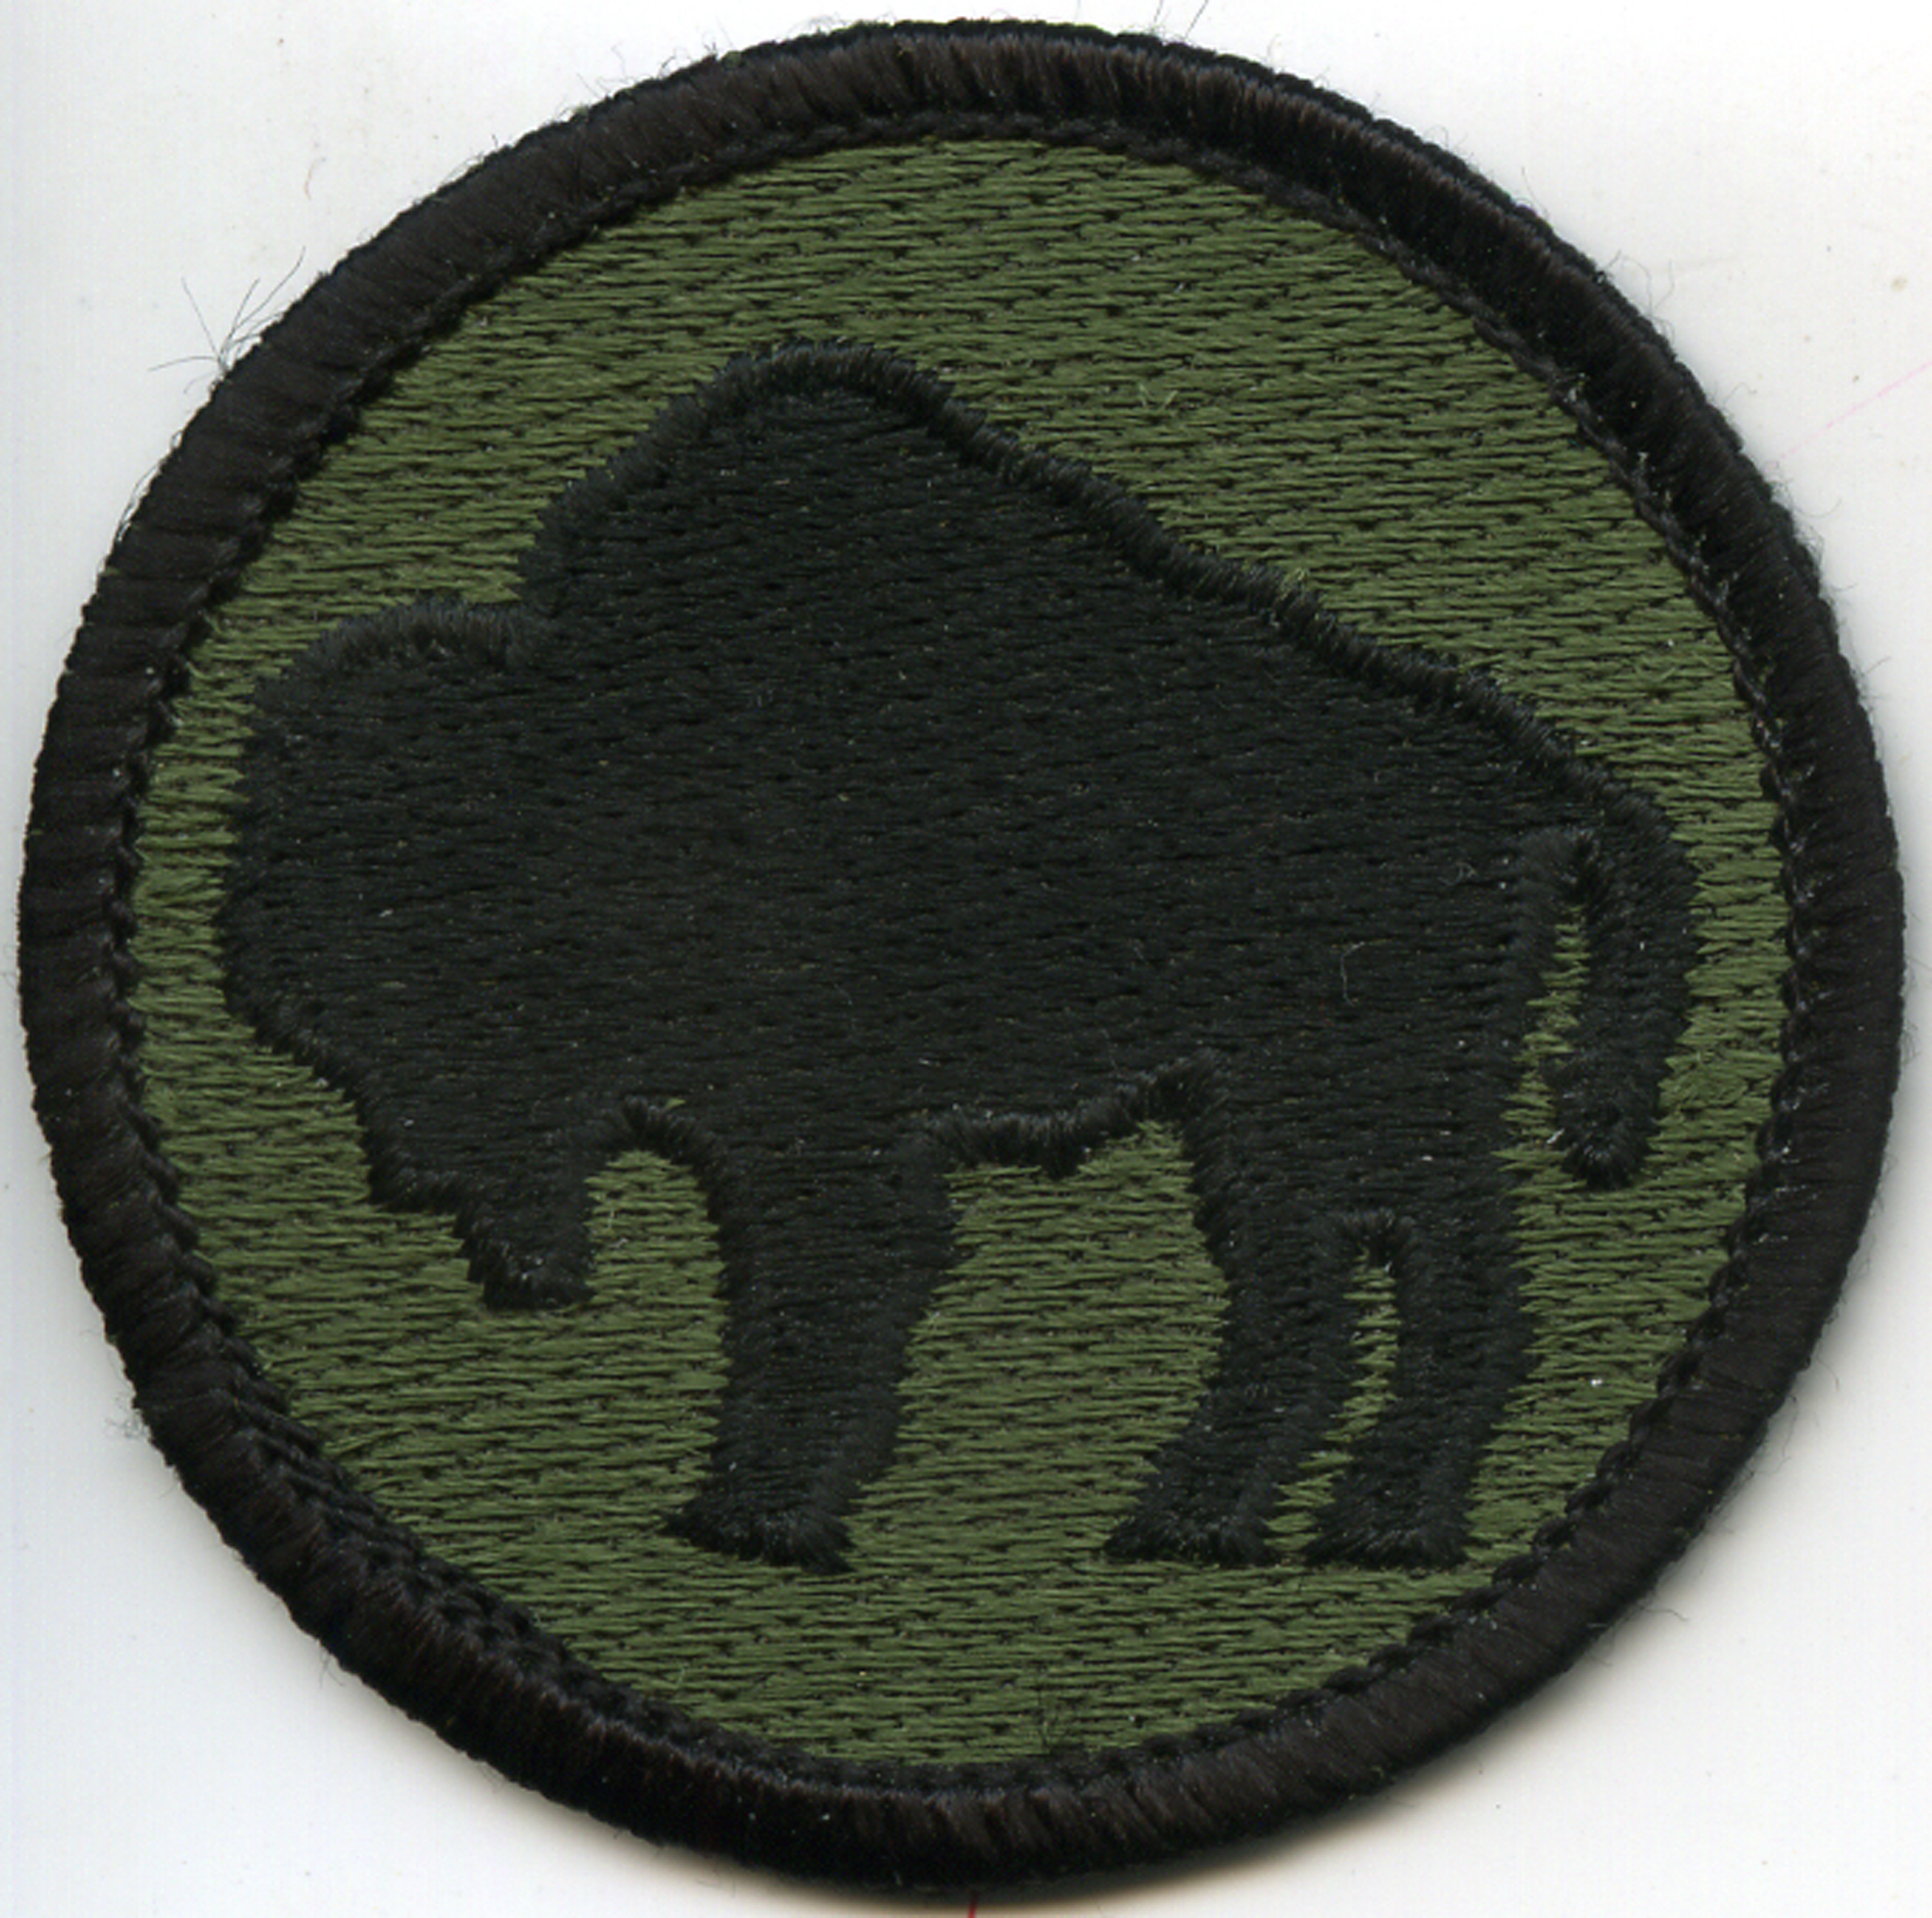
Shoulder insignia of the 92nd Infantry Division ‘Buffalo Soldiers’
The Buffalo Soldiers in the Italian Campaign
The name “Buffalo Soldiers” dates back to the frontier Indian Wars of the 19th-century when post-Civil War free blacks volunteered for service in various US army capacities in the West. Later, these units continued serving in various capacities through the Spanish-American War and into WWI. Reactivated in 1942, the Buffalo Soldiers of the 92nd Infantry Division finally made their way to the war via Italy in the fall of 1944.
Video of the 92nd Infantry arriving in Italy in October 1944
As part of the US 5th Army, the 12,000 men of the 92nd Infantry made up part of the multinational Allied coalition of US, Brazilian, British and UK Commonwealth forces which sought to break the Gothic Line. Cutting across Italy, the Axis hoped to hold off any further Allied progress north to meet with other Allied forces pressing through Europe from Normandy inland toward Berlin.
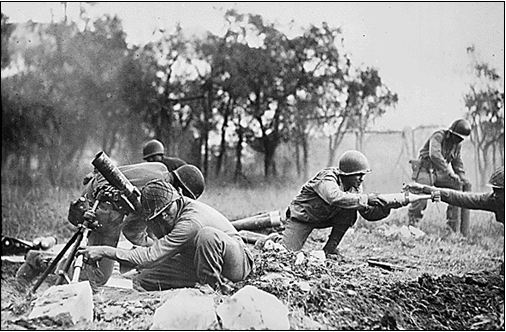
A 92nd Infantry Division mortar crew firing near Massa, Italy
Led by senior white officers in otherwise segregated units, the 92nd Infantry made up a key element of the left flank of the Allied push up through the Italian peninsula. Crossing the Arno River and proceeding north, the 92nd made its way up the Mediterranean coast through Lucca, Massa and on to La Spezia and Genoa by the time of Axis surrender in May 1945.
The legacy of the contributions of the 92nd Infantry Division’s effectiveness in Italy has been much-debated. A paper from the 1950s does what I read to be a good job in explaining the challenges the Buffalo Soldiers faced — delays in reinforcements, shortages in re-supply and a lack of training for the kind of terrain encountered in Italy. I believe much of this can be chalked-up to the ingrained organizational racism against the segregated units. Post-war, the members of the Buffalo Soldiers also returned to a United States still entrenched in racial discrimination. It was not until the late 1990s that two members of the 92nd were recognized with Medal of Honor commendations, some fifty years after the war’s end.
Spike Lee’s Miracle At St. Anna
As a wargamer and film fan, I often turn to the movies to cross-pollinate my interest in a period. Spike Lee’s Miracle At St. Anna from 2008 tells the story of four soldiers from the 92nd Infantry who hide out in a small Tuscan village and bond with its residents amid the oppression and danger of German occupiers. Lee’s movies often run hot and cold, and Miracle at St. Anna met with mixed reviews, poor box office results and a fair amount of criticism over the lack of historical accuracy. All that said, the Italian locations and strong individual performances makes the movie worth a view for a rare glimpse of African-American soldiers in WWII cinema.
Modelling the 92nd Infantry Division for Flames of War
In late February 2014, the revised Flames of WarRoad To Rome and Fortress Italy compilation was released as an updated and expanded guide to the Italy campaign of 1944 and 1945. The Fortress Italy book covers the German and Italian defenders, and Road To Rome outlines the Allied US, British, Polish, French and lesser-known UK Commonwealth forces from Canada, New Zealand, India and South Africa. A third book, Italy Battles, provides special mission rules, battle scenarios and campaign notes for Anzio (aka “Operation Shingle”) and Monte Cassino.
Having dedicated years of my FOW modelling and gaming to Western Europe, these books provided a great opportunity for myself and other members of Metropolitan Wargamers in Brooklyn, NY to dive into a club-wide Italian project. I’ve also been wanting to put together a unique company for my FOW collection, and I was pleased to find the 92nd Infantry Regiment outlined in the Road To Rome book. With all our focus on the Italy theater, we’ve decided to dive headlong into a multi-month FOW Infantry Aces campaign, and there will be more to come with updates on our new Infantry Aces blog.
For my 92nd Infantry I decided to snap up the two sets from the Plastic Soldier Company – Late War US Infantry 1944-45 and US Infantry Heavy Weapons. At about $26 a box from my favorite online dealer The Warstore, the PSC kits are a huge value in fielding an entire infantry company along with bazooka, machine gun and mortar supporting weapons. Assembly involves lots of small parts and bases must be purchased separately, but getting a whole company on the table for a fraction of the costs of FOW models can’t be beaten.
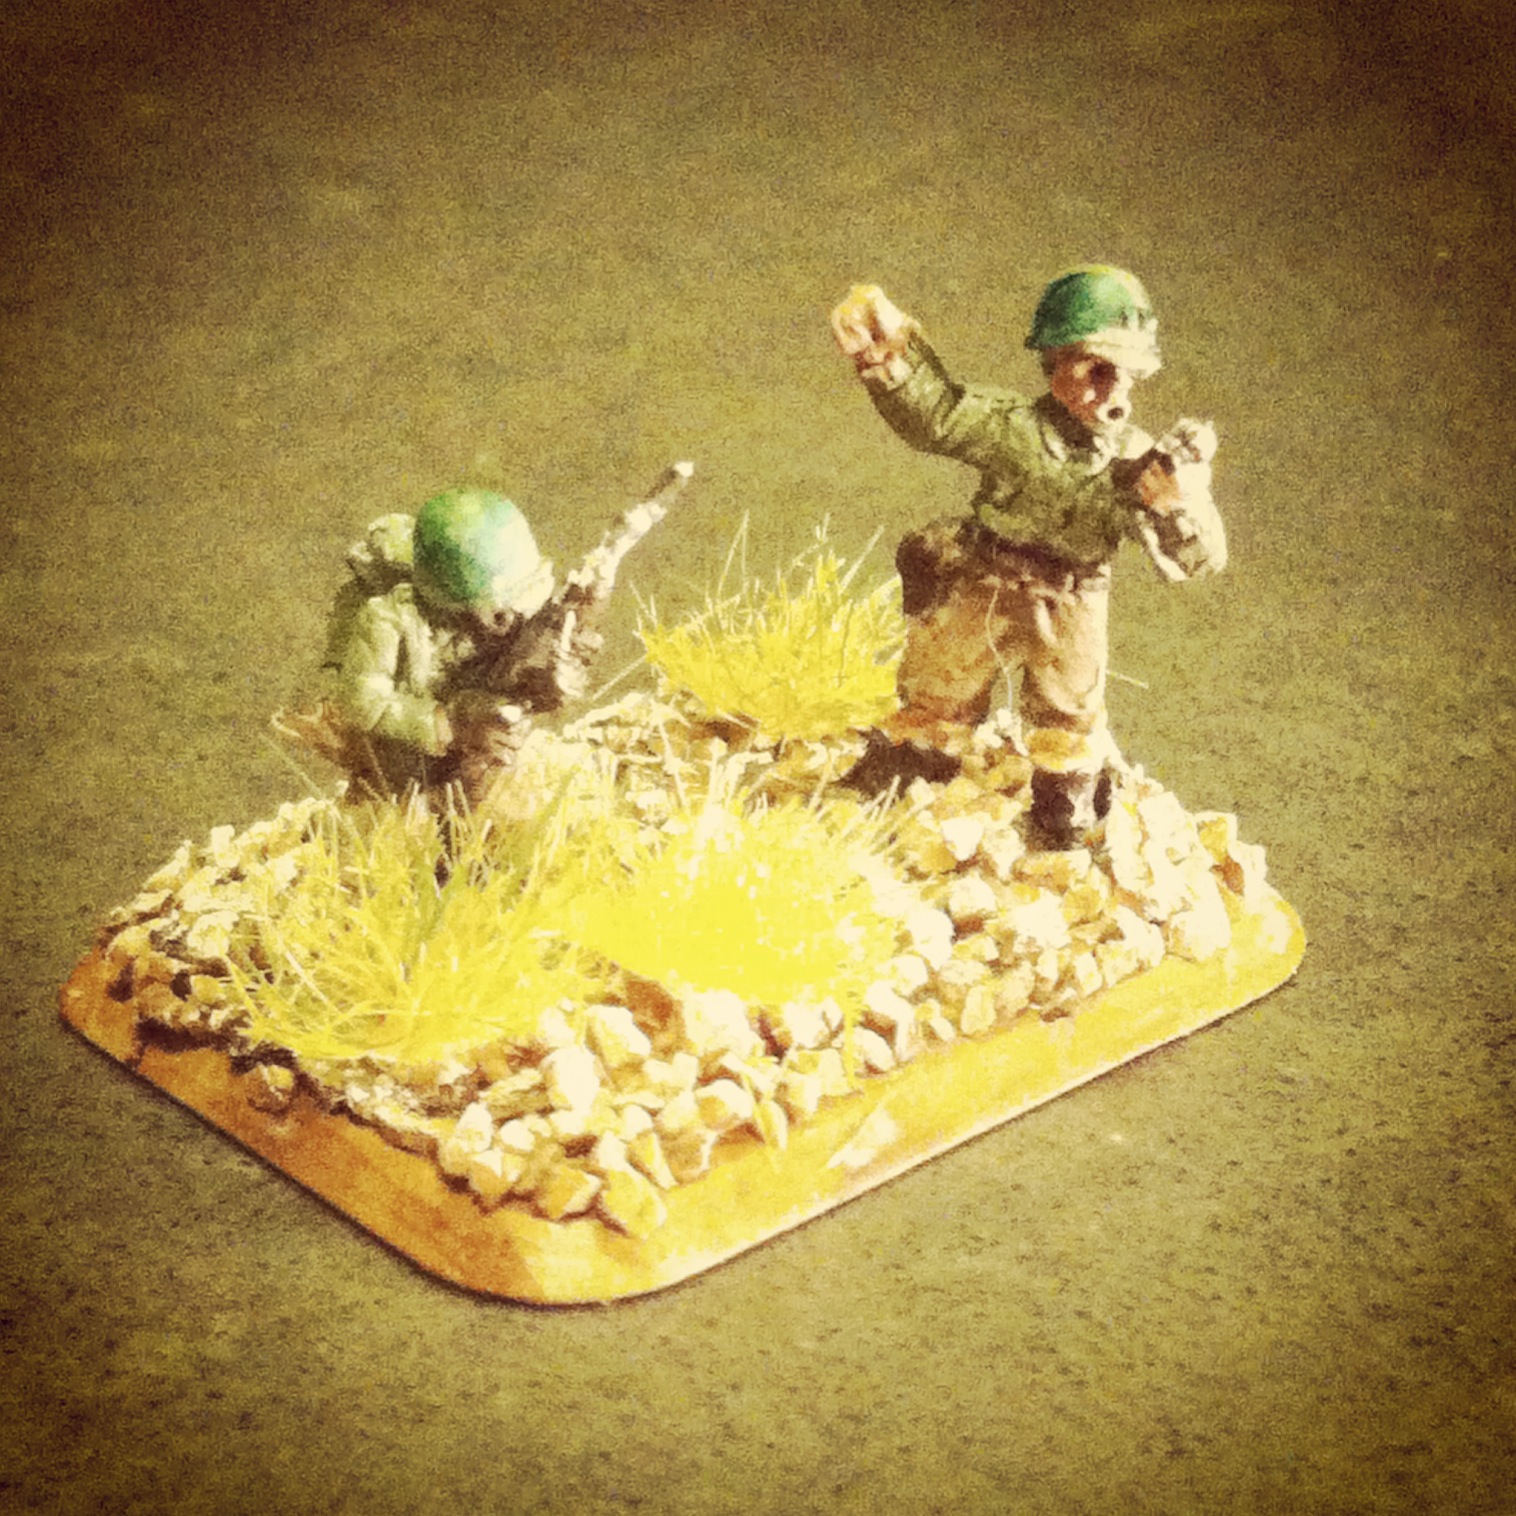
Pvt. Fred “Radio” Rogers and Lt. Daniel McFeeley
To fill out my force, I picked of the FOW Infantry Aces set for about $12. The pack gives you nine stands of character models to create special Infantry Ace command stands for use in the Infantry Aces campaign. The blister pack includes general US, British and German models with special Fallschirmjäger, Japanese-American Nisei, Kiwi and turbaned Indian characters. I shared the models with my fellow players at our club, and modelling these guys really adds some nice personality to the game. For my Command Ace stand, I’ve modeled the fictional Pvt. Fred “Radio” Rogers and Lt. Daniel McFeeley leading the way for my company.
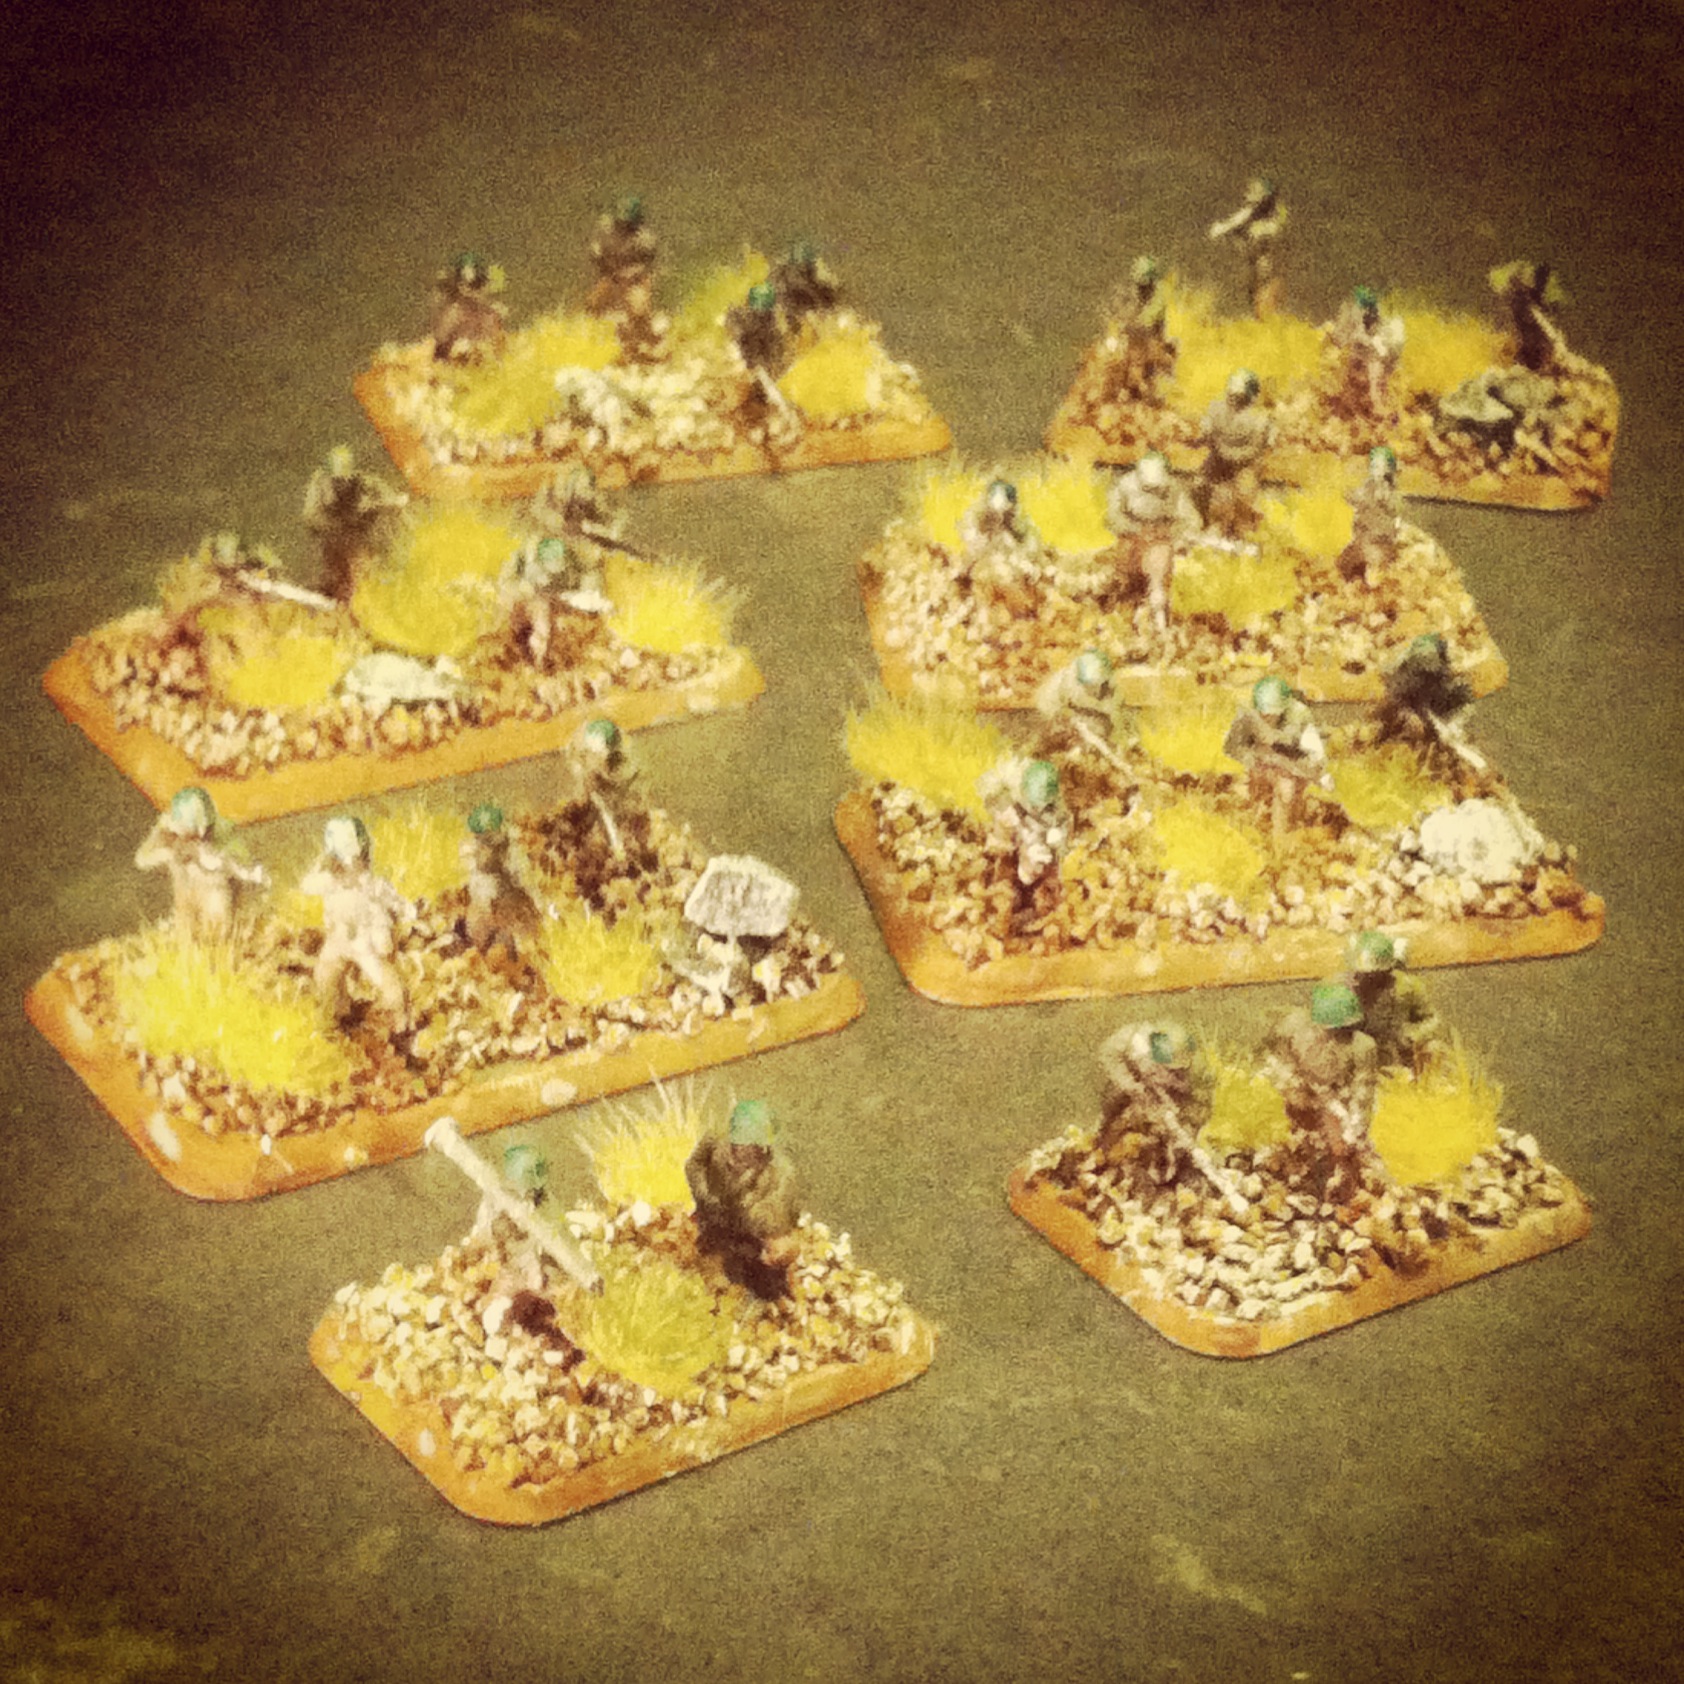
One of my three rifle platoons for the 92nd Infantry Division
In the FOW Italy campaign, the 92nd Infantry Division is rated as Confident-Trained making my force cheap and numerous. To start, I’ve constructed three rifle platoons with two rifle squads each plus a platoon command and bazooka in support. Along with my rifles and McFeeley and Rogers leading the way, I’m also bringing a weapons platoon in support. The platoon packs a punch with three 60mm mortars and four M1919 machine gun crews.
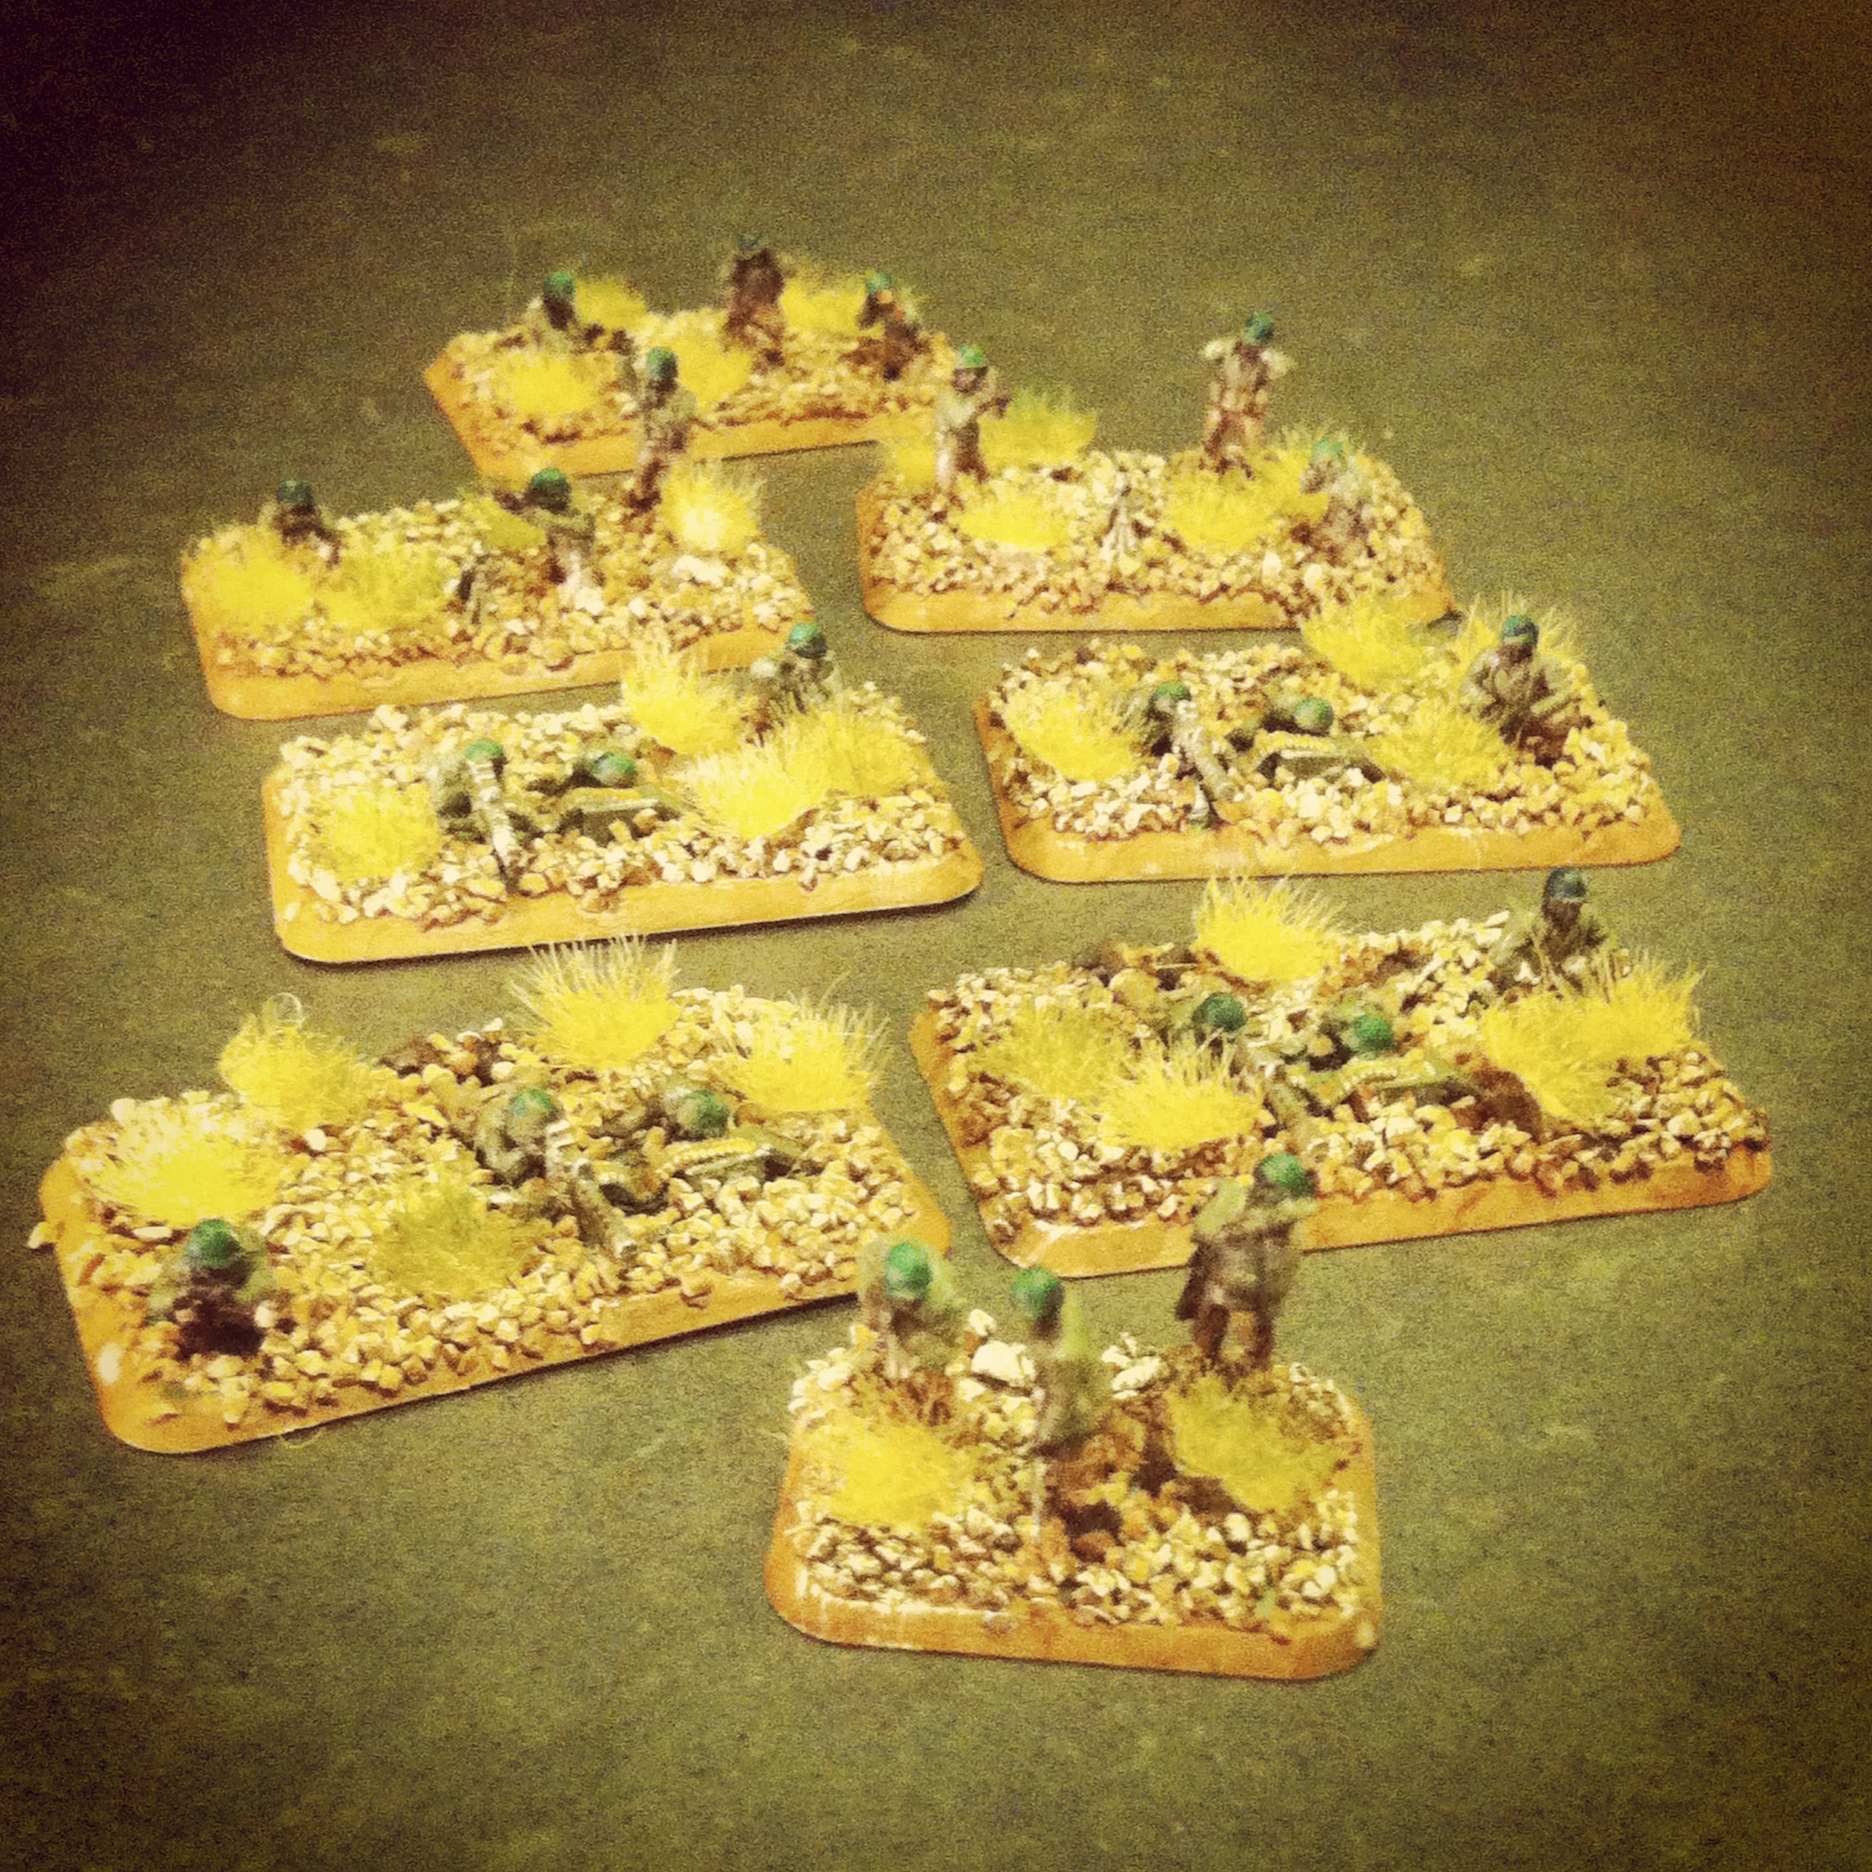
My Buffalo Soldiers mortar and machine gun weapons platoon
For all my models, I glued the PSC soldiers and equipment onto FOW bases and then hit them with an army green spray coat base. Boots, equipment, rifle stocks and flesh got a dark brown. Pants were done in a tan paint and leggings got a brownish off-white color. Guns were finished off in a metal coat. Basing involved a layer of fine gravel and larger rocks coated in a brown wash and then dry-brushed in a grey-white. Finally, tufts of brown-green grass completed the Mediterranean look of the models.
The beginnings of my platoon will be hitting the tabletop shores of Italy this coming weekend in their first round of our club’s Infantry Aces campaign. In the coming weeks I’ll be adding additional infantry weapons support with additional mortars, machine guns and more infantry. Even before these guys see their first action, I’m pretty thrilled to have put in the time to create some pretty unique models that I haven’t found modeled anywhere else at this scale. As in WWII years ago, I think the 92nd Infantry Buffalo Soldiers have been too often forgotten by mainstream history and many gamers alike. With my soldiers hitting the field again, I hope to bring a bit more glory back to these men who not only contributed to the fight against Axis fascism but also stood bravely against the tide of so much history against them.
 After wrapping up my first 28mm US Airborne troops, I set to work on some Germans. I ordered a bunch of Late War German infantry and command, plus an MG 42 team by Artizan Designs from Brigade Games and received them speedily. The detail in the figures really pops, and the personality and variety in the poses make them really engaging at this scale. I particularly like the stern officer in his greatcoat and the other figures screaming out orders and gesturing on the move.
  Painting WWII Germans for the first time at this scale, I really wanted to go for more detail than I do at 6mm or 15mm. Artizan Designs offers some great painting references on their website, including a general uniform guide and a lot of detail on German camoflage patterns. Using paints I had on hand plus a few more colors I picked up from Citadel’s paint line, I came up with a palette and painting scheme that produced some great results on my first go.
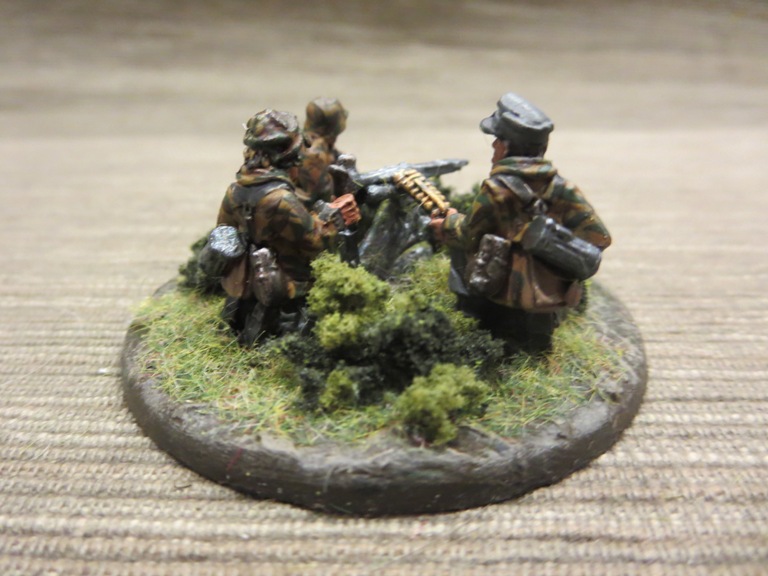
  The Artizan figures require little flash clean up before being glued to metal washers. The three man machine gun crew went on a 60mm plastic base I picked up from Proxie Models. Here’s the steps in detail for painting my German infantry.
 Helmets, smocks and pants base coated on the MG 42 team and infantry models
 Infantry and officer uniforms base coated
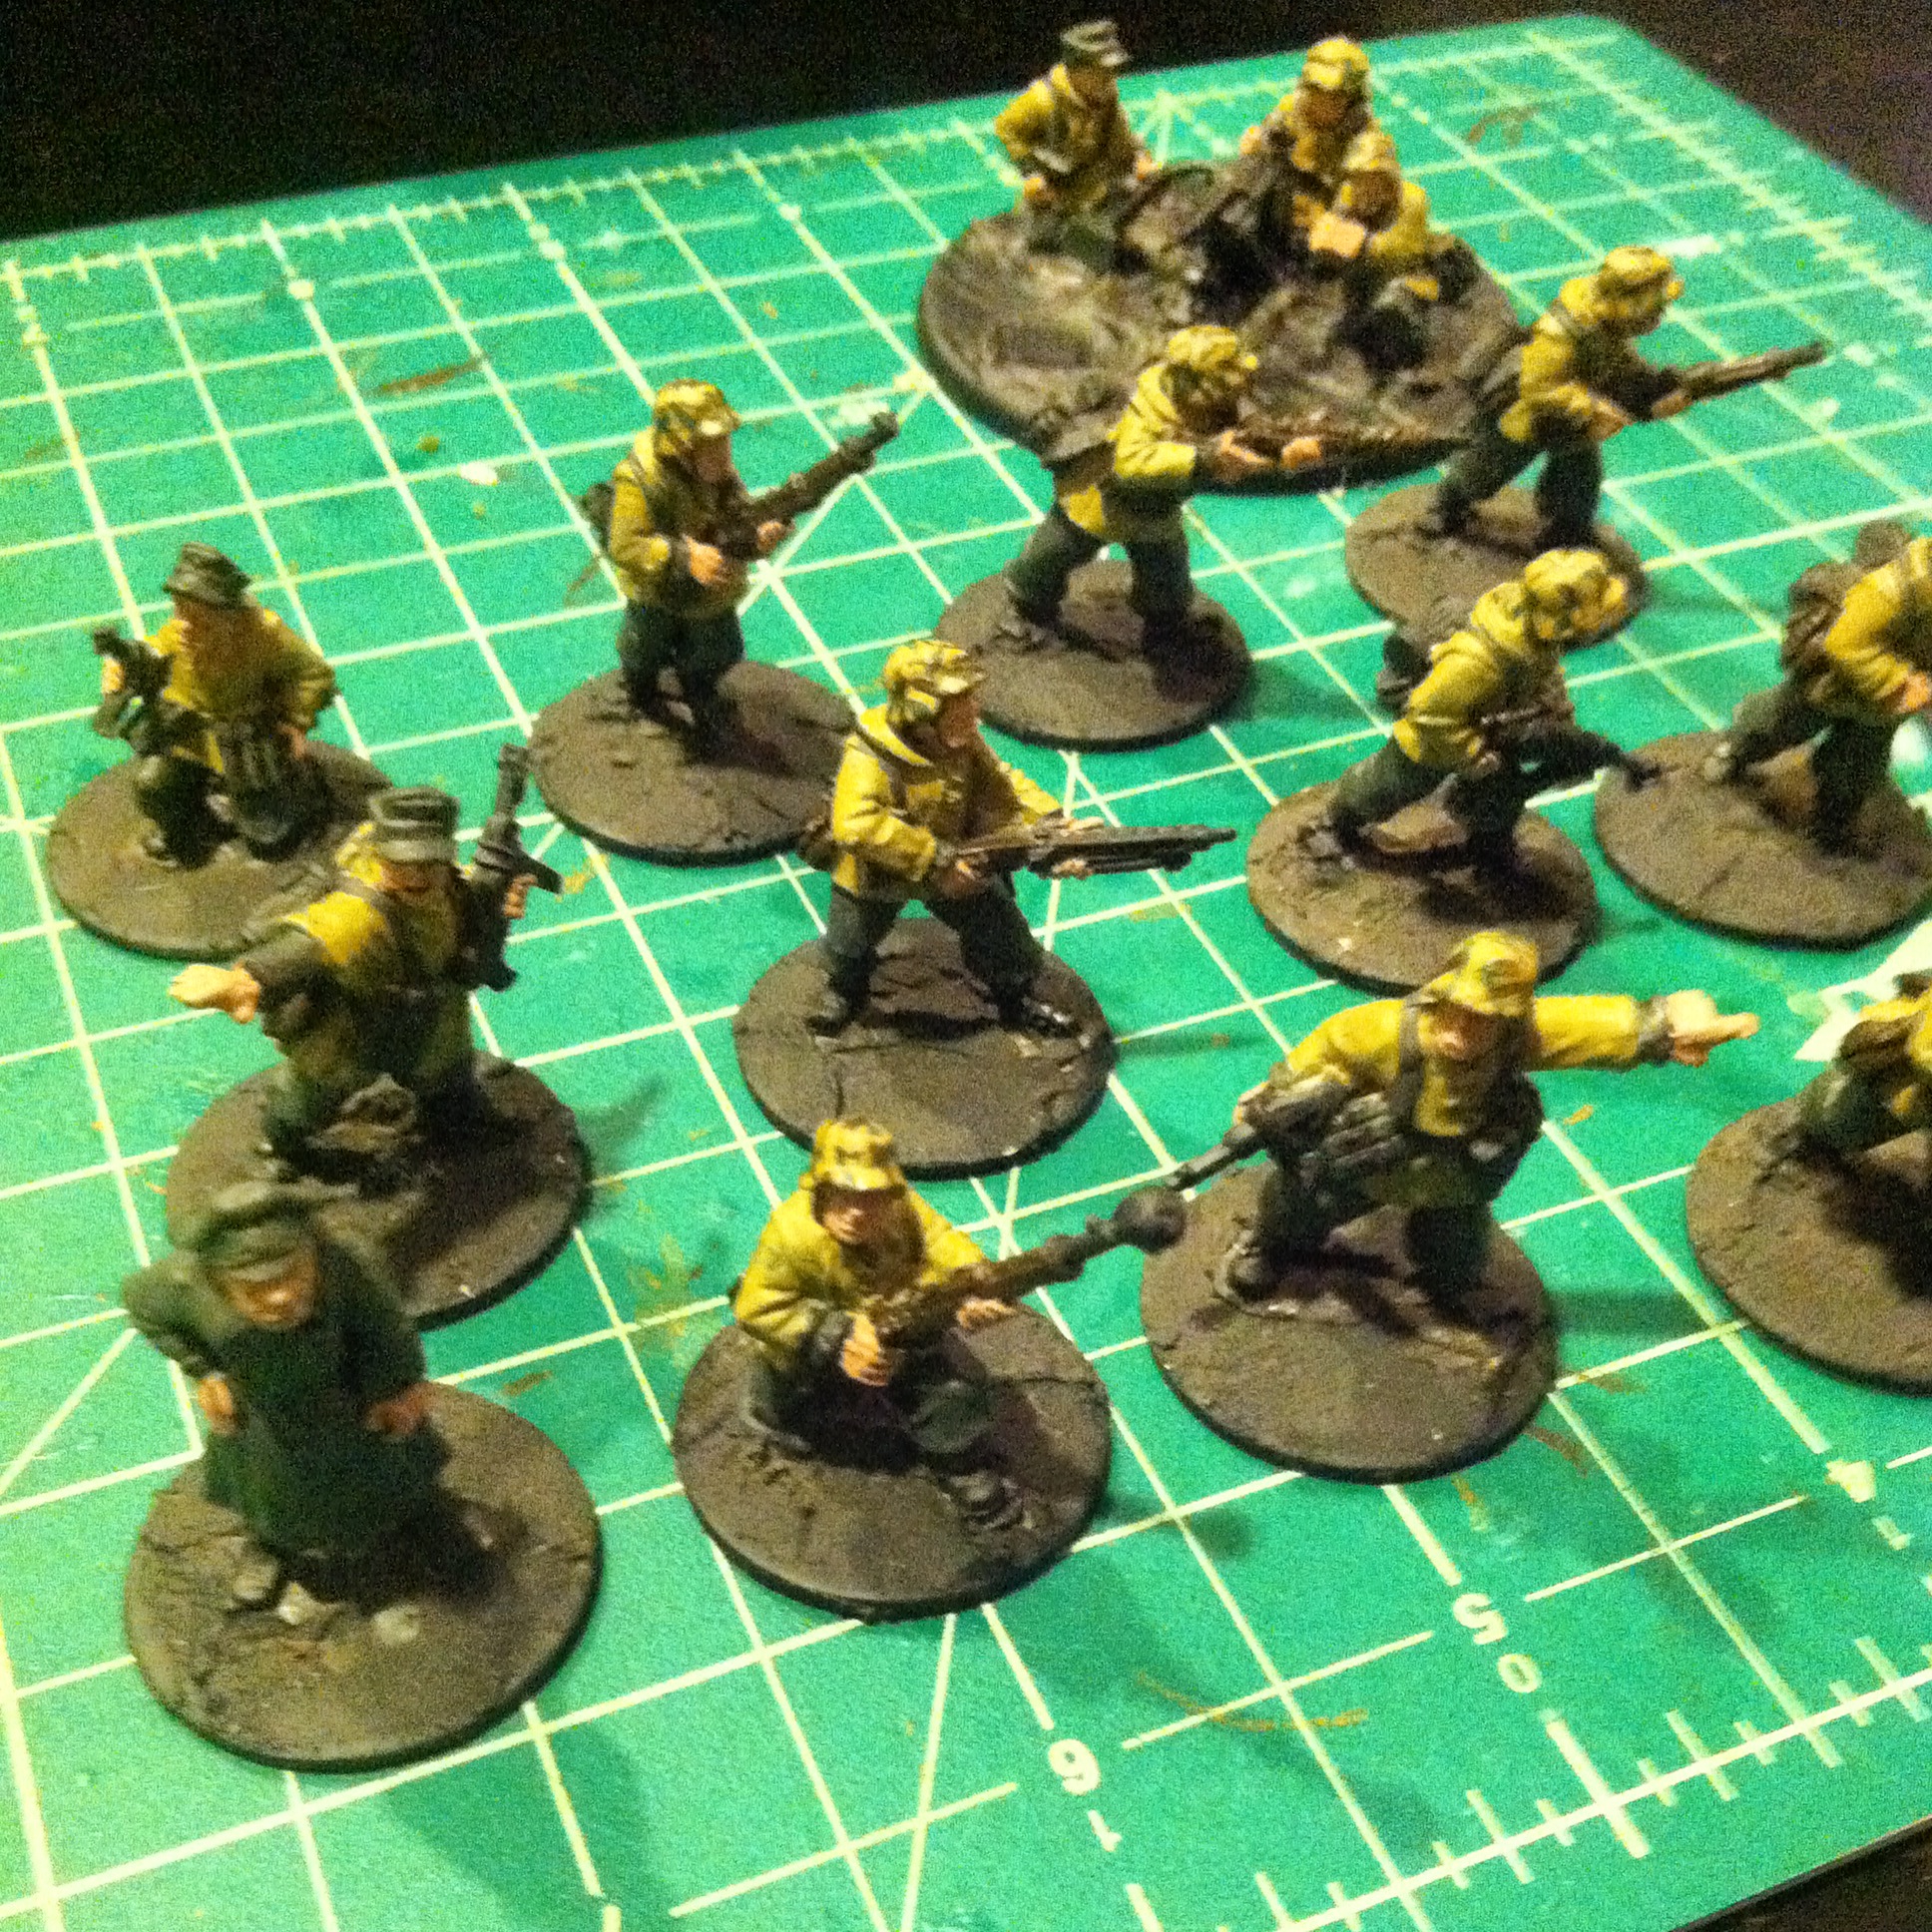 Flesh base coats and helmet camouflage added to infantry and officer
 Camouflage painted on helmets, and gun stocks and water bottles painted brown