I Ain’t Been Shot Mum: Cabourg June 6, 1944 Scenario

LandingatOmahaOn the morning of the Normandy Landings of June 6, 1944, taking the eastern sector of Omaha Beach fell to the United States 1st Infantry Division. Despite some missed targeted landing zones on the beach and heavy losses at the far ends, the exit “draws” were largely secured by mid-morning. As additional troops and supplies began to arrive, the push inland began.

Omaha to CobourgMap of the US push to Cabourg from Omaha Beach, June 6, 1944

(via US Army Center of Military History)

Moving toward the objective of Colleville-sur-Mer, probing forces from the 1st Infantry Division pressed forward through the seaside fields of Normandy and began to encounter German defenders in various states of disarray. Tired from the fighting at the beach, the first group of Americans on patrol moved cautiously into Cabourg from the north and east while the German force scrambled to hold against any additional headway by the invaders. WhereTheHell After a couple of month hiatus, we jumped back into a 15mm World War II game at Metropolitan Wargamers in Brooklyn, NY this past weekend centering on the action at Cabourg. Using the I Ain’t Been Shot Mum rules and a post-D-Day scenario from the Where The Hell Have You Been Boys? book, all from Too Fat Lardies, our table was set to show the American advance and German defense at Cabourg.

IMG_4940Initial advance of US forces on blinds from the east and north toward Cabourg

Playing on the US side, my partner and I divided our force of three rifle platoons under blinds plus three false blinds. I swung two platoons and a false blind directly at the village from the east while my teammate took the other two false blinds and a single platoon around to the north behind a copse of trees. The mass of US blinds hiding a force only half the actual size provided a great simulation of the confusion the Germans felt that morning as they also lay hidden in and around the village in defense.

IMG_4941US forces near Cabourg on blinds from the east

IMG_4942The first US forces are revealed beyond a wood north of Cabourg

After a couple turns of US movement and prodding for Germans outside the town, the Germans spotted the Americans moving cautiously to the north. With two false blinds exposed, the third American blind revealed a rifle platoon armed with a mortar and two officers present. A false blind was also revealed near a farm at the eastern edge of the town as the Germans continued to burn up turn actions trying to find out where the Americans actually were.

IMG_4943American and German forces simultaneously surprise each other near the farm

IMG_4944A close assault erupts in the woods behind the barn

In close proximity to each other to the rear of a barn at the farm, US and German blinds were exposed nearly simultaneously with American gunfire tearing into the outnumbered Germans. A close assault at a hedgerow quickly pushed the first German fire team to the rear and out the action for the game. The remainder of the German platoon stayed to continue on firing from within the first barn and a hede nearby.

IMG_4945The final American blind is exposed just north of the farm

IMG_4946Americans give and take fire at a hedgerow

On the other side of the farm, the final American blind revealed another rifle platoon hunkered behind a hedge lining a road to town. At long-range, shots were exchanged between German defenders in and around the barn and the Americans now shooting from both sides of the barn. The action at the east end of Cabourg settled into a stalemate of fire across the fields and around the barns.

IMG_4947US forces inch toward Cabourg across hedges and fields from the north

IMG_4949US forces stall out to the northeast of Cabourg

Back to the north of town, the lone US platoon on the moved cautiously along a road and over fields, fences and hedgerows. With the Americans creeping toward Cabourg, the Germans opened up with MG 42s positioned in an upper story of a second barn and from the garret of a farmhouse near the entry road to town. With a cross-fire of heavy machine gun pouring into the Americans at the north and east, the US advance stalled somewhat until something could be done about the German fire ripping from building windows.

IMG_4948The remnants of the first German rifle platoon look to reposition to cover

IMG_4950Americans move to assault the German machine guns at the second barn

Back at the two barns, one US platoon swung around to the rear of the barn to assault the German machine gun crew inside. With the MG 42 crew thrown back into a retreat from the barn, the surviving German rifles on the other side of the barn retreated from fire into a nearby house. Firing from their new position, the Germans stalled the Americans pushing around the barns to the village. At the same time, the other MG 42 continued to fire into the other US platoon now pinned with dwindling numbers behind a hedge.

IMG_4951German reserves arrive late in the day to defend against the American push from the north

As the engagement progressed late into the scenario, the game’s referee announced the arrival of reserves on both sides. From the west, a fresh German rifle platoon joined the fight at the road and tree line at the northern edge of town. At full strength, two German platoons focused fire on the lone American platoon which had so cautiously moved toward that end of the village. Taking casualties, the shrinking US force began to fall back over the hedges and fields from where they had just come.

On the far end of the table, three more American platoons arrived from the beach to the east. Looking to advance quickly on the road straight toward town, the US reserves just couldn’t get in the fight fast enough. With the US forces already near Cabourg greatly reduced and in retreat to defensive positions, the game was called with the Germans holding Cabourg from the American assault.

At Normandy in 1944, the result was the same and the German defense halted the US advance which broke off by mid afternoon. The IABSM scenario at Cabourg is a great illustration of the dozens of small inland battles which raged after the morning’s landings along the Normandy coast over 70 years ago, and we’ll be returning to more follow-up actions in the weeks to come.

Touching History at the Military History Society of Rochester

mhsrlogo

I have logged many, many hours over the years visiting battlefields, historical homes, living heritage sites, reenactments, roadside markers and all sorts of art, history and military museums. Near the top of these experiences was a full day I spent at the Imperial War Museum a few years back while working in London for over a month. With over two million visitors a year and some 11 millions artifacts, the IWM is hard to beat for immersing yourself in the history of warfare.

This past week I had a very different, yet truly remarkable experience in my first visit to the Military History Society of Rochester. Located up a flight of stairs in a warehouse inhabited by various artist galleries and studios, the MHSR occupies roughly 2000 square feet of space packed with all manner of historical artifacts focused on telling the story of the US military through the local lens of Rochester, NY.

IMG_4891

A timeline of US long arms from the American War of Independence through the Korean War at the MHSR

Founded several years ago by Chuck Baylis as the American Civil War Artillery Association, the group’s mission has since grown beyond his original collection of Civil War artifacts to encompass American wars from the Revolution to the present. The first room still focuses on the Civil War including detailed displays on artillery, uniforms and the 140th New York Volunteer Regiment formed in Rochester in 1862. A timeline of American long arms from the American War of Independence through the Korean War covers an entire wall.

IMG_4890

A timeline of military uniforms from the American War of Independence through the present at the MHSR

In the rear space of the museum, the focus swings to 20th-century with displays on World War I, World War II, the Korean War, Vietnam and present day wars. Uniforms, guns, swords, equipment hang from the walls, rest on shelves and lay slung over mannequins. Scale model airplanes hang from the ceiling, model vehicles rest on the floors and cases and a D-Day diorama sits nearby. Throughout the museum are some 2000 books as well as countless other letters, maps, photos, schematics, deck plans, prints, posters and other ephemera for perusal or research.

IMG_4887

 A US .50 caliber machine gun at the MHSR

Baylis has been joined by a number of passionate volunteers who can be found at the museum during its operating hours on Thursdays, Fridays and some Saturdays. Civil War reenactor, historian and wargamer Mike Vasile (co-author of the excellent Arena Games: Gladiatorial Combat rules) is responsible for many of the scale dioramas throughout the museum. Scale ship modeller Timothy Igoe of Historia Militaris Shipways has contributed several naval models to the collection and is currently undertaking a build of the USS Rochester (CA-2) for the museum. Retired Social Studies teacher Orton Begner rounds out the group with a deep knowledge of every object on hand.

IMG_4889

A US M1919 Browning machine gun at the MHSR

The one-to-one interaction with the MHSR’s members and the collection is what sets the museum apart from any other I’ve every visited. Everything has been well labeled, organized and put on display but hardly anything in the museum sits behind glass. Care to hold the various types of artillery rounds used in the Civil War? Want to feel the heft of a WWII era Thompson submachine gun or M-1 rifle? Would you like to take a look inside a pack carried by an American GI on D-Day? Want to lie down with a German MG-42? Ever wanted to hold a Japanese officer’s sword or 1913 “Patton Saber”? Just about everything in the museum, with the proper care, respect and assistance from one of the staff, can be touched, offering an incredibly rare opportunity to physically connect with past.

IMG_4888

 A German MG-42 and StG 44 at the MHSR

The mission to bring history alive beyond the walls of the museum also occurs with the exhibits members of the group bring to school groups and veteran events in the Rochester area. With its focus on celebrating the men and women of Western New York’s service in every branch of the military past and present, the museum is serving a unique and human mission of connecting today’s generations to a long tradition military service.

IMG_4892

My son gets some hands-on time with a Thompson submachine gun at the MHSR

In all my years of interest in history and military heritage, I have yet to find a museum as alive as the experience found at the Military History Society of Rochester. As a wargamer, the opportunity to see and handle so many objects up close is unparalleled. My time spent at the museum on my first visit was brief, but meeting the guys and seeing the collection at the museum will definitely bring me back my next time in Rochester.

Interview with Chuck Baylis of the MHSR

The Military History Society of Rochester is located in the Anderson Arts Building at 250 North Goodman Street on the second floor. Admission is free.

Flames of War: Forces of War Launches

ForcesHome

This month, Battlefront Miniatures, the makers of the popular World War II miniatures game Flames of War, took its first big digital step forward with the introduction of the first of their two new digital services — Forces of War.

EAhp

The soon-to-be retired EasyArmy.com

Debates have been raging through online message boards, Facebook groups, Twitter and over WWII-themed tabletops ever since the announcement that the beloved EasyArmy was being closed down and absorbed into Battlefront with Forces of War. During its run, EasyArmy had become a much relied-upon tool for FOW players worldwide. Battlefront has maintained a lengthy working relationship with EasyArmy’s designer in an incredibly rare example of a corporation willing to cede some control of their intellectual property. Now, like so many other companies working in the digital space today, Battlefront has brought the ideas and work of a passionate outsider in-house with this month’s launch of Forces of War.

ForcesNewCo

The New Companies menu on Forces of War

Beginning with Forces of War, buying a company list will run $1.00 USD with a 25% discount extended when buying all lists from an entire book or compilations at about $16.50 USD. The initial offering of lists is meager, focusing on the more recent FOW books Road To Rome, Barbarossa, Road To Remagen and the World War I themed Great War. Devil’s Charge is listed but the complete book is not available and instead points to the popular Panzers To The Meuse list. This set of German companies is the only free offering at launch, allowing for some limited experimentation with the site before buying additional lists. Being a Late War player who mostly plays US and British lists of the D-Day, Market Garden and Battle of the Bulge operations, my hope is that FOW quickly updated Forces of War with these lists as well as Eastern Front lists for Late War Russian and German players.

92ForcesCo

 Company builder on Forces of War

As a test, I went through the quick PayPal process of buying the US 92nd Infantry list from the Road To Rome book. The performance was familiar to my experience on EasyArmy, although I did find the Forces of War site to be somewhat faster than its predecessor. Within a platoon, options are selected with simple clicks, and a running points total is tracked along the top of the page by company and platoon. Forces can be saved with custom names and a nice (but minor) new feature allows notes to be added within each platoon.

ForcesCoPDF

A sample Saved Company page on Forces of War

Saved companies are accessed through easy to view lists which can be filtered by period, country, type, name, source, motivation and skill. Companies can be exported and saved as PDFs or printed. The printed lists are somewhat clearer with better page breaks than those with EasyArmy, a simple but welcome tweak. Frustratingly, the platoon motivation and skill ratings still print within unnecessarily colored text boxes which are nearly unreadable on the page.

ForcesScenarios

Scenarios selector on Forces of War

Most other aspects of EasyArmy have been ported over to Forces of War, including the handy Scenarios map. The Scenarios page could use some upgrades with a search or menu feature to allow quicker access and some better designed graphics or links.

Much like EasyArmy before, Forces of War offers an easy interface in which to view and manage force lists for FOW. In a nutshell, all the core functionality of EasyArmy has been preserved and then packaged with an official FOW wrapper.  Like a lot of players, I would have very much liked to have seen more lists available at launch. As more lists become available in the coming months, re-buying lists already purchased via EasyArmy is also a sticking point for many but I find the new pricing scheme to be completely in-line with FOW balancing customer usability with needed company profit. Some will also continue to complain about the inaccuracies in some lists, but clean-up edits over time, cross-checking the books and being a considerate, mindful and fair player will always trump any gaming tool.  Gone too are all the ads which cluttered the layout of EasyArmy — a true step forward for any premium digital offer. As transitions go, the evolution of EasyArmy to Forces of War is a good start with room for greater improvements to hopefully occur in the very near term.

Metropolitan Wargamers D-Day Plus 70 Event Report

NYTimesDDay

This past weekend at Metropolitan Wargamers in Brooklyn, NY, dozens of gamers came together for three days commemorating the 70th anniversary of the Allied invasion of Normandy on June 6, 1944. Throughout the weekend, we ran multiple WWII-themed games, including Normandy ’44, I Ain’t Been Shot Mum, Flames of War, World In Flames and Memoir ’44. Dice were rolled, strategies were debated, prizes were won and Allied and Axis forces vied for control of France. In all, it was another great weekend full of gaming at our club’s space in the heart of Brooklyn.

Friday Games

IMG_3586The invasion of France begins with Normandy ’44 at Metropolitan Wargamers

Friday kicked off after work with a few players unpacking a fresh copy of the classic Normandy ’44 from GMT Games. This one-map game covers the pre-dawn D-Day Airborne landing areas, five Allied invasion beaches and the charge to the initial inland objectives. The game scale plays with regiments and battalions with each turn representing one day of action. The small, self-contained game provides a great introduction to game mechanics at this scale with a tight, clear rules set. With a quick look at the game, I decided I’m going to have to personally give this one a shot sometime soon.

IMG_3587 US infantry blinds move toward unsuspecting German defenders at a farm outside Vierville

At the back of the club, we ran a game of our new favorite WWII tactical miniatures game, IABSM  from Too Fat Lardies. In our ongoing campaign of the Normandy scenarios in the IABSM Where The Hell Have You Been Boys? book, our game focused on the battle at Vierville-sur-Mer. With the 116th Infantry Division supported by the 5th Ranger Batallion, the Allied mission was to drive inland to capture and defend the church at Vierville.

IMG_3589

German and US units exchange fire in and around the farm at Vierville

As per the scenario, initial Allied blinds approach a farm outside Vierville where a German blind sits unknowingly in the complex of buildings. With Allied infantry closing in over dense bocage hedgerows and orchards, a firefight erupted and drove the German defenders through the buildings and into the orchard beyond.

IMG_3590

German reserves arrive at the flanks of the advancing US infantry outside Vierville

IMG_3633

Germans reinforcements push the Americans from the farm

As the first force of Germans fled the farm, their reinforcing comrades came on to the rear and flank of the US infantry. The Americans made consecutive moves of firing and moving back to defend at a series of stone walls across the road from the farm. The retreating defensive US actions held off the German onslaught until enough Americans could take up position amid Vierville’s houses. At the same time, the US Rangers moved in at the far end of town to hold the objective at the church.

IMG_3632

Americans pull back from the farm to take position in Vierville

The game eventually settled into a bloody house-to-house and hedge-to-hedge fight along the road leading toward the church. Occasional lucky shots from US Ranger light machine guns at the church also harassed the Germans lying low behind their stone wall position at the farm’s orchard. By midnight, much of the initial American force had been destroyed or was retreating to a final stand at the church held by the Rangers. While the Germans had also lost a sizable amount of their force, their heavy machine guns were still in play as they closed in through the town. This time around, we called the action at Vierville a draw.

Saturday Games

IMG_3603The Americans hit the Easy Green sector of Omaha Beach

The next day kicked-off with a running of a FOW beach landing at Easy Green on Omaha Beach. We have been play testing the FOW scenario over the past two months, tweaking our forces and strategies to cope with the clumsy beach landing rules. In our past games, the US invaders only manage to win about a third of the time. Even so, we decided no D-Day weekend was complete without a return to “Bloody Omaha” on one of the club’s award-winning sand tables.
IMG_3604German defenders hold their positions behind a burning bunker

The opening turns found a lot of US boats on the beach and a quick push to the seawall. So early combined arms fire managed to destroy the main bunker at the beach, but the battle was far from over. The initial US push followed on to the left of the beach, but multiple turns at clearing the barbed wire stalled the advance as the Americans took heavy fire.

IMG_3606

American armor and artillery follow-up the infantry landings

As US armor arrived, several tanks managed to drive off the beach to the minefield position to lay down fire on the German trenches. One tank wound up spending three turns bobbing in the surf offshore only to arrive and bog for two more turns on the beach. As this most inexperienced tank crew in Normandy struggled, the other Shermans took fire from German rockets and reserve tank platoon which rolled to bulk up the beach defense. American artillery also arrived but proved pretty ineffective to the Germans at the trenches. Wave after wave of US infantry pushed to the trenches, eliminating most of the defenders but never managing to clear the barbed wire lines to seize the German position. At the final turn, the Americans just hadn’t made enough headway to control the beach.

IMG_3627World In Flames continued over D-Day weekend

With action raging on the sand table, a group of club members showed up to continue playing their massive World In Flames game. Australian Design Group’s WIF from 1985 is the standard in grand-scale strategic fighting of the entire WWII period. The game’s rich playable detail, dizzying number of 1400 playing counters and sprawling maps makes it a commitment for only the most experienced gamers over many months of play.

IMG_3630Allied forces push from the beaches inland to Caen in Normandy ’44

The Normandy ’44 game from the evening before concluded with a decisive Allied victory Saturday afternoon. Pushing the Germans back from all but Utah Beach, the Allies captured Bayeux and several smaller towns. With German defenders routed from roads leading inland from the landing beaches, the victors rolled in to control half of Caen by the game’s end.

IMG_3625No one was going hungry at Metropolitan Wargamers over the weekend

Saturday also included a lot of other club members down for the usual variety of board, Euro and card games, making for a packed house. As the crowd rolled in, a longtime club member showed up with an enormous fresh-caught fish which he proceeded to gut with a huge military-style knife. With fish on the grill and food ordered in, there was plenty of food to sustain the crowd of gamers throughout the day.

We all took a mid-afternoon break to dice-off in a game, books, DVD and miniatures raffle to raise funds for the club. I was fortunate to score a copy of A Few Acres of Snow from Treefrog Games, and another lucky person picked up an unused copy of out-of-print the Games Workshop classic Dreadfleet.

IMG_3631

Initial deployment of Allied and Axis blinds in our Saturday evening IABSM scenario

As the main crowd thinned out, we ran an evening IABSM game continuing the assault beyond Easy Green. The scenario found initial US forces deployed around a small French farm with the objective of moving men off the table on the roads beyond. The Germans were tasked with preventing the American advance and seizing the farmhouse stronghold.

IMG_3607

Settling in for a contested fight at the farmhouse above Omaha Beach

Using initial blind deployment, Germans quickly moved to the farm along thick hedgerows as the Americans drove into the building for cover. Turns followed with the Americans jumping from cover to fire on the dwindling German force which returned fire over the hedges to unfortunate US infantry hanging out in the open. A US flamethrower attack from the window of the farmhouse decimated another German squad sitting close behind a nearby hedge. Pressing their luck, a group from the farmhouse made a run for the road exit only to be stalled by a reinforcing German heavy machine gun squad. Returning fire, the German MG42s were eliminated from their position in the open field. However, the damage had been done. Although the Germans had not captured the farm objective, the Americans no longer had a sufficient force to push off the table. The night ended with a German victory beyond Easy Green.

Sunday Games

IMG_3620The war continues on the Memoir ’44 Hedgerow Hell battle map

With the first days of Operation Overlord behind us, Sunday’s game focused on the breakout actions. A couple visiting players showed up for the club’s Memoir ’44 game around noon on Sunday. Using the wide Hedgerow Hell expansion map, the Allies beat the scenario odds to win the game in the Overlord scenario. There was much talk of getting larger games of Memoir ’44 back in rotation at the club soon, so hopefully getting the game back on the table will bring some renewed interest in the coming months.

 IMG_3621

The initial armored encounter outside Lingevres leaves British tanks in flames

I finished off my weekend as the British at Lingevres using the same scenario I first ran at the club a few months ago. The mission ahead for the Brits was to move into the heavily defended town and take two of the buildings. Historically, the battle played out as a tank duel between UK Sherman Firefly and German Panther tanks, and our game this past weekend played out in a similar way.

IMG_3624

A Panther meets its end at the hand of the British Royal Artillery as a close assault is attempted on another in the woods nearby

At the outset, my first platoon of tanks got a bit overly aggressive and charged into contact with the full Panther platoon at the farm outside Lingevres. With the first Firefly destroyed in the opening turns, my remaining Shermans pulled back as the Panthers rattled to the middle of the field to hold off UK infantry advancing through the woods and bocage-lined fields beyond. One Panther bogged on a hedgerow and another was destroyed in an initial volley from the Royal Artillery in the fields outside town. Several turns became ensnared in attempted infantry assaults on the third Panther in the woods, but eventually the German tank rolled away to deal with the building reinforcing infantry and tank platoon in the fields on the other side of the table.

IMG_3622British Shermans and infantry break across a field toward Lingevres

With the Panthers moving away, fresh British infantry and the surviving Shermans moved to the farm and fields beyond. British artillery fire winnowed and pinned the German platoon in the church over several turns. Artillery fire also sought to keep the reinforcing German spotter pinned to limit the effectiveness of the reserve Nebelwerfer battery which as delayed reserves to the rear of Lingevres.

IMG_3623

The duel between the Panther and Firefly ends with the British tank in flames as the remaining Shermans destroy a Panzer IV platoon in the distance

In the meantime, a multi-turn tank duel had settled in between a lone Firefly and Panther while a reinforcing Panzer IV platoon arrived at the edge of town. Both tank groups traded fire, and in the end, the Panzers were routed with two or their three destroyed and the Firefly fell to the Panther’s gun. Back at the farm field, Shermans traded fire with Pak 40s and destroyed an anti-aircraft platoon defending the town’s flank. With two Panthers left on either side of the church, Shermans on each side of town and advancing British infantry, we called the game a draw.

 Weekend Debrief

After more than 20 hours of gaming over two nights and days, I was pretty worn out, but the interest in the D-Day event had made the weekend well worth it. WWII still holds enormous interest to this day, as demonstrated not only by our weekend of gaming but by the mainstream media’s coverage of D-Day over the week leading up. In the next week, we’re kicking off an FOW Infantry Aces campaign with fresh forces hitting the tables in rounds of Italy-themed WWII games. This fall we’ll be playing out some Market Garden battles and by the winter we hope to host some Battle of the Bulge engagements. It was a pretty special weekend in Brooklyn, but for regular visitors to Metropolitan Wargamers, there’s always the next game in this very unique New York City community.

New Game Weekend: I Ain’t Been Shot Mum

IABSMbook

As a World War II gamer, I have a newly-discovered love for a game which doubles my gaming possibilities with all the time and money I’ve  got invested in the 15mm Flames of War game which is the modern standard for the period. The past two weekends at Metropolitan Wargamers in Brooklyn, NY, I’ve been turned on to I Ain’t Been Shot Mum which is billed as “the other World War II miniatures game. For gamers with a lot of miniatures on hand and a hankering to play WWII at a different and more historical level, IABSM is well worth it.

TFLlogoNow in its third edition, IABSM has been published since 2002 by Too Fat Lardies, UK-based makers of a number of wargaming rules systems for a variety of historical periods. Overall, the game provides WWII wargamers with a simple, sleek set of skirmish rules that focuses far less on fielding shiny models and more on tactical decisions on the tabletop. IABSM is a true “what you see is what you get” system with a 1:1 scale at 15mm but easily adaptable to other model scales. One guy on the table equals one soldier in the field during battle, taking the game down to a level that really “feels” like commanding a group of troops. The smaller, less abstract scale of IABSM games provides a lot less “gaminess” to the systems, and relies a lot more on the decision-making skill of players commanding forces on each side. In many ways, the game is a throwback to original Kriegsspiel invented for use in Prussian army training two hundred years ago.

IABSMcardsSample cards from I Ain’t Been Shot Mum from Too Fat Lardies

The core rules of IABSM retail at under $20, and provide a number of basic underlying mechanics easily usable in any battle or theater of WWII. As an avid FOW player who is often faced with hundreds of pages of more grand-scale rules, army lists and ongoing modifications, the elegance of the skirmish-level IABSM comes down to five main areas:

1. Random Activation: Rather than playing by a simple “I go, you go” turn-based mechanic, IABSM games are powered by a set of cards which randomly activate deployed troops in the field. At the beginning of the game, a deck of cards is shuffled with each card representing a unit in the game. Cards are drawn and units are activated in turn, with units choosing a number of actions based on their quality. Highly-trained US Airborne troops may have four actions when activated, while less elite regulars may only have three. Actions include movement, firing, spotting the enemy and many other activities which makes commanding a unit’s turn one of many possible choices. Cards are added to the deck as new units arrive and removed if a unit is destroyed. Drawing a “tea break” card ends the turn with one final round of shooting for available inactivated units before the cards are shuffled a new turn begins.

2. Morale: Troop morale is nearly as important as firepower on actual battlefields. A well-armed but rattled group of soldiers may prove to be nearly ineffective in the field without some stalwart command leading the way. IABSM offers several levels of morale with pinning, shock and suppression which progressively eats into how effective a particular force can perform on the table. When being shot at, a simple table resolves possible kills as well as whether a unit is progressively shocked into poorer performance in subsequent turns or entirely immobilized due to overwhelming fire.

3. Command: Commanding and junior officers in IABSM are represented as “big men,” with individual cards allowing for their separate officer actions to drive gameplay. Through proximity or attachment to their forces, commanders can greatly affect morale by clearing shock from troops and boosting their strength in subsequent exchanges with the enemy. The presence of command also doubles the chance of troop activation, as a drawn “big man” card can press an attached unit into action without its own card being drawn.

4. Blinds: In real-world combat, knowing the enemy position through intelligence, observation or contact is almost as important as the engagements that result. While many miniatures games present an open table where nearly everything is known from the get-go, IABSM preserves a “fog of war” element with the deployment of “blinds” on the table. Represented by oval-shaped markers, blinds are able to move around the table without revealing their actual make-up. Thus, a player might move a small unit, a large platoon or even a false blind containing no troops around the table without the enemy knowing its true make-up until revealed. This allows players to add an element of diversion to the game, as an enemy way burn up several turns chasing a ghost across the table as real forces jockey into position.

5. The Game Referee: One of the hallmarks of wargames until recent decades was an all-seeing, all-controlling game referee. As a non-player, the referee not only provides clarifications on rules and contested play on the table, but they also are able to maintain a level of secrecy between each player as a scenario unfolds. The game can be played without a referee, but the presence of one adds yet another depth of to the “fog of war” randomness employed already with blinds and random card activation.

WTHbook

Beyond the base rules, Too Fat Lardies offers a number of IABSM scenario and guide books for Europe, Italy, North Africa and the Pacific. General lists allow for the creation of custom scenarios, but I really like the historically-specific books. The past two weekends, I played the first two games in the D-Day-themed Where The Hell Have You Been Boys? book which contains over twenty scenarios from Omaha and Utah beaches to the inland. Following the United States advance and subsequent German counterattacks, each scenario lays out a simple briefing for the German and US players along with a referee sheet, terrain map and a guide to forces and cards needed for play.

IMG_3554“Protect The Guns” scenario set-up for IABSM

IABSMGameScenes from the German defense above Pointe du Hoc in “Protect The Guns”

My first game — “Protect The Guns” — saw me playing as the defending Germans looking to hold off the Allied advance from Pointe du Hoc with a couple heavy machine guns, snipers and some off-board artillery. One of the remarkable things about IABSM is the vast amount of space represented on the table, making decisions of movement and firing  very important. My artillery was also very unreliable, representing some of the German communication challenges come alive. That said, with only a few men at my disposal, I was able to stave off and force the Americans to redirect through constant harassing fire until their reinforcements entered under a blind at my rear. With one of my machine guns and both snipers finally destroyed, the last of my Germans found themselves pinched on two sides of more-skilled US troops who took the game.

IMG_3553

“Holding The Pointe” scenario set-up from IABSM

In “Holding The Pointe,” my Germans were on the counter-offensive and looking to push the Americans back into the sea. With all my forces deployed at the game’s start and all American units under blinds, my Germans began in overwhelmed confusion. This disadvantage made the game play so much more like the actual action in Normandy as German forces scrambled to head-off the Allied attack inland. Rather than focus my attack, I made the poor gamble of splitting myself to chase two sets of US targets. By the time a large force of German reinforcements arrived in the seventh turn, my initial force had gotten chewed-up in a series of stand-off firefights amidst the thick bocage near my original deployment. My divided force tactics were ultimately my undoing, and I’m certain a more textbook massed attack may very well have giving me a greater shot at victory.

With a couple of games under our belts, we’re going to continue right through the IABSM D-Day scenarios and beyond. We’ve managed our games without a referee so far through some really good fair play, but we’re anxious to try some scenarios with the referee element. Overall, the up-close feel for command and the heightened tactical realism in IABSM has given me a second WWII game to love at the 15mm scale.

Flames of War: Omaha Beach “Easy Green” 1944 Scenario

OmahaBeachSandwiched between tall bluffs on either end, a five-mile stretch of Normandy coastline was designated Omaha Beach near the center of the Allied D-Day landings on June 6th, 1944. Landing at Omaha was the relatively fresh US 29th Infantry Division. With British and Canadian troops landing on beaches to the left and other US men landing at Omaha Beach to the right, the 40,000 Americans at Omaha met with the highest rate of casualties of the day with some 3,000 falling in the French surf and sand.

OmahaEasyGreen“Easy Green” sector on Omaha Beach, Normandy 1944

Lying in wait at Omaha was a mix of green recruits and older veterans in the German 352nd Infantry Division. Dug in at the coast in a wall of pillboxes, bunkers, gun pits and trenches, the German men (and unknown number of boys) met the US invaders with a storm of machine gun, artillery, mortar and rocket fire. For the US, little went right as landing craft drifted off course and special floating DD M4 Sherman tanks were swamped and sank offshore. Only through improvised efforts and a slow, methodical pace under withering fire did the American infantry finally make it through the German lines to control the beach by the close of the day.

EasyGreenFOWMap set-up for the Flames of War “Easy Green” scenario

In preparation for our upcoming D-Day Plus 70 weekend at Metropolitan Wargamers in Brooklyn, NY on June 6th-8th, a couple of us have been playing out beach landing practice games. Flames of War offers a specific outline for coastal assaults with their “Hit The Beach” rules, but we’ve found them to be very difficult to play with US invaders losing more often than not. Last summer we ran through our first beach landing on one of the club’s sand tables with a Utah Beach “Easy Red” scenario in which the US failed horribly. Since then we’ve been studying up, tweaking our forces and diving deep into the particular rules for a tabletop beach landing game.

German352

29thinf

This past week we ran through the Omaha Beach “Easy Green” scenario to what was probably our most evenly matched and played game to date. The scenario sticks pretty closely to the situation at Easy Green with one beach exit road guarded by lines of barbed wire, trenches, mines and anti-tank obstacles. Finally, a combined defense of heavy machine guns, a 5 cm KwK 39 gun bunkered at the coast and Nebelwerfer rockets at the rear provide a daunting nut for the US infantry to crack. For our game, my German opponent was able to field forces as outlined in the published FOW scenario but I had to modify my American list slightly to fit my model collection. Even with slight changes, our final lists had the US at a few more points stronger than the Germans as per the mission outline and the game rules.

IMG_3452The first US boats land and platoons rush ashore

After an initial US naval bombardment which destroyed one stand of German infantry, my boats and DD tanks headed for the beach. In the initial wave, one DD tank sank in the water offshore and one boat was delayed in the bouncing surf. With two platoons of US infantry on French ground, they made way for the barb-wired seawall. Further down the beach to the right, my three surviving Shermans rolled to the one exit causeway from the beach.

IMG_3453DD Sherman tanks make it across the beach toward the exit ramp

In the opening salvo from the Germans, rocket fire came in from the rear of the table as entrenched guns fired from the beach defensive lines. US troops did well with dice roll saves and lost just a few teams before ending the turn pinned high on the beach.

IMG_3454German Nebelwerfers sit atop a hill overlooking the Allied objective

In the next couple turns, landing craft continued to meet mixed success in landing and stalling on the sea. Luckily, most boats didn’t drift too far down the beach, allowing me to execute my general plan of running infantry to the left while my tanks dealt with the heavier nests and pillbox to the center and right. One tank bogged in the sand but the other two rolled over the barbed wire to take up position at the line of minefields, sending fire into the Tobruk nests and gun bunker. A couple turns in, the bunker was in flames and the German machine guns had been dealt with. The way was clearing for the US infantry to push inward.

IMG_3455The 5 cm KwK burns in its bunker as US troops push over the seawall

IMG_3456DD tanks struggle through the coastal defenses and take heavy combined fire

With several US platoons whittled-down in their struggle through several tiers of barbwire, one platoon of German infantry arrived and made way for the row houses near the objective and remaining rockets on the hill. In the open, the Germans took fire from naval guns but most survived to find shelter in the buildings. Back on the beach, my final US reserves of M7 Priests landed at the center of the beach and one heavy machine gun section tramped forward at the extreme left. With these late arrivals so far back from the main action, it was up to the forces already inland to get the job done.

IMG_3475German defenders rain mortar and machine gun fire into oncoming US troops

IMG_3476With German defenders destroyed at the beach, the 29th Infantry Division hustles inland

With the major defenses eliminated at the beach, the Shermans turned their machine guns on the remaining German infantry manning the trench line high on the central hill. At the same time, US infantry began pushing into the German position after spending turns alternately being pinned by rocket and mortar fire, removing barbwire and shooting back with light machine gun, rifle and direct mortar fire. Despite their losses, the combined arms of my US troops really shined, as was often the fateful experience of their German opponents 70 years ago.

As the game moved into the second-to-last turn, the Americans were ultimately just too far away and too weakened to make the final push to the objective still held by the remaining German infantry comfortably defending from the nearby houses. It had been a pretty even match, but timing was everything. Luckily for the Allies on June 6th, 1944, the only limits on the day’s outcome at “Bloody Omaha” was the grit and dedication of the storm of humanity hitting the beach.

Metropolitan Wargamers D-Day Plus 70 Event – June 6th-8th 2014

MWGDDay

This June is the 70th Anniversary of the Allied D-Day landings at Normandy, and New York City’s oldest and largest wargaming club Metropolitan Wargamers is celebrating with a full weekend of events.

IMG_2161

La Fiere Causeway at Metropolitan Wargamers in Brooklyn, NY

Whether you’re new to the hobby or an experienced gamer, there will be plenty of WWII action the entire weekend. On the evening of Friday June 6th we’ll begin with Flames of War airborne landing scenarios. Saturday June 7th kicks off at noon with a FOW beach landing scenario on one of the club’s famed sand tables. Sunday wraps up the weekend with a couple FOW breakthrough battles and a large Memoir ’44 board game. Other WWII-themed games will run throughout the weekend.

IMG_2816

Utah Beach on one of the sand tables at Metropolitan Wargamers

We’ll have FOW scenarios set up for the weekend with plenty of miniatures and stunning terrain on the club’s tables, so all you need to bring is your passion for wargaming and history. Our FOW miniatures games are fun and a feast for the eyes, and you can get a sense of what’s in store for the weekend by viewing some of our past scenarios at the club here.

Admission for the full weekend of gaming is just $10 and a great opportunity to visit a very unique community of gamers in the heart of Brooklyn’s Park Slope neighborhood.

For more information and to RSVP for the D-Day Plus 70 weekend, check the Metropolitan Wargamers website or join our Yahoo group.

Flames of War: Fielding the FOW M10 Tank Destroyer Platoon

m10

The Blitzkreig of German armored forces is one of the more enduring tactics introduced in World War II. Swarmed masses of German tanks and mechanized forces in the early war period rolled through Poland, France, Belgium and the Netherlands in Western Europe and punched into the Soviet Union with Operation Barbarossa in 1941. With early Panzer and later Panther and Tiger tanks ruling the battlefields of Europe, Allied forces struggled for solutions to crack the German tide of iron.

m10normandy

A US M10 tank destroyer comes ashore in Normandy after D-Day in 1944

By mid-war, the Americans had a solution with the M10 tank destroyer. Introduced first into the battlefields of North Africa in 1943, the M10 GMC (“gun motor carriage”) carried a big 3-inch/76mm gun and on a Sherman hull. After success in Africa against earlier model German tanks, M10s became part of the post-D-Day Allied breakthrough campaign. While effective against Panzer III and IV tanks, more heavily-armored Panther and Tiger tanks still proved problematic. Luckily, the M10 was supplemented by the British-modified Sherman 76mm Firefly and the later US-built M18 Hellcat which was quicker on the field. The combination of these three tank destroyers, along with the stalwart work of Allied infantry and deadly air support, turned the tide in Europe.

fowm10set

One of my earliest 15mm WWII purchases years ago, and somewhat at random, was the now-discontinued M10 Tank Destroyer Platoon set from Flames of War. I think at the time, I just liked the look of the models and I was looking to fill-out my new US forces with more variety. To get to a full platoon of four M10s, a fellow club member at Metropolitan Wargamers in Brooklyn, NY recently gave my two more M10s to which I’ve added an additional M20 scout car.

IMG_3389New M10 tank destroyer and M20 scout car

IMG_3388New M10 tank destroyer

IMG_3387New M20 scout car

IMG_3390US tank destroyer platoon with new models (left) and older models (right)

With my existing and new section sections, I now can field a full tank destroyer platoon using a variety of Allied Late War European lists. Anti-tank tactics in the game provide multiple opportunities for the M10 platoon to be used in combination with infantry and other Allied armor on the game table. With optional deployment as a recon platoon using the M20 scout cars, the M10s can create ambushes to wreak havoc on German tanks. Admittedly, using this full platoon will take some practice but I’m certain they’ll be causing headaches for my German opponents in the very near future.

Flames of War: Fielding the FOW Hawker Typhoon

Typhoon

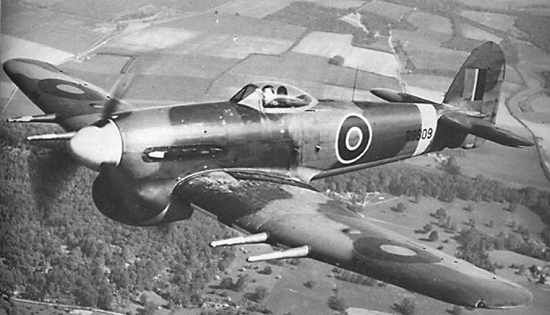
The story of the British Hawker Typhoon in WWII is one best told in two acts. Its early use beginning  in 1941 met with very mixed service results against superior planes in the German Luftwaffe  and production of the plane was nearly scrapped by the Royal Air Force. However, with a bit of re-purposing, the Typhoon’s speed was soon coupled with increasingly-heavy bomb payloads to become an effective fighter bomber against ground targets.

In 1943, the Typhoon really came into its own when armed with wing-mounted rockets and fuel tanks providing greater flight range. While of questionable effectiveness against tough-armored German tanks, a run from a squadron of  Typhoons with rockets firing struck fear into German forces and devastated supply lines and production facilities in Western Europe. The Typhoon’s role in D-Day, Operation Goodwood, Operation Varsity and other engagements was both disruptive and deadly in support of ground campaigns all the way to the war’s end.

fowtyphoon

Flames of War offers a model of the Typhoon as well as a short online guide to painting their model. With my British ground forces fairly well built out with artillery, tanks, infantry and support weapons, adding some air support seemed to be the next natural step as well as another interesting modelling project.

IMG_3206

I picked up my model online at a slight discount online and went straight to work. I painted the plane in a RAF grey and green camouflage pattern with yellow details to the nose and leading wing edges. Next, I added black and white “invasion stripes” which had been used on Typhoons since earlier in the war, although my plane was going to be flying over late war Normandy. The decals included with the kit finished off the plane with “V” markings, subtly allowing me to add my own initial to my completed plane. Finally, a little watery rusty brown wash brushed along the seams in the fuselage added a weathered look of many previously-flown missions.

IMG_3207

With my existing American P-47 Thunderbolt, having the Typhoon in my miniature Allied arsenal is sure to add more depth and choice to my Late War Western Europe gaming. With the Typhoon hitting the table in the near future, my hope is its presence above the battlefield will rain rocket-fueled terror and distraction on my German opponents just as they did over Europe some 70 years ago.

Flames of War: Lingevres 1944 Scenario

lingevres1944

By D-Day +8 on June 14, 1944, the British 50th Infantry Division had pressed about 5 miles inland from Gold Beach to the outskirts of Lingevres. Dug in at the town were elements from the Panzer Lehr Division with several Panther tanks ready to force back the looming British attack. With 6-pdr anti-tank guns in tow, the British pushed into town mid-morning following a bombardment by 25-pound artillery and runs from supporting Typhoons above. A ferocious battle commenced between the 4th/7th Royal Dragoon Guards and the German Panthers. When the smoke cleared, several Panthers sat burning as victims of Sherman Firefly and anti-tank gun fire. At day’s end, the British controlled Lingevres.

lingevresAT

British 6-pdr anti-tank gun deployed outside Lingevres, June 14, 1944

The WWPD website has a Lingevres scenario available which two of us adapted for play this past weekend at Metropolitan Wargamers in Brooklyn, NY. Using the scenario as a guideline, we laid out the tabletop battlefield with cornfields stretching outside the town occupying two-thirds of the table. With our 1750-point forces on each side, the Germans began with two platoons of infantry and a heavy machine gun platoon inside two buildings and the church at the center of Lingevres. The British then deployed with their artillery battery, two rifle companies and a recon patrol. All other forces were held off table, with German delayed reserves set to arrive in turn three and British reserves eligible to arrive immediately at the beginning of the game.

Victory conditions as presented were simple — the British needed to take three buildings in the town and the Germans needed to drive the British from the field. How the game played was not simple and once again revealed my need to sink more work into creating accurate, playable scenarios for FOW.

IMG_3163Germans dug in at Lingevres in the town’s buildings while British artillery and infantry deployed from the cornfields in the distance

IMG_3164

Initial movement of British forces into Lingevres with recon carriers moving left and infantry moving into the woods near the church

The first two turns of the game saw the British marching from their edge of the table toward Lingevres. At the town, a German machine gun platoon sat waiting in a building at the crossroads while two other infantry platoons took up position in the church and shops across the road. By turn three, British artillery had opened fire on the machine gunners and pinned them. The first British tank platoon also rumbled onto the table, as did the German Panthers which made way for the center of town.

IMG_3165

Panther reserves roll into the center of Lingevres

IMG_3173

British infantry in the woods take fire and are pinned as armored reserves move from the rear

The first British infantry platoon made way through the woods at the center of the table but were pinned and cut down over two consecutive turns of fire from nearby Germans. The British recon patrol, edging its way through the bocaged fields near the church, was chased away with the appearance of the Panthers.

IMG_3167A British Sherman takes up position to spot for the artillery battery

IMG_3166

British infantry move from the farmhouse across the field

IMG_3169

Panthers destroy a Firefly and the Sherman spotter tank at the edge of town

IMG_3170

British infantry fall back after taking fire from the German half-tracks

On the main road to town, the British ran their Sherman spotter tank and lead Firefly toward the nearby farmhouse. On the other side of the farmhouse, a British infantry platoon moved into position using the building and nearby bocage as cover as they made way for the open field. The heavy British push around the farm was stymied with the arrival of German halftracks which fired machine guns into the field. By turn five, the Sherman spotter tank and spearheading Firefly also lay in flames after some quick shots from the German Panthers.

IMG_3168

British machine gun carriers and tank reserves roll on

IMG_3171

Armored reserves move to support infantry

IMG_3172 British infantry reserves move in near their artillery battery

By turns six and seven the inital British assualt had been repulsed at a safe distance from town. All German infantry platoons remained safely bunkered up in the town’s buildings, and the spotter for the German’s reserve 12cm mortar platoon was now camped out in the church’s bell tower. The three Panthers prowled back and forth at the center of town, and the incoming fire from the British artillery in the distance was the only real agitation to the occupying Germans. The Britsh rolled on their final reserves of machine gun carriers, Sherman/Firefly tanks and a fresh infantry platoon.

Even with all reserves on the table, the British attack was stumped. With one rifle platoon destroyed and a second whittled down, the British had just one intact infantry platoon on the field. One tank platoon struggled through the fields to one side of town, while the second sat idling on the road to town. Clear lines of fire around the church and town center presented open killing zones for the Germans in the town’s buidings and the three Panthers. All the Germans needed to do was sit in place and mow down the coming British.

I love playing wargames for historical scenarios, but our game this past weekend at Lingevres presented some serious limitations to the FOW rules as written. Playing an even match of 1750-point forces per side ultimately did not allow for a satisfying game for either player. What works for a head’s up FOW tournament game or randomly-rolled mission simply does not play well in recreating historic engagements.

In our Lingevres game, the British simply didn’t have enough units to create a critical mass to advance into town under what was sure to be withering fire from the Germans. We decided we liked the scenario, but perhaps the British needed a 50% increase in points, perhaps with additional rifle and tank platoons and a Typhoon providing air support.

With a three-day D-Day weekend being planned at our club this June, we’ve got multiple historic airborne, beach and inland fights to sketch out in the coming months. There’s going to be a lot of playtesting and tweaking to get our historic games to play well. With wargaming, striking the balance between a game that provides both historic accuracy and the potential for different outcomes is the real challenge that lies beyond just the roll fo the dice.