Flames Of War: Encounter Mission

IMG_2697

The official FOW website makes all the missions from the third edition rules available online, and they’re a quick way to throw together a game and practice tactics without putting all the work needed into a historic scenario. Having been away from a Flames of War table for a week or two, a couple of us at Metropolitan Wargamers in Brooklyn, NY threw together a quick, non-historic Encounter Mission last weekend.

IMG_2698Encounter Mission table (German deployment to right and US to the left)

My opponent, playing as Germans, rolled as attacker and chose the long side of the table with the church on his right and a farm and wooded area to his left. This left my US 101st Airborne with the bridged river at my right and a farm at my left as defender. As per scenario rules, we each began by placing an objective on either long edge of the table, placing half our platoons in reserve and deploying the remainder of our starting units along our edges.

IMG_2699

Germans Stugs move to control the center

The Germans won the roll to go first and immediately pressed toward the center around the church yard with their Stug platoon and on their left toward the river with Panzergrenadiers. It was clear the Germans hoped to make  speedy run to the objective just on the other side of the stone bridge and ford on the river.

IMG_2700US anti-tank platoon rolls to seal the German advance at the bridge

In my first turn, I moved my M-18 Hellcat tank destroyers to the bridge and hoped to get some quick kills in on the advancing German Stugs from the bridge.

IMG_2701

Members of the 101st Airborne take position in the woods

On the other side of the road to the bridge, my US Airborne hustled into the two sets of woods. Hiding among the trees, the paratroopers looked to seal the flank against the advancing German mounted troops on the other side of the river.

IMG_2702

One Hellcat burns at the foot of the bridge while another fires from the bridge

With my Hellcats missing their shots on the advancing Stugs, the German guns rolled to the intersection just beyond the bridge and destroyed one of my anti-tanks. While the loss of the Hellcat halved my anti-tank capabilities, the burning hulk effectively shut down the German path to the bridge.

IMG_2703

US Airborne and German Panzergrenadiers exchange fire over the river

Across the river, the 101st troops safely fired from the treeline toward the mechanized Germans across the river. With combined fire from a a nearby remaining Hellcat, Jeep and armored car from the tank destroyer platoon, a German halftrack was destroyed and forced its troops to dismount. Returning fire, the Germans destroyed the armored car and Jeep.

IMG_2706

Stugs cross the field as an Airborne platoon lies behind the bocage beyond

With the road to the bridge shut down, the Stugs turned to speed their way across the fields at the center of the board. An Airborne platoon took up position on the other edge of the field, lying in wait for the advancing Stugs.

IMG_2707

The US P-47 hits the Stugs in the open field

The Stugs sitting in the open field made for a quick target for the P-47 Thunderbolt which flew on in turn four, leaving one Stug in flames and a second with its crew bailed out.

IMG_2708

The Stugs reach the gap at the field edge and destroy the remaining Hellcat

I their next turn, the Stugs remounted and made their way to the gap at the far edge of the field. A couple quick shots to the side armor of the remaining Hellcat destroyed the remaining US tank destroyer which had been busying itself pouring fore into the still-mounted Panzergrenadiers. It looked bad for the Americans with nothing standing between the German Stugs and the objective just beyond the river ford.

IMG_2709

US Shermans make quick work of the remaining Stugs

Luck switched back for the Americans as they successfully rolled for their Sherman tank reinforcements in turn five. The Shermans moved to the river’s edge and destroyed the remaining three Stugs. Not only had the German armored advance to the objective been thwarted, but yet another easy path had been closed-up with a burning Stug clogging the exit from the field.

IMG_2710Panzer IV reinforcements move to take the US left

By turn six, the German Panzer IV reinforcements were rolling down the road looking to run around the far edge of the field and attack the US left flank. The left side was only held by a US light machine gun and rifle platoons, so armored support was badly needed if the Germans were to be stopped.

IMG_2716The first turn at the battle of the crossroads on the US left

At the intersection on the US left, ferocious fighting erupted as an assault from the usually stalwart 101st Airborne was repelled. The Shermans moved in and destroyed a Panzer IV.

IMG_2717

The second turn of the battle of the crossroads on the US left

With space and options getting tight, the Panzer IV’s returned fire and Sherman was left burning. With a two-on-two fight. the Shermans destroyed another Panzer IV in the sixth turn and the final German tank fled the field after failing a morale test for the pummeled platoon. With German armor destroyed across the field, the US rifle and light machine gun platoons scurried to the German right toward their objective behind the church.

IMG_2714

German half tracks struggle to cross the river on the weakening American right

The final turns of the game played out back at the river with the reinforced Germans struggling across the river. Fire continued to be exchanged with the US rifle platoon in the forest which eventually fell back into the treeline at the road.

IMG_2715

The Thunderbolt engages German transports at the river crossing

Another run from the Thunderbolt threw more Germans from destroyed transports. Remaining Germans trucked over the river and around the woods with only only a few US rifles between them an victory with capture of the objective.

IMG_2720

The final showdown at the contested objective

On the eight turn, it all came down to the contested objective. With a full US parachute rifle platoon in the woods and another heavily-damaged one nearby, the final battle looked like it was going to be decided with some bloody assaults. It looked like anyone’s game, but the Germans were now at half-strength on the table, and a failed motivation test caused the Germans to cede the battle.

German artillery never played a factor in the game, and the heavy terrain shut down use of US air support except for in two deadly runs of the game. Tanks on both sides wound up serving more as roadblocks at some key points on the road, and the river also played an important role in the US defense against the German advance.

We’ve got a couple historic scenarios at the club I’ll be reporting on soon, including a landing at Utah Beach and a scenario from the first day of the Battle of the Bulge. What makes FOW flexible and so enjoyable as a system is the ability to play historic and non-historic engagements, something I experienced last week and am certain to see more of in my after-action reports soon to come.

Flames of War: Fielding the Guards Armoured Division Part II

UKguards

Since starting with 15mm World War II Flames of War gaming a number of years ago now, my Allied modelling has focused exclusively on United States forces. Beginning with basic US infantry rifle, artillery and armored companies, I eventually added in some US Airborne forces plus some air support. Recently I’ve felt maxed-out on the US, so I’ve taken to looking to build out my Allies with another country’s army.

eagUARDSTEMP

After a bit of research and reading, I’ve settled on the British Guards Armored Division. I began this new journey with the plastic Guards Armored Sherman and Firefly models included in the excellent Open Fire! starter game box set. While these can be played as Allied support to my existing US Airborne, I really wanted to give the British their own space on the board.

IMG_2737

Along with my existing plastic Shermans and Fireflies I already have painted-up, I bought another set from a fellow member at Metropolitan Wargamers in Brooklyn, NY. This gives me a full four-platoon armoured squadron with four Shermans in the command section.

IMG_2738

 To fill out my Guards Armored Division, I’ve also added the special Lieutenent Colonel Joe Vandeleur warrior character. As a leader of the Irish Guards during such famed actions as Operation Market Garden, Vandeleur proved to be a solid field commander known for his by-the-book leadership.

Caine

 Michael Caine as Lt. Col. Joe Vandeleur in ‘Bridge Too Far’

I’m a big fan of 1977’s A Bridge Too Far in which Michael Caine co-stars as Vandeleur during Market Garden, so I couldn’t help but add this model to my new force with the colonel riding upright in his armoured car.

IMG_2735

IMG_2734

IMG_2733

In the coming month or so I’ll be filling out my British force. I have one completed Royal Artillery section and another on the workbench, enabling me to field a full eight-battery platoon. I’ve also got Battlefront’s British Rifle Company box allowing me to march three full platoons on the table of what was known affectionately during WWII as the PBI – Poor Bloody Infantry.

IMG_2732

I’m really looking forward to playing with my new British units this coming year, along with all their special national rules. The Brits are really going to open possibilities with new scenarios and new fronts. As Caine says as Vandeleur in A Bridge Too Far, “I’ve got nothing else planned.” At least for now.

Related articles

2014: Opening New Fronts

wraondsnyIn the middle of 2013 I somewhat unexpectedly re-launched Brooklyn Wargaming with a new design and a renewed posting vigor. Since then, I’ve had more than 10,000 visits from readers all over the world. Together with these folks I’m sure to never know, we share a continued passion for gaming I am committed to infusing in every one of my postsings here.

My World War II Flames of War posts are clearly the favorites for visitors to the site. My FOW After Action Reports continue to garner a lot of daily views, and people in particular seem to love the Barkmann’s Corner scenario I played in July at Metropolitan Wargamers in Brooklyn, NY. More AARs and building-out my various national forces in my FOW Modelling posts will be a big part of 2014.

As for other stuff on the site, my few posts on Warfare In The Age of Reason are quickly shooting to the top of popularity. I really enjoy writing up my plays a variety of board and card games through my New Game Weekend posts, and taking a look backward at Retro Gaming The 70s & 80s often result in emails from people like me who have fond memories of hours spent at play in the past.

Looking to 2014, here’s where my focus will continue and grow on Brooklyn Wargaming and the tabletop each week.

World War II

For years, I’ve played a lot of FOW with a big focus on Western Europe. To start the year, I’ll be playing a beach landing or two as a way to prep for the 70th anniversary of D-Day this summer, and I’ve also got a handful of other historic scenarios I’ve been working-up over the past few months.

a3ee242c52

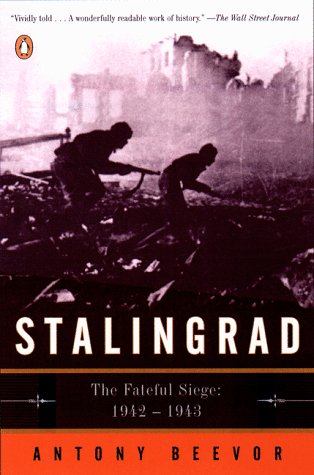
Over Thanksgiving, my brother (another lifelong gamer like myself) handed me a copy of Antony Breevor’s Stalingrad and told me it was the best military history book he’d ever read. The highly-readable account of the vicious siege of Stalingrad has gotten my hooked on the idea of expanding my WWII gaming into the Eastern Front in the new year.

Desperate-Measures

As a first step toward this front of the war, I picked up the new FOW Desperate Measures book. While this intelligence briefing is centered on the closing months of the war battled among German and Soviet forces, there’s also a newly-released updated edition of the FOW Red Bear book which gives a broader look at the Allied forces on the Eastern Front. These resources coupled with my historical reading on Stalingrad have whet my appetite for fielding some large masses of Russian forces on the table. A couple other guys at the club in Brooklyn have already started putting together some of Stalin’s finest and I’m very much looking forward to the Eastern Front opening up my WWII gaming with some scenarios this year.

716532

I spent a chunk of the past year reading Rick Atkinson’s Guns At Last Light, the third book in his World War II Liberation Trilogy. The book’s focus on the D-Day landings through the campaigns in Western Europe to the fall of the Third Reich squares with the majority of my FOW gaming from the past year. Working my way back through Atkinson’s books, I’m just starting in on The Day Of Battle for Christmas. As with my new swing in interest toward the Soviets and Eastern Front, I’m looking to Atkinson’s second WWII book to fill in my knowledge on the southern European campaigns in Sicily and Italy. Whether I get some Italian troops on the table by year’s end remains to be seen, but I’m really looking to 2014 as another big year of WWII gaming and learning.

Seven Years War

I grew up in Western New York State and then lived for a period of time in Western Pennsylvania, so the French and Indian War has always lingered as an interest but has never found its way into my gaming.

lastmohicanpen

James Fenimore Cooper’s The Last of the Mohicans and other books in his Leatherstocking Tales series have also been favorites since boyhood. These colorful stories are set within the wilderness backdrop of the colonial wars of the Americas fuel much of my love for the French and Indian War period, and my visits to historic sites like Fort Niagara and Fort Necessity have added physical understanding to the frontier conflicts of the period.

ageofreasonrules

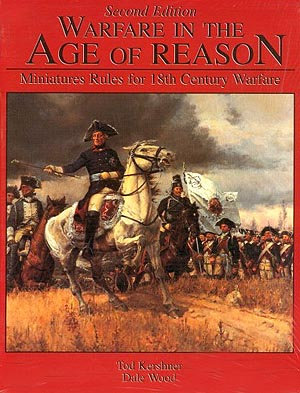
Toward the end of 2013, a fellow club member introduced me to the Warfare In the Age Of Reason rules and the Seven Years War. While my experience gaming battles from the period have thus far had a European focus, my long-time interest in what most consider the world’s first global-scale war holds tremendous interest for me. To this end, I hope to make wargaming the Americas front with the FIW a project for the coming year. Modelling 15mm miniatures of colonists, French, British and Native Americans, along with requisite early American frontier terrain, is sure to be making an appearance here in the coming months.

World War I

While I’m on the subject of world wars, I can’t help but acknowledge the calendar and the 100th anniversary of the beginnings of World War I this coming July.keegan_first_l

My only real exposure to the war so far has been with John Keegan’s excellent The First World War. I’ve read a half-dozen of Keegan’s books, and his 1999 overview of the Great War gave me a solid introduction to a war that’s often overlooked by most Americans like myself. Clearly this is a major period in modern warfare I could stand to learn more about.

9780385351225_p0_v1_s260x420

To get myself back into the period, I’m planning on reading Max Hasting’s Catastrophe 1914: Europe Goes To War which made many top nonfiction lists at the end of 2013. I’ve only gamed WWI once with a 28mm French-German trench warfare scenario at a convention back in 2011, but there are a number of club members with miniatures from the period I may prod into using in some games this year. There are also rumors afoot that the makers of FOW are expanding into WWI just in time for this year’s anniversary, but for now I think some time with a few good books should be enough tribute from me in 2014.

And…

I can’t really tell with complete certainty where this coming year in gaming will take me. Like with most battle plans, a grand strategy can be laid out but actual events often unfold very differently in the fog of war. I can say there will be more miniatures, more scenarios and more completely fresh games to come here on Brooklyn Wargaming by New Year’s Day 2015. For now, here’s to old fronts not forgotten from 2013 and new fronts to come in 2014.

Downloading: Blogging War In Pictures

11290985505_26680f4f03_c

I’ve made my living for the past 17 years in the pictures business. In 1996, I arrived in New York City and landed a job with a photo-licensing company doing historic photo research. My days were spent fulfilling client requests for photos, illustrations and artwork to be used in advertising, corporate marketing, book publishing, magazines and newspapers,  documentaries, motion pictures and TV programming. Since then, I’ve gone on to work with several of the largest stock photo and film licensing companies in the world.

In my time, I’ve participated in the rapid changes in the business as it evolved from a world of photo prints kept in dusty file cabinets to the digital marketplace of images today. The proliferation of online search and digital photography databases has granted professionals and non-professionals alike enormous access to visuals illustrating  the arc of world history from the dawn of time to the latest celebrity gossip.

With this has come the significant challenges of copyright management. Companies like those that have employed me license images for a fee ranging from a couple bucks to tens-of-thousands of dollars each, depending on the use and value of the image (often based on murky concepts of scarcity and quality). With these licensing fees, photographers, archives recieve payment and people like me are able to pay the rent and feed my kids.

With images easily available online there is a lot of misinformation on in what instances a photo which may be used without paying someone a fee. Bloggers and other online outlets (and even traditional print-based users) regularly use photos under misunderstood concepts like “fair use.” In short, unless someone is granting you permission to use their works you could very well be in some sort of copyright violation and subject to significant legal and financial penalties. This is a conversation we in the licensing business have countless times a day with new and old customers alike.

For a blogger like me, I try to take as many photos myself and stick to others that are either out of copyright or used in the context of reviewing a game, book or film. Looking for great historical reference images for use online or off still remains a challenge at times, but it keeps getting easier all the time.

This past week, the British Library announced the release of nearly one million images for free use via Flickr Commons. The BL becomes the latest insitutional archive to make available enormous selections of images. For bloggers, gamers and armchair historians, these resources are incredible and hours can be spent paging through them. Other existing collections of interest for wargamers include:

For now, below is just a taste of what’s new to be found in the British Library’s new online Flickr collection. The emphasis is on 18th-19th century history with tons of maps, engravings, diagrams and photographs. The Napoleonic Wars is documented in a ton of gorgeous color plates of uniformed soldiers, making them a perfect reference for your miniatures painting projects. The American Civil War is represented in scores of maps, portraits of various military and political leaders and lots of reference drawings of equipment and fortifications. The centuries of Britain’s colonialism is captured with a lot of material on Egypt, South Africa and the Middle East. Finally, there is a fair amount of naval and land imagery from the Spanish-American War.

Have a look for yourself and I’m sure you’ll find some obscure visual historic treasure of your own.

Napoleonic Wars

11197448323_f29a6f55fa_c

11003362935_ac6bd93346_c

11003528116_3ec187b941_c

American Civil War

11189959606_caa7577d01_c

11195430764_c3203d4309_c

11203099085_144b616820_c

11187451524_41b1288915_c

African Colonial Wars

11213541216_3036b5474e_c

11034541986_c31dcfcff5_c

11235101336_f9af33fc5b_c

Spanish-American War

11244813946_7135b5594b_c

santiago

11244838355_a6551da621_c

Warfare In The Age Of Reason: Battle of Kolin 1757

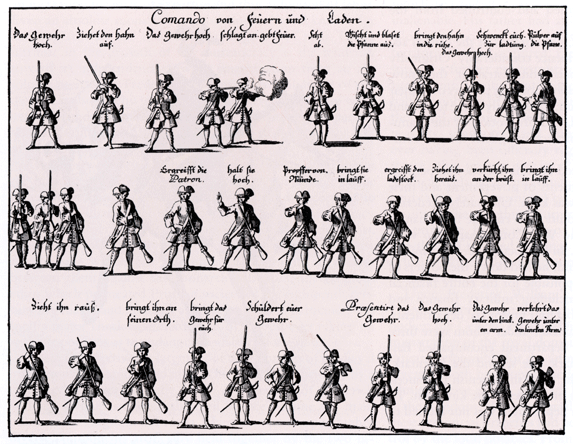
drillmanual18th-century European military drill manual

Now that I’ve had my interest sparked in the Seven Years War (SYW) period, I’ve been doing some homework. For background, a lot of people point to the outstanding Wiki-style Kronoskaf SYW Project website for more than 2200 articles and 5500 pictures relating to the period. I’ve found the maps collection to be particularly compelling since I have a huge interest in how landscapes shape warfare in all periods.

I’ve also laid out a small initial investment on the very popular Warfare In The Age Of Reason rulebook written by Tod Kershner and Dale Wood, published by Emperor’s Press and available at On Military Matters. I also found a Facebook page dedicated to the rules which I plan on using for visual inspiration and gaming information in the coming months. At some point, tracking down a copy of the out-of-print Uniforms of the Seven Years War 1756-63 by John Mollo and Malcolm McGregor sounds like thing to do if I want a collection of handy plates on my bookshelf.

Fortunately there are a few players at Metropolitan Wargamers in Brooklyn, NY who already have pretty sizable collections of SYW 15mm miniatures from a represenative cross-section of period armies. Some guys at the club also have figures from the period in 28mm, and one of the newer members is talking about running a campaign-style SYW game next year. Even with models at the ready for gaming at our club, I’m already eyeballing the 18th-century 15mm figures available from Old Glory Miniatures and Essex Miniatures as one of my projects for 2014.

Kolin1757

Battle of Kolin, June 18, 1757

This past weekend, my son and I got together with some club members in Brooklyn for another SYW game, this time the Battle of Kolin June 18th, 1757. The battle came a couple months prior to our previously-played scenario of Moys from September 1757, and proved to be the first defeat experienced by King Frederick II of Prussia.

Admired by contemporaries and scholars today as one of the greatest military leaders in history, Frederick The Great and his Prussian forces were viewed at the dawn of the SYW period as the greatest standing army in Europe. Aligned with Great Britain and surrounded by Austrian-aligned adversaries on the continent, Frederick’s tactical innovations led his often outnumbered forces to numerous victories.

At Kolin in the present day Czech Republic, Frederick led some 34,000 Prussians in a march hoping to destroy the Austrian army seeking to reinforce the besieged city of Prague. Unfortunately for Frederick, he chose to confront the superior force of 44,000 Austrians on their home turf defending from the rolling hills near Kolin. On the hot summery day in June, Frederick’s aggressive gamble would result in his undoing.

 IMG_2605Starting hilltop positions of the Austrians with the oak wood to their right and the Prussian lines before them

IMG_2591The central Austrian defenses with heavy guns at the front, cavalry in reserve and skirmishers in the town beyond

Our battle started historically with the Austrian infantry aligned across the defending hills, three heavy gun batteries at the center and cavalry to either end of the line. The Prussian advance began with a cavalry push on their left around a small town held by Austrian allied skirmishers. Frederick, near the center of the line, began a slow and cautious march to the hill objectives toward the center.

IMG_2597Prussian cavalry charge into the Austrian right

IMG_2596Austrians advanced on the skirmishers in the village

On the Prussian left, a cavalry charge was met with a counter charge from the Austrian-aligned Hussars. Nearby, Austrian line infantry advanced in the hopes of driving skirmishers out of the nearby town. If the initial Austrian press worked, the entire Prussian right flank would fold.

IMG_2602As disordered Hussars retreat, Austrian heavy cavalry ride to answer the Prussian charge

IMG_2593Austrian heavy cavalry gallop to defend their right

As the Hussars folded under the attack and retreated in disorder, Austrian heavy cavalry charged back toward the advancing Prussians. With the Prussian charge repulsed with losses on both sides, the Austrian cavalry now looked to turn the Prussian left flank with more heavy cavalry rushing from the rear.

IMG_2592Gun batteries at the Austrian center

IMG_2604Prussians advance on the Austrian center and receive cannon fire

IMG_2600Prussian lines continue the advance as cavalry reserves in the distance rush to buoy their softening left flank

At the center of the table, the Austrian lines held their ground and pulled into the nearby woods to defend against the coming Prussian advance. As Prussian infantry advanced several lines deep, they were met with several turns of cannon fire yet continued their press forward with Fredrick attached at the rear. If you listened carefully, I think you could hear Fredrick’s famed shout of “do you want to live forever?” echoing from the tabletop as he urged his Prussians onward.

IMG_2603The Austrian battery takes casualties from the advancing Prussians

IMG_2601The Austrian battery is overrun in a Prussian charge

Eventually, the  overwhelming force of the Prussian lines closed on the Austrian batteries at the front of the line. One battery was destroyed and a second fled the field following a charged assault. With Austrian infantry now staring down from on the hill, the Prussians marched uphill to their objective and closed within charge distance.

IMG_2598Prussians press the attack into the woods and up the hill

IMG_2599The wood becomes a locked melee as firing erupts all along both lines and into the distance on the Austrian left

A charge and counter charge locked lines in melee in the woods at the Austrian right as Prussians pressed their advance now all along the line. On the center hill, an Austrian line wheeled down the hill to envelope the Prussian lines in fire both to the front and at their flank. The one remaining Austrian battery continued to pummel the Prussian lines scrambling for the center hill. On the far hill on the Austrian left, lines finally made a move on the Prussians.

With the cavalry charges at a stalemate on the Austrian right and the Prussian lines split into two losing combats at the hills, the Prussians failed a morale test under heavy losses and ceded the field to the Austrian army. Once again, Frederick’s gambit at Kolin had resulted in defeat.

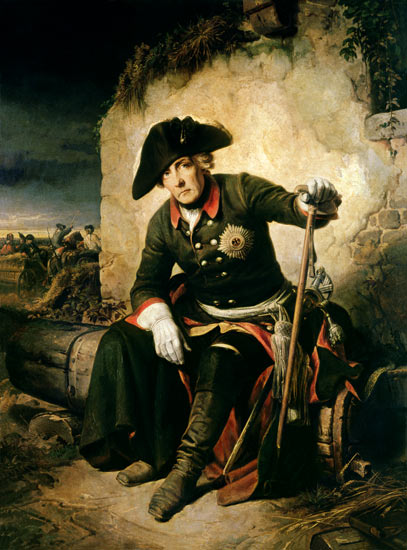
fredIIkolin‘ Frederick the Great After the Battle of Kolin’ by Julius Schrader (1859)

After two games in the Seven Years War period in as many weeks, I’m hooked on the era. The games begin cautiously with slowly-deployed movements but quickly erupt into vicious volleys of fire, swift charges and hand-to-hand combats. Even with thoughtful strategic planning at the outset, the battles quickly evolve into chaotic back-and-forth tactical blood baths. The constant morale checks as the battlefield shifts and fire is taken becomes as much a path to outcome as men falling on the field. And, as with the original battle at Kolin, the Austrians defenders proved to be too much a match again for the Prussian invaders this past weekend.

Retro Gaming The 70s & 80s: Dover Cut & Assemble Books

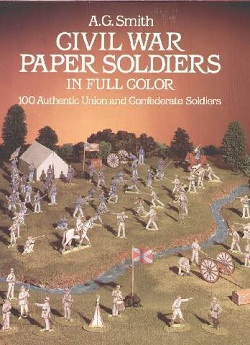
dover greenfield

I had a whole host of hobbies as a kid. There were plastic model kits from Airfix and Revell. I had a huge HO-scale train layout in my basement. Model rockets from Estes regularly launched from my back yard. Roleplaying and historical miniatures gaming finally came along, allowing me to incorporate a lot of my passion for models  into the terrain, buildings and countless metal figures I’d need for my dungeon crawls or fields of battle.

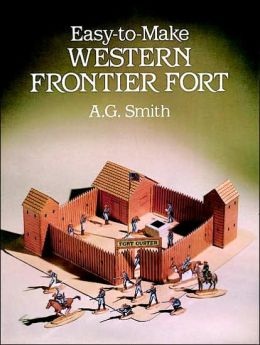
dover fort

One of my fondest early memories of scale-modelling was with the Dover Publications “Cut & Assemble” or “Easy-To-Make” books. I recall a steady flow of these books in my house with my mother picking them up with some frequency off the book racks at five-and-dimes, toy shops and book stores. There were so many of these and other activity books piled in my room as a kid, and it seemed like nearly every time we went shopping there was a new one to add to the collection.

dover village

These books offered models from many periods including ancient castles, Viking outposts, European villages, Old West towns, Victorian mansions, seaside settlements and even some modern structures. Along with the main buildings, many of the books included details like fences and walls, wells, animals, vehicles and people. These made each book a playset of its own but also allowed for a few different books to be used together. My western town might be settled right outside the fronteir fort, and civil soldier cut-outs would fight among the buildings included in the New England-themed village sets. The HO scale of the models also lent them for use with my plastic soldiers and livestock , and I’d often throw in some lichen bushes or custom-made roads to the set-up.

dover western

Assembly of the models in the Dover books did take a fair amount of time, and the details on things like porches, roofs, stairways and chimneys often involved tiny multiple folds. The hours I spent cutting and gluing together the buildings, often with minimal instructions, certainly gave me plenty of practice in a small scale. The heavy cardstock made the buildings fairly sturdy once built, making them easy to throw in a box when done playing with them.

dover soldiers

The rise of at-home printing has created a resurgence in papercraft modelling no longer constrained to books like those from Dover and Usborne Books. A lot of miniatures gamers swear by the relatively-inexpensive and quickly-accessible papercraft terrain made specifically for gamers by companies such as Paper Terrain or uploaded for free on a number of gaming sites and forums.

Despite my time paper modelling as a kid in the 70s and 80s, I’ve moved on from it with my gaming today. That said, I have been spending a fair amount of time with my youngest son who has developed an interest as of late in searching, printing and assembling Minecraft papercraft models. With his new passion for papercrafting I’m thinking that revisting the Dover books of my past with my son may be a great way to nurture a newly-seeded hobby to last another lifetime.

Collector’s Note: While some of the Dover “Cut & Assemble” or “Easy-To-Make” books are now out of print, many are still available online both new and used starting at under $10 each.

Warfare In The Age Of Reason: Battle of Moys 1757

moysfullA c. 1790 map of the Battle of Moys, September 7, 1757

This past weekend at Metropolitan Wargamers in Brooklyn, NY, there was some focused excitement around around two big boardgames. One group of players was huddled around an ongoing campaign using the very popular Zombicide and its new expansions. Another crowd anxioulsy anticipated the arrival of the newly-released Designer’s Edition of the old Steve Jackson Games sci-fi battle classic Ogre which comes in a monstrous 30-pound box overflowing with huge game maps, 3D models and more than 500 cardboard playing pieces.

At the back of the club, four of us had a go at a game of more traditional historical miniatures wargaming our club was founded on nearly 30 years ago. After a long hiatus, our club President had decided to blow the dust off his “Warfare In The Age Of Reason” rules from Emperor’s Press and host a few of us for a learning game of the Battle of Moys from the Seven Years War. After so many hours spent with World War II miniatures gaming with Flames of War, it was great to dig into a period ruled by wigs, muskets and traditional European battlefield tactics.

moysdetailMap detail of the area of the game scenario

The Seven Years War was a different kind of world war from a very different era. Fought throughout Europe, along the West African coast and in the colonial outposts of India, the Philippines and the Americas, the war raged from 1756-1763 between various kingdoms and alliances competing for land and trade worldwide. By the fall of 1757, several major battles had already been fought including the Prussian defeat of Austrian defenders at the Battle of Prague in May 1757 and the Austrian defeat of Prussians in answer at the Battle of Kolin a month later.

Near Moys in modern Poland on September 7th, 1757, a 26,000-man Austrian force led by General Franz Leopold von Nádasdy moved toward routing an isolated and retreating Prussian force half its size commanded by Lieutenant- General Hans Karl von Winterfeldt.  A small group of advance Prussian troops were posted on the Jäkelsberg outside of Moys but the majority of the army lay encamped at a distance. Rather than attack at first light of dawn, the Austrians waited for the Prussians to complete their breakfasts and morning drills before moving columns of Grenadiers on the defending Prussians. As subsequent Austrian waves pushed onto the heights, Hussars met the retreating Prussians. Surprised by the Austrian attack, Prussian leadership rushed reinforcements from nearby Gorlitz to the fight, briefly retaking the Jäkelsberg. The battle for the raged back and forth, but by mid afternoon the Austrians had deployed lines of regulars in the neighboring plains and forced an eventual Prussian retreat.

IMG_2537Austrian Grenadier columns enter the field toward Moys

Our game began with advancing Austrian Grenadiers and artillery moving in column on the central Jäkelsberg objective hill. With short firing range for small arms, there were a couple turns of movement and positioning from column into line as the Prussians remained stationary in their positions on the hill.

IMG_2539Prussians on the Jäkelsberg spot the advancing columns of Austrians

The Austrian medium cannons also began the game out of range, necessitating them to spend a turn moving and getting into position to fire on the Prussian lines.

IMG_2556Austrian guns deploy on a hill near the Jäkelsberg

By the third turn, the lines of advancing Austrians began softening-up the Prussian left and center with musket volleys as cannon likewise opened fire. On the far side of the hill, Hussar cavalry raced to the flank and skirmishers moved toward the right lines.

IMG_2555Austrian lines advance on the Jäkelsberg as guns fire

With things on the Jäkelsberg heights looking bad for the Prussians, fresh columns of Austrian regulars advanced on the field in turn four and immediately broke toward the open fields on the far side of the battle.

IMG_2557Fresh Austrian columns arrive

On the Jäkelsberg, the Prussian cannon position was overwhelmed by advancing Austrians and the remaining Prussian infantry lines were closed in on three sides.

IMG_2558Austrians take the Jäkelsberg to the left, form lines to the right and fresh columns arrive at the rear; Prussian reinforcements arrive in the distance

With the Austrian objective of taking the Jäkelsberg nearky achieved by turn six, over a hlaf-dozen late-arriving columns of Prussians began arriving on the table in the distance. To the right rear of the Austrians, a Prussian cavlary contingent also arrived and moved to flank the deploying Austrian lines in the field.

IMG_2559As the Austrians overrun Prussian positions to the left, my son’s reinforcements arrive at the edge of the field

The Prussian cavalry made a move to charge the fresh Austrian arrivals in the rear, and one column quickly moved to defend in square formation. Cannon blasts from the Austrian guns routed the Prussian cavlary, driving them toward retreat off the board. By the seventh turn, the new Prussian lines were marching toward the Austrians who were already massig several ranks deep. With the Jäkelsberg held by the Austrians and their lines likewise controlling the open field, we called the game with a repeat historical victory for Austria.

ageofreasonrulesThe Battle of Moys was my first time playng with the popular “Warfare In The Age Of Reason” rules. Having not played a pre-20th-century miniatures game in quite some, I loved the tactics of movement, fire and charges. In the period and game, fighting occurs at very close range, making movement and protecting flanks and rear key to victory. Forcing your opponent into disorder or routing becomes as important as the number of casualties inflicted.

I found the rules to be simple, with the move order determined by drawn cards. Dice throws for morale checks, arms fire and charges all occur with a simple mechanic of adding or subtracting the number of dice according to the position and condition of your forces. Fighting in close quarters causes the battlefield to quickly shift throughout the game as lines and columns ebb and flow for position on the board.

With the fairly large scale Battle of Moys under my belt, I’m looking forward to studying up on the “Warfare In The Age Of Reason” rules and Seven Years War period a bit more. The 18th-century tactics,  colorful troops and special rules according to nationalities and fighting quality provides for a ton of unique fun in a vast world war period I look to get back to again very soon.

New Game Weekend: Dixit Journey

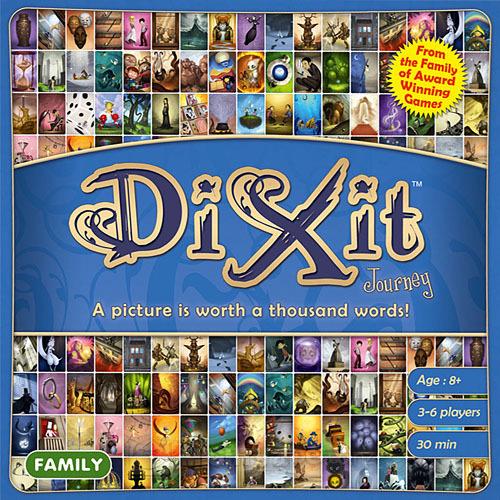
dixitbox

I play a lot of games with my kids. I started them at an early age, so they have a pretty healthy knowledge and love for hefty wargaming miniatures games like Flames of War and elaborate strategy games like Settlers of Catan, Village, Canterbury and Civilization. Even with a big stack of boardgames crowding our shelves, we regularly run into new games that capture our imagination in new ways. After several rounds of of Dixit Journey with three generations of my family over the Thanksgiving weekend, we have a new favorite in our constantly-growing list of favorites.

journeycontentsDixit Journey is a variation on the family of games and expansions from Asmodee , an award-winning French Eurogame publisher. In essence, Dixit is a storytelling game with the only real skill needed is your imagination. Each round a storyteller player secretly selects an illustrated card from their hand of six cards and announces a clue somehow referenced by the picture on the card. Anything can be used for a clue — song lyrics, characters from a book, famous quotes, historical figures, TV shows, sounds, news stories, etc. — provided it somehow references something depicted on the card. After the clue is announced, the other players then likewise secretly select a card from their hands which they think may also depict the clue in some way.

Cards are then revealed and laid out along the edge of the board. All players except the storyteller then place their guesses on the card they think is the storyteller’s card. Player guesses are then revealed with points going to the storytller if their card is selected and to other players whose cards were also guessed on. Choosing an overly-obvious card and clue combination everyone guesses correctly results in no points for the storyteller, so balancing a clue and card pairing that is both guessable but not too literal is key to the winning the game.

IMG_2518

Like many Eurogames, Dixit is simple on the surface with minimal rules and reading but creatively open in how it plays out. In our games, one clue was given as an interpretive dance of sorts. Other clues included movie references, literary allusions and just flat-out odd phrases inspired almost wholly by the cards themselves. Part of the fun of the game is to see how it plays out with different people’s minds interpretting the same clue in multiple cards.

For a taste of how a game of Dixit plays, check out  the episode below of Wil Weaton’s always entertaining Tabletop web series.

Dixit is a gorgeous game with trippy, weird and abstract cards that may be reused over and over again. The many expansions available add more storytelling possibilities to the game, and the Journey edition makes some improvements on the scoring and game board included in the first edition box. Playing in about a half hour and with multiple players or even teams, Dixit makes for a great nighttime game with family or friends of all ages after the dinner plates are cleared.

New Game Weekend: Dreadfleet

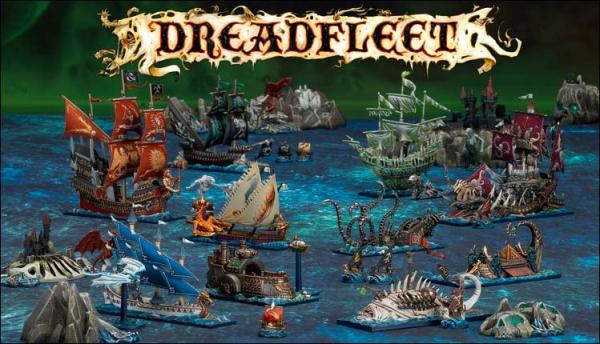
m1980418a_DFBlog_Opener

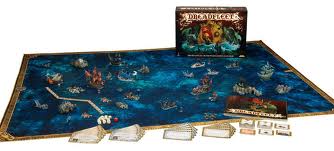
There are some games with reputations that far precede them in gamer lore, despite having few people who can say they’ve actually played them. Games Workshop’s Dreadfleet from 2011 is one of these, and this past weekend I was finally able to dip my toes into a session with this gorgeous and infamous game.

dreadcontents

The limited-edition and now out-of-print Dreadfleet was met with mixed reviews when it was released a couple years ago. Set in the Warhammer Fantasy world with the Grand Alliance armada facing off against the undead Dreadfleet, the standalone game comes packed with incredibly intricate and delicate plastic models of ships, islands, sea monsters, treasure, ship wrecks and navigational pieces set on a beautiful printed cloth seascape playmat and accompanied by scores of cards. 

IMG_2521

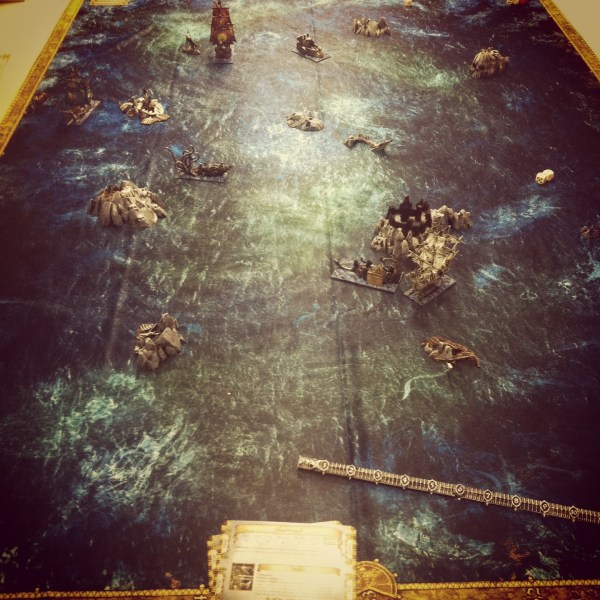
The Dreadfleet table with all models painted by my brother

Playing 2 to 10 players, the game finds the two fleets squaring off with sailing and mechanical ships in a sea dotted with fortressed islands. Deep backstories accompany the lushly-illustrated rulebook, adding depth and significant game color to the captains steering their ships toward broadside cannon battles, ramming boarding parties and assaults on enemy island outposts.

IMG_2525

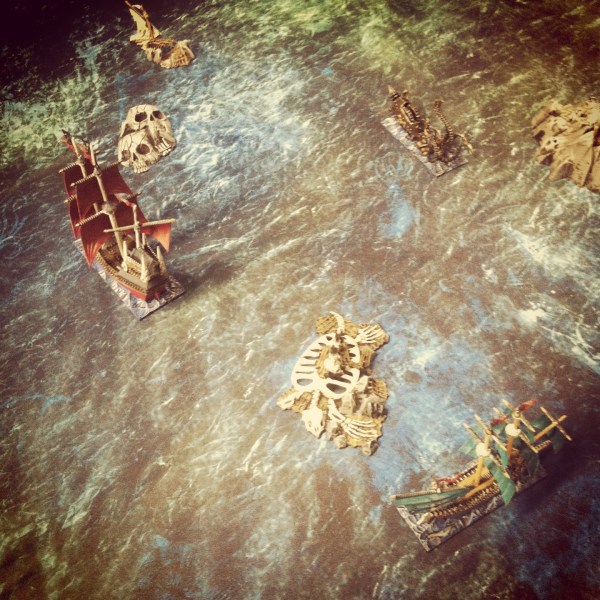
The Heldenhammer (left), Black Kraken (upper right) and Swordfysh (lower right) navigating around Turtle Island

The game turn begins by drawing fate cards which inject specific plot points into each round along with shifts in the wind direction and strength. Next, each captain rolls to declare orders for the round. Next, ships move while taking into account the wind conditions as well as the ship’s handling and special skills, which may include attributes of the vessel itself or the captain at the helm.

Ranged fire occurs at 6″, 12″ and 18″ distances to varying effect, and ships ramming into contact result in face-to-face boarding melees between the heroic captain characters. Captains may also call for special attacks using smaller proxy launches from their ships, creating additional deadly chaos in the water. Captains receive wounds and ships draw cumulative damage cards, many of which carry lingering effects that can only be remedied in turns spent using repair actions.

IMG_2523

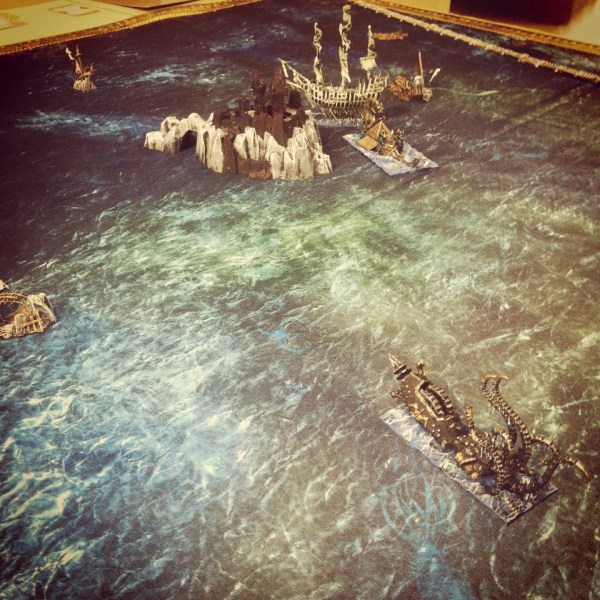
The Black Kraken sailing from Castle Island

After a few turns at Dreadfleet, the mixed reputation was pretty handily revealed. While the game is visually one of the best I’ve ever seen on the tabletop (especially showcasing the painting skills of my brother), the mechanics are incredibly complex. Hitting or sinking a ship is difficult, to say the least. With lots of ships and islands on the table, the waters of the game quickly become complex to navigate. While I love the game’s wind mechanic on the page, shifting winds foil plans constantly. Cards are exceedingly detailed and wordy, bogging the game down as these are referenced repeatedly for the uniquely specific effects and outcomes they each carry.

The dense rulebook comes replete with a number of detailed story scenarios, but all the color the authors can muster quickly drains away under the thick fog of the rules and mechanics which must be referenced again with each turn. Playing a game with multiple players on a side would easily result in a tangle of boats over many, many hours of play.

1450686_10202032642952010_1750681014_n

The Swordfysh

The original retail price for Dreadfleet of over $100 rubbed a lot of gamers the wrong way for a non-expandable game. However, the enduring love-hate relationship with the game is revealed in attempting to track down a copy for yourself. Some collectors seek these boxes out merely for the models and components, often buying multiple sets to field larger fleets. Others track them down for a chance to experience the game’s rules first hand. Unopened copies can sometimes run into the hundreds of dollars, but a friend of mine recently tracked down five copies a dealer was more than happy to part ways with for $20 each.

Having now experienced Dreadfleet first hand, I completely see why this game was left a mark on gamedom. The unparalleled look of the game just can’t offset the price and wildly complex rules which make replay value a challenge. A well-painted set of models from the Dreadfleet and Grand Alliance are sure to be a showcase on any modeller’s shelf, but hauling the game to the table may very well leaving players feeling a bit adrift.

Flames of War: Metropolitan Wargamers Tanksgiving 2013

Tanksgiving PicAbout ten of us at Metropolitan Wargamers in beautiful Park Slope, Brooklyn kicked off the holiday season this past weekend with a day of WWII armored action in conjunction with our first Flames of War Tanksgiving event. The official rules for the event called for 1500-point companies facing off in multiple games throughout the day. Given we had so many new players interested in playing their first games of Flames of War, a few of the more experienced players decided to play host with our own forces brought along for the day over two tables.

FFAMissionThe bigger of the two tables featured Allied forces facing off against Germans in a Late War Western Europe scenario. The Flames of War website offers a group of basic missions of increasingly-complex scenarios, each easily playable in about three hours. Given we were dealing with an entry-level game, we went with a beginner-friendly Free-For-All mission with two 1500-point companies on each side.

IMG_2442Allied defenders (left) and German attackers (right) deployed

Since this was a tank-focused game, we went easy on terrain with just a smattering of wooded areas, buildings and fields spread over the table. The Allied forces defended, beginning on the side of the table defined primarily by a small river crossing bridge on the Allied right and a field and nearby farmhouse on the Allied left.  On the attacking German side of the table, a walled farm complex surrounded by a tree-lined road sat to the German left and a group of wooded areas to their right. A small town was situated squarely at a crossroad at the center of the field.

IMG_2446Guards Armoured and 101st Airborne started in the farm field

The British Guards Armoured Company began near the farm at their left, deploying its Sherman and Firefly tanks along with one platoon from the US 101st Airborne. Near the bridge, the US 4th Armored Company set its 75mm and 76mm tanks and finally deployed its 105mm artillery platoon at the center of the table edge hidden behind a copse of trees. The Germans deployed Panzer IVs, two Tiger tanks and a Grenadier platoon near a forest at their right. A large group of Panthers started near the center behind the small town with a supporting dismounted Panzergrenadier platoon on their left and a two-tank Panther command platoon at their extreme left.

IMG_2444US 75mm and 76mm Shermans tanks at the bridge near the German objective

With the German player starting things off, their main thrust of Panthers moved toward the center of the table while their Panzer IVs and Tigers made a move looking to shutdown to the advance of the Guards Armoured and US airborne troops. The Panzergrenadiers made their way for the walled farm and the treeline at the neighboring road, and the commanding Panthers looped around the farm toward the river and the American right flank.

IMG_2448A Tiger sits burning after being hit by a Firefly

On the Allied first turn, the 101st Airborne made a beeline for the neighboring forest across from the field while tanks rolled into the gap between the forest and the field. A lucky opening shot from a British Firefly took out a German Tiger, providing one of the only bright spots for the Allies during the entire afternoon. The spotter for the US howitzers ran for the cover of the town’s buildings while the mass of American tanks on the right split to hold off the center German advance as well as the German command section’s coming end-run at the river.

IMG_2453The Armoured Guards take ferocious fire from the German tanks

In the second and third turns, the German players began running the table to their victory. A concentration of fire into the town destroyed the US artillery spotter, effectively shutting down any good chance of Allied artillery support. The Tigers began laying waste to the line of advancing Shermans in the field and rolling in the open. A failed assault on the German tanks by the 101st Airborne out of the woods stalled under a hail of machine gun before it began, but the Guards Armoured managed to route the Panzer IVs off the board and whittle-down the Grenadiers making their way between the town and farm house nearby.

IMG_2460Panzer IVs and Shermans aflame as the 101st Airborne sprints across the field

By the fourth turn, German infantry making their way through the open both for the bridge and objective near the American artillery were mowed down under heavy machine gun fire from the US Shermans. Finding a gap amid the tank fight around them, the 101st made a dash to the next forested area while German tanks poured more fire into the British armor at the rear. At the bridge, American 76mm guns managed to destroy one command tank and bail the crew from the other. Unfortunately, the remnants of the American armor were outgunned and entangled in the burning shells of their comrade’s tanks. With nothing left to stop the advance, German tanks rolled to the center and seized their objective.

IMG_2458Nothing left to stop the German advance to victory

While things raged away on the European table, an Early War showdown between 1500-point British and Italian forces in Africa dustily clamored away one table over. You couldn’t get a more different game with less advanced equipment and differently skilled troops battling in a desert environment laced with prepared defensive positions. Since most of my gaming has focused on Late War Europe, the earlier war stuff fascinates me and I’m definitely going to make some time to try my hand at this other period soon.

IMG_2440Early War Italian and British desert action at Tanksgiving in Brooklyn

As it turned out, the Italians took the game on the Africa table, making our first Tanksgiving event a 2-0 victory for the Axis powers. I learned a mass of German armor is really hard nut to crack unless you’ve got some effective artillery and enough infantry to assault and push to an objective. Every game under my belt gives me ideas for the next. Win or lose, I think a few hours of playing may have hooked a couple new players on Flames of War. For that, we’ll all be thankful as we deploy our platoons for another game very soon.