Retro Gaming The 70s & 80s: Dover Cut & Assemble Books

dover greenfield

I had a whole host of hobbies as a kid. There were plastic model kits from Airfix and Revell. I had a huge HO-scale train layout in my basement. Model rockets from Estes regularly launched from my back yard. Roleplaying and historical miniatures gaming finally came along, allowing me to incorporate a lot of my passion for models  into the terrain, buildings and countless metal figures I’d need for my dungeon crawls or fields of battle.

dover fort

One of my fondest early memories of scale-modelling was with the Dover Publications “Cut & Assemble” or “Easy-To-Make” books. I recall a steady flow of these books in my house with my mother picking them up with some frequency off the book racks at five-and-dimes, toy shops and book stores. There were so many of these and other activity books piled in my room as a kid, and it seemed like nearly every time we went shopping there was a new one to add to the collection.

dover village

These books offered models from many periods including ancient castles, Viking outposts, European villages, Old West towns, Victorian mansions, seaside settlements and even some modern structures. Along with the main buildings, many of the books included details like fences and walls, wells, animals, vehicles and people. These made each book a playset of its own but also allowed for a few different books to be used together. My western town might be settled right outside the fronteir fort, and civil soldier cut-outs would fight among the buildings included in the New England-themed village sets. The HO scale of the models also lent them for use with my plastic soldiers and livestock , and I’d often throw in some lichen bushes or custom-made roads to the set-up.

dover western

Assembly of the models in the Dover books did take a fair amount of time, and the details on things like porches, roofs, stairways and chimneys often involved tiny multiple folds. The hours I spent cutting and gluing together the buildings, often with minimal instructions, certainly gave me plenty of practice in a small scale. The heavy cardstock made the buildings fairly sturdy once built, making them easy to throw in a box when done playing with them.

dover soldiers

The rise of at-home printing has created a resurgence in papercraft modelling no longer constrained to books like those from Dover and Usborne Books. A lot of miniatures gamers swear by the relatively-inexpensive and quickly-accessible papercraft terrain made specifically for gamers by companies such as Paper Terrain or uploaded for free on a number of gaming sites and forums.

Despite my time paper modelling as a kid in the 70s and 80s, I’ve moved on from it with my gaming today. That said, I have been spending a fair amount of time with my youngest son who has developed an interest as of late in searching, printing and assembling Minecraft papercraft models. With his new passion for papercrafting I’m thinking that revisting the Dover books of my past with my son may be a great way to nurture a newly-seeded hobby to last another lifetime.

Collector’s Note: While some of the Dover “Cut & Assemble” or “Easy-To-Make” books are now out of print, many are still available online both new and used starting at under $10 each.

Warfare In The Age Of Reason: Battle of Moys 1757

moysfull
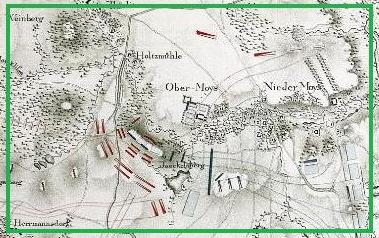
A c. 1790 map of the Battle of Moys, September 7, 1757

This past weekend at Metropolitan Wargamers in Brooklyn, NY, there was some focused excitement around around two big boardgames. One group of players was huddled around an ongoing campaign using the very popular Zombicide and its new expansions. Another crowd anxioulsy anticipated the arrival of the newly-released Designer’s Edition of the old Steve Jackson Games sci-fi battle classic Ogre which comes in a monstrous 30-pound box overflowing with huge game maps, 3D models and more than 500 cardboard playing pieces.

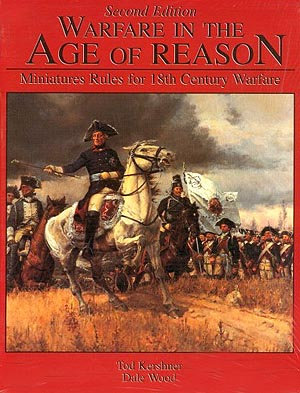
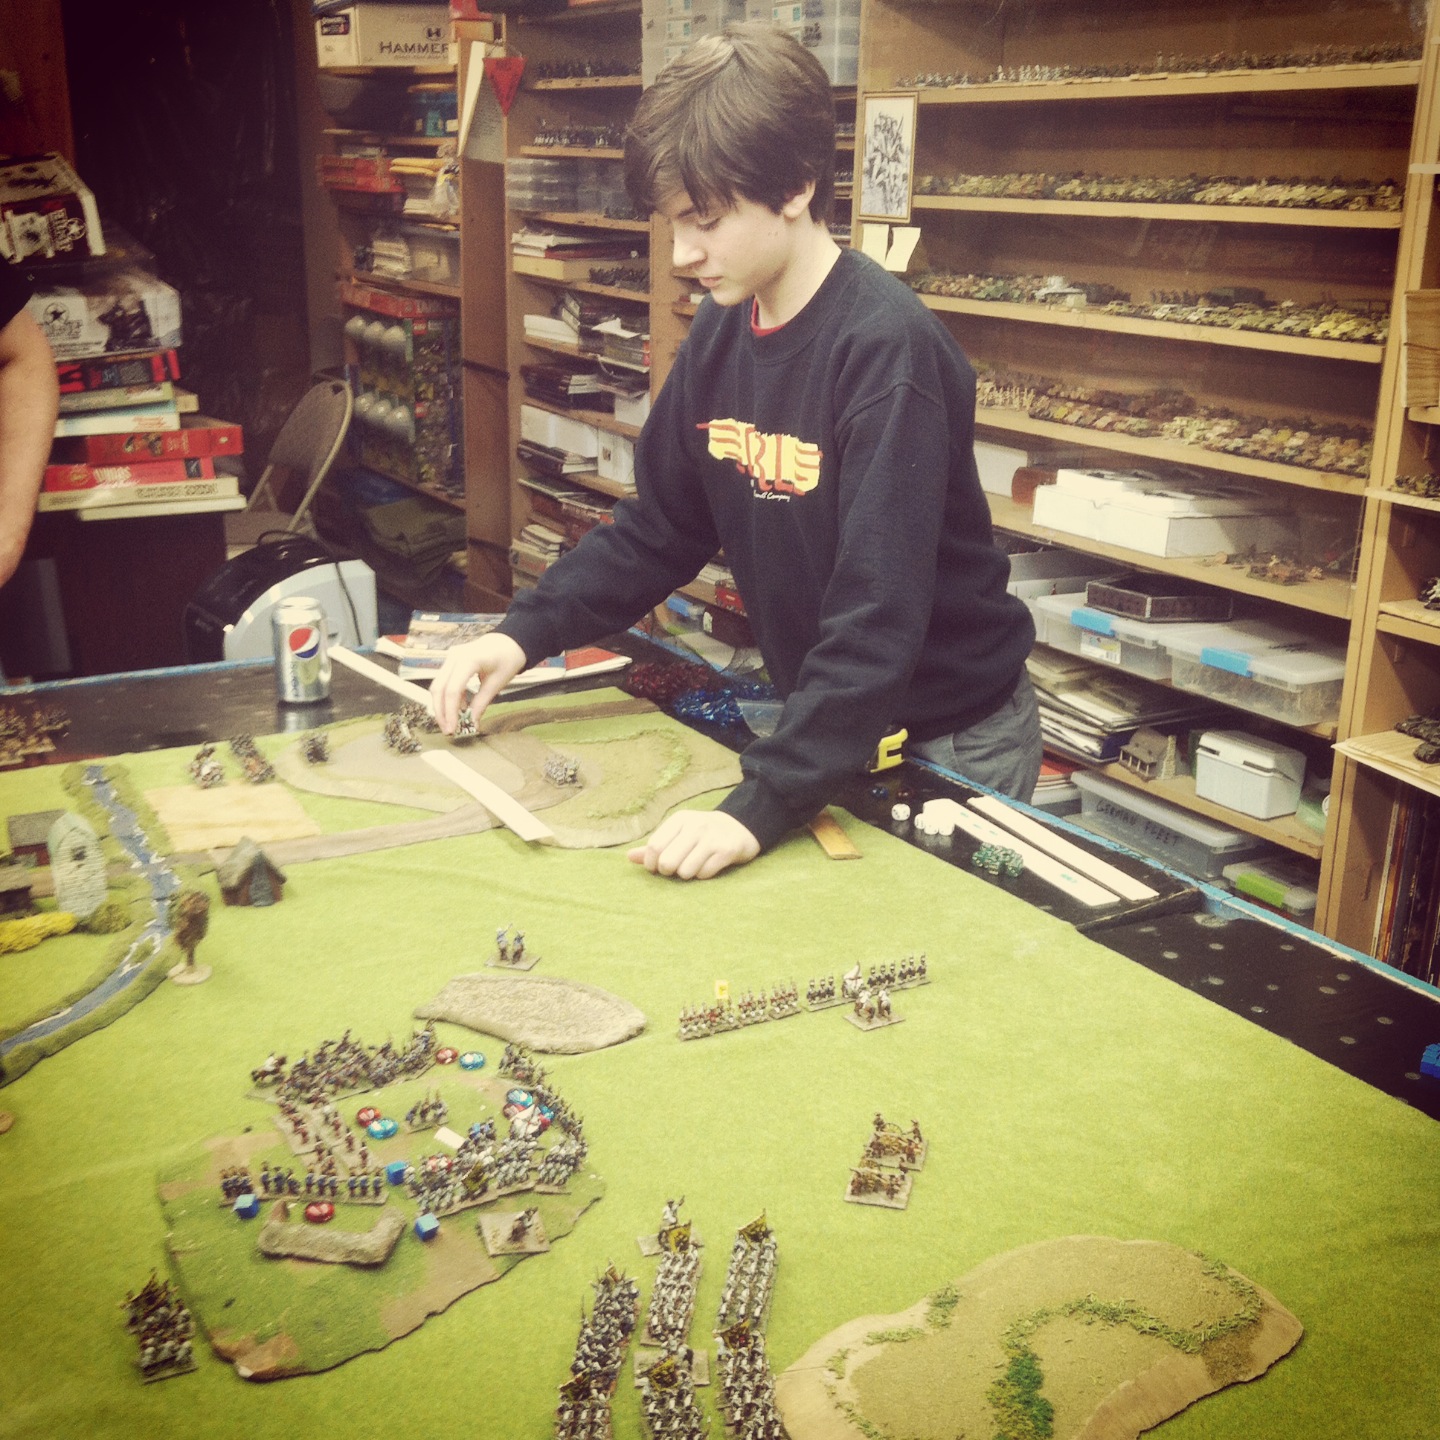
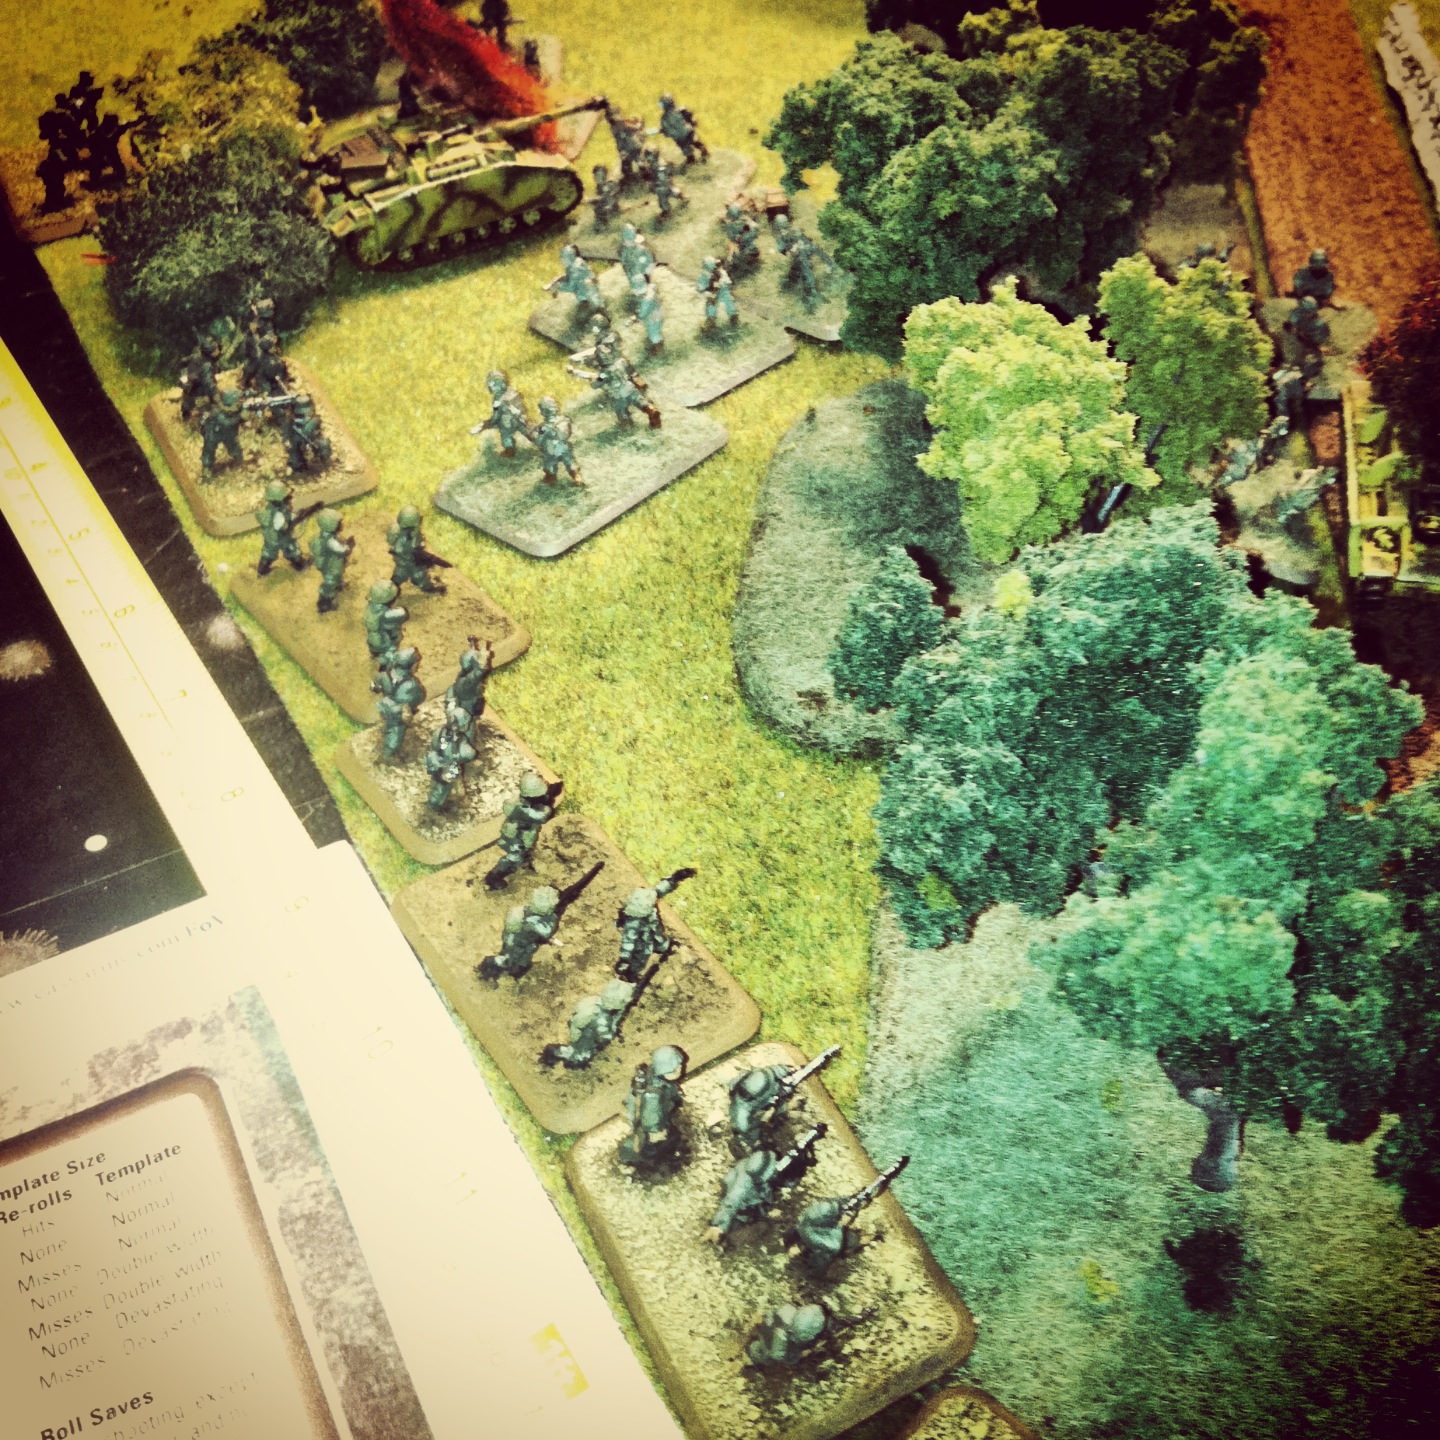
At the back of the club, four of us had a go at a game of more traditional historical miniatures wargaming our club was founded on nearly 30 years ago. After a long hiatus, our club President had decided to blow the dust off his “Warfare In The Age Of Reason” rules from Emperor’s Press and host a few of us for a learning game of the Battle of Moys from the Seven Years War. After so many hours spent with World War II miniatures gaming with Flames of War, it was great to dig into a period ruled by wigs, muskets and traditional European battlefield tactics.

moysdetailMap detail of the area of the game scenario

The Seven Years War was a different kind of world war from a very different era. Fought throughout Europe, along the West African coast and in the colonial outposts of India, the Philippines and the Americas, the war raged from 1756-1763 between various kingdoms and alliances competing for land and trade worldwide. By the fall of 1757, several major battles had already been fought including the Prussian defeat of Austrian defenders at the Battle of Prague in May 1757 and the Austrian defeat of Prussians in answer at the Battle of Kolin a month later.

Near Moys in modern Poland on September 7th, 1757, a 26,000-man Austrian force led by General Franz Leopold von Nádasdy moved toward routing an isolated and retreating Prussian force half its size commanded by Lieutenant- General Hans Karl von Winterfeldt.  A small group of advance Prussian troops were posted on the Jäkelsberg outside of Moys but the majority of the army lay encamped at a distance. Rather than attack at first light of dawn, the Austrians waited for the Prussians to complete their breakfasts and morning drills before moving columns of Grenadiers on the defending Prussians. As subsequent Austrian waves pushed onto the heights, Hussars met the retreating Prussians. Surprised by the Austrian attack, Prussian leadership rushed reinforcements from nearby Gorlitz to the fight, briefly retaking the Jäkelsberg. The battle for the raged back and forth, but by mid afternoon the Austrians had deployed lines of regulars in the neighboring plains and forced an eventual Prussian retreat.

IMG_2537
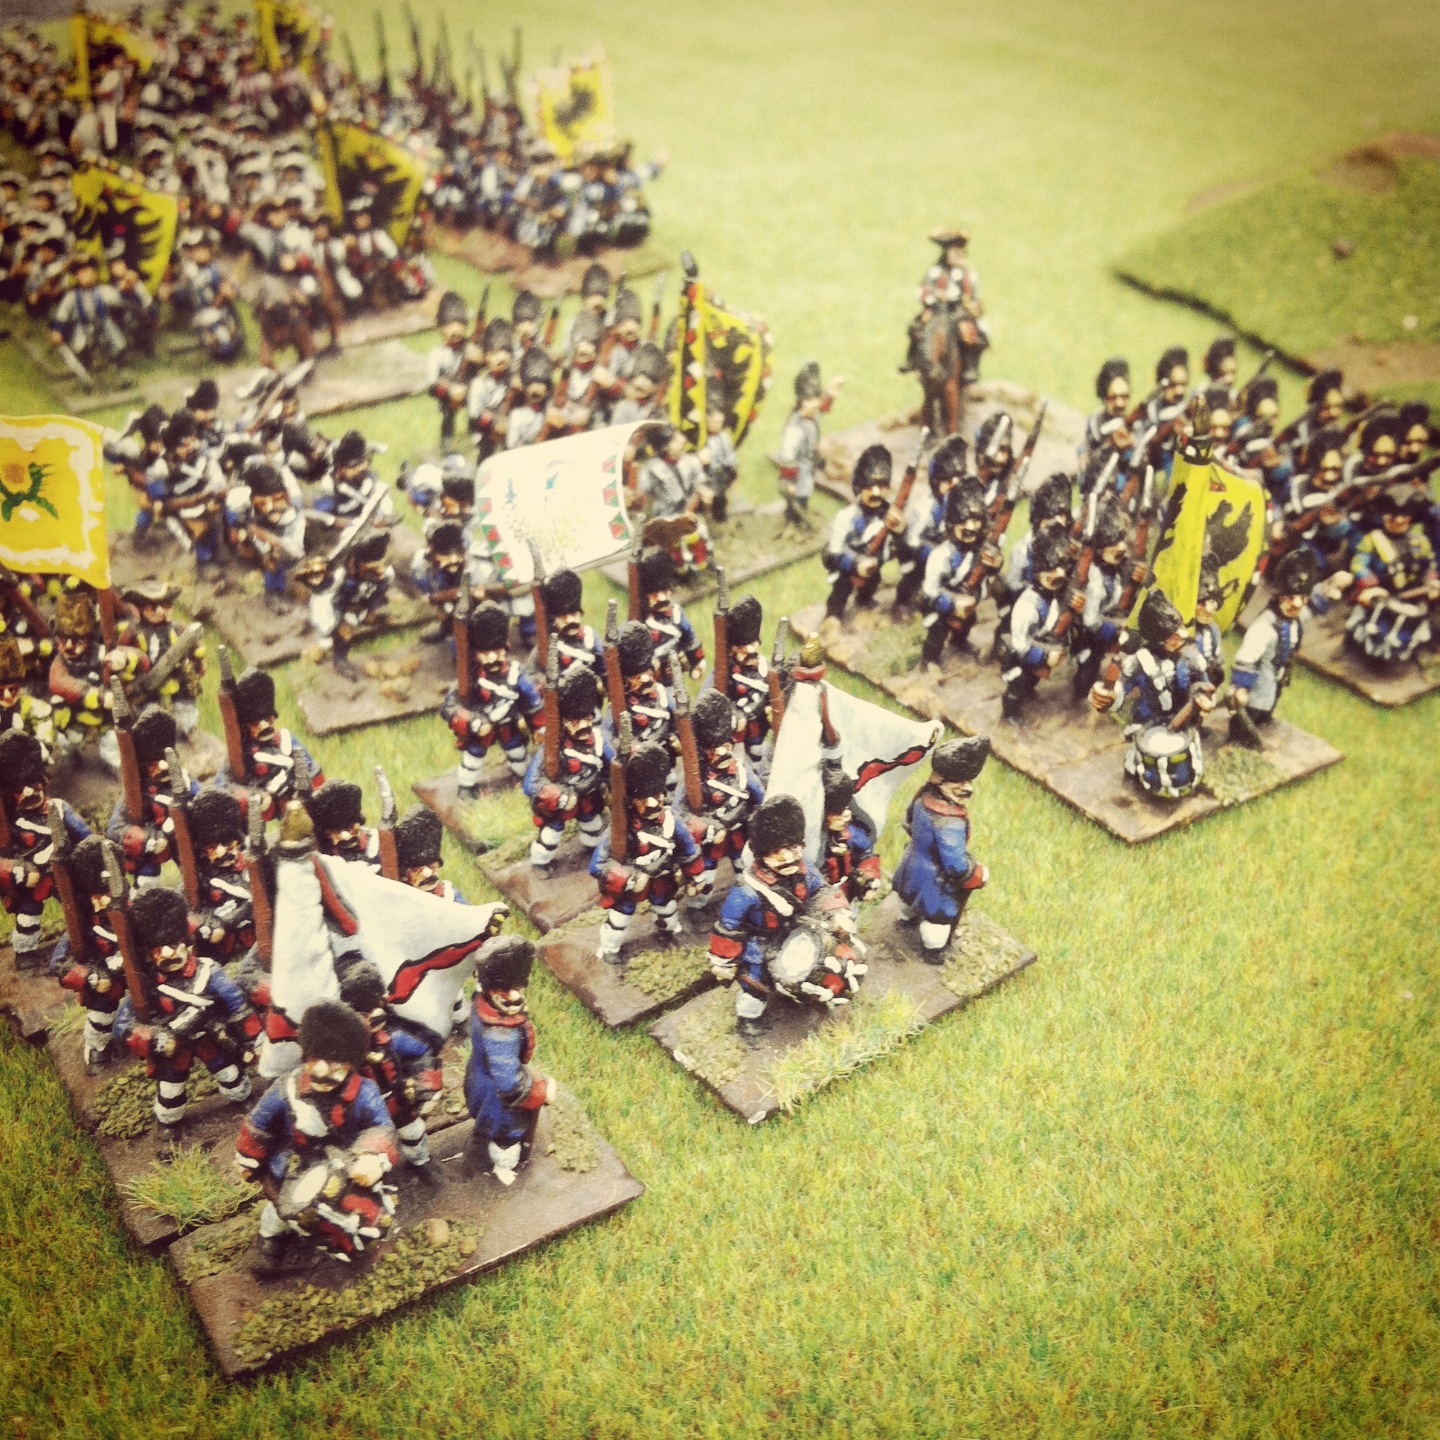
Austrian Grenadier columns enter the field toward Moys

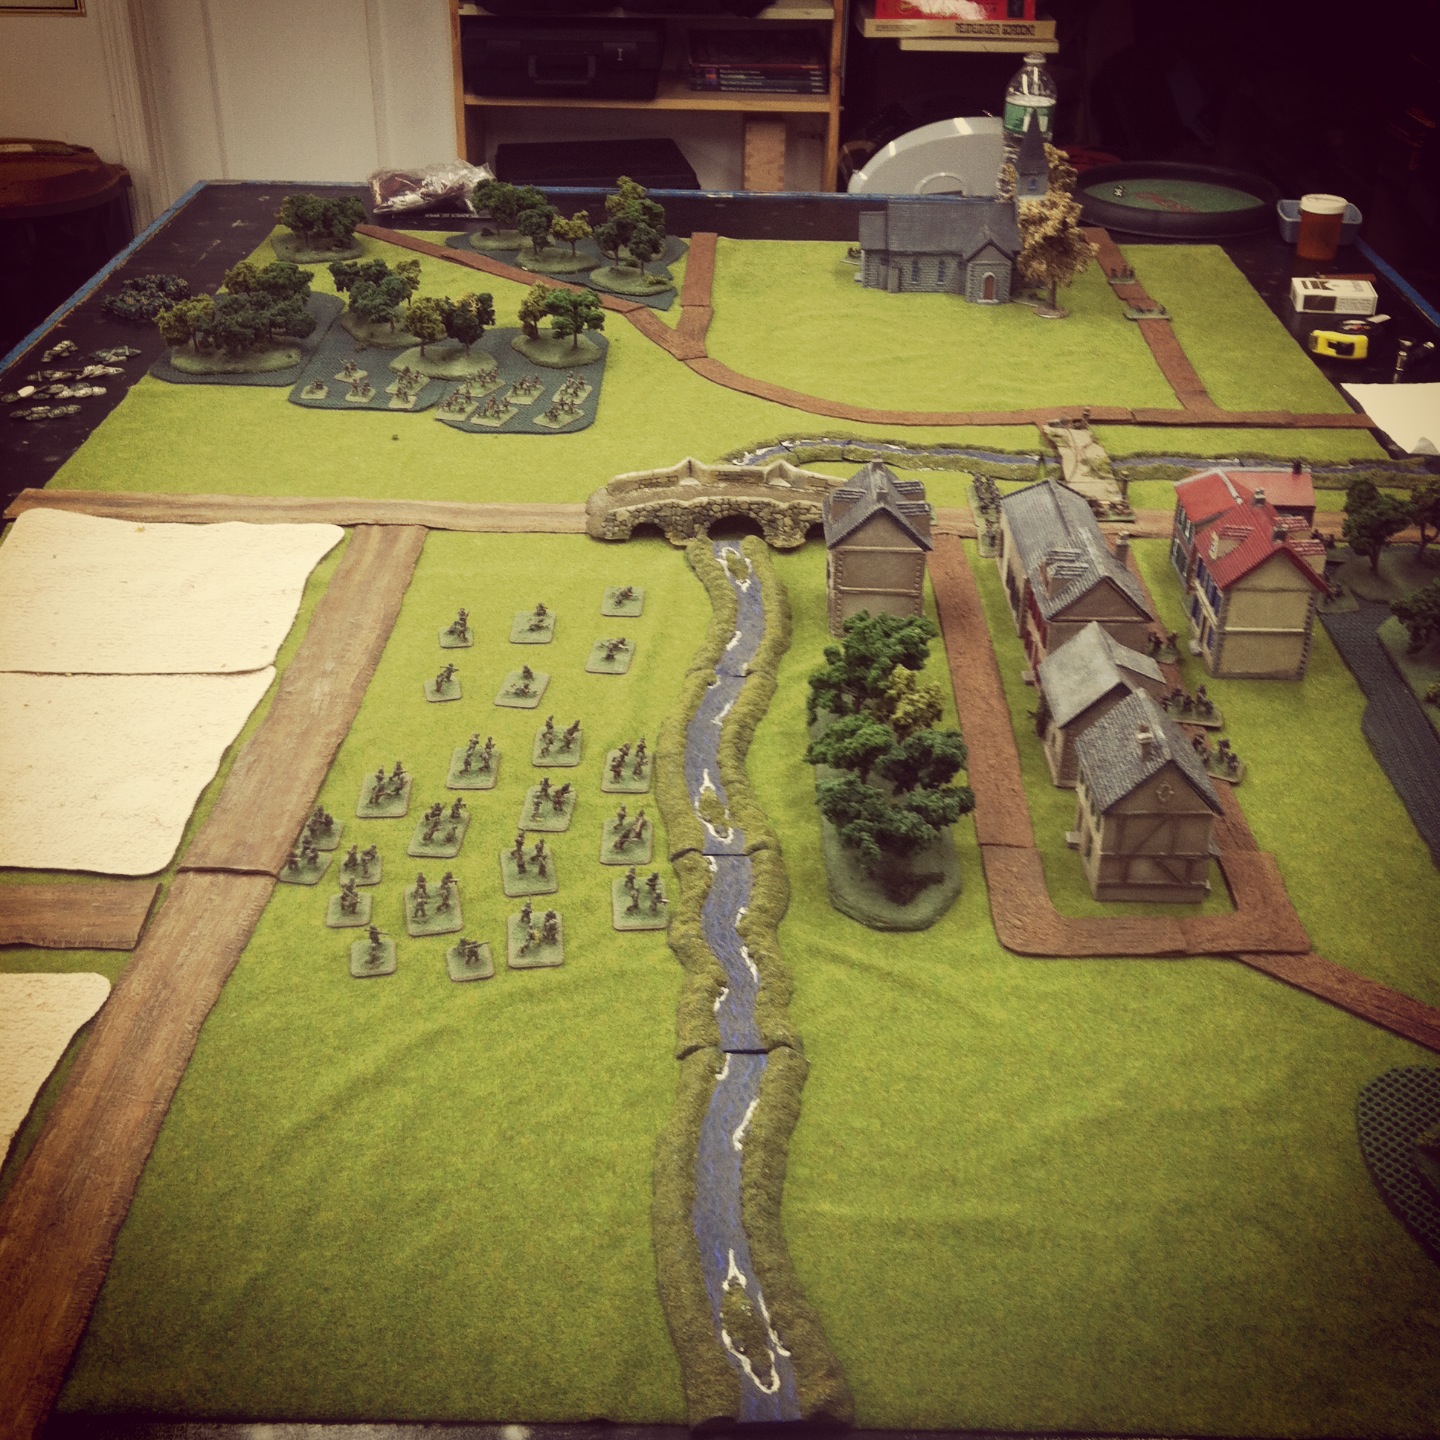
Our game began with advancing Austrian Grenadiers and artillery moving in column on the central Jäkelsberg objective hill. With short firing range for small arms, there were a couple turns of movement and positioning from column into line as the Prussians remained stationary in their positions on the hill.

IMG_2539Prussians on the Jäkelsberg spot the advancing columns of Austrians

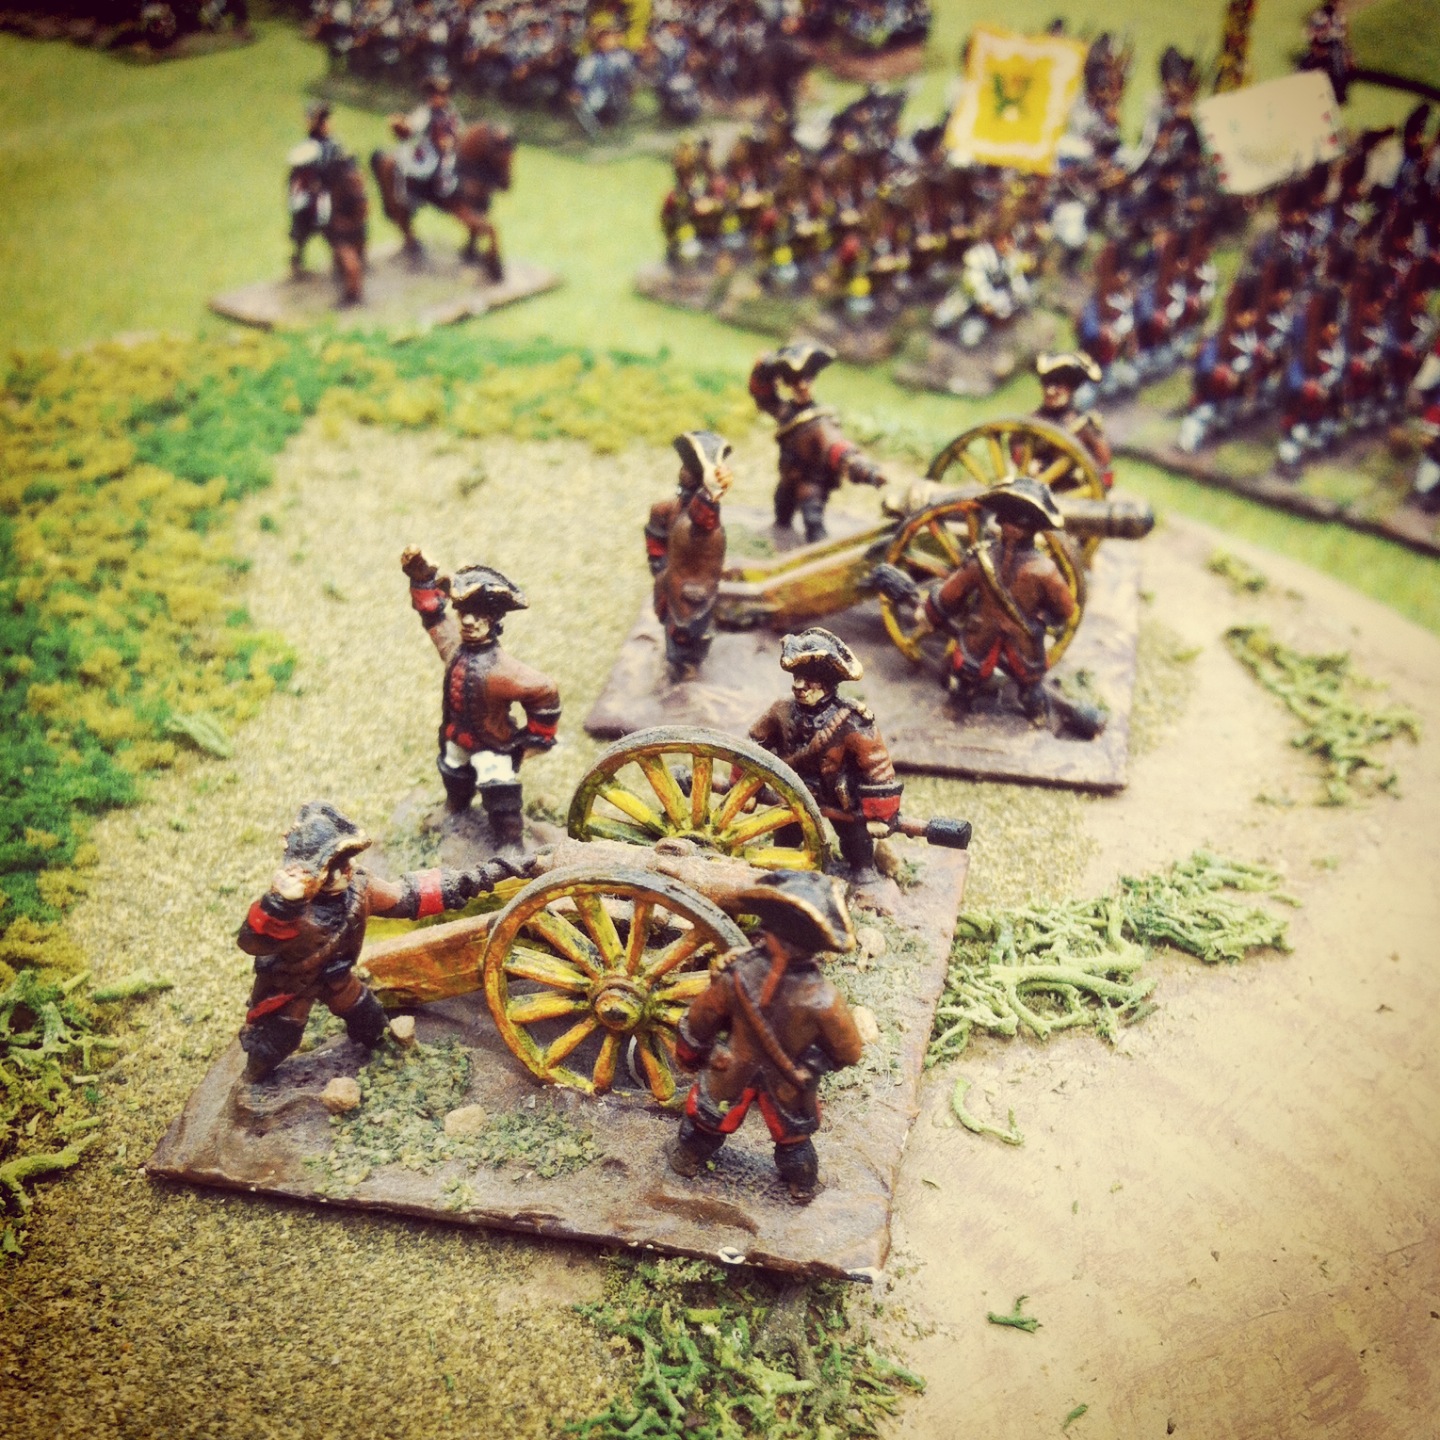
The Austrian medium cannons also began the game out of range, necessitating them to spend a turn moving and getting into position to fire on the Prussian lines.

IMG_2556Austrian guns deploy on a hill near the Jäkelsberg

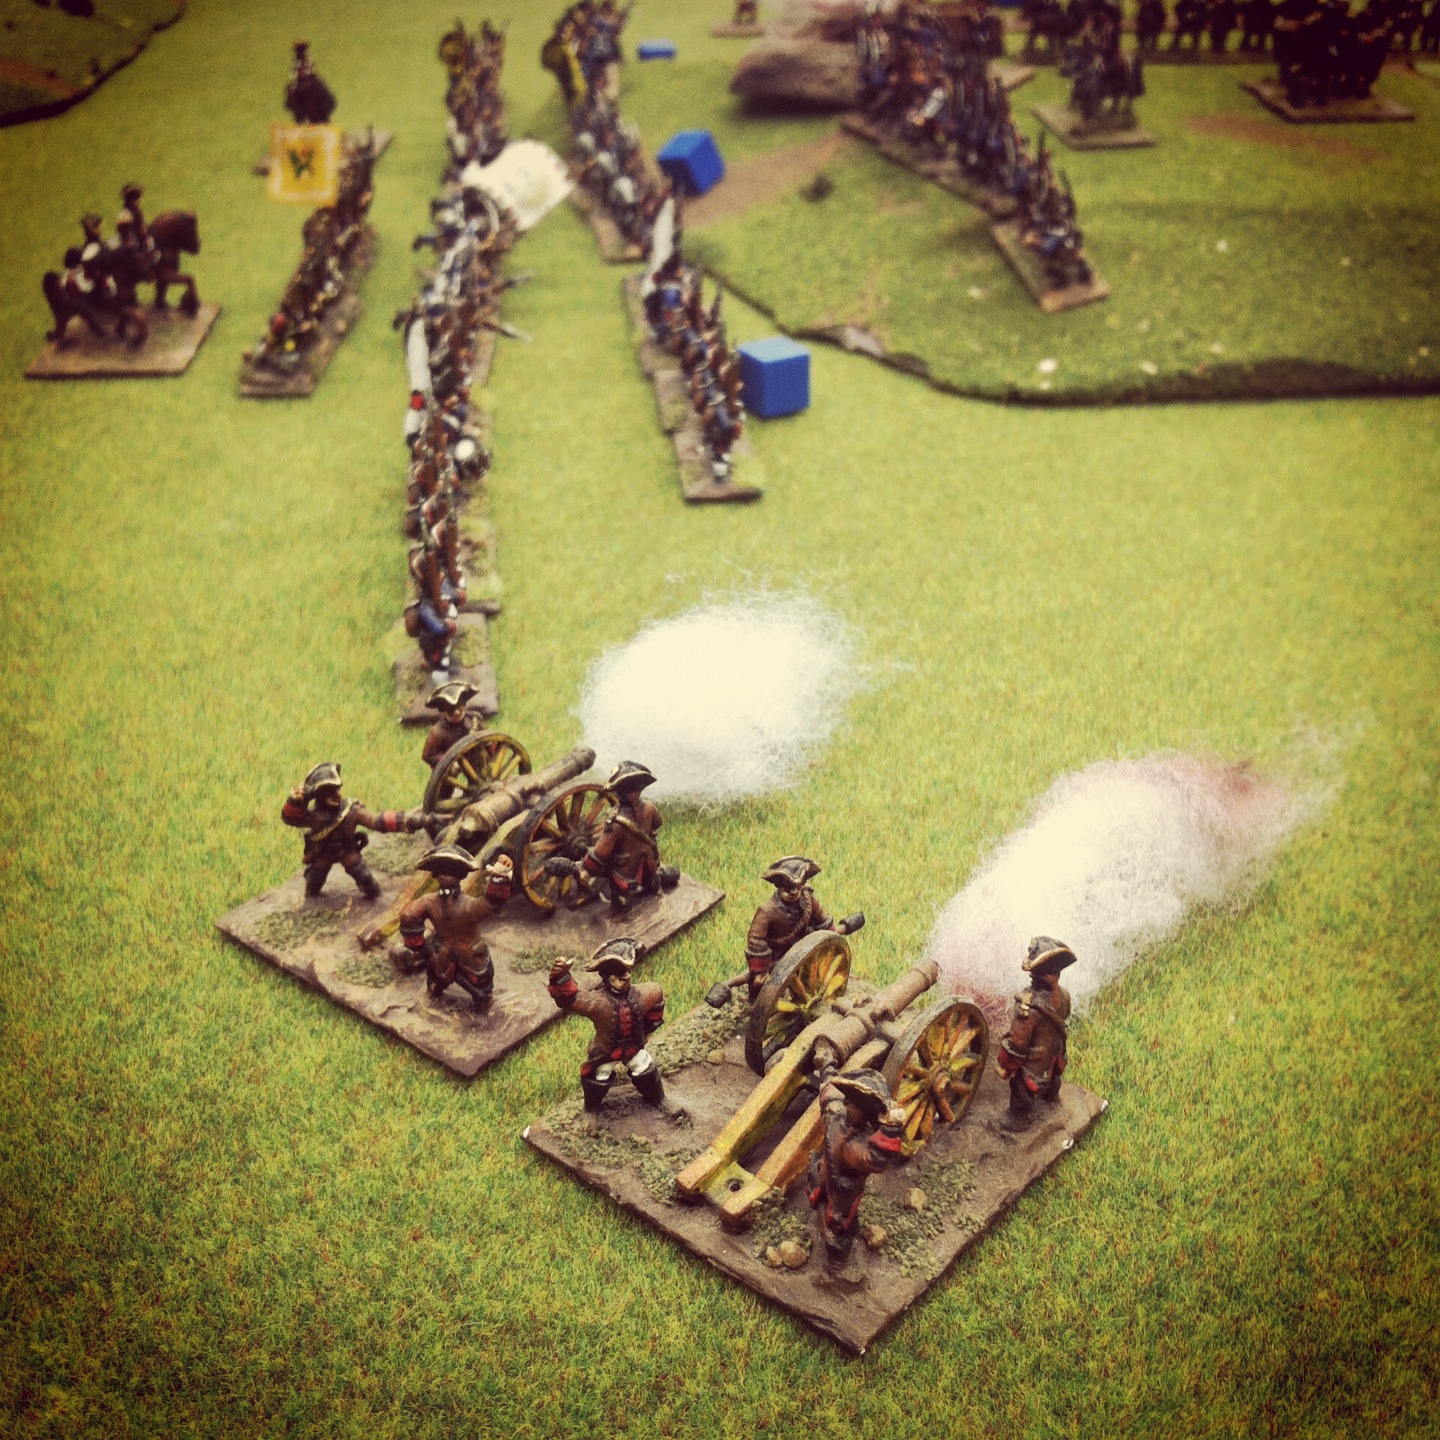
By the third turn, the lines of advancing Austrians began softening-up the Prussian left and center with musket volleys as cannon likewise opened fire. On the far side of the hill, Hussar cavalry raced to the flank and skirmishers moved toward the right lines.

IMG_2555Austrian lines advance on the Jäkelsberg as guns fire

With things on the Jäkelsberg heights looking bad for the Prussians, fresh columns of Austrian regulars advanced on the field in turn four and immediately broke toward the open fields on the far side of the battle.

IMG_2557Fresh Austrian columns arrive

On the Jäkelsberg, the Prussian cannon position was overwhelmed by advancing Austrians and the remaining Prussian infantry lines were closed in on three sides.

IMG_2558Austrians take the Jäkelsberg to the left, form lines to the right and fresh columns arrive at the rear; Prussian reinforcements arrive in the distance

With the Austrian objective of taking the Jäkelsberg nearky achieved by turn six, over a hlaf-dozen late-arriving columns of Prussians began arriving on the table in the distance. To the right rear of the Austrians, a Prussian cavlary contingent also arrived and moved to flank the deploying Austrian lines in the field.

IMG_2559As the Austrians overrun Prussian positions to the left, my son’s reinforcements arrive at the edge of the field

The Prussian cavalry made a move to charge the fresh Austrian arrivals in the rear, and one column quickly moved to defend in square formation. Cannon blasts from the Austrian guns routed the Prussian cavlary, driving them toward retreat off the board. By the seventh turn, the new Prussian lines were marching toward the Austrians who were already massig several ranks deep. With the Jäkelsberg held by the Austrians and their lines likewise controlling the open field, we called the game with a repeat historical victory for Austria.

ageofreasonrulesThe Battle of Moys was my first time playng with the popular “Warfare In The Age Of Reason” rules. Having not played a pre-20th-century miniatures game in quite some, I loved the tactics of movement, fire and charges. In the period and game, fighting occurs at very close range, making movement and protecting flanks and rear key to victory. Forcing your opponent into disorder or routing becomes as important as the number of casualties inflicted.

I found the rules to be simple, with the move order determined by drawn cards. Dice throws for morale checks, arms fire and charges all occur with a simple mechanic of adding or subtracting the number of dice according to the position and condition of your forces. Fighting in close quarters causes the battlefield to quickly shift throughout the game as lines and columns ebb and flow for position on the board.

With the fairly large scale Battle of Moys under my belt, I’m looking forward to studying up on the “Warfare In The Age Of Reason” rules and Seven Years War period a bit more. The 18th-century tactics,  colorful troops and special rules according to nationalities and fighting quality provides for a ton of unique fun in a vast world war period I look to get back to again very soon.

New Game Weekend: Dixit Journey

dixitbox

I play a lot of games with my kids. I started them at an early age, so they have a pretty healthy knowledge and love for hefty wargaming miniatures games like Flames of War and elaborate strategy games like Settlers of Catan, Village, Canterbury and Civilization. Even with a big stack of boardgames crowding our shelves, we regularly run into new games that capture our imagination in new ways. After several rounds of of Dixit Journey with three generations of my family over the Thanksgiving weekend, we have a new favorite in our constantly-growing list of favorites.

journeycontentsDixit Journey is a variation on the family of games and expansions from Asmodee , an award-winning French Eurogame publisher. In essence, Dixit is a storytelling game with the only real skill needed is your imagination. Each round a storyteller player secretly selects an illustrated card from their hand of six cards and announces a clue somehow referenced by the picture on the card. Anything can be used for a clue — song lyrics, characters from a book, famous quotes, historical figures, TV shows, sounds, news stories, etc. — provided it somehow references something depicted on the card. After the clue is announced, the other players then likewise secretly select a card from their hands which they think may also depict the clue in some way.

Cards are then revealed and laid out along the edge of the board. All players except the storyteller then place their guesses on the card they think is the storyteller’s card. Player guesses are then revealed with points going to the storytller if their card is selected and to other players whose cards were also guessed on. Choosing an overly-obvious card and clue combination everyone guesses correctly results in no points for the storyteller, so balancing a clue and card pairing that is both guessable but not too literal is key to the winning the game.

IMG_2518

Like many Eurogames, Dixit is simple on the surface with minimal rules and reading but creatively open in how it plays out. In our games, one clue was given as an interpretive dance of sorts. Other clues included movie references, literary allusions and just flat-out odd phrases inspired almost wholly by the cards themselves. Part of the fun of the game is to see how it plays out with different people’s minds interpretting the same clue in multiple cards.

For a taste of how a game of Dixit plays, check out  the episode below of Wil Weaton’s always entertaining Tabletop web series.

Dixit is a gorgeous game with trippy, weird and abstract cards that may be reused over and over again. The many expansions available add more storytelling possibilities to the game, and the Journey edition makes some improvements on the scoring and game board included in the first edition box. Playing in about a half hour and with multiple players or even teams, Dixit makes for a great nighttime game with family or friends of all ages after the dinner plates are cleared.

New Game Weekend: Dreadfleet

m1980418a_DFBlog_Opener

There are some games with reputations that far precede them in gamer lore, despite having few people who can say they’ve actually played them. Games Workshop’s Dreadfleet from 2011 is one of these, and this past weekend I was finally able to dip my toes into a session with this gorgeous and infamous game.

dreadcontents

The limited-edition and now out-of-print Dreadfleet was met with mixed reviews when it was released a couple years ago. Set in the Warhammer Fantasy world with the Grand Alliance armada facing off against the undead Dreadfleet, the standalone game comes packed with incredibly intricate and delicate plastic models of ships, islands, sea monsters, treasure, ship wrecks and navigational pieces set on a beautiful printed cloth seascape playmat and accompanied by scores of cards. 

IMG_2521

The Dreadfleet table with all models painted by my brother

Playing 2 to 10 players, the game finds the two fleets squaring off with sailing and mechanical ships in a sea dotted with fortressed islands. Deep backstories accompany the lushly-illustrated rulebook, adding depth and significant game color to the captains steering their ships toward broadside cannon battles, ramming boarding parties and assaults on enemy island outposts.

IMG_2525

The Heldenhammer (left), Black Kraken (upper right) and Swordfysh (lower right) navigating around Turtle Island

The game turn begins by drawing fate cards which inject specific plot points into each round along with shifts in the wind direction and strength. Next, each captain rolls to declare orders for the round. Next, ships move while taking into account the wind conditions as well as the ship’s handling and special skills, which may include attributes of the vessel itself or the captain at the helm.

Ranged fire occurs at 6″, 12″ and 18″ distances to varying effect, and ships ramming into contact result in face-to-face boarding melees between the heroic captain characters. Captains may also call for special attacks using smaller proxy launches from their ships, creating additional deadly chaos in the water. Captains receive wounds and ships draw cumulative damage cards, many of which carry lingering effects that can only be remedied in turns spent using repair actions.

IMG_2523

The Black Kraken sailing from Castle Island

After a few turns at Dreadfleet, the mixed reputation was pretty handily revealed. While the game is visually one of the best I’ve ever seen on the tabletop (especially showcasing the painting skills of my brother), the mechanics are incredibly complex. Hitting or sinking a ship is difficult, to say the least. With lots of ships and islands on the table, the waters of the game quickly become complex to navigate. While I love the game’s wind mechanic on the page, shifting winds foil plans constantly. Cards are exceedingly detailed and wordy, bogging the game down as these are referenced repeatedly for the uniquely specific effects and outcomes they each carry.

The dense rulebook comes replete with a number of detailed story scenarios, but all the color the authors can muster quickly drains away under the thick fog of the rules and mechanics which must be referenced again with each turn. Playing a game with multiple players on a side would easily result in a tangle of boats over many, many hours of play.

1450686_10202032642952010_1750681014_n

The Swordfysh

The original retail price for Dreadfleet of over $100 rubbed a lot of gamers the wrong way for a non-expandable game. However, the enduring love-hate relationship with the game is revealed in attempting to track down a copy for yourself. Some collectors seek these boxes out merely for the models and components, often buying multiple sets to field larger fleets. Others track them down for a chance to experience the game’s rules first hand. Unopened copies can sometimes run into the hundreds of dollars, but a friend of mine recently tracked down five copies a dealer was more than happy to part ways with for $20 each.

Having now experienced Dreadfleet first hand, I completely see why this game was left a mark on gamedom. The unparalleled look of the game just can’t offset the price and wildly complex rules which make replay value a challenge. A well-painted set of models from the Dreadfleet and Grand Alliance are sure to be a showcase on any modeller’s shelf, but hauling the game to the table may very well leaving players feeling a bit adrift.

Flames of War: Fielding the FOW Universal Carrier

UniversalC

British Universal Carriers in Normandy 1944

Used extensively by Commonwealth forces in all theaters throughout WWII, the Universal Carrier served as a transport, a towing vehicle and a quick-response weapons platform for machine guns, flamethrowers, anti-tank guns and mortars. So popular were these agile and flexible vehicles that production ran until 1960 and over 100,000 eventually rolled off the assembly line, making them the most-produced armoured combat vehicle ever produced.

With my new British forces moving along, I picked up a few inexpensive packages of Universal Carriers in the flea market at Fall In! this past weekend. The models from Battlefront come three to a carded package in solid-cast resin with metal crew and gun options. The packs I got were the early war models but I decided for gaming purposes I’d fudge them a bit to make them work in my late war gaming. Along with a carrier from my Royal Artillery battery I’m also working on, I’d wind up with seven vehicles to start.

IMG_2432

Carrier example with rear gun mounted

I chose to model my inital six carriers with extra 50 cal. machine guns, hoping to use them to quickly get into a fight and pin down German infantry with a hail of bullets. Adding the 50 cal. gun was a field modification during WWII, but without any extra parts on hand I simply clipped the barrels on the guns at the front and added a bit of plastic to make some semblence of a machine gun manned in the front seat.

IMG_2430

Carrier example with the rear gun carried in the back

Since construction is minimal, these glue-up fast. I modelled a couple of the guns in the back thrown in the back seat as if those guys were moving fast to get into action before re-mounting their guns. After a quick spray of green armor basecoat, the crew get hit with some drab, brown and flesh paints and washes. Tracks get a black base followed on with some metallic dry-brushing. Guns and other details added from some leftover tank stowage get some gun metal, browns and weathering. I decalled the carriers with the Guards Armoured markings, and then everything got a splatter of muddy earth tones.

IMG_2427

Guards Armoured carrier platoon ready for the roads and fields of Europe

With so many British troops cruising around Europe in these vehicles during the war, adding just a few of these to my growing menu of options in creating British company lists for my FOW gaming at Metropolitan Wargamers in Brooklyn, NY was a good place to start. I’ll fill in these early war models with another three of the late war models at some point, making it into a nine carrier transitional platoon of old and new model vehicles. One of the reasons I wanted to expand my Allies with UK forces was the chance to model different infantry, armour and artillery. Getting these nifty little Universal Carriers into the mix will definitely give my games some new interest on the tabletop and hopefully wreak havoc on my German opponents.

Related articles

New Game Weekend: Shoot N’ Skedaddle

sns

One of my favorite parts of attending gaming conventions is playing scales, periods and scenarios I usually don’t game. Getting the chance to play in scenarios run by the authors of rules is also a big bonus opportunity to experience a game “straight from the horse’s mouth,” so to speak. This past weekend at Fall In! I had one of those rare sessions that hit all these marks, playing in an Old West 28mm skirmish game of Shoot N’ Skedaddle by Oscar Turner.

Since I was a kid, I’ve been a big fan of Westerns. Starting with re-runs of the old Lone Ranger TV show and radio serials, I graduated up through American Western classics like Red River and The Searchers to the Italian “Spaghetti Westerns” of Sergio Leone and Clint Eastwood. Over the years I’ve remained dedicated to the now-declining genre, and I’m an enormous fan of Eastwood’s later Unforgiven and Quentin Tarantino‘s Django Unchained

unforgiven

1992’s Academy Award-winning Unforgiven, produced, directed by and starring Clint Eastwood

Like a lot of American boys, my  interest in Western TV, radio and movies spilled over into my play time. I spent a lot of time gunfighting on my bedroom floor in the 1970s with Gabriel Lone Ranger dolls  and the earlier Marx Johnny West toys. I also had plenty of cheap dimestore plastic cowboys and indians, plus a pretty substantial collection of the cowboys and indians from Britains Deetail and a pile of Western-themed Playmobil toys.

gabriellr

1970s ad for Gabriel’s Lone Ranger toys

Despite all my interest in Westerns, gaming the genre never became my thing. TSR’s Boot Hill, released in 1975 just as Dungeons & Dragons was taking off, has been a popular RPG option for years. There are a number miniatures ruelsets for the Wild West, and 1992’s Desperado by Monday Knight Productions seems to be the standard I’ve seen played at conventions. So, with nearly zero experience with shoot-outs on the streets of dusty tabletop frontier towns, I was really impressed with my three hours playing through my first game of Shoot N’ Skedaddle this past weekend.

snsgameset

The Shoot N’ Skedadle cards, dice and equipment needed to play

 With a visually stellar town laid out with incredible laser-cut and plastic scenery, Oscar’s scenario presented a simple scenario of outlaws on the lam with lawmen in hot pursuit. In Shoot N’ Skedaddle, play begins with character cards dealt to players playing on either the Outlaw Gang or Lawmen Posse side. Main characters such as “Judge,”Doc” and “Bandit” team-up with neutral characters like “Thug,” “Cowboy,” “Townsperson” and “Thug.” Characters then draw primary and secondary weapons (if any) which can include anything from a deringer, knife or carbine to a gattling gun, buffalo gun or dynamite. There are 40 character and 72 weapons cards, making for tremedously fun variations in the player Gangs and Posses in Shoot N’ Skedaddle.

IMG_2418

The town set-up for Shoot N’ Skedaddle at Fall In!

After initial deployment according to the scenario, regular playing cards are drawn to randomly activate characters in turn. I really loved this thematically-appropriate mechanic, tying the iconic Old West card game into the play. On a turn, a player can perform a combination of movements and action. Special event cards are also randonly drawn for each side, allowing the resurrection of dead characters, the arrest of an outlaw or an extra character activation. With this simple framework, characters can perform a seemingly endless variety of feats including running, hiding, shooting, grabbing a mule by the reins, jumping between rooftops, crashing through windows, kicking in doors or starting a fist fight. Player imagination bordering on role-playing is really the only boundary to the game.

IMG_2419

Lawmen with guns blazin’ in Shoot N’ Skedaddle at Fall In!

To resolve actions, an incredibly elegant dice mechanic is used. Characters each come with key attributes — Strength, Agility, Scrap, Marksmanship and Guts — with each of these weighted with a D6, D8, D12 or D20. Success when using a particular attribute is resolved by rolling a 5 or better, no matter what the action and no matter what the die. For example, a poor shot would roll a D6 when firing their pistol while a more skilled character might roll a D12. In either case, the player would need to roll a 5 or better to succeed. Wounds, hiding in cover or other game conditions modify the dice downward, so that same crack shot with the D12 Marksmanship would roll a D8 when shooting at someone hiding behind a barrel.

IMG_2420

A local woman acting just a little suspicious in Shoot N’ Skedaddle at Fall In!

Shoot and Skedaddle’s wonderful card and dice structure puts the focus back on the fun on the table like any really great game should. Oscar offers his game as a free PDF ruleset or in a printed set of cards for $25 ($30 with a box). Check out his website at http://shootnskedaddle.blogspot.com/ for downloads, ordering info, development news and more pics and information. The basic rules contain scenarios and a campaign option for longer-term  storylines to be played. I can’t say I’m going to run out and invest in a dozen Western buildings and paint up a bunch of cowboys and local citizens, but if you’re a fan of Old West gaming, I highly recommend checking out Shoot N’ Skedaddle. It’s a bullseye.

Flames of War: Fielding the FOW Cromwell and Firefly Tank

dratsBy the time of the Normandy Invasion in June 1944, the British 7th Armoured Division had already seen plenty of war. The division first distinguished itself early in the war in the dusty North African campaign, going brutally head-to-head with General Erwin Rommel’s tough Afrika Korps and earning the nickname “Desert Rats.” In the mid-war invasion of Italy, the division adapted to the southern terrain of Salerno and Naples and helped in securing the Allied push northward.

cromwellA British Cromwell in WWII Europe

fftankSherman Firefly on a street during WWII

Back in the UK following its successes in Africa and Italy, the 7th Armoured rested and retrofitted with new Cromwell and Sherman Firefly tanks in preparation as a follow-on force in the D-Day landings in mid-1944. Over the next six months, the division’s 75mm-armed Cromwells and 17-pound-gunned Fireflies were present during Operation Perch, Operation Goodwood, the Battle of Villers-Bocage, Operation Spring, Operation Bluecoat, Operation Cobra and the final pushes into the Low Countries and Germany. By the war’s end, the battle-weary Desert Rats had cemented themselves as one of the most celebrated divisions in World War II.

fowcromwellAfter being introduced to British Armoured forces with the excellent plastic Sherman and Firefly models included in Flames of War Open Fire! box set, I’ve recently swung some significant focus on building-out a decent amount of UK late-war forces. Modelling the storied 7th Armoured Division seemed like a logical next step in bringing the UK to my Allied forces on the table.

Through some serendipity, I happened to score a couple of half-price box sets of the FOW Cromwell Armoured Platoon from a fellow club member at Metropolitan Wargamers in Brooklyn, NY. Between the two boxes, I’ve been able to assemble a company command of two Cromwells plus two platoons of three Cromwells and one Firefly each. The models feature individually-cast resin tanks, each with their own detail of stowage and ragged camouflage, along with cast metal treads, gun barrels, crew and other details. Compared to curvaceous US Sherman tanks, I also really enjoy the flatter hull profile and boxy riveted turrets on the Cromwells. Although pricier than alternatives from makes like Plastic Soldier Company and Command Decision from Old Glory Miniatures, official FOW models are generally hard to beat for their heft and historical accuracy.

IMG_2334Primer and base coat on treads and stowage

After assembly, my models were hit with a green armor base coat. Tank treads start with a black coat followed a slight wash of metal. Tools, stowage, ropes and the other stuff on the tanks all get a mix of built-up layers of browns, greens and metallic colors. I especially liked the tiny tennis rackets strapped to a couple of the tanks, a nod to the British gentlemen who came to Europe not only equipped for war but for hopeful yet unlikely leisure pursuits. These details really create a lot of depth, interest and personality among the tanks which can otherwise get very visually redundant en masse on the table. Finally, the exposed crews get a a bit of brown-drab uniform color and some flesh tones to finish off those brave Brits.

IMG_2344Decals being applied (grrrrrr….)

I do have to say, the red-and-white Desert Rats vehicle marking has a really big cool factor for me. The FOW kits conveniently come with appropriate decals for the 7th Armoured Division, making finishing off the tanks one step easier than with competitor model-makers that don’t generally supply decals with their models. That said, I find the FOW decals to be incredibly finicky and fragile, and I found myself re-applying several to get them on just right. Once the decals are dry, all the tanks got splashed with mud here and there with some earthy dry-brushing.

IMG_2350Cromwell command section

IMG_2352One platoon of three Cromwells and one Sherman Firefly

IMG_2354Cromwell close-up

IMG_2356Sherman Firefly close-up

In terms of gameplay, I can’t wait for the 7th Armoured Division to go up against some Germans. The combined one-two punch of the faster-moving Cromwells and the hefty-gunned Fireflies should reinvigorate my games away from the sameness I’ve had in just playing with my large group of US Shermans for a couple years. Already, I want more of these platoons to really get the division bulked-out. I’m thinking a follow-up with Cromwells and Fireflies from the Plastic Soldier Company will supplement the finished FOW models nicely. Until then, the 7thArmoured are ready to roll and there’ll be more to report soon on my post-D-Day British force project.

IMG_2348The Desert Rats ready for action in France and beyond…

Related articles

Flames of War: Sint-Oedenrode 1944 Scenario

StOAB

Like many cities in the Low Countries, the Dutch city of Sint-Oedenrode was occupied by German forces after their invasion of France, Belgium and the Netherlands in the spring of 1940. The southern Netherlands and Belgium were the area of focus for the Allied Operation Market Garden in September 1944 which hoped to take several river crossings before the push on to Germany. At Sint-Oedenrode, the famed US 101st Airborne Division seized the bridge over the Dommel River but were met with a counterattack by German Fallschrimjäger regiments and other supporting forces. The battle that would take place at the crossing of the Dommel was typical of the action of the Allied push along what became known as Hell’s Highway. While Market Garden would ultimately prove to be a fiasco for the Allies overall, the grateful people of Sint-Oedenrode were liberated by US troops after a week of brutal fighting against the German occupiers.

StOMap

The Flames of War website has a scenario for the engagement at St. Oedenrode available in their list of historical scenarios on their website. The forces in the scenario were originally covered in the now out-of-print Hell’s Highway and A Bridge Too Far FOW books now available as Market Garden for the US, UK and Canadian forces and Bridge By Bridge for the Germans.

This past weekend at Metropolitan Wargamers in Brooklyn, NY we ran a modified Sint-Oedenrode scenario with the US 101st Airborne facing off against the German Fallschirmjägers. My paratroopers deployed in the fields and woods across the river with two rifle platoons and a light machine gun platoon. In reserve were US mortar and parachute howitzer platoons along with a delayed reserve Sherman and Firefly tank platoon from the Guards Armoured Division. The Germans started defending the two objectives at the bridges with a mortars, heavy machine guns and a rifle-machine gun platoon dug in around the town buildings.

IMG_2324In the first two turns, the Airborne units made way for the river and first bridge while avoiding shots coming from the defending Germans. The US light machine guns poured fire into the houses across the river, but shots missed on all accounts but did manage to pin the units. With little US progress toward the objectives, my German opponent remained solidly in control of the bridge points in the early third of the game.

IMG_2322By the third turn, the Germans successfully rolled on their a reserve rifle-machine gun platoon as well as their PaK 40 anti-tank guns. While the US lacked tanks of the board, the US platoon crossing the bridge took heavy combined arms fire from the German artillery outside of the town and the infantry platoons hidden among the town’s houses. Another US platoon made their way across the Dommel, through a small wood and attempted a quick assault on the Germans defending from the nearby buildings. Under heavy fire, the US charge was repulsed with some losses pushing them back into the treeline.

IMG_2326With the Airborne rifle companies pinned on the bridge and in the  trees over the river, I finally threw a successful roll for reserves on the fourth turn and brought in my mortars and howitzers. Firing at a distance from the fields, all my artillery missed their hard-to-hit German targets hidden in the buildings across the river. The platoon on the bridge took an additional round of combined German fire and fled the field. The US light machine guns to one side of the bridge likewise encountered heavy fire, finding themselves pinned and still unable to effectively knock the Germans from their defending positions in the town.

IMG_2328By turn four, things went from bad to worse for the Allies. With the Guards Armoured forces finally rolling in, they did quickly take out one of the German anti-tank guns. This was unfortunately quickly answered with two Allied tanks being destroyed with return fire from the crack shots from the German PaK 40s. With the beginning of the fifth turn, the US attempted a final series of artillery barrages and tank fire to chase the Germans from the town. Still at nearly full strength, the Germans had clearly overwhelmed the US and I conceded the game.

Even without their Panzer IVs on the table, the German position within the town proved hard to route. In retrospect, a concentrated Airborne end-run over the river and through the town might’ve proved more effective in chasing the Germans out of their defending positions near the bridge entry points. A lack of armoured and artillery reserves until late in the game also left the 101st outgunned and running on their own as German reserve strength mounted. Luckily for the Dutch people of Sint-Oedenrde things went much better for the Allies in 1944, but my replay of the attack just didn’t go my way this day.

Flames of War: Fielding the PSC German Heavy Weapons and FOW Artillery Command

ger8cmmortar

After focusing on my Flames of War (FOW) Allied forces for a while, I decided to throw some energy back into beefing-up and diversifying my late war Germans. Although my German troops seldom see play, getting some infantry punch on the table led me to a number of mortar and other support weapons platoons the FOW rules offer.

Battlefront, the maker of FOW, has a number of good platoons which run anywhere from about $12-20 each. Having recently tried my hand at the Allied Stuart Tank set from the growing line of 15mm WWII kits from the Plastic Soldier Company (PSC), I spotted the Late War German Heavy Weapons box. At around $25, the set looked to be an excellent and economic way to get a lot more German infantry on the table at perhaps a quarter to one-third the cost of the official FOW models.

pscgerhw

The PSC box comes with four MG 42 teams, four 8 cm mortar teams, four 12 cm mortar teams, eight Panzerschrecks and eight Panzerfausts. Also included are four Panzerschreck loaders and four ammo carriers. With about 70 bits on the sprues, this set was going to add a lot of action to my already extensive German infantry collection.

pscgerhwsheet

Cutting out and gluing-up the tiny pieces from the PSC sprues is a bit of nerve-racking task harkening back to my early years wrangling with assembling soft plastic HO scale Airfix soldiers. That said, following PSC’s simple assembly diagram (above) and keeping all the parts carefully organized on the workbench is key to getting the job done right and not losing anything along the way. Flames of War rules call for basing Panzerschreck teams in groups of four miniatures per medium stand, allowing for four total teams to be constructed from the PSC set with two Panzershrecks plus a loader and ammo carrier per team. The 8 cm mortar and MG teams likewise went on medium bases and the big 12 cm mortar teams were glued-up on larger bases. I had a few extra plastic FOW Germans on hand from a bonus promotional sprue I received from the Open Fire! box set, and adding those to the 12 cm mortar stands helped finished those off.

artycmdhw

With a bunch of new mortars in the field, I also needed to add some additional command and spotters to make them playable. FOW offers an artillery command headquarters blister pack which I added to the mix. The set comes with enough models that I was able to create three two-man spotting teams, a few command stands (adding in Panzerfausts from the PSC kit) and a nifty HQ vignette with a four figures surrounding a table with a radio operator.

IMG_2214

Painting Germans is a simple process for me with a base spraycoat in flat black followed by a darkish grey uniform and details picked out in flesh, blacks, browns and gun metal. The stands get finished off with some simple grass flocking and a matte varnish spray. Getting a consistent finish on the PSC models made them blend in nicely with my FOW models.

IMG_2226

For comparison’s sake, the PSC figures do tend to be a tad smaller and thinner than the typically-chunky FOW figures. Since most my PSC figures are being fielded on separate stands, I don’t see the minor scale differences being an issue at arm’s length on the tabletop battlefield. In addition, the extra poses in the PSC casting add some nice variety and animation in the troops once deployed.

IMG_2224

IMG_2217My FOW German force has long-relied on the strength of deploying large numbers of tanks in my games, so these new additions should be a nice compliment to getting more action from my German infantry. Now that it’s fall, I’m anxious to rush my new PSC and FOW Germans to the tables at Metropolitan Wargamers in Park Slope, Brooklyn and add a new season of playablity to my battleworn forces.

Flames of War: Breakthrough Mission

bocageShortly after fighting ashore and in the iair drop zones on D-Day, the Allies quickly discovered a new enemy awaiting them: bocage.

Lacing the Normandy countryside, bocage was a tight overgrown network of hedgerows of shrubbery, stone walls and copses of trees lining the rural French fields. All but impassable by Allied armor and difficult to fight through for infantry, bocage slowed the push inland and delayed the taking of key objectives. It was only through the quick-thinking and inventiveness of the Allies that new tactics were hastily developed. To free-up the passage of tanks, hedgerow cutters were welded to the front of armored platoons and demolition crews blasted gaps to continue the forward march. Fighting amidst the bocage would prove to be deadly for both sides, as recounted in the 1988 paper by Captain Michael Doubler. It’s required reading for anyone interested in the tactics of bocage warfare.

This past weekend at Metropolitan Wargamers in Brooklyn, four of us got together to slog it out in the bocage tabletop of a Breakthrough Mission as provided in the Flames of Wars rules. The mission scenario calls for use of the Mobile Reserves rule for the defenders and the Delayed Reserves rule for the attackers. The Germans chose to field a 1250-point Fallschirmjager company backed with heavy machine guns, a Nebelwerfer rocket battery, Stugs and Pak 40 anti-tank guns plus a 1250-point tank company armed with mechanized infantry, Panzer IVs, Stugs and one imposing Tiger tank. We Americans also fielded two companies beginning with a 1250-point rifle company with three infantry platoons, Shermans, a weapons platoon of light machine guns and mortars and a P-47 Thunderbolt for air support. The other US company was pulled from the 82nd Airborne with a Priest mobile artillery battery and Stuart light tanks. To aid in navigation of bocage, the US armor were outfitted with hedgerow cutters. The Germans had six turns to take an objective and it would be the Americans’ job to stop them.

BTMapThe table was laid out thick with bocage surrounding a small village and a nearby farm. Americans rolled as the defenders meaning all our mobile units — all the tanks and artillery we had — were going to be held off the board as reserves. I hid all my rifle platoons in the town’s buildings and stuck the machine guns and mortars in the field between the Germans and their nearest objective. In the opposite corner, the Airborne platoons deployed near the farm hoping to camp out on the German objectives for the duration of the game.

As the attackers, the Germans deployed in their assigned corner of the table. Their rocket battery, anti-tank guns, heavy machine guns and the majority of their infantry dug into the field outside of the town. The large tank company deployed in the adjacent field. Held off-table was a Stug and a Fallschirmjager platoon, hoping for the a delayed reserves roll beginning on the third turn to put them right on top of one of their objectives at the opposite corner.

IMG_2177As the attackers, the Germans got the first turn, quickly pressing their armor toward the center of the table while the rocket battery, heavy machine guns and anti-tank cannons poured fire into the town, pinning one US platoon. Reserves failed to arrive on the first US turn and the P-47’s first run came up empty. As per the plan, the US Airborne pushed into the farm buildings to hold the nearest objective.

IMG_2179

IMG_2181In the second turn, the Germans continued to light up the town with the US companies pinned in the buildings. A Stug opened fire down a lane but the Americans avoided being hit. US bazooka teams moved into the barn at the edge of town and took shots on the a German Stug and approaching half tracks but to no effect. The US machine gunners attempted to fire and then assault the nearing Germans but were thwarted by the thick bocage and failed terror test against a nearby Panzer. The Thunderbolt once again on did nothing its second run while the Airborne units at the farm ran across the road into the treeline, securing the second German objective.

IMG_2183

IMG_2185

IMG_2191In turn three, the German players thankfully failed their first attempt at calling in reserves. Pressing on, German half tracks raced through the town toward the American weapons platoon which took heavy casualties and lost the machine gunners to fire from both sides. Stugs and artillery continued to pound the American rifle platoons in the town. At the top of their turn, the Shermans arrived and made a hasty path to cut a hole in the bocage standing between the rest of their reserves and the nearby road.

IMG_2185

IMG_2189Things really heated up in turn four as the Germans rolled on their first reserved Stug platoon near one of the objectives and the awaiting US Airborne. German infantry and Panzers pushed into the next field, knocking out the US mortars and eliminating their first platoon. The Americans pulled in the rest of their reserves but immediately created a bottleneck of Shermans and Stuarts as paths were cleared through the bocage. The P-47 came in hard on the Germans in the field, knocking out several units and destroying a Panzer. Finally, the fearless Airborne did what they’re trained to do and burst from the treeline to assault the newly-arrived Stug platoon. Two Stugs were destroyed and the third fled the field after a failed morale test. The objective was still held by the Americans but things were looking dicey with Germans coming in from all sides.

IMG_2196

IMG_2187

IMG_2198

IMG_2193

IMG_2200The fifth turn started with the final German reserve platoon arriving amid their burning tanks and assaulting the US Airborne. Through a series of attacks and counterattacks, the two groups whittled each other down. The Germans were eventually ground down to two remaining stands, lost their morale check and were destroyed. The victory for the Americans was short-lived, however, and the heavily-damaged Airborne platoon also failed a morale save and likewise fled the battle. With the game nearing it’s end, a Sherman was destroyed and blocked the road. All the US armor and artillery was effectively shut-out of the game. As the Germans covered an objective, the American P-47 made one final run to force a German morale check but to no avail. The Germans had won the day.

IMG_2208

IMG_2210There were a number of things that had gone wrong for the Americans. The rifle platoons never got out of the town, contributing almost nothing to the battle. Had they hauled their way toward the forest in the middle of the board, pressure would been greater on one of the objectives. The restrictions on the reserves also hurt the Americans, with nearly half their force never getting a chance to get in the fight. The US Airborne were typically deadly in their assaulting enemy armor and ground troops and proved to be the one positive for the Allies. On the German side of the table, much of its large armor platoon, including the Tiger, was sidelined for much of the battle as they navigated the hedgerows and roads.

The game was a new experience for one of the German players who typically games in the wide-open spaces of the Northern Africa theater from earlier in the war. As in 1944, bocage played the role of a third unmovable enemy on the table. The bocage was frustrating for all players but this time sided more with the Germans in their breakthrough victory.