Touching History at the Military History Society of Rochester

mhsrlogo

I have logged many, many hours over the years visiting battlefields, historical homes, living heritage sites, reenactments, roadside markers and all sorts of art, history and military museums. Near the top of these experiences was a full day I spent at the Imperial War Museum a few years back while working in London for over a month. With over two million visitors a year and some 11 millions artifacts, the IWM is hard to beat for immersing yourself in the history of warfare.

This past week I had a very different, yet truly remarkable experience in my first visit to the Military History Society of Rochester. Located up a flight of stairs in a warehouse inhabited by various artist galleries and studios, the MHSR occupies roughly 2000 square feet of space packed with all manner of historical artifacts focused on telling the story of the US military through the local lens of Rochester, NY.

IMG_4891

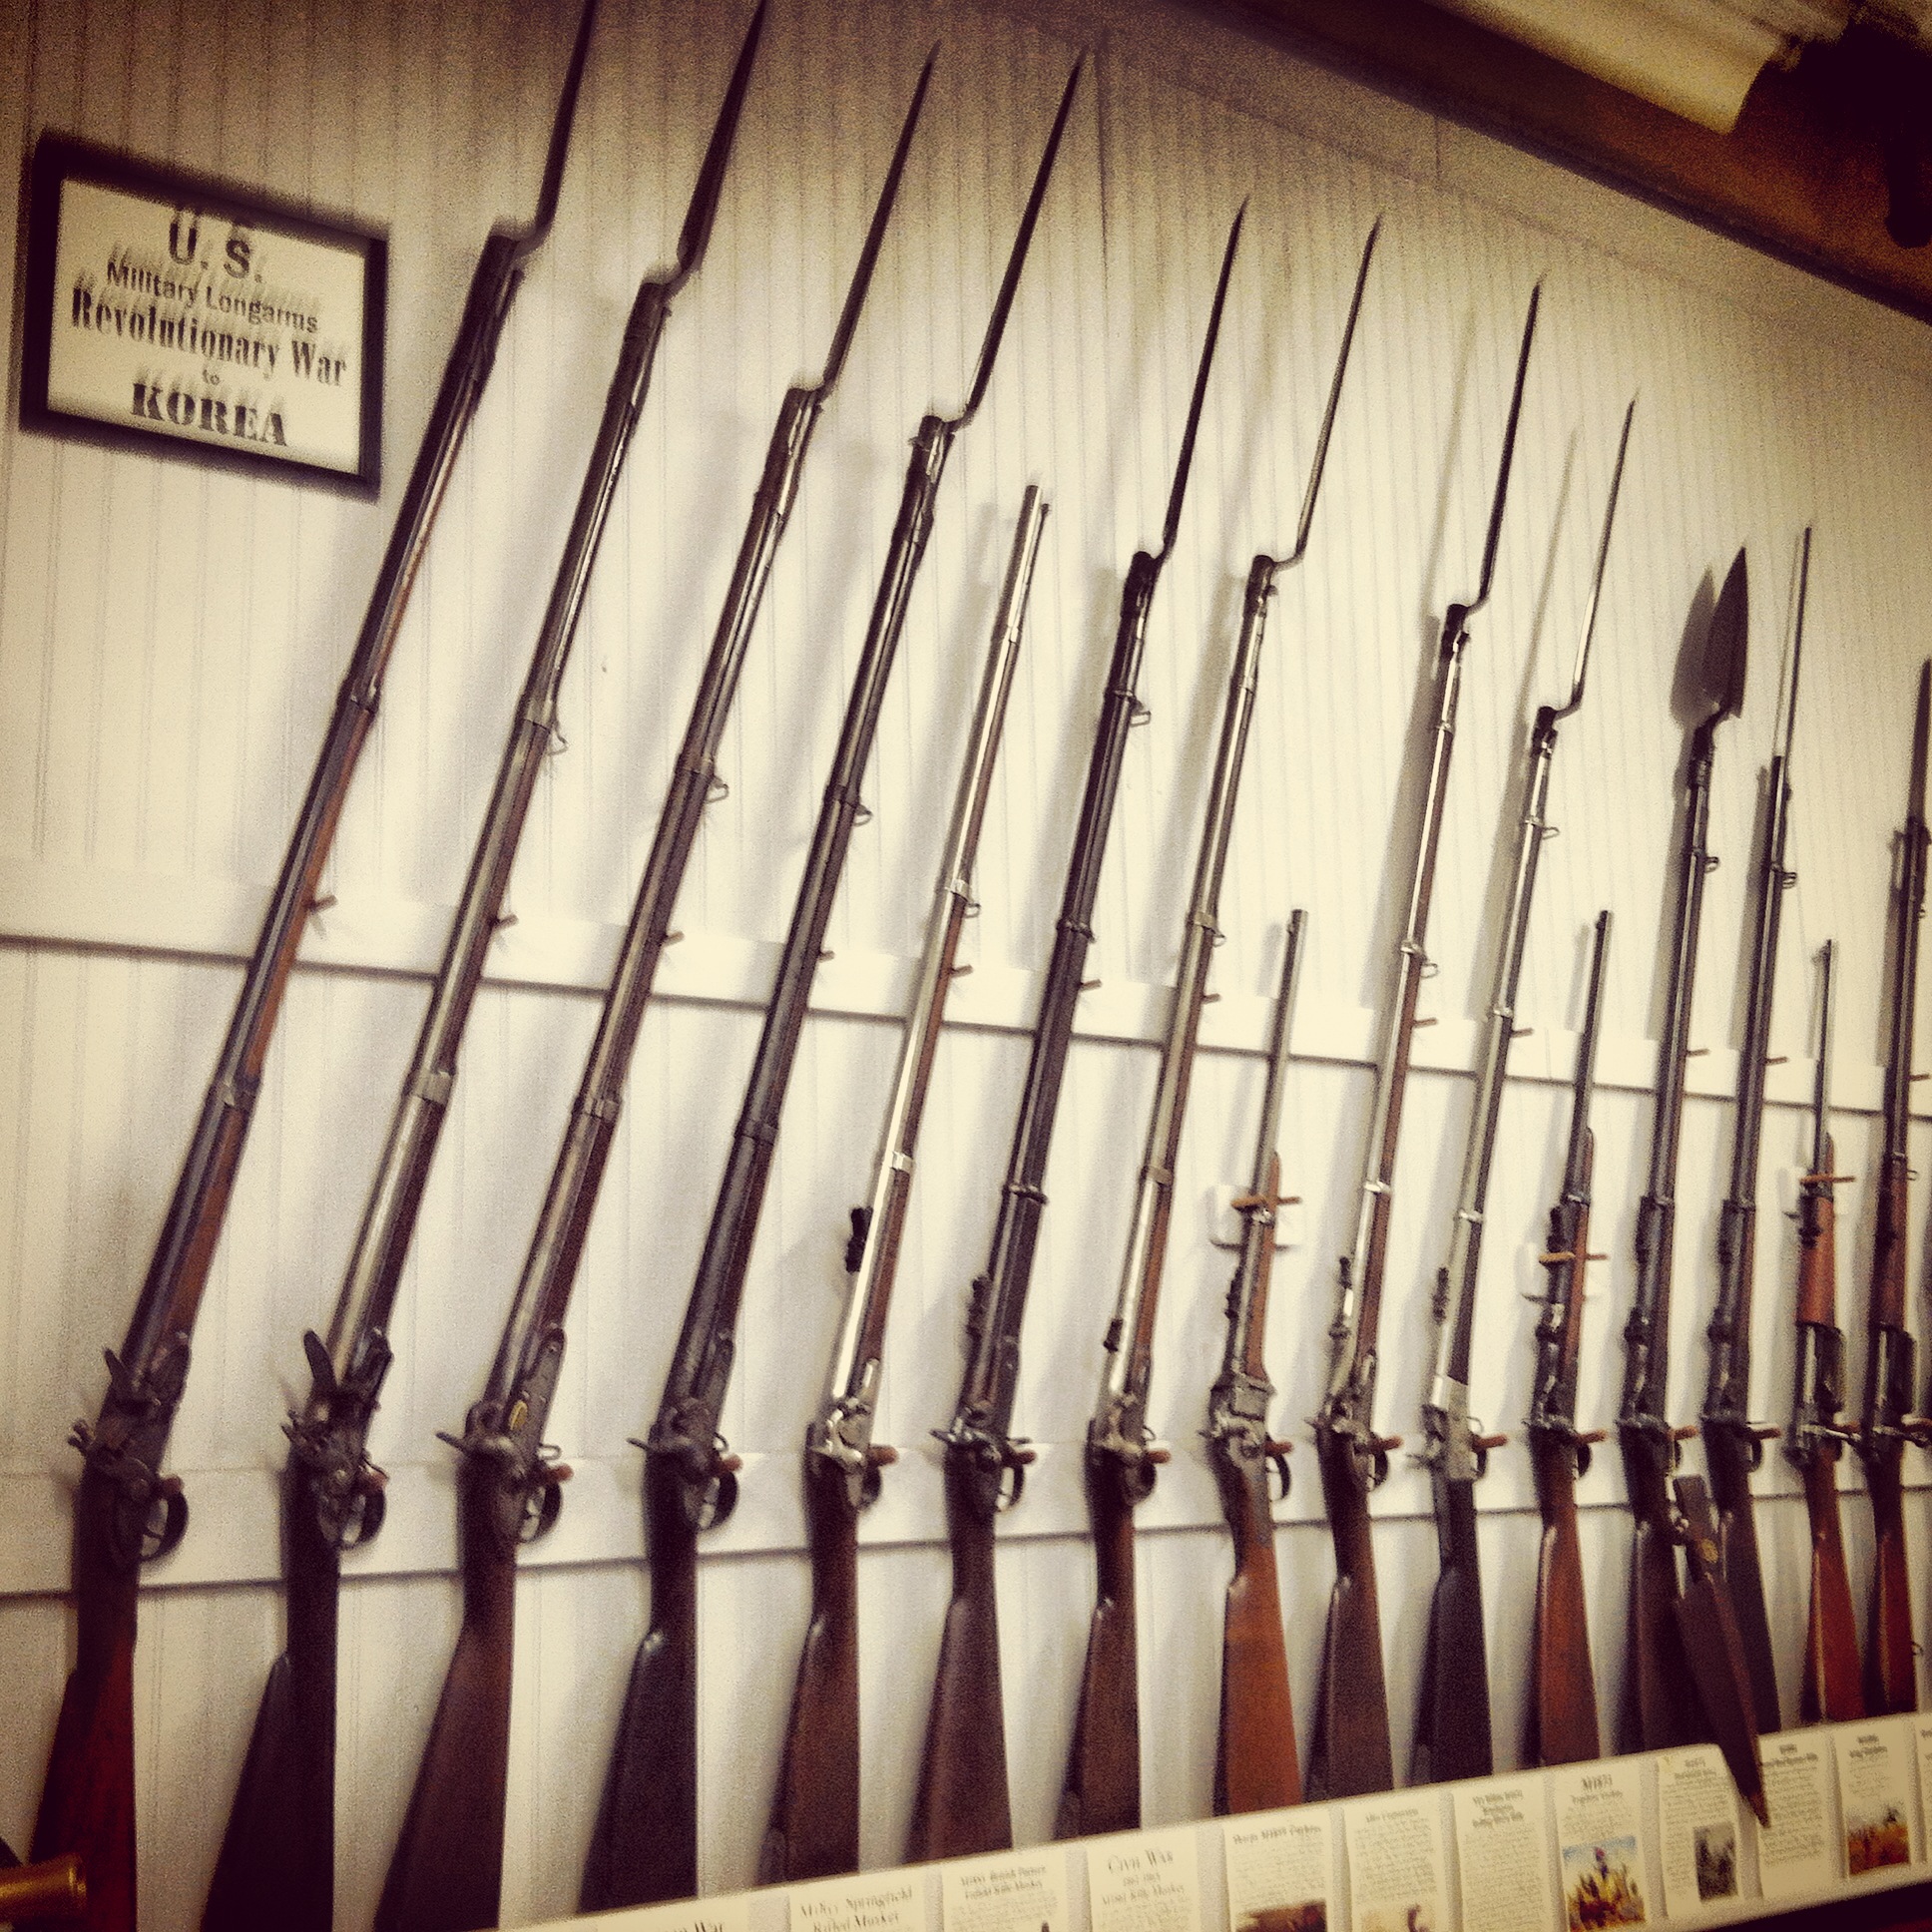
A timeline of US long arms from the American War of Independence through the Korean War at the MHSR

Founded several years ago by Chuck Baylis as the American Civil War Artillery Association, the group’s mission has since grown beyond his original collection of Civil War artifacts to encompass American wars from the Revolution to the present. The first room still focuses on the Civil War including detailed displays on artillery, uniforms and the 140th New York Volunteer Regiment formed in Rochester in 1862. A timeline of American long arms from the American War of Independence through the Korean War covers an entire wall.

IMG_4890

A timeline of military uniforms from the American War of Independence through the present at the MHSR

In the rear space of the museum, the focus swings to 20th-century with displays on World War I, World War II, the Korean War, Vietnam and present day wars. Uniforms, guns, swords, equipment hang from the walls, rest on shelves and lay slung over mannequins. Scale model airplanes hang from the ceiling, model vehicles rest on the floors and cases and a D-Day diorama sits nearby. Throughout the museum are some 2000 books as well as countless other letters, maps, photos, schematics, deck plans, prints, posters and other ephemera for perusal or research.

IMG_4887

 A US .50 caliber machine gun at the MHSR

Baylis has been joined by a number of passionate volunteers who can be found at the museum during its operating hours on Thursdays, Fridays and some Saturdays. Civil War reenactor, historian and wargamer Mike Vasile (co-author of the excellent Arena Games: Gladiatorial Combat rules) is responsible for many of the scale dioramas throughout the museum. Scale ship modeller Timothy Igoe of Historia Militaris Shipways has contributed several naval models to the collection and is currently undertaking a build of the USS Rochester (CA-2) for the museum. Retired Social Studies teacher Orton Begner rounds out the group with a deep knowledge of every object on hand.

IMG_4889

A US M1919 Browning machine gun at the MHSR

The one-to-one interaction with the MHSR’s members and the collection is what sets the museum apart from any other I’ve every visited. Everything has been well labeled, organized and put on display but hardly anything in the museum sits behind glass. Care to hold the various types of artillery rounds used in the Civil War? Want to feel the heft of a WWII era Thompson submachine gun or M-1 rifle? Would you like to take a look inside a pack carried by an American GI on D-Day? Want to lie down with a German MG-42? Ever wanted to hold a Japanese officer’s sword or 1913 “Patton Saber”? Just about everything in the museum, with the proper care, respect and assistance from one of the staff, can be touched, offering an incredibly rare opportunity to physically connect with past.

IMG_4888

 A German MG-42 and StG 44 at the MHSR

The mission to bring history alive beyond the walls of the museum also occurs with the exhibits members of the group bring to school groups and veteran events in the Rochester area. With its focus on celebrating the men and women of Western New York’s service in every branch of the military past and present, the museum is serving a unique and human mission of connecting today’s generations to a long tradition military service.

IMG_4892

My son gets some hands-on time with a Thompson submachine gun at the MHSR

In all my years of interest in history and military heritage, I have yet to find a museum as alive as the experience found at the Military History Society of Rochester. As a wargamer, the opportunity to see and handle so many objects up close is unparalleled. My time spent at the museum on my first visit was brief, but meeting the guys and seeing the collection at the museum will definitely bring me back my next time in Rochester.

Interview with Chuck Baylis of the MHSR

The Military History Society of Rochester is located in the Anderson Arts Building at 250 North Goodman Street on the second floor. Admission is free.

Flames of War: 70th Anniversary Battle Of The Bulge Mission

Bulge82nd

This past week marked the 70th anniversary of the Battle of the Bulge fought between Allied and German forces in the snowy, wooded Ardennes region of Western Europe. The six-week German offensive through a frigid December 1944 and January 1945 surprised Allied forces and proved to be costly for all involved. At its conclusion, commanders on both sides counted nearly 100,000 casualties and much of the German ground and air reserves had been smashed as a result of their ill-fated gambit against the Allies.

BulgeMission

The Battle of the Bulge Mission rules from Flames of War

To mark the occasion, several of us met at Metropolitan Wargamers in Brooklyn, NY to run through the big Battle of the Bulge Mission available free online for Flames of War. The simple scenario plays out on a huge 6′ x 8′ tabletop with 4000-point forces on either side drawn from the Nuts! and Devil’s Charge books as well as the Panzers To The Meuse PDF. We set our table using a large off-white canvas with roads crisscrossing the forested field dotted with a few small structures.

101stabbulge

101st Airborne US Parachute Rifle Company from Nuts!

gliderrc

US Glider Rifle Company from Nuts!

On the Allied defending side, I ran my US 101st Airborne Division “Easy Company” list made famous by the book and TV series Band of Brothers. Several special character Warrior figures were included in my list and I also added a hefty group of five M4A3 76mm Shermans and an 81mm mortar platoon. My partner fielded a US Glider Rifle Company, also with 81mm mortars and a 57mm anti-tank platoon. In support, his list was rounded out with M7 Priests, M18 Hellcats and a tank platoon with a Jumbo, two Easy Eights and two more M4A3 76mm Shermans.

 PLJustinBulge
Lehr Panzerkompanie from Panzers To The Meuse

For the armored attacking Germans, both players pulled Lehr Panzerkompanie lists from the Panzers To The Meuse PDF from FOW. Across the lists, a swarm of Panzer IV platoons were accompanied by Panther G and Jagdpanther tanks, Puma armored cars, rocket launchers, Wirbelwinds and two Panzergrenadier platoons. To supplement their massive armored ground forces, the German players also opted for limited air support from a ME 262 A2a Sturmvogel jet plane.

IMG_4830

Initial Battle of the Bulge set up as German players plot their offensive

Per the scenario, the largely infantry US forces were deployed with the exception of our 76mm tank platoon and anti-tank guns which we held in reserve. The US anti tank platoon deployed at the center of the board with their M20 Greyhound scout cars, ready to spring support with the soft but deadly Hellcats to either flank.

IMG_4831

Panzer Lehr forces deploy and move toward the American right

IMG_4832

The German armored assault pushes to the American left

IMG_4833

German ME 262 jet attempts to dig the 101st Airborne out of their positions

The German forces moved quickly onto the board with reconnaissance moves from the Pumas stretching across the table. A mass of Panzer IVs and the Jagdpanthers rolled to the US right. On the American left, Panthers moved to cover in a small wood while the two platoons of mounted Panzergrenadiers pushed down the road toward a US rifle team dug into another woods looking to attack with an armored assault. At the rear, the first run of the Sturmvogel took after the US Airborne in position protecting an objective to no effect.

IMG_4834

The German armored assault on the US rifles in the woods

The German armored assault commenced but was bounced back over the first couple turns with the Americans taking only a few losses from the protection of the trees. Panzer IVs moved in to support from behind the German halftracks and took fire from the Jumbo, Easy Eights and 76mm Shermans sitting in a treeline across the road. The Americans sprang their first ambush, placing anti-tank guns nearby the Panthers. While shots from the US AT platoon were unable to crack the heavy panther armor, their position would go on to strongly limit the maneuverability of the Panthers for the whole game.

IMG_4835

US 76mm tank platoon springs an ambush on the right

IMG_4836

US tanks receive heavy fire from the Panzer Lehr

IMG_4837

US Hellcats move to stop the German armor advance

Over on the German right, the Panzer IV and Jagdpanther force divided around a wooded area and was engaged by the platoon of five 76mm Shermans exposing themselves in ambush. Over the next several turns, armor fire was exchanged as the German tanks sought cover in and around the woods. Three 76mm Shermans were quickly destroyed and the position was quickly reinforced with the US Hellcats deploying from behind a nearby barn. One Jagdpanther quickly bogged and sat stalled over repeated attempts to unbog for the majority of the remainder of the game.

IMG_4838

Panzer IVs are devastated by US armor fire from the woods at the left

Back on the US left flank, the German armored assault was pushed back with most of two platoons destroyed in a crossfire from American rifle infantry in one woods and tank fire from another. the combined fire from the US armor likewise laid waste to the approaching Panzer IVs and Pumas. At mid-game, the American left was holding but the US right was in trouble.

IMG_4839

The ME 262 Sturmvogel takes a run at the US Priests

Supporting fire from both sides proved relatively ineffective throughout the game. The German ME 62 failed to score a hit on multiple runs over the table both to infantry and the rear American Priest platoon. The Priests themselves served to only stall the German armor advance with poor results from multiple bombardments. German rocket fire from their rear also showed little for its repeated efforts once spotting teams were in position on both flanks.

IMG_4840German Panthers are thwarted by smoke rounds at the US left

IMG_4841German armor pushes for the crossroads objective

By the sixth and seventh turns, the game continued to progress steadily on two fronts. At the US left, Panther tanks moved into position after their allied Panzer IVs sat burning all around them. Smoke rounds from two US mortar platoons effectively kept the Panthers out of most of the fight as they crept forward and back in the woods. Finally, a couple of side armor shots from the American anti-tank 57mm guns took a couple of the Panthers out and effectively ended the German threat on one side of the field.

IMG_4843

101st Airborne troops rush forward to contest the crossroads objective

IMG_4842

Panzer Lehr forces attempt to push out the 101st Airborne

IMG_4844

German armor continues to roll to a second objective crossroads at the rear

Things were fairing much better for the Germans all along at the other end of the field. Over several late game turns, the German armor pushed forward, leaving all the US Hellcats in flame and the final surviving 76mm Sherman fleeing the field. The veteran 101st Airborne troops continued to snarl the German advance, remaining static and dug in under wooded cover. With the Americans handily holding their left, two US platoons ran to the right to shore up the defense of two objectives. Just as one platoon of US paratroopers broke, a round of fire from the Priests took out one of the Jagdpanthers. With German armor at one objective and pushing hard at a second, a lot of American troops were poised to go down contesting two crossroads with plenty of mortar support ready to shift their attention across the table.

The written scenario doesn’t call for a turn limit, but after having played for nearly eight hours we called the game at the ninth turn. This was one of the longer and larger FOW battles we had played at the club in Brooklyn in this year. In a year of 70th anniversaries, wrapping up with an exhausting and dynamic Battle of the Bulge game seemed the best way to play some tribute in miniature to the largest battle fought in US history.

Flames of War: Forces of War Launches

ForcesHome

This month, Battlefront Miniatures, the makers of the popular World War II miniatures game Flames of War, took its first big digital step forward with the introduction of the first of their two new digital services — Forces of War.

EAhp

The soon-to-be retired EasyArmy.com

Debates have been raging through online message boards, Facebook groups, Twitter and over WWII-themed tabletops ever since the announcement that the beloved EasyArmy was being closed down and absorbed into Battlefront with Forces of War. During its run, EasyArmy had become a much relied-upon tool for FOW players worldwide. Battlefront has maintained a lengthy working relationship with EasyArmy’s designer in an incredibly rare example of a corporation willing to cede some control of their intellectual property. Now, like so many other companies working in the digital space today, Battlefront has brought the ideas and work of a passionate outsider in-house with this month’s launch of Forces of War.

ForcesNewCo

The New Companies menu on Forces of War

Beginning with Forces of War, buying a company list will run $1.00 USD with a 25% discount extended when buying all lists from an entire book or compilations at about $16.50 USD. The initial offering of lists is meager, focusing on the more recent FOW books Road To Rome, Barbarossa, Road To Remagen and the World War I themed Great War. Devil’s Charge is listed but the complete book is not available and instead points to the popular Panzers To The Meuse list. This set of German companies is the only free offering at launch, allowing for some limited experimentation with the site before buying additional lists. Being a Late War player who mostly plays US and British lists of the D-Day, Market Garden and Battle of the Bulge operations, my hope is that FOW quickly updated Forces of War with these lists as well as Eastern Front lists for Late War Russian and German players.

92ForcesCo

 Company builder on Forces of War

As a test, I went through the quick PayPal process of buying the US 92nd Infantry list from the Road To Rome book. The performance was familiar to my experience on EasyArmy, although I did find the Forces of War site to be somewhat faster than its predecessor. Within a platoon, options are selected with simple clicks, and a running points total is tracked along the top of the page by company and platoon. Forces can be saved with custom names and a nice (but minor) new feature allows notes to be added within each platoon.

ForcesCoPDF

A sample Saved Company page on Forces of War

Saved companies are accessed through easy to view lists which can be filtered by period, country, type, name, source, motivation and skill. Companies can be exported and saved as PDFs or printed. The printed lists are somewhat clearer with better page breaks than those with EasyArmy, a simple but welcome tweak. Frustratingly, the platoon motivation and skill ratings still print within unnecessarily colored text boxes which are nearly unreadable on the page.

ForcesScenarios

Scenarios selector on Forces of War

Most other aspects of EasyArmy have been ported over to Forces of War, including the handy Scenarios map. The Scenarios page could use some upgrades with a search or menu feature to allow quicker access and some better designed graphics or links.

Much like EasyArmy before, Forces of War offers an easy interface in which to view and manage force lists for FOW. In a nutshell, all the core functionality of EasyArmy has been preserved and then packaged with an official FOW wrapper.  Like a lot of players, I would have very much liked to have seen more lists available at launch. As more lists become available in the coming months, re-buying lists already purchased via EasyArmy is also a sticking point for many but I find the new pricing scheme to be completely in-line with FOW balancing customer usability with needed company profit. Some will also continue to complain about the inaccuracies in some lists, but clean-up edits over time, cross-checking the books and being a considerate, mindful and fair player will always trump any gaming tool.  Gone too are all the ads which cluttered the layout of EasyArmy — a true step forward for any premium digital offer. As transitions go, the evolution of EasyArmy to Forces of War is a good start with room for greater improvements to hopefully occur in the very near term.

Flames of War: Tanksgiving 2014 After Action Report

Tanks2014AAR

This past weekend seven of us gathered at Metropolitan Wargamers in Brooklyn, NY for our second annual Flames of War Tanksgiving event. One new player and six experienced FOW gamers (including two father/son pairs) played through five Late War games using 1750-point companies stretching over three tables — two from Western Europe and one from the Eastern Front. Over the course of the afternoon, British, US, German, Soviet and Hungarian forces fought it out with a mixed results but a slight edge toward the Axis for the day.

IMG_4722

Setting up two Western Europe tables for Tanksgiving 2014

IMG_4723

Western European tables ready to go at Metropolitan Wargamers with an Eastern Front table at the back

British Guards Armoured vs German Schwere SS-Panzerkompanie

The first Western Europe table presented a No Retreat Mission with the Guards Armoured defending a small town from a raiding Tiger-led German force attacking from the open farm area across a river. The Guards deployed an eight 25-pound gun Royal Artillery at the back edge of the table and one objective near the bridge spanning the river to the town. With three other platoons of Sherman and Sherman Firefly tanks in reserve, the initial British force would need to hold fast against the German onslaught.

IMG_4724

Guards Armoured tanks deploy at an objective

IMG_4726

Tigers roll toward the bridge and are covered in smoke rounds

The Germans began the game fully deployed and slowly moving their Tigers toward the bridge and an objective just beyond. With famed tank ace Michael Wittman commanding, the key for the spare British force was to stay away from the deadly guns of the German tanks. At the river ford in the center, the Panzer IVs moved to flank the other side of town with Panzer Grenadiers mounted in half tracks at the rear. The best the British could do was fire smoke rounds into the Tigers across the river and follow-up with long-range shots from the single Firefly deployed at the beginning of the game.

IMG_4727

A Firefly destroys a Tiger at the bridge

IMG_4728

Panzer IVs and Shermans face off in the town streets as a Firefly covers the bridge

Over the next two turns, British reserves arrived and made way for the center of the town, using the tight cobblestone streets and buildings as cover. Artillery spotters stationed in the rooftops of buildings called in several turns of artillery fire but failed to have any effect on the Tigers and destroying only one German halftrack at the river. A crack shot from a Firefly at the center of the town destroyed the first Tiger over the bridge. By the end of the fourth turn, the Panzer IVs wheeled to get into the town at the British left but were pushed back by fire from British Shermans.

IMG_4730

Reserve platoons from the Guards Armoured arrive to engage the Panzer IVs

IMG_4731

Tigers position themselves on two flanks of the town

In the fifth turn, the two remaining platoons from the Guards Armoured arrived to the British left and pushed forward toward the Panzer IVs. With two German tanks quickly lit up, the surviving Panzer IV fell back to the treeline where it was destroyed in the next turn. The British held their left for the moment, but in the cover of the raging tank fight, the dismounted Panzer Grenadiers had managed to slip into the town’s buildings unharmed.

IMG_4732

Firefly Shermans and Tigers face off to protect the objective

IMG_4733

Three Tigers charge hard toward the objective beyond the road

As smoke continued to hold the Tigers from firing at the bridge, a second Tiger was destroyed from a volley from the same Firefly that had sent the first Tiger into flames. While action at the bridge stalled, the three other Tigers had been working their way through wrecking the British tanks which had destroyed the Panzer IVs. All the while, the German infantry had continued to work through the town’s building’s untouched and toward the objective back the rear of town. The British command tanks rolled to stall the advance of the Panzer Grenadiers with machine gun fire and cover the objective.

With most of the British armour ablaze throughout the town, three Tigers rolled toward the objective at the bridge. The surviving British tanks had continued to make successful morale checks with the benefit of their special rerolls. The two surviving Firefly Shermans took a combined shot at a Tiger’s rear and missed. The Tiger’s spun around to return fire, destroying a Firefly. With further ineffective artillery rounds and just one Firefly sitting between three Tigers and the objective, the game was called with a victory for the Germans.

Final Result: Victory for the Germans!

Soviet Tankovy Batalon vs. Hungarian Harckocsizó Század

The day also saw a couple Eastern Front games with Hungarian and Soviet forces facing off on tables set up using a random terrain generator. The Eastern Front table showcased log structures from the excellent Miniature Building Authority Russian Village set along with some rural farm buildings from FOW. Each game saw the Soviets as the attacker, the first taking place on a table representing the bleak steppes of Russia in a Fighting Withdrawal Mission. The defending Hungarians began in prepared positions with a howitzer battery and Panzer IVs to their right, infantry at the center and tanks at the left. The Soviets with T-34 obr 1942 tanks at their extreme  left and right,  SU-100 tank killers and a Gvardeyskiy Tyazheliy Tankovy company at the center and a heavy mortar company at the rear.

IMG_4725The Soviet line moves toward the Hungarian positions

IMG_4719

Soviet tanks roll toward the Hungarian positions

IMG_4720

Hungarian armor proves to be no match for the Soviets

The second Eastern Europe match-up occurred around a collective farm complex with a Dust Up Mission. Starting from opposite corners, both the Hungarians and Soviets positioned themselves into a fantastic series of turns in and around the small farm. With both players moving, dodging for cover and firing at close range, the Hungarians and Soviets sparred for victory as tanks burned all around.

IMG_4721

Game two on the Eastern Front with the central Soviet farm complex

As Hungarian reserves arrived late in the game, infantry climbed out of their trucks and assaulted the Soviet T-34s. Soviet reserves likewise entered the game and made way for the Hungarian howitzers and the objective at the opposite corner. With two intense assaults at either end of the field, the Soviets gained a slight edge and were able to score their second victory on the day.

Final Results: Two Victories for the Soviets!

US 7th Division vs. German Panzer Ausbildungs Abteilung

Back on the other Western Front table a spare rural village anchored by a prominent church and surrounding hill and forests, a deadly force of German Panthers, Tiger Is and Königstigers squared off against the US 7th Division. The Americans rolled into the first Pincer Mission with standard Shermans, M4A3E8 Easy Eights and M4A3E2 Jumbo. At the rear, M7 Priests and 81mm mortars mounted in half tracks were positioned to cover the field in smoke while a P-47 Thunderbolt was on call to swoop in against the German force.

IMG_4742

The US 7th Division deploys in cover on the Western Front

Hoping to avoid German fire, the US tanks crowded into position using the church and other structures for cover as they eased across the field. Once engaged, the Jumbos did their job of eating up fire from the German guns and allowed the other US tanks to advance toward the objectives. Even with smoke cover fired from the rear, air support above and a mass of US armor, the cautious pace of the Americans was no match against the German Tigers firing from the woods. By the time the Americans made a push for the objective in the open, the German tanks were squarely deployed to defend the objective and take the game.

IMG_4740

American tanks bide their time waiting for clear shots at the heavy German armor

IMG_4739

Overwhelming German presence holds the objective

The players switched sides in the second No Retreat Mission on the same table. Again, the Americans came on the table on the far side of the town but this time chose to race aggressively toward their objectives. Defending from the wooded areas again, the Germans were able to fire at will on the advancing Americans. Quickly moving to a close series of short-range duels, tanks on both sides shifted to get into important side armor shot positions. With a tight cluster of models crowding the field near the objectives, American artillery smoke and air support quickly became irrelevant and some lively debate erupted around lines of sight and facings. The second game was a much closer match, but in the end, the thick hulls of the German tanks were no match for the American guns.

IMG_4741

Tanks on both sides jockey for effective shots near an objective

With two victories for the Germans, there was a fair amount of discussion as to whether the Panzer Ausbildungs Abteilung list is an example of a “broken” and unbeatable list in FOW. The Americans tried their best with both cautious and forceful tactics using some great available equipment

Final Results: Two victories for the Germans!

At day’s end, the Axis came out with a slight edge of a 3-2 victory over the Allies across two European fronts. The presence of tough late war German Tiger tanks are a hard force to crack, even with quality American and British armor with lots of air and artillery support. On the other hand, the Russian tank horde always proves to be a formidable Allied opponent whether facing Hungarians or Germans. Force quality, tactics and a bit of luck always play a role, and our five Tanksgiving games were all unique examples of how Flames of War tank battles can go on any given day.

Flames of War: JR Miniatures 15mm Arnhem Row Houses

arnhemstreet

I picked up two different 15mm JR Miniatures Arnhem row house models on my recent trip to the HMGS Fall In! 2014 convention at a real steal of 40% off the list price. At nearly 12″ long and up to 8″ tall, these cast resin models create a quick urban feel to a tabletop battlefield. Each model has lift off roofs and interior floor and wall sections which pull out to allow for stands of troops to occupy varying rooms and levels. The roofs on the models also contain open parapet areas where artillery spotters, machine gunners or other troops can placed to command the battlefield from high upon the rooftops.

IMG_4674Cleaned and primed Arnhem row houses from JR Miniatures

As with most of my experiences with JR Miniatures models, there’s a fair amount of clean up to flash before getting started. The castings also contain a few air holes here and there, but nothing that detracts too much from the overall models. If anything, missing pieces of a cornice or a small hole in a wall might be chalked up to gunfire.

Here’s a simple outline of my technique for painting resin buildings:

Painting Western European Buildings

  1. Use a sharp hobby knife to carefully remove extra resin flash from casting. Particular care should be taken to make sure interior floor sections lift out of the model easily.
  2. Wash models in warm soapy water to remove molding residues. Allow models to dry overnight.
  3. Spray prime roof and removable interior floor sections in flat black and main building sections in flat grey. Allow primer to dry overnight.
  4. Paint roofs:
    1. Tile roofs begin with a dry brush of 50/50 black and red paint, followed by a dry brush coat of red paint and finished with a dry brush of orange paint to highlight.
    2. Shingled roofs begin with a dry brush of dark grey, followed by dry brushed coats of lighter browns, light greys and dark green.
    3. Stuccoed areas in roof gables and dormer windows receive a dry stipple brushed coat of light brown followed by off-white paint dry brushed with the same stipple brush.
  5. Paint floor sections:
    1. Dry brush floorboards with layers of dark and lighter brown paints.
    2. Paint wall sections in off-white paint.
  6. Paint building facades:
    1. Stucco walls receive a dry stipple brushed coat of light brown followed by off-white paint dry brushed with the same stipple brush. Dab some random areas with more off-white to create areas of more fresh stucco to create variations along the street.
    2. Dry brush a slightly heavier amount of off-white paint over cornices and door a window molding to create more depth of highlights.
    3. Stone areas receive a dry brush of light grey followed by off-white dry brush highlights and a dark brown wash in recesses.
    4. Brick areas are dry brushed with 50/50 black and red paint followed by random dry brushing in off white paint to highlight.
    5. Paint doors and shutters with a variety of blues, whites, greens, reds and browns. Follow basecoat with highlight in same color slightly lightened with off-white. Dab doorknobs with brass paint with a fine brush.
    6. Window panes are all carefully given a light coat of black and then dry brushed with dabs of lightly dry brushed white paint to give the illusion of glass.
    7. Sidewalks are dry brushed with light greys over a medium grey basecoat.
  7. Ground areas at the rear of the buildings receive brown and green dry brush coats followed by grass flocking and small clumps of foliage.
  8. Coat models in several layers of spray clear matte finish, allowing each coat to dry before applying an additional coat.

I was able to achieve a pretty decent tabletop quality finish to my buildings with maybe three hours of work on each model using the painting scheme above. Since colors on buildings are rarely monotone (unless newly constructed), I use a plastic surface on which I dab a variety paint shades and mix colors from this palette as I go with my dry brushing. I then build up areas with heavier amounts of one color or another to pull out highlights, create varying textures and differentiate from one building to the next along the street.

IMG_4695A completed JR Miniatures Arnhem row house

IMG_4694 The other completed row house with corner shop

IMG_4692Close up of the corner shop

IMG_4698A view along both row house blocks

IMG_4697Rear detail of one of the blocks

IMG_4693Close up view of the facades

IMG_4696A German Stug parked in front of the row houses

IMG_4691Overhead view of the interior floors

IMG_4690A floor section being removed for placing troops inside

I’m really excited about these models which nearly double the footprint of my existing Western European buildings in 15mm. Models from JR Miniatures fit in nicely with my buildings from Mark IV Miniatures and terrain from a variety of other manufacturers. Although modeled on actual streetscapes of Arnhem, the buildings are easily usable in creating the look of many densely populated areas of France, the Netherlands or elsewhere in Western Europe during late war operations.

Flames of War: Metropolitan Wargamers Tanksgiving 2014

Tanks2014

For the second year in a row, we’ll be hosting a day of armored Flames of War tank battles on Sunday November 30th at noon at Metropolitan Wargamers in Park Slope, Brooklyn. At last year’s Tanksgiving 2013 we hosted about ten players stretched over two tables participating in Early War Africa and a Late War Europe scenarios. This year we’ll be running multiple Late War Europe games using 1500 points of armored forces on a side. We’ll have plenty of US, British, Germand and Russian models on some gorgeous tables, so experienced players can bring their own forces or newcomers are welcome to just come along, move some armor, roll some dice learn the game.

The event will be held at Metropolitan Wargamers at 522 5th Street in Park Slope, Brooklyn (enter through basement level). Visitors pay just $15 and regular club members are free. The event will be a great opportunity for new people to meet some of us at the club and experience the best and oldest wargaming community in New York City. If you’d like to come, RSVP via our club’s Yahoo group.

Bringing Modelling Into Focus

IMG_4465

As a wargamer and scale miniatures modeller working my way through the latter half of my 40s, eyesight has become more of an issue for me. It’s a reality of just getting older (I like to think, more experienced) as I’ve aged through about 30 years in the hobby.

Recently, I picked up the magnifying visor from Sharper Image and it’s become a welcome addition to my modelling tool kit. Retailing for about $60 (and less expensive with an additional 10% off for new customers), the visor brings a number of great features which separates it from other magnifiers I’ve seen. The adjustable visor comes with four lenses at  1.5x, 2x, 2.5x and 3x strengths stored in a separate small plastic case. Each lens snaps into the visor and flips up and down easily with a flick of the wrist while painting. Most visors or magnifying eyeglasses used by hobbyists come with just one fixed lens strength, so being able to adjust the level of magnification depending on the project adds a lot of use to the Sharper Image’s visor.

Living in an a Brooklyn apartment, I do most of my modelling projects in natural light at the dining table flanked by a tall set of large windows. For a lot of other hobbyists relegated to painting in basements or small, darker rooms, lighting is often supplemented with workbench lights or a separate camping-style headlamp. For hobbyists like me without a permanent workspace, tabletop lights just aren’t practical and adding a headlamp is just one more thing to store. With these factors in mind, the added feature of a powerful LED light on the Sharper Image visor is also a welcome addition. The light adjusts easily to angles which can direct a beam of cool, white light directly to the area needed. Again, this kind of thing just isn’t found on lesser magnifiers.

I got the Sharper Image visor just as I started going to a smaller scale with 6mm World War II microscale models from GHQ. Whether painting or applying decals, the visor makes details pop on these tiniest of models. At this scale, I found the 2.5x lens to be the best option. The smallest bits of equipment and other features on models practically jump out at me when wearing the visor, and I feel I could practically apply paint with a house painting brush if I had to. I’ve got some other 15mm projects coming up in the coming months, and I’ll be using the visor at that scale for the first time, too.

Regardless of the scale and veteran status in the miniatures hobby, the outlay for the magnifying visor from Sharper Image is a solid investment. As I soon head into another decade in the hobby, I’m grateful to have this new tool to keep my future projects in focus.

Micro Armour: Fielding the GHQ German Kampfgruppe and Panzer IVs

kampfgruppegerman

After getting my initial GHQ 6mm US armored infantry and tank force painted-up a few weeks ago, I’ve moved on to my Germans next. My Axis starter force comes from two GHQ box sets. Ten Panzer IV tanks are included in the Shermans vs. Panzer IVs Battle BoxTo this armor I’ve added the contents of the German Kampfgruppe 1944 box set which includes two towed 20mm Flak guns, two Marder IIIs, two 150mm Bisons, two Sdkfz 10/1 transports, a Kfz 15 command car, a couple horse-drawn wagons, infantry mortars, machine gun teams and a pile of infantry. All together, this gives me a pretty hefty late war German set of models with a solid mix of infantry weapons, tanks, transports and supporting heavy weapons.

IMG_4105GHQ’s Kampfgruppe 1944 Combat Command box set

As with my basic US force in 6mm, I’ve worked up a simple painting method for my Germans. The key is to get an even, thin base coat on the models so tiny details can show through as highlighted areas as I add subsequent colors. Using a magnifier is also a necessity at this scale, and staring at tiny models through the lenses makes painting a downright breeze.

IMG_4111Getting the models and workspace organized is key when working with 6mm

IMG_0599GHQ German infantry, machine guns, Sdkfz 10/11 and Marder IIIs

Painting German Infantry

  1. Glue a small piece of card over the center hole of washers.
  2. Glue models to washer bases.
  3. Basecoat models and bases with white spray primer.
  4. Wash models in a mix of 1 part dark grey, 1 part light grey and 5 parts water.
  5. Paint boots, gun stocks and equipment details dark brown,
  6. Paint hands and faces flesh.
  7. Paint gun barrels and equipment details gun-metal silver.
  8. Paint bases dirt brown.
  9. Cover bases in white glue and cover in 50/50 mix of fine light green and dark green grass flock.
  10. Glue small pieces of clump foliage to base.

 IMG_0603Completed GHQ Panzer IVs

Painting German Armor and Transports

  1. Glue a small piece of card over the center hole of washers.
  2. Glue models to washer bases.
  3. Basecoat models and bases with white spray primer.
  4. Wash models in a mix of 1 part dark grey and 5 parts water.
  5. Lightly coat models in mud brown wash.
  6. Dry brush light grey highlights to models.
  7. Dry brush tracks, machine guns and body details gun-metal silver.
  8. Paint bases dirt brown.
  9. Cover bases in white glue and cover in 50/50 mix of fine light green and dark green grass flock.
  10. Glue small pieces of clump foliage to base.
  11. Paint tire tracks on bases dark brown.

Getting decals applied to the Panzer IVs is finicky, but with some trial and error using my process I did get that last little bit needed to get my Germans rolling onto the table at a very small scale.

IMG_0607GHQ German machine guns

IMG_0605GHQ wagons and 20mm flak guns

IMG_0600GHQ German infantry and Kfz 15 command car

IMG_0601GHQ German infantry and mortar team

Flames of War: Fielding the CD and FOW M13/M16 MGMC AA

M1650cal AA

One of my favorite blogs, War Is Boring, recently ran an article about the famed Browning M2 machine gun. Introduced in the 1930s, the .50 cal machine gun went on to become one of the most common heavy weapons used in the field by US infantry, mounted on ground vehicles and installed in aircraft. Whether used on the ground or against air targets, the gun is beloved by troops for its ferocious stopping power. Installed in combinations in half tracks as anti-aircraft guns, the weapon earned affectionate nicknames like the “Ma Deuce,” the “Quad 50” or simply “The Fifty.” To this day, the .50 cal is still in wide use wherever US forces deploy.

IMG_4295M13/M16 MGMC AA model comparisons with Flames of War (left) and Command Decision (right)

My recent projects for  my 15mm World War II gaming have focused on filling in extra support units, and adding some AA was key to filling a gap in my forces. Needing four models for a full platoon, I was faced with a choice of manufacturers. Flames of War sells their M13 MGMC models separately for about $13 each. Old Glory Miniatures offers a 3-pack of M16 Quad AA SP Halftracks for $25. So, I was looking at choices of purchasing four of the FOW models for $52, buying two of the CD sets for $50 (and having two leftover, unused models) or ordering from each manufacturer and getting exactly the four models I needed for $38.

I opted for the economical route and wound up with some pretty different models. Side-by-side, the FOW resin and plastic truck is taller, longer and wider than the CD all-metal castings. Everything glued-up nicely, but the guns for both companies proved to be very delicate and prone to bending. The FOW model has crisper lines, but the rougher CD half tracks have a fair amount more detail.

IMG_4296My completed M13/M16 MGMC AA platoon

With four half tracks in the platoon, the larger FOW model literally stands out among the other three smaller CD models. With its bigger profile, I’ve decided to take advantage of its differences and use the FOW half track as the command model in the unit. Since I won’t be fielding the platoon all the time, the delicate gun barrels are less of concern as they are bound to sit comfortably in one corner of the table and blaze away at any Axis aircraft or unfortunate ground forces who dare get too close.

Flames of War: Fielding the FOW L-4 Grasshopper AOP

L4Grasshopper1944

Piper Aircraft was founded in the late 1920s with an eye toward building planes for general civilian use. From 1938 to 1947, Piper sold nearly 30,000 of their relatively inexpensive J-3 Cub models, making the plane one of the most ubiquitous non-commercial planes soaring over the United States by the mid-20th-century.

1943 industrial film of the building of a Piper Aircraft J-3 Cub

During World War II, Piper supplied the US Army Air Forces with nearly 6000 of their J-3 Cub planes in a modified military version known as the L-4 Grasshopper. The main modification of the light plane was the installation of wide banks of plexiglass windows, making it usable as a radio observer and reconnaissance plane during key missions like the Allied invasion of Normandy in June 1944. The Grasshopper also found varied service transporting supplies to the front, carrying wounded to the rear and ferrying military and political dignitaries. In rare cases later in the war, the plane was also equipped with light weapons for use as an air-to-ground attack platform.

IMG_4250My completed Flames of War US AOP Grasshopper

My modelling for Flames of War has been focusing as of late on filling in some odd little gaps in my forces. Since I run some US artillery from time to time, adding an air observation plane not only allowed me to add to my gaming but also take a break to model another plane. This time around I also decided to pay a bit more attention to basing my plane to add a bit of visual interest to an otherwise simple model. I like the quick work on the base so much that I’m going to go back and add the same to my US P-47 Thunderbolt and British Hawker Typhoon models. While relatively inexpensive and easy to assemble and paint like my other aircraft, my one criticism of the FOW Grasshopper model is the lack of decals.

Even with the one shortcoming in markings, my new Grasshopper will be a welcome addition to my FOW games. In most American army lists, adding an AOP is a cheap point spend while also greatly expanding the effectiveness of the already devastating US 105mm howitzer battery. Getting this little plane zipping over the heads of my Axis opponents on the tabletop battlefield may not prove to be a total game changer. It is, however, going to give the enemy one more thing to worry about and may just provide an edge like this classic of American engineering did some 70 years ago in the skies of Europe.