A Milestone at Brooklyn Wargaming

100KviewsThis week, this site rolled past 100,000 views and 56,000 visitors since its launch in July 2013. While Brooklyn Wargaming is by no means one of the more popular gaming sites out there, I am constantly pleased I garner so many visitors every day around the world coming to check out what’s new with me and my hobby.

Over the past few years, I written over 200 posts, played over 100 games, paid visits to numerous historic sites and museums, modeled a lot of terrain and painted a ton of miniatures. My blog has served as not only a diary of my gaming passion, but also as a way to share my love for this stuff with people who have visited my site from almost every country on the planet.

Here are some lessons learned and observations about blogging about gaming over the past two years:

Be Early

One of my earliest successes was from a post I wrote about the passing of famed wargamer and author Donald Featherstone in the autumn of 2013. Just as the story was breaking on the morning of September 4, 2013 in Europe, I noticed there wasn’t a lot of coverage in the United States as of yet. I work for a company that works partially in breaking news, so I know the value of being first to a story. By the end of the day, my traffic had spiked to nearly 200 visitors, by far the best day for my site which had just launched a couple months before.

Be Timely

As a historical wargamer, posts which tie in with anniversaries of particular battles and campaigns are great generators of traffic. My best examples are the two articles I wrote about modelling the Guards Armoured Division during Market Garden. Many months after originally posting them, the Flames of War website made the two posts featured articles in their weekly site update celebrating the anniversary of Market Garden. Traffic flooded in and each have seen about 3000 reads over their lifetime.

Be Unique

Now and then I write about my early years of gaming with my Retro Gaming the 70s & 80s series. In these posts, I look back at games from my childhood and teen years when I was just becoming passion about the hobby. Often times, these posts are love letters to obscure games which appeal to only certain people. While many of these articles get just a few views from my nostalgic visitors, I’ve been surprised that my piece on Crossbows and Catapults has become a popular post day in and day out since it was published in July 2014.

The Crossbows and Catapults article lingered in obscurity for a few months, but several months later the traffic started picking up. Since then, this piece has been getting about five reads a day. I find this to be an interesting stat given the game is not especially well-remembered nor is it played much today. What I think makes the post strong is that it is one of the few comprehensive articles about the game you can find online. The article contains a detailed history of the game and its subsequent editions plus lots of photos and scans of the original rules included in the game. Other sites have linked to the article over time, directing traffic to my site daily with people with fond memories for this game. Unwittingly, my written childhood memories have now become a go-to article online for Crossbows and Catapults.

Be Instructive

As a hobbyist, some of my favorite articles online fall into the ‘how-to’ category. It shouldn’t be surprising then that my posts which outline detailed descriptions, step-by-step guides and lots of illustrative photos are among my most popular. Over time, I’ve added more in-process descriptions and pictures of my painting and modelling projects, garnering traffic day in and day out. Whether it’s modelling 15mm Western European terrain, micro armor projects or my recent build of Pegasus Bridge in 15mm, these ‘how-to’ posts are visited multiple times day after day. The great thing about a solid, detailed instructional post is they have long ‘evergreen’ lives as both new and old hobbyists alike seek reference posts as they work their own projects.

Be Connected

People don’t find stuff online on their own, so connecting my blog to like-minded folks is an important way to get others to read my posts. Posting modelling projects and after action reports links to The Miniatures Page is the number one generator of outside traffic for my site. After that, connecting posts to various groups, museum, historic site and manufacturer pages on Facebook is the second best way to find readers. Facebook also gives the most ego-boosting immediate feedback as the likes, shares and comments flow with almost every post. Posting my articles directly to forums on manufacturer websites, like Flames of War and GHQ, also drive pretty significant views from people invested in a particular niche of the hobby. As a member and president of Metropolitan Wargamers in Brooklyn, NY, my posts also flow directly to the club’s homepage for current and prospective members to check out. I also use my Twitter account and have dabbled in Reddit, although each of these only see a trickle of visitors to the site. It’s a bit of work, but I definitely need to push my social media connectivity to keep my traffic boosted.

Getting to the next 100,000 visits…

So, with this first milestone at Brooklyn Wargaming, I’m asking myself where I go next. I’m certainly going to be continuing to post projects on a regular basis, and I’d like to break into miniatures of more eras beyond my core interest in World War II. I’m going to keep bringing reviews and plays through new board games to the site as I’m introduced to them. I’d also like to get into more feature articles, and I’ve got a few ideas churning away in the back of my head.

As a kid originally from a tiny rural Western New York town who’s been pushing little miniatures around tables and rolling dice for over thirty years, I’m grateful to my tens-of-thousands of readers who have come to my site over the past two years. Keep checking out the site, and, if you’re ever in Brooklyn, let’s play a game.

28mm: German Wehrmacht By Black Tree Design

Wehrmacht

I recently got back to my 28mm World War II projects with some Wermacht from Black Tree Design. After painting up a bunch of German troops in camouflage smocks, I wanted to get some more Heer infantry into the mix. And so, on the back of a big sale this summer, I’ve just about doubled my Axis forces at this scale.

BTD

I was really pleased when I received my large order and marveled at all the detail on these figures. Lots of varied poses, weapons, equipment and personality make these casting from Black Tree Design stand as equals with all my other troops. As always, the customer service from the company was superb with nice hand-written notes included in each order boxed up in a little metal tin.

WehrDecalsGerman infantry decals from Company B

Along with my figure order, I also went back to Company B to order up some decals for the helmets. Even though it might not be as historical, I went with the national colors of the double decal helmet configuration which was phased out fairly early in the war. I really just wanted a bit more color on the otherwise monotone color scheme. And, while I’m on the subject of color, I really liked how the Skavenlight Dinge from Citadel Paint captured a nice mix of grey-green-blue tones of the standard German uniform.

IMG_6375A painted figure gets decals applied

Painting 28mm German Infantry

  1. Clean flash from metal models with a sharp knife and glue to metal washer or plastic bases.
  2. Apply filler putty to bases. When dry, scrape off excess with a sharp knife.
  3. Basecoat models and bases with flat black spray primer.
  4. Paint pants, helmets, soft hats, officer greatcoats and gas mask containers with Skavenlight Dinge.
  5. Paint faces and hands with Tallarn Flesh.
  6. Paint packs ans straps with Baneblade Brown.
  7. Paint boots and equipment straps Black.
  8. Paint bases, gun stocks, water bottles and helmet straps with Dark Brown.
  9. Apply Agrax Earthshade wash to webbing and packs.
  10. Dry brush pants, helmets, soft hats and officer greatcoats with Light Grey.
  11. Lightly dry brush bases and gun stocks with Baneblade Brown.
  12. Paint metal gun and water bottle parts with black and finish with a light dry brush of Metallic Silver.
  13. Dry brush gasmask containers with metallic Silver.
  14. Paint eyes with small dots of Off White and Dark Brown. Clean up around eyes with Tallarn Flesh.
  15. Mix 50/50 Tallarn Flesh and Off White and brush highlights on cheekbones, chins, forehead, nose and hands.
  16. Cover bases in white glue and cover in 50/50 mix of fine light green and dark green grass flock.
  17. Glue small pieces of clump foliage to base.
  18. Spray coat completed models with matte finish.

I really like how these models scale with all my previous 28mm miniatures from Artizan Designs and Warlord Games, and my Wermacht forces will fit nicely in the defense of Europe from the tabletop assault of my Allied troops.

IMG_0762

IMG_0767

IMG_0769

IMG_0771

IMG_0773

IMG_0764

IMG_0766

IMG_0768

IMG_0772

IMG_0770

IMG_0765

IMG_0774

IMG_0763

Boardgames of the American Revolution, Part I

DOI

Last month, Quartz published a crowd-sourced online survey of how the rest of the world learns about the American Revolution in school. For most outside the US, the war is variably seen as a sideshow to other 18th-century European conflicts, an extension of the Enlightenment or ignored altogether. Children in the United States itself often leave school and march into adult citizenship with only the broadest mythic stories and American patriotic heroes of the war under their belts.

My interest in the American War of Independence has fluctuated over time since growing up as a kid amid the United States Bicentennial fervor of the mid-1970s. Having been in Brooklyn for almost two decades now, I’ve developed a growing interest in the war as I live and commute daily through the ground fought over during the Battle of Brooklyn and Battle of New York in 1776. Over the past year or two I’ve also been working through a minor obsession with boardgames of the American War of Independence. I’ve played many and collected a few ranging from classics of the early 1970s to modern games varied in scope and mechanics.

Presented here is by no means a complete list of games themed on America’s defining early conflict, but an overview of the ones I’ve played or chosen to add to my inventory of wargames. Style, scope and time commitments vary with these games, offering interested gamers – both new and experienced – an opportunity to play and learn about the American Revolution anew with each tabletop session.

AMRevSPI

The American Revolution 1775-1783 (SPI)

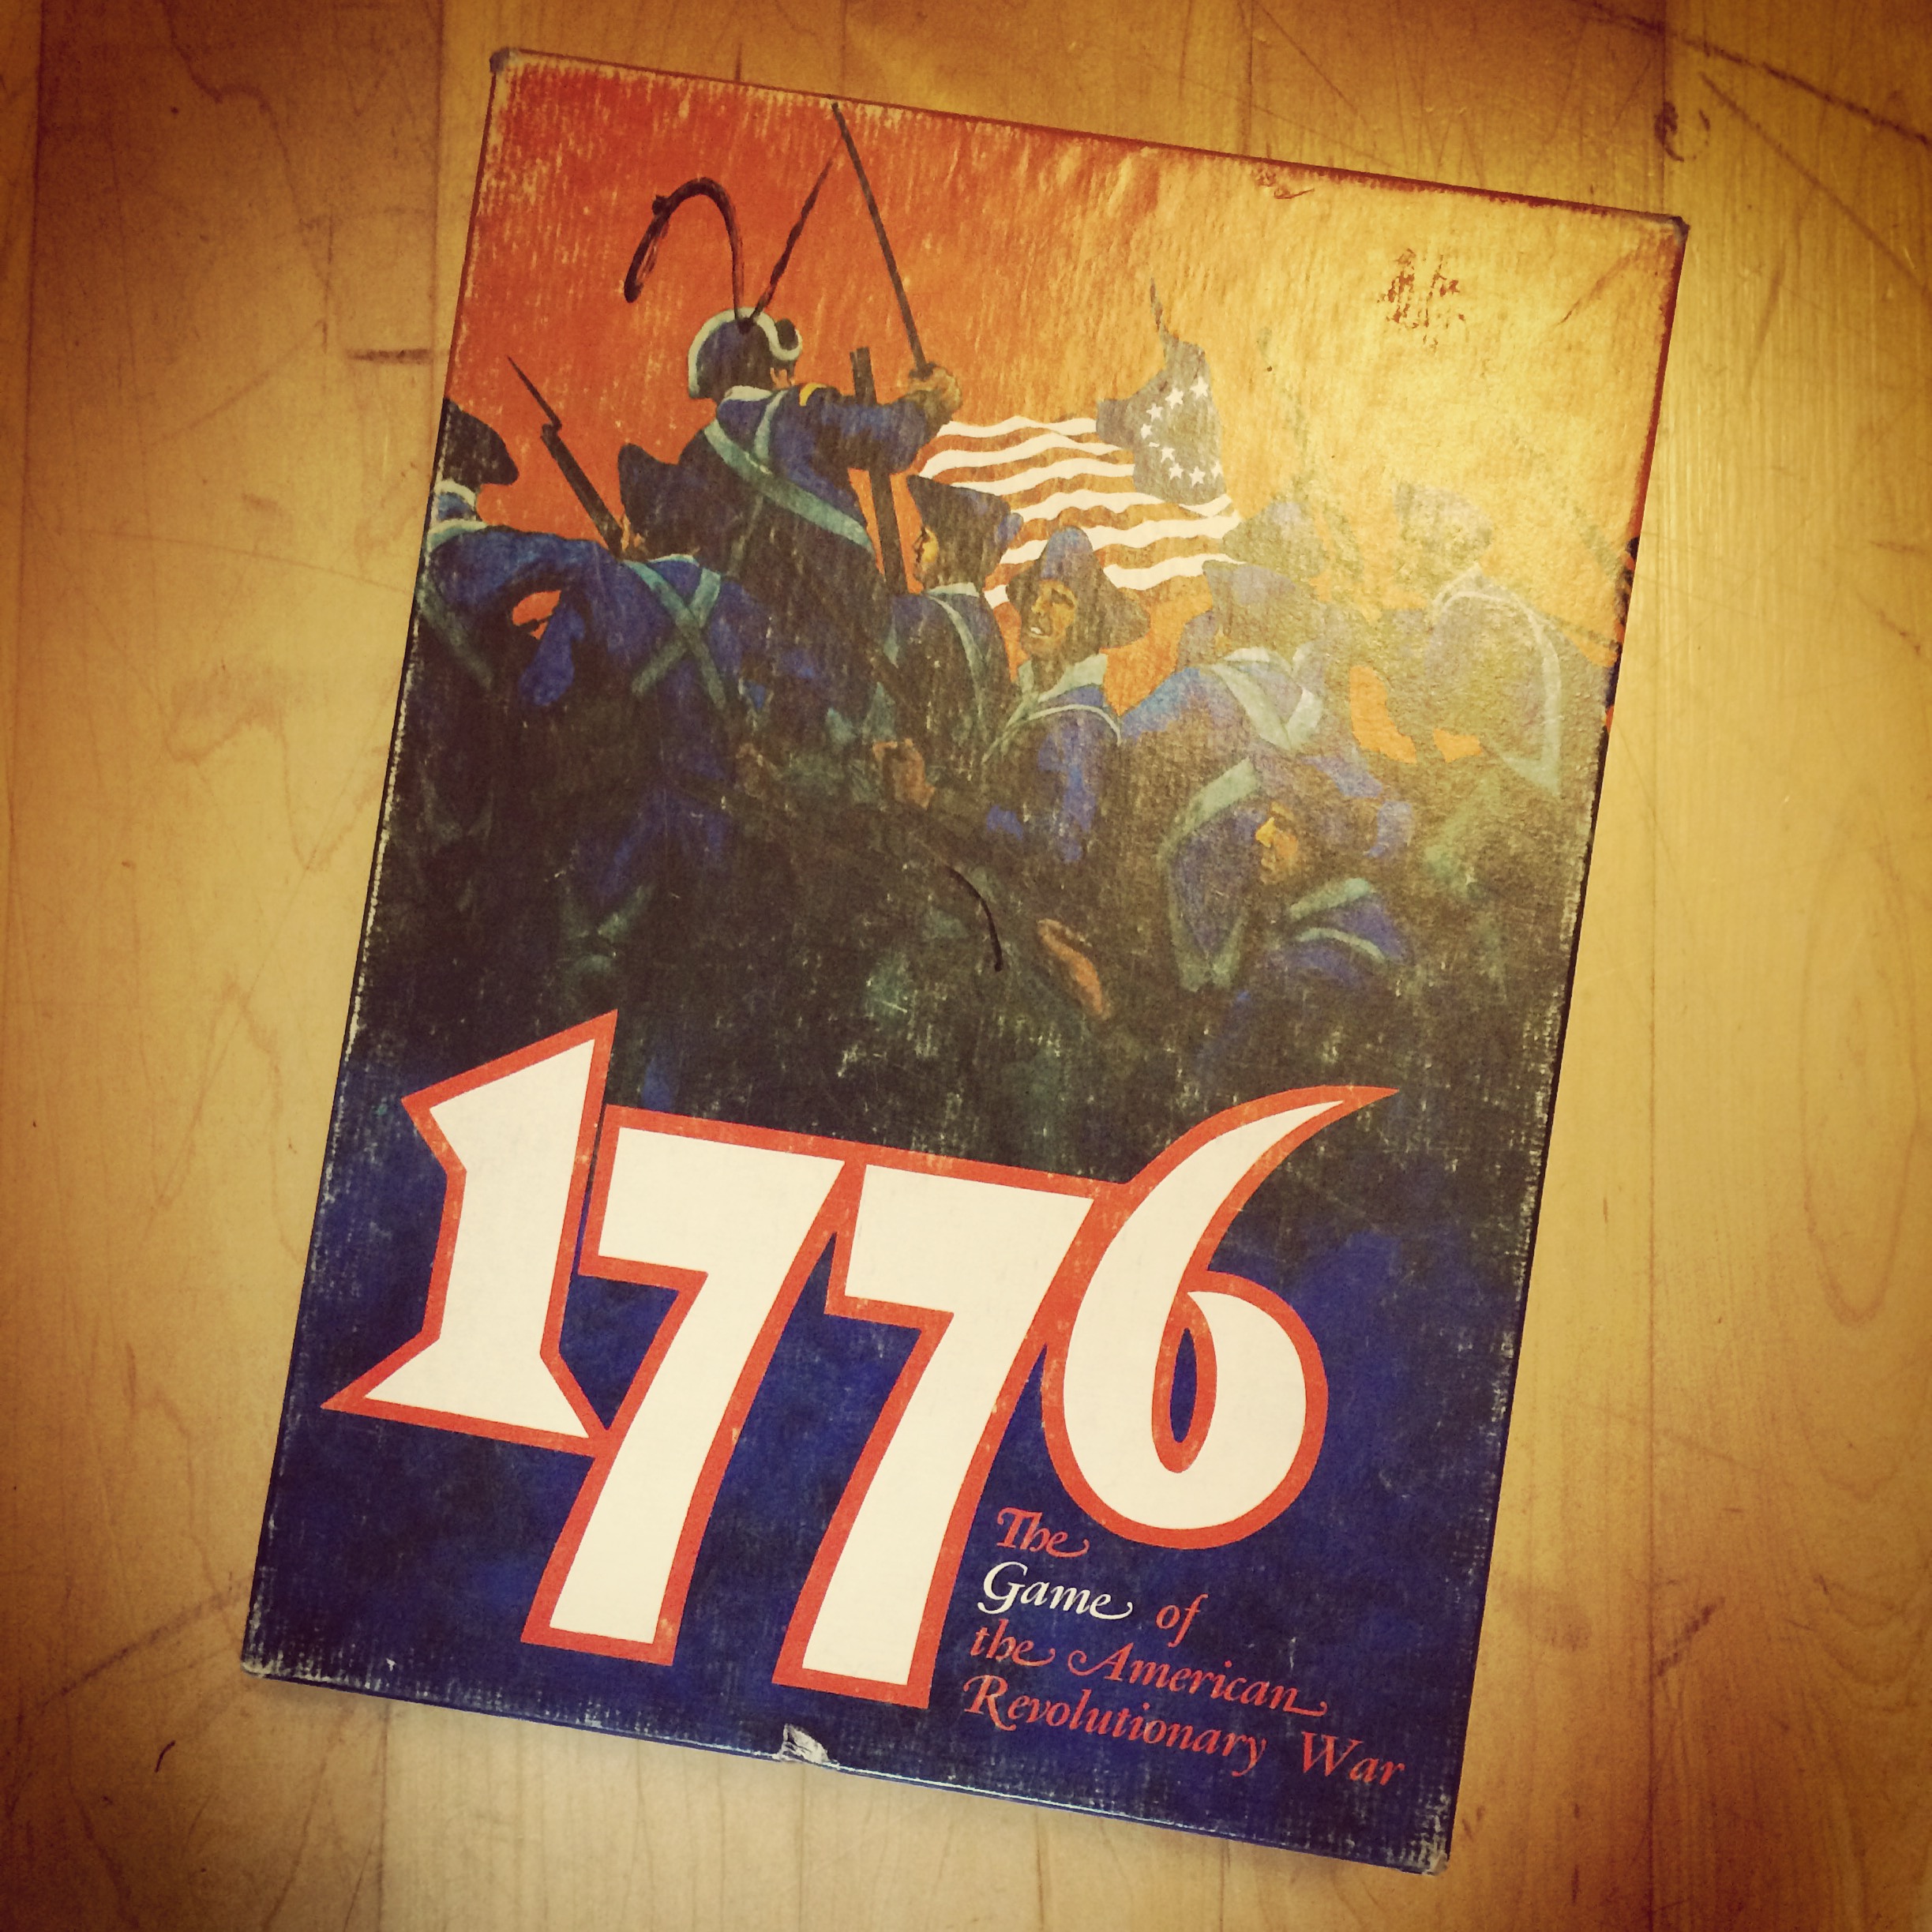
Simulation Publications Inc (SPI) rolled out The American Revolution 1775-1783 in 1972 a few years ahead of the Bicentennial celebration, and launched some revolutionary new aspects to wargaming along with it. Breaking from the tradition of a hex-based wargame map of the time, SPI’s game is laid out in a graphic abstract series of areas and regions with their own victory point values. Rules for the game are slim, and reference charts for turn sequence, movement, winter attrition, combat and reinforcements by turn season and year are all printed right on the map. The overall design, from the slick Helvetica font on the plain white box edition to the map itself has a great retro feel that sets it apart from other games of the early 70s. I’ve played In short, the game feels very ‘modern’ despite being more than forty years old.

AmRevSPIgameSPI’s The American Revolution 1775-1783

Cardboard chits with simple iconic graphics display force strength for the two main sides of the war, and movement is standardized in terrain marked simply as either as wilderness or open. Colonial forces move more effectively in wilderness areas than the British, making it easier for them to evade confrontation with the superior English troops. Staying away from the British until enough Colonial forces can be raised is key to any success for the Revolution.

The arrival of additional British troops into ports is scheduled specifically according to the year and season of the game outlined at the edge of the board, and Colonial forces are raised and deployed through a random die roll levy. The mechanics whereby Colonial Militia and Tory forces deploy I find to be pretty accurately reflective of the regional politics of the era. Tories appear only once when British Regulars enter a region, and Colonial Militia take up arms against the British when they first enter a region they do not control and each time the British lose control. French forces arrive after a ‘major success’ (five or more losses by the British) in combat by the Colonials. All these well-thought deployment mechanisms stand out as big historical differentiators for me with this game.

Combat is resolved through a die roll check on a simple table in a corner of the board which can result in very bloody losses to both sides as they meet in battle. First losses in battle always go to Tories of Militia forces which historically often left battlefields when the going got tough. Sieges are pretty simple with forces defending in forts getting triple their combat strength and attackers outside the fort doubling their value when counter-attacked by the fortified foes. Victory for the British comes by controlling a value of 51 victory points on the board, and the Colonials can win with three ‘major success’ battles. In all its abstract area movement and control, SPI’s game offers a slick game that captures just enough of the nuanced history of the period to more than satisfy.

 IMG_6366

1776 (Avalon Hill)

The other big game to come out before the Bicentennial was Avalon Hill’s 1776 from 1974. With rules running almost three times as long as those in SPI’s game, 1776 is often viewed as the more detailed play experience of the two. Some 400 counters represent infantry, artillery and dragoons for the Continental Army, British Regulars, Colonial and Tory Militia, French Regulars, Indians, and British and French naval units. The large mounted hex maps are filled with detailed terrain with each feature effecting movement and combat in different ways. Other tables for combat and turn sequence are contained on a series of additional reference charts, and tactical cards and scenario sheets round out the components in the hefty box.

IMG_6370Avalon Hill’s 1776

I’ve only recently picked up a copy of 1776 and I’m not certain when I’m going to be able to find an opponent to give this one a proper play. A read through the lengthy rules outline the game from a quick beginner’s experience to specific historic scenarios within the war to a full campaign mode covering the entire war. Advanced rules go deep in simulating the role of supply, forts, entrenchments, naval movement and combat, river movement by bateaux, wintering effects, French entrance to the war and the arrival of additional troops throughout the chosen game. Combat is achieved by a ratio of force size and a die roll modified by factors of supply, defense from forts and trenches and presence of artillery. Control of specific locations within a region is the key factor to the game, creating an interestingly complex dynamic for the raising additional forces as well as a path of victory. Aside from the game itself, the splendid designer notes offer a great general meditation on the trade-offs inherent to historic war simulation balanced with playability. For the gamer really wanting to roll their sleeves up with the intricacies of the American Revolution, 1776 is probably the game.

IMG_6365

Liberty: The American Revolution 1775-83 (Columbia Games)

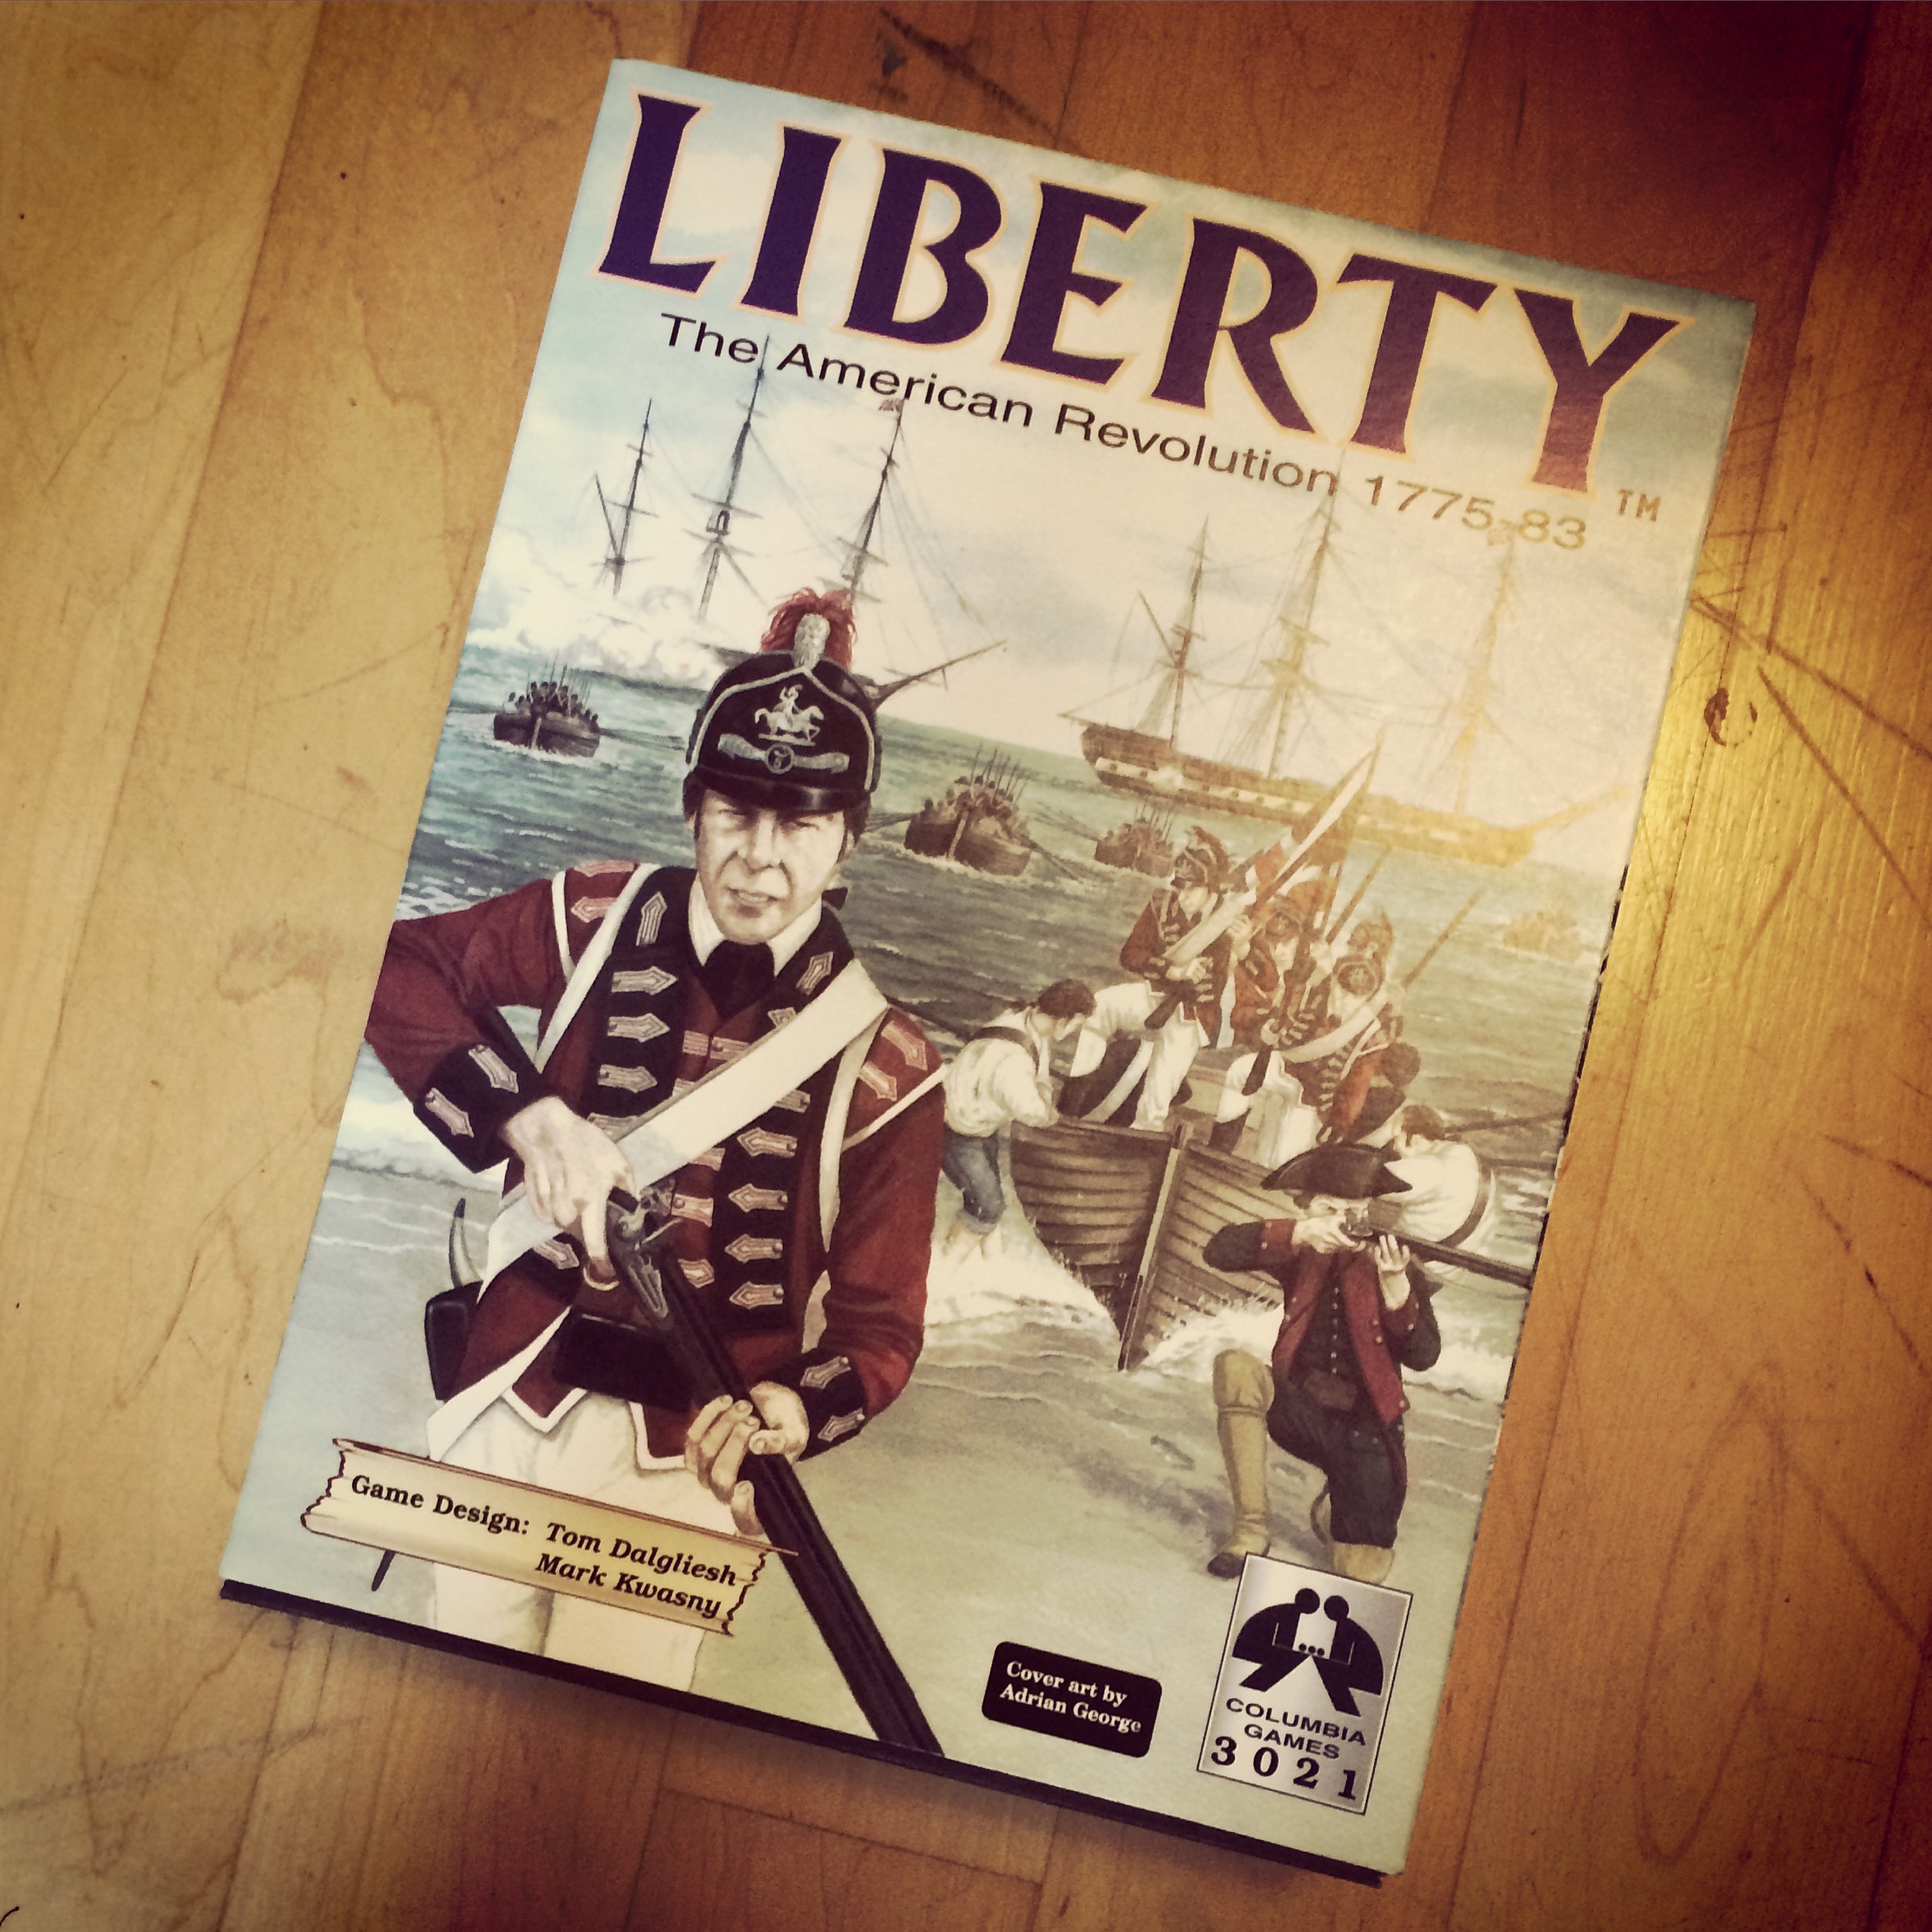
Liberty: The American Revolution 1775-1783, published by Columbia Games in 2003, bridges the gap from traditional wargames to the present with relatively swift play, wooden blocks to represent British, Colonial, French and Native American forces, and simple cards driving force activation and supply during each game turn. The long game map consists of large hexes with forest, swamp and river terrain features which affect movement as well as geographic supply towns and key victory point locations. British and French West Indies ports allow for additional options in naval movement and combat. The game strikes a balance between simple rules and rich re-playability, and my time with the game has seen victories for either side depending on the session.

IMG_6372

Liberty: The American Revolution 1775-83 by Columbia Games

In each year of the game, a hand of five dealt cards activate forces and re-supply existing forces which have taken step losses in previous turns. Actions may either move forces already on the map or bring new units onto the board by selecting from a random pool of blocks. A limited number of Native American blocks are allied with the British player only, and French forces may arrive randomly after the first turn beginning in 1776. Colonial forces arrive in controlled supply areas, British and French forces arrive by sea to available ports and Tory Militia rise from British-controlled supply areas. When opposing forces move into contact, combat is resolved by simple die rolls depending on the quality and strength of the blocks available. Blocks are reduced in strength and then eliminated as ‘prisoners’ which may be exchanged at the end of the turn and returned to each player’s pool of available forces. At the end of combat, forces may have the option to withdraw or stay in the fight. Weather plays a random role in the game, potentially limiting combat during a turn year, and troops may be also eliminated in a wintering phase at the end of turn. Victory is tallied at the end of each hand of cards and year with the British winning with 30 supply points and the Colonials by driving the British to under 12 supply points.

1775box

1775: Rebellion (Academy Games)

I’ve written previously in detail about 2013’s 1775: Rebellion from the Birth of America series from Academy Games, one of my favorite quick-playing boardgames of the American Revolution. The game plays different from most in the period with two to four players able to command the American Continental Army, Patriot Militia, British Army and Loyalist forces in a game driven by card activation and randomized turn order.

IMG_2757

1775: Rebellion from Academy Games

The four main forces plus French, Hessian and Native American allies are all represented by simple colored cubes moving and warring over a gorgeous game board representing the the colonies, territories and Canadian provinces of the northeastern American continent of the late 18th-century. Cards drive the action with movement, period-specific events and personalities, and special color-coded dice resolve combat as forces are either destroyed or flee to return in later turns. Areas flip to British or American control as combat is resolved. When two special Treaty of Paris cards are played, the game ends with victory rewarded to the player holding the most control of the board. If I’m going to play the American Revolution with a relatively inexperienced player or non-gamer, this is my go-to game for the period.

Worthington1776KS

New York 1776 and Trenton 1776 (Worthington Publishing)

In 2014, Worthington Publishing launched their ambitious Campaigns of the American Revolution series with New York 1776 followed by Trenton 1776 in 2015. These strategic block games, funded through popular Kickstarter campaigns I backed, take players through specific stages of the war beginning with the action on Long Island and in and around New York City in the summer and fall of 1776 and continuing the conflict into New Jersey in the winter of 1776 and 1777.

While the games do not directly connect to each other in a grand campaign, each two-hour game is well-scaled to the strategy inherent to each series of battles in the early years of the war. Randomized turn order, variable numbers of turn actions and the block components provide a fog of war mechanic to the game as forces move by themselves or as groups under the command of the many leaders present on each side. Movement is broadly point-to-point on game boards simply illustrated with towns, ports, forts or other key geographic points of control. Combat goes off as forces meet on the map with infantry, artillery, leaders and fortified positions playing into results that can include withdrawals, retreats, fleeing Militia and follow up attacks. Command plays several roles in these games, including being able to move groups of forces and other scenario-specific special rules in battle, deployment and victory conditions.

NY1776gameplayWorthington Publishing’s New York 1776

New York 1776 presents the largest meeting of troops during the American Revolution with the professional British army and navy, along with their hired Hessian allies, looking to halt the uprising of the new American Colonial army and Militia in the early months of the war. Controlling the waterways and supply routes around New York with the British navy plays a big part in the British player’s path to either capturing Washington or controlling New York by game’s end. For the Colonial player, the game is largely one of avoiding the mass of better rated British troops, preventing their control of New York or reducing the superior British army by 20 points.

IMG_6368
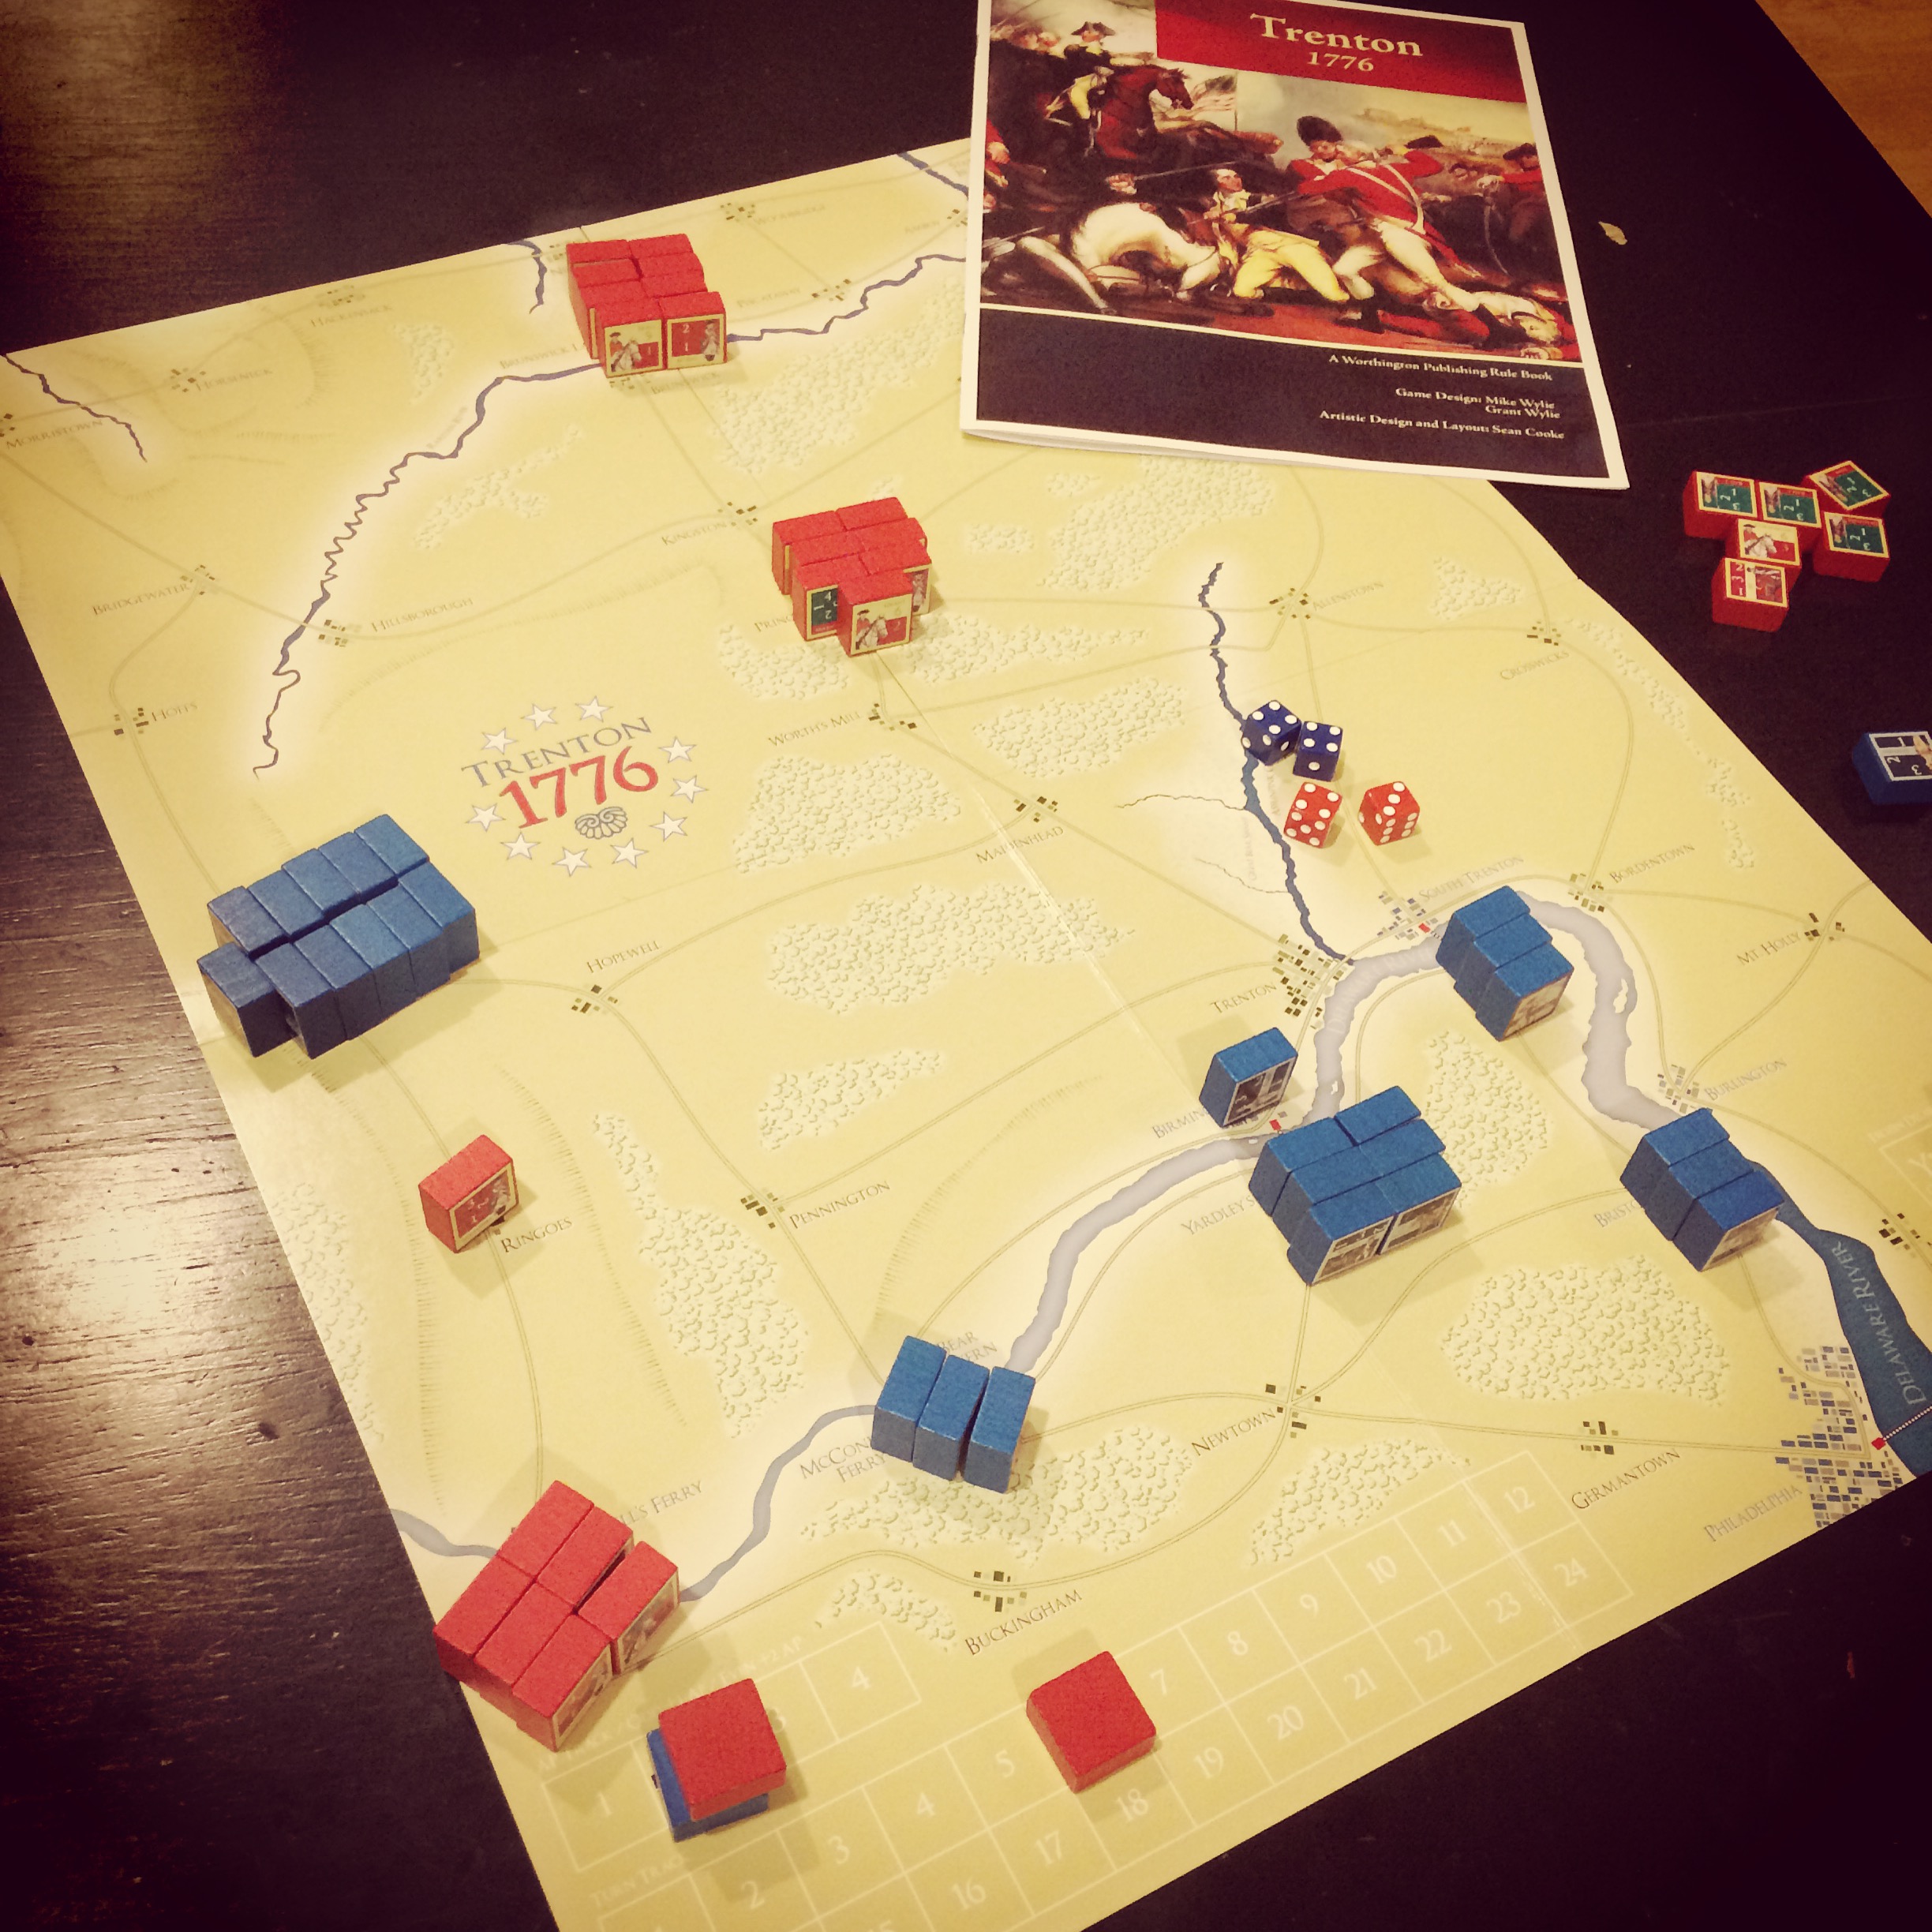
Worthington Publishing’s Trenton 1776

In Trenton 1776, the action moves to smaller scale engagements in New Jersey as the British looked to smash the Colonial army and Militia retreating from their defeat in New York. With Washington in command, he risks bold counterattacks to push the British back out of southern New Jersey or simply moving to safety south of the Delaware. Howe’s pursuing British army must mass its forces against the rebel army at key towns and river crossings and hopefully push to seize Philadelphia as the icy winter settles in. With similar rules but at a smaller scale than New York 1776, multiple plays of Trenton 1776 can really show players how cautious or aggressive decisions can make or break a campaign.

GMTLibertyDeath

Liberty Or Death: The American Insurrection (GMT Games)

I’m really looking forward to the release of Liberty Or Death: The American Resurrection, due out late this year. The sixth game in the counterinsurgency (COIN) series from GMT Games, I’ve had this one on pre-order based on my love for the other COIN games. Playing from solo to four players, Liberty Or Death will present the war as one of insurgent and counterinsurgency forces of American Colonials, British, French and Native Americans warring for control of the North American continent. As in the other COIN games, shifting alliances, varied turn order, separate victory conditions, irregular forces and historically-themed event cards will each play into a game which will greatly expand beyond the typical presentation of the war as one between just two opposing nations. Early reports from game tests and some sneak looks at artwork make this my personally most anticipated game of the year, and I’ll surely be back with a full report in the coming months.

So where to start with the American Revolution?

The 1970s era SPI and Avalon Hill games will appeal the most to experienced strategy players looking to really dig into hours of the broad complexity of some or all the war within a very traditional wargame. On the flipside, the Worthington Publishing games provide short but replayable intros to gaming the period for younger players or those just getting into block games. The Columbia Games take on the war splits the difference by offering up relatively simple mechanics of a card-activated block game representing the entire war over a couple hours of play. The Academy Games game expands play to four players and allied forces in an abstracted area control strategy game that likewise covers the entire war in mix of card and dice action. The forthcoming game from GMT Games will reinvent the conflict anew within the context of four separate interests vying for victory.

Players wishing to play through advanced strategic simulation of 18th-century warfare will be rewarded by time invested in the Avalon Hill and SPI games. The Columbia Games and Worthington Publishing games will also provide a satisfying  combat simulation albeit at a much simplified level. To experience more abstracted combat as well as the interplay of politics, alliances and events within the period of the war, the Academy Games and GMT Games games provide both relatively fast play as well as more of a learning experience about broader aspects of the American Revolution.

Each game above paints the American Revolution large or small, and together they are a fine reflection of the evolving mechanics of wargaming over the past forty years. There are numerous additional games of the American Revolution, some focusing on specific regional campaigns and many others presenting the full war. Games still on my shortlist to try include 2010’s Washington’s War from GMT Games and its 1994 predecessor We The People by Avalon Hill which helped launch the modern trend in card-driven wargaming.

There’s a point of entry for gamers of every type to get in on the War of Independence and relive what Thomas Paine famously called, “the times that try men’s souls.”

I Ain’t Been Shot Mum: Pegasus Bridge and Bénouville June 6, 1944 Scenarios

Horsas

There are thousands of little actions in the history of warfare, and a longtime favorite of myself and other wargamers is the capture of Pegasus Bridge on June 6, 1944. Just minutes past midnight, Operation Deadstick delivered some 180 British soldiers from the 6th Airborne Division onto French soil near two key bridges on the far eastern flank of the Allied invasion during the D-Day invasion throughout that historic day.

DDayOverallMapThe D-Day Allied assault routes with the British 6th Airborne Division drop zone (circled in red)

Landing in the dark in six wooden Horsa gliders with only one casualty and minimal other initial incident, the British soldiers and engineers made quick work of the surprisingly meager defense by about 50 men from the German 716th Infantry Division. With the bridge over the Caen Canal secured and another at the nearby River Orne also captured, the initial mission had been accomplished in quick order.

The mission then shifted to a defensive one for the British at the bridges and nearby Bénouville as the German command ordered a counter attack. Another 200 paratroopers from the British 7th Parachute Battalion landed to join in the occupation but were met by German tanks, mortars and guns. Under German sniper fire at the bridge and with few heavy weapons at their disposal, the British held out in the town amid house-to-house fighting in Bénouville until the close of the first day of the invasion.

Too Fat Lardies, makers of the I Ain’t Been Shot Mum company-level WWII rules, provided scenarios for the actions at Pegasus Bridge and Bénouville in the 2006 Summer Special. Playing the scenarios recently at Metropolitan Wargamers in Brooklyn, NY allowed me to use my recently-completed 15mm bridge model from Najewitz Modellbau and refight one of my favorite little moments in the big history of the war.

The Battle for Pegasus Bridge

Like most IABSM games, the fight at the bridge started with hidden German troops and the British entering the board on blinds. Initial blind placements were randomized through a die roll to reflect the off-board glider landings. Owing to the time just past midnight, spotting of any troops was impossible until units closed with just inches of each other.

IMG_6299Initial set up of the scene at Pegasus Bridge

IMG_6300British charge hard into the German positions

IMG_6301A British fire team splits off to attack the German bunker

Dividing my British force, one platoon rushed into an initial German position, took a few hits in a close assault, fell back but charged back to overwhelm the Germans. The remainder of my force (including my engineers) moved slowly, clipped a path through barbed wire and made its way toward the concrete bunker. A brief firefight at the bunker sent the German defenders fleeing toward the canal, the engineers placed their explosives and the rest of the British made way for the bridge.

IMG_6302German troops flee their bunker as the British cut the wire and push onward

IMG_6303British engineers set charges at the bunker as German machine guns open fire across the canal

As the German bunker went up in and explosion of flame, German machine guns revealed themselves on the opposite side of the bridge. Two sniper sentries also appeared and began harassing the advancing British with fire. To clear the way, a British officer took a heroic run at one sniper, capturing the German where he sat.

IMG_6305The bunker burns, the British head over the bridge but take shots from German snipers

IMG_6304A thin line of Germans look to hold off the advancing British

IMG_6306With the Germans in retreat, the British take Pegasus Bridge

With the bunker aflame, the British marching over the Bridge and the thin German defense starting to run, the British had again made quick work of their mission. The bridge was held, but it was on to Bénouville and the inevitable German counterattack.

The Battle for Bénouville

At Bénouville British blinds moved on to the table for six turns, stalling briefly in turns four and five. Taking up occupying positions in the town, the mission was to simply hold against the coming German counterattack. As German blinds began entering the field in the woods and open areas outside the town, the initial British infantry were supported by slow-arriving reinforcements to the rear.

IMG_6307Initial set up of the scene at Bénouville from the British end of the table

IMG_6308British blinds enter and occupy the town

Attacking from a safe position within two buildings, the British over zealously abandoned their defensive mission and attacked to reveal the closing German blinds. In a close assault, the British were thrown back as reinforcing German heavy machine guns and mobile guns moved in. Taking fire from the German guns at close range, the remaining British defenders in the nearest house answered with a side-armored shot from a PIAT which left one German gun burning but the Germans still on the advance.

IMG_6309German troops advance on the town supported by mobile guns

IMG_6310Germans swarm out of the woods toward the British defenders

IMG_6311A British PIAT takes out a German gun

The licky destruction of one German gun was about the last thing to go right for the British. Additional reinforcements were tardy in their arrival as Germans continued to pour into the town. As the Germans set up positions amid the town’s houses, two towed field guns also rumbled into the town. Additional close combat erupted between the buildings with the British continuing to take heavy casualties and losing more ground.

IMG_6312German artillery is towed into the town

As British reserves continued to fail in their arrival, the Germans pressed on. After initially holding four safe positions in the buildings of Bénouville, British positions continued to evaporate and men fell back under continued German combined arms fire and close assaults. By that time of the game, it was clear the British were not going to hold the town and the German counterattack was clearly on its way to victory.

Our final score in the played action at Pegasus Bridge and Bénouville was 1-and-1. The early success at the bridge had not been capitalized upon by the British at Bénouville, upsetting the historic balance from 1944 but still making for a great afternoon of gaming a favorite scenario for the first time.

Battleground: Iron Wedge 1943 Scenario

KurskT34sOur latest Battleground scenario at Metropolitan Wargamers in Brooklyn, NY took us back to one of our club’s sand tables and the area northwest of Ulianovo during Operation Kutuzov in July 1943. The Soviet 11th Guards Army and 1st and 5th Tank Corps led the counteroffensive action against a thin but dug in German force, resulting in some of the heaviest losses to both sides during Operation Citadel and the Battle of Kursk.

IMG_6214

Using 20mm miniatures and the scenario from the Red Guards At Kursk book from the Skirmish Campaigns series, the game sets up a 12 turn limit with the Soviet objective of pushing tanks through the German defenders. The German side is tasked with holding off the largely armored Soviet force of T-34s and T-70s with infantry and two Pak 38 anti-tank guns.

IMG_6239Battlefield layout with German infantry and anti-tank guns in dug in positions

The bleak, open table was set up with Germans in foxholes spread over half the field. The two anti-tank gun positions sat at the left rear of the German position with a mine field laid to channel the Soviets toward the river at the other side of the battlefield. Sparse wooded areas and small hill to the Soviet left formed the areas of safer ground for the Red Army’s tanks.

IMG_6233The first T-34s take position at the top of the hill

IMG_6234The second T-34s and tank riders move to the middle

The Soviets quickly ate up two of the game’s turns moving their first T-34 platoon forward toward the hilltop. By turns three and four, the second T-34 platoon entered at the right and the T-70s moved to the center with both groups of tanks carrying tank-riding infantry.

IMG_6231The center German Pak-38 position

IMG_6236T-34s race to engage German foxholes at close range in the center

With the German anti-tank guns at too long range to effective hit the Soviet tanks, the Red Army’s armor rolled aggressively to engage the German infantry at close range. Tank riders took some initial hits but the tanks pushed in to fire HE rounds into the German foxholes, quickly causing several casualties. German infantry answered back with several soldiers effectively setting off close assaults with satchel charges being placed and several tank riding Soviets being killed.

IMG_6235Close engagements between T-34s and German infantry in foxholes

IMG_6232The second Pak-38 on the German left

By mid-game, one T-34 at the Soviet left had been left in flames and a second at the center had a track blown out and was permanently immobilized. The Pak-38s continued to fire rounds at long range with one more T-34 crew bailed out in a delay while they fixed their tank for a number of turns. In the meantime, the German foxholes were emptied as surviving Soviet tanks and infantry poured fire into the positions.

IMG_6237T-34s are destroyed and immobilized as they push forward

IMG_6240T-70s provide cover in the center as surviving T-34s move to the river

As the T-34s closed into the German side of the field, one of the anti-tank positions was completely destroyed while another had their crew eliminated. With the Germans scrambling to man their surviving gun, the three functioning T-34s raced to the river at the German right while the light T-70s cleared out resistance in the remaining center German defenses. With only a few crossing checks at the river, the Soviets were assured a victory as they continued to rattle to the German edge of the field and on to a victory by alluding the last German defenders.

With only a sparse historic defense, the Germans performed remarkably well in our replay of the scenario. The German infantry had a tall order holding off the rumble of Soviet tanks but the Red Army’s iron assuredly rammed a wedge through the bleak sandy landscape and rolled on to support the further counterattack.

28mm: M4A3 Sherman By Rubicon Models

M4A3ShermanPicThree

I’ve been quickly fitting out my 28m World War II infantry over the past few months with models from Artizan Designs, Warlord Miniatures and Black Tree Design. With scores of figures on the table, I thought it was high time to add some hefty support to the mix. So, at my recent journey to the excellent NJ Con I picked up a copy of the Rubicon Models M4A3 Sherman tank

55mm-M4A3_no_outline_cs4

Retailing for under $40 USD, the 1/56 scale Rubicon Sherman comes on three sprues of well cast plastic. The very detailed instructions allow for the construction of three versions of the tank with 75mm, 76mm or 105mm guns and multiple turret variations. As this was my first at this scale, I opted for the most common 75mm gun, and the assembly allowed for loose gun for elevation at multiple angles. The interlocking turret also enabled easy rotation as did the top machine gun when left unglued but snuggly fitted into the turret. No stowage parts were included, but since this was my first model, I didn’t mind keeping it a relatively clean, right off the assembly line version of the workhorse Sherman of WWII.

IMG_6250My go-to basecoat for my US wargaming miniatures

After a quick assembly, my Sherman was hit in a basecoat in the US olive drab color from the Plastic Soldier Company. I’ve gotten a ton of mileage out of this product as a foundation for 15mm Flames of War models in the past, and it worked equally as well at this larger scale. Following the base spray, the treads got a black and then metallic drybrush. Seams in the hull were washed with a black-brown, and the hull received layers of dry-brushed rusty metallics and layers of varying brown mud. The included decals were easily applied and then washed and muddied up before the whole model was dull-coated in a final protective spray.

The resulting M4A3 Sherman armed with a 75mm gun is shown below in detail from a few angles and is ready to operate in support of my Allied models in the months to come.

IMG_6247

IMG_6246

IMG_6249

IMG_6248

Battleground: Uncle Red 1944 Scenario

UtahBeach44UncleRed

The action at the “Uncle Red” sector of Utah Beach on D-Day June 6, 1944 is a favorite at Metropolitan Wargamers in Brooklyn, NY. Using one of the club’s sand tables, we have previously run the scenario for Flames of War in 15mm, and this past week we had a go with a game in 20mm using the Battleground skirmish rules.

utahmap2Map of US 4th Infantry Division at Utah Beach June 6, 1944 (“Uncle Red” circled)

The US 4th Infantry Division’s landing was less murderous than the casualties experienced by the Allies at Omaha Beach, but the German 709th Infantry Division’s defense was still substantial. German fortifications eventually fell to US assaults by both infantry and timely tank support arriving successfully on the beach.

IMG_6037 Skirmish Campaigns  “Normandy ’44 – First Hours” scenario book

We’ve been enjoying World War II scenarios at the skirmish level in both 28mm and 20mm, allowing for a more detailed feel to our games taken from the well-researched and detailed Skirmish Campaign books, including the Normandy ’44 – First Hours book.

IMG_6176Table set up for the “Uncle Red” scenario at Utah Beach

The table’s layout featured a heavily-defended beachhead with German machine guns firing from three coastal bunkers, lines of barbed wire, mines and trenches carved into the sand. The short, eight-turn scenario presents the Americans with the objective of taking the three bunkers at the seawall plus one at the rear of the table. The Germans must simply hold off the US invaders from seizing their objectives.

IMG_6179The US 4th Infantry Division arrives in Normandy

IMG_6178US soldiers hit the beach

US arrivals began with one boat of infantry arriving in each of the first two turns. The Americans used both of their actions in each turn to push forward on the beach with an eye on assaulting the bunkers at the German center and left.

IMG_6177American GIs push forward under German machine gun fire

IMG_6180The initial US landings take heavy casualties from German bunkers at Utah Beach

Under no cover on the open beach, the US soldiers took heavy crossfire from German machine guns in each of the three beach bunkers and one squad of infantry tucked behind barbed wire in trenches. The first two turns were deadly. One American squad were reduced to half strength by the time they pushed toward a gap in the minefields and on to their first bunker objective. Combined fire from the US poured into the bunker, cutting the German machine gun’s crew to a barely functioning unit as the Americans swarmed forward.

IMG_6188A brave American close assault leaves the first German bunker in flames

By turn three, the Germans in the trenches had shifted left to cover the oncoming Americans just breaching the seawall. In a close frontal assault the first American squad managed to lob a grenade into the German bunker, incinerating the remaining machine gun crew inside. With one objective one, the GIs set their sites on the bunker at the rear of the table beyond trenches, barbed wire and weakened German forces.

IMG_6194American armored support arrives

IMG_6193US engineers light up a German bunker with a flamethrower

The US Sherman and final boat of engineers arrived in turn four and immediately made way for the right side of the German lines. Exploiting a gap in the wire, the fresh squad made quick work of the bunker on the German right with a blast from a flamethrower in turn six. German infantry at the center trench were cut up through combined HE rounds from the Sherman on the beach and close fire from the encroaching American squad.

IMG_6190US troops get bogged down under German grenades and gunfire

Back at the German left, the initial US success became hung up in a tangle of trenches and barbed wire just beyond the burning bunker. German survivors at the second row of trenches tossed grenades and opened fire on US troops, and the Americans answered back likewise. In the bloody close action, the Germans offered just enough delaying actions while taking heavy casualties. By the time the Germans began to break in turn seven, the American forces were in no position to seize their final two objectives by the game’s end. Despite the aggressive American fight, the beach was held by the Germans.

Having played the Uncle Red scenario now several times using Flames of War rules in 15mm, we really liked the nuance of play at the skirmish level in 20mm. At the larger scale, individual losses and heroic actions seem to mean more and can swing the game from victory to defeat in a heartbeat on the sandy tabletop beach of Normandy.

Mad Max In Miniature

MadMaxOriginal Just as my early-1980s adolescent brain was feasting on a steady diet of Dungeons & Dragons, comic books and all things Star Wars, Mad Max raced out of the Australian wastelands and into my world. I caught The Road Warrior at a local theater, only to realize there was an earlier film which I tracked down on video cassette. In the years to come, the Mad Max movies and their sequels tucked in nicely with my other adventure film mythologies. The Conan movies held the sword-and-sandals spot, Star Wars filled the sci-fi niche and Indiana Jones was the retro heroic adventure serial.

It was the the Mad Max films which brought the genres together in a barbaric, sci-fi tale led by a charismatic hero who always seemed to be losing right up until the final moments of the film when you realized he’d just won. The Mad Max movies also held a certain raw immediacy to me, especially in the final dangerous decade of the Cold War where a Road Warrior-esque post-apocalyptic future seemed like a possibility. Thirty years after the third film, Mad Max Beyond Thunderdome, I (thankfully) am not surviving in a souped up car on a murderous desert highway, but I did get another new Mad Max film that thrilled my inner teenager while satisfying my now more adult brain with story and message.

I’m also thankful for being a part of Metropolitan Wargamers which is filled with passionate, creative gamers who put together stunning games like the Road Warrior miniatures event this past weekend at the club. IMG_6151 The game was based largely on a modified set of rules available at the Third Point of Singularity website which have been popular during late night games at some conventions the past year or so. The basics of the rules were maintained with simple sticks for movement, and combat and damage results resolved with D20s and D6s cross-referencing tables. The tabletop itself  used an extra large canvas desert mat, rocky outcroppings and some custom blacktop roads made from roofing material. Dust, smoke and fire markers all come in handy as the carnage builds rapidly. The pics below give a pretty good feel for what the game looks like as the cars race and battle across the table. IMG_6156 IMG_6150 IMG_6162 IMG_6160 IMG_6161 The really wonderful aspect of the game is the cars, made for the most part from Hot Wheels and Matchbox toy vehicles. Cars are tricked-out using bits left over from other military models plus a lot of special 20mm parts and figures made specifically by Stan Johnson Miniatures for post-apocalyptic gamers. Each of the unique cars gets its own stats card and name, as shown in some of the examples below. IMG_6159 IMG_6153 IMG_6152 IMG_6154 IMG_6155 IMG_6158 IMG_6157 With a couple dozen cars, trucks and vans, bunches of good guys and bad guys, and a raucously absurd game, there’s going to be a lot of Mad Max-style roadside carnage in the weeks to come in Brooklyn.

Battleground: Brecourt Manor 1944 Scenario

brecourt1944

This year’s 71st anniversary of the Allied invasion of Normandy on June 6, 1944 didn’t get the same attention as last year’s full weekend of D-Day gaming at Metropolitan Wargamers in Brooklyn, NY. Even so, a few of us did come together for a quick run through a gamer favorite small-scale battle at Brecourt Manor.

101stABDDaydropsDrop zones of the US 101st Airborne on June 6, 1944 and the area around Brecourt Manor (circled in red)

Made famous in more recent years in the hit HBO series Band Of Brothers, the action at Brecourt Manor by a couple dozen men from the US 101st Airborne has long been a favorite for military historians and a textbook example of a small-scale assault on a heavily defended position. With four 105mm howitzers firing on Utah Beach, the German gunners were defended in a series of shallow trenches by several MG42 heavy machine guns and a number of infantry. Through surprise and quick movement through the trenches, the US Airborne quickly took the position and disabled the German guns.

IMG_6037

Skirmish Campaigns  “Normandy ’44 – First Hours” scenario book

For our replay of Brecourt Manor, we turned to the classic Normandy ’44 – First Hours scenario book from Skirmish Campaigns. The Skirmish Campaigns series of books offers well-researched and detailed campaign scenarios filled with orders of battle, terrain layout maps and deeply descriptive narrative of how actual engagements unfolded during World War II. Adaptable to a number of rules systems, the scenario as outlined in the book scaled nicely to our game. Using most of my recently painted 28mm German and US troops and classic Battleground WWII skirmish rules, we were set to replay Brecourt Manor.

IMG_6025The 101st Airborne plot their assault on Brecourt Manor

Two players split their command as the US Airborne and set their battle plans before my Germans deployed in the trench system. Beginning German positions were defined by four gun emplacements each crewed by a team of five rifle-armed gunners and an officer. I also placed three MG42s at different points in the trench lines and one patrolling battery command squad of four riflemen and two officers deployed at the western end of the position.

IMG_6027Germans sit at the ready in their positions at Brecourt Manor

The Americans moved first, slowly deploying a .30 cal machine gun crew from behind the farmhouse at the northwest corner of the table. Directly to the north, a bazooka team crept into position behind a copse of trees with two fire teams behind the nearby hedgerows in support. To the west and toward the south, the other two US fire teams set up and moved toward the German lines, also under cover of the thick bocage.

IMG_6026105mm gun crews stand at the ready

Spotting the American bazooka team to the north, I quickly redeployed one of my machine guns to hold back the advance on that side of my position. Not waiting to get their machine gun in place, the Americans advanced on two sides and took heavy fire to their fire teams leaving them pinned in place. Hoping to pin down the Germans at the strongly defended north and western edges of the position, the US machine gun attempted to lay down a stream of fire but jammed is the trigger was pulled on its first shot of the day.

IMG_6029A 105mm gun position is destroyed by an American bazooka

Even under fire, the US bazooka team managed to get into place and a shot destroyed the northernmost howitzer, killing one German gunner and suppressing most of the rest of the gun team. On the western side, another of my redeployed machine guns was instantly spotted and raked with American gunfire and all but knocked out of the rest of the game. With only one MG42 left in the western trench line, a US Airborne team moved with over confidence toward making their first assault. The foolhardy bravery of the Americans was met with combined arms fire from my remaining MG42, rifles at the gun position and shots from the command squad. When the smoke cleared, one American fire team was left with just one man standing and the other had been briefly pinned.

IMG_6028   US Airborne units ready for a close assault at Brecourt Manor

By turn three, the American machine gunners cleared their jam and were finally able to lay down strafing fire along the entire western edge of the German trenches. With bullets whizzing overhead, the Germans were forced to the ground and the remaining Airborne came over the hedge and made way for the German howitzer. The Airborne soldiers poured into the German gun position and hand-to-hand combat ensued leaving two Germans and two Americans dead in the melee. With no clear victory in the first close combat of the day, the Americans bounced out of the German position, pulling back toward the hedges from where they had just come.

Back to the north, the American bazooka team had been cut to just one man who had retreated under heavy fire. One other US rifle team at the north had been eliminated, and the last had been whittled to just two injured men. With just a few rattled troops strung along two sides of the field, the US Airborne retreated and left three guns ready to continue raining shells on the beaches in the distance.

What the scenario showed us, as it did on the actual day some 71 years ago, was the importance the US machine gunners in a tight assault like the one at Brecourt Manor. Met with a larger, more well-defended German force, the American machine guns were the equalizer in real life. Had the American soldiers on our tabletop focused their assault after pinning the German defenders, our game this month may very well have gone the way of history with another victory in the hedgerows of Normandy.

28mm: US Airborne Pathfinders And Characters By Artizan Designs

USABcharacters

Among the US 101st Airborne Division, the volunteer pathfinders were a particularly hearty group. Parachuting into France just after midnight on June 6, 1944, the pathfinders were among the first allied troops to set foot on French soil as the D-Day invasion commenced. Tasked with marking the drop zones, the mission of the pathfinders was hampered by poor weather, heavy German defenses, flooded fields and faulty equipment. Despite the challenges hampering the pathfinders on the ground, the Allied air invasion of more than 13,000 men behind the beaches of Normandy proved key to the day’s success.

ADlogo

In continuing to round out my 28mm US Airborne collection, I went back to Artizan Designs for their pathfinder models as well as some additional characters. Two of the pathfinders feature the signature mohawk hairstyles and I added “war paint” markings on their faces as seen in some historic photographs. The other character models will serve as officers since their poses display confidence in command.

AB Paint Scheme

Painting 28mm US Airborne

  1. Clean flash from metal models with a sharp knife and glue to metal washer or plastic bases.
  2. Apply filler putty to bases. When dry, scrape off excess with a sharp knife.
  3. Base coat models and bases with flat black spray primer.
  4. Paint uniforms and bandages on helmets with Tallarn Sand.
  5. Paint helmets and knee and elbow patches with Waaagh! Flesh.
  6. Paint faces and hands with Tallarn Flesh.
  7. Paint webbing and packs with Baneblade Brown.
  8. Paint bases, boots, gun stocks and helmet straps with Dark Brown.
  9. Apply Agrax Earthshade wash to uniforms, helmet netting, webbing and packs.
  10. Mix 50/50 Baneblade Brown and Off White and lightly dry brush packs, webbing and socks.
  11. Lightly dry brush bases, gun stocks, helmet netting, holsters and elbow and shoulder patches with Baneblade Brown.
  12. Paint metal gun parts with black and finish with a light dry brush of metallic silver.
  13. Paint eyes with small dots of Off White and Dark Brown. Clean up around eyes with Tallarn Flesh.
  14. Mix 50/50 Tallarn Flesh and Off White and brush highlights on cheekbones, chins, forehead, nose and hands.
  15. Cover bases in white glue and cover in 50/50 mix of fine light green and dark green grass flock.
  16. Glue small pieces of clump foliage to base.

To finish my models I’ll be adding decals to shoulders and helmets from Company B, followed by a coat of Solvaset decal fixative from Walthers and a spray coat with matte finish. After that, these guys will relive the heroics of D-Day on a tabletop soon.

IMG_0745

IMG_0747

IMG_0748

IMG_0746

IMG_0750

IMG_0749