I Ain’t Been Shot Mum: West Of The Oktiabrski State Farm July 12, 1943 Scenario

t34Oktiabrski
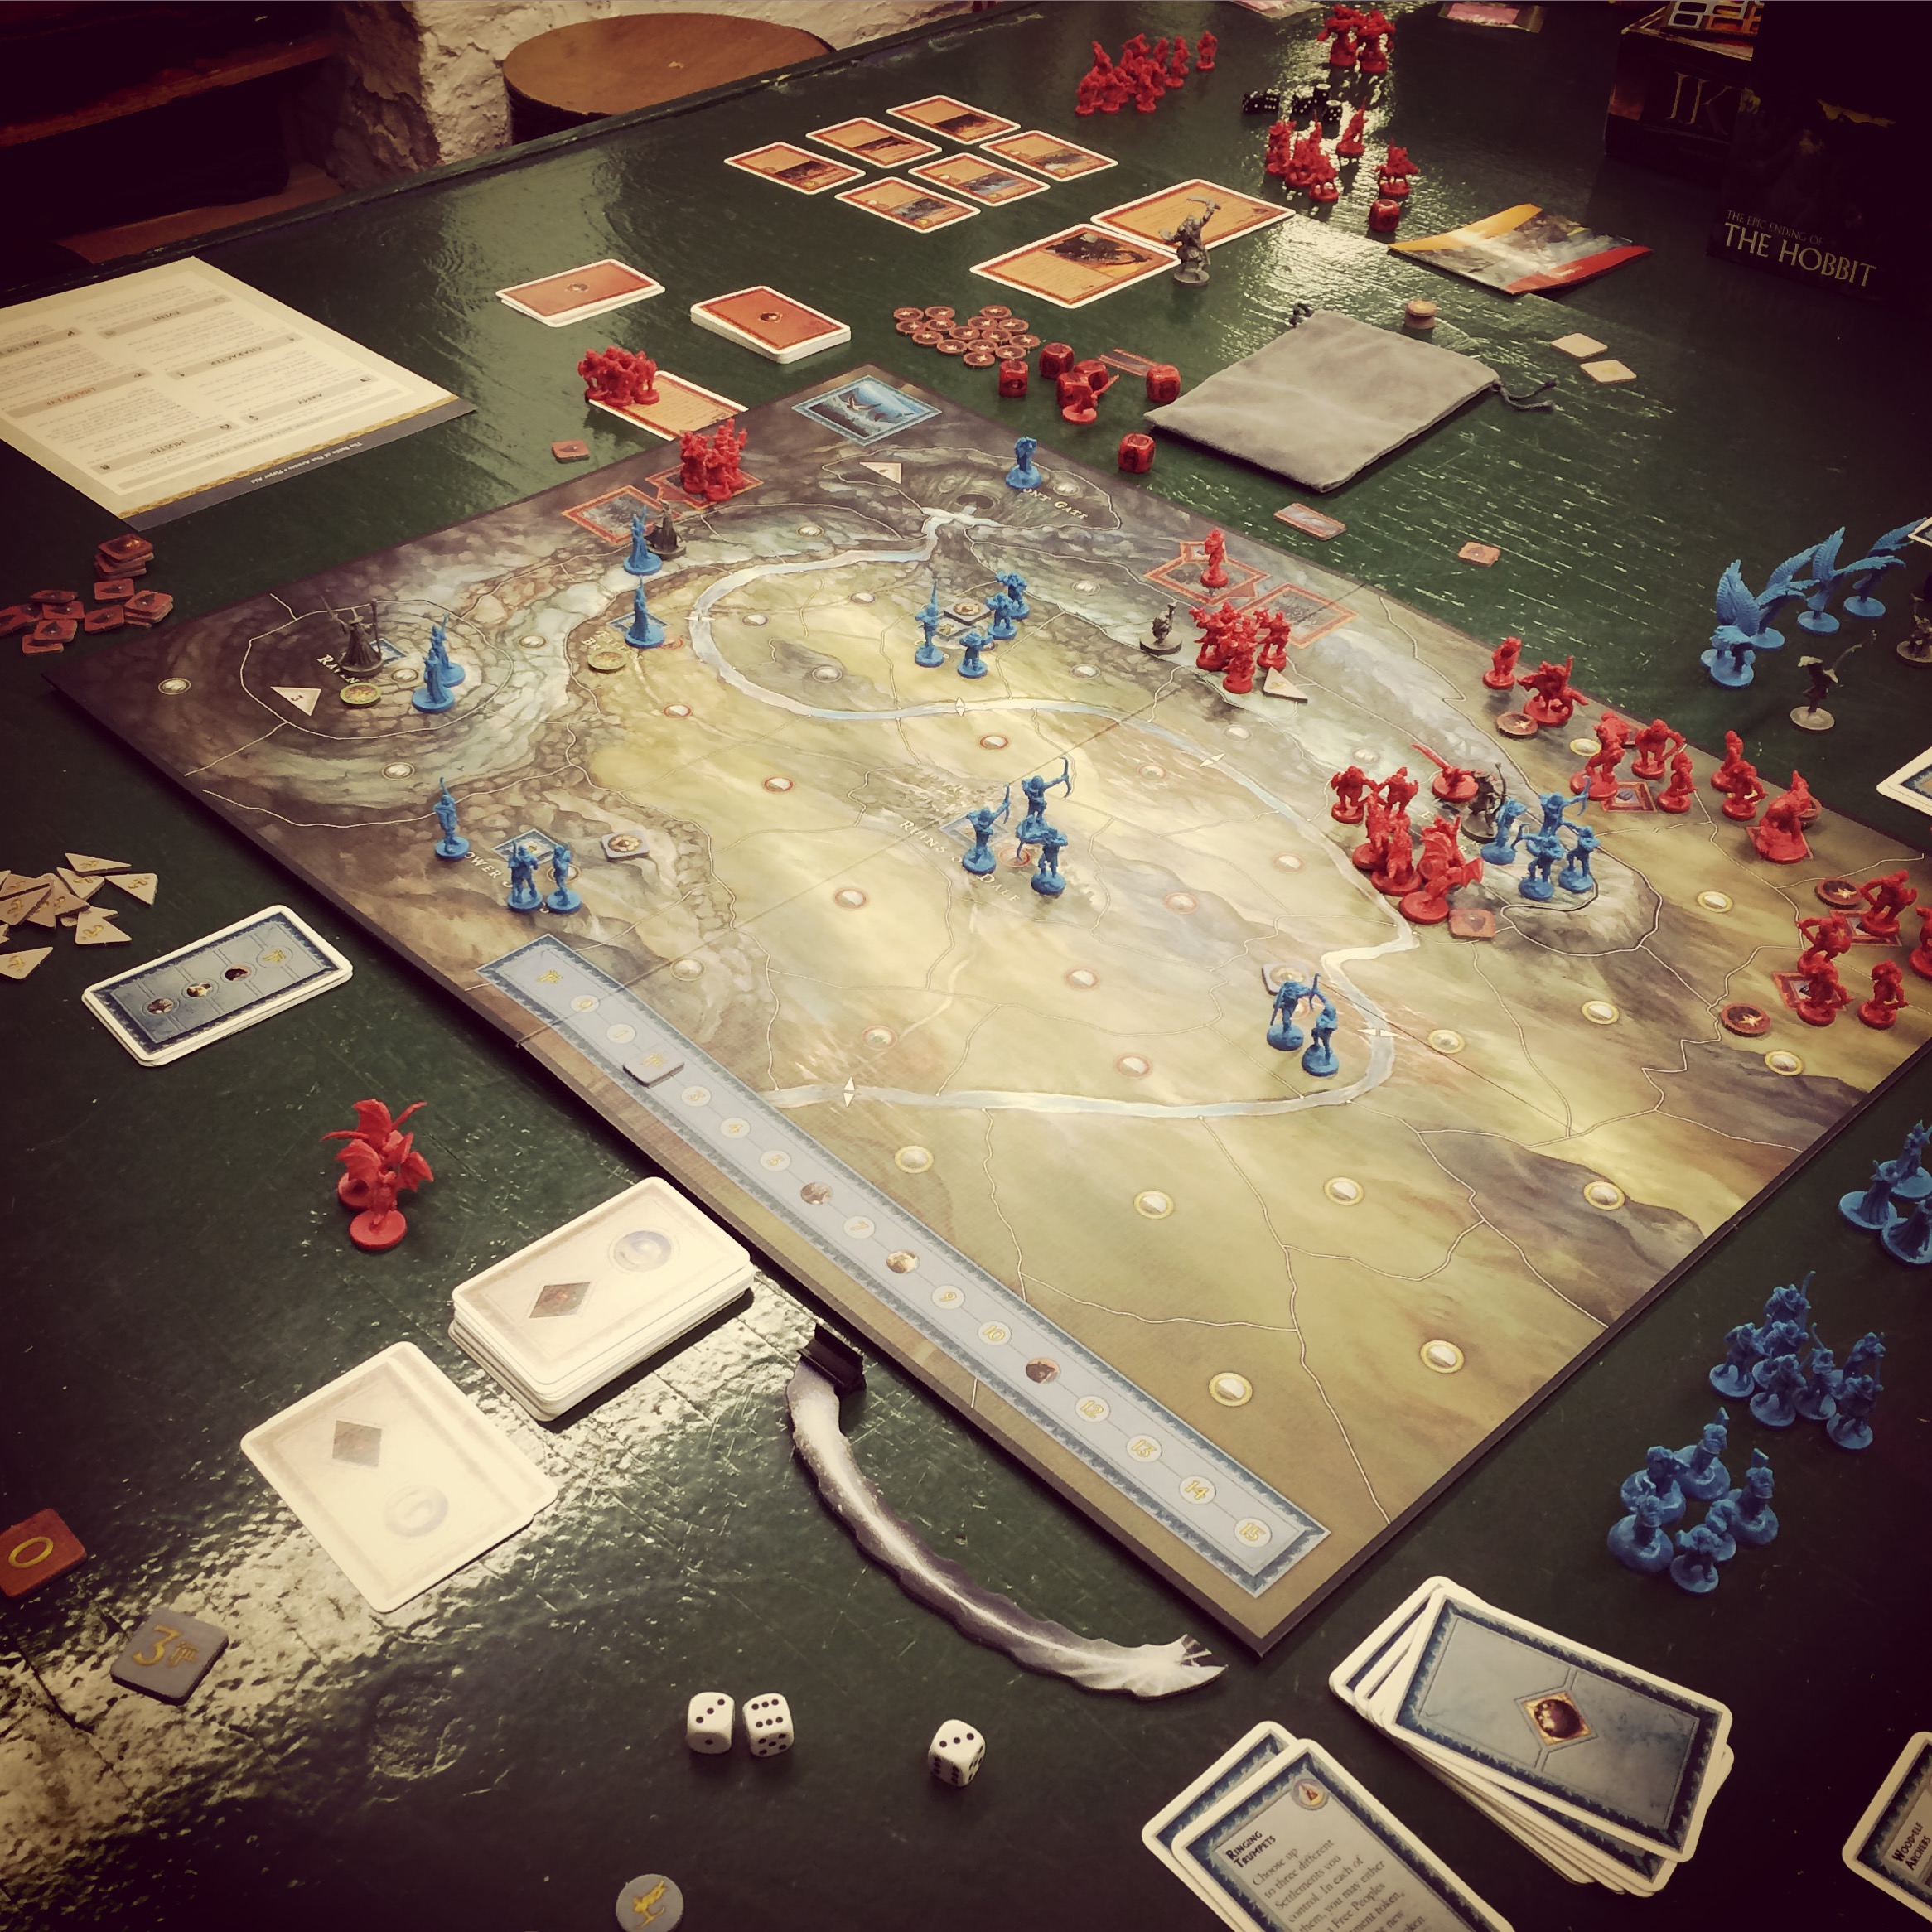
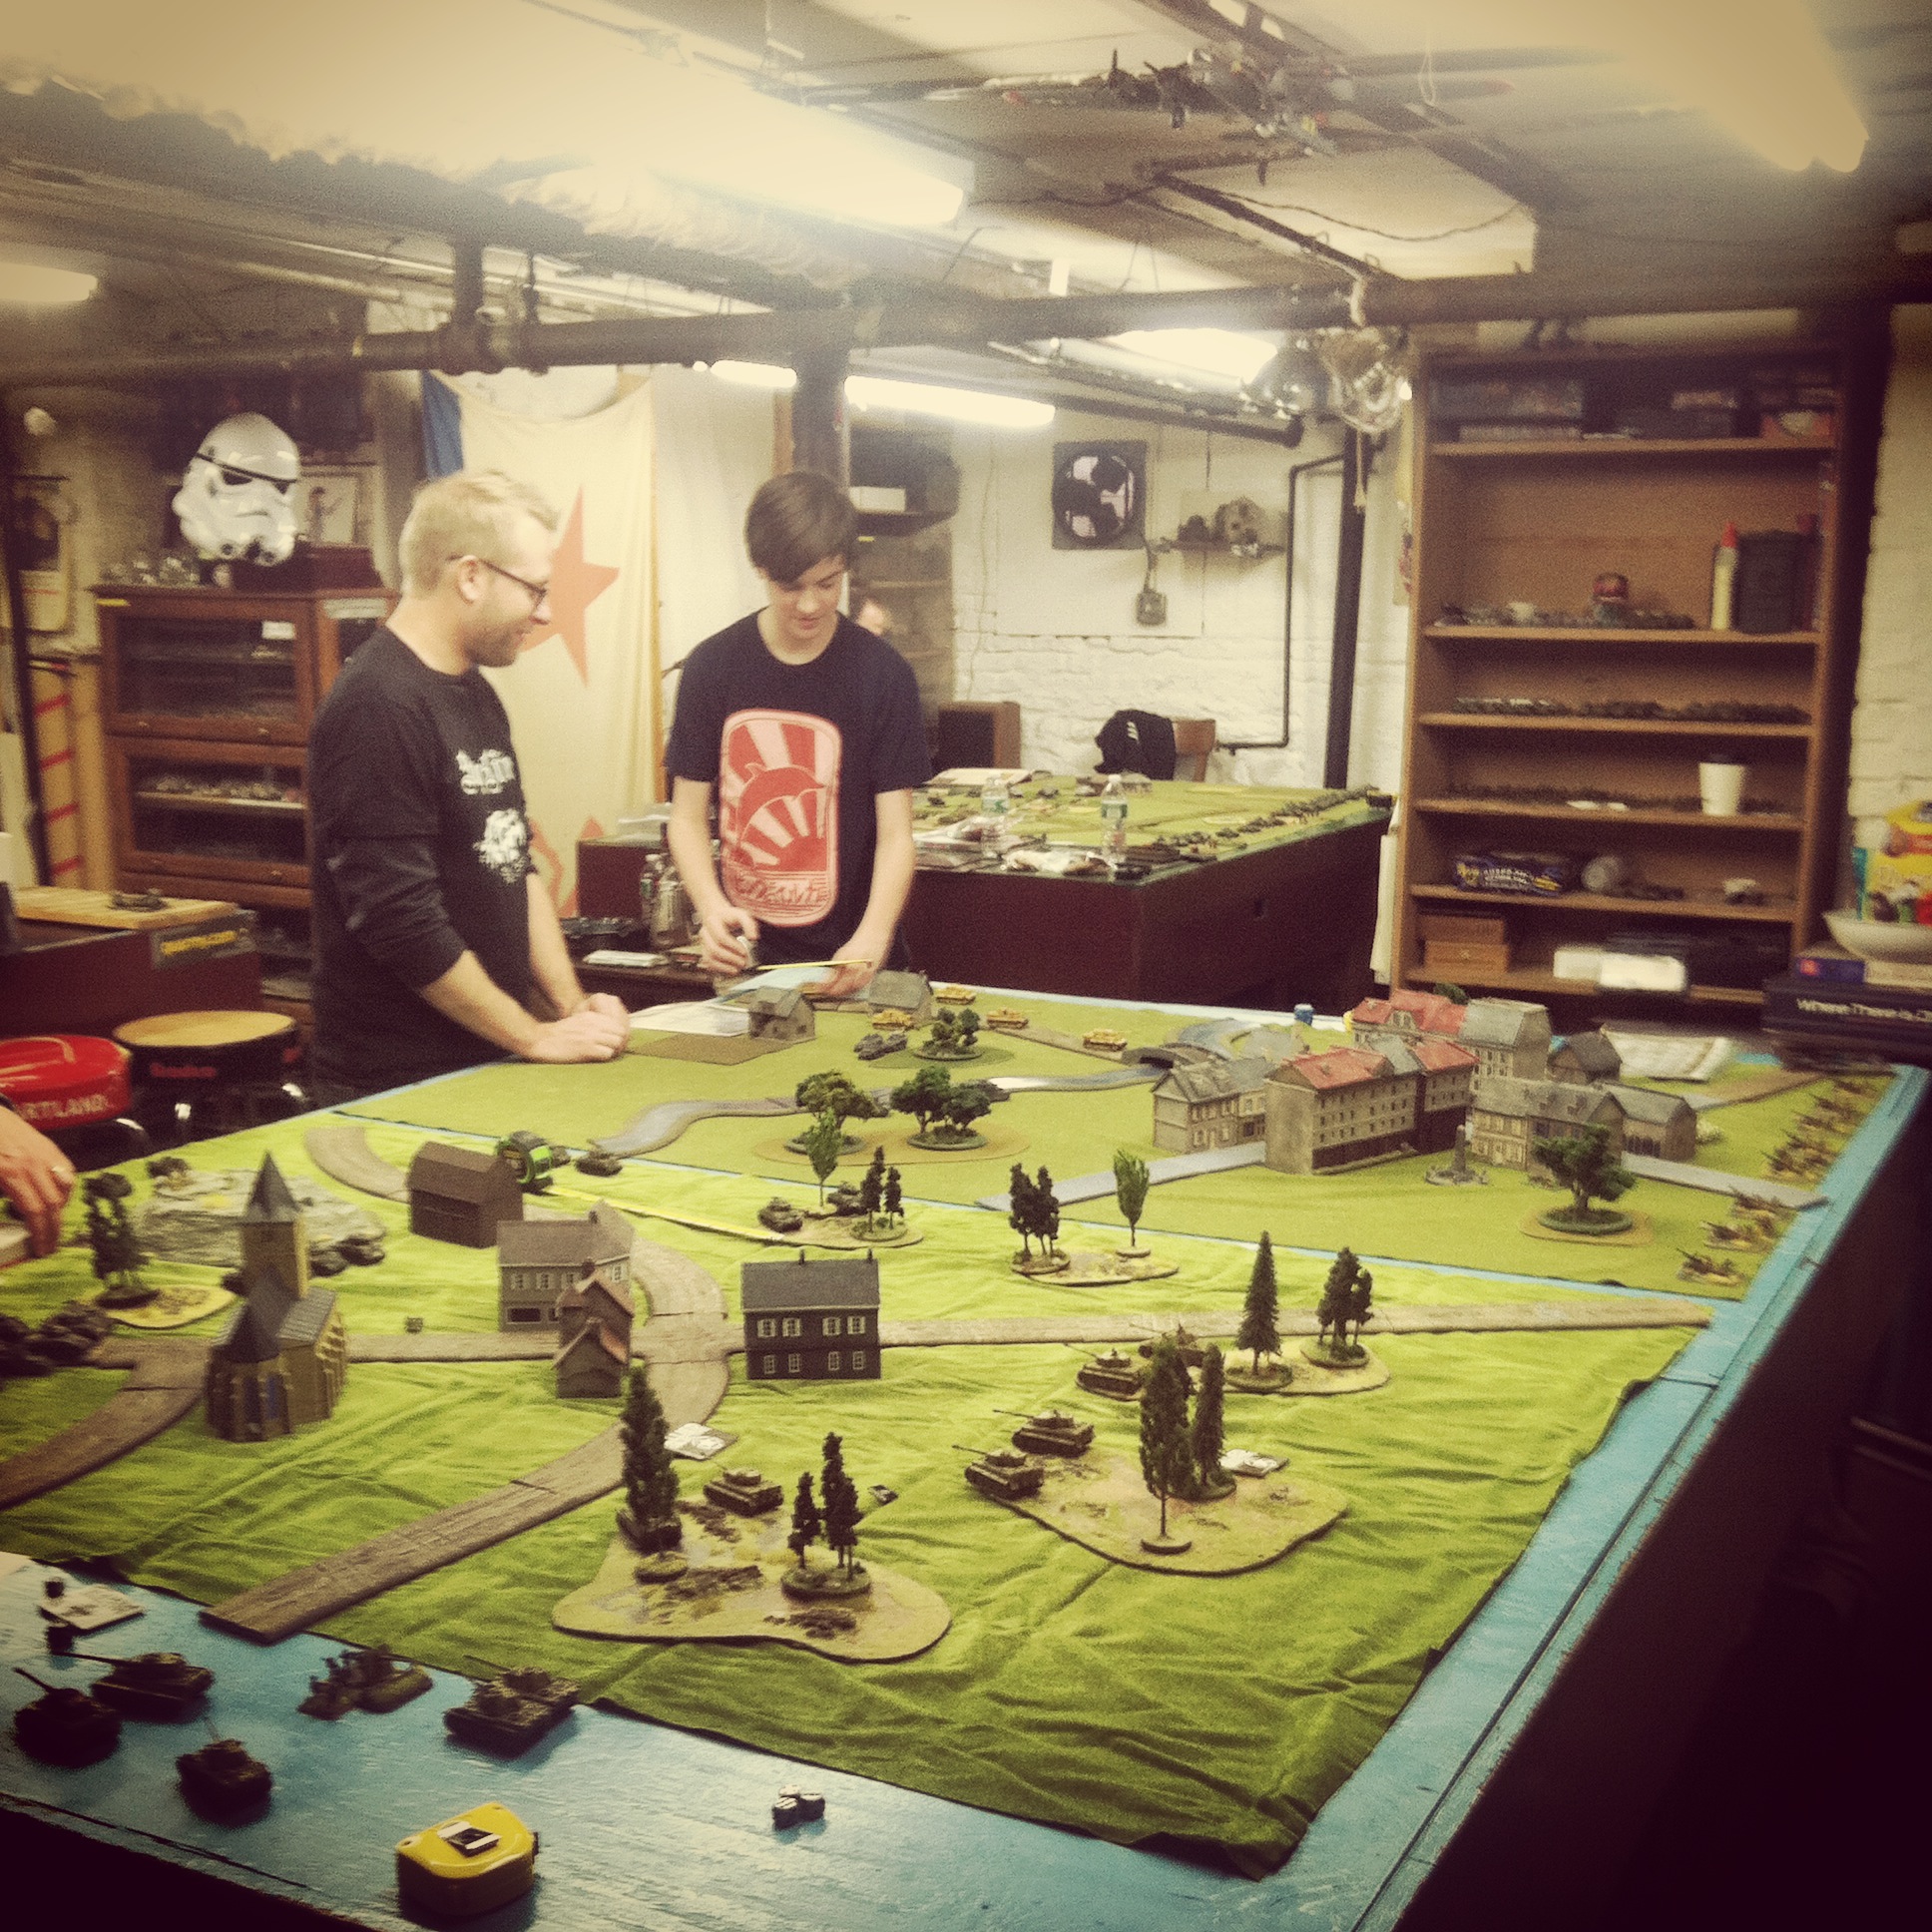
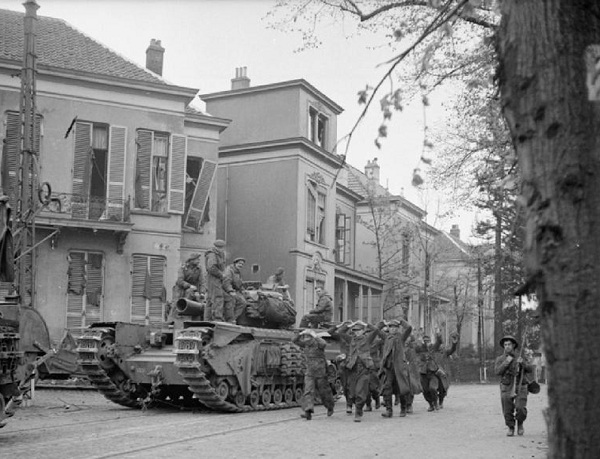
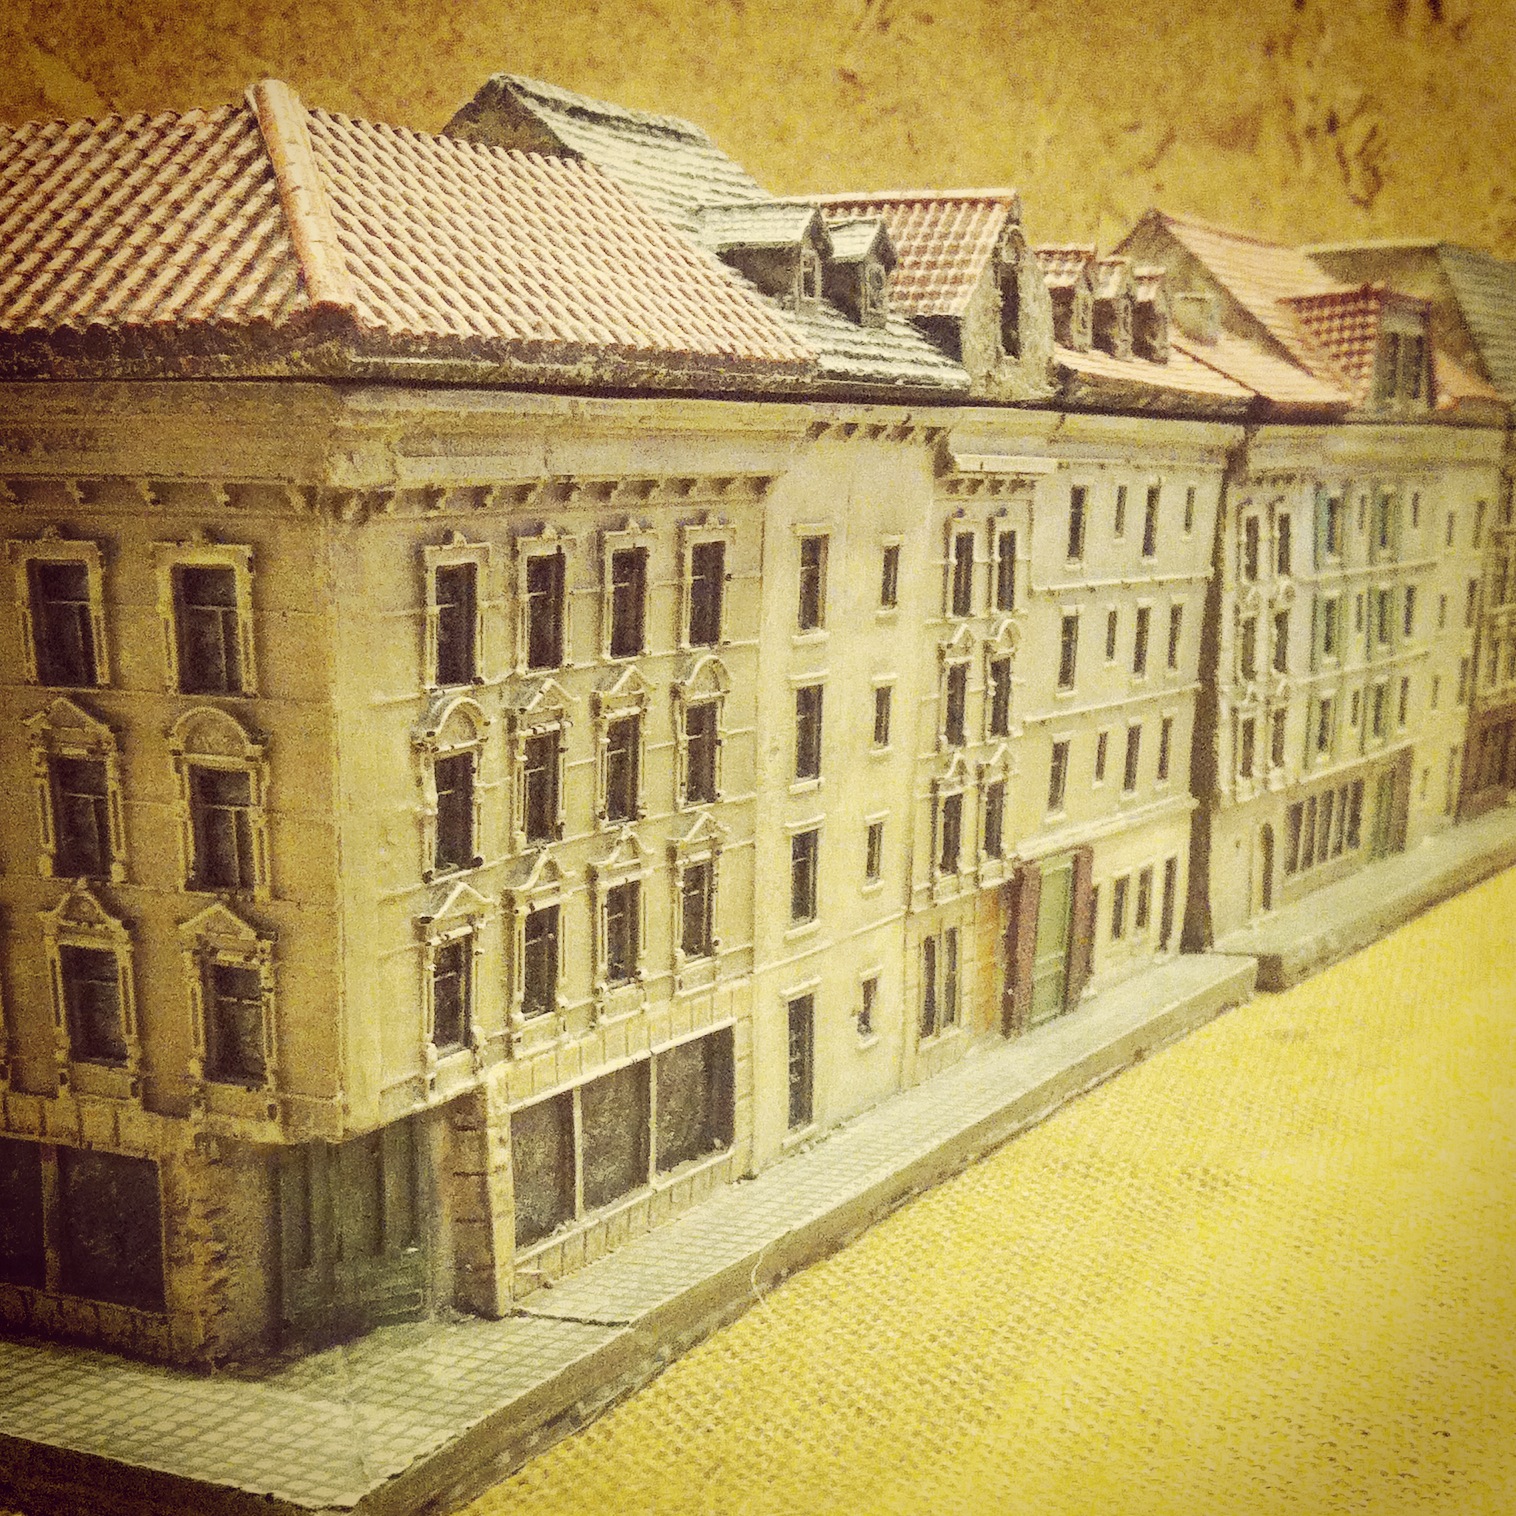
This past week, two of us at Metropolitan Wargamers in Brooklyn, NY headed back to the summer of 1943 and the opening days of what would become known as the Battle of Kursk. The German offensive in Soviet territory, known as “Operation Citadel,” took place southwest of Moscow and led to one of the largest tank battles of all time, the Battle of Prokhorovka. It was south of Prokhorovka at the Oktiabrski State Farm where our game began.

BKCover‘Battlegroup Kursk’ from Iron Fist Publishing

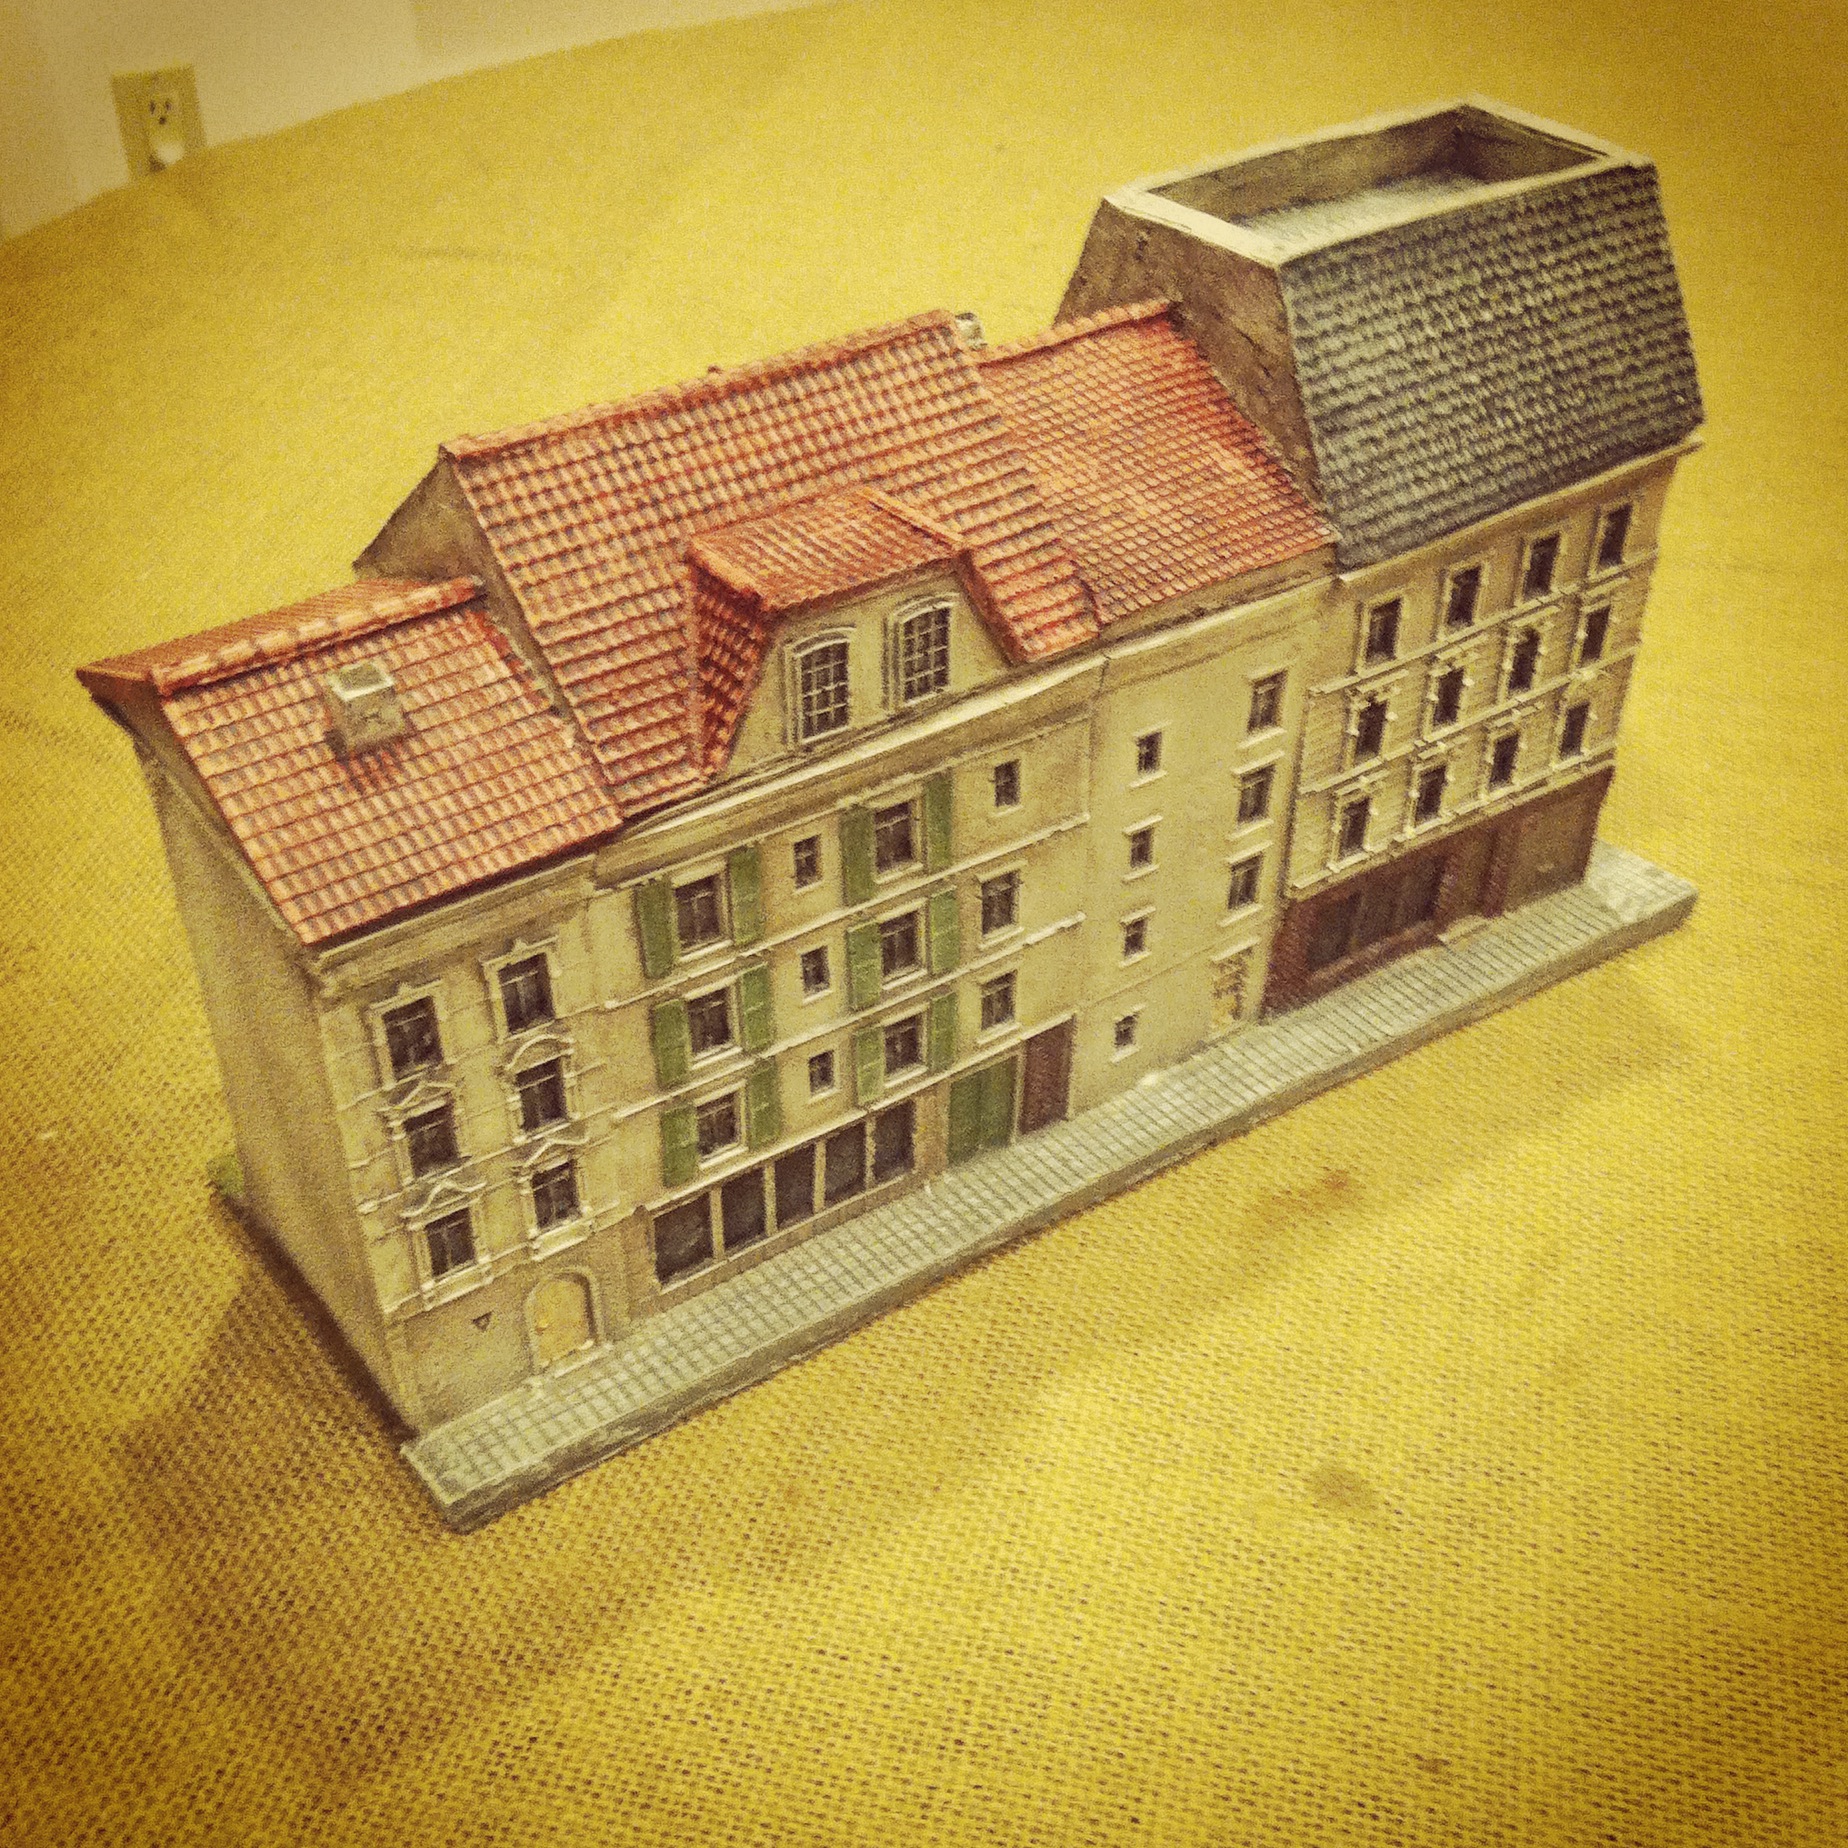
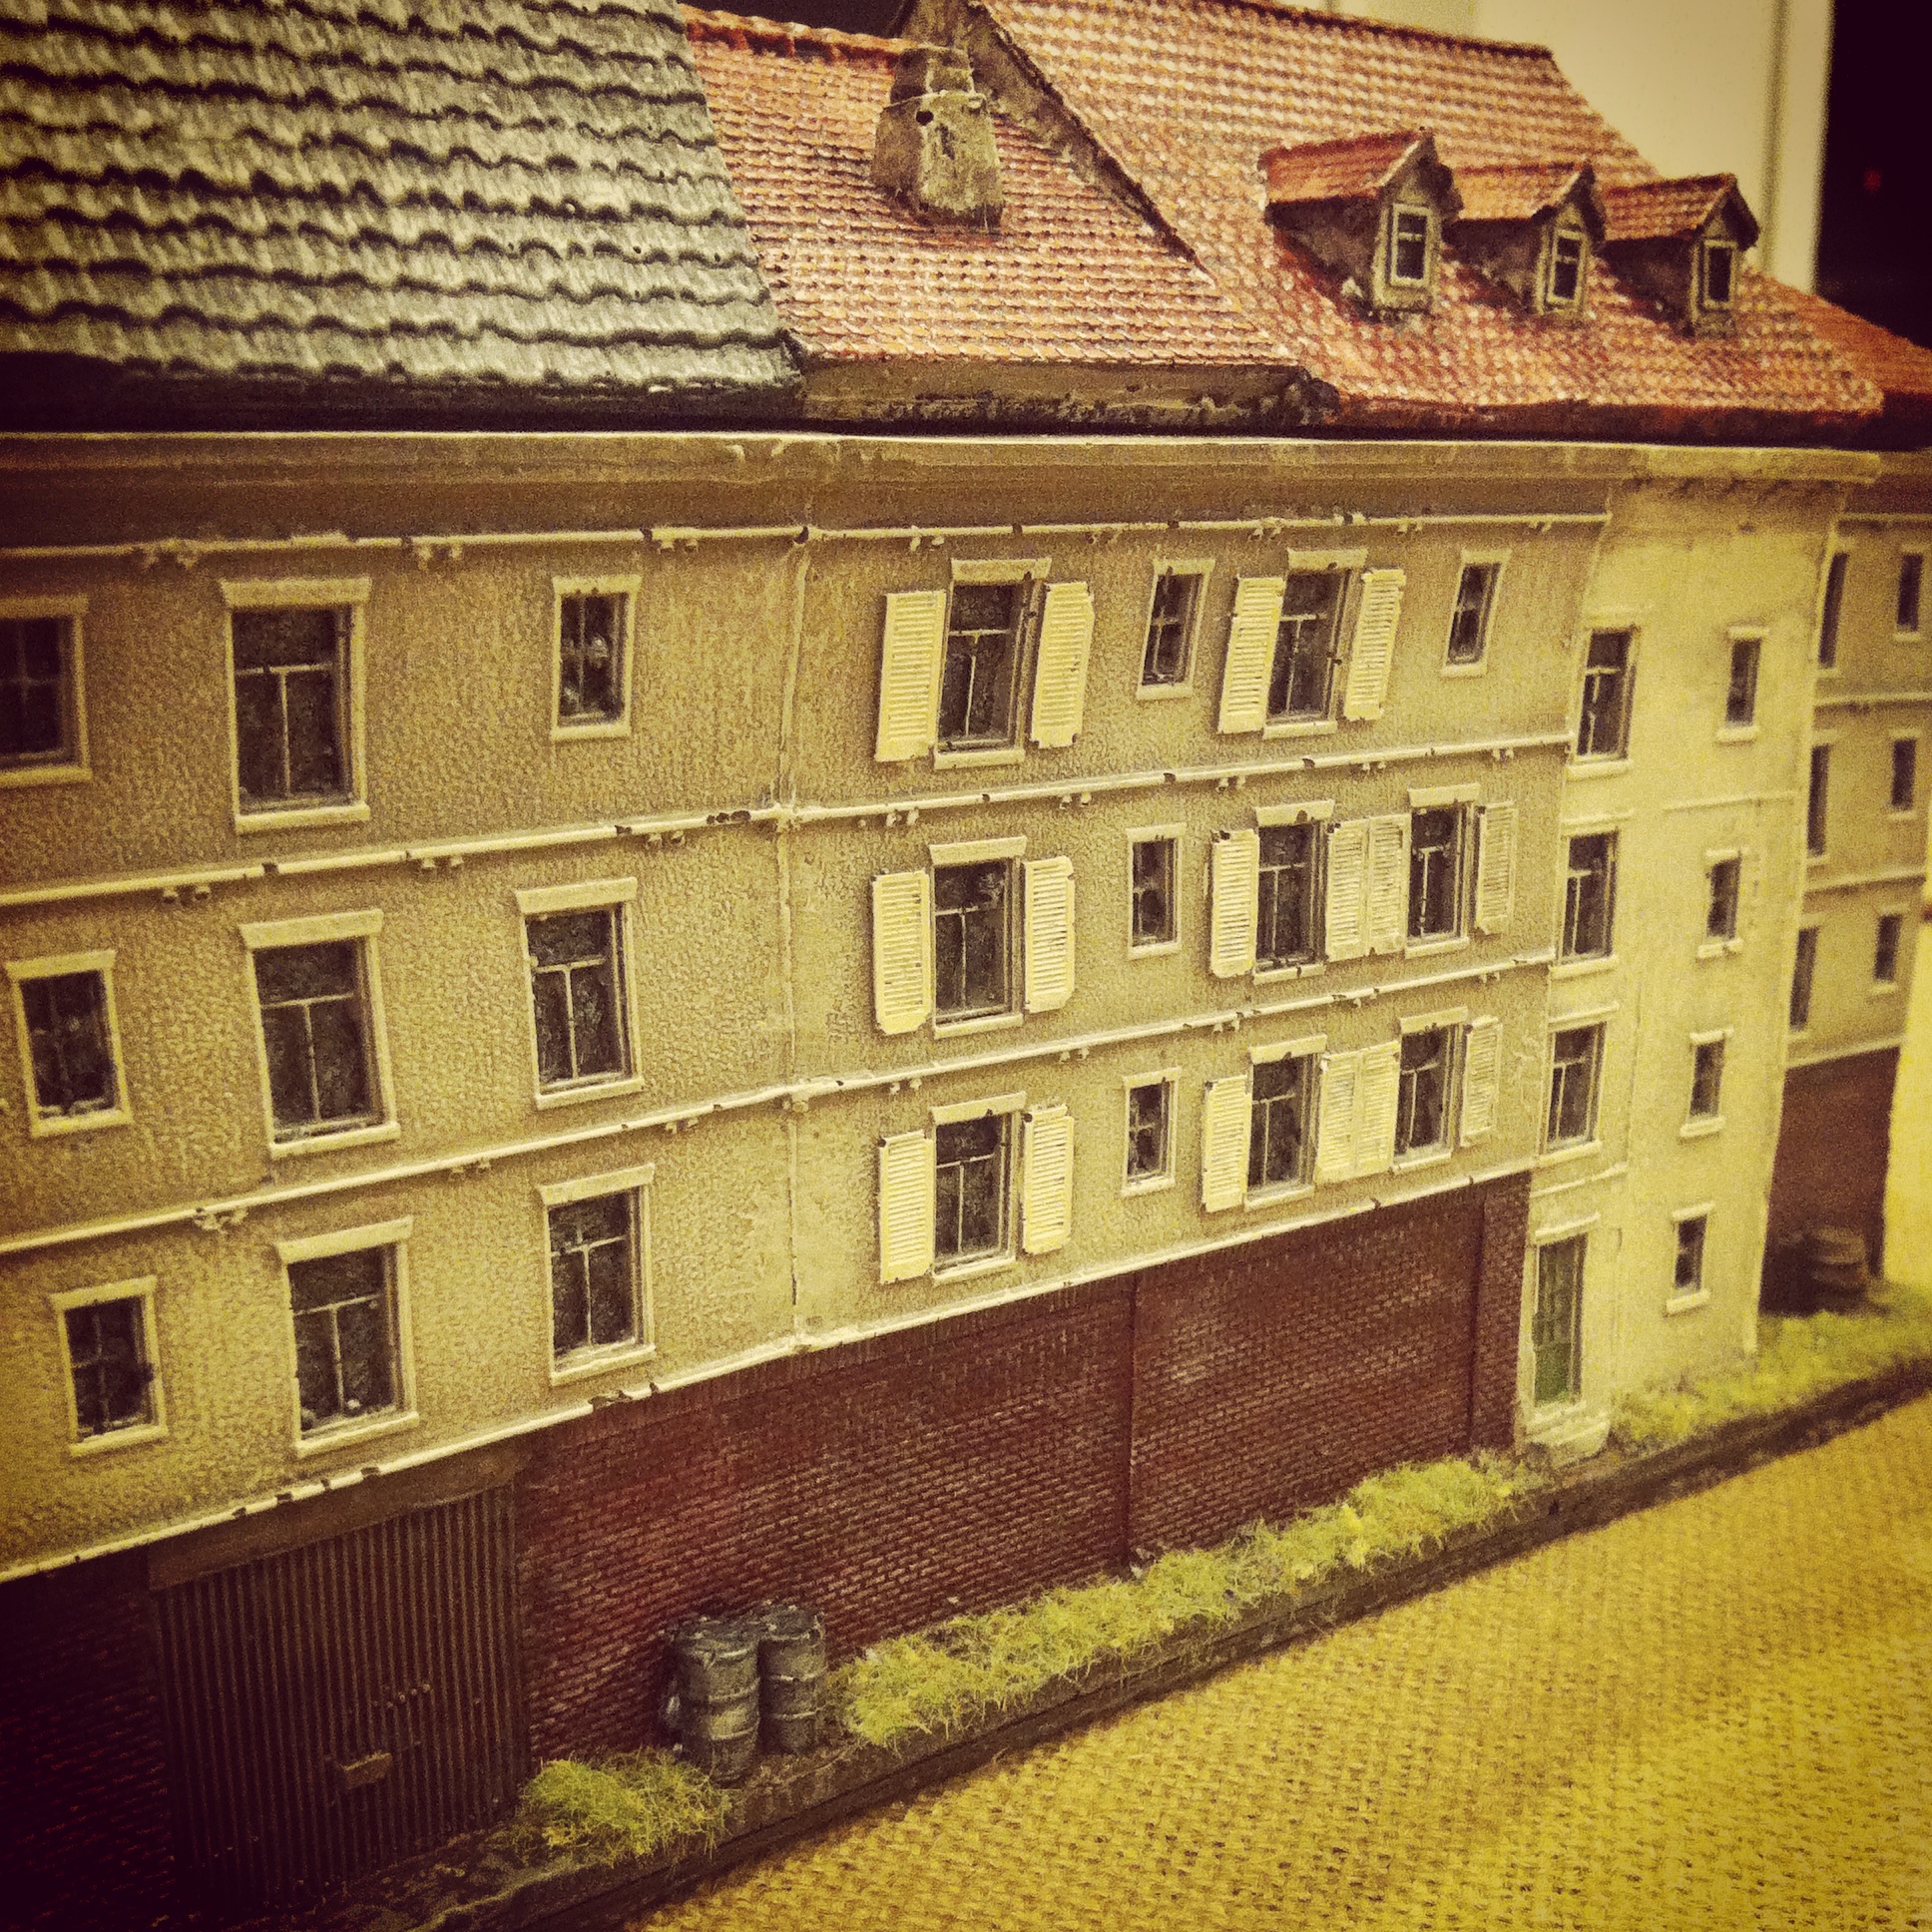
Our 15mm battle was a mash-up of game systems, using Flames of War models, I Ain’t Been Shot Mum rules and a scenario lifted from the Battlegroup Kursk book by Iron Fist Publishing. Aside from its own set of tabletop rules, the Battlegroup Kursk book offers some well-drawn scenarios easily adaptable to a variety of gaming systems and scales. Our scenario, “West Of The Oktiabrski State Farm,” was the second of seven scenarios from the section entitled “The Inglorious 12th July.”

oktMAP
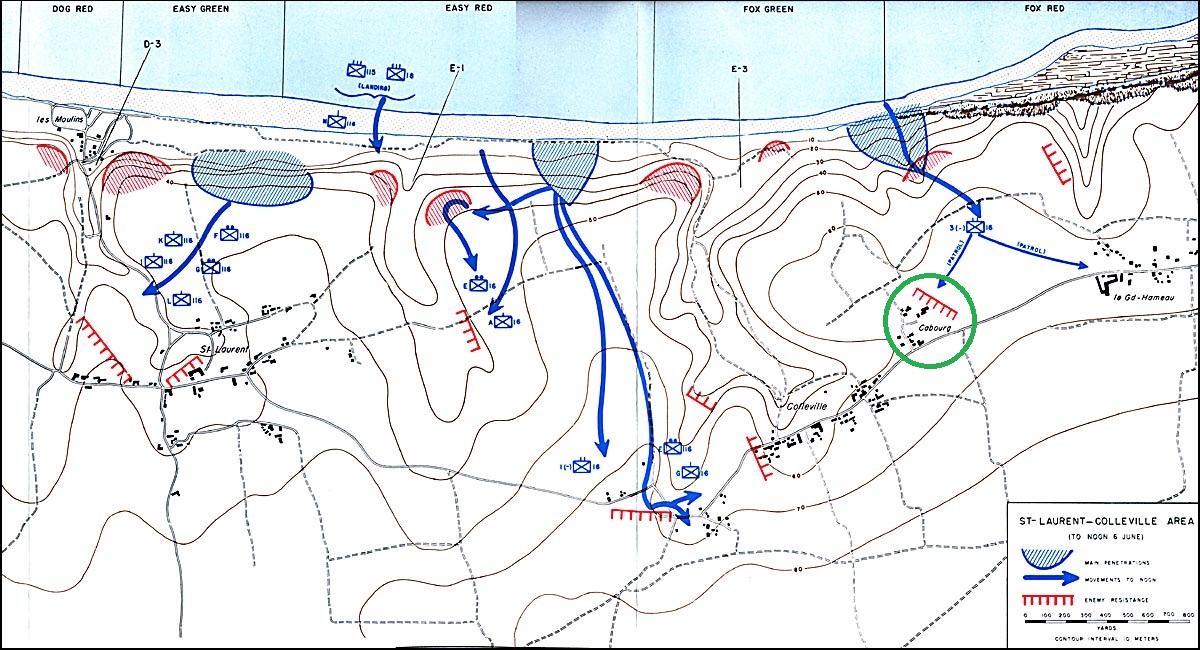
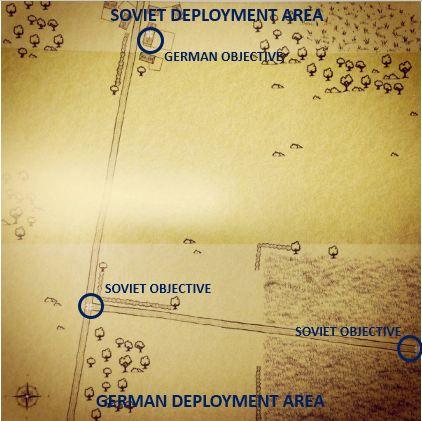
Map of the West Of The Oktiabrski State Farm scenario

IMG_5577
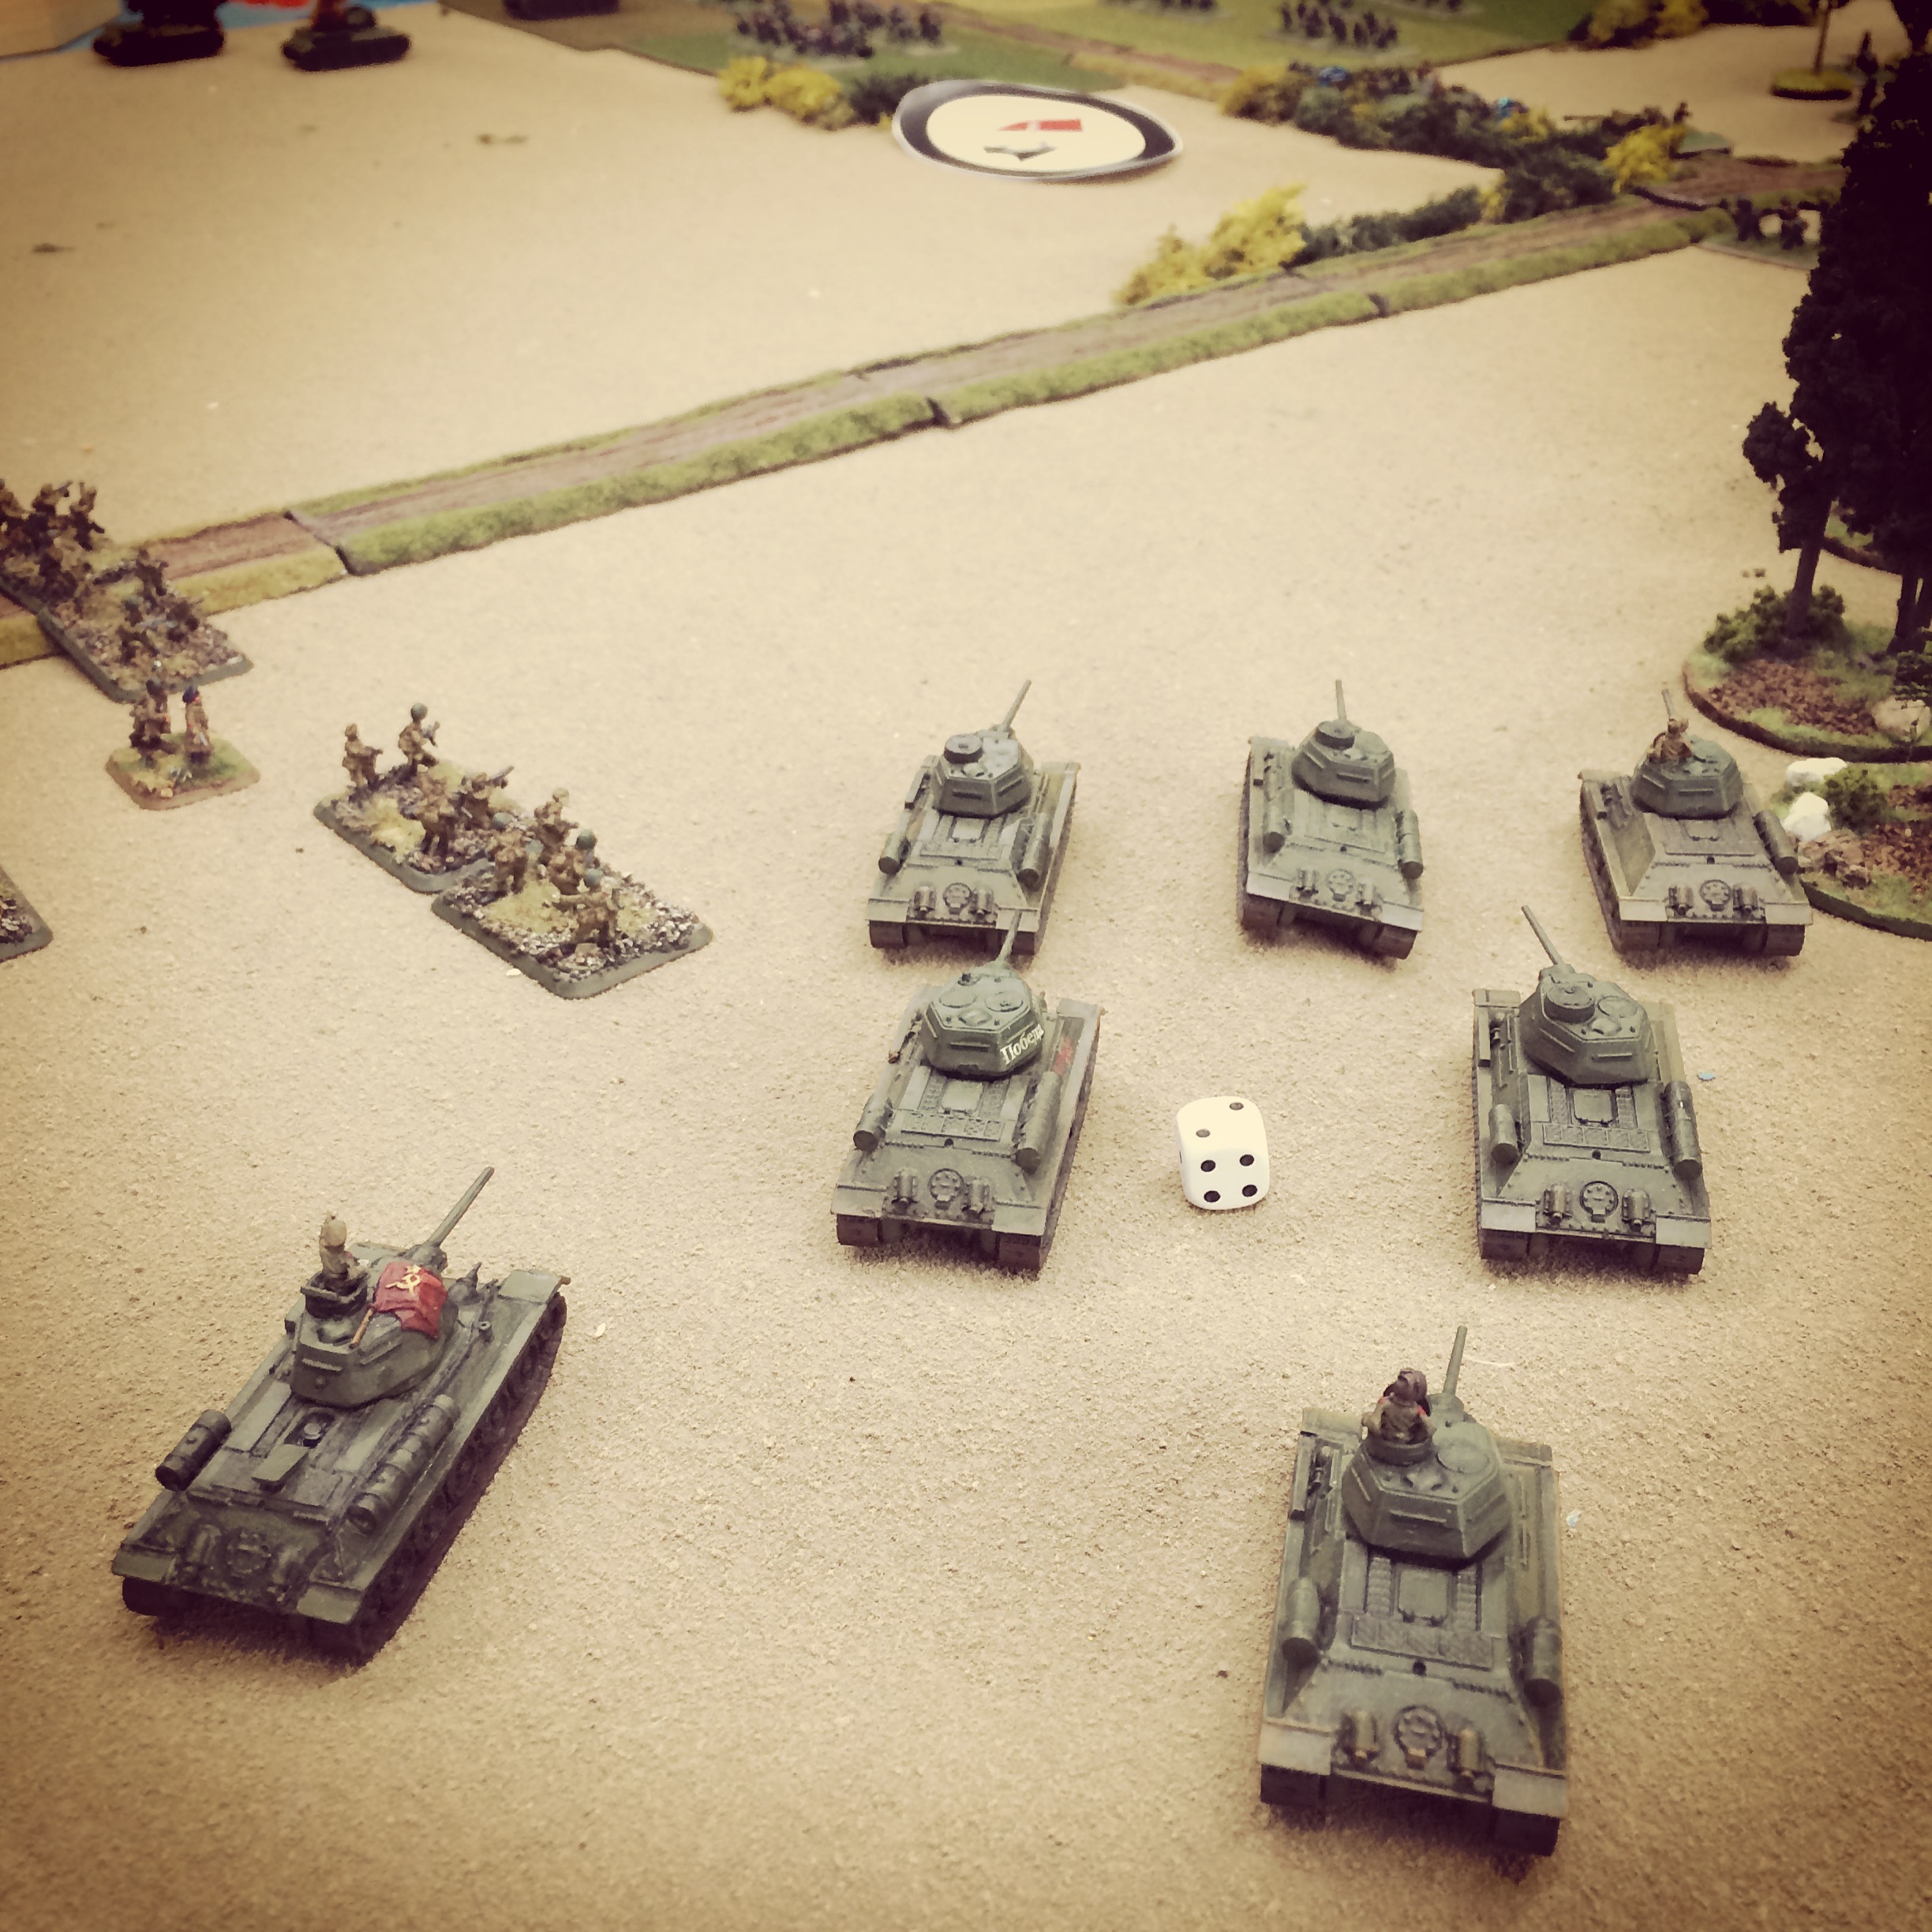
Soviet blinds deploy and move as T-34s are spotted pushing on the left

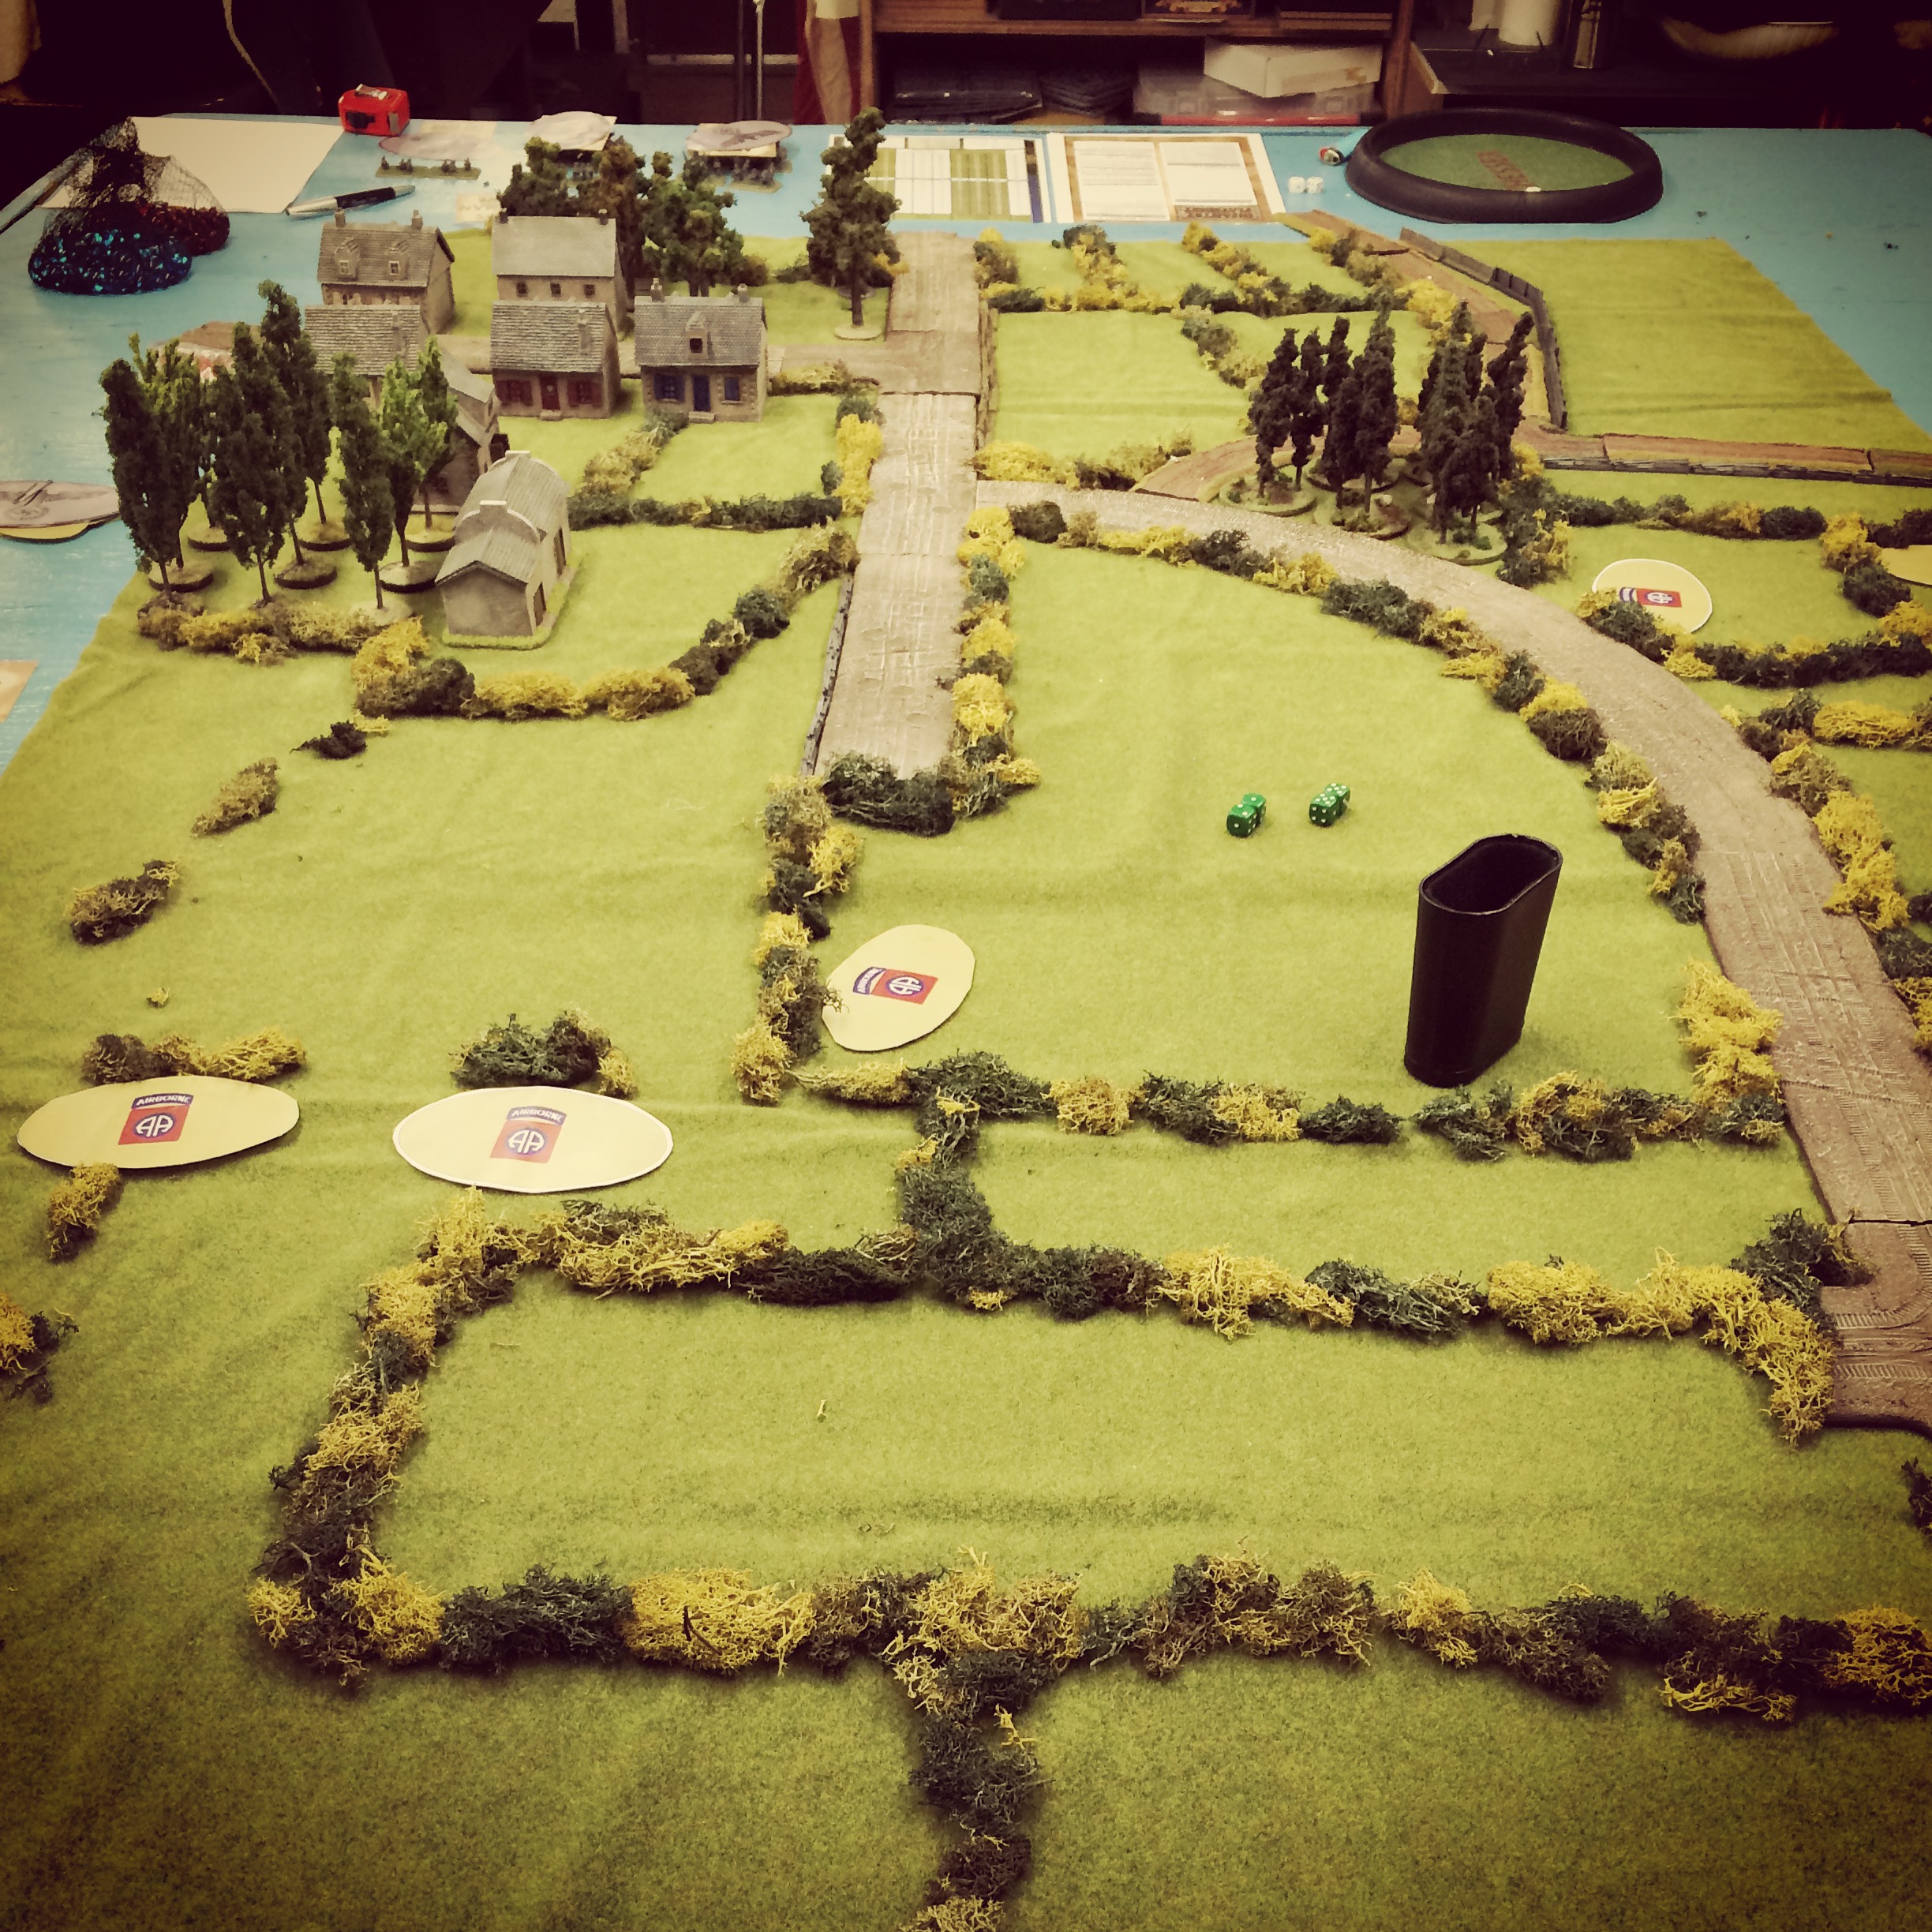
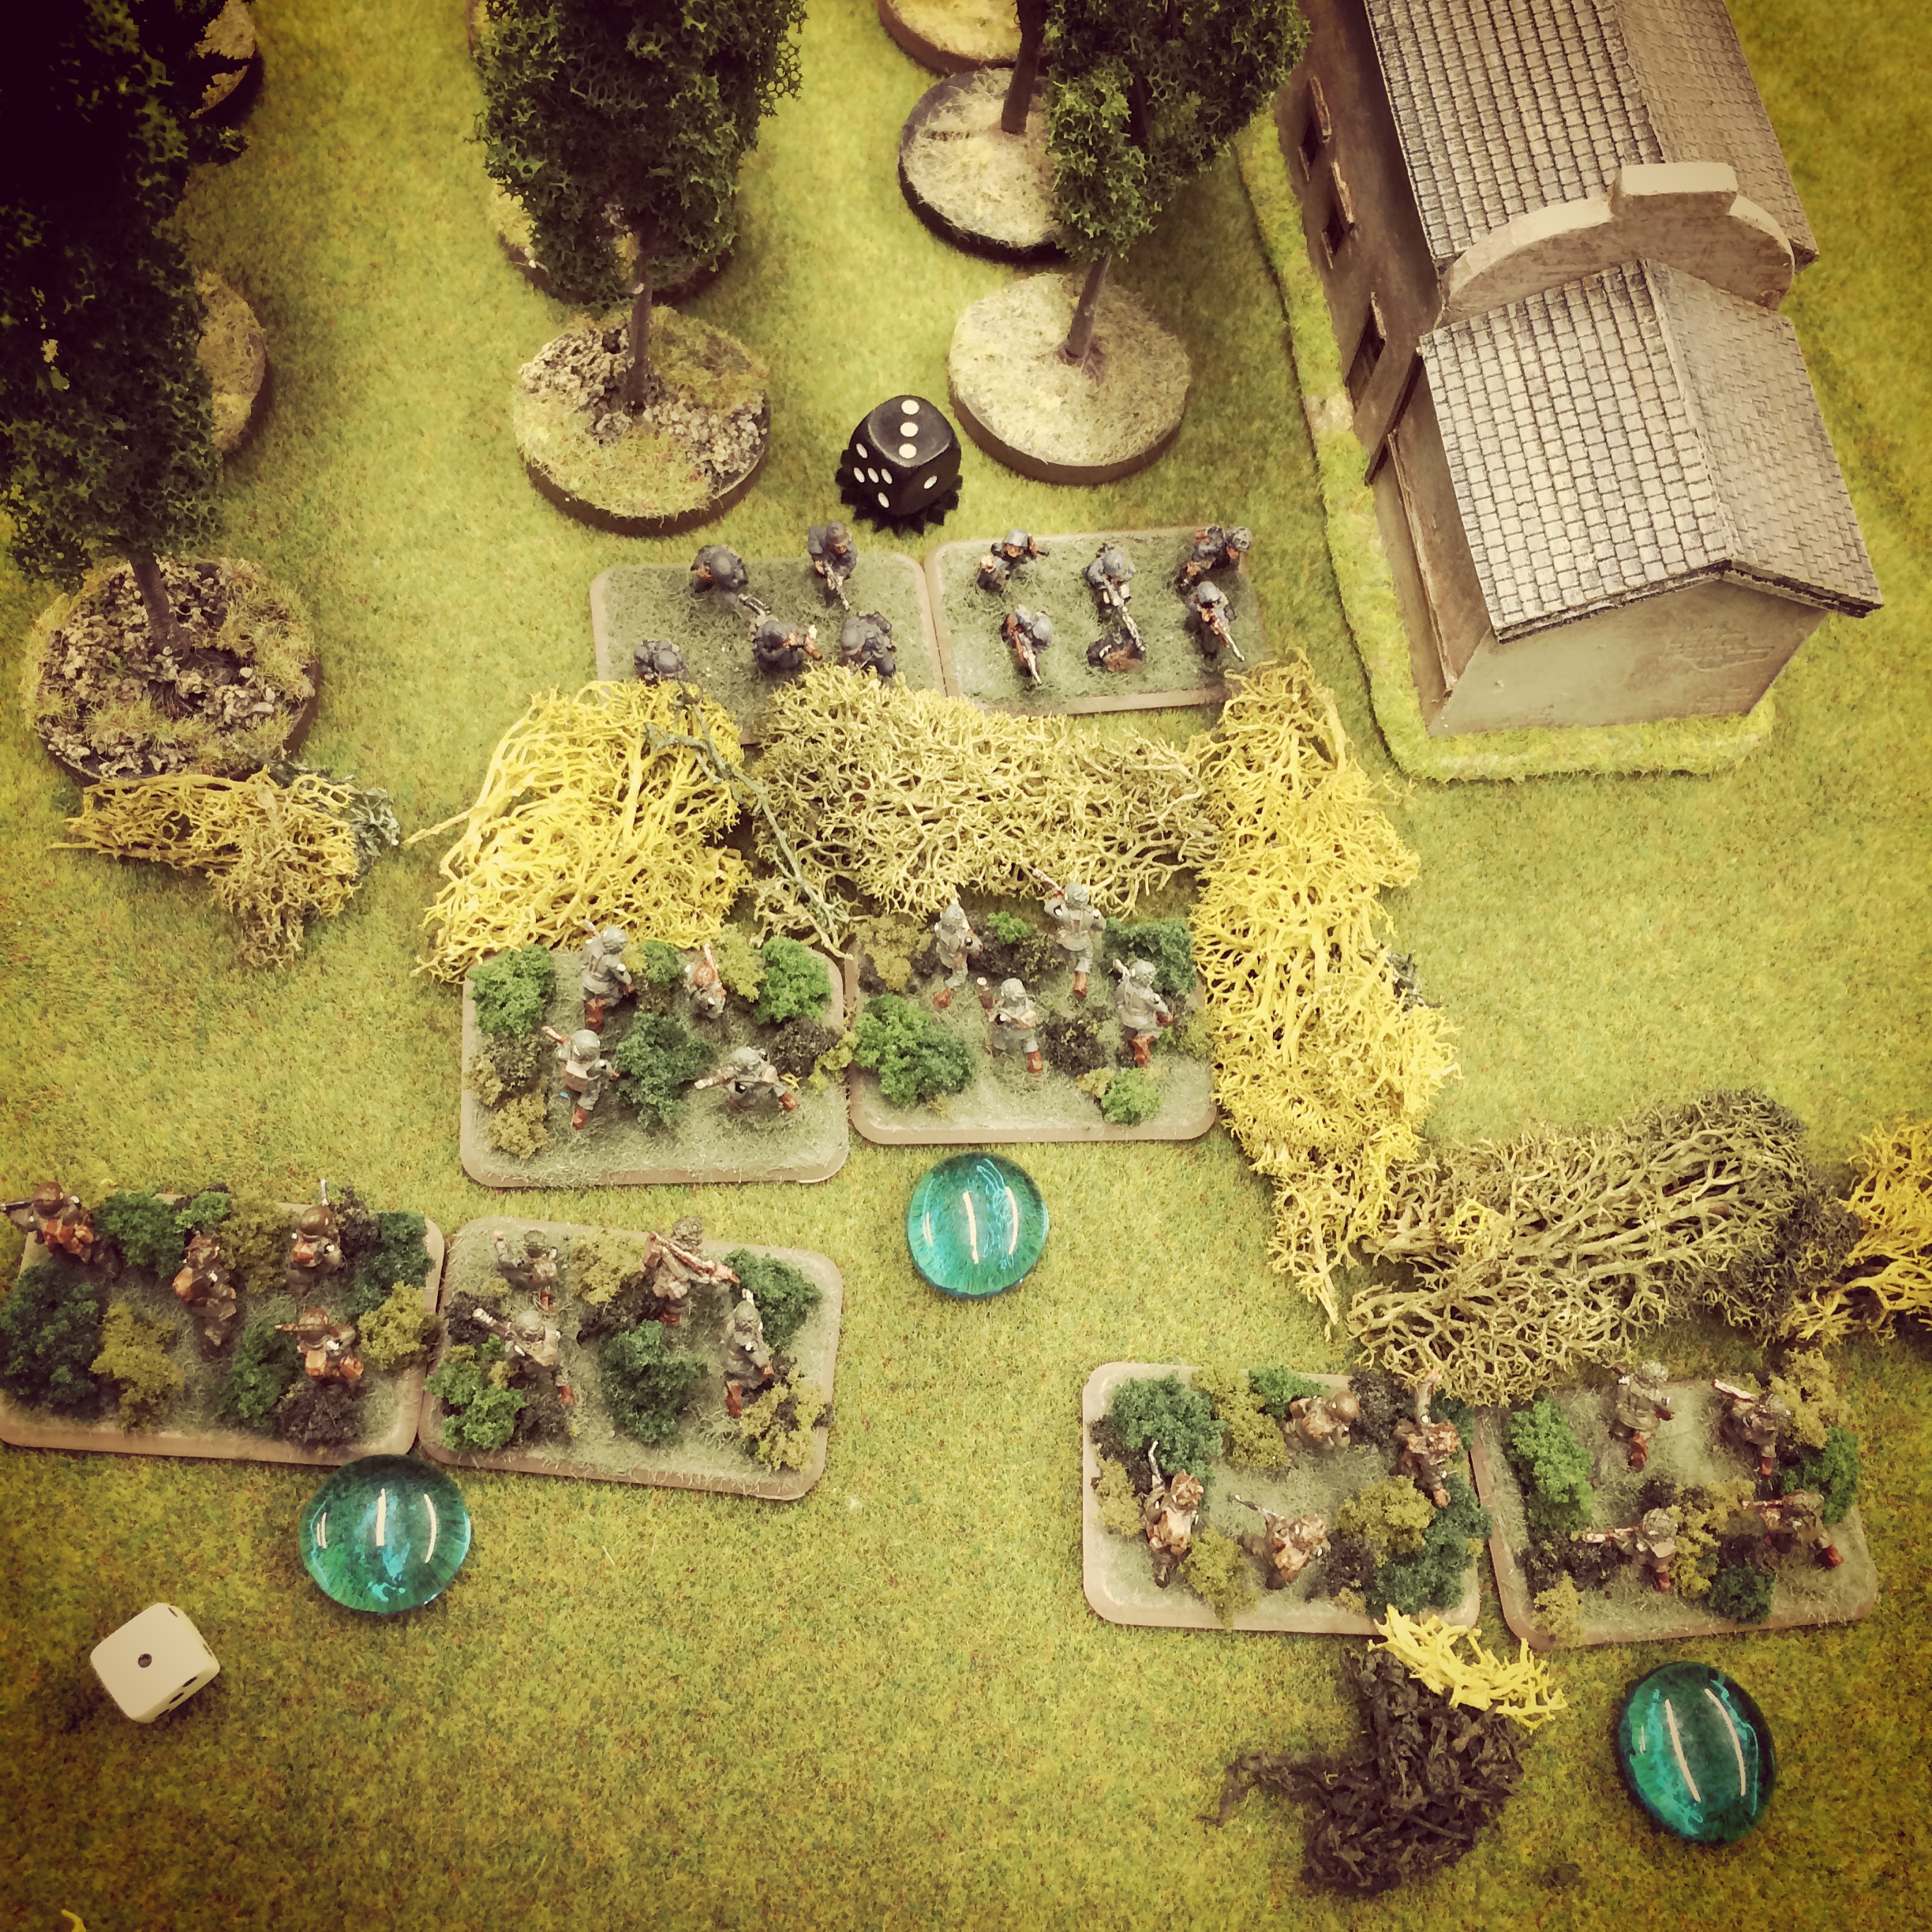
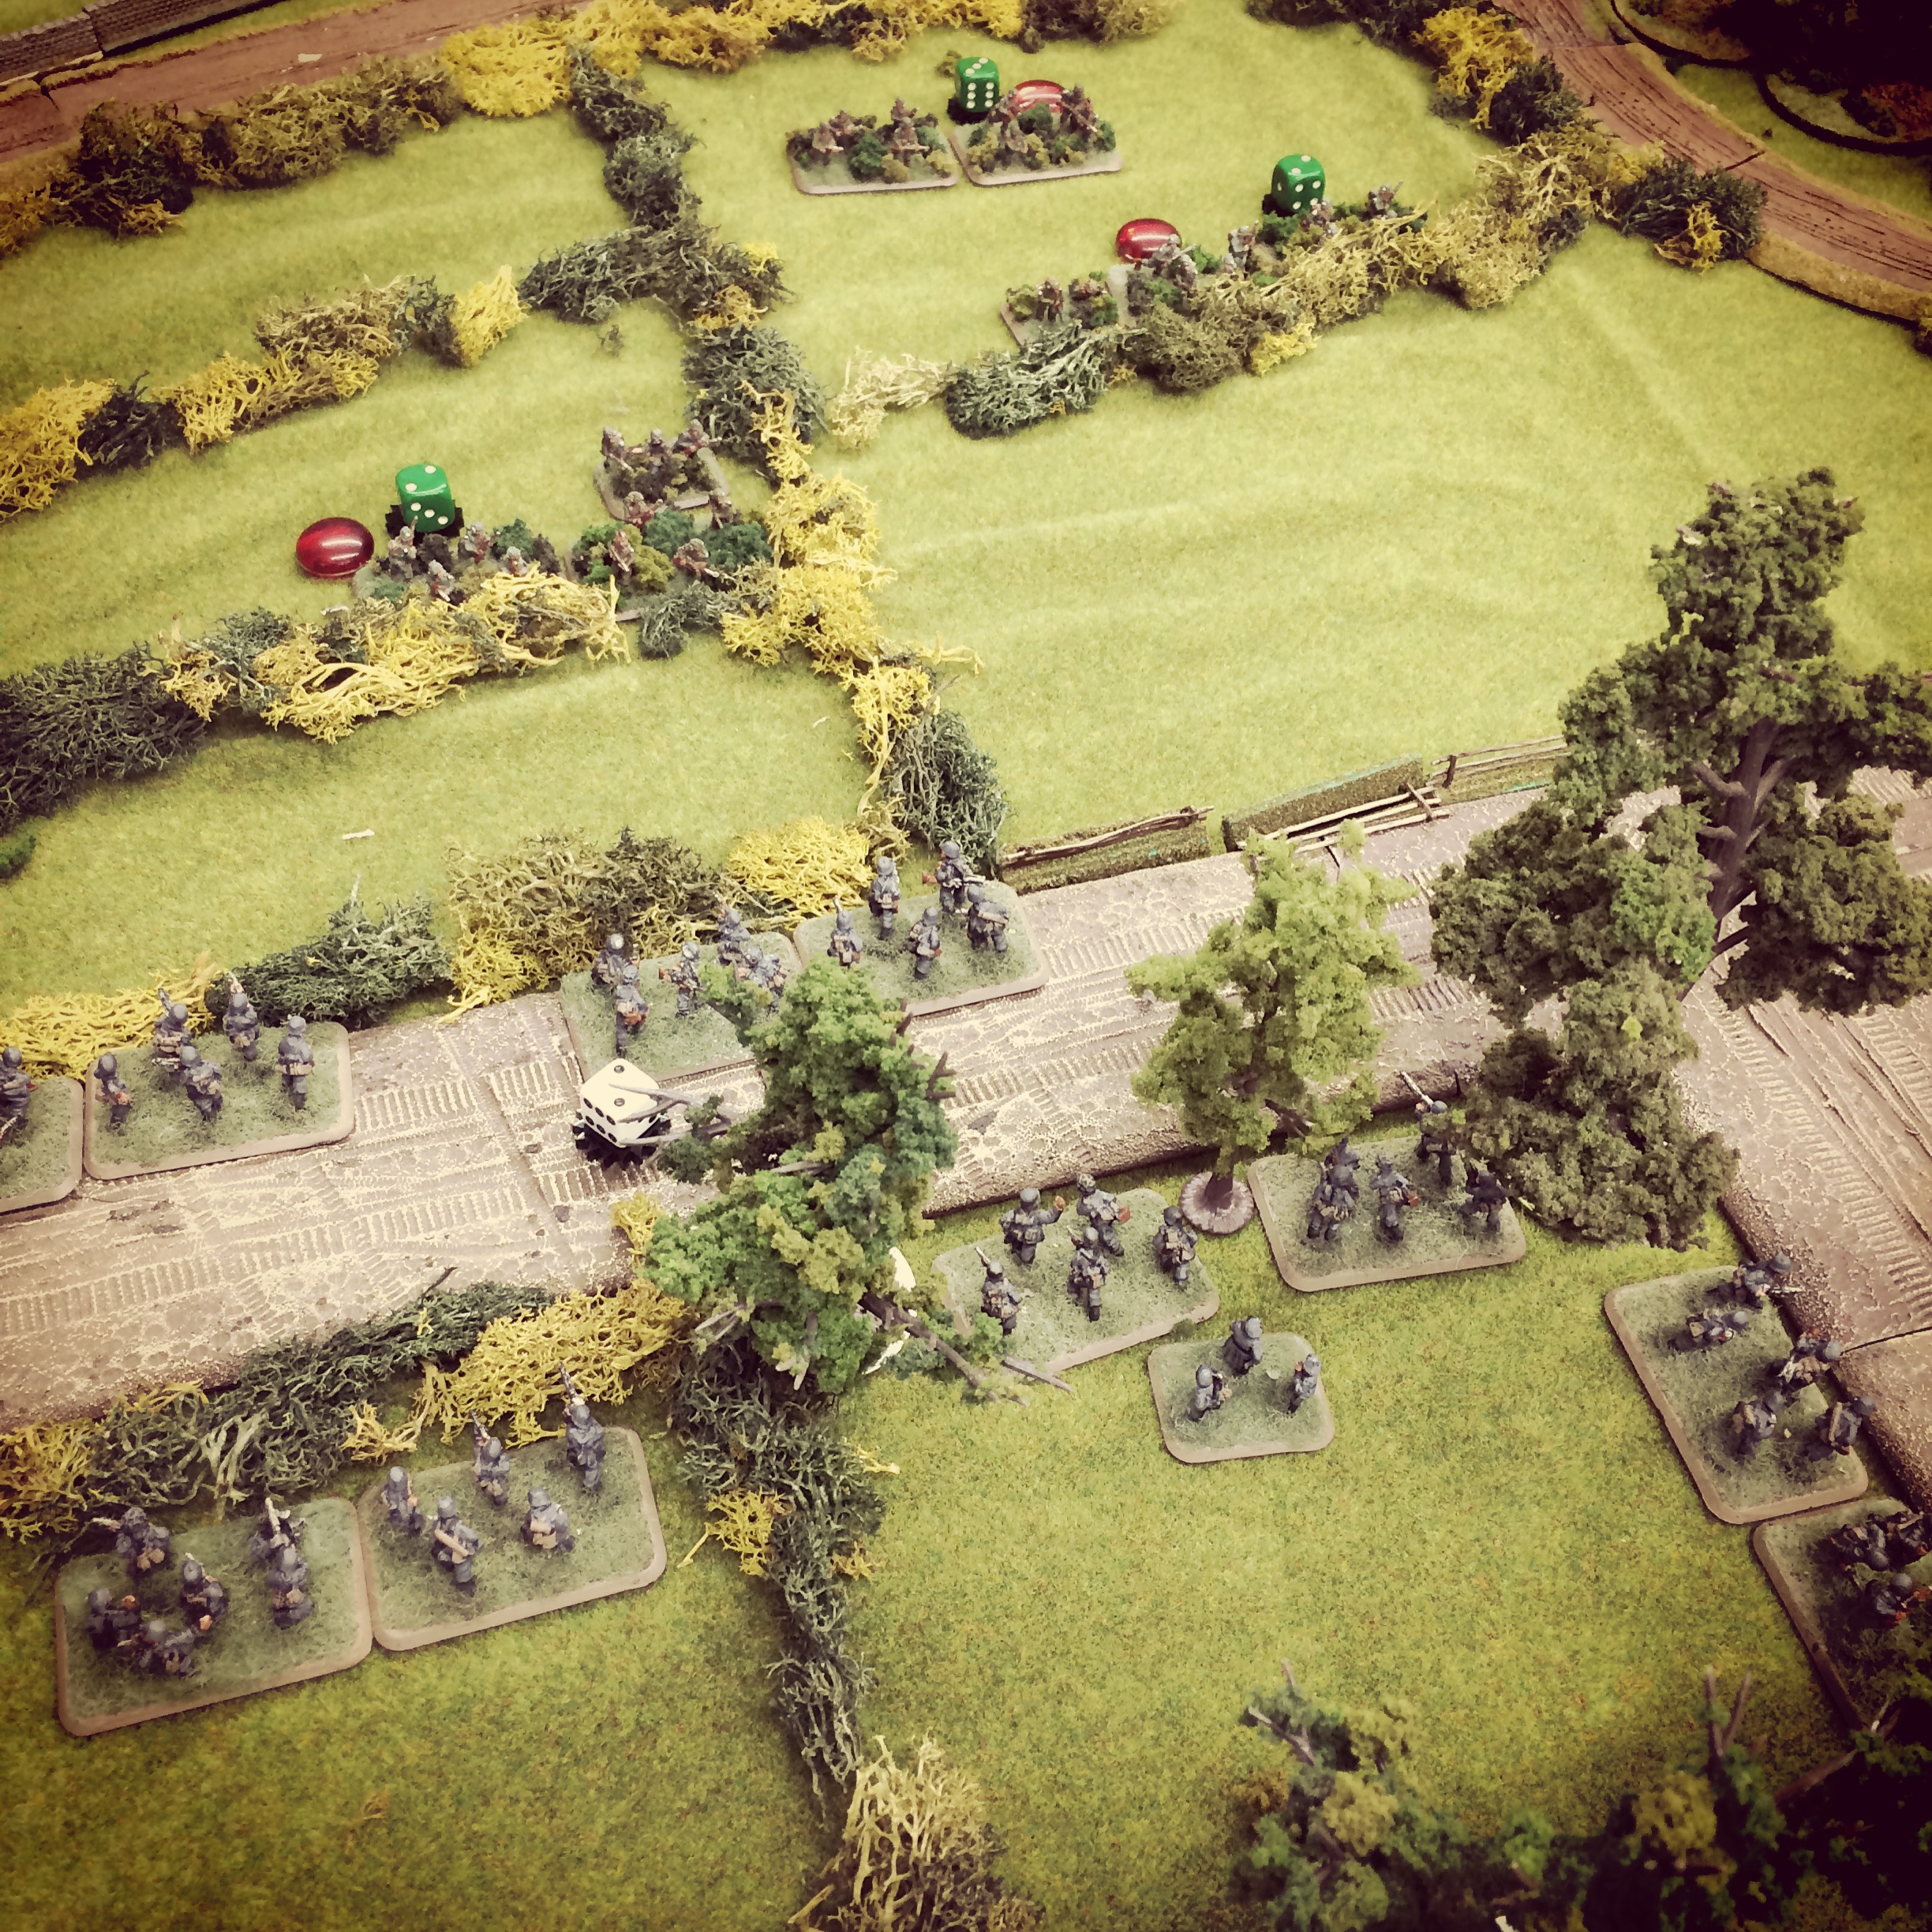
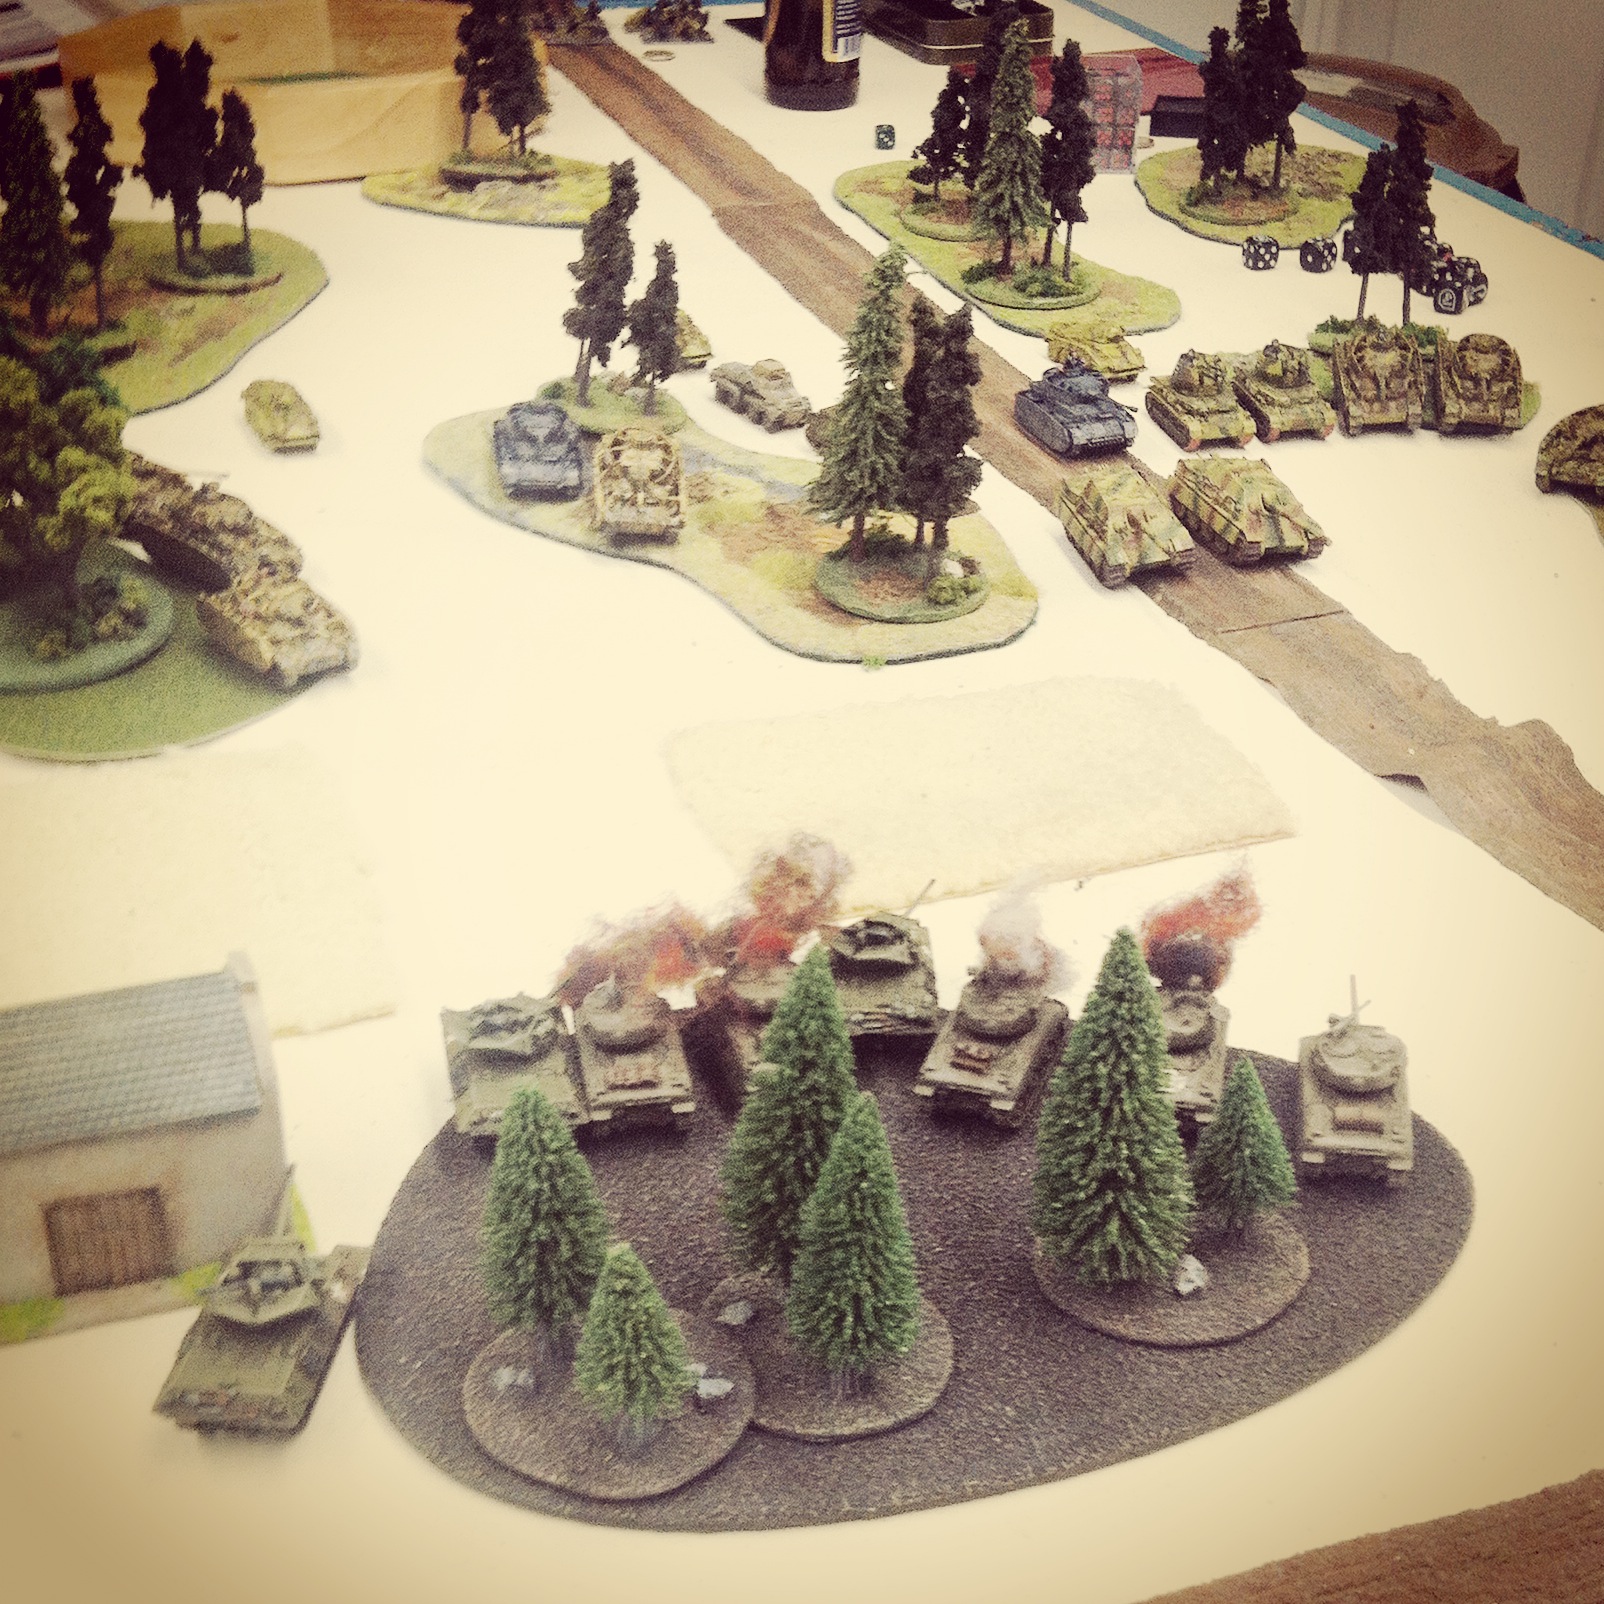
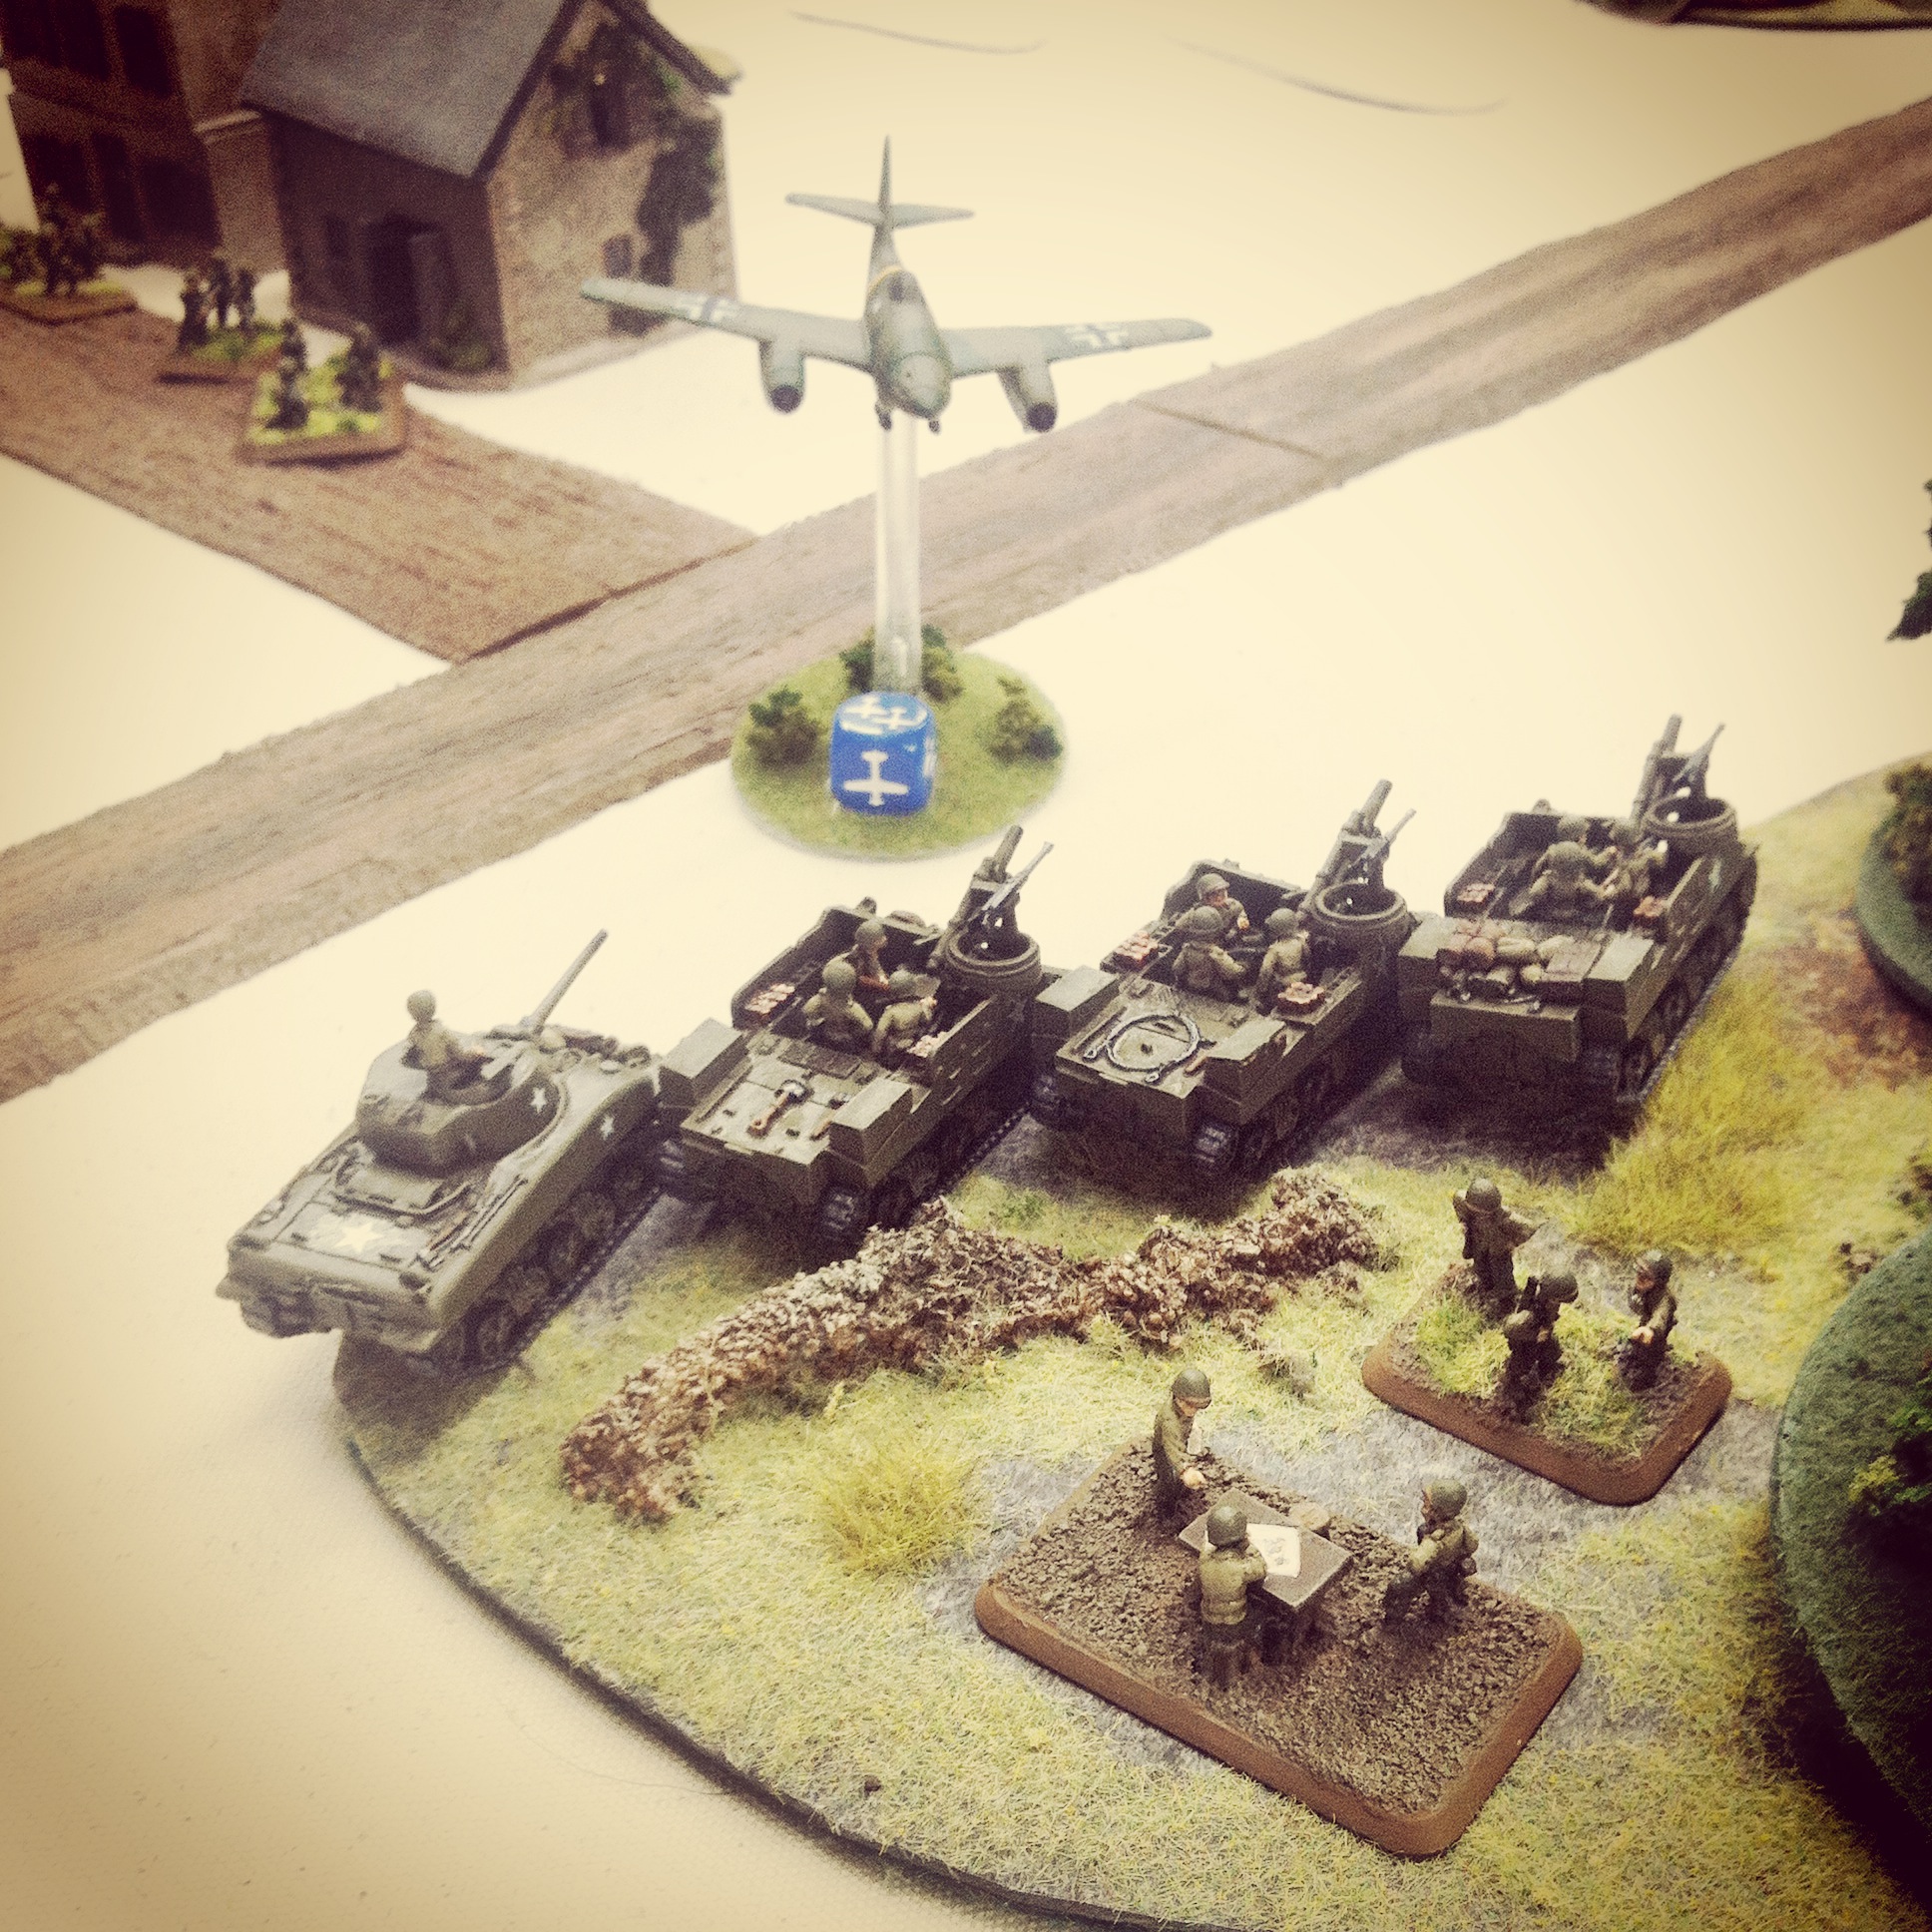
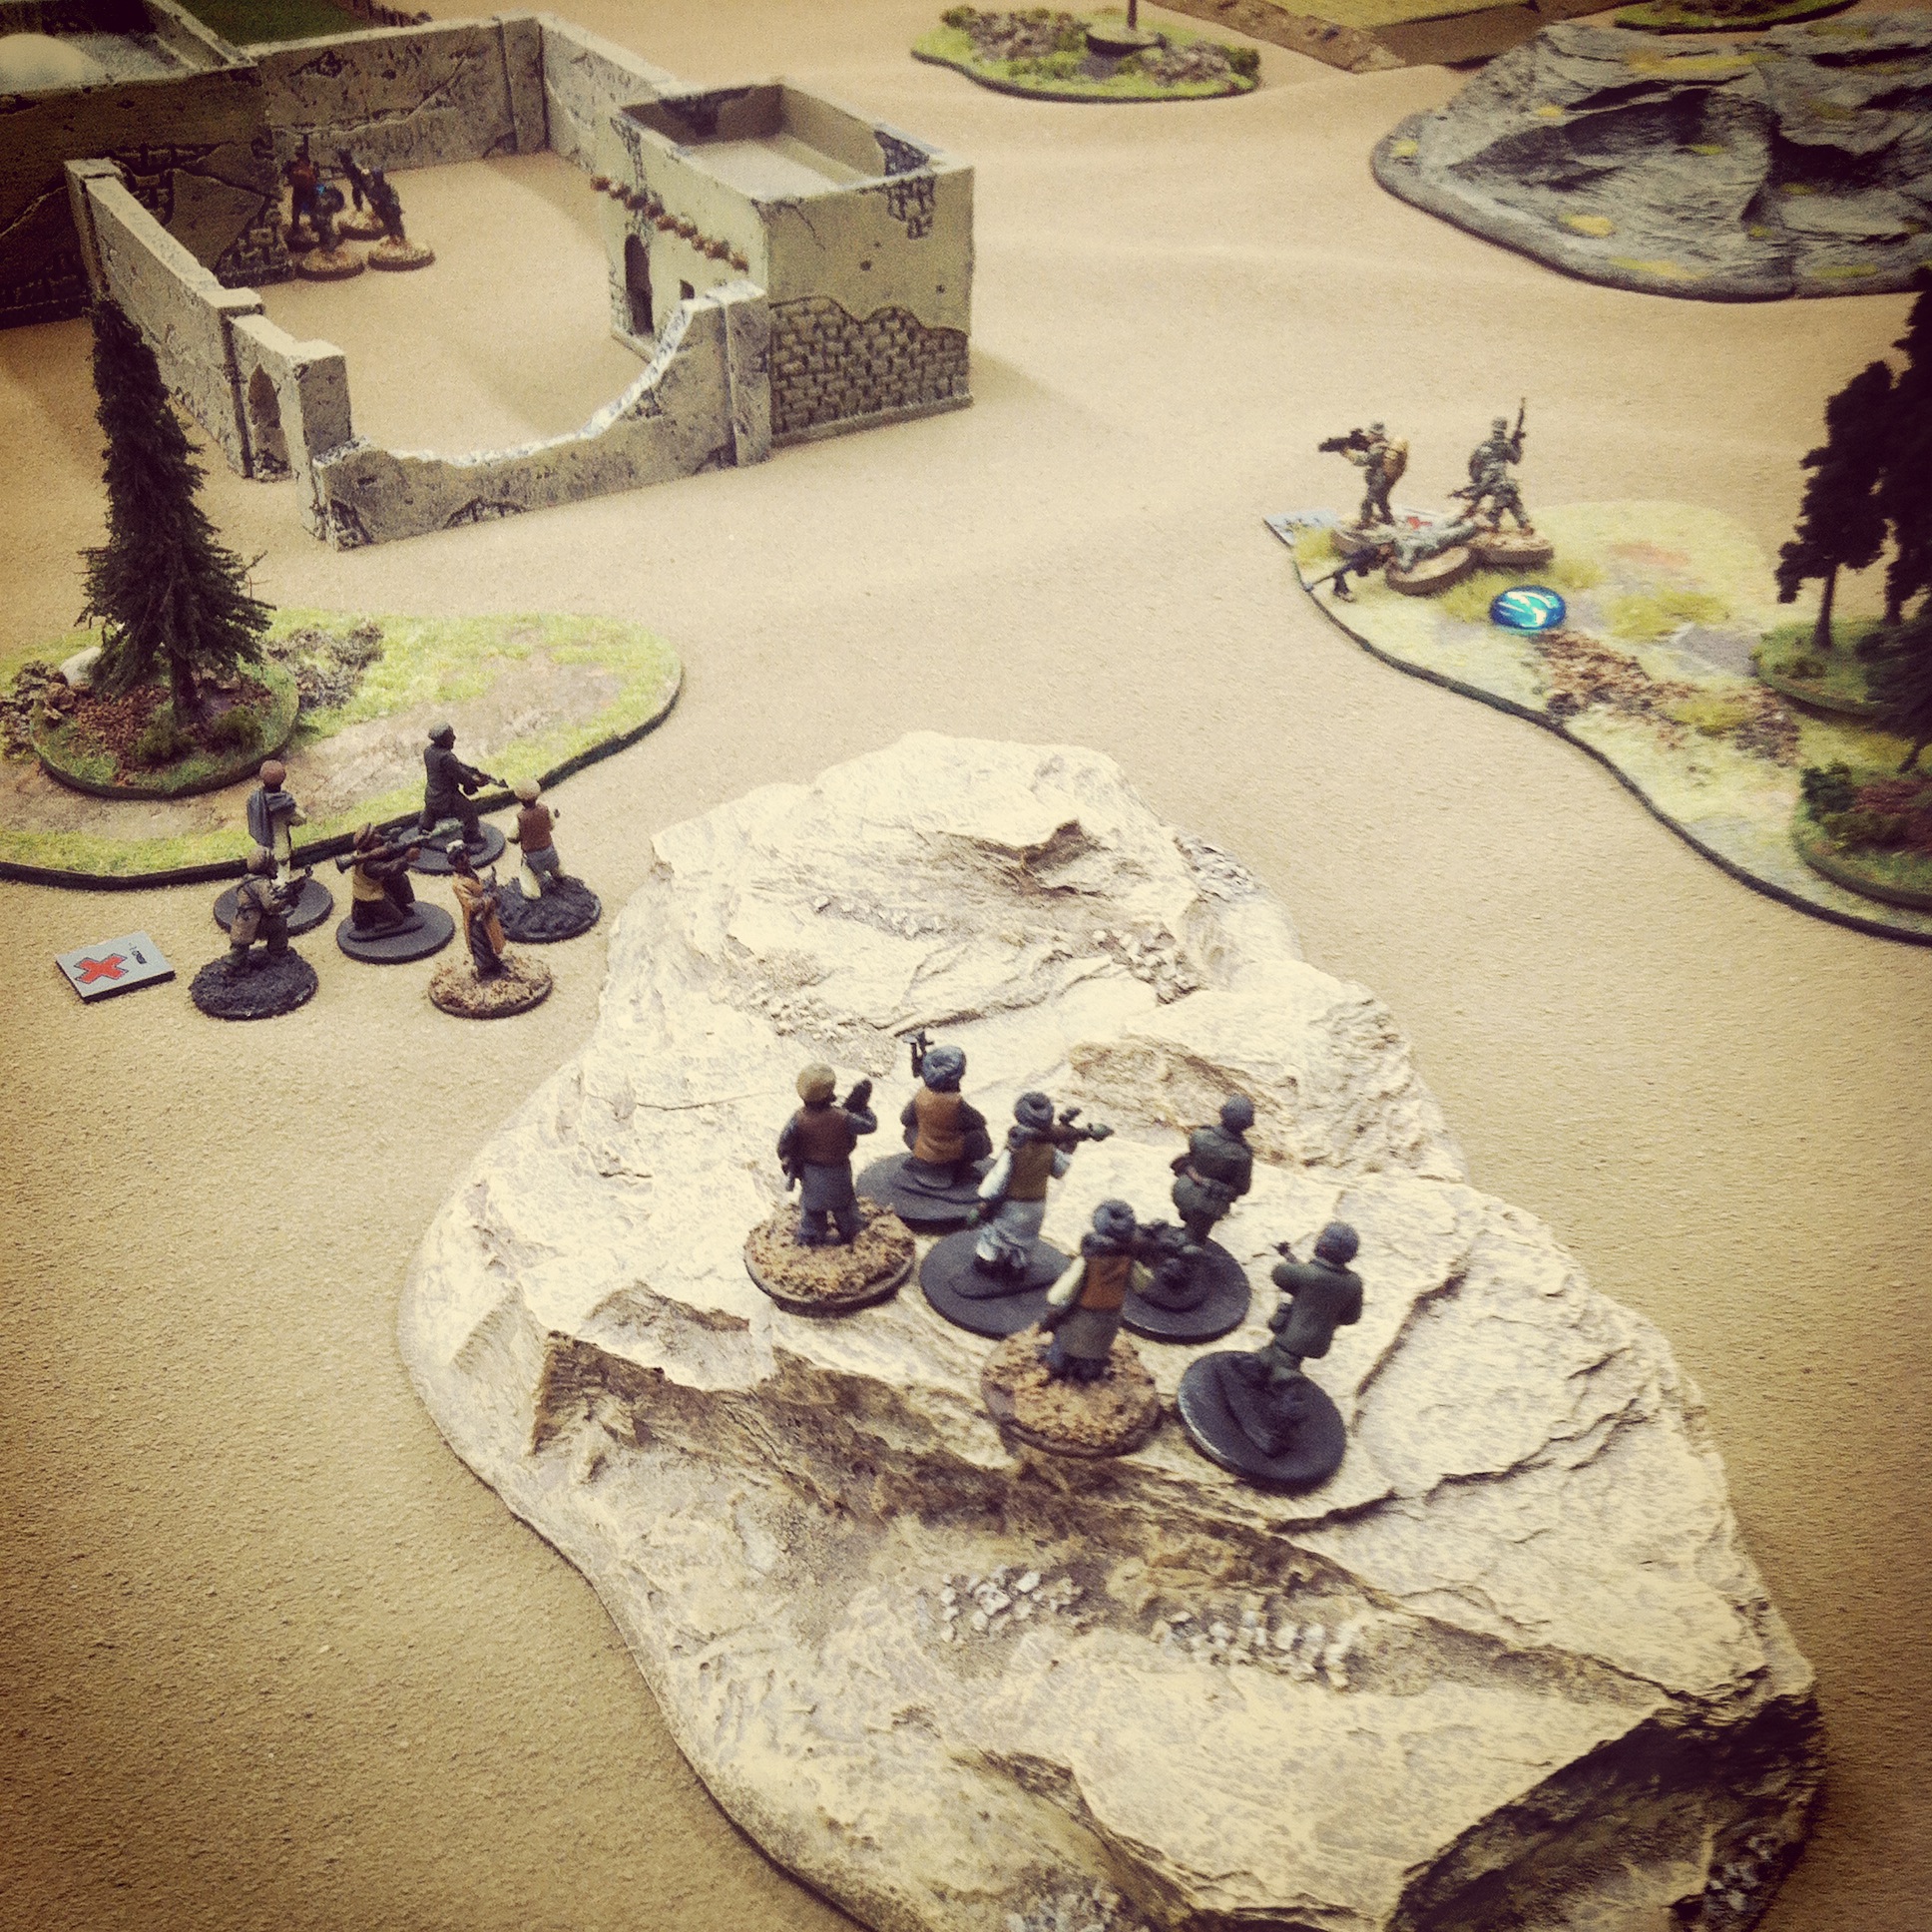
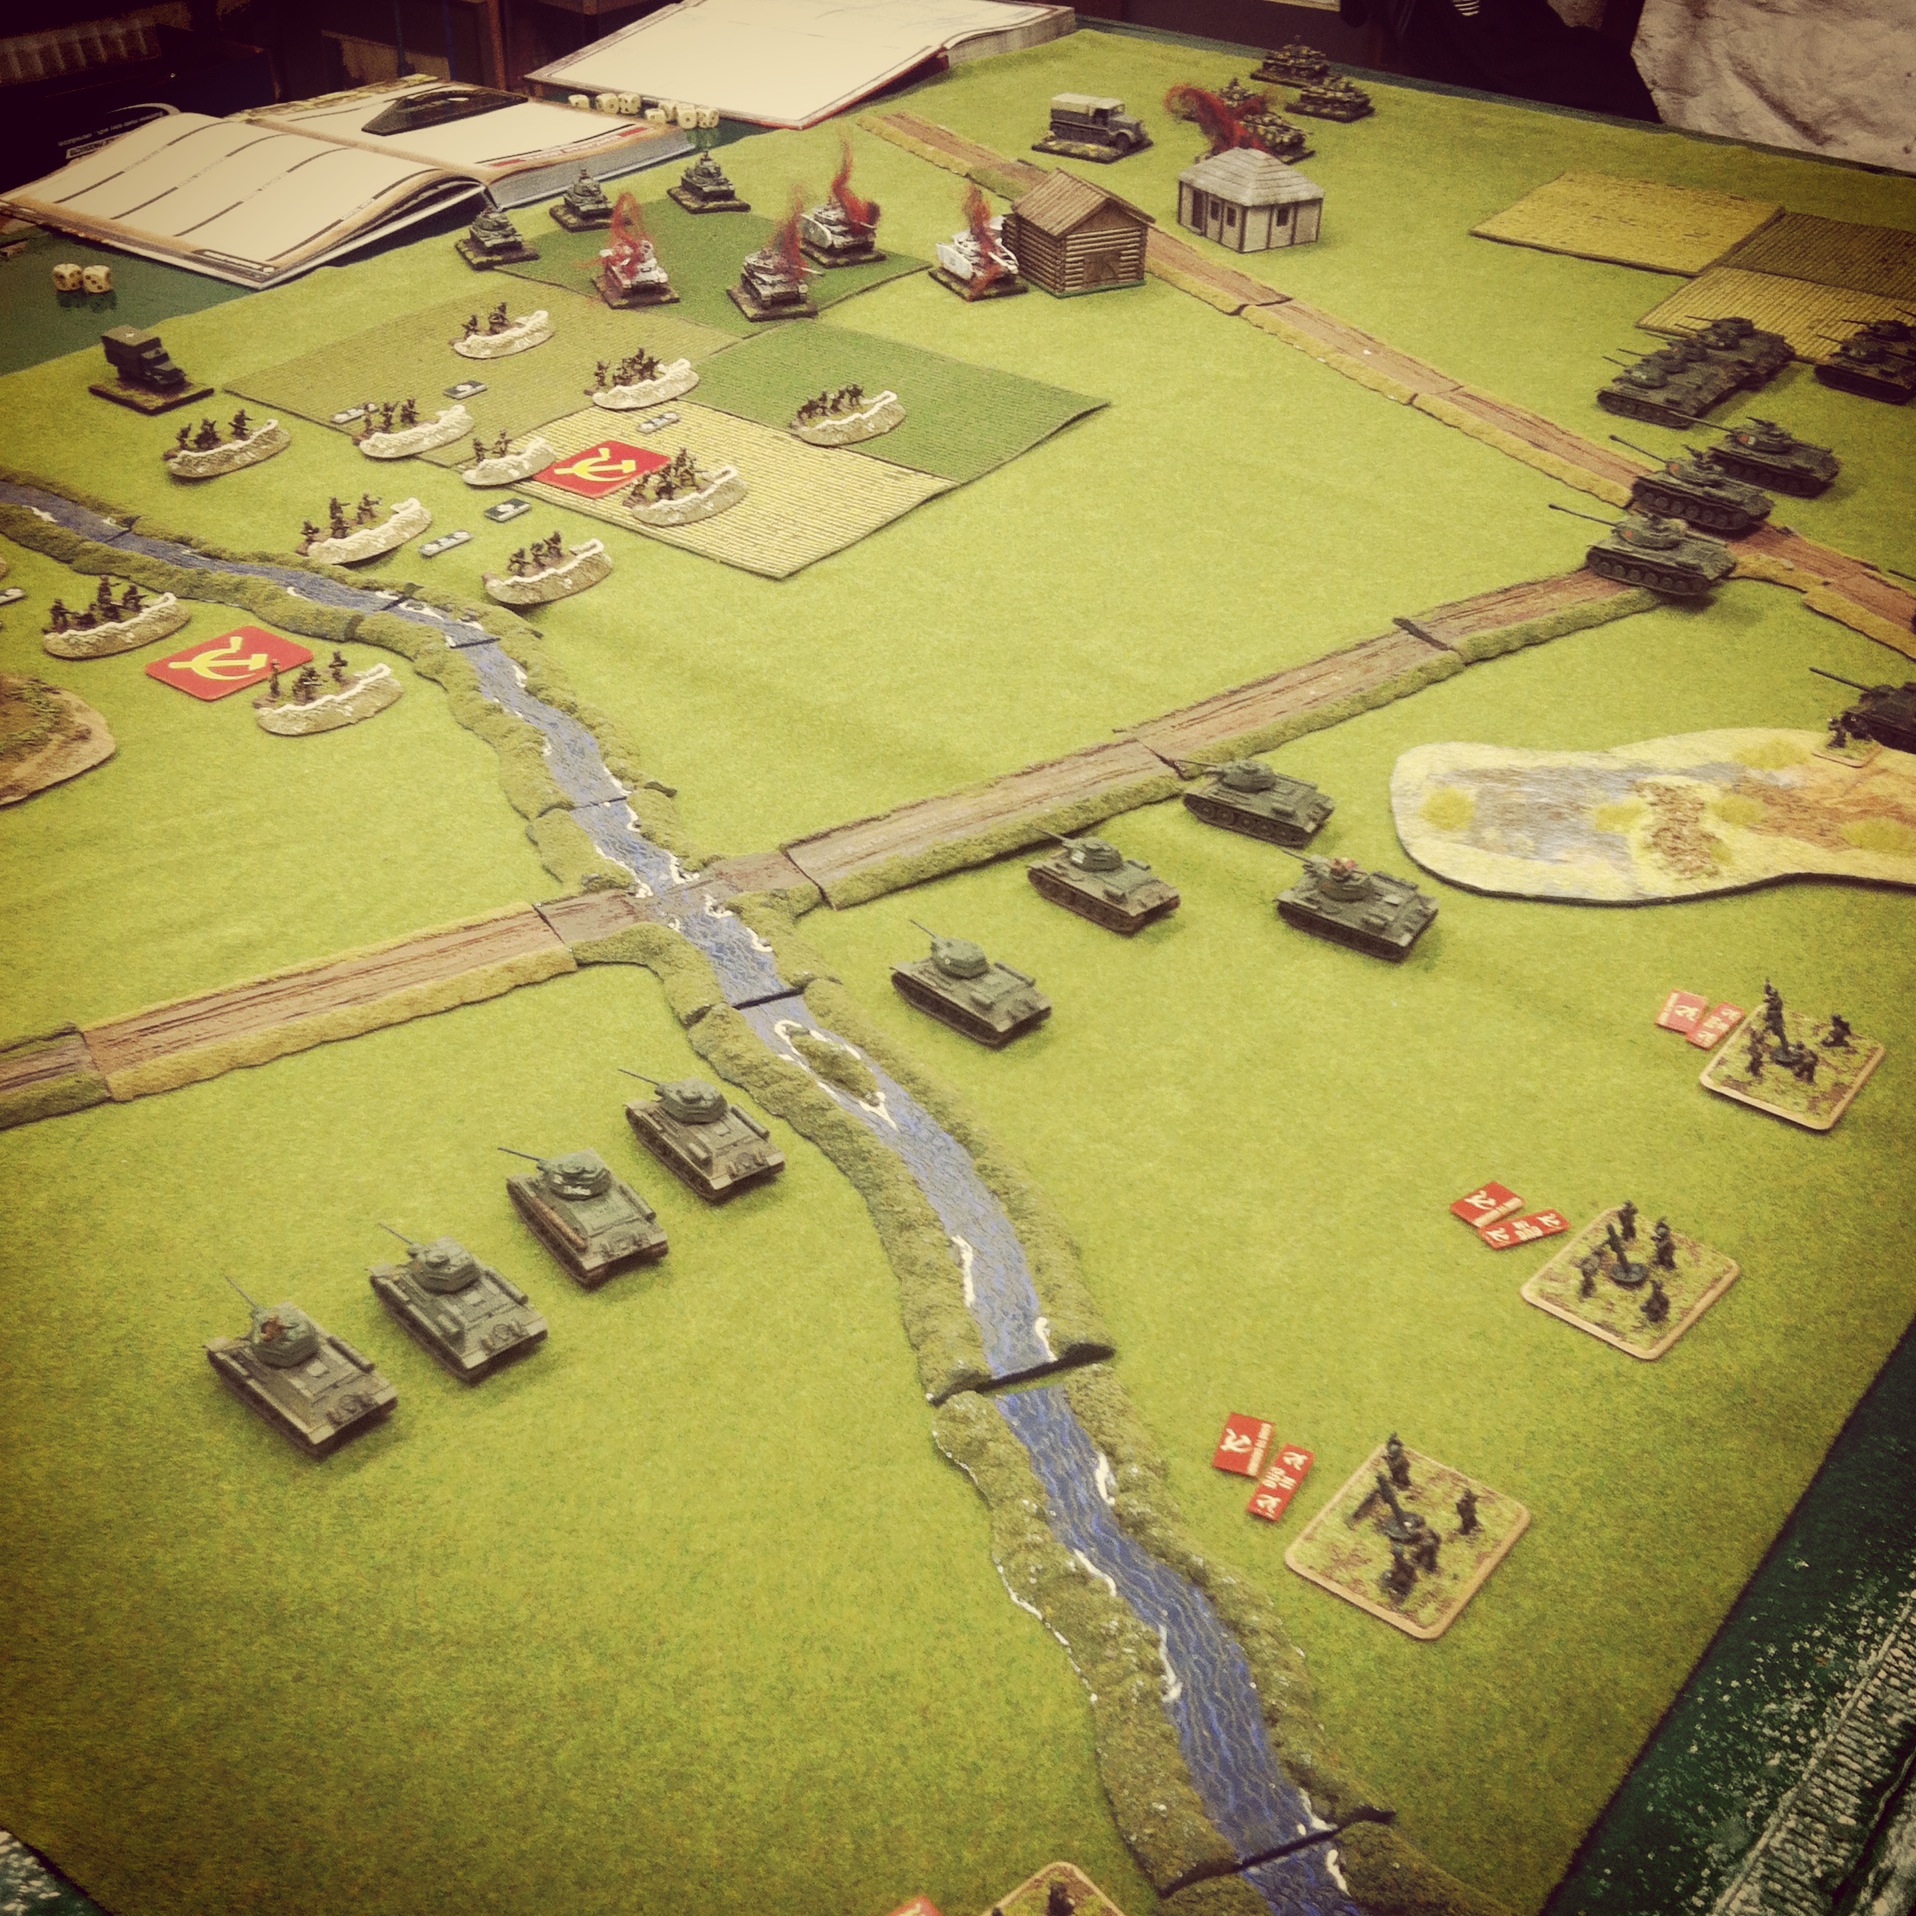
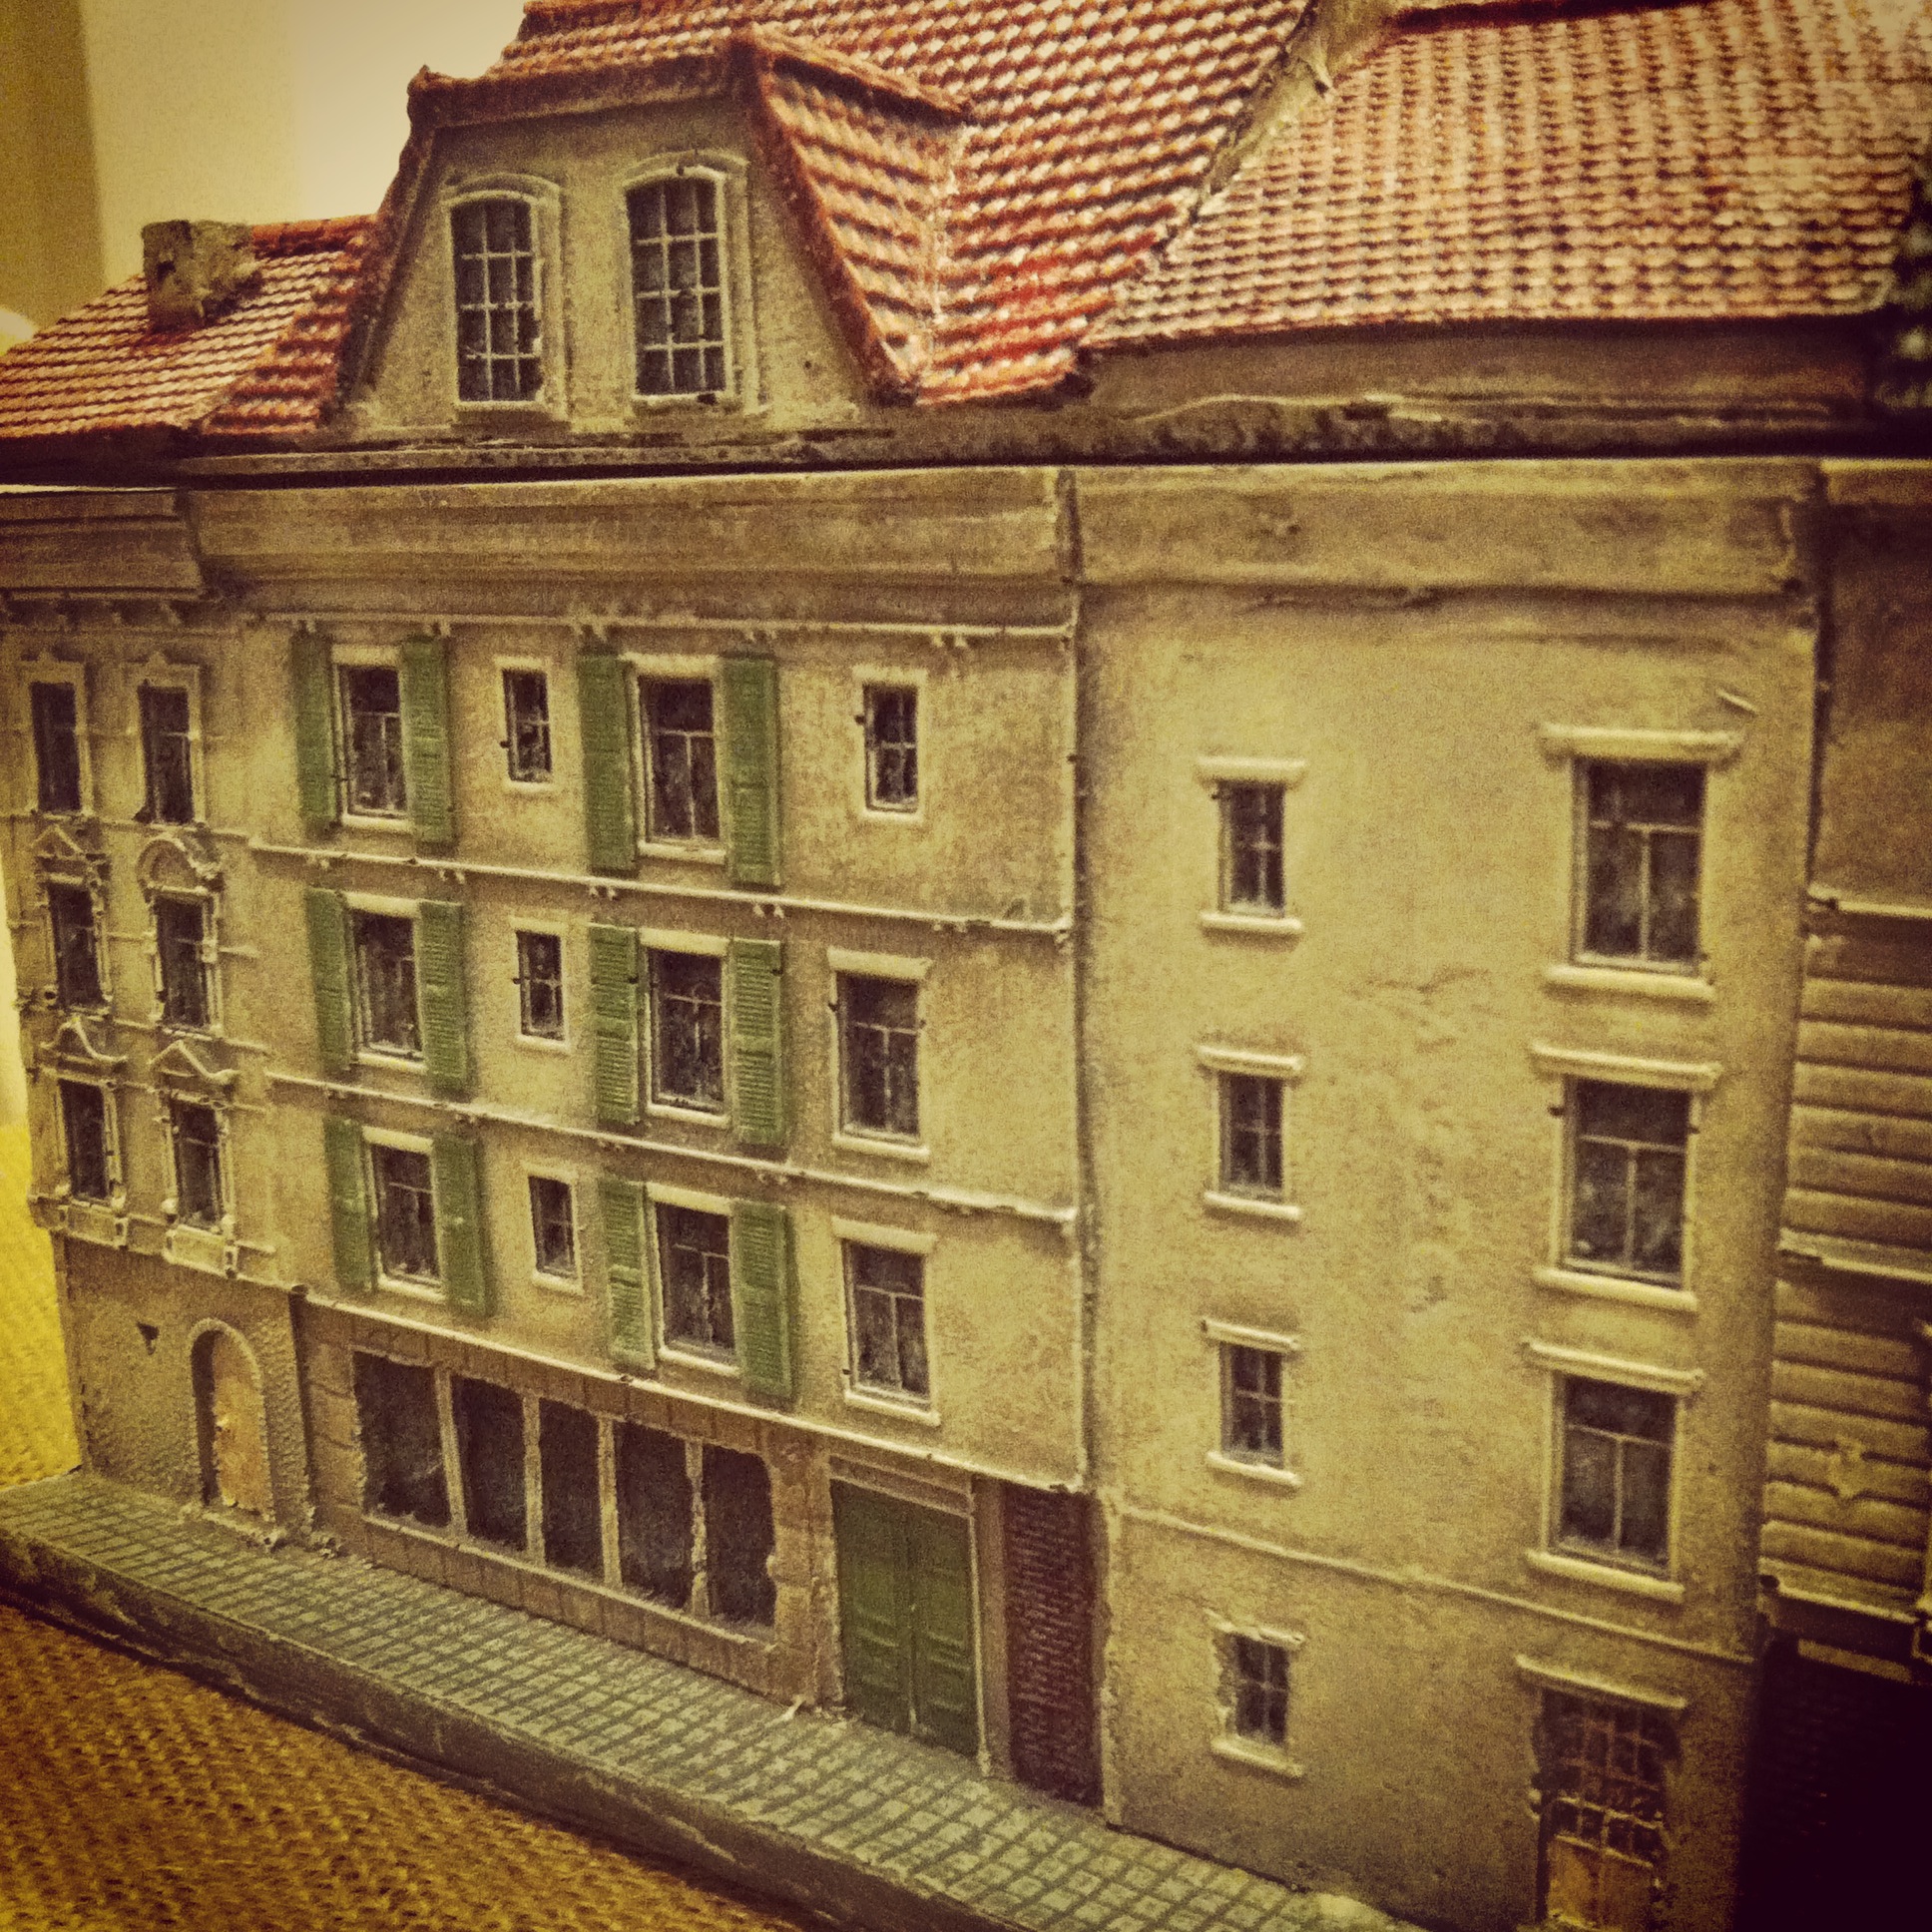
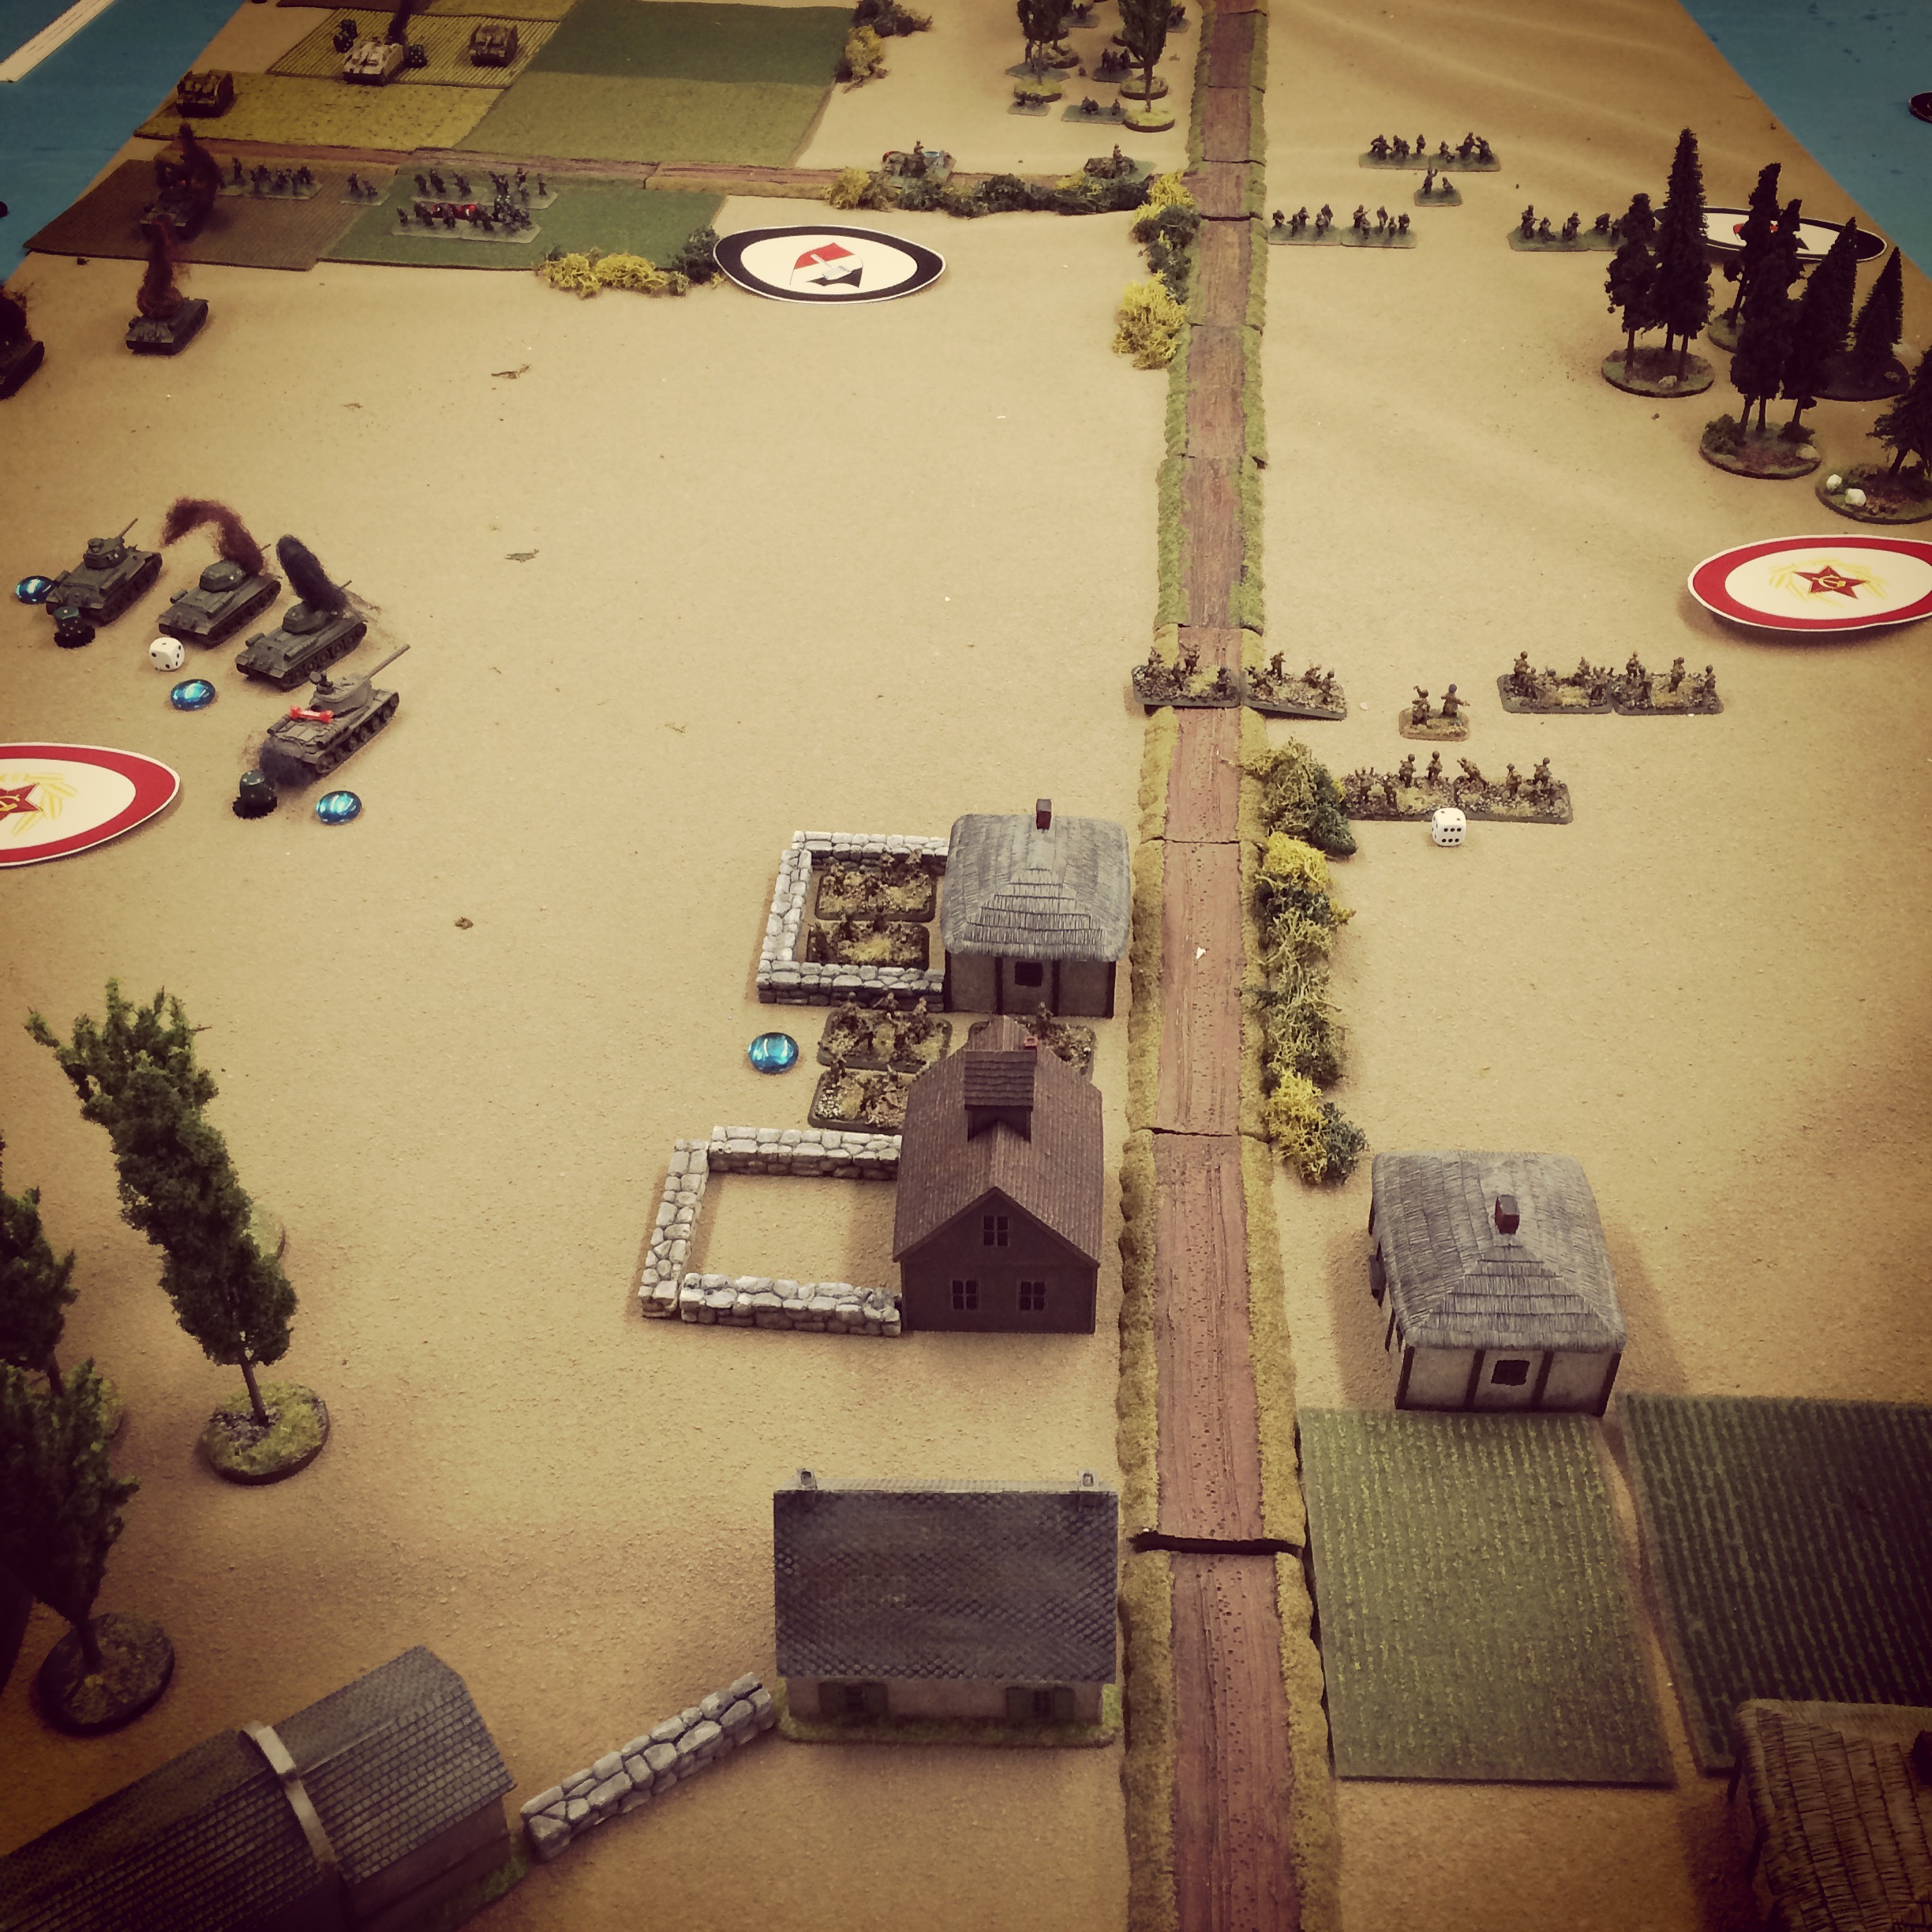
Our first Eastern Front and largest IABSM game to date started with the German infantry, Pak 40 anti-tank guns and two StuG III units deployed in hidden on a third of the table. Across a wide field, the Soviets deployed on blinds along the table edge in and around a collective farm complex. The initial Soviet blinds featured three infantry platoons at the center, a T-34 tank platoon to the left flank and one more tank platoon arriving on blinds in the second and third turns. Each side also featured off board artillery and the German side also had air fire to draw on throughout the game, although none of it would play a measurable role during the battle.

IMG_5547Soviet armor rumbles toward their first objective

IMG_5578A Pak 40 reveals itself to the approaching Soviet T-34s

IMG_5569The T-34s and Pak 40 exchange fire across the open field

IMG_5571
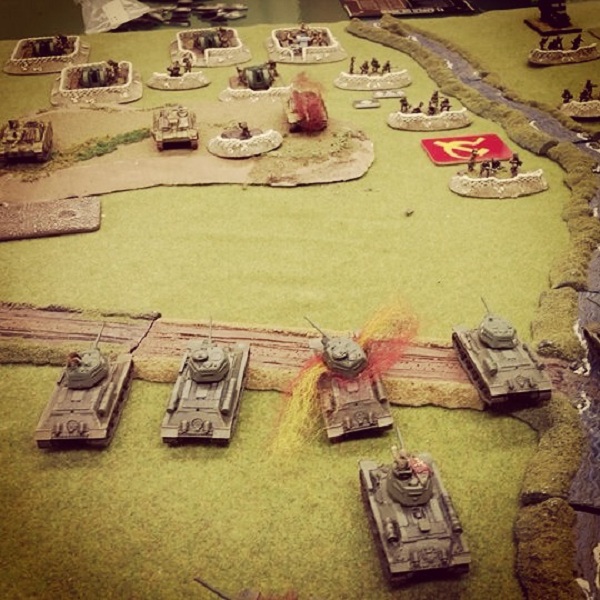
The Soviet commander exposes Germans dug into the field just as his tank is destroyed

IMG_5575The first wave of Soviet armor burns in the field as reinforcements arrive on a blind to the rear

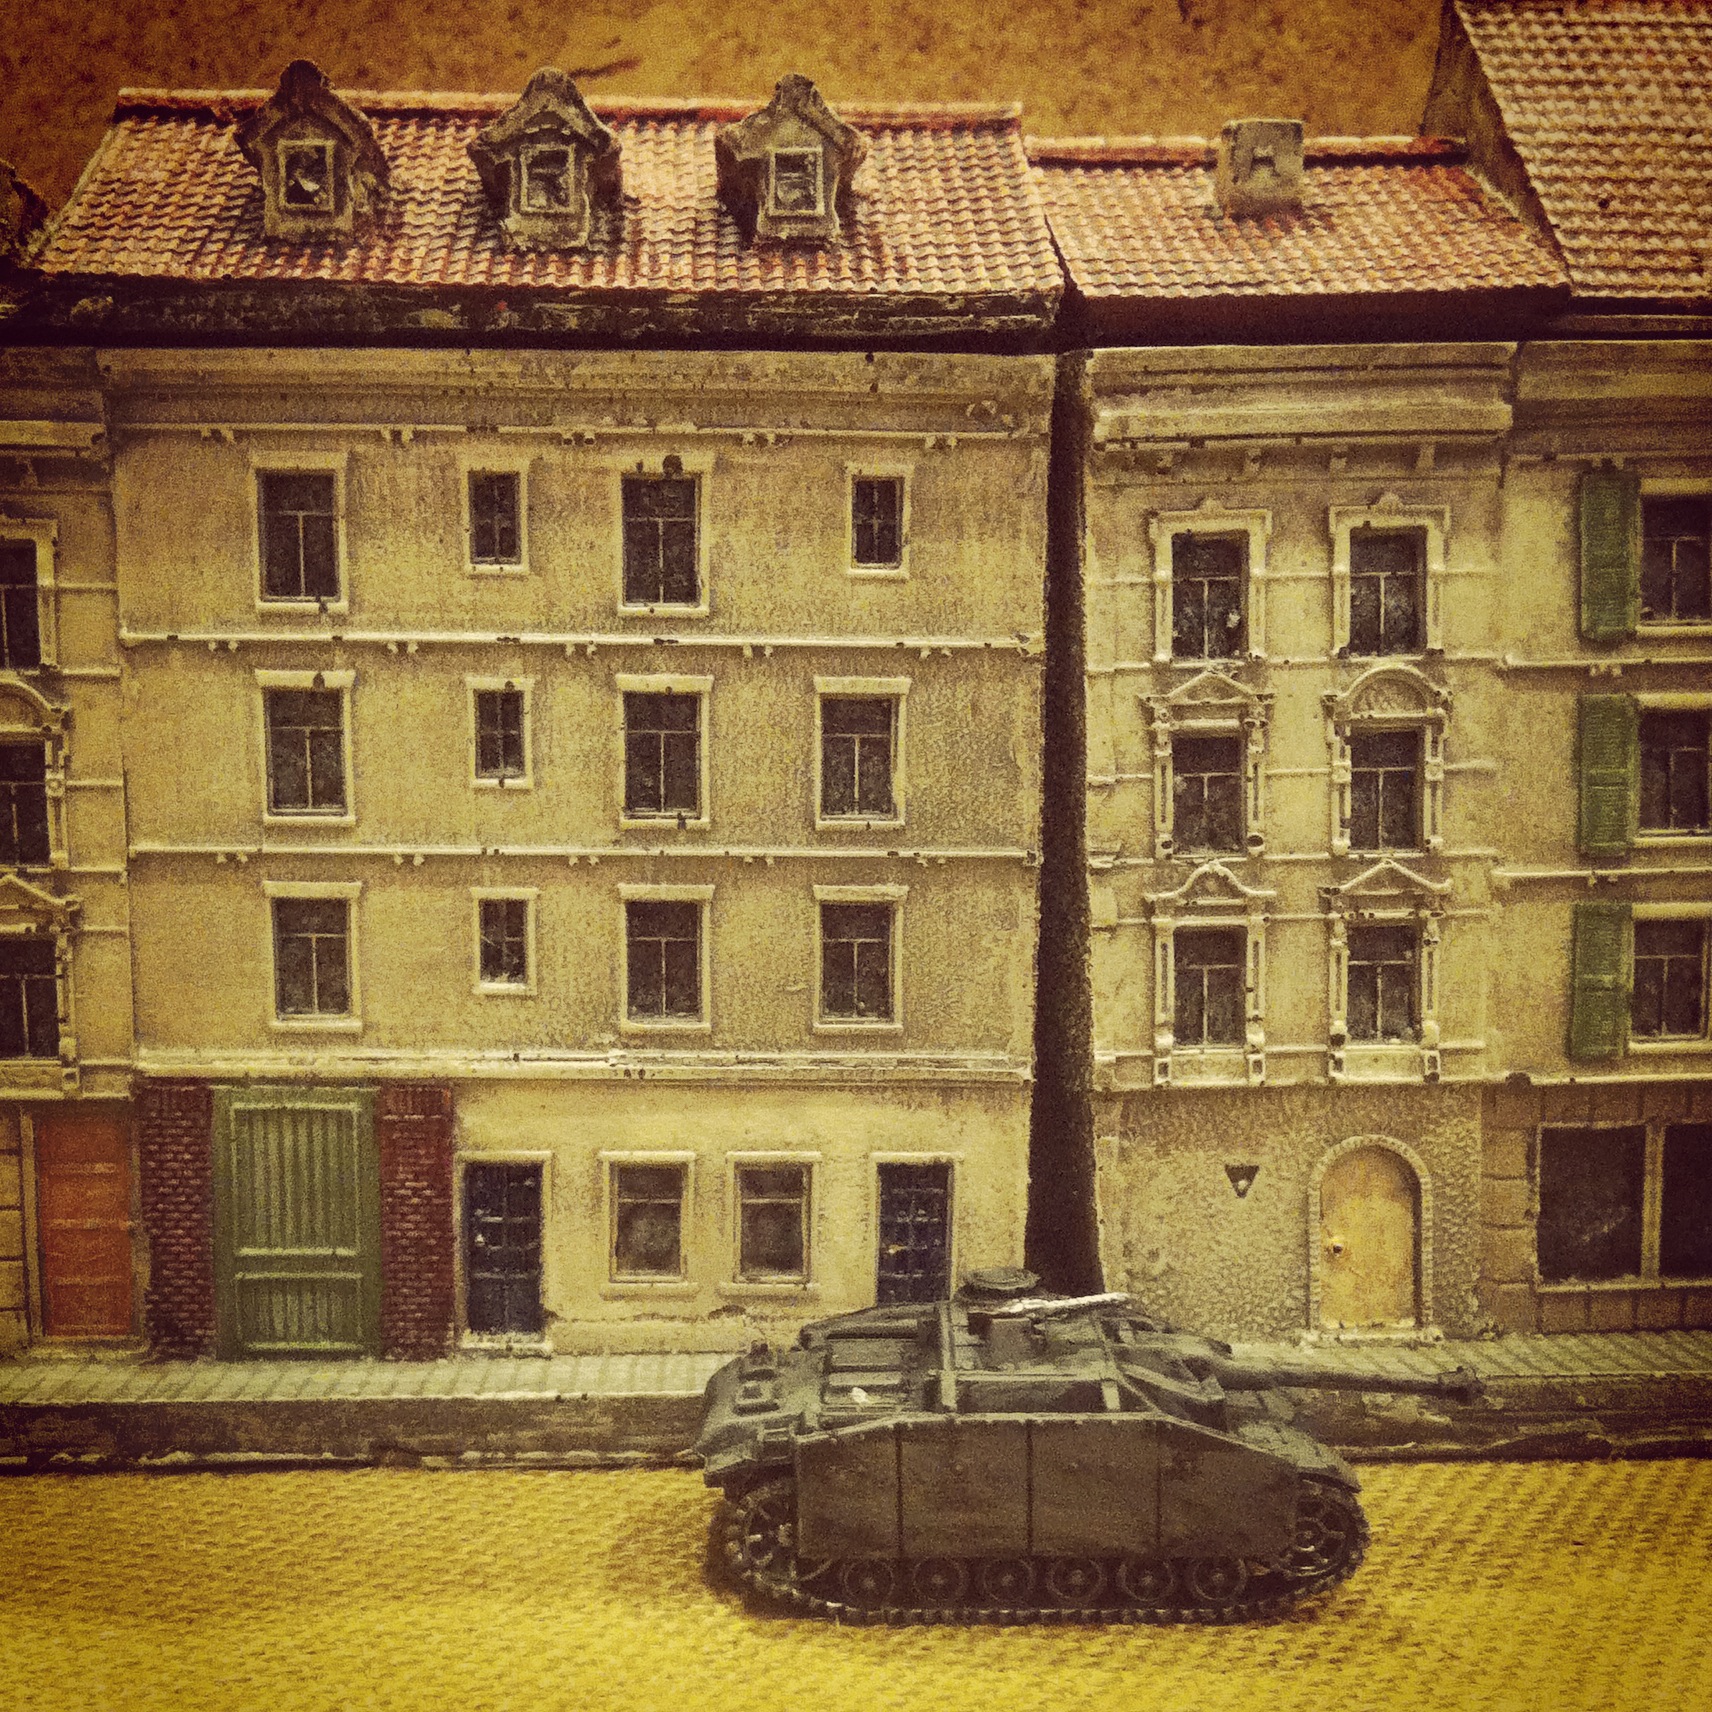
Soviet objectives sat at the German-defended crossroads, and so the T-34s pushed hard in the initial turns toward the road entry at the edge of the table at the Soviet left. Rolling quickly toward the road, the T-34s encountered a Pak 40 position at a hedge dominating a field of fire at the center of the table. The Pak 40s immediately hit the tanks, damaging the turrets, sights and mobility of the T-34s. Over several turns, fire was exchanged between the T-34s and the German anti-tank crews, leaving several burning tanks and a partially destroyed German gun position. Mid-game, a reinforcing platoon of T-34s moved to support the first wave of nearly-destroyed Soviet armor but were likewise halted in a crossfire from the surviving Pak 40s and three StuGs moving out their hidden positions and toward the road. The Soviet tank commander managed to close gloriously on the objective, but the StuGs and hidden German infantry positions stalled the advance and his tank went up in flames with those of his comrades, too.

IMG_5570
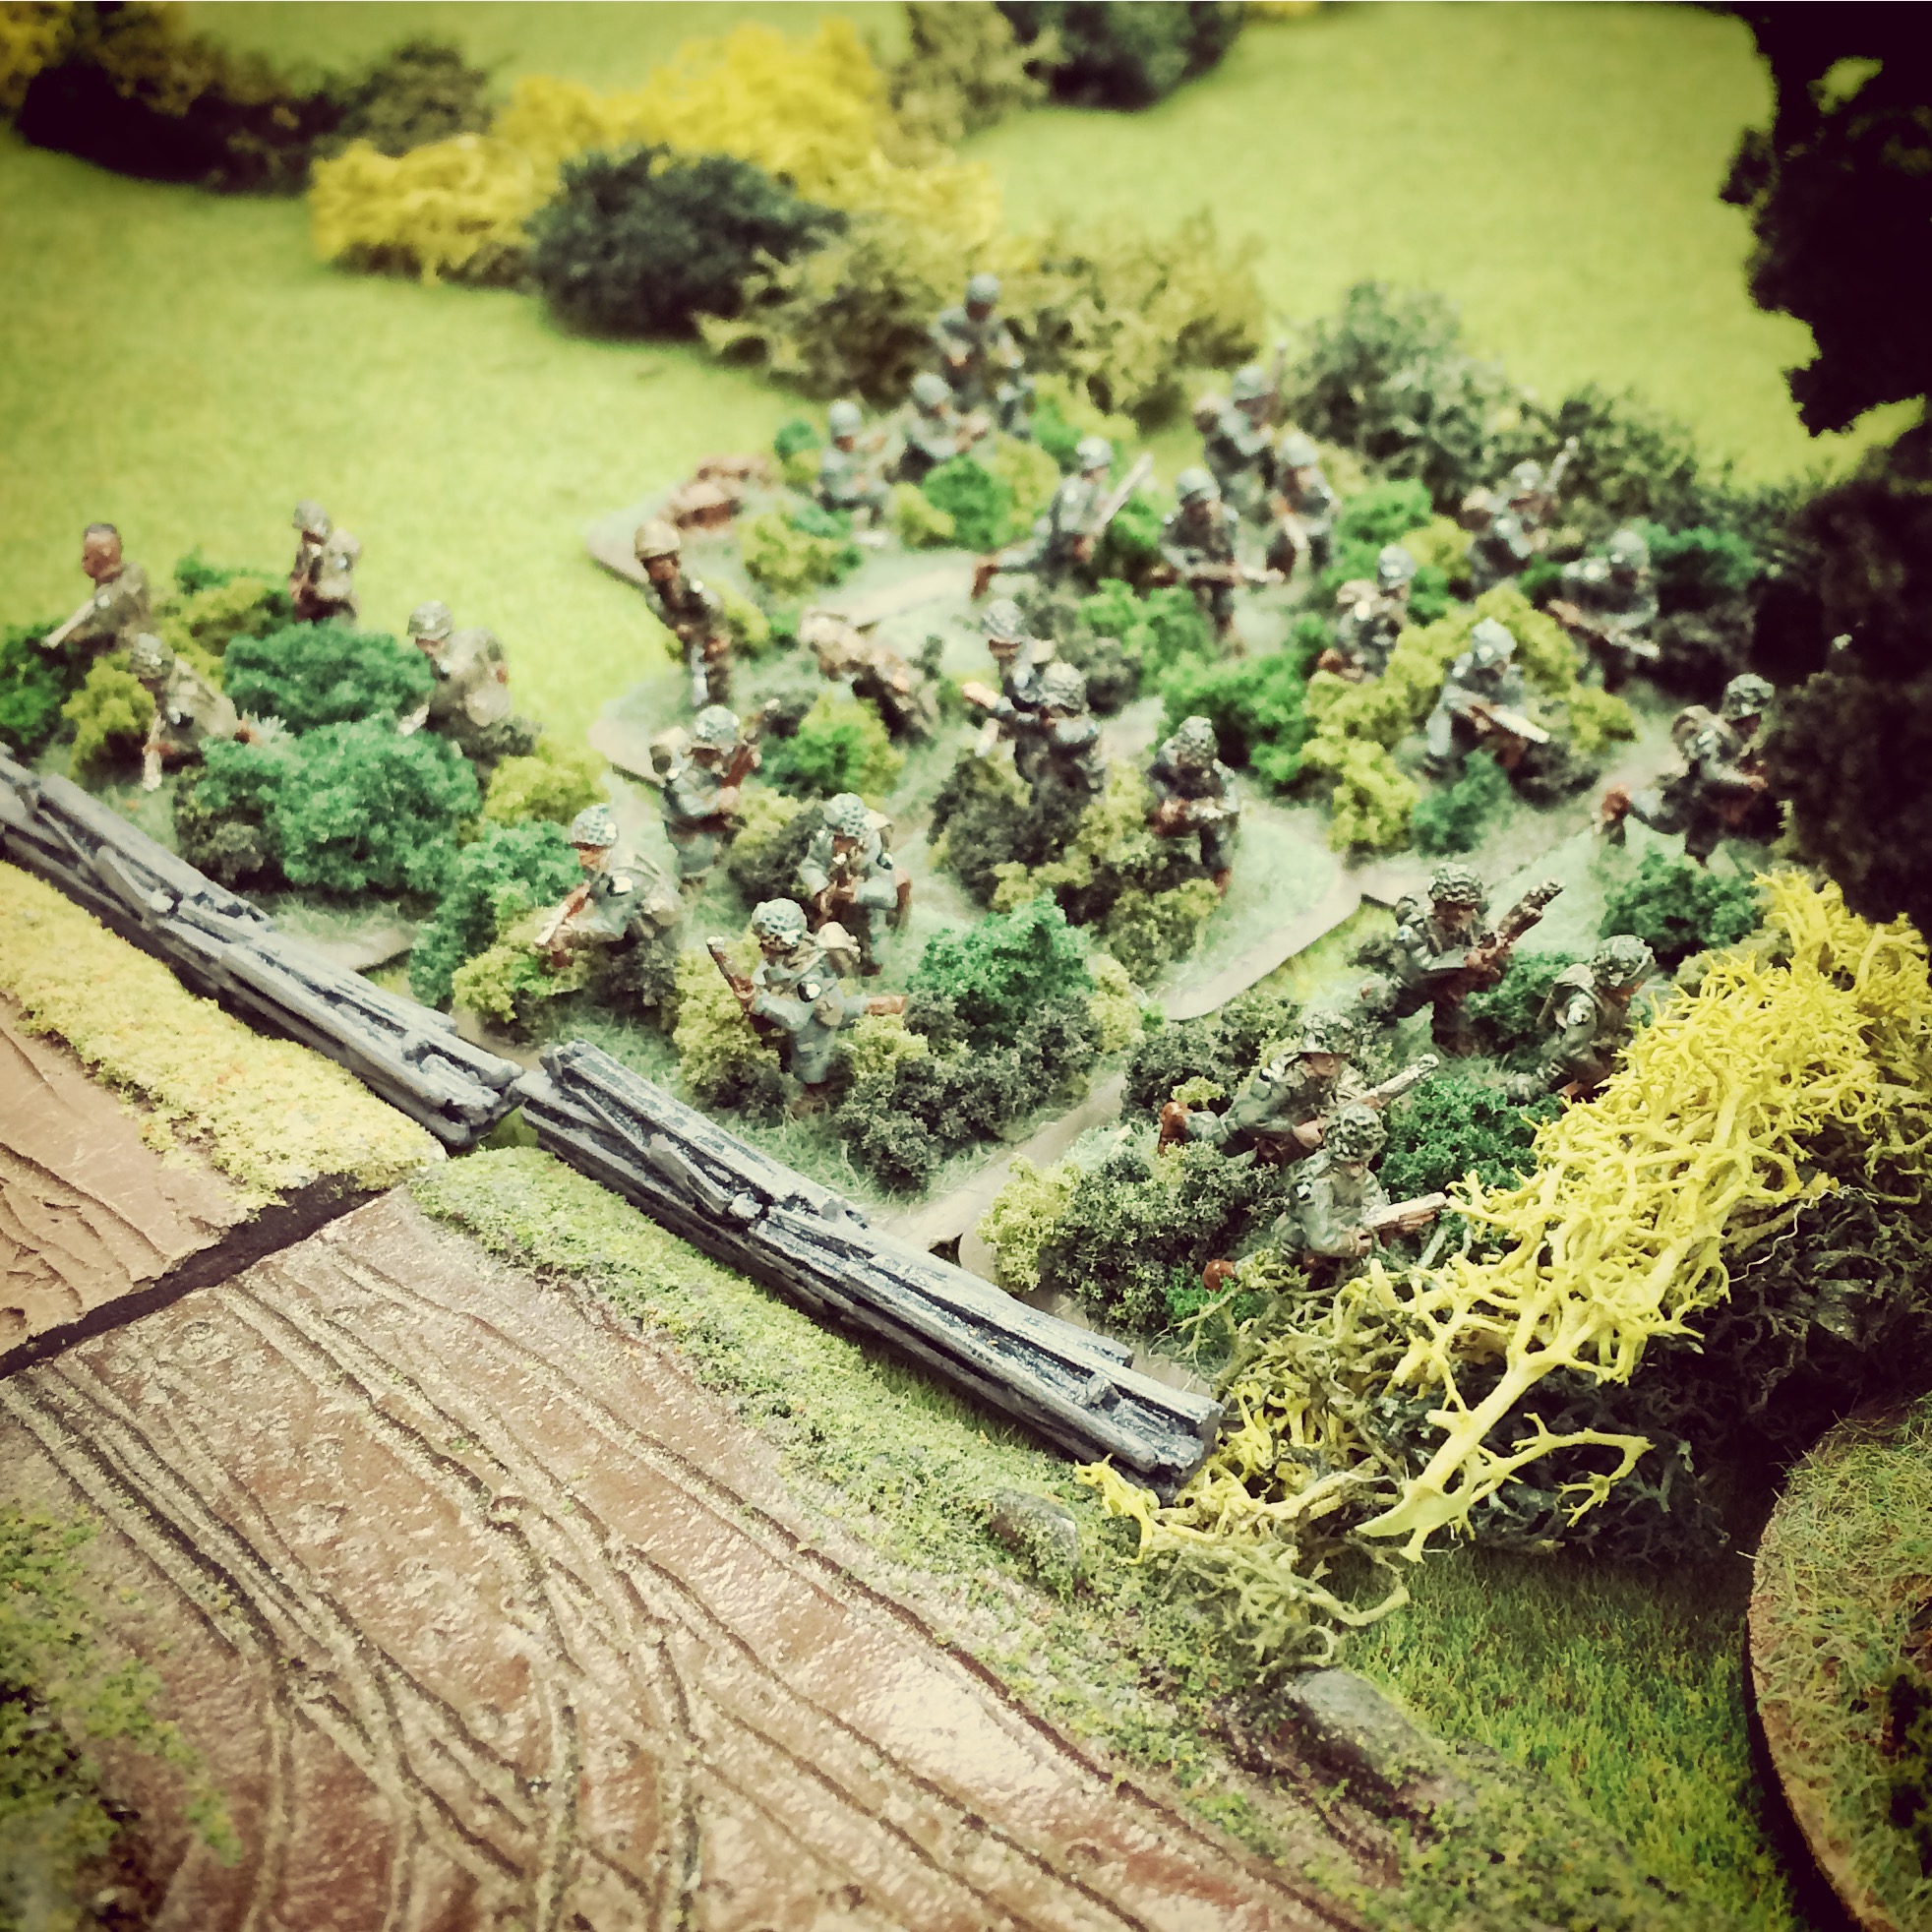
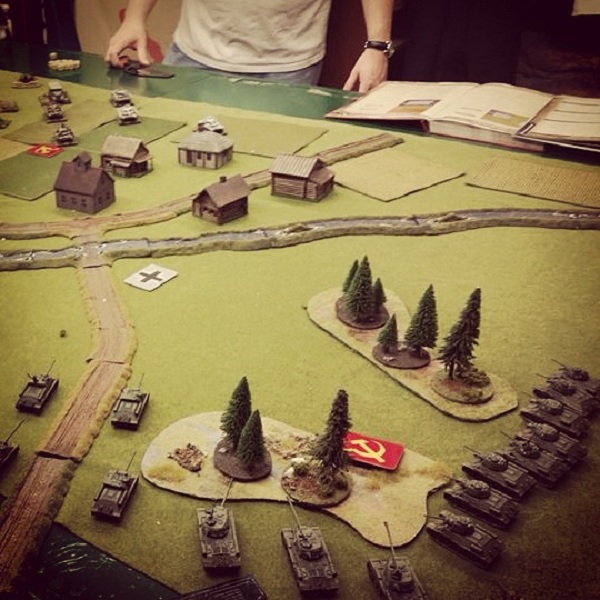
Mid-game with Soviet blinds arriving on each flank, infantry at the middle and thick lines of German defenders in the distance

IMG_5572
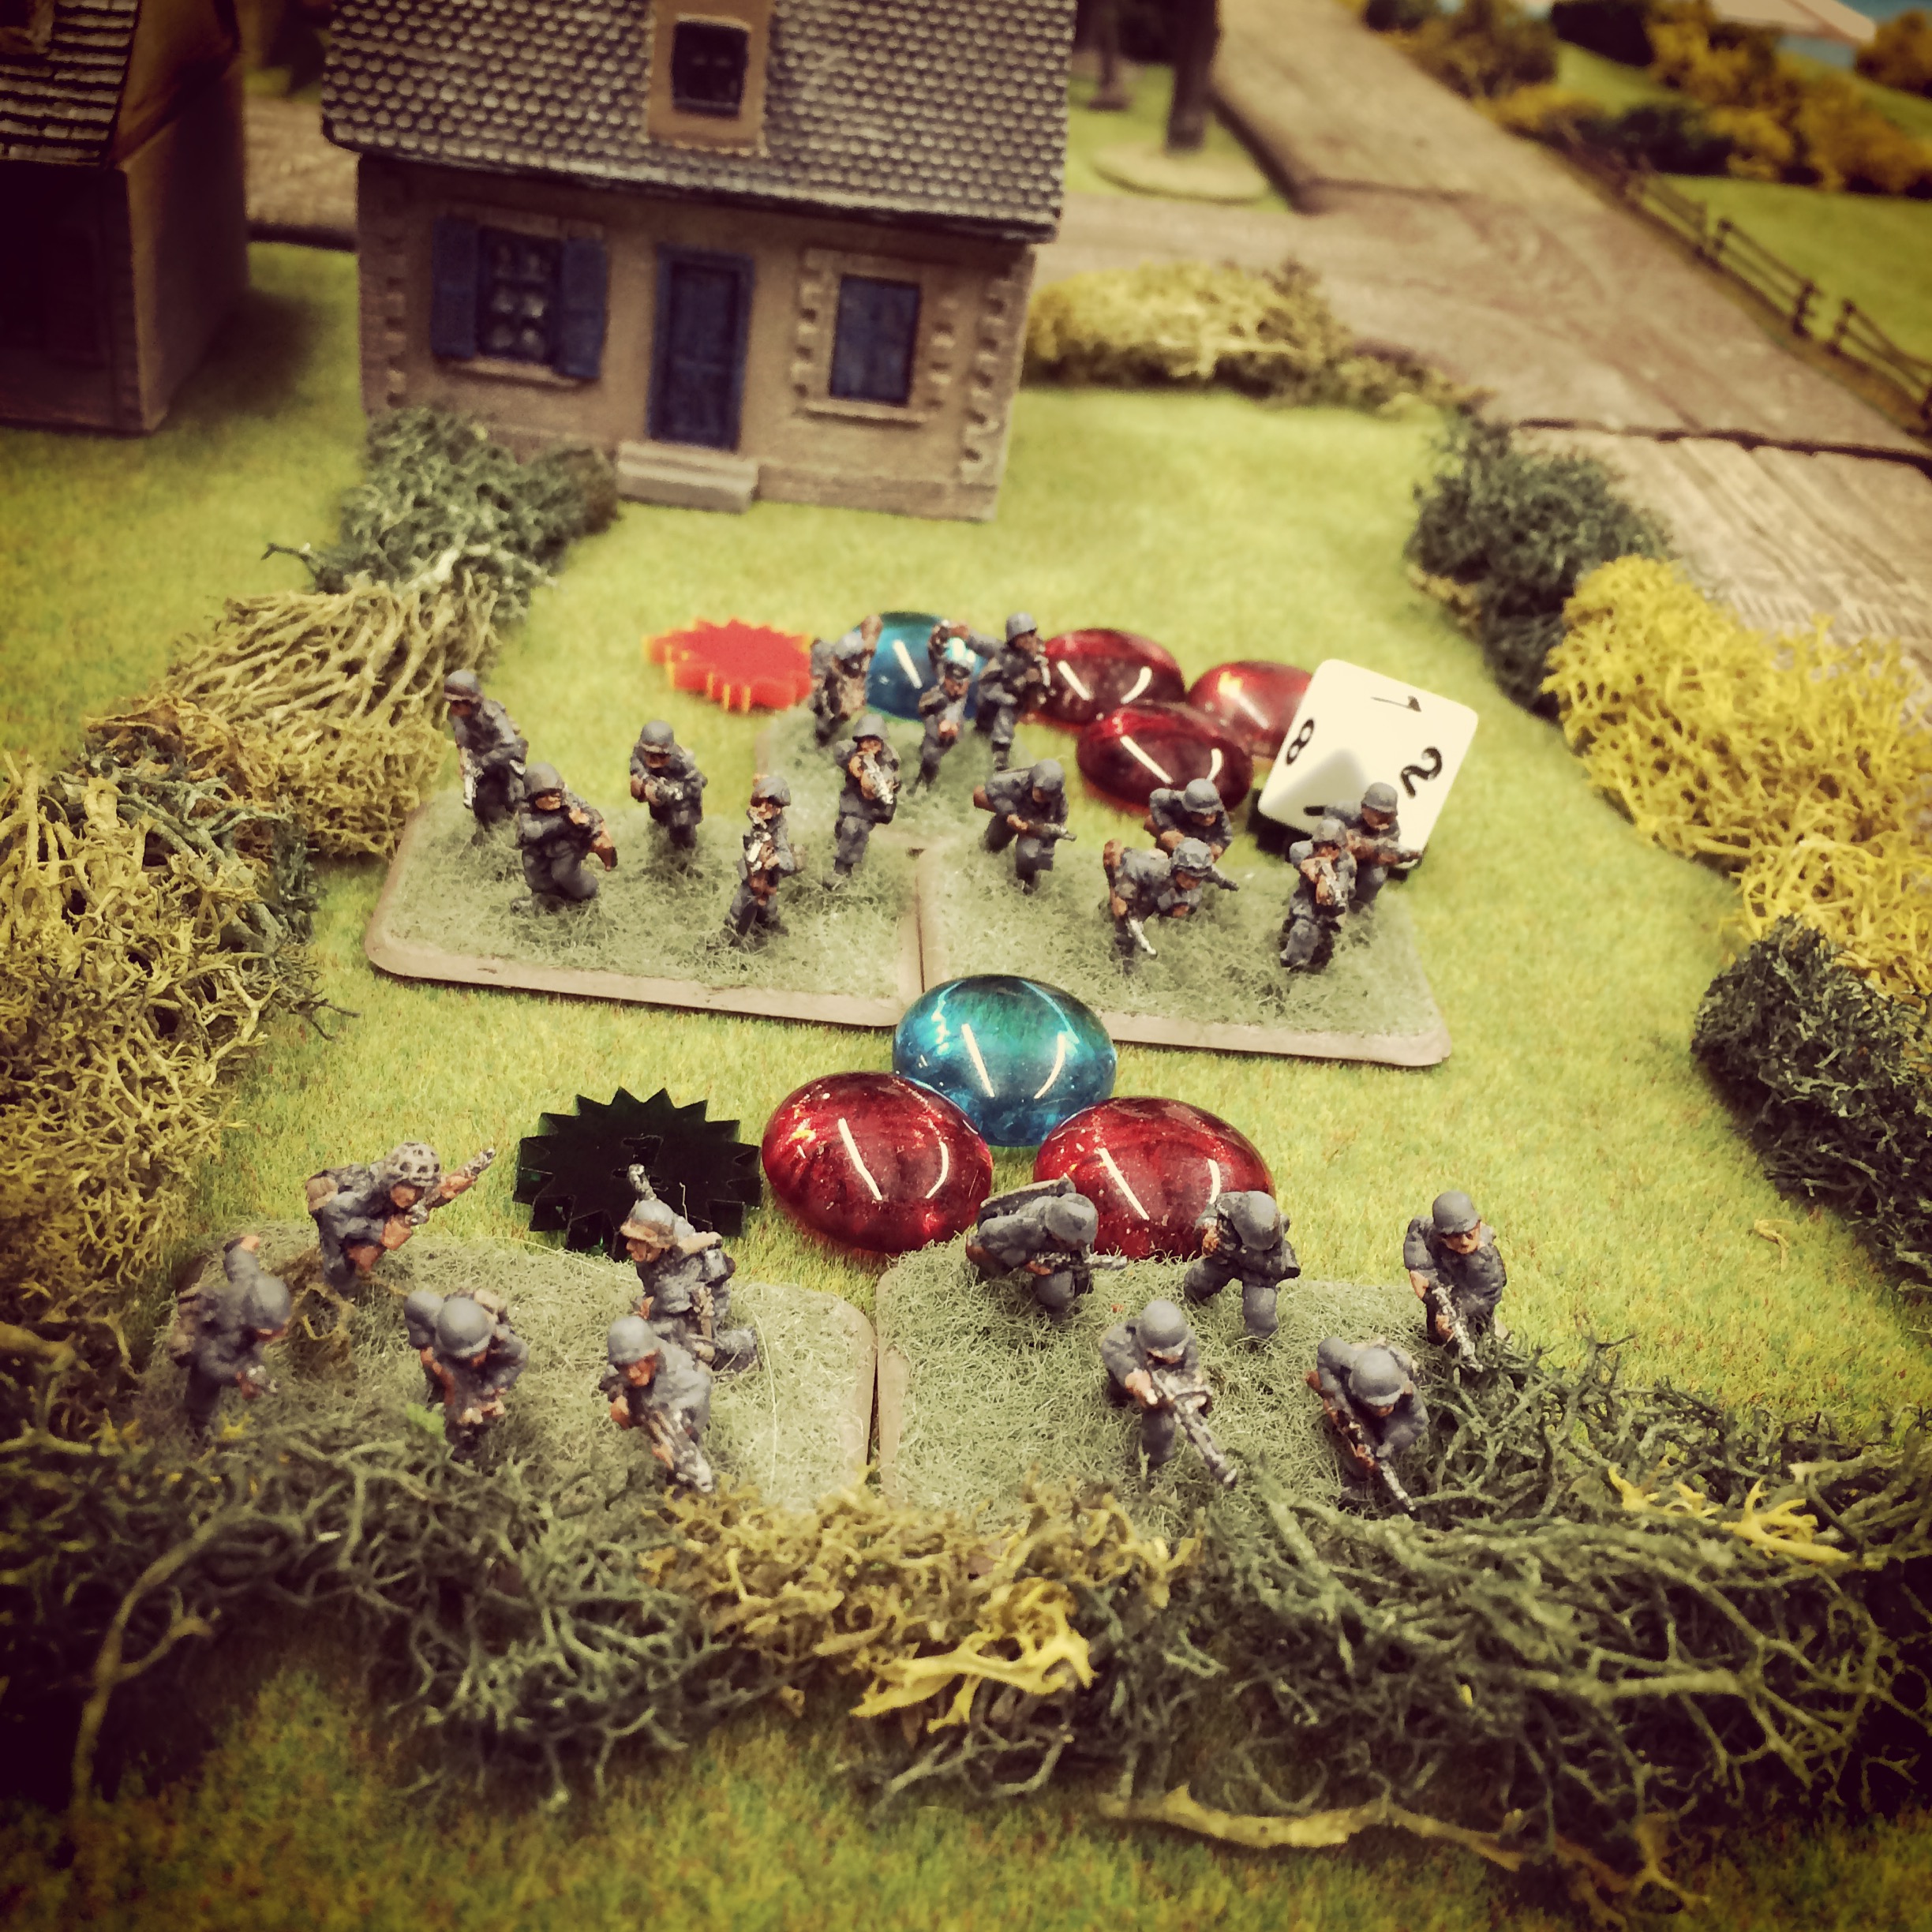
German Pak 40s and MG42s hold the center

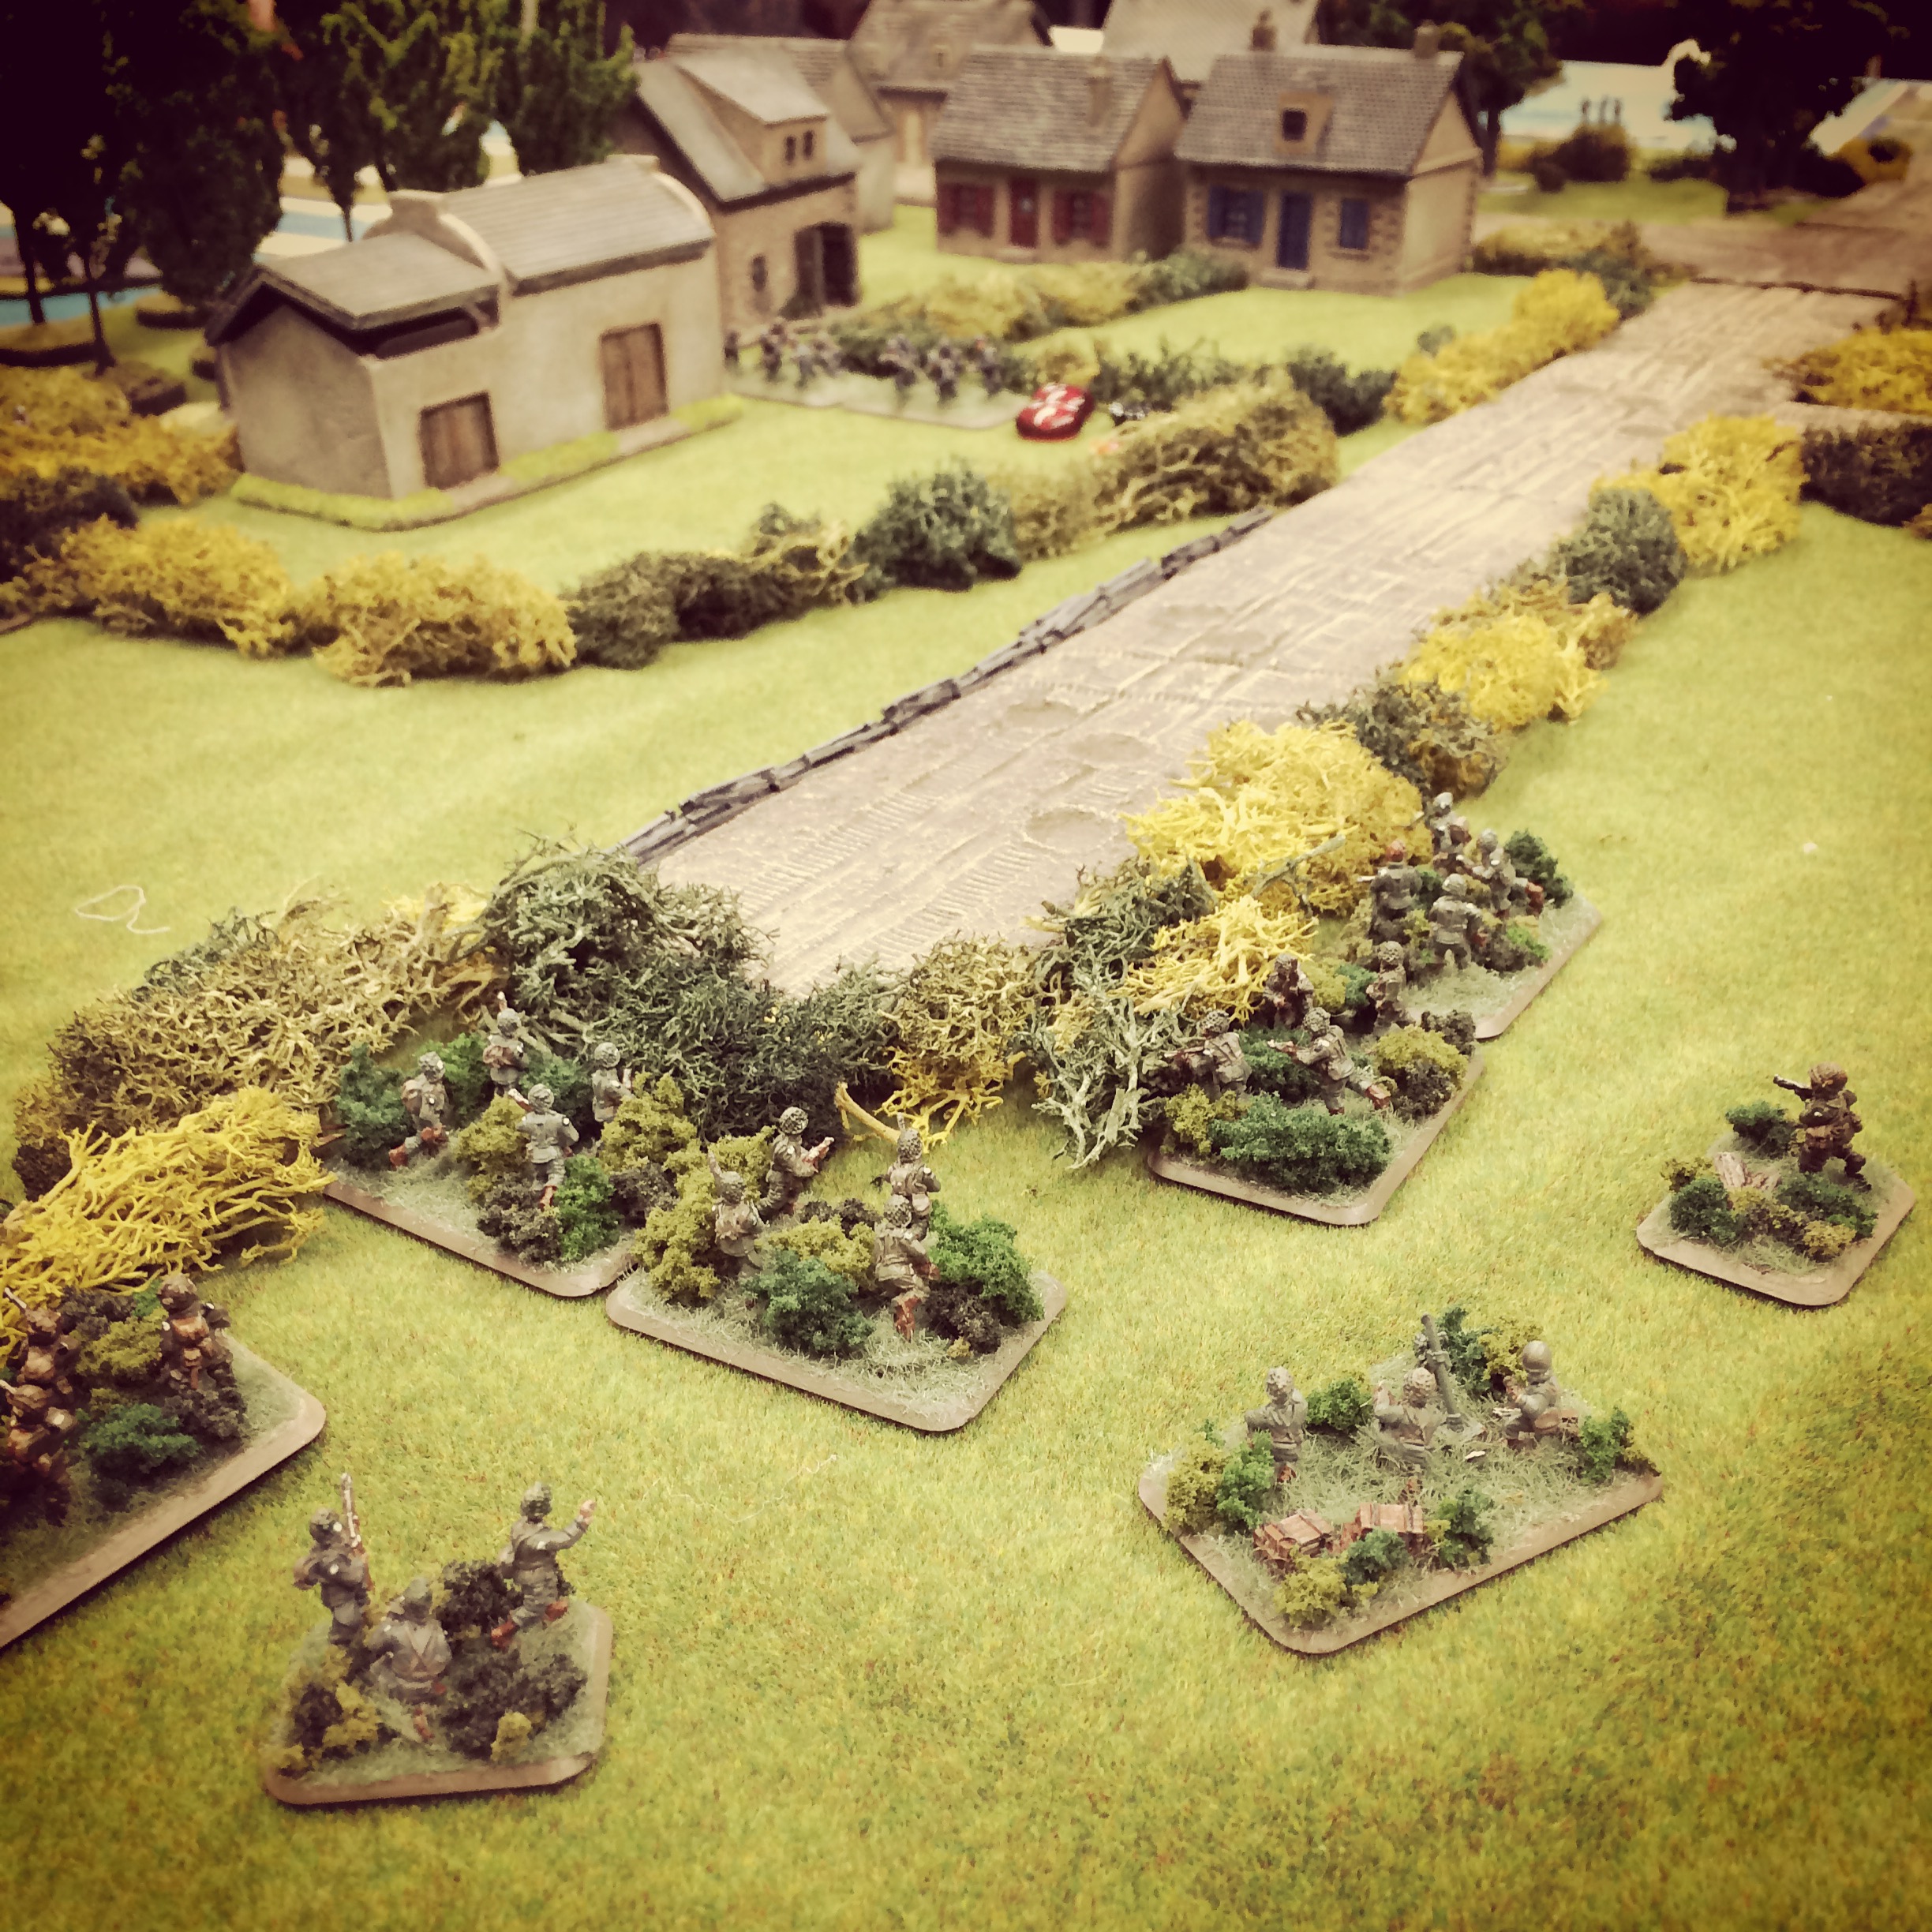
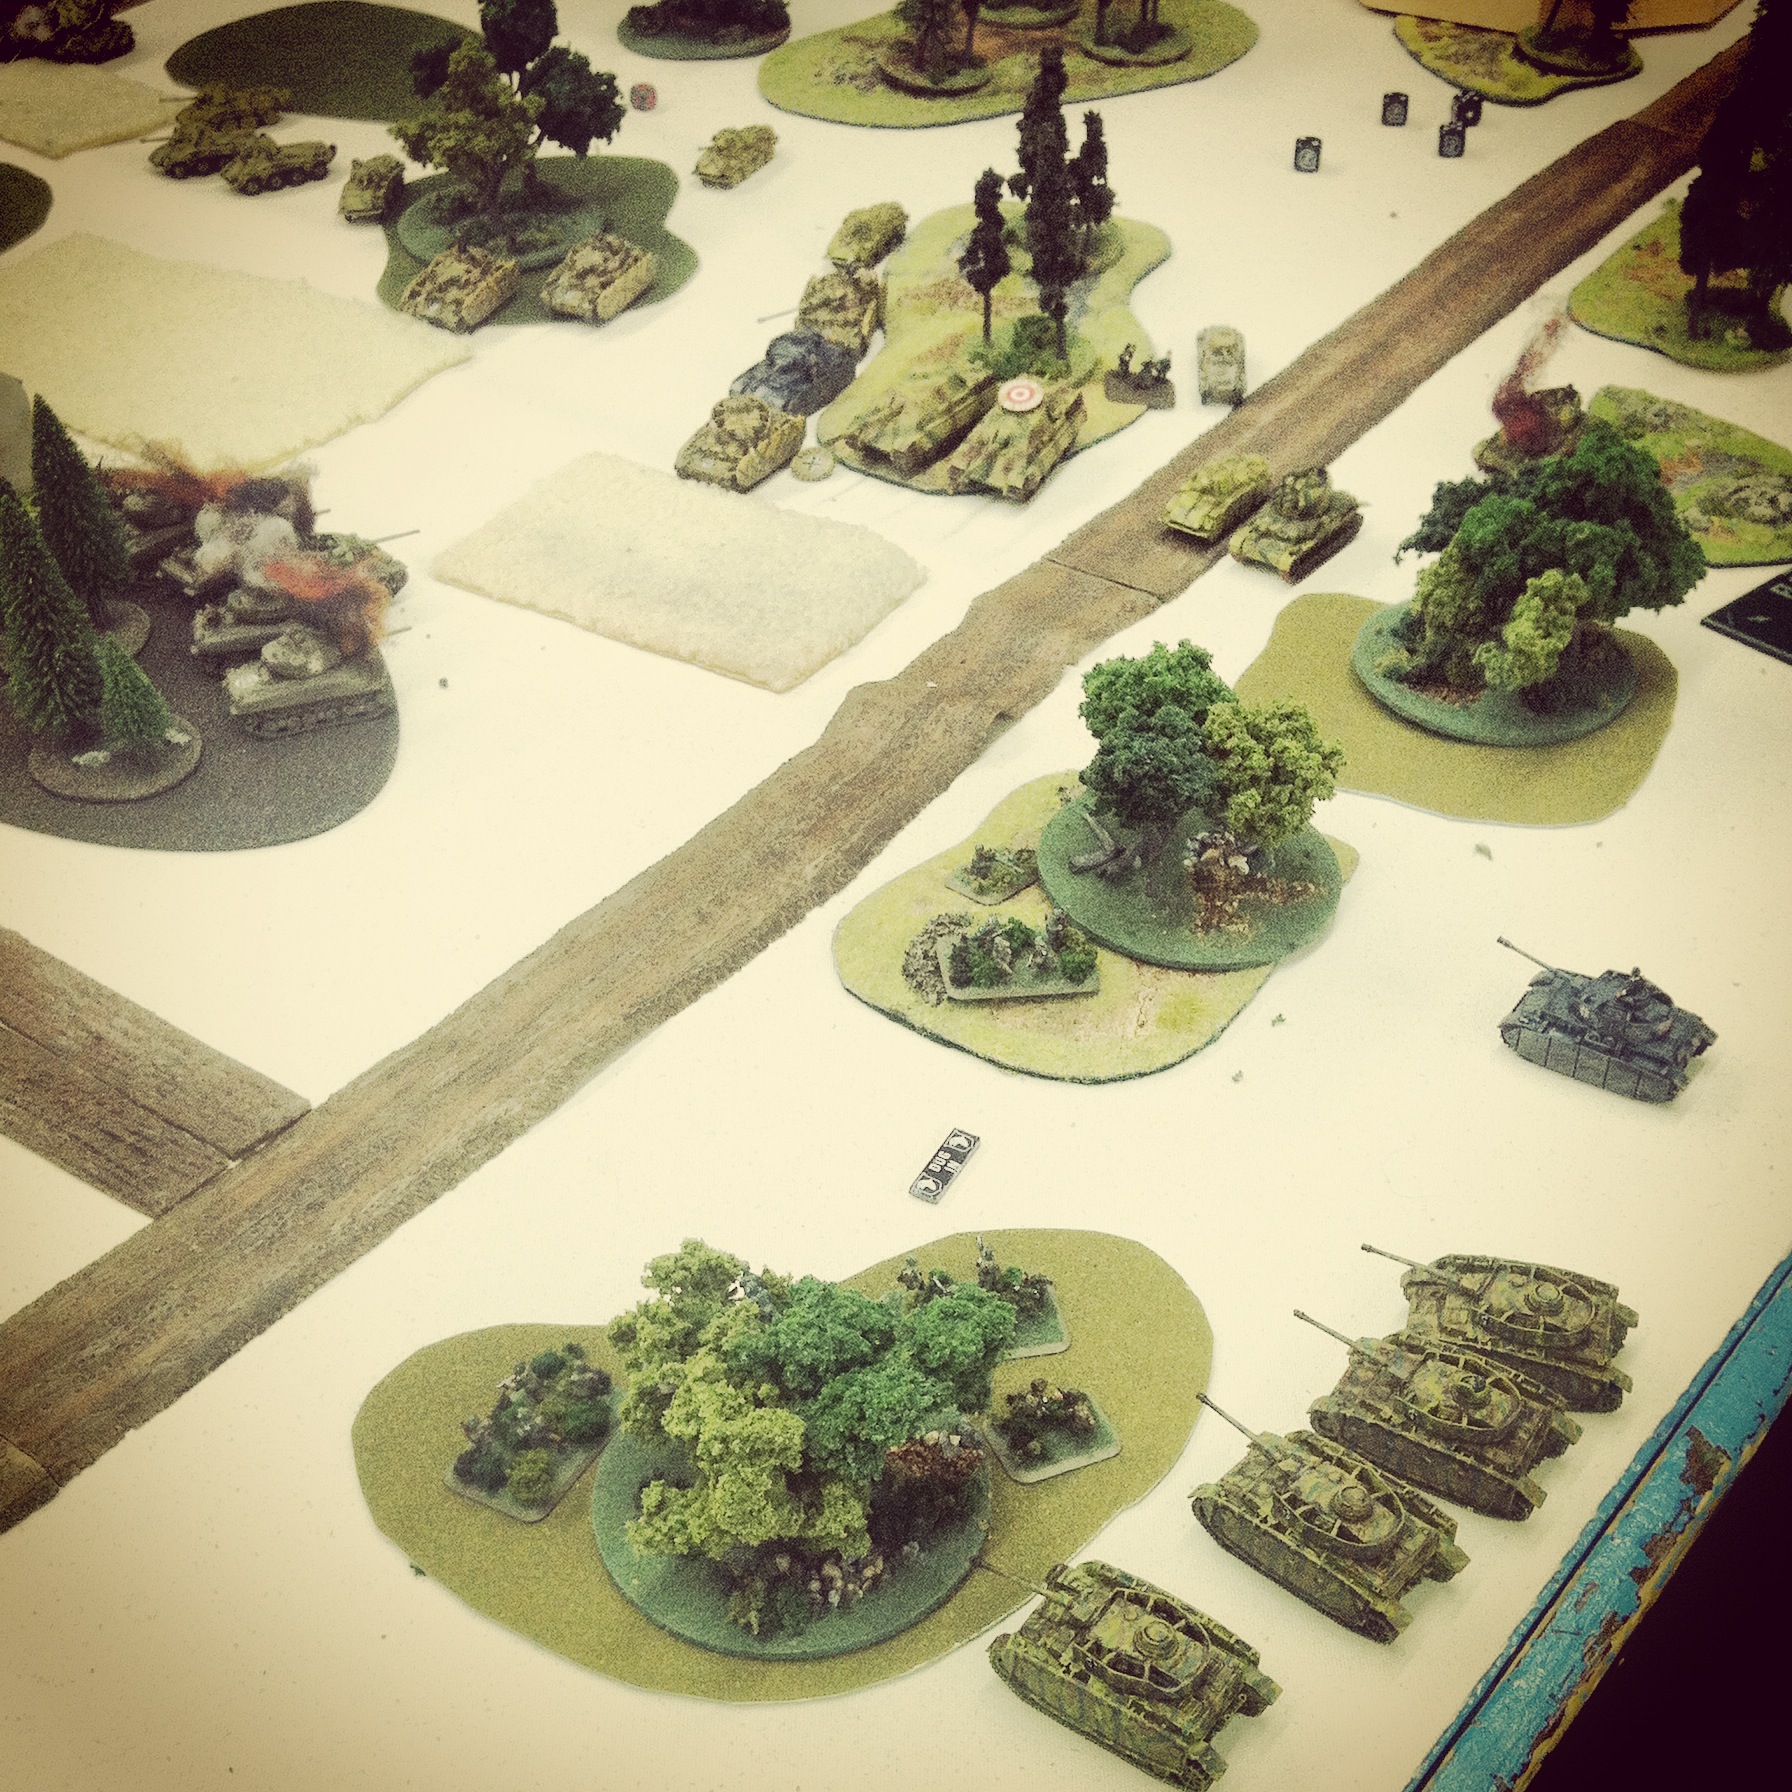
With the Soviet attack on the left completely at a standstill, infantry moved from the farm complex toward the crossroads objective in the distance as T-34s maneuvered to their right using a forested area to cover their advance. The Germans moved to strengthen their center with the deployment of MG42s which laid fire into the Soviet infantry. German infantry deployed across the crossroads objective and were buoyed by the support of another StuG platoon on the opposite side of the trees.

IMG_5573T-34s try to push from the right using the forest as cover

IMG_5574
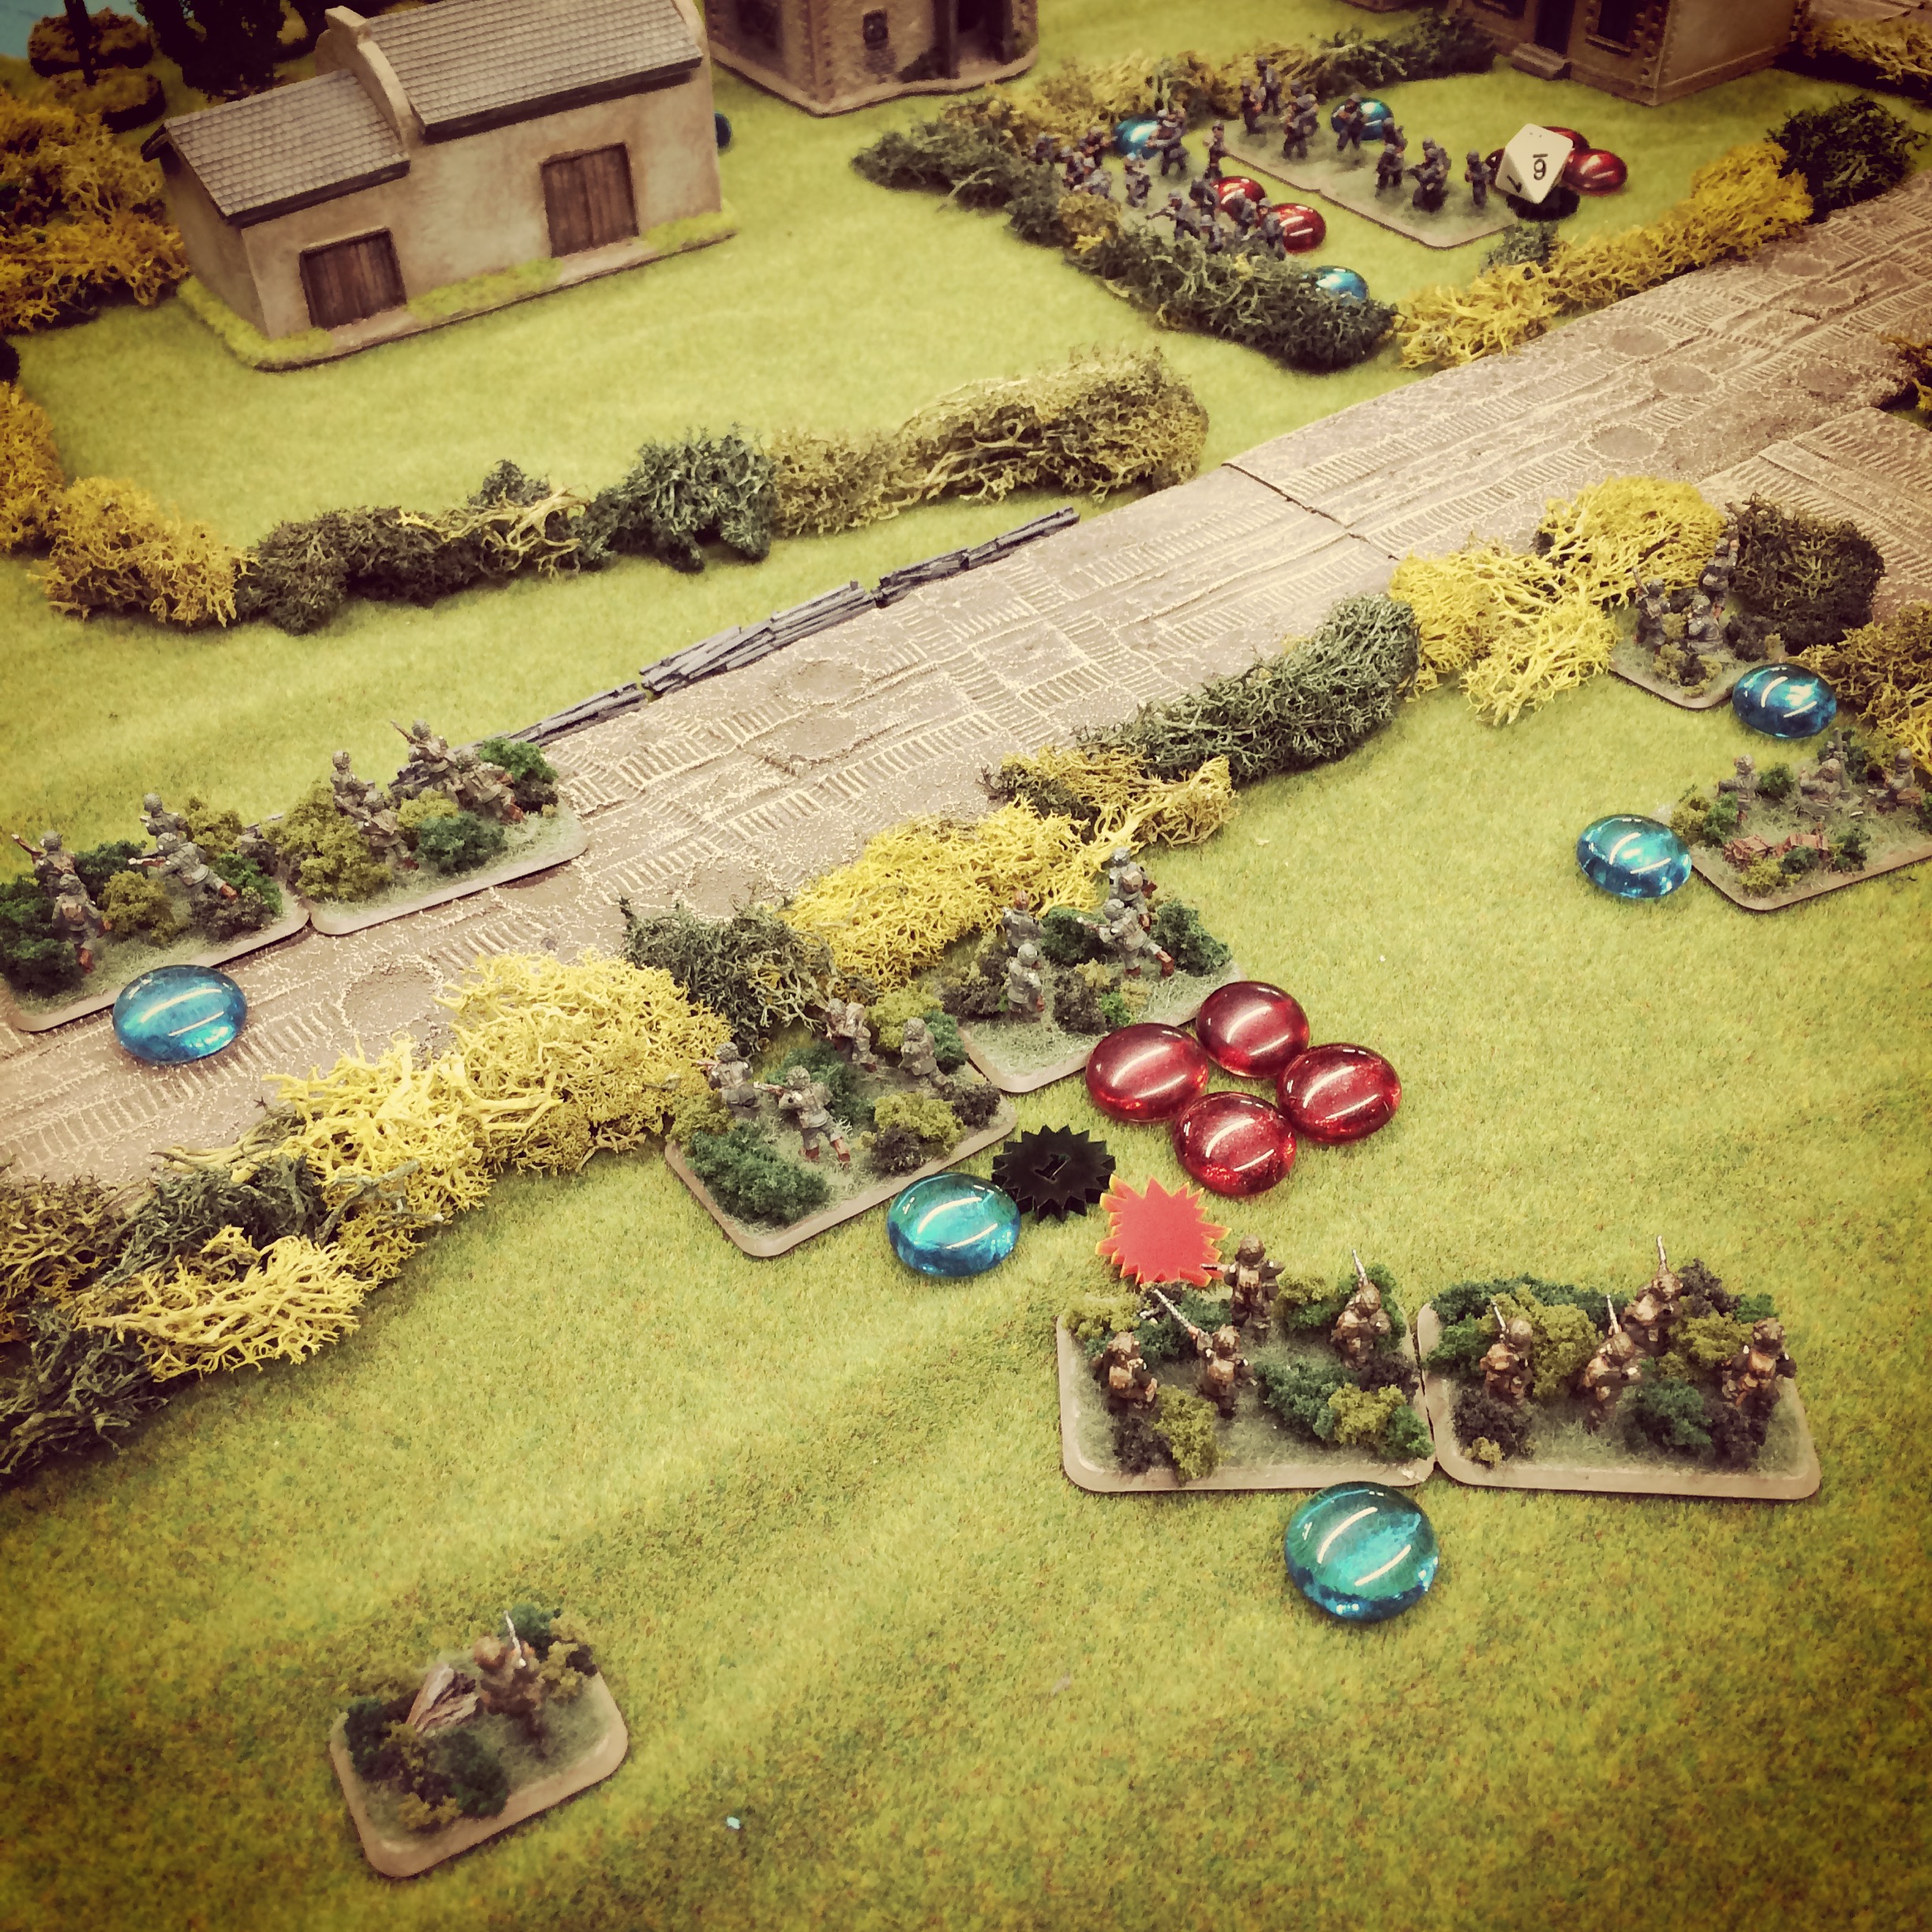
T-34s and StuGs duel at the edge of the forest as infantry begins to take heavy casualties on both sides

Between the road and forest, the battle for crossroads began. Soviet infantry were cut down in the open and the Soviet armor moved cautiously around the woods to fire into the German infantry and armor. As the T-34s rounded the edge of the forest, a crossfire of Pak 40 and StuG shots stalled the Soviet tank advance with the Germans suffering a loss of only one StuG in the firefight. With the objectives at the crossroads and road at the table edge still secure, the day tipped to a German win effectively repelling the Soviet attack.

I hardly ever play Soviets, and in a look at the battle afterward I reasoned a consolidated attack to the road on the German right may have provided the critical mass of armor needed to sway the victory. The German anti-tank guns had effectively pinned the center, and a replay with T-34s massing to one side may have provided just enough of a steel wall to allow the other tanks to move to the objective instead of dying in the open. With our largest IABSM battle played out over several hours, we thought having a crack at one of the other Eastern Front scenarios would be worth it to test if Soviet metal might prevail over the German invaders on another day.

New Game Weekend: The Battle Of The Five Armies

fivearmiesbox

Like so many of my generation, J.R.R. Tolkien’s stories from the page to the screen to the game table and back again have shaped much of my life. As a fantasy-steeped child of the 1970s standing on the threshold of a lifetime of gaming and Tolkien fandom, The Hobbit (1977) and The Lord of the Rings (1978) cartoons were my first intros to the mythos of Middle-Earth. From there, I began my own journey of swords, sorcery and funny-shaped dice with Dungeons & Dragons. In my teen and college years, I plowed through Tolkien’s The Lord Of The Rings and The Hobbit books. After traveling through many pages and countless paper and pencil campaigns, Peter Jackson’s trilogy of The Fellowship of the Ring (2001), The Two Towers (2002) and The Return of the King (2003) turned another whole generation (including my own young kids) on to the story that became a worldwide phenomenon anew. Around the same time, I leaped into Game Workshop’s Lord of the Rings miniatures game and spent a fair amount of time re-fighting the battles of Middle-Earth on the tabletop in miniature. Ten more years on, Jackson returned to the prequel story of The Hobbit with An Unexpected Journey (2012), The Desolation of Smaug (2013) and The Battle of the Five Armies (2014). So, not coincidentally, gaming in the realm of hobbits, orcs, wizards and elves has also returned for a time.

hobbit5armiesposterThe Battle Of The Five Armies dominates the final movie from Peter Jackson’s Lord of The Rings and Hobbit franchises

Over four decades, I’ve come around again and again to the Battle of the Five Armies in the late-70s cartoon, my worn copy of The Hobbit, Jackson’s final blockbuster movie of last year and now with the 2014 re-issue of The Battle Of The Five Armies board game by Ares Games. The epic battle between the loose alliance of the Free Peoples of men, dwarves and elves and the evil Shadow Armies of orcs and goblins at the foot of the Lonely Mountain is a story etched into my imagination and that of many of my friends since an early age. This past week I sat down at the table with a fellow member of Metropolitan Wargamers in Brooklyn, NY for a learning game and to meet as the forces of good and evil for control of Middle-Earth.

IMG_5479The Battle of the Five Armies begins

The two-player Battle Of The Five Armies retails for $89.99 USD but can be found online for about $60 USD, an incredible deal for a big box packed with fantastic components. The game contains 125 well-sculpted plastic miniatures depicting dwarves, men, elves and eagles of the Free Peoples in blue and goblins, orcs, warg riders and bats from the Shadow Armies in a ghastly red. Nine hero characters from the battle — Bard, Beorn, Bolg, Bilbo Baggins, Dain, Gandalf, the Elven King, Lord of the Eagles and Thorin — are each represented with an unique silver miniature and a character card outlining their special heroic abilities. Action and combat dice, numerous cardboard counters, dozens of Event, Fate and Story cards and a simple game board presenting the plains and mountains of the battlefield round out a greatly designed game.

The game begins on the eve of the battle with the Shadow Armies swarming in the mountains while the allied elves, men and dwarves work to create defensive position from the impending onslaught. Turns progress along a Fate track with the forces of evil racing to capture territory equaling ten points before time elapses or the Free Peoples are able to repel the Shadow Armies attack with the arrival of reinforcements or surprise allies like the Eagles from Misty Mountains or the ferocious shape-shifting man-bear Beorn.

IMG_5480The Shadow Armies and Free Peoples fight at the Eastern Spur

In each round, a single Story and Event card is drawn by each player up to a maximum hand size of six cards. The Free Peoples player then chooses to activate up to three hero characters in the round, allowing for extra recruits to appear, special magic attacks from the wizard Gandalf or a hail of arrows from the Elf King. Depending on the number of heroes activated, the Free Peoples player then also places Leadership tokens with some of their units. The Shadow Armies player then randomly selects Fate tiles to advance the Fate track, choosing as many tiles as the Free Peoples player chose to activate. Once the Fate track hits certain levels, additional heroes may appear in the game, bolstering the defenses of good. Thus, the Shadow Armies player needs to race against the Fate track to move and attack quickly and mercilessly before the Free Peoples can string together enough of a defense to win the day.

IMG_5481Gandalf releases a fireball from Ravenhill on the Shadow Armies in the distance

Dice and cards propel the action of the game. Each player throws a set of special Action dice, each depicting a specific type of activation within their turn — Character, Army, Muster, Muster/Army, Event and Will Of The West for the Free Peoples or Lidless Eye for the Shadow Armies. Beginning with the Free Peoples player, each chooses an Action die and resolves a given action. For example, an Army action allows a player to move or attack with armies or play a Character Event or Story card, and a Muster action allows recruitment or rally of armies or the play of a Muster Event or Story card. When a combat occurs, players collect their available unit cards into their hand and then roll dice based on the Combat ratings of their units. Along the way, other cards may be played to create specific events like dealing extra damage or negating leadership abilities. Terrain also plays a role in specific unit effectiveness during battle.

IMG_5485The Shadow Armies mass for a late game attack on the Free Peoples

Like many strategy games, The Battle Of The Five Armies becomes one of timing and getting the right cards, actions and forces in play. In our first learning game, the Shadow Armies quickly built up their horde and raged forward with fierce waves from the north and northeast. A heroic defense of the Eastern Spur by Lakemen fell to the orcs and their wargrider allies, and many dwarves also met their final end in a battle at Camp near the Front Gate. Gandalf held off the orcs and goblins to the west with a ranged fireball hurled from Ravenhill, saving the elven forces at the Fallen Bridge from imminent attack. As the Fate track moved in the late game to the eighth position, the Eagles were able to swoop down from their mountain aerie and attack the Shadow Armies in four areas, stalling the advance of evil. The Shadow Armies regrouped as additional recruits were placed throughout the realms defended by the Free Peoples. The Fate marker moved into the eleventh stage, releasing Beorn who sat at the southern border ready to wreak havoc on the encroaching Shadow Armies. Although many Free Peoples had fallen during the battle, the Shadow Armies weren’t close enough to strike a final fatal blow, and Middle-Earth remained free at the close of the game.

Our first game of The Battle Of The Five Armies, epic as it was, clocked in at over three hours as we got a hang of the rules. Lessons learned included the need for the Shadow Armies to always be on the attack since the arrival of more allies of the Free Peoples spells almost certain defeat for the forces of evil. Studying over the various cards and their effects, used by themselves or in combination, is also a big part of becoming an effective commander on either side of the battle.

Famously, Tolkien’s description of the Battle of the Five Armies in The Hobbit spans less than ten pages tucked in near the end of the book. For the two of us players, what we felt most from the game was how true it was to that short text and the pictures and the legends filling our imaginations over many, many years.

I Ain’t Been Shot Mum: Cabourg June 6, 1944 Scenario

LandingatOmahaOn the morning of the Normandy Landings of June 6, 1944, taking the eastern sector of Omaha Beach fell to the United States 1st Infantry Division. Despite some missed targeted landing zones on the beach and heavy losses at the far ends, the exit “draws” were largely secured by mid-morning. As additional troops and supplies began to arrive, the push inland began.

Omaha to CobourgMap of the US push to Cabourg from Omaha Beach, June 6, 1944

(via US Army Center of Military History)

Moving toward the objective of Colleville-sur-Mer, probing forces from the 1st Infantry Division pressed forward through the seaside fields of Normandy and began to encounter German defenders in various states of disarray. Tired from the fighting at the beach, the first group of Americans on patrol moved cautiously into Cabourg from the north and east while the German force scrambled to hold against any additional headway by the invaders. WhereTheHell After a couple of month hiatus, we jumped back into a 15mm World War II game at Metropolitan Wargamers in Brooklyn, NY this past weekend centering on the action at Cabourg. Using the I Ain’t Been Shot Mum rules and a post-D-Day scenario from the Where The Hell Have You Been Boys? book, all from Too Fat Lardies, our table was set to show the American advance and German defense at Cabourg.

IMG_4940Initial advance of US forces on blinds from the east and north toward Cabourg

Playing on the US side, my partner and I divided our force of three rifle platoons under blinds plus three false blinds. I swung two platoons and a false blind directly at the village from the east while my teammate took the other two false blinds and a single platoon around to the north behind a copse of trees. The mass of US blinds hiding a force only half the actual size provided a great simulation of the confusion the Germans felt that morning as they also lay hidden in and around the village in defense.

IMG_4941US forces near Cabourg on blinds from the east

IMG_4942The first US forces are revealed beyond a wood north of Cabourg

After a couple turns of US movement and prodding for Germans outside the town, the Germans spotted the Americans moving cautiously to the north. With two false blinds exposed, the third American blind revealed a rifle platoon armed with a mortar and two officers present. A false blind was also revealed near a farm at the eastern edge of the town as the Germans continued to burn up turn actions trying to find out where the Americans actually were.

IMG_4943American and German forces simultaneously surprise each other near the farm

IMG_4944A close assault erupts in the woods behind the barn

In close proximity to each other to the rear of a barn at the farm, US and German blinds were exposed nearly simultaneously with American gunfire tearing into the outnumbered Germans. A close assault at a hedgerow quickly pushed the first German fire team to the rear and out the action for the game. The remainder of the German platoon stayed to continue on firing from within the first barn and a hede nearby.

IMG_4945The final American blind is exposed just north of the farm

IMG_4946Americans give and take fire at a hedgerow

On the other side of the farm, the final American blind revealed another rifle platoon hunkered behind a hedge lining a road to town. At long-range, shots were exchanged between German defenders in and around the barn and the Americans now shooting from both sides of the barn. The action at the east end of Cabourg settled into a stalemate of fire across the fields and around the barns.

IMG_4947US forces inch toward Cabourg across hedges and fields from the north

IMG_4949US forces stall out to the northeast of Cabourg

Back to the north of town, the lone US platoon on the moved cautiously along a road and over fields, fences and hedgerows. With the Americans creeping toward Cabourg, the Germans opened up with MG 42s positioned in an upper story of a second barn and from the garret of a farmhouse near the entry road to town. With a cross-fire of heavy machine gun pouring into the Americans at the north and east, the US advance stalled somewhat until something could be done about the German fire ripping from building windows.

IMG_4948The remnants of the first German rifle platoon look to reposition to cover

IMG_4950Americans move to assault the German machine guns at the second barn

Back at the two barns, one US platoon swung around to the rear of the barn to assault the German machine gun crew inside. With the MG 42 crew thrown back into a retreat from the barn, the surviving German rifles on the other side of the barn retreated from fire into a nearby house. Firing from their new position, the Germans stalled the Americans pushing around the barns to the village. At the same time, the other MG 42 continued to fire into the other US platoon now pinned with dwindling numbers behind a hedge.

IMG_4951German reserves arrive late in the day to defend against the American push from the north

As the engagement progressed late into the scenario, the game’s referee announced the arrival of reserves on both sides. From the west, a fresh German rifle platoon joined the fight at the road and tree line at the northern edge of town. At full strength, two German platoons focused fire on the lone American platoon which had so cautiously moved toward that end of the village. Taking casualties, the shrinking US force began to fall back over the hedges and fields from where they had just come.

On the far end of the table, three more American platoons arrived from the beach to the east. Looking to advance quickly on the road straight toward town, the US reserves just couldn’t get in the fight fast enough. With the US forces already near Cabourg greatly reduced and in retreat to defensive positions, the game was called with the Germans holding Cabourg from the American assault.

At Normandy in 1944, the result was the same and the German defense halted the US advance which broke off by mid afternoon. The IABSM scenario at Cabourg is a great illustration of the dozens of small inland battles which raged after the morning’s landings along the Normandy coast over 70 years ago, and we’ll be returning to more follow-up actions in the weeks to come.

New Game Weekend: Acquire

acquire box

Acquire was designed by Sid Jackson and published in 1964 as part of the 3M bookshelf series. Produced from the early 1960s through mid-1970s, 3M’s games were a bit of an oddity outside their core office, medical and industrial supplies business yet they hold a solid place in the hearts and history of the gaming community. Along with classic board games like Go, Backgammon and Chess, the 3M bookshelf games also introduced the early trivia game Facts In Five, the election-themed Mr. President and economic strategy games like Acquire. In 1976, the 3M games were sold off to Avalon Hill which was subsequently purchased by Hasbro in 1998. The chain of ownership of Acquire through the years made for multiple international editions as well as a more recent period of the game being out of print until Hasbro’s Wizards of the Coast made the game available again in 2008. For a game based in the economic mechanics of buying and selling, Acquire itself has passed through several acquisitions itself over the past five decades.

AcquireBoxesTL

Various editions of Acquire from the 1960s to 1990s

I had a chance to play the modern incarnation of this venerable game on a recent weekend at Metropolitan Wargamers in Brooklyn, NY. The latest edition of Acquire consists of relatively underwhelming card stock and paper components that is short on charm but does keep the price just under $30. The game board presents a grid of building lots marked with a number and letter combination which coincide with a set of tiles with the same markings. In turn, players play tiles and may opt to construct an available corporation once two contiguous lots are available. Constructing a new corporation gets the player a free stock certificate plus the opportunity to buy up to two more shares at the starting price.

IMG_4920

My first game of Acquire in progress

On a turn where a new corporation is not being founded, a player may instead buy up to three shares total among the existing corporations. As chains of tiles are built out, the value and cost of a stock rises. Over the course of the game, existing corporations expand and larger corporations merge with smaller ones once their chains of building lots intersect. When corporations merge, players with stock may cash out, convert shares at two to one for the new coronation’s stock or hold the old stock for when (or if) the gobbled up company finds a new space to start again on the board. Once a corporation grows to a chain of eleven tiles it becomes safe from a take over, and the game ends once every company reaches at least eleven tiles in size. Stocks are cashed in and money is counted to determine the winner.

IMG_4919

Stock certificates, tile rack and reference chart from Acquire

Acquire’s staying power rests in its simplicity coupled with a lot of strategic and tactical play mirroring something like actual investing. As in the real world, timing, location and having cash on hand to strike when an opportunity presents itself are all key factors in Acquire. The game is also almost purely competitive, and the rules as written offer no opportunity for side trading or off-board deals. Placing a tile is usually a direct benefit to the player or may be a defensive move against another player’s expansion. Swooping in to buy stock to become a majority shareholder right before a merger can cut someone else out of a hefty payout. A merger or expansion of existing companies may also benefit multiple players. The ability to quickly convert cash earned into a new investment and then flipping that into more profit rules the game.

While the modern incarnation of Acquire pales next to past editions with their better components, the game itself remains strong. The buy-sell cycle of investing hasn’t changed much over the years. For a game with a fifty-year history of itself being bought and sold, little has changed with Acquire either.

Flames of War: 70th Anniversary Battle Of The Bulge Mission

Bulge82nd

This past week marked the 70th anniversary of the Battle of the Bulge fought between Allied and German forces in the snowy, wooded Ardennes region of Western Europe. The six-week German offensive through a frigid December 1944 and January 1945 surprised Allied forces and proved to be costly for all involved. At its conclusion, commanders on both sides counted nearly 100,000 casualties and much of the German ground and air reserves had been smashed as a result of their ill-fated gambit against the Allies.

BulgeMission

The Battle of the Bulge Mission rules from Flames of War

To mark the occasion, several of us met at Metropolitan Wargamers in Brooklyn, NY to run through the big Battle of the Bulge Mission available free online for Flames of War. The simple scenario plays out on a huge 6′ x 8′ tabletop with 4000-point forces on either side drawn from the Nuts! and Devil’s Charge books as well as the Panzers To The Meuse PDF. We set our table using a large off-white canvas with roads crisscrossing the forested field dotted with a few small structures.

101stabbulge

101st Airborne US Parachute Rifle Company from Nuts!

gliderrc

US Glider Rifle Company from Nuts!

On the Allied defending side, I ran my US 101st Airborne Division “Easy Company” list made famous by the book and TV series Band of Brothers. Several special character Warrior figures were included in my list and I also added a hefty group of five M4A3 76mm Shermans and an 81mm mortar platoon. My partner fielded a US Glider Rifle Company, also with 81mm mortars and a 57mm anti-tank platoon. In support, his list was rounded out with M7 Priests, M18 Hellcats and a tank platoon with a Jumbo, two Easy Eights and two more M4A3 76mm Shermans.

 PLJustinBulge
Lehr Panzerkompanie from Panzers To The Meuse

For the armored attacking Germans, both players pulled Lehr Panzerkompanie lists from the Panzers To The Meuse PDF from FOW. Across the lists, a swarm of Panzer IV platoons were accompanied by Panther G and Jagdpanther tanks, Puma armored cars, rocket launchers, Wirbelwinds and two Panzergrenadier platoons. To supplement their massive armored ground forces, the German players also opted for limited air support from a ME 262 A2a Sturmvogel jet plane.

IMG_4830

Initial Battle of the Bulge set up as German players plot their offensive

Per the scenario, the largely infantry US forces were deployed with the exception of our 76mm tank platoon and anti-tank guns which we held in reserve. The US anti tank platoon deployed at the center of the board with their M20 Greyhound scout cars, ready to spring support with the soft but deadly Hellcats to either flank.

IMG_4831

Panzer Lehr forces deploy and move toward the American right

IMG_4832

The German armored assault pushes to the American left

IMG_4833

German ME 262 jet attempts to dig the 101st Airborne out of their positions

The German forces moved quickly onto the board with reconnaissance moves from the Pumas stretching across the table. A mass of Panzer IVs and the Jagdpanthers rolled to the US right. On the American left, Panthers moved to cover in a small wood while the two platoons of mounted Panzergrenadiers pushed down the road toward a US rifle team dug into another woods looking to attack with an armored assault. At the rear, the first run of the Sturmvogel took after the US Airborne in position protecting an objective to no effect.

IMG_4834

The German armored assault on the US rifles in the woods

The German armored assault commenced but was bounced back over the first couple turns with the Americans taking only a few losses from the protection of the trees. Panzer IVs moved in to support from behind the German halftracks and took fire from the Jumbo, Easy Eights and 76mm Shermans sitting in a treeline across the road. The Americans sprang their first ambush, placing anti-tank guns nearby the Panthers. While shots from the US AT platoon were unable to crack the heavy panther armor, their position would go on to strongly limit the maneuverability of the Panthers for the whole game.

IMG_4835

US 76mm tank platoon springs an ambush on the right

IMG_4836

US tanks receive heavy fire from the Panzer Lehr

IMG_4837

US Hellcats move to stop the German armor advance

Over on the German right, the Panzer IV and Jagdpanther force divided around a wooded area and was engaged by the platoon of five 76mm Shermans exposing themselves in ambush. Over the next several turns, armor fire was exchanged as the German tanks sought cover in and around the woods. Three 76mm Shermans were quickly destroyed and the position was quickly reinforced with the US Hellcats deploying from behind a nearby barn. One Jagdpanther quickly bogged and sat stalled over repeated attempts to unbog for the majority of the remainder of the game.

IMG_4838

Panzer IVs are devastated by US armor fire from the woods at the left

Back on the US left flank, the German armored assault was pushed back with most of two platoons destroyed in a crossfire from American rifle infantry in one woods and tank fire from another. the combined fire from the US armor likewise laid waste to the approaching Panzer IVs and Pumas. At mid-game, the American left was holding but the US right was in trouble.

IMG_4839

The ME 262 Sturmvogel takes a run at the US Priests

Supporting fire from both sides proved relatively ineffective throughout the game. The German ME 62 failed to score a hit on multiple runs over the table both to infantry and the rear American Priest platoon. The Priests themselves served to only stall the German armor advance with poor results from multiple bombardments. German rocket fire from their rear also showed little for its repeated efforts once spotting teams were in position on both flanks.

IMG_4840German Panthers are thwarted by smoke rounds at the US left

IMG_4841German armor pushes for the crossroads objective

By the sixth and seventh turns, the game continued to progress steadily on two fronts. At the US left, Panther tanks moved into position after their allied Panzer IVs sat burning all around them. Smoke rounds from two US mortar platoons effectively kept the Panthers out of most of the fight as they crept forward and back in the woods. Finally, a couple of side armor shots from the American anti-tank 57mm guns took a couple of the Panthers out and effectively ended the German threat on one side of the field.

IMG_4843

101st Airborne troops rush forward to contest the crossroads objective

IMG_4842

Panzer Lehr forces attempt to push out the 101st Airborne

IMG_4844

German armor continues to roll to a second objective crossroads at the rear

Things were fairing much better for the Germans all along at the other end of the field. Over several late game turns, the German armor pushed forward, leaving all the US Hellcats in flame and the final surviving 76mm Sherman fleeing the field. The veteran 101st Airborne troops continued to snarl the German advance, remaining static and dug in under wooded cover. With the Americans handily holding their left, two US platoons ran to the right to shore up the defense of two objectives. Just as one platoon of US paratroopers broke, a round of fire from the Priests took out one of the Jagdpanthers. With German armor at one objective and pushing hard at a second, a lot of American troops were poised to go down contesting two crossroads with plenty of mortar support ready to shift their attention across the table.

The written scenario doesn’t call for a turn limit, but after having played for nearly eight hours we called the game at the ninth turn. This was one of the longer and larger FOW battles we had played at the club in Brooklyn in this year. In a year of 70th anniversaries, wrapping up with an exhausting and dynamic Battle of the Bulge game seemed the best way to play some tribute in miniature to the largest battle fought in US history.

New Game Weekend: Fire In The Lake

FITLBox

I sometimes forget that I was born during the Vietnam War, one of the more complicated military conflicts in American history. In April 2015 we’ll be sitting 40 years after the fall of Saigon and the pullout of American involvement in the region’s conflict which began in the mid-1950s. To mark the occasion, the US government has quietly launched a special 50th anniversary Vietnam War Commemoration website this past year. Decades later, the complicated legacy of Vietnam continues to reverberate as even the website has proven to be controversial.

10385548_10204291766628690_7108403211786443463_n

Game set-up for the Fire In The Lake 1965-67 beginner’s scenario

Having played a few games of Cuba Libre over the past year, I’ve finally had a chance to dive into another in the COIN Series from GMT Games this fall with the Vietnam War themed Fire In The Lake. The counterinsurgency (COIN) games focusing on modern conflicts have fast become new favorites among a lot of us at Metropolitan Wargamers in Brooklyn, NY, and since the summer a core group at the club have been working through multiple games of FITL and getting a decent handle of this richly complex game.

FITLCards

Sample cards from Fire In The Lake

Like other games in the series, FITL uses a card-activation mechanic to drive the game among the competing factions of US forces and US-allied South Vietnamese ARVN counterinsurgency and the insurgent northern NVA and Viet Cong guerrillas and regulars. Cards provide turn order at the top of each with a symbol for each faction. Each player chooses to use the Event on a drawn active card, conduct an Operation and/or possibly also conduct a Special Activity related to the Operation. Operations include such things as Rally or Train (recruiting troops, irregulars and/or building bases); March, Patrol or Sweep (to move and expose and/or remove guerillas), Assault or Attack (to remove enemies); and, Terror (to effect support and opposition). Adding in Special Activities such as the VC’s Tax and Subvert, the devastating Air Strike from the US, Ambush and Infiltrate from the NVA and the ARVN’s Govern and Raid makes for a powerful set of player actions.

The card text contains effects beneficial to the US and ARVN COIN players at the top and NVA and VC events in a shaded box at the bottom. Events can produce either immediate benefit to the player using the card or a negative result to another player, so a player might choose to act on a card’s Event merely to prevent another player from using the Event. Keeping an eye on turn order and the next available card also drives decisions, as one player’s choice can limit or enable the next choice available to the following players. Every nine cards contains a random Coup card which pauses play for a round of faction-specific series of phases whereby resources are gained, troops are redeployed, pieces are reset and victory conditions are checked.
FITLmarkers

FITL Support/Opposition, Control and US, NVA, ARVN and VC Victory track markers

Each of the four groups has their own path to winning the game with victory points scored at the edges of the board on a track that also marks Resources, Aid and Patronage levels. The VC score by shifting the population of provinces toward opposition and constructing bases while the somewhat allied NVA win through gaining population control and creating bases. The ARVN player gains points through population control and earning patronage from the population of the cities and provinces. The United States wins through shifting support and building up the number of available bases and troops (reflecting a victorious withdrawal of the military from Vietnam).

IMG_4798

Another FITL game in progress this week

The combination of random turn order, Events, Operations and Special Activities creates a dizzying amount of variation to how a FITL game plays out over a few hours. With many interdependent actions and victory conditions, an unpredictable stack of Event cards and uncertainly timed Coup scoring rounds, Fire In The Lake makes returning to Vietnam again and again a most worthy choice.
FITLpic


New Game Weekend: Force On Force

Enduring FreedomFor a person who spends an outsized amount of time reading about, researching, modelling historic soldiers and playing wars of the past, I have pretty much ignored the wars of my own lifetime from the late 1960s to present. Born during the Vietnam War, I grew up in the last two decades of the Cold War. From there, the protracted engagements in Iraq and Afghanistan and the ever-shifting nation-less “War On Terror” have occupied my adult years. The United States has been at war for most of my life and all that of my two sons. For a whole host of reasons, I prefer to set my wargaming in the comfortable distance of the past.

FOFRulesForce On Force rule books from Ambush Alley Games

This past weekend at Metropolitan Wargamers in Brooklyn, NY, I took a rare trip to a modern tabletop battlefield with my first play through a couple of scenarios using the Force On Force rules system. Published in 2009 by Ambush Alley Games and distributed by Osprey Publishing since 2011, FOF has become the go-to rule set for miniatures gamers focused on modern conflict. The rules provide elegant gaming mechanics for asymmetric warfare between elite regular units and irregular forces. Using this, the FOF system accounts for the more advanced tactics, leadership, communications and equipment of US and NATO forces against the highly motivated yet less professional and poorly equipped irregular Taliban forces.

IMG_4793

The Afghanistan battlefield for our Force On Force scenarios

Our two scenarios presented a generic engagement between US Marines and Taliban forces in and around two typical walled compounds in rural Afghanistan in 2010. Amid the arid trees, hills and fields, the table was set with a hefty collection of 25mm Middle East structures from the Miniature Building Authority. The eight-turn scenario involved two four-man Marine squads attempting to hold a walled compound against the encroaching Taliban forces.

IMG_4792US Marines squad in Force On Force

As elite forces in FOF, the US Marines carry initiative and announce two actions  at the beginning of the turn. Actions include combinations of such things as shooting, remaining on overwatch, hiding, tactical movement of up to 6″ or rapid movement up to 12″ with a subsequent penalty for firing. The elite nature of American Marine regulars allows the unit to function without a troop quality check. Shooting for the US is achieved with D8s, one for each figure in the squad, with additional dice thrown into the mix for special or heavier weapons. For the Taliban without leaders present, movement must first be determined with a troop quality check with one D12 per each figure in the squad, and shooting is done using D6s. With their local knowledge, Taliban forces can also choose to move anywhere at any distance on the table provided they do not cross line of sight of any US forces.

IMG_4790Taliban unit in Force On Force

Thus the differing size of the dice thrown for each squad type — US regulars and Taliban irregulars — is used to determine all the variations in asymmetric troop quality. In FOF, any rolls of 4+ are considered successes, so the relatively easy D12 motivation tests for the Taliban account for their zealous dedication while their weaker D6 combat rolls mimic their relatively untrained fighters and poor weaponry with only a 50/50 chance of hitting anything. In addition, a Taliban figure firing a rocket-propelled grenade RPG gains two extra D6 but hits must be re-rolled with results of a 1 indicating a dud rocket and no effect to the target. On the other hand, US forces hit 2/3rds of the time using their D8s. Hits are applied randomly to figures in the unit, except for successful hits from US snipers which allows for a choice of targets.

IMG_4794

Second US Marines squad with sniper advances

In our game, the first US Marine squad began in a field adjacent to the objective compound with a single Taliban unit perched on an adjacent rooftop. The Marines chose to remain in cover on overwatch, allowing the Taliban a first ineffective round of fire. The Marines returned fire killing one of the Taliban fighters. Turn two saw the entry of the second US Marines team, including a sniper, while the first team scooted into the compound at a full 12″ of rapid movement through two open doors. The Taliban’s second unit, including an RPG, entered the table with a lucky roll of 6 which allowed them to deploy at the corner near the second US unit and the compound.

IMG_4795

Second US Marine squad takes heavy fire from two Taliban units

Over the next two turns, the first US team remained within the compound guarding the objective while the second US squad crept to a copse of trees just outside the compound’s walls. At the wall, the Taliban fired their RPG to open a hole in the wall to expose the US Marines inside. Another Taliban unit with two RPGs and a leader rolled another 6 to also deploy near the compound, moving close to their nearby allies to give the other unit the benefit of the leader.

Along the way, “fog of war” event cards were drawn on rolls of 1 during reactive fire. These cards add an extra element of randomness to a FOF game. The first card eliminated the Taliban’s ability to move anywhere on the table out of line of sight due to an US drone launching overhead. The second card drawn allowed the Taliban to set an improvised explosive device (IED) between the second US squad and the compound, effectively eliminating a direct path to the objective. The final card was pulled by the Americans an allowed for an “excellent position” to be created to protect the second team at the trees.

In the meantime, combined fire from the Taliban eliminated the US sniper in the trees and injured the other three members of the squad, effectively pinning them for the remainder of the game with no friendly force nearby to attempt a first aid check. With one American squad left and the Taliban poised to close in on the compound from multiple directions, the game went to the Taliban.

We switched sides for the second game with one US Marine unit immediately taking up position within the compound and the second unit moving under cover through the nearby ruins and trees. The Taliban reinforcements were not as lucky with their placement, and all entered at the far end of the table with stalled movement due to a lack of leadership. Again, a fog of war card eliminated the Taliban’s free movement on the table. A RPG shot blew up one building in the target compound, but the Marines survived and pulled back to another building. By turn six, the second US squad most moving to protect the compound and the Taliban forces, while great in number, had failed to advance far enough to prove a threat. A final fog of war card brought in a sandstorm, effectively shutting down shooting and movement for the remainder of the game. The US Marines had done their job and held the objective and the day.

One of the benefits of gaming modern war is the wealth of immediate information available in refighting actual engagements or creating other realistic scenarios. For our battle, some of the excellent coverage from National Geographic’s documentary Inside The Afghanistan War was used, and countless books, articles, photos, videos and websites provide further information and inspiration. The Force On Force rules do a masterful job at representing small engagements between regular and irregular forces, and I look forward to another series of games bringing in additional types of weapons, support and vehicles to the mix. Yes, our modern wars are still unfolding immediately in real-time, but with FOF a better appreciation of the tactics and challenges of today’s soldier is well represented for the interested wargamer.

New Game Weekend: Evolution

evolutionbox

This past summer, Evolution garnered a fair amount of attention during its successful Kickstarter campaign which netted over $120,000 on a $10,000 goal. Many gamers were familiar with the game’s producer, North Star Games, and their previous casual party game favorites such as Say Anything. Evolution was a big jump into strategy game design, and the result is box a gorgeous components and a very playable game for a whole range of ages and experience. The game has been hitting the table at Metropolitan Wargamers in Brooklyn, NY over the past week or two, and this past weekend I had a chance to get in on a six person game of Evolution.

evcardsSample trait cards from Evolution

Evolution begins with each player in possession of one species and a hand of four “trait” cards. The 129 beautifully painted cards are the core mechanic of the game. A player’s turn begins by throwing a required card into the watering hole at the center of the table, contributing to a food pool with the value at the lower right corner of the card. The player then decides to play some or all their other cards in a variety of ways. Cards may be discarded to increase a species body size, grow population, spawn an additional new species or, most importantly, evolve the species by playing trait cards. This where the real action comes in.

Up to three cards may be played above a species to create evolutionary traits for that creature. Some traits provide benefits every turn with things like Long Neck allowing the species to eat first and the Fertile trait which grows species population every round. Defensive traits such as Hard Shell, Horns and Burrowing aid in providing defense against being attacked by a species with Carnivorous trait. Carnivores might add aggressive traits such as Good Eyesight, Climbing or Pack Hunting to counteract the defenses of other species.

IMG_4752Special Kickstarter first player miniature

With multiple species growing in size, population and traits, Evolution plays out as nature’s arms race for supremacy and food. After every round of playing cards, all species are fed in turn from available food in the central primordial watering hole. Each species must feed up to its population size or risk a die off of that species. Carnivores by their very nature do not feed from the pool but on other species around the table, and those species must defend using their available traits and body size. Once feeding is complete, food tokens are swept from the species cards and stored in a bag. At the end of the game, the player with the most food points, living species and trait cards played wins.

IMG_4754Player pieces and the watering hole in Evolution

The designers of Evolution claim over 4000 species can be created using differing combinations of cards, and this is where the replay value really shines. Each game plays fast, with a six player game only representing about one play through the deck of trait cards. Timing and choices are critical in the game, and a player needs to figure when is the right time to create a new species or focus on building up the population or size of existing species. Keeping an eye on what other player species are evolving toward as well as the available food supply necessarily inform strategy.

IMG_4753A player’s carnivore goes after the other species in Evolution

In my first game this past weekend, I chose to focus early in the game on scoring points by getting two species with large populations going at once. With a number of protective traits played on each of my species, I was able to hold off three other carnivore species for most of the game as they ate some of the weaker species of other players. In the end, the carnivores were effectively in a three-way stand-off with each other as the final round of food was tallied and the win went to one of them who had more than 40 points to my losing 25.

With North Star’s previous focus on word and trivia style games, Evolution is a really fantastic surprise for their entry into strategy gaming. The building, card and food resource management has a feel like so many civilization building or other Euro style games, while its relative simplicity makes the entry skill level appeal to a lot of serious and casual gamers alike. The game would be a great way to break up a school biology class or engage a dinosaur-obsessed kid in gaming. Evolution plays out with nature in all its beauty and danger, and it presents a world where only the fittest player species who can wisely manage their own growth and resources is going to survive in the end.

Flames of War: Tanksgiving 2014 After Action Report

Tanks2014AAR

This past weekend seven of us gathered at Metropolitan Wargamers in Brooklyn, NY for our second annual Flames of War Tanksgiving event. One new player and six experienced FOW gamers (including two father/son pairs) played through five Late War games using 1750-point companies stretching over three tables — two from Western Europe and one from the Eastern Front. Over the course of the afternoon, British, US, German, Soviet and Hungarian forces fought it out with a mixed results but a slight edge toward the Axis for the day.

IMG_4722

Setting up two Western Europe tables for Tanksgiving 2014

IMG_4723

Western European tables ready to go at Metropolitan Wargamers with an Eastern Front table at the back

British Guards Armoured vs German Schwere SS-Panzerkompanie

The first Western Europe table presented a No Retreat Mission with the Guards Armoured defending a small town from a raiding Tiger-led German force attacking from the open farm area across a river. The Guards deployed an eight 25-pound gun Royal Artillery at the back edge of the table and one objective near the bridge spanning the river to the town. With three other platoons of Sherman and Sherman Firefly tanks in reserve, the initial British force would need to hold fast against the German onslaught.

IMG_4724

Guards Armoured tanks deploy at an objective

IMG_4726

Tigers roll toward the bridge and are covered in smoke rounds

The Germans began the game fully deployed and slowly moving their Tigers toward the bridge and an objective just beyond. With famed tank ace Michael Wittman commanding, the key for the spare British force was to stay away from the deadly guns of the German tanks. At the river ford in the center, the Panzer IVs moved to flank the other side of town with Panzer Grenadiers mounted in half tracks at the rear. The best the British could do was fire smoke rounds into the Tigers across the river and follow-up with long-range shots from the single Firefly deployed at the beginning of the game.

IMG_4727

A Firefly destroys a Tiger at the bridge

IMG_4728

Panzer IVs and Shermans face off in the town streets as a Firefly covers the bridge

Over the next two turns, British reserves arrived and made way for the center of the town, using the tight cobblestone streets and buildings as cover. Artillery spotters stationed in the rooftops of buildings called in several turns of artillery fire but failed to have any effect on the Tigers and destroying only one German halftrack at the river. A crack shot from a Firefly at the center of the town destroyed the first Tiger over the bridge. By the end of the fourth turn, the Panzer IVs wheeled to get into the town at the British left but were pushed back by fire from British Shermans.

IMG_4730

Reserve platoons from the Guards Armoured arrive to engage the Panzer IVs

IMG_4731

Tigers position themselves on two flanks of the town

In the fifth turn, the two remaining platoons from the Guards Armoured arrived to the British left and pushed forward toward the Panzer IVs. With two German tanks quickly lit up, the surviving Panzer IV fell back to the treeline where it was destroyed in the next turn. The British held their left for the moment, but in the cover of the raging tank fight, the dismounted Panzer Grenadiers had managed to slip into the town’s buildings unharmed.

IMG_4732

Firefly Shermans and Tigers face off to protect the objective

IMG_4733

Three Tigers charge hard toward the objective beyond the road

As smoke continued to hold the Tigers from firing at the bridge, a second Tiger was destroyed from a volley from the same Firefly that had sent the first Tiger into flames. While action at the bridge stalled, the three other Tigers had been working their way through wrecking the British tanks which had destroyed the Panzer IVs. All the while, the German infantry had continued to work through the town’s building’s untouched and toward the objective back the rear of town. The British command tanks rolled to stall the advance of the Panzer Grenadiers with machine gun fire and cover the objective.

With most of the British armour ablaze throughout the town, three Tigers rolled toward the objective at the bridge. The surviving British tanks had continued to make successful morale checks with the benefit of their special rerolls. The two surviving Firefly Shermans took a combined shot at a Tiger’s rear and missed. The Tiger’s spun around to return fire, destroying a Firefly. With further ineffective artillery rounds and just one Firefly sitting between three Tigers and the objective, the game was called with a victory for the Germans.

Final Result: Victory for the Germans!

Soviet Tankovy Batalon vs. Hungarian Harckocsizó Század

The day also saw a couple Eastern Front games with Hungarian and Soviet forces facing off on tables set up using a random terrain generator. The Eastern Front table showcased log structures from the excellent Miniature Building Authority Russian Village set along with some rural farm buildings from FOW. Each game saw the Soviets as the attacker, the first taking place on a table representing the bleak steppes of Russia in a Fighting Withdrawal Mission. The defending Hungarians began in prepared positions with a howitzer battery and Panzer IVs to their right, infantry at the center and tanks at the left. The Soviets with T-34 obr 1942 tanks at their extreme  left and right,  SU-100 tank killers and a Gvardeyskiy Tyazheliy Tankovy company at the center and a heavy mortar company at the rear.

IMG_4725The Soviet line moves toward the Hungarian positions

IMG_4719

Soviet tanks roll toward the Hungarian positions

IMG_4720

Hungarian armor proves to be no match for the Soviets

The second Eastern Europe match-up occurred around a collective farm complex with a Dust Up Mission. Starting from opposite corners, both the Hungarians and Soviets positioned themselves into a fantastic series of turns in and around the small farm. With both players moving, dodging for cover and firing at close range, the Hungarians and Soviets sparred for victory as tanks burned all around.

IMG_4721

Game two on the Eastern Front with the central Soviet farm complex

As Hungarian reserves arrived late in the game, infantry climbed out of their trucks and assaulted the Soviet T-34s. Soviet reserves likewise entered the game and made way for the Hungarian howitzers and the objective at the opposite corner. With two intense assaults at either end of the field, the Soviets gained a slight edge and were able to score their second victory on the day.

Final Results: Two Victories for the Soviets!

US 7th Division vs. German Panzer Ausbildungs Abteilung

Back on the other Western Front table a spare rural village anchored by a prominent church and surrounding hill and forests, a deadly force of German Panthers, Tiger Is and Königstigers squared off against the US 7th Division. The Americans rolled into the first Pincer Mission with standard Shermans, M4A3E8 Easy Eights and M4A3E2 Jumbo. At the rear, M7 Priests and 81mm mortars mounted in half tracks were positioned to cover the field in smoke while a P-47 Thunderbolt was on call to swoop in against the German force.

IMG_4742

The US 7th Division deploys in cover on the Western Front

Hoping to avoid German fire, the US tanks crowded into position using the church and other structures for cover as they eased across the field. Once engaged, the Jumbos did their job of eating up fire from the German guns and allowed the other US tanks to advance toward the objectives. Even with smoke cover fired from the rear, air support above and a mass of US armor, the cautious pace of the Americans was no match against the German Tigers firing from the woods. By the time the Americans made a push for the objective in the open, the German tanks were squarely deployed to defend the objective and take the game.

IMG_4740

American tanks bide their time waiting for clear shots at the heavy German armor

IMG_4739

Overwhelming German presence holds the objective

The players switched sides in the second No Retreat Mission on the same table. Again, the Americans came on the table on the far side of the town but this time chose to race aggressively toward their objectives. Defending from the wooded areas again, the Germans were able to fire at will on the advancing Americans. Quickly moving to a close series of short-range duels, tanks on both sides shifted to get into important side armor shot positions. With a tight cluster of models crowding the field near the objectives, American artillery smoke and air support quickly became irrelevant and some lively debate erupted around lines of sight and facings. The second game was a much closer match, but in the end, the thick hulls of the German tanks were no match for the American guns.

IMG_4741

Tanks on both sides jockey for effective shots near an objective

With two victories for the Germans, there was a fair amount of discussion as to whether the Panzer Ausbildungs Abteilung list is an example of a “broken” and unbeatable list in FOW. The Americans tried their best with both cautious and forceful tactics using some great available equipment

Final Results: Two victories for the Germans!

At day’s end, the Axis came out with a slight edge of a 3-2 victory over the Allies across two European fronts. The presence of tough late war German Tiger tanks are a hard force to crack, even with quality American and British armor with lots of air and artillery support. On the other hand, the Russian tank horde always proves to be a formidable Allied opponent whether facing Hungarians or Germans. Force quality, tactics and a bit of luck always play a role, and our five Tanksgiving games were all unique examples of how Flames of War tank battles can go on any given day.

Flames of War: JR Miniatures 15mm Arnhem Row Houses

arnhemstreet

I picked up two different 15mm JR Miniatures Arnhem row house models on my recent trip to the HMGS Fall In! 2014 convention at a real steal of 40% off the list price. At nearly 12″ long and up to 8″ tall, these cast resin models create a quick urban feel to a tabletop battlefield. Each model has lift off roofs and interior floor and wall sections which pull out to allow for stands of troops to occupy varying rooms and levels. The roofs on the models also contain open parapet areas where artillery spotters, machine gunners or other troops can placed to command the battlefield from high upon the rooftops.

IMG_4674Cleaned and primed Arnhem row houses from JR Miniatures

As with most of my experiences with JR Miniatures models, there’s a fair amount of clean up to flash before getting started. The castings also contain a few air holes here and there, but nothing that detracts too much from the overall models. If anything, missing pieces of a cornice or a small hole in a wall might be chalked up to gunfire.

Here’s a simple outline of my technique for painting resin buildings:

Painting Western European Buildings

  1. Use a sharp hobby knife to carefully remove extra resin flash from casting. Particular care should be taken to make sure interior floor sections lift out of the model easily.
  2. Wash models in warm soapy water to remove molding residues. Allow models to dry overnight.
  3. Spray prime roof and removable interior floor sections in flat black and main building sections in flat grey. Allow primer to dry overnight.
  4. Paint roofs:
    1. Tile roofs begin with a dry brush of 50/50 black and red paint, followed by a dry brush coat of red paint and finished with a dry brush of orange paint to highlight.
    2. Shingled roofs begin with a dry brush of dark grey, followed by dry brushed coats of lighter browns, light greys and dark green.
    3. Stuccoed areas in roof gables and dormer windows receive a dry stipple brushed coat of light brown followed by off-white paint dry brushed with the same stipple brush.
  5. Paint floor sections:
    1. Dry brush floorboards with layers of dark and lighter brown paints.
    2. Paint wall sections in off-white paint.
  6. Paint building facades:
    1. Stucco walls receive a dry stipple brushed coat of light brown followed by off-white paint dry brushed with the same stipple brush. Dab some random areas with more off-white to create areas of more fresh stucco to create variations along the street.
    2. Dry brush a slightly heavier amount of off-white paint over cornices and door a window molding to create more depth of highlights.
    3. Stone areas receive a dry brush of light grey followed by off-white dry brush highlights and a dark brown wash in recesses.
    4. Brick areas are dry brushed with 50/50 black and red paint followed by random dry brushing in off white paint to highlight.
    5. Paint doors and shutters with a variety of blues, whites, greens, reds and browns. Follow basecoat with highlight in same color slightly lightened with off-white. Dab doorknobs with brass paint with a fine brush.
    6. Window panes are all carefully given a light coat of black and then dry brushed with dabs of lightly dry brushed white paint to give the illusion of glass.
    7. Sidewalks are dry brushed with light greys over a medium grey basecoat.
  7. Ground areas at the rear of the buildings receive brown and green dry brush coats followed by grass flocking and small clumps of foliage.
  8. Coat models in several layers of spray clear matte finish, allowing each coat to dry before applying an additional coat.

I was able to achieve a pretty decent tabletop quality finish to my buildings with maybe three hours of work on each model using the painting scheme above. Since colors on buildings are rarely monotone (unless newly constructed), I use a plastic surface on which I dab a variety paint shades and mix colors from this palette as I go with my dry brushing. I then build up areas with heavier amounts of one color or another to pull out highlights, create varying textures and differentiate from one building to the next along the street.

IMG_4695A completed JR Miniatures Arnhem row house

IMG_4694 The other completed row house with corner shop

IMG_4692Close up of the corner shop

IMG_4698A view along both row house blocks

IMG_4697Rear detail of one of the blocks

IMG_4693Close up view of the facades

IMG_4696A German Stug parked in front of the row houses

IMG_4691Overhead view of the interior floors

IMG_4690A floor section being removed for placing troops inside

I’m really excited about these models which nearly double the footprint of my existing Western European buildings in 15mm. Models from JR Miniatures fit in nicely with my buildings from Mark IV Miniatures and terrain from a variety of other manufacturers. Although modeled on actual streetscapes of Arnhem, the buildings are easily usable in creating the look of many densely populated areas of France, the Netherlands or elsewhere in Western Europe during late war operations.