Flames of War: Aalst 1944 Scenario

aalst

The ultimately unsuccessful week-long Operation Market Garden commenced on September 17, 1944 with an Allied push toward Germany. The ground “Market” portion of the campaign saw the British Guards Armoured Division taking point on the push into the Low Countries.

On the second day of the operation, a column of the Guards Armoured had rolled to the southern outskirts of Aalst, a Belgian town occupied by German forces since 1940. Led by Col. Joe Vandeleur, the division’s tanks encountered the remnants of German troops and guns which were dug in but heavily-damaged by the previous day’s Allied air bombings and artillery barrages. For the Germans, Aalst was a line in the sand protecting the Allied advance northeast to Antwerp and  the Netherlands beyond. For the Allies, keeping the long column of armour moving was key to reinforcing the Allied airborne troops already engaged with German forces along several bridges.

This past weekend at Metropolitan Wargamers in Brooklyn, NY we ran the Aalst scenario for Flames of War with 2000-point forces on either side of the table. We pulled our British and German lists from the Market Garden and Bridge By Bridge books. As a jumping off point for the game’s outline, we referenced an Aaalst scenario originally designed for Battlefront. We planned a 10-turn game with points scored for destroyed platoons and an immediate end to the game when the British rolled a platoon off the German-defended north end of the table.

IMG_3026

German set-up at Aalst

As per the actual situation at Aalst in 1944, the Germans began setting up with half their force heavily dug in just north of the town’s center. Deadly 8.8 cm Flak guns were positioned on roads to their right and left flanks, and 7.5 cm PaK 40 anti-tank guns stood closer to town. Infantry and heavy machine gun platoons hunkered down in the fields just outside of town, and a single Jagdpanther idled nearby. Expecting both ground and possible air forces, the German guns were well-prepared for the arriving British.

IMG_3027

German 88’s dug in at the northeast and northwest ends of town

IMG_3016

British set-up at Aalst

The British laid out their 8-gun 25 pdr battery at the rear of the table and rolled on two platoons from the Guards with Joe Vandeleur attached. Spotters for the artillery were deployed in Shermans to the right and left hoping to provide eyes across the entire table for. Towed 6 pdr anti-tank guns, infantry, machine gunners and additional tanks lay in reserve off-table to follow the initial wave of armour. The plan was to use Vandeleur’s special rules to rush tanks to the center of the table, saturate the Germans with artillery fire and pave the way from additional supporting platoons.

IMG_3029

 Vandeleur leads the Guards into position behind the town

IMG_3028

German infantry and Pagdpanther make for the church at the center of Aalst

In the first two turns, the Guards quickly rolled up to take position behind the town to the south with their Vickers machine gun platoon riding on the tanks. The British artillery spotter hopped from his Sherman tank and ran for back door of a building. The Germans made way to the north of town with infantry looking to occupy the church at Aalst with a lone Jagdpanther in support.

IMG_3031

A Firefly lays waste to the approaching Jagdpanther with its first shot

IMG_3032

The Guards take heavy fire and two Shermans and a Firefly sit in flames

Fire opened up in the next two turns with a well-positioned Firefly scoring a kill on the nearing Jagdpanther. Returning fire, German 88s destroyed the Firefly and PaK 40s bailed and subsequently wrecked two other Shermans. Machine gunners made their saves, jumped off their tanks and made way for cover in a nearby building at the town’s intersection. Meanwhile, British artillery lobbed a volley over the town hoping to slow down the German infantry and machine guns looking to take hold of the town’s buildings. The barrage resulted in a destroyed PaK 40 just to the north of the church, but the German infantry pressed on to take up positions in the church.

IMG_3034

British infantry move to assault the church as reserve armor rolls to the town center

With British infantry reserves moved at the double to the town and then moved in a subsequent turn to assault the church. At the same time, a reinforcing Guards tank platoon raced to the town center. Shots from the Shermans failed to destroy nearby PaK 40s but fire from the Vickers guns in a nearby building pinned the Germans in the church ahead of the assault. Despite all the British fire lighting up the center of town, the assault failed and the British infantry fell back to the other side of the street.

IMG_3033

German armored reserves arrive

With the British stalled at the crossroads in Aalst, German reserves moved onto the table. A Stug platoon, Wirbelwinds and a fresh Jagdpanther began closing in from the northwest of town, drawing fire from the British battery looking to slow their advance. Volleys from the 25-pound guns blew up an 88 and a PaK 40, but the mass of German hardware kept rolling forward.

IMG_3035

British command tanks move to engage the Germans

IMG_3036

A swarm of German armor and troops push forward under British artillery fire

IMG_3037

A Panzerfaust lights up a British command tank

Hoping for a hard push of combined arms on the German right, British command tanks followed by two platoons of infantry pressed forward from a nearby woods. The British tankies proved to be tough, surviving a turn of fire from nearby Stugs and an attempted infantry assault with  Panzerfaust-wielding infantry as British guns continued to range in and rain shells on the Germans to no effect.

IMG_3038

The lone surviving command British tank awaits its fate from the German onslought

Back at the center of town, the last tank platoon took fire from the 88s, PaK 40s and a Panzerfaust in the church steeple and was destroyed. The one lone command tank on the western outskirts of town was surrounded and destroyed by combined tank and artillery fire. With only the remnants two rifle platoons and the Vickers left spread through the town, the game was lost for the British. As the sun set in the west, Aalst remained in Axis hands.

In our discussion after, the British artillery had only been effective only about 50% of the time and only eliminated a few units throughout the game. Too many British tanks burned too quickly against overwhelming crossfire from German guns, and reinforcing British infantry could never make headway beyond Aalst’s crossroads. More British tank platoons with Fireflies might have gone a long way toward at least pushing through the town.

Fortunately for the people of Aalst, the engagement during Market Garden resulted in the liberation of the town by the British. Pictures from the victory show a very different outcome from our game with smiling faces all around. The very nature of wargaming sometimes just makes things go a different way, and this past weekend the dice rolled against the tide of history with a victory for the Germans at Aaalst.

Flames of War: Fielding the FOW British Rifle Company, Machine Gun Platoon and 6-Pdr Anti-Tank Platoon

BritSoldiers

At long last, my months-long build of my British forces for Flames of War was wrapped up this week (at least for now). Starting with the Guards Armoured Division this past summer, my British collection now contains a fair amount of armor, artillery, transport and now, infantry platoons. With most of my WWII gaming focused on the late war period from D-Day onward in Western Europe, having a solid British base to supplement my Americans provides me with a lot of playability for my Allies in any number of scenarios and campaigns.

fowbritinf

With nearly 3.8 million soldiers serving for the British army in WWII, the “PBI” (Poor Bloody Infantry”) led the war for the Allies from its earliest days right up until the bitter end in Western Europe and the Pacific. The FOW British Rifle Company box provides gamers the basic backbone for fielding a core group of British infantry. The FOW rifle company comes armed with the standard kit of WWII British infantry, including the Bren light machine gun, Sten submachine gun, 2-inch mortar and PIAT anti-tank weapon. The set also includes a few snipers and a hero figure of Stanley Hollis, whose heroic actions on D-Day earned him the only Victoria Cross awarded on that historic day.

For inspiration during my hours of painting, I looked to a lot of photos of Commonwealth forces from the period and have included some below.

britinfBritish infantry with their Bren light machine gun

BritStenBritish soldiers loading Sten submachine gun magazines

Brit2inchBritish 2-inch mortar crew

BritPiatA British soldier with his PIAT

I keep my painting simple with a brownish-drab uniform, brown boots and a bit of green lightly brushed on the helmet netting. The FOW models offer a nice variety of weapons and poses, plus little details like trench shovels tucked on the backs of many of the figures. I’m usually pretty spare with my basing of basic green flock over a light brown base. That said, I’ve recently discovered easy-to-apply grass tufts from Walthers, a model railroading hobby supplier, and so I added a bunch of those to really make the bases come a bit more alive.

I’ve included a few photos below of my completed British three-platoon infantry company:

IMG_2990

IMG_2988

IMG_2991

IMG_2989

To supplement the standard infantry company and its weapons, I added in the FOW Machine Gun Platoon with the Vickers machine gun. With wide use by the British from WWI to the late 1960s, the hearty Vickers machine gun lays down a hail of fire in support of the swift advancing actions of their infantry countrymen.

britvickersBritish infantry dug in with their Vickers machine gun

IMG_2987Completed British machine gun platoon

Aside from man-packed weapons, many infantry units were accompanied by heavier weapons for when faced by enemy armor. The Ordnance Quick-Firing 6-pounder or 6-pdr was the go-to British anti-tank gun throughout the battlefields of WWII. Hand-hauled short distances or commonly pulled along with the ubiquitous Universal Carrier, the 6-pdr proved most effective in stopping German tanks in the early desert war of Africa. Thicker armor on Panther and Tiger tanks eventually stymied the use of the 6-pdr in frontal face-offs with German crews, but later development of heftier armor-piercing shot by 1944 brought their effectiveness back into play in the last campaigns of the war in Normandy and beyond.

brit6pdrBritish crew with their 6-pdr anti-tank gun in Europe

Again, I needed some of these guys in the mix, so the FOW 6-pdr Platoon was another must-have in my force. I love this little set, especially the officer with his foot planted boldly on a gun’s wheel as he gestures to a distant target. Along with my existing British armor and Royal Artillery Battery, having some anti-tank guns in my force will hopefully provide enough firepower against my heavily-armored German opponents.

IMG_2984Completed 6-pdr anti-tank platoon

Any time I complete a big build, I’m inevitably left with the question of “what next?” First of all, most of my British will begin hitting the game table this coming weekend at Metropolitan Wargamers in Brooklyn, NY in a scenario at Aalst from September 18th, 1944 during Operation Market Garden. I’ll be posting an after-action report for the game early next week, and I’m certain I’ll have plenty more to write up on my fresh British boys in the months to come.

Flames of War: Fielding the PSC Cromwell and Firefly Tank

cromwell

I started out a month ago putting together my British 7th Armoured Divison for my Flames of War gaming with a couple platoons of FOW’s boxes. I wound up with two great looking platoons and a command section, but I really wanted two more platoons of the storied Desert Rats to beef up the company to maximum size in my post-D-Day break through scenarios.

PSCcromwell

While I love the detail in the cast resin FOW models, you can’t beat the value of the kits from the Plastic Soldier Company. For about half the cost of the FOW boxes, I’m been able to double the size of my company and field a formidable wall of nimble British armor on the tabletop. Ordering directly from PSC, I was also able to add an extra Cromwell to the five included in the box plus two Firefly models for a total of two additional four-tank platoons.

IMG_2966

Two platoons of the 7th Armoured Division PSC Cromwells and Fireflies

Assembling PSC kits always reminds me of the hours I spent frustrated and thrilled gluing-up Airfix models as a kid. While FOW cast resin and metal tanks go together in a couple simple steps, there’s a particular investment in time and focus needed with boxes from PSC. The FireflyPSC molded turret  is simple to assemble, but the multi-piece tracks are a challenge even though the results with the sagging upper tread is a nice detail. The turrets on the PSC Cromwells have many pieces but fit nicely with patience, and their single-piece tracks are a breeze.

IMG_2962

Close-up of the PSC Cromwell and Firefly models

PSC tank sprues come with multiple modelling options, although there’s no stowage included in PSC offerings. To add a bit of detail, I attached some folded mesh panited as camouflage netting to rear the hulls of a few of my PSC models.

britfirefly

Members of the 7th Armoured Division with their Firefly in Normandy

Comparing the PSC and FOW models, there are some differences. PSC models tend to be thinner than the chunkier FOW kits, expecially in regards to the main gun barrels. The PSC tanks are also significantly lighter and their turrets require a bit of extra drilling to provided free movement more easily found in the magnet-mounted FOW turrets.

IMG_2963

Firefly model comparison from PSC (left) and FOW (right)

The FOW Cromwells and Fireflies both come draped in camouflage and other cast details, yet when mixed together side-by-side with the more sparely-detailed PSC kits some nice variety across the four platoons is acheived. Separate decals are also needed to complete the PSC tanks which do not include any markings options in the kits.

IMG_2965

 Four platoons and command for the 7th Armoured Division “Desert Rats” from PSC and FOW

Ultimately, the PSC and FOW models come together quite nicely with a consistent paint job and markings. If anything, the slight differences in the models will make tracking cohesive platoons on the table a bit easier when the Desert Rats roll onto the game table in the very near future.

A Trip to Brooklyn’s Trainworld

trainworldbknyI’ve written several times about my lifetime love for model trains which served as my gateway to the scale modelling hobby and eventually to miniatures wargaming. Walking into a model train convention or local hobby shop as a kid was like opening an alternate fantasy world of endless possibility. On occasional nights after dinner as a young hobbyist, my dad’s announcement that we were climbing into his truck to take a trip to Kurt’s Trains & Hobbies in nearby Caledonia, NY was like declaring we were about to take a journey to another universe.

So, after some 16 years living in Brooklyn, NY I recently made my first stop at Trainworld in the Kensington neighborhood just a few subway stops from my front door. Located in an light industrial stretch of McDonald Avenue right under the elevated F line, Trainworld is an old slice of Brooklyn brimming with charmingly coarse but knowledgeably helpful staff and one of the largest inventories anywhere of model railroading and related hobby supplies.

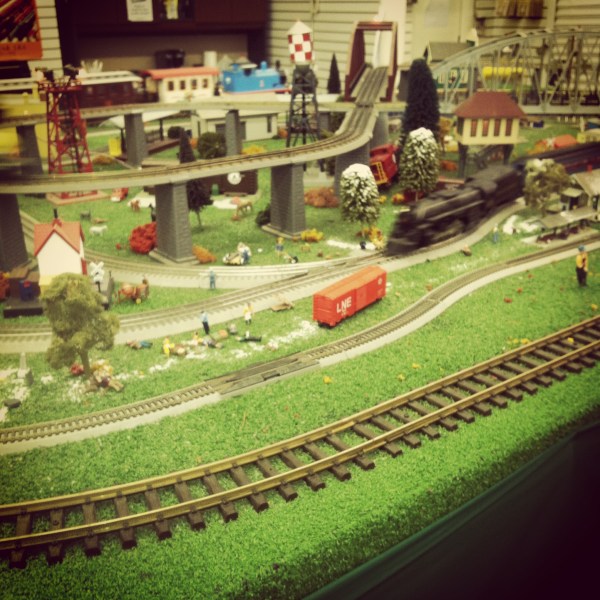
IMG_2906Trains running on the layout at Trainworld in the Kensington area of Brooklyn, NY

Trainworld and their Trainland location in Lynbrook, NY in nearby Nassau County lay claim as “America’s Largest Discount Mail Order Discount Train Store” powered by their extensive and well-built website. The retail location in Brooklyn features a main store space packed from floor to ceiling with N, HO, O, G and S scale model trains, track, buildings, scenery and supplies. A small phone staff manages customer service queries in a second space off the main store which also features a small train layout which loops and clatters around all day long. The enormous warehouse opens through a door just past the main retail counter space, granting any walk-in customer full access to the store’s massive inventory.

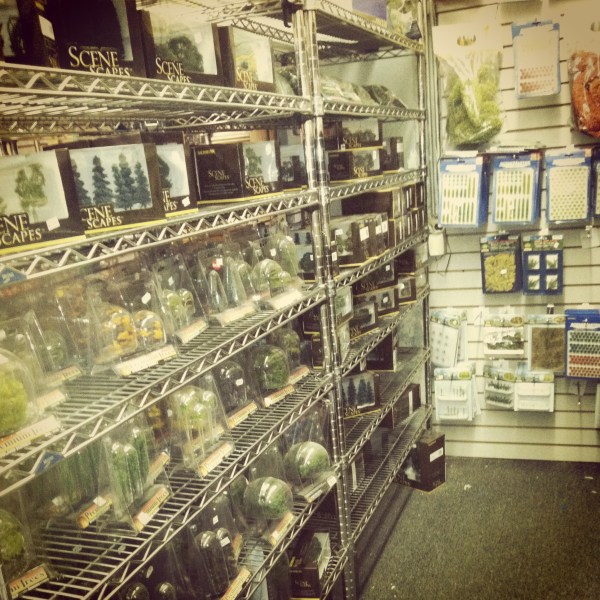
IMG_2904Scale scenery supplies at Trainworld

It’s been years since I’ve had my own model railroad layout, but having a place like Trainworld nearby is a huge resource for a wargamer and miniatures modeller like myself. On my recent visit, I was able to grab a few bags of various ground cover products from Woodland Scenics right off the racks stretched the entire length of one wall. When one specific color I needed wasn’t on display, a quick call to the warehouse brought a package to the counter in about five minutes.

IMG_2905Shelves of trees and natural modelling details at Trainworld

A little further down the aisle are several shelves of ready-made model trees of varying quality, size, coloring and price point, as well as other packaged details like rocks, gravel, crop fields and a flowering meadows. All these scenic materials are just the thing  I enjoy in making my various tabletop battlefields come alive, a topic I touched on in one of my earliest posts on this blog.

I’ve got a number of scenery projects on my list for the coming months, including a re-basing of my trees and scratch-building bocage hedgerows. Discovering a place like Trainworld just 10-minutes from my apartment is going to make these projects all the easier and provide fuel for more ideas for some time to come.

New Game Weekend: Axis & Allies: Guadalcanal

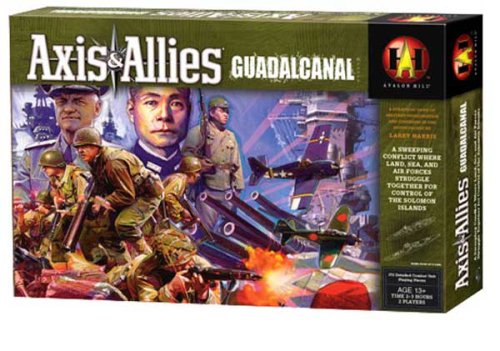
AandAguadalcanalboxThe  Battle of Guadalcanal between August 1942 and February 1943 was the first major Allied campaign set on crushing the Japanese foothold in the Pacific region. Fought in bloody air, sea and island engagements, the seven months of battle resulted in a significant shift in superiority to the Allies in the region and led to the beginnings of the downfall of the Japanese Empire in the Pacific.

Most of my wargaming happens on dry land and usually somewhere in Europe. The Pacific War in WWII always seems so separate, sprawling and overwhelming to me with its mix of different combined combats, complex supply lines and different territorial agendas. That said, dabbling in this portion of the war gives me a chance to use some very different tactics and strategies I’m not used to gaming. So, with a short couple of hours to spare recently at Metropolitan Wargamers in Brooklyn, NY, I tried my hand at some WWII Pacific action with Axis & Allies: Guadalcanal.

AandAlogo

The popular Axis & Allies boardgame series from Avalon Hill (owned by Wizards of the Coast) has been around for more than 20 years and covers many specific eras, battles and theaters of WWII. More recently, a WWI game has also been added in time for the 100th-anniversary of that conflict. The A&A games are readily available from a number of book and department stores, and they vary in complexity and time commitment. Mt first introduction to the series was with the Spring 1942 game which weaned my younger son and I off much simpler war board games like Risk forever. The great design, hundreds of sculpted plastic playing pieces, economic factors and combat mechanics make the A&A games a great way for old and new wargamers alike to engage in hours of very satisfying play.

AandAguadalcnalcontents

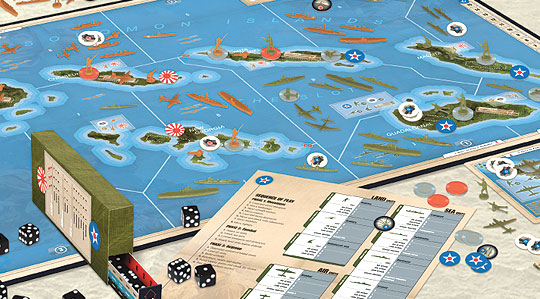
A&A: Guadalcanal board and game pieces (including the “battle box” at left)

The Guadalcanal game presents a map of the South Pacific islands and sea zones contested by US and Japanese forces. Victory points are determined by building and controlling island airstrips. As in the actual campaign, quickly capturing islands and building airstrips is critical not only to endgame victory but in providing bases to supply and deploy additional forces. Aside from capturing islands, controlling the three main sea zones at the center of the board (aka “The Slot”) is key in controlling the transport of crucial supllies and reinforcements.

The combat system in the game uses a “battle box” containing a dozen dice which are shaken and reveal various randomized target effects. With land, air and sea units crowding the board, the confused mass of combined arms is neatly accounted for with a few shakes of the unique battle box.

IMG_2895

Axis & Allies: Guadalcanal at Metropolitan Wargamers

In my first play as the Americans, I quickly captured the southern half of Guadalcanal while my Japanese opponent began a big push with his navy toward The Slot. In the second turn I was able to press on to Malaita and build a second airstrip of Guadalcanal to take an early lead in victory points.

With the Japanese navy massing in the central sea zone I made a risky gamble in turn three sending in a huge air attack which destroyed a few ships and damaged a battleship but was repulsed with overwhelming deadly force. With a vastly-depleted air force, I scrambled to build myself back up as the Japanese built an airstrip on Bougainville and I made moves toward Santa Isabel. By turn four my navy headed west along the southern coast of New georgia in the hopes of catching the Japanese navy from behind. While I was able to destroy a number of Japanese submarines at the western edge of the island, my attack on Santa Isabel was halted and the Japanese took the game.

A&A: Guadalcanal moves fast for two players, playing in about 2 hours. The short nature of the game makes every move from turn one onward important with little room for error. My lesson learned in the first game was not to run too fast toward facing-off against the superior Japanese fleet early, perhaps opting instead for a greater build-up of supply to gain island footholds to launch later game attacks.

The Axis & Allies series is fantastic for out-of-the-box playability with the different game versions each offering realistically-specific game dynamics for several WWII theaters and battles. Not being a big Pacific War gamer, A&A: Guadalcanal makes for a perfect way for me to get my feet wet and expand a bit of my gaming experience to another corner of the 20th-century’s greatest conflict.

New Game Weekend: Civilization & Advanced Civilization

CivAdvCivBoxesEarlier in the week I posted about the elegantly quick board game Eight-Minute Empire: Legends I first had a chance to play last weekend at Metropolitan Wargamers in Brooklyn, NY. After a brief, engaging 20 minutes with Legends, I joined four other players in another game that was also new to me and a completely different experience — Advanced Civilization.

CivMapCivilization game board with Western expansion map to the left

Civilization by UK game designer Francis Tresham was published by Avalon Hill in 1981 and introduced a number of now-standard gaming elements found in many board and video games today. Ten years later, Advanced Civilization offered some refinements, additions and simplifications to the game. Playing with 2-8 players and running to 8, 10, 12 or more rivetingly-complex hours, Civilization has become one of the signature games of the past 40 years.

CivASTAdvanced Civilization’s innovative  Archaeological Succession Table (AST)

At its core, Civilization is an area control game played in the Mediterranean region in an 8000-year period spanning the Stone Age through the Iron Age. Each player picks a civilization and places a single population marker in a territory in their color-coded beginning edge of the board. Territories each support varying numbers of population, indicated in each area. Population doubles each turn, so one marker grows to two. If the space cannot sustain more than the noted number of population markers, players must move and expand their population to new territories or “starve” population down to the maximum load for the territory. A population census grid on the Archaeology Succession Track (AST) notes population growth of each civilization and determines the order of play the following turn.

Moving six population markers to a space with a black square allows the settlement of a city, and twelve may settle a city in a blank space. Establishing cities allows the harvesting of goods the likes of Hides & Ochre, Salt & Timber or Gems & Dye. Drawn in turn order, the stacks of commodities cards also hide calamity cards which have adverse effect on a civilization through such things as Famine, Civil War, Flood or Volcano. Each round includes trading where players must keep certain untradeable calamities while trading away certain goods and other calamities in the quest to collect sets of cards which may then be turned into technologies. The technologies build upon each other through the building of a Technology Tree (“Tech Tree”) which advances with additional abilities and protections for the civilization. Simple beginning  technologies like Pottery, Mythology and Music aid early societies but lose importance over time. Philosophy, Democracy, Law, Trade Empire, Advanced Military and Golden Age technologies score the greatest points and advance a society through the  Stone, Bronze and Iron Ages to eventual victory.

IMG_2859Advanced Civilization at Metropolitan Wargamers

The AST and Tech Tree become the major machines in propelling the game forward, and evolutions of these elements have been incorporated into countless board and video games since their introduction with Civilization. These two innovations make Civilization and other subsequent games like Clash of Cultures focused more largely on elements of managing resources and cultural advancement than traditional combat-focused area control games like Risk. Resource management and building based on collection of resources shows up in so many games, prominently so in the widely-popular  Settlers of Catan. Somewhat controversially, the video and board game versions of the Sid Meir’s Civilization franchise owes a great deal both in its mechanics to the Avalon Hill game which preceded it in theme and name.

Civilization is incredibly compelling and eerily historic in how it plays and forces the hand of history. Players who begin with small civilizations are forced into territorial expansion through population growth or risk starvation of their people. Once cities thrive, feeding those cities becomes another concern and reason for more expansion. Soon, players find themselves in a loop where development begets expansion begets development. Isolated societies have to begin moving farther afield over land of through developing shipbuilding and sailing technologies. Resources become important to build technologies to further enhance and protect their civilization. By building more cities, more valuable goods are obtained and more advanced technologies may be developed. With all players expanding their societies by mid-game, civilizations eventually must compete for room in the region. War becomes somewhat inevitable, but diplomacy and mutual-beneficial trade also gain special importance as the game moves on and civilization begin to settle into specific paths to winning the game.

Of the hundreds of games I’ve played, I now understand why Civilization holds a special place in the hearts of gamers. Committing to hours upon hours of play becomes a game mechanic unto itself as players of Civilization must maintain focused attention on mentally-exhausting detail. Yes, Civilization is a game, but a marvelously intriguing one to play in the context of our own world where population, space, resources and technologies play out with increasingly dire importance as human civilization marches toward our own eventual historical endgame.

A Place To Play: Brooklyn Game Lab

bgllogo

Living and gaming in New York City is all about space. While gamers worldwide enjoy games in their basements, garages, dining rooms and even dedicated spaces, gamers living in the five boroughs wage a constant struggle for tabletop real estate. It’s in this context that Brooklyn Game Lab opens today and joins a mini-boom in storefront gaming spaces and stores that have opened over the past five years throughout New York.

Brooklyn Game Lab is the vision of Robert Hewitt, a former Silcon Valley game developer, designer, co-founder of game app company HashGo and ESL teacher in Brazil. Carrying his start-up experience and a passion for games and teaching, Bob’s mission for the Brooklyn Game Lab is to provide not only a space for play but to challenge players to think about games beyond what comes right out of the box.

Located in the heart of Brownstone Brooklyn’s Park Slope, the core of the Brooklyn Game Lab is an afterschool program focusing not just on kids playing games but evaluating games and creating homebrewed expansions. The curriculum involves player self-evaluation of gaming mechanics, strategy and tactics, as well as a reward system which will allow kids to earn merits as their gaming prowess develops. Euro, cooperative, social and conquest games like Settlers of Catan, Forbidden Island, King of Tokyo, Werewolf and Small World will serve as jumping-off points.

bglahlogo

Aside from the afterschool program, the Brooklyn Game Lab also features a number of After Hours gaming events targeting adult players. Mondays are Miniatures Night with a revolving series of fantasy and war-themed minis games the likes of Star Wars X-Wing, Space Hulk, Warhammer 40K and Flames of War for experienced players and curious newcomers alike. Wild Card Night on Tuesdays invites outside groups to host favorite go-to games for their own members and drop-ins from the general public. Thursdays are Singles Night, bringing in 20-somethings to roll dice, play cards and mingle. The old mainstay, Magic: The Gathering, occupies the Friday night slot, and weekends will provide opportunity for open gaming.

The 32-seat space will focus solely on the game curriculum and  special events for the time being, although there may be room for retail and private party rentals in the future. Things are off to a great start for Brooklyn Game Lab which is opening with a fully-booked afterschool program including my oldest son who will be a particpating Monday afternoons. Meeting with Bob for coffee last month, I was glad to connect with another passionate gamer looking to put a spin on New York’s gaming spaces. Getting kids engaged in games for life and igniting a developer mindset in them makes Brooklyn Game Lab a very welcome new space for the community.

Flames of War: Fielding the FOW Royal Artillery Battery

25pounder

My progress on my new British forces continues with my fielding of a full  Royal Artillery Battery for Flames of War. Dating back nearly 400 years, the British Royal Artillery Regiment (or RA) has been a mainstay of support for British infantry over many continents for a couple centuries. In World War II, the massed 25-pound guns were important for their rapid fire when manned by capable British crews.

fowroyalarty

FOW provides specific rules to account for the adept British guns with the ability to field eight or twelve guns and range in on targets even under initial missed attempts with massive bombardments. In short, these guns provide incredibly deadly strength to any Late War British companies in post-D-Day scenarios the likes of Villers-Bocage or Operation Market Garden.

IMG_2840My RA Battery is made up of two FOW kits, one of which I scored for a song from a fellow club member during a summer flea market at Metropolitan Wargamers in Brooklyn, NY. After gluing everything up, the models get a basic green undercoat followed by my quick finish of drab brown for the uniforms with brown boots and off-white coverings. Figures get finished off simply with a wash to add depth, as do the guns with some rusty dirt streaks.

IMG_2836Sand bag emplacements are finished with a few layers of browns, and stonework get a some built-up coats of grey. Stands are finished with details for stacked crates and discarded brass shells on a brownish dirt basecoat followed by two different grass flockings.

IMG_2837

IMG_2838

IMG_2839

My sets came with two different command bases, the first with a nice diorama of a demolished building with a motorbike parked out back. As orders are being passed between officers, another pours tea from an aluminum kettle. The other command stand features a crowd of staff around a field table and radio operator with one dapper officer standing to the side, cane in-hand.

IMG_2835

Each four-gun battery is filled out with two other command teams and a spotter, waiting to call in the guns on the unsuspecting German forces. All together, I’m anxious to get my British RA into action with my 7th Armoured and Guards Armoured tanks in the very near future. All that’s left is some British infantry, so stay tuned for their appearance on the field in the very near future.

IMG_2834

Flames of War: Utah Beach “Uncle Red” 1944 Scenario

utah1944

When most people think of the D-Day invasion at Normandy on June 6th, 1944, the deadly images from the US landings at Omaha Beach in popular movies like The Longest Day or Saving Private Ryan generally come to mind. Utah Beach was added as an objective for US forces late in the invasion planning and occupied the far right of the Allied coastal assault. The beach was divided into three sectors (Tare Green, Uncle Red and Victor), and the landing of some 23,000 troops and armor support started the day’s invasion at 6:30am. Awaiting the invasion was the German 709th Infantry Division.

utahmap2Map of US 4th Infantry Division at Utah Beach June 6, 1944 (“Uncle Red” circled)

The US 4th Infantry Division at Utah Beach, including Gen. Theodore Roosevelt Jr. and author J.D. Salinger, came ashore with relatively few US casualties of just 400 compared to the 3000 at nearby Omaha Beach. The success of the assualt is credited largely to the effective landing of more Sherman tank support, relatively light German fortifications covering the exits from the beach and early inland actions by the 101st and 82nd Airborne Divisions earlier in the morning.

ussandtable

US 17th Airborne Division using a sand table before Operation Varsity in 1945

 Metropolitan Wargamers in Brooklyn, NY is pretty well known for the sand tables which occupy our space, and some of our founding members have won several awards for presenting sand table games at conventions over the years. Sand tables have been used by military planners since ancient times when sticks and stones were simply laid out in the sand on the ground.

modern sand table

NY Army National Guard troops train with a sand table at Fort Irwin, CA in 2011

Despite all our military technological advancements, modern war colleges and even troops deployed in the field today still use sand tables for training and planning real-world actions. Gaming on a sand table provides a great amount of flexibility and realism in shaping the contours found in real-life battlefields, adding tremendous playability to just about any scenario.

HitthebeachmapFlames of War “Hit the Beach” scenario set-up

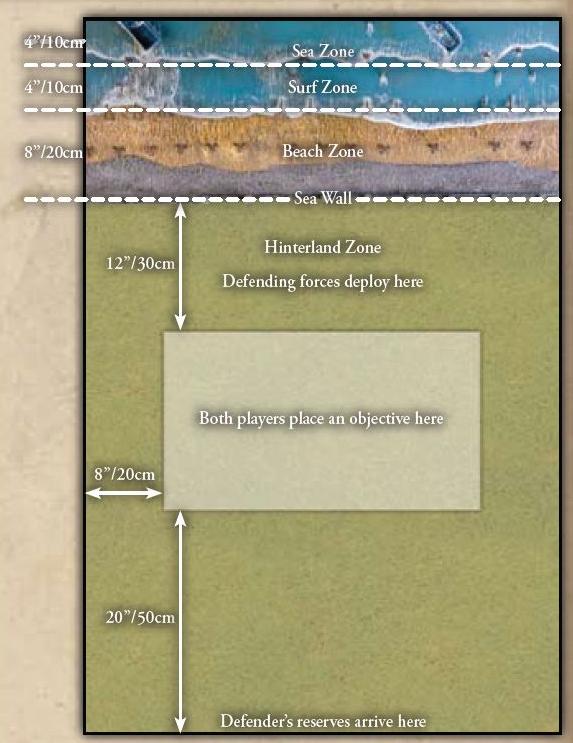
This past weekend a few of us ran an Uncle Red beach assault scenario on one of the club’s sand tables using the Flames of War Amphibious Assault rules and ‘Hit the Beach’ scenario.The 4′ x 5′ table I set up featured a sculpted surf landing zone, sea wall and two beach exits leading to an inland area. Each player placed an objective. The German player then deployed their coastal defenses at the beach including barbed wire, two bunkers, tobruk machine gun nests and a Grenadier platoon. At the rear of the table, the Germans deployed an artillery battery and another machine gun platoon in a nearby house defending their objective. Half their 1500-point force remained off the table in reserve.

IMG_2813The US landing begins against the fortified coast and German artillery at the rear

The Americans began with a naval gun barrage pinning every German platoon but only detsroying one stand at the beach. With the first turn, two boat assualt platoons and a pioneer platoon landed at their left and center area of the beach. Choosing to shoot rather than move at the double, the first three American platoons were quickly pinned and subsequently destroyed in the first two turns of the game.

IMG_2814View from the German rear with Americans landing

Choosing to still keep their D-Day tanks off the beach, the Americans attempted another landing in turns three with only two boats able to land. Naval guns and P-47 air support attempting to hit the rear German artillery proved completly ineffective as troops at the beach continued to be pinned and detsroyed.

IMG_2816

US waves struggle to get off the beach

IMG_2819

Remanants of US platoons get over the sea wall in turn four

With still more delayed landing reinforcements and no tanks heading for the beach, two US platoons breached the sea wall in turn four. Moving at the double and under heavy machine gun fire, the short-lived progress was stalled and the platoons lay pinned with heavy casualties.

IMG_2821

Swimming Shermans finally come ashore with more infantry

Switching tactics in turn five, the Americans went for the right side of the beach. Two boat crews hit the beach moving at the double with three Shermans coming ashore in support. Two tanks immediately bogged, creating two targets stuck on the beach for the next round of incoming German artillery.

IMG_2822

Shermans pour fire into the German defenses

With turn six, one more Sherman made it to the beach while another was swamped and lay destroyed in the surf offshore. Just one more boat of infantry landed to support a pinned and heavily-damaged platoon already on the beach. Progress was made over the sea wall with US troops moving out of range of much of the German machine gunners on the far right edge of the table. Finally, the US did some damage with fire from the Shermans destroying several Grenadier units and a tobruk nest. At the bottom of the turn, the Germans brought on their first reserves with a Nebelwerfer battery at the back of the table. One Sherman was hit and destroyed by German artillery and another’s crew bailed out.
The US looked to be making a bit of progress as turn seven began with their M7 Priest arillery platoon landing with half of the platoon bogging right off the boat. The remaining three guns, along with three Shermans, took  shots at the German defenses and destroyed two more Grenadier stands. German infantry reserves began rushing on the table in front of the artillery to cover the American objective. On the beach, another monstrous German barrage left the Priests in flames and just one surviving Sherman. At turn eight, the Americans ceded the table after only one additional landing craft of troops made it to the beach to join their final Sherman.
This was our first FOW beach landing at the club, and a big learning experience for us. The US players chose to play way too conservatively from the outset with troops moving too slowly off the boat in the first two turns. Leaving the Shermans off the beach until the fifth turn was also a huge mistake, as getting them on sooner would’ve provided greater pinning support and potential for smoke cover for the boat infantry. US air support was frustrating, as often seems the case, and use of the naval guns was likewise botched. The US also suffered from poor luck with too many landing craft either not getting back off the beach to grab more reserves or failing to land existing floating reserves. In many turns, just one of three boats were able to arrive, making it impossible to hit a critical mass of troops on the beach.

Several of us at the club are planning a weekend-long D-Day series to celebrate the 70th anniversary of the Normandy campaign this June, so look for more practice scenarios and a lot more on the anniversary event in the coming months. As Gen. Roosevelt said at Utah Beach, “We’ll start the war from right here!”

Flames of War: Buchholz Station 1944 Scenario

bulge

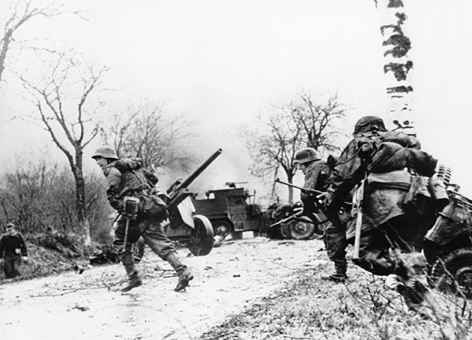
On December 16, 1944 what became known as the Battle of the Bulge began. The German surprise winter campaign offensive – Unternehmen Wacht am Rhen (“Operation Watch On The Rhine”) – would run until the end of the following month. In the cold, snowy forests of the Ardennes region of France, Luxembourg and Belgium, the series of ferocious engagements would see the highest casualties for the US during WWII severely set back the German war machine’s fighting ability for the remainder of the conflict.

BBmap

Map of the southern flank of the Battle of the Bulge, featuring Buchholz Station

Early in the morning of the 16th, a US company at Buchholz Station was taking a quick break from the morning’s action. Lining up for a hot breakfast, the weary American riflemen spotted distant shadowy shapes  moving through the fog along the nearby railway tracks. Initially figuring these troops to be fellow Americans, machine gun fire quickly erupted as the realization that these were in fact Germans moving to take the nearby train station. The Americans rushed to meet the Germans, eventually filling the area with exchanged mortar and gun fire. Late-arriving US anti-tank guns and some gutsy attacks eventually repelled the small German force.

IMG_2758Table set up for Buchholz Station at Metropolitan Wargamers

Recently on The Miniatures Page message boards I stumbled on a Buchholz Station scenario for Flames of War. A fellow blogger had sunk a fair amount of research into the scenario and presented a great overview on his blog known simply as Kevin’s Blog. Having never done a Battle of the Bulge scenario before, I was anxious to give Kevin’s game a try.

IMG_2761The US chow truck waiting for hungry GIs to show up at Buchholz Station

This past weekend I finally got around to running the scenario at Metropolitan Wargamers. Using the online scenario as a jumping off point, I modified it down to a 4′ x 4′ table decked out in snowy terrain (using regular baking flour). I also tweaked the US and German forces since my own collection didn’t have exactly what Kevin’s scenario called for as written.

IMG_2760The Buchholz Station depot — the main German objective

The Confident-Veteran Germans consisted of three rifle-machine gun Grenadier platoons, plus a heavy machine gun platoon. The Confident-Trained US company featured three rifle platoons, a light machine gun and mortar weapons platoon and a small anti-tank gun platoon towed by Jeeps. Both the US and Germans had large off-table mortars with German spotters deployed in the game and all US command spotting for their own mortar crews. Each company featured just under 750 points per side.

IMG_2776US deployment at the beginning of the game

As in the scenario outline, the Americans began with two rifle companies on the board. One was deployed within 4″ of the chow truck, and the second within 4″ of the small group of buildings at the table corner. All other US platoons were held in delayed reserve, meaning they would not come on until at least turn three. The towed anti-tank gun platoon would be the last reserves for the Americans.

IMG_2777German deployment after their first turn

The German platoons deployed all at once with their first turn, entering the table within 6″ of either side of the railroad tracks. They chose to move at the double and divided their force, heading toward the woods to hold off an American advance and straight toward their objective of the train station.

IMG_2778Turn one ends with a race to the train station

The Americans finished the first turn with their own movement at the double. The platoon at the chow truck headed for a small clump of trees, hoping the forest would provide just enough cover from the coming German fire. The second platoon stayed to one side of the road, out of range of German bullets and racing to the train station.

IMG_2779One US rifle platoon takes heavy fire while the second slides to cover the objective

In turn two, the Germans and US platoons each exchanged fire from their occupied woods. The US took their first casualties and were pinned from the withering German heavy machine gun fire. With most of the fire concentrated on the one US platoon in range, the second American platoon was able to slide toward the train station to control the objective ahead of the Germans.

IMG_2780US and German platoons fire between the woods

Turn three was somewhat of a repeat of turn two as the one US platoon swallowed a ton of German gunfire and remained pinned down in the woods. The US failed to roll any reserves on the table in their first attempt, but the platoon at the train station began occupying the buildings to hold off the coming German onslaught.

IMG_2781The Germans sprint in the open

With turn four, the Germans came out into the wide open looking to assault the remnants of the platoon in the woods and the train station objective. The Americans in the woods took more casualties but stuck it out with a motivation test roll as the Germans moved nearer to assault. The Americans in and around the train station benefited from cover and stayed in control of the objective with the Germans advancing. As the turn ended, two adjacent German platoons took American rifle and mortar fire, pinning the Germans in their advance to the train station.

IMG_2782Germans surround the train station

The last of the remaining Americans in the woods at the center of the table fled in turn five, just as the Germans prepared to assault them. Another German platoon reached the doors and windows of the train station but had their assault repulsed. At long last, the first American reserves arrived, and a light machine gun and mortar platoon platoon hit the ground running at the double. Additional US off-table mortar fire rained onto the assaulting Germans in the snowy open field.

IMG_2783US light machine gun and mortar reserves arrive

The Germans still in the woods broke from the trees iat the top of  turn six and made way toward the train station. Germans already at the station destroyed the remaining Americans there, effectively taking the objective. A few Americans ran at the double to contest the objective. The US responded with fire from the newly-arrived light machine guns and more from the mortars.

IMG_2785The final US reserves arrive…but too late

Things ended on turn seven with the last of the American reserves arriving too late and too far out of range movement and fire to contest the train station objective now in control by the Germans. Timing on the battlefield is everything, and the lack of US reserves arriving earlier in the game made it a tough slog for the Americans. The scenario is pretty fairly matched, and playing a FOW game without the usual mass of tanks was a refreshing break.

The Battle of the Bulge also seemed fitting, given the snowy winter we’ve had here in Brooklyn this past month. With the 70th anniversary of the Battle of the Bulge coming up at the end of the year, playing this first scenario already has me thinking of more wintery tabletop warfare about 11 months from now.