Flames of War: Fielding the PSC Cromwell and Firefly Tank

cromwell

I started out a month ago putting together my British 7th Armoured Divison for my Flames of War gaming with a couple platoons of FOW’s boxes. I wound up with two great looking platoons and a command section, but I really wanted two more platoons of the storied Desert Rats to beef up the company to maximum size in my post-D-Day break through scenarios.

PSCcromwell

While I love the detail in the cast resin FOW models, you can’t beat the value of the kits from the Plastic Soldier Company. For about half the cost of the FOW boxes, I’m been able to double the size of my company and field a formidable wall of nimble British armor on the tabletop. Ordering directly from PSC, I was also able to add an extra Cromwell to the five included in the box plus two Firefly models for a total of two additional four-tank platoons.

IMG_2966

Two platoons of the 7th Armoured Division PSC Cromwells and Fireflies

Assembling PSC kits always reminds me of the hours I spent frustrated and thrilled gluing-up Airfix models as a kid. While FOW cast resin and metal tanks go together in a couple simple steps, there’s a particular investment in time and focus needed with boxes from PSC. The FireflyPSC molded turret  is simple to assemble, but the multi-piece tracks are a challenge even though the results with the sagging upper tread is a nice detail. The turrets on the PSC Cromwells have many pieces but fit nicely with patience, and their single-piece tracks are a breeze.

IMG_2962

Close-up of the PSC Cromwell and Firefly models

PSC tank sprues come with multiple modelling options, although there’s no stowage included in PSC offerings. To add a bit of detail, I attached some folded mesh panited as camouflage netting to rear the hulls of a few of my PSC models.

britfirefly

Members of the 7th Armoured Division with their Firefly in Normandy

Comparing the PSC and FOW models, there are some differences. PSC models tend to be thinner than the chunkier FOW kits, expecially in regards to the main gun barrels. The PSC tanks are also significantly lighter and their turrets require a bit of extra drilling to provided free movement more easily found in the magnet-mounted FOW turrets.

IMG_2963

Firefly model comparison from PSC (left) and FOW (right)

The FOW Cromwells and Fireflies both come draped in camouflage and other cast details, yet when mixed together side-by-side with the more sparely-detailed PSC kits some nice variety across the four platoons is acheived. Separate decals are also needed to complete the PSC tanks which do not include any markings options in the kits.

IMG_2965

 Four platoons and command for the 7th Armoured Division “Desert Rats” from PSC and FOW

Ultimately, the PSC and FOW models come together quite nicely with a consistent paint job and markings. If anything, the slight differences in the models will make tracking cohesive platoons on the table a bit easier when the Desert Rats roll onto the game table in the very near future.

A Trip to Brooklyn’s Trainworld

trainworldbknyI’ve written several times about my lifetime love for model trains which served as my gateway to the scale modelling hobby and eventually to miniatures wargaming. Walking into a model train convention or local hobby shop as a kid was like opening an alternate fantasy world of endless possibility. On occasional nights after dinner as a young hobbyist, my dad’s announcement that we were climbing into his truck to take a trip to Kurt’s Trains & Hobbies in nearby Caledonia, NY was like declaring we were about to take a journey to another universe.

So, after some 16 years living in Brooklyn, NY I recently made my first stop at Trainworld in the Kensington neighborhood just a few subway stops from my front door. Located in an light industrial stretch of McDonald Avenue right under the elevated F line, Trainworld is an old slice of Brooklyn brimming with charmingly coarse but knowledgeably helpful staff and one of the largest inventories anywhere of model railroading and related hobby supplies.

IMG_2906Trains running on the layout at Trainworld in the Kensington area of Brooklyn, NY

Trainworld and their Trainland location in Lynbrook, NY in nearby Nassau County lay claim as “America’s Largest Discount Mail Order Discount Train Store” powered by their extensive and well-built website. The retail location in Brooklyn features a main store space packed from floor to ceiling with N, HO, O, G and S scale model trains, track, buildings, scenery and supplies. A small phone staff manages customer service queries in a second space off the main store which also features a small train layout which loops and clatters around all day long. The enormous warehouse opens through a door just past the main retail counter space, granting any walk-in customer full access to the store’s massive inventory.

IMG_2904Scale scenery supplies at Trainworld

It’s been years since I’ve had my own model railroad layout, but having a place like Trainworld nearby is a huge resource for a wargamer and miniatures modeller like myself. On my recent visit, I was able to grab a few bags of various ground cover products from Woodland Scenics right off the racks stretched the entire length of one wall. When one specific color I needed wasn’t on display, a quick call to the warehouse brought a package to the counter in about five minutes.

IMG_2905Shelves of trees and natural modelling details at Trainworld

A little further down the aisle are several shelves of ready-made model trees of varying quality, size, coloring and price point, as well as other packaged details like rocks, gravel, crop fields and a flowering meadows. All these scenic materials are just the thing  I enjoy in making my various tabletop battlefields come alive, a topic I touched on in one of my earliest posts on this blog.

I’ve got a number of scenery projects on my list for the coming months, including a re-basing of my trees and scratch-building bocage hedgerows. Discovering a place like Trainworld just 10-minutes from my apartment is going to make these projects all the easier and provide fuel for more ideas for some time to come.

A Place To Play: Brooklyn Game Lab

bgllogo

Living and gaming in New York City is all about space. While gamers worldwide enjoy games in their basements, garages, dining rooms and even dedicated spaces, gamers living in the five boroughs wage a constant struggle for tabletop real estate. It’s in this context that Brooklyn Game Lab opens today and joins a mini-boom in storefront gaming spaces and stores that have opened over the past five years throughout New York.

Brooklyn Game Lab is the vision of Robert Hewitt, a former Silcon Valley game developer, designer, co-founder of game app company HashGo and ESL teacher in Brazil. Carrying his start-up experience and a passion for games and teaching, Bob’s mission for the Brooklyn Game Lab is to provide not only a space for play but to challenge players to think about games beyond what comes right out of the box.

Located in the heart of Brownstone Brooklyn’s Park Slope, the core of the Brooklyn Game Lab is an afterschool program focusing not just on kids playing games but evaluating games and creating homebrewed expansions. The curriculum involves player self-evaluation of gaming mechanics, strategy and tactics, as well as a reward system which will allow kids to earn merits as their gaming prowess develops. Euro, cooperative, social and conquest games like Settlers of Catan, Forbidden Island, King of Tokyo, Werewolf and Small World will serve as jumping-off points.

bglahlogo

Aside from the afterschool program, the Brooklyn Game Lab also features a number of After Hours gaming events targeting adult players. Mondays are Miniatures Night with a revolving series of fantasy and war-themed minis games the likes of Star Wars X-Wing, Space Hulk, Warhammer 40K and Flames of War for experienced players and curious newcomers alike. Wild Card Night on Tuesdays invites outside groups to host favorite go-to games for their own members and drop-ins from the general public. Thursdays are Singles Night, bringing in 20-somethings to roll dice, play cards and mingle. The old mainstay, Magic: The Gathering, occupies the Friday night slot, and weekends will provide opportunity for open gaming.

The 32-seat space will focus solely on the game curriculum and  special events for the time being, although there may be room for retail and private party rentals in the future. Things are off to a great start for Brooklyn Game Lab which is opening with a fully-booked afterschool program including my oldest son who will be a particpating Monday afternoons. Meeting with Bob for coffee last month, I was glad to connect with another passionate gamer looking to put a spin on New York’s gaming spaces. Getting kids engaged in games for life and igniting a developer mindset in them makes Brooklyn Game Lab a very welcome new space for the community.

Flames of War: Fielding the FOW Royal Artillery Battery

25pounder

My progress on my new British forces continues with my fielding of a full  Royal Artillery Battery for Flames of War. Dating back nearly 400 years, the British Royal Artillery Regiment (or RA) has been a mainstay of support for British infantry over many continents for a couple centuries. In World War II, the massed 25-pound guns were important for their rapid fire when manned by capable British crews.

fowroyalarty

FOW provides specific rules to account for the adept British guns with the ability to field eight or twelve guns and range in on targets even under initial missed attempts with massive bombardments. In short, these guns provide incredibly deadly strength to any Late War British companies in post-D-Day scenarios the likes of Villers-Bocage or Operation Market Garden.

IMG_2840My RA Battery is made up of two FOW kits, one of which I scored for a song from a fellow club member during a summer flea market at Metropolitan Wargamers in Brooklyn, NY. After gluing everything up, the models get a basic green undercoat followed by my quick finish of drab brown for the uniforms with brown boots and off-white coverings. Figures get finished off simply with a wash to add depth, as do the guns with some rusty dirt streaks.

IMG_2836Sand bag emplacements are finished with a few layers of browns, and stonework get a some built-up coats of grey. Stands are finished with details for stacked crates and discarded brass shells on a brownish dirt basecoat followed by two different grass flockings.

IMG_2837

IMG_2838

IMG_2839

My sets came with two different command bases, the first with a nice diorama of a demolished building with a motorbike parked out back. As orders are being passed between officers, another pours tea from an aluminum kettle. The other command stand features a crowd of staff around a field table and radio operator with one dapper officer standing to the side, cane in-hand.

IMG_2835

Each four-gun battery is filled out with two other command teams and a spotter, waiting to call in the guns on the unsuspecting German forces. All together, I’m anxious to get my British RA into action with my 7th Armoured and Guards Armoured tanks in the very near future. All that’s left is some British infantry, so stay tuned for their appearance on the field in the very near future.

IMG_2834

Flames of War: Utah Beach “Uncle Red” 1944 Scenario

utah1944

When most people think of the D-Day invasion at Normandy on June 6th, 1944, the deadly images from the US landings at Omaha Beach in popular movies like The Longest Day or Saving Private Ryan generally come to mind. Utah Beach was added as an objective for US forces late in the invasion planning and occupied the far right of the Allied coastal assault. The beach was divided into three sectors (Tare Green, Uncle Red and Victor), and the landing of some 23,000 troops and armor support started the day’s invasion at 6:30am. Awaiting the invasion was the German 709th Infantry Division.

utahmap2Map of US 4th Infantry Division at Utah Beach June 6, 1944 (“Uncle Red” circled)

The US 4th Infantry Division at Utah Beach, including Gen. Theodore Roosevelt Jr. and author J.D. Salinger, came ashore with relatively few US casualties of just 400 compared to the 3000 at nearby Omaha Beach. The success of the assualt is credited largely to the effective landing of more Sherman tank support, relatively light German fortifications covering the exits from the beach and early inland actions by the 101st and 82nd Airborne Divisions earlier in the morning.

ussandtable

US 17th Airborne Division using a sand table before Operation Varsity in 1945

 Metropolitan Wargamers in Brooklyn, NY is pretty well known for the sand tables which occupy our space, and some of our founding members have won several awards for presenting sand table games at conventions over the years. Sand tables have been used by military planners since ancient times when sticks and stones were simply laid out in the sand on the ground.

modern sand table

NY Army National Guard troops train with a sand table at Fort Irwin, CA in 2011

Despite all our military technological advancements, modern war colleges and even troops deployed in the field today still use sand tables for training and planning real-world actions. Gaming on a sand table provides a great amount of flexibility and realism in shaping the contours found in real-life battlefields, adding tremendous playability to just about any scenario.

HitthebeachmapFlames of War “Hit the Beach” scenario set-up

This past weekend a few of us ran an Uncle Red beach assault scenario on one of the club’s sand tables using the Flames of War Amphibious Assault rules and ‘Hit the Beach’ scenario.The 4′ x 5′ table I set up featured a sculpted surf landing zone, sea wall and two beach exits leading to an inland area. Each player placed an objective. The German player then deployed their coastal defenses at the beach including barbed wire, two bunkers, tobruk machine gun nests and a Grenadier platoon. At the rear of the table, the Germans deployed an artillery battery and another machine gun platoon in a nearby house defending their objective. Half their 1500-point force remained off the table in reserve.

IMG_2813The US landing begins against the fortified coast and German artillery at the rear

The Americans began with a naval gun barrage pinning every German platoon but only detsroying one stand at the beach. With the first turn, two boat assualt platoons and a pioneer platoon landed at their left and center area of the beach. Choosing to shoot rather than move at the double, the first three American platoons were quickly pinned and subsequently destroyed in the first two turns of the game.

IMG_2814View from the German rear with Americans landing

Choosing to still keep their D-Day tanks off the beach, the Americans attempted another landing in turns three with only two boats able to land. Naval guns and P-47 air support attempting to hit the rear German artillery proved completly ineffective as troops at the beach continued to be pinned and detsroyed.

IMG_2816

US waves struggle to get off the beach

IMG_2819

Remanants of US platoons get over the sea wall in turn four

With still more delayed landing reinforcements and no tanks heading for the beach, two US platoons breached the sea wall in turn four. Moving at the double and under heavy machine gun fire, the short-lived progress was stalled and the platoons lay pinned with heavy casualties.

IMG_2821

Swimming Shermans finally come ashore with more infantry

Switching tactics in turn five, the Americans went for the right side of the beach. Two boat crews hit the beach moving at the double with three Shermans coming ashore in support. Two tanks immediately bogged, creating two targets stuck on the beach for the next round of incoming German artillery.

IMG_2822

Shermans pour fire into the German defenses

With turn six, one more Sherman made it to the beach while another was swamped and lay destroyed in the surf offshore. Just one more boat of infantry landed to support a pinned and heavily-damaged platoon already on the beach. Progress was made over the sea wall with US troops moving out of range of much of the German machine gunners on the far right edge of the table. Finally, the US did some damage with fire from the Shermans destroying several Grenadier units and a tobruk nest. At the bottom of the turn, the Germans brought on their first reserves with a Nebelwerfer battery at the back of the table. One Sherman was hit and destroyed by German artillery and another’s crew bailed out.

The US looked to be making a bit of progress as turn seven began with their M7 Priest arillery platoon landing with half of the platoon bogging right off the boat. The remaining three guns, along with three Shermans, took  shots at the German defenses and destroyed two more Grenadier stands. German infantry reserves began rushing on the table in front of the artillery to cover the American objective. On the beach, another monstrous German barrage left the Priests in flames and just one surviving Sherman. At turn eight, the Americans ceded the table after only one additional landing craft of troops made it to the beach to join their final Sherman.

This was our first FOW beach landing at the club, and a big learning experience for us. The US players chose to play way too conservatively from the outset with troops moving too slowly off the boat in the first two turns. Leaving the Shermans off the beach until the fifth turn was also a huge mistake, as getting them on sooner would’ve provided greater pinning support and potential for smoke cover for the boat infantry. US air support was frustrating, as often seems the case, and use of the naval guns was likewise botched. The US also suffered from poor luck with too many landing craft either not getting back off the beach to grab more reserves or failing to land existing floating reserves. In many turns, just one of three boats were able to arrive, making it impossible to hit a critical mass of troops on the beach.

Several of us at the club are planning a weekend-long D-Day series to celebrate the 70th anniversary of the Normandy campaign this June, so look for more practice scenarios and a lot more on the anniversary event in the coming months. As Gen. Roosevelt said at Utah Beach, “We’ll start the war from right here!”

Flames of War: Buchholz Station 1944 Scenario

bulge

On December 16, 1944 what became known as the Battle of the Bulge began. The German surprise winter campaign offensive – Unternehmen Wacht am Rhen (“Operation Watch On The Rhine”) – would run until the end of the following month. In the cold, snowy forests of the Ardennes region of France, Luxembourg and Belgium, the series of ferocious engagements would see the highest casualties for the US during WWII severely set back the German war machine’s fighting ability for the remainder of the conflict.

BBmap

Map of the southern flank of the Battle of the Bulge, featuring Buchholz Station

Early in the morning of the 16th, a US company at Buchholz Station was taking a quick break from the morning’s action. Lining up for a hot breakfast, the weary American riflemen spotted distant shadowy shapes  moving through the fog along the nearby railway tracks. Initially figuring these troops to be fellow Americans, machine gun fire quickly erupted as the realization that these were in fact Germans moving to take the nearby train station. The Americans rushed to meet the Germans, eventually filling the area with exchanged mortar and gun fire. Late-arriving US anti-tank guns and some gutsy attacks eventually repelled the small German force.

IMG_2758Table set up for Buchholz Station at Metropolitan Wargamers

Recently on The Miniatures Page message boards I stumbled on a Buchholz Station scenario for Flames of War. A fellow blogger had sunk a fair amount of research into the scenario and presented a great overview on his blog known simply as Kevin’s Blog. Having never done a Battle of the Bulge scenario before, I was anxious to give Kevin’s game a try.

IMG_2761The US chow truck waiting for hungry GIs to show up at Buchholz Station

This past weekend I finally got around to running the scenario at Metropolitan Wargamers. Using the online scenario as a jumping off point, I modified it down to a 4′ x 4′ table decked out in snowy terrain (using regular baking flour). I also tweaked the US and German forces since my own collection didn’t have exactly what Kevin’s scenario called for as written.

IMG_2760The Buchholz Station depot — the main German objective

The Confident-Veteran Germans consisted of three rifle-machine gun Grenadier platoons, plus a heavy machine gun platoon. The Confident-Trained US company featured three rifle platoons, a light machine gun and mortar weapons platoon and a small anti-tank gun platoon towed by Jeeps. Both the US and Germans had large off-table mortars with German spotters deployed in the game and all US command spotting for their own mortar crews. Each company featured just under 750 points per side.

IMG_2776US deployment at the beginning of the game

As in the scenario outline, the Americans began with two rifle companies on the board. One was deployed within 4″ of the chow truck, and the second within 4″ of the small group of buildings at the table corner. All other US platoons were held in delayed reserve, meaning they would not come on until at least turn three. The towed anti-tank gun platoon would be the last reserves for the Americans.

IMG_2777German deployment after their first turn

The German platoons deployed all at once with their first turn, entering the table within 6″ of either side of the railroad tracks. They chose to move at the double and divided their force, heading toward the woods to hold off an American advance and straight toward their objective of the train station.

IMG_2778Turn one ends with a race to the train station

The Americans finished the first turn with their own movement at the double. The platoon at the chow truck headed for a small clump of trees, hoping the forest would provide just enough cover from the coming German fire. The second platoon stayed to one side of the road, out of range of German bullets and racing to the train station.

IMG_2779One US rifle platoon takes heavy fire while the second slides to cover the objective

In turn two, the Germans and US platoons each exchanged fire from their occupied woods. The US took their first casualties and were pinned from the withering German heavy machine gun fire. With most of the fire concentrated on the one US platoon in range, the second American platoon was able to slide toward the train station to control the objective ahead of the Germans.

IMG_2780US and German platoons fire between the woods

Turn three was somewhat of a repeat of turn two as the one US platoon swallowed a ton of German gunfire and remained pinned down in the woods. The US failed to roll any reserves on the table in their first attempt, but the platoon at the train station began occupying the buildings to hold off the coming German onslaught.

IMG_2781The Germans sprint in the open

With turn four, the Germans came out into the wide open looking to assault the remnants of the platoon in the woods and the train station objective. The Americans in the woods took more casualties but stuck it out with a motivation test roll as the Germans moved nearer to assault. The Americans in and around the train station benefited from cover and stayed in control of the objective with the Germans advancing. As the turn ended, two adjacent German platoons took American rifle and mortar fire, pinning the Germans in their advance to the train station.

IMG_2782Germans surround the train station

The last of the remaining Americans in the woods at the center of the table fled in turn five, just as the Germans prepared to assault them. Another German platoon reached the doors and windows of the train station but had their assault repulsed. At long last, the first American reserves arrived, and a light machine gun and mortar platoon platoon hit the ground running at the double. Additional US off-table mortar fire rained onto the assaulting Germans in the snowy open field.

IMG_2783US light machine gun and mortar reserves arrive

The Germans still in the woods broke from the trees iat the top of  turn six and made way toward the train station. Germans already at the station destroyed the remaining Americans there, effectively taking the objective. A few Americans ran at the double to contest the objective. The US responded with fire from the newly-arrived light machine guns and more from the mortars.

IMG_2785The final US reserves arrive…but too late

Things ended on turn seven with the last of the American reserves arriving too late and too far out of range movement and fire to contest the train station objective now in control by the Germans. Timing on the battlefield is everything, and the lack of US reserves arriving earlier in the game made it a tough slog for the Americans. The scenario is pretty fairly matched, and playing a FOW game without the usual mass of tanks was a refreshing break.

The Battle of the Bulge also seemed fitting, given the snowy winter we’ve had here in Brooklyn this past month. With the 70th anniversary of the Battle of the Bulge coming up at the end of the year, playing this first scenario already has me thinking of more wintery tabletop warfare about 11 months from now.

Flames Of War: Encounter Mission

IMG_2697

The official FOW website makes all the missions from the third edition rules available online, and they’re a quick way to throw together a game and practice tactics without putting all the work needed into a historic scenario. Having been away from a Flames of War table for a week or two, a couple of us at Metropolitan Wargamers in Brooklyn, NY threw together a quick, non-historic Encounter Mission last weekend.

IMG_2698
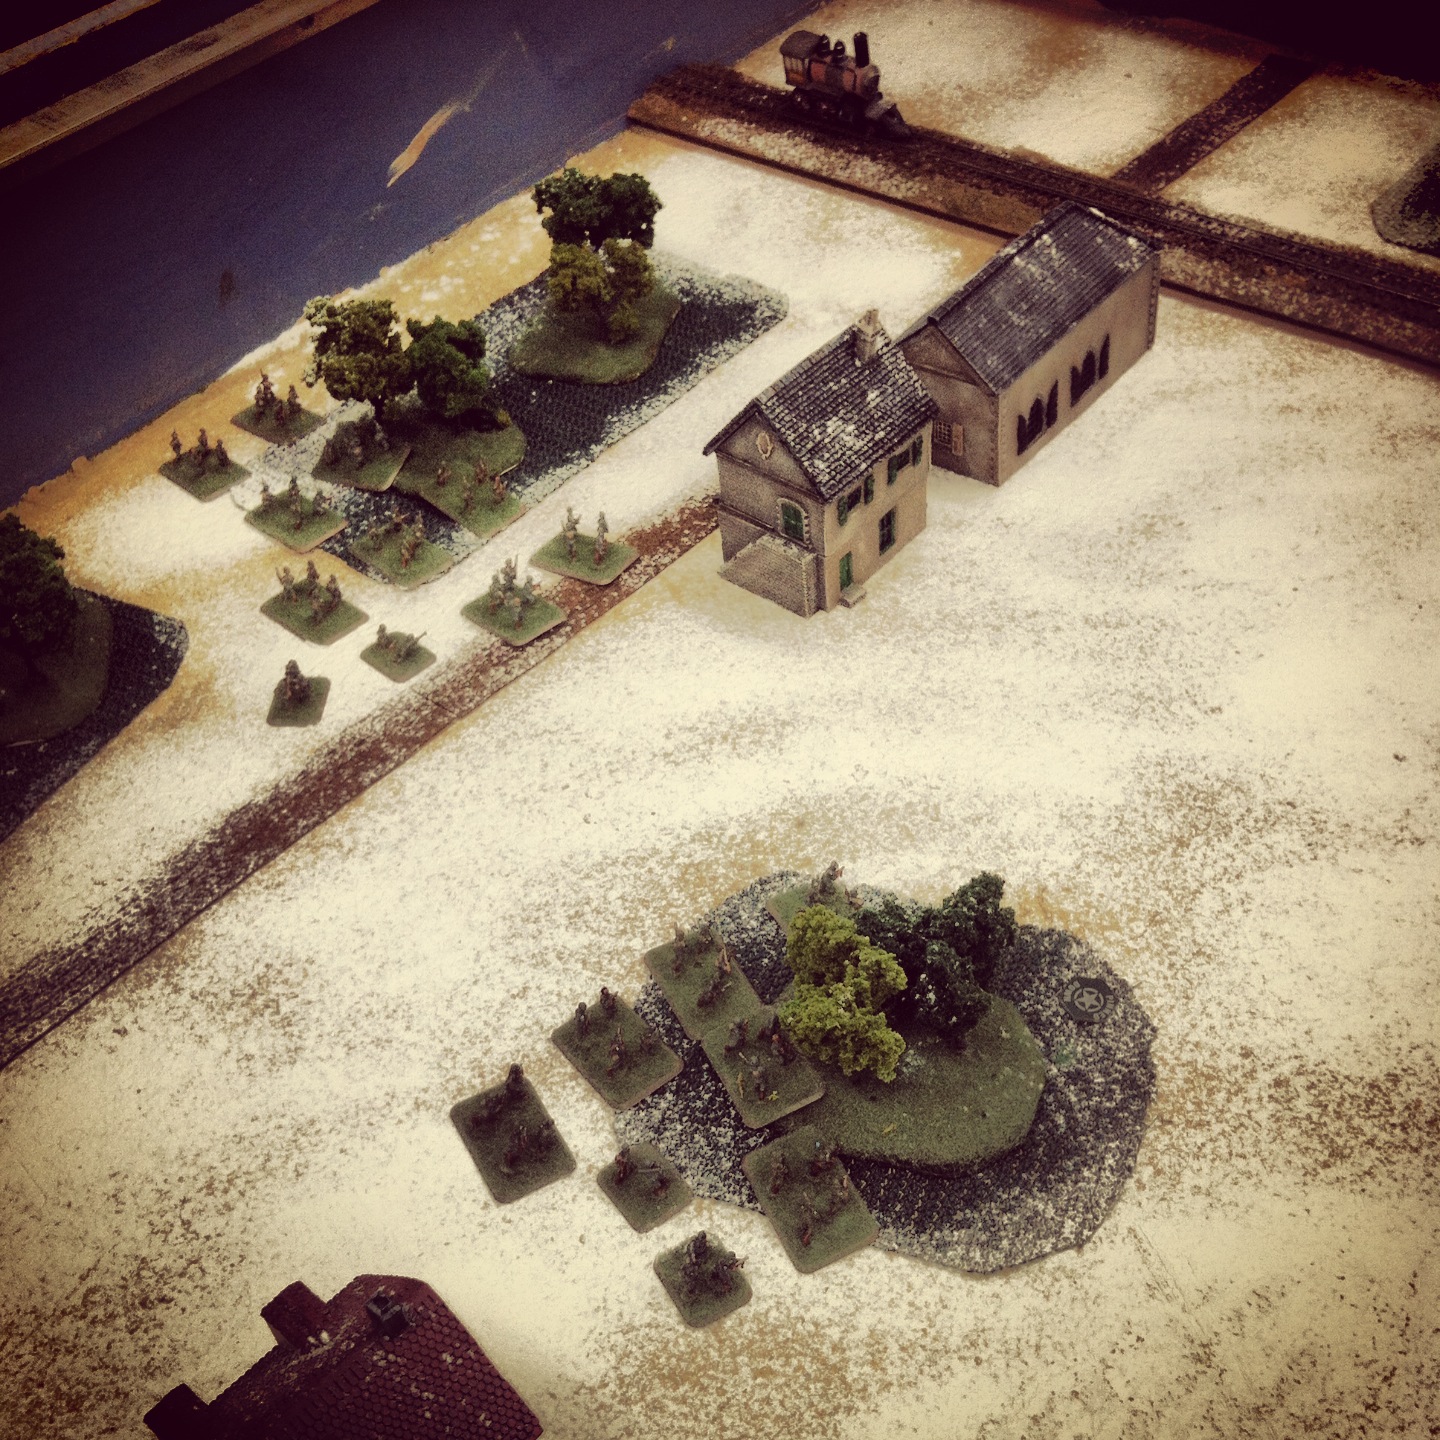
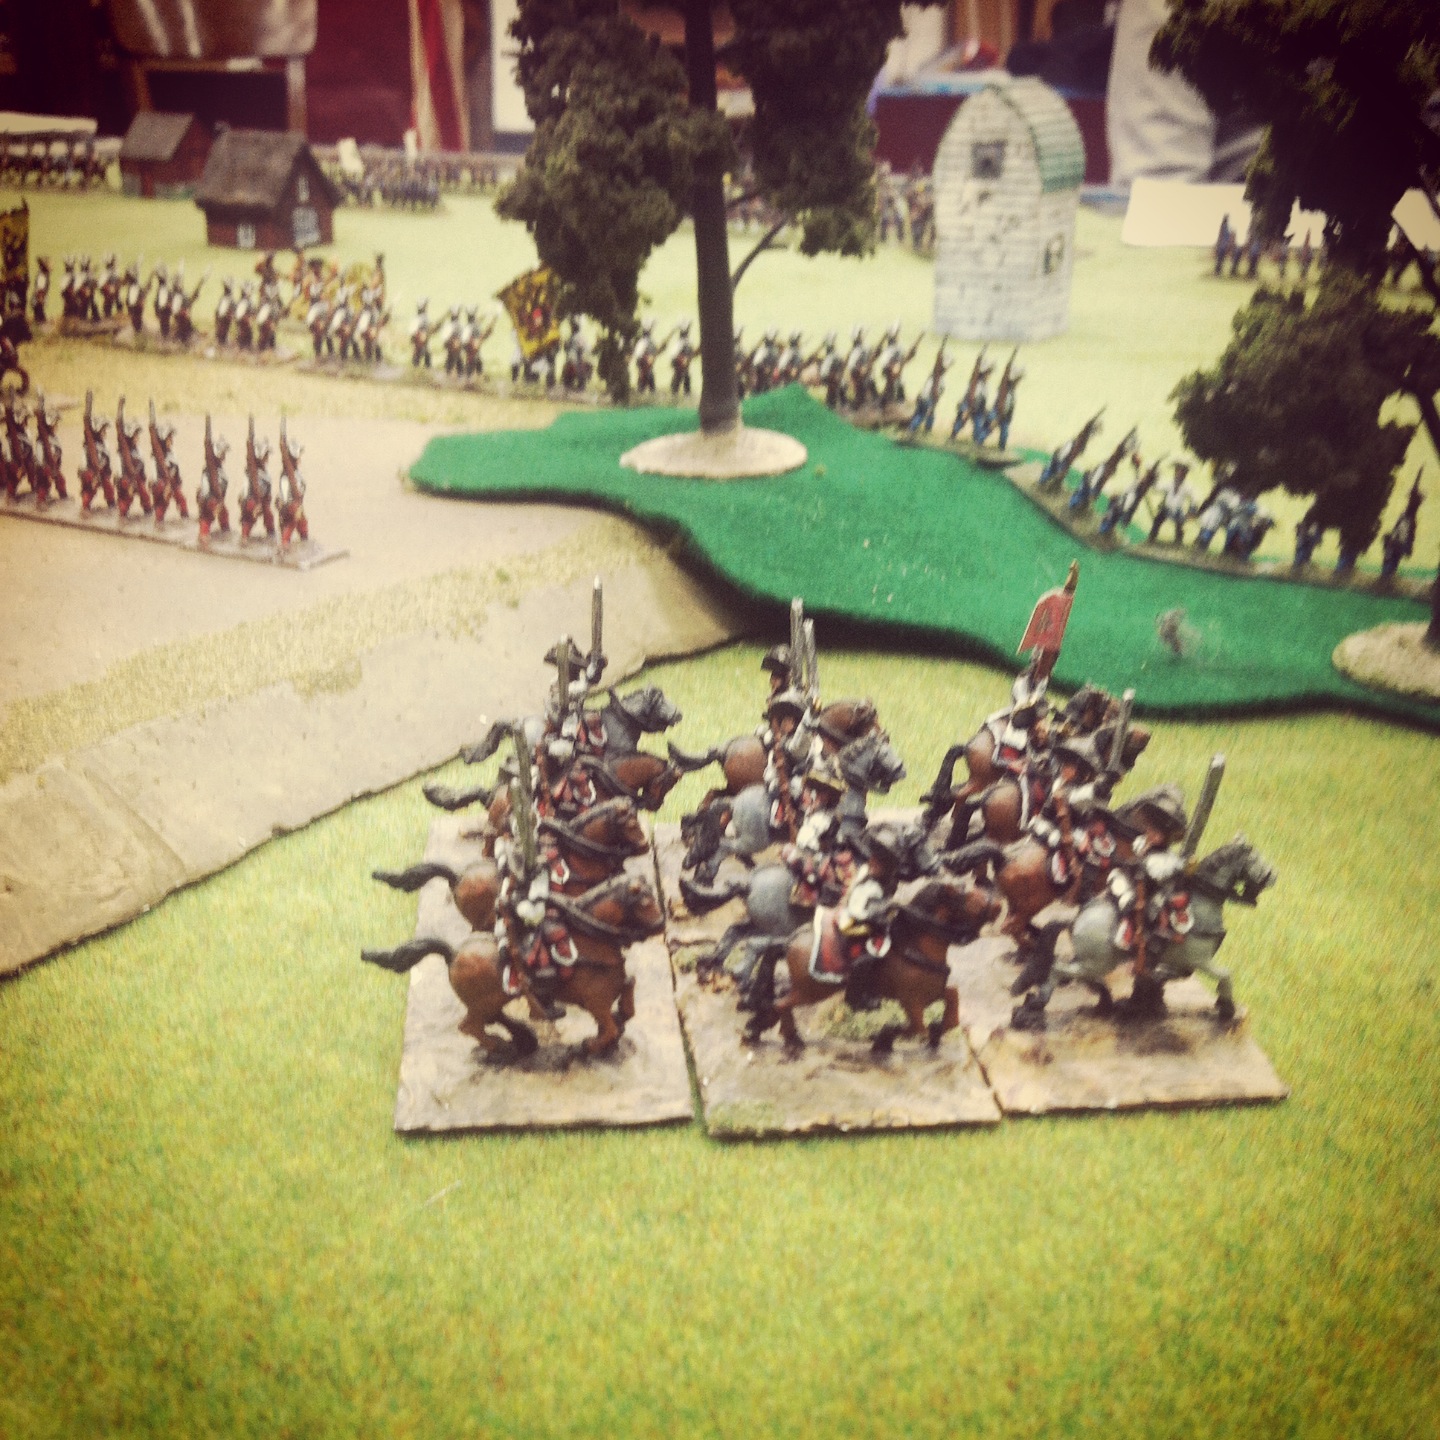
Encounter Mission table (German deployment to right and US to the left)

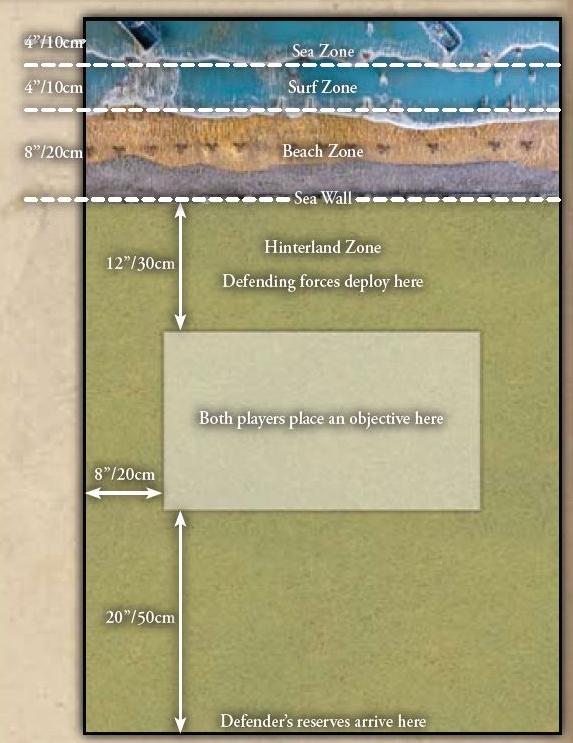
My opponent, playing as Germans, rolled as attacker and chose the long side of the table with the church on his right and a farm and wooded area to his left. This left my US 101st Airborne with the bridged river at my right and a farm at my left as defender. As per scenario rules, we each began by placing an objective on either long edge of the table, placing half our platoons in reserve and deploying the remainder of our starting units along our edges.

IMG_2699

Germans Stugs move to control the center

The Germans won the roll to go first and immediately pressed toward the center around the church yard with their Stug platoon and on their left toward the river with Panzergrenadiers. It was clear the Germans hoped to make  speedy run to the objective just on the other side of the stone bridge and ford on the river.

IMG_2700
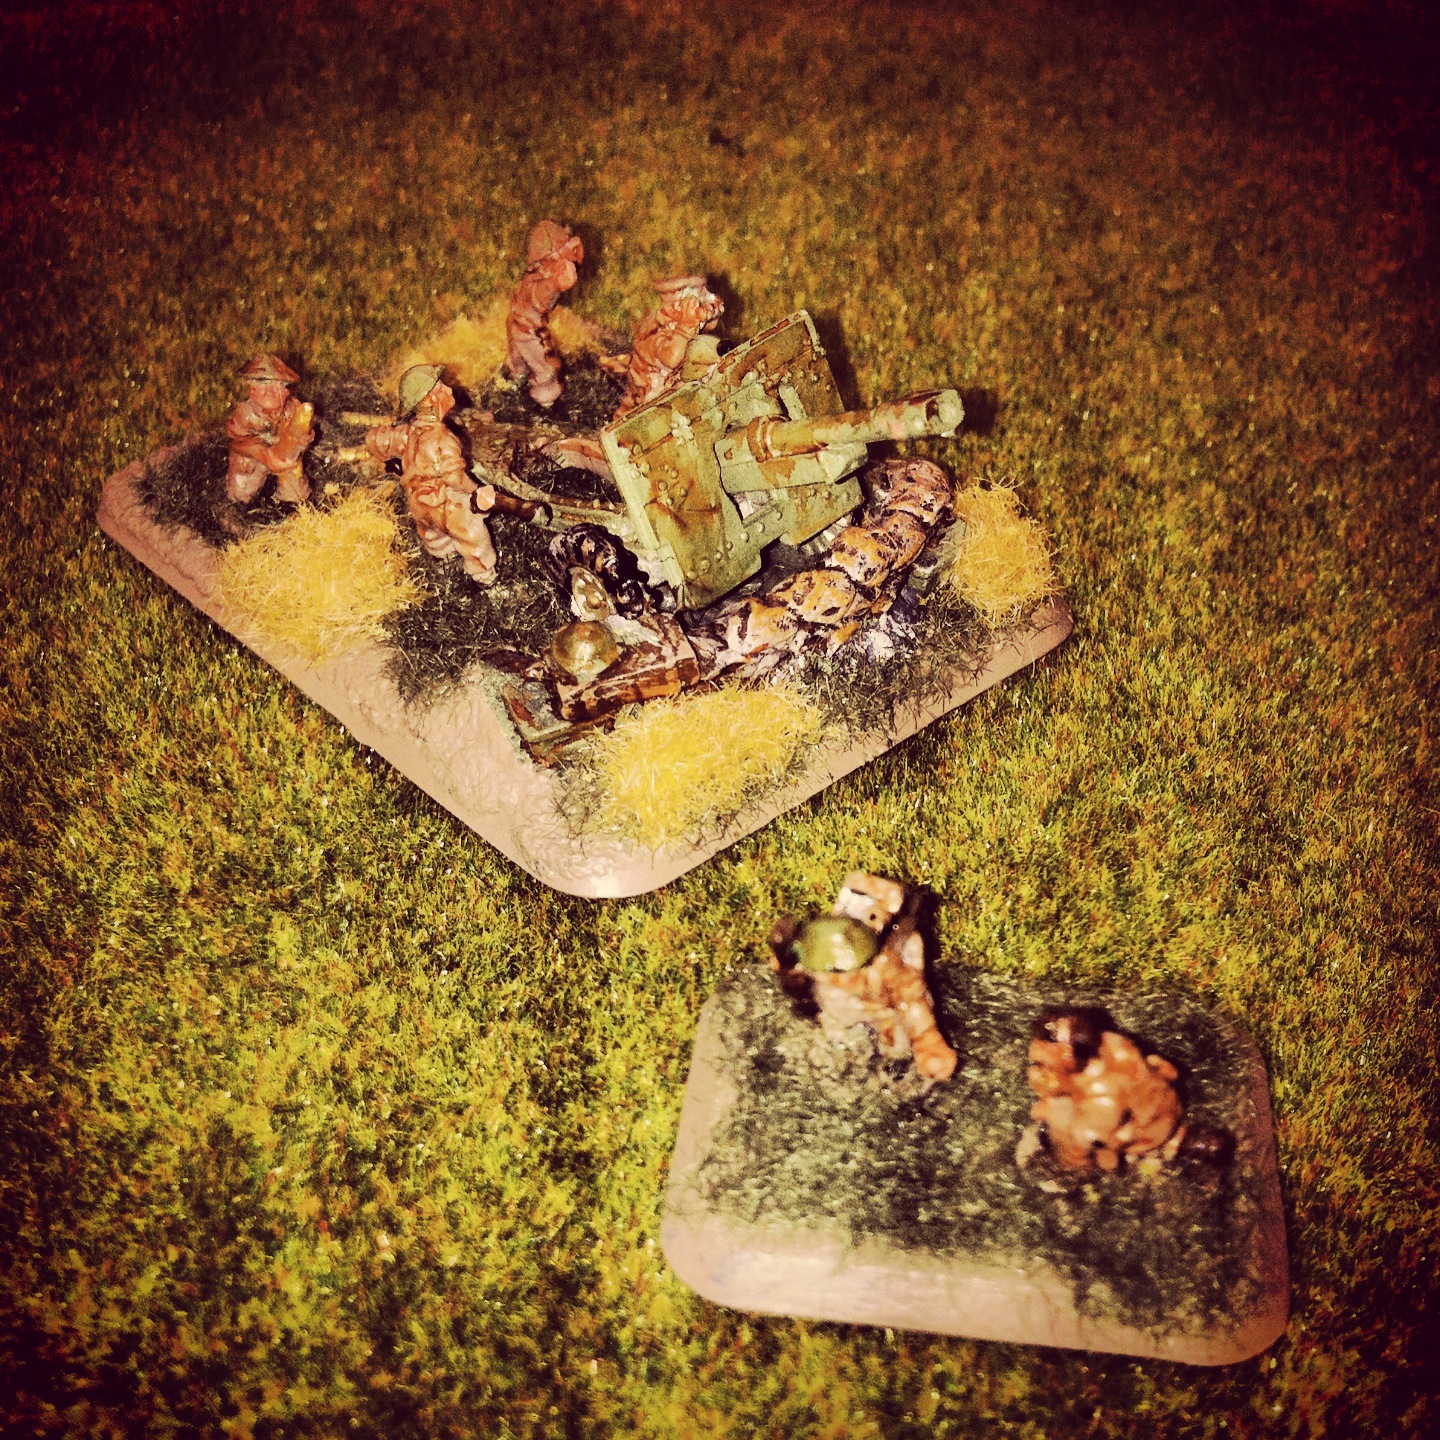
US anti-tank platoon rolls to seal the German advance at the bridge

In my first turn, I moved my M-18 Hellcat tank destroyers to the bridge and hoped to get some quick kills in on the advancing German Stugs from the bridge.

IMG_2701

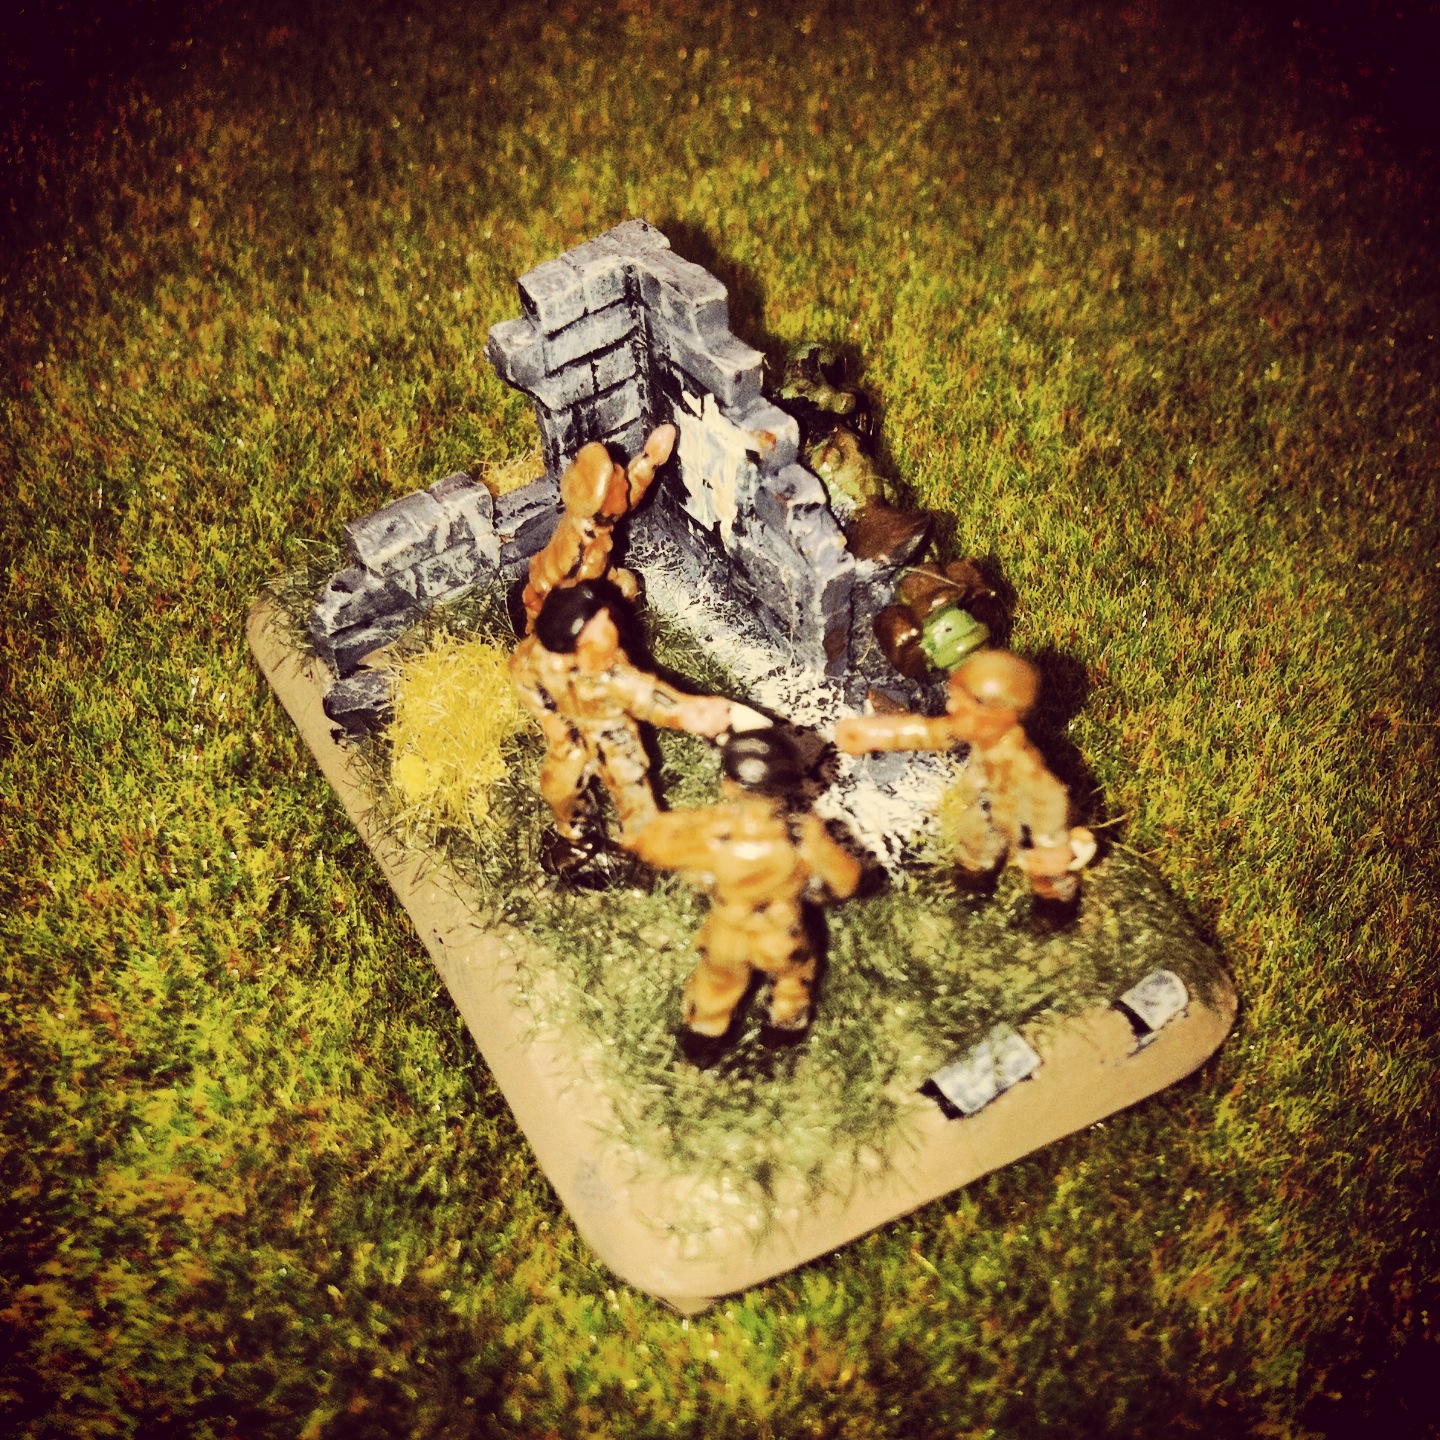
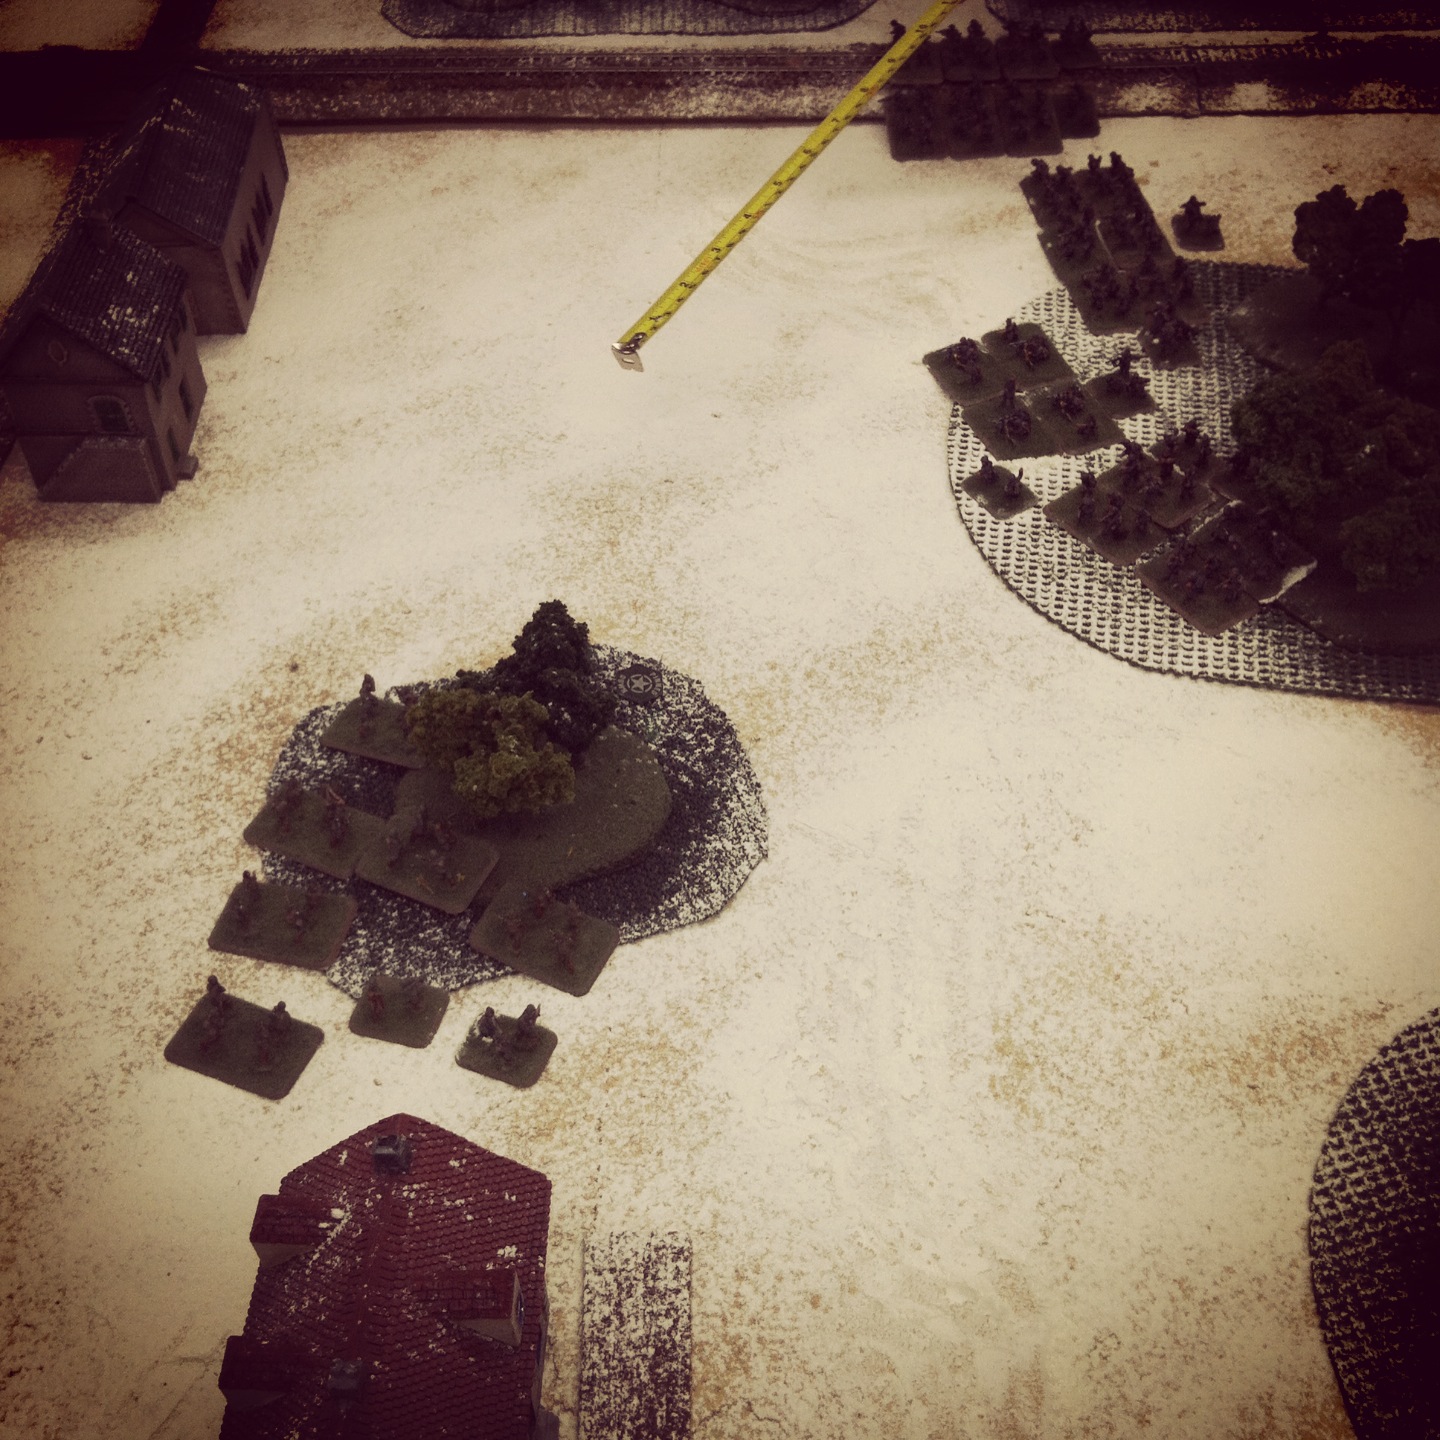
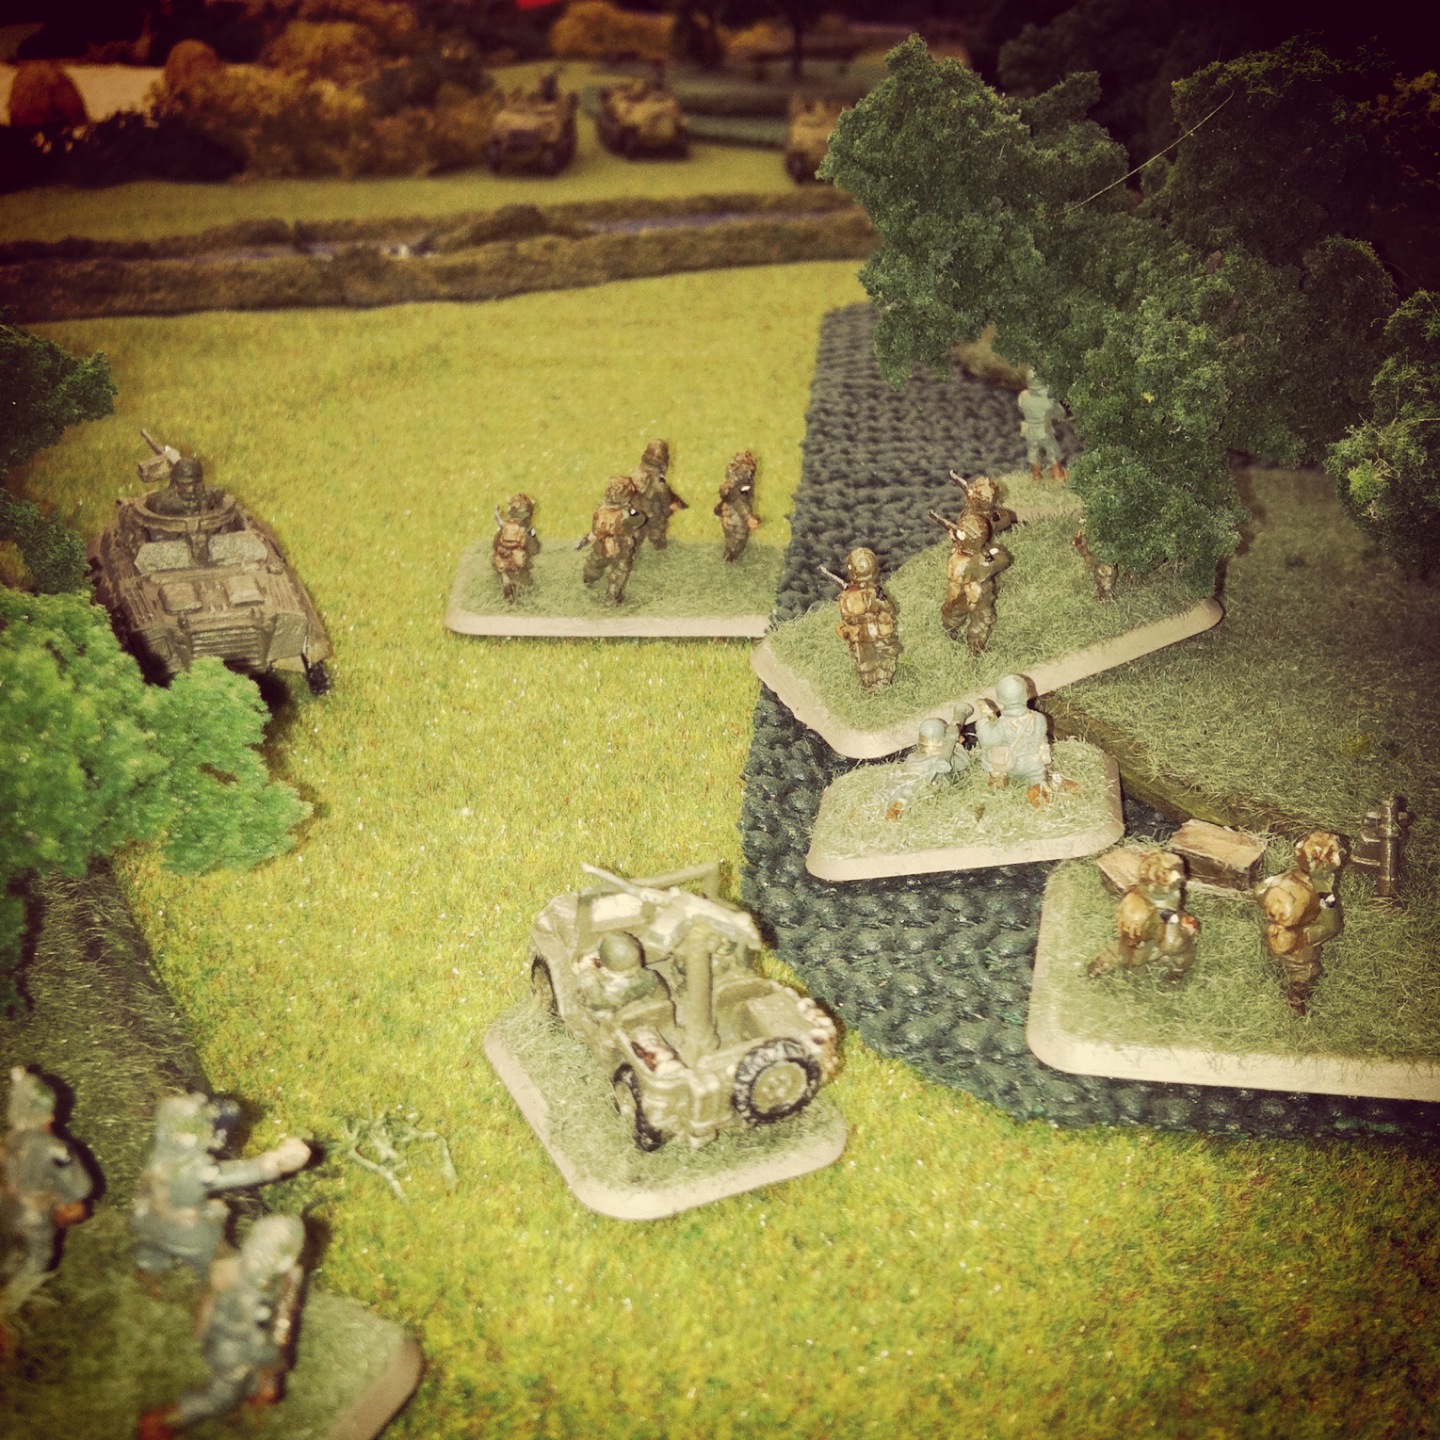
Members of the 101st Airborne take position in the woods

On the other side of the road to the bridge, my US Airborne hustled into the two sets of woods. Hiding among the trees, the paratroopers looked to seal the flank against the advancing German mounted troops on the other side of the river.

IMG_2702

One Hellcat burns at the foot of the bridge while another fires from the bridge

With my Hellcats missing their shots on the advancing Stugs, the German guns rolled to the intersection just beyond the bridge and destroyed one of my anti-tanks. While the loss of the Hellcat halved my anti-tank capabilities, the burning hulk effectively shut down the German path to the bridge.

IMG_2703

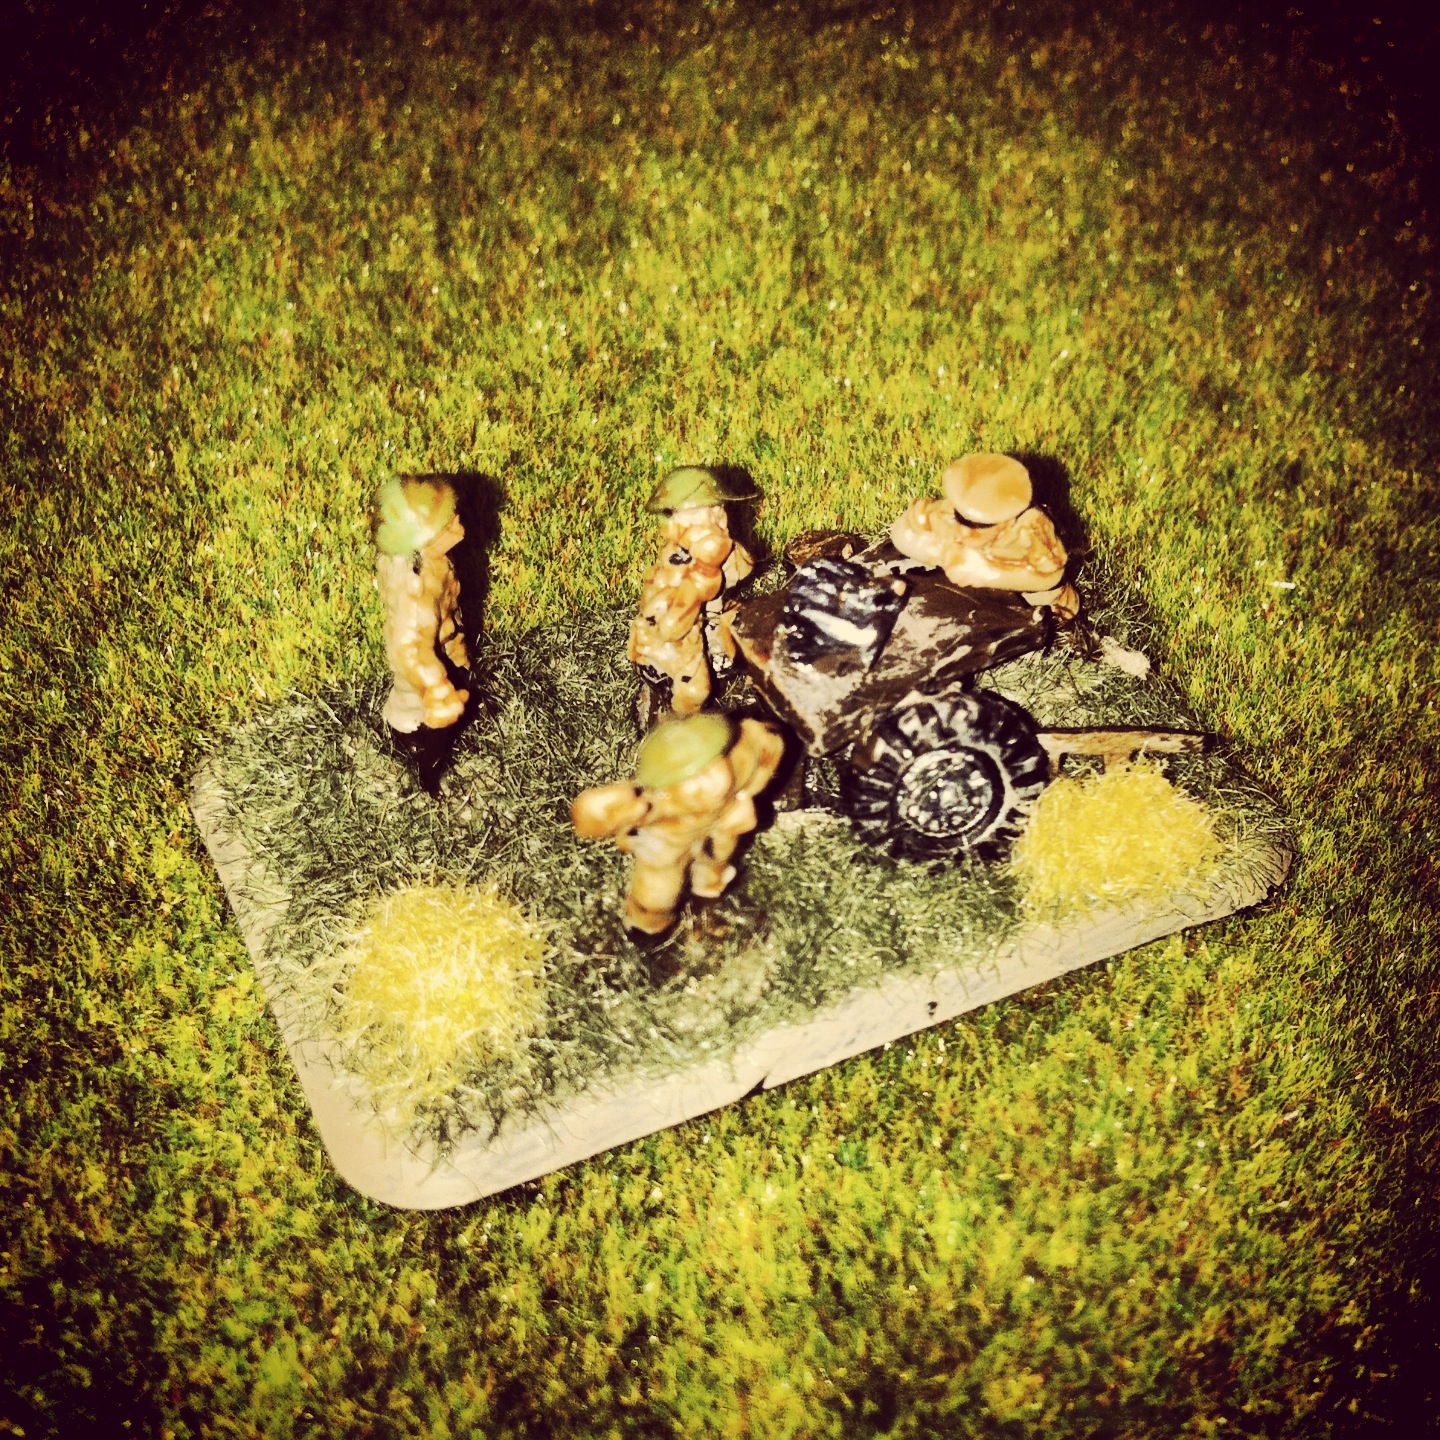
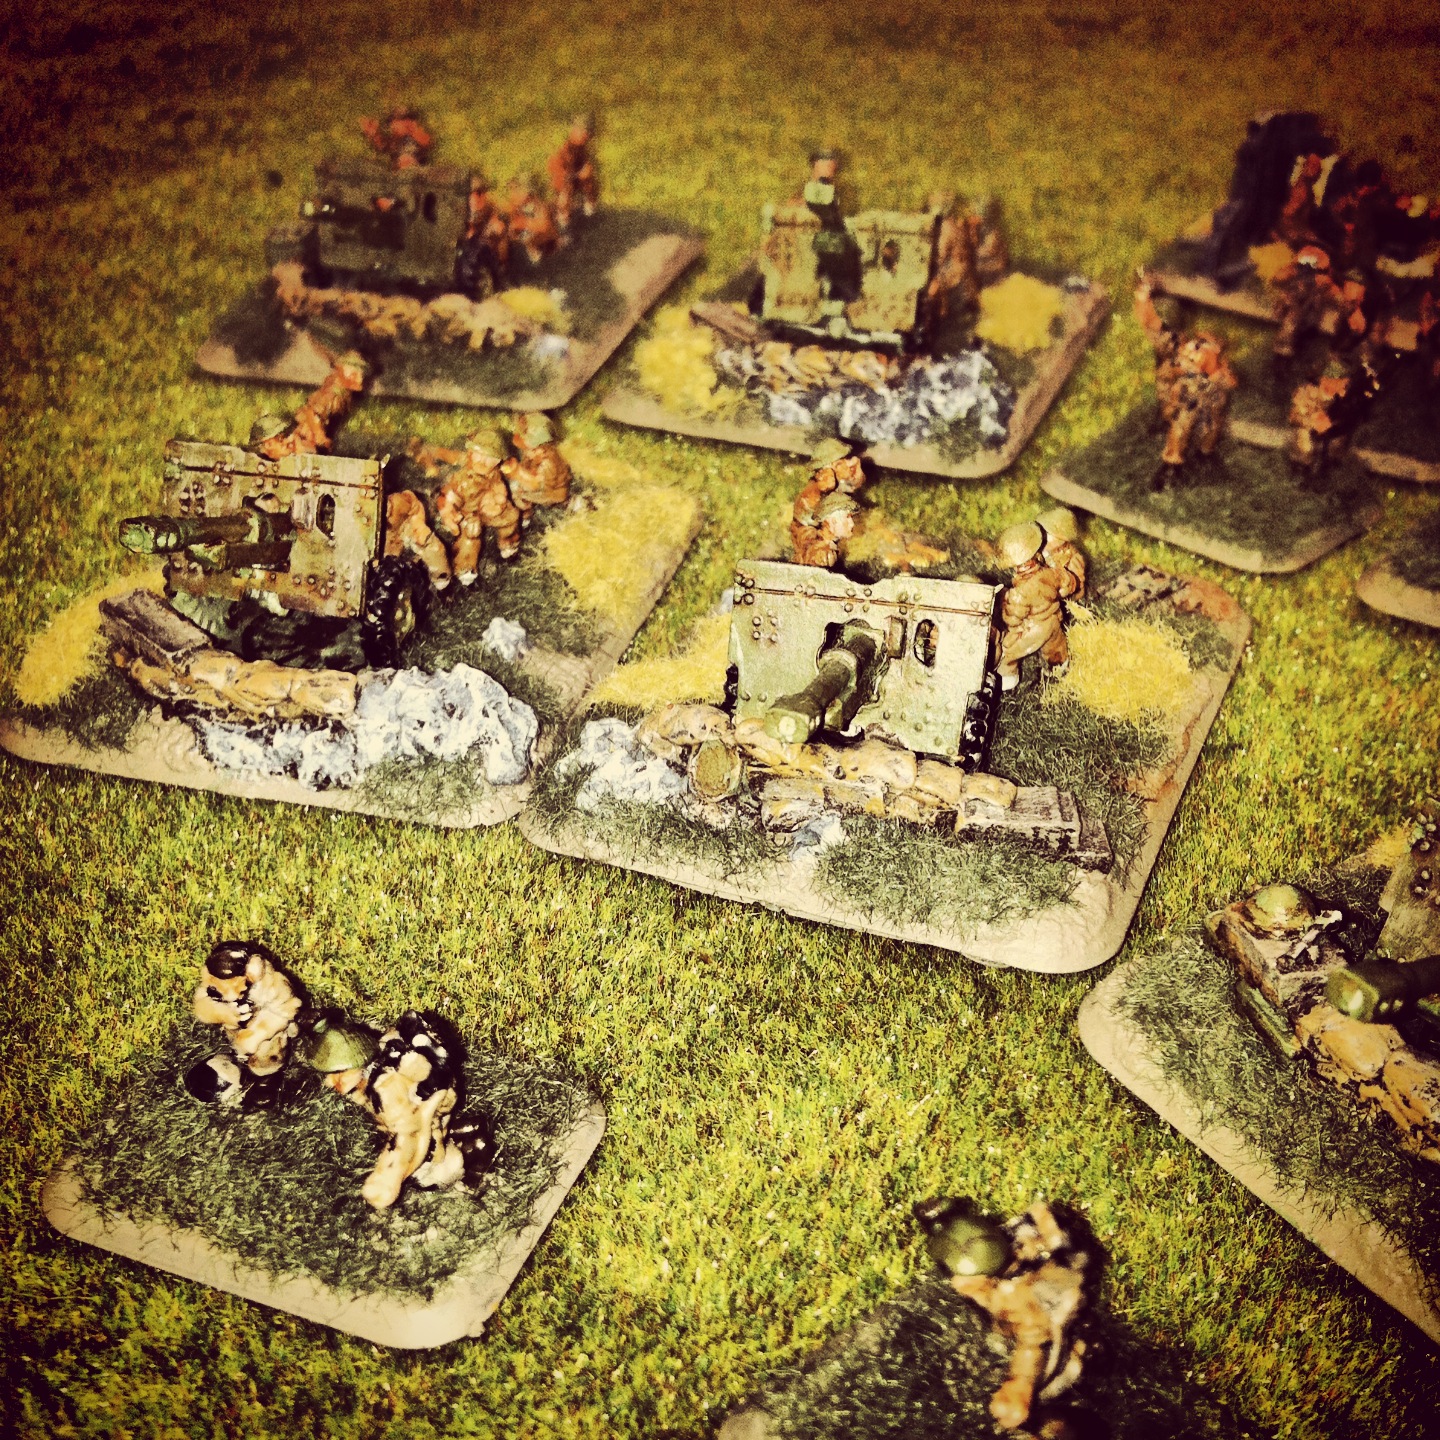
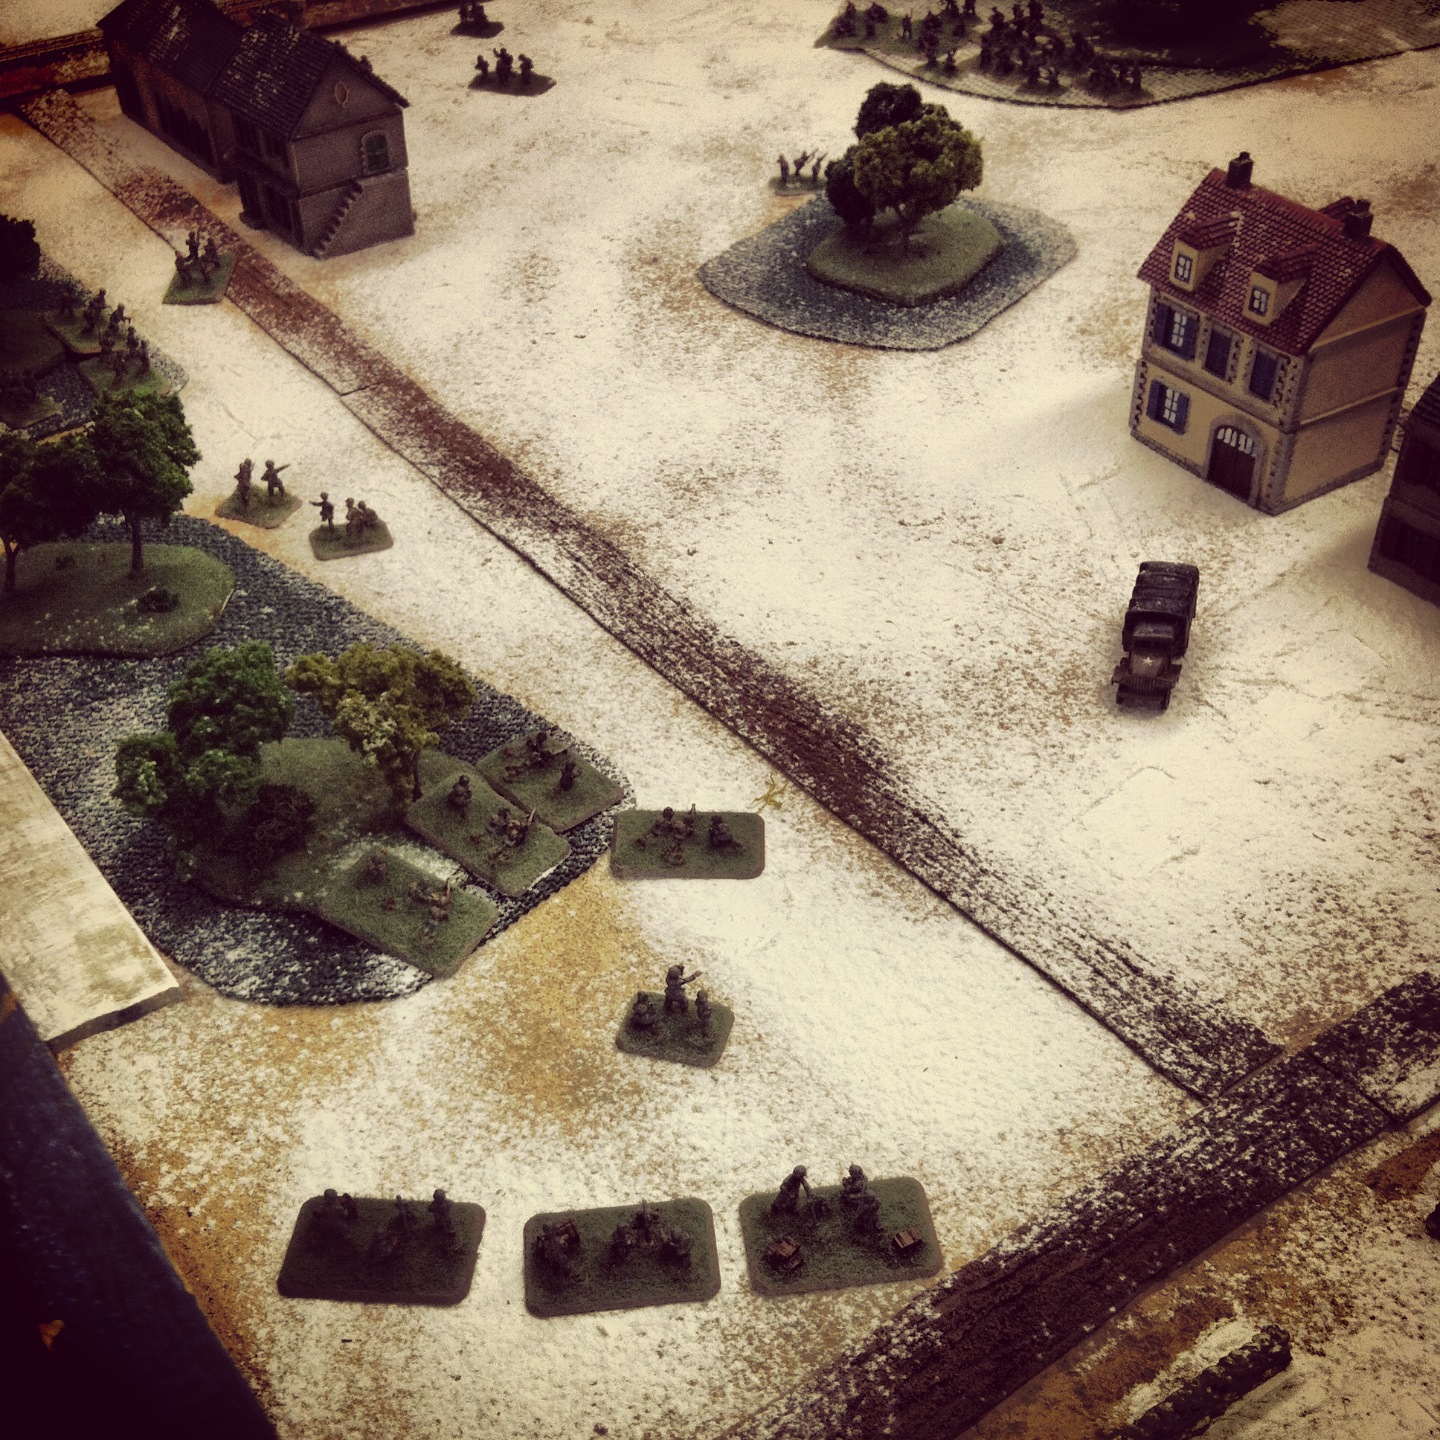
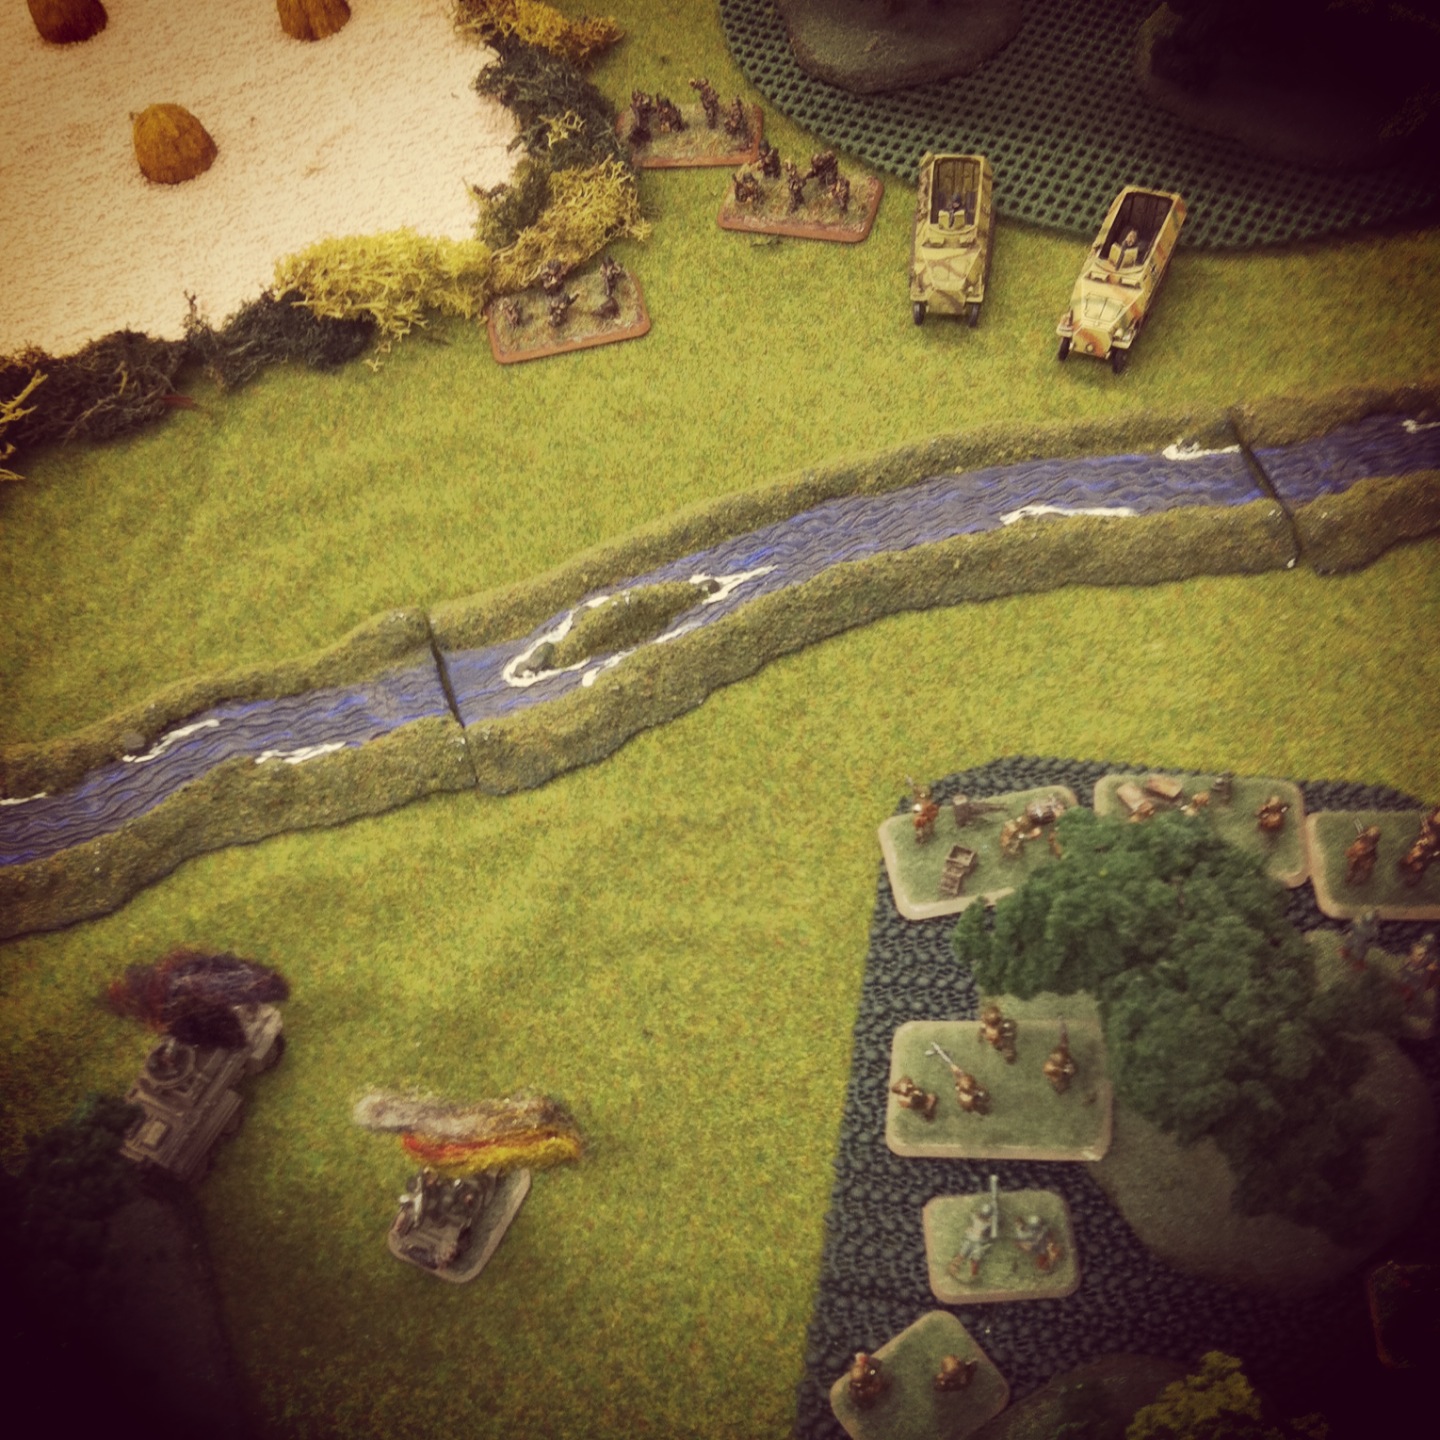
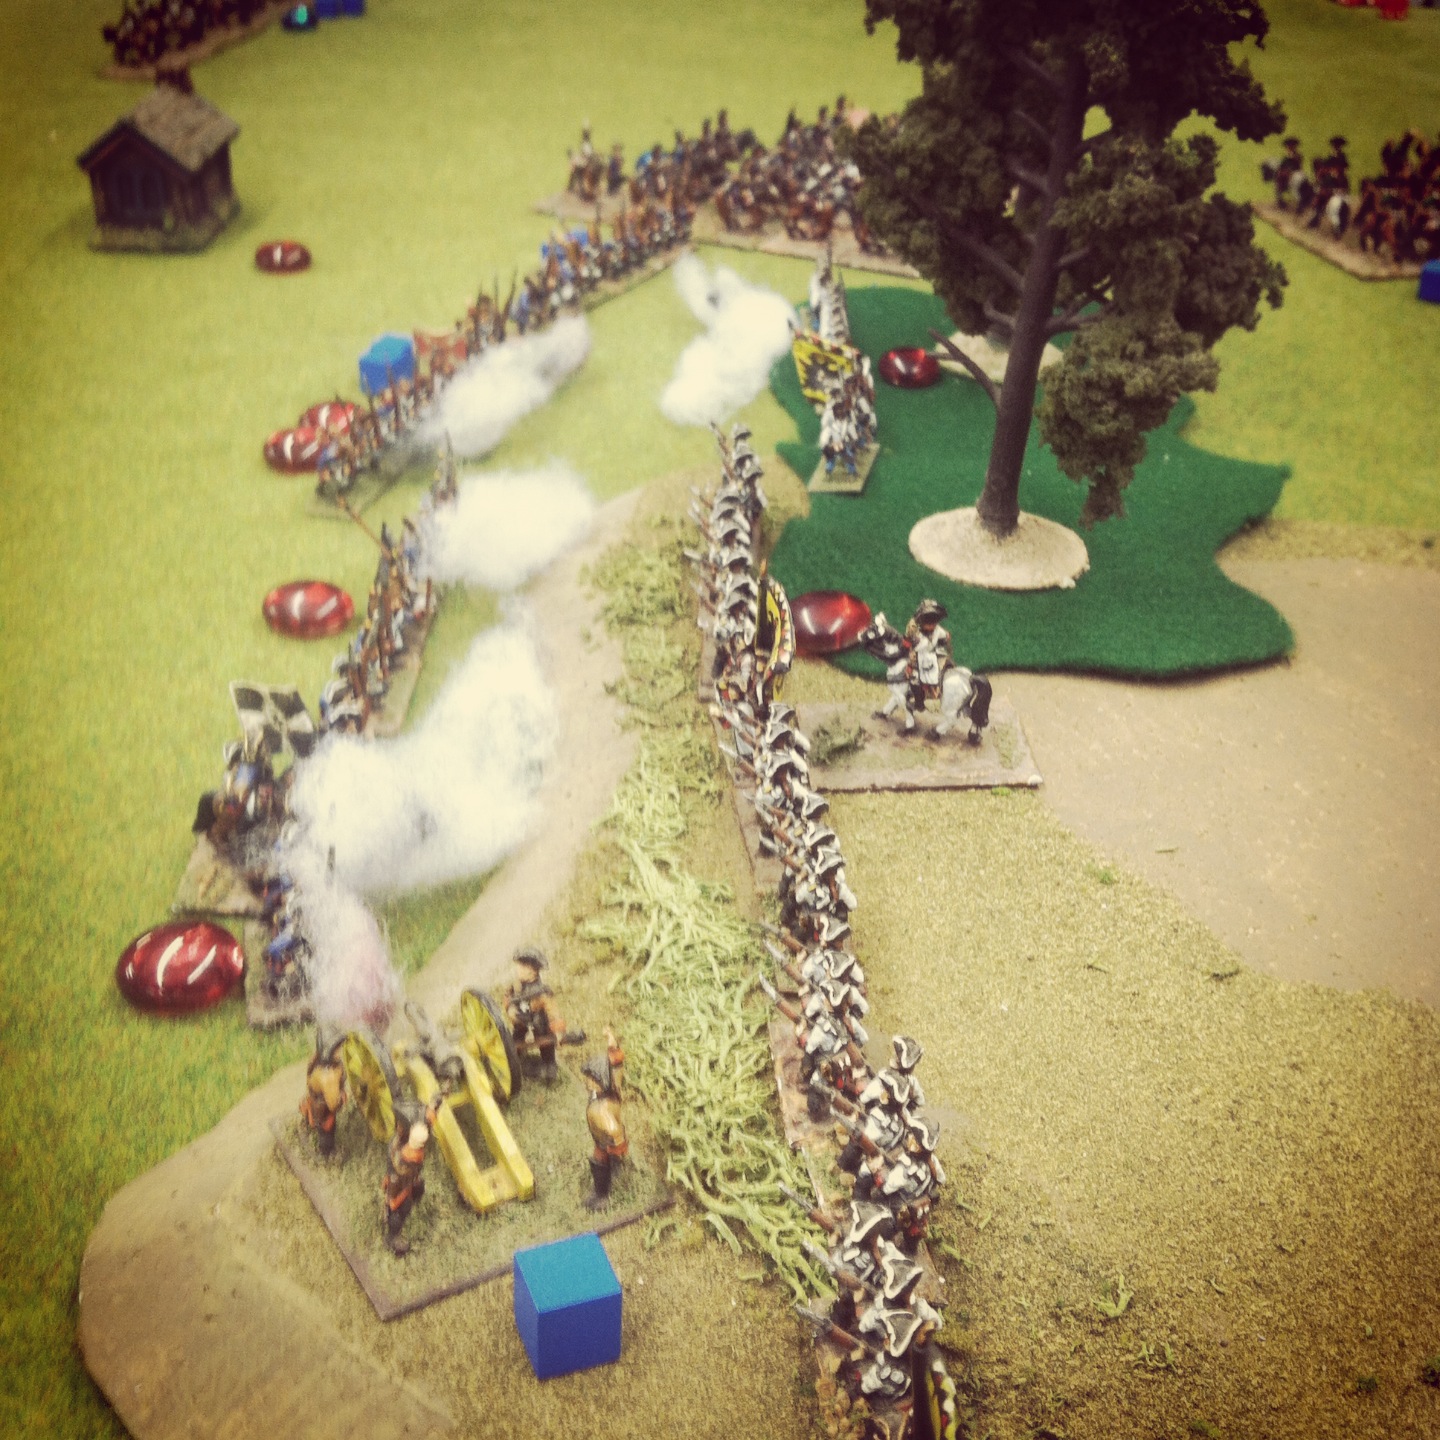
US Airborne and German Panzergrenadiers exchange fire over the river

Across the river, the 101st troops safely fired from the treeline toward the mechanized Germans across the river. With combined fire from a a nearby remaining Hellcat, Jeep and armored car from the tank destroyer platoon, a German halftrack was destroyed and forced its troops to dismount. Returning fire, the Germans destroyed the armored car and Jeep.

IMG_2706

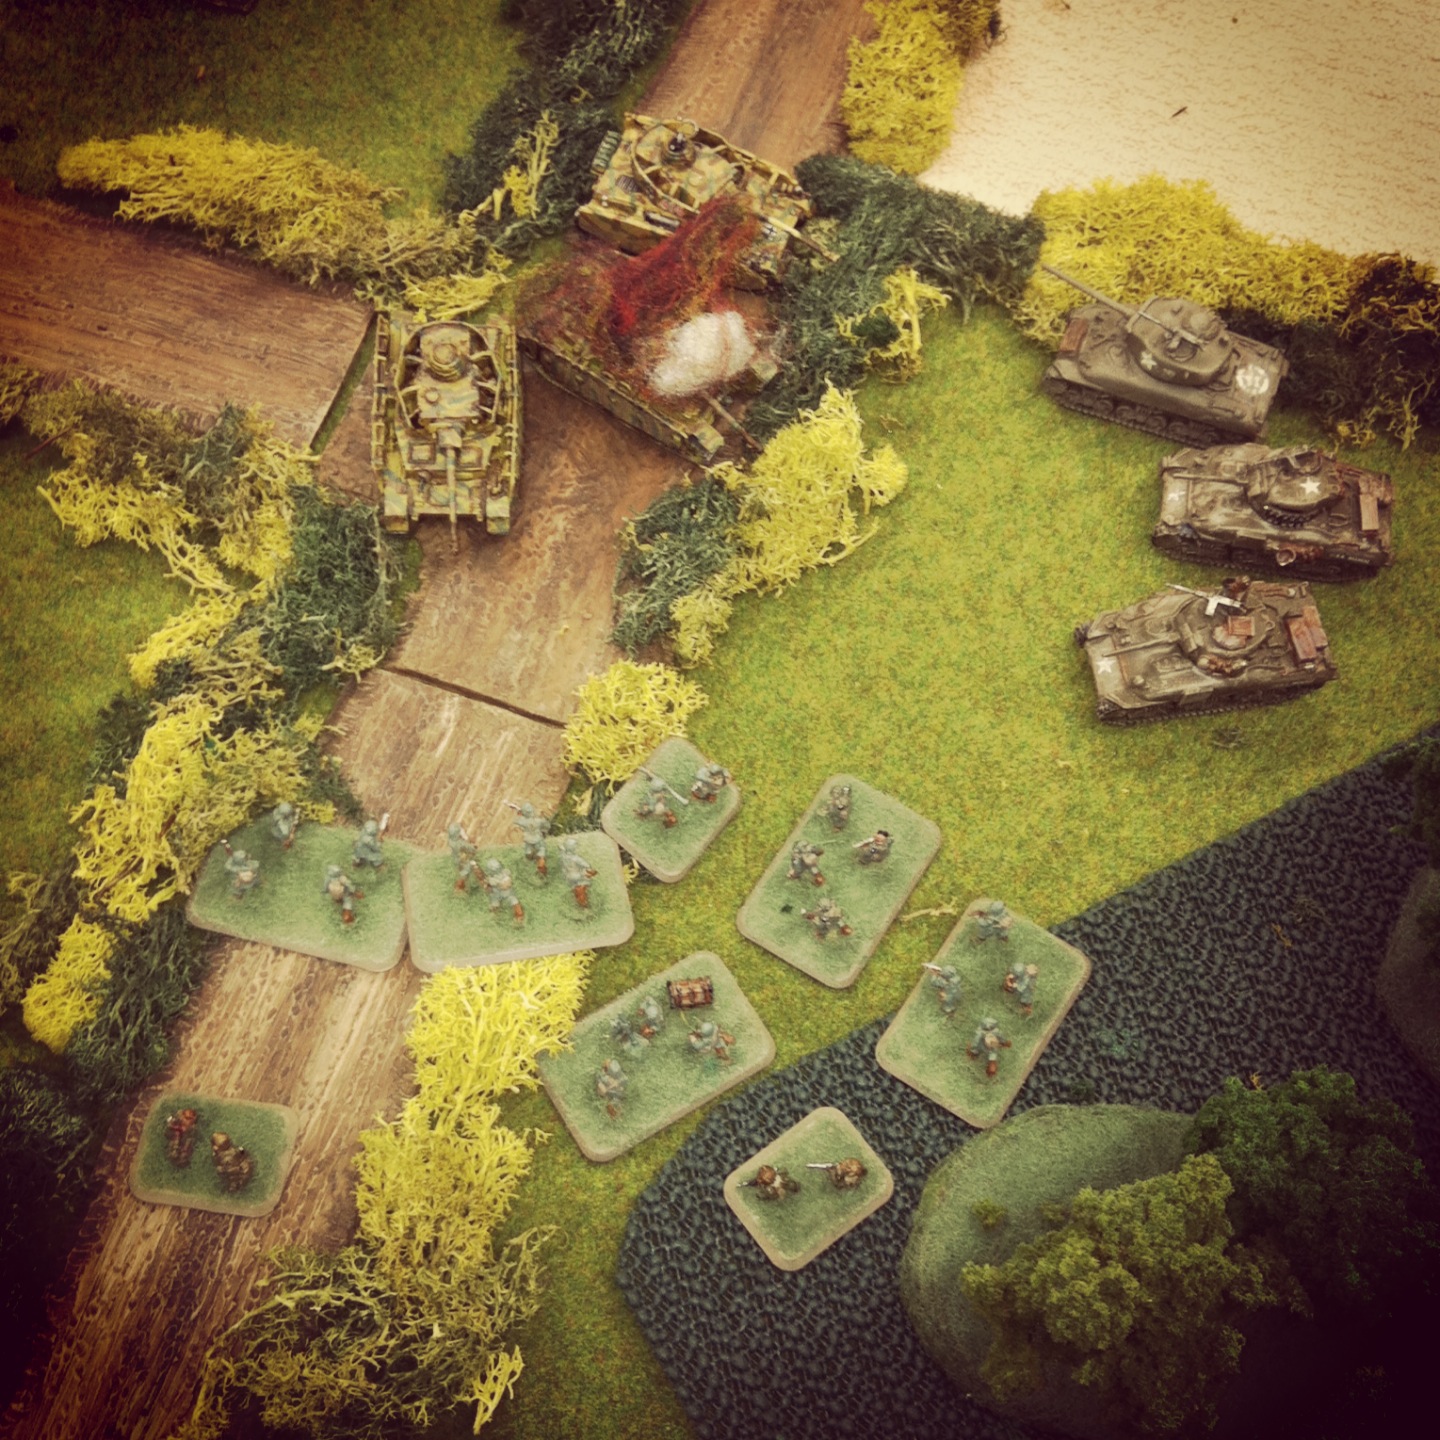
Stugs cross the field as an Airborne platoon lies behind the bocage beyond

With the road to the bridge shut down, the Stugs turned to speed their way across the fields at the center of the board. An Airborne platoon took up position on the other edge of the field, lying in wait for the advancing Stugs.

IMG_2707

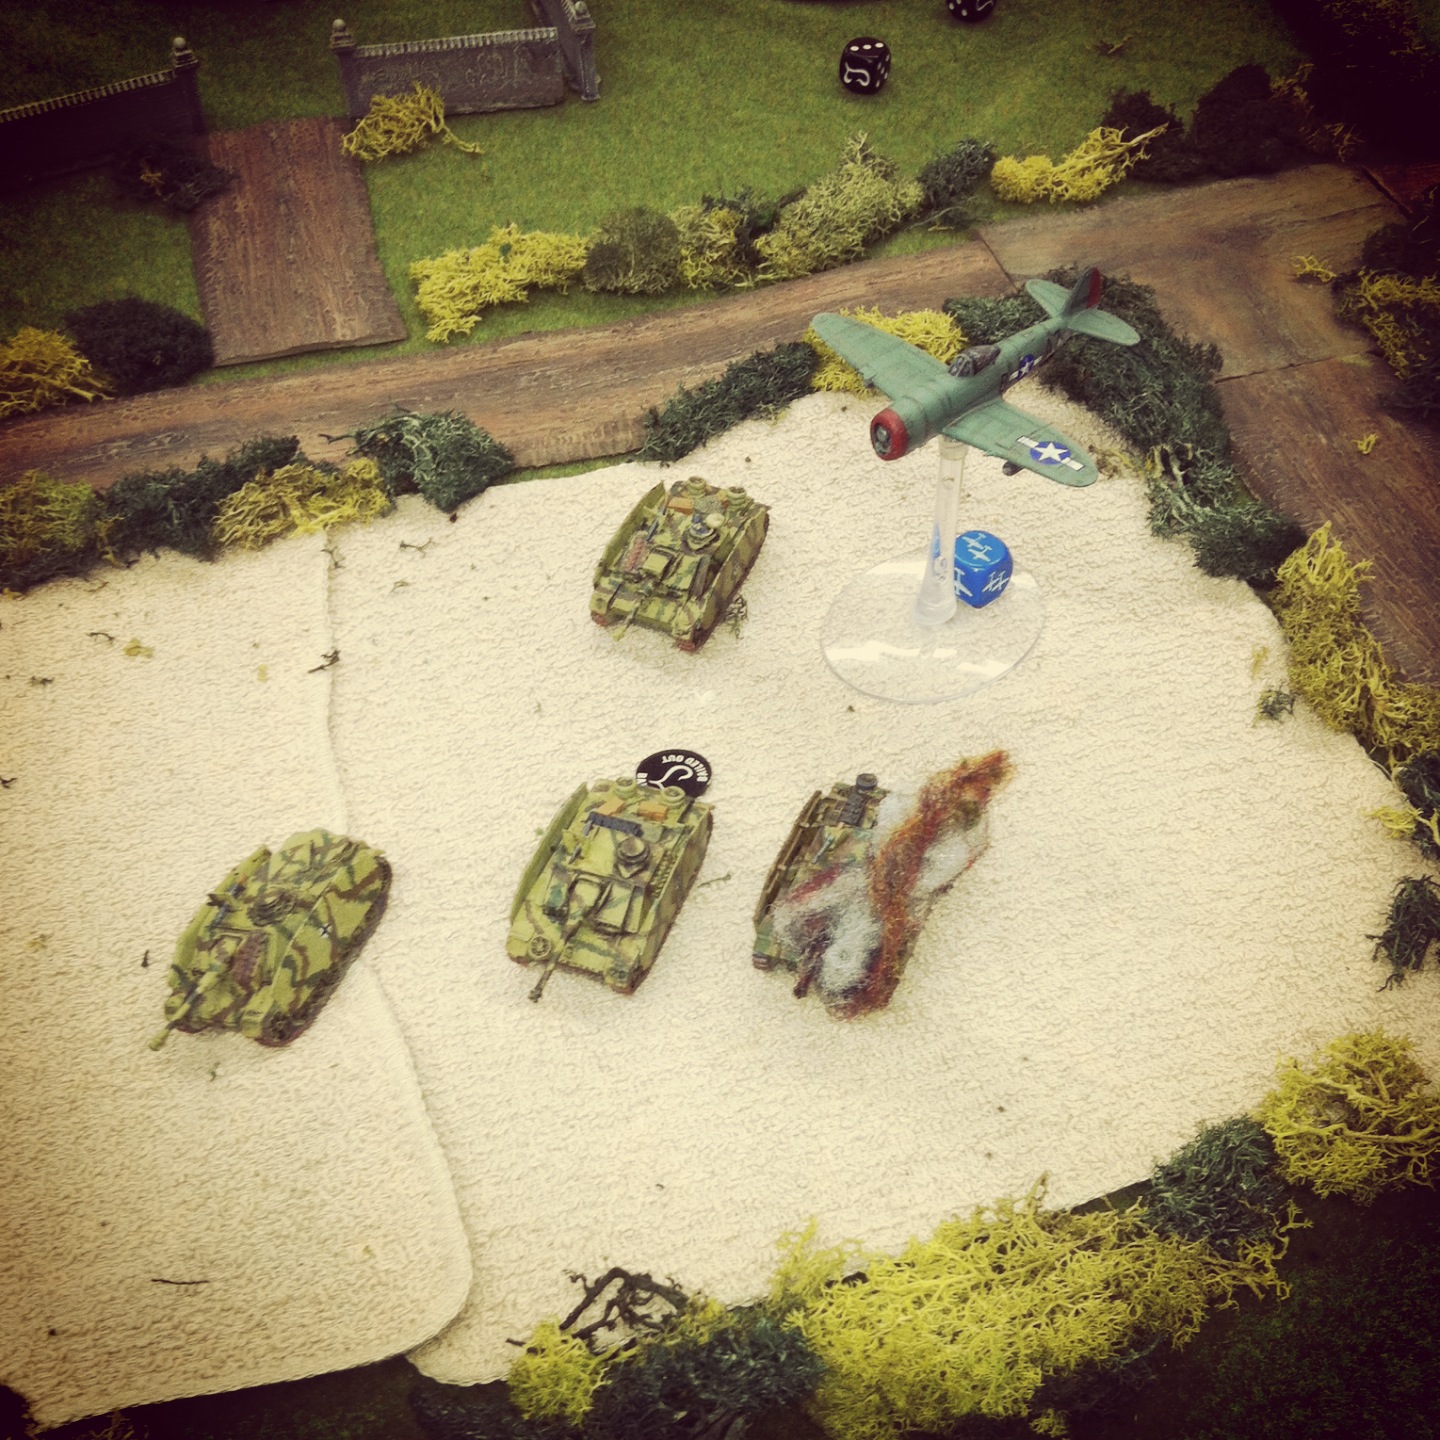
The US P-47 hits the Stugs in the open field

The Stugs sitting in the open field made for a quick target for the P-47 Thunderbolt which flew on in turn four, leaving one Stug in flames and a second with its crew bailed out.

IMG_2708

The Stugs reach the gap at the field edge and destroy the remaining Hellcat

I their next turn, the Stugs remounted and made their way to the gap at the far edge of the field. A couple quick shots to the side armor of the remaining Hellcat destroyed the remaining US tank destroyer which had been busying itself pouring fore into the still-mounted Panzergrenadiers. It looked bad for the Americans with nothing standing between the German Stugs and the objective just beyond the river ford.

IMG_2709

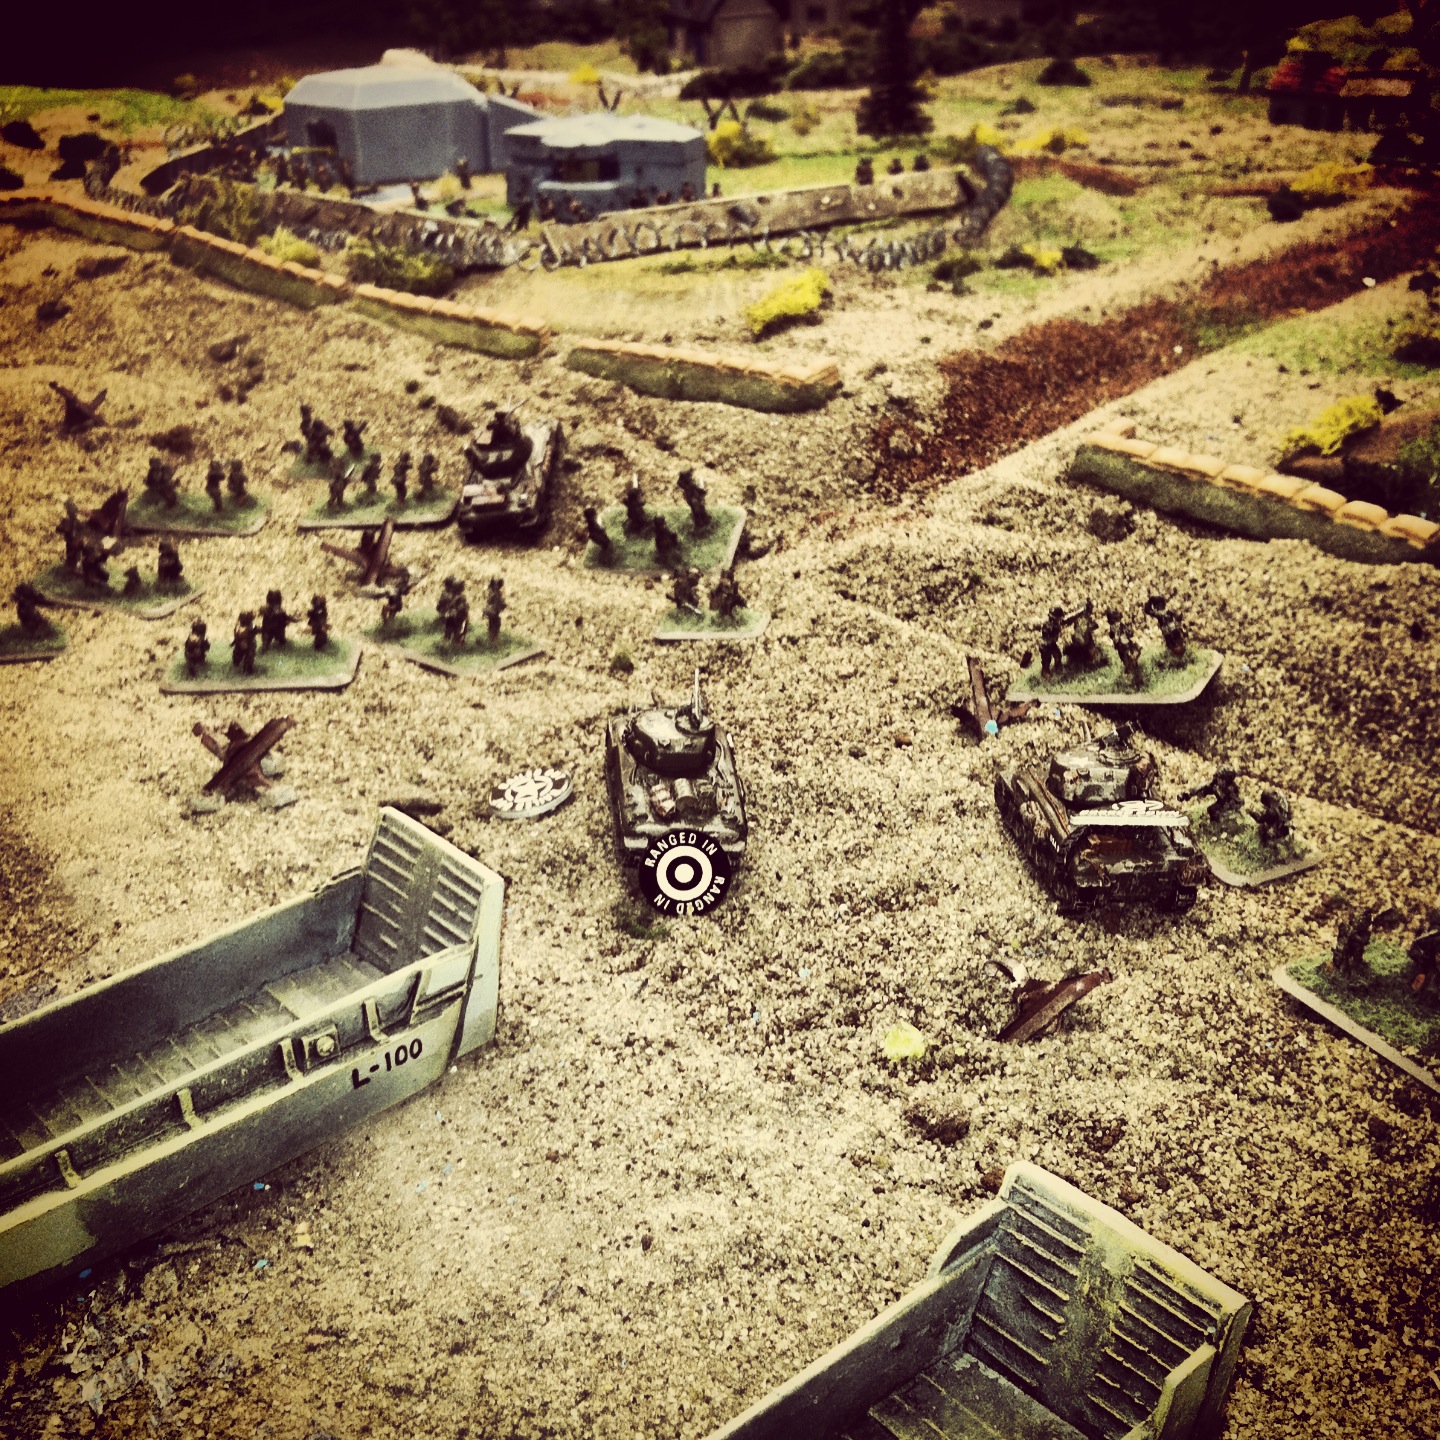
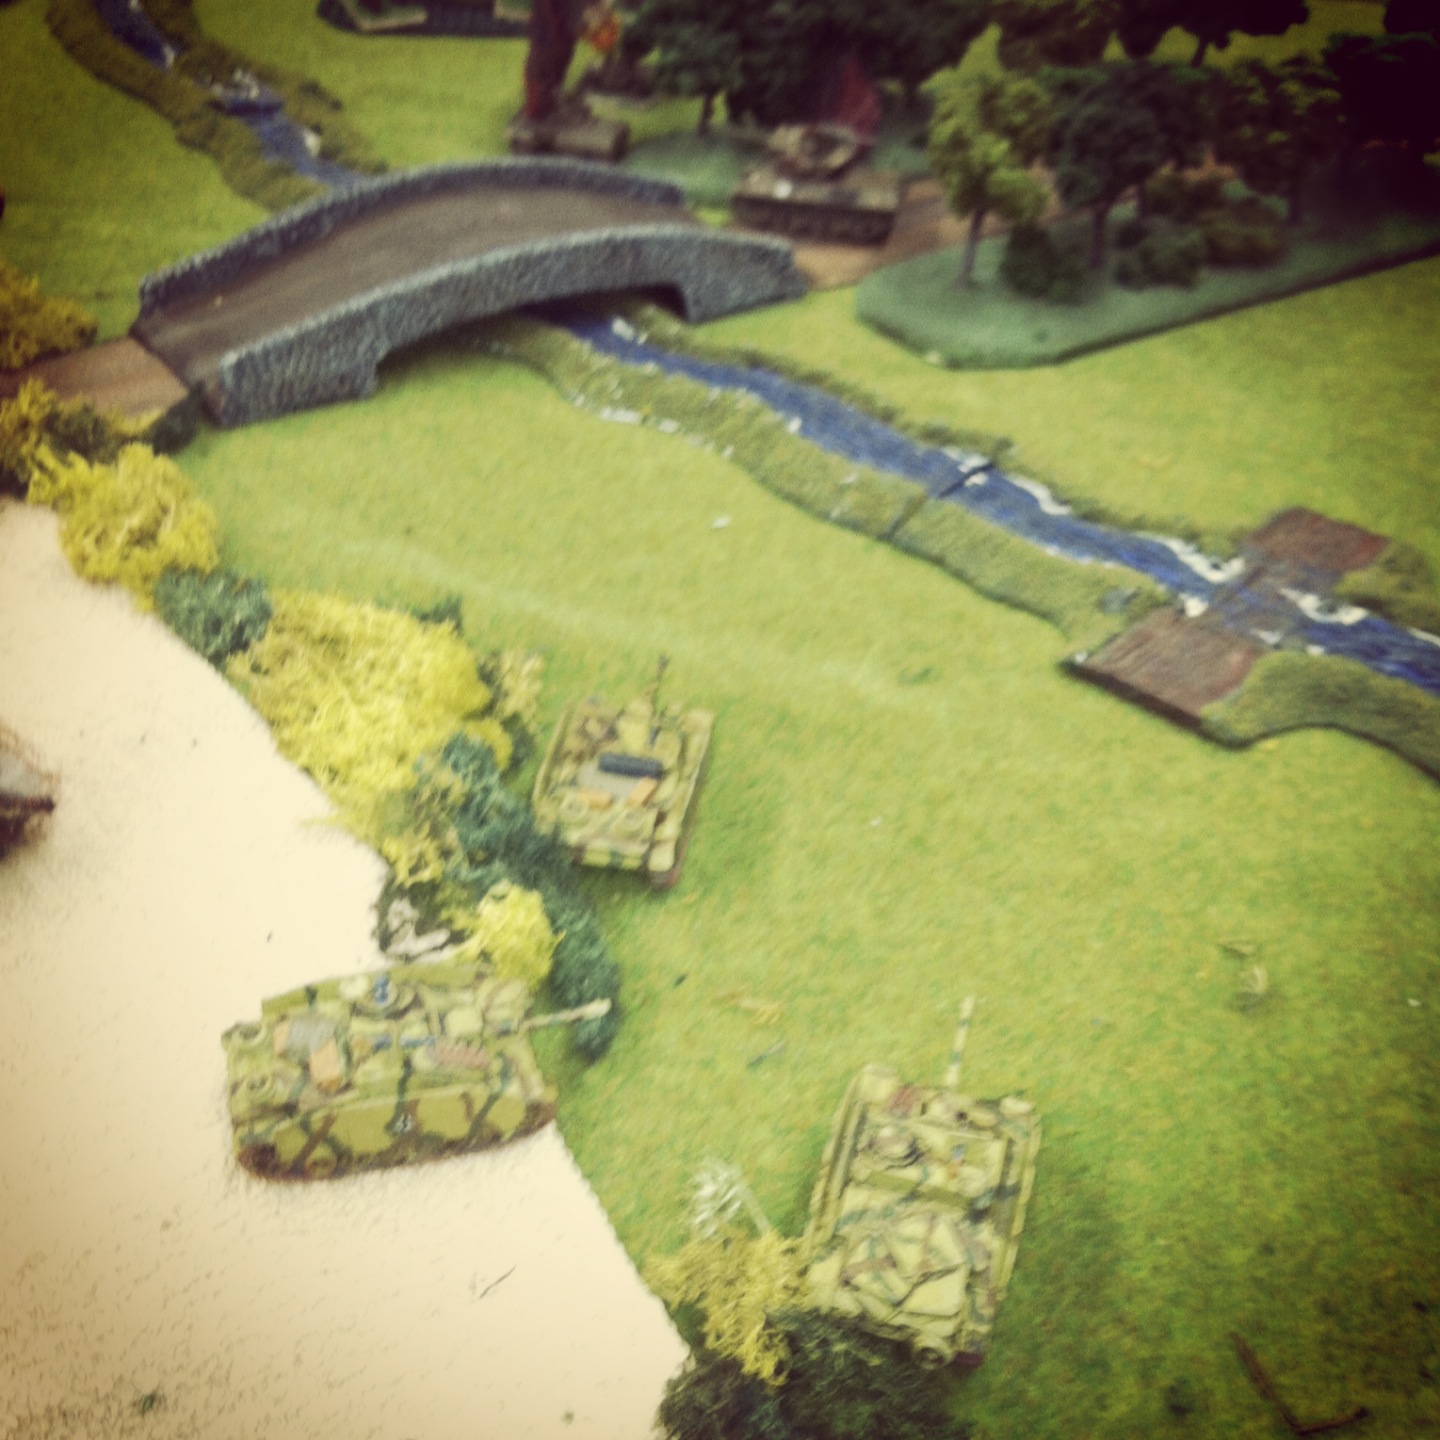
US Shermans make quick work of the remaining Stugs

Luck switched back for the Americans as they successfully rolled for their Sherman tank reinforcements in turn five. The Shermans moved to the river’s edge and destroyed the remaining three Stugs. Not only had the German armored advance to the objective been thwarted, but yet another easy path had been closed-up with a burning Stug clogging the exit from the field.

IMG_2710
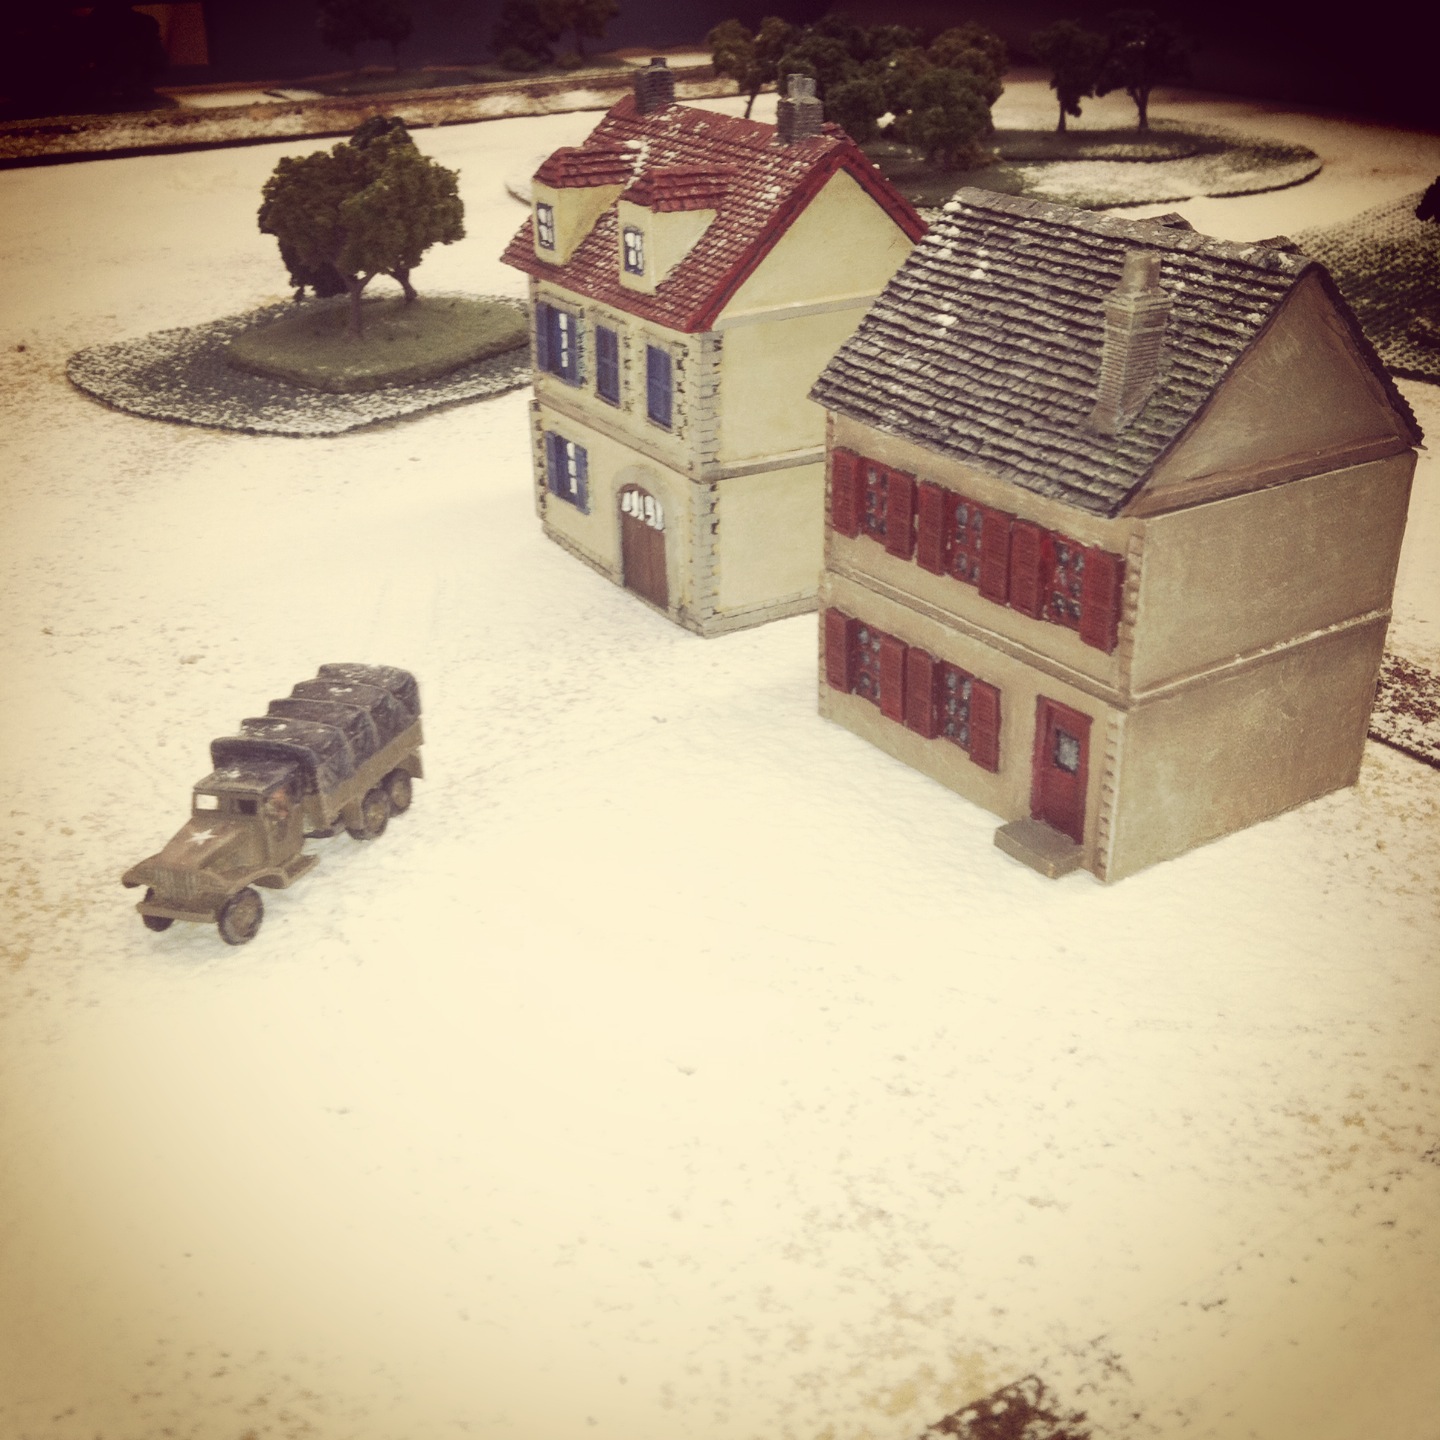
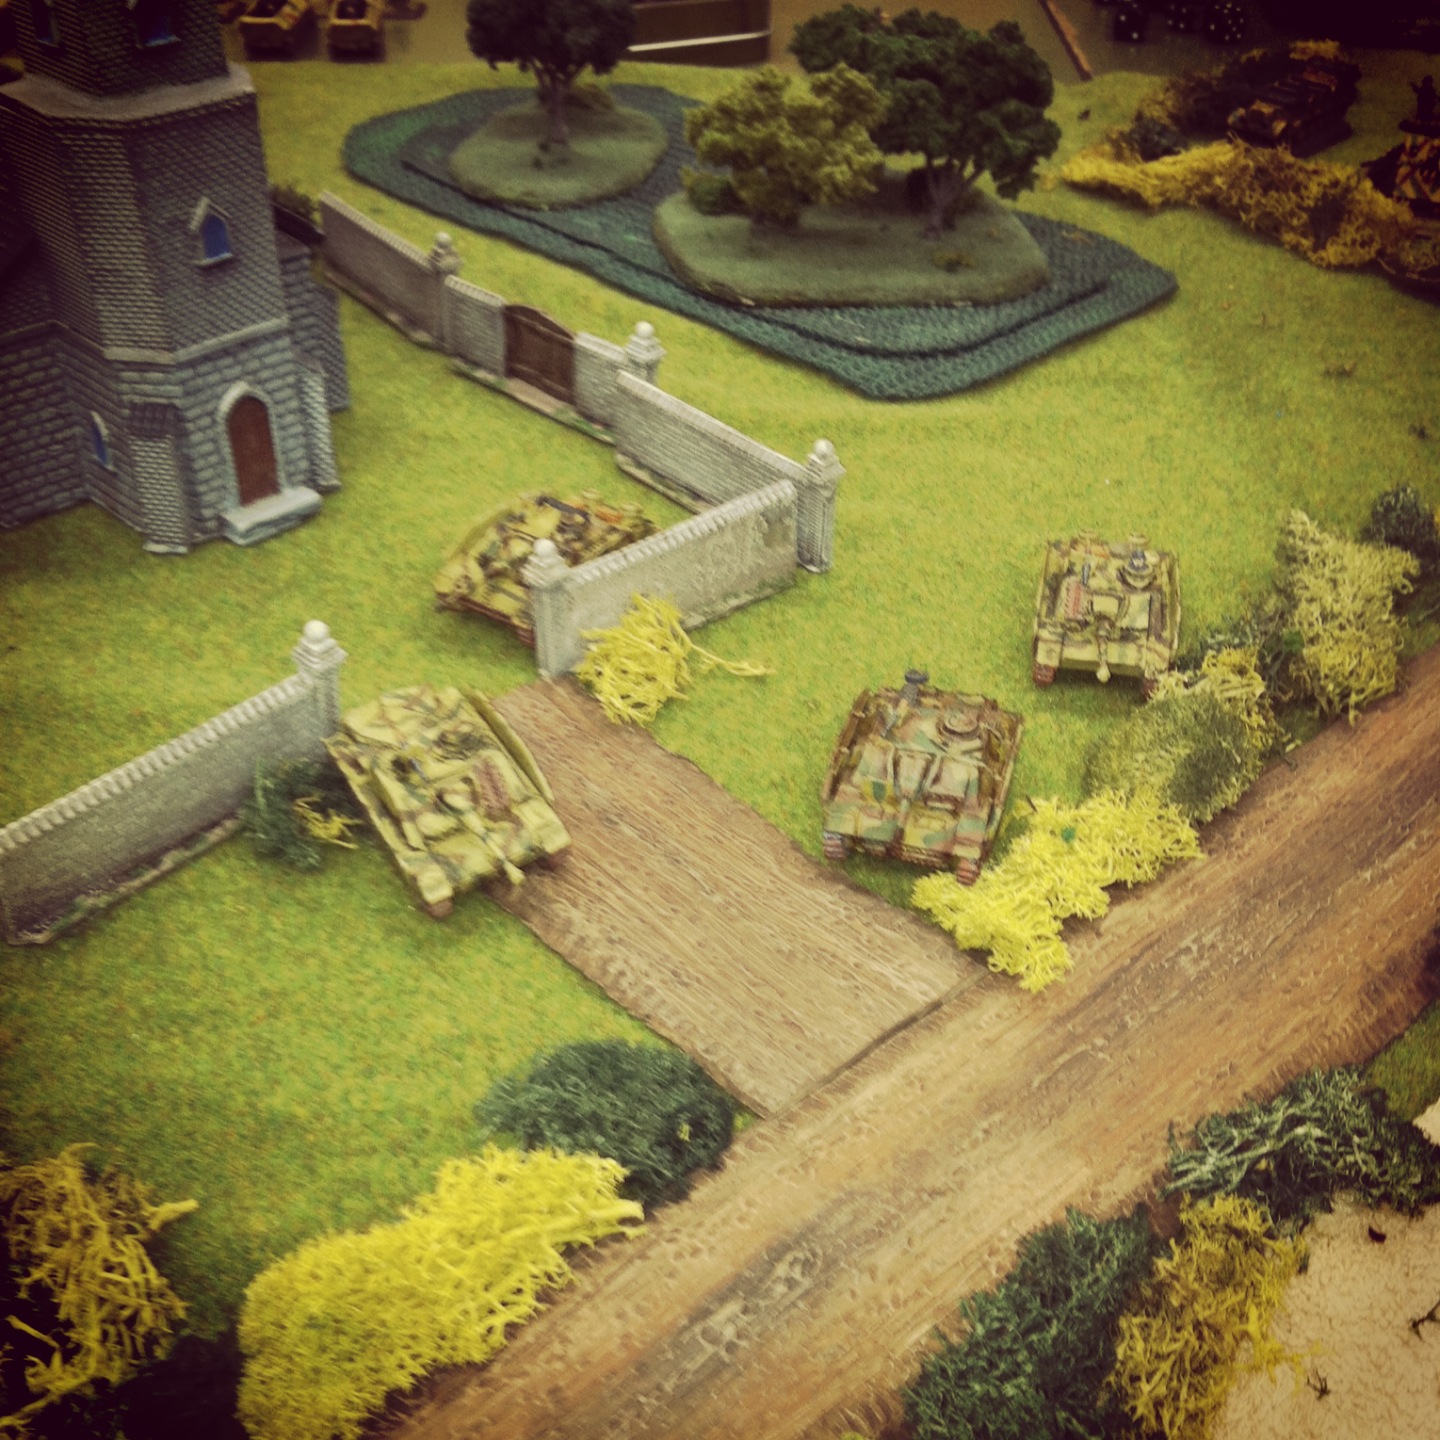
Panzer IV reinforcements move to take the US left

By turn six, the German Panzer IV reinforcements were rolling down the road looking to run around the far edge of the field and attack the US left flank. The left side was only held by a US light machine gun and rifle platoons, so armored support was badly needed if the Germans were to be stopped.

IMG_2716The first turn at the battle of the crossroads on the US left

At the intersection on the US left, ferocious fighting erupted as an assault from the usually stalwart 101st Airborne was repelled. The Shermans moved in and destroyed a Panzer IV.

IMG_2717

The second turn of the battle of the crossroads on the US left

With space and options getting tight, the Panzer IV’s returned fire and Sherman was left burning. With a two-on-two fight. the Shermans destroyed another Panzer IV in the sixth turn and the final German tank fled the field after failing a morale test for the pummeled platoon. With German armor destroyed across the field, the US rifle and light machine gun platoons scurried to the German right toward their objective behind the church.

IMG_2714

German half tracks struggle to cross the river on the weakening American right

The final turns of the game played out back at the river with the reinforced Germans struggling across the river. Fire continued to be exchanged with the US rifle platoon in the forest which eventually fell back into the treeline at the road.

IMG_2715

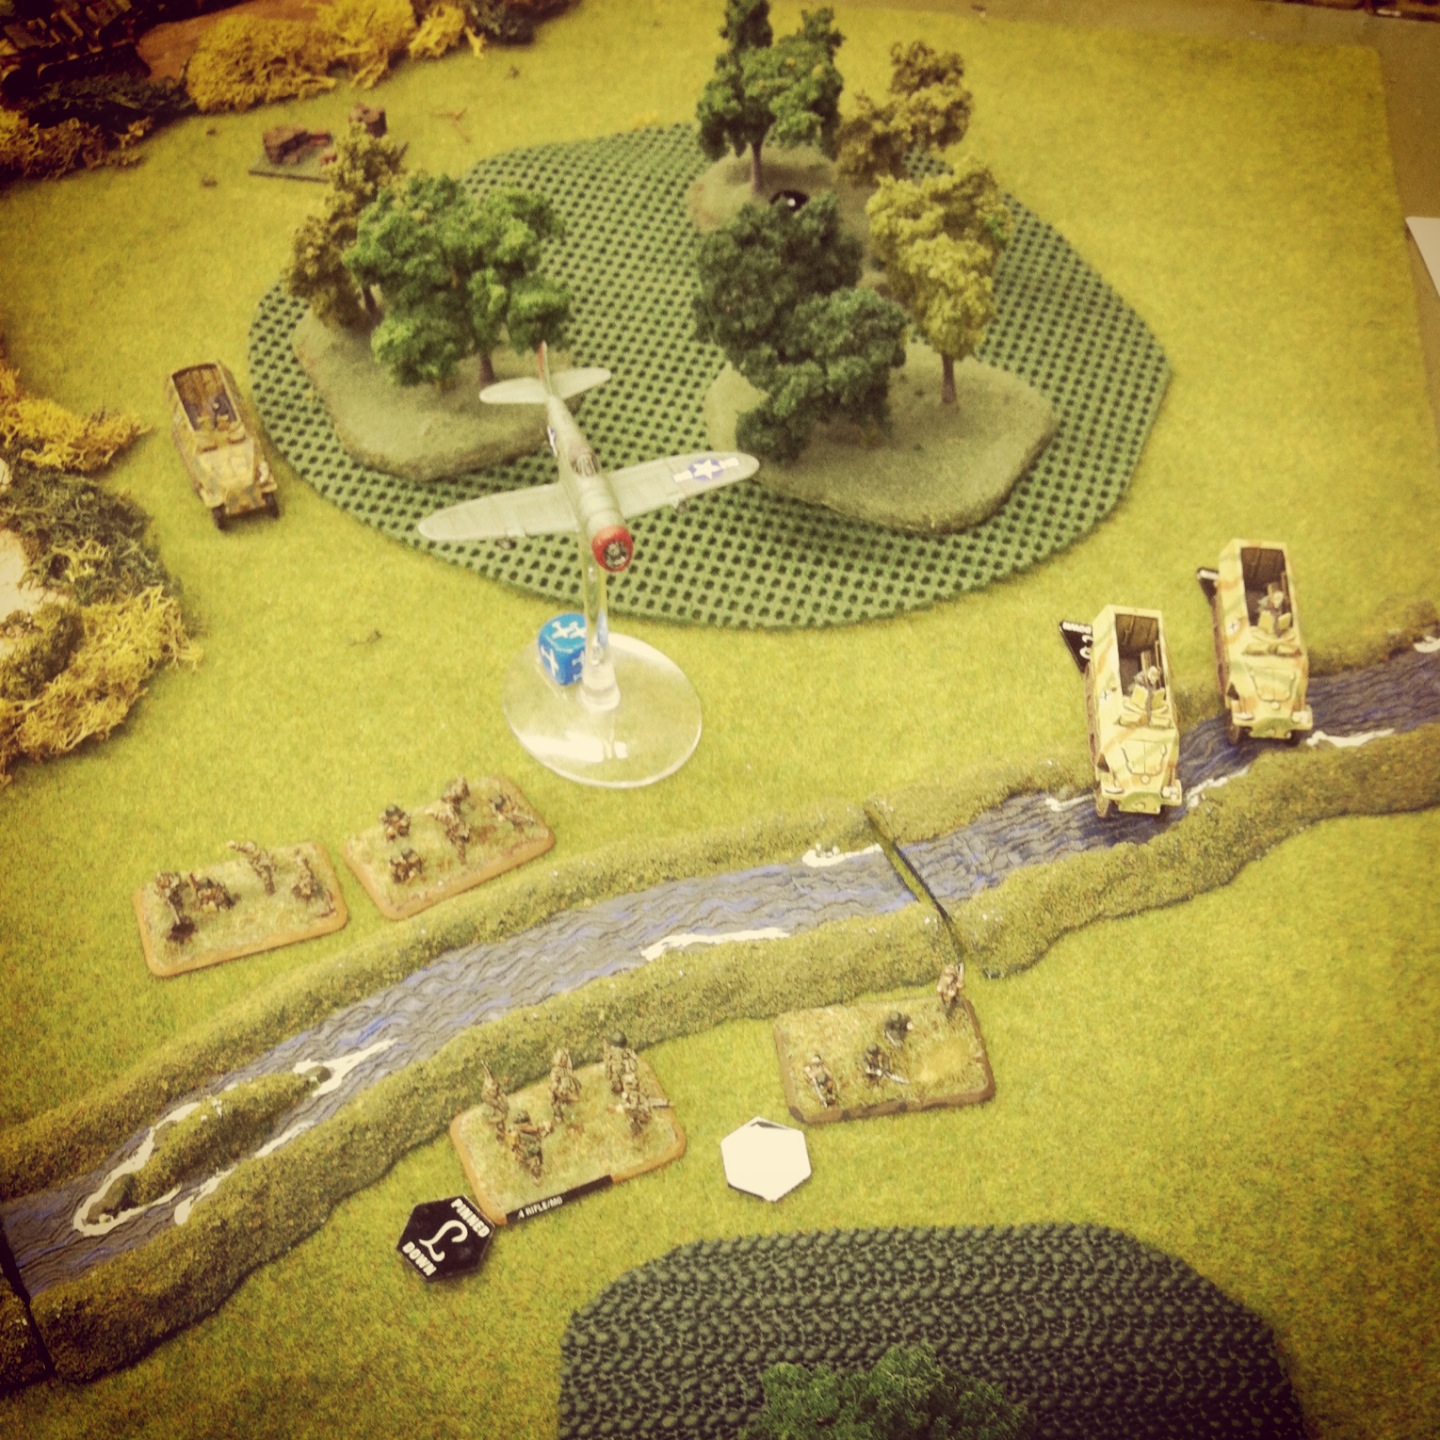
The Thunderbolt engages German transports at the river crossing

Another run from the Thunderbolt threw more Germans from destroyed transports. Remaining Germans trucked over the river and around the woods with only only a few US rifles between them an victory with capture of the objective.

IMG_2720

The final showdown at the contested objective

On the eight turn, it all came down to the contested objective. With a full US parachute rifle platoon in the woods and another heavily-damaged one nearby, the final battle looked like it was going to be decided with some bloody assaults. It looked like anyone’s game, but the Germans were now at half-strength on the table, and a failed motivation test caused the Germans to cede the battle.

German artillery never played a factor in the game, and the heavy terrain shut down use of US air support except for in two deadly runs of the game. Tanks on both sides wound up serving more as roadblocks at some key points on the road, and the river also played an important role in the US defense against the German advance.

We’ve got a couple historic scenarios at the club I’ll be reporting on soon, including a landing at Utah Beach and a scenario from the first day of the Battle of the Bulge. What makes FOW flexible and so enjoyable as a system is the ability to play historic and non-historic engagements, something I experienced last week and am certain to see more of in my after-action reports soon to come.

Flames of War: Fielding the Guards Armoured Division Part II

UKguards

Since starting with 15mm World War II Flames of War gaming a number of years ago now, my Allied modelling has focused exclusively on United States forces. Beginning with basic US infantry rifle, artillery and armored companies, I eventually added in some US Airborne forces plus some air support. Recently I’ve felt maxed-out on the US, so I’ve taken to looking to build out my Allies with another country’s army.

eagUARDSTEMP

After a bit of research and reading, I’ve settled on the British Guards Armored Division. I began this new journey with the plastic Guards Armored Sherman and Firefly models included in the excellent Open Fire! starter game box set. While these can be played as Allied support to my existing US Airborne, I really wanted to give the British their own space on the board.

IMG_2737

Along with my existing plastic Shermans and Fireflies I already have painted-up, I bought another set from a fellow member at Metropolitan Wargamers in Brooklyn, NY. This gives me a full four-platoon armoured squadron with four Shermans in the command section.

IMG_2738

 To fill out my Guards Armored Division, I’ve also added the special Lieutenent Colonel Joe Vandeleur warrior character. As a leader of the Irish Guards during such famed actions as Operation Market Garden, Vandeleur proved to be a solid field commander known for his by-the-book leadership.

Caine

 Michael Caine as Lt. Col. Joe Vandeleur in ‘Bridge Too Far’

I’m a big fan of 1977’s A Bridge Too Far in which Michael Caine co-stars as Vandeleur during Market Garden, so I couldn’t help but add this model to my new force with the colonel riding upright in his armoured car.

IMG_2735

IMG_2734

IMG_2733

In the coming month or so I’ll be filling out my British force. I have one completed Royal Artillery section and another on the workbench, enabling me to field a full eight-battery platoon. I’ve also got Battlefront’s British Rifle Company box allowing me to march three full platoons on the table of what was known affectionately during WWII as the PBI – Poor Bloody Infantry.

IMG_2732

I’m really looking forward to playing with my new British units this coming year, along with all their special national rules. The Brits are really going to open possibilities with new scenarios and new fronts. As Caine says as Vandeleur in A Bridge Too Far, “I’ve got nothing else planned.” At least for now.

Related articles

2014: Opening New Fronts

wraondsnyIn the middle of 2013 I somewhat unexpectedly re-launched Brooklyn Wargaming with a new design and a renewed posting vigor. Since then, I’ve had more than 10,000 visits from readers all over the world. Together with these folks I’m sure to never know, we share a continued passion for gaming I am committed to infusing in every one of my postsings here.

My World War II Flames of War posts are clearly the favorites for visitors to the site. My FOW After Action Reports continue to garner a lot of daily views, and people in particular seem to love the Barkmann’s Corner scenario I played in July at Metropolitan Wargamers in Brooklyn, NY. More AARs and building-out my various national forces in my FOW Modelling posts will be a big part of 2014.

As for other stuff on the site, my few posts on Warfare In The Age of Reason are quickly shooting to the top of popularity. I really enjoy writing up my plays a variety of board and card games through my New Game Weekend posts, and taking a look backward at Retro Gaming The 70s & 80s often result in emails from people like me who have fond memories of hours spent at play in the past.

Looking to 2014, here’s where my focus will continue and grow on Brooklyn Wargaming and the tabletop each week.

World War II

For years, I’ve played a lot of FOW with a big focus on Western Europe. To start the year, I’ll be playing a beach landing or two as a way to prep for the 70th anniversary of D-Day this summer, and I’ve also got a handful of other historic scenarios I’ve been working-up over the past few months.

a3ee242c52

Over Thanksgiving, my brother (another lifelong gamer like myself) handed me a copy of Antony Breevor’s Stalingrad and told me it was the best military history book he’d ever read. The highly-readable account of the vicious siege of Stalingrad has gotten my hooked on the idea of expanding my WWII gaming into the Eastern Front in the new year.

Desperate-Measures

As a first step toward this front of the war, I picked up the new FOW Desperate Measures book. While this intelligence briefing is centered on the closing months of the war battled among German and Soviet forces, there’s also a newly-released updated edition of the FOW Red Bear book which gives a broader look at the Allied forces on the Eastern Front. These resources coupled with my historical reading on Stalingrad have whet my appetite for fielding some large masses of Russian forces on the table. A couple other guys at the club in Brooklyn have already started putting together some of Stalin’s finest and I’m very much looking forward to the Eastern Front opening up my WWII gaming with some scenarios this year.

716532

I spent a chunk of the past year reading Rick Atkinson’s Guns At Last Light, the third book in his World War II Liberation Trilogy. The book’s focus on the D-Day landings through the campaigns in Western Europe to the fall of the Third Reich squares with the majority of my FOW gaming from the past year. Working my way back through Atkinson’s books, I’m just starting in on The Day Of Battle for Christmas. As with my new swing in interest toward the Soviets and Eastern Front, I’m looking to Atkinson’s second WWII book to fill in my knowledge on the southern European campaigns in Sicily and Italy. Whether I get some Italian troops on the table by year’s end remains to be seen, but I’m really looking to 2014 as another big year of WWII gaming and learning.

Seven Years War

I grew up in Western New York State and then lived for a period of time in Western Pennsylvania, so the French and Indian War has always lingered as an interest but has never found its way into my gaming.

lastmohicanpen

James Fenimore Cooper’s The Last of the Mohicans and other books in his Leatherstocking Tales series have also been favorites since boyhood. These colorful stories are set within the wilderness backdrop of the colonial wars of the Americas fuel much of my love for the French and Indian War period, and my visits to historic sites like Fort Niagara and Fort Necessity have added physical understanding to the frontier conflicts of the period.

ageofreasonrules

Toward the end of 2013, a fellow club member introduced me to the Warfare In the Age Of Reason rules and the Seven Years War. While my experience gaming battles from the period have thus far had a European focus, my long-time interest in what most consider the world’s first global-scale war holds tremendous interest for me. To this end, I hope to make wargaming the Americas front with the FIW a project for the coming year. Modelling 15mm miniatures of colonists, French, British and Native Americans, along with requisite early American frontier terrain, is sure to be making an appearance here in the coming months.

World War I

While I’m on the subject of world wars, I can’t help but acknowledge the calendar and the 100th anniversary of the beginnings of World War I this coming July.keegan_first_l

My only real exposure to the war so far has been with John Keegan’s excellent The First World War. I’ve read a half-dozen of Keegan’s books, and his 1999 overview of the Great War gave me a solid introduction to a war that’s often overlooked by most Americans like myself. Clearly this is a major period in modern warfare I could stand to learn more about.

9780385351225_p0_v1_s260x420

To get myself back into the period, I’m planning on reading Max Hasting’s Catastrophe 1914: Europe Goes To War which made many top nonfiction lists at the end of 2013. I’ve only gamed WWI once with a 28mm French-German trench warfare scenario at a convention back in 2011, but there are a number of club members with miniatures from the period I may prod into using in some games this year. There are also rumors afoot that the makers of FOW are expanding into WWI just in time for this year’s anniversary, but for now I think some time with a few good books should be enough tribute from me in 2014.

And…

I can’t really tell with complete certainty where this coming year in gaming will take me. Like with most battle plans, a grand strategy can be laid out but actual events often unfold very differently in the fog of war. I can say there will be more miniatures, more scenarios and more completely fresh games to come here on Brooklyn Wargaming by New Year’s Day 2015. For now, here’s to old fronts not forgotten from 2013 and new fronts to come in 2014.

Warfare In The Age Of Reason: Battle of Kolin 1757

drillmanual18th-century European military drill manual

Now that I’ve had my interest sparked in the Seven Years War (SYW) period, I’ve been doing some homework. For background, a lot of people point to the outstanding Wiki-style Kronoskaf SYW Project website for more than 2200 articles and 5500 pictures relating to the period. I’ve found the maps collection to be particularly compelling since I have a huge interest in how landscapes shape warfare in all periods.

I’ve also laid out a small initial investment on the very popular Warfare In The Age Of Reason rulebook written by Tod Kershner and Dale Wood, published by Emperor’s Press and available at On Military Matters. I also found a Facebook page dedicated to the rules which I plan on using for visual inspiration and gaming information in the coming months. At some point, tracking down a copy of the out-of-print Uniforms of the Seven Years War 1756-63 by John Mollo and Malcolm McGregor sounds like thing to do if I want a collection of handy plates on my bookshelf.

Fortunately there are a few players at Metropolitan Wargamers in Brooklyn, NY who already have pretty sizable collections of SYW 15mm miniatures from a represenative cross-section of period armies. Some guys at the club also have figures from the period in 28mm, and one of the newer members is talking about running a campaign-style SYW game next year. Even with models at the ready for gaming at our club, I’m already eyeballing the 18th-century 15mm figures available from Old Glory Miniatures and Essex Miniatures as one of my projects for 2014.

Kolin1757

Battle of Kolin, June 18, 1757

This past weekend, my son and I got together with some club members in Brooklyn for another SYW game, this time the Battle of Kolin June 18th, 1757. The battle came a couple months prior to our previously-played scenario of Moys from September 1757, and proved to be the first defeat experienced by King Frederick II of Prussia.

Admired by contemporaries and scholars today as one of the greatest military leaders in history, Frederick The Great and his Prussian forces were viewed at the dawn of the SYW period as the greatest standing army in Europe. Aligned with Great Britain and surrounded by Austrian-aligned adversaries on the continent, Frederick’s tactical innovations led his often outnumbered forces to numerous victories.

At Kolin in the present day Czech Republic, Frederick led some 34,000 Prussians in a march hoping to destroy the Austrian army seeking to reinforce the besieged city of Prague. Unfortunately for Frederick, he chose to confront the superior force of 44,000 Austrians on their home turf defending from the rolling hills near Kolin. On the hot summery day in June, Frederick’s aggressive gamble would result in his undoing.

 IMG_2605Starting hilltop positions of the Austrians with the oak wood to their right and the Prussian lines before them

IMG_2591The central Austrian defenses with heavy guns at the front, cavalry in reserve and skirmishers in the town beyond

Our battle started historically with the Austrian infantry aligned across the defending hills, three heavy gun batteries at the center and cavalry to either end of the line. The Prussian advance began with a cavalry push on their left around a small town held by Austrian allied skirmishers. Frederick, near the center of the line, began a slow and cautious march to the hill objectives toward the center.

IMG_2597Prussian cavalry charge into the Austrian right

IMG_2596Austrians advanced on the skirmishers in the village

On the Prussian left, a cavalry charge was met with a counter charge from the Austrian-aligned Hussars. Nearby, Austrian line infantry advanced in the hopes of driving skirmishers out of the nearby town. If the initial Austrian press worked, the entire Prussian right flank would fold.

IMG_2602As disordered Hussars retreat, Austrian heavy cavalry ride to answer the Prussian charge

IMG_2593Austrian heavy cavalry gallop to defend their right

As the Hussars folded under the attack and retreated in disorder, Austrian heavy cavalry charged back toward the advancing Prussians. With the Prussian charge repulsed with losses on both sides, the Austrian cavalry now looked to turn the Prussian left flank with more heavy cavalry rushing from the rear.

IMG_2592Gun batteries at the Austrian center

IMG_2604Prussians advance on the Austrian center and receive cannon fire

IMG_2600Prussian lines continue the advance as cavalry reserves in the distance rush to buoy their softening left flank

At the center of the table, the Austrian lines held their ground and pulled into the nearby woods to defend against the coming Prussian advance. As Prussian infantry advanced several lines deep, they were met with several turns of cannon fire yet continued their press forward with Fredrick attached at the rear. If you listened carefully, I think you could hear Fredrick’s famed shout of “do you want to live forever?” echoing from the tabletop as he urged his Prussians onward.

IMG_2603The Austrian battery takes casualties from the advancing Prussians

IMG_2601The Austrian battery is overrun in a Prussian charge

Eventually, the  overwhelming force of the Prussian lines closed on the Austrian batteries at the front of the line. One battery was destroyed and a second fled the field following a charged assault. With Austrian infantry now staring down from on the hill, the Prussians marched uphill to their objective and closed within charge distance.

IMG_2598Prussians press the attack into the woods and up the hill

IMG_2599The wood becomes a locked melee as firing erupts all along both lines and into the distance on the Austrian left

A charge and counter charge locked lines in melee in the woods at the Austrian right as Prussians pressed their advance now all along the line. On the center hill, an Austrian line wheeled down the hill to envelope the Prussian lines in fire both to the front and at their flank. The one remaining Austrian battery continued to pummel the Prussian lines scrambling for the center hill. On the far hill on the Austrian left, lines finally made a move on the Prussians.

With the cavalry charges at a stalemate on the Austrian right and the Prussian lines split into two losing combats at the hills, the Prussians failed a morale test under heavy losses and ceded the field to the Austrian army. Once again, Frederick’s gambit at Kolin had resulted in defeat.

fredIIkolin‘ Frederick the Great After the Battle of Kolin’ by Julius Schrader (1859)

After two games in the Seven Years War period in as many weeks, I’m hooked on the era. The games begin cautiously with slowly-deployed movements but quickly erupt into vicious volleys of fire, swift charges and hand-to-hand combats. Even with thoughtful strategic planning at the outset, the battles quickly evolve into chaotic back-and-forth tactical blood baths. The constant morale checks as the battlefield shifts and fire is taken becomes as much a path to outcome as men falling on the field. And, as with the original battle at Kolin, the Austrians defenders proved to be too much a match again for the Prussian invaders this past weekend.