Flames of War: Fielding the PSC Panzer IV Tank

pniv

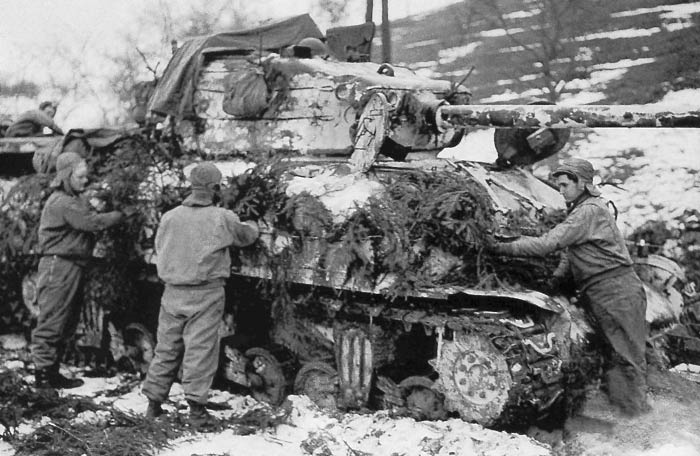
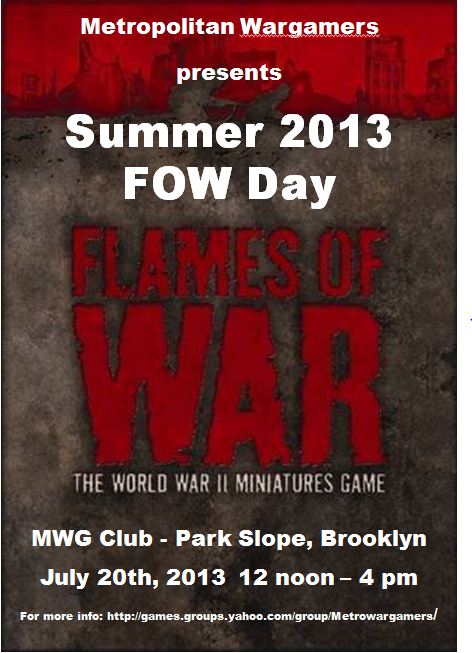
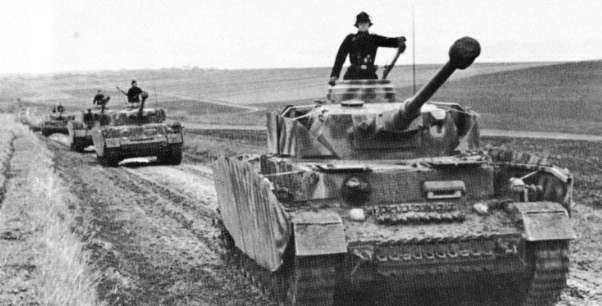
One of the greatest military impressions Germany left on the face of warfare during World War II was in its feared armored forces. The famed Tiger I heavy tank gets a lot of the glory for its independence and near idestructability, but the Panzer IV medium tank served as the real backbone of German armored forces throughout the war. With improvements to its armor and gunnery made throughout the war, the Panzer IV would prove to be a tough nut for the Allies to crack until very late in the war. Especially in the period from the D-Day landings through to the Battle of the Bulge, the Panzer IV played an ever-increasing role in attempting to stymie the Allied advance right up until the eventual fall of the Third Reich in the spring of 1945.

FOWpzIV

pscpziv

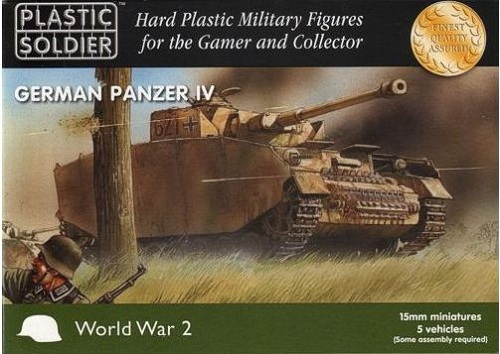
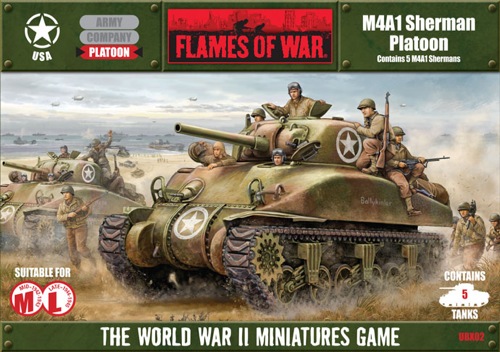
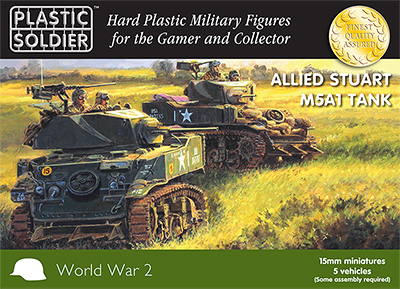
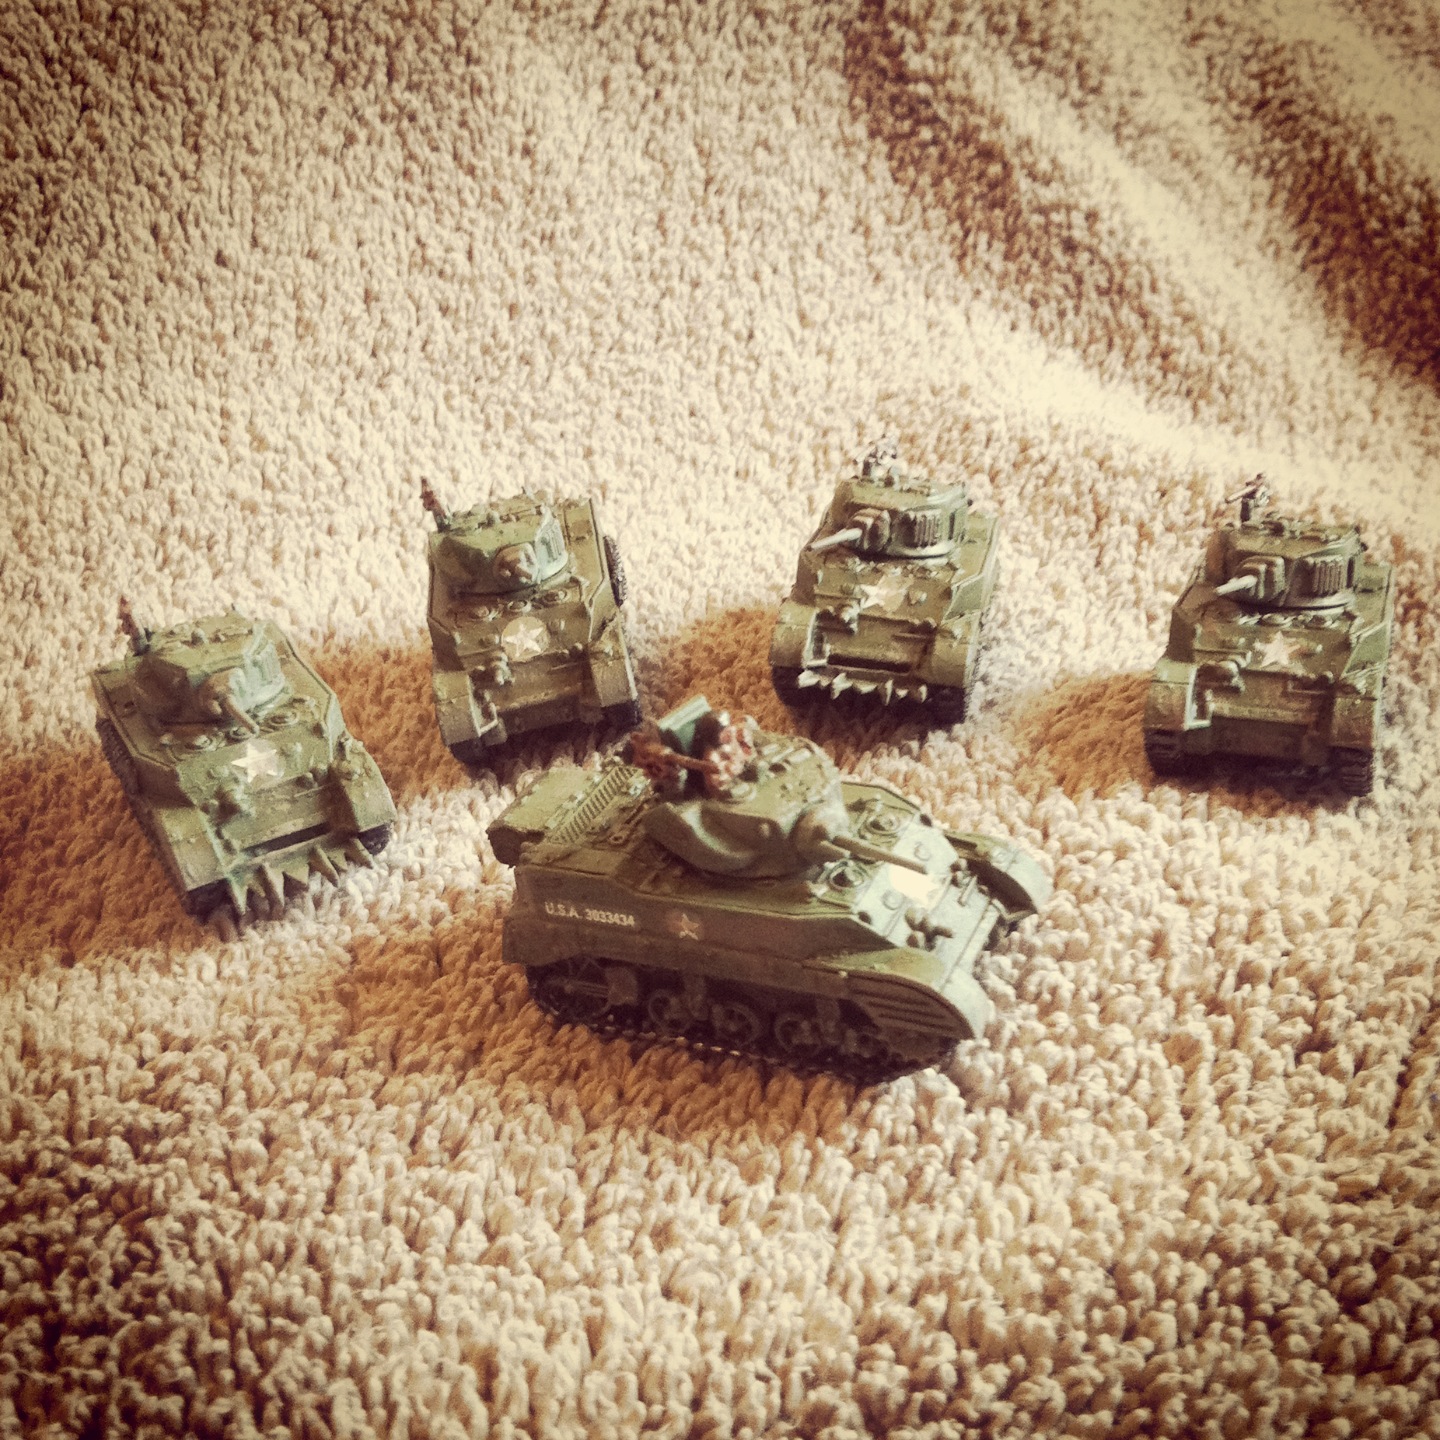
I already own a fair amount of German armor with Tigers, Panthers, Jagdpanzers and Stugs, but my force was sorely lacking in Panzer IVs. Most of my German tanks thus far have been from Battlefront, the makers of Flames of War (FOW). They offer a late war Panzer IV platoon in the pricey $50-60 range, depending on whether you pick the set up online or in a store. Going on some recent experience with the PSC Allied Stuart tank set, I went with the Panzer IVs from the Plastic Soldier Company (PSC) at about half the FOW cost.

pscpzivsheet

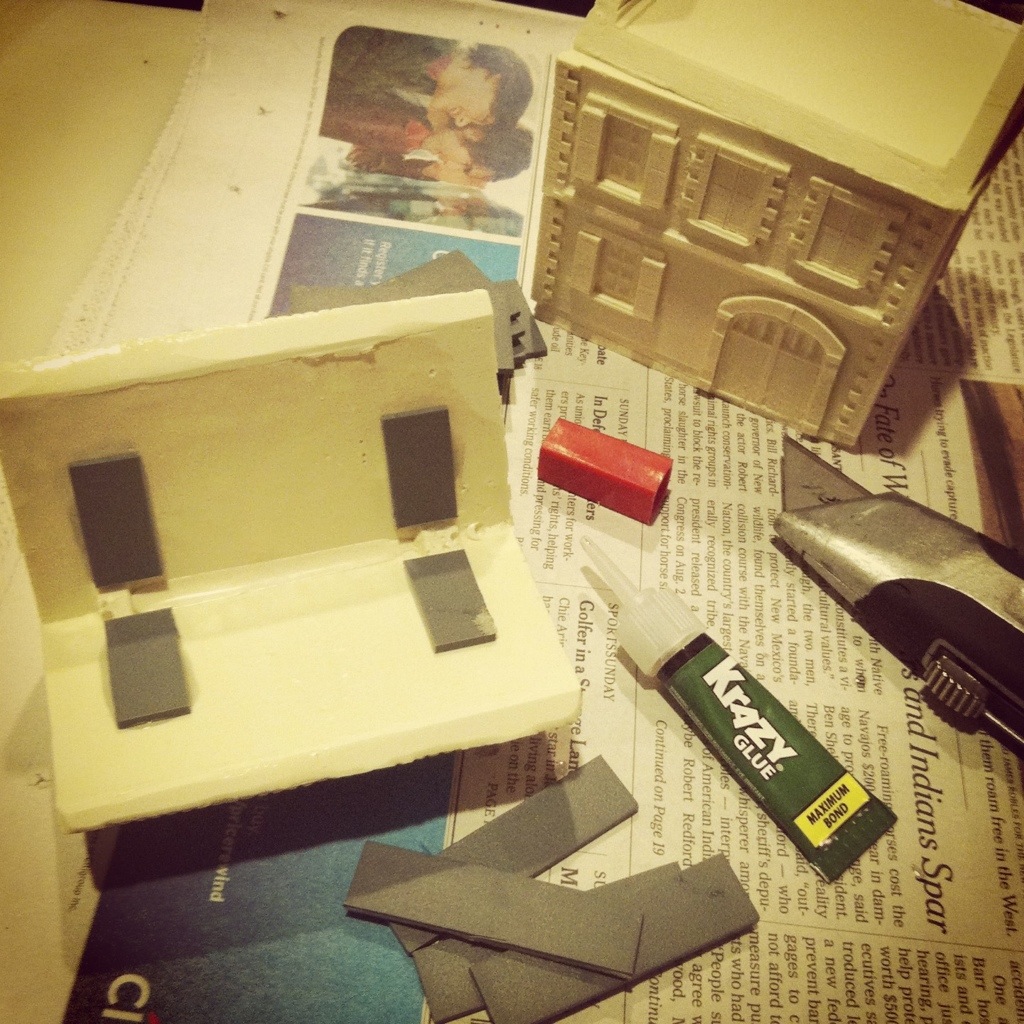
Unlike the FOW sets, PSC kits come with options to model miniatures in several periods. This allowed me to model my tanks as the later war Panzer IV Ausf H with its extra armor and gun power. Like the Airfix kits of my youth, the PSC tanks are comprised of lots of little parts. The diagrams included in the box offer clear color-coded keys to getting the correct pieces off the sprues and blow-up schematics for gluing the pieces together. If you’re like me, keeping your workspace clean and organized will prevent you from losing your mind during the multi-step assembly process. The sprues also leave some leftover parts which either go straight into the trash or into container of miscellaneous plastic for future modelling use.

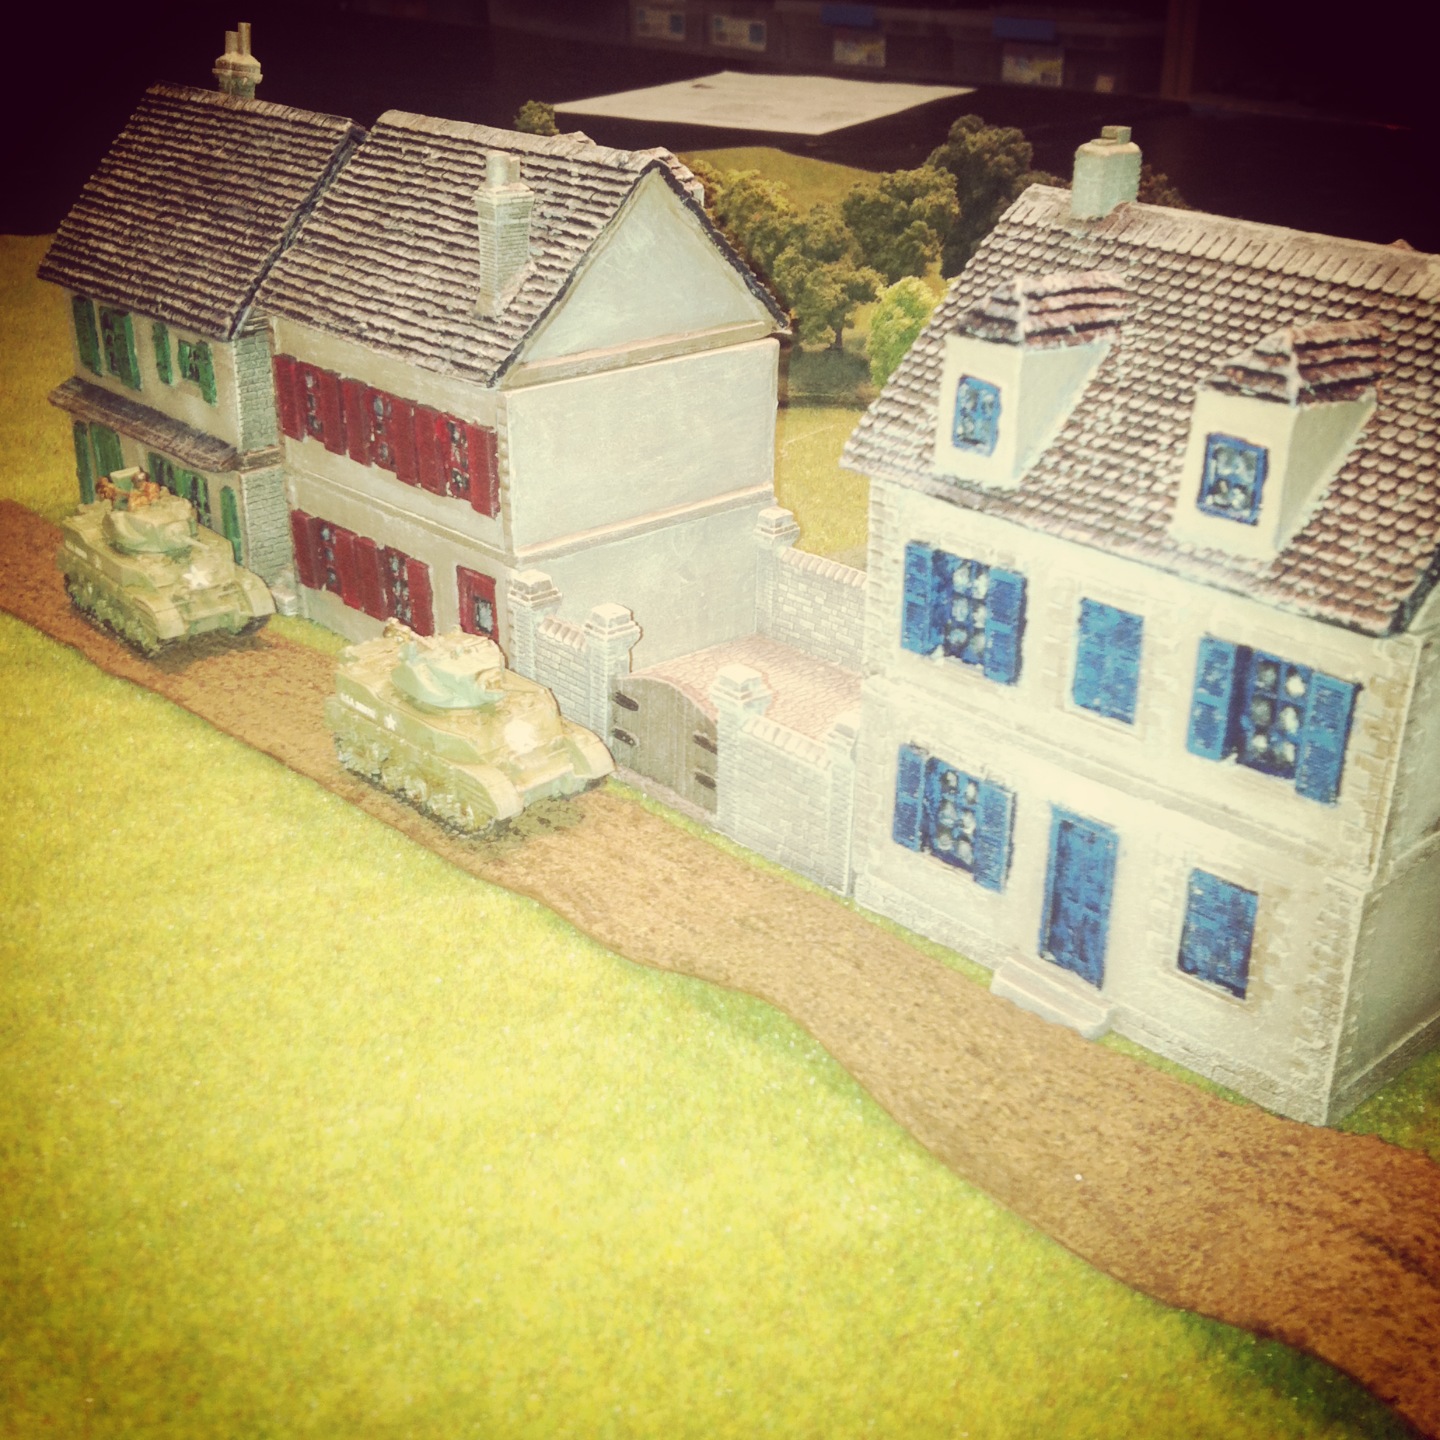
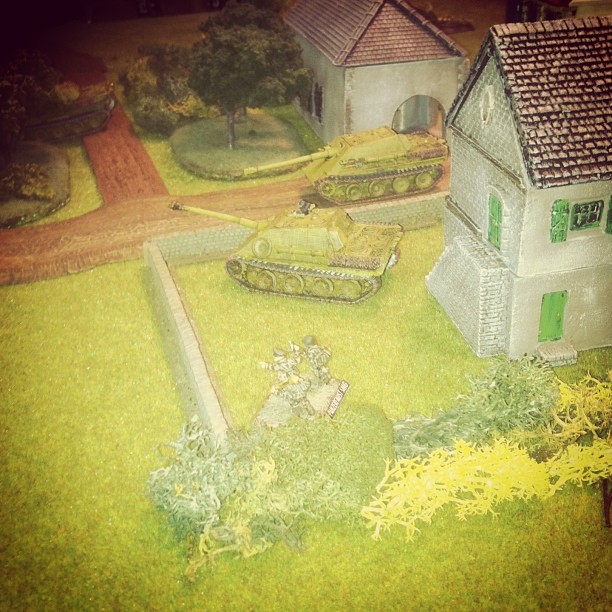
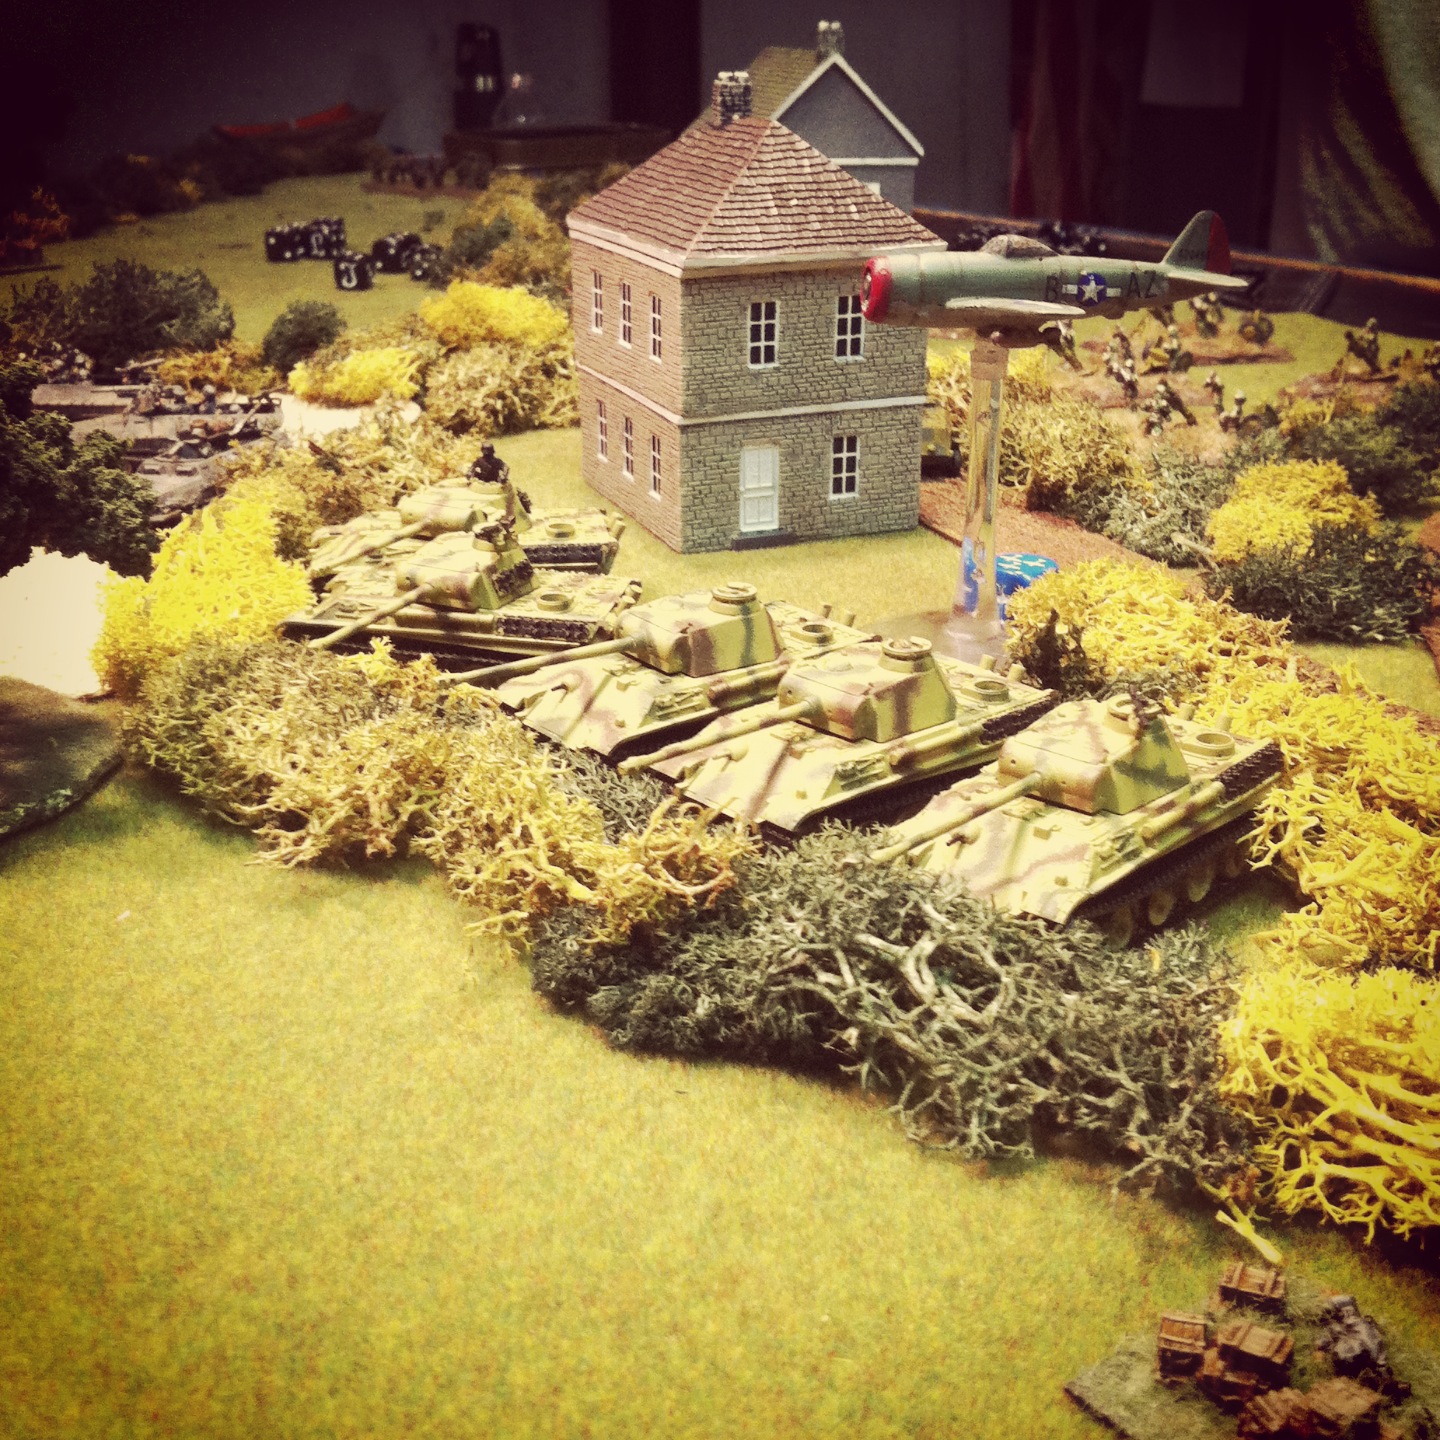
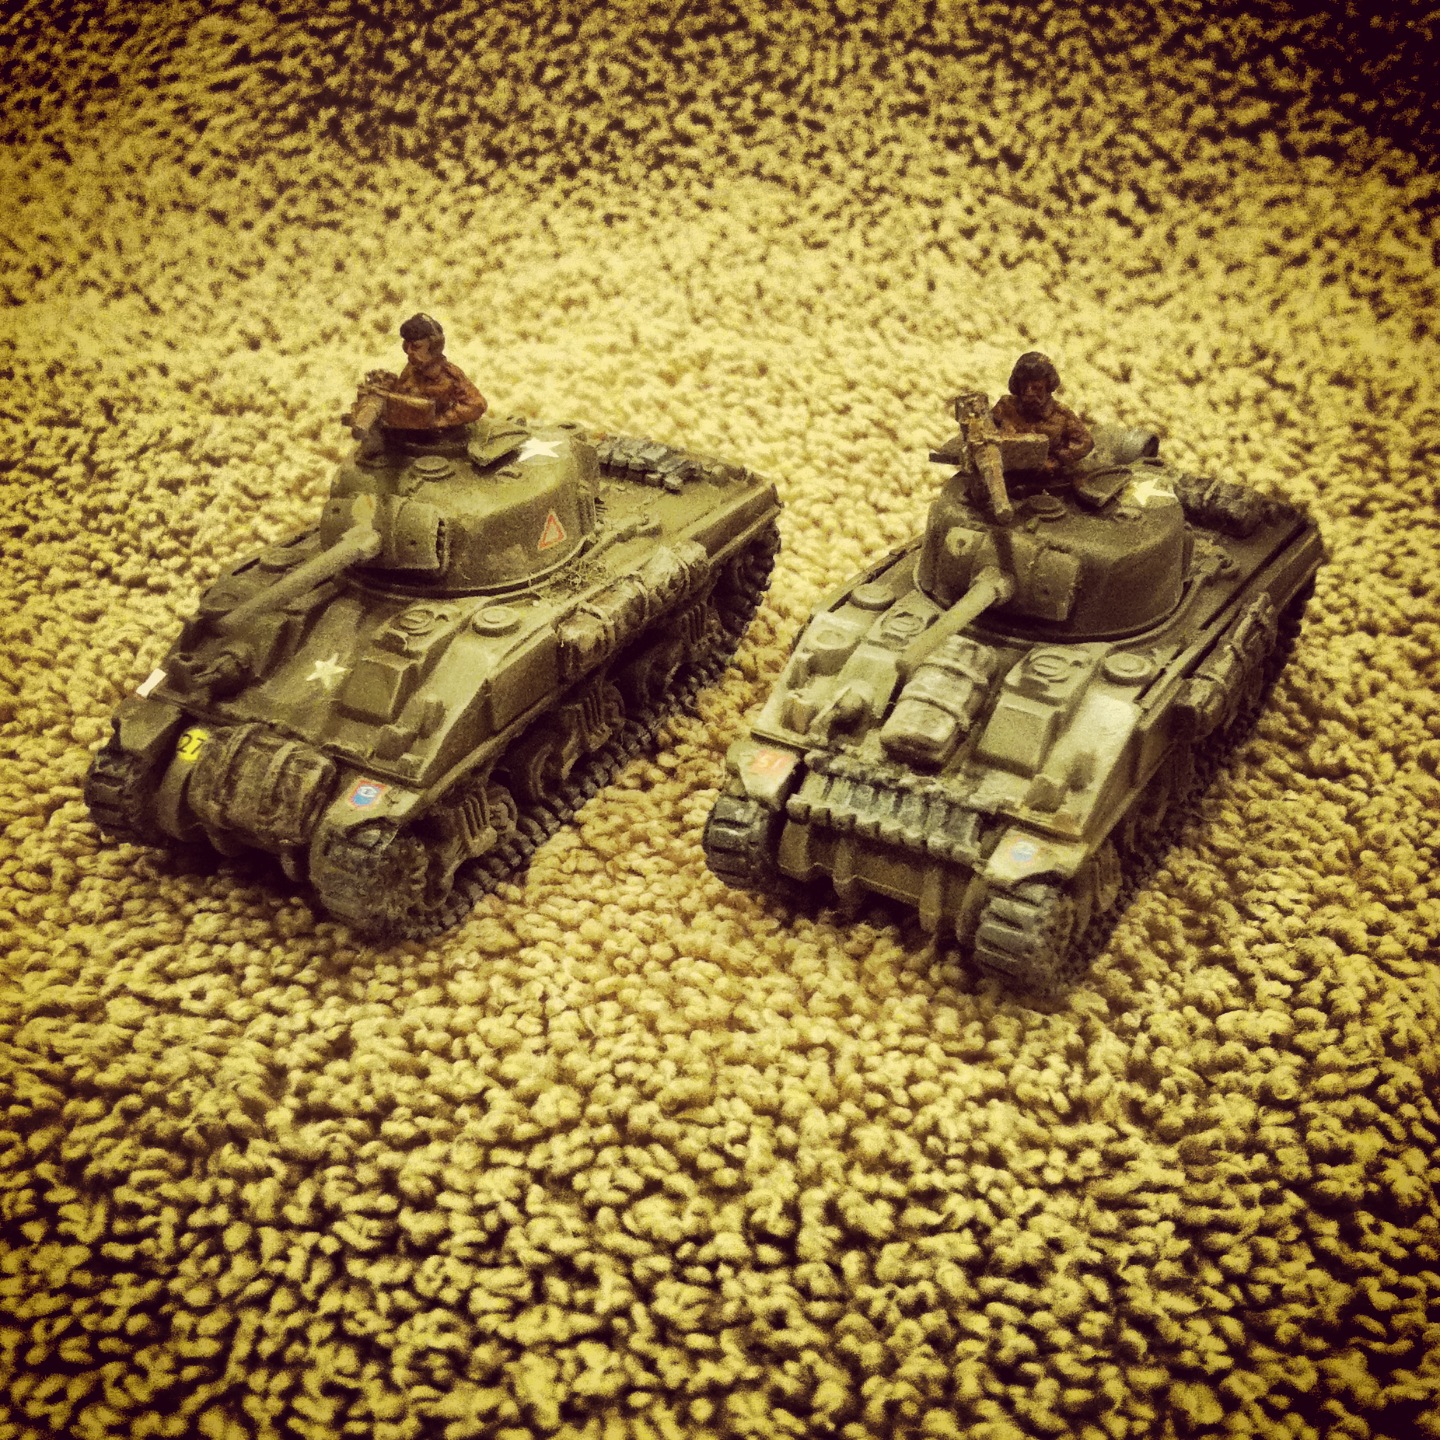
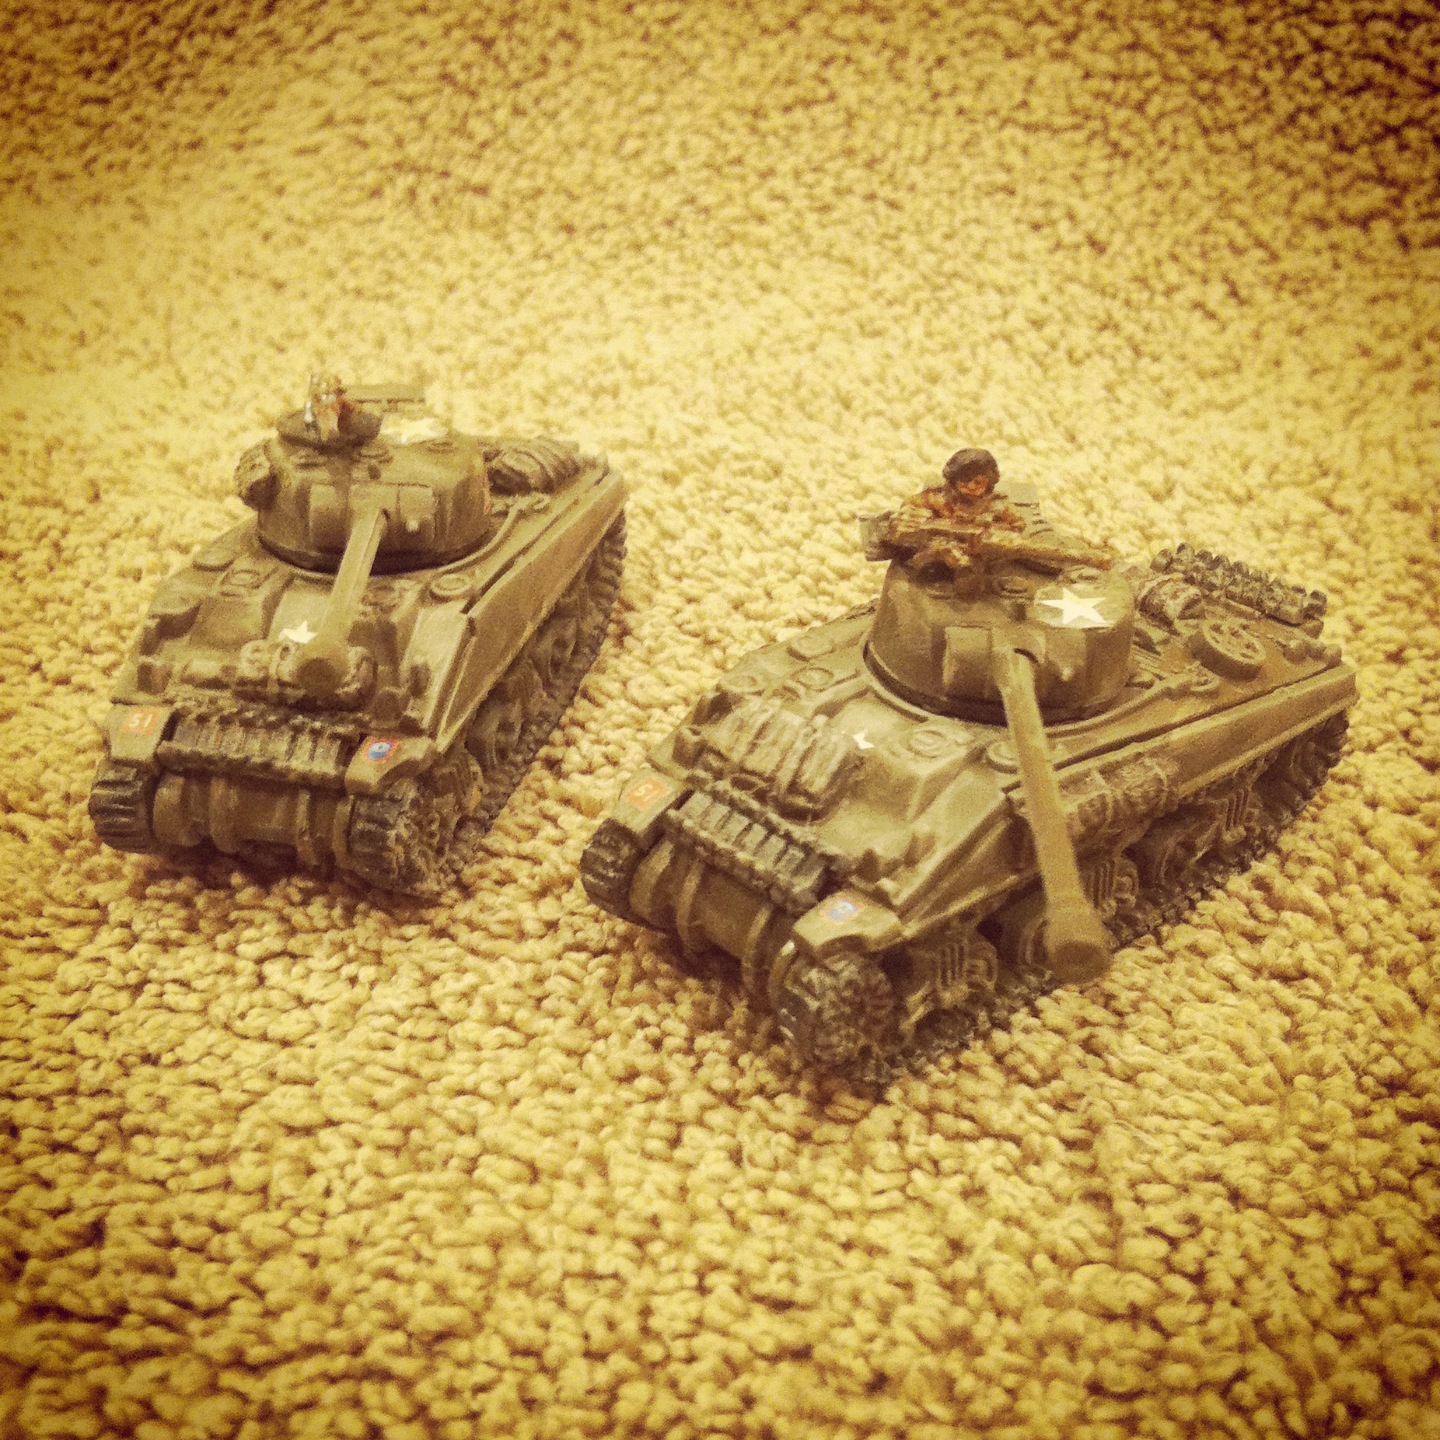
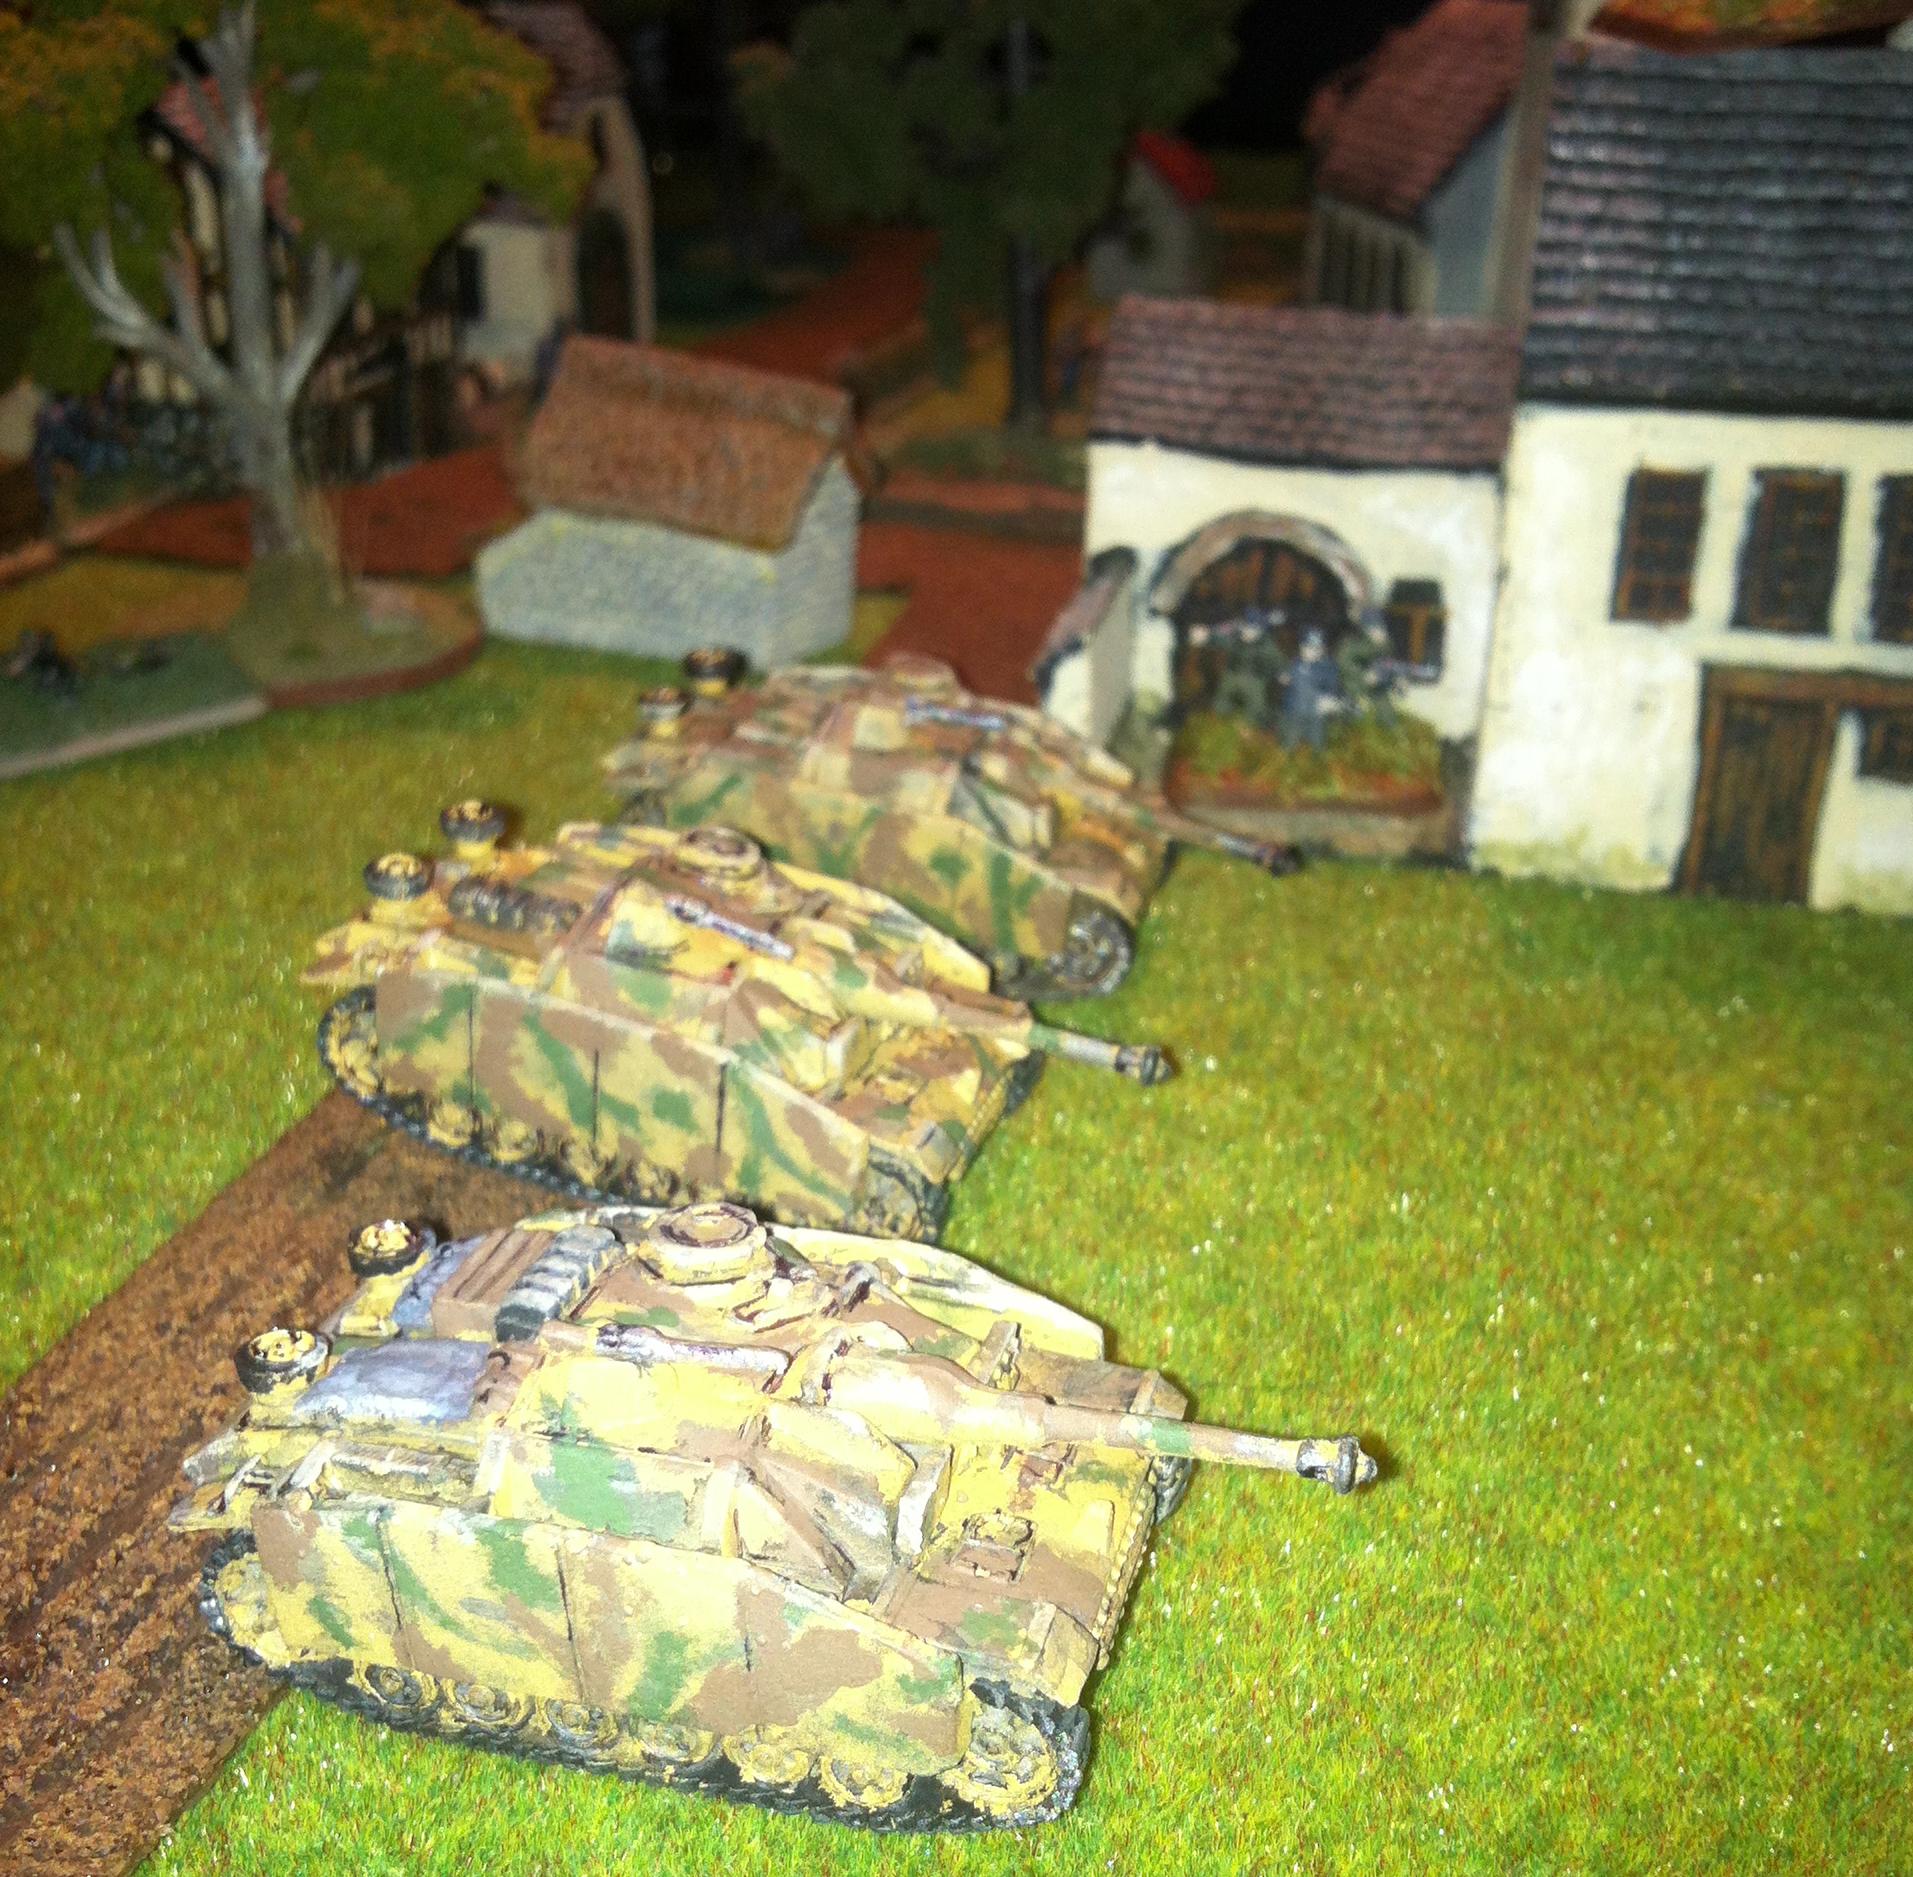
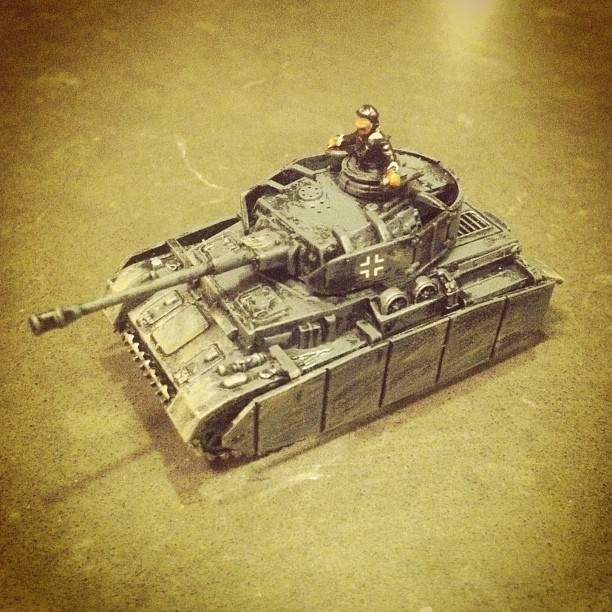
Lots of parts means lots of steps. The turrets alone are compromised of 9-10 parts and aligning the tank tread sections needs to be done carefully. I also found the hole on which the turret sits to be a bit tight, so I carefully drilled those out slightly larger. My Panzer IVs were completed with a basic grey-schemed paint job over a flat black spray base to match my existing models. With assembly, painting, decals and a matte finish finishing coat, these tanks are ready to hit the table in just a couple work sessions.

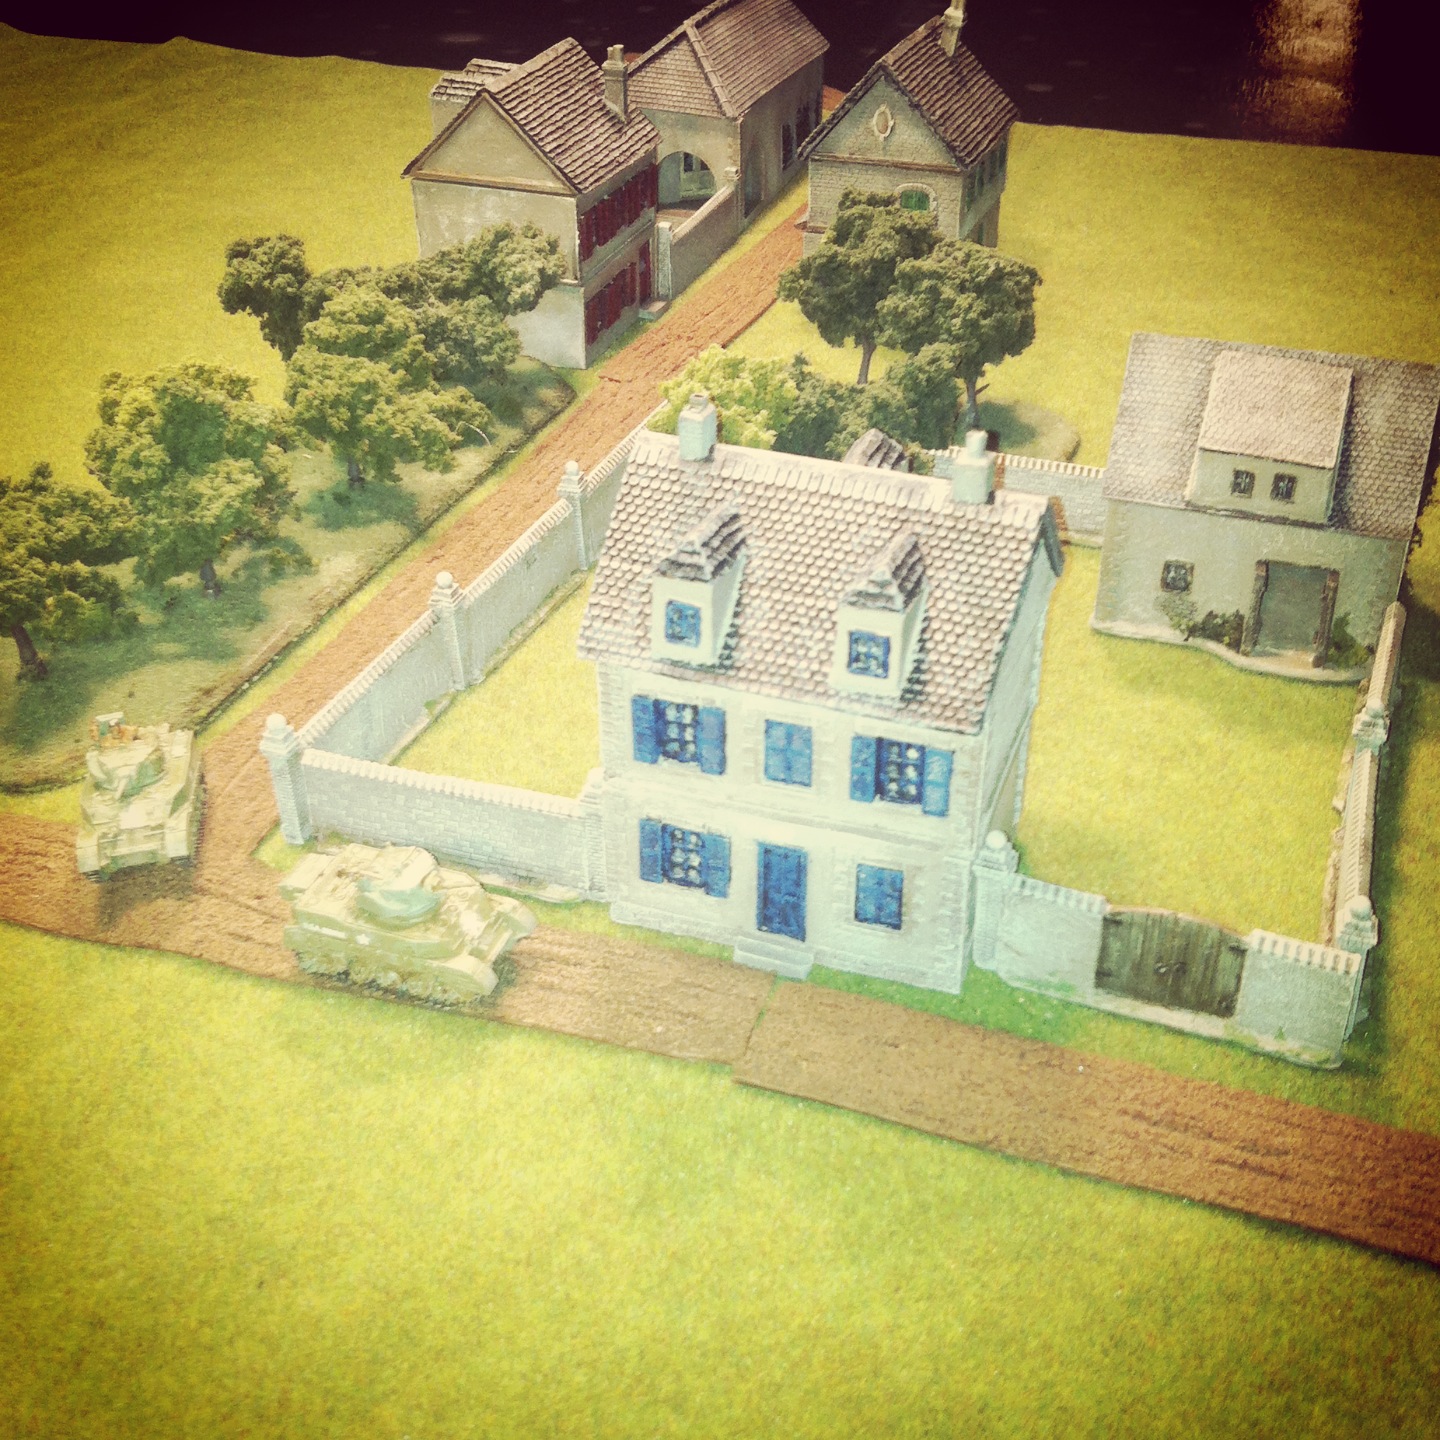
Compared to FOW models, the PSC tanks take a bit longer to put together and parts can be finicky, but I really like the PSC models when complete. The PSC tanks offer crisper molding and some fine details like a slight sag in the upper parts of the treads and hangers for the  side and turret Schurzen. Models are light, making for easier storage and transport. Putting together kits from PSC just feels a lot more like model building than what you experience with FOW and some other manufacturers.

pzivcommand

pzivplatoon

With so much economic pressure on miniature wargame funding budgets, you can’t beat getting more armor in the field for the low cost and fine results from the Plastic Soldier Company’s Panzer IV kit.

Flames of War: Modelling European Western Front Buildings

153770I got into miniatures wargaming through a combined set of interests I developed as a kid: history, role-playing and scale modelling. One of the aspects of gaming I enjoy is setting up a realistic and engaging tabletop battlefield, both for the visual effect but also to reproduce the playable advantages and challenges found in waging scenarios within scenery.

I’ve been searching high and low for an affordable and well-made set of buildings to add to my 15mm Flames of War World War II gaming set in the post D-Day Western Front. Battlefront Miniatures, the makers of Flames of War, launched their own series of buildings last year. The pre-painted buildings are beautiful, albeit a bit too perfect and pretty expensive at $40-50 each. Miniature Building Authority (MBA) has been a long-time producer of fine pre-painted buildings. Like the structures from Battlefront, MBA models feature removable roofs but also convert into ruined bombed-out versions. At $40-50 for single large buildings or for pairs of smaller ones, the MBA buildings are also pretty pricey. MBA keeps a small line in stock, but they have dozens of out-of-production models which you can also find at conventions and occasionally online. JR Miniatures is another standby in the industry, but I find their relatively low-priced line of buildings is a bit of a mixed bag in terms of casting and playability.

markivWith building up my gaming real estate on my mind, I posted to the message boards at The Miniatures Page. Some suggestions pointed to the above manufacturers, but several posters also mentioned Mark IV Miniatures. The company is run by Jeff McCarron, a second-generation gaming modeller out of Colorado who obviously puts great care and passion into his work. McCarron sells his models directly and distributes them through Musket Miniatures, and I found him to be incredibly responsive to a couple questions I had before ordering. As it turned out, a fellow member of Metropolitan Wargamers had recently picked up the large church model and a couple houses from Mark IV. After playing with his models during our big Summer FOW event and Barkmann’s Corner scenario at the club, I decided these were the buildings to sink an investment into.

1148873_10201247963855523_305675209_nI decided to go with several two and three-story buildings, a barn, a courtyard and some walls, all ordered from Musket Miniatures. With all these models, I’d have the flexibility to set up a fairly decent-sized town or play with them as a separate farm estates. The castings arrived clean and required little tidying-up of residual flash with a knife.

20130830-233936.jpgI did have to put in a bit of work gluing plastic tabs to the undersides of the floors and roofs to provide a snug fit for each story of the buildings. The larger one-story bank building also required a wall and metal cast windows to be glued in place.

20130830-234253.jpgFor painting reference, I searched online for photos of European villages. After a light grey spray basecoat, the stucco walls of the buildings were dabbed with a bit of foam sponge in sandy gray-brown stucco and then dry-brushed with an off-white paint to add variety to the wall surfaces. Exposed stonework, the courtyard cobbles and masonry details at the corners, doors and windows all got combinations of varying shades of grays, browns and whites to create some depth.

IMG_2115Shutters, doors and windows were painted with dull blue, white, green and red trim, mimicking some of the variety in paint schemes I had found in photos online. For the roofs, a black undercoat was dry brushed in a couple shades of grey with a bit of browns and dark green shades mixed in. On the barn model I glued on some thin pieces of lichen to add the look of vines covering part of the walls.

IMG_2117The walled courtyard and modular wall sections got a two-part paint scheme over the gray primer. A watered-down brown-black wash over the bricks and cobbles filled the cracks with a dark shading finished-off with an off-white dry-brushed highlighting coat. The courtyard and wall gates started with a dark brown base with a lighter brown adding aged detail to the wood. Iron hinges got a black undercoat with some rusty metal dabbed over it. The result was some very realistic stone and brickwork walls.

IMG_2112

IMG_2119

IMG_2123

IMG_2125I couldn’t be more pleased with the buildings. They’ve already seen some action on the tabletop in my recent Singling ’44 game and combining them with my existing trees, roads and lichen hedgerows really brings the battlefield to life. I’m already eying a few of the other models offered by Mark IV, including some ruined versions of the same buildings which come cast in some exciting bombed-out interior detail.

At Metropolitan Wargamers, there’s some early plans being laid for another big day of gaming to coincide with the fall’s Flames of War Tanksgiving 2013 event and there’s certain to be plenty of WWII action before then. With my new buildings from Mark IV on the table, these miniature landmarks are certain to add even more depth an interest to all out future games.

Flames of War: Singling 1944 Scenario

4tharmor

By the winter of 1944 the US 4th Armored Division had distinguished itself through a number of actions in France ranging from Operation Cobra in July and the Battle of Arracourt in September all the way through various engagements heading east toward the French-German border. Battleworn and bogged down in the wet winter slush of eastern France, the 4th Armored lumbered to the outskirts of Singling, Lorraine on December 6th, 1944. As part of the defensive Maginot Line, a hasty attack was thrown together to take the farm town with a small force of tanks and infantry. Finding themselves caught up fighting superior elements from the German 11th Panzer Division between the cottages and tight roads of the village, the day’s battle eventually fell to a stalemate and the 4th Armored pulled back. In the coming days, a hail of American artillery and subsequent ground force attacks eventually took Sibling.

SinglingMap44

The WWPD site has a handy Flames of War scenario available for the action at Singling called Abrams’ Folly. In addition, there’s some other gaming-freindly write-ups available online as well as some great historical documentation (including maps and photos) on the battle at Singling. Before heading off to an annual family vacation to Cape Cod, I had a chance to try my hand as the Americans in the Sibling scenario this past Wednesday evening at Metropolitan Wargamers in Brooklyn.

bggbookEach of us fielded 2500 points, sticking as close to possible with the forces outlined in the scenario. I used the Blood, Guts and Glory book which focuses on the armor-heavy battles in this region of France in late 1944 through early 1945. My force featured a mix of 75mm and 76mm Shermans, some tank destroyers, two armored rifle platoons and an off-table 105mm Priest battery. My German opponent started with a Panzer IV platoon, a Jagdpanther platoon, an 10.5cm leFH18 battery, a platoon of Pak 40s and a couple infantry platoons. As it was historically, the Americans were clearly in for a tough fight.

In December ’44, the US entered Sibling from the south but the scenario places the American point of entry at the western edge of the table. The Germans deployed first with infantry and Jagdpanthers in the town, the Panzer IVs to the northwest and the Pak 40s in prepared positions to the southwest. The artillery battery was positioned to the northeast of town with spotters stationed in the church belfry and the attic of a house near the town center.

siblingtable

With the first turn, the Americans rolled in around the main road to the west. Seeing the Pak 40s, all the armor rolled north toward the Panzer IVs parked around and behind a small copse of trees. Infantry platoons made way for the center and the orchard just south of the road. My US plan was to avoid the killing alley of the main road while the infantry would swoop toward an assault on the infantry and Pak 40s to the south and the armor would rumble to the north toward the German tanks.

The US 76s made quick work of the Panzer IVs in the first two turns and then turned toward the center of town. The Jagdpanthers crept out from behind buildings and took a few a shots down the road, eliminating a Sherman. A German platoon camped out in a house at the western edge of town made a misbegotten attempt at an assault on the Shermans, bailing two with Panzerfaust fire but ultimately running off when faced with return attacks from the US armor. Another Panzerfaust-wielding squad popped out from an adjacent cottage and destroyed another Sherman with a quick rear shot before being machine-gunned down. By the end of the third turn, the northwest area of the table was a snarl of burning German tanks and shaken but advancing US Shermans.

32387_10201314045587525_1920471111_n

1185574_10201313808021586_457796402_n

To the south of the road, a stalemate which would run the whole game commenced. The Priest battery struggled to range in and hit the Pak 40s on every turn, proving to be a complete waste of points. The American armored infantry platoons to the south of the road spent most of the game being pinned by German sniper fire and artillery barages, all the while struggling to progress through the orchard. Not until the fourth turn of the game did the American infantry truly get in the fight, exchanging fire with two nearby platoons of Germans but losing nearly half their number to fire from the Pak 40s and German heavy machine guns.

In turn four, things got bad for the Germans. After littering the field north of town with charred wrecks of US armor, several American tanks broke to the middle of town toward the three remaining Jagdpanthers. A near-certain side blast to one Jagdpanther glanced off with no effect, but then an extremely lucky shot from a US 76 destroyed the Jagdpanther command tank. While the Germans scrambled to appoint a new command tank, the Americans ganged up to destroy one of the two remaining Jagdpanthers. With the platoon reduced to just one remaining tank, the German player rolled and failed a morale check and the last tank fled the center of town.

267391_10201314392956209_640393299_n

1235934_10201314392676202_1206092596_n

With the center of town secured, all German armor destroyed, a stalled infantry firefight to the southwest and the American tanks advancing to the German artillery battery, the game was called at the fifth turn. I was honestly surprised by the American victory, upsetting the historic outcome of the battle. We stood around for some after-action what-ifs for both sides while packing up the table, and clearly there could be improvements in choices of forces and tactics the next time we head back to Singling.

Flames of War: Fielding the PSC Stuart Tank

While the durable US M4 Sherman gets most of the glory in the annals of WWII Allied tank history, the M3 Stuart also played a significant role in providing valuable infantry and reconnaissance support throughout the war. The Stuart was originally supplied to the British ahead of the US entry into the war, but American tank crews would eventually use them throughout the European, African and Pacific war theaters. Armed with .30-calibre machine guns and a 37mm main gun, the Stuart proved itself to be a finicky yet effective part of many of the war’s major actions and campaigns, including the D-Day Normandy campaign of 1944.

Most of the US armor I use in Flames of War gaming comes directly from Battlefront, the makers of the popular 15mm WWII wargame. Battlefront manufactures beautiful models but the company is often criticized for its prices. I already own a fair number of Battlefront’s M4 Sherman tank models. With so much of my armor tied up in the sameness of my Sherman platoons, I’ve long wanted to add some diversity in my force with a light tank platoon option.

Coincidentally, the Plastic Soldier Company has recently been expanding its small but growing line of 1/72 and 15mm WWII hard plastic infantry, vehicle and armor sets. At nearly half the price of the FOW offerings, the 15mm Plastic Soldier Company boxed sets look to be a legitimate bargain alternative. As luck would have it, among their new releases from the past month was a 15mm Allied Stuart set containing five models which make up a perfect light tank platoon for my FOW force.

Despite the relative low cost, I approached my first go-around with the PSC with a critical eye. The Stuart set comes with enough parts for five tanks from the early, mid or late WWII periods. The flexibility of the modelling is fantastic, but it does result in a bunch of unusable waste parts left on the sprue. Gluing the models up for the late war was fast, with the finely-detailed casting going together smoothly. A relectuant criticism of these otherwise excellent models is the way in which the turrets fit to the hulls with tabs which were a bit tight for my liking. I wound up cutting the tabs off so the turrets move more freely, but this extra step did destroy the other strong points of the PSC models.

After the glue dried, the models got a coat of green armor spray followed by some black and metallic paint brushed on the treads. Tools and stowage attached to the hull were picked out in detail, and then all the tanks got a watered-down brown wash. I applied some appropriate US decals I had left over and then the tanks got some splattered mud details in a lighter mud color.

IMG_1956

The result of my Stuarts and my first experience with the Plastic Soldier Company is entirely satisfying. Not only can’t I wait to roll these fast, deadly tanks onto the table in my next game, I likewise will be anxiously awaiting what new releases the company has in store to further build-out my forces.

Flames of War: Metropolitan Wargamers Summer 2013 FOW Day

Taking advantage of a renewed interest in the popular Flames of War 15mm miniatures WWII wargame, Metropolitan Wargamers in Park Slope, Brooklyn hosted a big day of gaming this past weekend. Both experienced and new players alike came together on two of the club’s largest tables to play to big scenarios over the better part of Saturday afternoon.

Metropolitan Wargamers

MWGFOWI mention it often, but the amazing group of people who make up the Metropolitan Wargamers club bears mentioning again. The club will celebrate its 20th anniversary next year, and it’s a real gamers paradise for those of us living in New York City. Visitors and a core group of long-time members drop by the club throughout the week and engage in all manner of games, from boardgame favorites and card games to large scale historical miniatures battles and grand strategic campaigns. The club’s space occupies an entire basement-level of a typical Brooklyn rowhouse and is lined with shelves full of games and miniatures collected by members over two decades. Playing space includes a number of the club’s award-winning sand tables, regular tables and racks on which ongoing games can be stored as they are played out over the course of weeks or even months.

The club is an incredibly diverse and supportive environment for those of us who share our common passion in gaming. With 2014’s anniversary coming up, I hope to dedicate more space here in the near future with some history and perspectives from members.

Summer 2013 FOW Day

totalwarThe folks at Flames of War provide special Total War rules for gaming large-scale matches like those we played this past weekend. With a few weeks of planning, I helped round up 10 players for the day’s game. We settled on two games from the late war, one each on the Eastern and Western Front. The Western Front game featured two teams of two players each on the German and US sides with each team running 3000 points on a 4’x8′ table. On the Eastern Front, two three-player teams squared off in a tank-heavy scenario on one of the club’s famed sand tables with each team compromised of 5000 points. Each game featured endgame objectives and were slated to run to eight turns. With games these large, we were up for a very long day of action.

On the Eastern Front, the table was wide open with widely-sloping sculpted sand hills, small copses of trees along each long side and a Y-shaped road bisecting the table. I spent the day riveted to my own game on the Western Front table, but the German and Russian armor spent the day pounding away at each other. By mid-day, things had looked pretty good for the Germans as many destroyed Russian tanks stood smouldering midfield. All that changed in the latter half of the game as the Russians rallied to victory.

IMG_1908

IMG_1912

My game on the Western Front featured a generic French landscape cut up into winding narrow roads lined with the notoriously difficult bocage hedgerows which stymied both sides in the engagements fought in the region throughout 1944 and 1945. A church stared across the board to a stone bridge crossing a narrow stream to a small village. On the other end of the table, a small farm was set beside two wheatfields with two more rural stone houses in the near distance.

IMG_1903Our US plan was to place the majority of our armor on our right flank, supported by mobile infantry deployed in a small wood. On the left flank, the US Airborne deployed just outside the wheatfields with its small parachute battery to the rear. At the center of the board, our M7 Priests with their 105mm guns formed another battery while one lone Airborne platoon pushed to hold the buildings in the town with a vantage covering the bridge.

The game started poorly for the Americans as the Germans quickly pummeled the American Shermans and kept the infantry hiding in the woods. In the center, the US infantry struggled to occupy the buildings as the Germans quickly rolled five exceedingly threatening tanks behind a row of bocage overlooking two objectives. The American’s P7 Thunderbolt was likewise ineffective through the first few turns of the gaming, missing all targets except on German tank which burst into flames while bogged over a hedgerow.

IMG_1918

IMG_1906

IMG_1916

The fight on the American left went better from the start as the US Airborne filled the wheatfields and headed for the hedge and road beyond. A brief scare from a platoon of German Stugs, a row of halftracks and a platoon occupying the farmhouse  was solved with our trusty American Shermans. With a combination of artillery bombardments, heavy fire from the US tanks and some shooting from the advancing Airborne, the crossroads in front of the farm was turned into a smoking mass of destroyed German armor. Just as the German right flank stood wide open to the rolling Shermans, the command tank bogged in the woods where it and its entire platoon would remain for the rest of the game.

IMG_1914

IMG_1924By mid-game things looked good for the Germans, but the resilience of the Americans would prove to be the edge in the second half. The American armor was pretty torn up on our right flank, but the US kept making some remarkable morale rolls to stay on in the fight with the dwindling German tanks. At the center, the Priests had lost one of their guns but snuck back into cover to continue taking direct shots across the river at the remaining German armor. The US Airborne platoon occupying the town’s buildings risked a run toward the river, taking casualties along the way despite the smoke covering the German line on the far side. The fight between the wheatfields and adjoining treeline saw the Germans and Americans whittling each other down.

IMG_1926

IMG_1910

IMG_1920

IMG_1928

In the final turn, the 101st Airborne finally got in close enough for a tank assault, destroying one tank and pushing another back from an objective. It was a bloody fight, but in the end it was an American victory with four of six objectives held. On both tables, it had been a good day for the Allies.

And it was a long one, too. With a nearly eight hours of gaming and only brief breaks to grab a drink from the fridge up front or a hotdog off the grill out back, the two games had been exhausting but enjoyed by everyone – win or lose. That’s the kind of spirit we at the club experience every week, and already there’s some after-action discussion about when we’re planning our next big Flames of War day in Brooklyn.

Flames of War: Fielding the Guards Armoured Division

guardstanks

Among the multi-national Allied forces that participated in the campaign following Operation Overlord on D-Day on June 6, 1944 were the British Guards Armoured Division. Arriving a couple weeks late to the party on June 26, the Guards would roll on to participate in many of the key post-D-Day engagements including Operation Goodwood, Operation Market Garden and the Battle of the Bulge. I’ve been encountering the Guards over and over again in Rick Atkinson’s engaging The Guns At Last Light, the latest and final volume in his “Liberation Trilogy” telling of the Allied march to victory in World War II. And so, it is great timing that I’m finally getting around to adding the Guards as my first allied group supplementing my already extensive US forces in my Flames of War gaming.

FWOFBoxI’ve been working away for half this year on finishing up the models included in the excellent Flames of War Open Fire! box set. Among all the plastic goodies included, the set offers up a nice Guards platoon to provide support to their allied US Airborne infantry. The eight models include six of the US-supplied Sherman V tanks and two of the famed Sherman Firefly tanks, retrofitted by the British with a massive 17-pound anti-tank gun.

Aside from a rather significant and well-documented issue with some parts fitting together, the models glue up pretty nicely. To the included stowage and gear included on the sprues I also added some leftover bits. A quick coat of green armor spray paint followed by black and silver lightly brushed on the treads made up the majority of the painting work. The exposed drivers received a tan uniform, black beret and radio headset picked out in detail. Crates and tool handles strapped to the hull got a quick touch of brown.

IMG_1894For decals — a big oversight in not being a part of the Open Fire! kit — I used a set from the Plastic Soldier Company and guidelines found on the Flames of War site. I found the decals from PSC to be easier to apply than those I had used from FOW in the past, but I did still use a few Allied “star” markings I had lying around from previous US tank models from FOW. With the decals dry, a bit of dried mud color and watered-down brown wash added some wear and tear around the tanks before they were hit with a matte finish.

IMG_1896

IMG_1898Now that I’ve got some Brits on the table, I’m eying some UK infantry to add some depth to my collection and flavor to my games. There’s a big full-day Flames of War gaming event coming up in just a few days at Metropolitan Wargamers, but I don’t think the Guards will be making an appearance this time around. Still, it will be good to know they’re waiting to throw in with the Yanks on another day in the near future.

Flames of War: Hunner Park 1944 Scenario

nijmeganab

In September 1944, Allied forces launched the now-infamous Operation Market Garden. Fought in the Netherlands and Germany, the ill-fated plan was an attempt to aggressively take and control various river crossings through a series of bold airborne and armored assaults along key German strongpoints.

This past weekend at Metropolitan Wargamers, two of us threw together a quick Flames of War game based on the doomed Allied attempt to take the large bridge over the Waal River at Nijmegen, the oldest city in the Netherlands. Battlefront Miniatures, the makers of Flames of War, offer a PDF of the Hunner Park scenario which we used to broadly set the scene using the diagram below.

hpmap

We each fielded small, relatively balanced 1000 point forces. My US Airborne company consisted of two parachute rifle platoons, a machine gun support platoon and a US tank platoon consisting of four Shermans. The German Fallschirmjägers fielded two rifle-machine gun platoons, a heavy-machine gun support platoon and a three-tank Panzer IV platoon. The Germans deployed one rifle-machine gun platoon in the center of the town and the rest near the bridge, as per the scenario rules. My US Airborne deployed fully along the far edge.

1017331_10201039903174136_1883265778_nThe scenario’s goals call for the US Airborne to take the bridge and center of town with the Germans playing a defensive game, all within the six turn time limit. Since the Allies are at a pretty clear historical disadvantage in the scenario, I modified the game’s terrain to include some additional bocage and cover at the American end of the table to help balance the game.

My plan was to quickly run one parachute rifle platoon along the side of the table, into the woods and up the road to the bridge while the remainder of my force would slug it out against the German platoons hunkered down in the town. After one turn of movement, the second turn found the US Shermans and machine gun platoon pouring fire into the Germans occupying the town’s buildings but with no result. My other rifle platoon ran at the double to occupy the woods opposite the town while a German rifle-MG platoon and their heavy MG platoon converged to meet them.

227419_10201040232582371_1708827010_nBy the third turn, the Panzers showed up in the middle of town and quickly destroyed their first Sherman tank. In the woods, the German and US platoons began exchanging fire with the Americans finding themselves pinned after the first firefight and the Germans already taking heavy casulties. Through turns four and five, the Panzers went on to destroy two more Shermans while the American machine gun platoon and additional rifle platoon began to make headway with the German infantry hidden in the buildings. Over in the woods, the tough American Airborne managed to destroy the two German platoons and finally rolled to unpin themselves. It was a bit too little too, late. By the time of the sixth and final turn, the game was pretty well lost for the Americans as the final Sherman fled the field, a last-ditch US assault on the pinned Germans holding the  town was repulsed and the German armor rolled back to meet the Americans just emerging from the woods.

Historically, Operation Market Garden was an Allied debacle, so our game play of the scenario near the Nijmegen bridge wasn’t too far off. With just under three hours to play, the game did offer a quick, varied bit of play with plenty of opportunity for both sides to get some decent shots in. It was also a good warm-up as we prepare for a large all-day Flames of War event next Saturday at the club when I hope my US Airborne roll a bit better toward victory in Europe.

Flames of War: Foy 1945 Scenario

With a big full day of Flames of War gaming coming up at Metropolitan Wargamers on July 20th a few of us got together for a practice game this past weekend. There’s a renewed interest in FOW at the club as of late, and one of the great things about the group is the way experienced and new players alike come to learn together.

Wanting a manageable but interesting late war Western Europe scenario with US Airborne and German forces, we settled on the Battle of Foy from January 1945. The battle was just one small part of the brutal and much larger Battle of the Bulge campaign in the Ardennes forest region of France, Belgium and Luxembourg during the winter of ’44-’45. The engagement near Foy is featured dramatically in an episode from HBO Band of Brothers miniseries (clip here), so I was looking forward to trying my hand at commanding Easy Company from the 101st Airborne Division on the table for the day.

The FOW website offers a downloadable PDF outlining the scenario which fairly represents the German defensive position in and around Foy. No guidelines are given on the make-up of forces, but we decided on 1780 points on a side with flexibility beyond the historic record. The US Airborne begins in two divided deployment areas with I Company pinned due to indecision by its commander Lt. Norman Dike. Only by the daring sprint across open ground by Ronald Spiers sent on orders by Capt. Richard “Dick” Winters to relieve Dike of command can I Company join the assault on Foy. In the FOW scenario, the US forces have six turns to wrest control of one of two objectives from the defending Germans. The Germans must hold their ground against the bravery and skill of Easy Company.

The US struck first with an airstrike from their P-47 Thunderbolt taking out two of the three German PaK 40 anti-tank guns tucked behind the churchyard walls at the center of town. After being pinned by the P-47, the anti-tank platoon wound up rolling poorly and remained pinned and ineffective for the remainder of the game.

That was pretty much the last major good story the US could tell for the rest of the game. Some house-to-house fighting took place along the German right flank with the Airborne eventually beating the Germans back from the protection of the row of houses along the road to town. The American Sherman tank platoon rolled up the center but remained stuck for the whole game attempting to machine-gun the German platoons dug in behind the churchyard walls. Four of the five tanks wound up taking fire and being destroyed where they sat.

With the US infantry moving too slowly on both sides of the table, the Germans rolled their armored reserves in on turn three as their Stug platoon entered the table to hold off any US advance on the German right flank.

US volleys from the parachute artillery platoon tucked far back in the field did little more than occasionally eliminate a few German infantry and keep the units protecting the objective on the German left flank pinned.

Aside from a deadly late game P-47 strike on the German mortars which had harassed the Americans for the entire game, US air support never did much more for the rest of the game. By the sixth turn, the final German Panzer IV armor support rolled onto the table. With both flanks locked down by the Germans, a final desperate US attempt at dual assaults on the German armor platoons were ineffective. With three American platoons eliminated and most others with heavy casualties, the US ceded victory to the Germans in a revisionary result from the actual American victory in 1945.

Games like this are fun but also an opportunity to consider lessons learned. My US 101st Airborne was entirely too cautious and didn’t get into the fight fast enough, losing the opportunity to control the town’s center before the arrival of the German armor. My machine gun platoon got stuck mid-field and got chewed up bit by bit without having the opportunity to truly unleash its full effectiveness on the Germans who remained out of range and dug in for most of the game. Other infantry platoons hung back too much in the woods or buildings and never really got up in the fight.

With a much larger game coming up in a few weekends, I see that taking greater advantage of Easy Company’s aggressive, daring and deadly experience is going to be key to an Allied victory. Looking back at our re-running of the battle at Foy this past weekend, I can see I was a little too much like the wavering Lt. Dike and never let the heroics of individuals like Ronald Spiers to take over.

Flames of War: Fielding the Sd. Kfz. 7/1 Anti-Aircraft Gun

Wars are filled with big, heavy equipment, and the 8-ton German  Sd.Kfz. 7 served as the longtime workhorse throughout World War II. Short for the Sonderkraftfahrzeug (German for “special purpose vehicle”), the Sd. Kfz. 7 half-track was widely used as a transport, towing vehicle and the basis for self-propelled anti-aircraft gun crews. AA configurations of the truck featured either quad-mounted 2cm Flakvierling 38 guns on the Sd. Kfz. 7/1 and the Sd. Kfz. 7/2 with more cannon-like 3.7cm FlaK 36 guns.

For my Flames of War AA gun team, I’ve chosen to model the Sd. Kfz. 7/1 in its two variants – one with its open cab and one with an armored engine and driver’s cab. After gluing-up the metal and plastic pieces, I left the gun turrets unglued to the truck bed so the crews could rotate 360 degrees as they did in real life. As with most of my German armor, a flat black sprayed primer coat was then dry-brushed in a dark grey. Guns and details were picked out with a bit of gun metal and the bench seats were painted to resemble a reddish-brown leather. The crew and driver were finished to match my usual infantry models with flesh and equipment details finished off with a watered-down brown wash.

For now, I’ve got the open cab version finished and I’ll post again once the armored one is complete.

Having recently finished my P-47 Thunderbolt for use as air support for my Allied forces, I only thought it fair to even-out the German side with some anti-aircraft protection. As in actual combat, the FOW Sd. Kfz. 7/1 model is as equally deadly against aircraft as it is to ground forces. With a big day-long FOW day coming up on July 20th at Metropolitan Wargamers in Park Slope, Brooklyn, rushing these guys to the tabletop front to hold back the Allied invasion should be key to striking a gaming balance.

Flames of War: Fielding the P-47 Thunderbolt

The P-47 Thunderbolt was a big, heavy, expensive and deadly plane with .50-cal machine guns and a bomb payload of 2500 pounds. Rushed into development and production near the dawn of World War II, these American planes saw their first use in Europe in 1942. By the late war period, the P-47 was being widely used in Western Europe and proved to be among the most effective fighter aircraft in both air-to-air and air-to-ground combat operations. During the Normandy landings in June 1944, the German Luftwaffe was a virtual no-show and the P-47 Thunderbolt ruled the air in support of the massive Allied invasion below.

I’ve been modelling and playing with the 15mm World War II Flames of War miniatures wargaming system for a number of years now, but until now all my gaming has been with tiny scale boots, wheels and tank tracks firmly planted on the ground. With a full afternoon of large 2500-point late war period FOW games being planned in July at Metropolitan Wargamers in Brooklyn, I decided to supplement my existing US Airborne force with some new air support with a P-47 Thunderbolt model. Armed with its wing machine guns and laden with bombs, I’m pretty excited about adding the P-47 and a whole additional dimension to a game I’ve gotten pretty familiar with over the years.

Choosing a paint scheme for the model was the first decision I needed to make in my project, and there are hundreds of historical variations to be found. While the silver fuselage seemed to be among the more commonly-modeled versions of the P-47, I opted for a simpler olive drab body. The green base coat was followed by a grey underbelly and some boldly-colorful red details at the nose and tail. The windowed canopy “glass” consisted of some flat black and white dry-brushing. Along the seams in the body of the plane I wiped fine lines of rusty metal to show wear on the plane. The decals included in the kit completed the model, albeit with a fair amount of struggle with near-miss tears.

While my first shot at modelling a plane for FOW may not be 100% historically accurate, I’m pretty satisfied with the visual impression it makes. At some point I’ll even things up with a German plane, but for now I can’t wait for my P-47 to take off in my next game.