Flames of War: Fielding the Guards Armoured Division Part II

UKguards

Since starting with 15mm World War II Flames of War gaming a number of years ago now, my Allied modelling has focused exclusively on United States forces. Beginning with basic US infantry rifle, artillery and armored companies, I eventually added in some US Airborne forces plus some air support. Recently I’ve felt maxed-out on the US, so I’ve taken to looking to build out my Allies with another country’s army.

eagUARDSTEMP

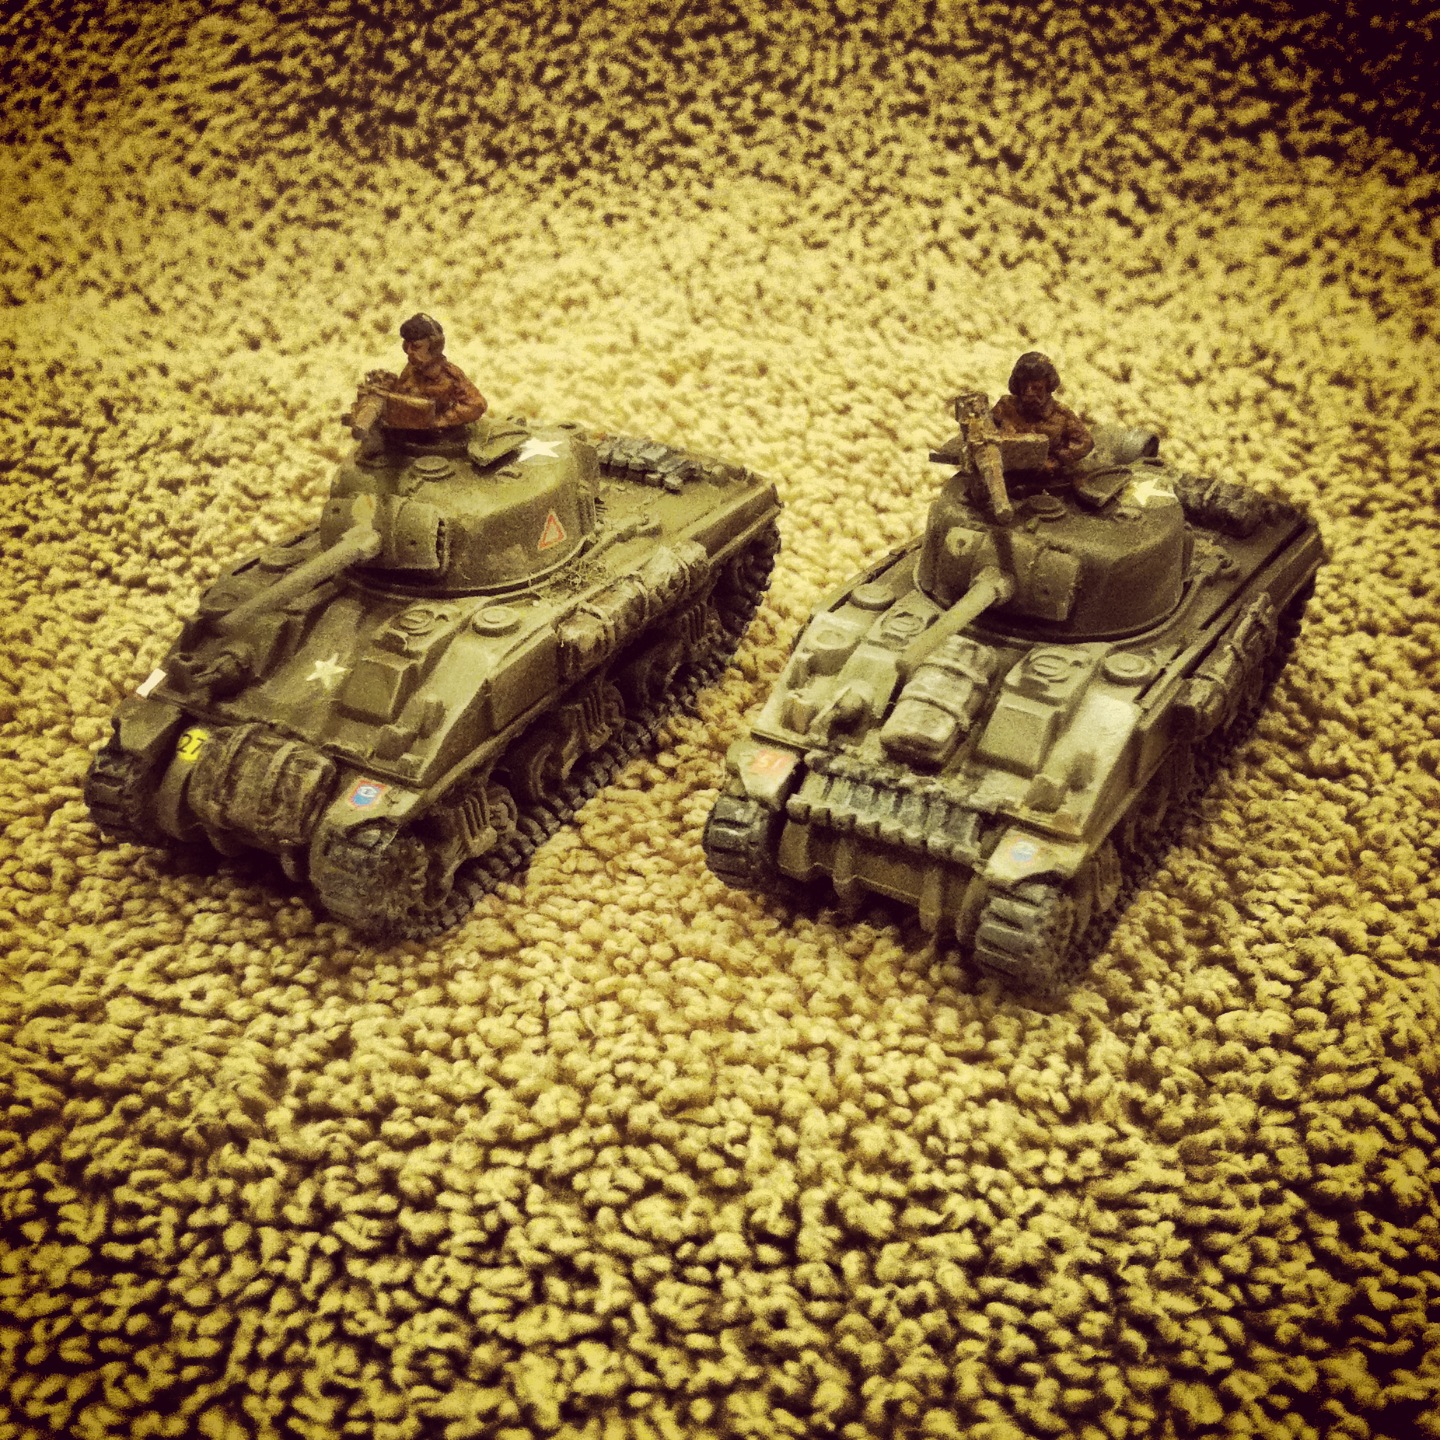
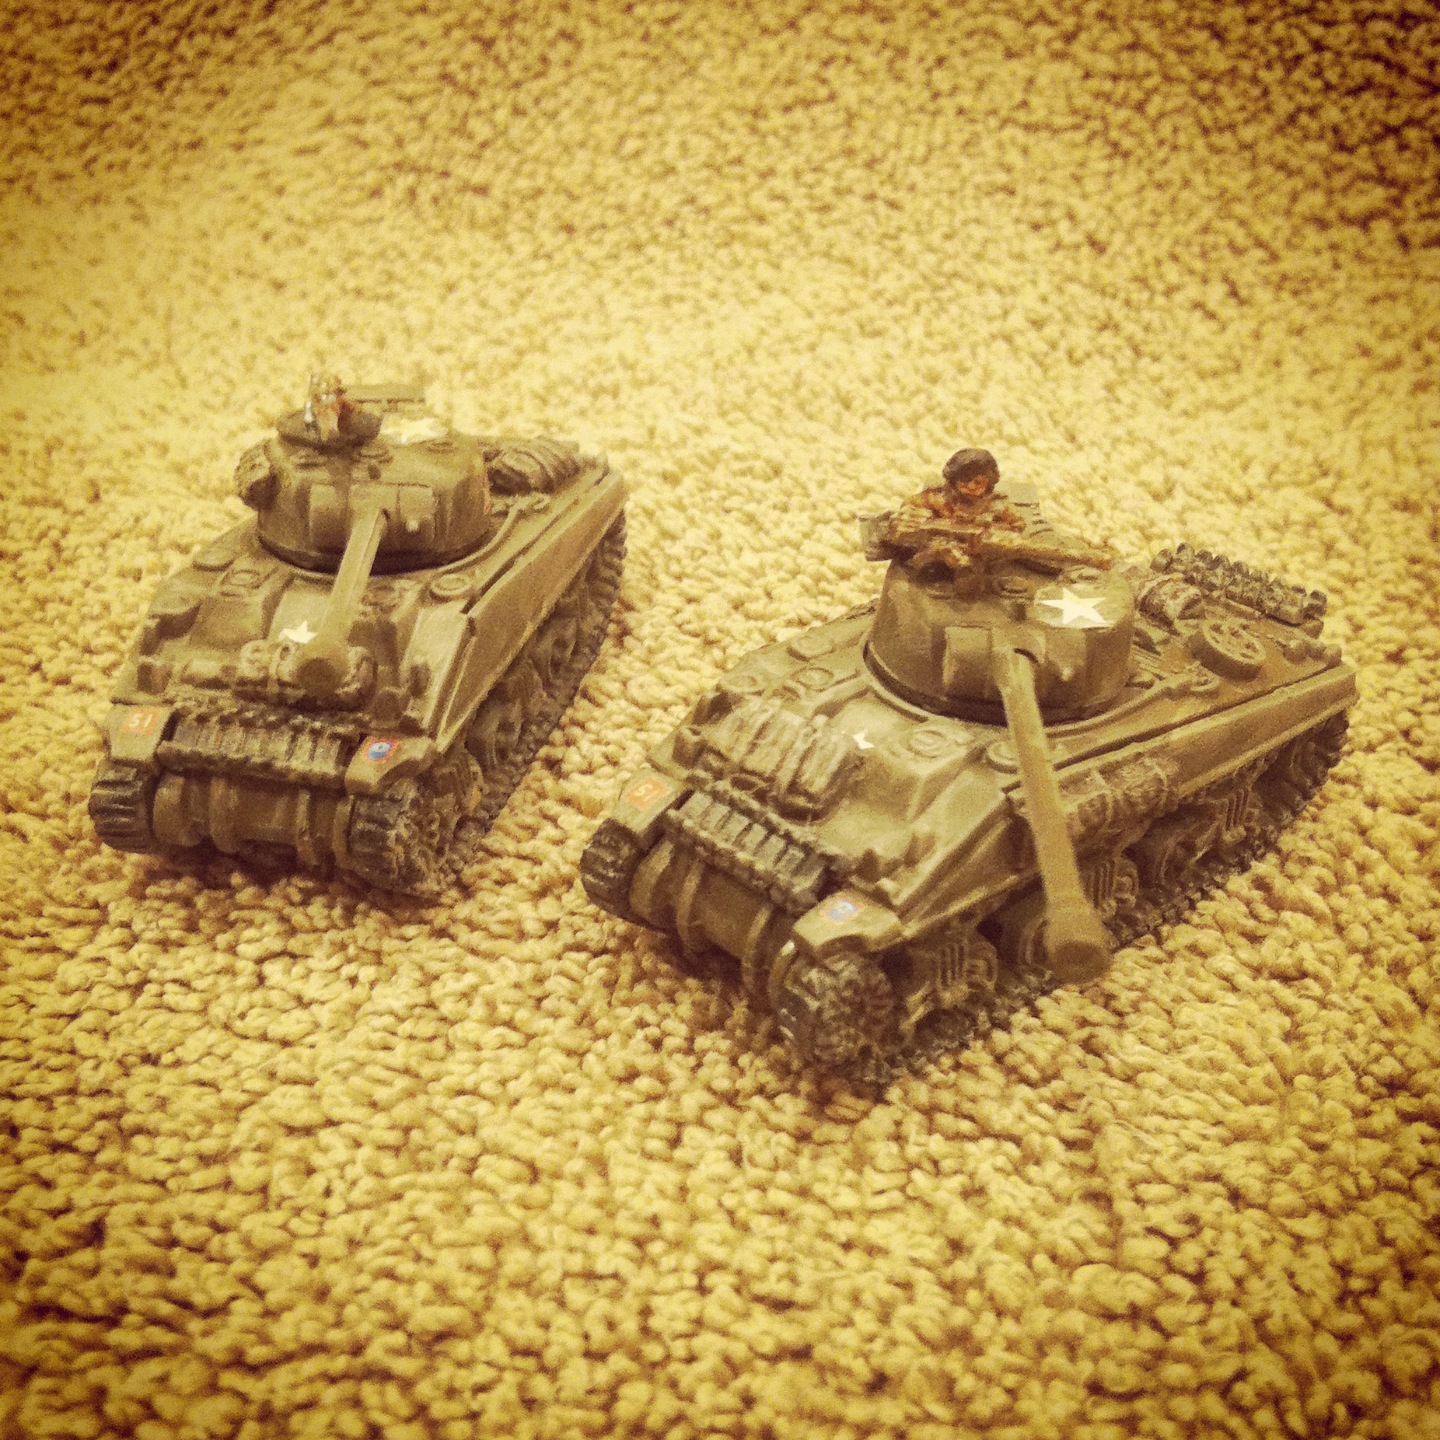
After a bit of research and reading, I’ve settled on the British Guards Armored Division. I began this new journey with the plastic Guards Armored Sherman and Firefly models included in the excellent Open Fire! starter game box set. While these can be played as Allied support to my existing US Airborne, I really wanted to give the British their own space on the board.

IMG_2737

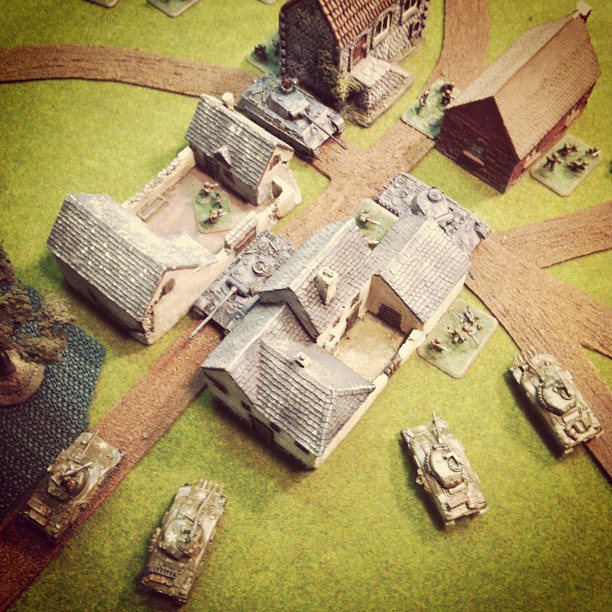
Along with my existing plastic Shermans and Fireflies I already have painted-up, I bought another set from a fellow member at Metropolitan Wargamers in Brooklyn, NY. This gives me a full four-platoon armoured squadron with four Shermans in the command section.

IMG_2738

 To fill out my Guards Armored Division, I’ve also added the special Lieutenent Colonel Joe Vandeleur warrior character. As a leader of the Irish Guards during such famed actions as Operation Market Garden, Vandeleur proved to be a solid field commander known for his by-the-book leadership.

Caine

 Michael Caine as Lt. Col. Joe Vandeleur in ‘Bridge Too Far’

I’m a big fan of 1977’s A Bridge Too Far in which Michael Caine co-stars as Vandeleur during Market Garden, so I couldn’t help but add this model to my new force with the colonel riding upright in his armoured car.

IMG_2735

IMG_2734

IMG_2733

In the coming month or so I’ll be filling out my British force. I have one completed Royal Artillery section and another on the workbench, enabling me to field a full eight-battery platoon. I’ve also got Battlefront’s British Rifle Company box allowing me to march three full platoons on the table of what was known affectionately during WWII as the PBI – Poor Bloody Infantry.

IMG_2732

I’m really looking forward to playing with my new British units this coming year, along with all their special national rules. The Brits are really going to open possibilities with new scenarios and new fronts. As Caine says as Vandeleur in A Bridge Too Far, “I’ve got nothing else planned.” At least for now.

Related articles

Flames of War: Sint-Oedenrode 1944 Scenario

StOAB

Like many cities in the Low Countries, the Dutch city of Sint-Oedenrode was occupied by German forces after their invasion of France, Belgium and the Netherlands in the spring of 1940. The southern Netherlands and Belgium were the area of focus for the Allied Operation Market Garden in September 1944 which hoped to take several river crossings before the push on to Germany. At Sint-Oedenrode, the famed US 101st Airborne Division seized the bridge over the Dommel River but were met with a counterattack by German Fallschrimjäger regiments and other supporting forces. The battle that would take place at the crossing of the Dommel was typical of the action of the Allied push along what became known as Hell’s Highway. While Market Garden would ultimately prove to be a fiasco for the Allies overall, the grateful people of Sint-Oedenrode were liberated by US troops after a week of brutal fighting against the German occupiers.

StOMap

The Flames of War website has a scenario for the engagement at St. Oedenrode available in their list of historical scenarios on their website. The forces in the scenario were originally covered in the now out-of-print Hell’s Highway and A Bridge Too Far FOW books now available as Market Garden for the US, UK and Canadian forces and Bridge By Bridge for the Germans.

This past weekend at Metropolitan Wargamers in Brooklyn, NY we ran a modified Sint-Oedenrode scenario with the US 101st Airborne facing off against the German Fallschirmjägers. My paratroopers deployed in the fields and woods across the river with two rifle platoons and a light machine gun platoon. In reserve were US mortar and parachute howitzer platoons along with a delayed reserve Sherman and Firefly tank platoon from the Guards Armoured Division. The Germans started defending the two objectives at the bridges with a mortars, heavy machine guns and a rifle-machine gun platoon dug in around the town buildings.

IMG_2324In the first two turns, the Airborne units made way for the river and first bridge while avoiding shots coming from the defending Germans. The US light machine guns poured fire into the houses across the river, but shots missed on all accounts but did manage to pin the units. With little US progress toward the objectives, my German opponent remained solidly in control of the bridge points in the early third of the game.

IMG_2322By the third turn, the Germans successfully rolled on their a reserve rifle-machine gun platoon as well as their PaK 40 anti-tank guns. While the US lacked tanks of the board, the US platoon crossing the bridge took heavy combined arms fire from the German artillery outside of the town and the infantry platoons hidden among the town’s houses. Another US platoon made their way across the Dommel, through a small wood and attempted a quick assault on the Germans defending from the nearby buildings. Under heavy fire, the US charge was repulsed with some losses pushing them back into the treeline.

IMG_2326With the Airborne rifle companies pinned on the bridge and in the  trees over the river, I finally threw a successful roll for reserves on the fourth turn and brought in my mortars and howitzers. Firing at a distance from the fields, all my artillery missed their hard-to-hit German targets hidden in the buildings across the river. The platoon on the bridge took an additional round of combined German fire and fled the field. The US light machine guns to one side of the bridge likewise encountered heavy fire, finding themselves pinned and still unable to effectively knock the Germans from their defending positions in the town.

IMG_2328By turn four, things went from bad to worse for the Allies. With the Guards Armoured forces finally rolling in, they did quickly take out one of the German anti-tank guns. This was unfortunately quickly answered with two Allied tanks being destroyed with return fire from the crack shots from the German PaK 40s. With the beginning of the fifth turn, the US attempted a final series of artillery barrages and tank fire to chase the Germans from the town. Still at nearly full strength, the Germans had clearly overwhelmed the US and I conceded the game.

Even without their Panzer IVs on the table, the German position within the town proved hard to route. In retrospect, a concentrated Airborne end-run over the river and through the town might’ve proved more effective in chasing the Germans out of their defending positions near the bridge entry points. A lack of armoured and artillery reserves until late in the game also left the 101st outgunned and running on their own as German reserve strength mounted. Luckily for the Dutch people of Sint-Oedenrde things went much better for the Allies in 1944, but my replay of the attack just didn’t go my way this day.

Flames of War: Fielding the Guards Armoured Division

guardstanks

Among the multi-national Allied forces that participated in the campaign following Operation Overlord on D-Day on June 6, 1944 were the British Guards Armoured Division. Arriving a couple weeks late to the party on June 26, the Guards would roll on to participate in many of the key post-D-Day engagements including Operation Goodwood, Operation Market Garden and the Battle of the Bulge. I’ve been encountering the Guards over and over again in Rick Atkinson’s engaging The Guns At Last Light, the latest and final volume in his “Liberation Trilogy” telling of the Allied march to victory in World War II. And so, it is great timing that I’m finally getting around to adding the Guards as my first allied group supplementing my already extensive US forces in my Flames of War gaming.

FWOFBoxI’ve been working away for half this year on finishing up the models included in the excellent Flames of War Open Fire! box set. Among all the plastic goodies included, the set offers up a nice Guards platoon to provide support to their allied US Airborne infantry. The eight models include six of the US-supplied Sherman V tanks and two of the famed Sherman Firefly tanks, retrofitted by the British with a massive 17-pound anti-tank gun.

Aside from a rather significant and well-documented issue with some parts fitting together, the models glue up pretty nicely. To the included stowage and gear included on the sprues I also added some leftover bits. A quick coat of green armor spray paint followed by black and silver lightly brushed on the treads made up the majority of the painting work. The exposed drivers received a tan uniform, black beret and radio headset picked out in detail. Crates and tool handles strapped to the hull got a quick touch of brown.

IMG_1894For decals — a big oversight in not being a part of the Open Fire! kit — I used a set from the Plastic Soldier Company and guidelines found on the Flames of War site. I found the decals from PSC to be easier to apply than those I had used from FOW in the past, but I did still use a few Allied “star” markings I had lying around from previous US tank models from FOW. With the decals dry, a bit of dried mud color and watered-down brown wash added some wear and tear around the tanks before they were hit with a matte finish.

IMG_1896

IMG_1898Now that I’ve got some Brits on the table, I’m eying some UK infantry to add some depth to my collection and flavor to my games. There’s a big full-day Flames of War gaming event coming up in just a few days at Metropolitan Wargamers, but I don’t think the Guards will be making an appearance this time around. Still, it will be good to know they’re waiting to throw in with the Yanks on another day in the near future.

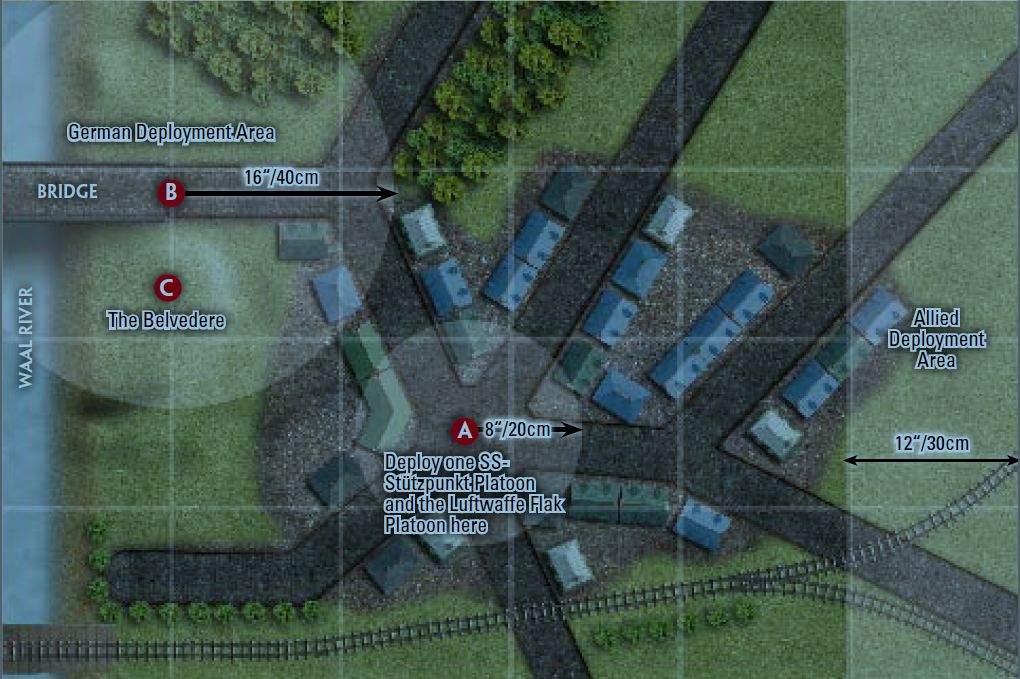
Flames of War: Hunner Park 1944 Scenario

nijmeganab

In September 1944, Allied forces launched the now-infamous Operation Market Garden. Fought in the Netherlands and Germany, the ill-fated plan was an attempt to aggressively take and control various river crossings through a series of bold airborne and armored assaults along key German strongpoints.

This past weekend at Metropolitan Wargamers, two of us threw together a quick Flames of War game based on the doomed Allied attempt to take the large bridge over the Waal River at Nijmegen, the oldest city in the Netherlands. Battlefront Miniatures, the makers of Flames of War, offer a PDF of the Hunner Park scenario which we used to broadly set the scene using the diagram below.

hpmap

We each fielded small, relatively balanced 1000 point forces. My US Airborne company consisted of two parachute rifle platoons, a machine gun support platoon and a US tank platoon consisting of four Shermans. The German Fallschirmjägers fielded two rifle-machine gun platoons, a heavy-machine gun support platoon and a three-tank Panzer IV platoon. The Germans deployed one rifle-machine gun platoon in the center of the town and the rest near the bridge, as per the scenario rules. My US Airborne deployed fully along the far edge.

1017331_10201039903174136_1883265778_nThe scenario’s goals call for the US Airborne to take the bridge and center of town with the Germans playing a defensive game, all within the six turn time limit. Since the Allies are at a pretty clear historical disadvantage in the scenario, I modified the game’s terrain to include some additional bocage and cover at the American end of the table to help balance the game.

My plan was to quickly run one parachute rifle platoon along the side of the table, into the woods and up the road to the bridge while the remainder of my force would slug it out against the German platoons hunkered down in the town. After one turn of movement, the second turn found the US Shermans and machine gun platoon pouring fire into the Germans occupying the town’s buildings but with no result. My other rifle platoon ran at the double to occupy the woods opposite the town while a German rifle-MG platoon and their heavy MG platoon converged to meet them.

227419_10201040232582371_1708827010_nBy the third turn, the Panzers showed up in the middle of town and quickly destroyed their first Sherman tank. In the woods, the German and US platoons began exchanging fire with the Americans finding themselves pinned after the first firefight and the Germans already taking heavy casulties. Through turns four and five, the Panzers went on to destroy two more Shermans while the American machine gun platoon and additional rifle platoon began to make headway with the German infantry hidden in the buildings. Over in the woods, the tough American Airborne managed to destroy the two German platoons and finally rolled to unpin themselves. It was a bit too little too, late. By the time of the sixth and final turn, the game was pretty well lost for the Americans as the final Sherman fled the field, a last-ditch US assault on the pinned Germans holding the  town was repulsed and the German armor rolled back to meet the Americans just emerging from the woods.

Historically, Operation Market Garden was an Allied debacle, so our game play of the scenario near the Nijmegen bridge wasn’t too far off. With just under three hours to play, the game did offer a quick, varied bit of play with plenty of opportunity for both sides to get some decent shots in. It was also a good warm-up as we prepare for a large all-day Flames of War event next Saturday at the club when I hope my US Airborne roll a bit better toward victory in Europe.

New Game Weekend: A Bridge Too Far: Operation Market Garden

Maybe it was the dampness and spring chill, but Saturday night at Metropolitan Wargamers in Brooklyn was pretty empty with just me and one other club member around. We decided on a two-player boardgame, and being big WWII enthusiasts we picked 2010’s A Bridge Too Far: Operation Market Garden from Battlefront Miniatures.

I’ve been a long-time fan of the 1977 film A Bridge Too Far featuring a classic international cast recounting the events of Operation Market Garden and the botched Allied attempt to chase the Germans out of a number of key defenses in the Netherlands in September 1944. The film does an entertaining job of depicting the colorful real-life personalities against a backdrop of a daring daylight airborne invasion, over-confidence in the weakness of the German forces and disagreement among commanding Allied staff on the plan itself. The game offers two scenario set-ups giving the option of refighting the battle as rather historically depicted in the film or through a plan of your own devising. The game we played was the historical one, and I commanded Field Marshall Marshal Bernard Montgomery’s British and US forces.

The game involves five play turns with a random number of battles making up each turn. Initiative is rolled before each battle, and targeted objective spaces on the board are chosen to attack. Each player chooses to commit some, all or none of their forces to each battle. Different forces – tanks, guns and airborne infantry – each provide bonuses modifiers in different terrain types. Defenders of areas containing bridges get an extra bonus. Resolving combat is a simple roll of the dice with modifiers added. Defeated forces roll to be destroyed or retreat to adjoining areas, and then the next initiative is rolled for. Once a round of battles is completed, strategic moves can be made and the Allied player has the option to air-drop additional forces and supplies into designated areas of the board. The Axis player can then choose to attempt to fend off the Allied air support with their own air power. Keeping supply lines intact is key to the Allied strategy, as forces which are cut-off from their line of supply suffer a greater weakness in subsequent battles.

Typical of games by Battlefront Miniatures, makers of the popular WWII 15mm miniatures game Flames of War, this game packs some great design and ease of play into a neat box. While each battle and turn of play involves a number of steps, the game moves along quickly in about 90 minutes. The game comes with over 40 well-sculpted plastic playing pieces, but the version at the club had been modified with painted metal micro-scale armor and troops. Gamers who long-ago graduated from Risk to games like Axis & Allies will find a lot to love in the focused presentation of this game.

Even with the relative simplicity of the game, there’s a lot of strategic play potential. My first time through, my Allied strategy of pushing hard from the rear and left flanks of the board stalled rapidly as my tanks were quickly destroyed by some disastrous die throws against German anti-tank guns. My paratroppers dropped effectively into the middle of the board, yet they too became surrounded and snarled by the superior German armor defending the game’s main objectives. By four turns in, I faced certain defeat with no additional hope for much-needed tank support for my floundering airborne troops.

For a notoriously one-sided battle, I can easily see a lot of replay value in this game . I hope to give this one another shot soon, trying out some less historical and more aggressive strategies in running the Germans off the field. Having a chance to remake history is one of the joys and challenges of wargaming, and the board game A Bridge Too Far: Operation Market Garden provides a lot of opportunities to do so.