Flames of War: Hunner Park 1944 Scenario

nijmeganab

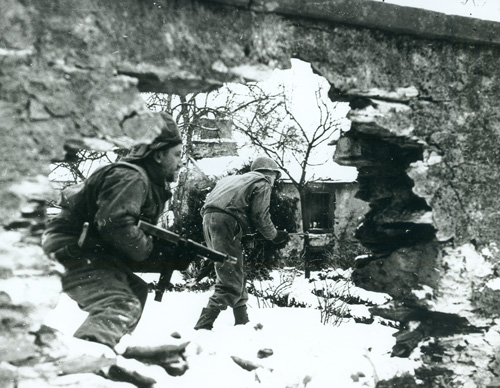
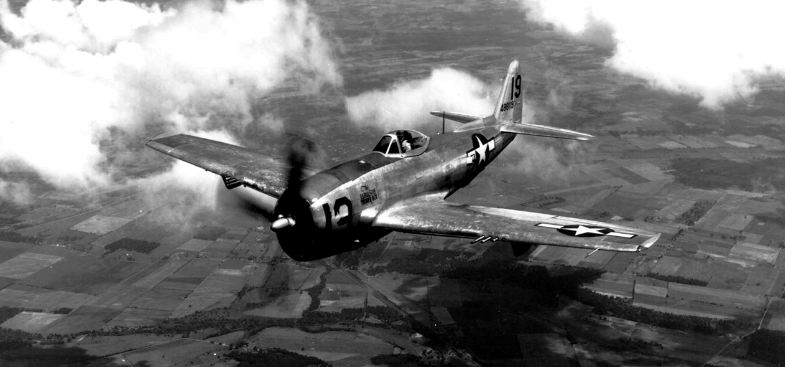
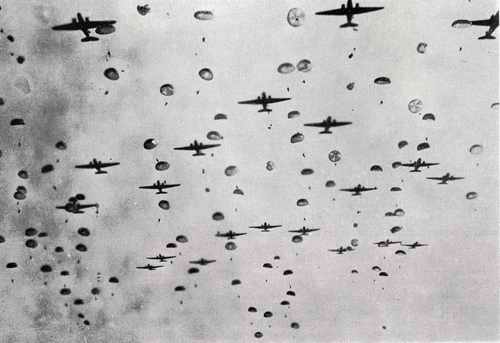
In September 1944, Allied forces launched the now-infamous Operation Market Garden. Fought in the Netherlands and Germany, the ill-fated plan was an attempt to aggressively take and control various river crossings through a series of bold airborne and armored assaults along key German strongpoints.

This past weekend at Metropolitan Wargamers, two of us threw together a quick Flames of War game based on the doomed Allied attempt to take the large bridge over the Waal River at Nijmegen, the oldest city in the Netherlands. Battlefront Miniatures, the makers of Flames of War, offer a PDF of the Hunner Park scenario which we used to broadly set the scene using the diagram below.

hpmap

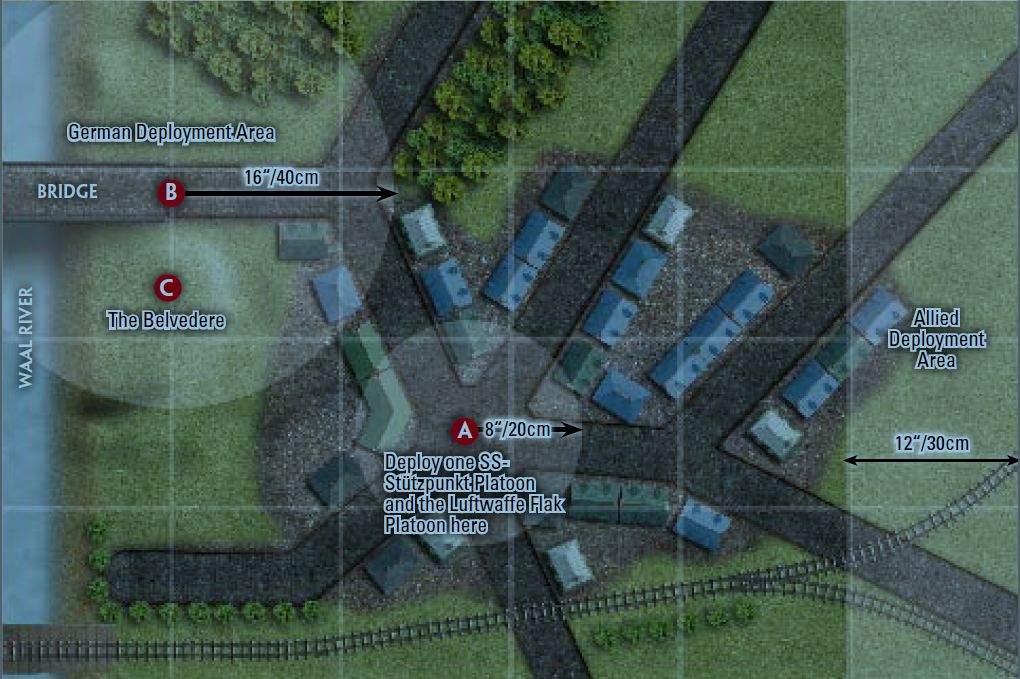
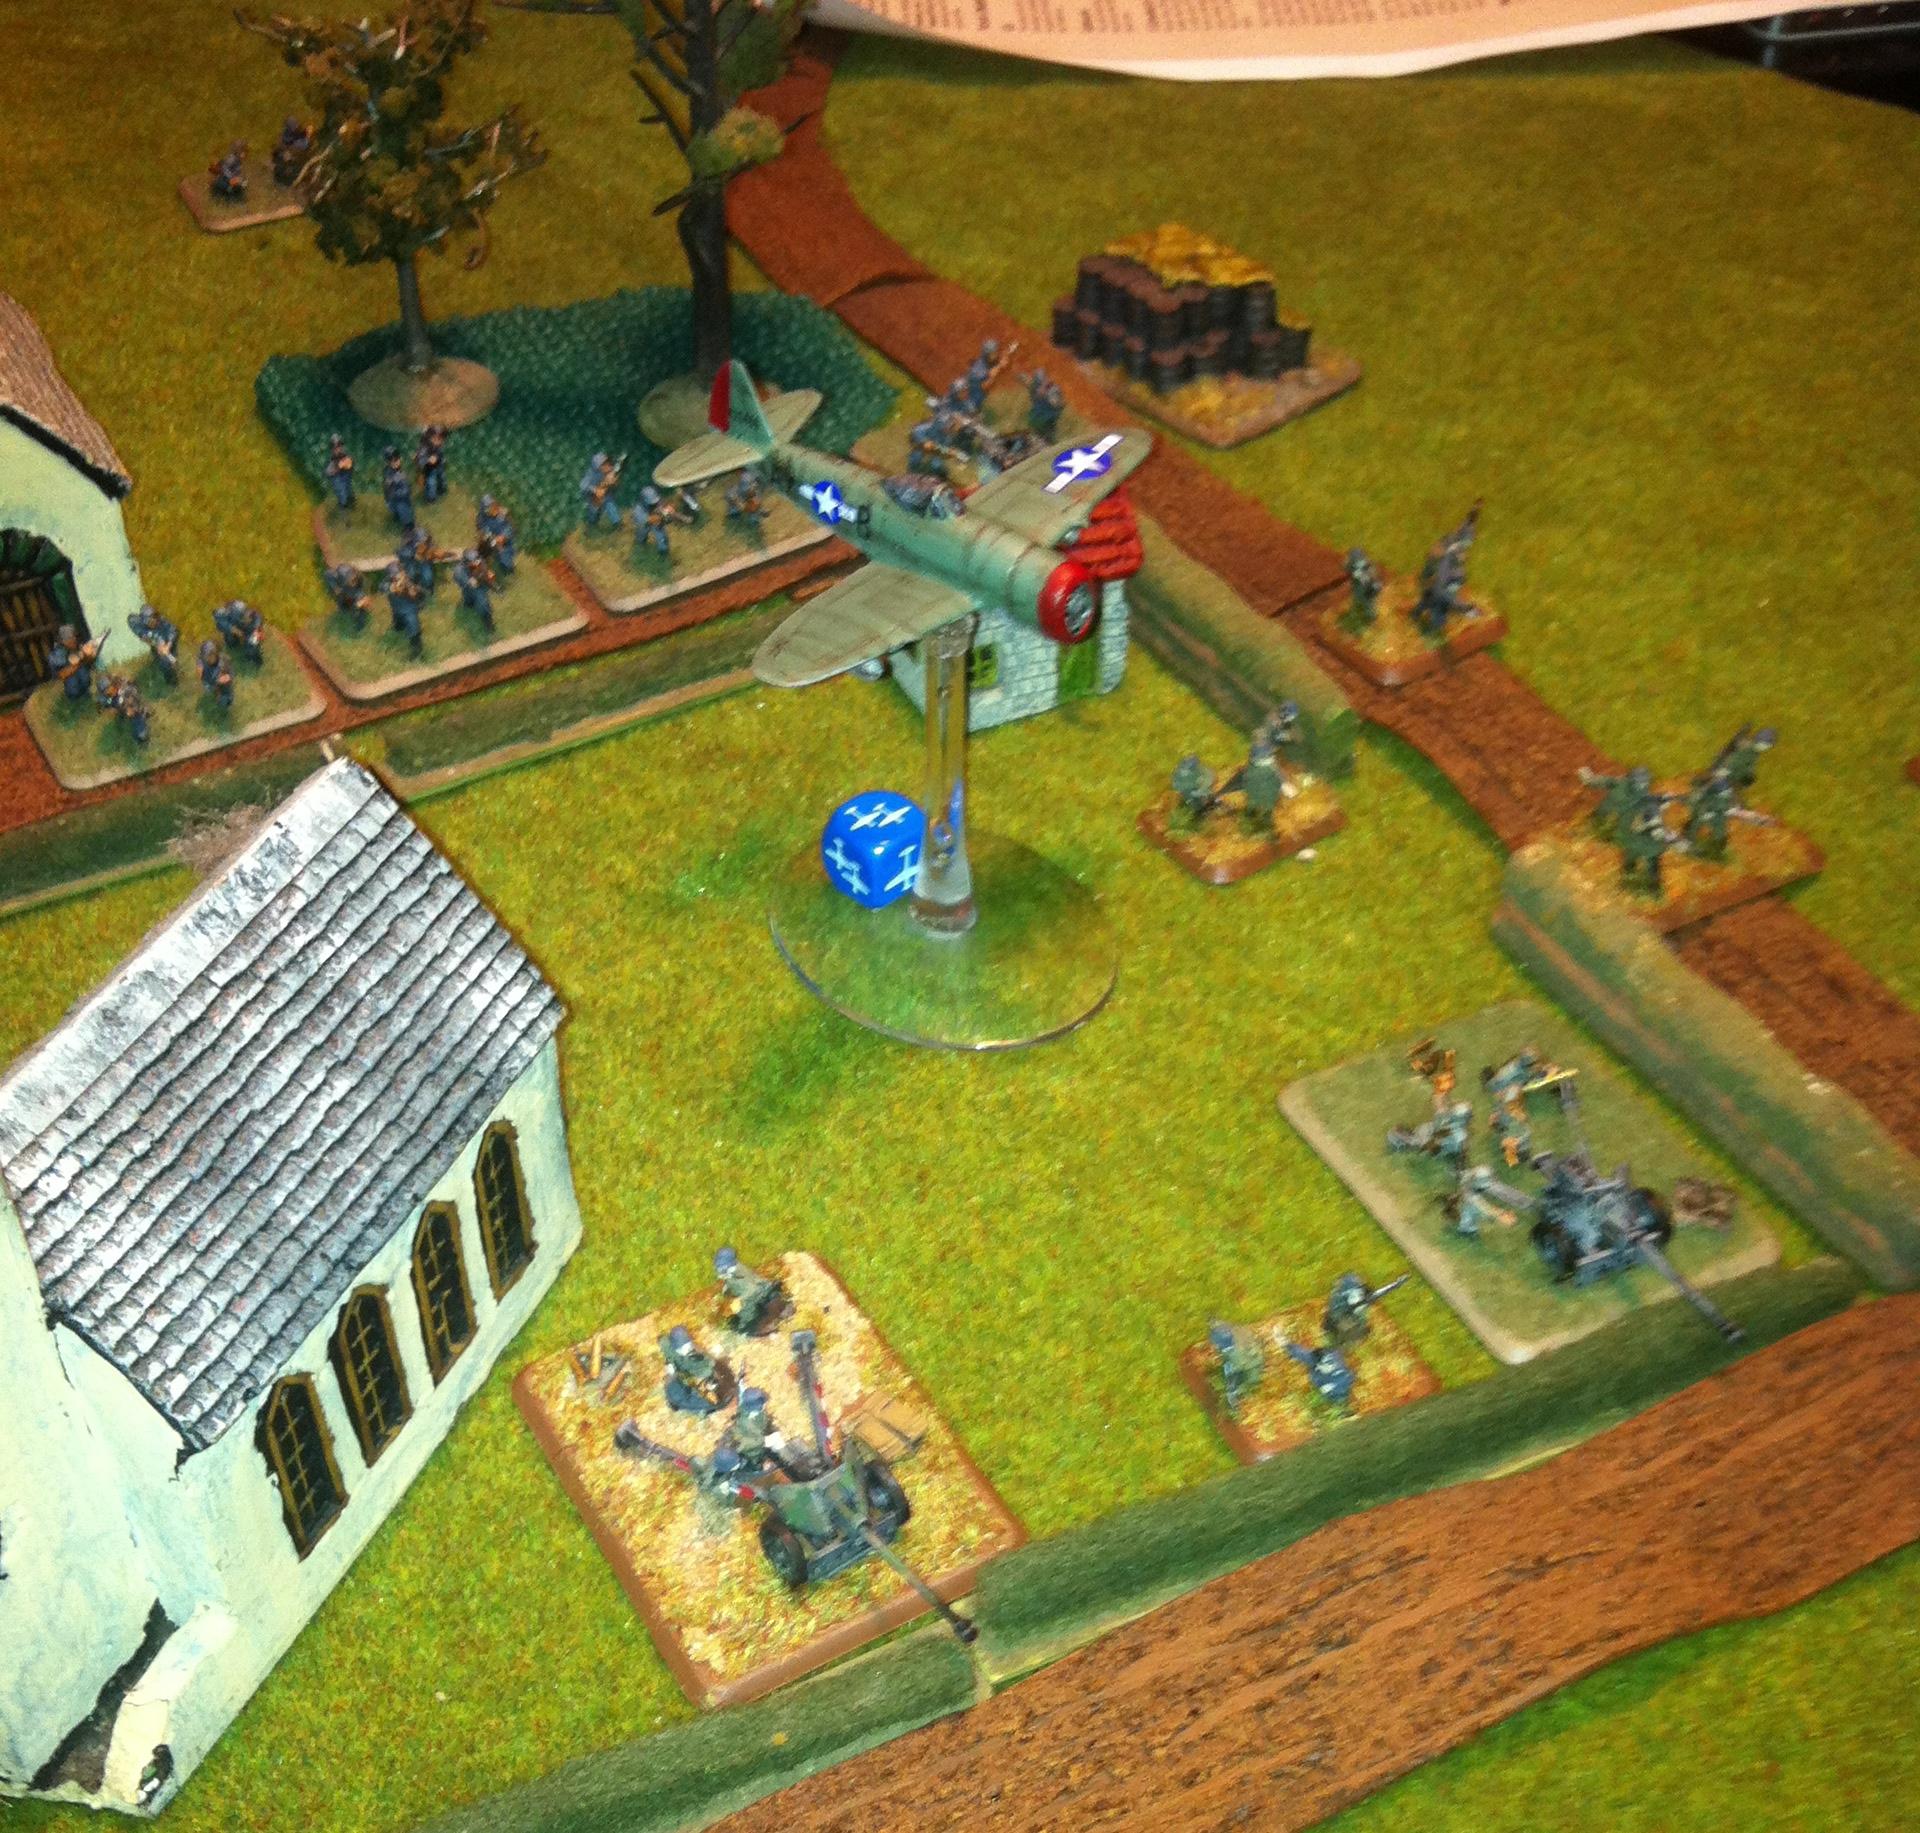
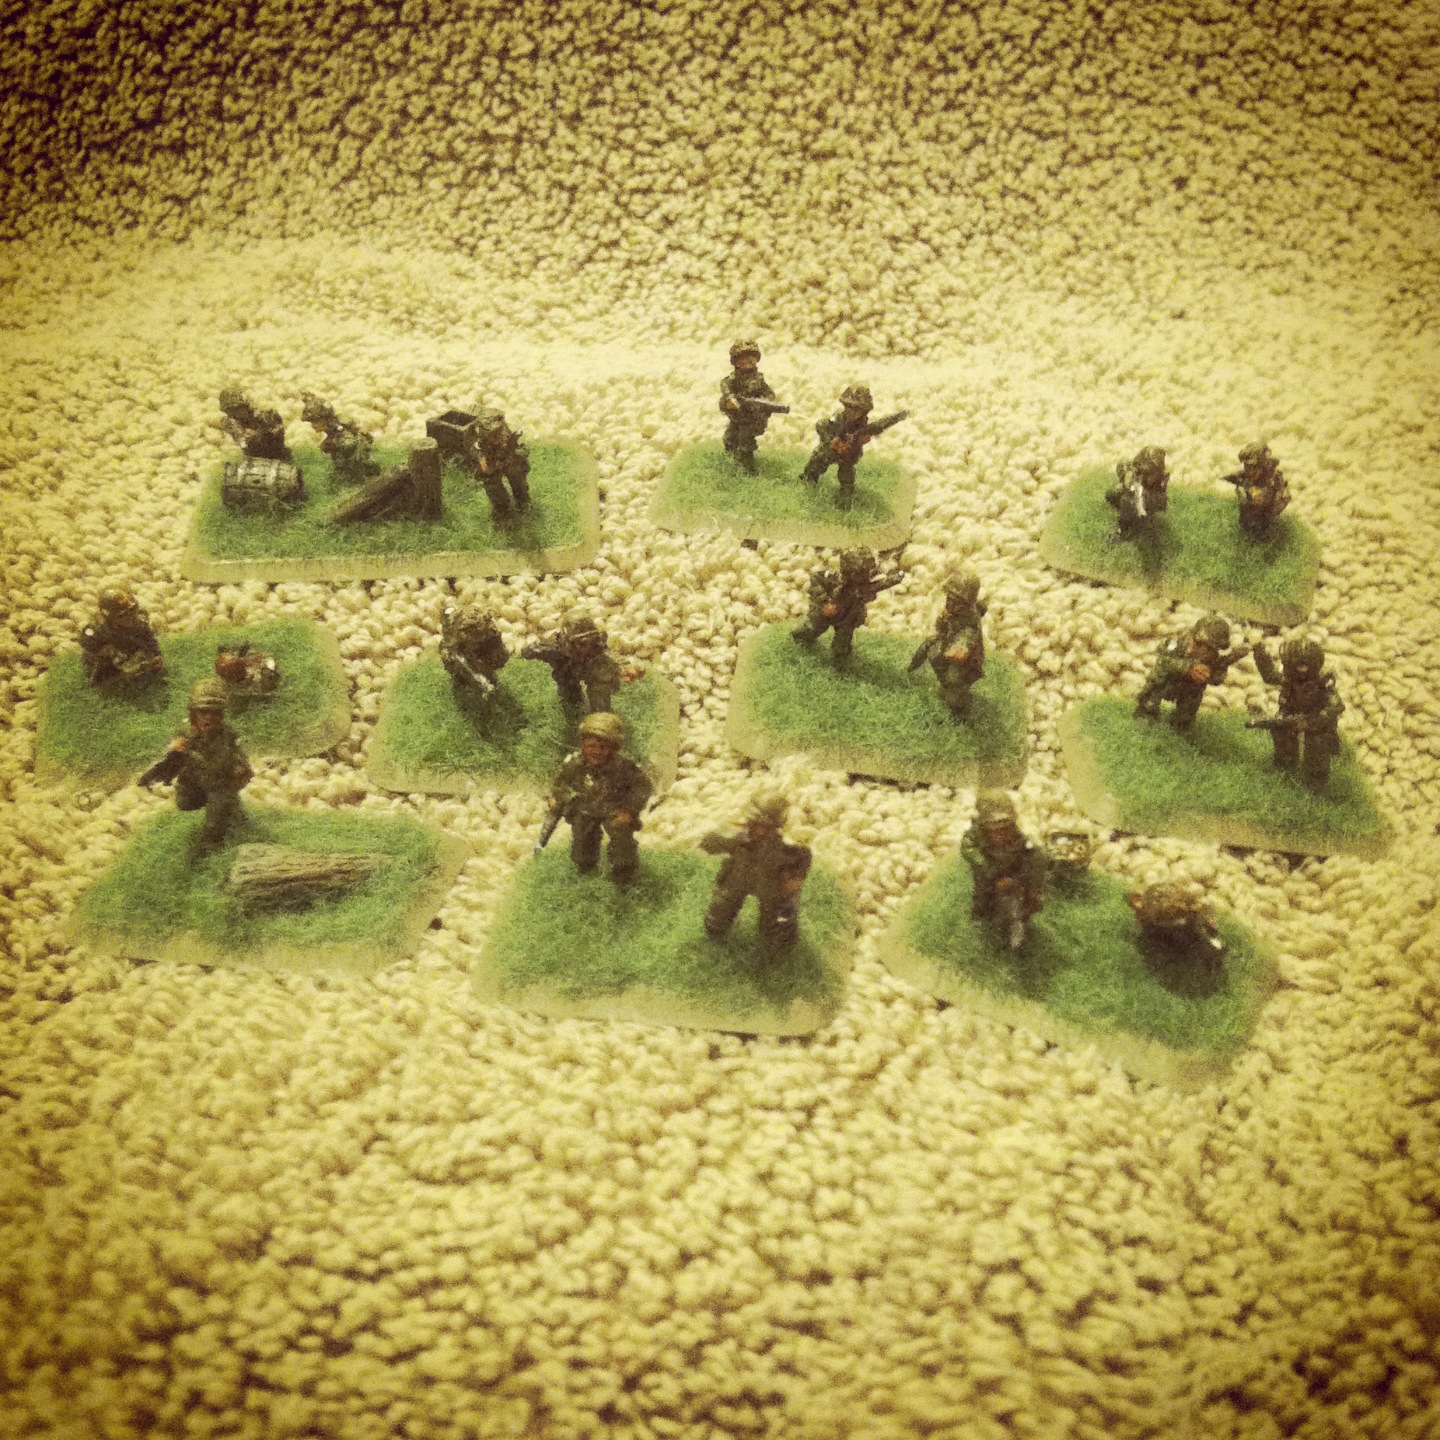
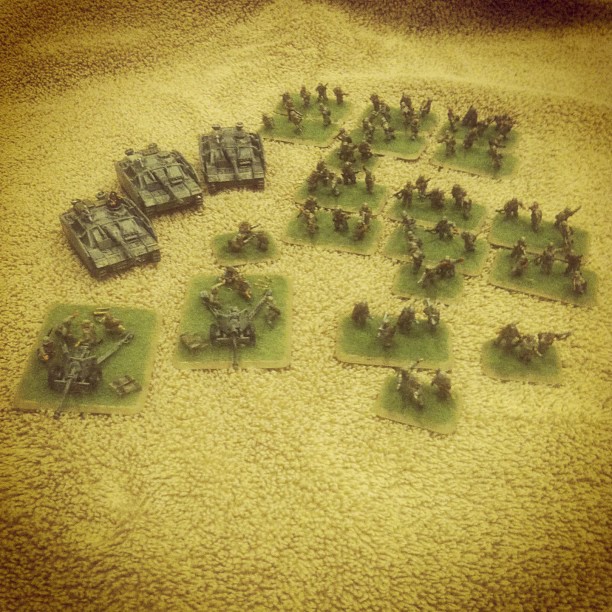
We each fielded small, relatively balanced 1000 point forces. My US Airborne company consisted of two parachute rifle platoons, a machine gun support platoon and a US tank platoon consisting of four Shermans. The German Fallschirmjägers fielded two rifle-machine gun platoons, a heavy-machine gun support platoon and a three-tank Panzer IV platoon. The Germans deployed one rifle-machine gun platoon in the center of the town and the rest near the bridge, as per the scenario rules. My US Airborne deployed fully along the far edge.

1017331_10201039903174136_1883265778_n
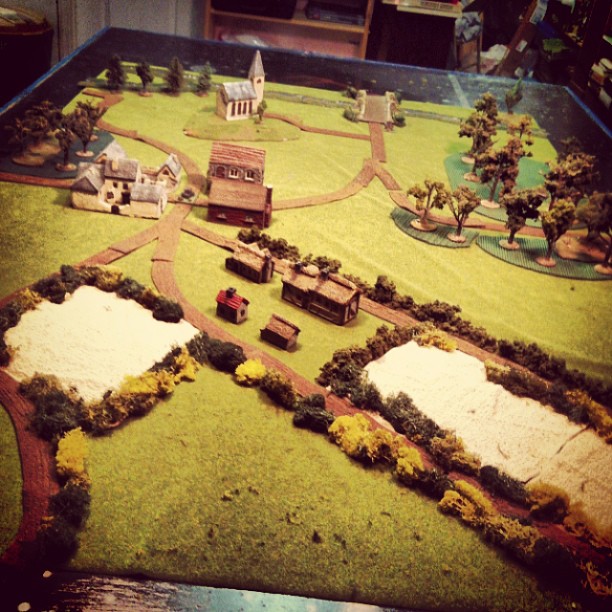
The scenario’s goals call for the US Airborne to take the bridge and center of town with the Germans playing a defensive game, all within the six turn time limit. Since the Allies are at a pretty clear historical disadvantage in the scenario, I modified the game’s terrain to include some additional bocage and cover at the American end of the table to help balance the game.

My plan was to quickly run one parachute rifle platoon along the side of the table, into the woods and up the road to the bridge while the remainder of my force would slug it out against the German platoons hunkered down in the town. After one turn of movement, the second turn found the US Shermans and machine gun platoon pouring fire into the Germans occupying the town’s buildings but with no result. My other rifle platoon ran at the double to occupy the woods opposite the town while a German rifle-MG platoon and their heavy MG platoon converged to meet them.

227419_10201040232582371_1708827010_n
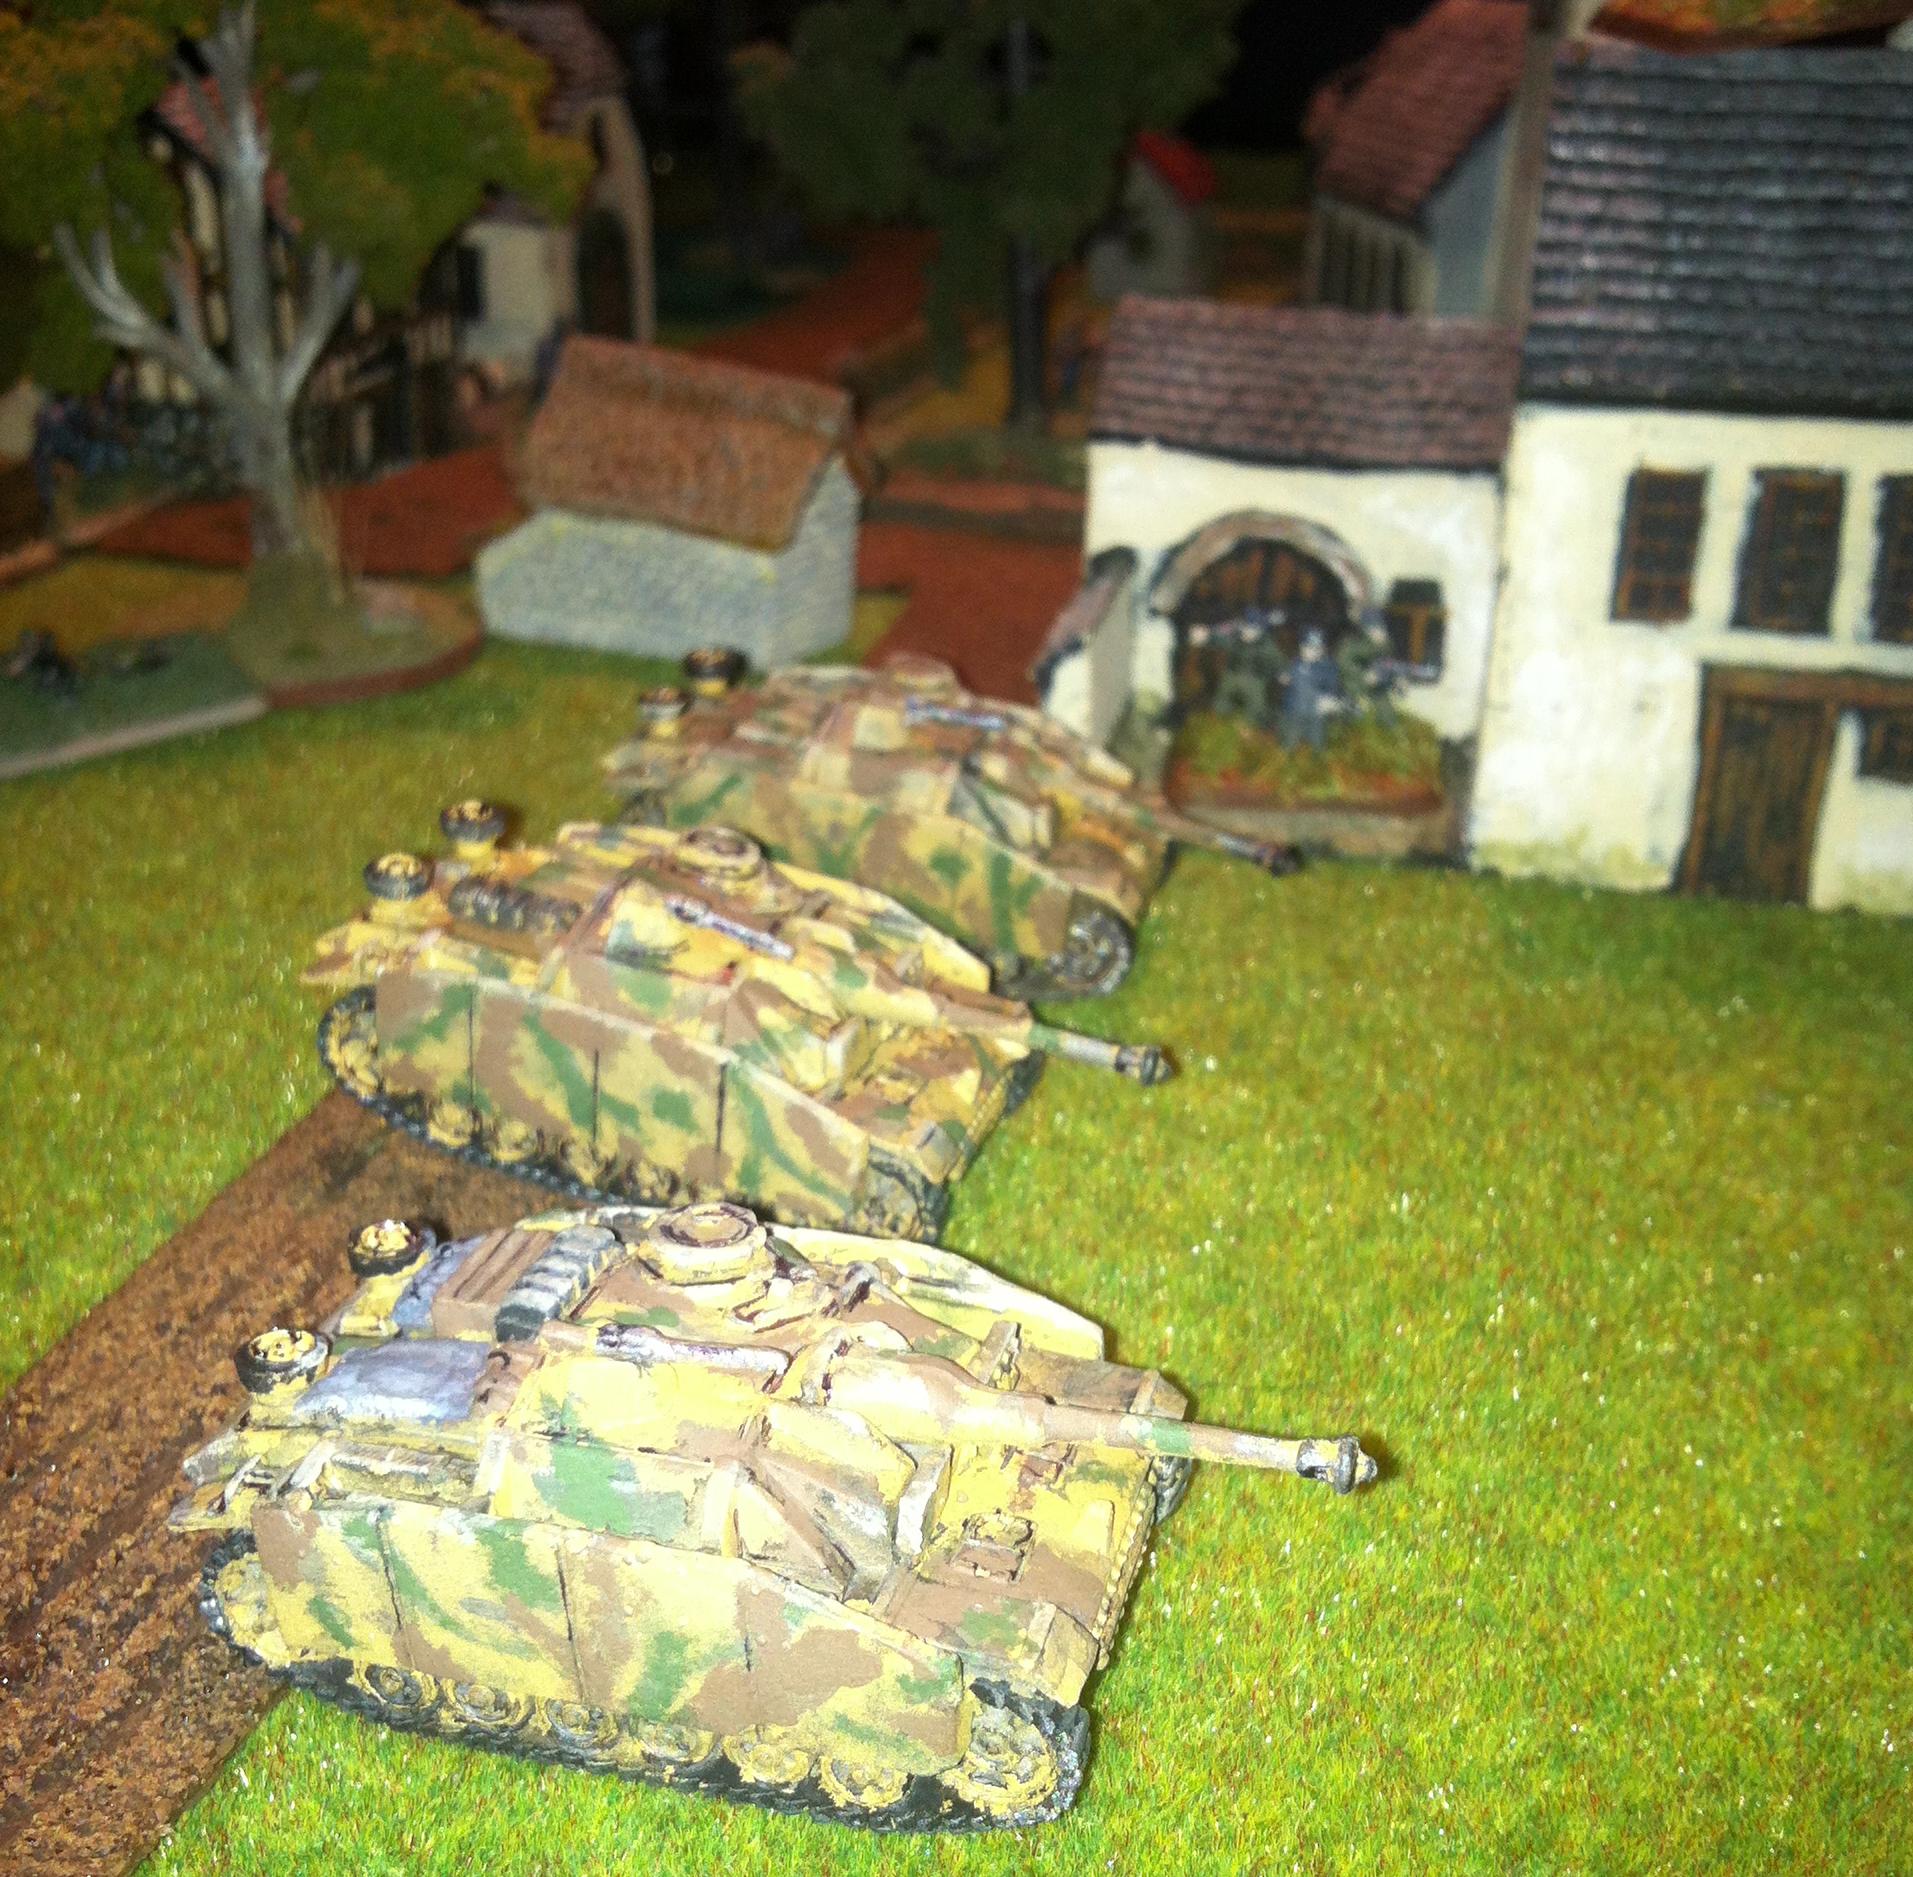
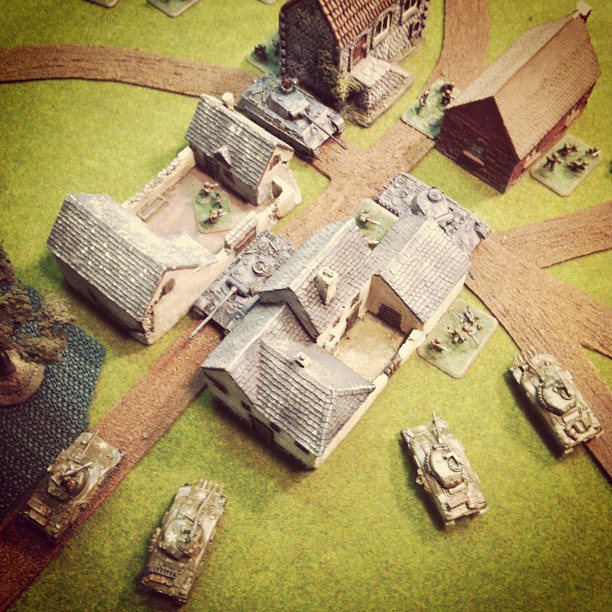
By the third turn, the Panzers showed up in the middle of town and quickly destroyed their first Sherman tank. In the woods, the German and US platoons began exchanging fire with the Americans finding themselves pinned after the first firefight and the Germans already taking heavy casulties. Through turns four and five, the Panzers went on to destroy two more Shermans while the American machine gun platoon and additional rifle platoon began to make headway with the German infantry hidden in the buildings. Over in the woods, the tough American Airborne managed to destroy the two German platoons and finally rolled to unpin themselves. It was a bit too little too, late. By the time of the sixth and final turn, the game was pretty well lost for the Americans as the final Sherman fled the field, a last-ditch US assault on the pinned Germans holding the  town was repulsed and the German armor rolled back to meet the Americans just emerging from the woods.

Historically, Operation Market Garden was an Allied debacle, so our game play of the scenario near the Nijmegen bridge wasn’t too far off. With just under three hours to play, the game did offer a quick, varied bit of play with plenty of opportunity for both sides to get some decent shots in. It was also a good warm-up as we prepare for a large all-day Flames of War event next Saturday at the club when I hope my US Airborne roll a bit better toward victory in Europe.

Flames of War: Foy 1945 Scenario

With a big full day of Flames of War gaming coming up at Metropolitan Wargamers on July 20th a few of us got together for a practice game this past weekend. There’s a renewed interest in FOW at the club as of late, and one of the great things about the group is the way experienced and new players alike come to learn together.

Wanting a manageable but interesting late war Western Europe scenario with US Airborne and German forces, we settled on the Battle of Foy from January 1945. The battle was just one small part of the brutal and much larger Battle of the Bulge campaign in the Ardennes forest region of France, Belgium and Luxembourg during the winter of ’44-’45. The engagement near Foy is featured dramatically in an episode from HBO Band of Brothers miniseries (clip here), so I was looking forward to trying my hand at commanding Easy Company from the 101st Airborne Division on the table for the day.

The FOW website offers a downloadable PDF outlining the scenario which fairly represents the German defensive position in and around Foy. No guidelines are given on the make-up of forces, but we decided on 1780 points on a side with flexibility beyond the historic record. The US Airborne begins in two divided deployment areas with I Company pinned due to indecision by its commander Lt. Norman Dike. Only by the daring sprint across open ground by Ronald Spiers sent on orders by Capt. Richard “Dick” Winters to relieve Dike of command can I Company join the assault on Foy. In the FOW scenario, the US forces have six turns to wrest control of one of two objectives from the defending Germans. The Germans must hold their ground against the bravery and skill of Easy Company.

The US struck first with an airstrike from their P-47 Thunderbolt taking out two of the three German PaK 40 anti-tank guns tucked behind the churchyard walls at the center of town. After being pinned by the P-47, the anti-tank platoon wound up rolling poorly and remained pinned and ineffective for the remainder of the game.

That was pretty much the last major good story the US could tell for the rest of the game. Some house-to-house fighting took place along the German right flank with the Airborne eventually beating the Germans back from the protection of the row of houses along the road to town. The American Sherman tank platoon rolled up the center but remained stuck for the whole game attempting to machine-gun the German platoons dug in behind the churchyard walls. Four of the five tanks wound up taking fire and being destroyed where they sat.

With the US infantry moving too slowly on both sides of the table, the Germans rolled their armored reserves in on turn three as their Stug platoon entered the table to hold off any US advance on the German right flank.

US volleys from the parachute artillery platoon tucked far back in the field did little more than occasionally eliminate a few German infantry and keep the units protecting the objective on the German left flank pinned.

Aside from a deadly late game P-47 strike on the German mortars which had harassed the Americans for the entire game, US air support never did much more for the rest of the game. By the sixth turn, the final German Panzer IV armor support rolled onto the table. With both flanks locked down by the Germans, a final desperate US attempt at dual assaults on the German armor platoons were ineffective. With three American platoons eliminated and most others with heavy casualties, the US ceded victory to the Germans in a revisionary result from the actual American victory in 1945.

Games like this are fun but also an opportunity to consider lessons learned. My US 101st Airborne was entirely too cautious and didn’t get into the fight fast enough, losing the opportunity to control the town’s center before the arrival of the German armor. My machine gun platoon got stuck mid-field and got chewed up bit by bit without having the opportunity to truly unleash its full effectiveness on the Germans who remained out of range and dug in for most of the game. Other infantry platoons hung back too much in the woods or buildings and never really got up in the fight.

With a much larger game coming up in a few weekends, I see that taking greater advantage of Easy Company’s aggressive, daring and deadly experience is going to be key to an Allied victory. Looking back at our re-running of the battle at Foy this past weekend, I can see I was a little too much like the wavering Lt. Dike and never let the heroics of individuals like Ronald Spiers to take over.

Flames of War: Fielding the Sd. Kfz. 7/1 Anti-Aircraft Gun

Wars are filled with big, heavy equipment, and the 8-ton German  Sd.Kfz. 7 served as the longtime workhorse throughout World War II. Short for the Sonderkraftfahrzeug (German for “special purpose vehicle”), the Sd. Kfz. 7 half-track was widely used as a transport, towing vehicle and the basis for self-propelled anti-aircraft gun crews. AA configurations of the truck featured either quad-mounted 2cm Flakvierling 38 guns on the Sd. Kfz. 7/1 and the Sd. Kfz. 7/2 with more cannon-like 3.7cm FlaK 36 guns.

For my Flames of War AA gun team, I’ve chosen to model the Sd. Kfz. 7/1 in its two variants – one with its open cab and one with an armored engine and driver’s cab. After gluing-up the metal and plastic pieces, I left the gun turrets unglued to the truck bed so the crews could rotate 360 degrees as they did in real life. As with most of my German armor, a flat black sprayed primer coat was then dry-brushed in a dark grey. Guns and details were picked out with a bit of gun metal and the bench seats were painted to resemble a reddish-brown leather. The crew and driver were finished to match my usual infantry models with flesh and equipment details finished off with a watered-down brown wash.

For now, I’ve got the open cab version finished and I’ll post again once the armored one is complete.

Having recently finished my P-47 Thunderbolt for use as air support for my Allied forces, I only thought it fair to even-out the German side with some anti-aircraft protection. As in actual combat, the FOW Sd. Kfz. 7/1 model is as equally deadly against aircraft as it is to ground forces. With a big day-long FOW day coming up on July 20th at Metropolitan Wargamers in Park Slope, Brooklyn, rushing these guys to the tabletop front to hold back the Allied invasion should be key to striking a gaming balance.

Flames of War: Fielding the P-47 Thunderbolt

The P-47 Thunderbolt was a big, heavy, expensive and deadly plane with .50-cal machine guns and a bomb payload of 2500 pounds. Rushed into development and production near the dawn of World War II, these American planes saw their first use in Europe in 1942. By the late war period, the P-47 was being widely used in Western Europe and proved to be among the most effective fighter aircraft in both air-to-air and air-to-ground combat operations. During the Normandy landings in June 1944, the German Luftwaffe was a virtual no-show and the P-47 Thunderbolt ruled the air in support of the massive Allied invasion below.

I’ve been modelling and playing with the 15mm World War II Flames of War miniatures wargaming system for a number of years now, but until now all my gaming has been with tiny scale boots, wheels and tank tracks firmly planted on the ground. With a full afternoon of large 2500-point late war period FOW games being planned in July at Metropolitan Wargamers in Brooklyn, I decided to supplement my existing US Airborne force with some new air support with a P-47 Thunderbolt model. Armed with its wing machine guns and laden with bombs, I’m pretty excited about adding the P-47 and a whole additional dimension to a game I’ve gotten pretty familiar with over the years.

Choosing a paint scheme for the model was the first decision I needed to make in my project, and there are hundreds of historical variations to be found. While the silver fuselage seemed to be among the more commonly-modeled versions of the P-47, I opted for a simpler olive drab body. The green base coat was followed by a grey underbelly and some boldly-colorful red details at the nose and tail. The windowed canopy “glass” consisted of some flat black and white dry-brushing. Along the seams in the body of the plane I wiped fine lines of rusty metal to show wear on the plane. The decals included in the kit completed the model, albeit with a fair amount of struggle with near-miss tears.

While my first shot at modelling a plane for FOW may not be 100% historically accurate, I’m pretty satisfied with the visual impression it makes. At some point I’ll even things up with a German plane, but for now I can’t wait for my P-47 to take off in my next game.

Flames of War: Fielding Easy Company

I’m not unique in being a World War II gamer and a big fan of HBO’s Band of Brothers miniseries from 2001. I also finally got around to reading Stephen Ambrose’s same-titled book on which the series was based. Both works follow the exploits of “Easy” Company of the 506th Parachute Infantry Regiment, 101st Airborne Division from training to D-Day to the end of the war. The story is absolutely riveting and presents a dramatic account of how the collective action of individuals contributed to the Allied victory.

I’ve been working away recently at finishing my long-overdue modelling of Easy Company and a large US Airborne force. Nearly two years ago I purchased and painted up an entire company of Command Decision Paratroopers from Old Glory Miniatures, including command, machine guns, mortars, bazookas and parachute artillery support teams. This past week I’ve wrapped-up the small plastic parachute rifle company from the Flames of War Open Fire! starter box set I received this past Christmas. To this collection of troops, I’ve added the excellent Easy Company set from FOW containing a number of the real historic US servicemen portrayed in Band of Brothers.

While the casting is a bit skinnier and lacking in the detail of the official FOW miniatures, the value of the Command Decision models can’t be beaten at the low price of $15 for a hefty bag of 50 solidly serviceable figures. At under $70 online, the big Open Fire! box is a real deal for all the troops, tanks, artillery and other stuff included. The FOW Easy Company set itself runs about $12 for the few specific personality figures, and fielding these models is going to add significantly both to the look and effectiveness of my force on the tabletop battlefield.

With a good mix of FOW and Command Decision models painted-up, I turned to the “Nuts!” campaign book to put-together my order of battle for Easy Company. The book focuses on the 101st Airborne’s involvement in late 1944’s siege of Bastogne and other Battle of the Bulge engagements and then on to the German border and the eventual Allied victory in 1945.

In creating my list I wanted a highly-mobile and playable 1500 point force heavy on infantry with just a bit of tank support. In the FOW rules, the parachute rifle company is rated Fearless/Veterans, making them hard-hitting and tough to chase from the field. Their special use of Gammon bombs enhances their impact in risky infantry assaults on otherwise-intimidating German tanks. Adding the special characters from Easy Company makes for an even more resilient and daunting force, reflecting the historic bravery these men brought to the late war European campaigns.

I’ve modeled my infantry pretty simply with a quick coat of flat green primer, lighter brown on backpacks and equipment bags, a contrasting watered-down brown wash and some equipment details picked-out. Finally, the shoulders get a dot of black and a dab of white to mimic the famed Airborne eagle insignia (shown at the top of the page).

The first photo below shows the specific men of East Company which come packed with a lot of individual personality. Leading the platoon is Capt. Richard Winters and Capt. Lewis Dixon (front row, center) with the Nixon model taking a swig from a bottle as he was known to do. Pvt. Eugene Roe (middle row, far left) is shown patching-up an injured comrade. Corp. Darrell “Shifty” Powers (top row, far left) is hunched aiming on a barrel and ready to take out his German target. With so many generic models in my force, these guys are all a real treat.

And below is a look at the plastic Airborne platoon included in the Open Fire! box set:

In July, I’m organizing a big FOW day at Metropolitan Wargamers with two simultaneous 2500-point games of Soviets vs. Germans and US Airborne vs. Germans. To the above list I’ll be adding some significant artillery muscle and I also hope to have a new P-47  Thunderbolt air support model ready to go. With Easy Company ready to lead on the tabletop, I can’t wait to get my new Airborne force into action.

Flames of War: Fielding the Grenadierkompanie

I got the Flames of War Open Fire! set this past Christmas and I’m finally getting around to painting-up all the stuff that comes packed in the box. At under $70 online, this big package is a real deal for new and experienced FOW gamers alike. The set includes over 100 plastic Allied and German infantry, tanks and artillery models, plus the full FOW rulebook, dice, markers and some other goodies included. A couple guys at Metropolitan Wargamers also picked up the set and are just getting into FOW. If you have any interest in gaming WWII at all, this set is the place to start.

First off, I’ve finished the German Grenadierkompanie, including anti-tank 7.5cm PaK40s, a Stug G tank platoon and two platoons of infantry. These will supplement the pretty extensive Grenadier and Fallschirmjäger infantry I already have. The Stugs will also add to the large collection of Panzer IV, Jagdpanther and Konigstiger platoons I’ve already got on the shelf.

The plastic models all glue together quickly, but handling them has to be a bit delicate so as not to snap off the tips of the gun barrels. For the infantry, I spray prime everything in flat black and paint the uniforms in a mid-dark grey. All the details — guns, boots, equipment and skin — get picked-out with quick dabs of paint. Everything gets a very watered-down brown wash in the end which gives the uniforms a more accurate grey/green muted finish and also tones-down the flesh.

My camouflage painting abilities are honestly pretty atrocious, so my default is to go with a more generic grey paint scheme on my armor, artillery and vehicles. For the Stugs and PaK40s, the flat black primer was hit with a quick dry brushing of mid-dark grey.  After the dry brush coat, tank cargo and other details were then dabbed on. The platoon commander got some special attention with white detail on his cuffs and collar, plus some detail on the radio headset he’s wearing over his hat. Finally, I applied some wet-transfer decals and then dry brushed some light brown mud in the areas most likely to see some splashing on the tracks, sides and fenders.

y

With my Germans from Open Fire! complete, I’ll be posting soon with an update on the US Airborne and allied models from the set. Along with the Germans, a set of special FOW models from the famed Easy Company and a bunch of my existing models, there’ll be some major action from the Normandy campaign and beyond coming soon.

New Game Weekend: A Bridge Too Far: Operation Market Garden

Maybe it was the dampness and spring chill, but Saturday night at Metropolitan Wargamers in Brooklyn was pretty empty with just me and one other club member around. We decided on a two-player boardgame, and being big WWII enthusiasts we picked 2010’s A Bridge Too Far: Operation Market Garden from Battlefront Miniatures.

I’ve been a long-time fan of the 1977 film A Bridge Too Far featuring a classic international cast recounting the events of Operation Market Garden and the botched Allied attempt to chase the Germans out of a number of key defenses in the Netherlands in September 1944. The film does an entertaining job of depicting the colorful real-life personalities against a backdrop of a daring daylight airborne invasion, over-confidence in the weakness of the German forces and disagreement among commanding Allied staff on the plan itself. The game offers two scenario set-ups giving the option of refighting the battle as rather historically depicted in the film or through a plan of your own devising. The game we played was the historical one, and I commanded Field Marshall Marshal Bernard Montgomery’s British and US forces.

The game involves five play turns with a random number of battles making up each turn. Initiative is rolled before each battle, and targeted objective spaces on the board are chosen to attack. Each player chooses to commit some, all or none of their forces to each battle. Different forces – tanks, guns and airborne infantry – each provide bonuses modifiers in different terrain types. Defenders of areas containing bridges get an extra bonus. Resolving combat is a simple roll of the dice with modifiers added. Defeated forces roll to be destroyed or retreat to adjoining areas, and then the next initiative is rolled for. Once a round of battles is completed, strategic moves can be made and the Allied player has the option to air-drop additional forces and supplies into designated areas of the board. The Axis player can then choose to attempt to fend off the Allied air support with their own air power. Keeping supply lines intact is key to the Allied strategy, as forces which are cut-off from their line of supply suffer a greater weakness in subsequent battles.

Typical of games by Battlefront Miniatures, makers of the popular WWII 15mm miniatures game Flames of War, this game packs some great design and ease of play into a neat box. While each battle and turn of play involves a number of steps, the game moves along quickly in about 90 minutes. The game comes with over 40 well-sculpted plastic playing pieces, but the version at the club had been modified with painted metal micro-scale armor and troops. Gamers who long-ago graduated from Risk to games like Axis & Allies will find a lot to love in the focused presentation of this game.

Even with the relative simplicity of the game, there’s a lot of strategic play potential. My first time through, my Allied strategy of pushing hard from the rear and left flanks of the board stalled rapidly as my tanks were quickly destroyed by some disastrous die throws against German anti-tank guns. My paratroppers dropped effectively into the middle of the board, yet they too became surrounded and snarled by the superior German armor defending the game’s main objectives. By four turns in, I faced certain defeat with no additional hope for much-needed tank support for my floundering airborne troops.

For a notoriously one-sided battle, I can easily see a lot of replay value in this game . I hope to give this one another shot soon, trying out some less historical and more aggressive strategies in running the Germans off the field. Having a chance to remake history is one of the joys and challenges of wargaming, and the board game A Bridge Too Far: Operation Market Garden provides a lot of opportunities to do so.